How to make a deck chair with your own hands?
Camping is a great way to relax. Some go to the village, others - to the country, where they are waiting for comfortable lounge chairs, allowing you to forget about the environment and a little nap. Such attributes relieve tension from the spine and almost all muscles, you just have to choose the most comfortable option for you: a rocking chair, an ordinary folding chair or a sunbed.
It is easiest to buy a ready-made chaise longue, picking it up for the interior of the villa or for your individual needs. But not everyone has this financial opportunity. A model made by hand is more appreciated and fully corresponds to the taste of its owner.
Kinds
Create a homemade lounge chairs is not difficult. Before you begin, you need to choose the type of furniture that you want to bring to life. There are several:
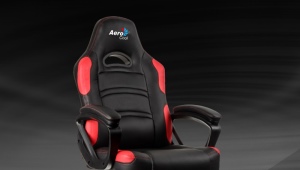
- Armchair. As a basis, you can take items from the baby cot or folding bed. Armrests are optional.
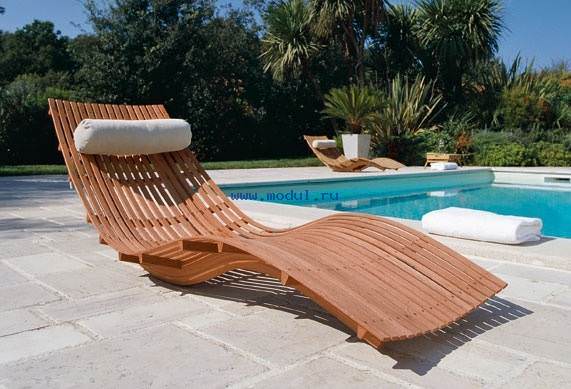
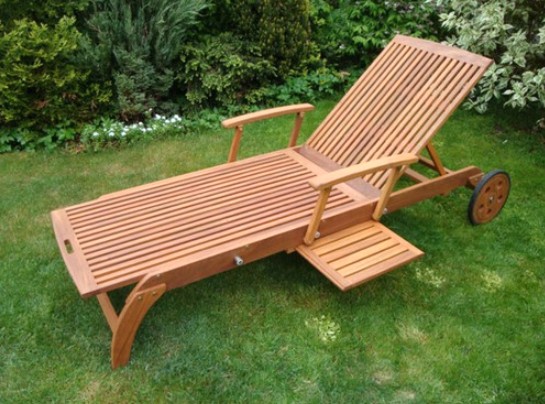
- Sun bed The creation process takes about four hours. The product can be made of plastic or wood, which is perfectly polished and varnished.
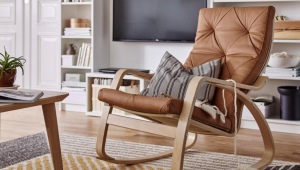
- Rocking. His back is at an angle, so it is possible to lie down, relax, take a nap. It is important to make a strong bottom of the attribute so that it does not loosen when swinging.

In addition to the distribution of products in appearance, there are variations of types of structures:
- Monolithic. When creating it, all elements are fastened, therefore disassembly is impossible. Such a chaise longue is durable and durable, but the back is not regulated here and the product as a whole does not fold. As a result, problems may arise with its transportation.
- Portable. A reliable and compact folding attribute has a special mechanism that makes it easy to adjust its position.
- Welded with inserts. A practical product will decorate any interior due to its attractive appearance.But inserts from other materials do not guarantee durability.
If the chaise longue is made of durable materials, it can be supplemented with a blanket, pillows and other items for a comfortable stay.
Possible materials
When choosing a material for the manufacture of a chaise longue, one should take into account its location. It can be a summer cottage, a beach, a special place by the pool or even at home. There are the following options:
- Wood. This design is durable, comfortable, eco-friendly, different in shape and appearance. The only drawback is a lot of weight. To facilitate the transfer of the chaise longue, wheels are attached to the legs.
- Plastic. The products are light, inexpensive, easy to care for. Of the negative sides - fragility.
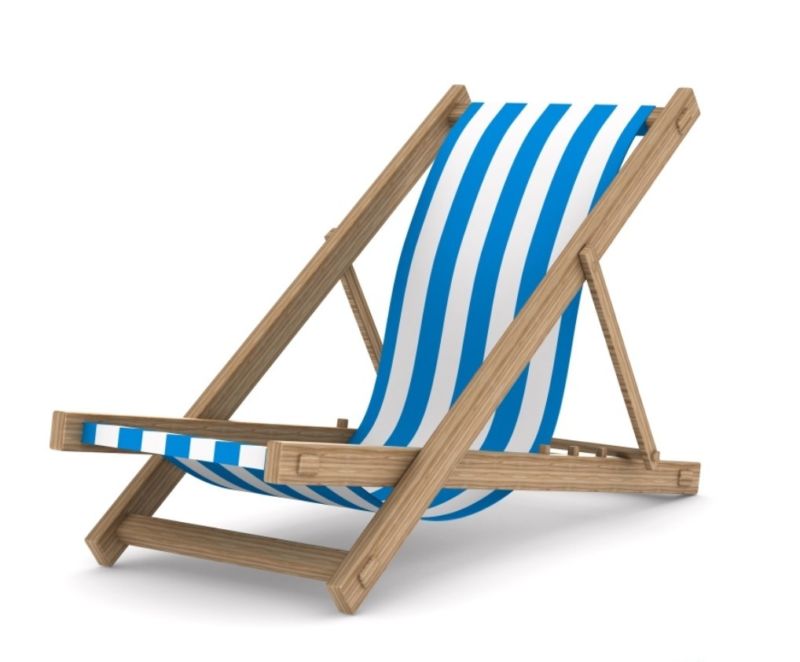
- Fabric Attributes are comfortable and compact. The frame can be made of planks, metal, profile pipe.
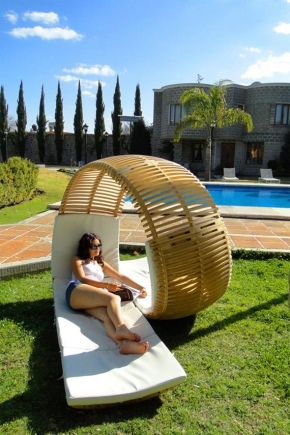
- From rattan. Against the backdrop of nature, these deck chairs look great. They are environmentally friendly, but are expensive. If you have the skills to weave, to make such an attribute for the rest is easy.
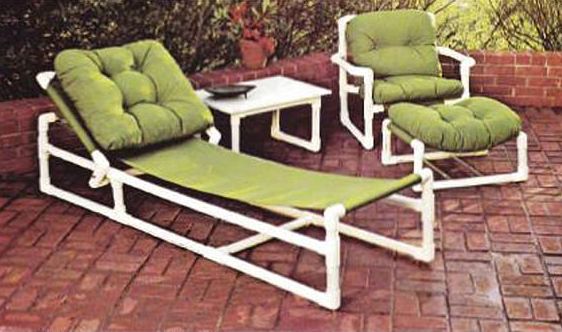
- PVC The same lounger with a fabric base, but at the heart of the frame - PVC pipes.
It is not difficult to make a deck chair on your own, it is necessary to correctly determine the dimensions of all elements and spend several hours assembling them.


Production scheme of various options
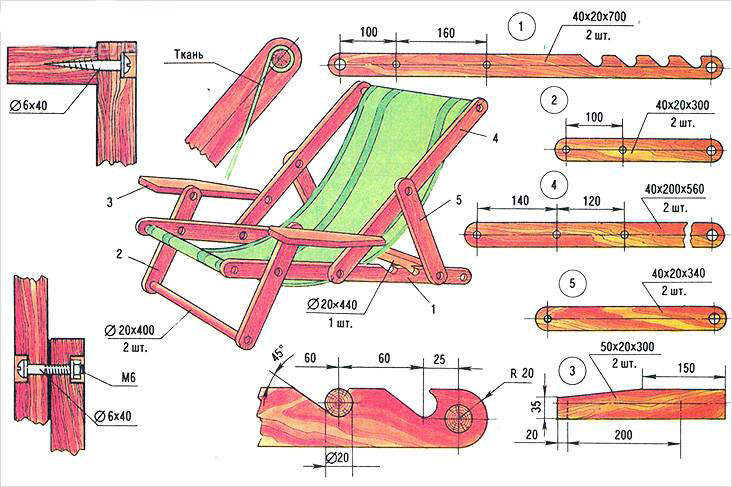
Before you start making an attribute for the rest, you need to draw its scheme. It plays an important role, because it determines the dimensions of the elements for the product, their shape, quantity and other details. You can make such a scheme yourself, but not everyone can do it. Therefore, we give an example of such a scheme. Qualitative chaise longue (fabric) will turn out on such a drawing with dimensions.

It remains only to find materials for creating a sunbed. There are also other options for drawing different types of lounge chairs.
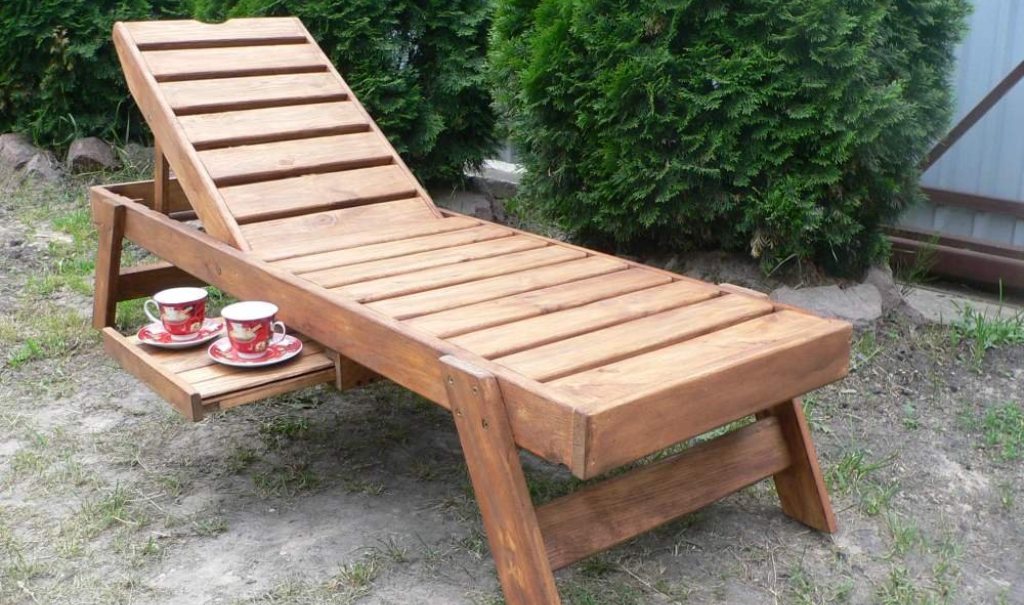
From wooden lattice
Such a chaise lounge is strong enough, reliable, and its back can be adjusted. For such a model should be taken wooden plates of conifers, as they are resistant to climatic changes. Here is a diagram with the specified dimensions:
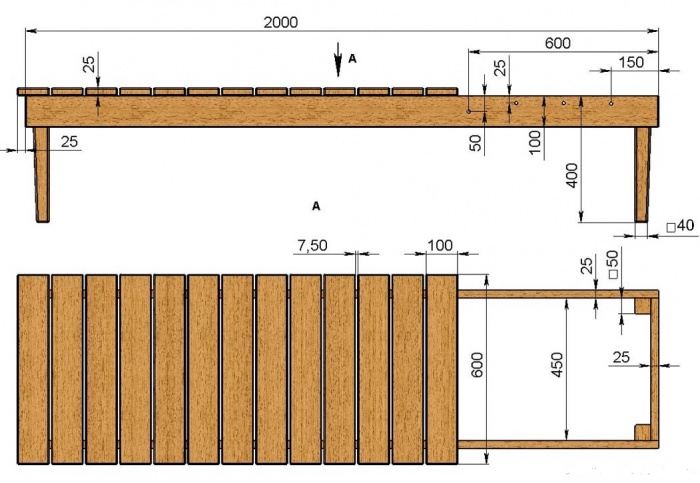
All work is done in stages:
- It creates a frame of bars, it is fastened with metal corners.
- The boards are attached to the outside, and the legs are attached to them.
- The slab is sawn using an electric jigsaw and a wooden grid is made.
- An adjustable backrest is separated from the main part of the attribute and sealed with a door hinge.
- In the area of the headboard an attachment plate is attached, and a stand is attached to it with screws.
- The finished product is polished and varnished.
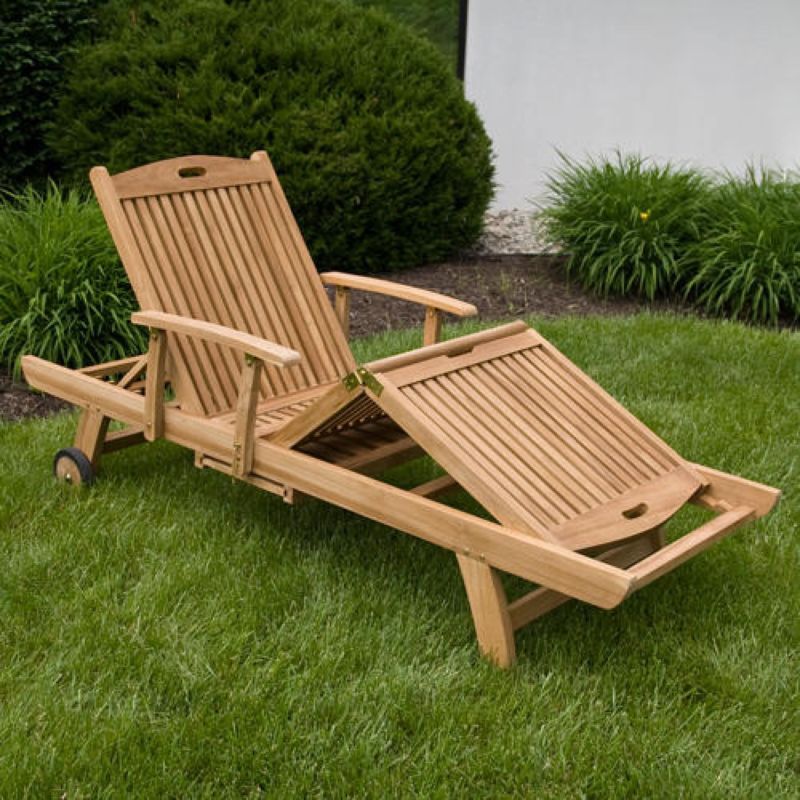
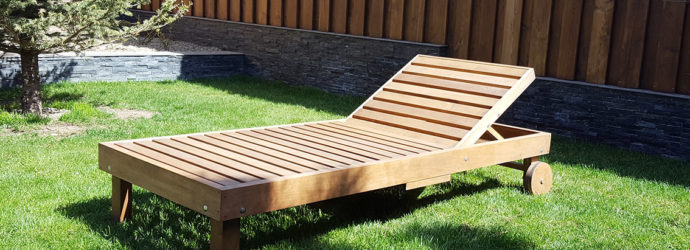
If the lounger in the future will often move from one place to another, it is better to attach the wheels to its legs, because the weight of the attribute itself will be considerable.
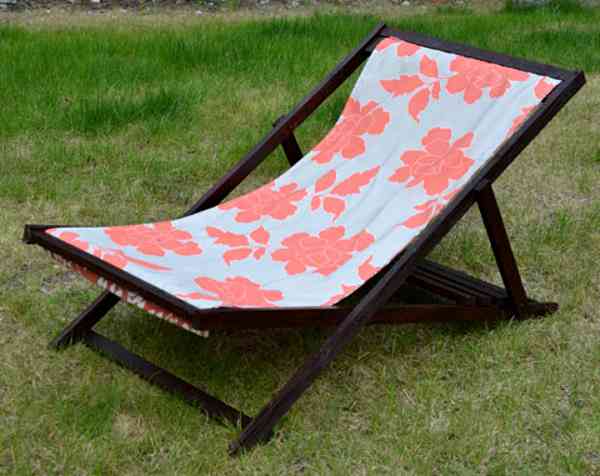
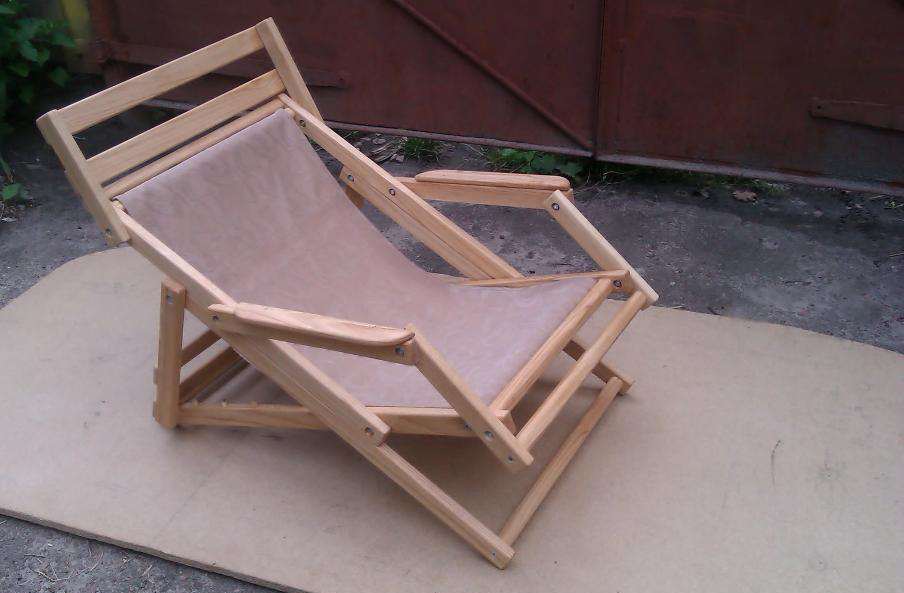
Fabric on the frame
This lounger will be very comfortable due to the fabric base, but not durable. The scheme is as follows:
Work on the frame occurs in this order:
- The ready basis is taken from a folding bed or a crib. In the absence of such, take the slats of the desired length or cut and polished.
- The holes are drilled in the main frame, the other one is provided with cutouts (4 pieces) for adjusting the backrest tilt.
- Holes are made at both ends of the rails. to install the seat.
- Round bars greased with glue and installed in the holes.
Now you should prepare the seat itself. To do this, lay down the basis of the product and measure the length of the web. It should sag for comfortable accommodation of the owner. On the sewing machine are processed all edges. Then wrap a cross round bar with a cloth and from both sides nail it with small studs. The attribute is ready and you can enjoy the rest.

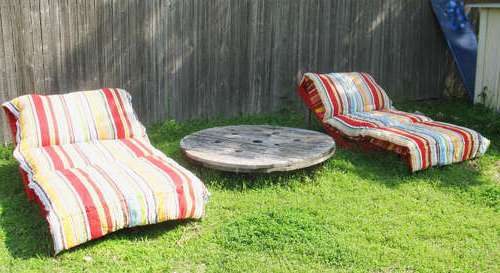
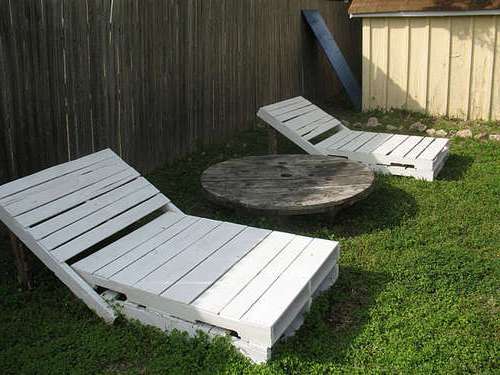
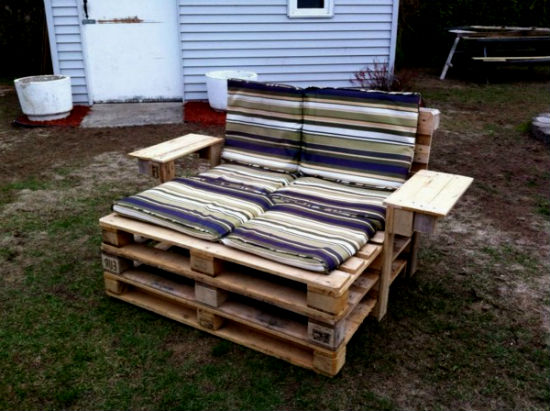
From pallets
This is the easiest option to create a sunbed.Such a product has a small weight (it is easy to move it to different places) and practical (you can put a mattress on it for greater comfort). The work happens in the following order:
- Pallets sorted out, all the nails are drawn out.
- A frame is made of two flat boards. They are laid edge and parallel to each other, and the rest are sawn in half and attached to the base. The result is a seat with two support legs at the back.
- To create the front legs into two equal parts sawed board from the pallet. Next, with the help of bolts, they are screwed to the base of the seat and tightened with nuts through the washers. The transverse bar is needed to strengthen the legs.
- The back is created from two boards, which are connected to the seat frame with bolts, nuts, washers. This should be done at an equal angle. After that, backboard boards are fastened to the support boards with screws. Behind it is attached to the rear legs bar - it is necessary for structural strength.
The final step is sanding the attribute with an emery sheet.
To prevent the boards from rotting, the product is varnished.
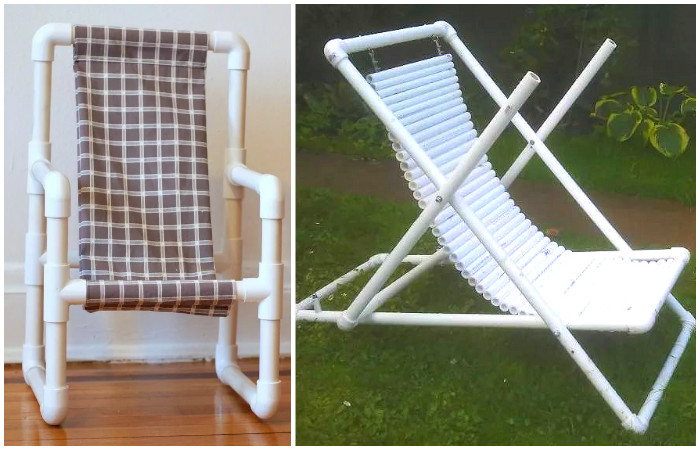
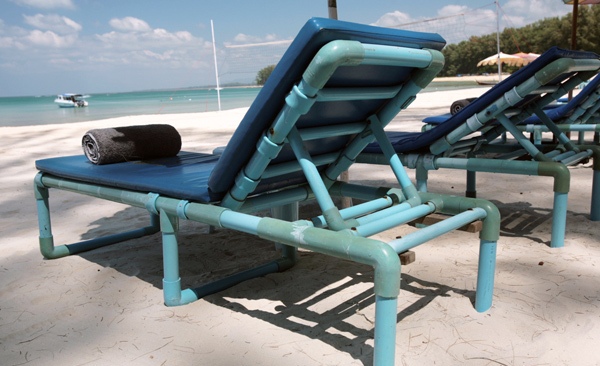
From polypropylene pipes
The drawing of such a lounger is identical with the fabric, only the wooden frame is replaced with polypropylene pipes. To create the product, 2-inch pipes are needed, fittings in the form of the letters “g” and “t” are 8 and 6 pieces, respectively. The assembly process has several steps:
- First, a vertical bar is made. A T-connector is taken and pipes 30 and 45 cm are held together with it. L-fittings are put on the ends. The bottom vertical is also fastened and the two sides are connected.
- Important point: the horizontal crossbar should be solid and have a length of 66 cm. AboutIt is mounted closer to the connection with the letter “T”, which should be directed to the inside of the structure. The other side - two pipes of 30 cm, fastened with a T-shaped fitting. This tee must be rotated 45 degrees from the elongated side. The end result is a rectangle.
- For the rotatable seat, a 5 cm tube is inserted into the triple connecting element, which is fastened with the same part. This will be the basis of the horizontal frame.
- The long sides of the horizontal frame are made in the same way as the vertical. For transverse crossbars, a tube with a length of 30 cm and another, consisting of 2 to 20 cm with a tee fitting, are taken. The result is a rectangular shape in the same shape.
- The seat will be between the short section of the horizontal section and the elongated vertical section. After adjusting the tilt level, a backup is inserted at the back.
The frame is ready, which means that now a fabric base is needed. To do this, take a dense canvas and fasten it to the base.
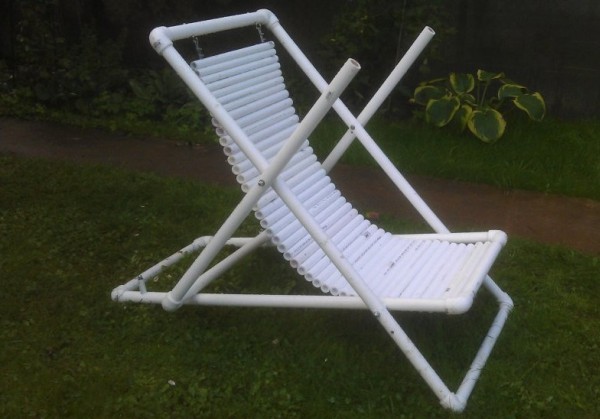
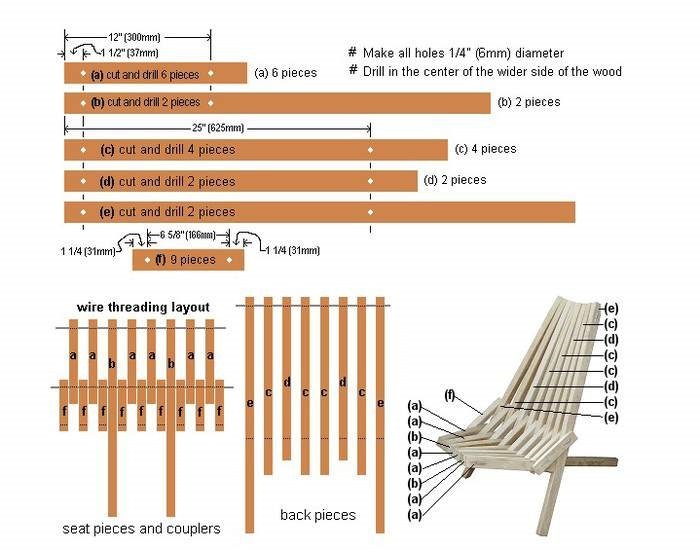
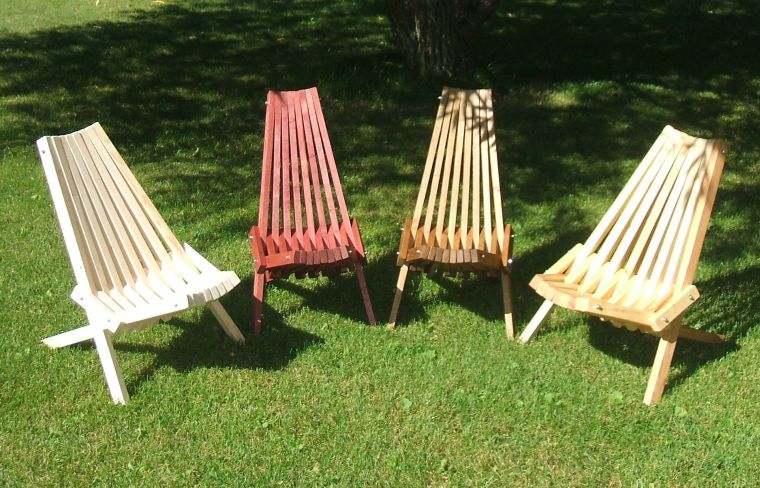
"Kentucky"
Such an attribute for recreation has a number of advantages: compact, convenient, easy to fold, lightweight, durable and reliable, in a folding form takes up little space. In appearance it resembles a chair with a high back. An unusual way to build looks original. This will require bars, galvanized wire (diameter 4 mm) and the same brackets for fixing the wire (16 pieces), wire cutters, a hammer. The process goes like this:
- The bars are applied a protective coating. But the parts should be ready for assembly.
- Holes are made. However, they should be more wire by a couple of millimeters.
- The bars are assembled in an interesting way, because of what the whole structure looks creative. Here is the scheme:
At the end of the whole process, the chair gently rises and unfolds. This folding product looks stylish and modern.
Original ideas
People with creative thinking do not always want to see simple chaise lounges on their territory, so there are several original ideas for creating models for recreation.
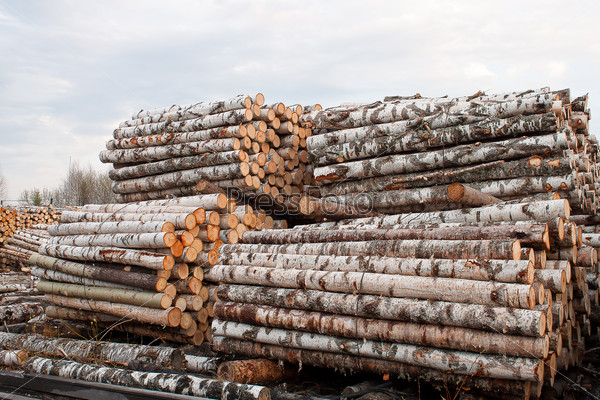
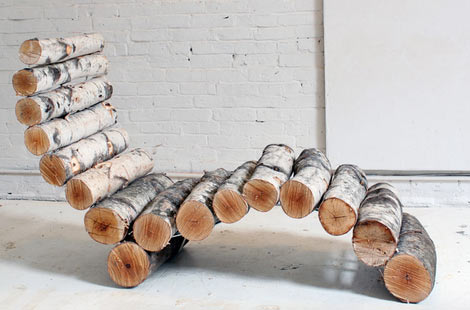
From birch chocks
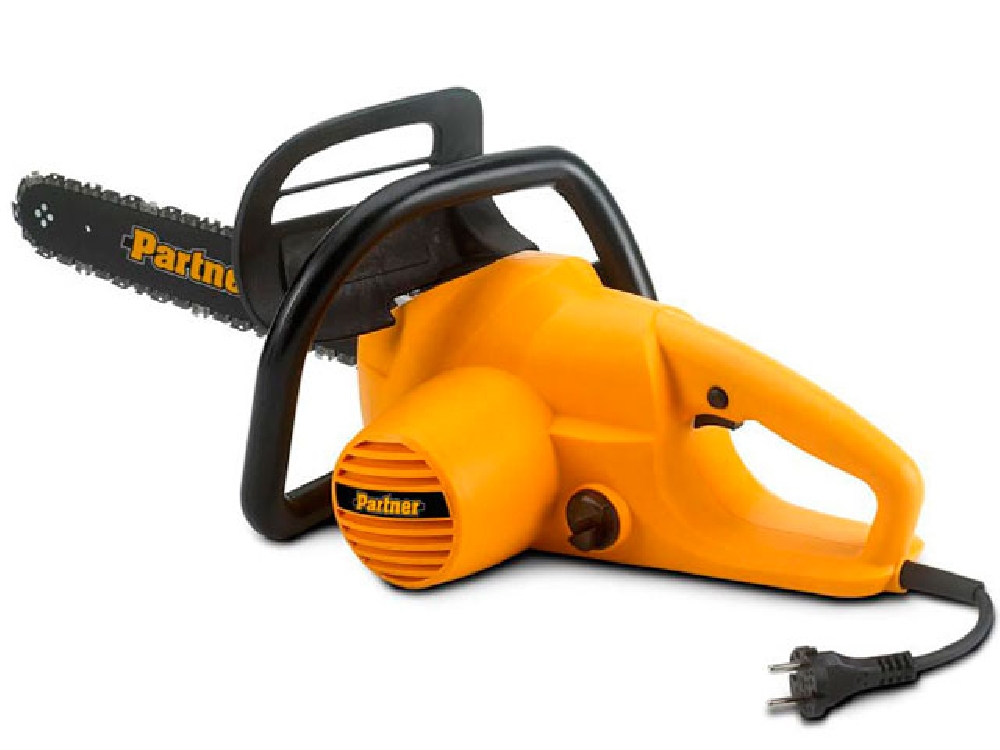
This design has an unusual appearance, so you have to work hard. For such a lounger need birch logs with a diameter of 75-120 mm. But keep in mind that the larger the diameter of the chocks, the more the product will weigh. Before you start, you should stock the following tools:
- power saw;
- drill;
- set of drills;
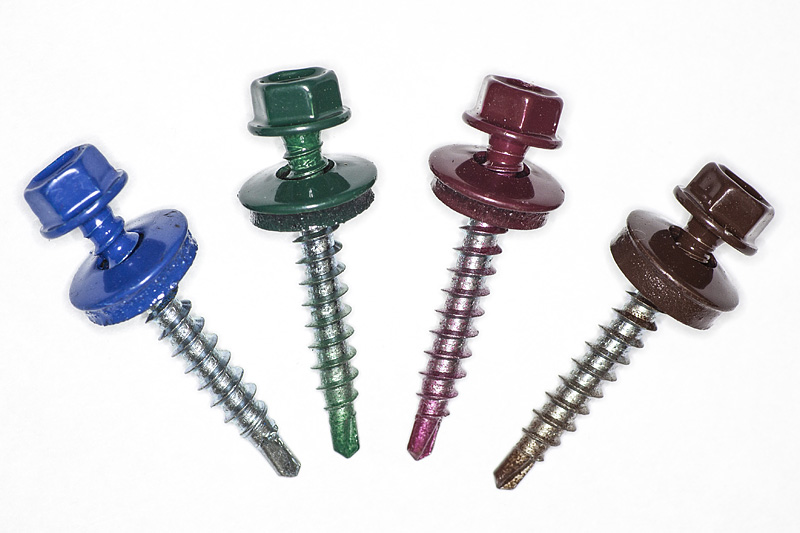
- self-tapping screws;
- staples.


When the birch chocks are properly prepared, it is necessary to begin the process itself, which consists of the following steps:
- The design of the future sunbed is formed. Quickly carry out this procedure will help a simple electrical tape. With its help, the product contour is applied directly to the floor.
- In chopped logs (approximately 45 cm) holes are made.
- All parts are fastened together. 4 long self-tapping screws are twisted into each chock. A socket wrench is suitable here.
- The design is tested for stability. If it is not, you need to remove defects. For reliability and balance, brackets are fixed on the back side.
The process of creating a chaise longue of birch chocks is time consuming, but the result will be great.
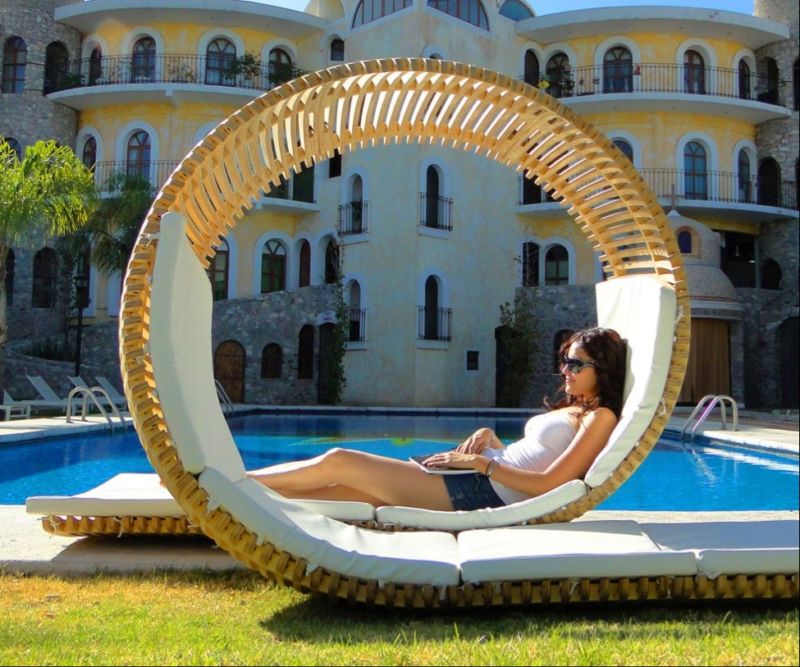
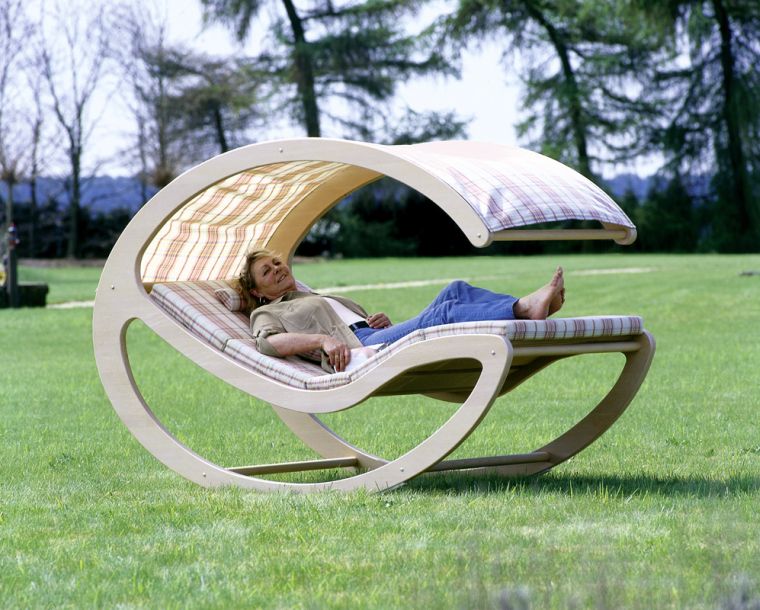
Plywood rocker
Such an attribute for recreation can be in the form of a chair, a bed, with and without armrests, even with a roof that will cover the sun on the summer cottage or the beach. For the product to last for many years, it is necessary to choose trees of high-quality varieties: needles, oak, larch. A sheet of plywood from such rocks is flexible and lends itself well to processing. In addition, the plywood itself has a low price and a number of advantages:
- strength;
- plastic;
- ease in processing, finishing, sawing.
Before starting to work, all material should be treated with protective agents. Next, create an exact scheme of the chair. You can do this yourself or use the already prepared size drawing. Here is one of the original rocking plywood schemes:
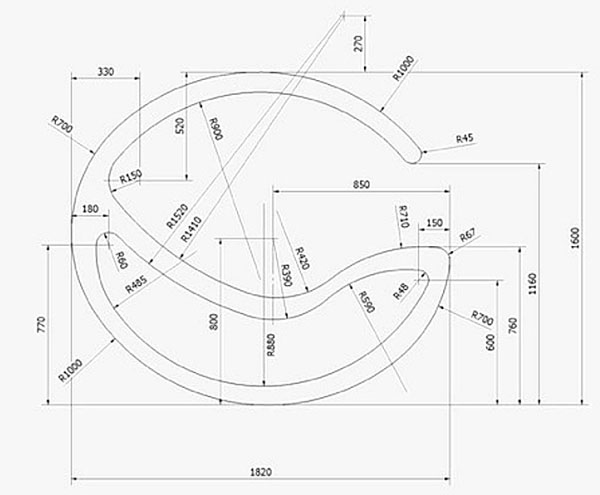
When you have the necessary materials and drawing, you need to start work:
- The scheme is transferred to a plywood sheet. Details are arranged so that the material is used sparingly.
- Milling cutter and jigsaw cut out the components of the structure.
- Holes for screws are made in places of fastening.
- All elements are polished and varnished.
- Assembly begins with the base. Then the remaining parts are connected.
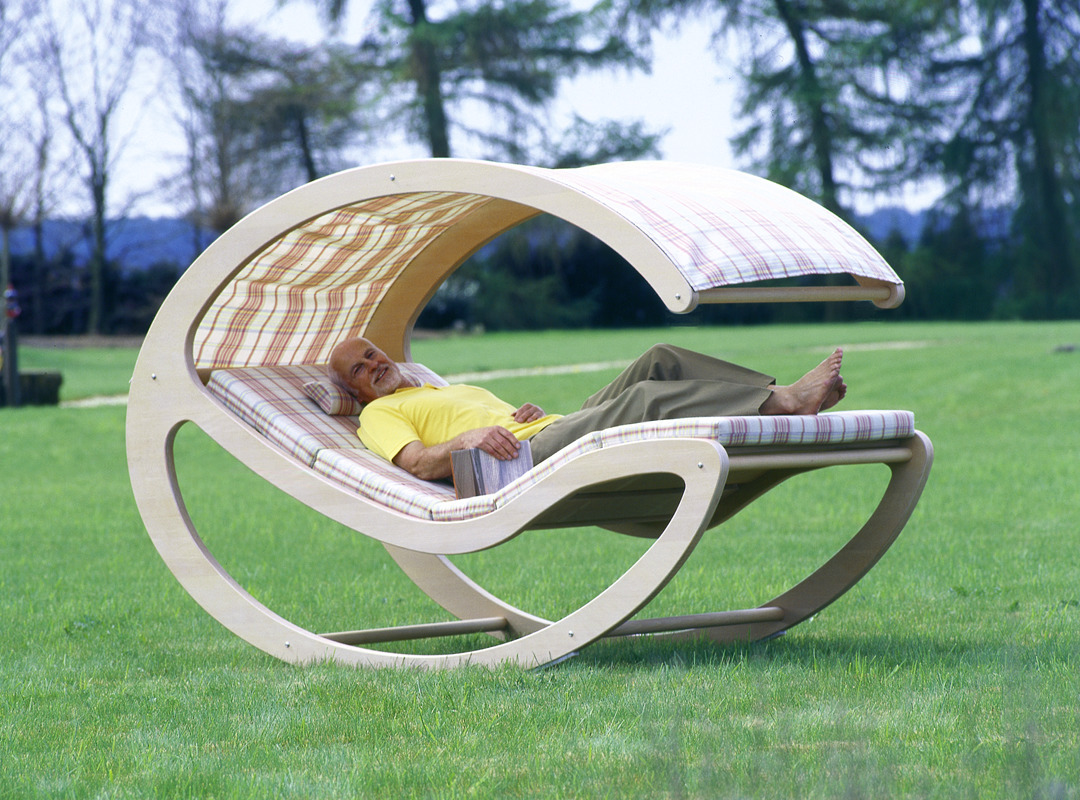
The upper part of the deck chair is better to make the fabric. It will look beautiful and will not weigh down the whole structure.
By showing a little patience and putting some physical effort, you can create an original attribute for a comfortable rest. Create a creative scheme or take it ready - everyone’s choice, but the final result will surely please you.
How to make a lounger to give your own hands, see the following video.