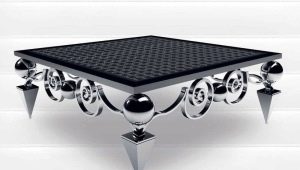
Epoxy Tables DIY

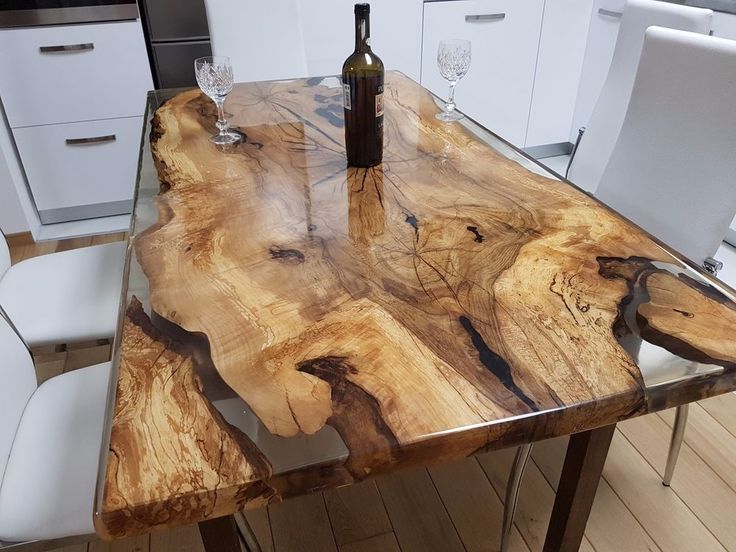
Agree, the table is made with the use of epoxy resin looks quite unique, original, and sometimes extravagant? Combining this material with a tree, you can easily realize a unique and inimitable piece of furniture that can decorate any room.
Time does not stand still, as well as fashion.
Interior design requires us all new solutions and non-standard use of familiar materials. One of them is a well-known epoxy resin.
The rich properties of this material give us great opportunities in its application.
At one time, epoxy resin was used only as a two-component adhesive for gluing various objects, and now it is widely used in the performance of author projects, dioramas, as well as the manufacture of designer furniture.
Properties
Epoxy resin is quite simple to use, but it will allow you to create a new table with your own hands, as well as update the old one and transform it beyond recognition. The strength and stability of the frozen resin to chips, moisture, as well as temperature changes, makes products from it wear-resistant and durable.
Such a table does not change its color, is not deformed and is not covered with scratches and damage.
Design features
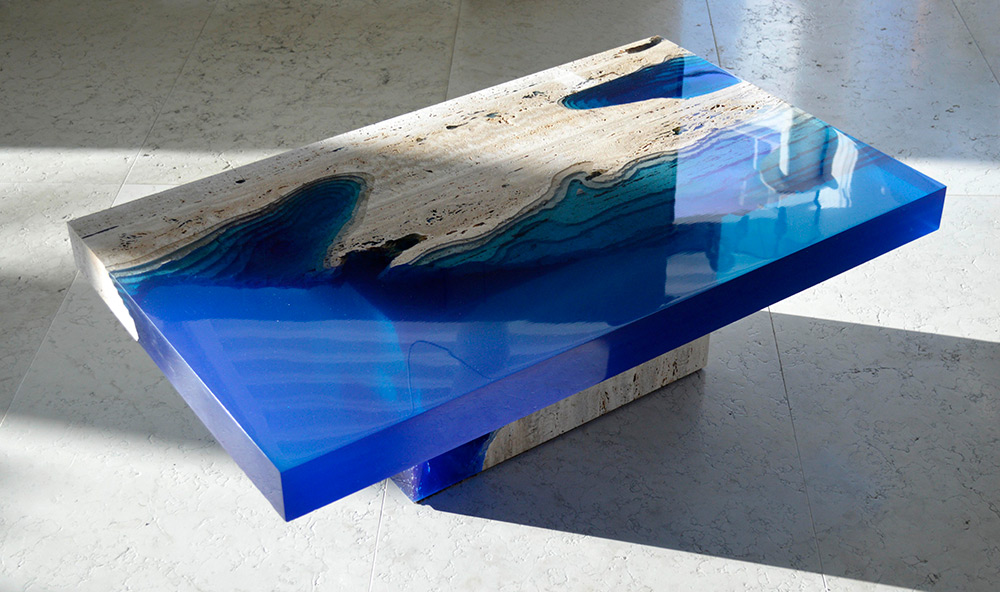
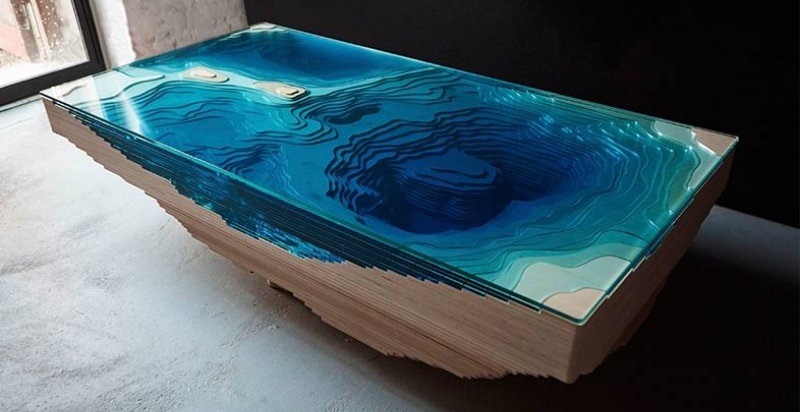
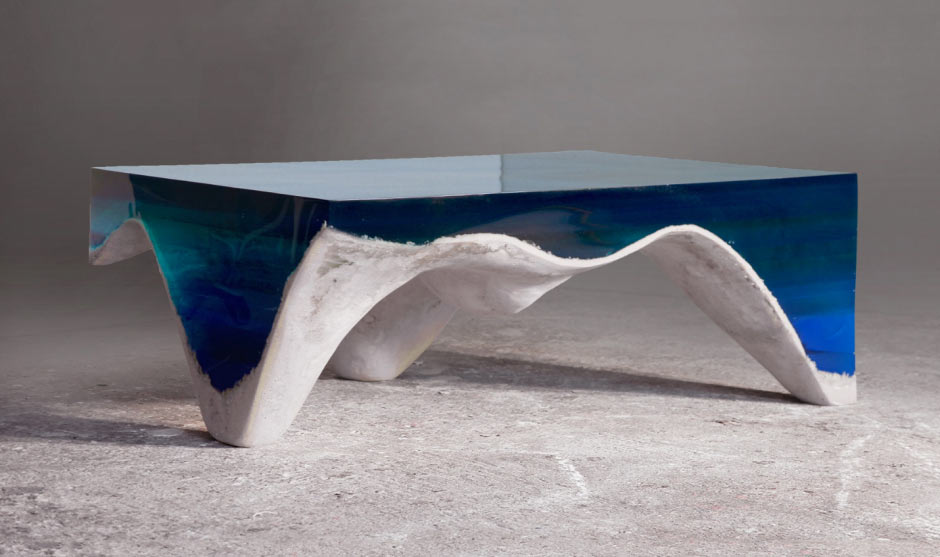
Thanks to the staining of the resin, you can get hundreds of color nuances from transparent to deep and rich colors, according to your desire, as well as to achieve the effect of various landscapes, from mountain to sea, which is very popular now.
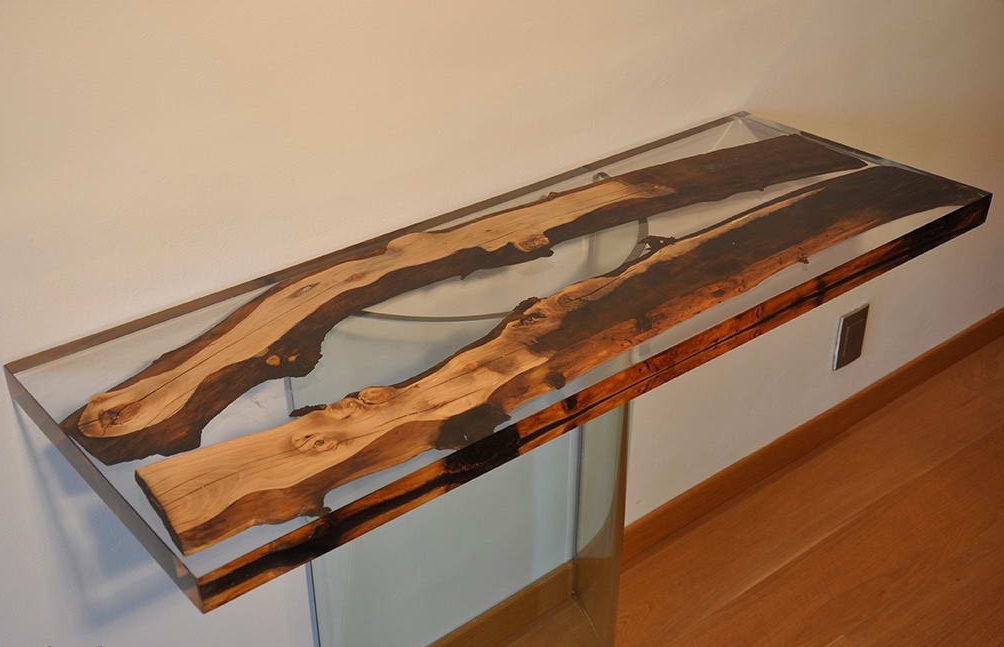
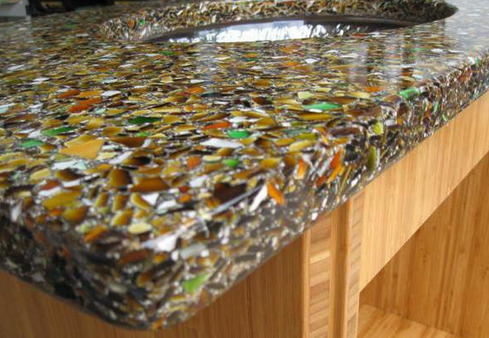
Under the fill, you can place any components of your choice: pebbles, shells, interesting twigs and leaves, various types of sand, marble chips, dried flowers, as well as memorable trifles and souvenirs.
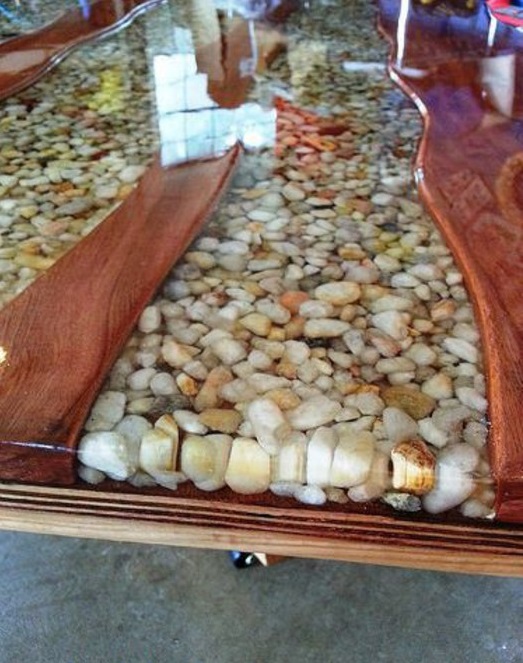
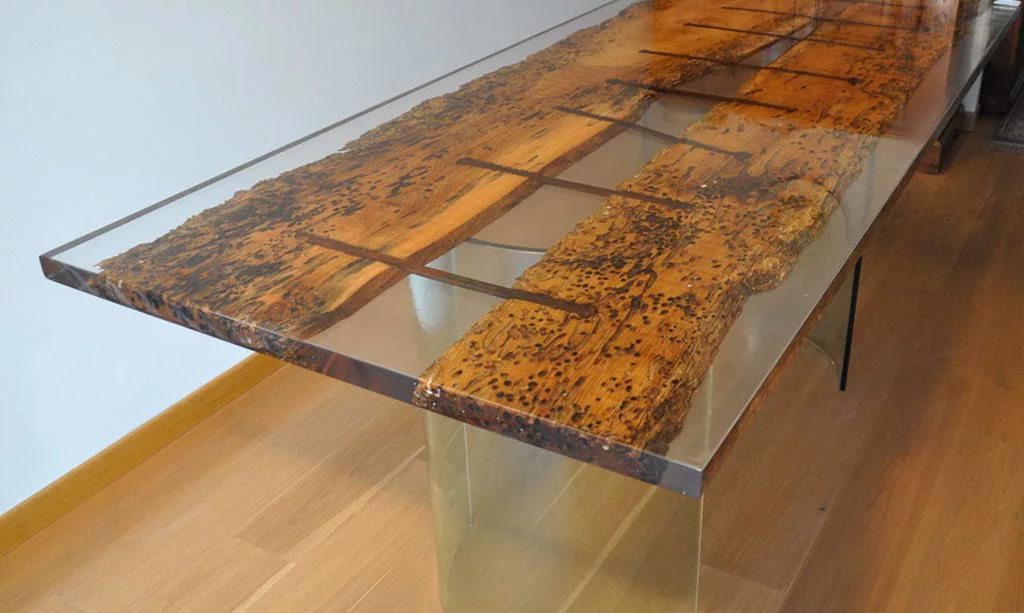
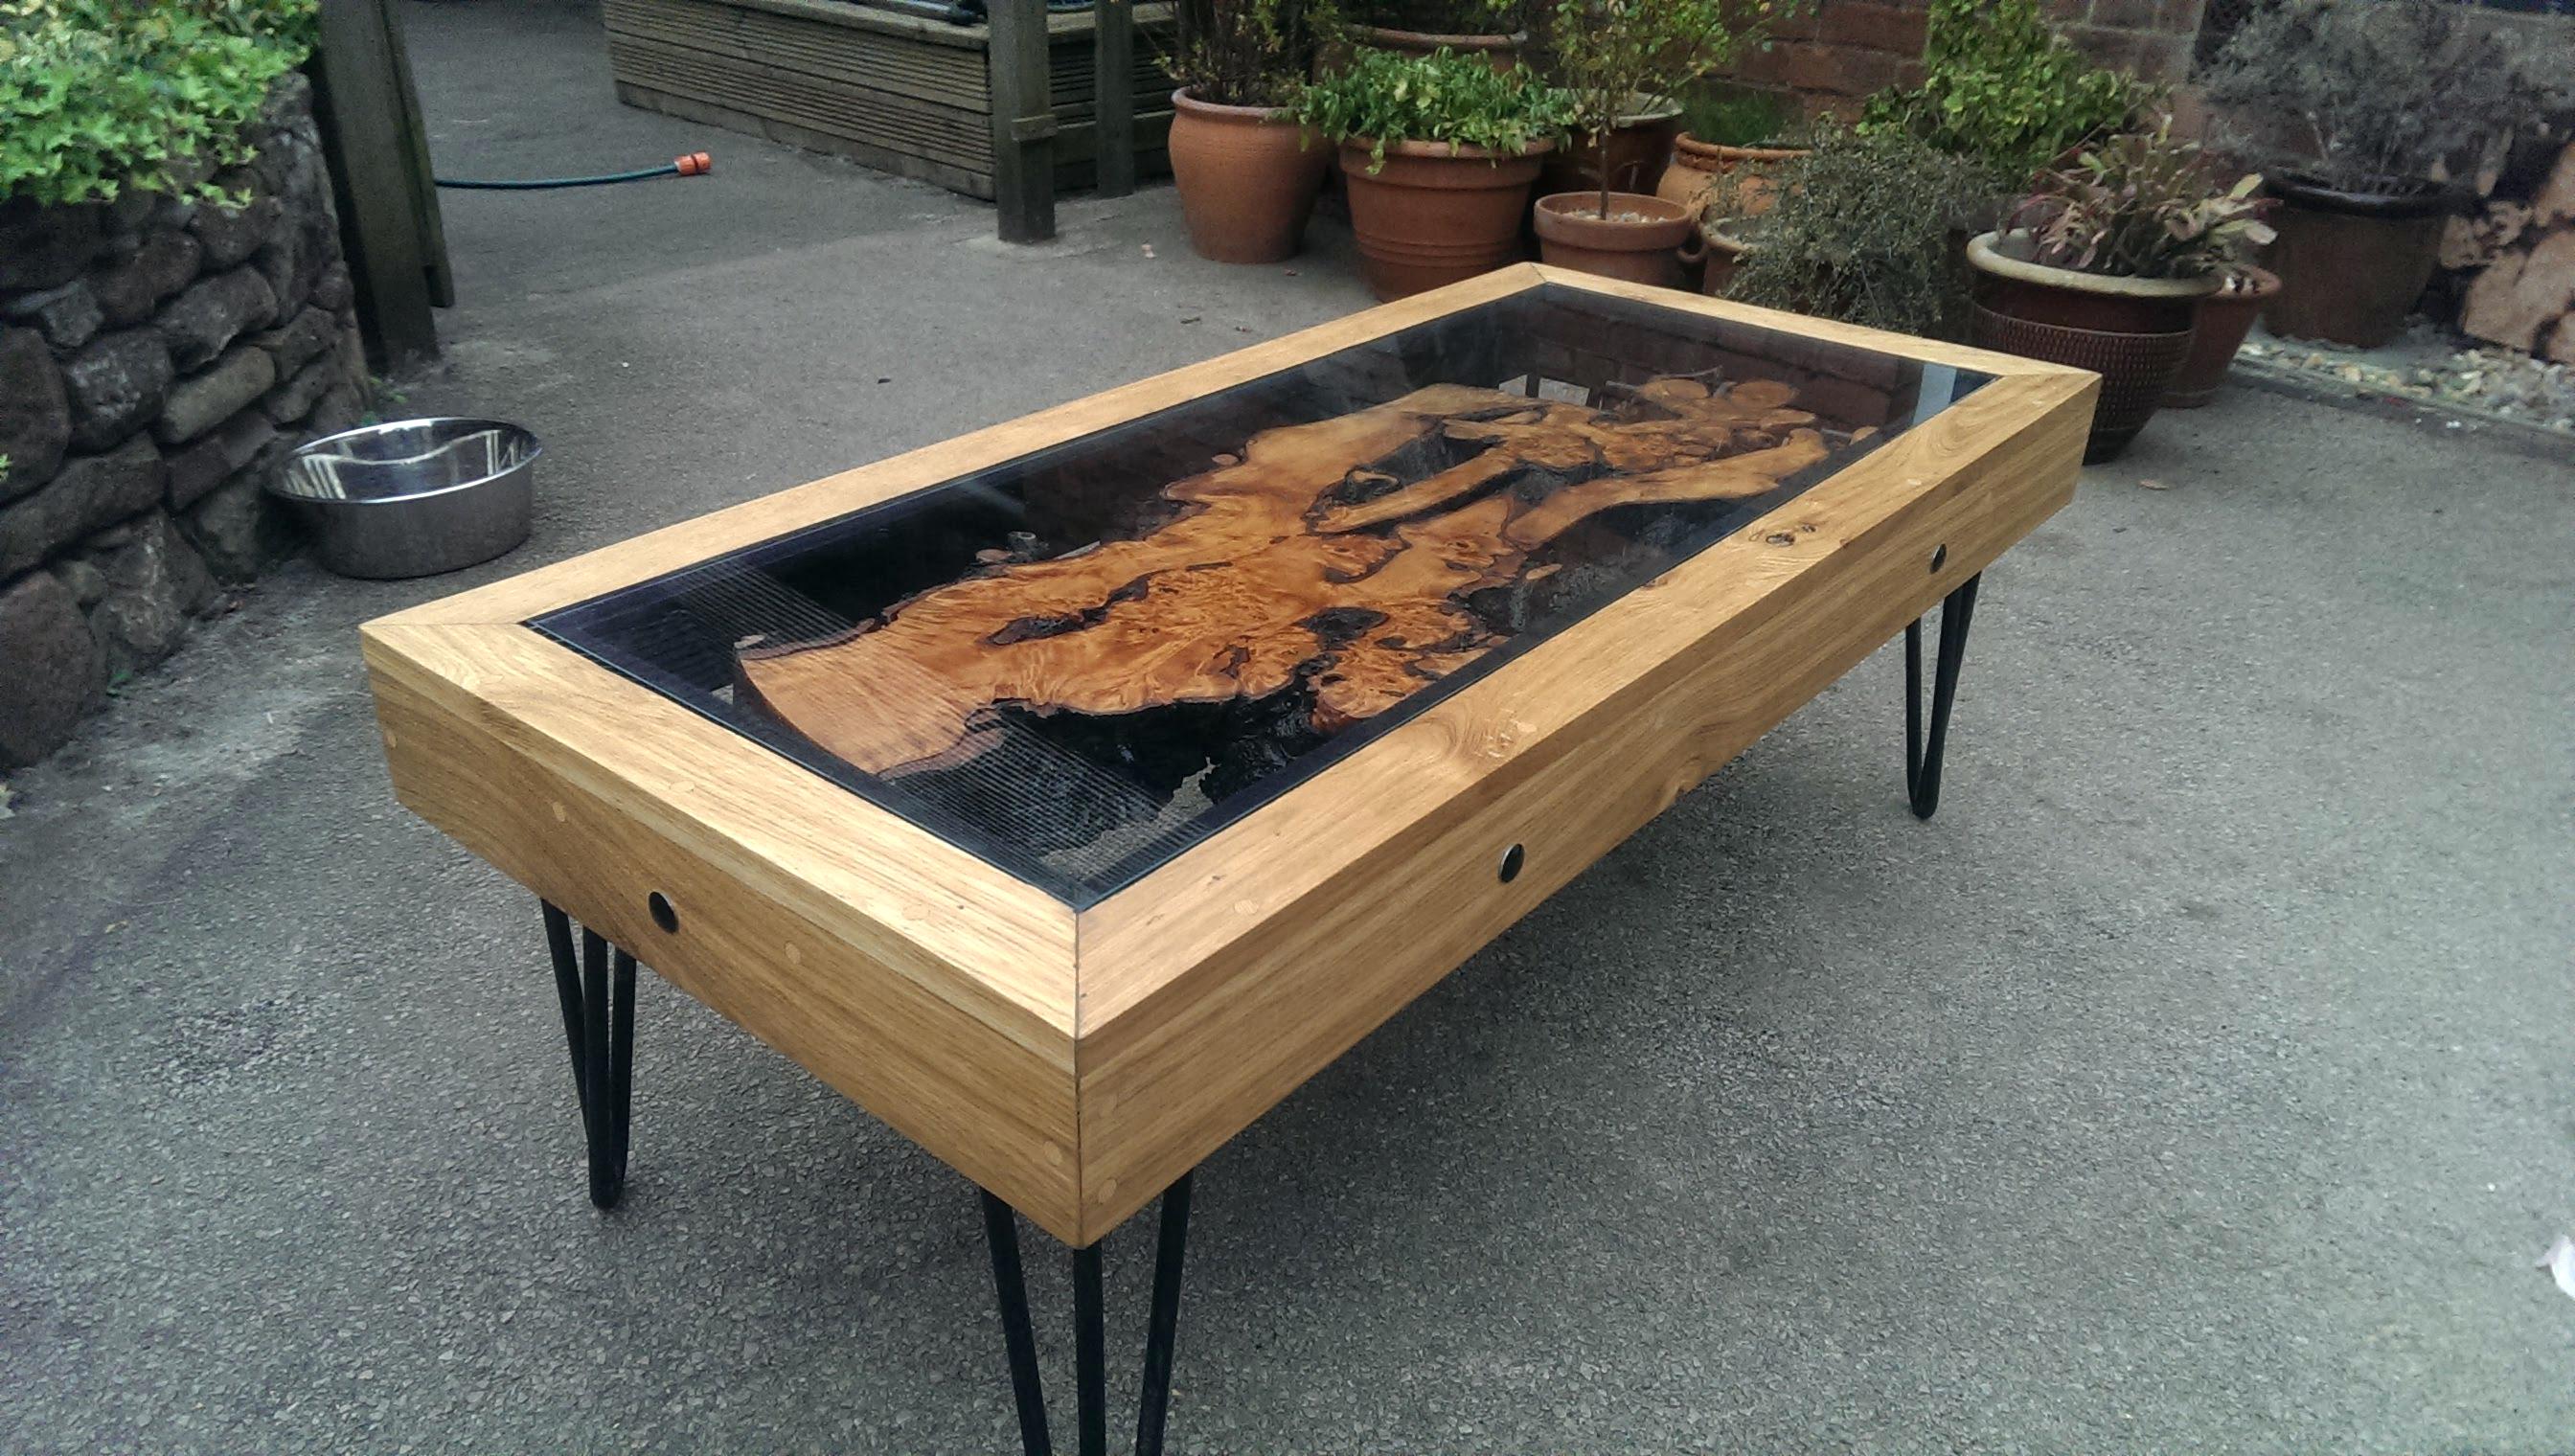
The special beauty of the furniture is given by shabby pieces of wood, withered, corroded by bark beetles, larvae and voids formed from time to time. Filling such natural epoxy flaws, you can achieve unrealistic special effects.
And adding to the gaps additional decor in the form of coarse sand, alternating layers of resin with chips and sawdust, we will create the impression of frozen time.
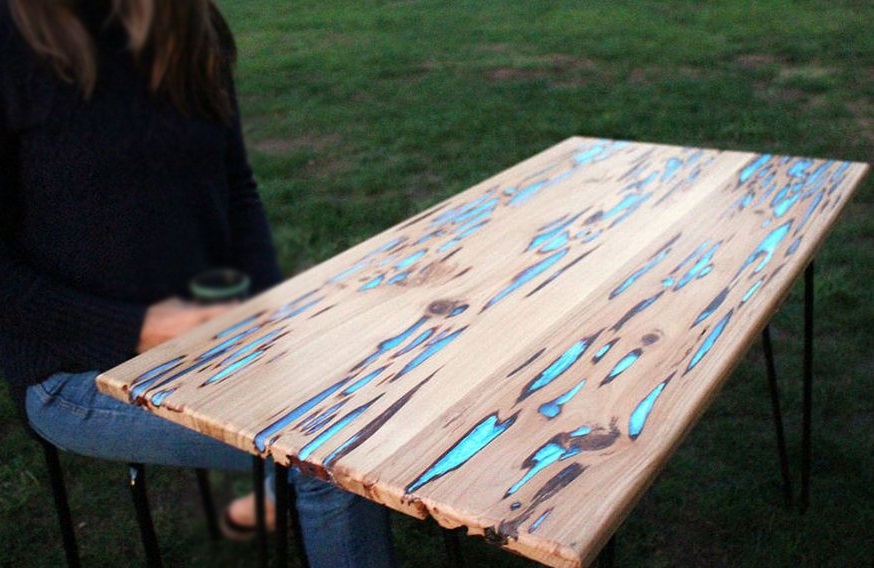
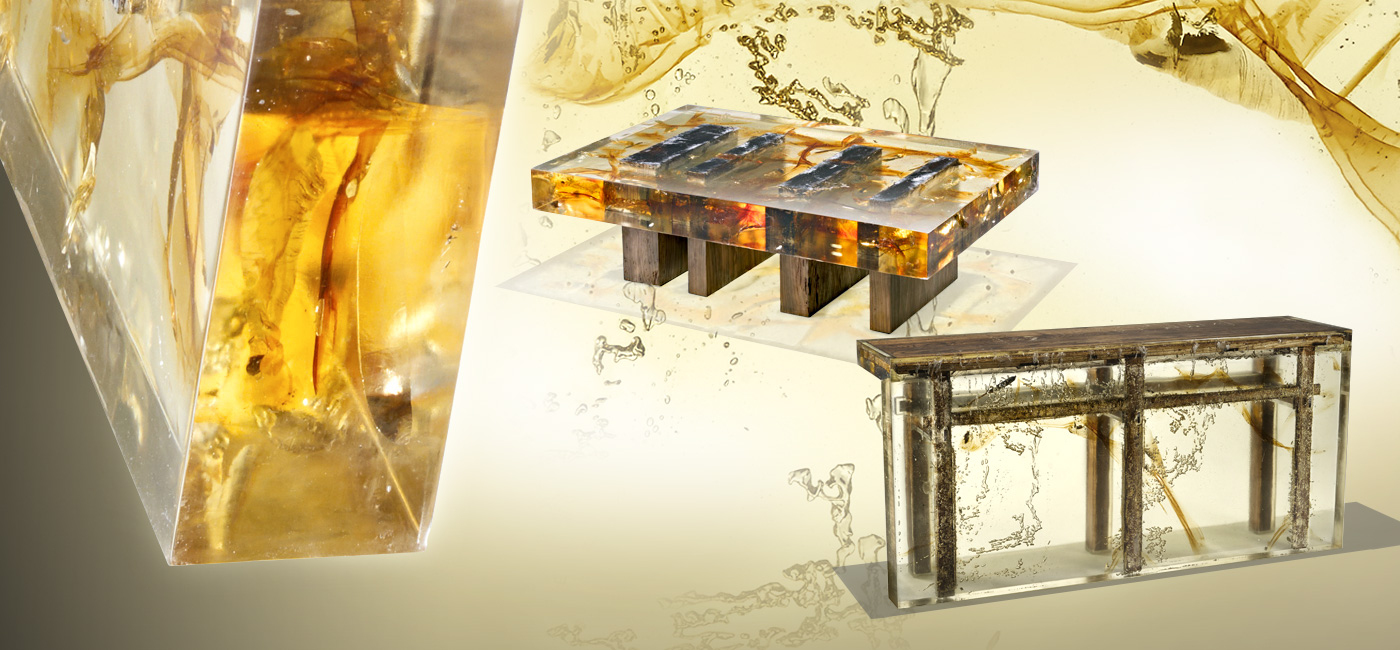
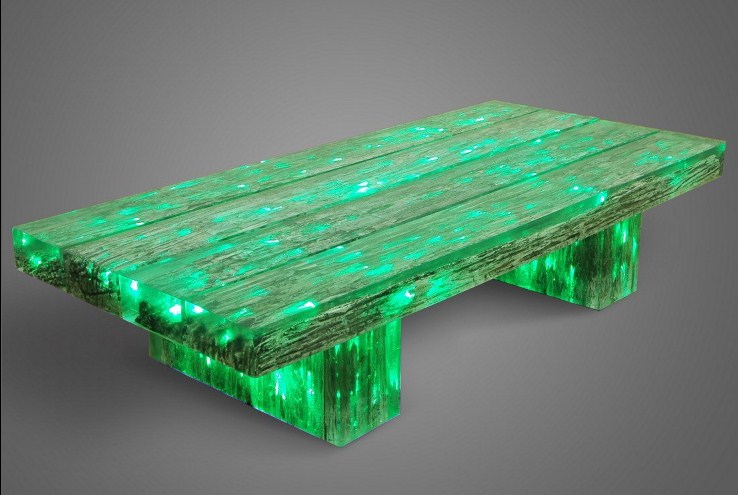
It is also easy to create modern motifs with the help of polymer resin, investing in the worktop metal objects, semi-precious stones, glitter, foil. In addition, when we paint the open parts of the tree with metallic paints, we will get fantastic effects and modulations.
To work we need a tree, resin, any decor we like and unlimited imagination.
Density features
First of all, it is important to know that, depending on the chosen decor, different fill viscosities are harvested. The working mixture consists directly of epoxy resin and hardener.
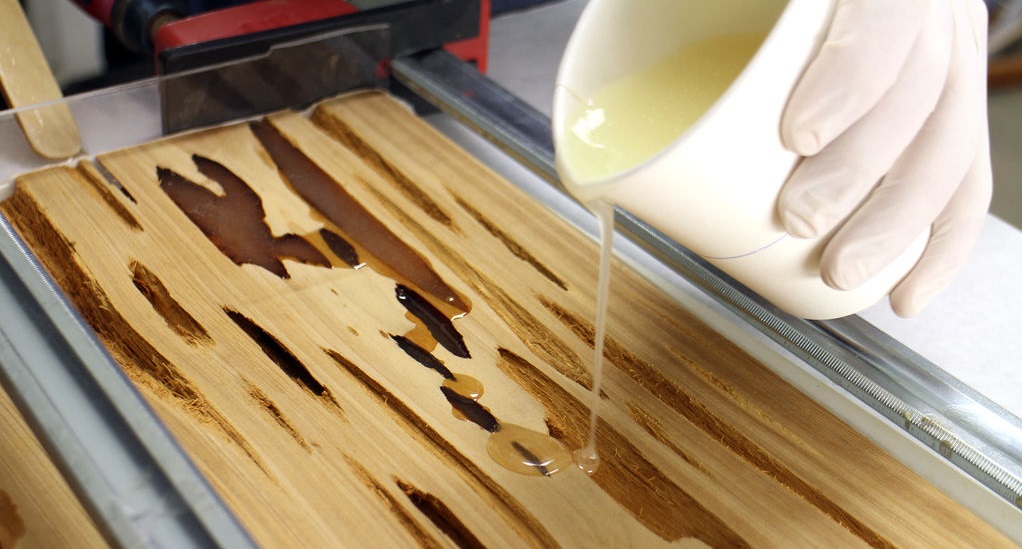
For the smallest and most accurate fill, a more liquid mixture is suitable. So she will be able to fill all the cracks of the tree and completely fill the objects chosen for inlay.
But the thick mixture, the so-called "liquid honey", is better suited for creating unique volumetric forms, beautiful drips and lenses.
Epoxy resin applications
There are several spectacular uses for epoxy resin in decorating furniture.

Update the old table
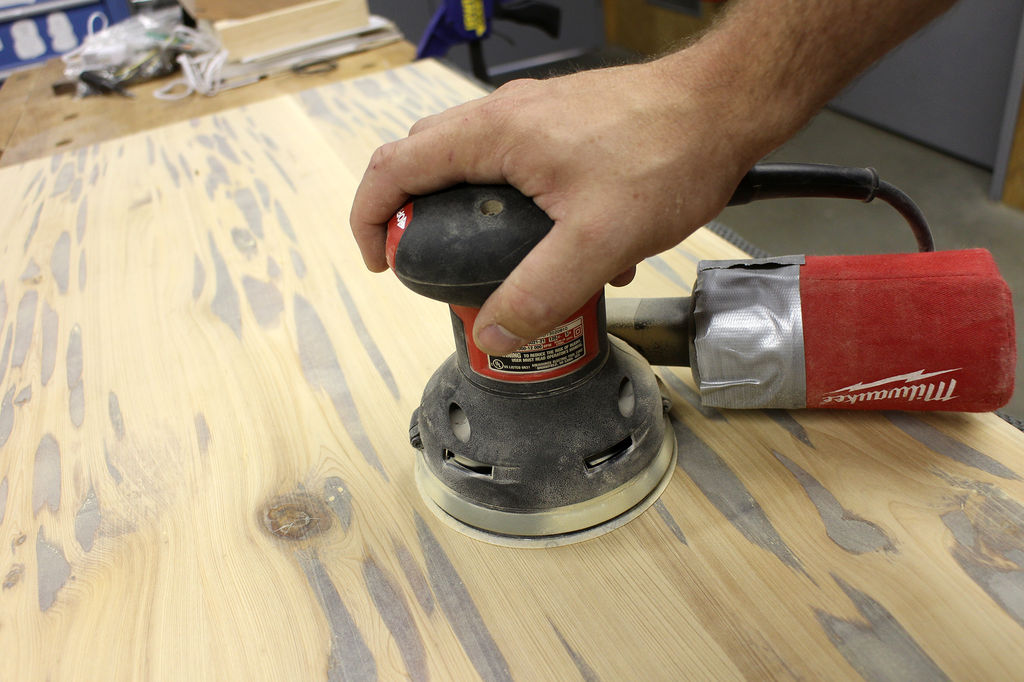
You need to take the old table and carefully process it with sandpaper, removing the worn layer of varnish or paint.
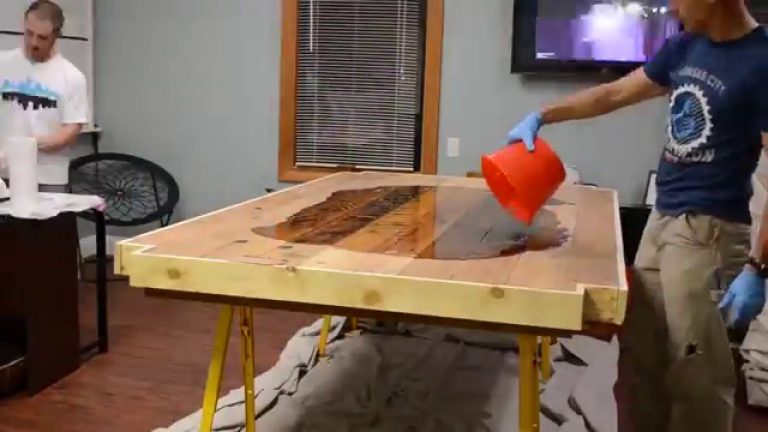
On the tabletop itself, you need to make a side. To do this, you can take a wooden slats and cut angles at 45 degrees, fill them at the edges. You can also take metal corners and create a frame around the canvas of the future table top.
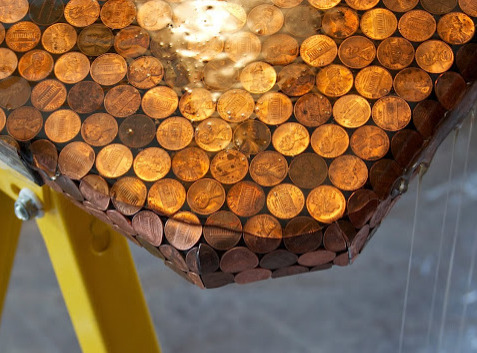
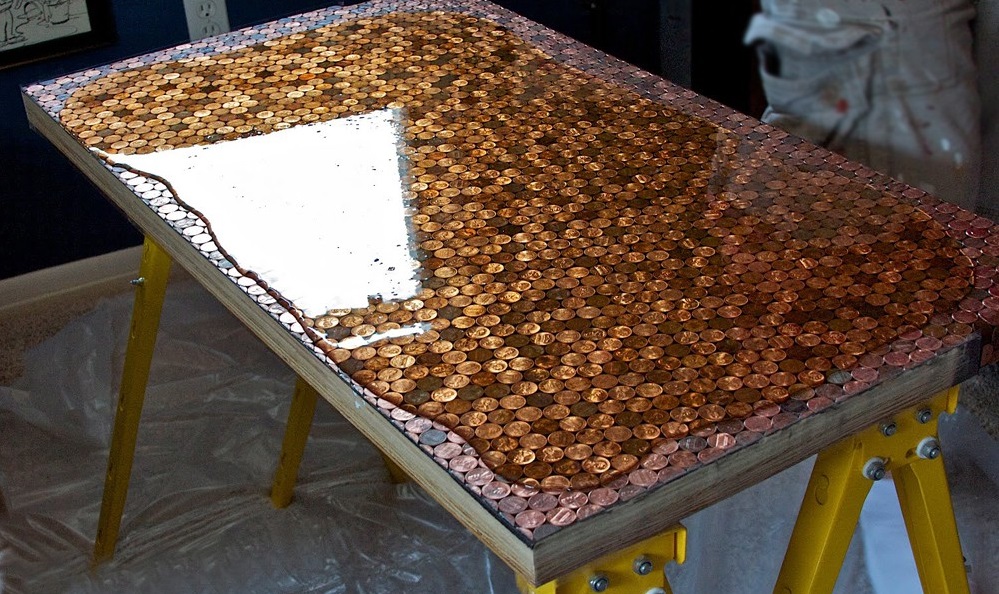
For inlays, we choose according to your taste: old coins, small tiles for the “apron” of the kitchen, or chips and pieces of wood of unlike shades and breeds. Dilute the resin and let it brew. In parallel, we lay out our decor on the surface of the table, then gently pour the prepared glue.
If the height of the fill is no more than 5 mm, then the process is performed in one run.
For a higher profile, content will have to be done in several stages, each of which is repeated after 48 hours. After filling it is necessary to remove bubbles with the help of hot air. It is enough to heat the flooded layer and the bubbles themselves will come out.
The complete epoxy polymerization process is 7 days.
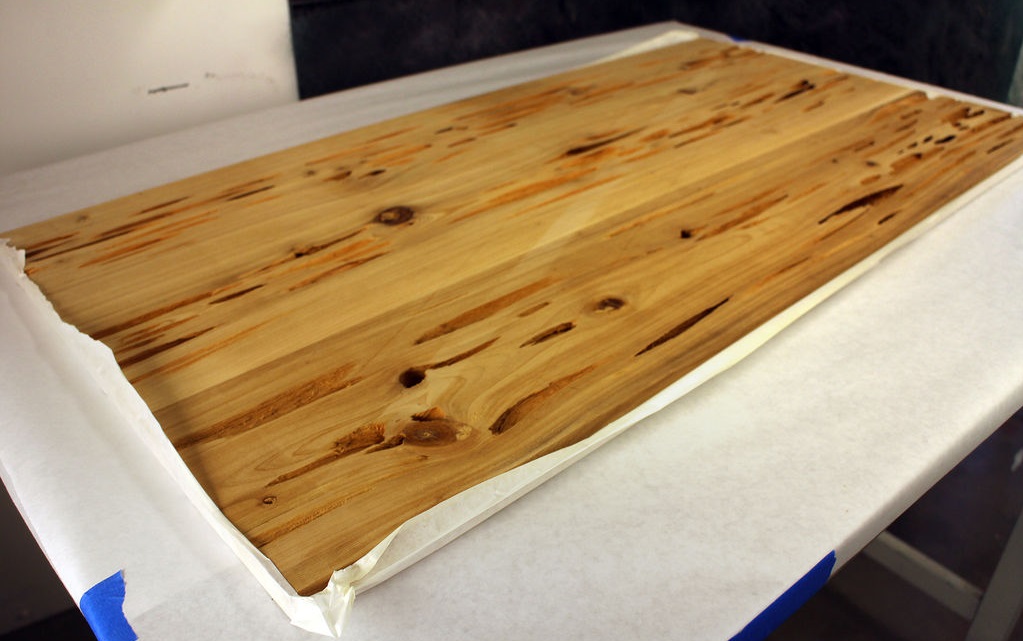
After the resin has completely cured, the sides must be removed, the whole surface must be sanded, removing the resin layer. When the entire surface is thoroughly treated, it must be varnished, and after it is fully cured, it must also be sanded and polished.
It is necessary to approach the choice of a varnish not less responsibly. The lacquer itself must be high gloss and preferably with increased strength.
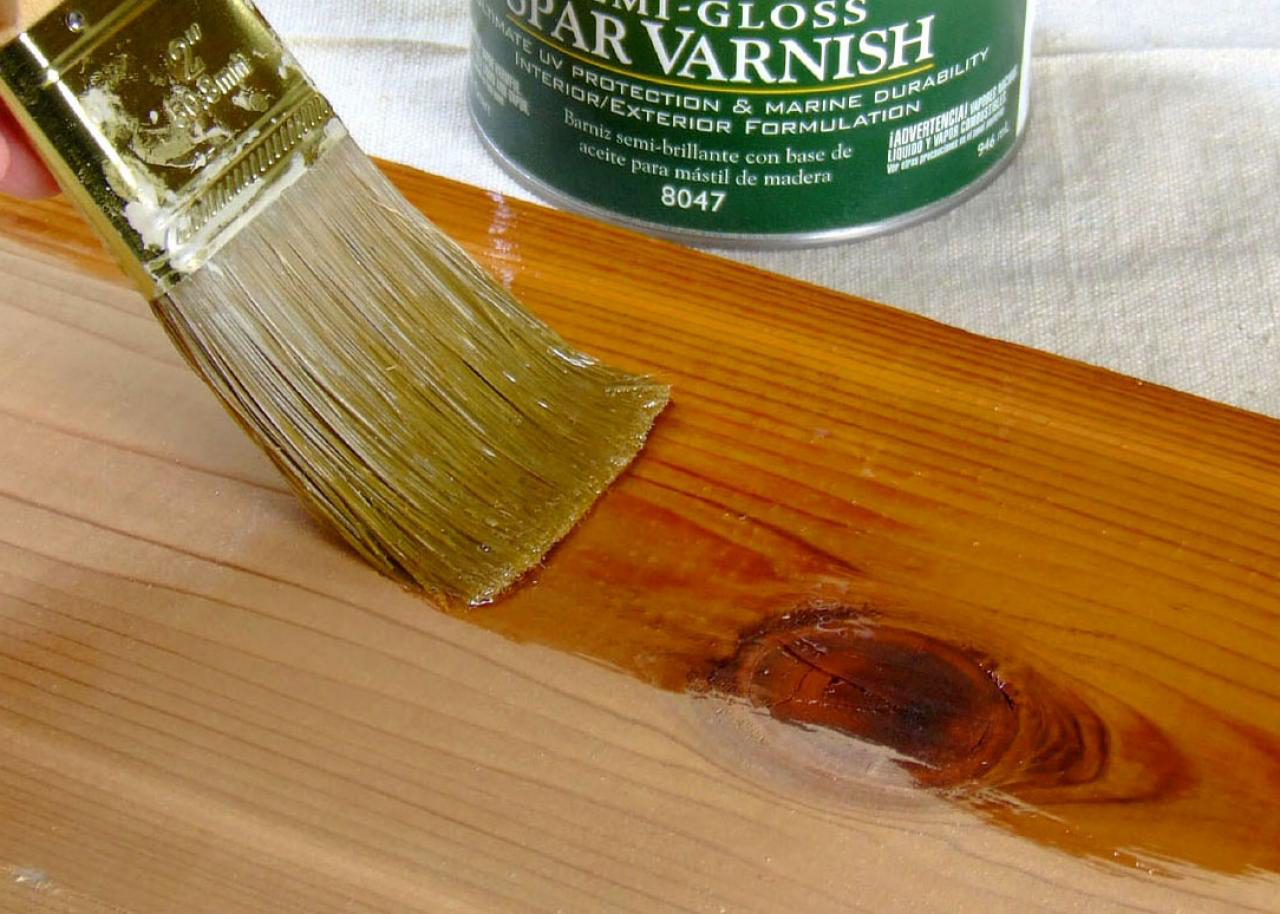
The beauty of the finished product depends on the properties of the selected varnish.
The second way. Table do it yourself
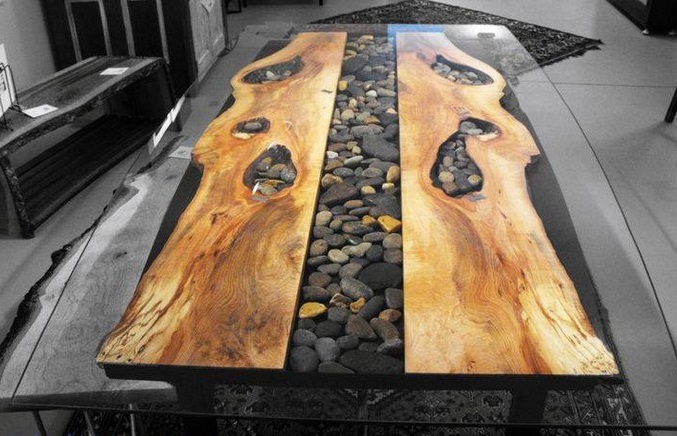
First you need to make a table frame made of wood or metal and the base of the tabletop. This can be a solid canvas for casting, or individual parts that will be laid in the frame of the future table, only openings and corners will be poured. The result depends on what blanks do you use for the basics. In this way, you can get an imitation of a stream, river, flooded ravine or fantasy relief.
If you take for the basis of individual boards or pieces of wood, then they need to fix the mounting tape, for the stability of the structure. It should also be remembered that on the reverse side of the future tabletop all the holes are carefully sealed with masking tape or puttied, in order to avoid epoxy resin leakage.
In this embodiment, only the imperfections of the tree or the holes between the details of the canvas are filled. The epoxy for this casting can be either colorless or tinted.
Processed such countertops as described above, after complete curing of the resin.
In addition, this material gives us the opportunity to cut openings, grooves or decorative holes in an already finished product, which will add uniqueness to your interior.
You can find out how to make a coffee table out of wood and epoxy with your own hands in the next video.