Garden paths: how to make cheap and beautiful with your own hands?
Often, owners of garden and dacha plots are faced with the fact that after the rain it is almost impossible to walk through the garden. Dirt sticks to the shoes, and slipping, and you can do yourself injury. Wealthy people hire a designer who develops a design project with the inclusion of garden paths to solve this issue. But in order to save, you can not only make a drawing yourself, but also lay out garden paths with your own hands. And what is needed for this will be discussed in this article.
Special features
Garden paths can be capital or temporary construction. With regards to the temporary tracks, they can be dismantled and moved at any time, but the capital ones are made once and for all, therefore before installation it is important to pre-pave them in the drawing.
Laying tracks in the country should be made taking into account shrubs, trees, beds and greenhouses.
Keep in mind, plants can grow to such size in a few years that they will interfere with movement around the site, and in some plants the roots can damage the paths altogether. To avoid this, Experts do not recommend laying building materials close to plantings. It must be remembered that the construction of new outbuildings in the future should not have any obstacles. Otherwise, it will be necessary to dismantle and lay new paths, and these are additional expenses and time and money.
When choosing a material, it is necessary to make a start from the fact that it must be reliable, with a long service life, safe not only for movement, but also for the soil. It is necessary to weigh all the pros and cons before buying building materials that may be subject to decay, corrosion, colonization by mold fungi and other harmful microorganisms. It is necessary to take into account the climate, especially the temperature in winter and snow cover, so that the material has frost resistance and winter resistance.
In the case of repair work, no difficulties should arise, otherwise you will have to dismantle the entire lane. From this point of view and care of the track should not cause complications.
The choice of building material is determined by the frequency of use and functional load. For example, for those paths that rarely move, solids like gravel, crushed stone or sand are suitable, including the use of cork bark. In places where the flow of people is large, durable materials such as concrete, rubber, brick or monolith will do. This can be attributed to the tracks along which the movement of vehicles or loaded wheelbarrows is planned.
Making your own tracks is a creative process. It depends not only on the financial situation of the owner of the site, but also on his skills. But often this issue can be solved with minimal physical and material investments.
What is needed?
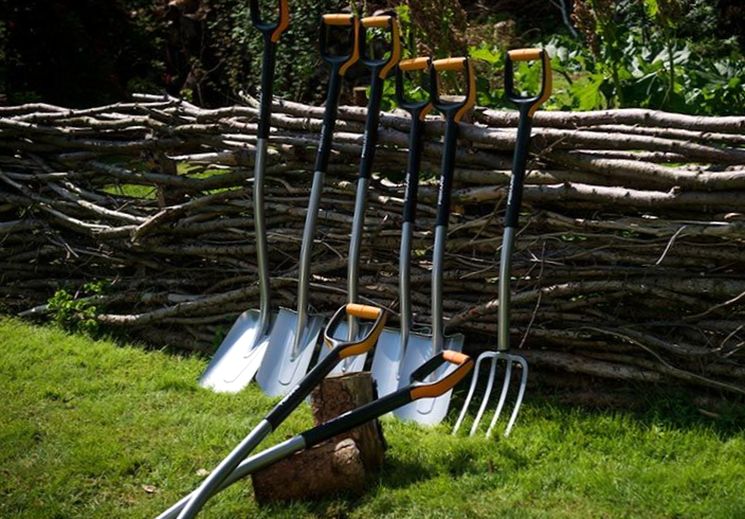
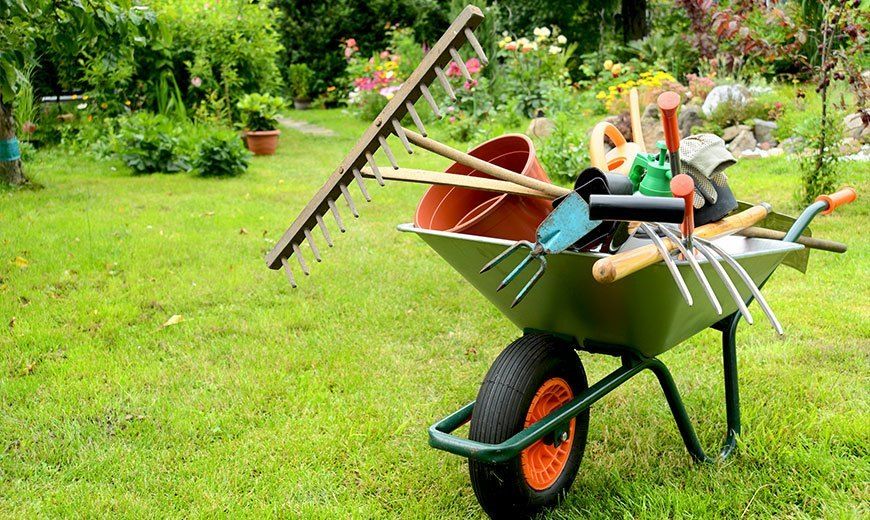
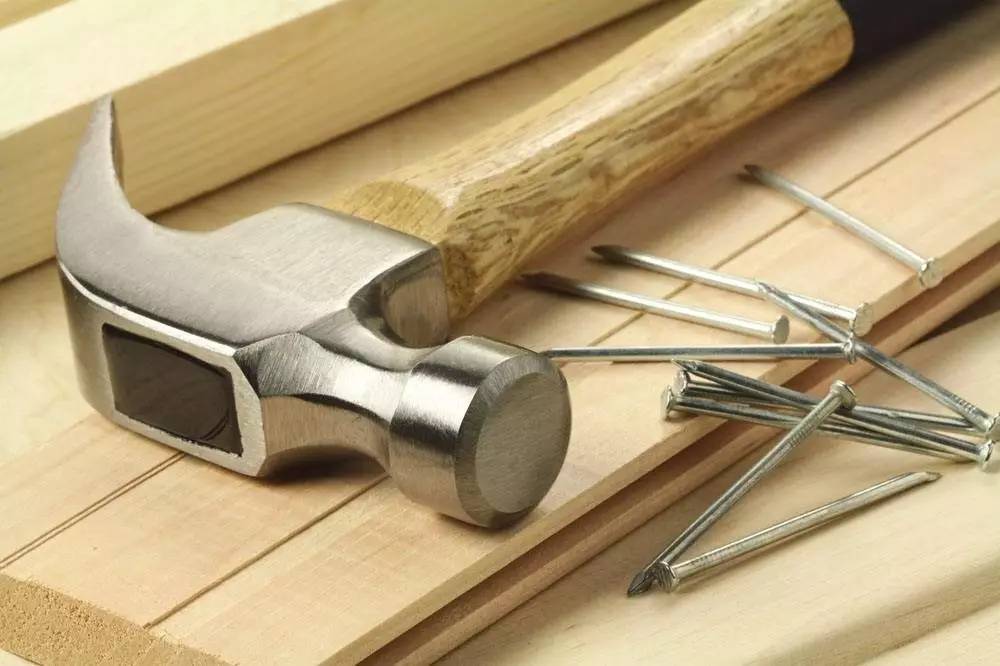
Depending on the chosen material, geogrids, a concrete mixer, a wood saw, a metal saw, a hammer, a mallet and even ordinary scissors may be needed. In addition, do not forget about the construction rule and the construction level, thanks to these tools you can level the surface and make it perfect.
Not to do in this work and without shovels - sovkovoy and bayonet, without rake, forks and scrap may be needed in less fertile areas. With their help, make markup, remove unnecessary land, which is folded in a wheelbarrow. An alternative to the wheelbarrow are metal buckets.
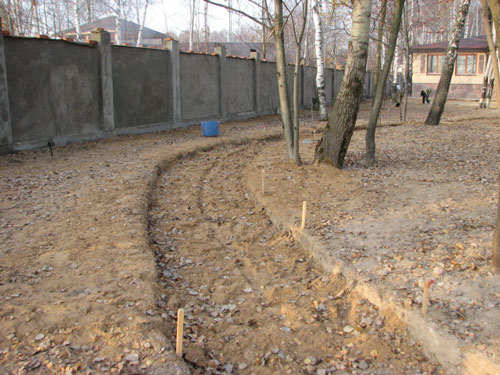
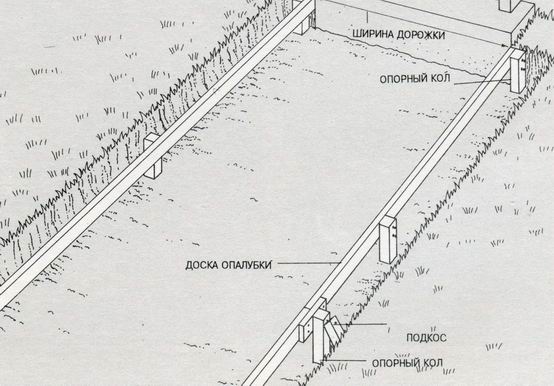
The project plan is carried out in specialized computer programs or on a regular sheet of paper with a pencil or pen. First you need to draw a house, a barn, a bath, a toilet, then a gate and a central gate. Directly to these objects are drawn schematically tracks. Additional paths are laid out to the gazebo, swimming pool, mangalny zone. Do not forget about the approaches to the beds, water system, greenhouses. As for the width of the future tracks, they will be marked on the ground. This can be done with pegs, a hammer and a twine.
After the pegs are driven in, they are joined together by a string. The width of the avenue should ideally be suitable for movement not only of people, but also of construction wheelbarrows. Instead of pegs, the marking can be done with the help of sand, it is sprinkled in a small amount, but at the same time it should be visible from the side. Due to this, it is possible to plan in advance the flower beds, beds and other plantings.

Simple budget options
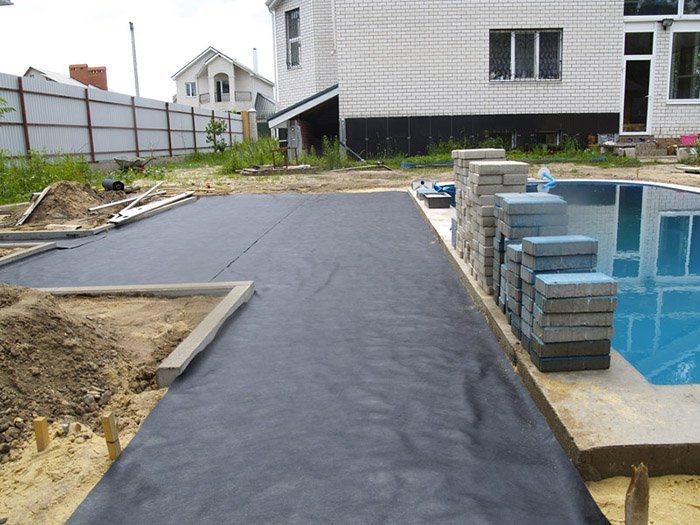
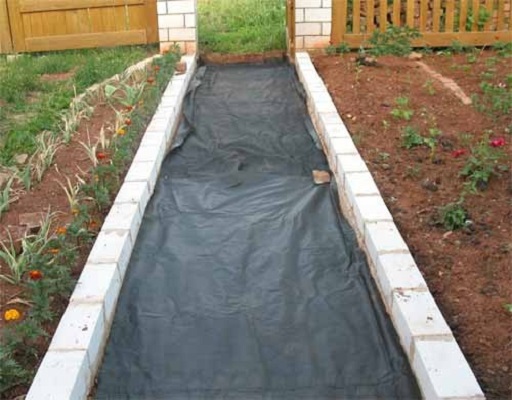
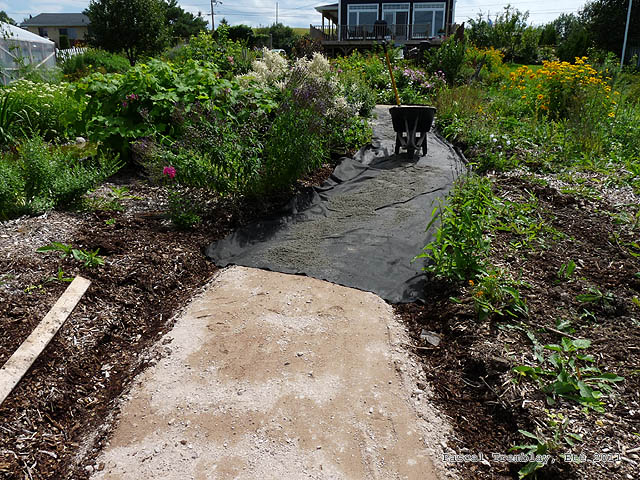
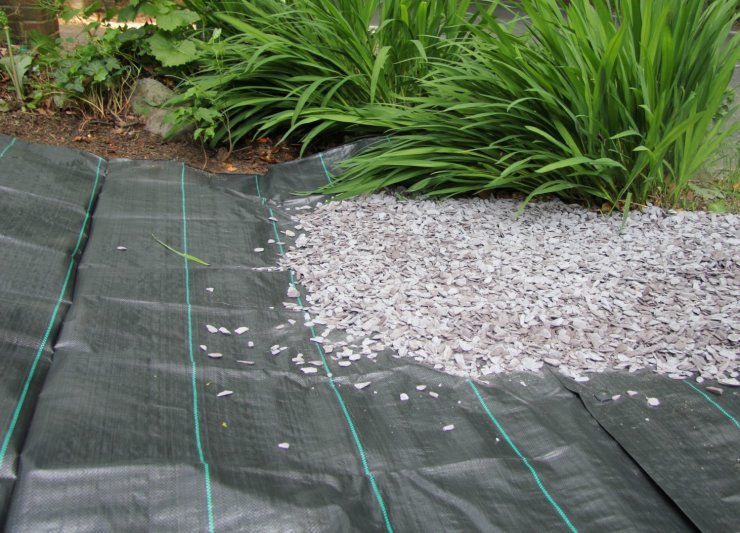
In recent years, geotextiles have been very popular among summer residents. The black canvas is used for weed control. As you know, plants need sunlight, without it, nothing living can grow, and weeds are physically unable to break through geotextiles due to the fact that the material prevents the penetration of ultraviolet radiation. Some craftsmen use it as an option for garden paths.
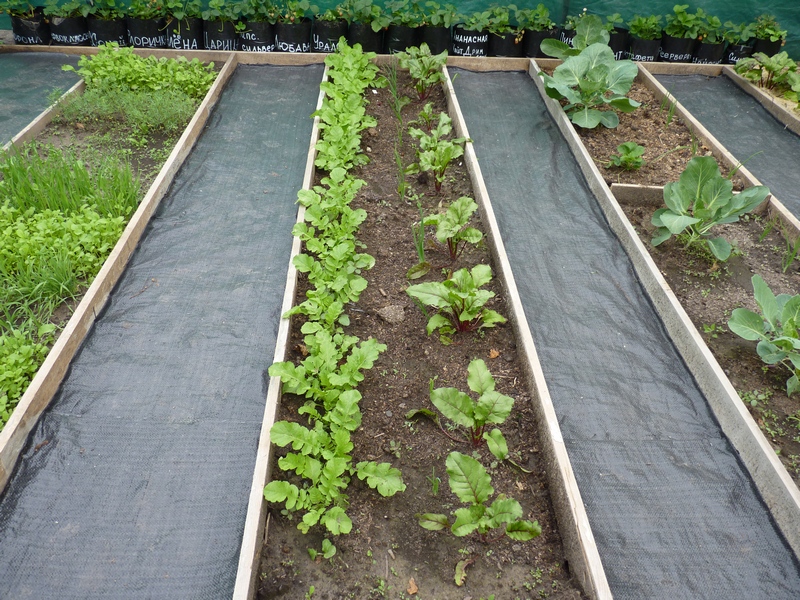
On sale covering material is found in white and black, the second option is suitable for construction work. Its density is 60 microns - which means that it will be enough for several seasons. The width of geotextiles usually has an indicator of 3.6 m, and the length can be cut into any.
To make a track out of this material, you first need to cut it. If you fold the material in two times, you get segments of 80 cm - this is quite enough for small paths.
It is important to note that the soil remains in place, while in other cases a few centimeters of land will need to be removed. Due to this, the installation process will take less time.
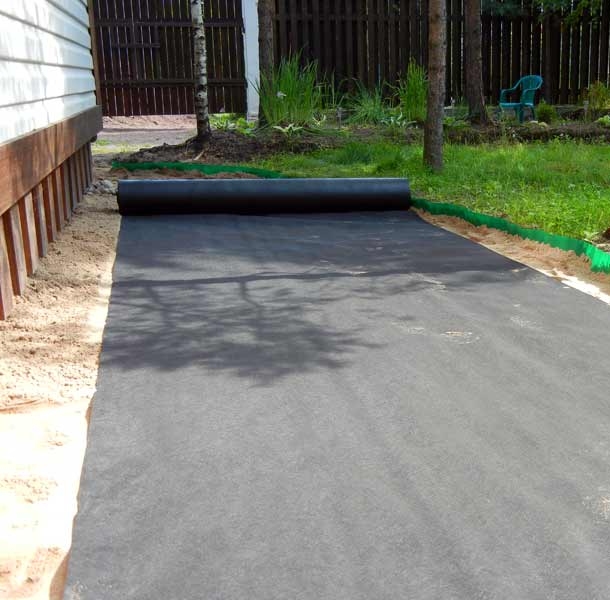
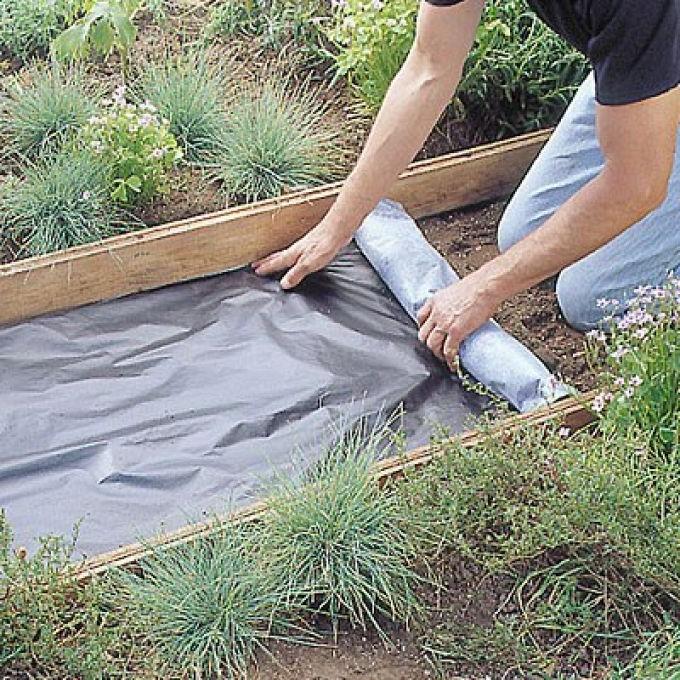
Usually the tracks are made in places where paths have already been laid and the earth is dense there, so you have to tinker with it.For this work it is necessary to use a bayonet spade with a rounded base. With its help, a small gap is made, subsequently geotextiles are pushed into it. This stage continues first on the left side, and then on the right.
As a result, the edges of the material must be completely in the ground. In practice, it is enough to “bury” 10 cm from one side and 10 cm from the other side. Keep in mind that material is desirable to tighten, otherwise "pockets" may form, and if there are small children in the family, they can hurt themselves if they are stumbled over.

The ground around the track must be tamped. It is enough to walk on it several times back and forth. Under the influence of precipitation and ultraviolet earth will clutch and will hold the material as tightly as possible.
Installation of the next segment is desirable to overlap. Joints between building materials can be sealed with metal straps or pieces of steel wire. For this, two materials are “stapled” with staples, the hammering is done with a hammer. This operation is also performed to secure the ends of the geotextiles.
Of tires
From old tires, you can create a high-quality wear-resistant coating, which is not afraid of either rain, nor snow, nor the scorching sun.In addition, the rubber perfectly tolerates temperature drops and serves for several decades.
Caring for such a track is simple. It is sufficient from time to time to sweep up the garbage with a broom, and after drying out the dirt, flush it with a strong pressure from a hose. After wet cleaning and after rain, the water on the rubber surface dries quickly, so accidental drops can be avoided.

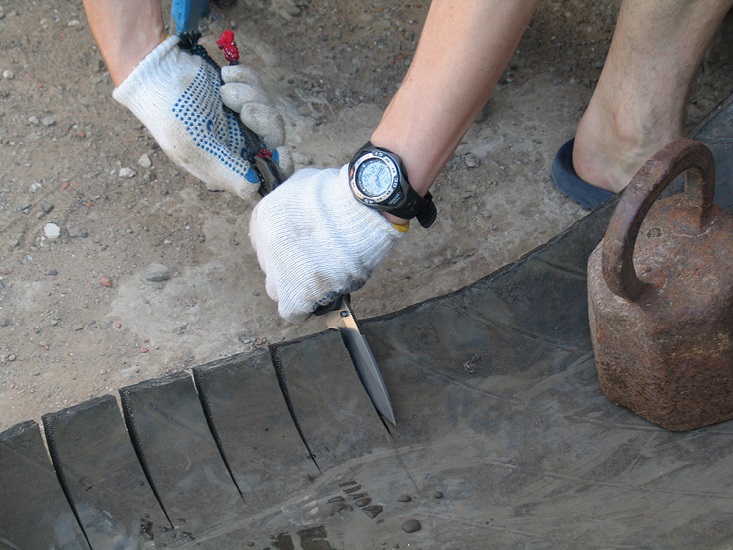
After the construction material is assembled, the tracks are to be created, but before you start laying, you need to make a rubber band. For this, a car tire is taken and placed on the surface. It is best to use an old two-liter barrel.
First, rubber is incised near the rim; this procedure is easiest to perform with a shoe knife. After the appearance of a small incision, a well-sharpened large knife is taken. Moving the knife up and over, the tire is ripped open. For convenience, the cut must be slightly bent to the side. Having managed with one side, the same is to be done with the other.
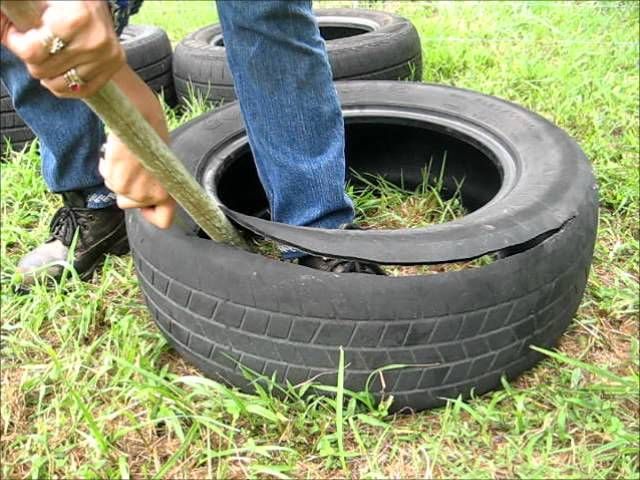
Keep in mind that the sharpness of the knife should be sufficient to perform this work without chipping and a wedge.Periodically, the knife must be moistened with grease and wiped with a cloth so that it is slightly slippery.
The rubber hoop is to be turned inside out; for this, the cut tire is placed on the ground and, fixing it with legs, this procedure is carried out by the hands. It remains only to break the twisted tire on the sides to the state of the hoop. Do not forget about safety - it is advisable to use gloves.
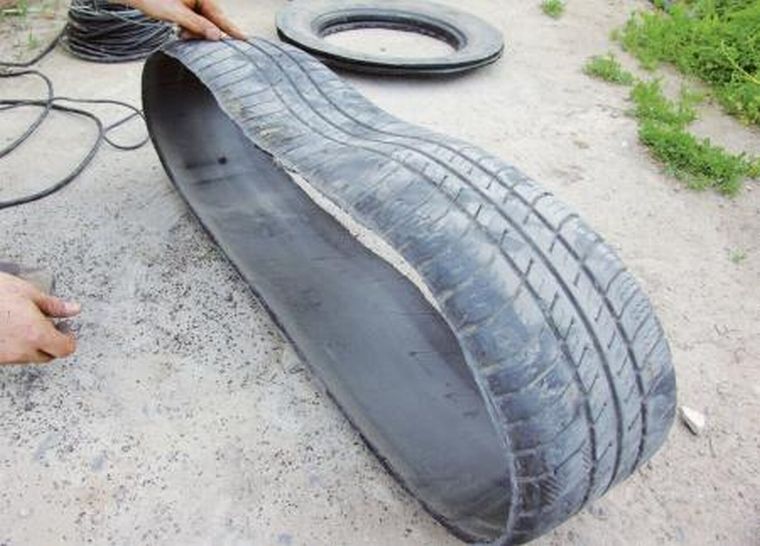
In order to make a rubber tape, the workpiece is transferred to a bench or stool. And fix its sides with a clamp.
It is important that the rubber is in a stressful state, since inside the tire there is a metal body. If metal is started to be cut with a knife, then the knife will quickly become dull, therefore cutting is performed using an angle grinder.
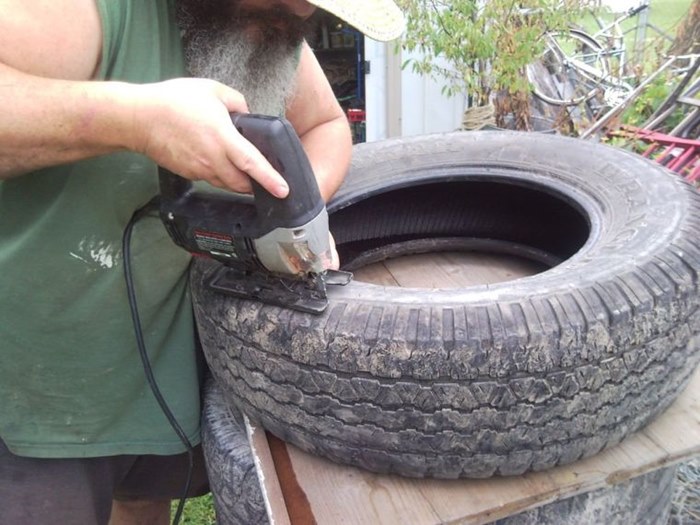
Experts recommend to follow the direction of the wind, ideally, it would be that he was blowing not towards the neighbors, but onto the roadway. Otherwise, the smell of burning rubber may not please the neighbors. Try to avoid sparks on the skin and especially in the eyes. At the end, all that remains is to remove the clamp and the rubber band is ready.These tapes need to do as much as is needed to create garden paths.
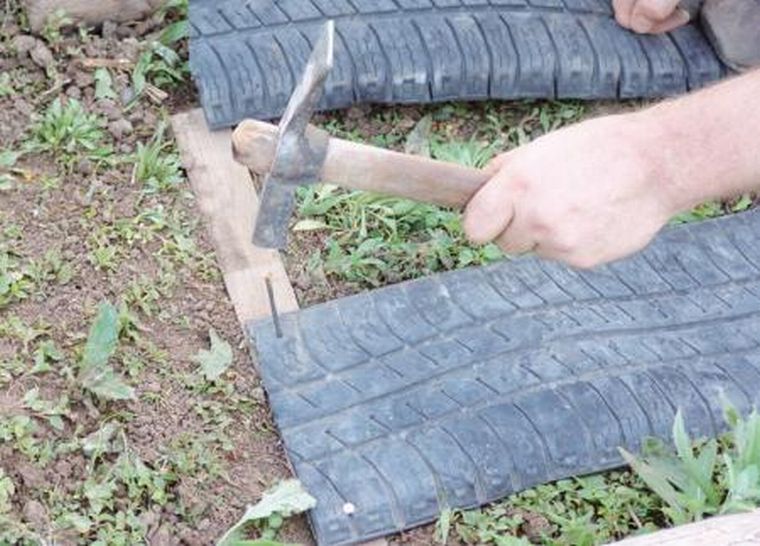
Cut the tape to be fixed on a wooden bar - for this fit a hammer and nails. How wide a path is needed, such a length should be a board. Usually they fill two or three rows, it will not work out completely without joints, which means that in the future we will have to fight against weeds.
Before installation, the ground must be leveled and properly tamped. In the wetted soil fit the resulting product. The protruding part of the timber must be completely trampled into the ground to get a flat garden path.

Some people remove the ground before laying and fix the rubber in such a way that the waves are formed. In the resulting pits, either sand, or gravel, or pebbles are poured.
On rough areas, where there is a steep slope, make the stairs of tires. From bottom to top shovel made protrusions, which lay the car wheels. The first row should correspond to the dimensions of the tire, and the second and subsequent ones should be a bit narrower.
So that the tires do not budge, the extracted earth, gravel or sand is poured, after which ramming occurs,top sprinkle gravel.
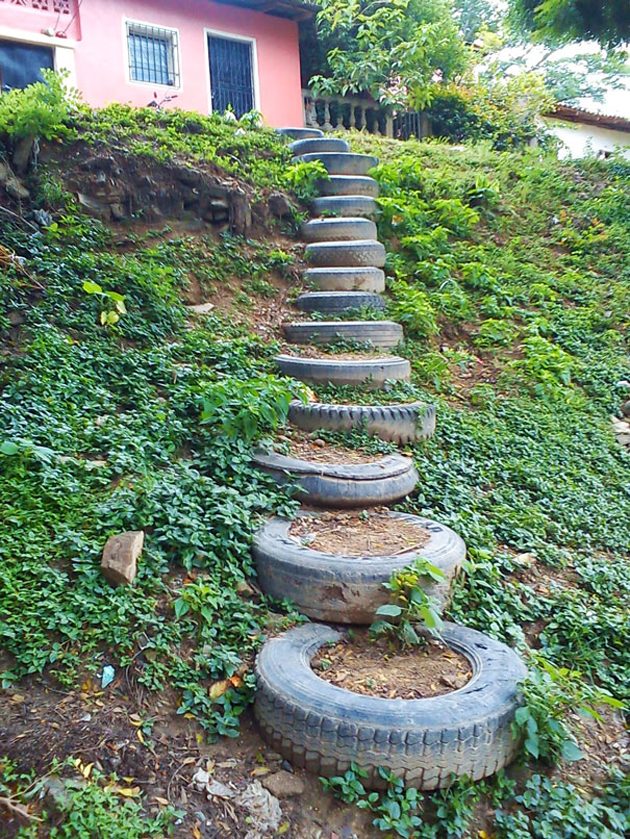
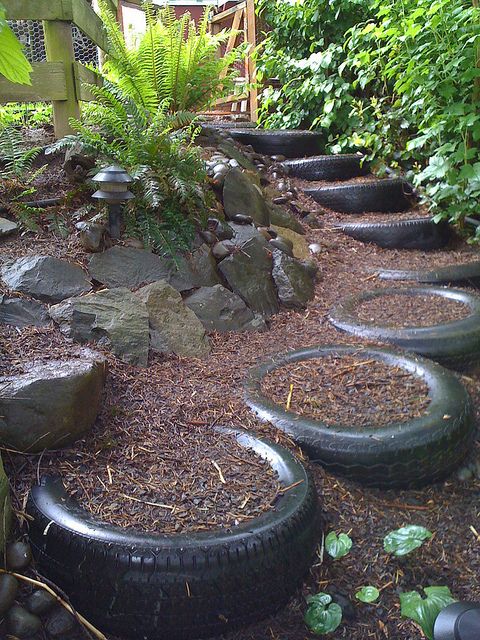
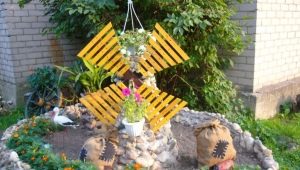
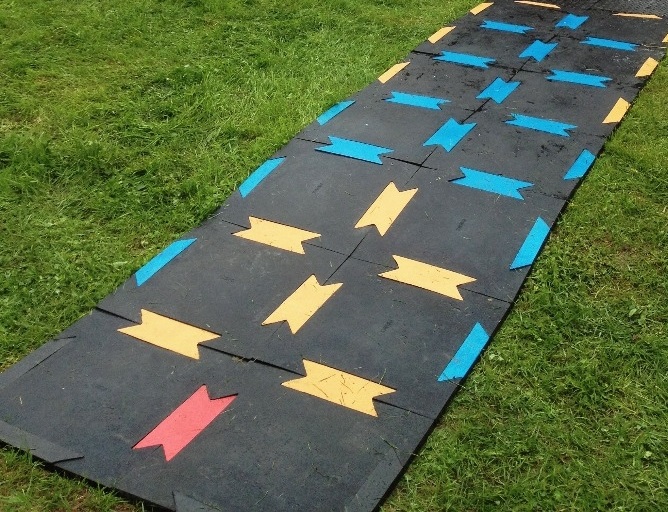
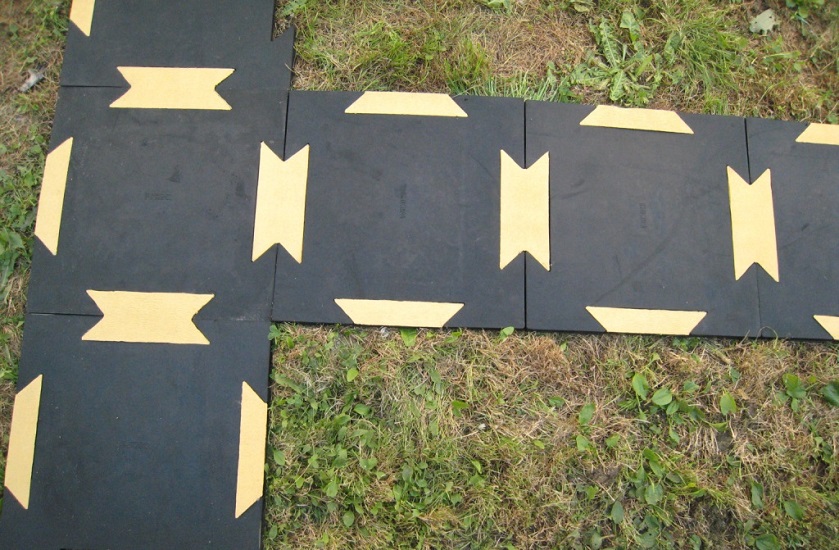
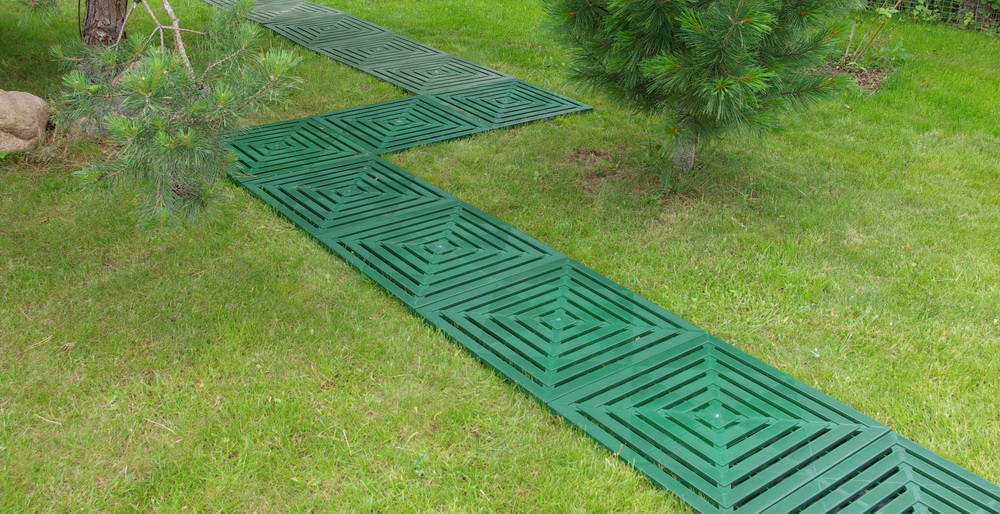
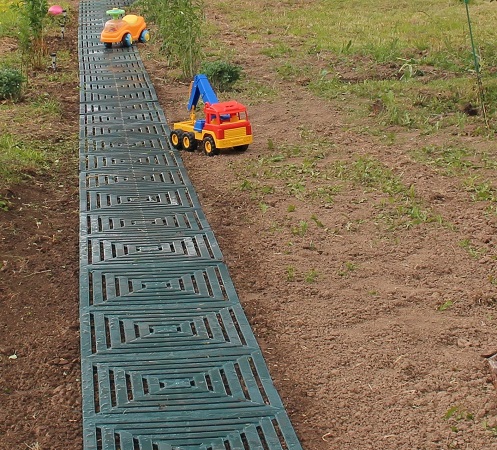
Additionally, the construction can be fenced with boards or stakes to prevent slipping. Manufacturing plants, processing old tires, produce special rubberized tiles of various colors, which are suitable for creating garden paths. Fastening is carried out thanks to the locking connection.
Professionals advise thin slabs to be laid on a cement screed, the surface of which is pre-leveled.
From plastic bottles
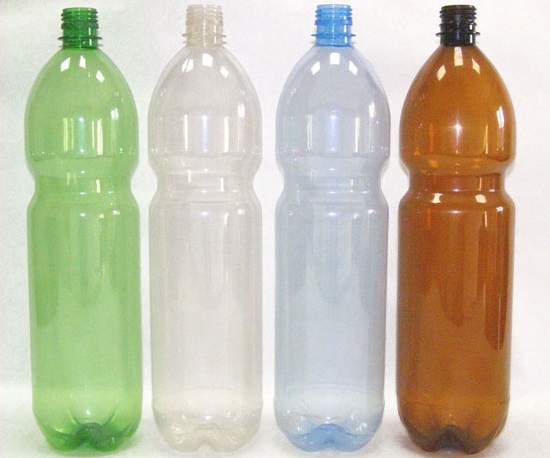
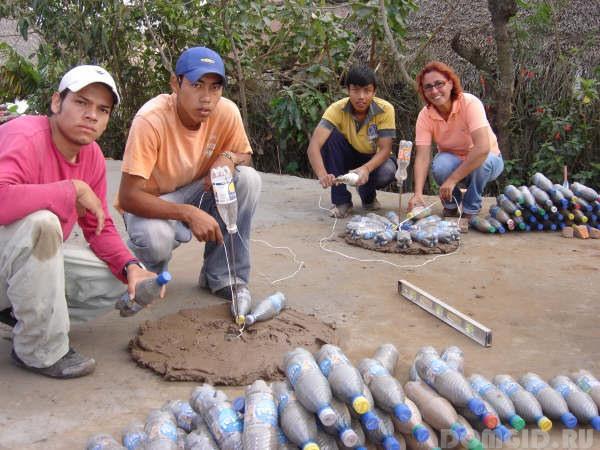
You can lay out the track from another recycled material - plastic bottles. Moreover, the material can be accumulated by yourself or negotiate with friends, acquaintances and colleagues. Of course, this will require several hundred plastic bottles of various capacities, but at the same time such an arrangement will not hit the family budget.
The advantages of this finishing material include multi-colored color, durability, strength and ease of installation. Of the minuses can be noted melting at high temperatures, the likelihood of slipping after rain and the fact that the material under the action of the sun fades.
Keep in mind that in addition to the container itself, the work can also use bottoms and covers.
Plastic bottles before laying must be well cleaned from residual liquids. At the time of washing, it is advisable to tear off all the labels and remove the adhesive composition so that particles of dirt and dust do not stick to it. After that, the plastic is either wiped dry or dried on a sunny day in the fresh air.
The prepared finishing material is packed with earth, if sand remains after construction - it can also be used. There should be no voids inside the container, it is necessary to carefully tamp the ground or sand. This is done to ensure that at the time of circulation the bottles are not forced by the human weight.
Children can be involved in this work, firstly, it will distract them from other activities, and secondly, it will allow them to cope with the task in less time.
Then you need to remove the ground. To do this, take a shovel and a wheelbarrow, the earth is removed by about 25-30 cm. The fertile layer can be used in garden beds or in a greenhouse. The formwork is made of planks, the thickness of which should be about 16 cm.
Boards are screwed to the pegs using a screwdriver and screws. If there is no special tool at hand, then the hammer and nails can serve as an alternative.
To avoid soil shrinkage, it is advisable to walk along the ground several times back and forth, and then fill the path with construction and household waste. These can be branches, broken bricks or leafs that have flown around. In order that the garbage does not scatter around the site, it is covered with sand. I would like to note that it is sand that will not allow the future path to subside.

The first row of plastic bottles is laid on the sand cushion. Laying needs to be done along the direction. On top of baklazhka boards are temporarily mounted, after which you need to jump properly on them. Due to this, the bottles are evenly distributed over the surface, and the resulting voids have to be filled with cement-sand mixture. Subsequently, the mixture is abundantly wetted with water, and when the cement dries, the first row will be ready. Usually, one row is enough, but if there is room for one more, then the process should be repeated, but without the laying of domestic waste.
Above has been described the use of small volume containers. If there are five-liter bottles in stock, then after washing and drying, they need to cut the bottom. Such bottles need several tens or hundreds.When they are ready, they have to put one bottle into another and put the resulting forms into a trench. It will remain to cement the track as previously described.

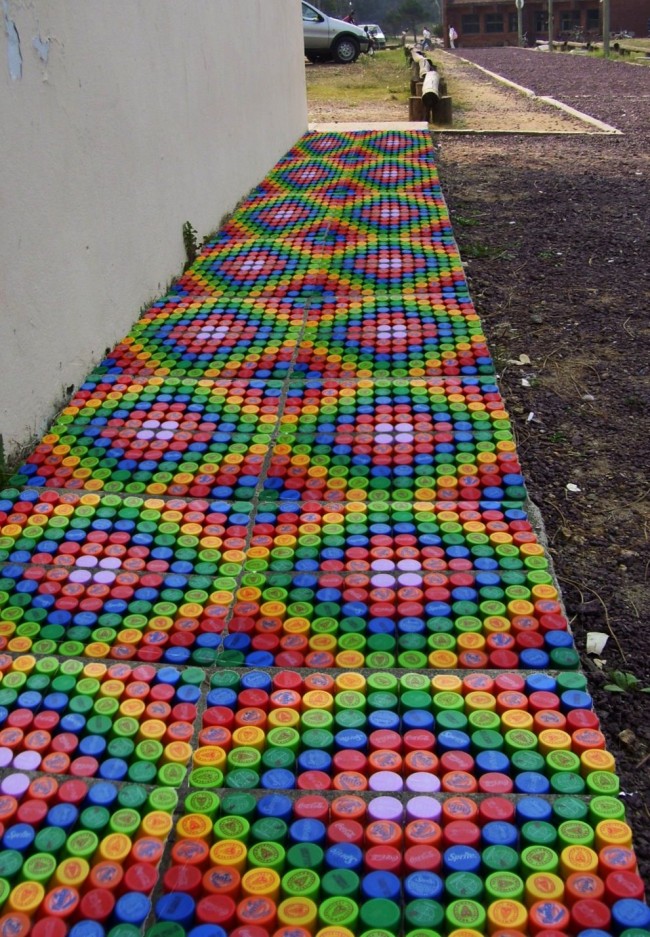
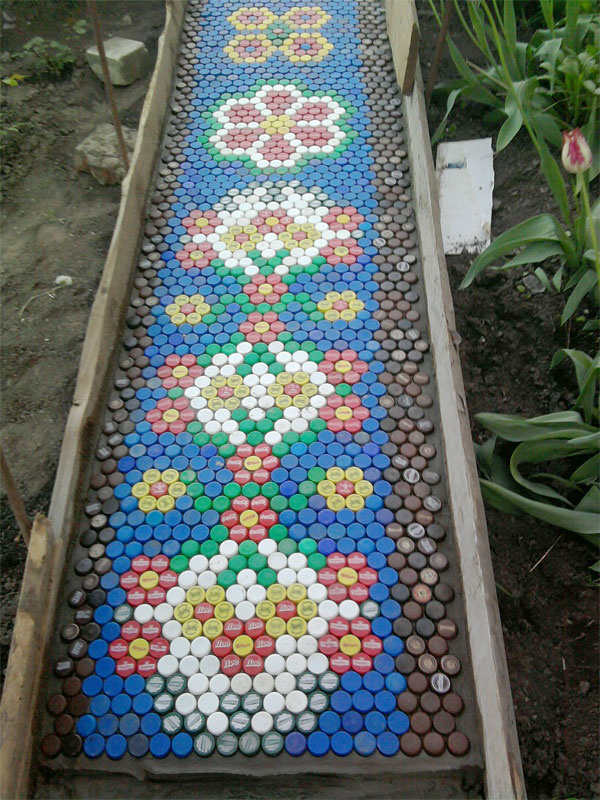
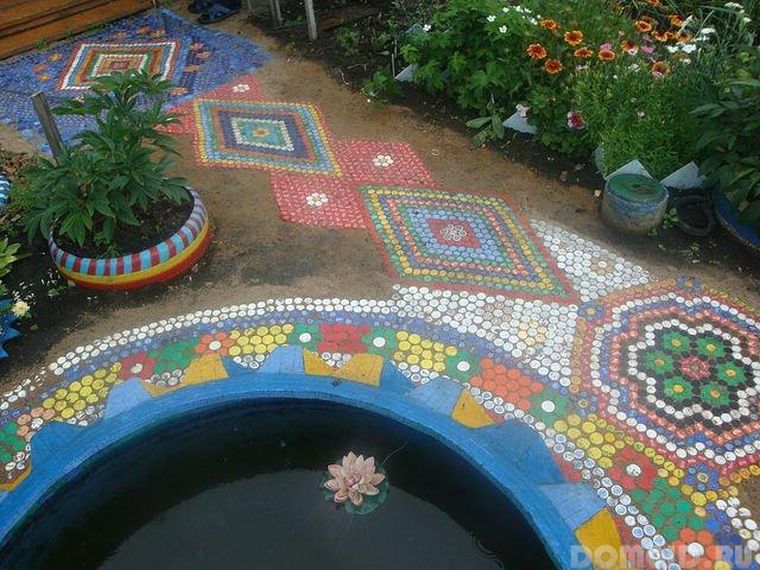
The whole mosaic panel can be laid out using plastic covers, but unfortunately, you need a lot of building material. In order to lay the running meter of the garden path, you will need hundreds of covers. But at the same time you can create a beautiful picture that will delight not only households, but also guests.
First of all, traffic jams are laid in the direction of the path, from the top they temporarily mount the boards on which to walk. Due to the chaotic movements of traffic jams rammed and will be on the same level.
To get rid of the gaps, the seams are filled with sand, the boards are put on top again and final tamping occurs. It will be necessary only to clean the surface of excess ground and sand, for this purpose a brush or a broom will do.
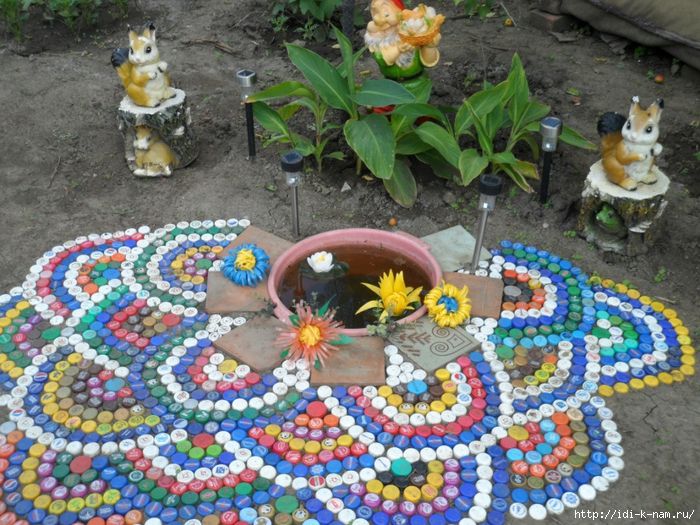
The bottoms of plastic bottles are laid in a similar way. Keep in mind that this track is not suitable for permanent use, because it does not have durability.Country craftsmen, starting from their experience, recommend using bottles made of durable plastic.
Today, production and plastic tiles. Due to its qualities and light weight, it is very popular among summer residents.
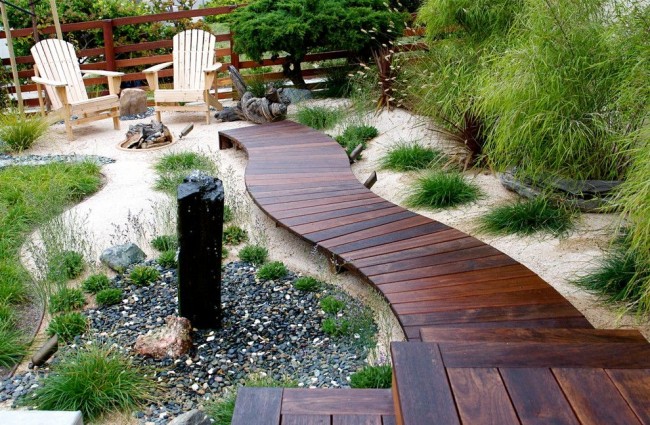
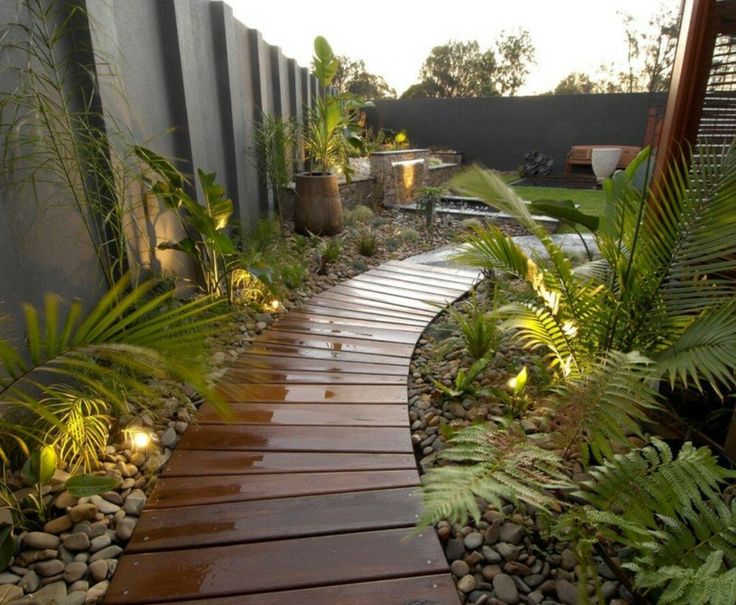
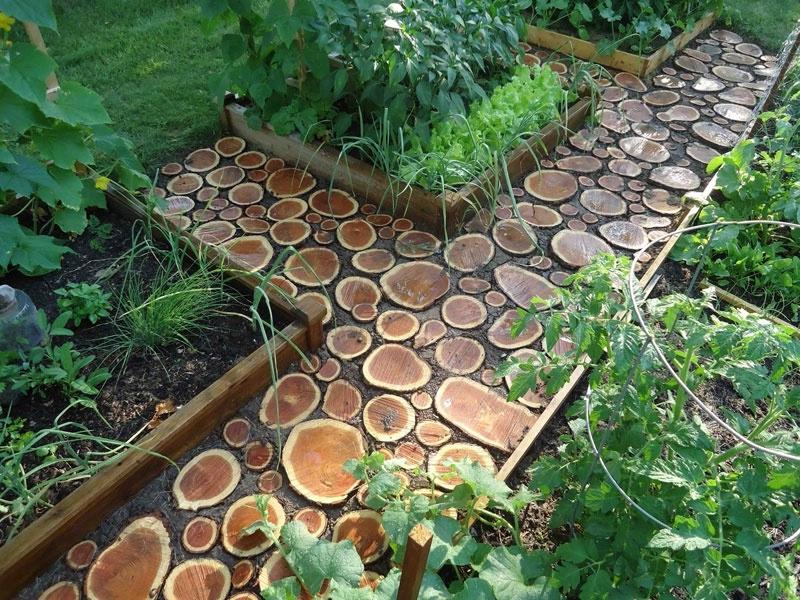
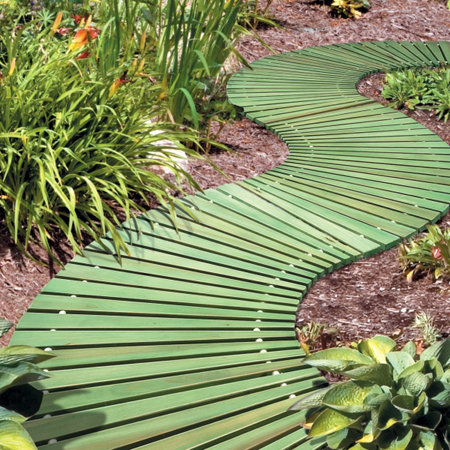
From wood
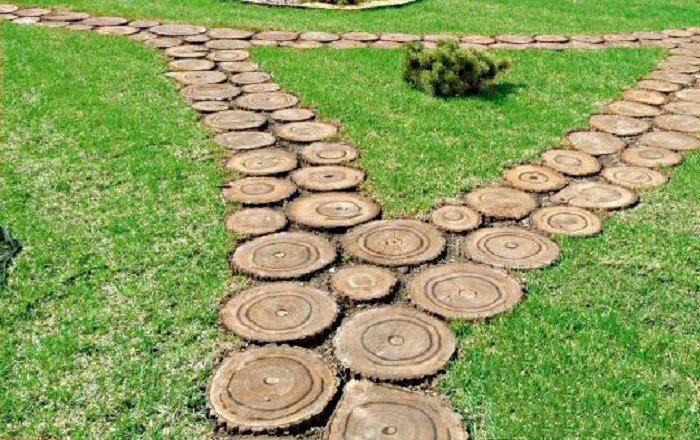
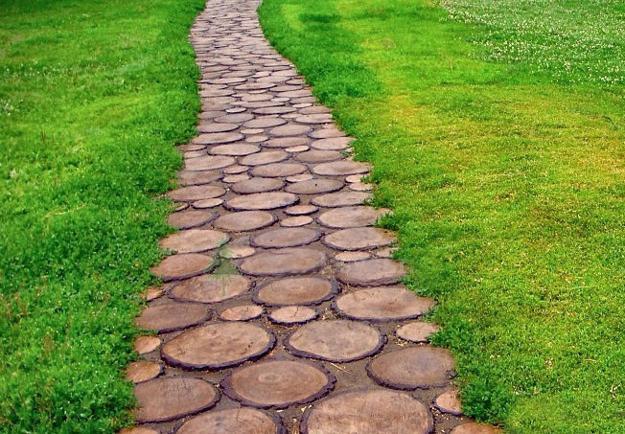
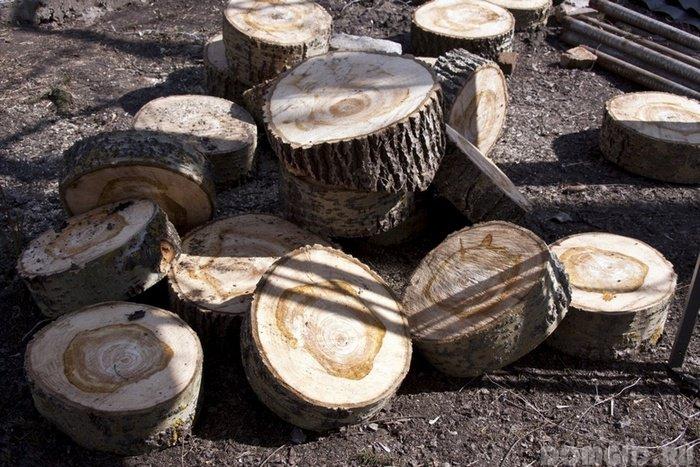
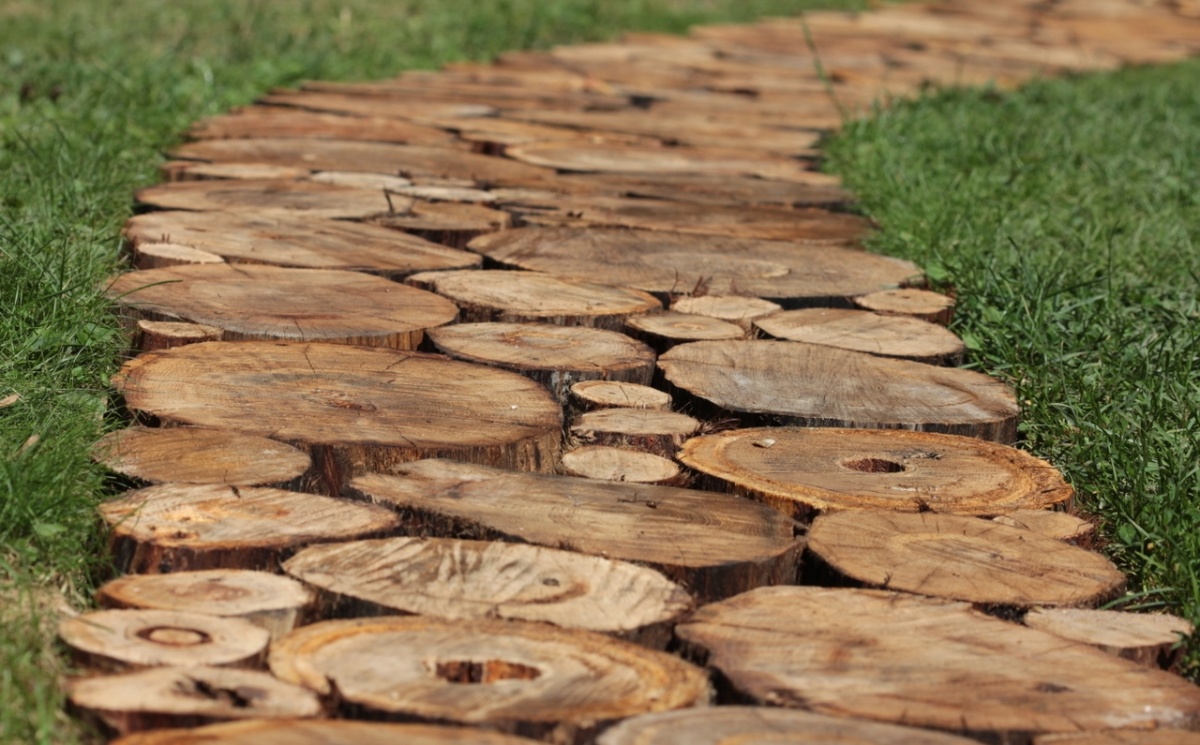
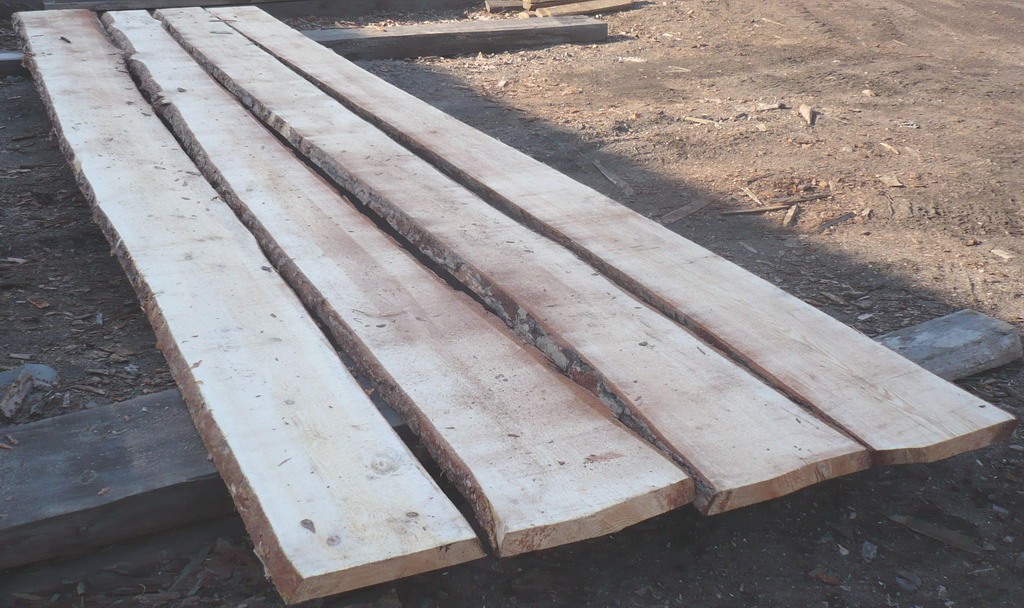
Do not lose their popularity and wooden paths. Make them either from the boards, or from the cuts. Wood is not only a natural material, but also a durable, stylish product. Wood is easy to process, so the installation of the tracks can be done by hand.
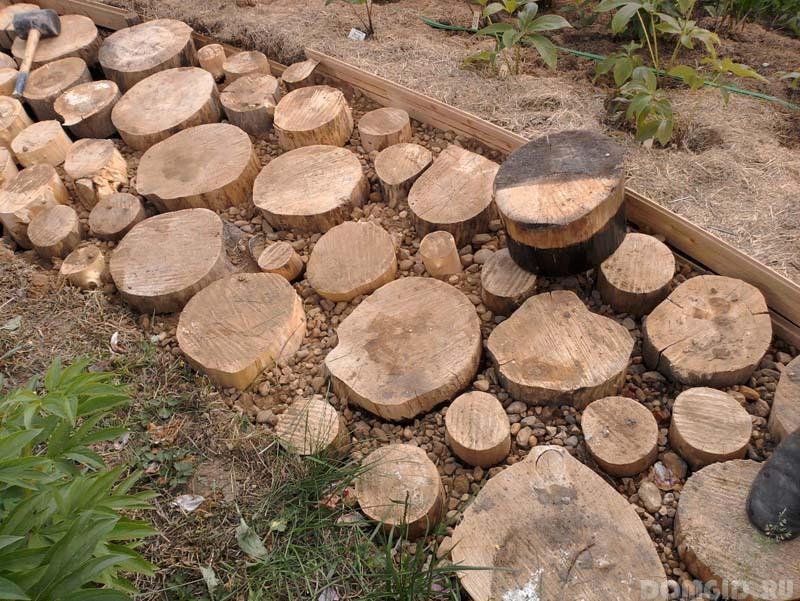
Many in the suburban areas have old sawed fruit trees - pears, apples, cherries. But it is best to use hemp oak, birch, beech, pine or larch for this procedure.
It is advisable to acquire building materials of different diameters, thanks to which you can lay winding paths.
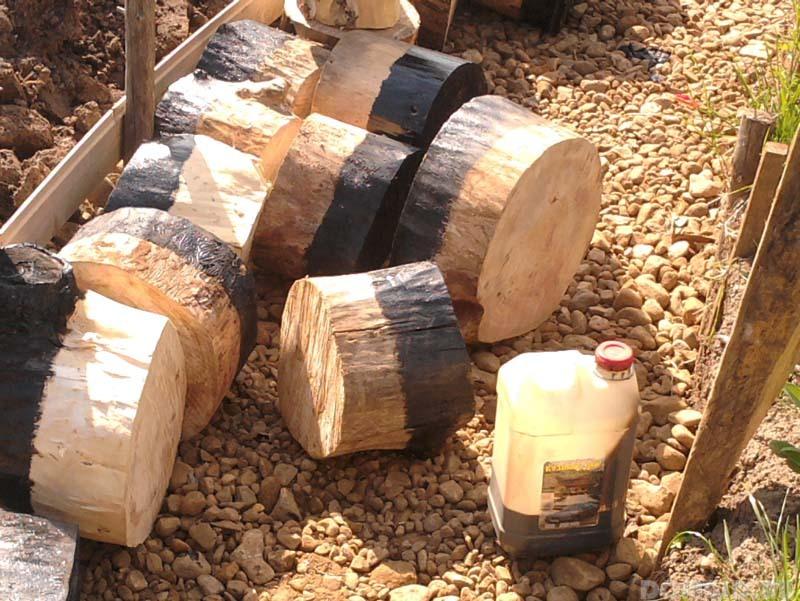
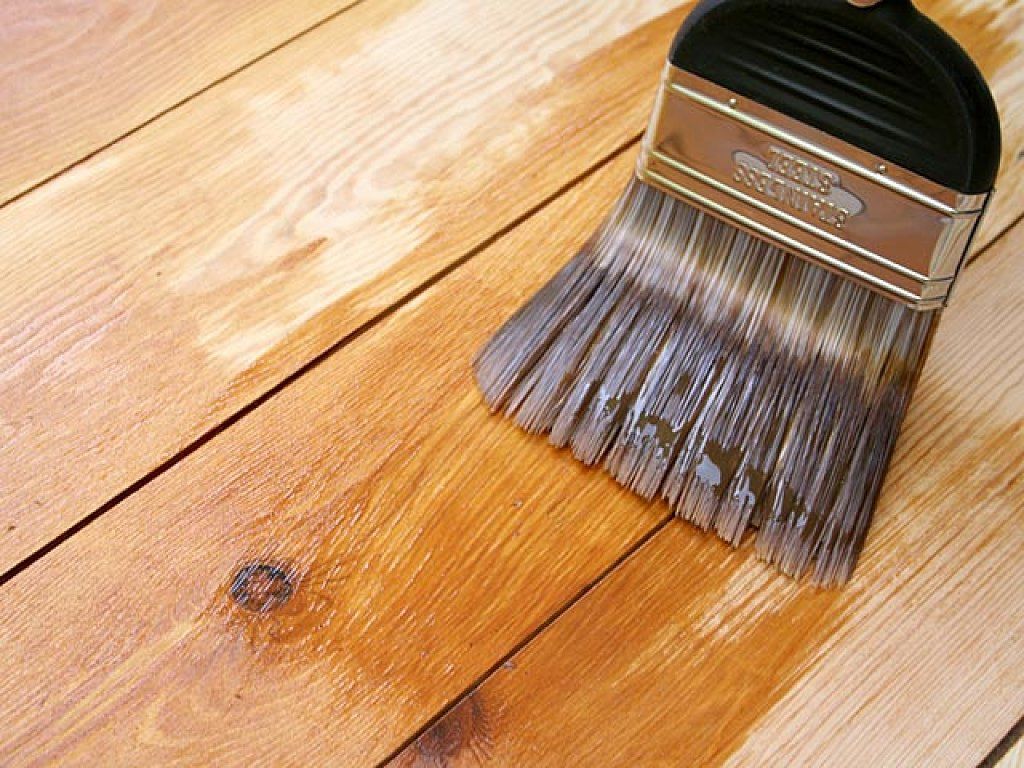
It is not a secret for anyone that a tree that is not processed from fungal diseases and from moisture quickly becomes useless. Therefore, in no case can not be laid freshly sawn round timber. For processing suitable linseed, which is brought to a boil.It is important to cut the sawn completely, and it is better to immerse the stump at all in the varnish vat so that the material is absorbed. This operation is advisable to perform professionals, because you can get burned.
For safety, you can use special antiseptic solutions sold in hardware stores. Kruglyak fully placed in the solution for several hours. Allowed to apply the solution with a brush or roller. Additionally, experts recommend treating the bottom of the plate with bitumen, and the surface of copper sulfate. Further actions with wood are carried out only after complete drying.
There are soft woods - pine can be attributed to them, and solid ones are oak, beech, larch. By the way, the processed larch will easily lie in the ground for 25-30 years, but the pine will be enough only for 5-6 years, after which the path will have to be dismantled.
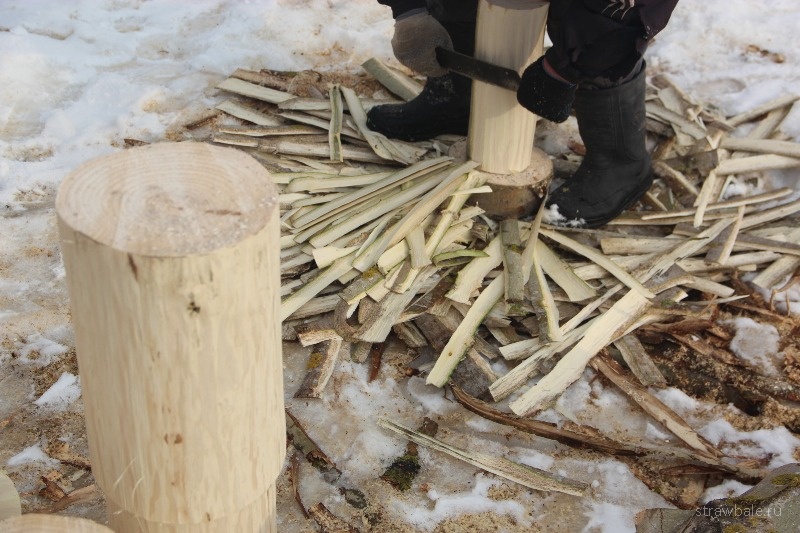
Only dried wood, not populated by pests and without cracks, is suitable for work. The ideal height for dice is 15-17 cm. The height is measured with either a ruler or a tape measure. With the help of an ax or a cleaver, the bark is removed.
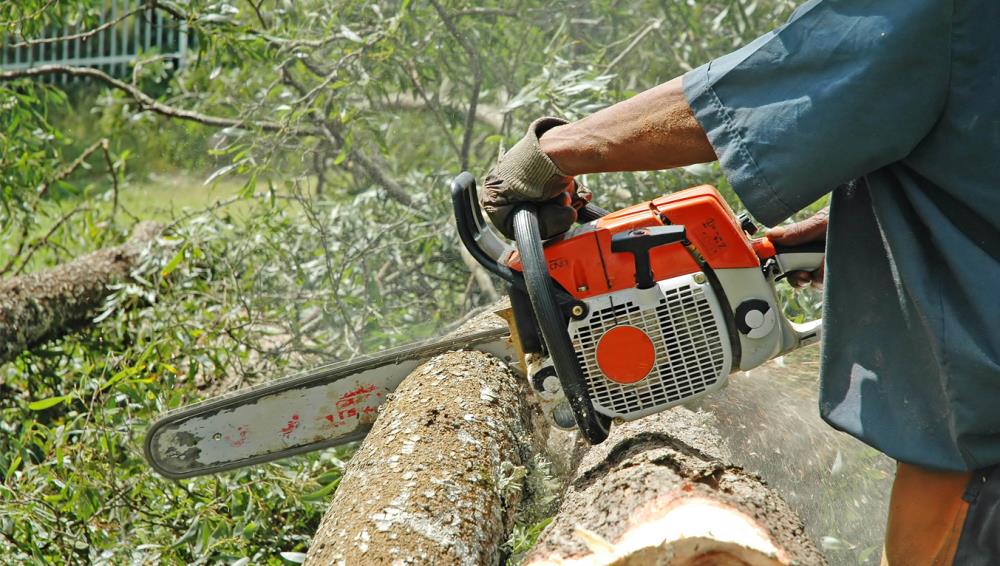
In this case, it is important that the saw is made with an electric saw or a chainsaw perpendicularly.
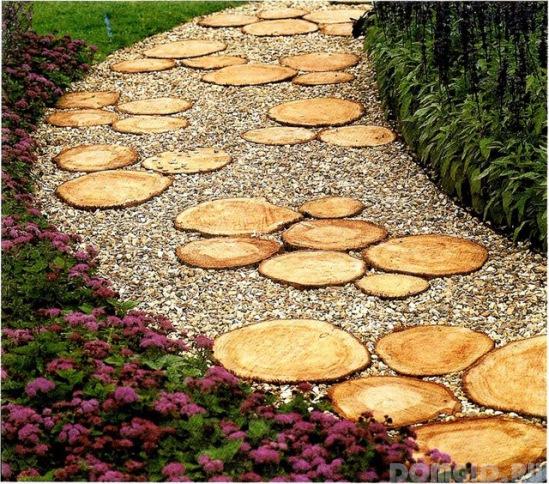
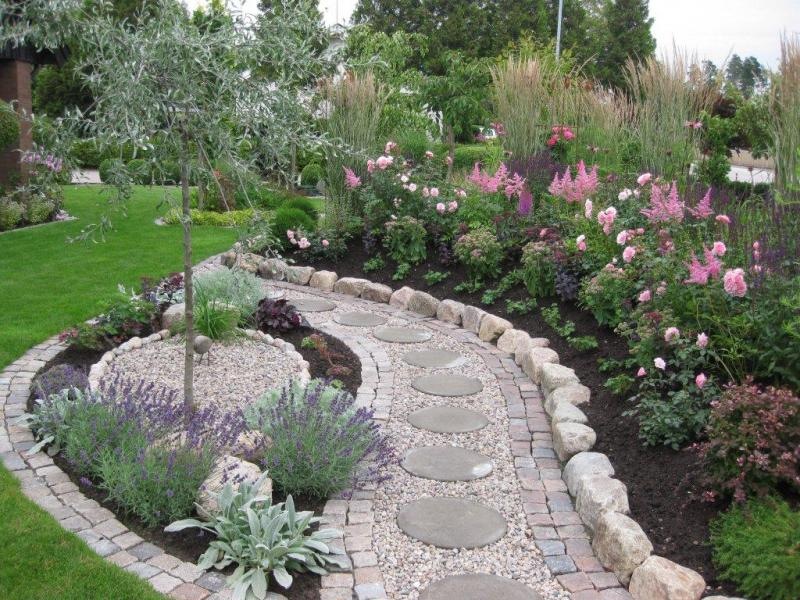
The optimal width of the garden path is 70-75 cm. Ornate path looks great on the garden plot. To create it to remove the top layer of the earth. Sod is the easiest to remove together - while one person works with a shovel, the second rolls the lawn into rolls. Rolls in the future can be moved and put in another place.
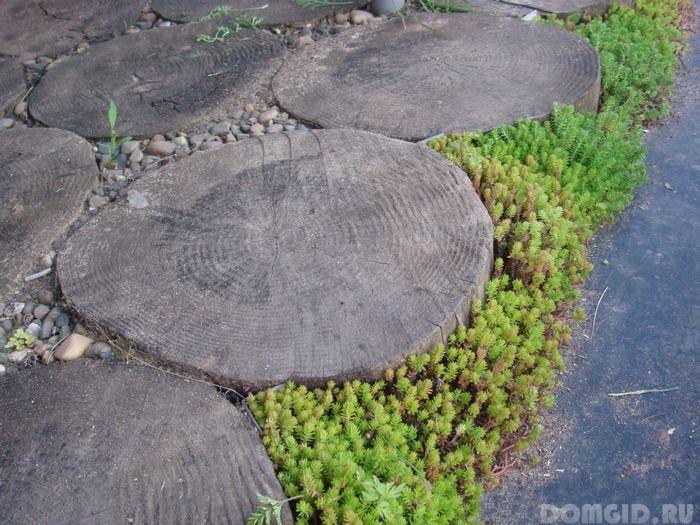
Geotextiles are spread into the resulting trench. As noted earlier, weeds do not break through. A layer of sand or crushed stone is poured onto geotextiles - this is drainage, and round timber is laid. You need to start laying with large circles, then medium ones are laid out and only then small ones. Try to match them in size so that no visible voids form. Do not forget to check the flatness of the surface building level. If in some place there are drops, then you need to use a hammer. Hemp should be laid about 3 cm above the lawn.
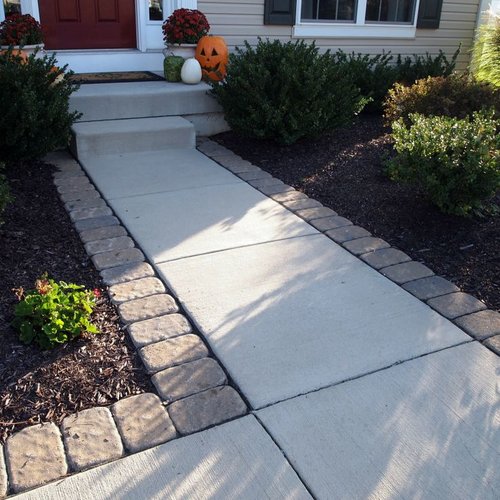
If a curb is planned, its installation must be carried out before laying saw cuts. For this fit brick, stone or chubuki.

Unfortunately, you can’t do without voids. To close them up, it will be necessary to chop or saw round timber and place its parts between the saws.Sand or crushed stone is poured over the base. It is plentifully shed by water. The building material will settle under the pressure of the water, so additional bedding is required.
The final stage is the decoration. You can paint the round timber or put pebbles in the voids or leave everything as it is - this choice remains for the owner of the site.
Remember that the track needs annual care. Periodically you will need to clean the surface, treat it with antifungal agents and fungicides. As the protective layer dries, apply a new layer of varnish or acrylic paint.
A few round timbers need to be left for the future, so that in case of repair, the failed hemp must be dismantled and spare ones should be put in their place.
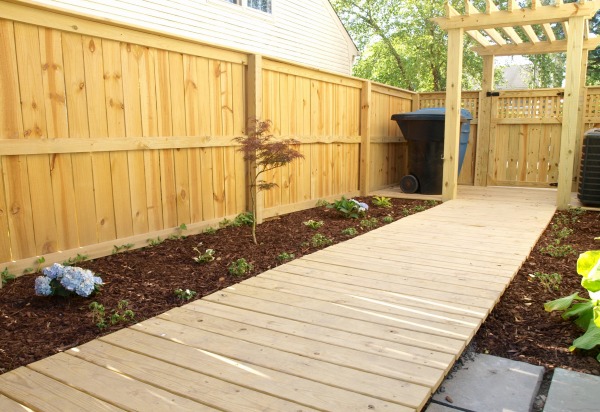
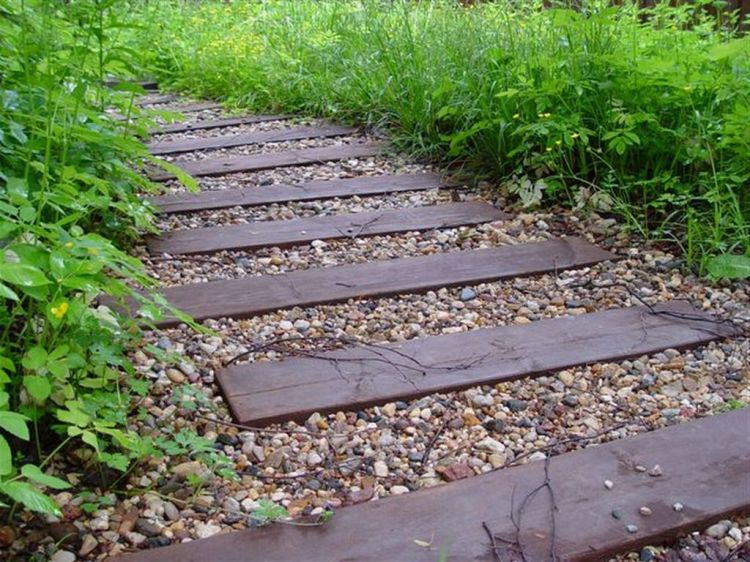
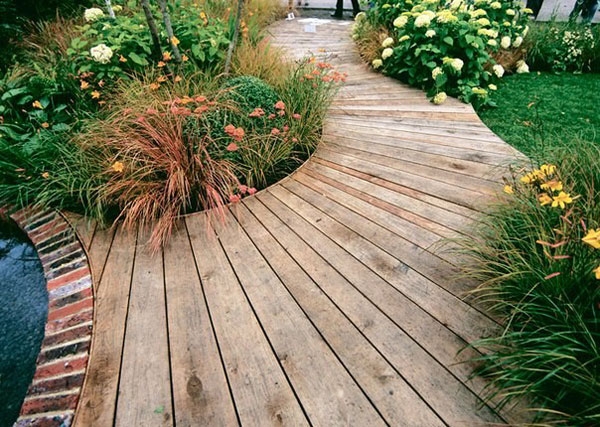
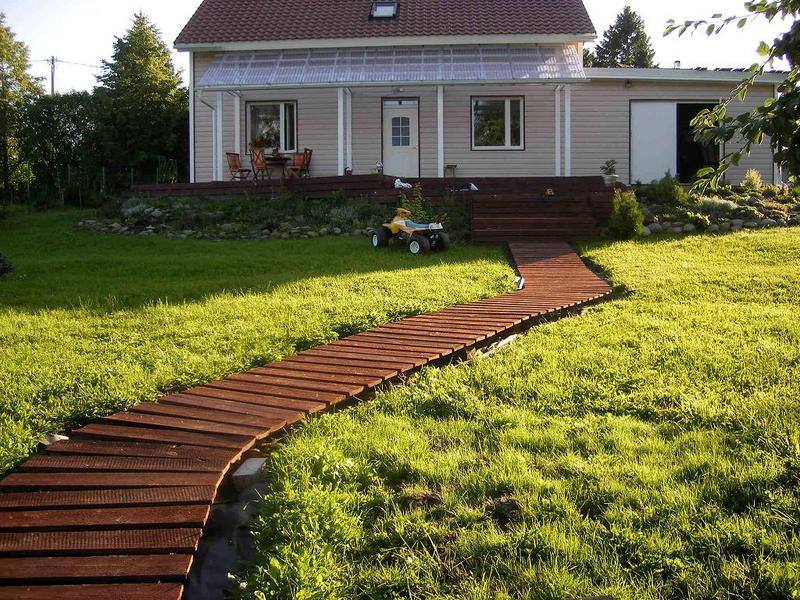
Another type of wooden garden path is a boardwalk path. Installation is faster in comparison with the installation of round timber, and special alignment is not required in this case.
Coniferous trees are considered to be a cheap option for laying. At the same time, the thickness of the board should not be less than 5-6 cm. Usually, raw edging boards are sold in construction stores.In this regard, it is necessary to treat it with antifungal agents, and after - with varnish or linseed oil.
Using a hacksaw, the same slats are cut. If there is a special tool at hand, then this work will be done faster. If a rounded path is planned, then the boards may differ from each other in size.
Keep in mind that boards can also be used from pallets. Some people put whole pallets at all. But today production of a terrace board is adjusted, in its structure - a wood crumb and polypropylene. Such building material does not require processing, while it is easily cut to the desired size.
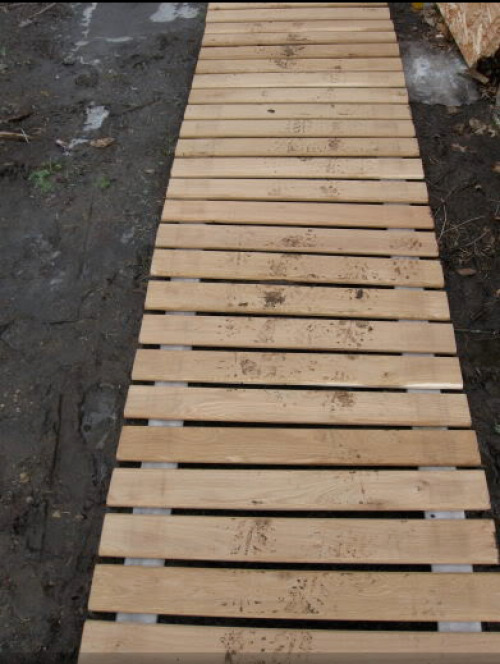
The process of preparing the foundation has already been described earlier, so it does not make sense to repeat. After that you need to mount the frame. A bar that fits every 50-60 cm is suitable for the frame. A timber is connected either by metal elements or by planks. The main coating is screwed to the frame perpendicular to the direction. To perform the connecting work using a screwdriver and screws of the required length. If hills or depressions appear along the path, steps will need to be erected.
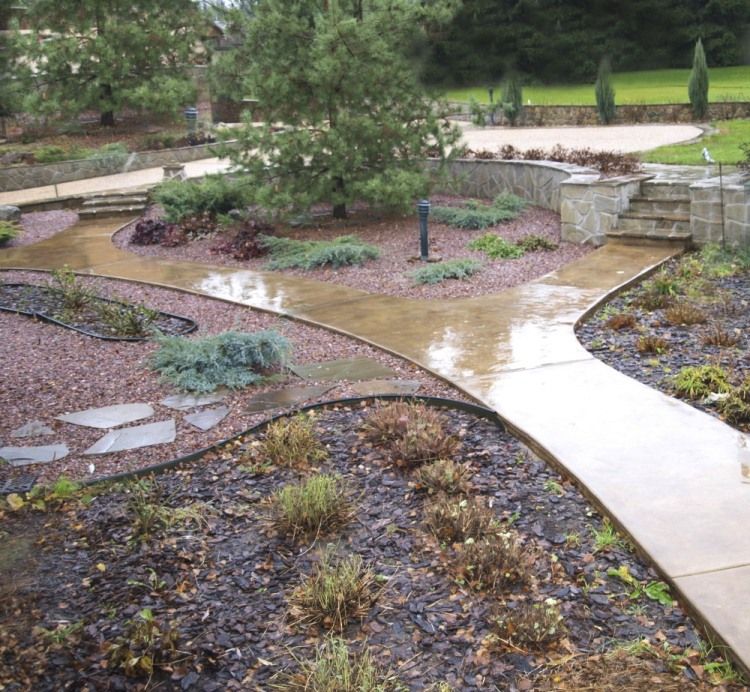
Out of concrete
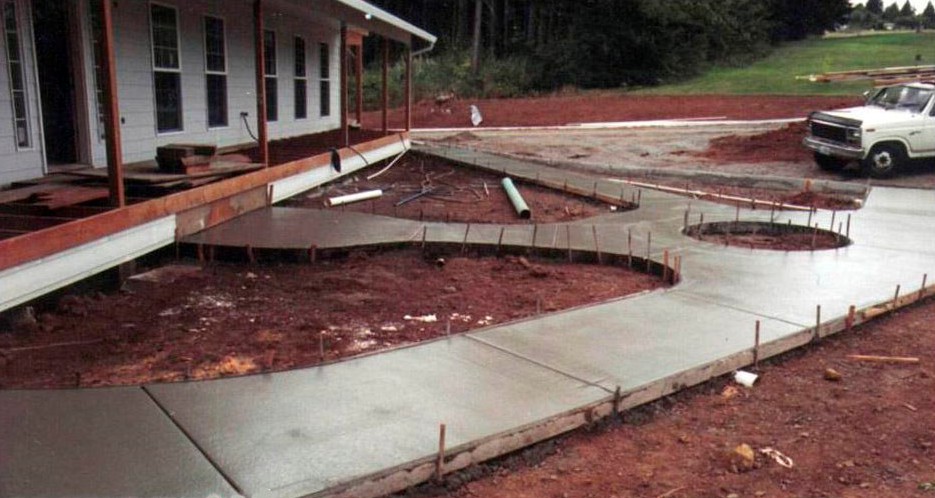
Concreting is another budget option, but at the same time concrete paths are capital structures that will last 20-26 years. Therefore, it is very important to approach this issue with full responsibility, since in the future, changing the direction of the tracks in a few minutes will not work.
They are made of cement and sand; therefore, a sand machine and several bags of cement must be purchased in advance. The exact amount will depend on the width and on the length of the future structure.
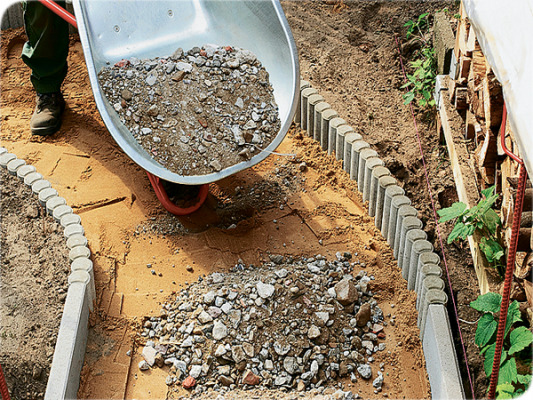
At the time of digging the trench, it is important to pay attention to the ground. If there is a lot of sand in the ground, then concrete can be poured directly into the trench. But for most regions water will be required. To do this, at the bottom of the pit lays a layer of rubble. Enough 9-13 cm, and for strength, you can pour 15 cm.
Remember that before filling the rubble the ground must be compacted.
If along the path of the track passes the central drainage, pipes need to "sheathe". The path should rise about 2-3 cm above the ground level. Curving will be required for rounding. Plastic or sheet plywood perfectly cope with this task.
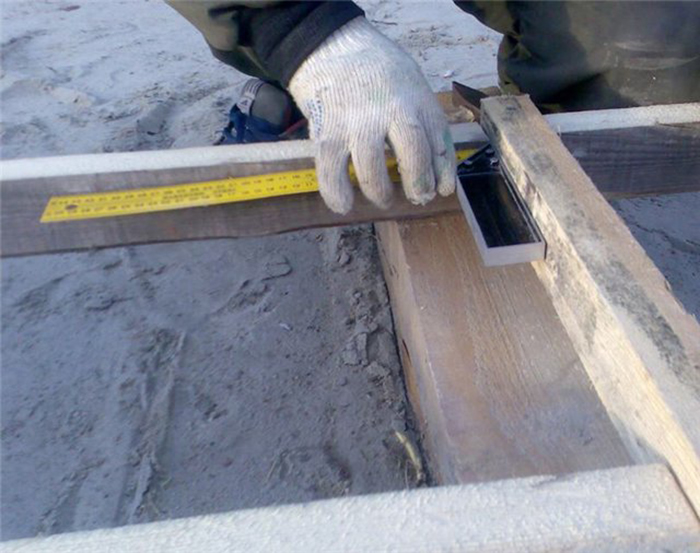
To save on the formwork, experts recommend making it parts and rearrange after drying the first fill. Formwork can be made from boards.Its width should correspond to the width of the future alley. It usually ranges from 60 cm to 90 cm.
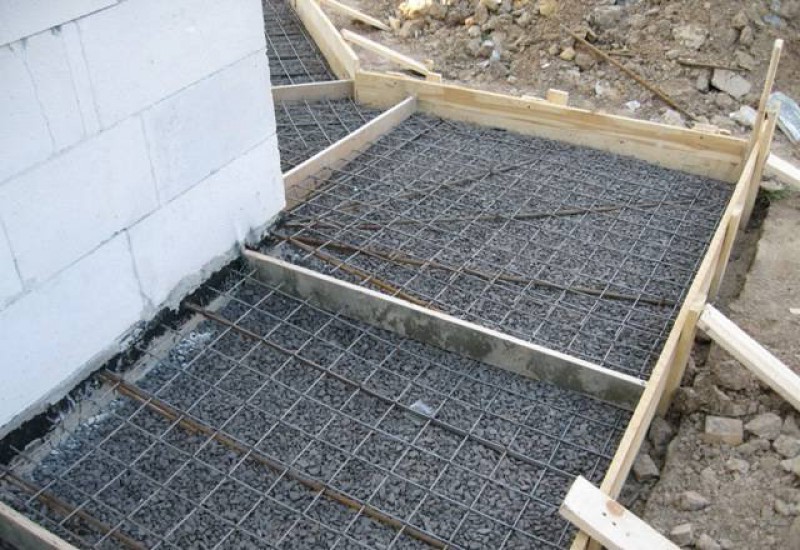
The next step is the installation of a waterproofing layer, for this use roofing material or agrofibre. If there is a covering material on the site - geotextiles, it can also be suitable. A layer of gravel or crushed stone is laid over the waterproofing, followed by a layer of sand. The resulting pillow must be thoroughly shed water.
Unfortunately, the concrete dries for a long time, usually it takes a month. During this time, the likelihood of cracks on the surface. To avoid this, before drying the screed every 3 m, wooden slats are introduced into the solution. They do not allow concrete to expand.
To give stiffness of the structure, some gardeners use reinforcement. Wire, self-tapping screws, nuts, screws, nails, trimming pipes or a chain-link, left over from the old fence, are suitable for this. If construction waste is not at hand, then the store will have to buy a special reinforced mesh. A solution is poured onto the fixed mesh, and it will be needed less than if you make a track without it.
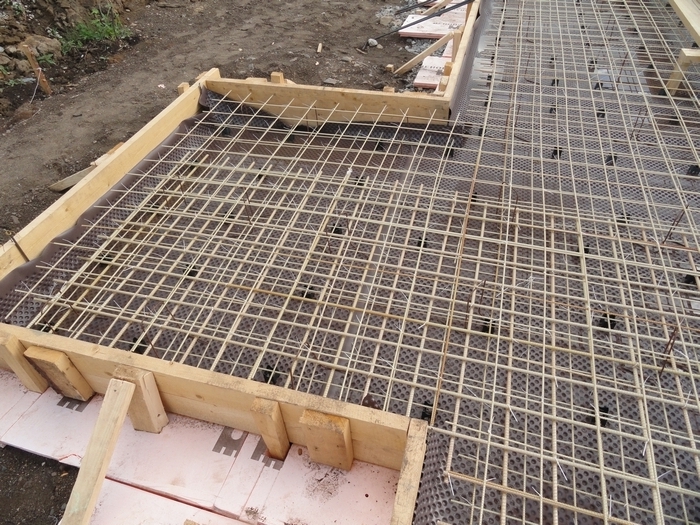
As for the proportions of the mortar, it will require one part of cement (preferably, the mark should not be lower than M500), three parts of sand and six parts of crushed stone.Ideally, crushed stone should be of medium fraction. All this is filled with one part of the water. The solution is best prepared in a concrete mixer.
If it is not, then the batch will be done in an old bath or in a bucket. In order not to knead by hand, you can use a construction mixer or a drill with a special nozzle. After the solution is poured, do not forget to remove the air voids. To do this, the concrete should be pierced with a rod, and on the formwork to knock with a hammer.
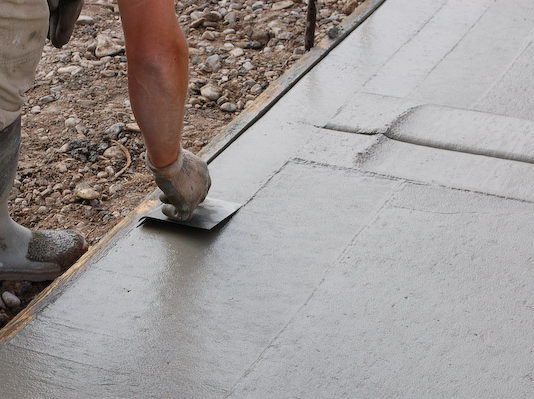

Alignment is best done using the rule: if you do not make a small bias, then water will accumulate on the surface. On top of the track is laid plastic film. It provides a certain microclimate sufficient to ensure that cracks do not appear on the base.
After a day, it is necessary to check the evenness of the alley with a building level. If there are drops, they should be cut with a sharp cleaver or ax.
The slats installed earlier, if necessary, are dismantled after a few days, a thermal gasket is installed in their place.
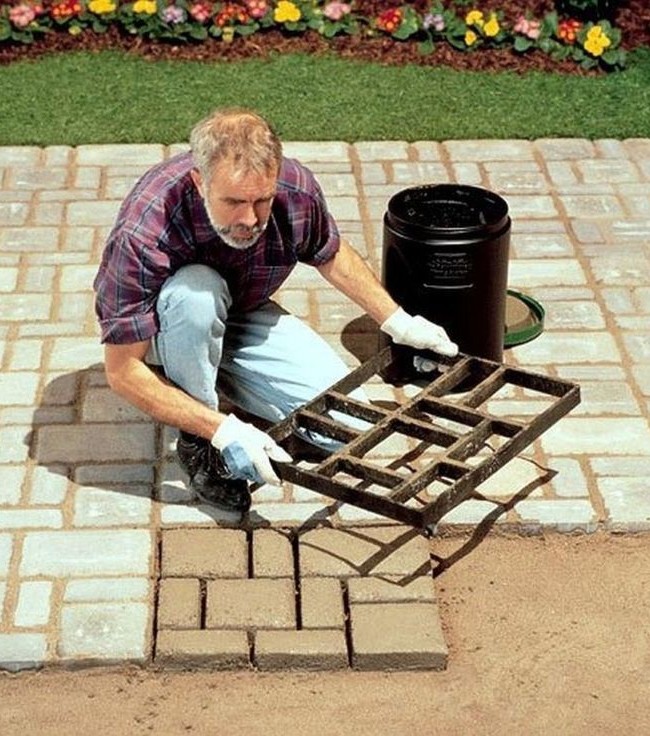
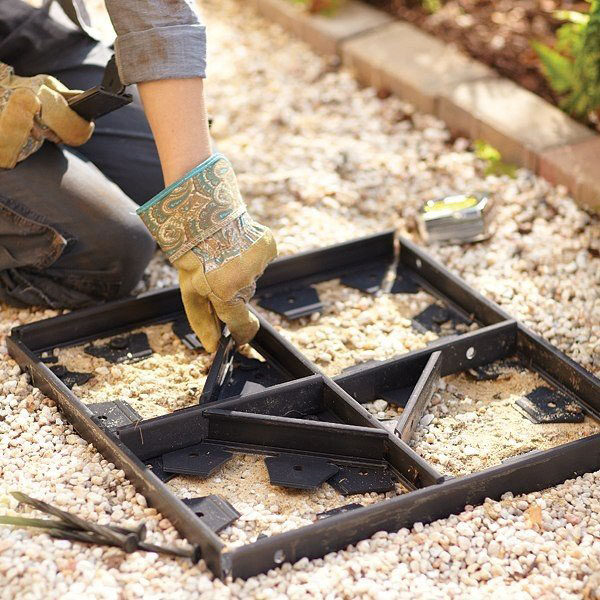
Using the form
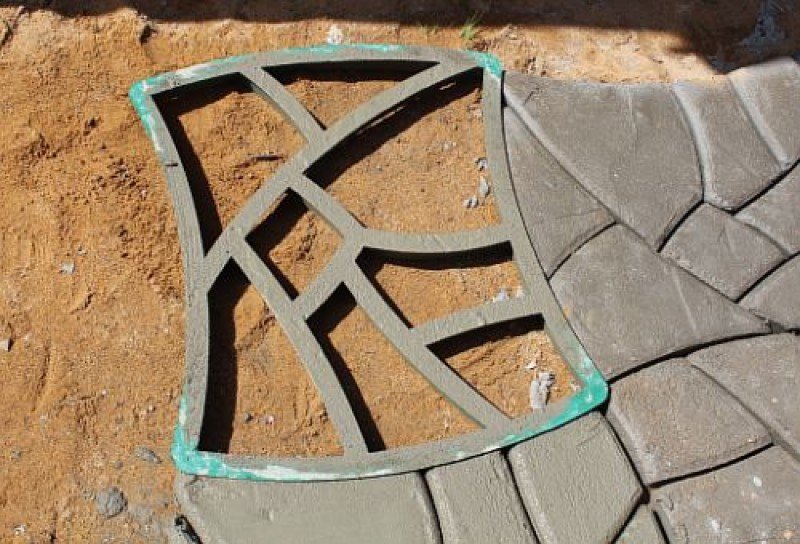
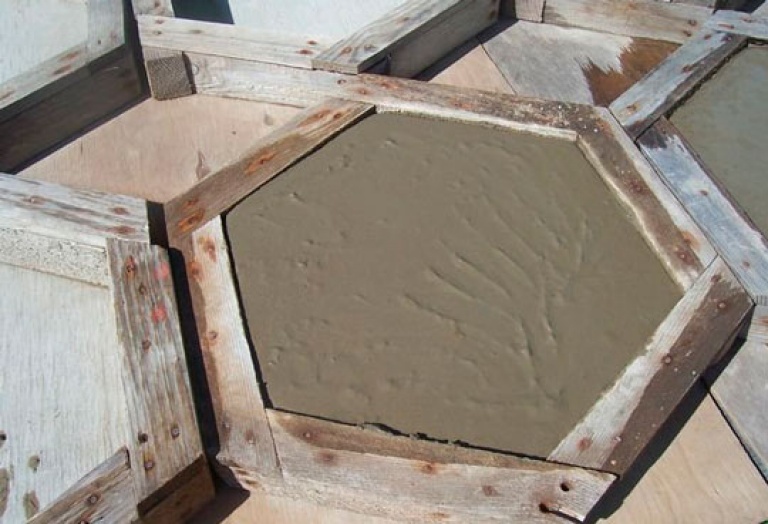
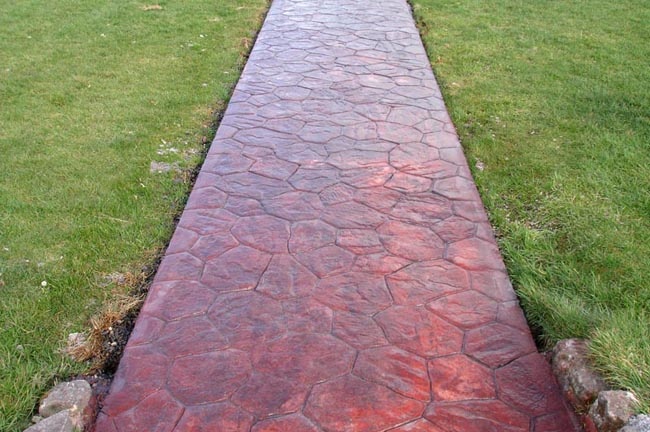
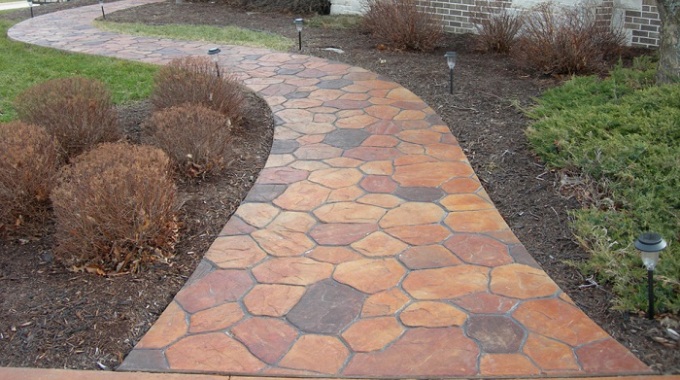
Concreting results in continuous gray alleys that do not look quite aesthetically pleasing in modern areas.To remedy the situation in the building stores, the sale of special ready-made forms was organized.
Filling is not much different from the filling described earlier, but it is not necessary to wait for the concrete to dry out, the mold is released and moves to the next place in 20-25 minutes, thanks to which the creation of tracks takes place without delay.
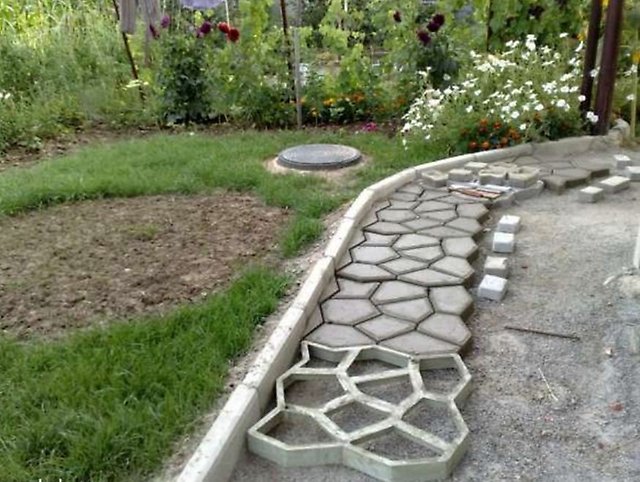
Cement screed level with a spatula. Tamping allows you to get rid of air voids. If the base is made slightly rounded, then the water will not stagnate on the surface.
The seams between the tiles fall asleep either with sand or gravel of small fraction. In landscape design is practiced on the tracks from the form to sow the lawn. Especially enthusiastic people spill fermented milk joints, after which moss appears on the surface.
Some summer residents, looking at a master class, try to make forms with their own hands. Some use hoops from old barrels, others - wooden bars of various diameters and sizes. Patterned forms can be made of metal, taking the material by welding.
The resulting tile can be painted. Modern coloring pigments are added to concrete at the kneading stage, thanks to which garden paths are obtained in bright, saturated or pastel shades.
Polyacrylic paints do not fade under the scorching sun, do not fade after winter. Alternatively, you can buy latex or polyurethane paints. Another option recommended for external painting, are PVC enamels.
Before painting the surface is cleaned from dust, dirt, old paint and grease. It is advisable to get rid of weeds. Cracks are smeared with sealant or acrylic. The surface is treated with a primer in two layers, and the second layer is applied after the first is completely dry. Coloring occurs in several stages. To do this, use brushes, rollers or spray.
Keep in mind that sand can damage the protective layer, so it should not be on the painted surface.
It is recommended to wash the track with a hose in sunny weather. On hot days, the concrete base dries faster.

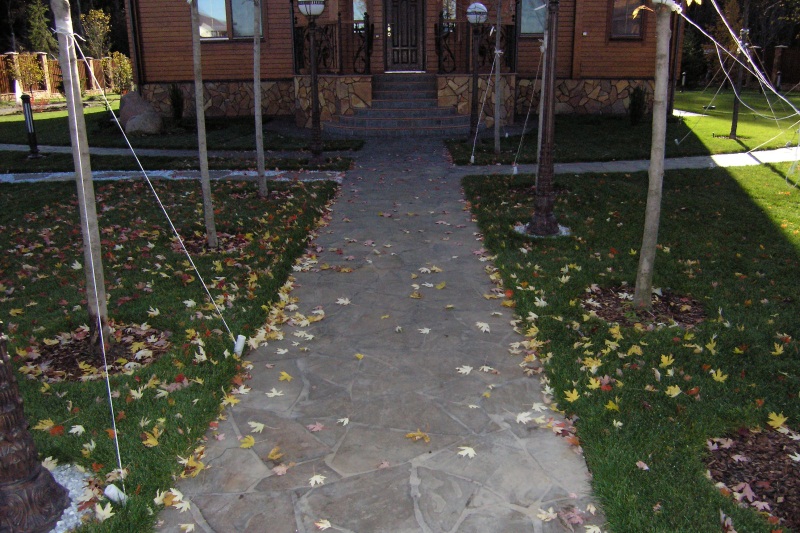
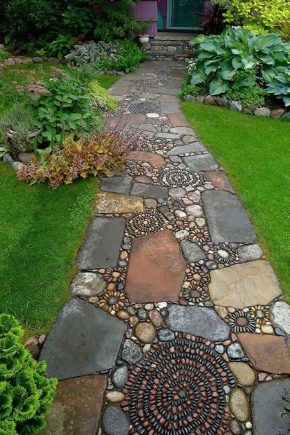
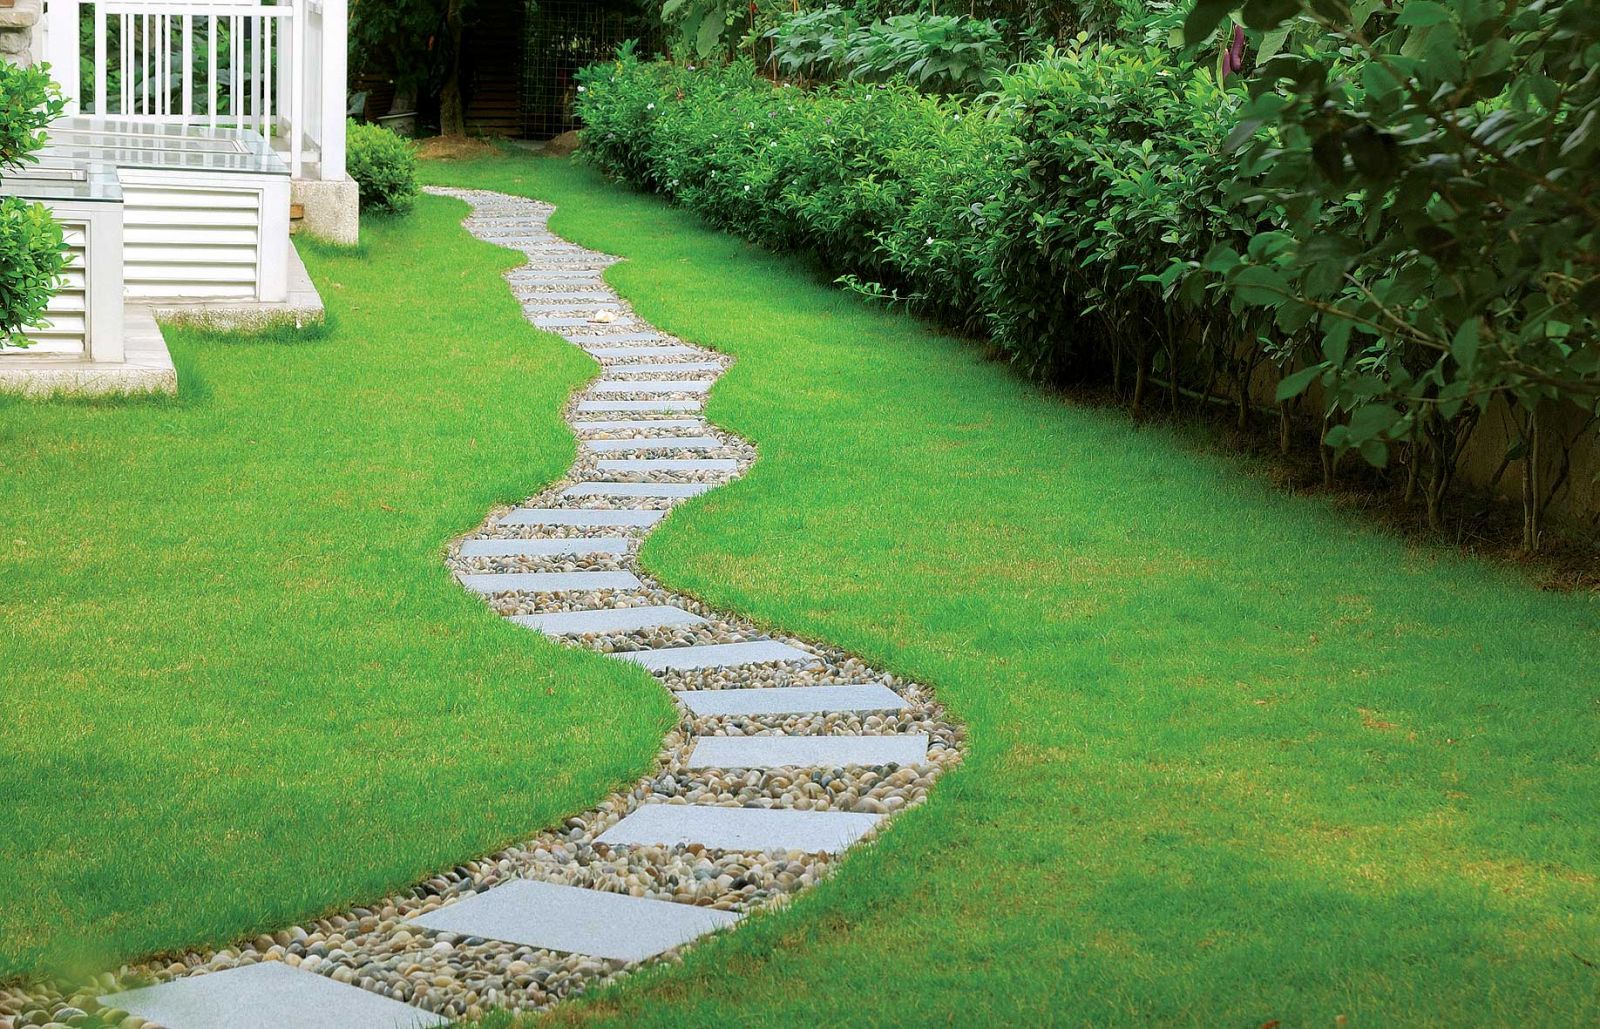
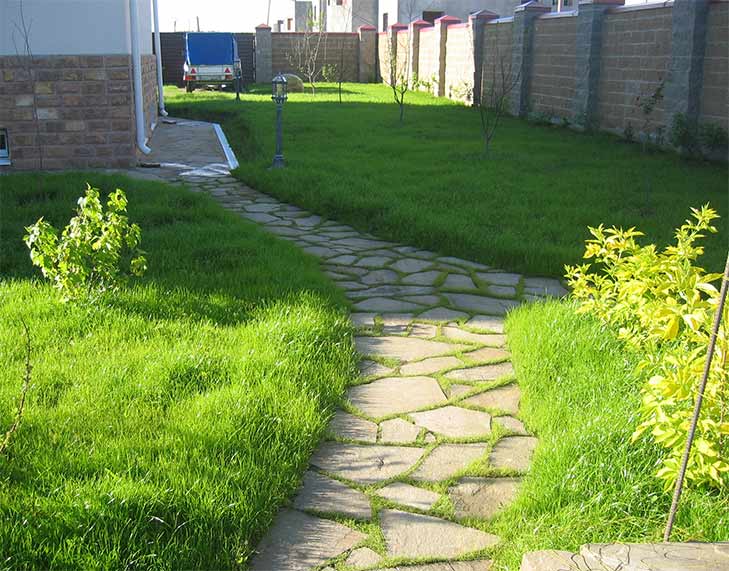
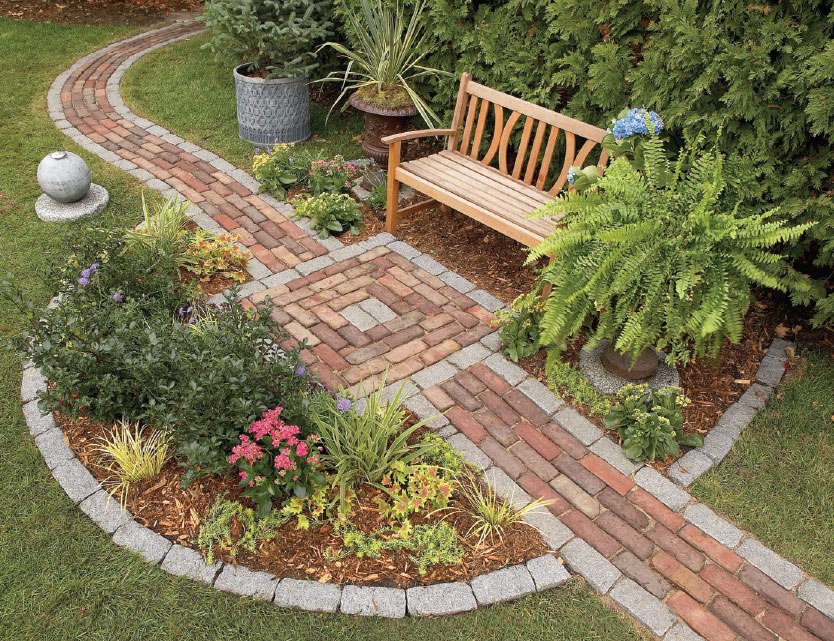
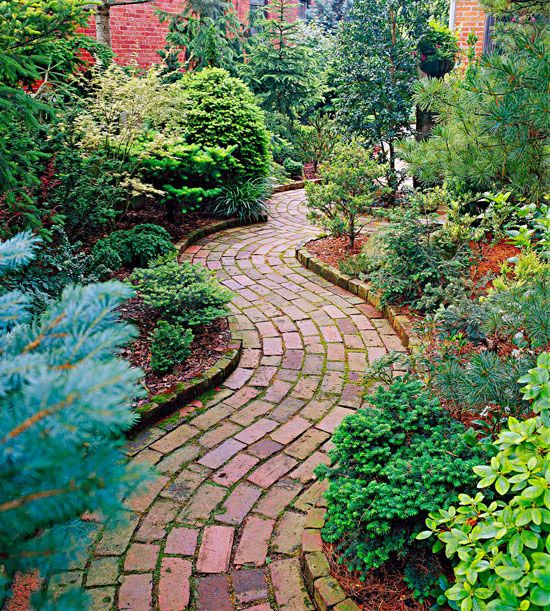
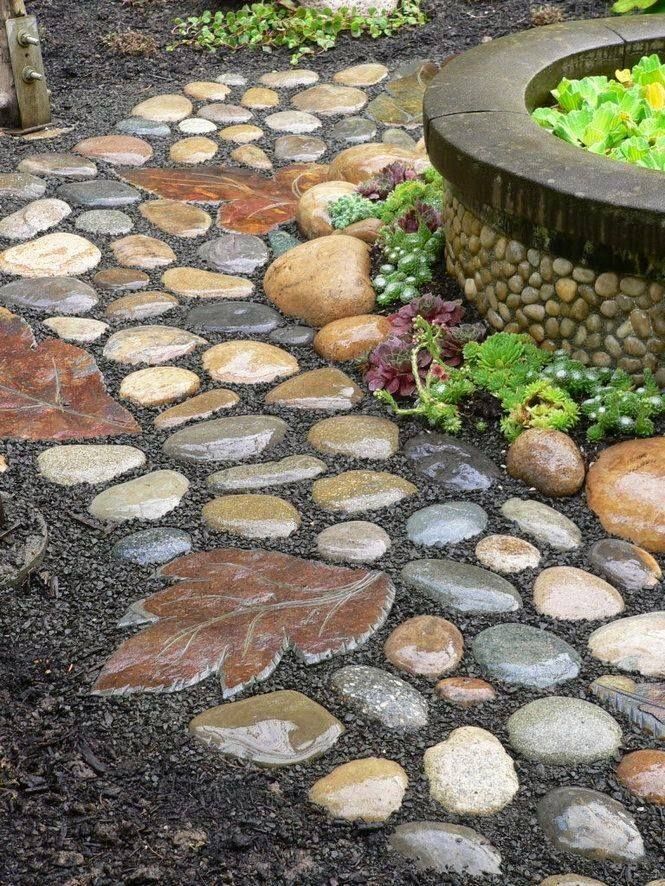
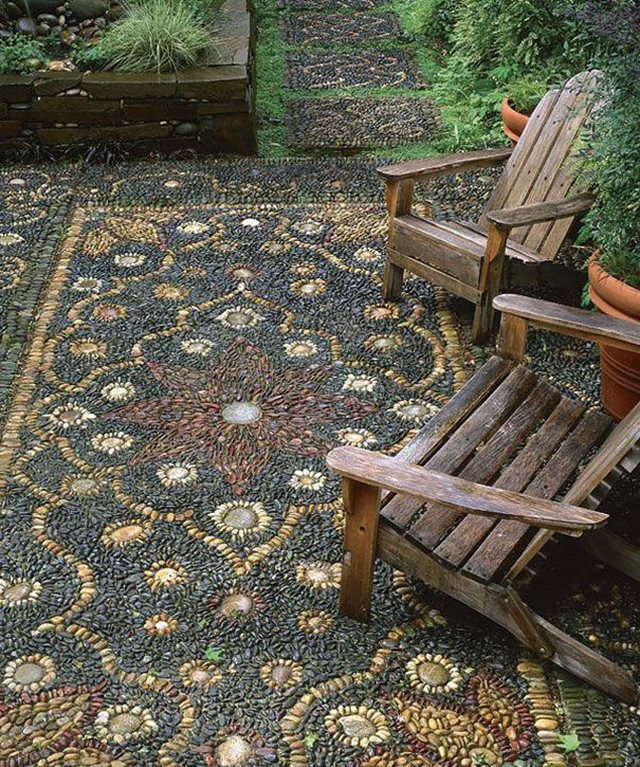
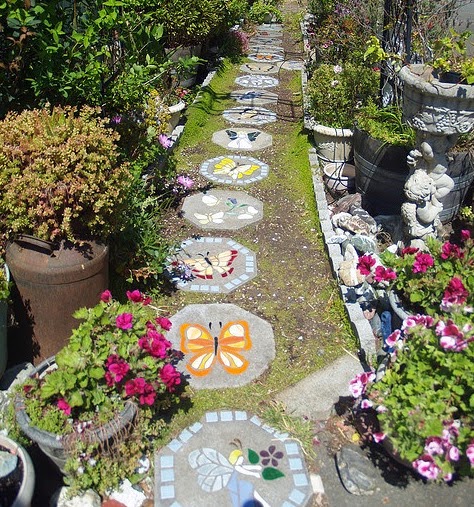
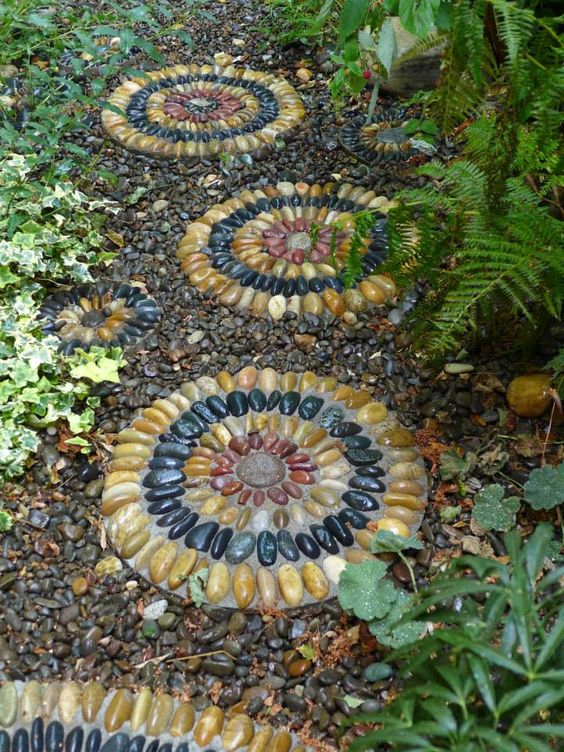
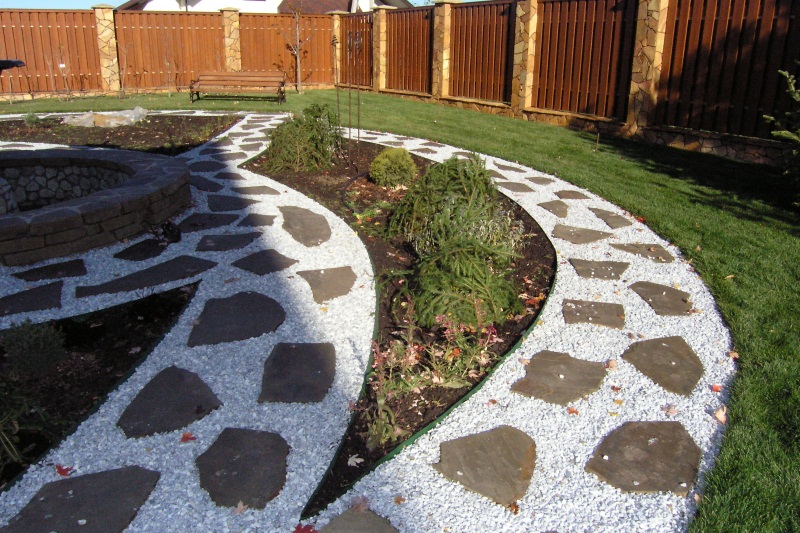
Of stone
Garden paving has been known for several decades. The discoverers made paths of gravel, rubble and brick. Unfortunately, when entering mud on such paths, it will not be possible to get rid of the earth, and after a while weed seeds will fall on their surface and germinate.
In recent years, more and more people began to resort to the use of natural stone as a finishing material. The foundation is prepared in compliance with all the steps described above - these are geotextiles, gravel, sand, and ramming.
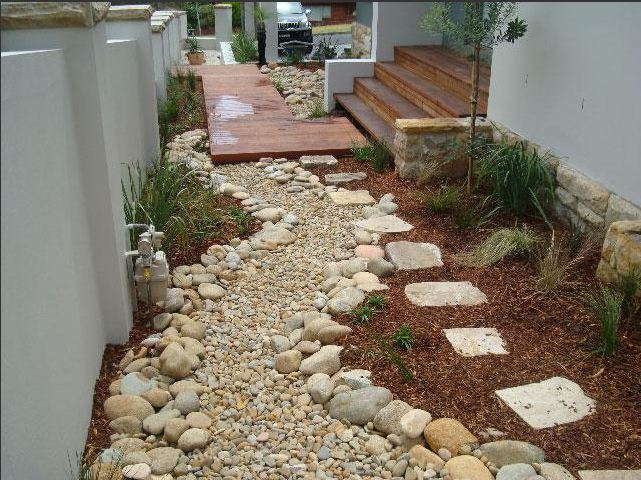
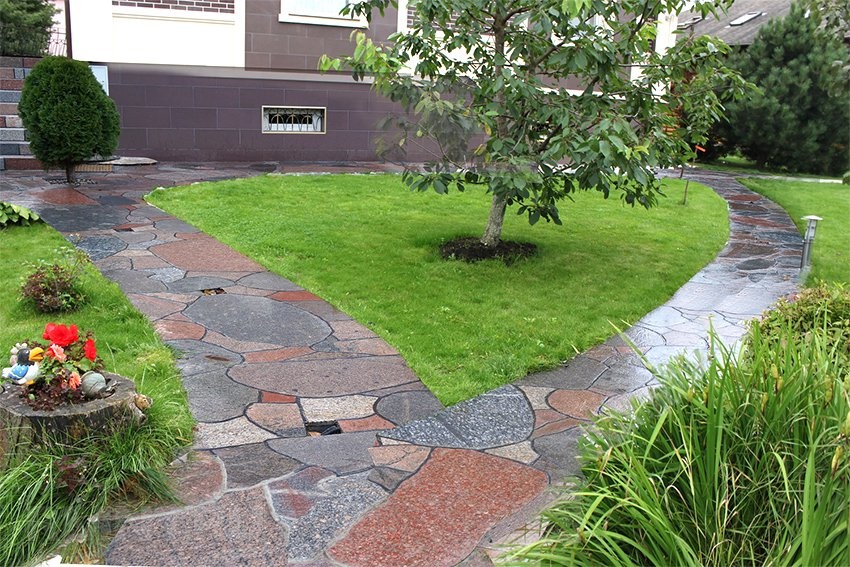
The stone is laid on a layer of sand; a rubber mallet is used to fix it. Due to the unevenness of the surface, a slope is made that ensures the discharge of water. The curb is held along the sides of the walkway, and between the seams the cement-sand mixture is filled up with a building syringe.
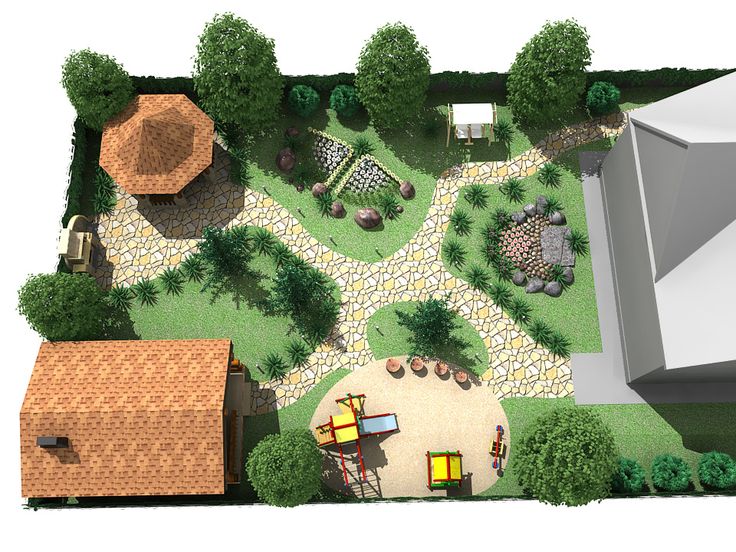
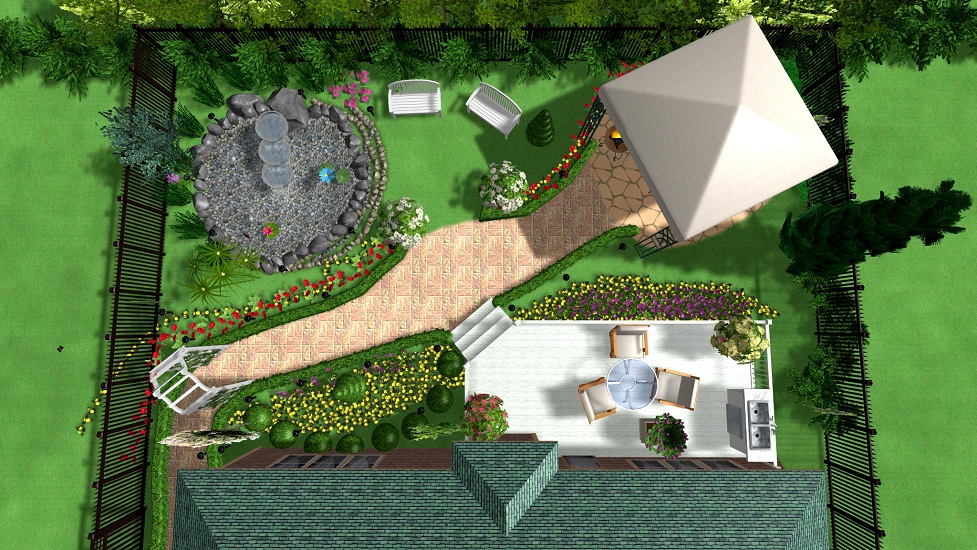
Design examples
Country lanes can be mounted from scrap materials - plastic bottles and car tires - it will be cheap and beautiful. Will be suitable for a kitchen garden and a round timber from the cut trees. Simply put, the arrangement of a garden plot is a creative process, and it is not necessary to spend big money for this.
Visually on how to make garden paths with your own hands, see the following video.