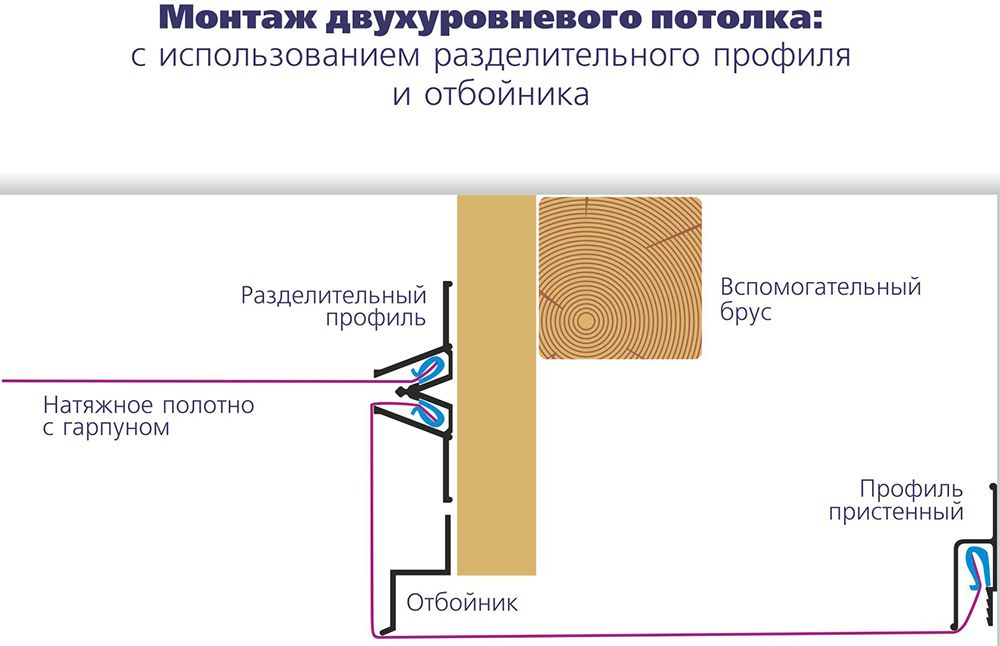
Do-it-yourself installation of a two-level stretch ceiling
Today it is very fashionable to install stretch ceilings in their homes. And that's not bad. In recent years, this option for decorating a room has been overgrown with a large number of myths and legends, which in practice are not always justified. The main clue of untrusting users was the self-installation of a stretch ceiling. But this is already in the past.
Design features
When simple PVC film over the head was not enough, nimble designers decided to diversify the scope of application of this uncomplicated material. At the peak of popularity today is the installation of a two-level stretch ceiling, a combination of fabric and PVC in the decoration of such structures, options using drywall, photo printing on canvases.Two-level tension surfaces play into the hands of citizens, the original ceiling of which is far from ideal. Everyone knows how it is for days to level and clean the existing surface in order to bring it at least a little closer to that which can be covered with wallpaper or paint. The tension design allows to get rid of such a headache and make the ceiling not only smooth, but also beautiful.
Starting self-installation of two ceiling levels, you need to understand exactly what you want. First of all, you should measure the perimeter of the surface above your head and calculate the approximate amount of material that will be needed to decorate the room. A simple outline or freehand drawing is already half the battle. When the owner of the room, satisfied with his creative impulses, sees the desired in his own mind, and not in his thoughts. Only after these ritual dances with drawings, you can begin to choose materials and tools for installation.
Materials and tools
To begin with, you will have to decide what exactly your two-level stretch ceiling will be made of. There are two main options: PVC film and fabric. The first one is known for its water repellency, airtightness, ease of cleaning and spectacular appearance. It can be additionally produced in three versions: gloss, matte and photo print. The fabric two-level ceiling is less whimsical in installation, it “breathes”, but does not resist moisture at all, absorbs sunlight, and is recommended for installation in large, bright rooms with high ceilings.

Fabric cloths are much more expensive than PVC film, and they look more elegant and luxurious. Vinyl ceilings give more light, especially if you install additional fixtures aimed at the glossy surface of such a coating. Then there will be a mirror effect - and the whole room will be flooded with light.
So, having decided on what to stretch, let's move on to what to stretch. Among the standard set of tools will simply be needed:
- heat gun or hair dryer (with a tension film of PVC);
- aluminum profile for the frame and plasterboard (with different installation options);
- shovels and spatulas.
Depending on the material and method of installation of the two-level tensioning structures, the components necessary for the installation process may change and be added.It is very important to remember that when self-tensioning ceilings, it is necessary to observe not only safety rules as precisely as possible, but also to carefully follow all stages of installation and accuracy in work.
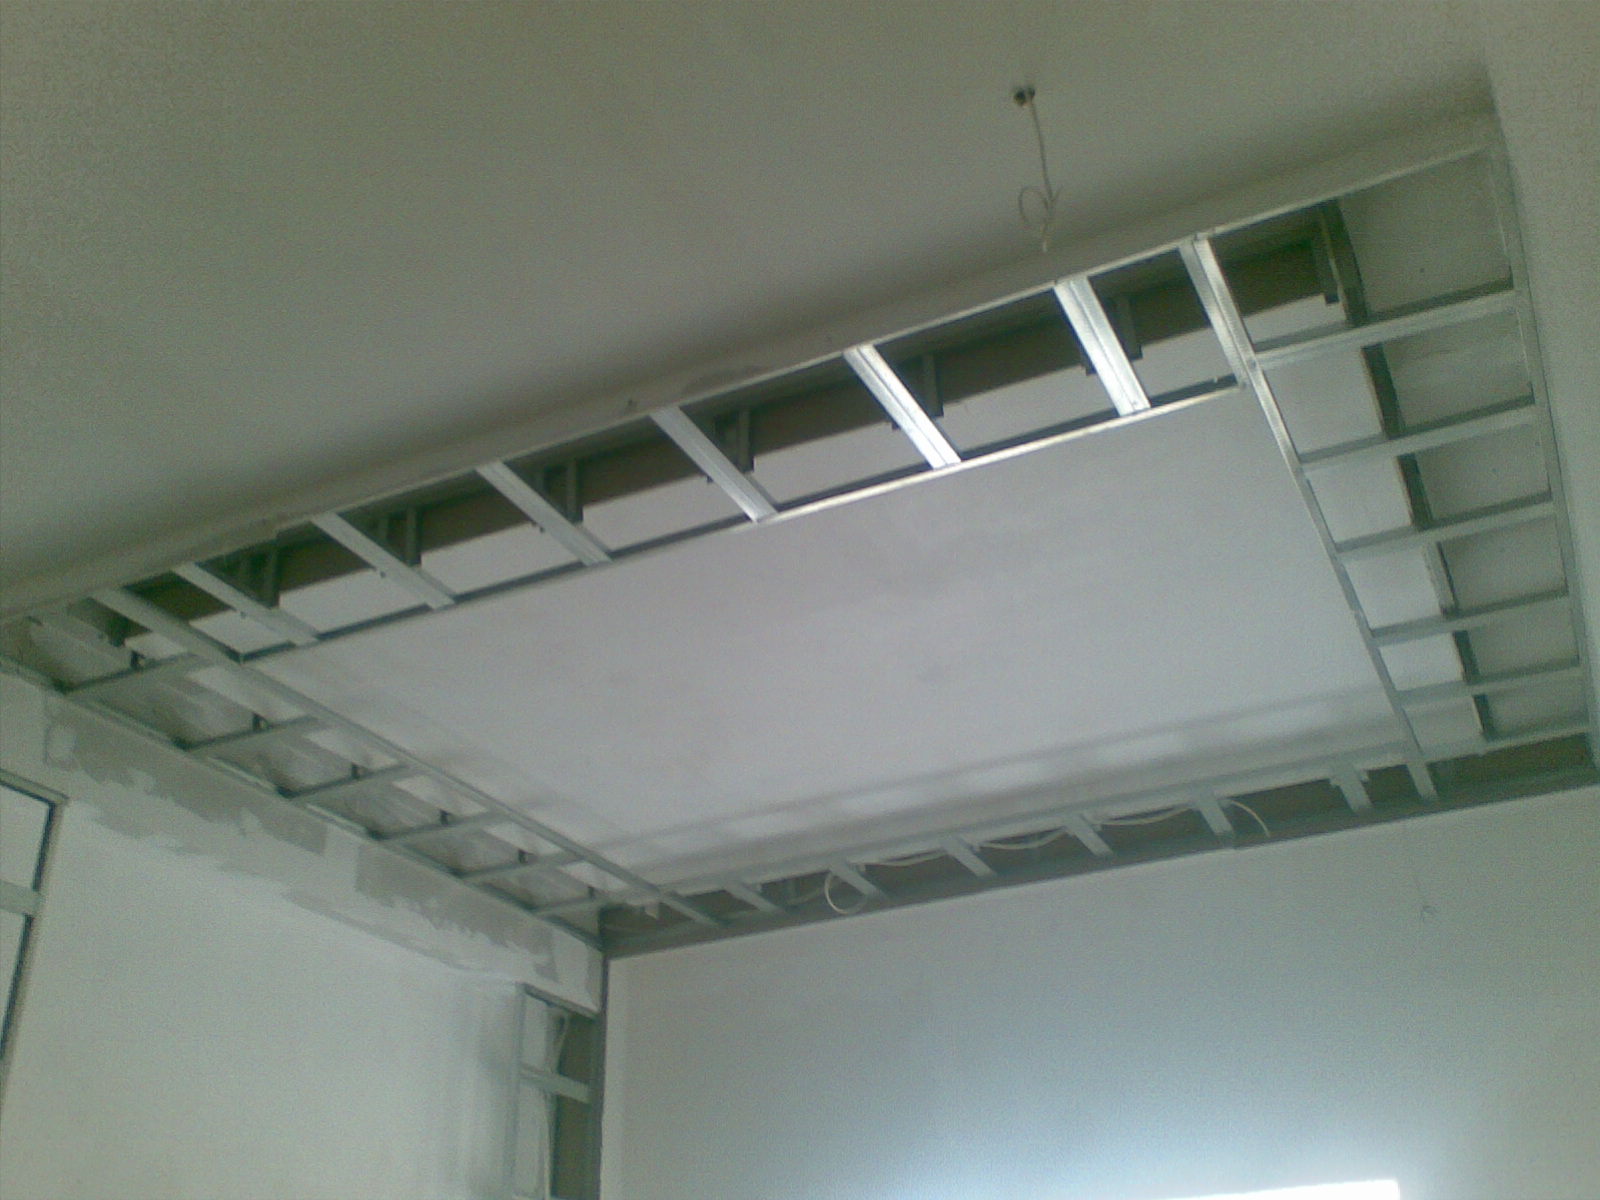
Frame Mounting
Cloths for two-level ceilings should be immediately ordered from the manufacturer of the required size and shape. So that then at home I did not have to cut or cut unnecessary things on my own. It is better to measure with a tape measure and a pencil, which will mark the measured areas. It is very important to immediately foresee the height of the first threshold of the ceiling nearest to the concrete floor.so that you can safely place the lighting and bring them outside. It should not be forgotten that some of the spotlights get very hot during operation, which can sadly affect the integrity of the membrane.

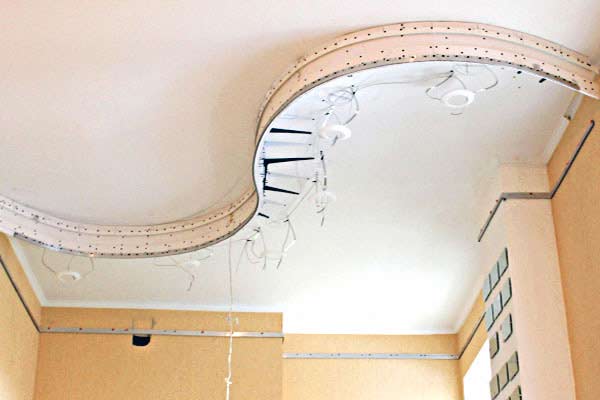
Before installing the frame of the stretch ceiling, it is necessary to make a markup, which is based on measuring the perimeter of the room and preliminary delineating the future shape on the draft ceiling. The step-by-step instruction will help you to easily understand how two-tier tensioning structures are made.The measurement technology is such that the marking on the perimeter of the room is first carried out. It is very important to use a water or infrared level so that the two-level ceiling is laid down smoothly and beautifully.. To do this, you can use a special construction trick.
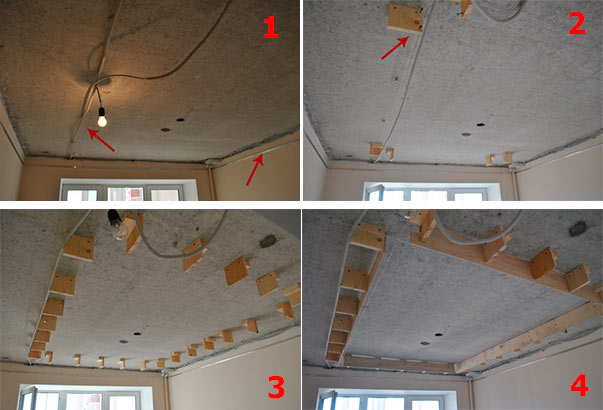
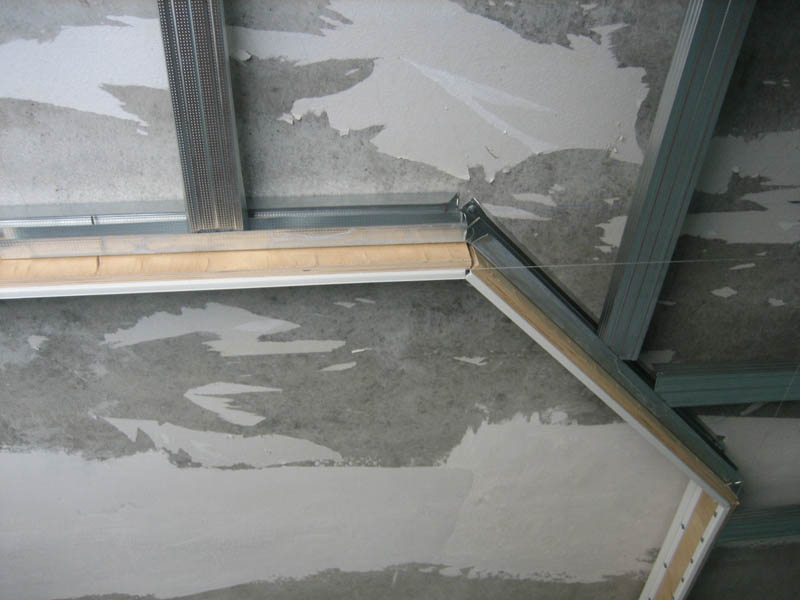
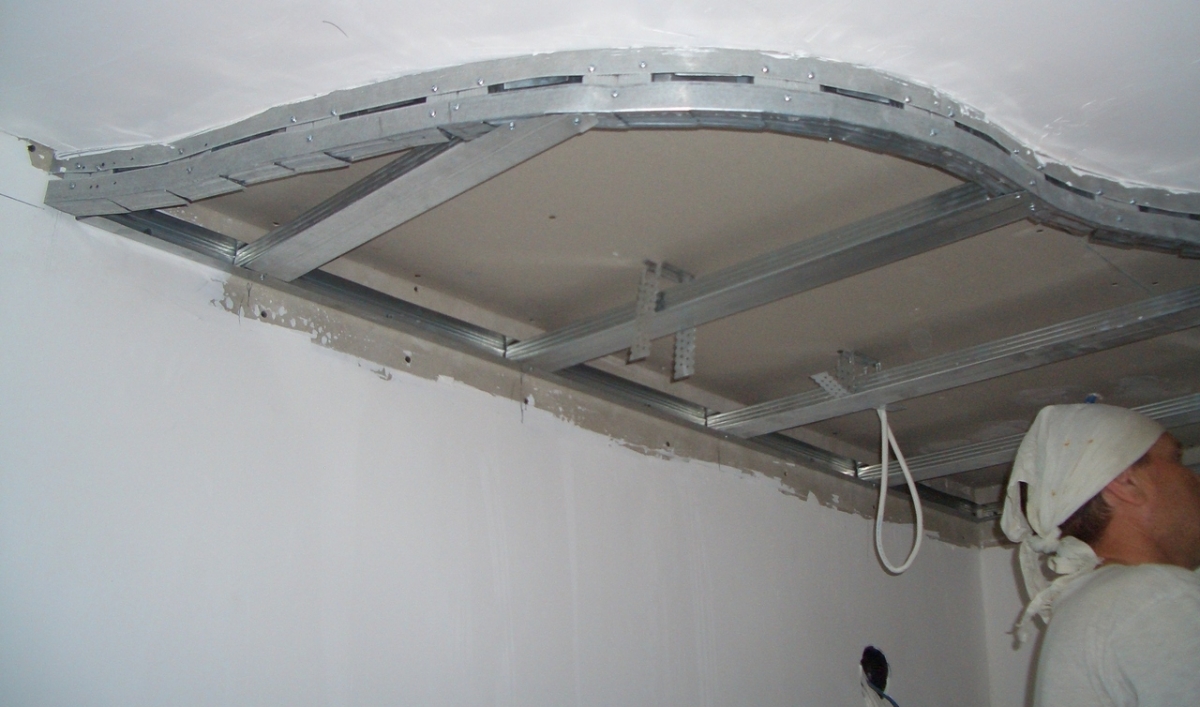
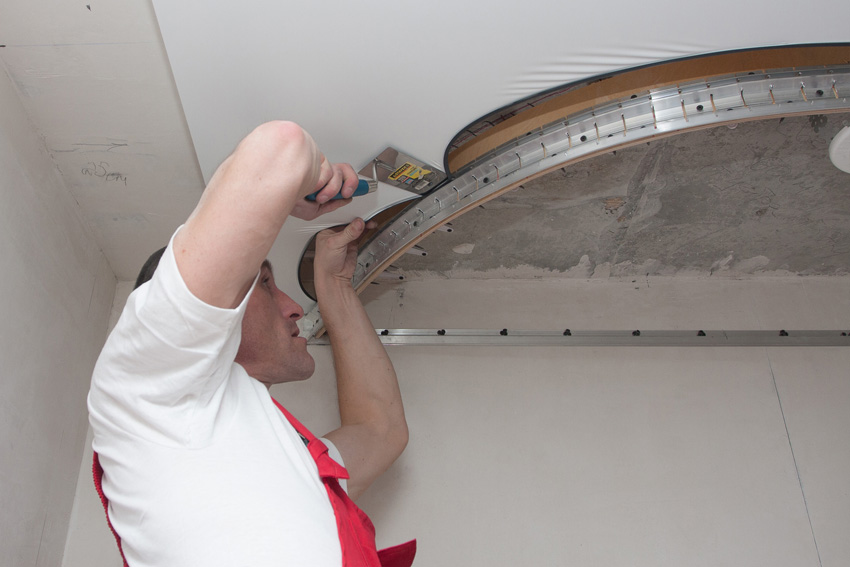
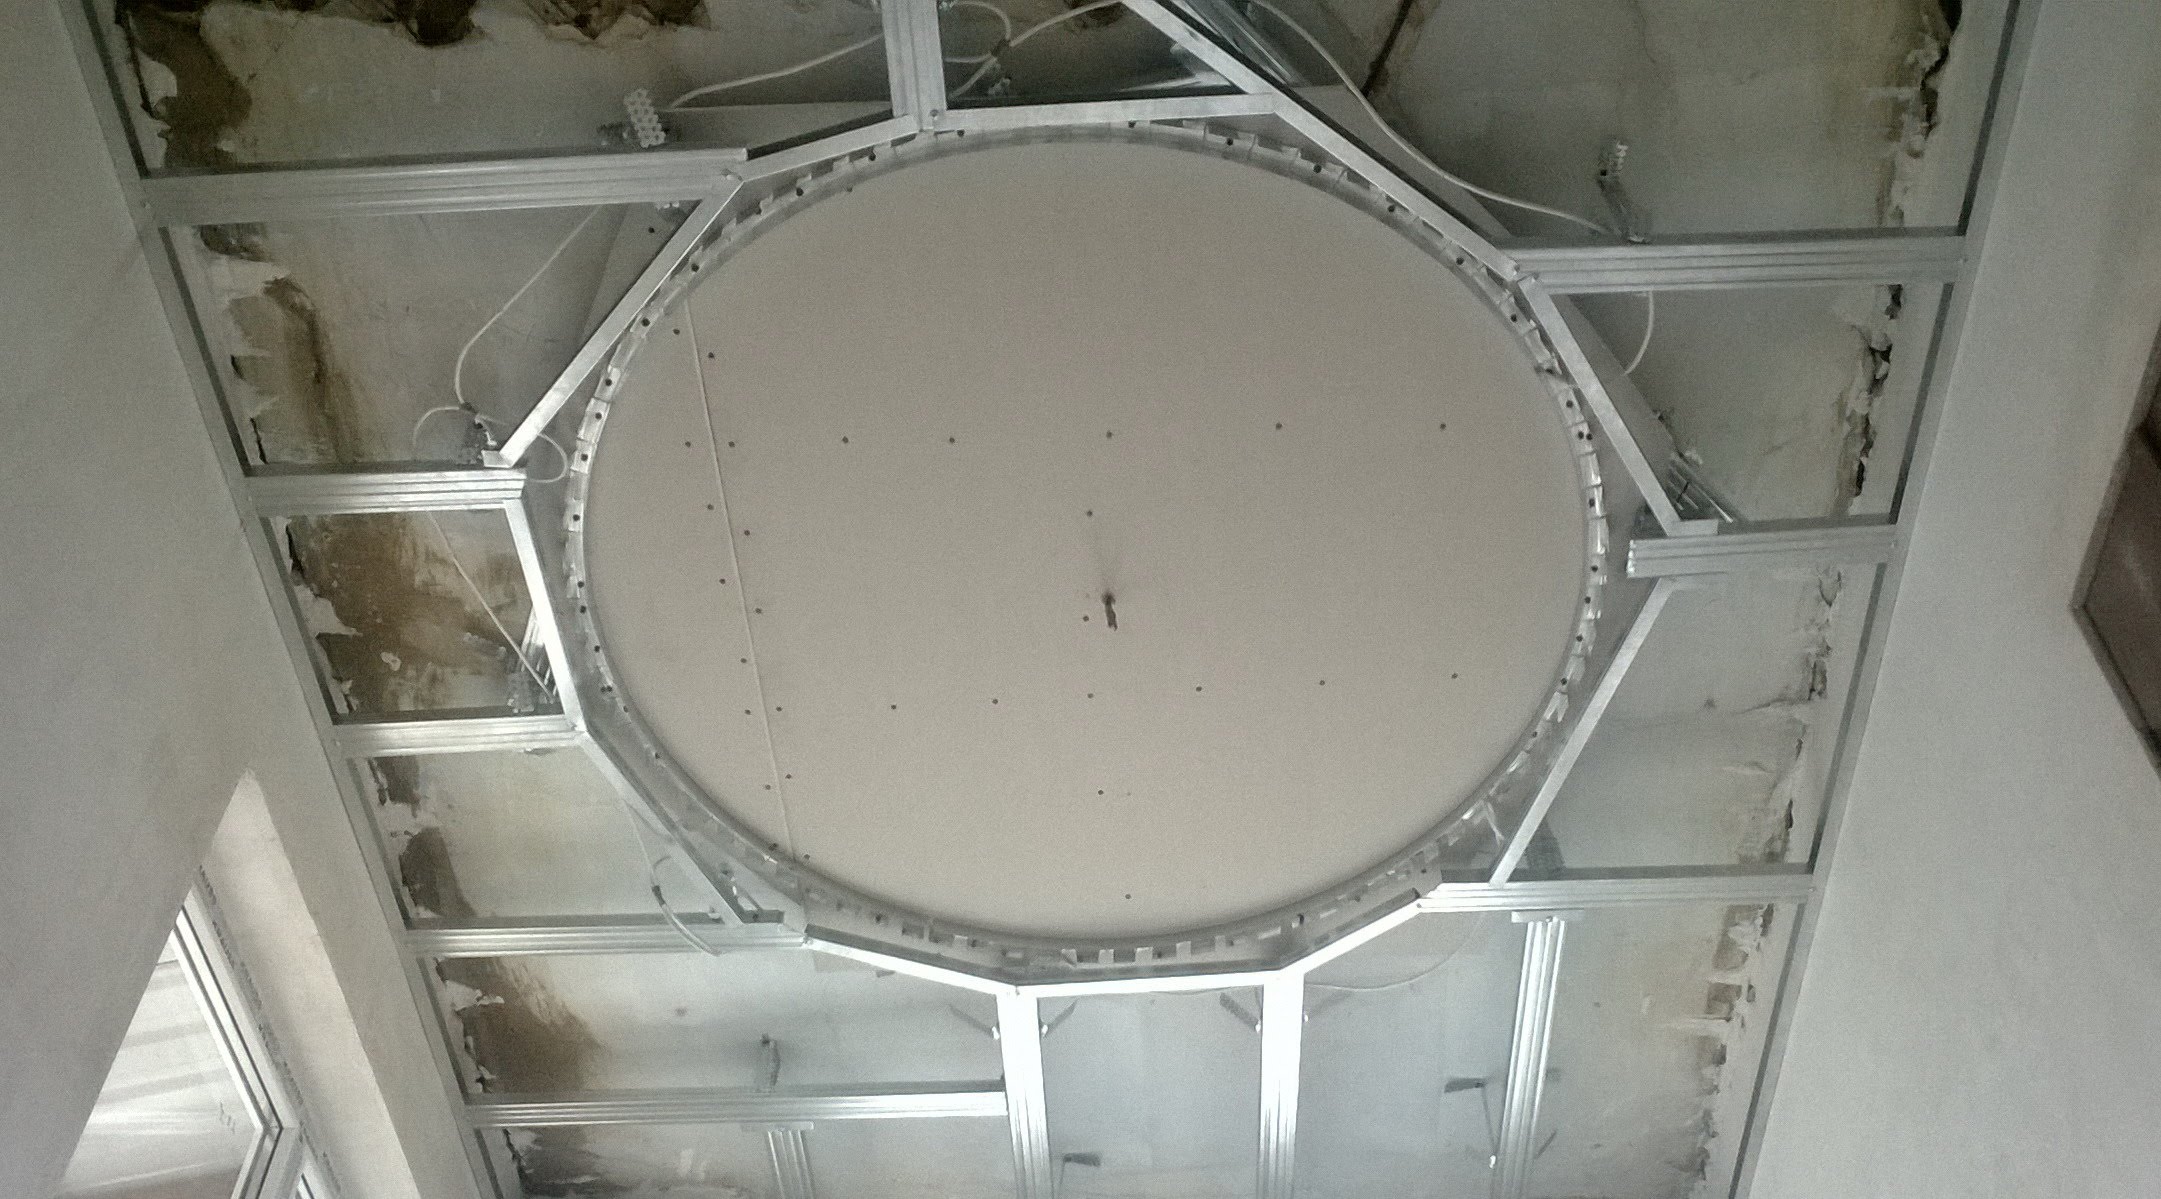
First of all, the height of each corner of the room is measured. A staple nail is driven into the lowest of them, and then, using a level, a kapron thread or a chop cord is pulled along the entire perimeter of the room. Thus, it turns out a quadrangle of the correct form, which will allow you to install the stretch ceiling on your own with minimal risks of curvature. The installation of the frame start from the bottom of the ceiling. Wooden bars are often used for this step: 6 cm tall and 10 cm long. They are driven into the perimeter of the bottom of the future frame, repeating the contours drawn on the draft ceiling. Stripes about 12 cm wide are attached to these bars. It is noteworthy that here you can make a choice in favor of the material you are interested in:
- plastic profiles;
- aluminum profiles;
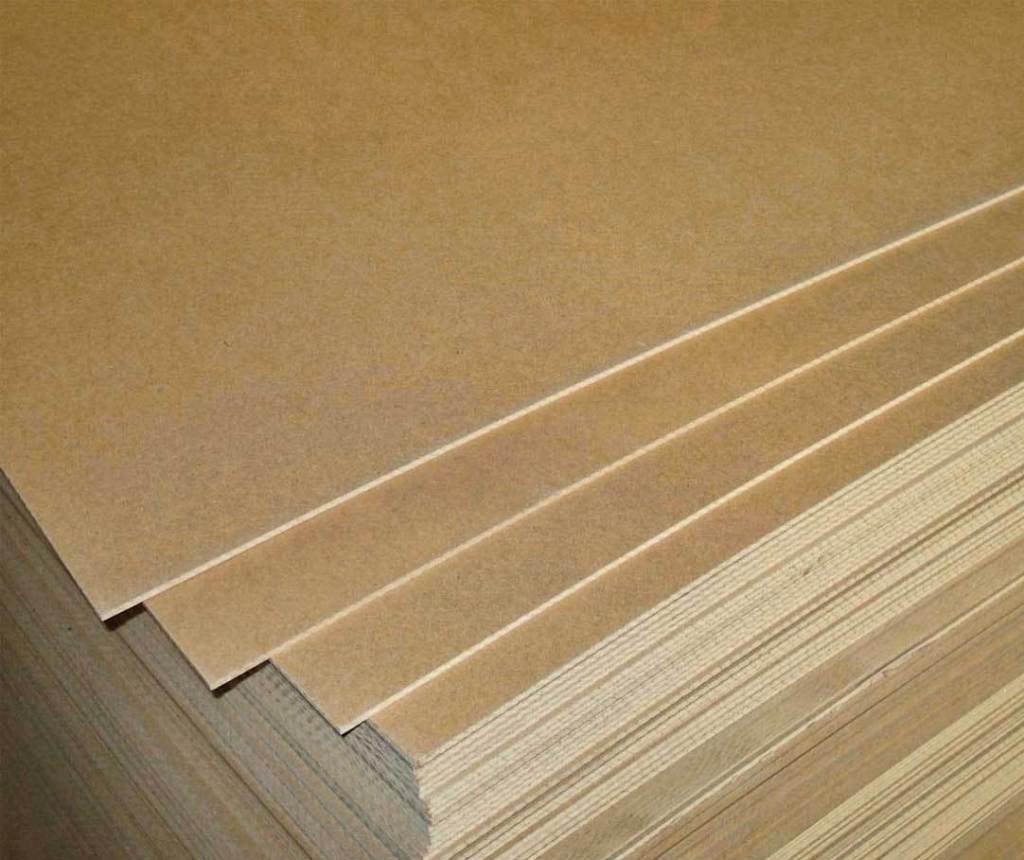
- strips of plywood veneer;
- Drywall increased elasticity.
Professionals do not advise beginners to use aluminum, since additional tools and certain knowledge and skills are needed to create such a framework. At this stage it is possible to do with plastic or veneer. At the second, flexibility is achieved by first moistening it abundantly. After forty minutes - an hour, the plywood will bend in any direction, without breaking or deforming.
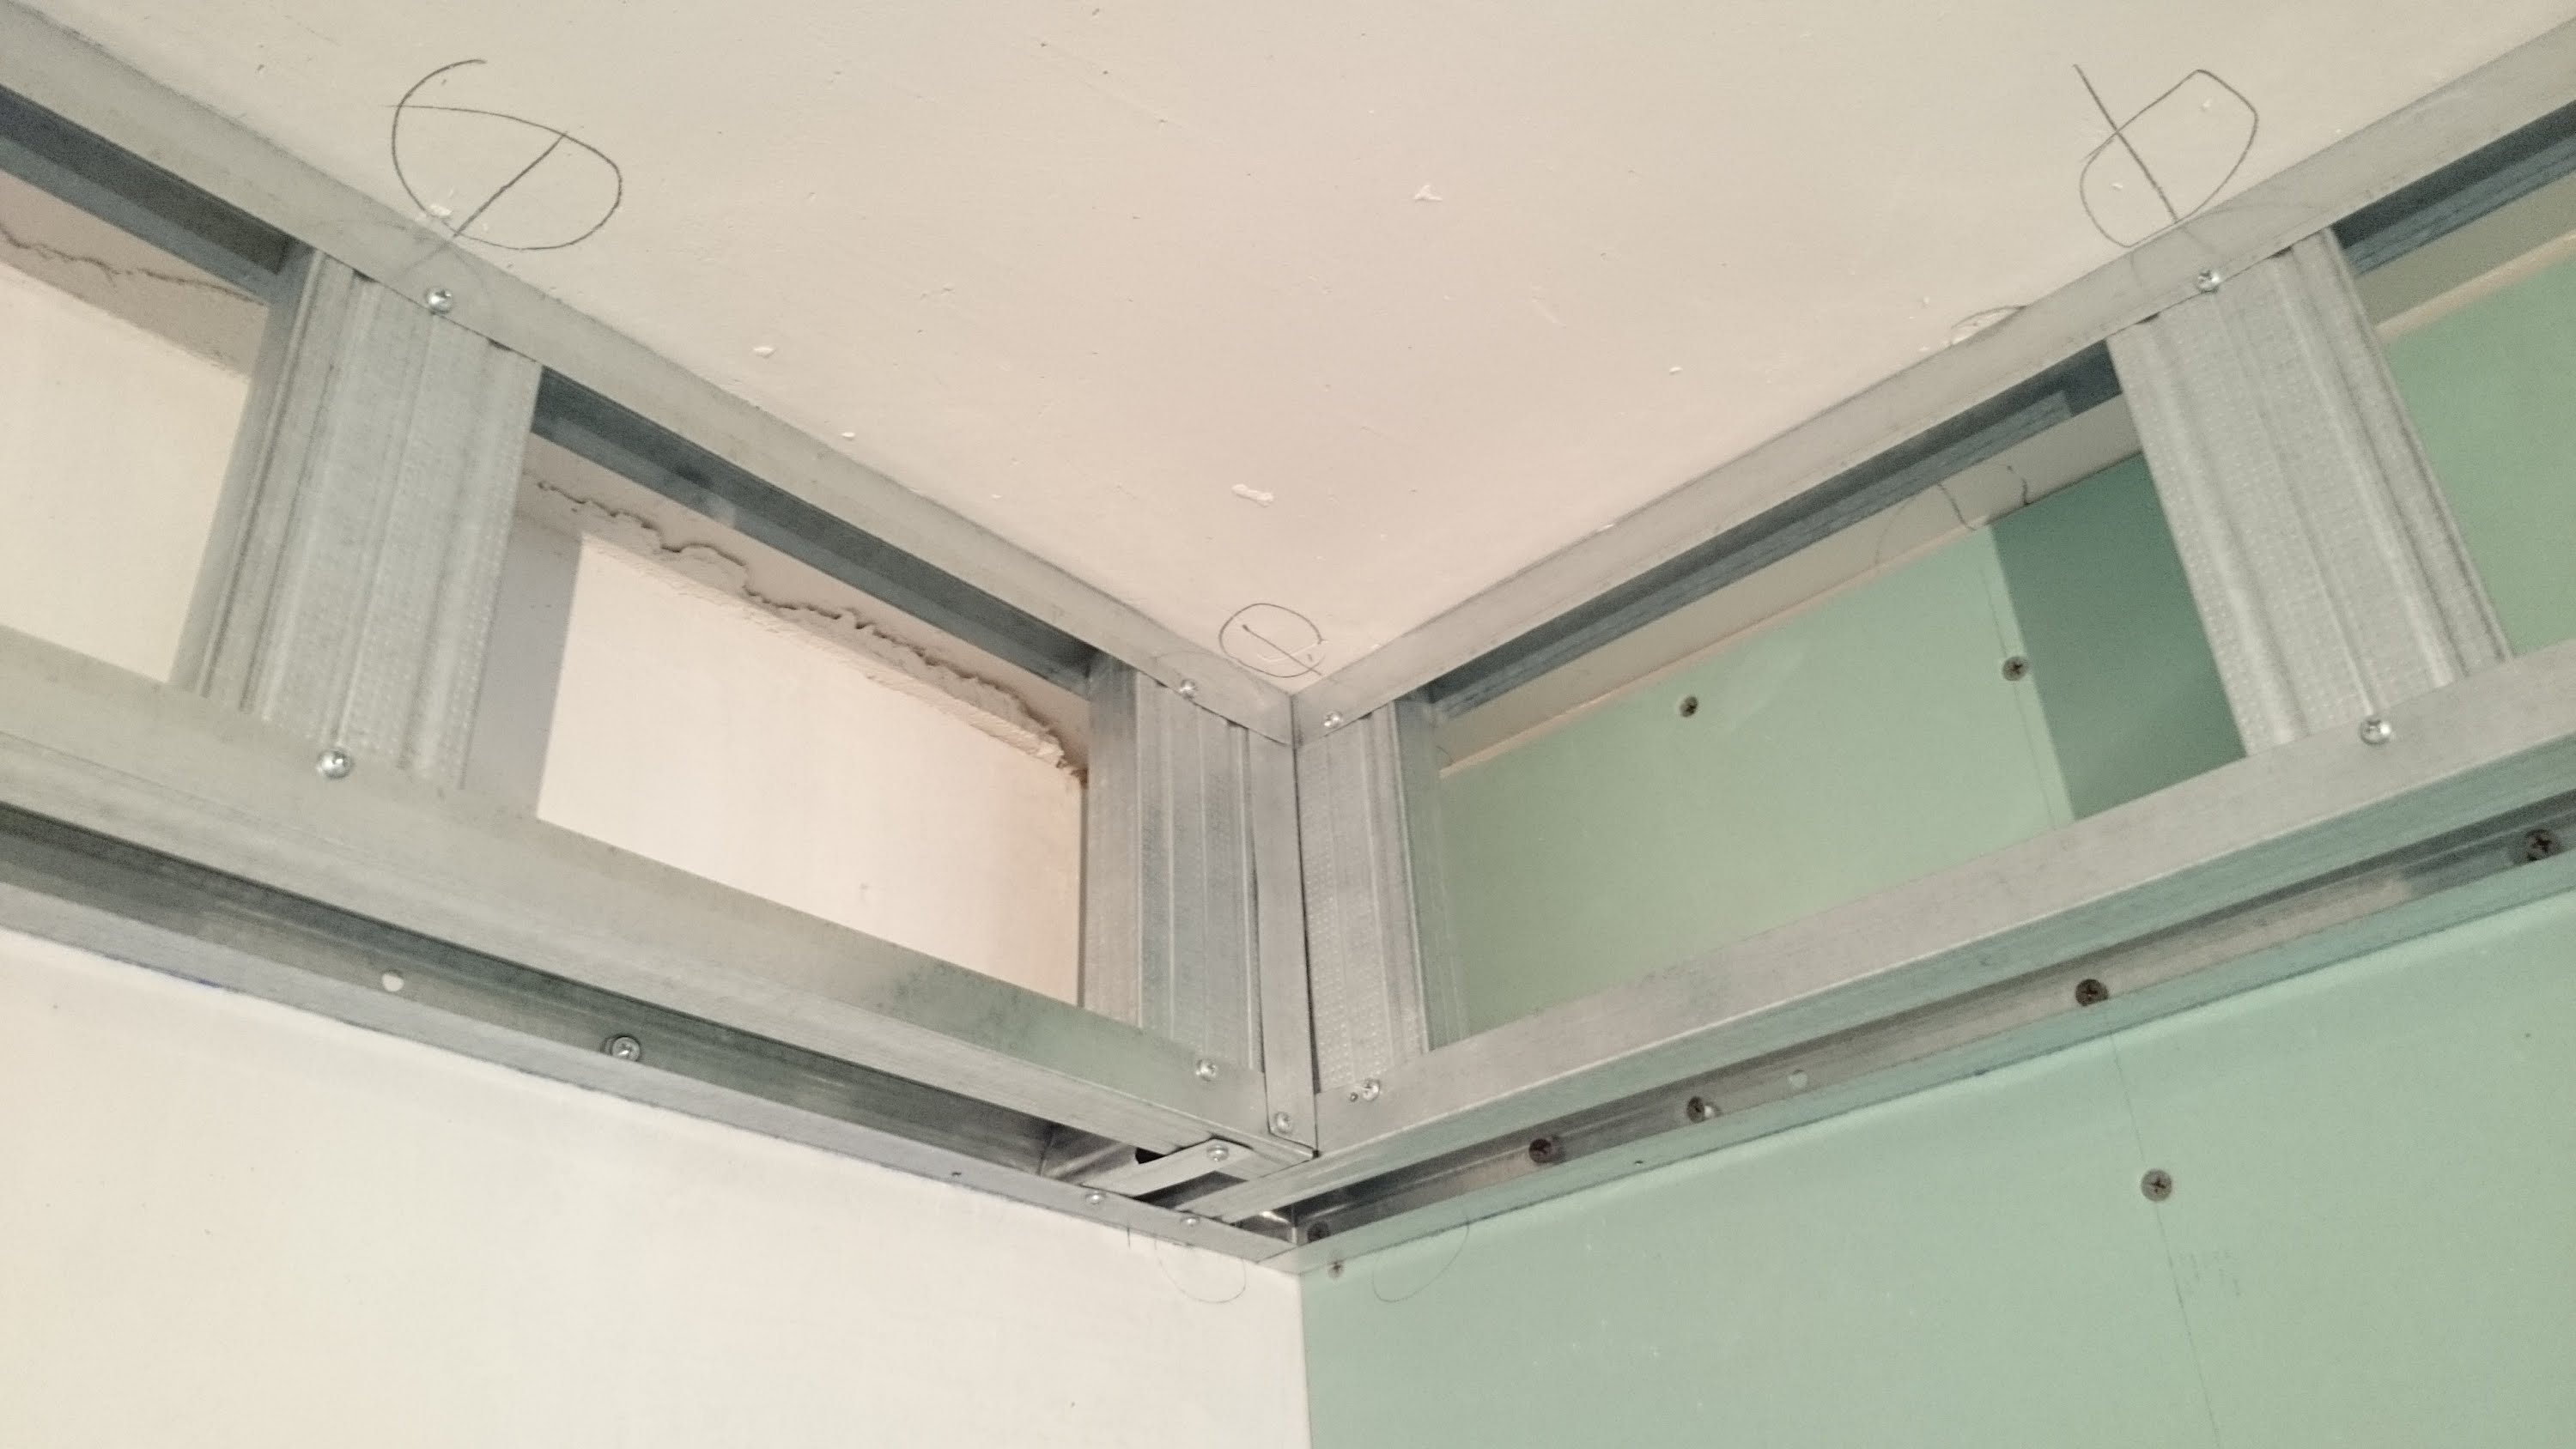
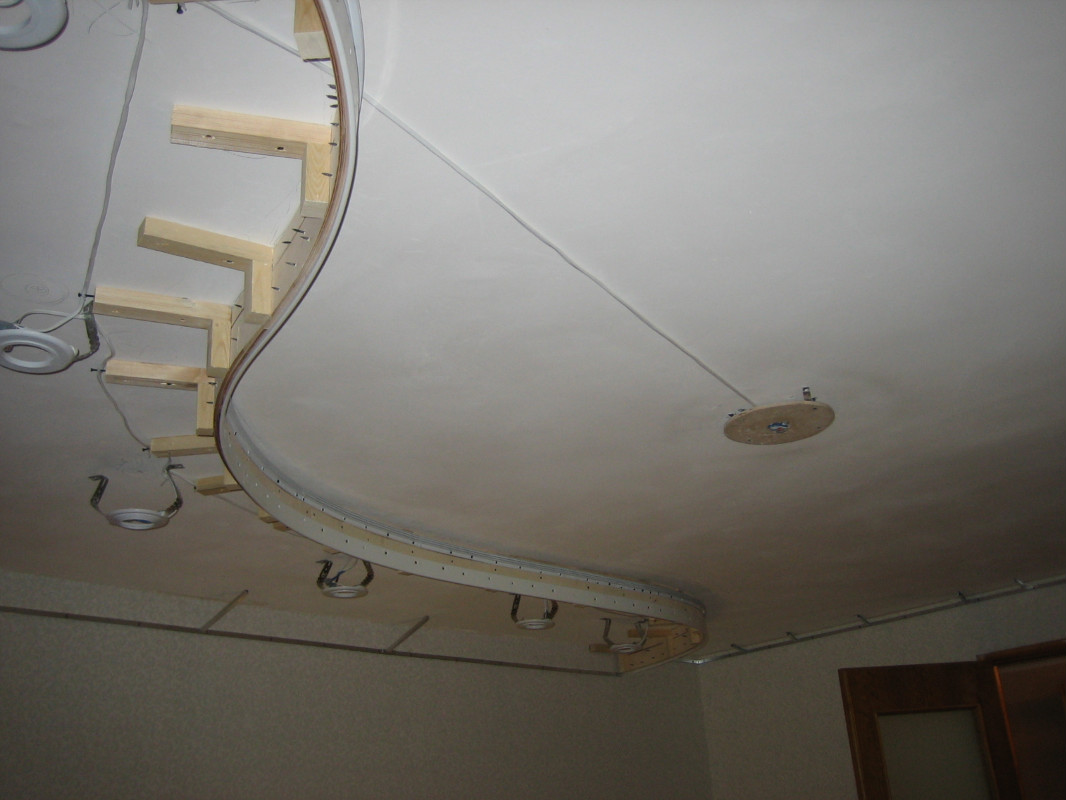
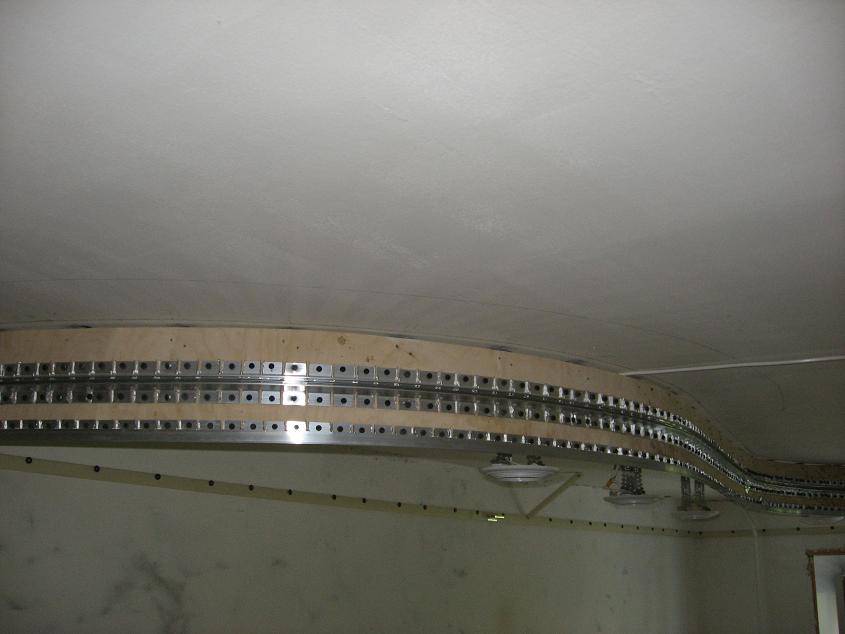
Let's stop on the strips of plywood veneer. Their length will depend entirely on the size of the uneven portion of the lower level of the ceiling. Its width is indicated conventionally, it is selected taking into account the installation of lamps and a flat native surface. So, the plywood strip is attached to the wooden bars with self-tapping screws. The frame under the winding level of the stretch ceiling is ready. We return to the labels stretched along the perimeter of the room. Baguettes for the first and second levels of canvases will be installed here.
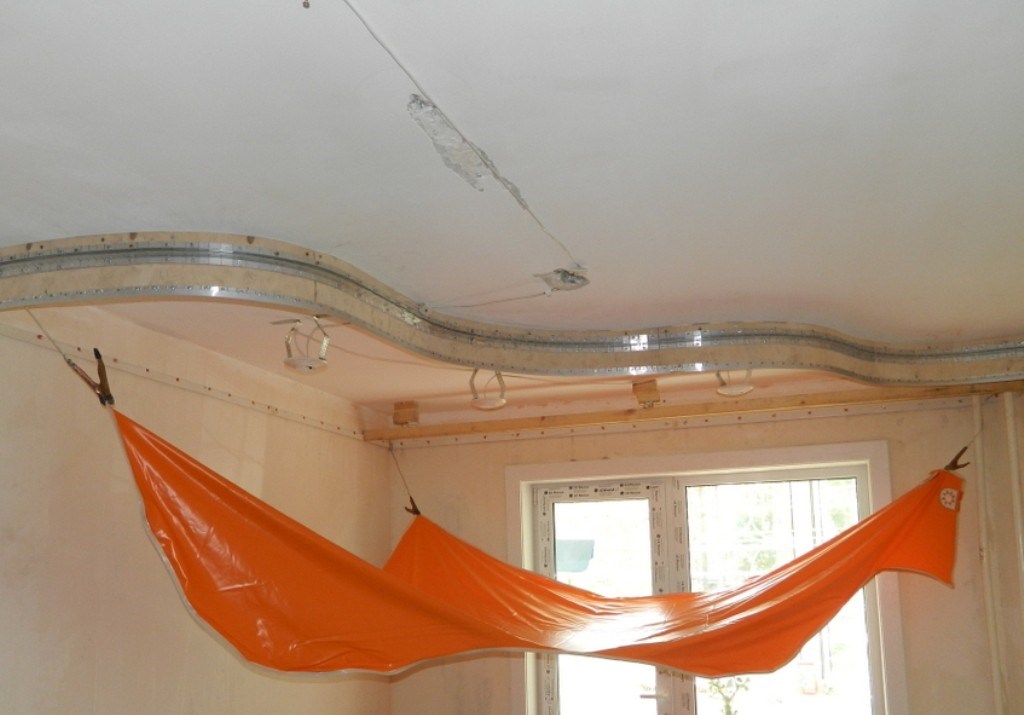
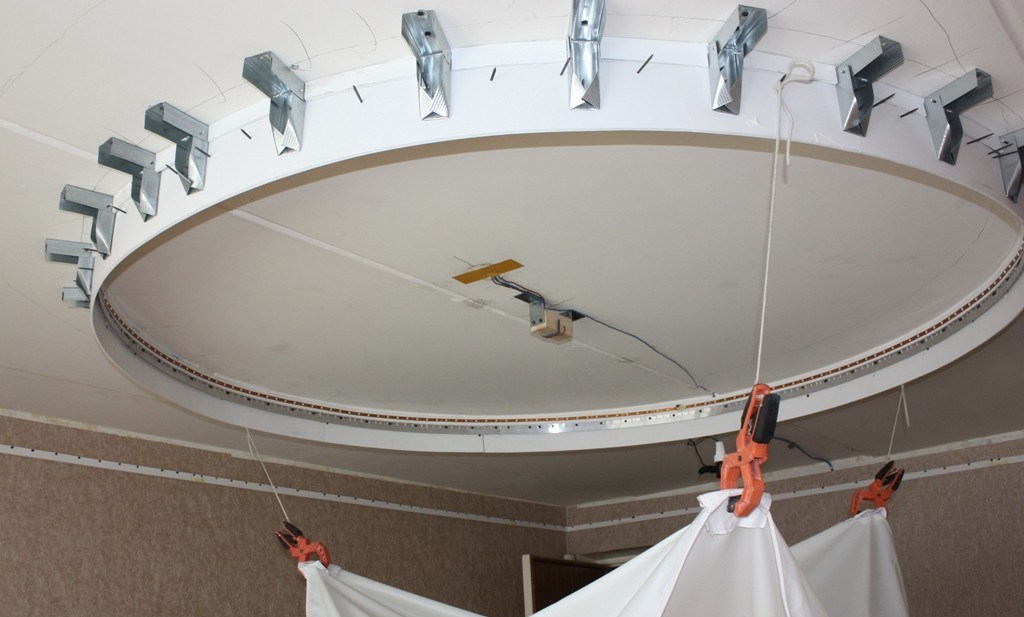
The general framework of the two-level stretch ceiling is ready. Next comes the fun part.
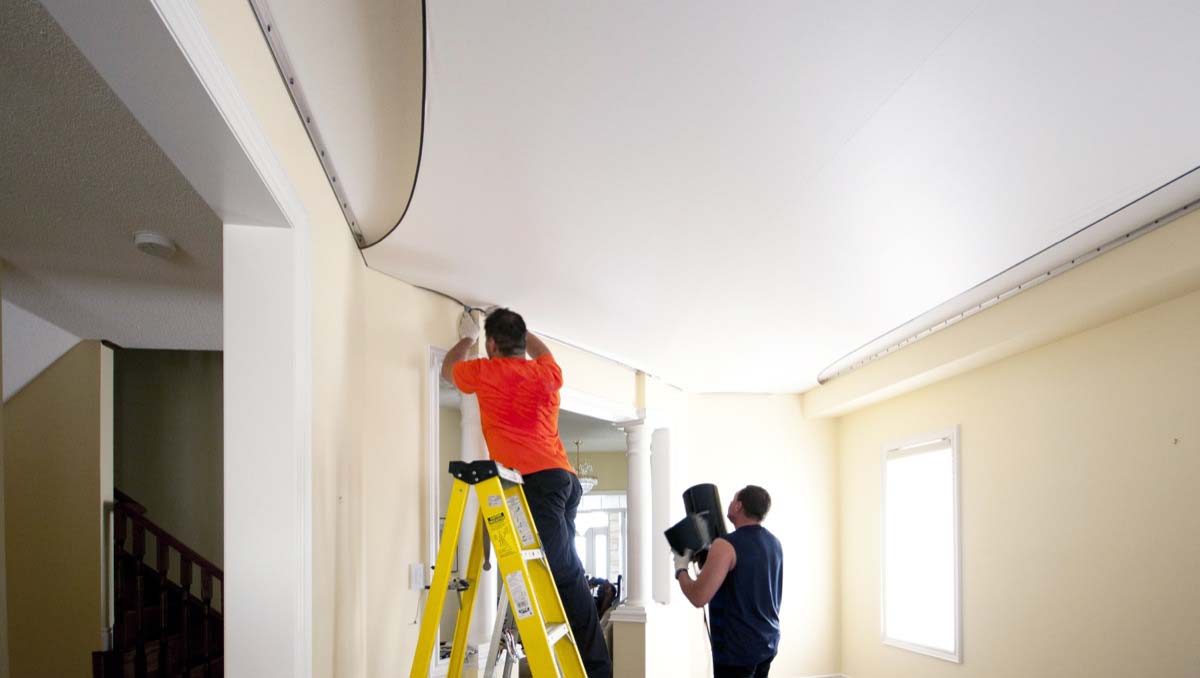
Stretch ceiling installation
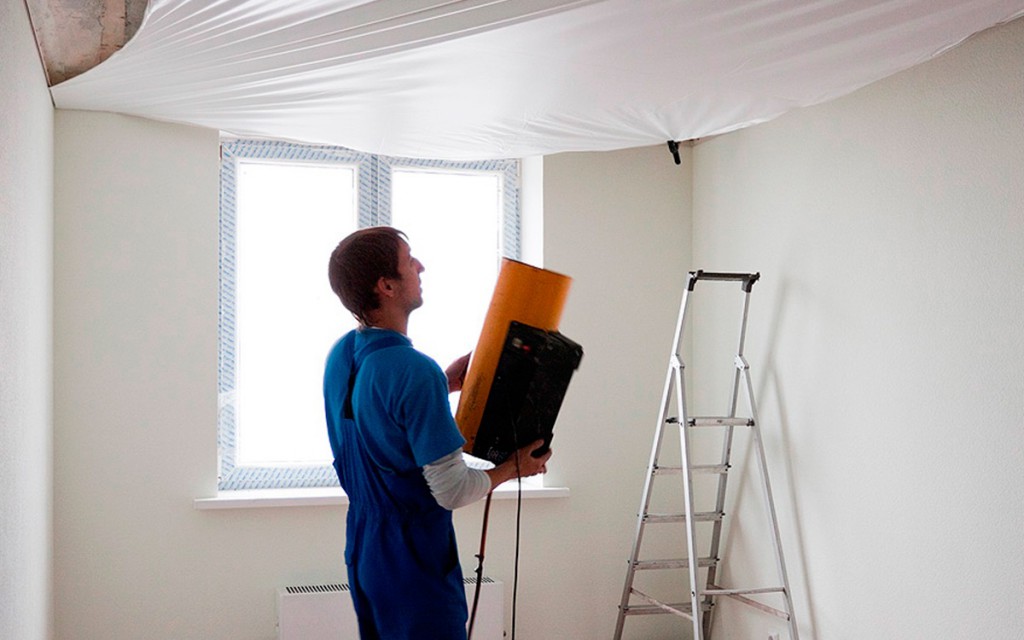
Assembling a stretch ceiling with your own hands does not seem so terrible if you are confident in the measurements that were taken, and in the manufacturer directly the canvases for the new coating.In order to properly stretch the PVC film, you need to constantly maintain the temperature in the room not lower than 30 degrees. In no case is it recommended to open windows, create a draft or blowing through the room to be treated.
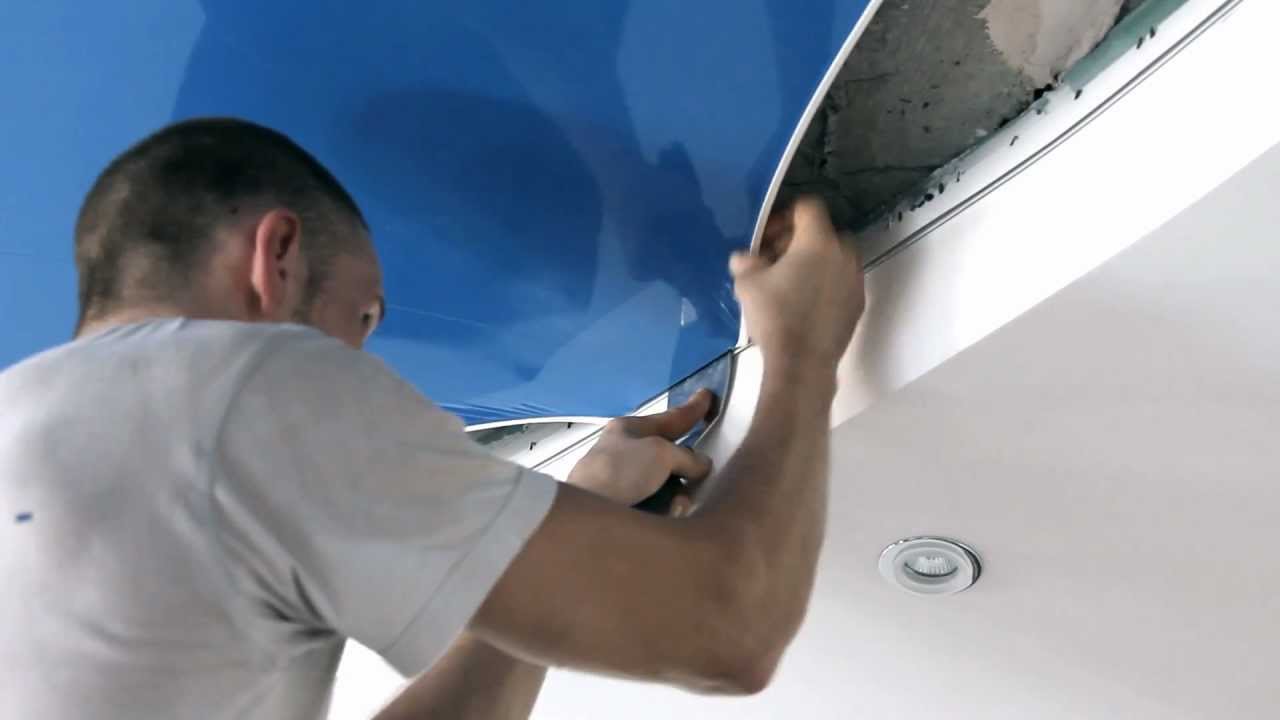
Begin with the second level of the stretch ceiling. The canvas is laid out gently on the floor, stretched in different angles of the required area. Heating the film, pull it in the right directions and fill it with a plastic spatula into the baguette clip. If there are wrinkles or bumps in the middle of the canvas, we smooth them with a construction hair dryer or a heat gun. It should be noted that there are three types of film fixing:
- Wedge. Cloth held in a baguette with a special wedge. With this mount, it is possible to replace the stretch ceiling, but a limited number of times.
- Shtapikovy. It consists in tight clamping of a film or fabric inside the slits. It is possible to replace such a ceiling only with a frame.
- Harpoon. One of the key ways that almost all installers stretch ceilings. This type of "lock" in a baguette consists of two main components - a hook and a shovel.When interacting, these two components tightly clamp the canvas between them and, if necessary, replace the fabric or film easily part with it.
The membrane never stretches on two levels at the same time. It is always preferable to process the lower one and then take up the design of the upper one in the same way.
Useful recommendations
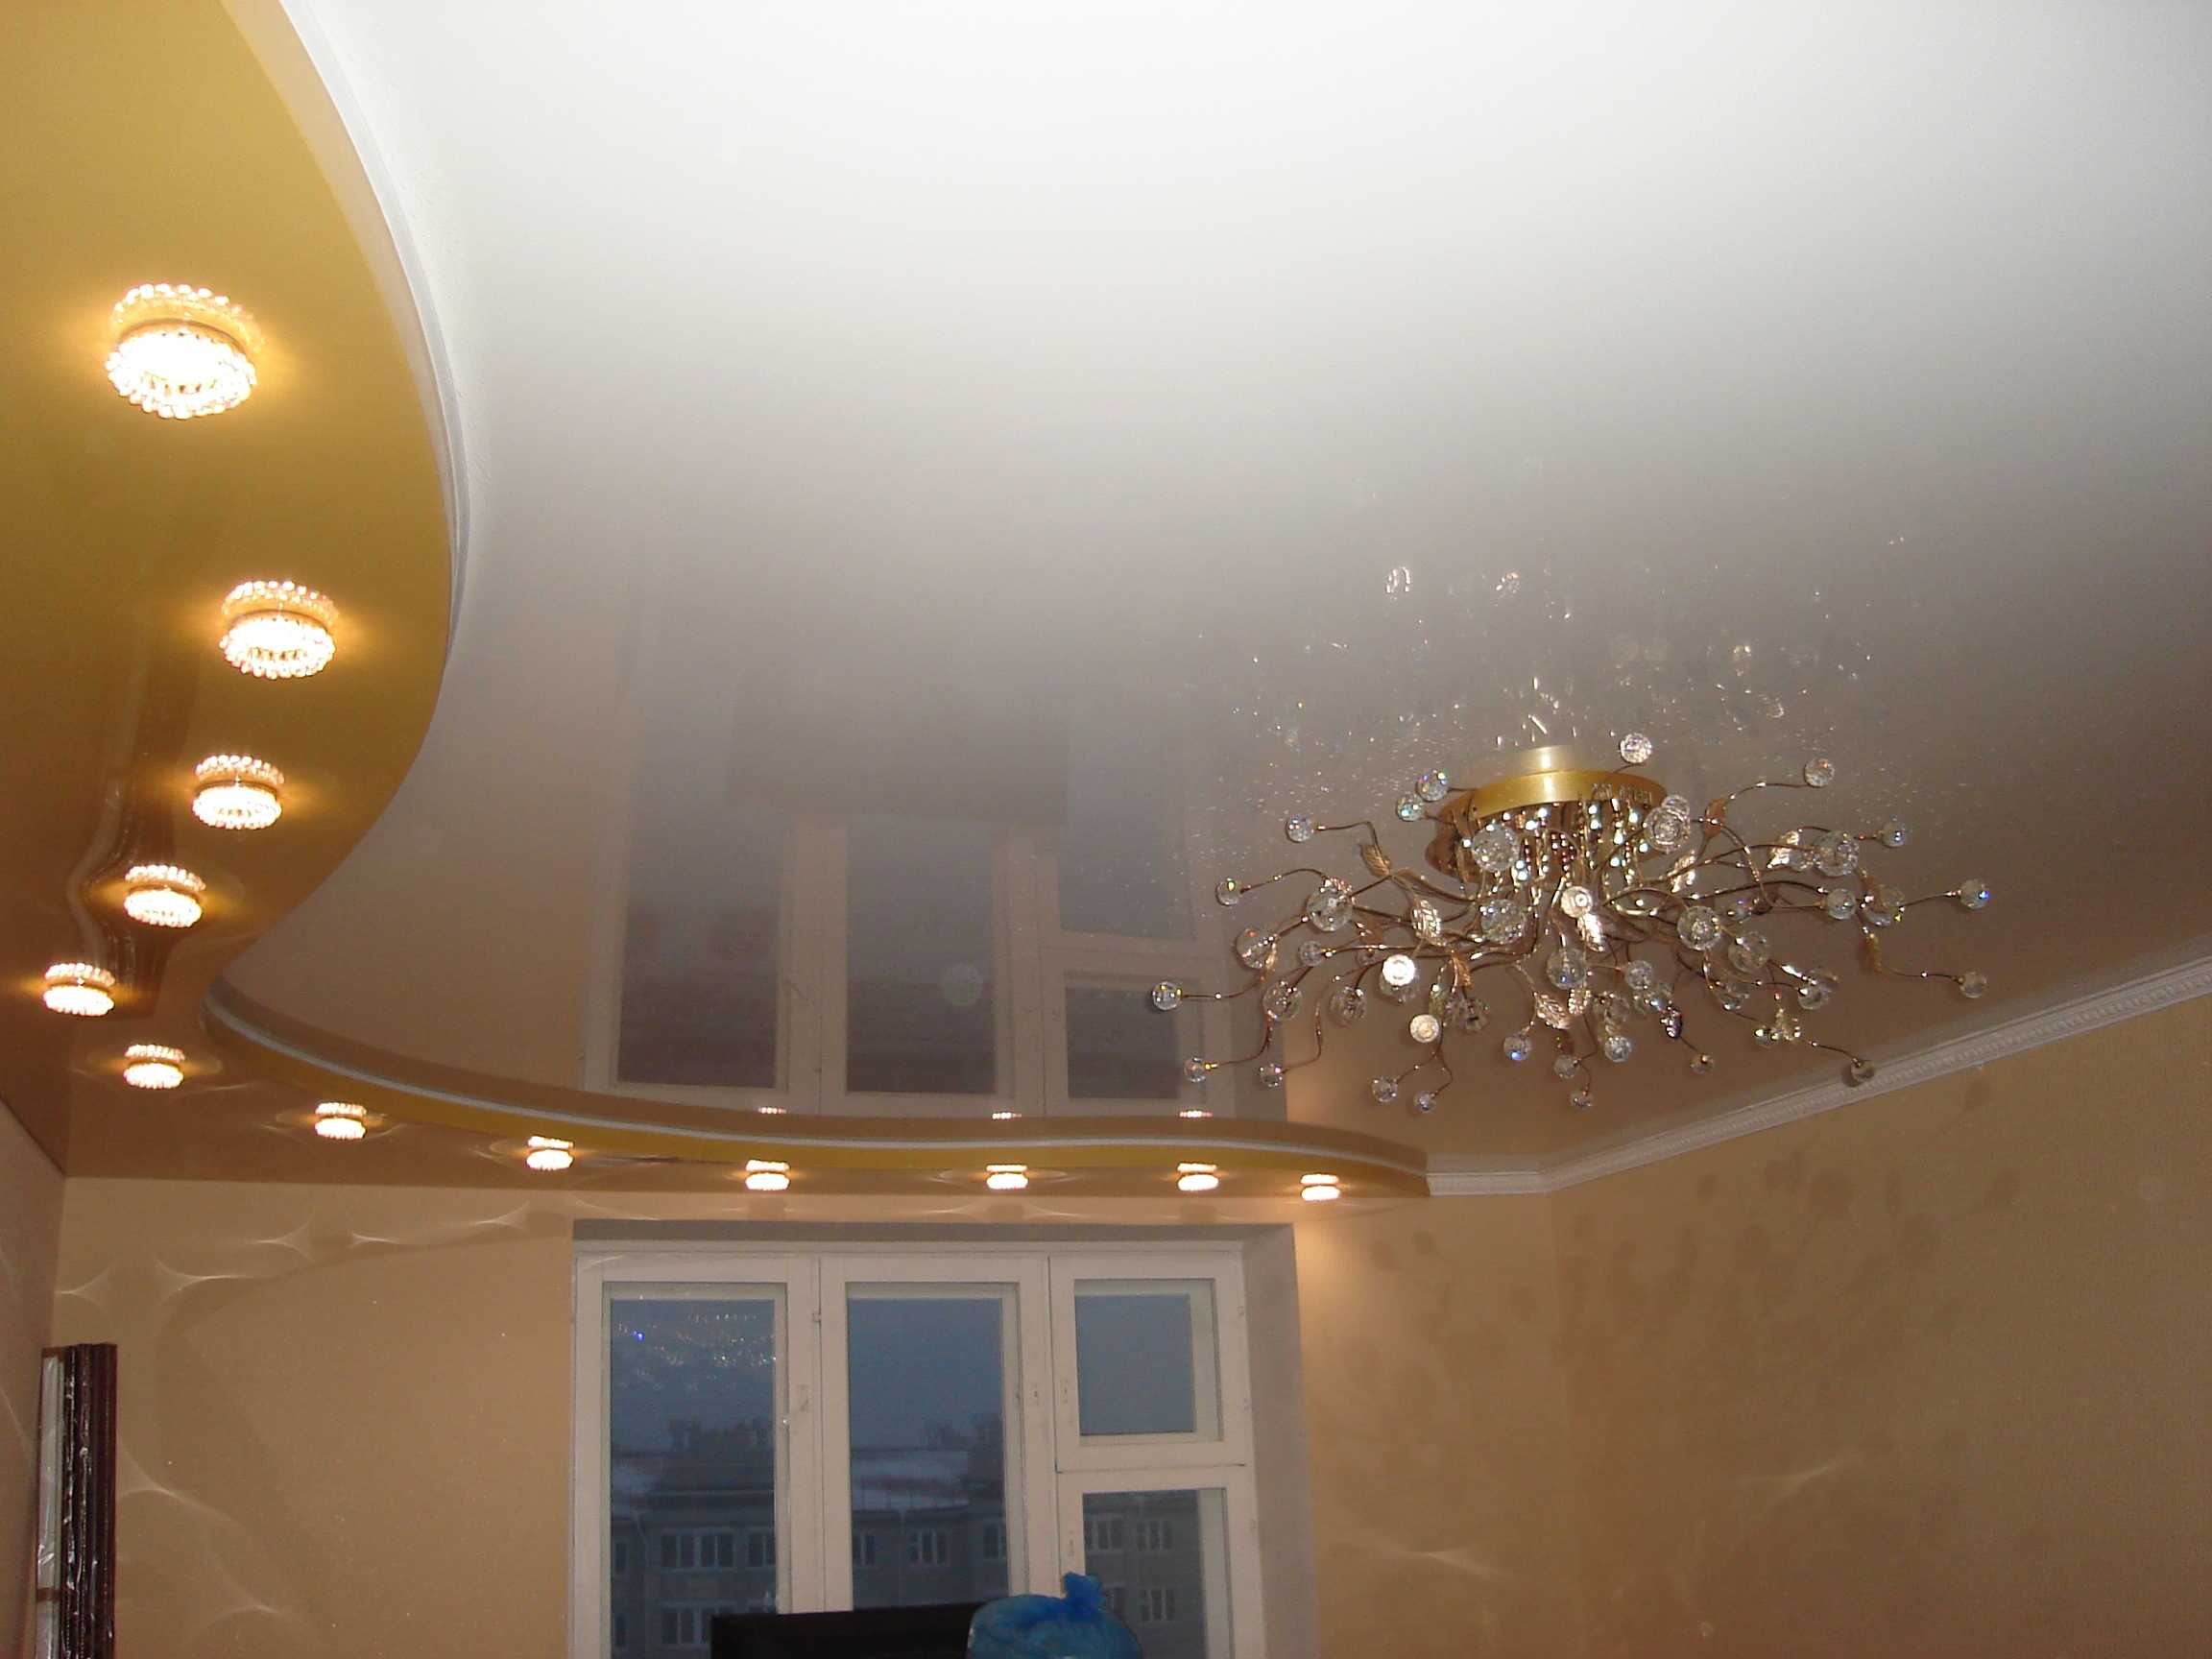
Two-level stretch ceilings are good because they perfectly zone the space and can be performed with the installation of additional lighting. In order to create the best combination of a tension structure with a game of light and shade, one should pay attention to the main recommendations of professionals on this issue.
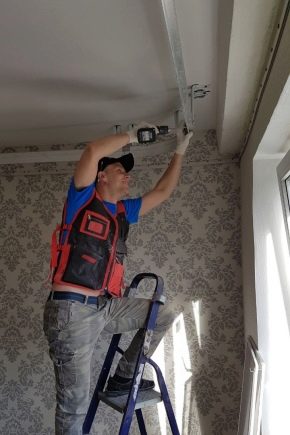
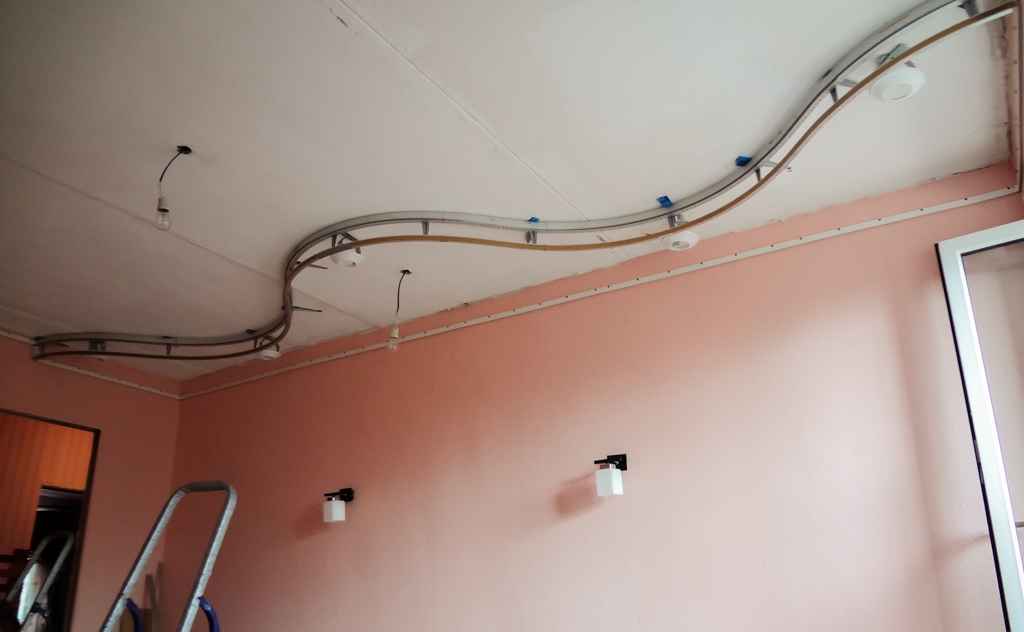
So, the canvases are stretched, but it is not clear where to make the light. Wooden bars, which were attached to the rough ceiling at the very beginning of the work, were just provided in order to fix the second level ceiling lighting to them. Gently groping the necessary places, proceed to the design of the hole. Please note that you can not cut the stretch ceiling. For tricky making openings in such surfaces there are two options for action:
- Melting film. To do this, you need to take a rounded reinforcement of the desired or approximate diameter (it should not exceed 2-3 cm), heat it with a building dryer or the same heat gun. Attach to the place where the lamp will be located. Ensure that the edges of the hole are melted and the web does not tear.
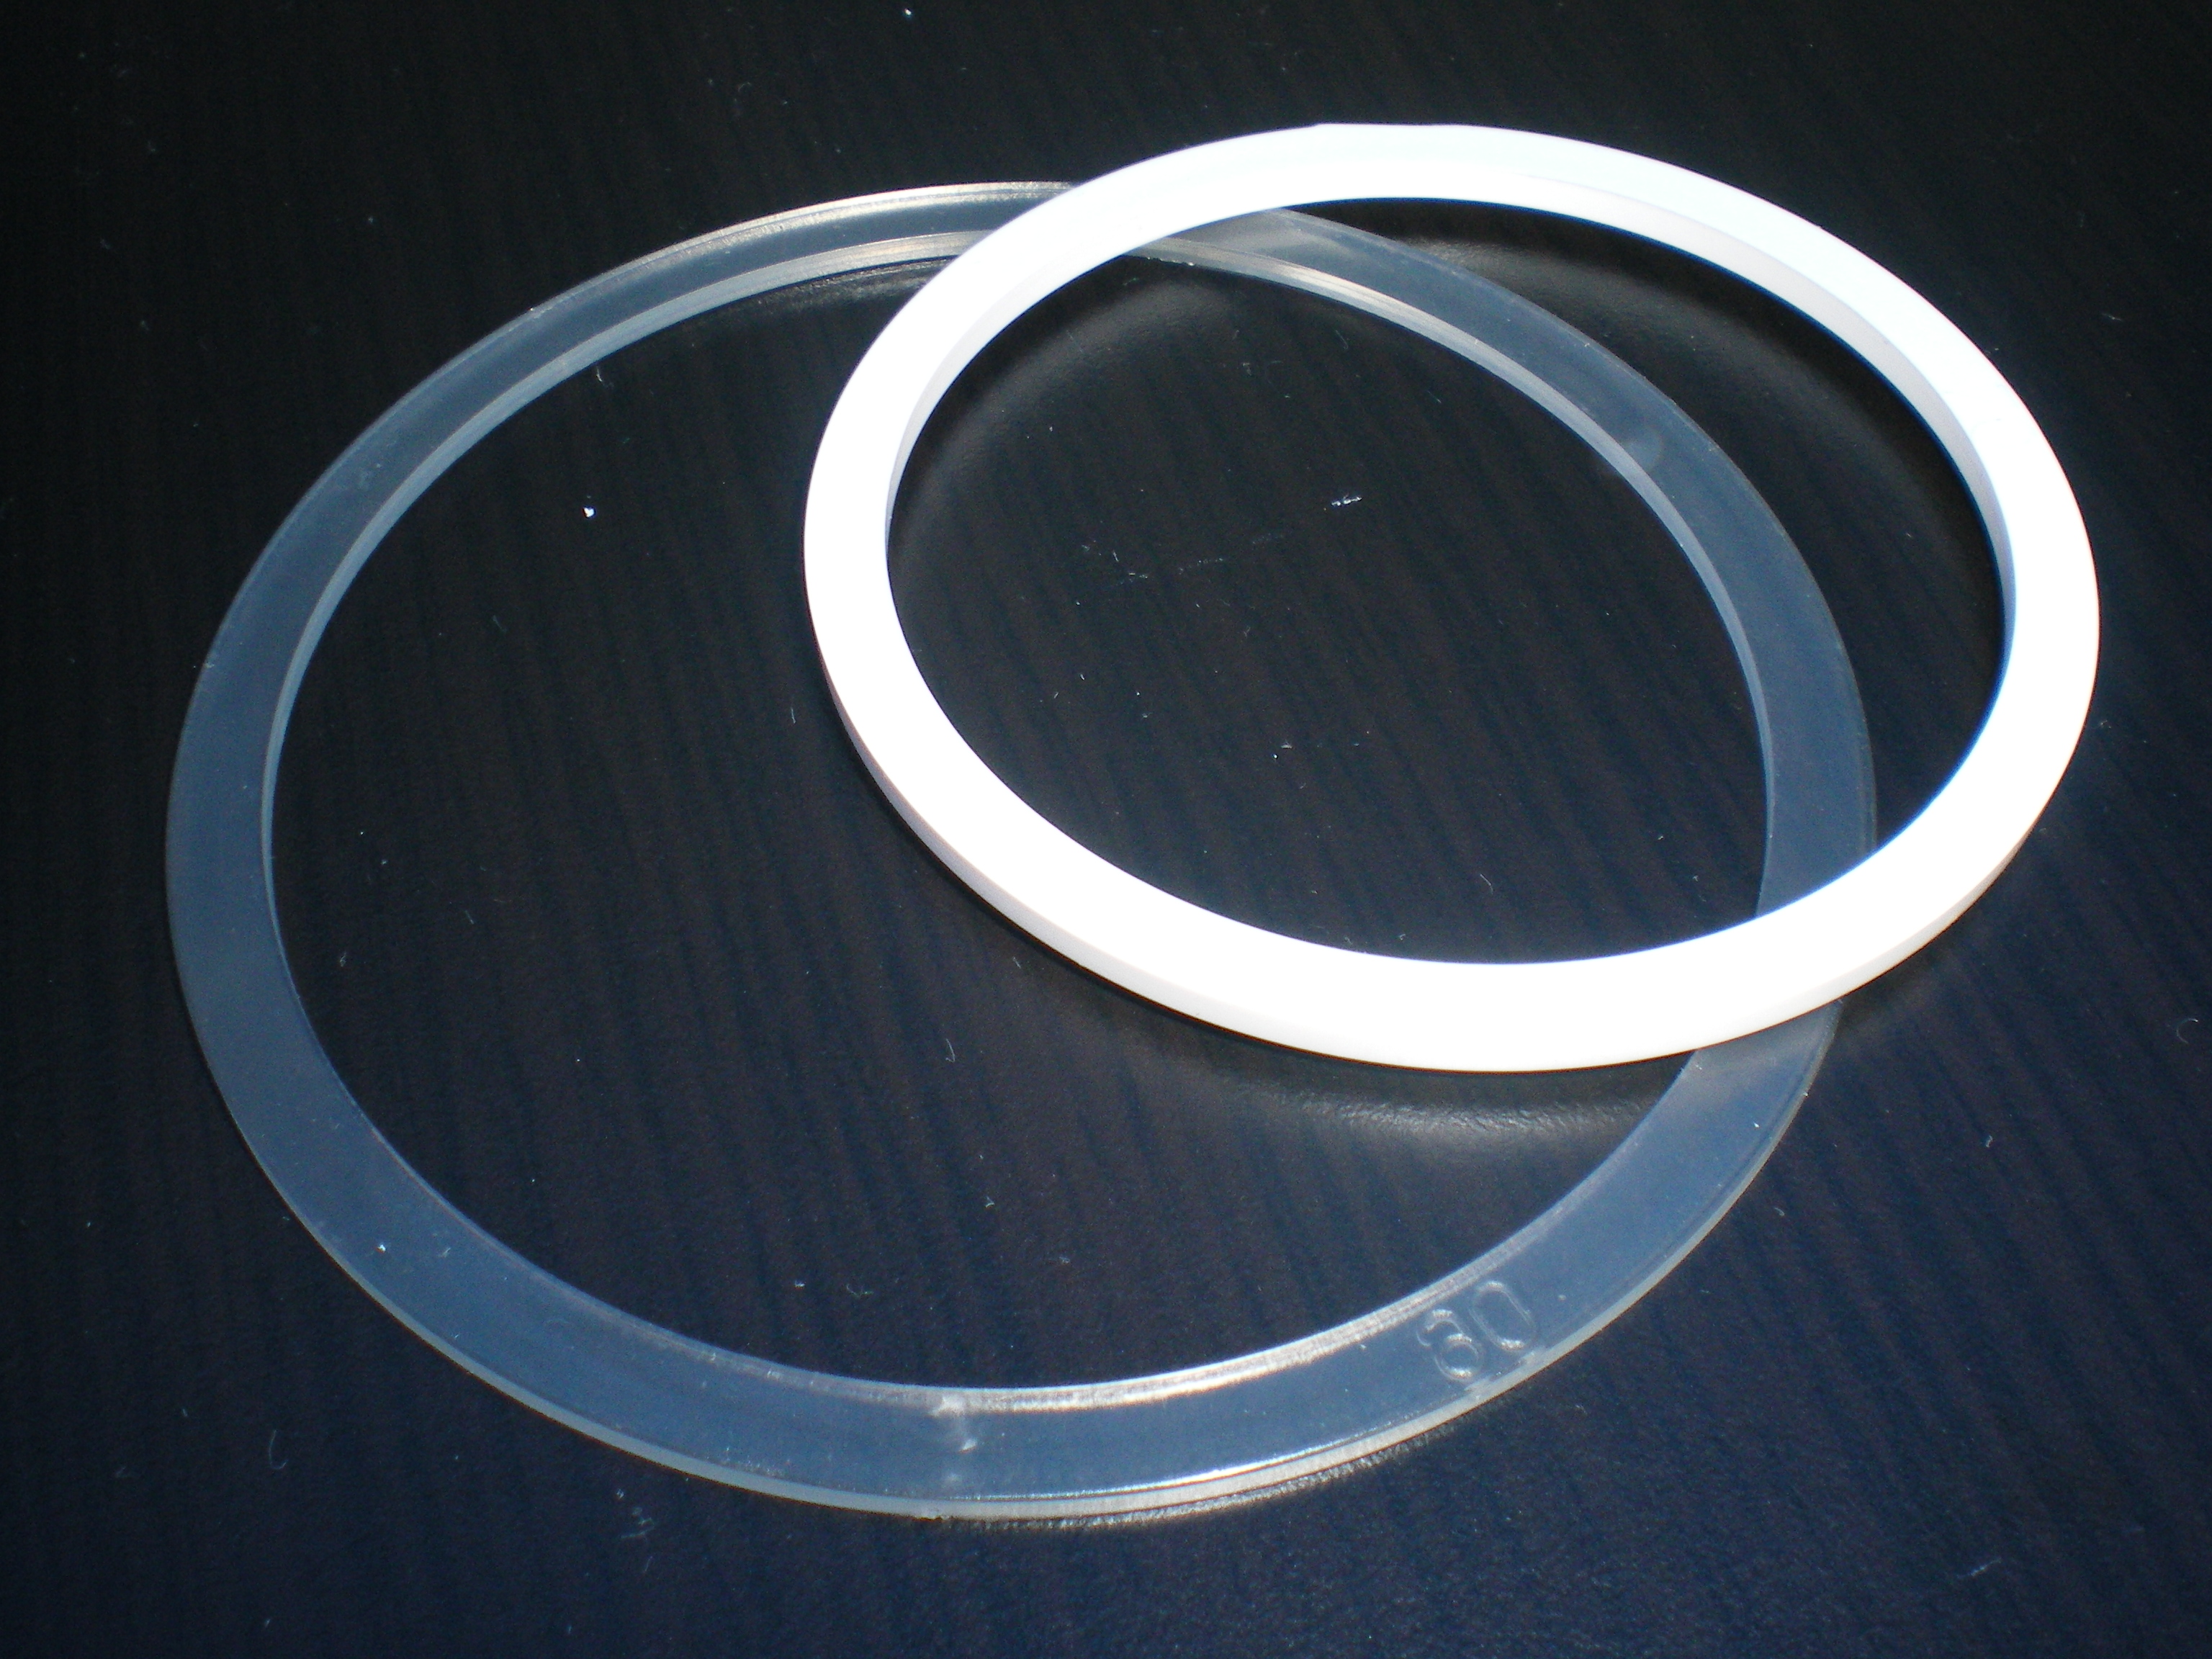
- Use of plastic thermocable. A unique and quite affordable thing. The ring is glued in the center of the future hole. After drying, the canvas is cut to the inside diameter of the ring.
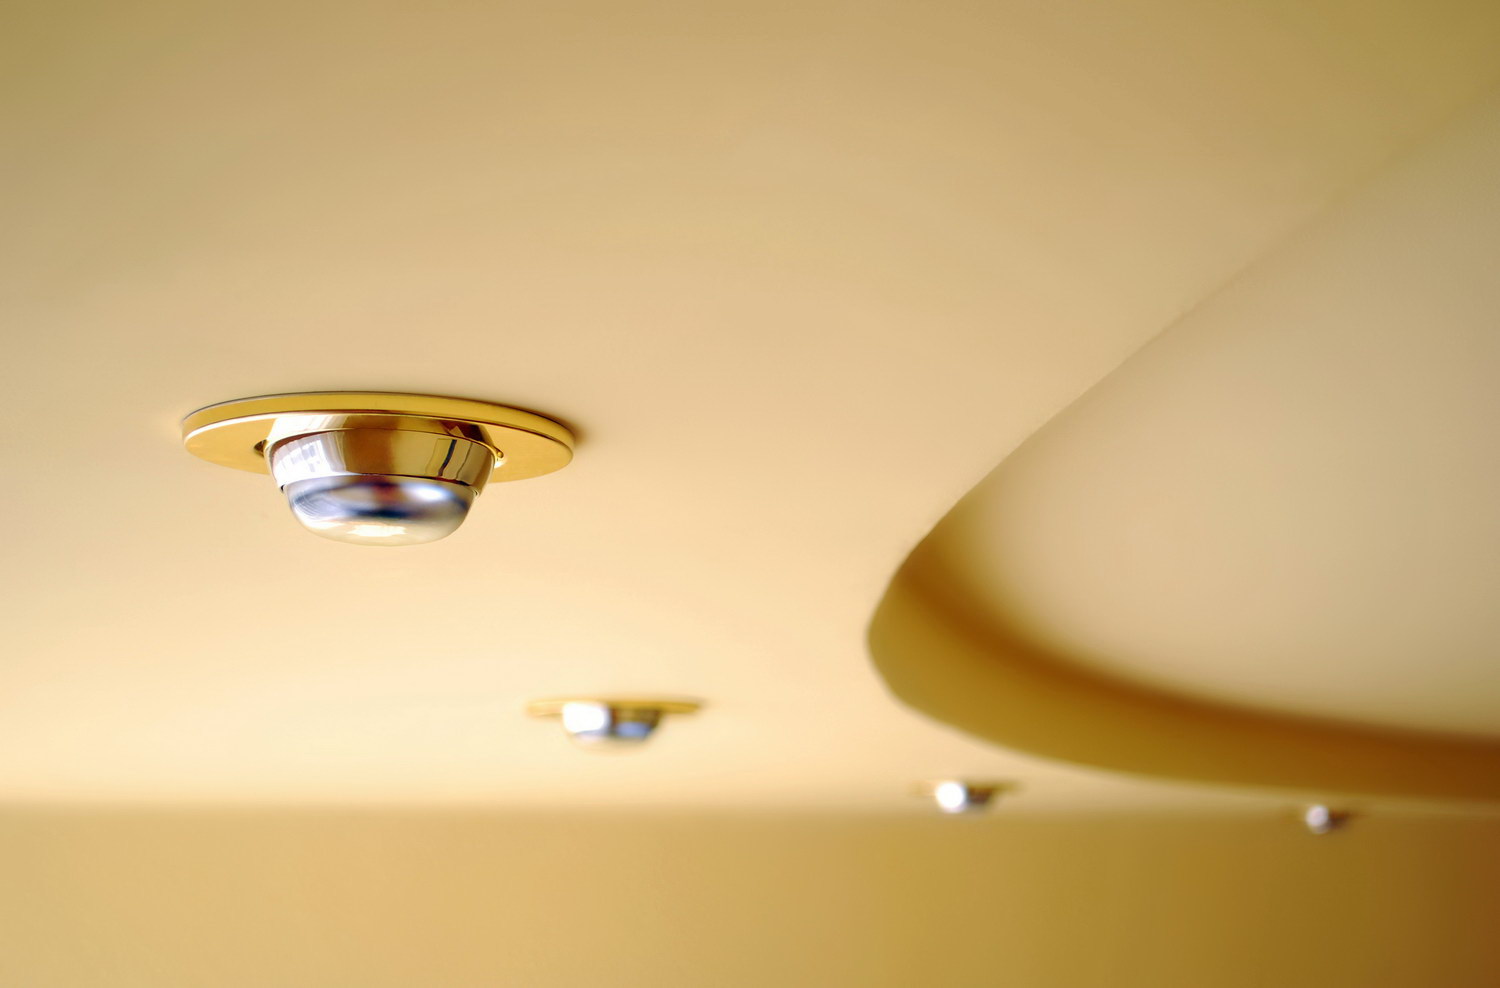
In order to prevent overheating of the two-level stretch ceiling, you should think about the quality of the fixtures that will be installed in it. Professionals advise the use of LED-lamps and ribbons that do not heat up during operation and last long enough without the need for replacement.
Examples in the interior
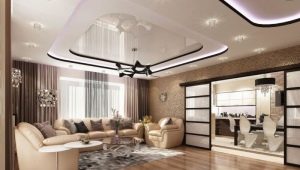
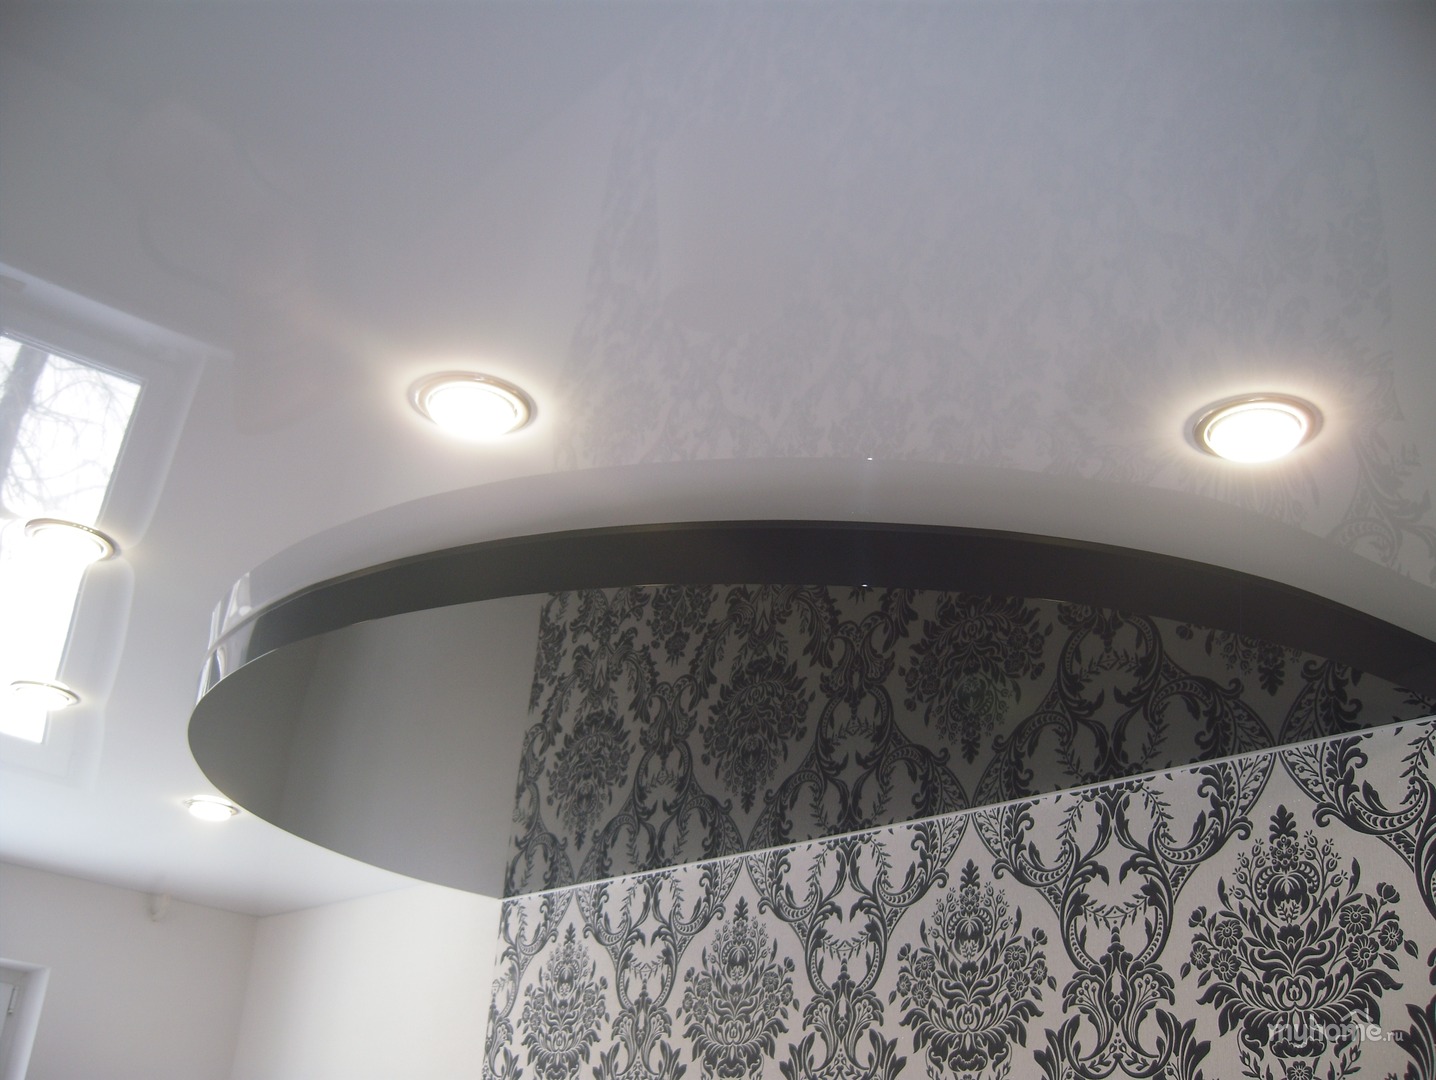
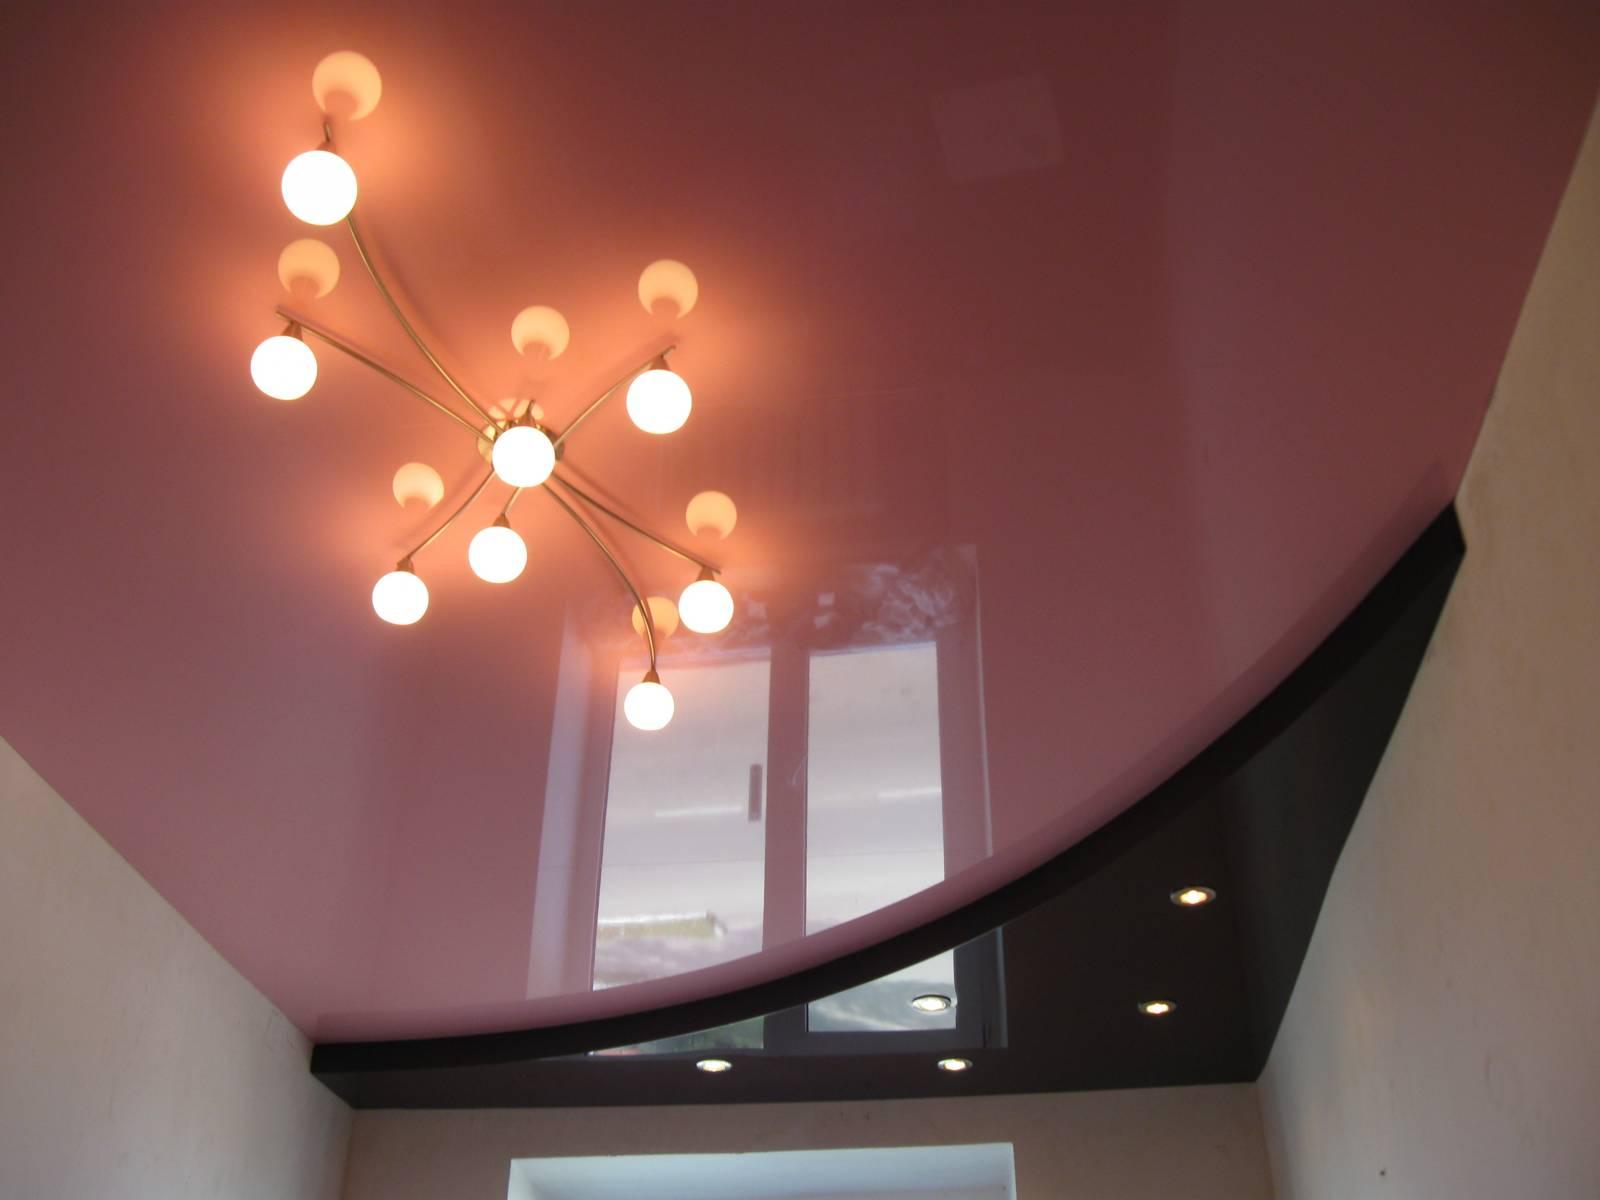
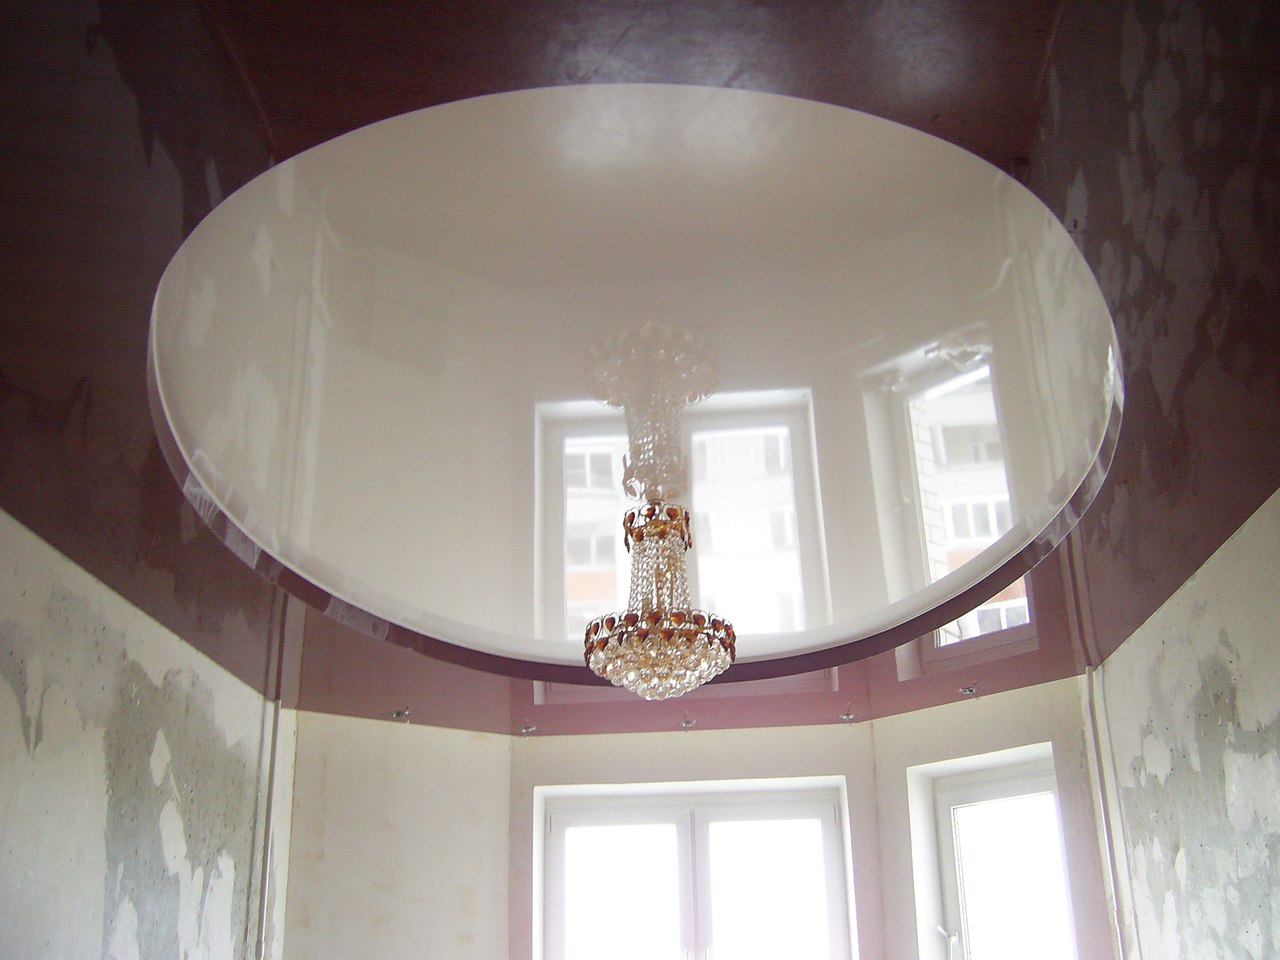
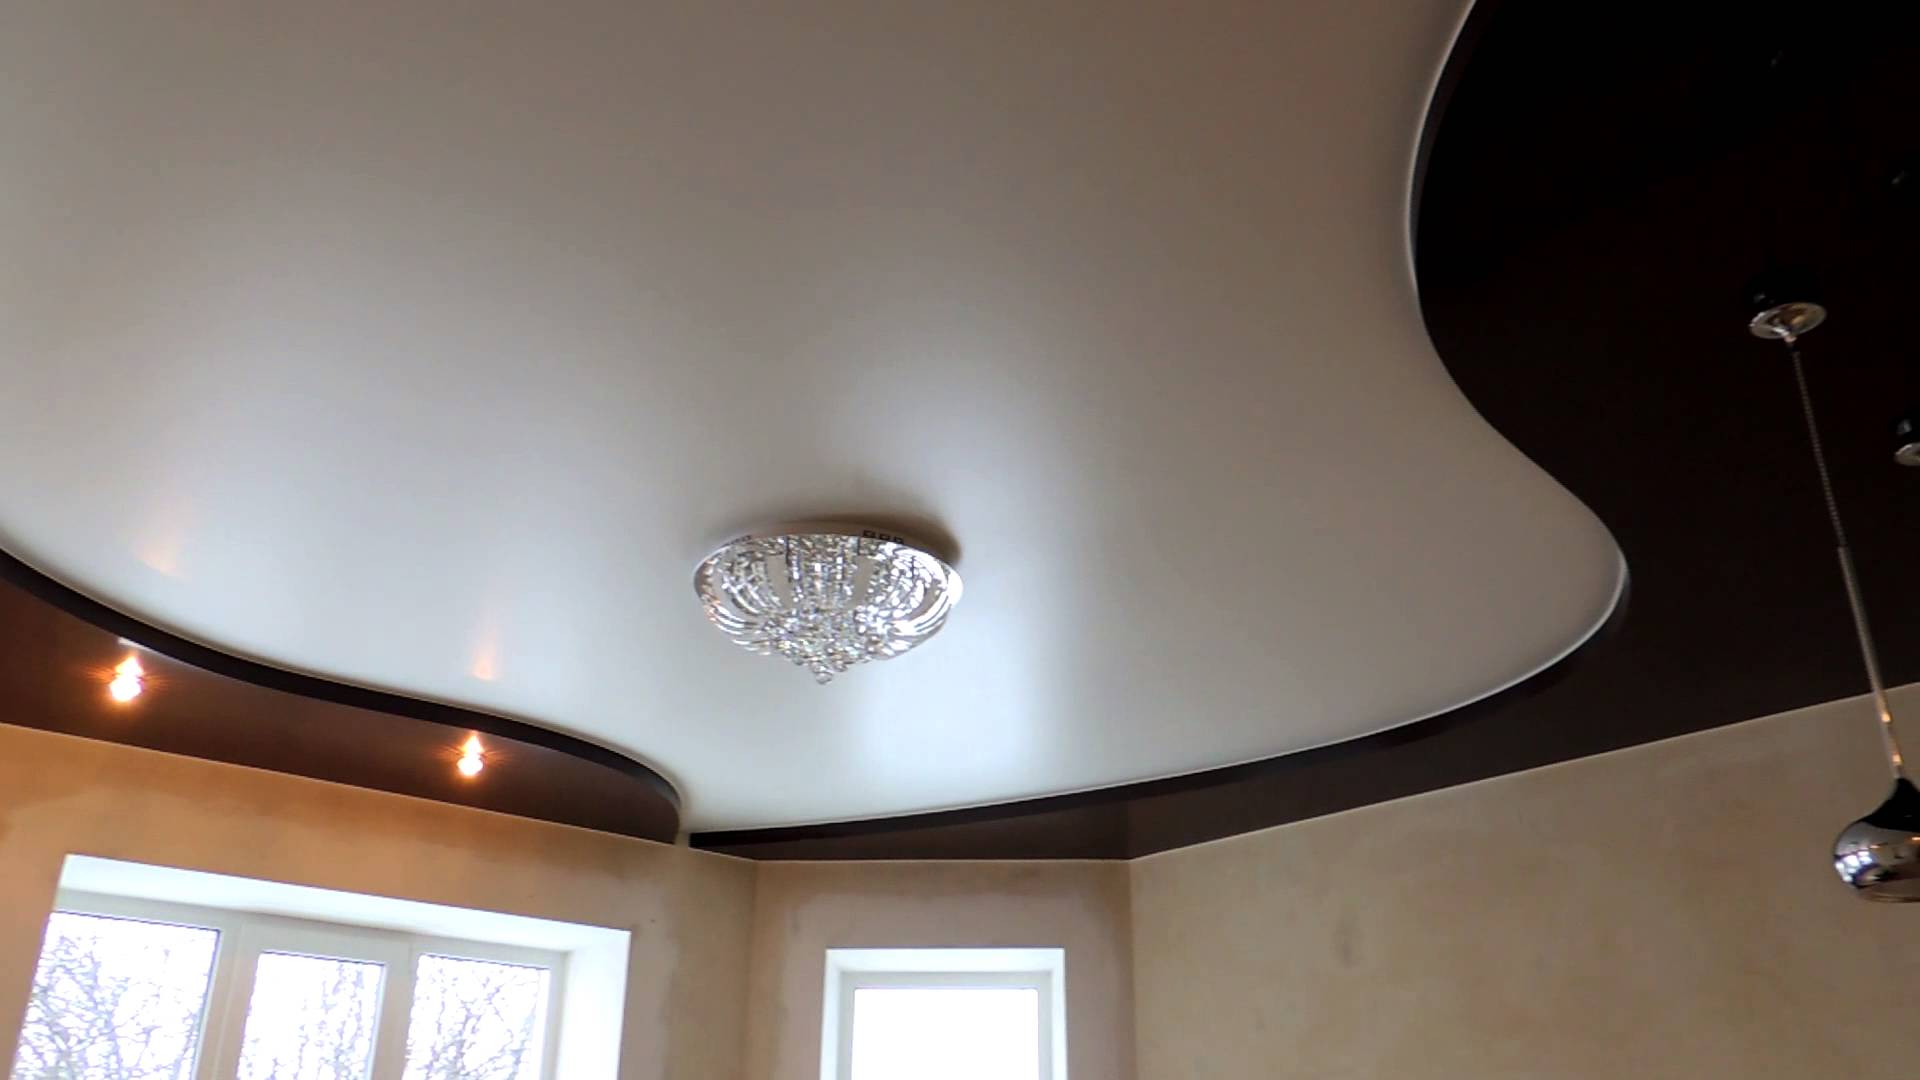
- A very beneficial option is the combination of matte and glossy surfaces. This design plays with special colors, as in the center of the ceiling there is a matte film of beige color, framed by a second level of dark brown color with illumination with spotlights.
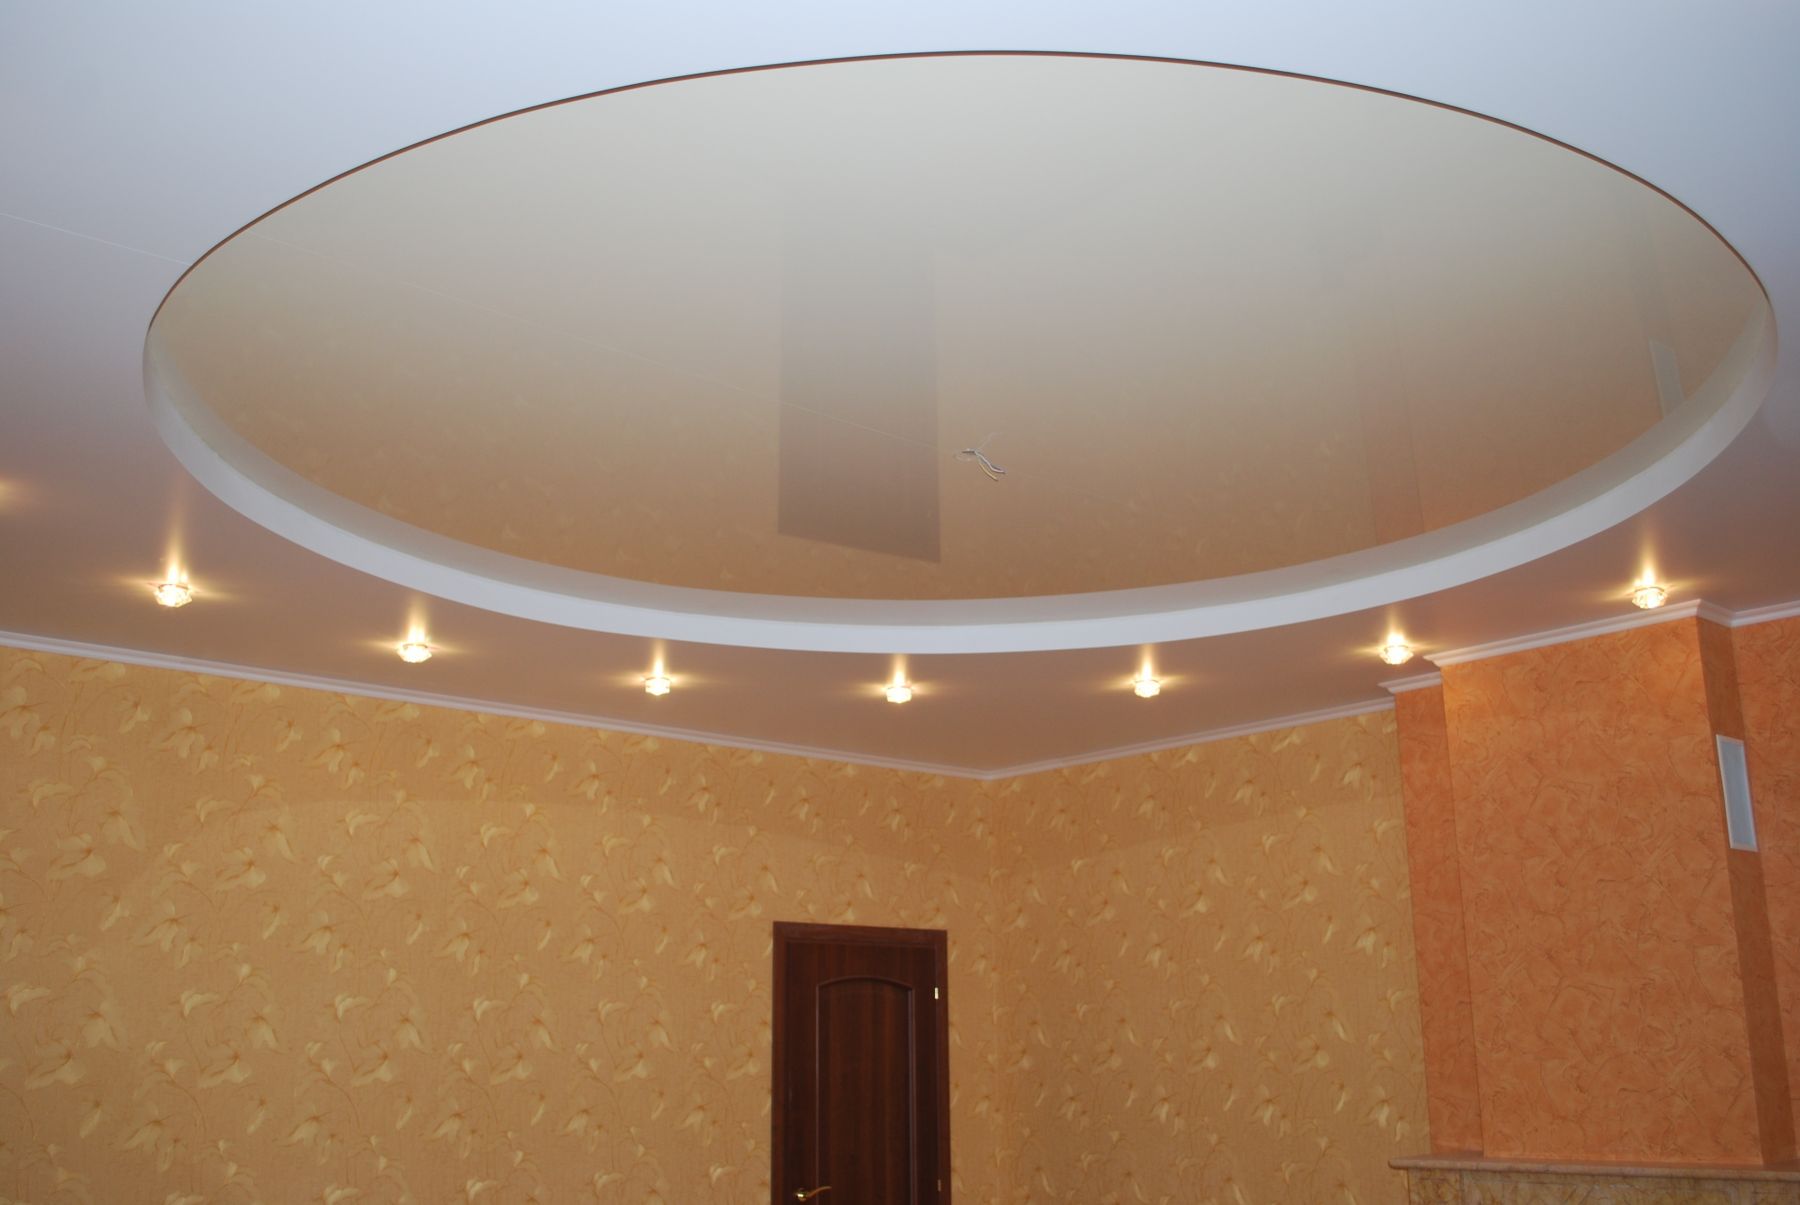
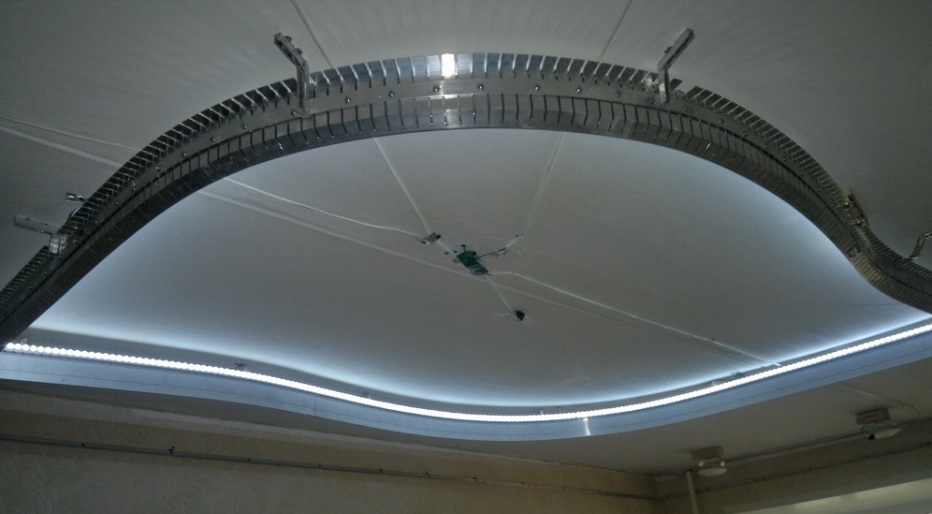
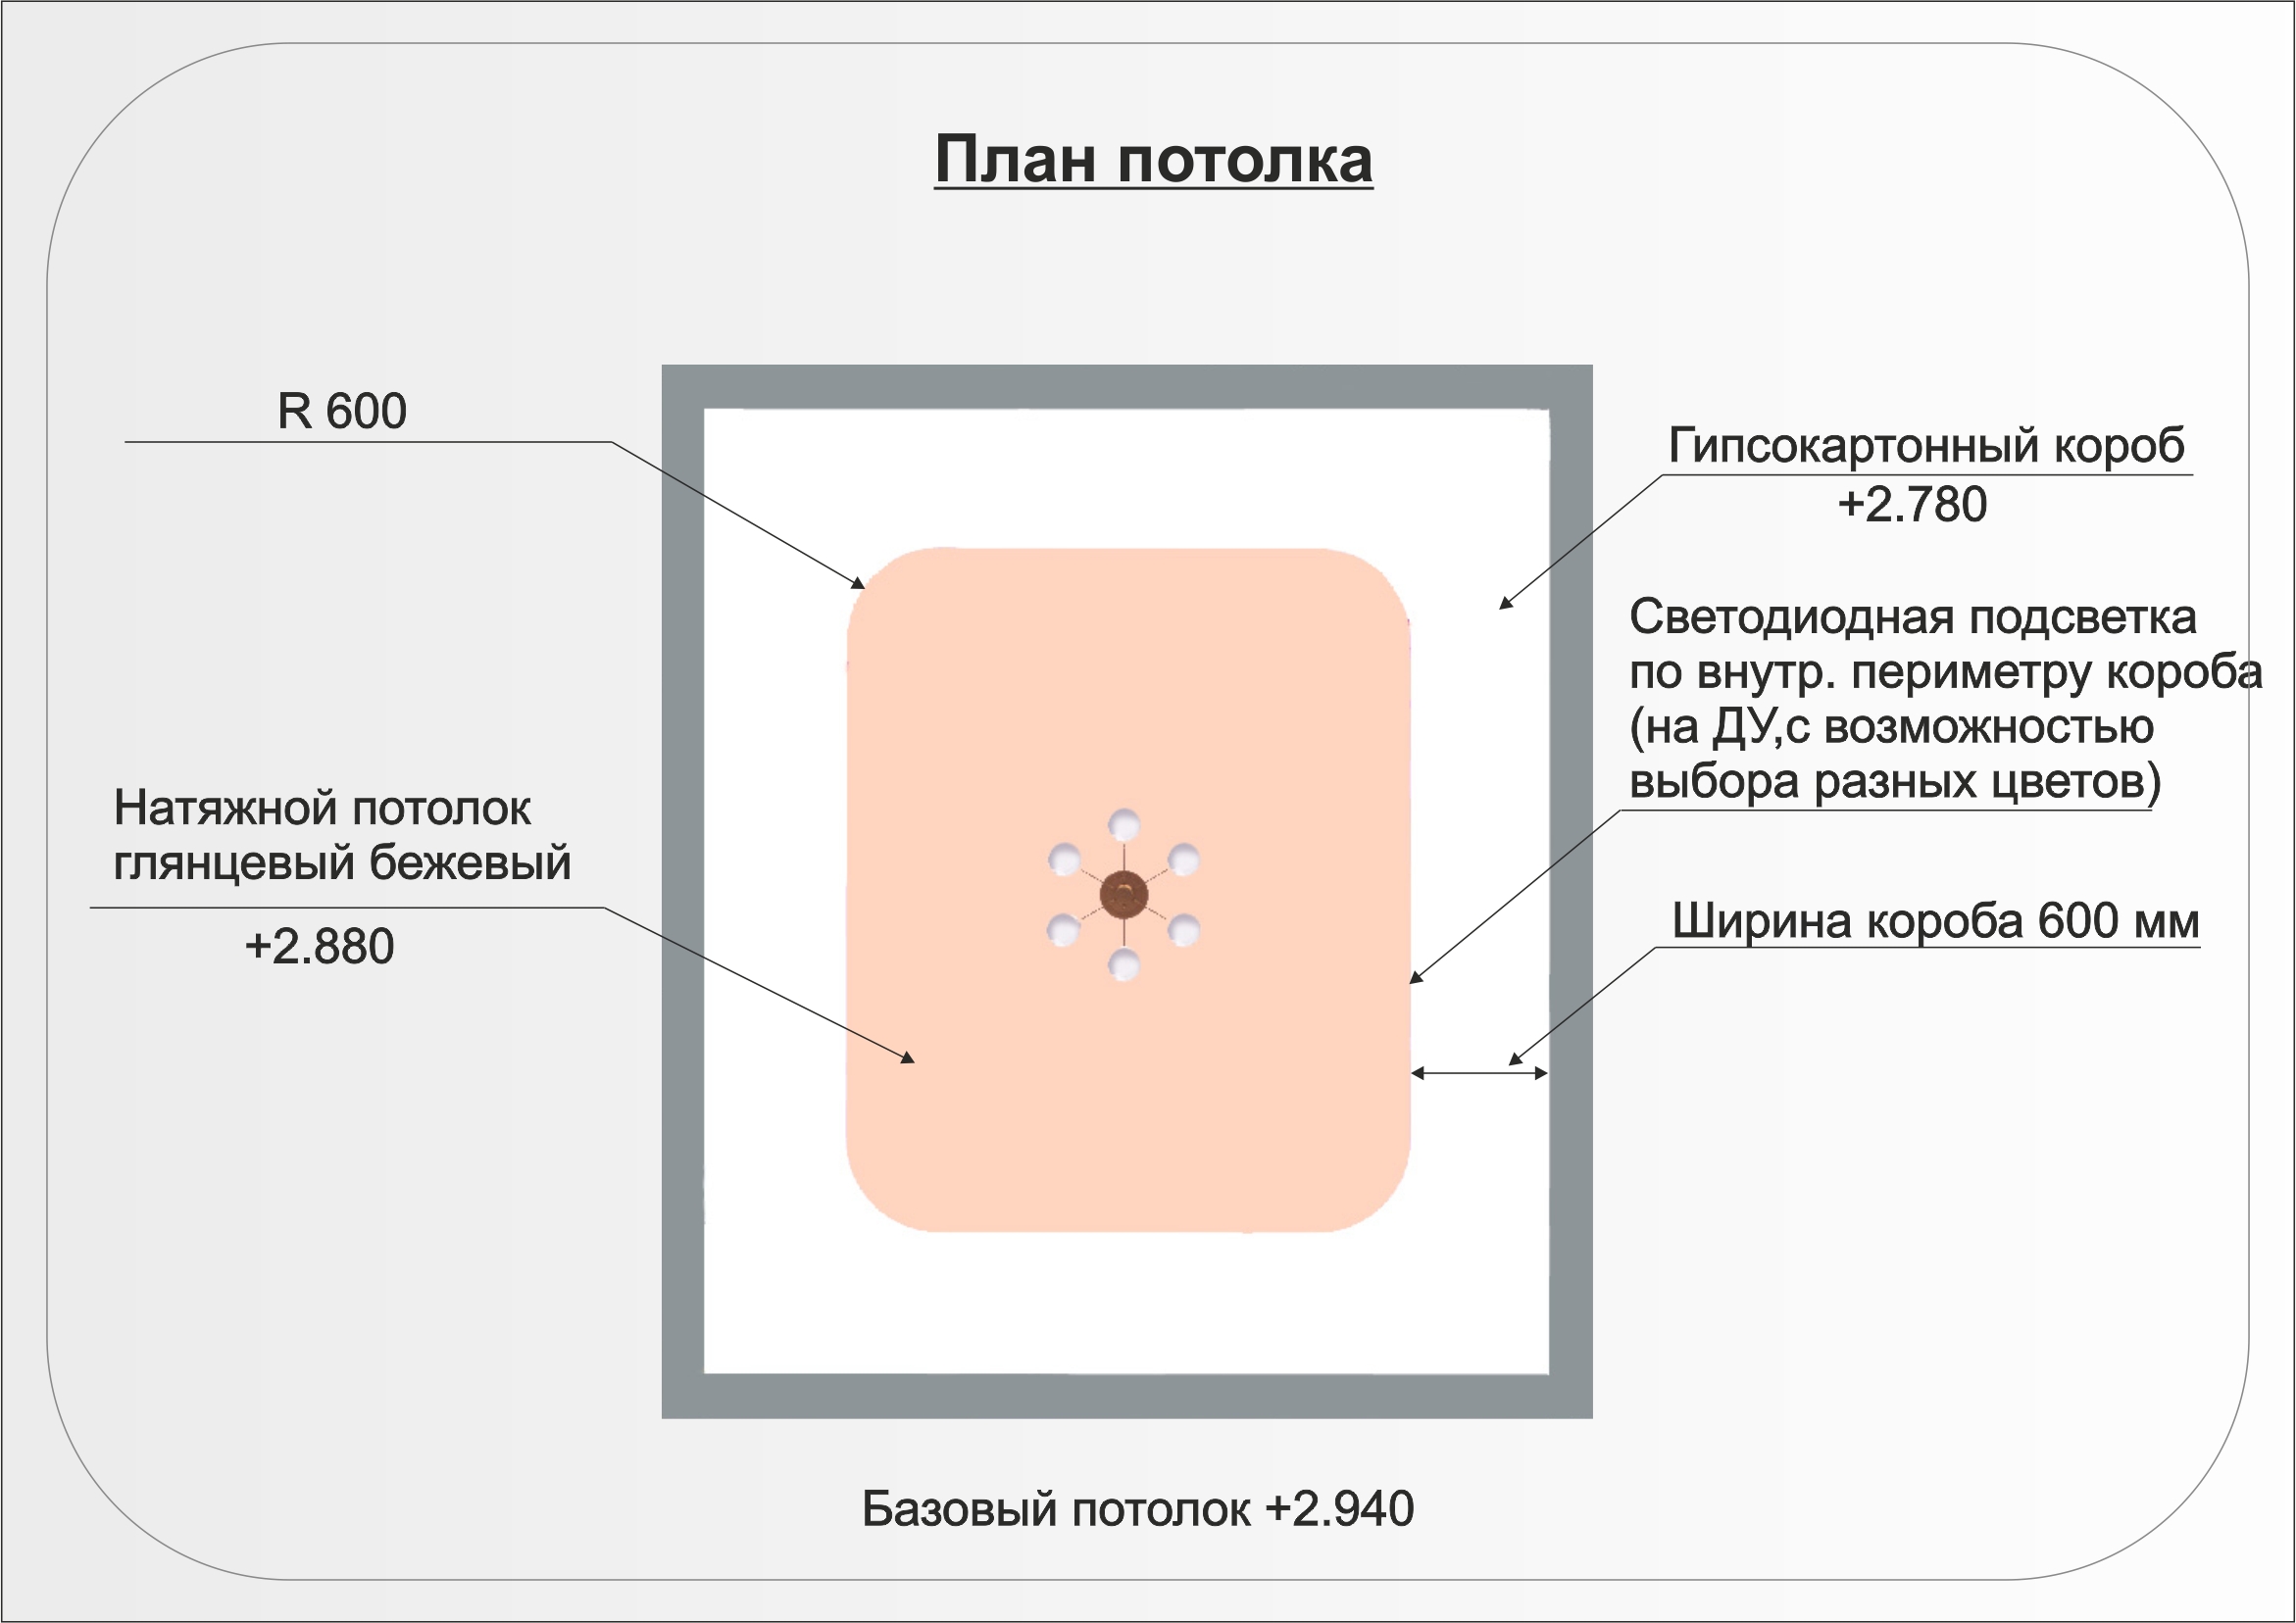
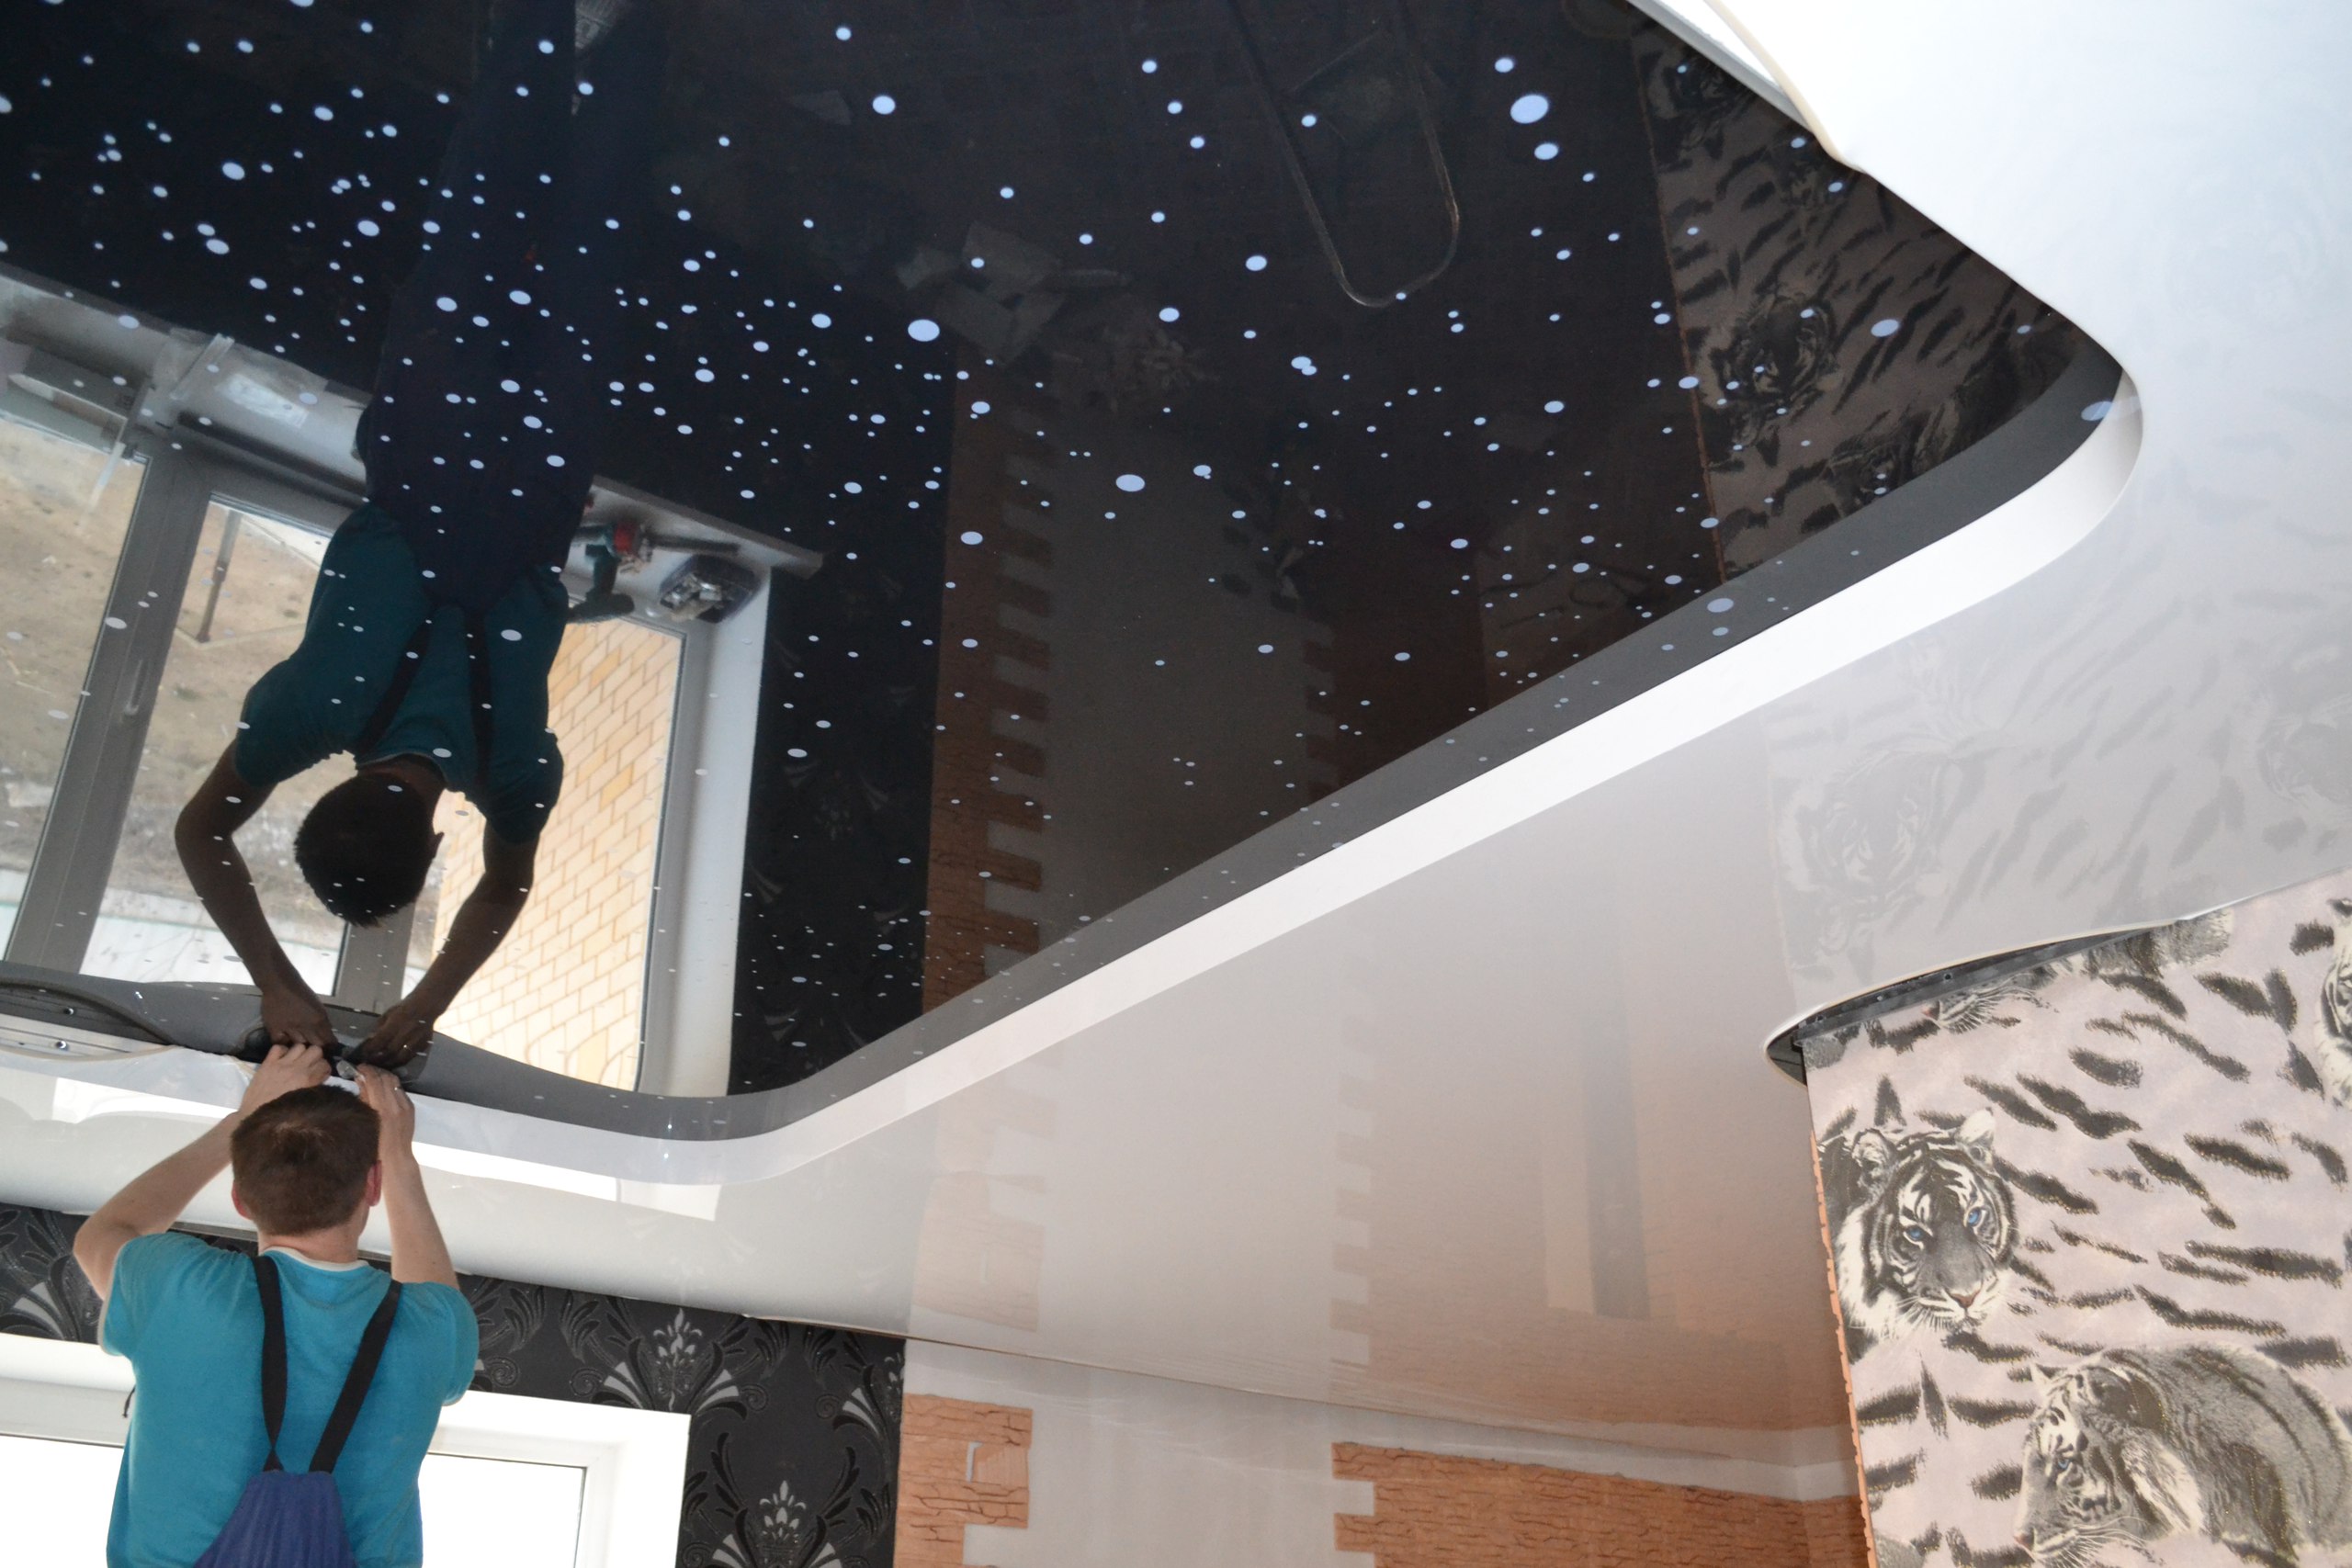
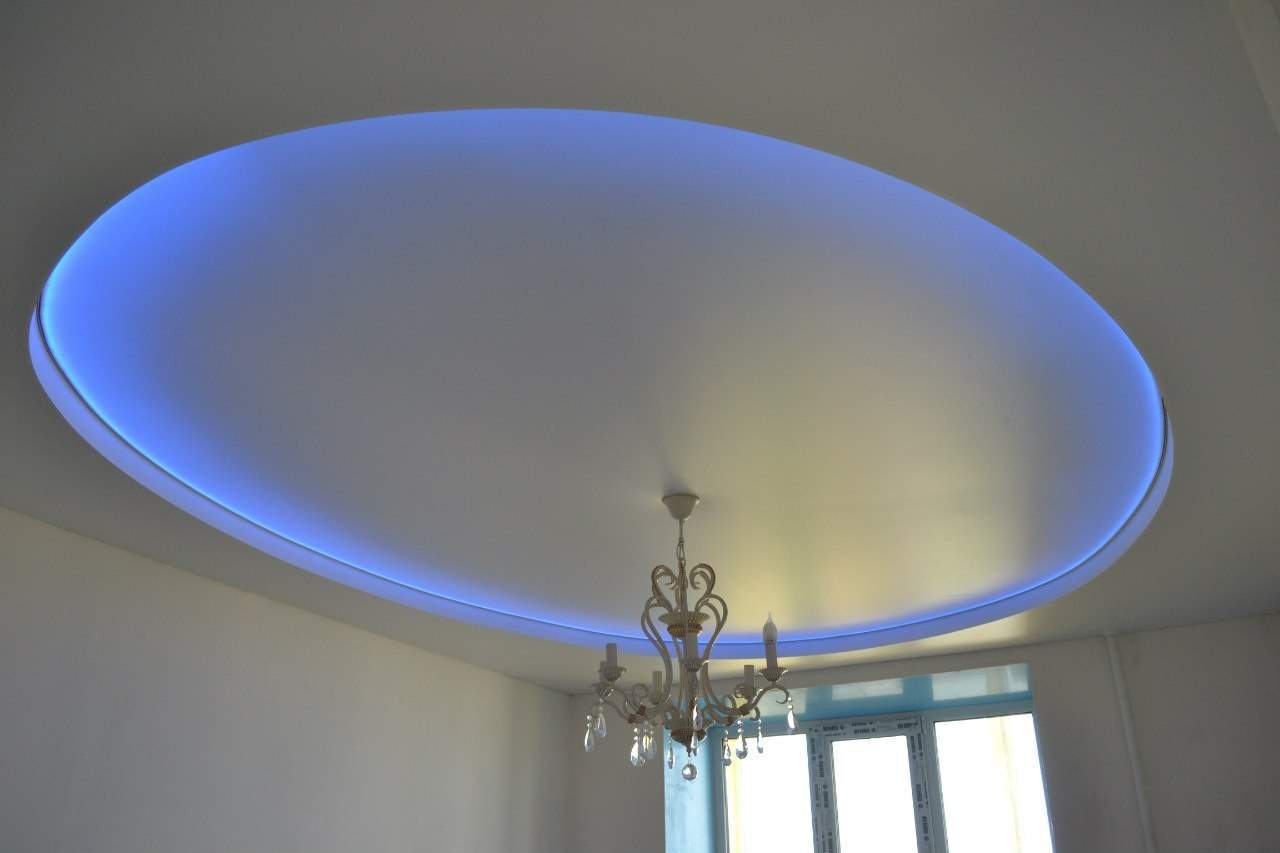
- The second two-level stretch ceiling pleases the eye with its monochromatic composition, illuminated by bluish LED strips along the inner circumference of the circle. This technique visually increases the height of the room and gives a certain mystery to the interior.
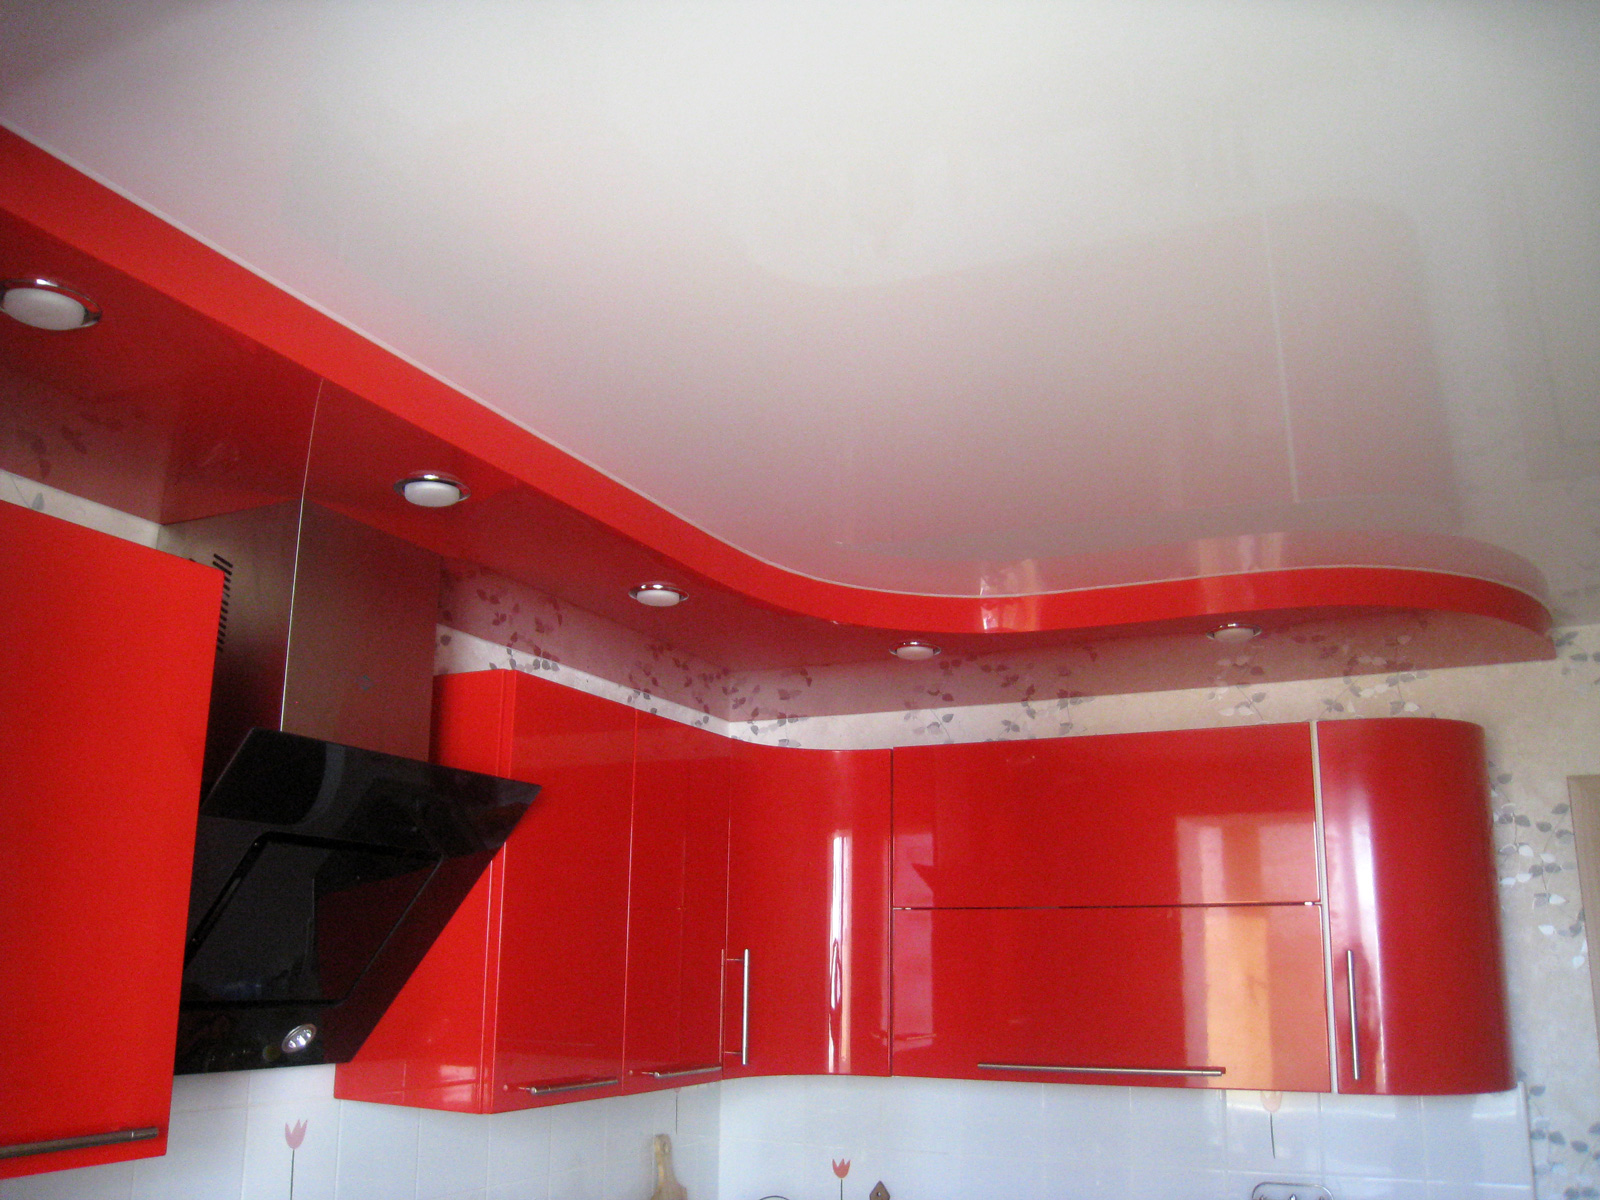
- As can be seen from the photo, two-level stretch ceilings are used for zoning not only living rooms and bedrooms. This option is great for fencing the working kitchen surface from the eating area, for example. Built-in spotlights above the table create additional lighting, which is especially valuable in the evening hours.
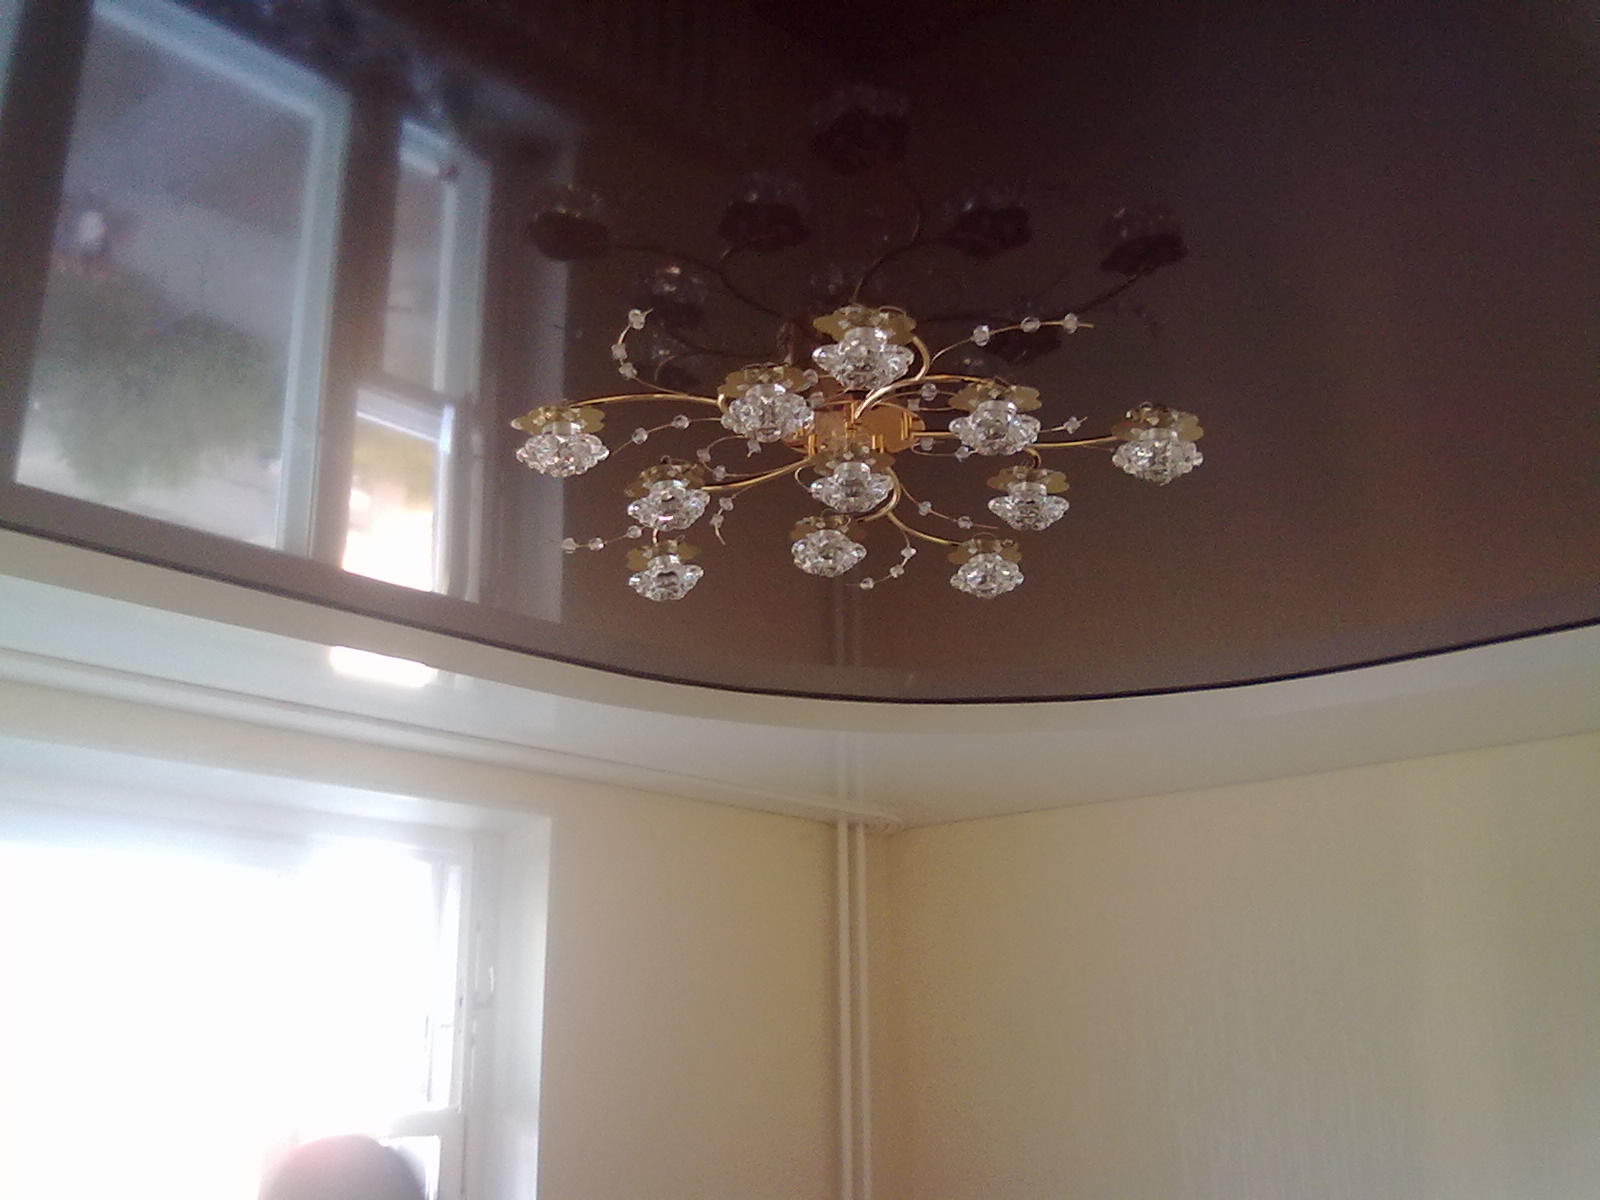
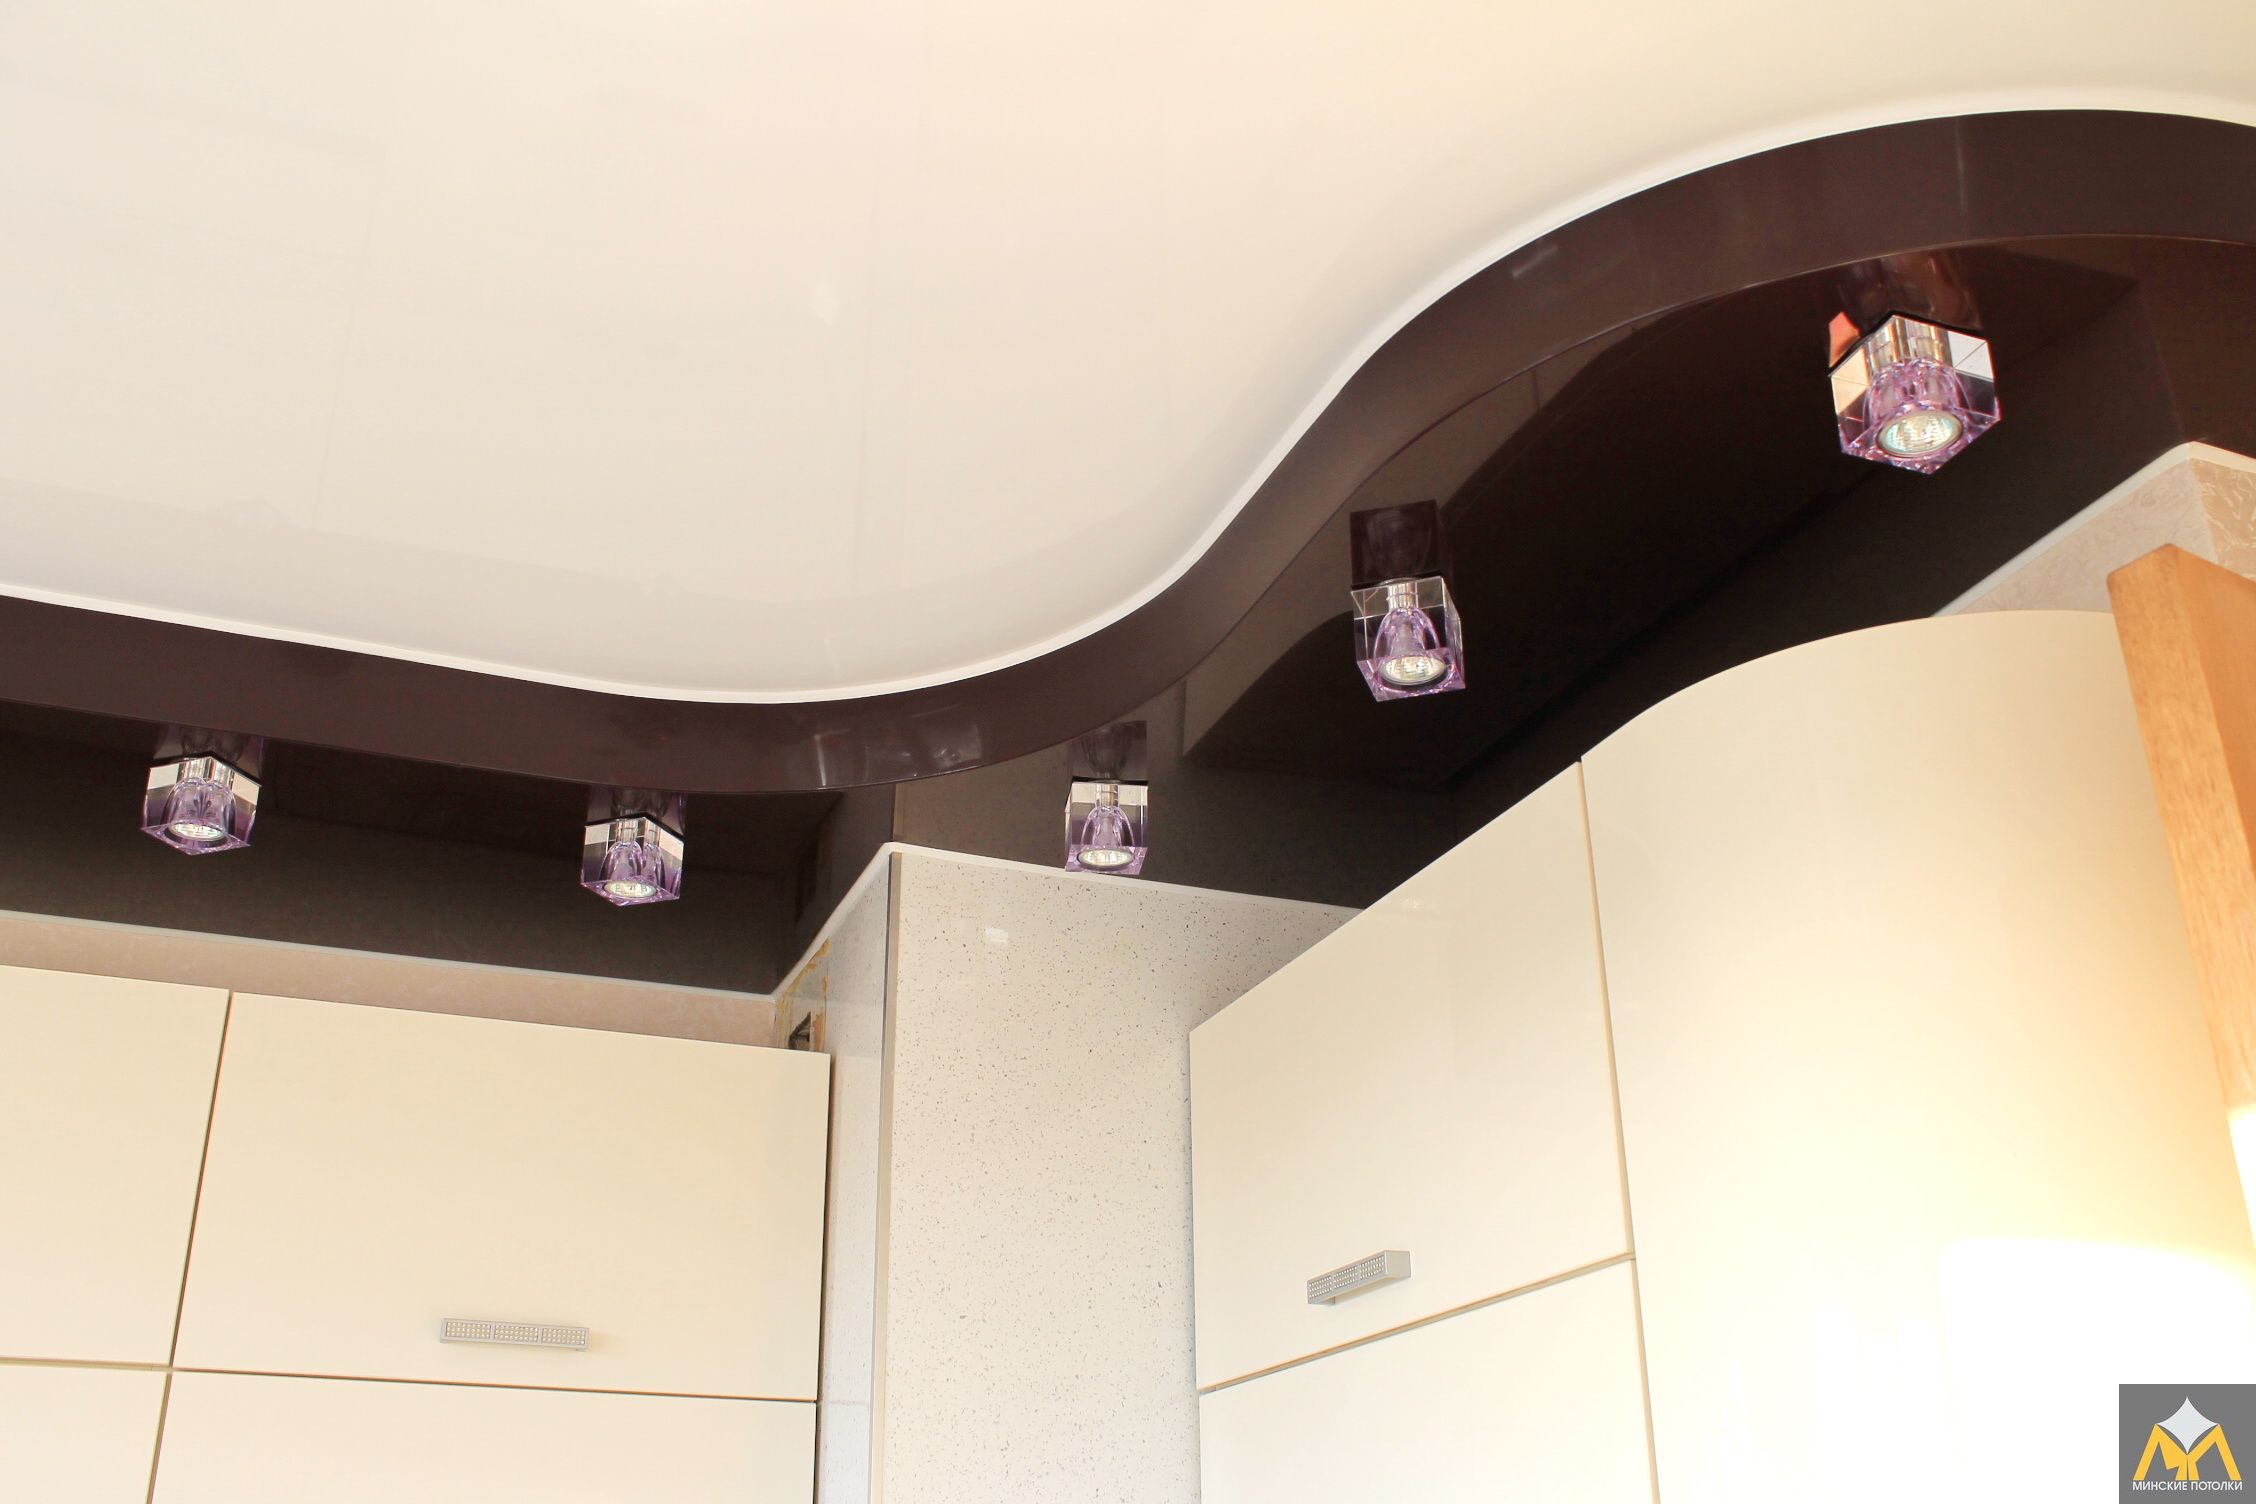
- Here the cube-shaped spotlights add originality to the interior. From them, as from crystals, the light is reflected and falls on the immaculate glossy lower level of the stretch ceiling. This creates a feeling of comfort and home comfort.
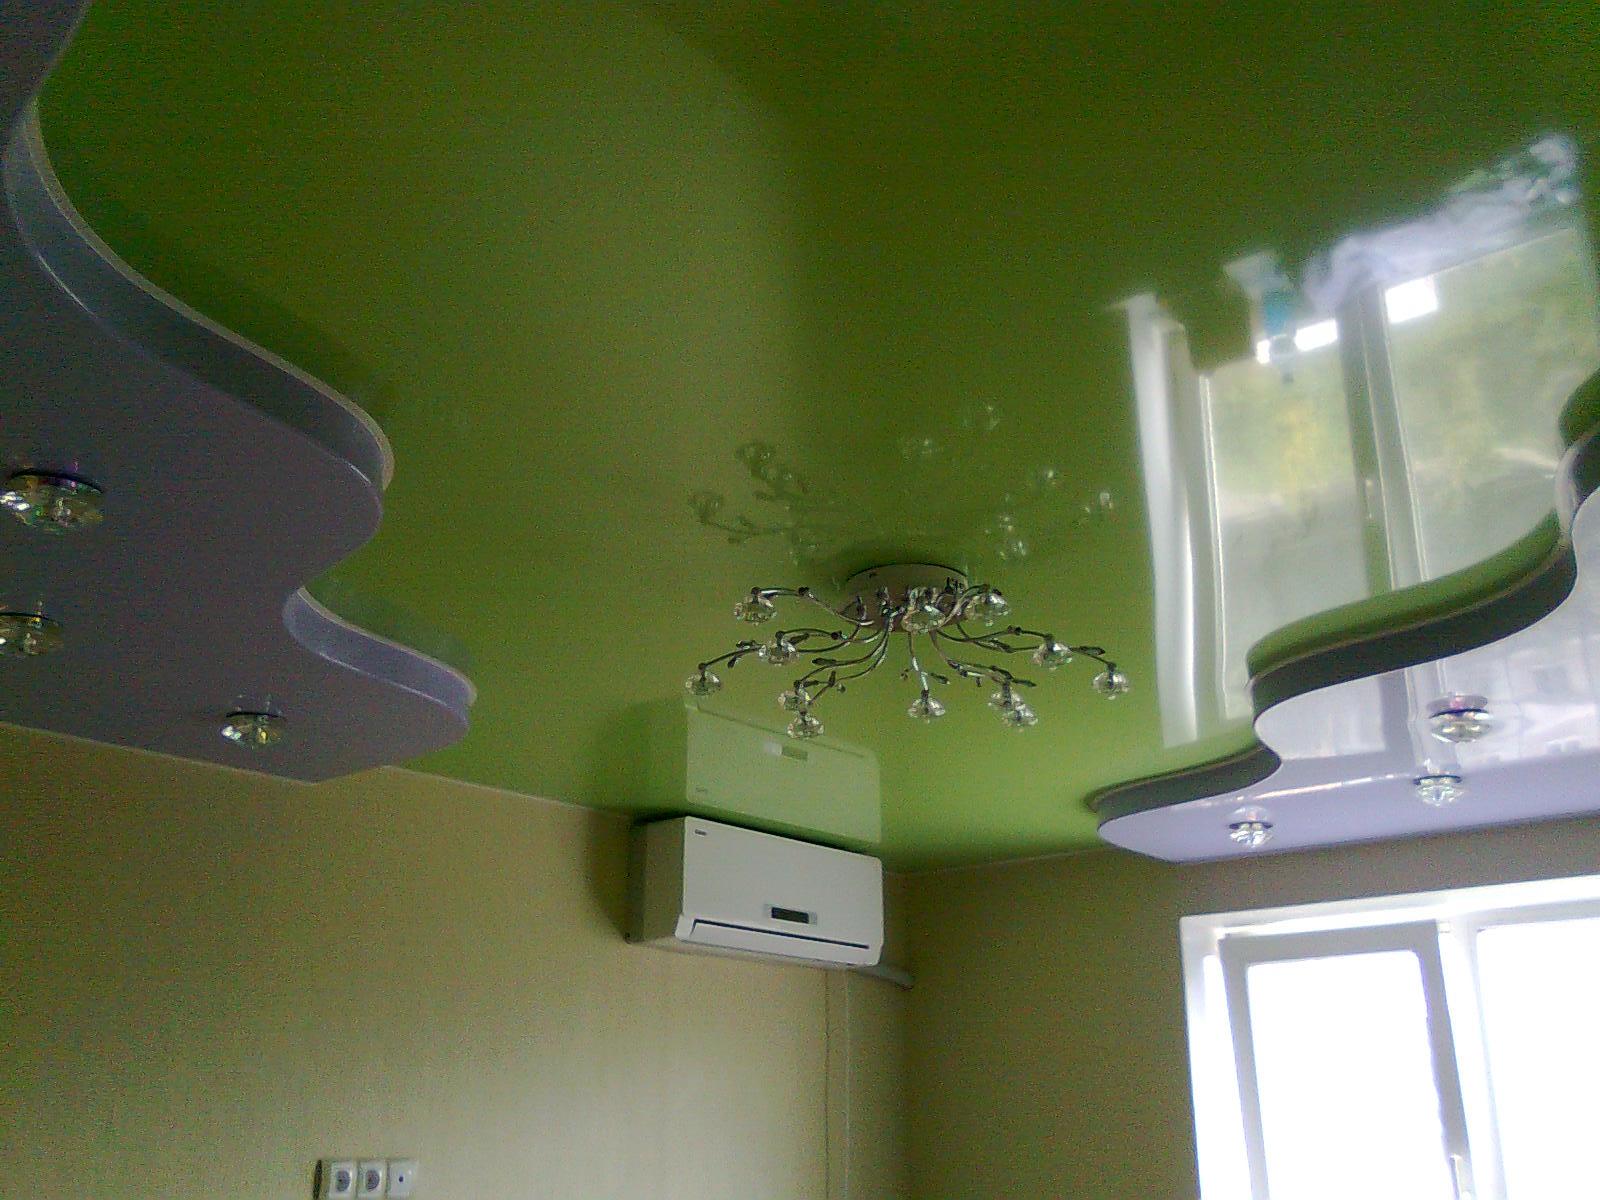
- A vivid example of a combination of a two-level stretch ceiling and photo printing on it. Pay attention to the smooth and unobtrusive transition of the lower level of the ceiling covering to the wall and the contrasting upper level of white color. A very romantic solution for a bedroom or a bridal suite.

How to install two-level stretch ceilings, see the next video.