How to drill a wall tile?
The laid ceramic tile - one of the most widespread options of finishing of a bathroom, a bathroom and kitchen. It is easy to wash a tile, it does not pass and does not absorb water, risking to swell, as a laminate.
It is quite possible to lay the tile with your own hands without the involvement of specialists, because it is a fairly simple and not expensive process. However, after the surface of the wall or the floor in the bathroom glitters with the novelty of the tile, there comes a time when it is necessary to proceed with the installation of a sink, mirror or heated towel rail.
That is why it is necessary to clearly understand how to properly drill holes and install fixtures in a wall covered with tiles so that you do not have to redo an already completed repair.
Process features
Cutting a hole for a socket or plug in a tile is a process with certain risks.An inexperienced master is most likely to split or crumble an already finished surface on the wall, starting to drill it without certain knowledge and training, because the hardness of ceramic tiles is much higher than the hardness of the brick or concrete material of the wall itself. When working with such a surface need to use special drillswhich are harder than regular and than tile itself.
The surface of ceramic tiles is very smooth due to the fact that it is covered with special glaze. This coating allows you to protect the material from moisture and damage, but the drill will slide over it and "break", so it is necessary to use some rough material that can be applied to the tile and which will allow the drill to plunge into the glaze strictly perpendicular to the wall.
Despite its hardness, the tile is quite fragile inside and it is easy to crumble and crack if the drill falls into the void between the glue unevenly distributed under it.
Therefore, it is also important to evenly distribute the solution when laying the tile on the wall with your own hands or to choose an experienced master who will do it.

What is required?
Due to its increased hardness, the tile easily blunts ordinary drills, so you need to choose tools made from high-strength materials with a certain sharpening.
For drilling holes in wall tiles It is not recommended to use a perforator or other percussion instruments. They are likely to damage ceramics and repairs will have to be redone. Do not press hard on the tool while drilling., make holes larger or smaller than necessary.
Possible options:
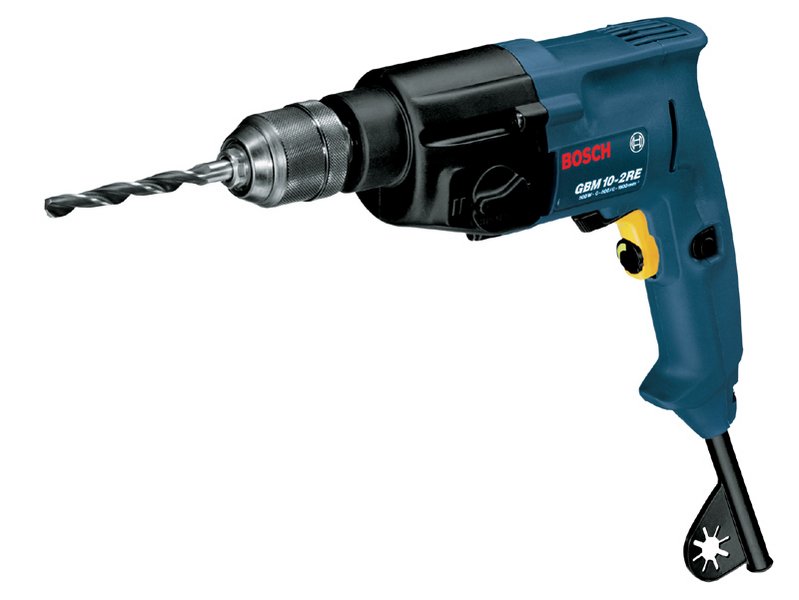
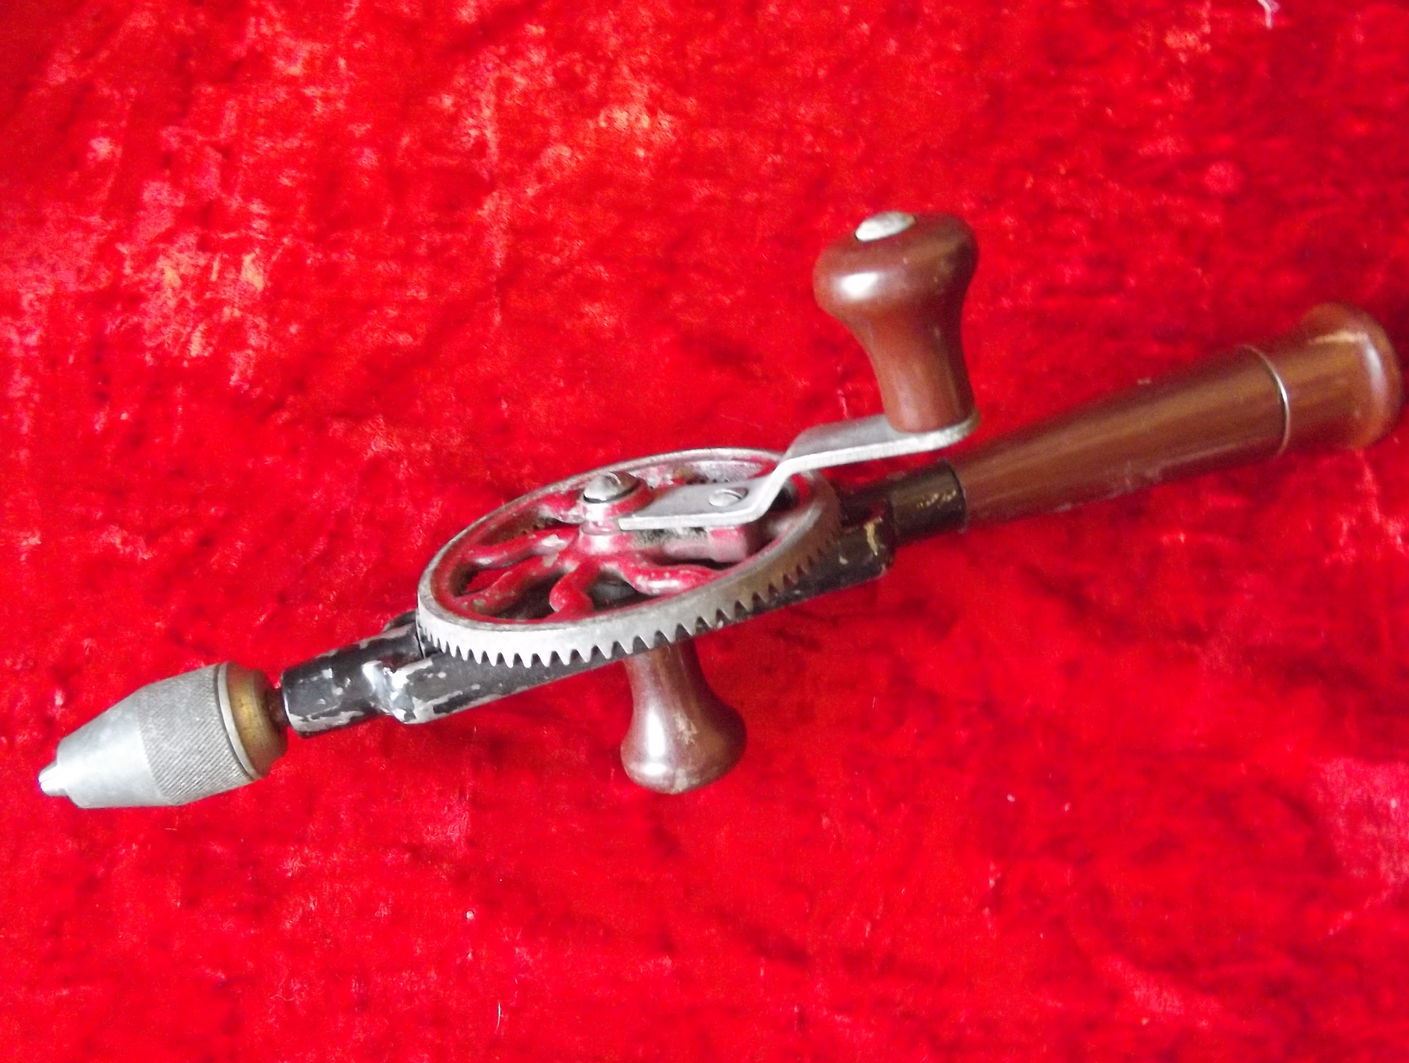
- Electric drill. Any suitable with the ability to smoothly adjust the speed of the drill. It is not necessary to buy expensive tools; tiles do not need high drilling speed.
- Screwdriver. It is useful for twisting steel screws in the dowel, and for drilling tiles. Some screwdrivers have a fairly powerful power source, which allows the installation of a special drill to work with ceramics and, in particular, with tiles.

- For drilling small holes for fasteners, sometimes even ordinary ones are enough. brace or hand drill. In this case, it is even easier to control the speed of rotation of the drill. A hand drill does not give such a strong vibration and thus greatly reduces the risk of damage and painting of the tile.
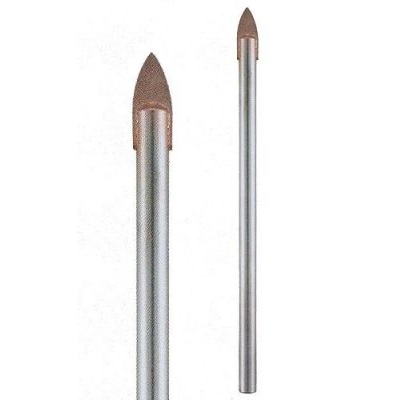
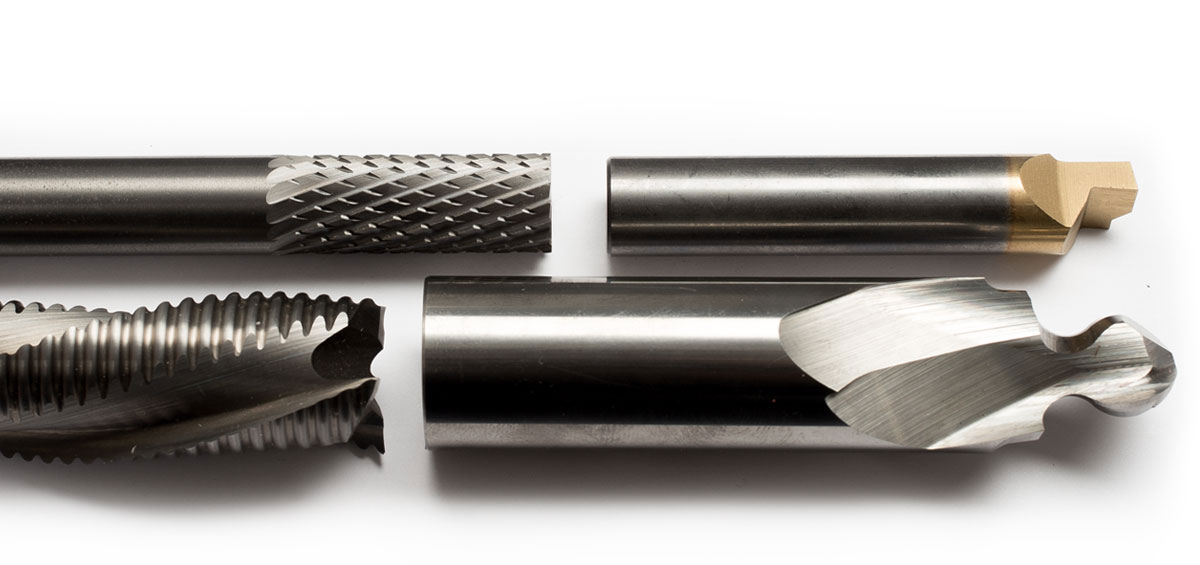
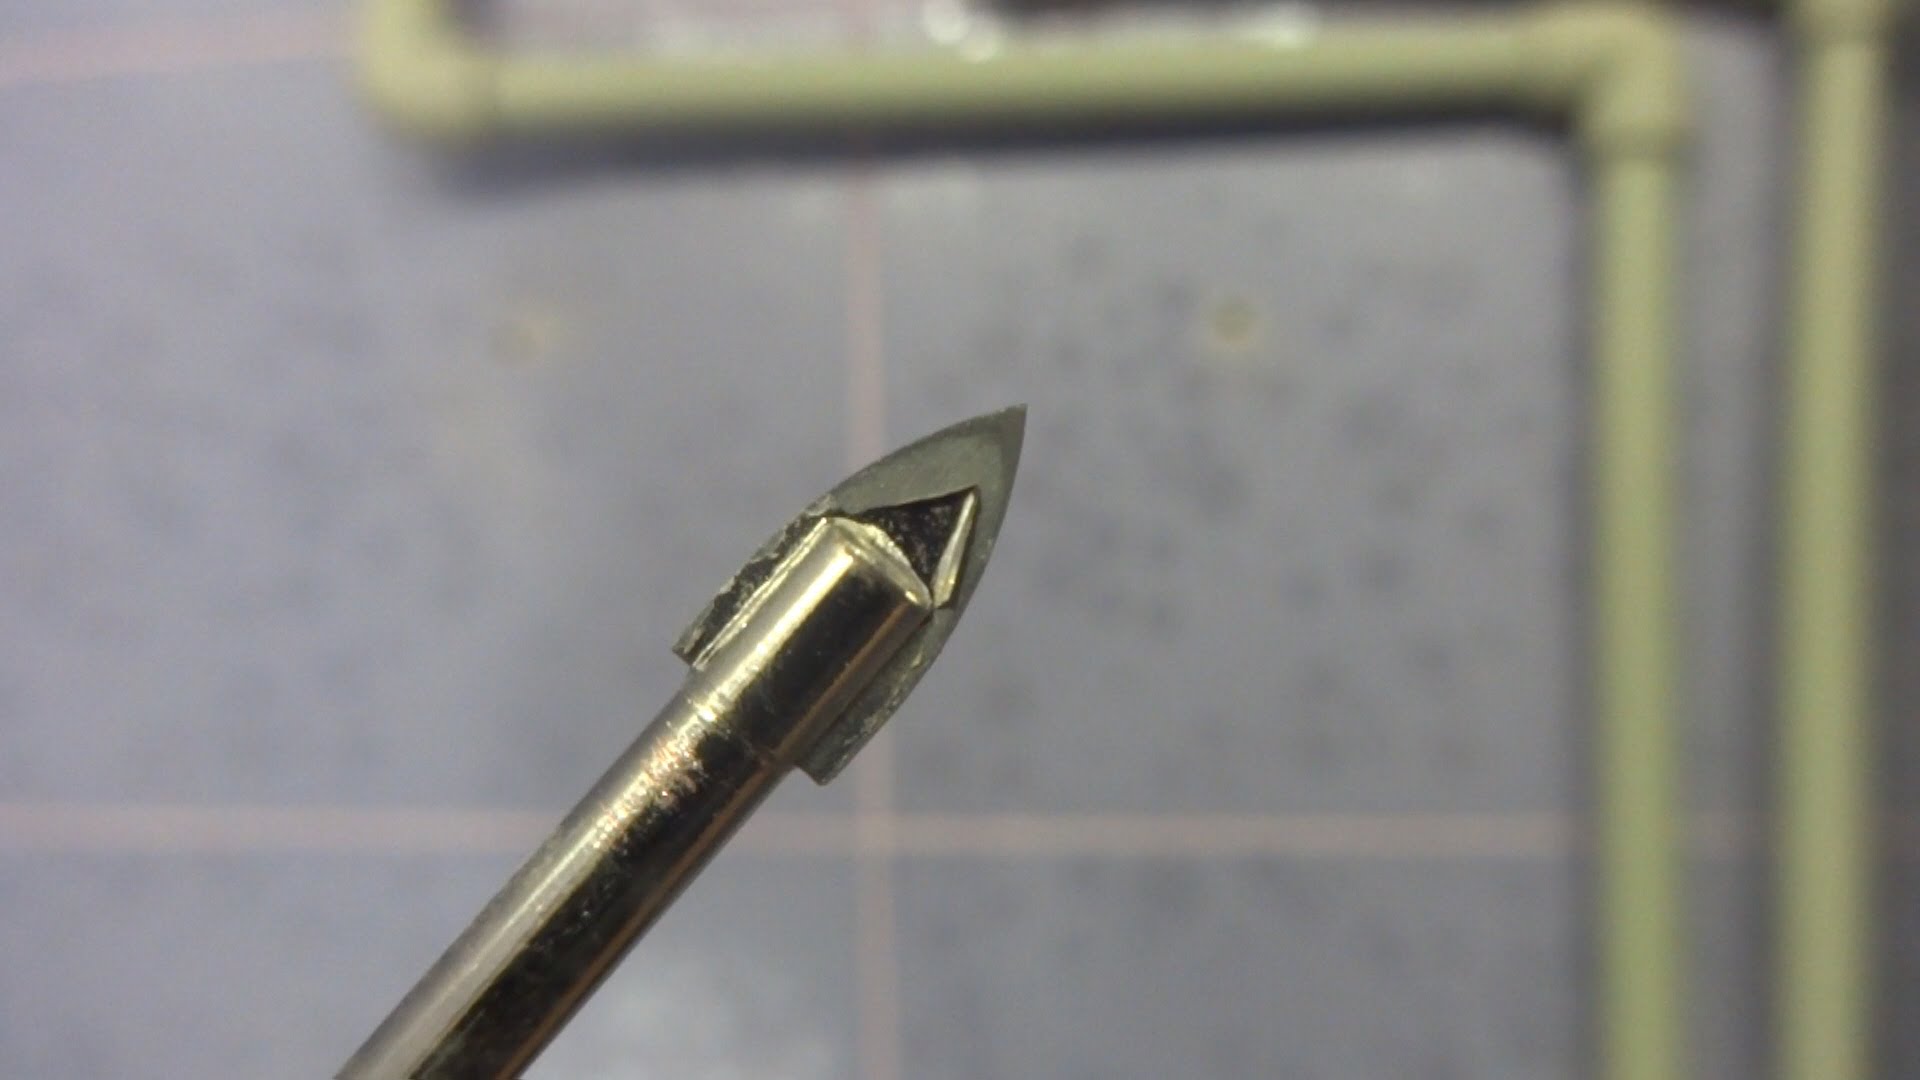
- Drills with a pointy tip in the form of an arrow called spear-shaped. Such drills are made specifically for working with tiles for making holes of small diameter. Due to the specific sharpening and sharp edges, the contact surface with ceramics is reduced and, as a result, the risk of damage to the tile is reduced. However, these drills are not enough for a long time: 15-20 holes in a regular tile and no more than 5 in ceramic granite.
- Carbide Drill Bits. Their angular sharpening in the form of a hexagon easily passes a layer of glaze on ceramics and allows you to use such tools for a long time.
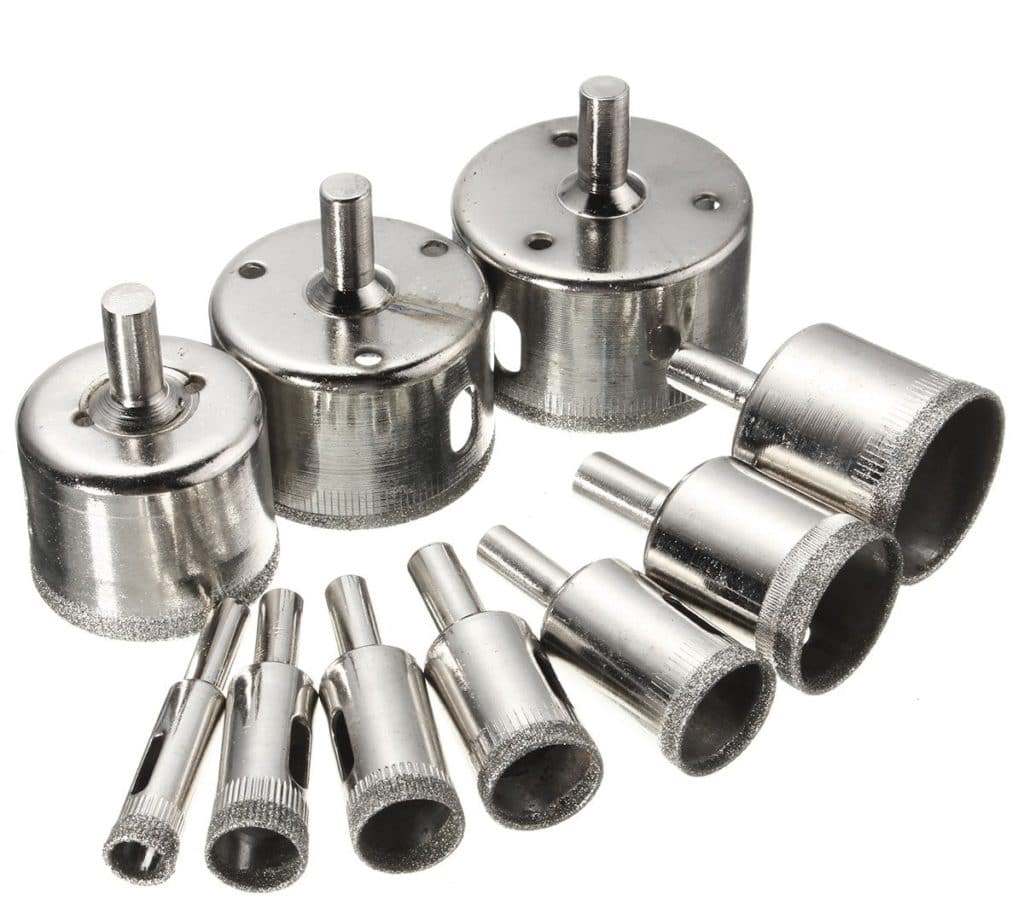
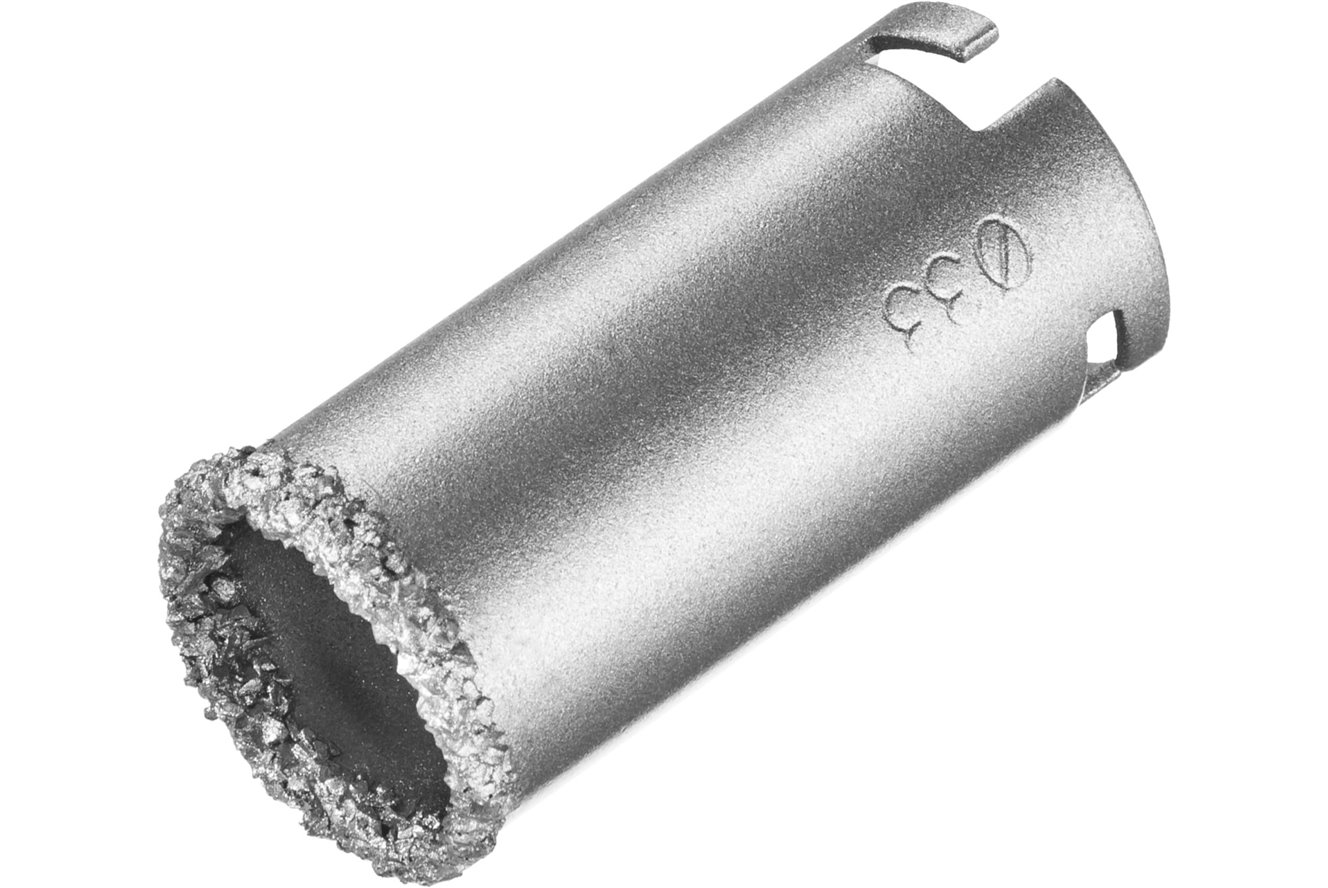
- Crown drills look like as tubes of various diameters and belong to professional equipment. Diamond spraying or sputtering of corundum makes it easy to drill not only ordinary tiles, but also porcelain stoneware. Provided exit for waste, in which dust and chips accumulate under the drill,allows not to be interrupted every 40-60 seconds of work.
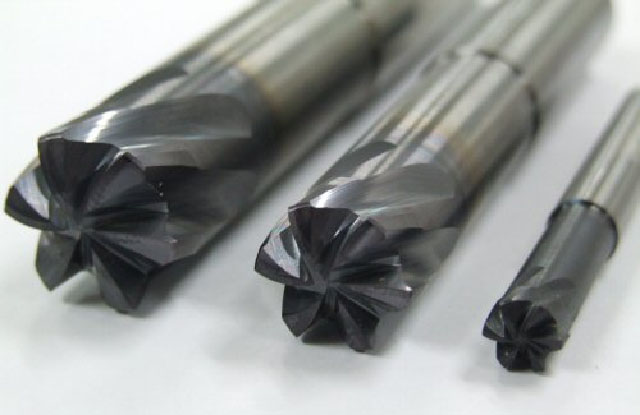
- Carbide Tungsten Dust Crown Drills also a professional expensive tool. They are sold in sets with crowns of various diameters and can cut a hole even in natural marble or granite.
- Conventional tipped drills from hard alloys They are not suitable for working on the tile itself, but they are perfect for installing dowels in concrete or brick of the wall itself, when the hole in the ceramics has already been made.
- For holes that are not suitable for the diameter of any of the available drills, you can buy a special "ballerina". The principle of operation of such a drill is similar to the principle of the compass: the sharp "leg" is installed in the center of the intended hole, and the cutter moves in a smooth circle with a given radius.
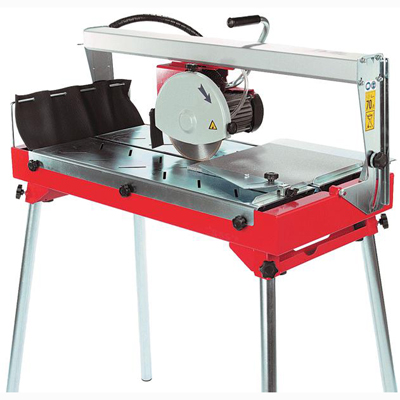
- Professional tile cutting machine hardly needed for a one-time repair work because of its high cost and size, which complicate its subsequent storage. However, if present, the process of cutting tile is simplified several times.

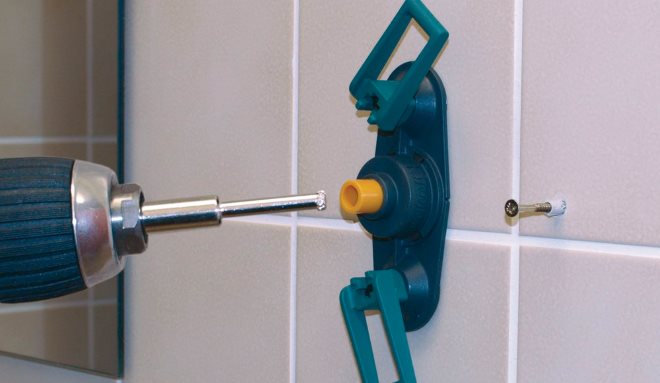
- Conductor - A special device that is fixed on the wall and does not allow the drill to deviate from the intended point on the tile.
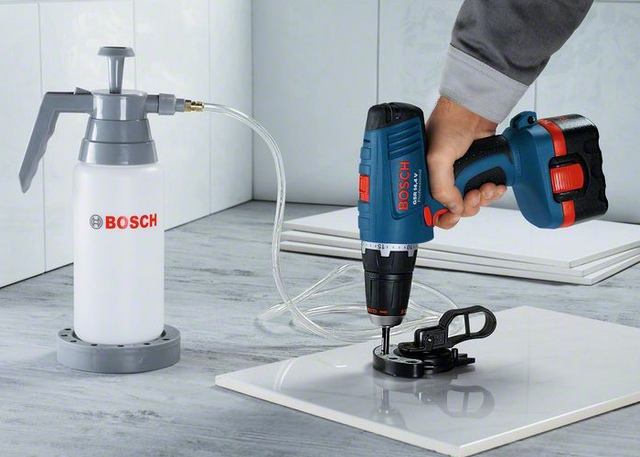
- Water blower in place of the cut it is necessary to cool the drill and material, heated by contact at such a high speed, with the help of a liquid.
Technology works
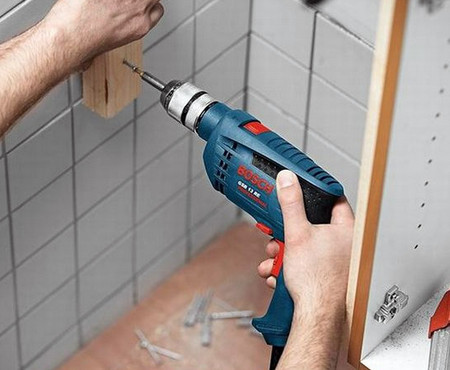
After selecting the right tools, you can go directly to drilling. It should be noted that overheating of the drill or tile can lead to cracks, so at least you need to water the drilling site or take short breaks. If simply immersing the drill in cold water does not help to reduce the incandescence rate, it is necessary to use a special system that forcibly supplies cold water to the point of contact of the drill with the tile.
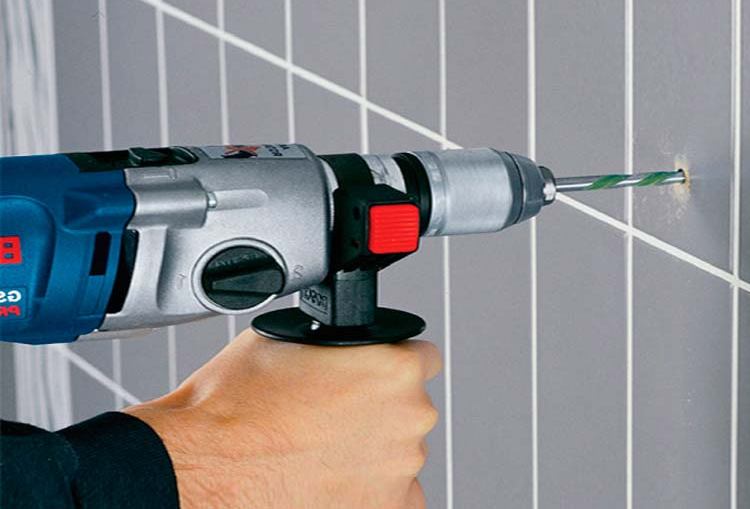
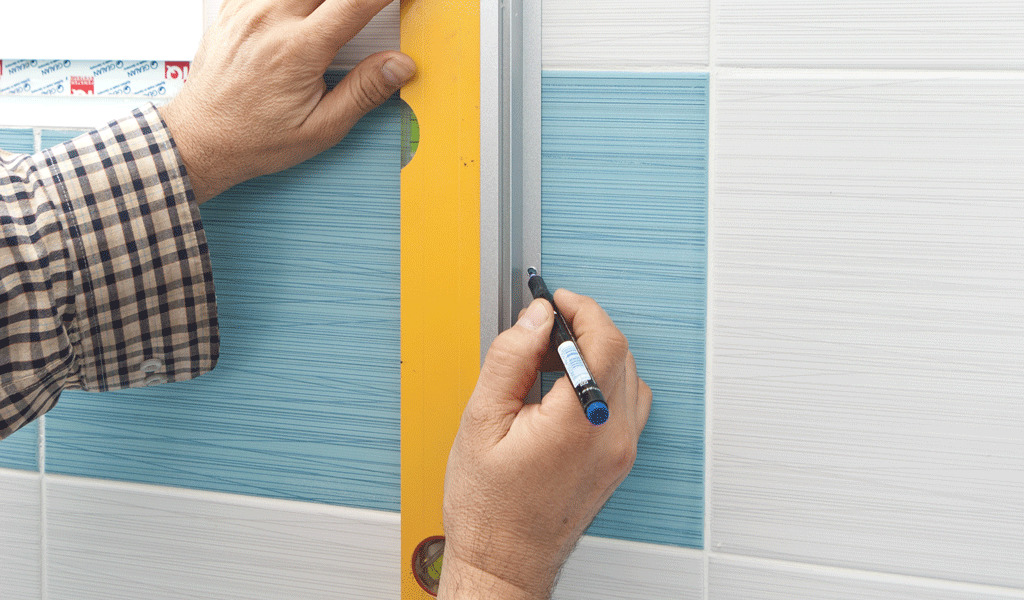
With such an opportunity, it is better to drill at the seam between the two tiles. If it is impossible to drill around the seam, then it is better to retreat from the edge at least 2 cm, which will reduce the risk of chipping and breaking along the tile edge. The drill should be located clearly perpendicular to the tile., you need to closely monitor this.
Do not greatly increase the speed of the drill when working with ceramics. The optimum range of rotation is from 100 revolutions per minute to 400 maximum.

If used for work drill, in which the installation of a shock mode is possible, it is necessary to check that this feature is disabled each time before drilling.
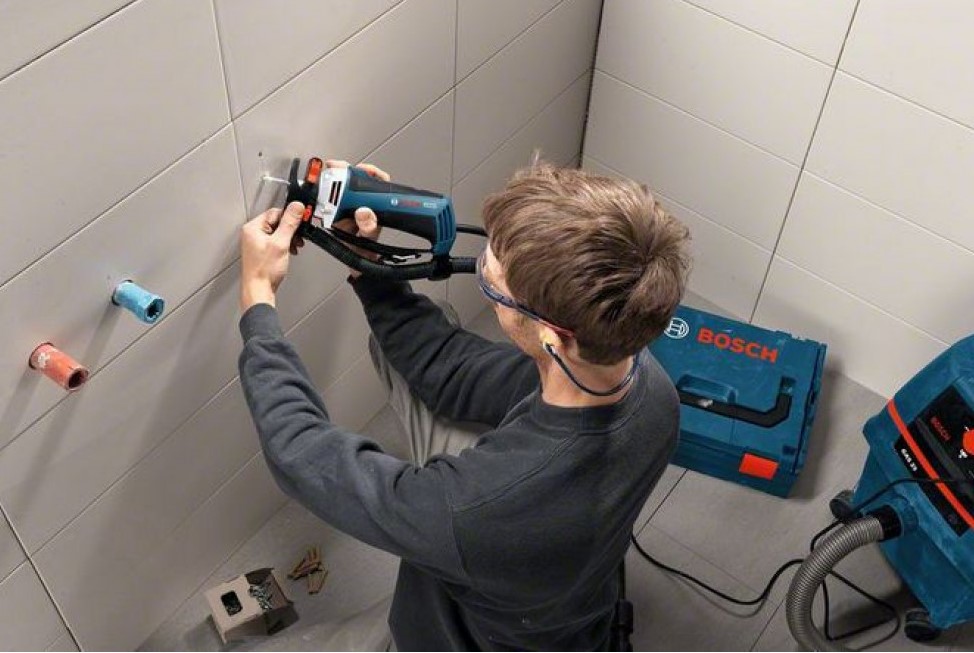
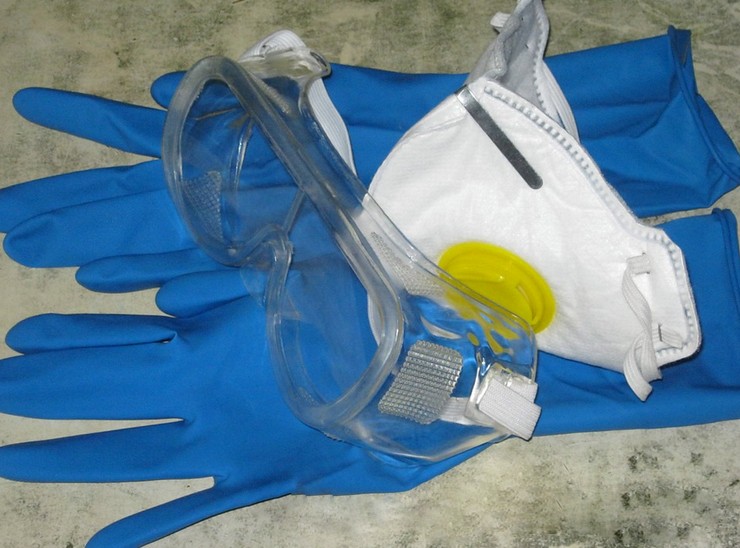
When cutting tiles into the air, there is a huge amount of tile dust, chips, and tiny sharp splinters that can easily get into the eye or airway, therefore safety goggles, mask and gloves should be used.
Small hole
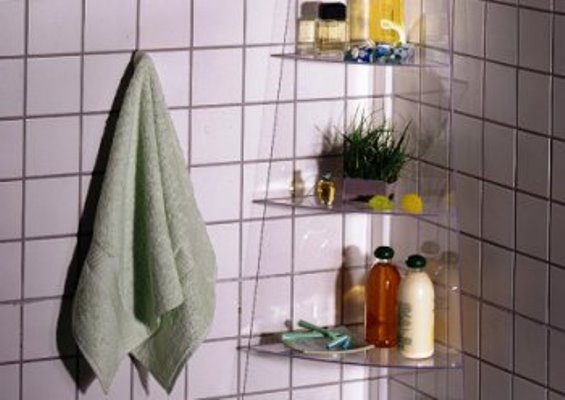
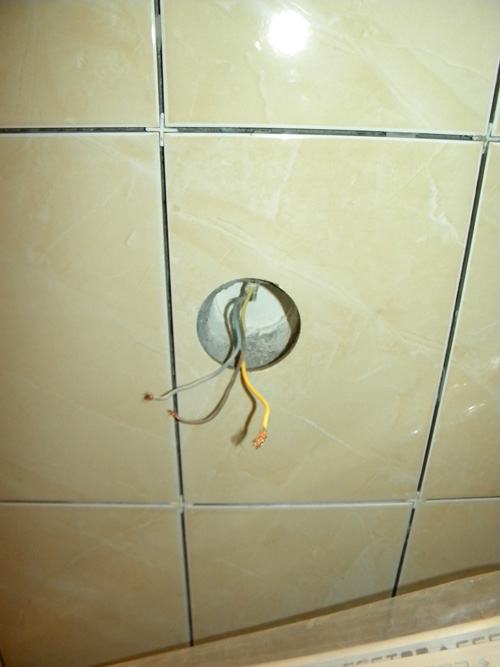
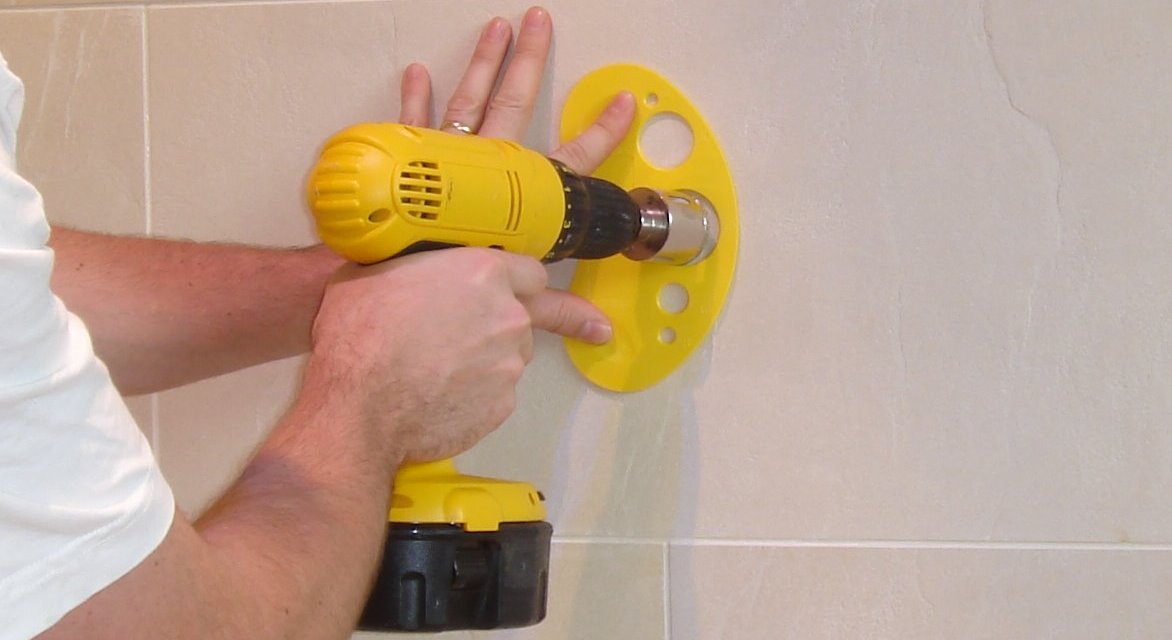
Small holes for mounting for a mirror, a towel or a hinged locker are usually drilled on an already lined wall. The glue under this tile is already frozen, the tile is in a vertical position.
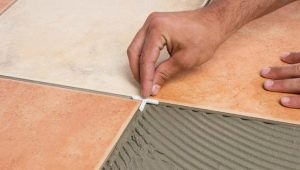
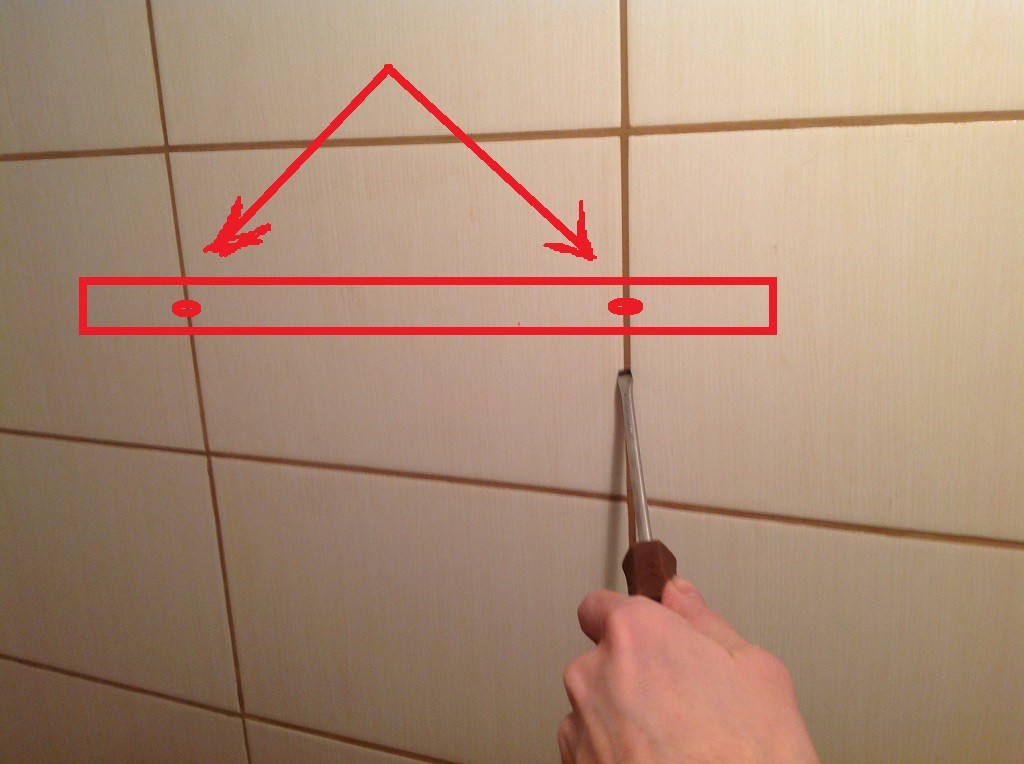
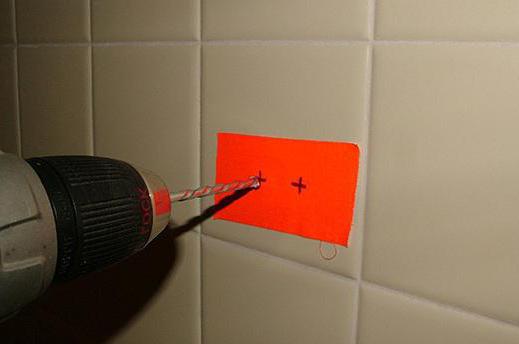
To make the work look neat, it is better to use dowels with a diameter not exceeding 12 mm. Before starting work, you need to decide on the place where the fastener will be located: it must be located either on the seam or not adjacent to the tile edge closer than 15-20 mm.
The algorithm of work will be as follows:
- A drill bit with a suitable diameter is selected. The size of the hole should be only 1-2 mm larger than the size of the dowel, otherwise it will be free to walk inside the tile.
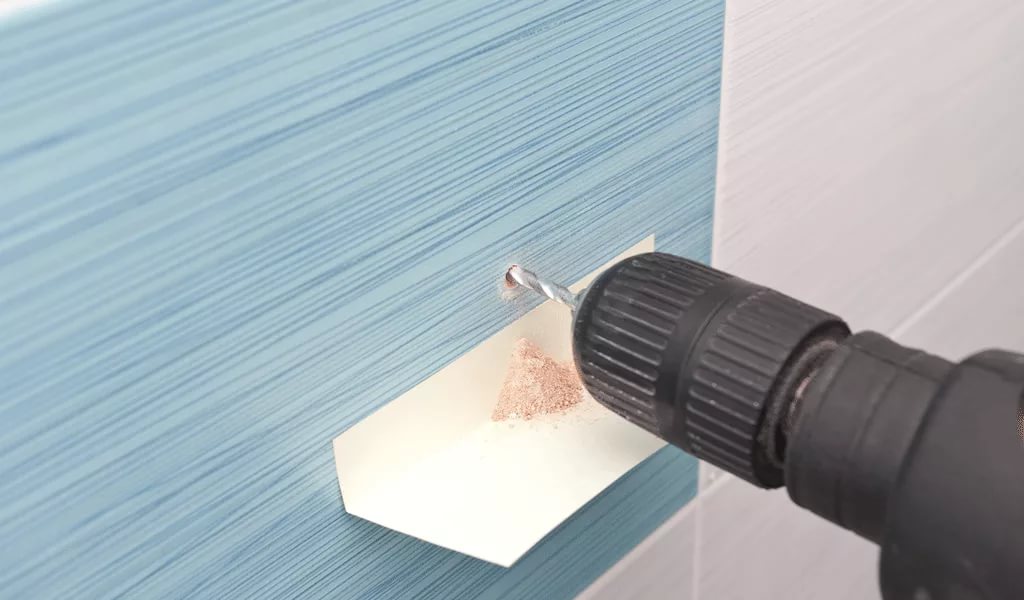
- The drill should be carefully set in the center of the intended hole and, starting work at low revolutions of the drill, the drill should pass the top layer of glaze on the tile.It is best to make a crown with a small diameter.
- To pass the subsequent tile thickness, the speed of the drill can be slightly increased. It is necessary to keep the tool strictly along the line, otherwise the hole will not be even and round.
- To drill the wall itself under the tile, it is better to change the drill so as not to spoil the special one. Conventional drill for work on concrete perfectly cope with this task. The main thing is not to touch the tile itself, so this drill should be significantly smaller than the finished hole in the tile material.
- Then you need to carefully clean the resulting holes from debris and dust, using an old toothbrush, cotton swab or a napkin.
- Insert the dowel into the drilled holes of the tile and the wall and hammer it gently with a hammer, trying not to hit the tile, so as not to accidentally split it.
- After that, a screwdriver is screwed into the dowel with a conventional screwdriver or screwdriver and the necessary piece of furniture is hung up.
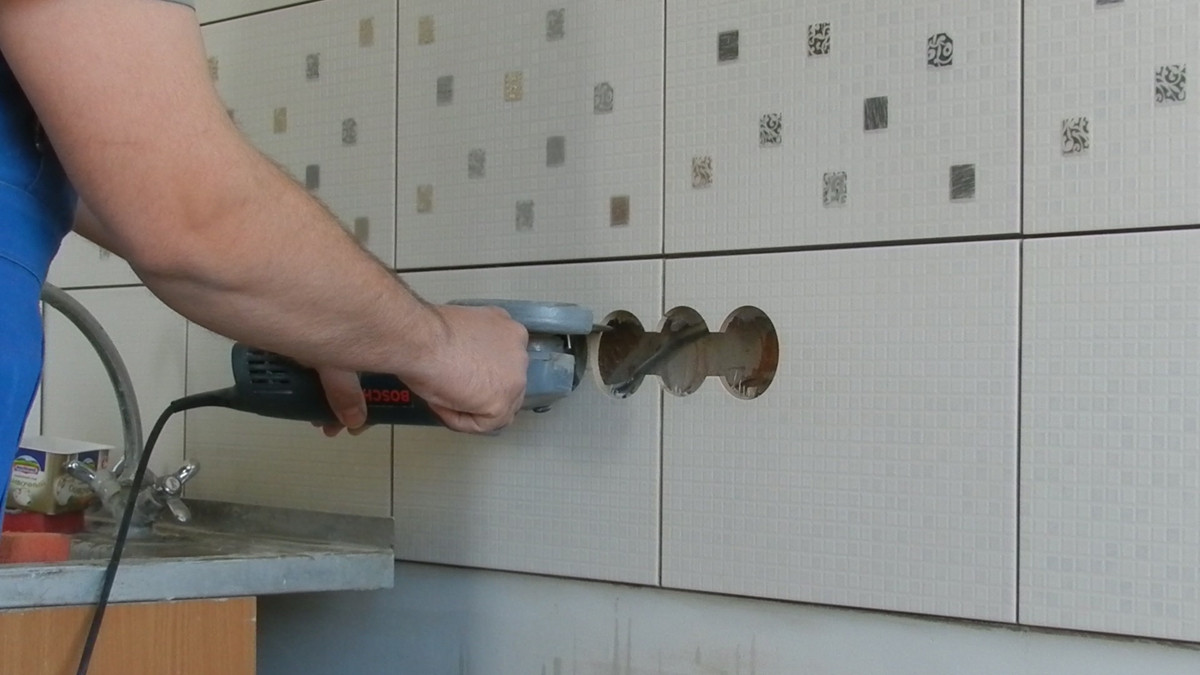
Large
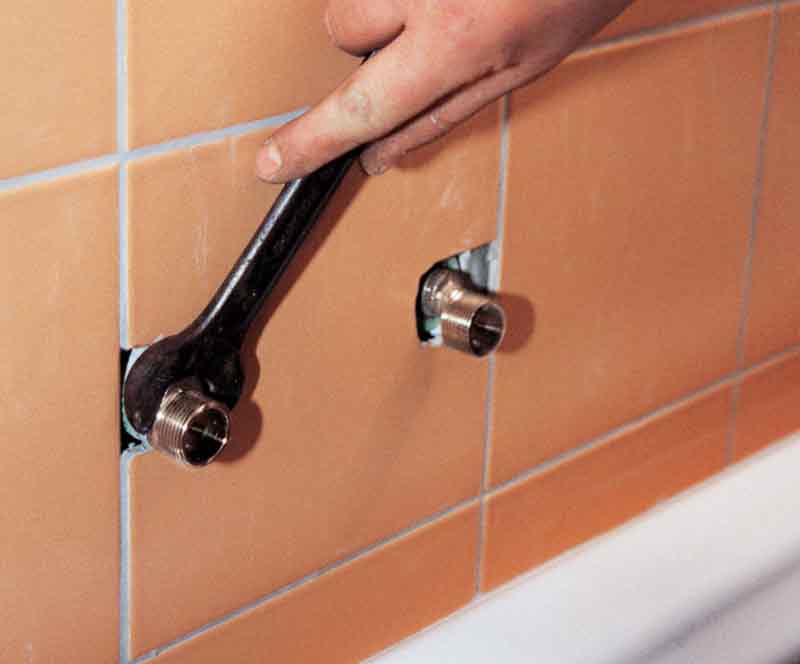
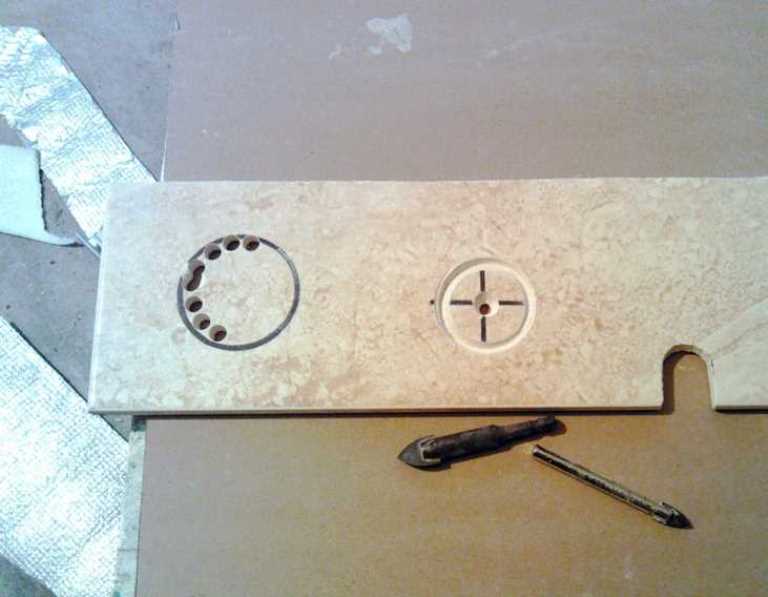
Holes with diameter more than 20 mm, must be drilled before laying the tile on the floor or wall. Usually they are needed when installing sockets or mixers, installing drain pipes and installing switches.You must use a special workbench or prepare a suitable place for this from scrap materials. The tile should fit snugly to the surface, you need to remove all debris and eliminate the possibility of heavy objects falling onto the tile from above. The center of the intended hole is determined and drilling is performed directly.
If you need to use a “balerinka”, then first it is better to drill a through hole with an ordinary thin drill. The fixed leg of the “ballerina” is inserted into such a hole and the locking screw is firmly tightened. The movable foot sets the radius of the future hole, and at low speeds the necessary hole is drilled. It is advisable to use a safety cover made of plastic.to reduce instrument vibration. If necessary, you can modify the edges of the hole with ordinary pliers and sandpaper.
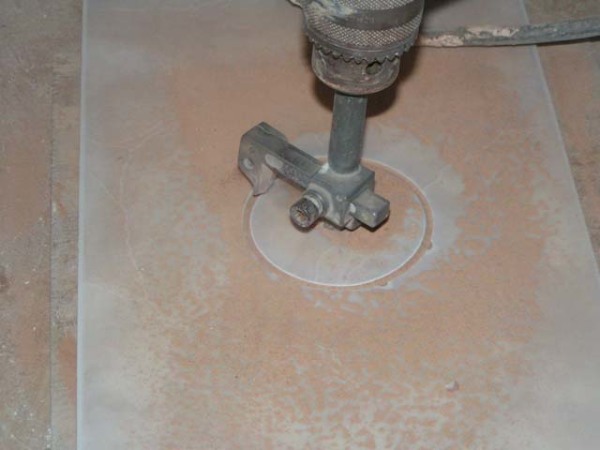
When using corundum, carbide tungsten or diamond dust drill bits, it is necessary to separate them into large diameter drills, which have their own central guide drill, and small diameter drills that do not have such a central drill bit.In the first case, the central drill is installed in the intended center of the intended hole and is drilled at low revolutions with little pressure. In the second, you must use a jig, which is attached to the surface with the help of special suction cups and does not allow the drill to move relative to the center.
If there is no conductor, you can use special patterns that are applied to the tile surface, but they are more difficult to use.
Even with one thin drill bit for a tile, you can drill a hole in it that is many times larger than the diameter of this drill. It is necessary to pre-plan on the tile the circumference of the future hole and drill a lot of small holes along it. The resulting piece must be carefully removed from the tile and clean the edges with pliers, a file and sandpaper. This is a rather long and laborious way.which requires a certain level of ownership of the tool and a lot of patience.
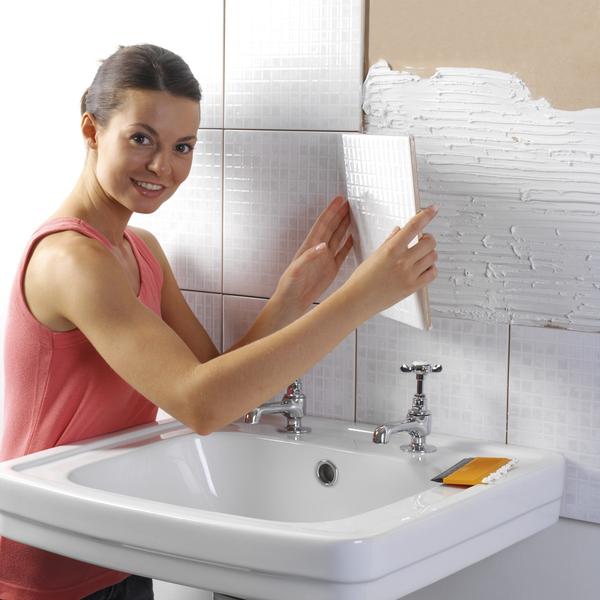
Before planting a tile that has a hole on the glue, it is necessary to check in advance whether it is correctly calculated and completed. It is best to attach the trimmed tile to a dry wall directly in the place of its gluing and check everything well.. Then glue it and remove excess glue, which can act on the edges of the cut circle.
Useful tips
If there are several fragments of unnecessary tiles, then you can practice drilling holes in them. At the same time, it will be possible to look at how the material behaves under this or that drill, how holes of various diameters are drilled.
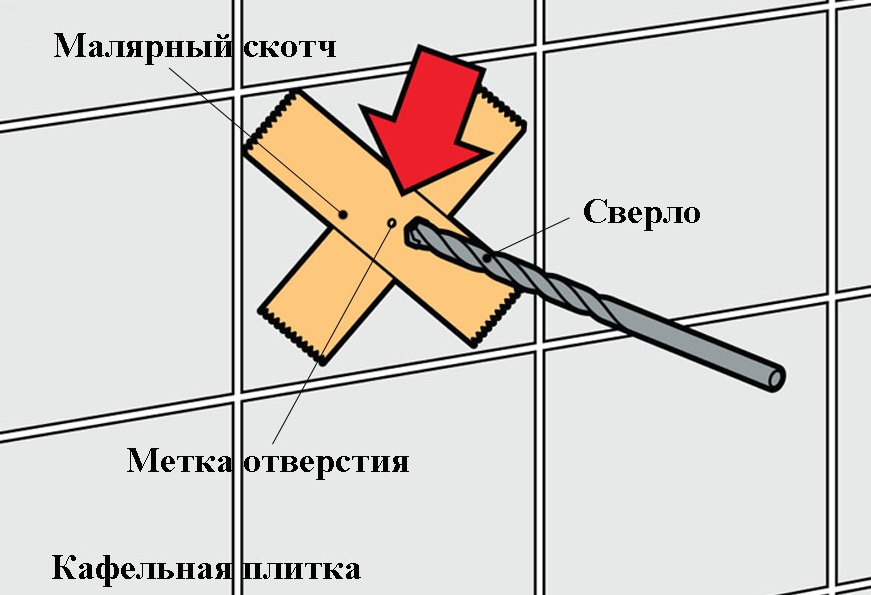
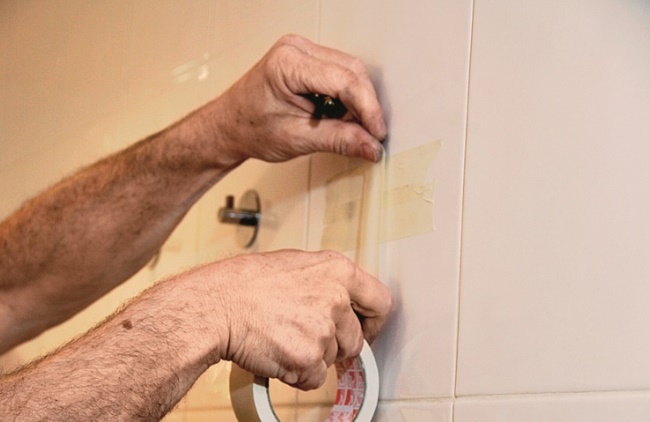
To make a marking on a tile, it is not enough to apply a drawing with a regular pencil or a marker. The first is hard to put on the tile so that it can be clearly seen and it was hard to damage the drawing, leaning his hand against it. The second one is also easily erased until it is dry, and when it is dry, on the contrary, it is difficult to remove after completion of the work. The best way is to attach a piece of masking tape to the tile and draw on it any pen, marker or pencil. In addition, the sharp drill bit will slip less from the rough surface of the masking tape, which will greatly facilitate the drilling process on ceramics.
In outdated instructions for drilling tiles, you can find a recommendation to pre-knock the glaze at the place of drilling tiles.
However, when using modern equipment, this operation is not only unnecessary, but also increases the risk of spoiling the tile, breaking it with careless movement when chipping the upper layer.
If the tile has not yet been laid on glue, it can be pre-soaked for an hour in warm water before starting to drill. This will significantly reduce the chance of splitting and cracking in the tile.

How with a simple drill to make a hole in the tile, see below.