Correctly decorate tile and laminate joint: recommendations
Properly selected material for finishing the floor greatly simplifies life. However, few materials are able to equally well manifest themselves in operation in all areas of the house. It is necessary to resort to a combination of several species. Most often it is tile and laminate. And here there is a common problem - how to properly arrange the joints between these two types of finishes.
At first glance, this is a difficult task, but the recommendations of specialists in the field of repair will help to cope with it yourself.
Where is docking used?
In modern interior design, various combinations of techniques are widely used. This concerns the combination of colors and shades, textures, materials.
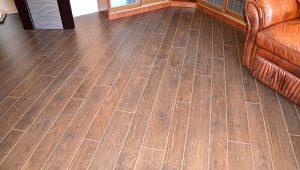
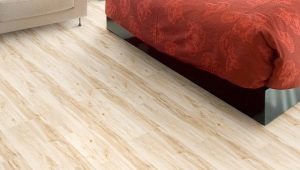
Relevant and quite economical combination of tile and laminate. A more expensive and elegant coating is obtained by using parquet boards instead of laminate, and tile successfully replaces more practical ceramic granite.
Any other combination of these materials among themselves is possible, including a combination of tiles of different thickness, color and texture.
Questions of color in the combination of flooring are solved using simple design rules on the compatibility of colors, but in practice it is often necessary to “bring” laminate and tile into one plane.
This happens in the following cases:
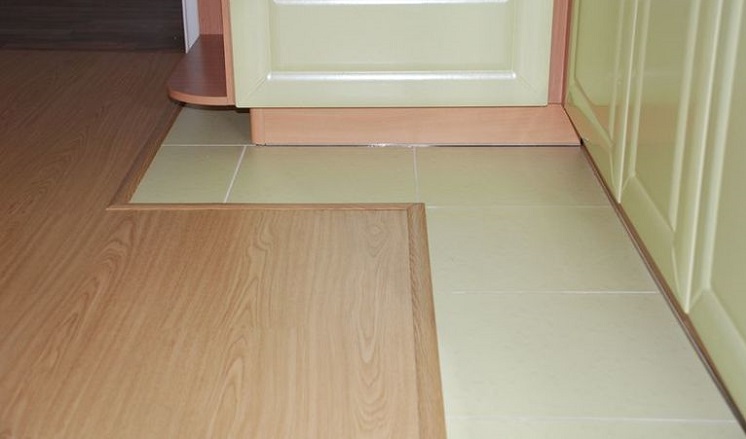
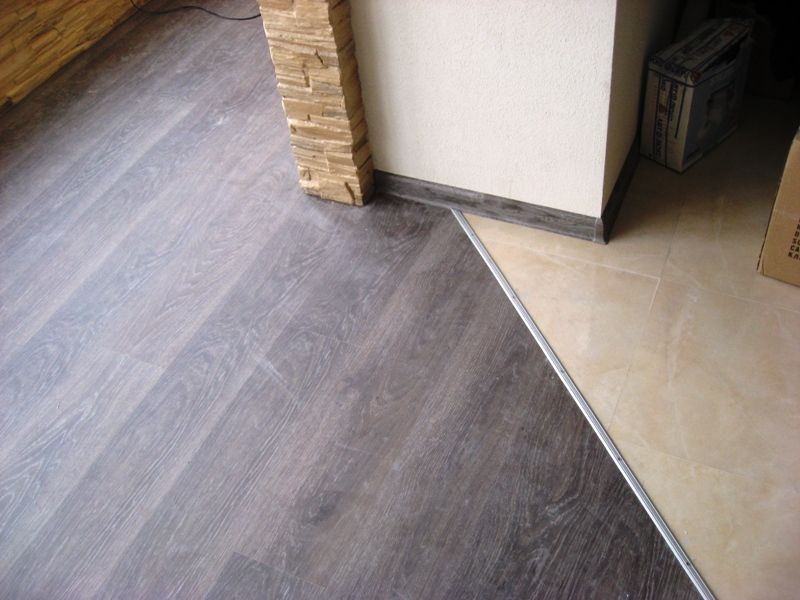
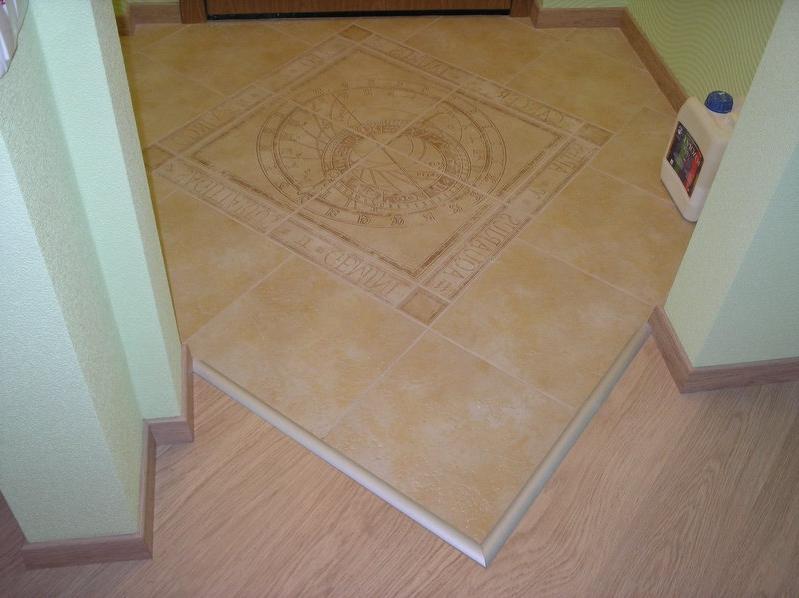
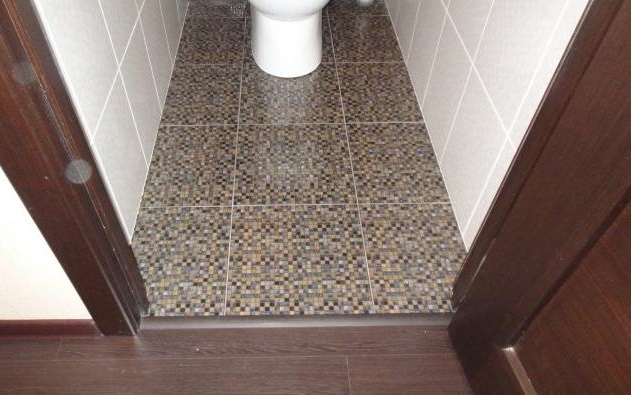
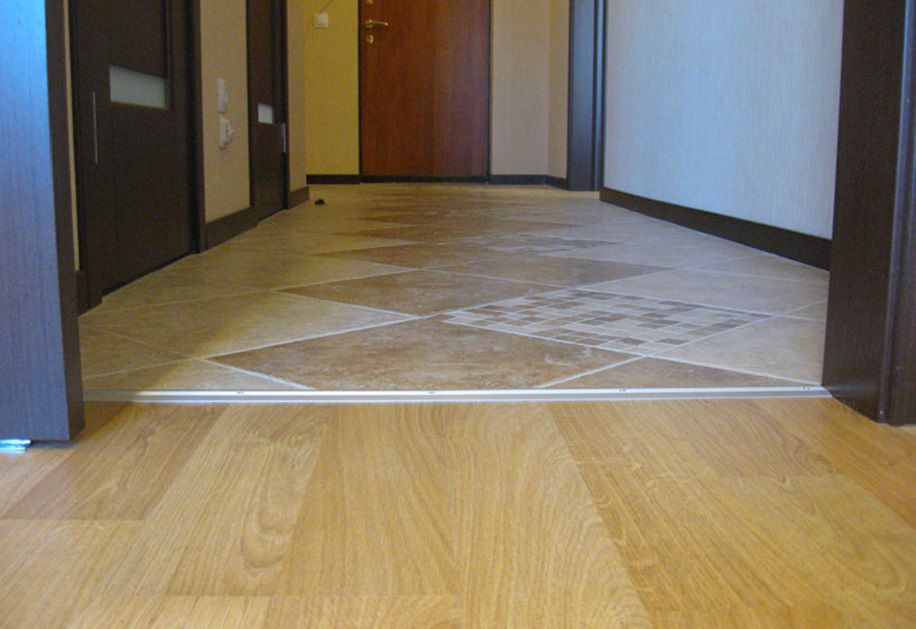
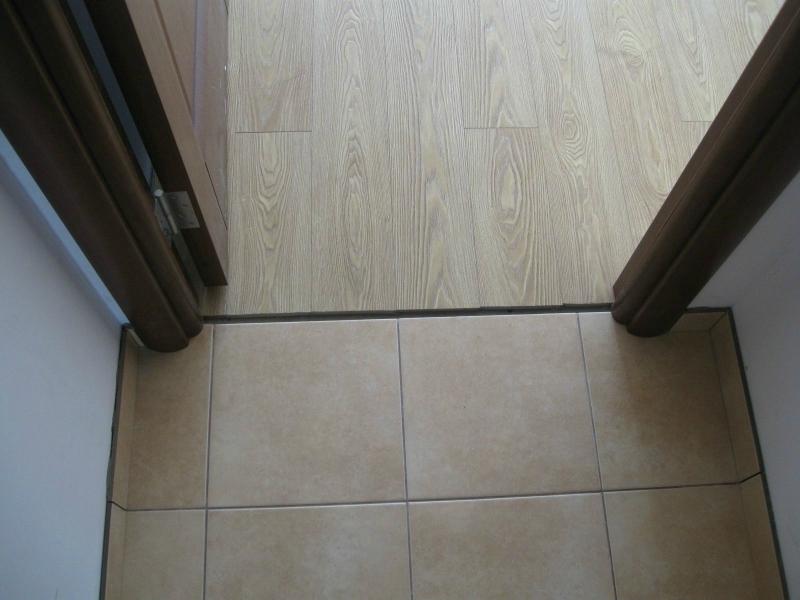
- Materials are joined on the border of two rooms. For example, a bathroom and a corridor, a corridor and a kitchen, a bedroom and a balcony. Typically, two coatings are combined under the door that separates the premises, and the transition can be arranged with the help of a simple and effective solution - decorative threshold;
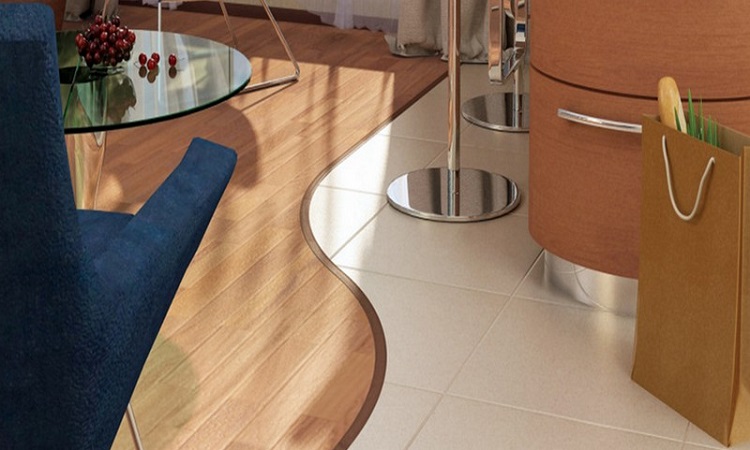
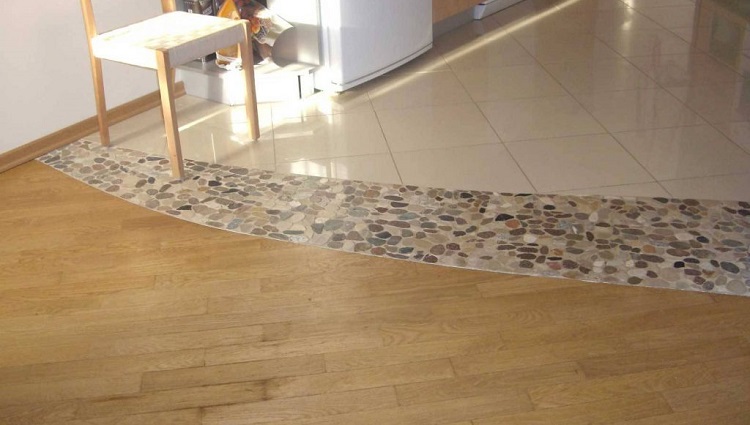
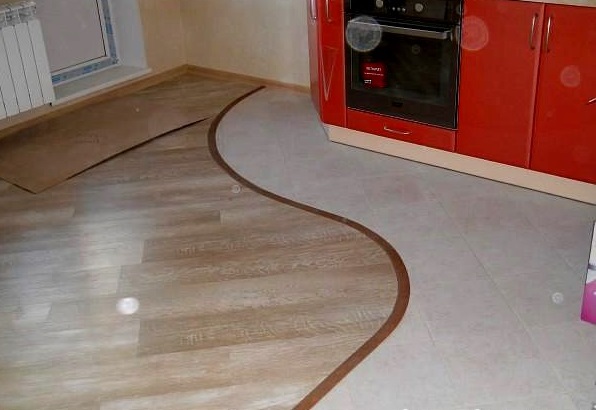
- Line of descent is formed in open space, on the border of functional zones in the same room. This is an urgent problem for large kitchens, in which the cooking and dining areas are decorated with different materials, as well as for studio apartments, where such zoning may be the only convenient option.Separately, the areas of kitchen, bathroom, balcony, and transit zones are drawn up. The porozhek here is no longer a universal solution, more complex methods of connection are needed.
However, you should not abandon such a practical finish due to the complexity of the process of laying materials. The combination of different floor coverings has several advantages:
- When tile and laminate with different performance characteristics are used only in those conditions that are more suitable for them, the coating will generally last much longer. So, it is very practical to arrange tiles with high humidity, and lay laminate in a drier;
- The tile longer serves in places with big passability and mechanical loadings, and the laminate looks more cozy and decorative. By combining these materials in transit zones, you can get a reliable and beautiful coating;
- Finishing the floor looks more fresh and original;

- The tiles, and especially the porcelain, are expensive. Finishing the entire premises only with these materials is much more expensive than combining them with laminate;
- If it is necessary to make a warm floor in the house, it can be laid only under the tile in order to save or choose a laminate with appropriate marking that allows laying on the heating system and insulate the whole room;
- The drawing, relief and color pattern created by the two materials visually increase the space in small rooms.

Methods and materials of connection
If it is necessary to combine different floor coverings, two legitimate questions arise: how to do this and what materials to use for this. The modern market offers a variety of solutions.
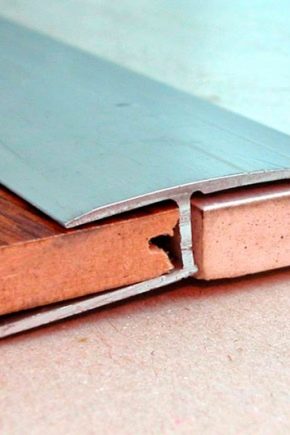
Docking profile
With its help, neat and technological joining is created on the border of the premises under the door leaf. Profiles are of the following types:
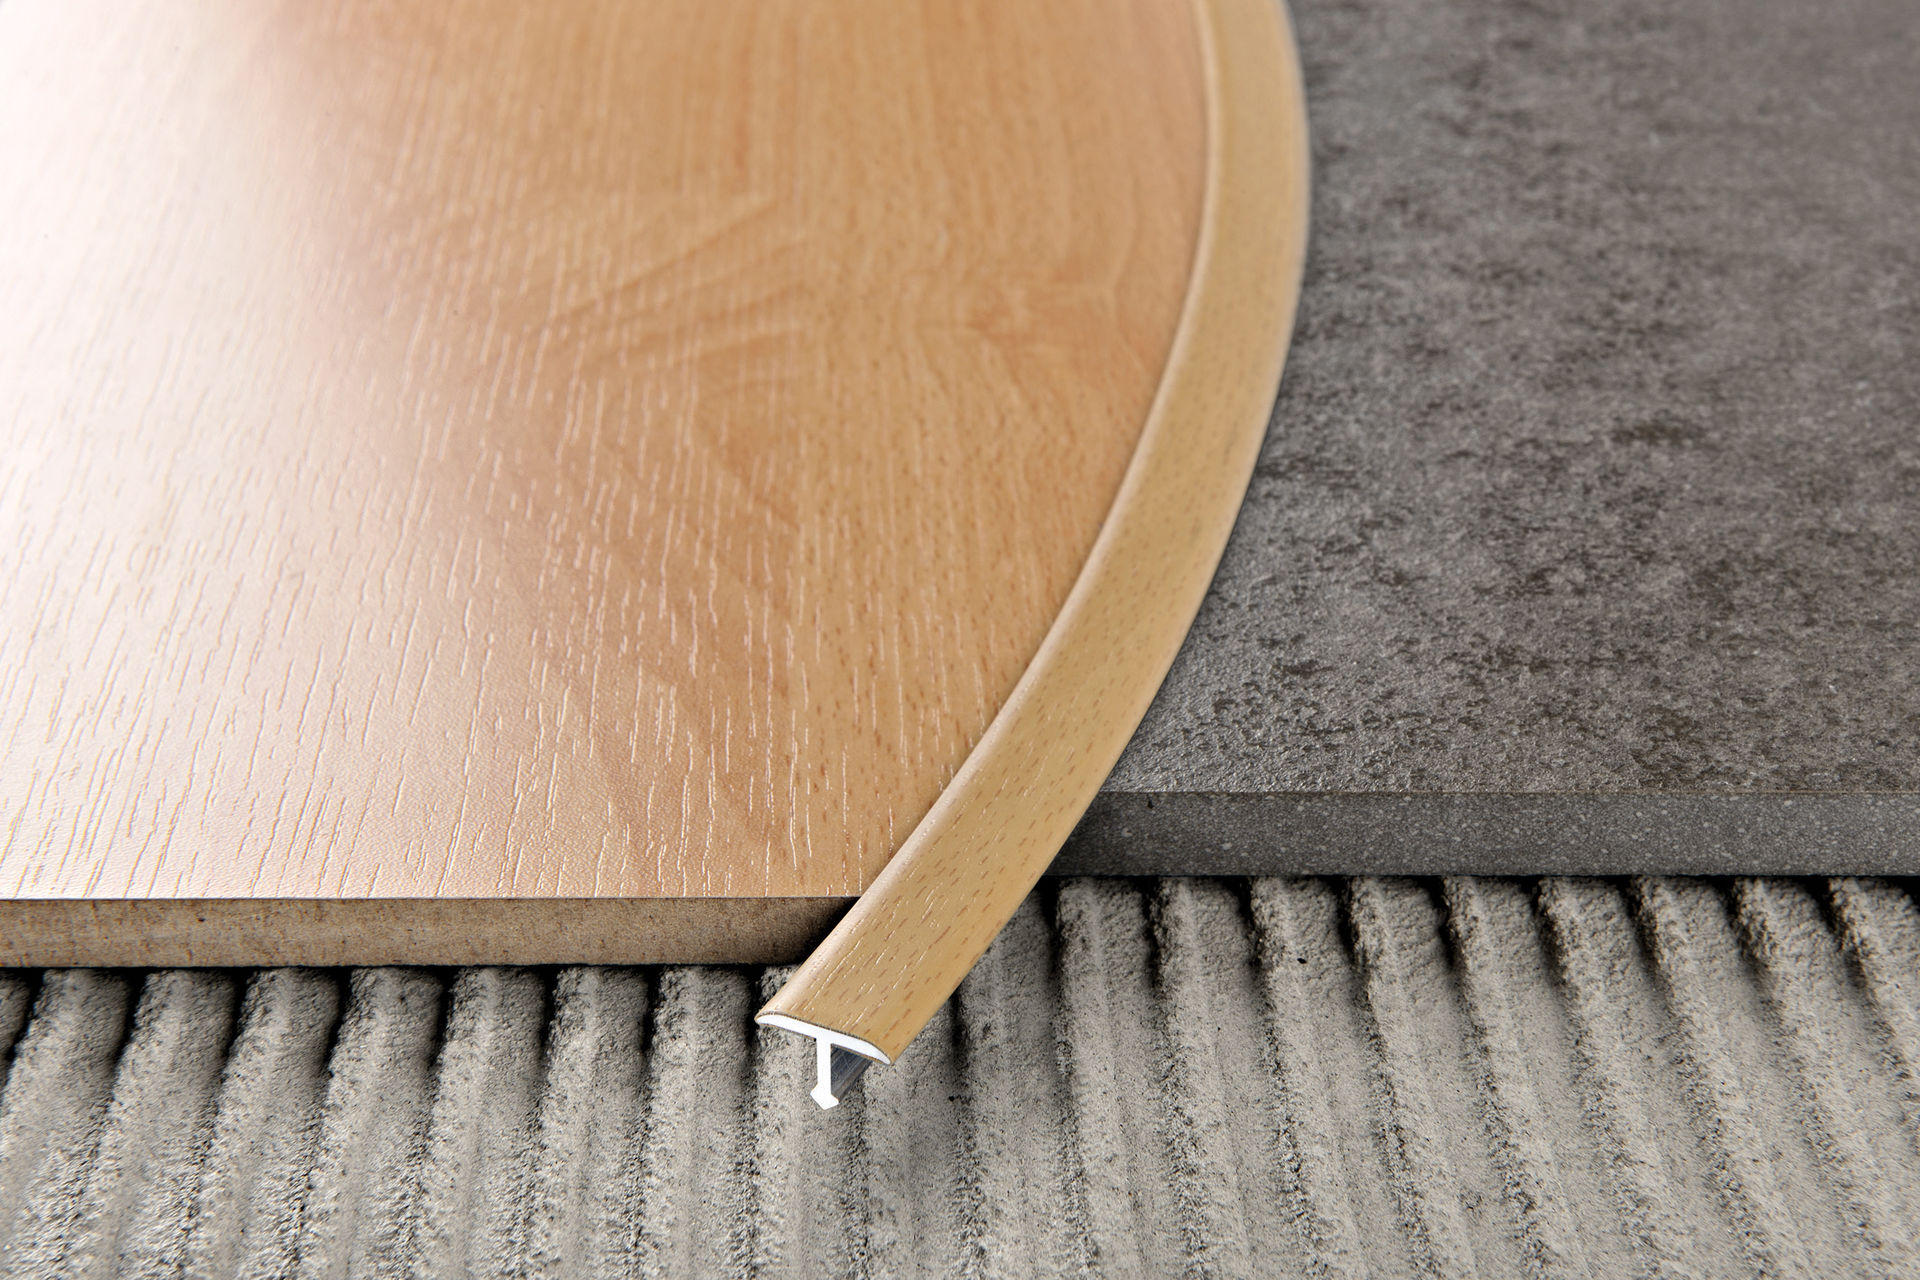
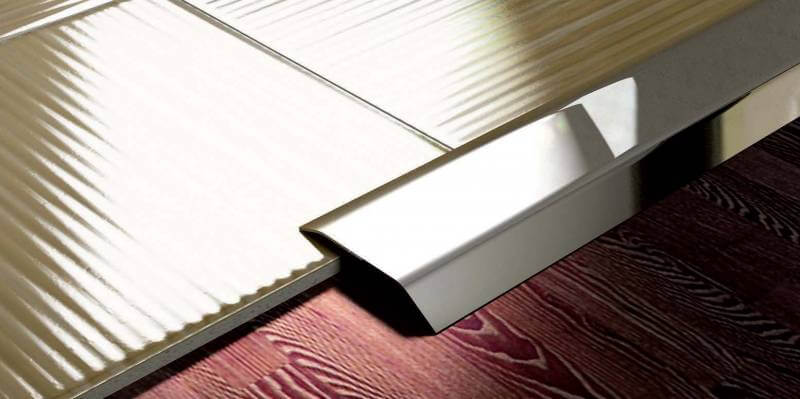
- Metallic (aluminum, steel, brass). Some of them are distinguished by flexibility and ductility in work and the ability to take a curved shape;
The cost of such a profile is low, and performance characteristics are among the best.


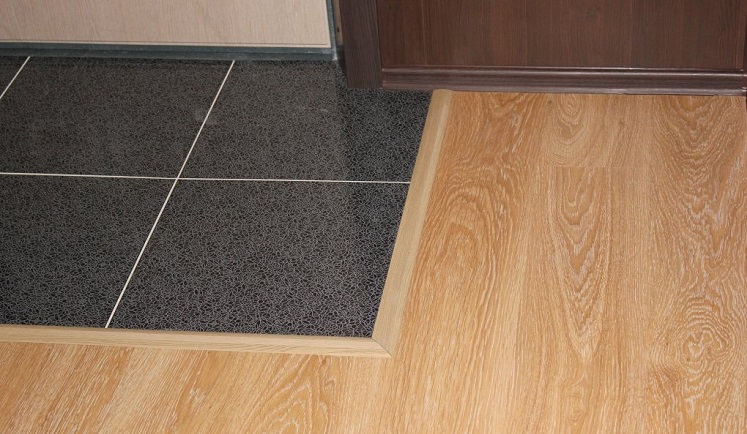
- Wooden. Such a product fits well where laminate with a pattern for natural wood was used.The combination looks as successful as possible if you pick up a wooden threshold to match the laminate panels. But wooden profiles have their drawbacks. They are expensive, afraid of moisture, and require constant care (sanding, varnishing).
- Plastic. It is a cheap and elastic profile that is easy to install and bend, but it has the lowest wear resistance among other profiles and quickly loses its presentable appearance. This is especially noticeable on the white plastic. It becomes cloudy and absorbs dirt.
Laminated MDF moldings
This is a budget alternative to a wooden profile. The moldings look great, are easy to assemble, but have a low resistance to mechanical damage and are very afraid of moisture.
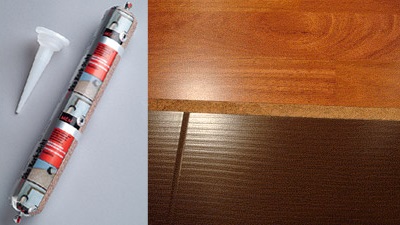
Liquid plug
This connector is a know-how in construction. It is a combination of fine cork chips and adhesive bonding element. With a relatively low price and convenient format of use liquid plug has many advantages:
- Environmentally friendly material and the absence of toxic substances in the composition;
- Resistant to mechanical damage;
- Accurate filling of gaps and joints;
- High level of thermal insulation;
- Not afraid of moisture, high temperatures and atmospheric extremes;
- Does not deform, does not crack;
- Can fill gaps of any length and width.
However, it is important to remember that Do not allow the liquid plug to get on the floor, as it is difficult to clean. The method of joining (butt-joint or stacking) depends on the combination used.
With the help of the nut
Powders are used in several cases. First of all, it is the junction of the laminate to the tile on the border of the rooms and the design of straight joints, and the second - the connection of those places on the floor where it was not possible to lay the laminate and tile on the same level.
An alternative to the threshold in this case could be a border or a transitional PVC profile.
Advantages of using the threshold:
- Levels height differences between two surfaces;
- Protects the junction of laminate and tile from the accumulation of dust and dirt;
- It helps to create tightness in spaces such as the kitchen and bathroom due to the fact that there is practically no gap between the door and the floor;
- It has several convenient mounting methods;
- Easy to install;
- Many types are economical in price;
- It is possible to close even a wide gap between the coatings;
- The service life of the threshold is equal to the service life of the coatings.

Disadvantages of butt thresholds:
- Even the most inconspicuous threshold will slightly protrude above the laminate and tile, which will spoil the smooth transition;
- To choose a threshold that is suitable for tile and laminate color is a difficult task;
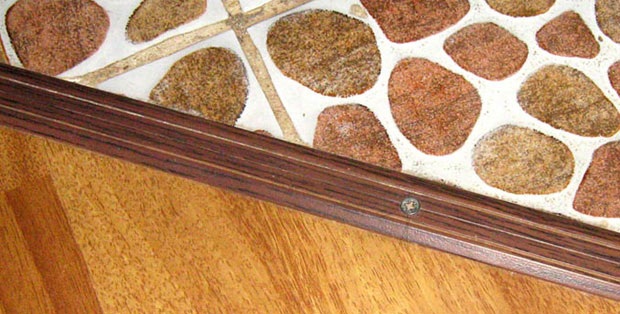
- Screws are visible if the fastening of the threshold is not glue;
- Not all types of thresholds are cheap. If the transitional part is wider than one meter, materials and installation can stand in a round sum;
- Docking is not completely sealed.

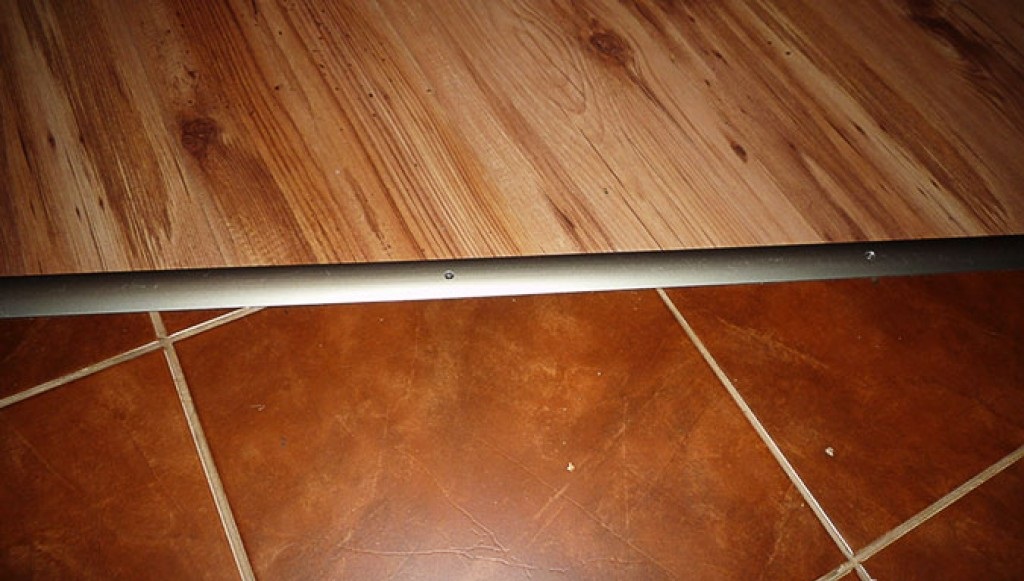
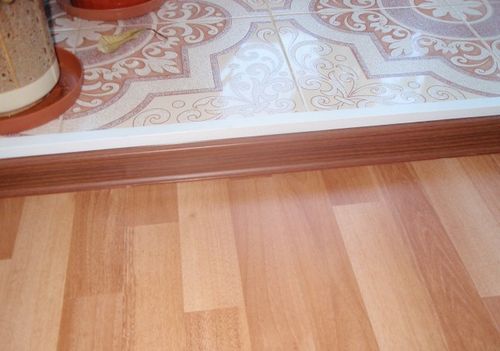
One of the advantages of using threshold docking is a large variety of species. This makes powders a versatile way to join laminate and tile. Types of thresholds:
- Decorative. These are aluminum or plastic products that close the gaps and create a smooth transition in places of small differences in height between the laminate and tile. In color, they do not have to be neutral and inconspicuous. Silvery and golden shades of metals are often used. It can be open (attachment points are visible) and hidden (fixture elements are not visible).

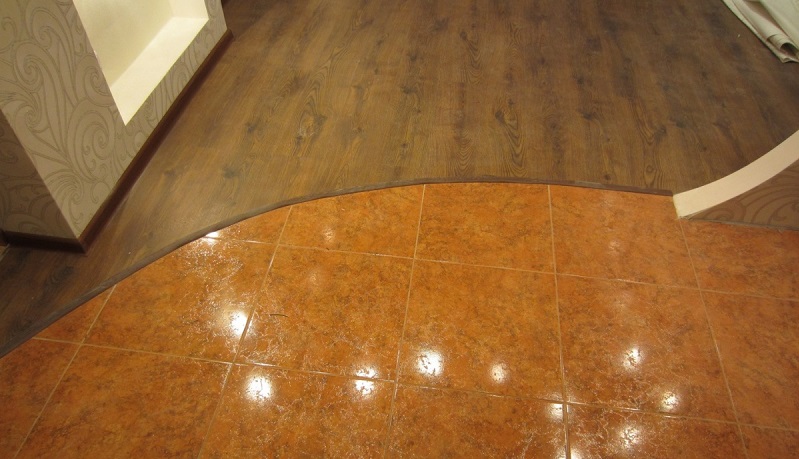
- Flexible. This is a soft plastic or metal profile, which is installed on the border of two materials lying on the same level.It assumes the filling of a fairly wide gap between the floorings.
It can be laid on top, then the joint will not be smooth, or be mounted directly between the tile and the laminate, then the joint turns out perfectly smooth.
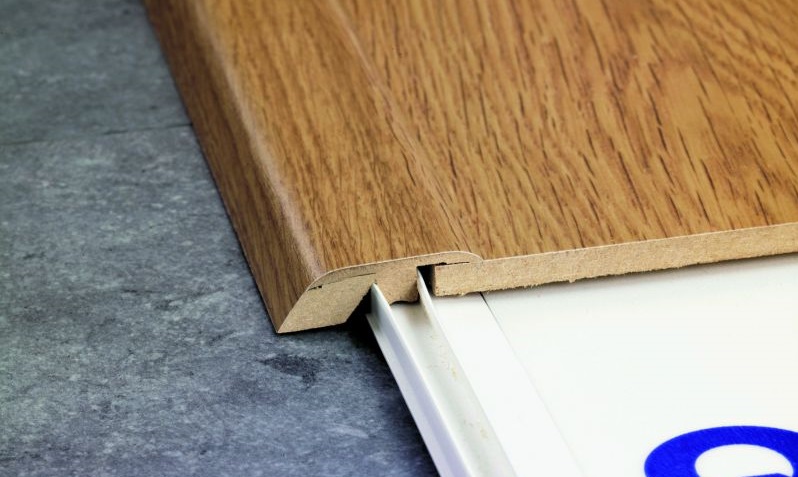
- The plastic profile is fixed in the groove when both materials are laid on the floor. The metal profile has fasteners of a special structure, so it is laid after one material is lined and before the second one begins laying.
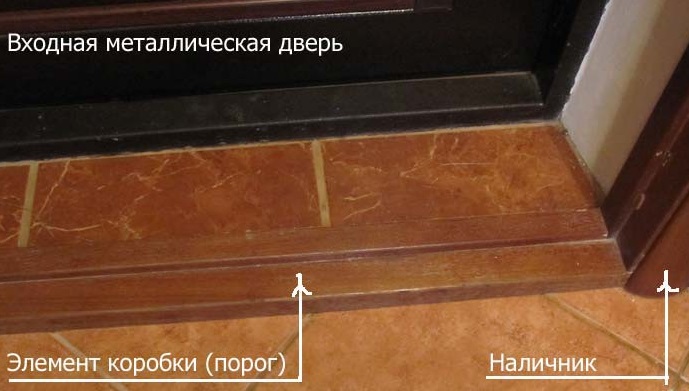
- Boxed This is the threshold for moving from one room to another. It is necessary in places where the height differences are up to 20 millimeters, and in addition to the aesthetic function, it is also practical - it improves noise insulation and thermal insulation in the room. May be part of the door frame.
This threshold is inconvenient for only one - its own height is, on average, 3 cm, and it is easy to stumble about it.
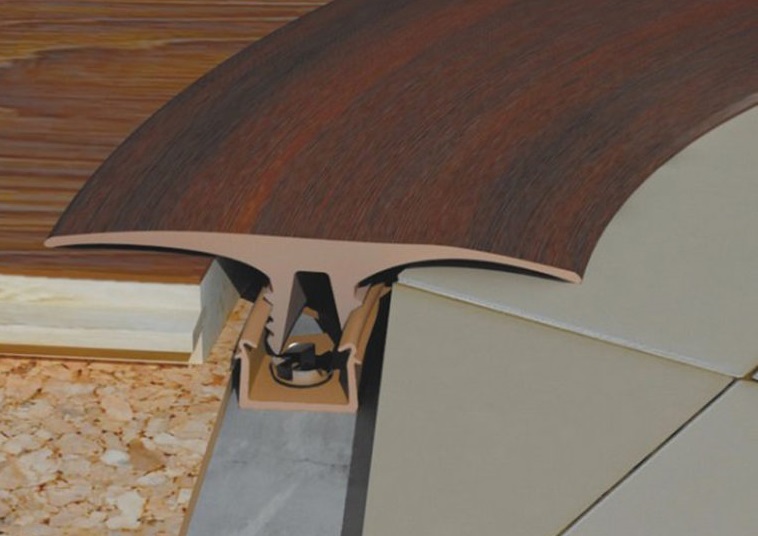
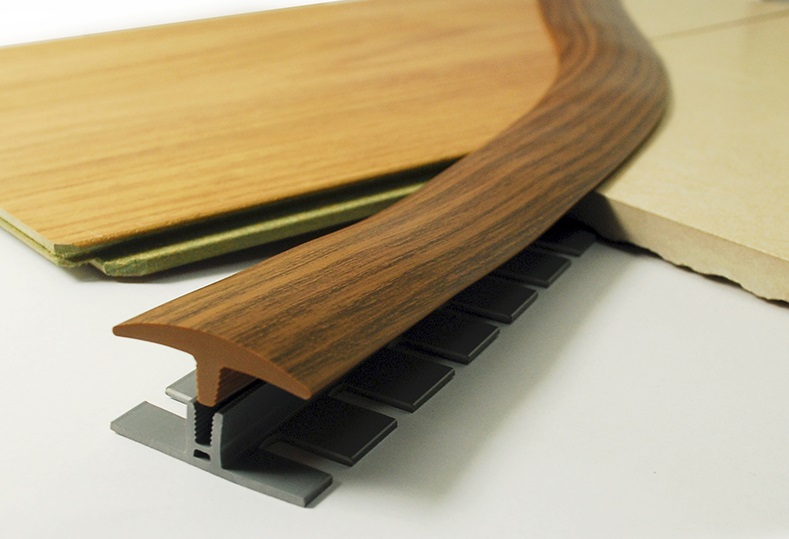
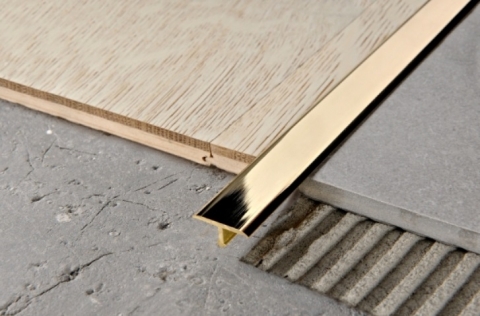
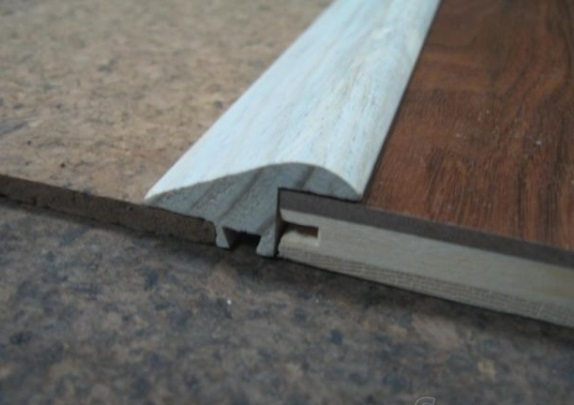
- T-shaped. Strictly speaking, this is a type of solid wood or PVC profiles. This is a beautiful plank that is inserted into the grooves for the design of straight seams. T-shaped thresholds are convenient, but it costs such pleasure from 600 rubles per meter;

- Single level. Such thresholds are also called moldings.They are designed to connect even surfaces.
- The speaker Suitable for installation in doorways where doors are missing. May have sharp corners or rounded shape.
- Transitional. The most diverse and complex in both the performance and installation of the thresholds. It is necessary for leveling multi-level flooring. With the help of round thresholds, coatings are connected at a height of up to 20 mm, and thresholds of complex geometric shape are needed to design the boundaries of functional areas in the room.
If the difference between the floorings exceeds 5 cm and the base cannot be leveled, a podium is constructed at the junction of the tile and laminate.
Materials and tools
The required working set depends on what materials are selected and how the installation of the nut will be carried out. For wooden and plastic thresholds, both self-tapping screws and high-quality adhesives are suitable.

Metal profiles are mounted exclusively with special fasteners provided for in the construction, or with the help of screws.
But the profile and the clamp is not enough to perform installation work on the joining of tile and laminate. The complete kit includes the following tools:
- Drawing accessories (pencil, ruler or tape measure) for leveling the edges of the flooring;
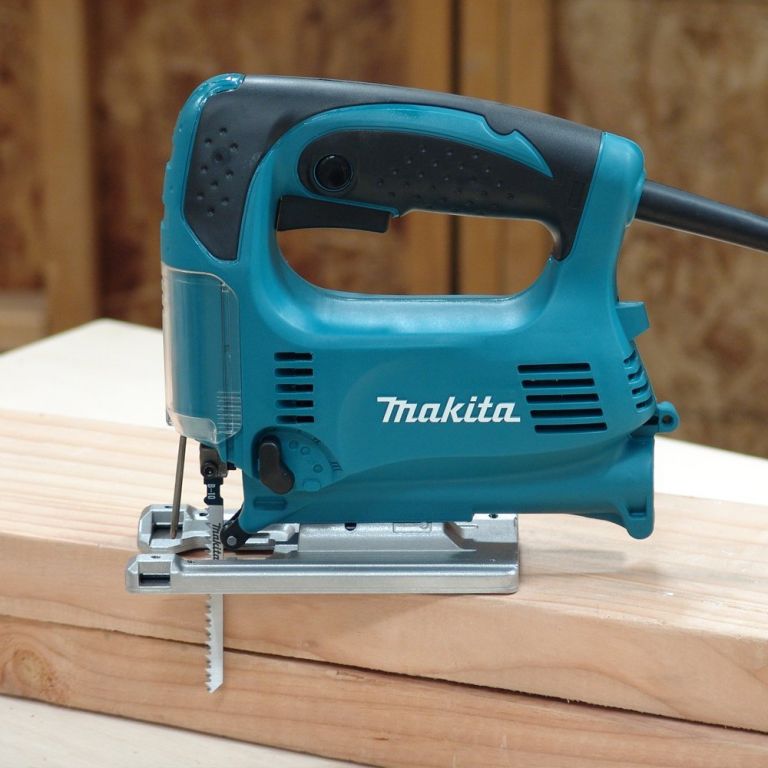
- Electric jigsaw or grinder with a disk or blade for cutting, which has a diamond coating (protect tiles from chipping);
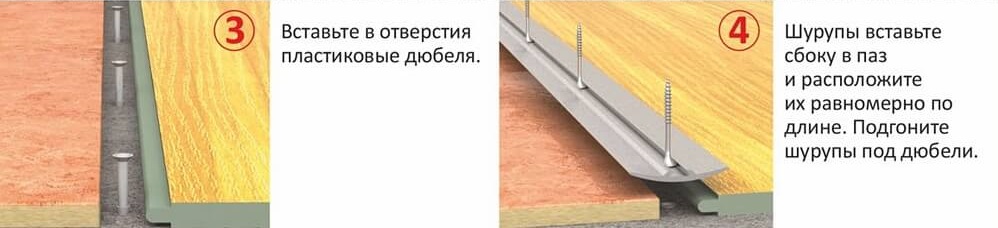
- A set of dowels and self-tapping screws (at least one for every 10 cm) for fastening the sills;


- Screwdriver or drill with interchangeable nozzles for tightening screws;
- Phillips screwdriver size fixer;
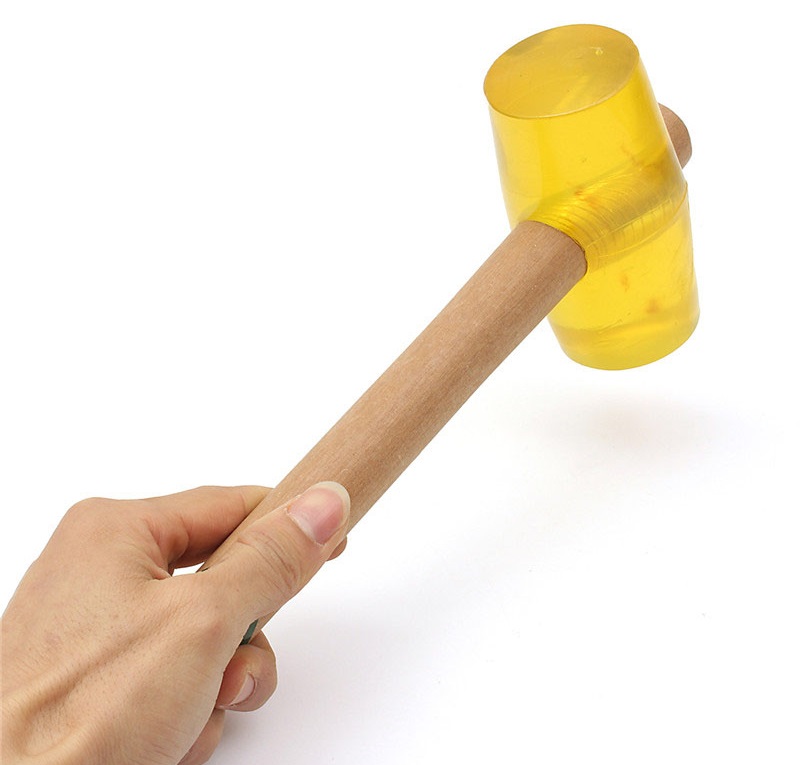
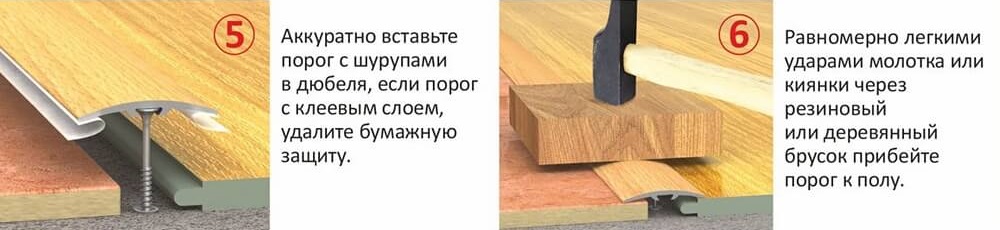
- Rubber hammer. The usual will not work - it can severely damage the appearance of the flooring;
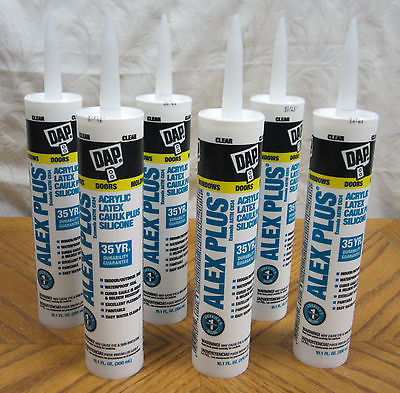
- For straight joints, a sealant or glue can be used instead of screws.

How to dock?
The combination of two types of flooring with the help of the nut is carried out in different ways.
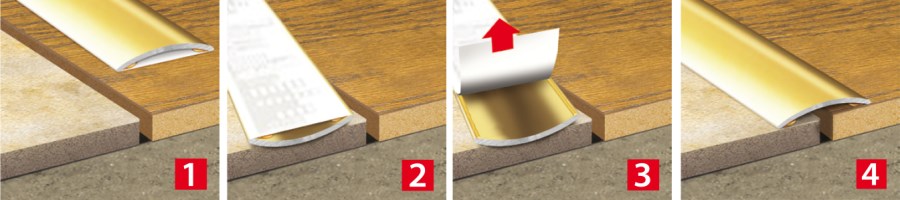
The simplest solution is use self-adhesive threshold. All that is needed to install it into the groove between the two decks is to peel off the protective film, to put the spike of the nut evenly into the slot and fix it well.
If the molding is just a flat plank, you need to make a markup so that it sticks straight. To do this, you need to attach the molding to the junction of the tile and laminate, align it so that the gap is underneath it in the middle, mark the edge line with a pencil or masking tape, peel off the protective film from the molding and place it on the joint by marking.
This option of masking the connection of two decks is suitable if it is a straight seam or doorway without differences in height between the decks.
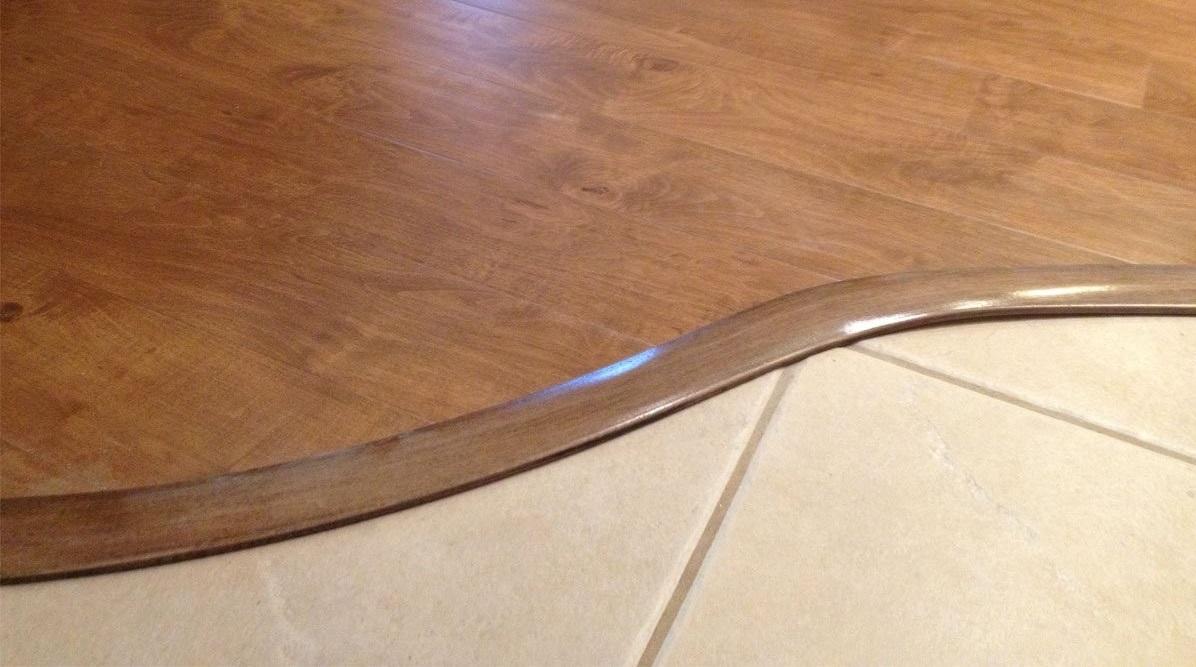
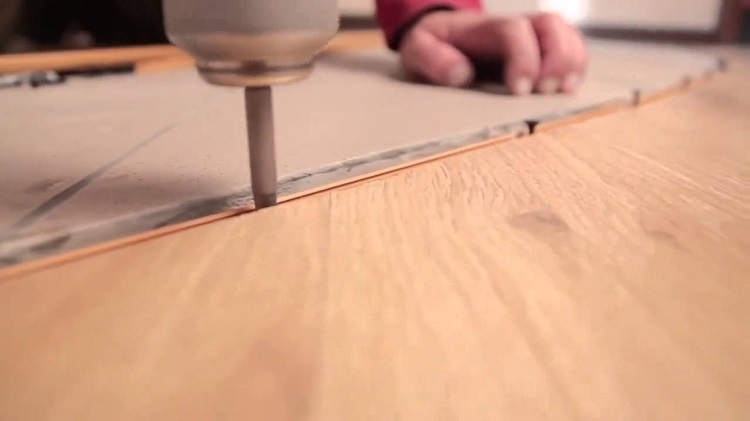
In case the joint is figured (wavy), and the height of one coating is slightly larger than the other, flexible connecting elements made of aluminum and plastic are used.

Installation of plastic profile is carried out step by step:
- Finishing the floor with tiles (porcelain stoneware) and laminate in such a way that the gap between the coatings allows you to install a mounting profile. Plus 5 millimeters for the “temperature gap” - the width of the profile changes with changing temperatures, and the installation is carried out with a heated profile.
- Drilling holes in the expansion joint. You can do it in advance. It is also important to consider how the electric floor heating system will be equipped in this place. In this case, the use of screws and dowels can be dangerous, it is better to choose liquid nails or sealants.

- Measurements of the required length of the nut. For maximum accuracy, it is advisable to manually bend it along the joint line, since it is much more difficult to adjust the size of the nut too short than to cut off the excess from the long one.
- Giving the profile a suitable length using a jigsaw or a sharp cutter.
- Connection with screws or self-tapping screws for fastening profile and base.
- Soaking a decorative profile. To make the product easily take the desired shape of the joint, it is pre-soaked for a quarter of an hour in hot water (up to 70 degrees). The preheated decorative part is inserted into the fixing part until a characteristic click.
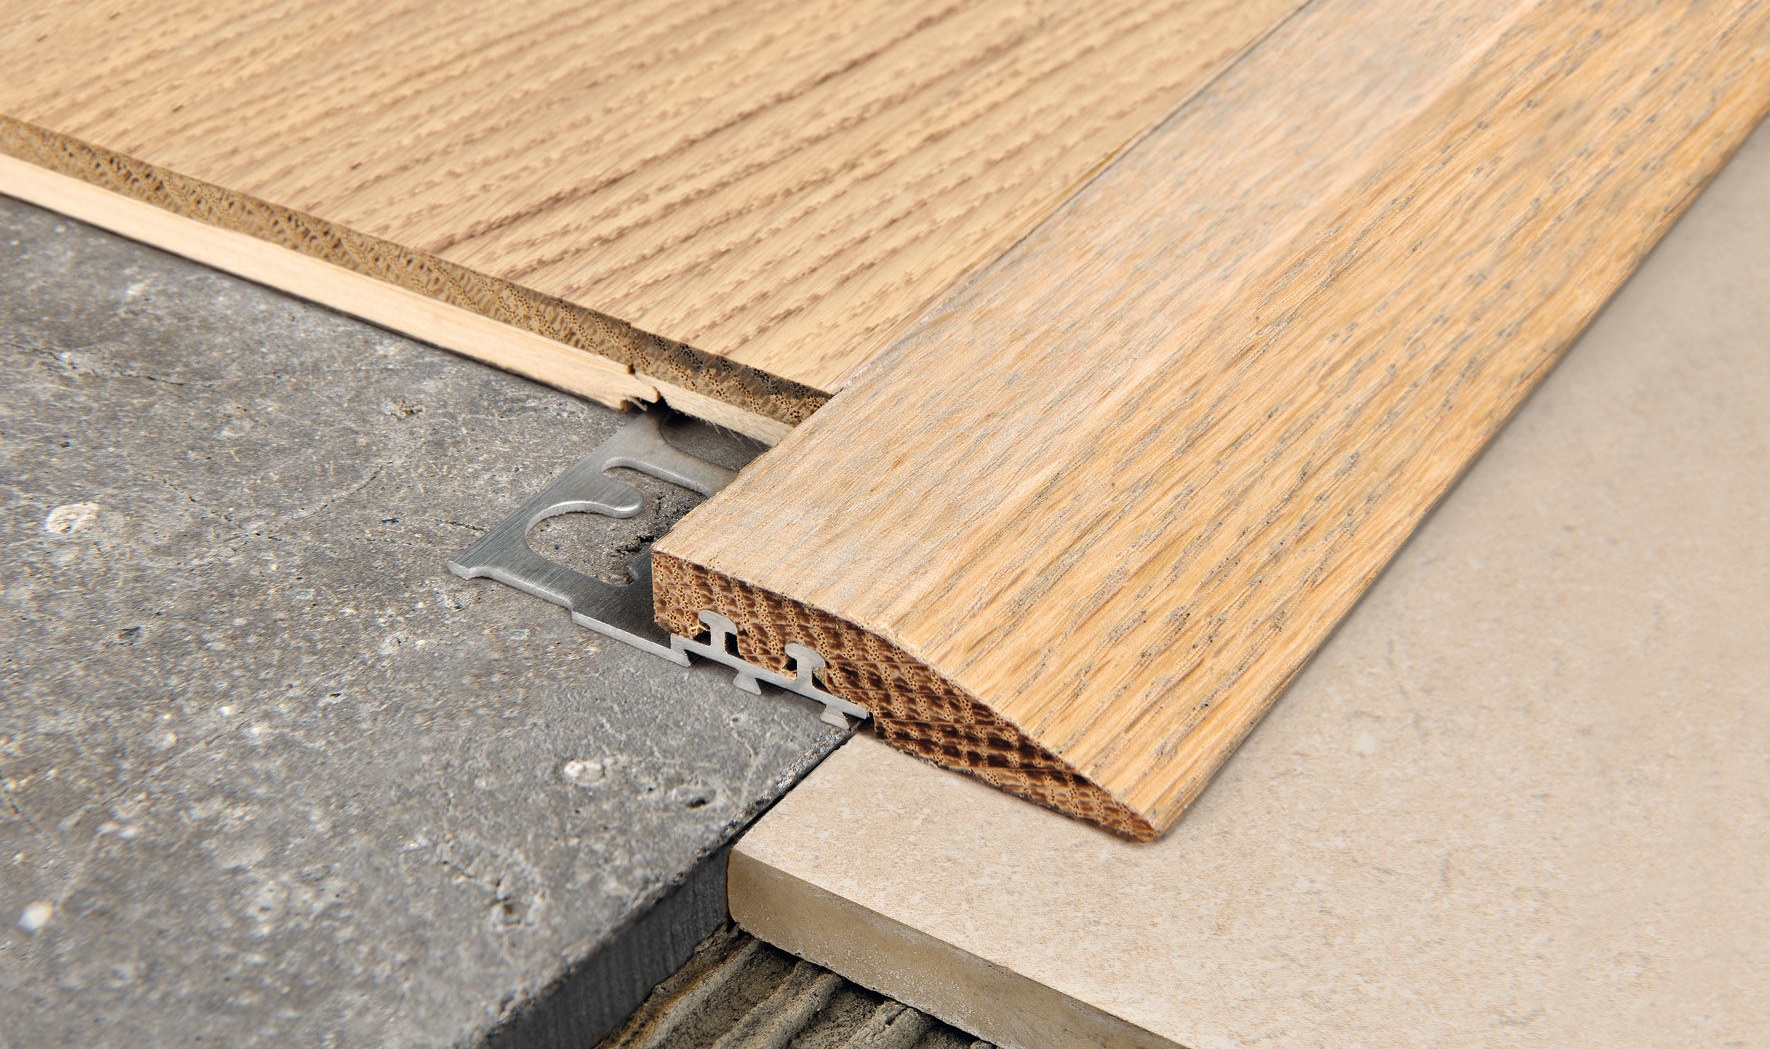
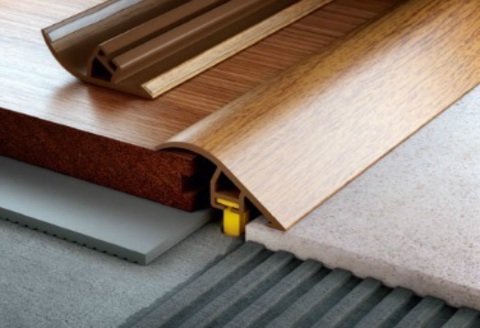
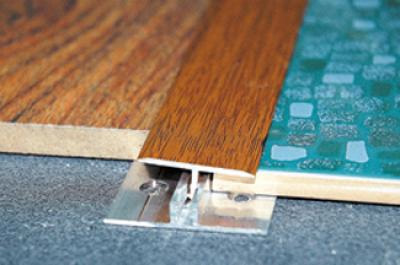
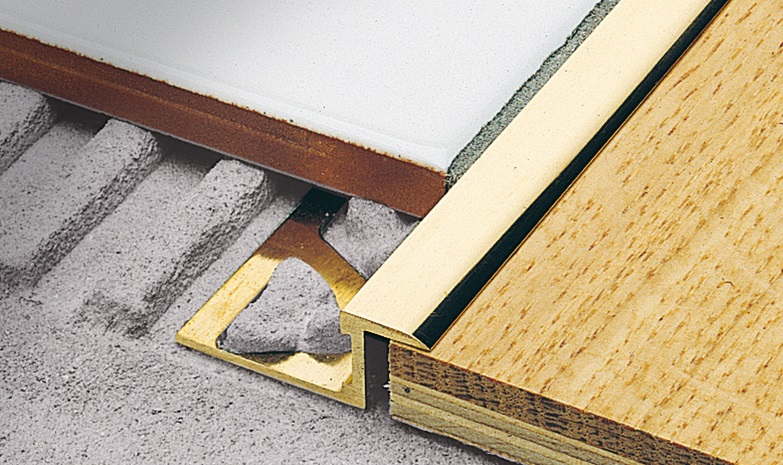
Installation of metal-based profiles, whether aluminum, brass or any other, is somewhat different from PVC:
- Prior to laying, it is necessary to calculate the thickness of the flooring, including the leveling layer (substrate), adhesive, thickness of tiles and laminate panels. As a result, the two decks will have to match. This is a prerequisite when the separation threshold is made of metal.

- It is necessary to start laying the floor covering with a tile, since it “presses” one edge of the profile and fixes it securely. The profile itself is equipped with metal "legs" that are attached to the floor, so its installation should be carried out immediately after or in parallel with the tile.
- After the tile is laid, you must manually bend the profile so thatso he repeated the bends of the joint. Then cut the desired fragment.
- The last fit laminate. Having laid out a part of the coating, it is necessary to “push” it under the profile, and only then lay out to the end.
Wooden porozhek most often used in doorways. It is less flexible and more expensive. Mounted in two ways: open and closed.
For open, you must perform the following steps:
- Measure the width of the doorway, taking into account the trim.
- Mark points for drilling holes at the joint, drill.
- Insert dowels into the holes, fasten the wooden cap with screws from above. It is better to use a Phillips screwdriver so as not to damage the product.

Installation in the closed way:
- To purchase a wooden threshold, in which there is a groove for the installation of screws;
- Unpack the screws, if necessary, file the sides of the caps to keep them in the groove better.
- Drill holes of the required diameter in the floor and insert the dowels from the kit into them;
- Insert the screws into the groove, distribute at the same distance as the dowels.
- Insert the nut with screws into the holes in the dowels, nail it to the floor with a rubber hammer.
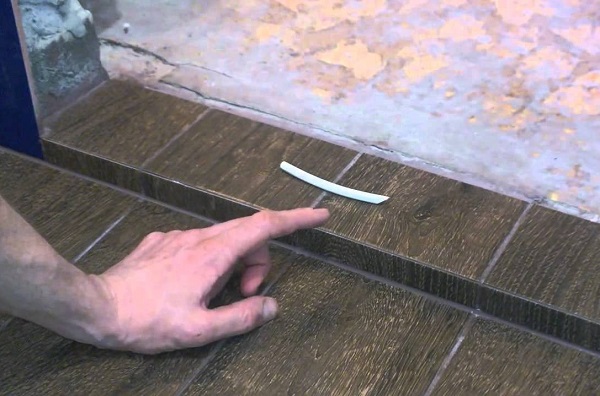
Thresholdless connection
When the gap at the border of the joints is too wide, the installation of sills, profiles and moldings is impractical. It is more convenient to connect the two floorings using materials that fill the void between the laminate and tile and level them up. These are a variety of sealants, compensators and liquid compounds that harden in air.
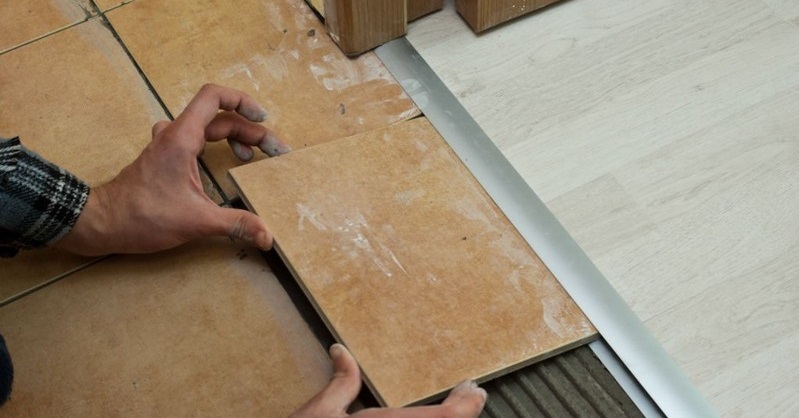
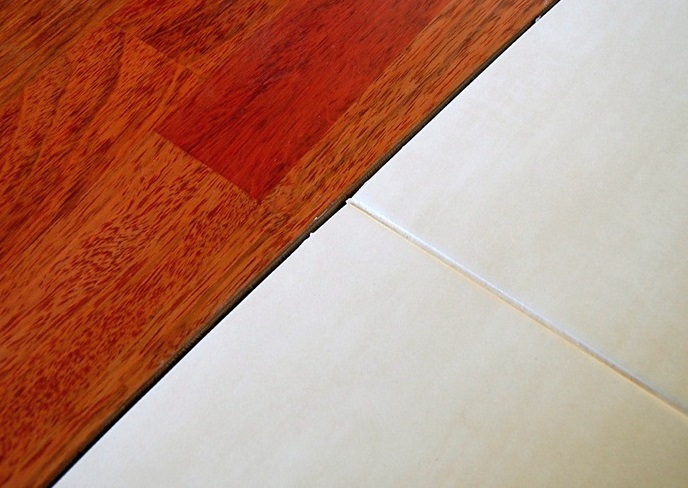
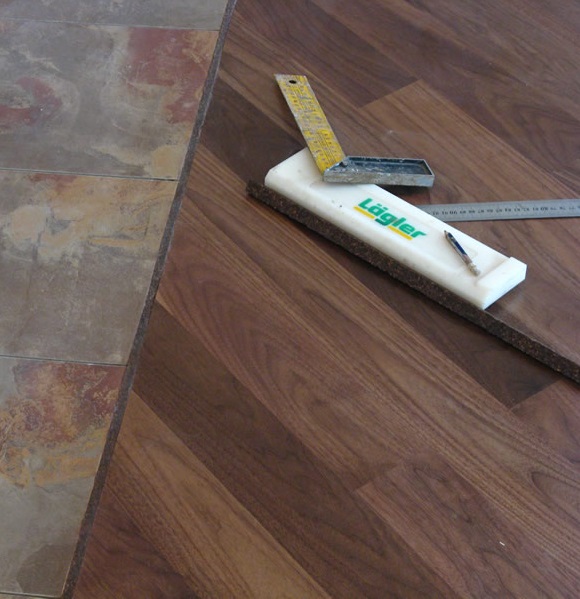
Difficult actions to merge the two decks together are not needed when these decks are located at the same level and as close as possible to each other. There is a separate technology of laying, which eliminates the need to turn on the imagination and work with your hands to eliminate the gaps in the floor - butt.
Laying tile against laminate requires some skill and experience for the most accurate execution. The docking of two decks requires adherence to a number of rules:
- Carefully level the floor with the substrate and the stabilizing layer. This is necessary for converging surfaces that need to be joined into one plane;
- The maximum difference in height between decking is up to 1 mm;
- The end parts of the ceramic and wood-fiber coating should be properly processed;
- To install the materials butt to joint, they must be cut without chips, burrs and irregularities.
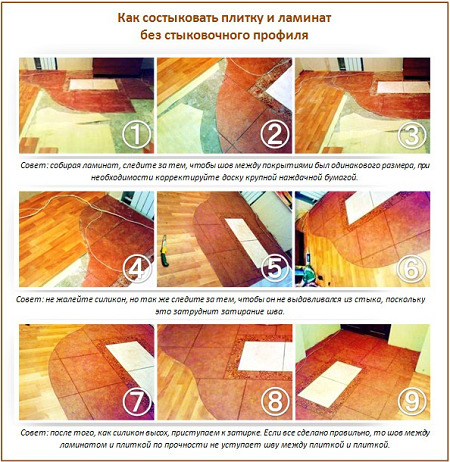
Installation is a sequence of steps:
- Before laying the pattern on the floor with a tile or laminate to the intended place of the joint, process this place with a primer or sealant based on silicone. The layer should be smooth and thin, and the material - not shrinking.
- Laying tile with adhesives. It should protrude slightly over the line of junction.
- Lay laminate overlap.

- Use a convenient material to cut the pattern of the docking seam of the desired shape.
- Mark the floor and cut off the excess. The tile is cut only with a diamond wheel, laminate - with a jigsaw or hacksaw.
- Glue the base to the floor;
- Fill the docking seam with a liquid substance with good hardenability and resistance to damage. Align the seams.

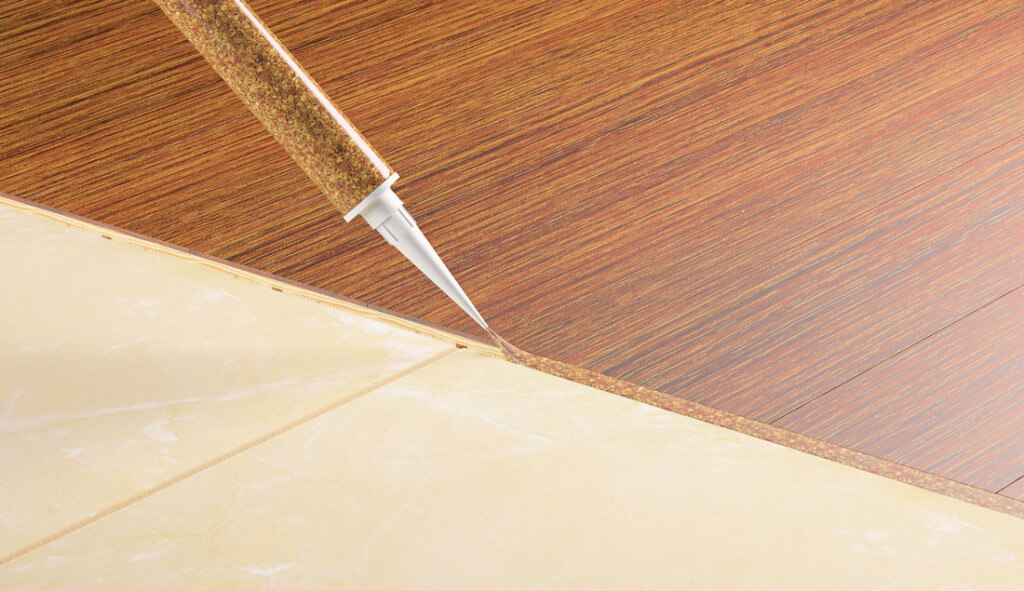
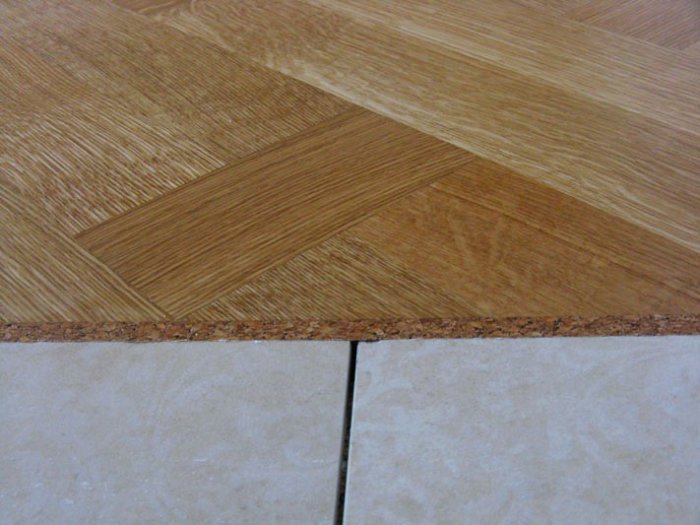
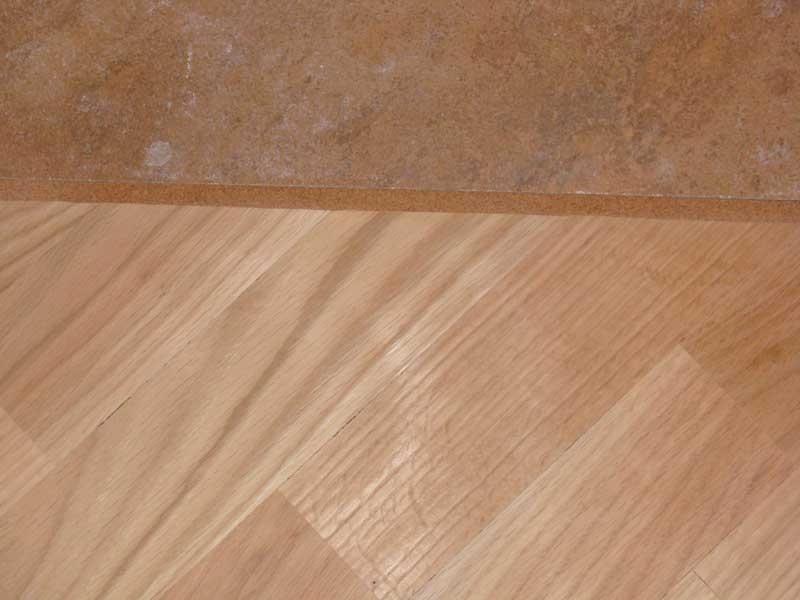
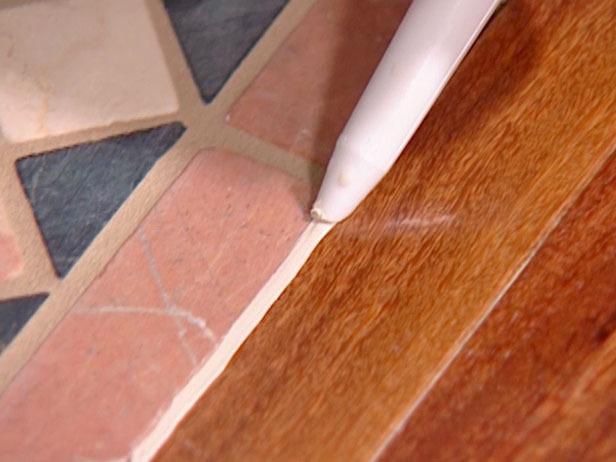
Cork compensator
Its use makes the joint almost invisible and perfectly flat. It is especially important to use a compensator when the seam is long, and for long and figured joints, a cork sealant or a “liquid” compensator is used.

Progress:
- Lay the cable and laminate as close as possible.
- Cut the compensator to the desired length.
- Place a compensator in the seam using a screwdriver. There is nothing difficult, you just need to push and tamp the product.
- Treat the top with a clear sealant.
- To wipe the seams.
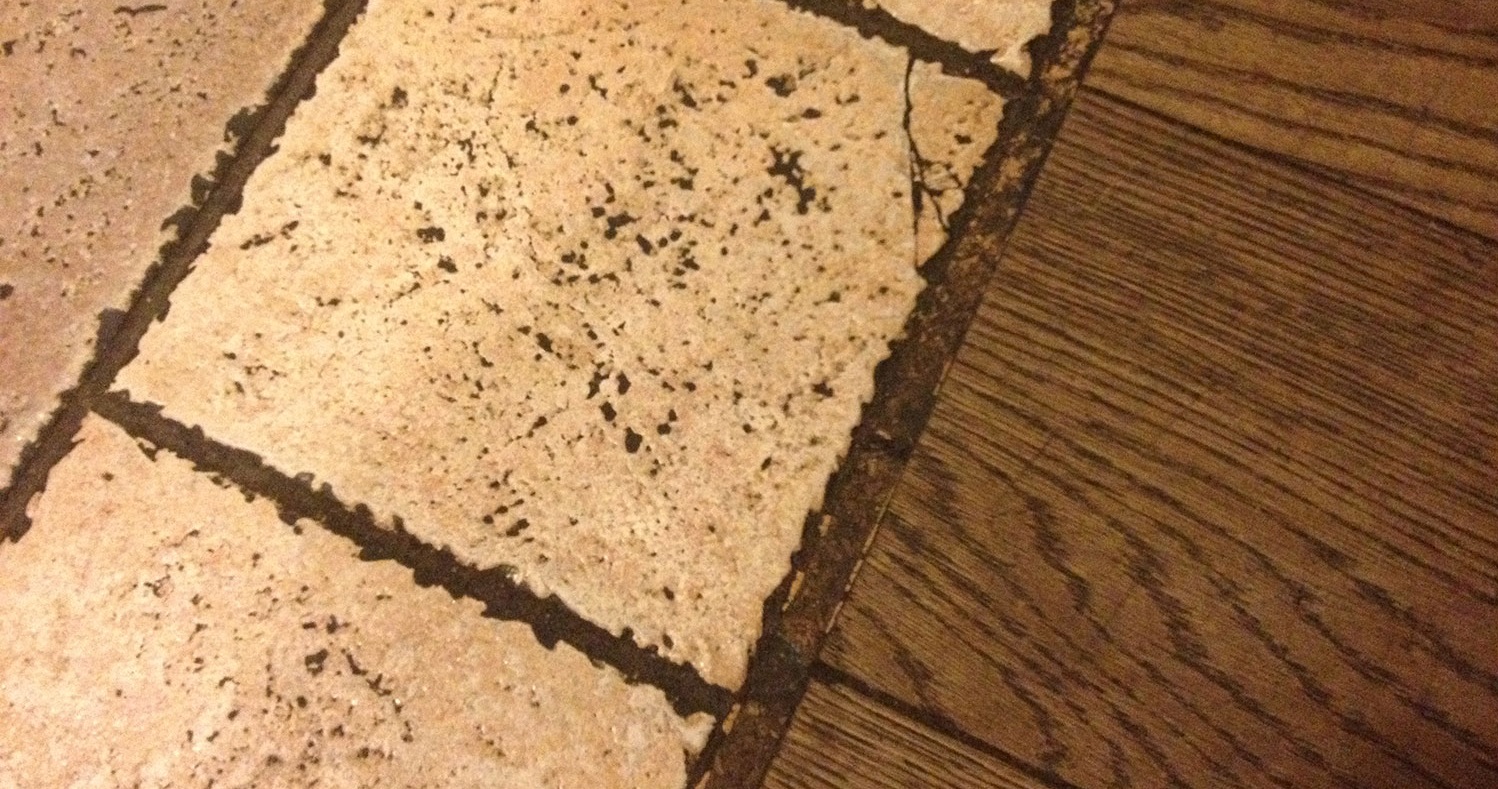
The course of work with a liquid cork implies similar actions with the difference that the liquid cork “fills” into the joint seam, like paste. Before applying cork sealant, it is necessary to clean the joint from dust and debris, level the edges of the flooring and treat the joint with a primer. Unlike the finished compensator, which has a different width, depth and length, the cork is universal.
The most important thing is to completely fill the void, otherwise the compensator will “drain” and the gap between the floorings will open.

Podium
Podiums are constructed rarely. As a rule, this is required by design features, or it is just necessary to beautifully beat a multi-level floor. If it is not possible to align it with a tie and backing, you can make a drop (from 40 mm and above) using different materials. Fixed decoration of the podium with adhesives and special fasteners.
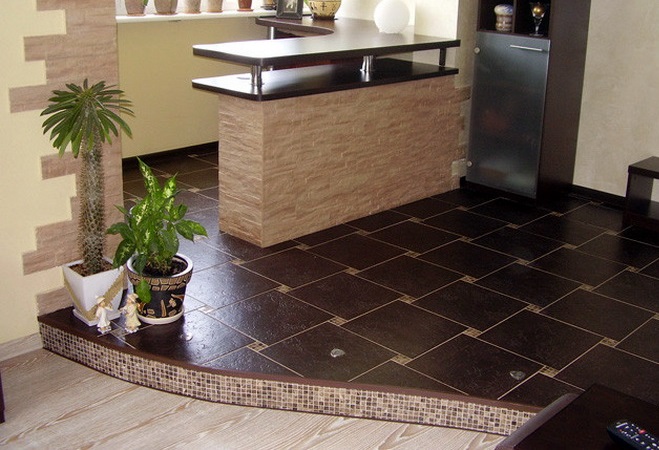
Most often it is made of tile or porcelain.
Using podiums may be unsafe in the entrance area and in a house with small children.
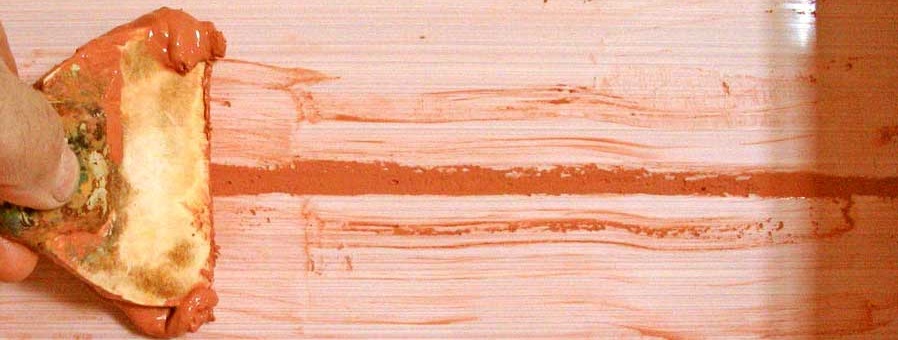
Grouting
To seal the connecting seam on the border of two floorings without eaves and profiles, a sealant of various types and properties or grouting is used.
Grouting is a finished dry mix (cement, epoxy, silicone), which includes the proportions of all the necessary components. To be ready for use, you just need to dilute it with water, like wallpaper paste.
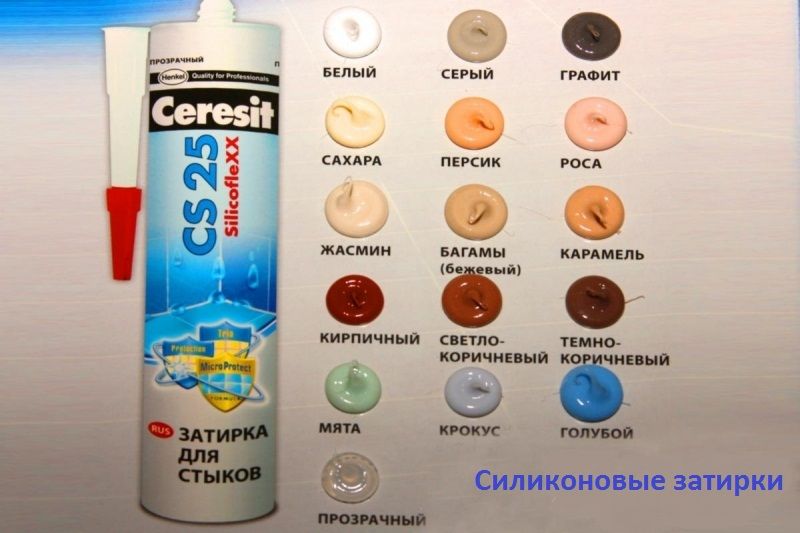
The grout is matched to the color of the tile, but there are also universal colors, for example, white. It will be harmoniously combined with tiles and laminate of any color.
The advantages of grouting are that it is economical, easy to use, creates a feeling of wholeness and a smooth, even joint, has decorative properties, is waterproof and durable.
You can find out how to quickly and easily join tiles with laminate in the next video.