How to make garden paths from scrap materials yourself?
Garden paths have long ceased to be a necessity and are one of the elements of the dacha plot décor. Let's try to understand the variety of materials for their manufacture. And also let's talk about the basic principles of manufacturing tracks on their own.
Design features
The shape of the tracks depends largely on the area of the site, its functionality and on the cost of making it yourself. For a small suburban area with a garden and other buildings, they are trying to make small, low-cost paths from scrap materials, but taking into account that it is possible to roll a trolley. The shapes of such tracks are, as a rule, rectilinear, without winding lines.
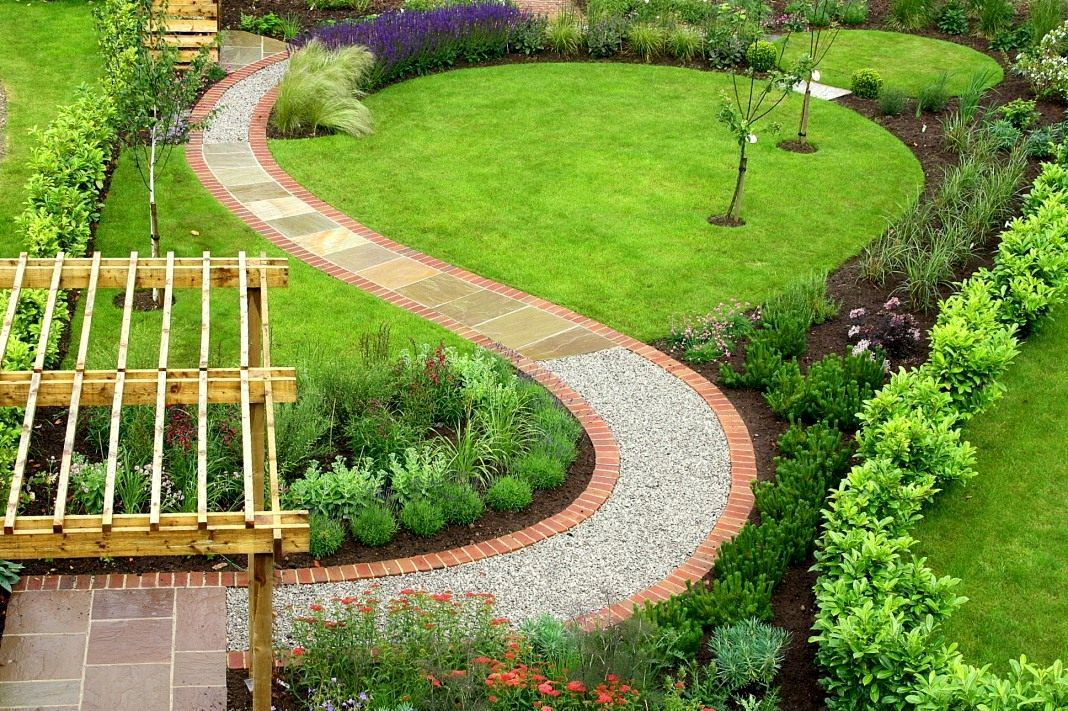
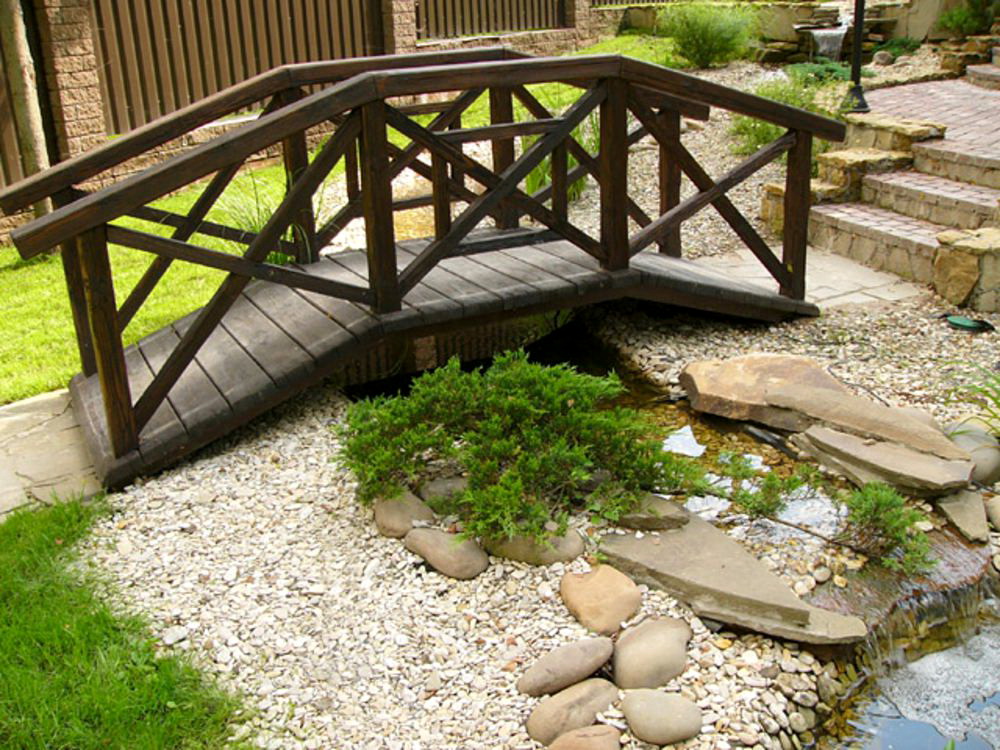
If the area allows, there are forces and time, then it is better to make curvilinear tracks in the country, the overall composition of the plot will only benefit from this. With the help of the tracks, you can create an artificial or beat the existing relief. The decorative bridge will look even more interesting, the reservoir can be real or “dry”.
Materials
It is possible to make garden paths from anything, everything depends on your imagination, temporary opportunities and financial assets. But before choosing a material you should take into account the following factors in advance:
- Load by weight Driveways for the car and the main entrance are most often used, respectively, and the materials must be strong and durable (for example, concrete, stone). Paths among garden trees can be easier and more airy - gravel, wooden cuts, plastic tiles will do.
- The length of the tracks and the cost of materials. These are two factors that are directly dependent on each other: for small sections of 6-8 acres and the tracks will be small, the total cost of materials in this case will not be high. While for plots of 15-20 acres and even higher, even the most expensive pavement tiles with a large length of paths can get into a serious amount. The possibility of repairing and replacing some parts is also worth considering.
- Weather resistance. When picking up the material, pay attention to its resistance to temperature extremes, decay and the formation of mold.

Now try to list all the most frequently used types of materials for creating garden paths in suburban areas:
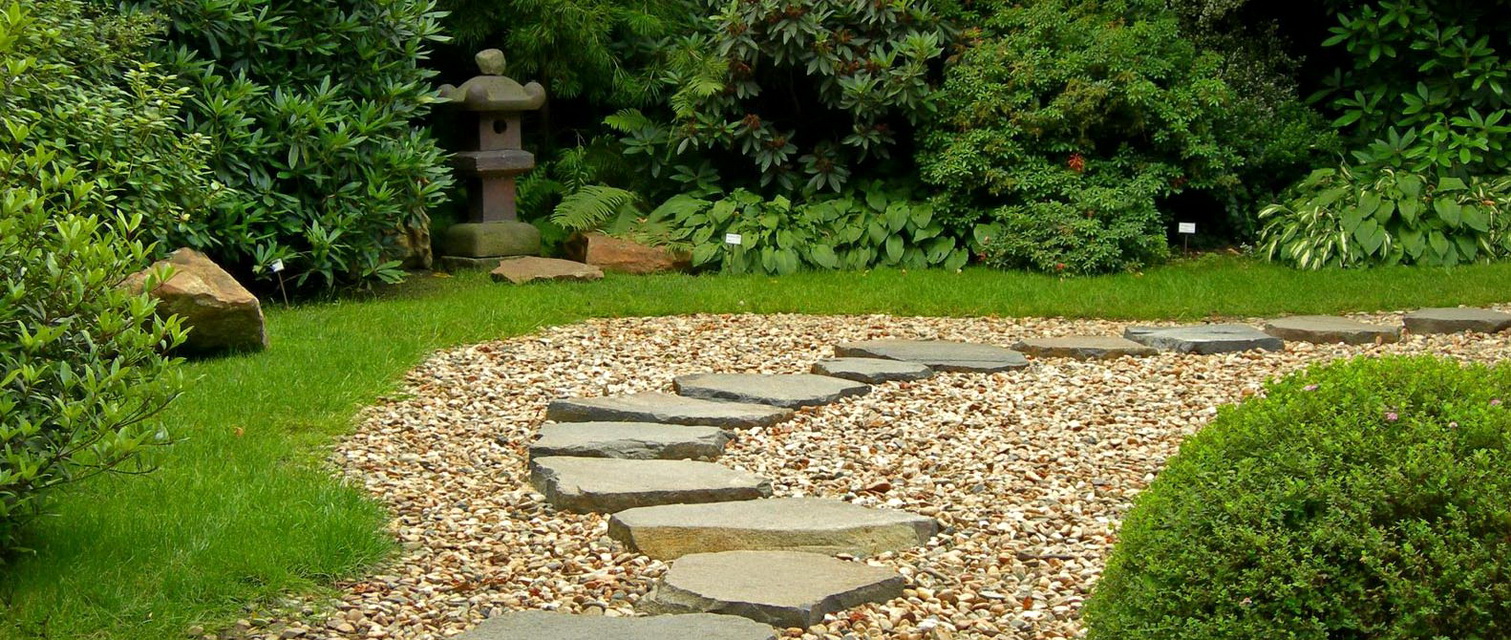
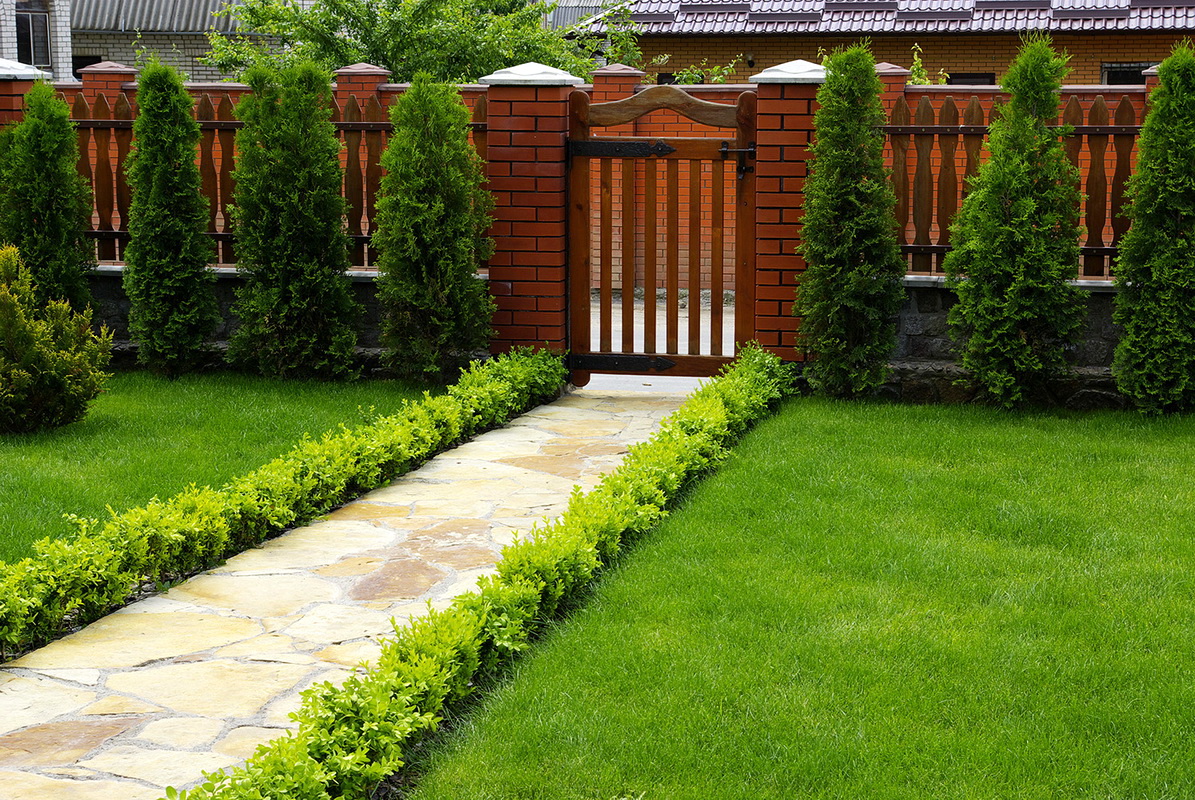
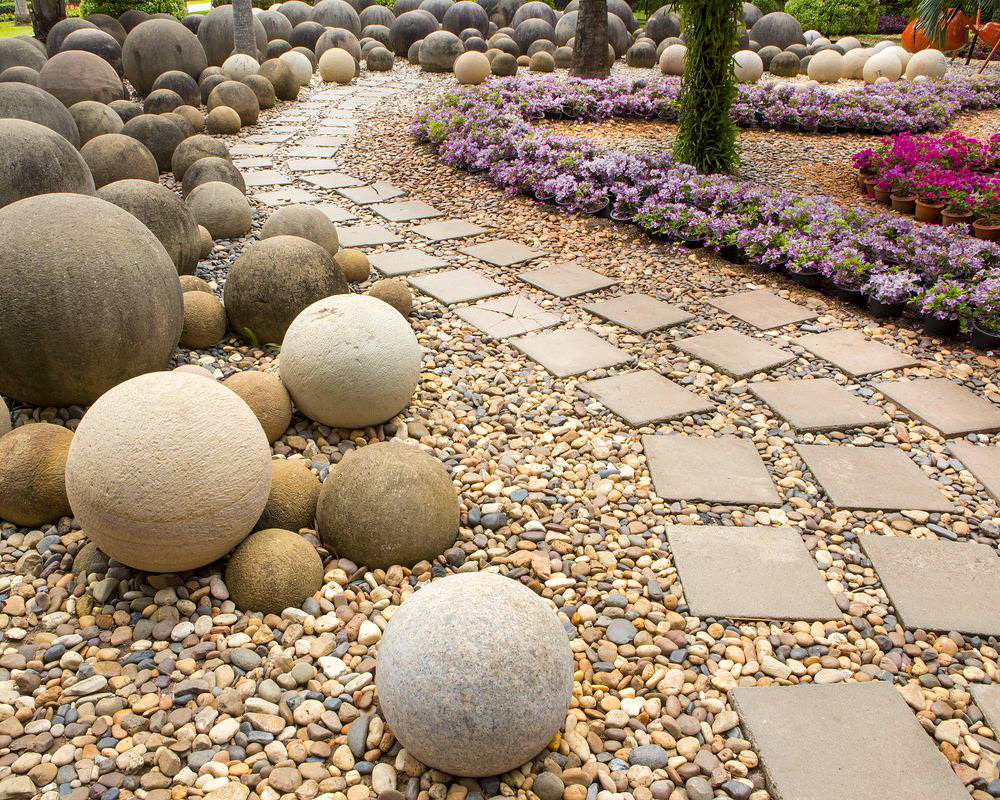
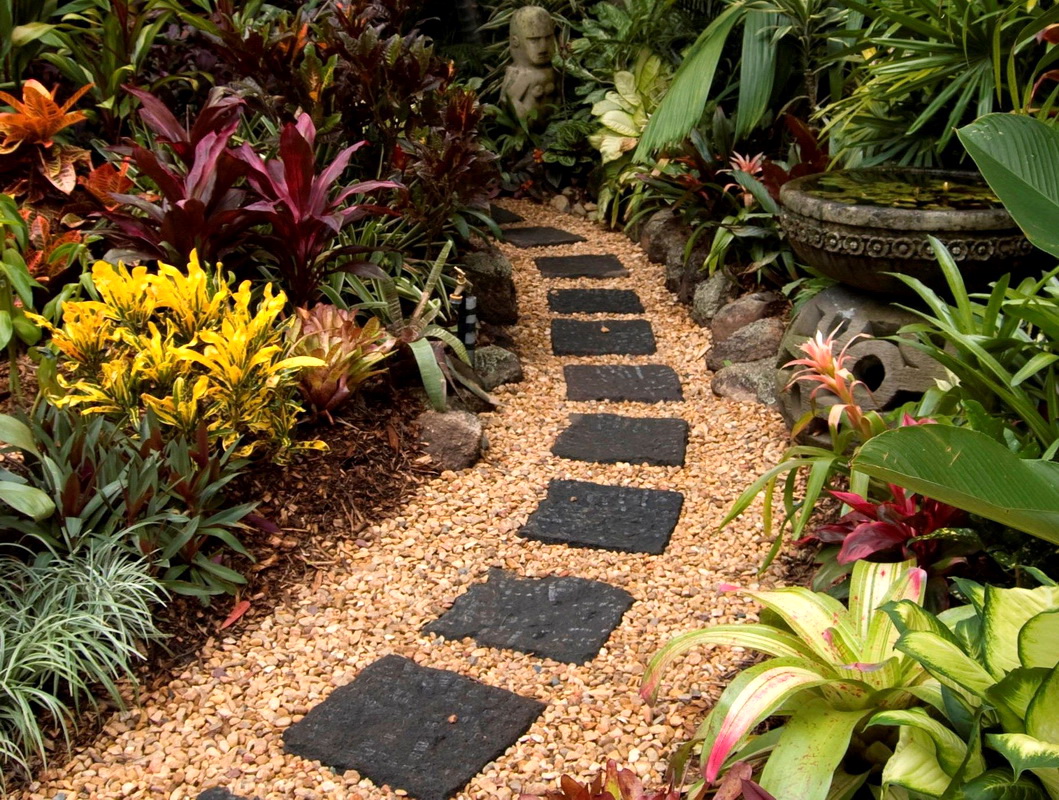
- A rock. The most commonly used limestone, which is produced by sawing large stones into flat plates. A variety of shapes and sizes of flagstone allows you to create different configurations of tracks. They will serve you not one decade, look very effectively and nobly. Of the disadvantages of this material is worth noting the high cost, it can become slippery when wet, and at sub-zero temperatures it becomes covered with ice.
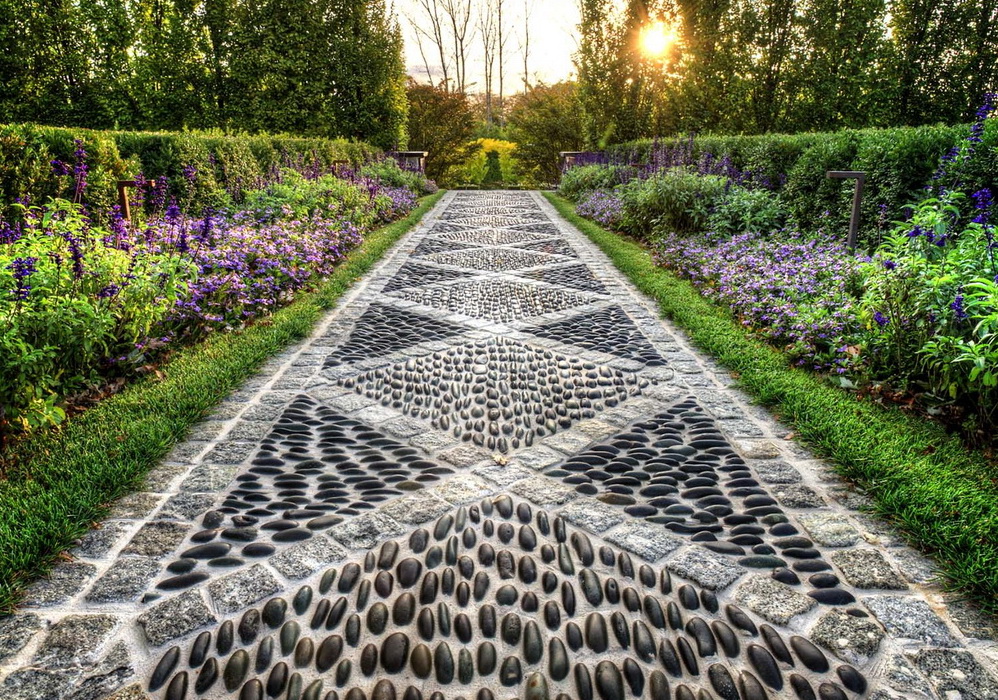
For paving paths, you can use the river round stone or pebbles. It will look very original if you lay out a picture or ornament.
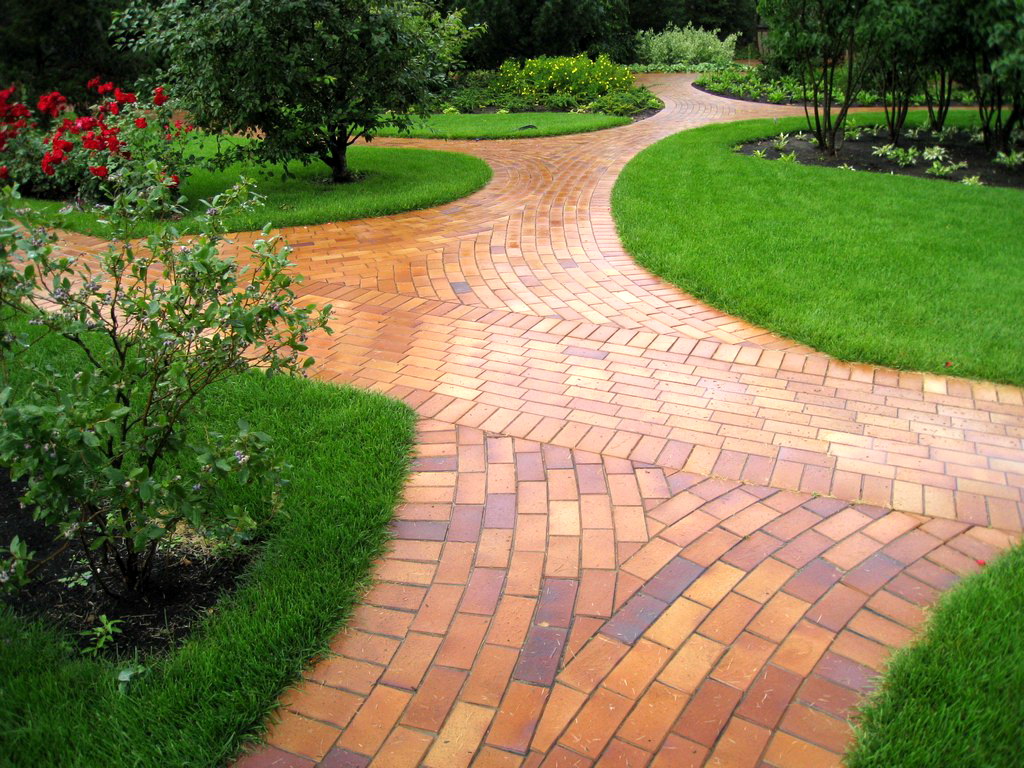
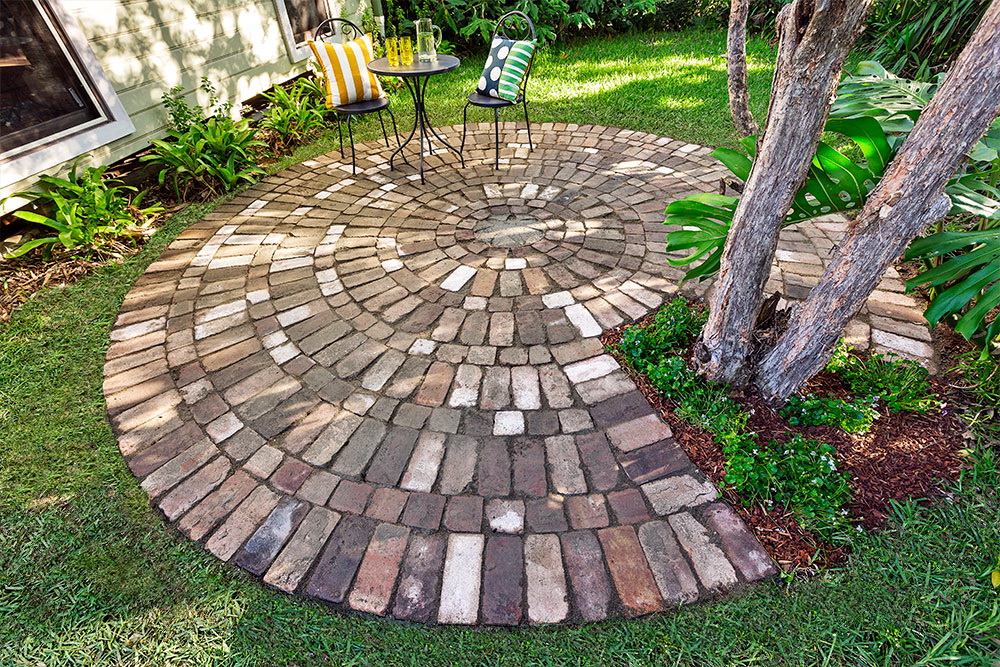
- Brick. For street lanes it is permissible to use a brick, but only not ordinary for walls, but a clinker brick, it is more durable. With the help of bricks it is possible to create different ornaments. The color scheme has several shades.Of the minuses, we note the considerable cost of one unit, as well as complexity in laying (brick should be laid on a concrete solution, a simple sand pad will not work).
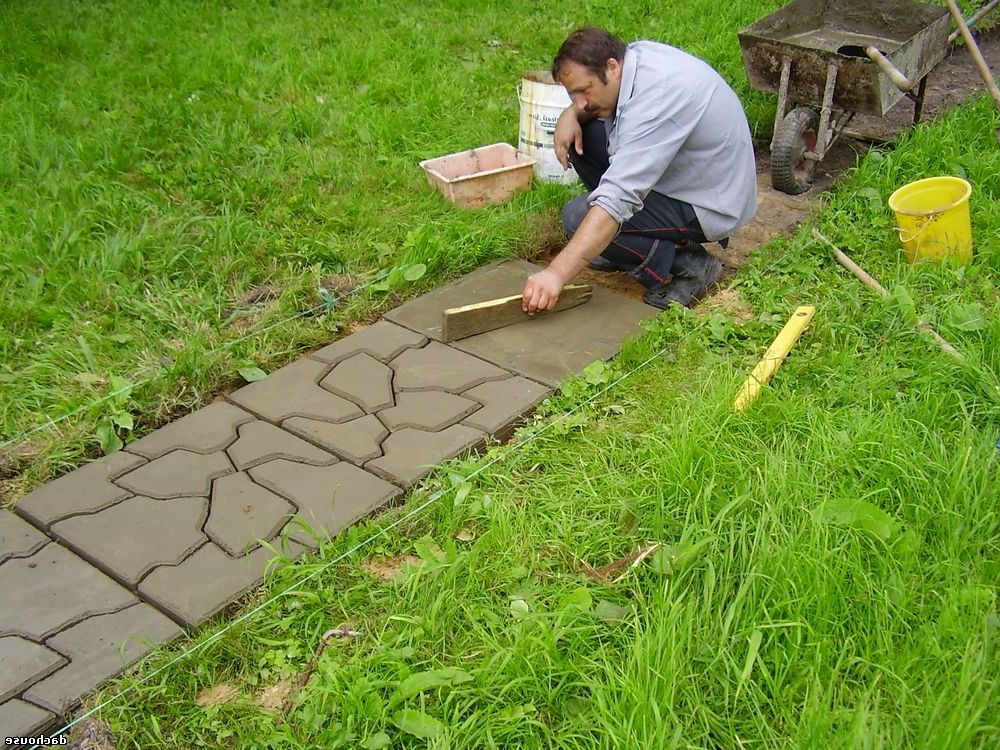
- Concrete. Concrete tracks - this is a more budget option than stone and brick. Modern technologies allow making concrete paths in color, imitations of stone and other textures are created with the help of various building forms.
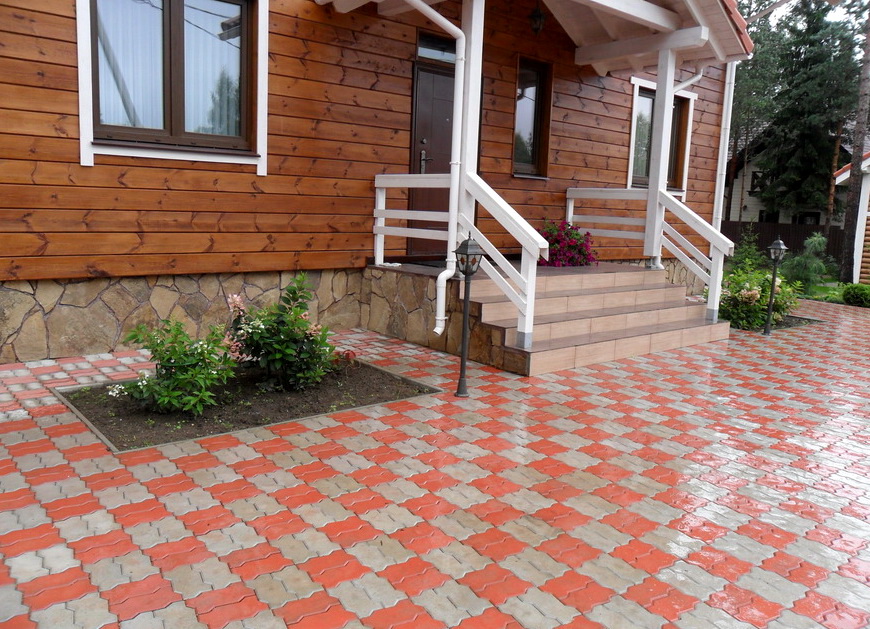
- Paving slabs. The paving slabs find the increasing popularity as option of dressing of garden paths. The reasons for the overall popularity lie in a wide variety of shapes and colors, and the installation is not as complicated as with brick and concrete.
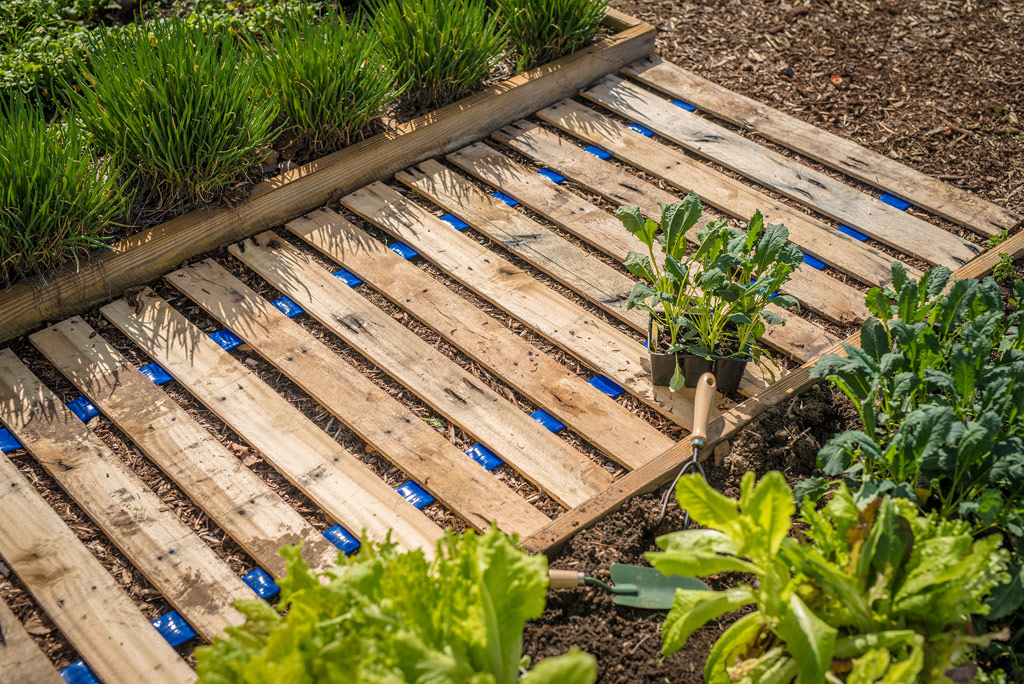
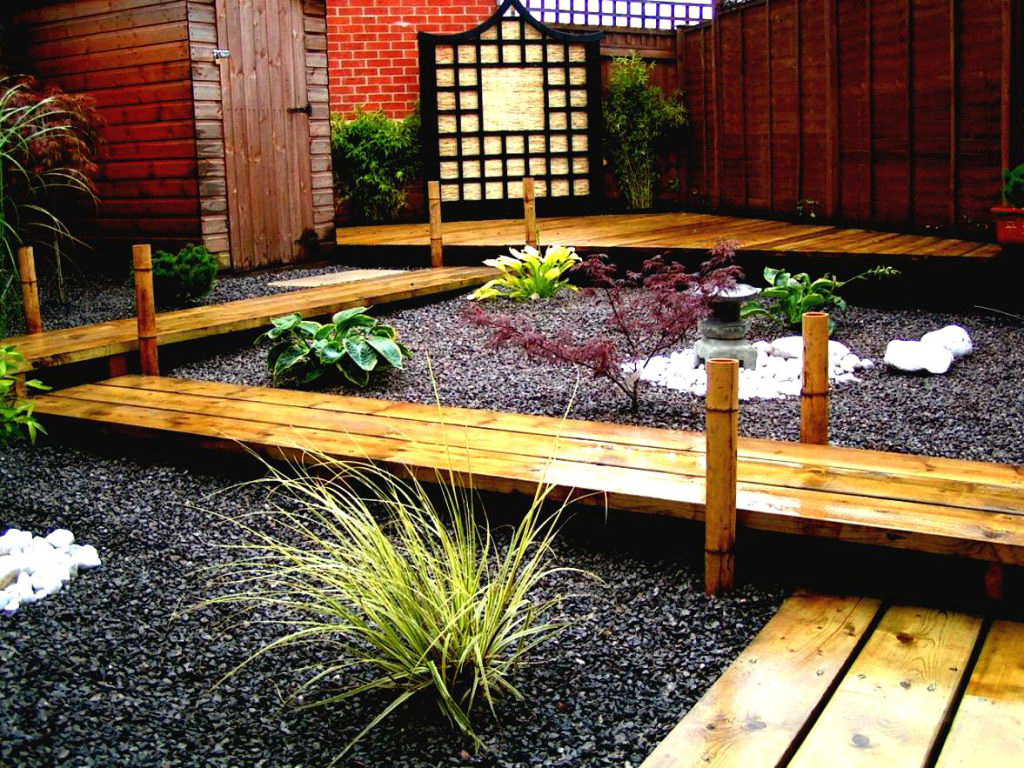
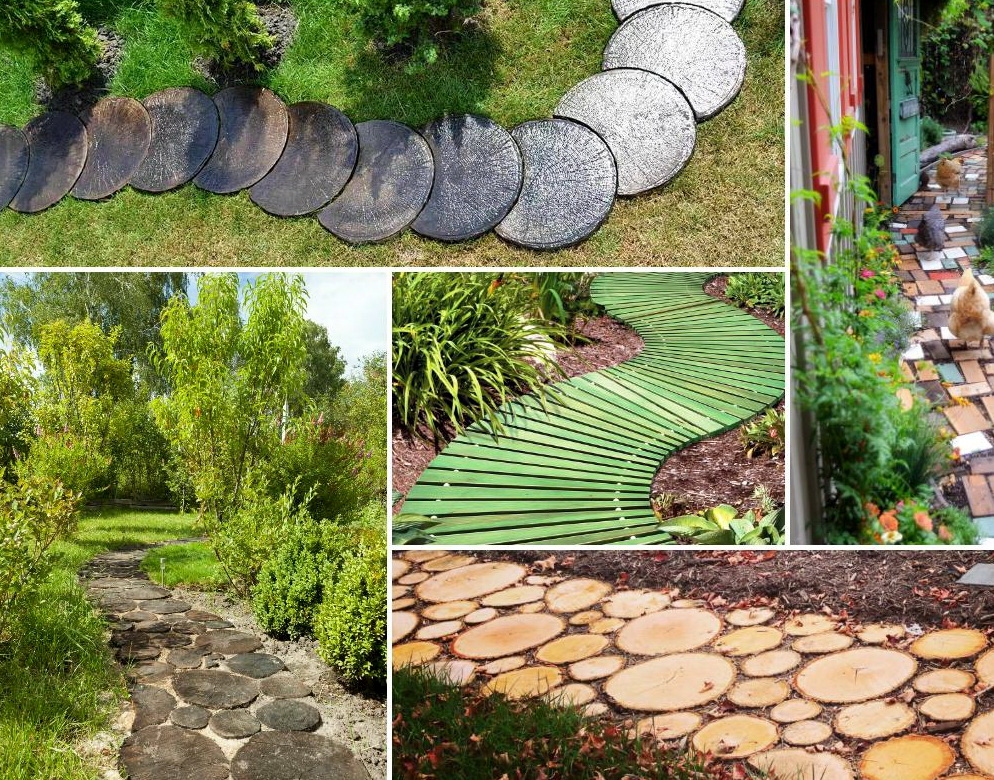
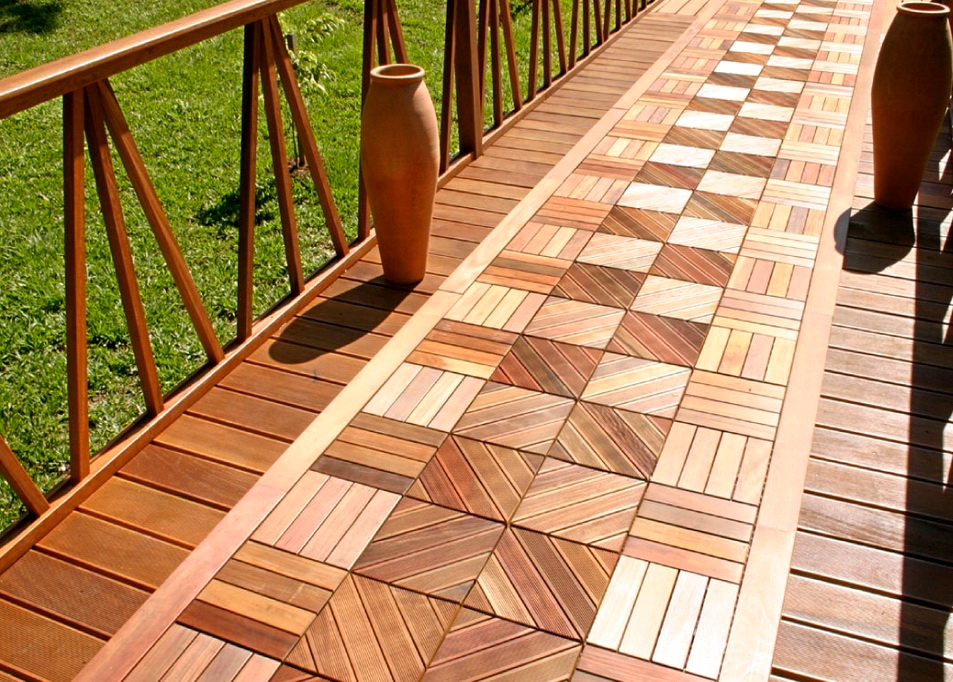
- Tree. Wood, as a very eco-friendly and widely available material, will always be in demand among any construction work. It is convenient and pleasant to work with him. Wooden walkways, as a rule, are made from ordinary planks, decking or sawn roundwood.
The latter are best treated with special solutions to protect against the aggressive effects of the sun and water.
- Plastic and other materials. On sale there are special sets of modular plastic coating.If this is a set of tiles, then their installation is very fast and convenient with the help of special clips. But such a coating is more fragile than those listed above, you should not use it in places with a large functional load. However, it is perfect for the playground in front of the pool, in the recreation area or in the playground.
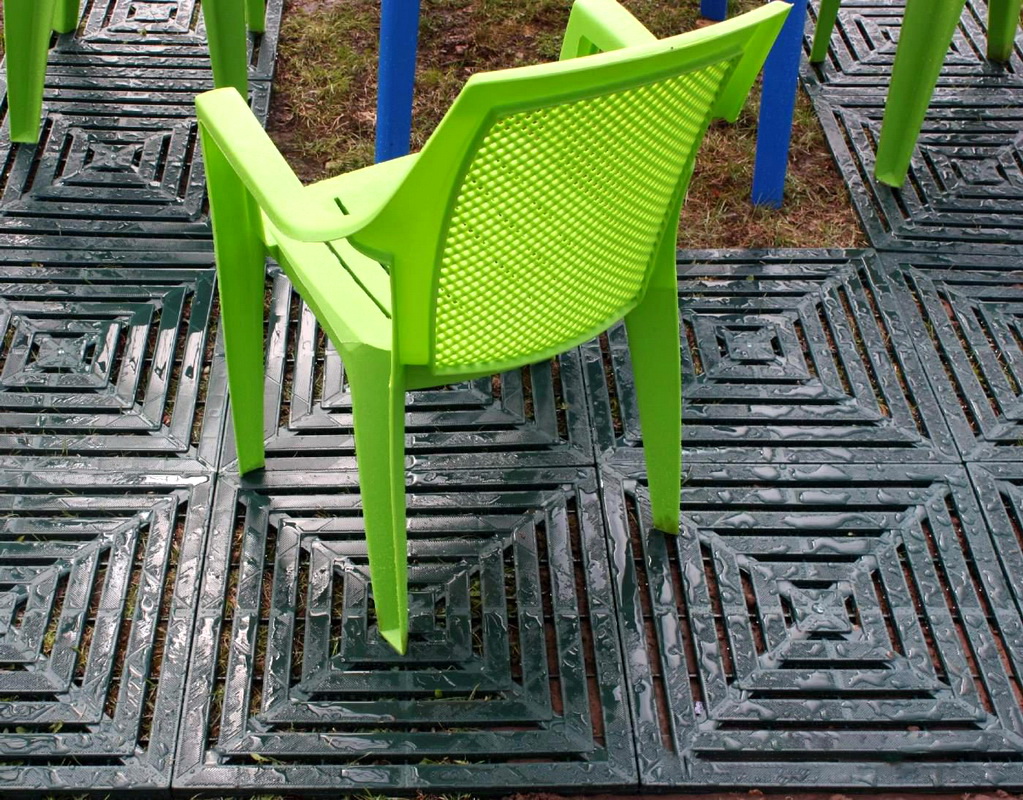
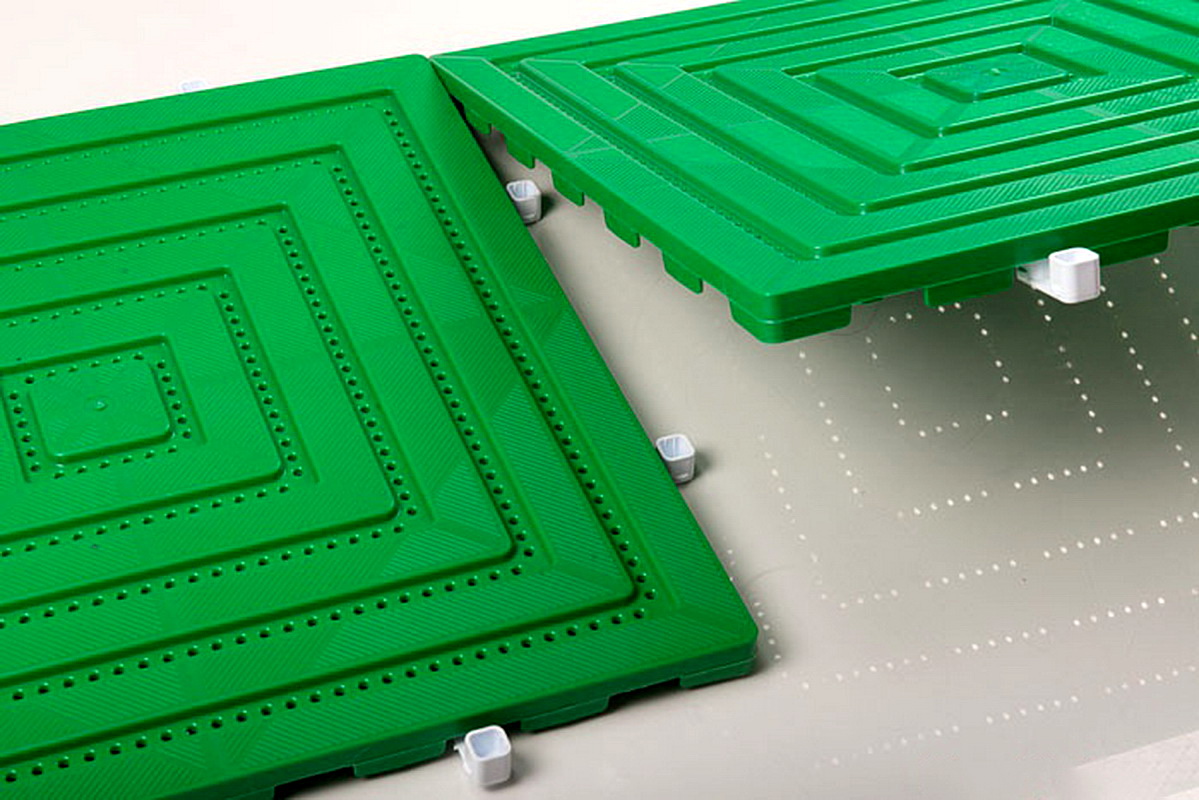
- This group will be assigned to garden flooring. These are wooden elements or plastic imitating wood, at the base of which there are special mounts like modular plastic plates. The assembly of such a coating is very fast, and it looks very impressive. However, during the operation it should not be subjected to heavy loads. This coating is perfect for decoration gazebos and verandas.
Handy objects sometimes find a second life in the form of covering the paths on the garden plots. Resourceful summer residents use the lids or the plastic bottles themselves, shards of glass bottles and ceramic dishes, and old automobile tires.
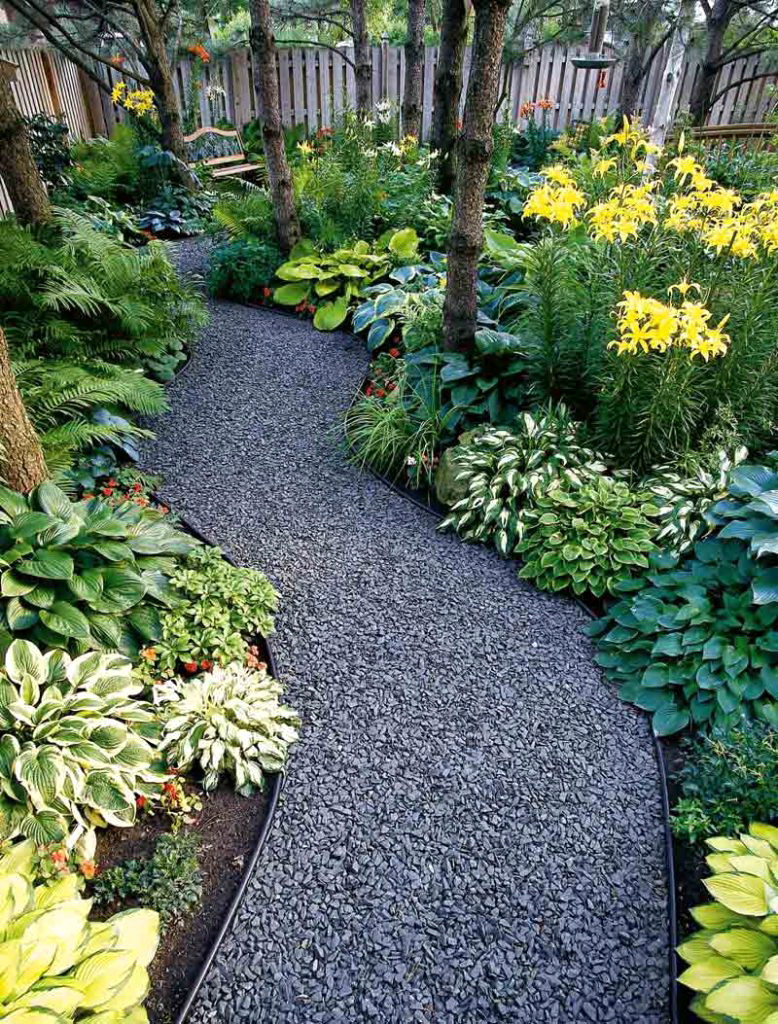
- Bulk tracks. In suburban areas, where there is only a lawn and trees, where the territory is planned only for a walk, you can organize bulk paths.The material for filling such paths is crushed stone, gravel, brick and marble chips, sand, sawdust or car, a combination of bulk materials with solid elements (boards, limestone). Making such tracks is much easier than all the others, but the maintenance will be more complicated and permanent (it will require constant filling of material).
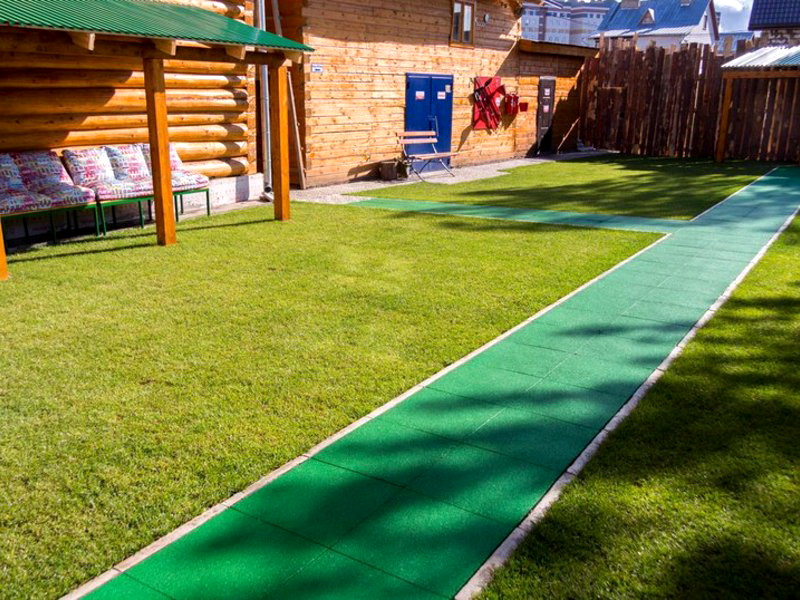
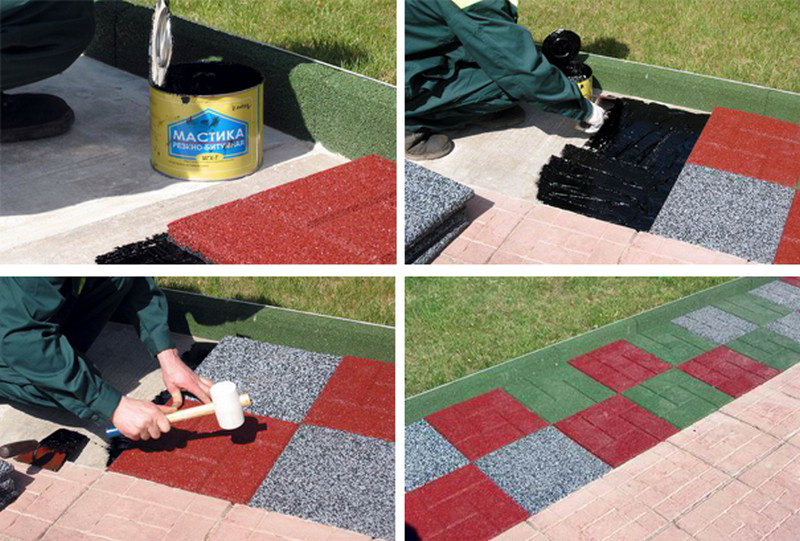
- Rubber cover. This is one of the "youngest" types of coverage. In recent years, modern playgrounds are covered with just such a rubber coating. The rubber coating is a mixture of rubber crumb, which is obtained by crushing old tires, and a polyurethane connector.
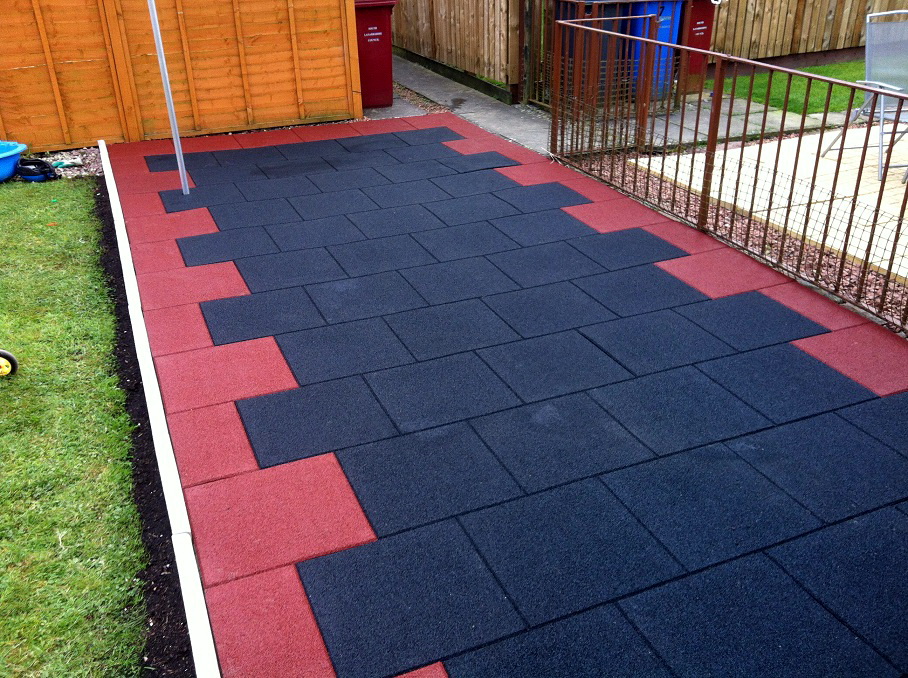
The latest new type of flooring has many advantages:
- Easy to install and dismantle.
- Can be installed on any surface (wood, stone, metal).
- Resistant to environmental influences.
- It is environmentally friendly, odorless and does not acquire any others during operation.
- Moisture does not linger, does not slip.
- Wide color palette, variety of forms and types (tile, paving stones, border, rolled, seamless).
But a couple of drawbacks significantly hinders the widespread use of rubber coating: high cost and fire hazard near an open flame.
Plot marking
So that the country lanes would last for many years, not collapsing and not disturbing the planned geometry, It is very important to perform preliminary work on the installation of the material:
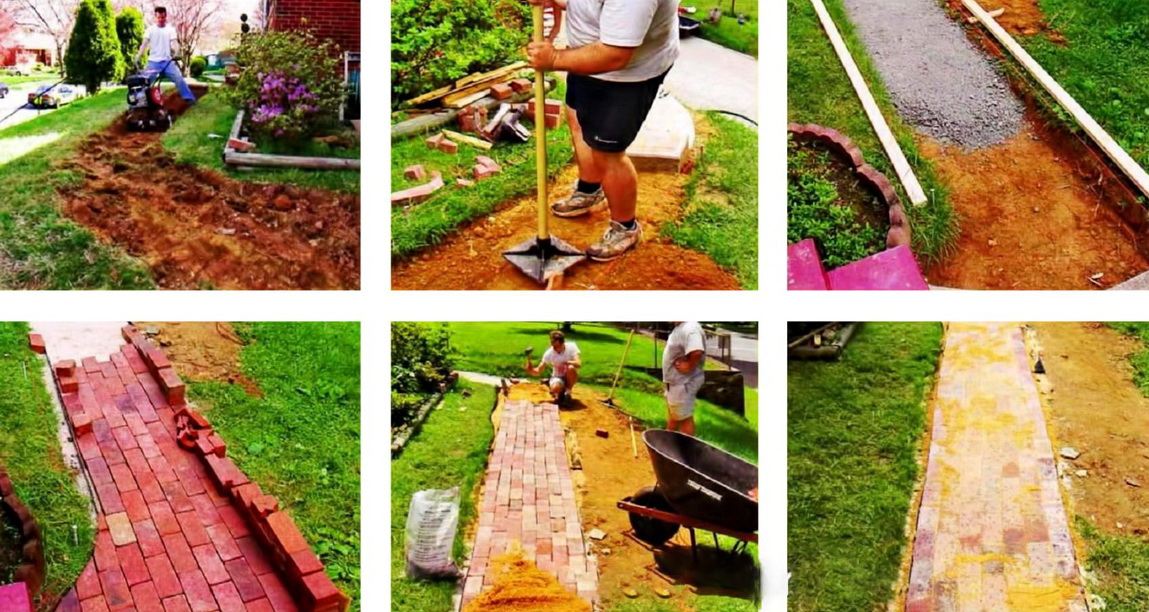
- The first step in the preparation of the tracks is the preparation of a site plan with the marked tracks, the design thought out, preliminary calculations of the number of materials needed and the preparation of tools.
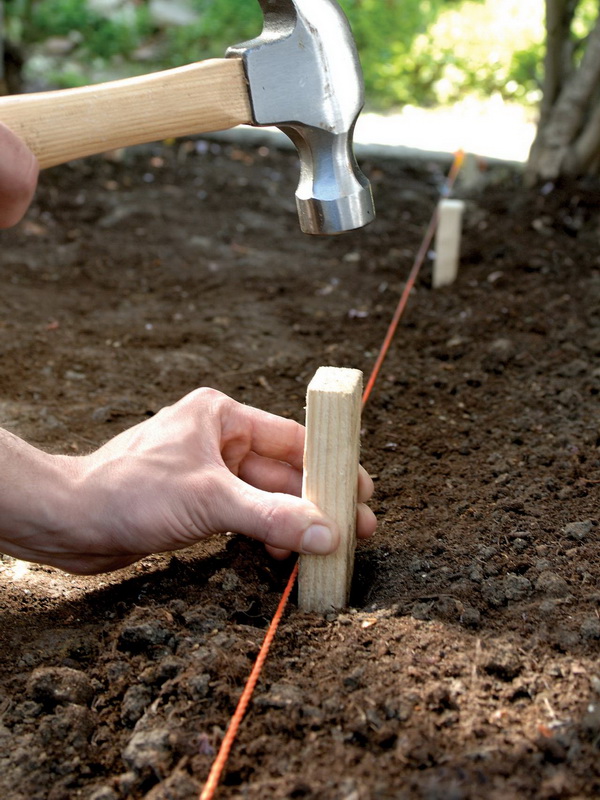
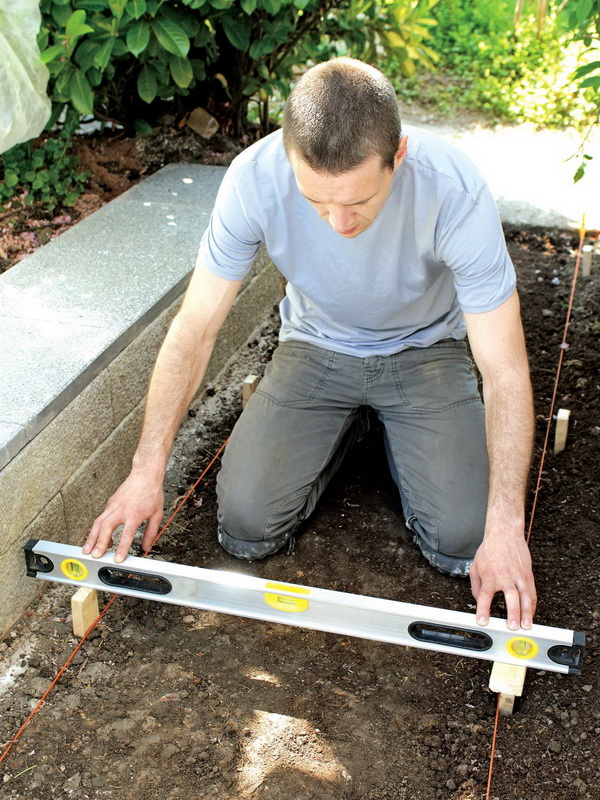
- Then you need to mark up the tracks on the site. To do this, draw tracks on the ground in width, for greater clarity, the borders can be sprinkled with lime.
- For the laying of most materials will need to remove the top layer of soil. Note that the trench should be slightly wider in order to install fencing for the material to be laid on the sides.
- If the shape of the tracks provides for certain verified dimensions, it is more convenient to make a trace using hammered pegs and a rope stretched over them.
After completing all the preparatory work, you can proceed to the most time-consuming stage - laying material.
Performance of work
Do not rush and lay your future tracks in a trench without a prepared cushion. Otherwise, after a few years, the tracks will lose their shape, and the material will lose appearance or begin to collapse (for example, wooden bars without special treatment and without drainage of water will begin to rot, and the stone will begin to tighten with moss).
To prepare a special pillow you need to approach with great care:
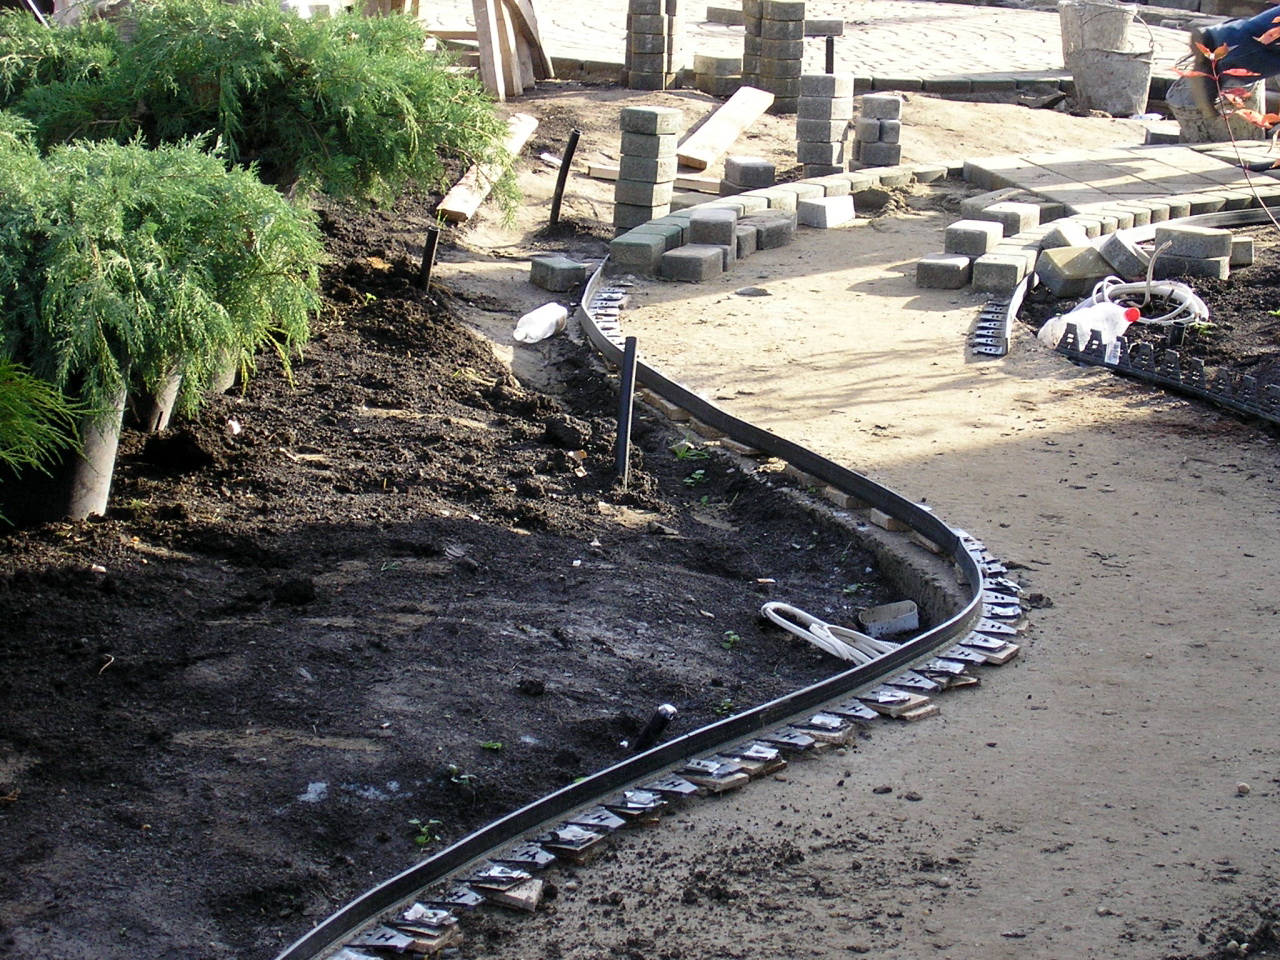
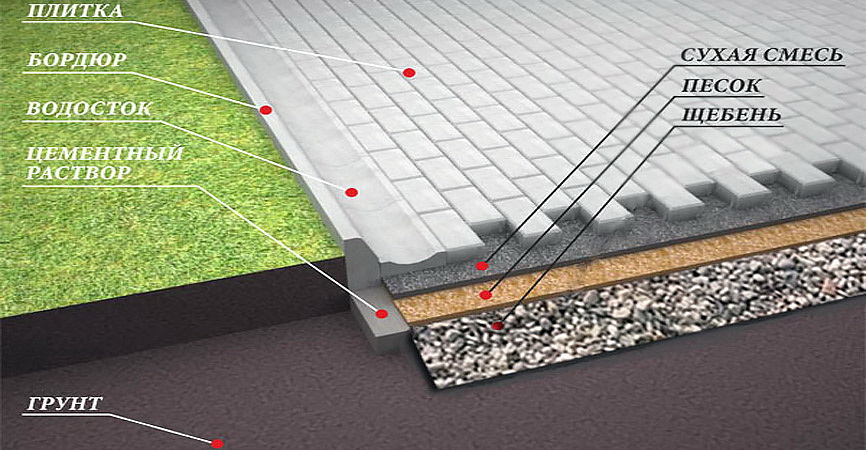
- On the sides, install temporary or permanent borders. They have both aesthetic value (give a finished look to the paths of brick, stone, concrete), and help to align each layer of the pillow, as well as need if you plan to pour concrete.
- Pour gravel or crushed stone into the prepared trench, it is better to use a smaller fraction.
- Laying geotextile canvas on top, it will not allow sand to seep through the gravel bed, will reduce the germination of plants that can destroy the path.
- Pour a layer of sand on top of the geotextile so that the top edge of the finished track is slightly above the soil level. The layer of sand must be well tamped and leveled.
Try to achieve a perfectly flat and dense surface of the sand pillow, it is possible that for this you will have to level and ram several times, but the result of such work is worth it.
Such a preparatory layer is desirable to make before laying the track of any material. The exception is concrete, but detailed preparation for it is described below.
When preparing a pillow try to give it a bias. Depending on the selected base material, the slope can be in one or in both directions. This technique is used even when laying asphalt roads and highways so that the water does not linger on the surface and does not have its destructive effect. This becomes especially noticeable in the offseason, when daytime positive temperatures give way to nighttime negative temperatures, and freezing water destroys building materials. An exception can be considered as tracks of rubber plates, for them the slope is not needed, as the water will easily seep between the gaps of the plates and go into the soil.
Stone paths are laid on the sand pillow, as well as paving slabs and bricks. They are driven in with a rubber hammer or mallet.
Do not use an ordinary metal hammer, and even wooden can damage the material of the tracks.
If you chose the brick paths, it is better to start laying with curb rows, and then move to the center. Try to think out the drawing of the track so that one row is along the curb, and the other across, this method will add strength to the entire masonry. When the laying of bricks will be completed, you should bond them together with cement-based glue, designed for outdoor work.
In addition to the basic function of bonding material, glue will not allow the grass to sprout between the bricks. Then the seams between the elements should be filled with sand using a brush with a long pile. Then the formwork is removed, in its place crushed stone is filled up and properly rammed. To achieve a beautiful brick color and increase service life, coat it with a penetrating primer and, after it is completely dry, fix all outdoor paint with varnish.
The paving slabs and a stone are put by the same principle. Installation and installation of rubber slabs are similar to working with bricks, with the exception of bonding with glue, coating with primer and varnish.
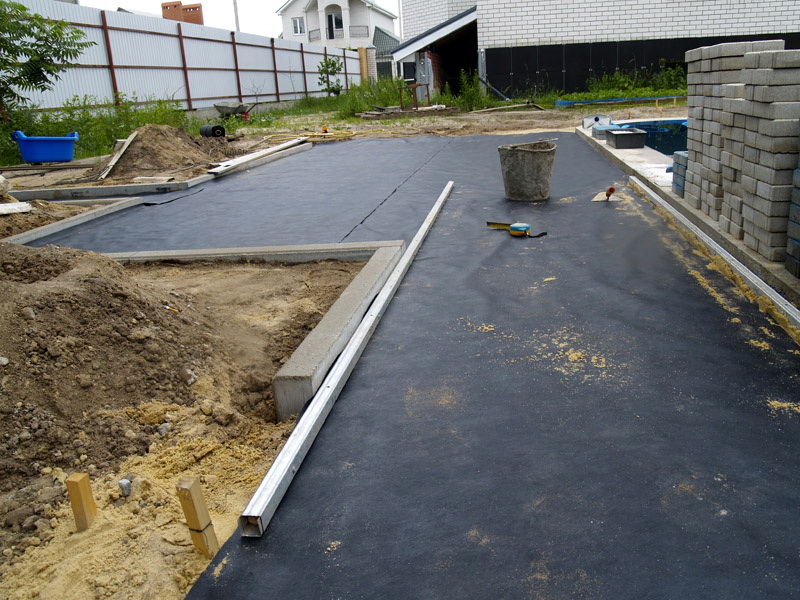
Work with concrete paths has several nuances:
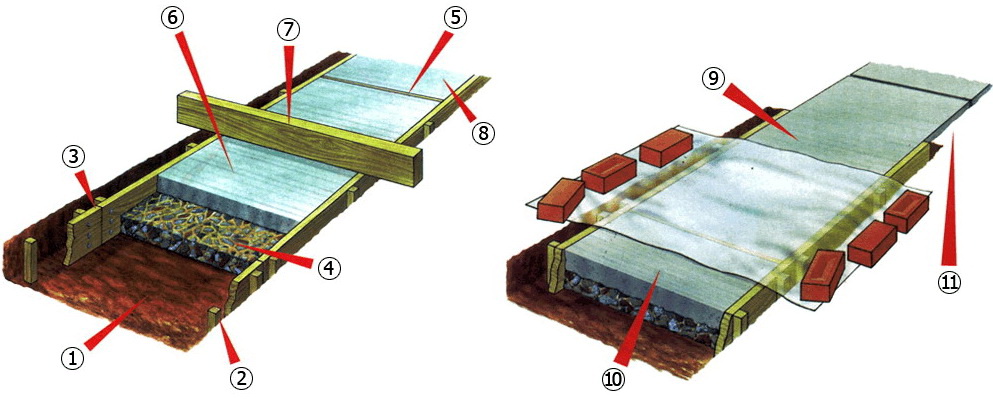
- Boards are installed in the prepared trench as curbs, and they will serve as a formwork for concrete. From the outside, the boards are fixed with pegs or reinforcement. Where the track bends, it is better to use pieces of plywood or plastic for the formwork.
- Further, sand is poured, moistened and compacted. The thickness of the sand layer should be at least 60 mm.
- The last layer of the pillow will be crushed stone, its thickness should be about the same as sand - 60 mm. Do not forget to tamp it tightly.
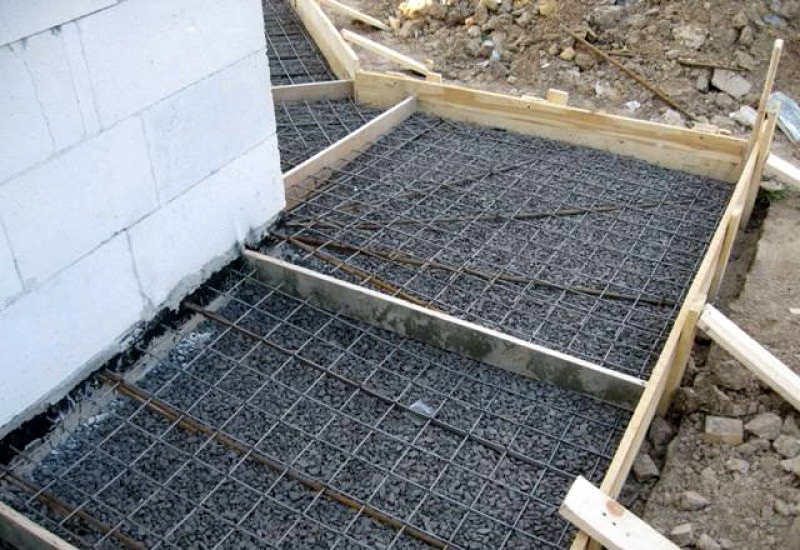
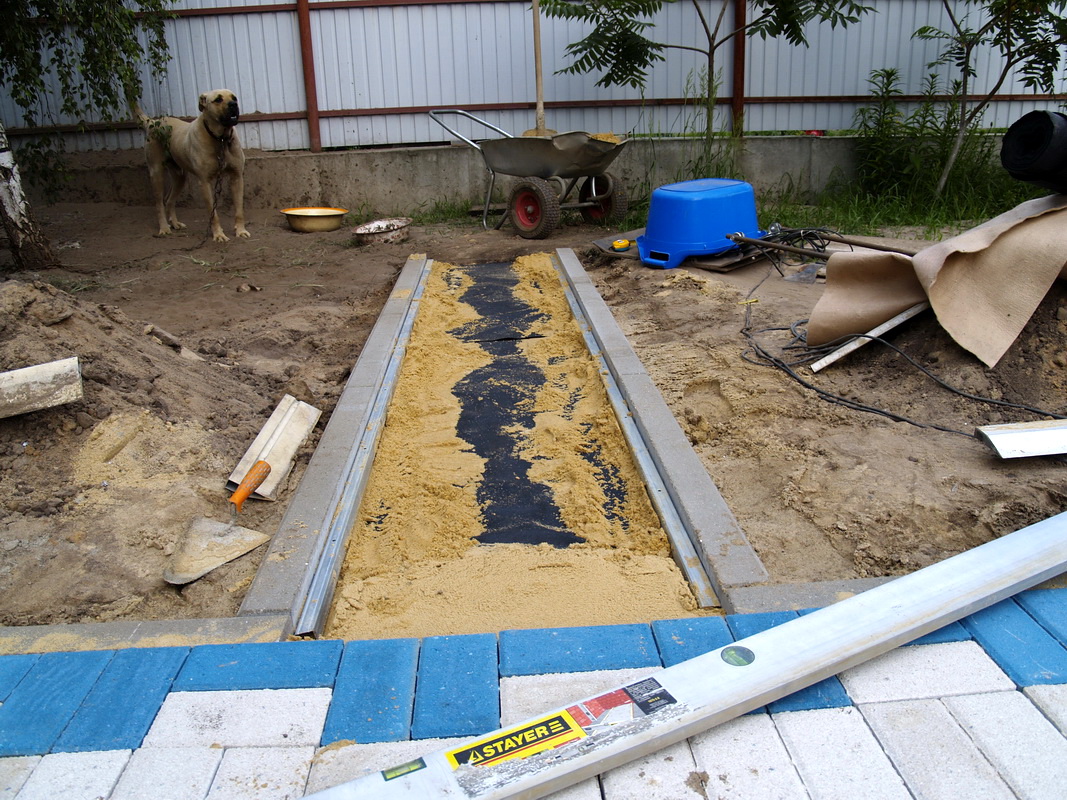
- The last is the reinforcing mesh or any other suitable material to create additional strength for the track. The reinforcement also allows you to save concrete consumption, without it the thickness of the concrete must be at least 15 cm. It is also necessary to install metal or plastic dividers along the length of the entire future track with a step of not more than 1.5 m.
- When pouring concrete, they will create barriers and divide the continuous layer into sections, and after drying, these dividers are removed, and so-called expansion joints are formed in the tracks.
- Do not forget to lubricate all elements in contact with concrete, which will subsequently be removed from the final structure.
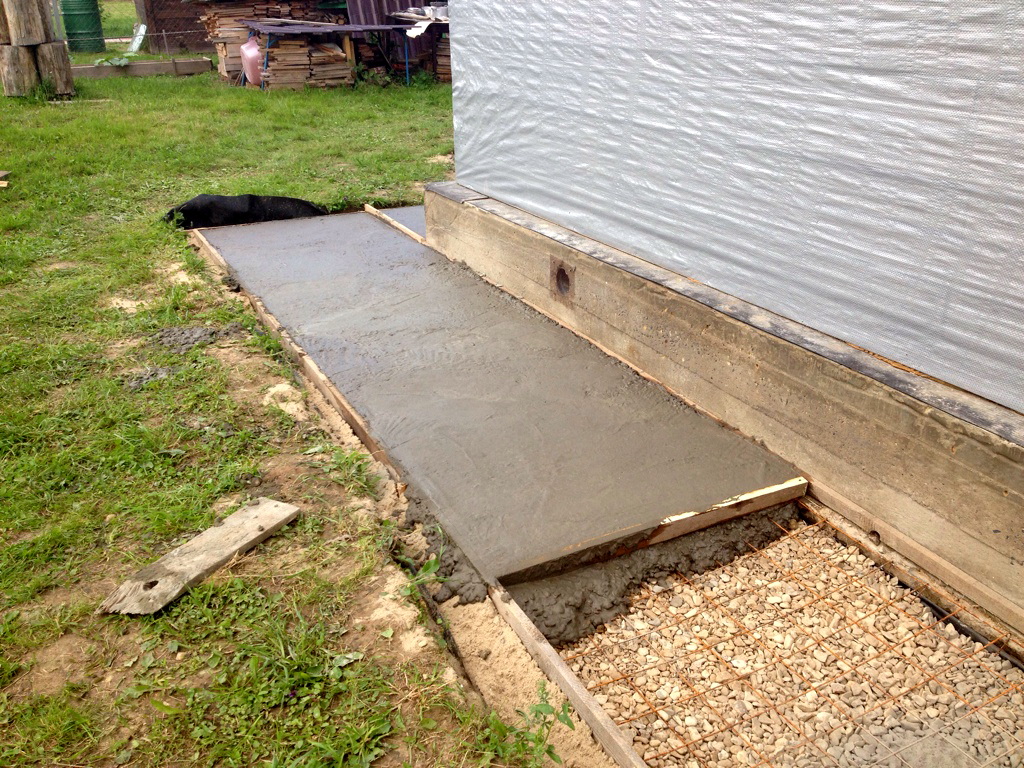
When the pillow is prepared, you can start pouring concrete mix. You can cook it yourself, for this there are many recipes:
- Cement and sand mix in a ratio of 1: 3 and dilute with water to the desired thick consistency.
- A more complex mixture of cement, sand and rubble in a ratio of 1: 3: 3, and water.
Water should be added to the dry mix gradually, Concrete should not be liquid, achieve such a consistency, so that it flows smoothly. To increase the plasticity in the concrete mix, it is permissible to add some clay. Another option is to purchase a ready-made solution and work with it. But do not forget that the ready-mixed concrete must be used within a few hours, otherwise it will dry.
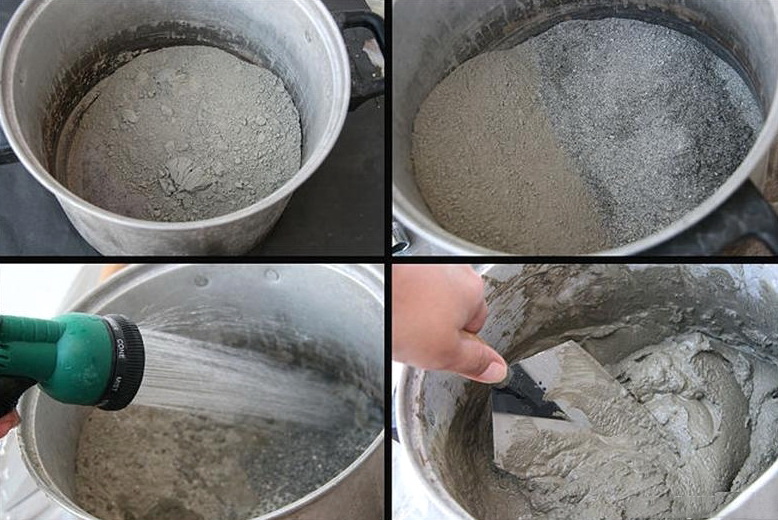
Concrete pouring to the upper edges of the formwork, leaving only a small space for leveling the surface rule. Immediately after pouring, pierce the entire path with a shovel or metal bar, so you will avoid the formation of voids inside the path. The concrete path can be strengthened using the ironing procedure.(dry cement powder is scattered on a fresh surface and rubbed gently) or coated with a hardening topping mixture.
In order to avoid quick drying and water ingress, cover the freshly laid concrete path with a film. The final result can be assessed after 3-5 days (depending on the thickness of the cast layer).
Useful tips
There are some tricks to make from boring country paths. beautiful and original elements of landscape design:
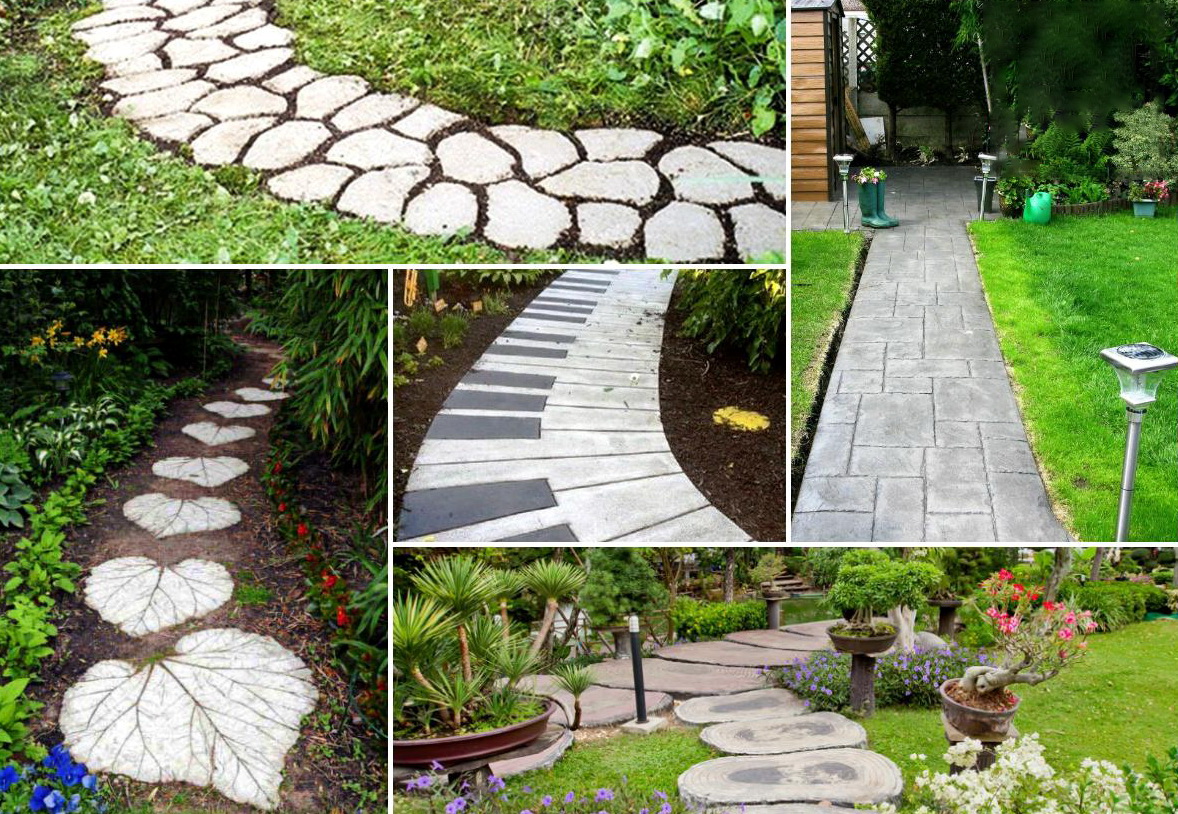
- Try to move away from crisp straight lines, it is better to form tracks with curves and rounding. Making them will be a little more difficult, but the result is worth it.
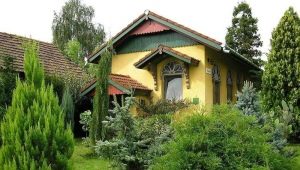
- The use of materials that are involved in the design of the facade of a house in the design of garden paths gives a finished look to the entire plot, united by a common idea of design.
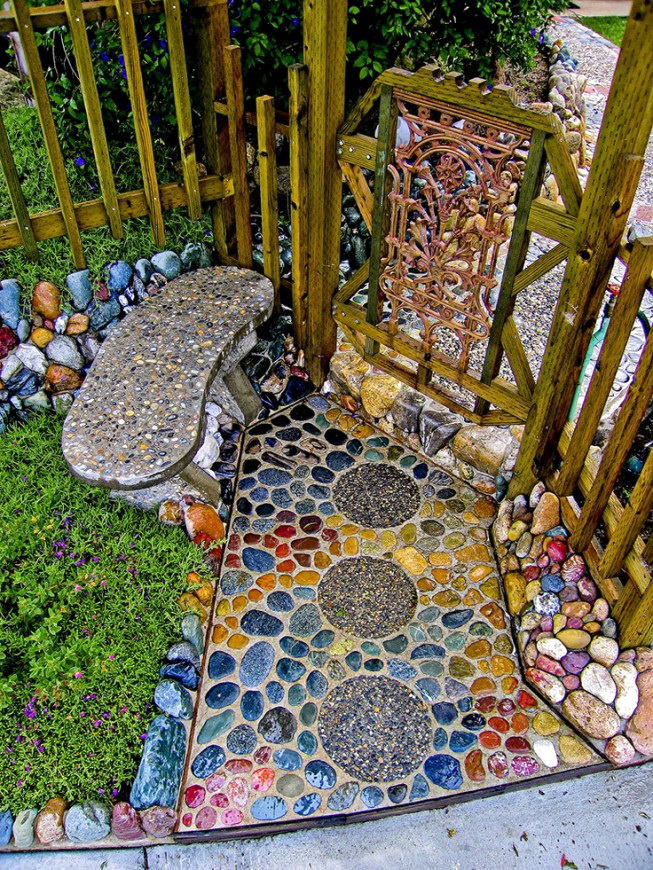
- Concrete tracks can be colored with the help of special colors, as well as decorated with pieces of glass and ceramics, creating a mosaic effect. Sometimes, in order to create an original idea, it is enough just to draw grooves along the edges of the concrete paths with a sharp rod, or to paint a pavement imitation on the surface (this kind of drawing should be done no earlier than a day after the concrete mix is cast).
- Creating borders of paths from flowerbeds and hedges will distract the eye from the simple drawing and allow to hide some flaws.
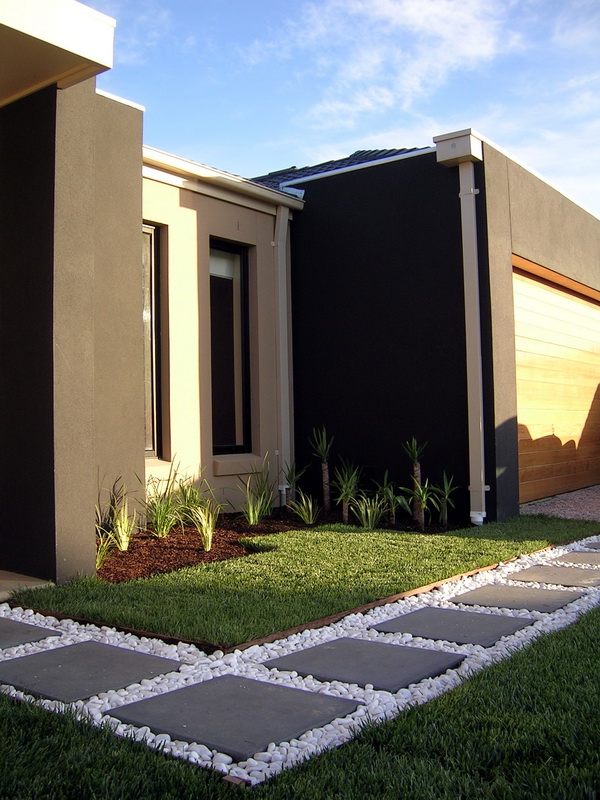
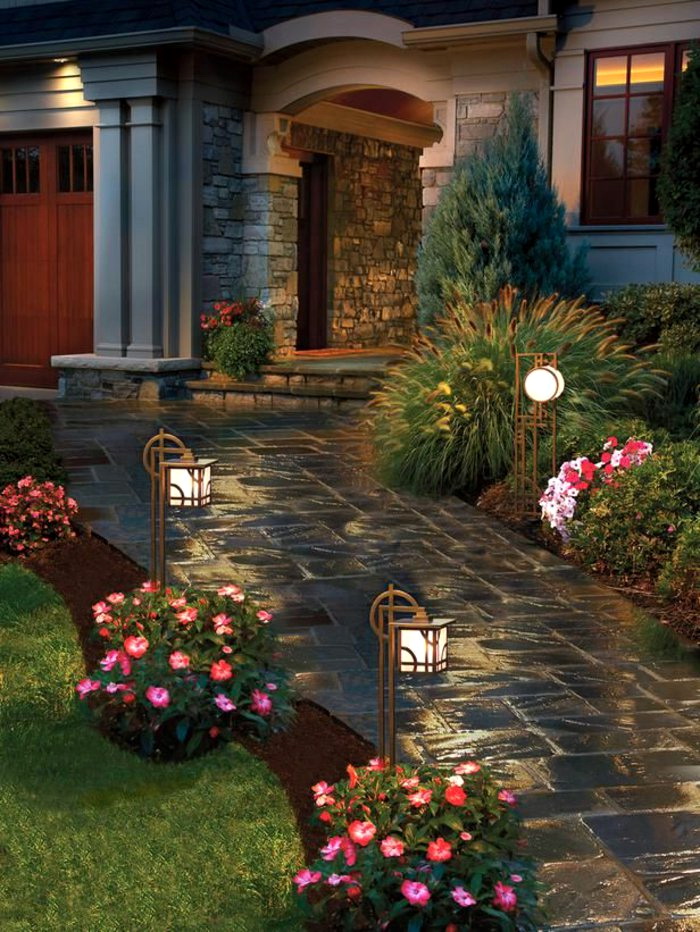
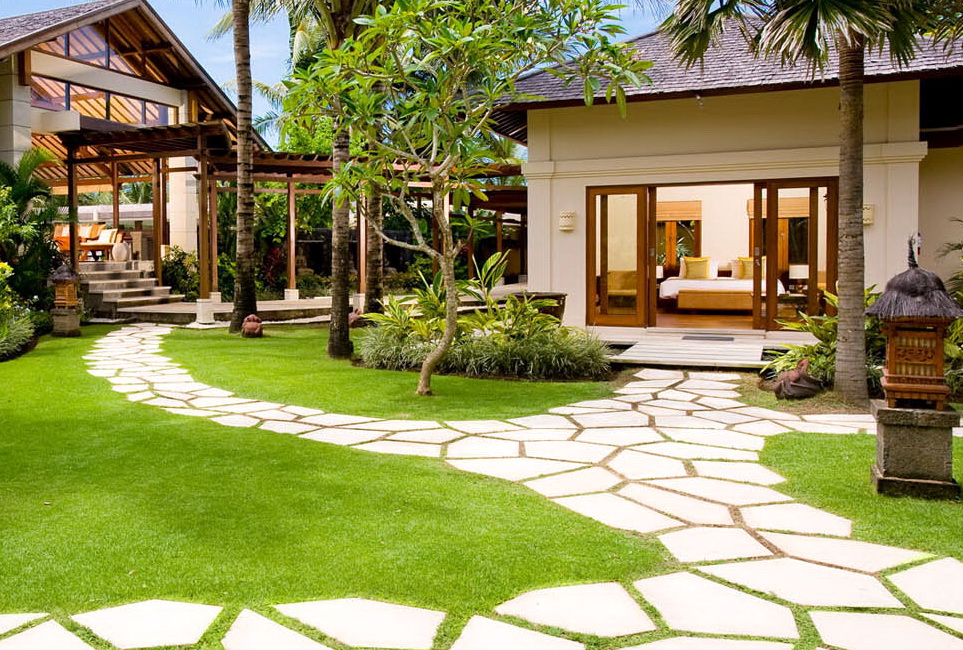
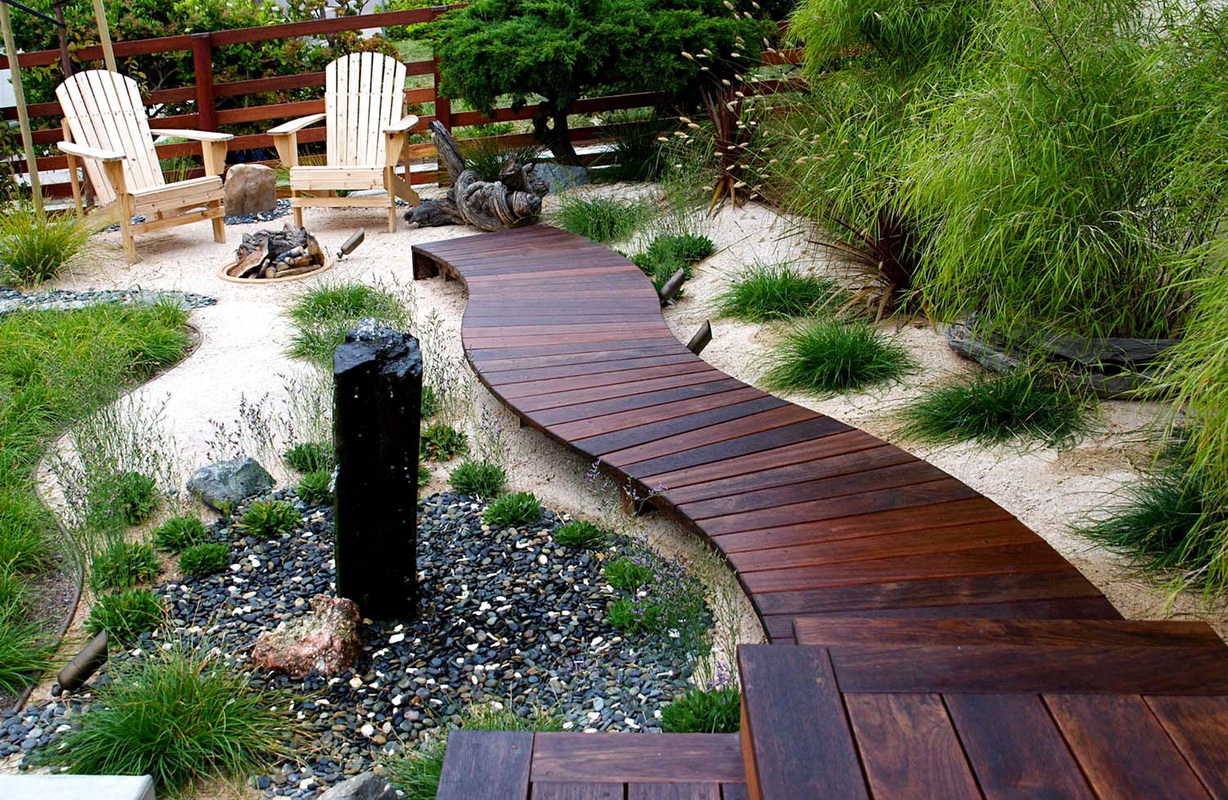
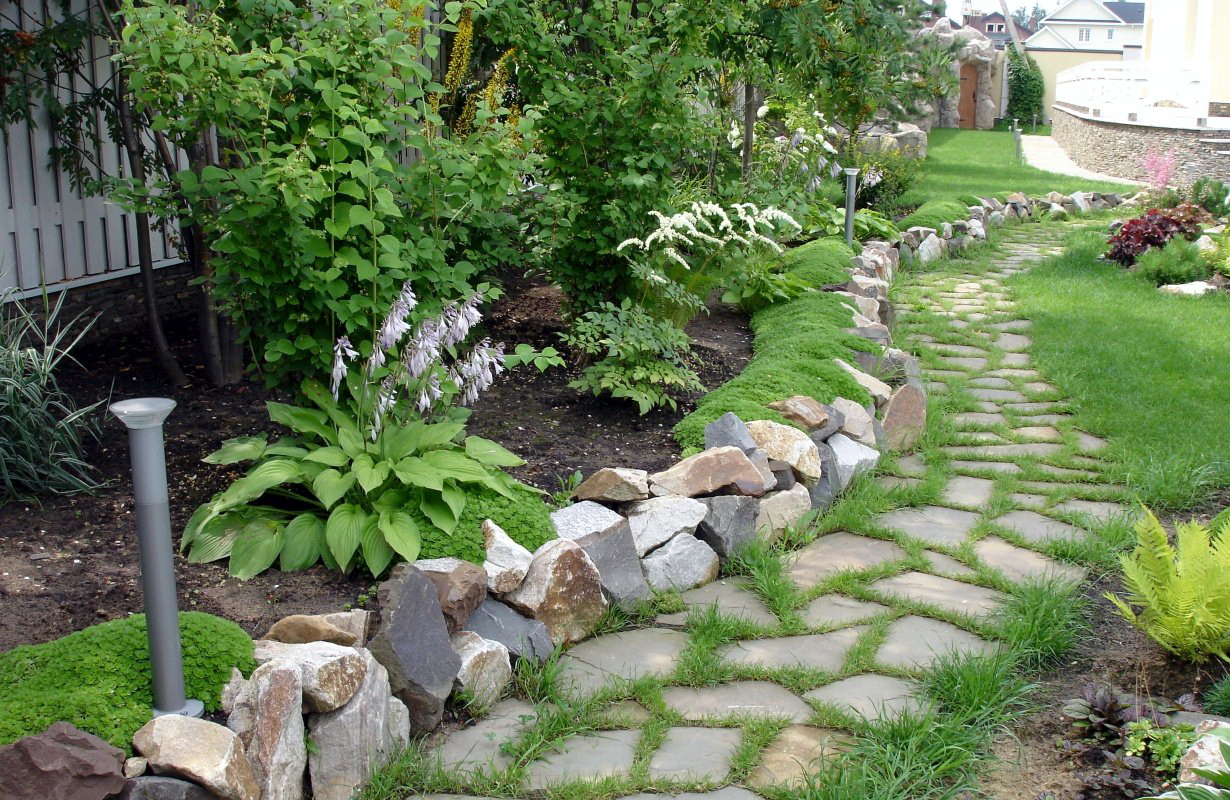
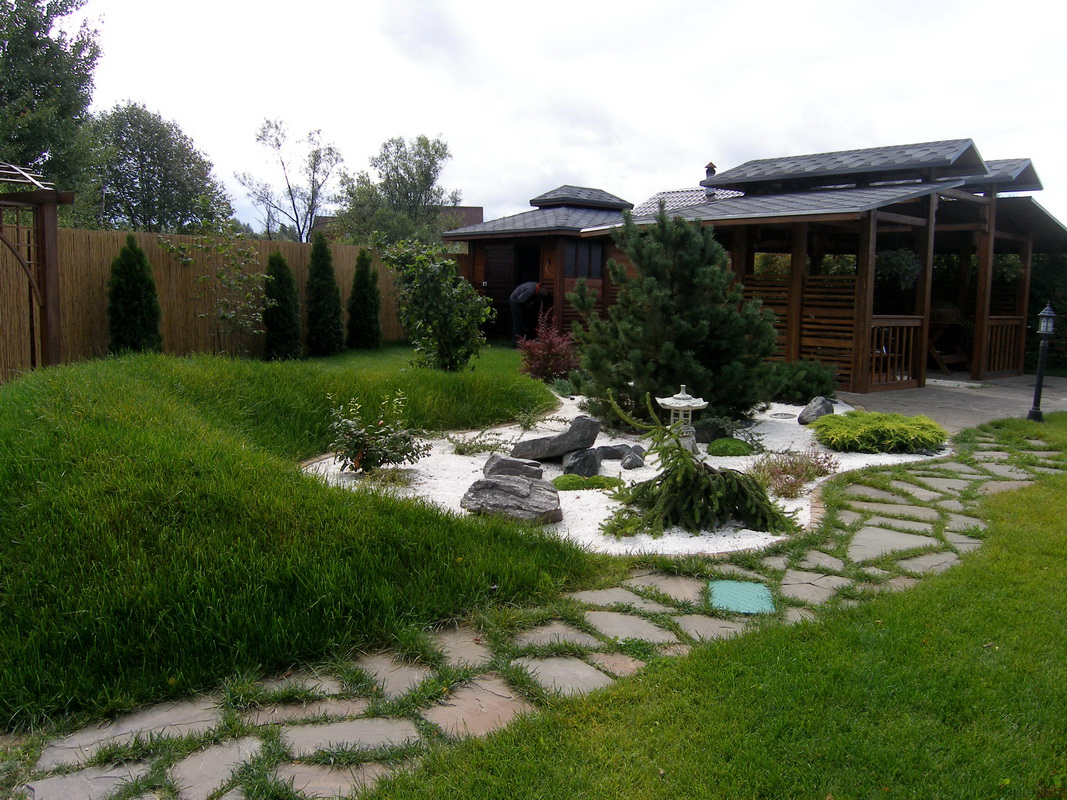
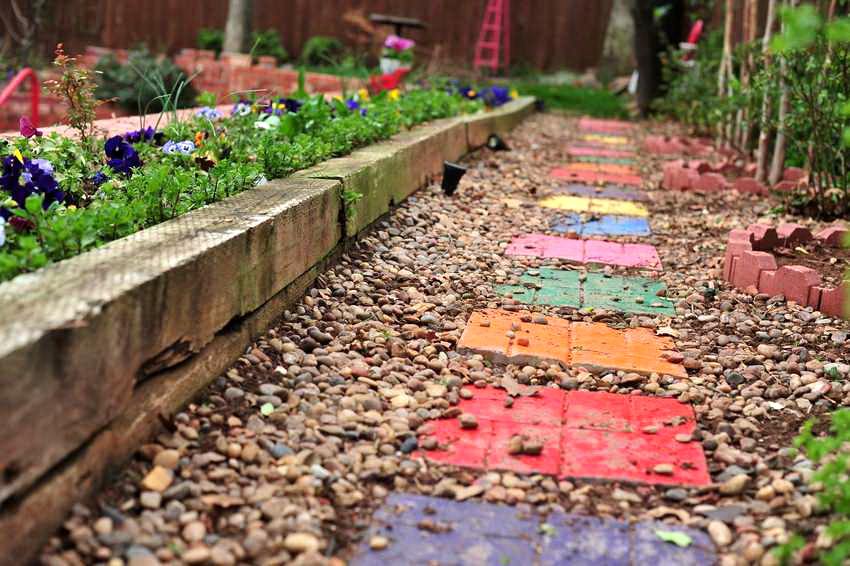
Beautiful examples
The long and painstaking work of laying intricate patterns of stone leads to an excellent result.

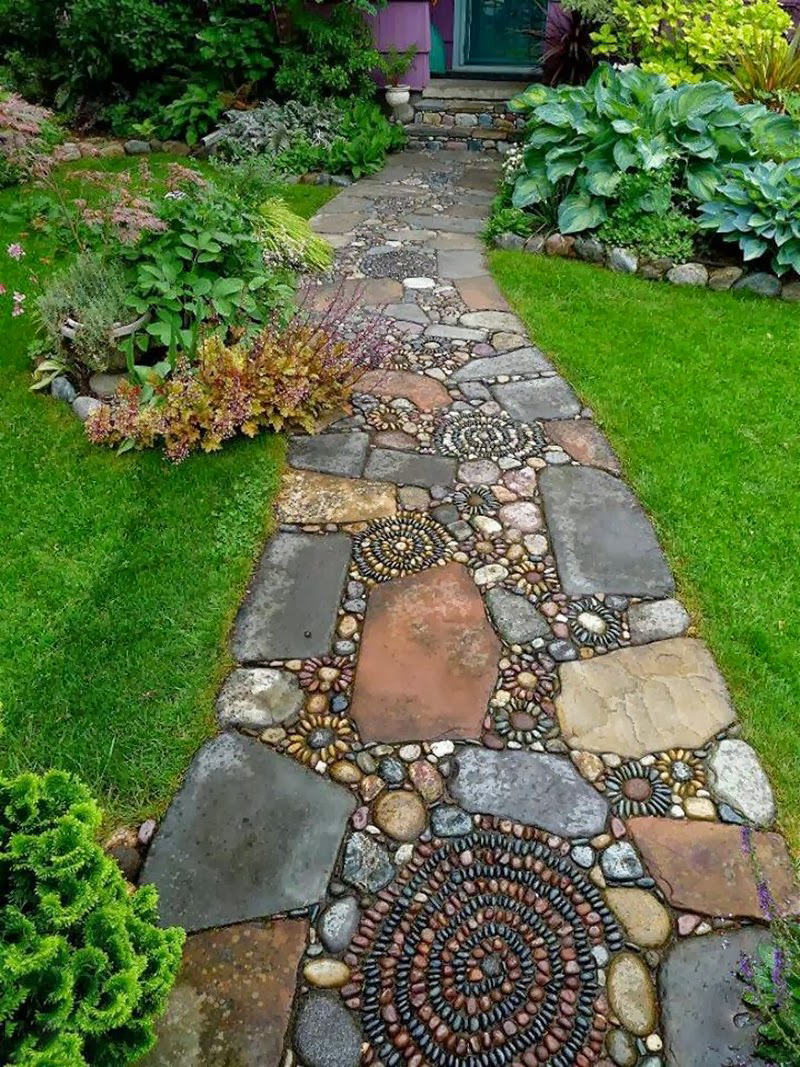
The combination of materials allows you to take the best from each without loss of functionality, as well as create extraordinary garden paths.
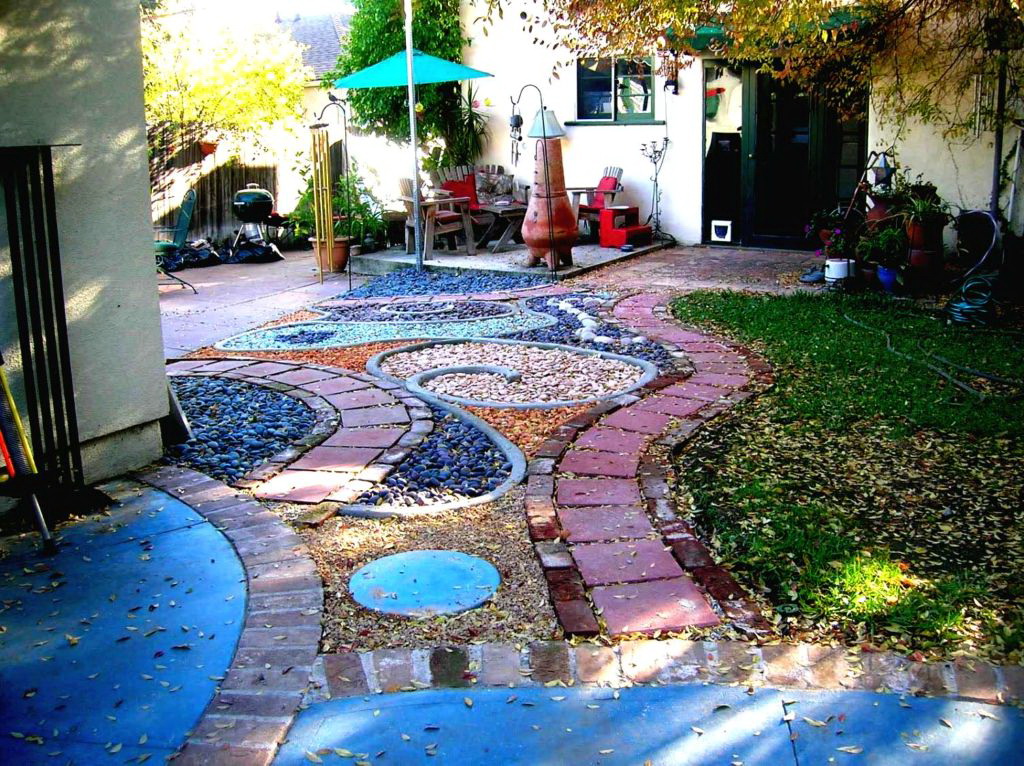
And even budget options can look very interesting.
How to make a garden path of brick, see the following video.