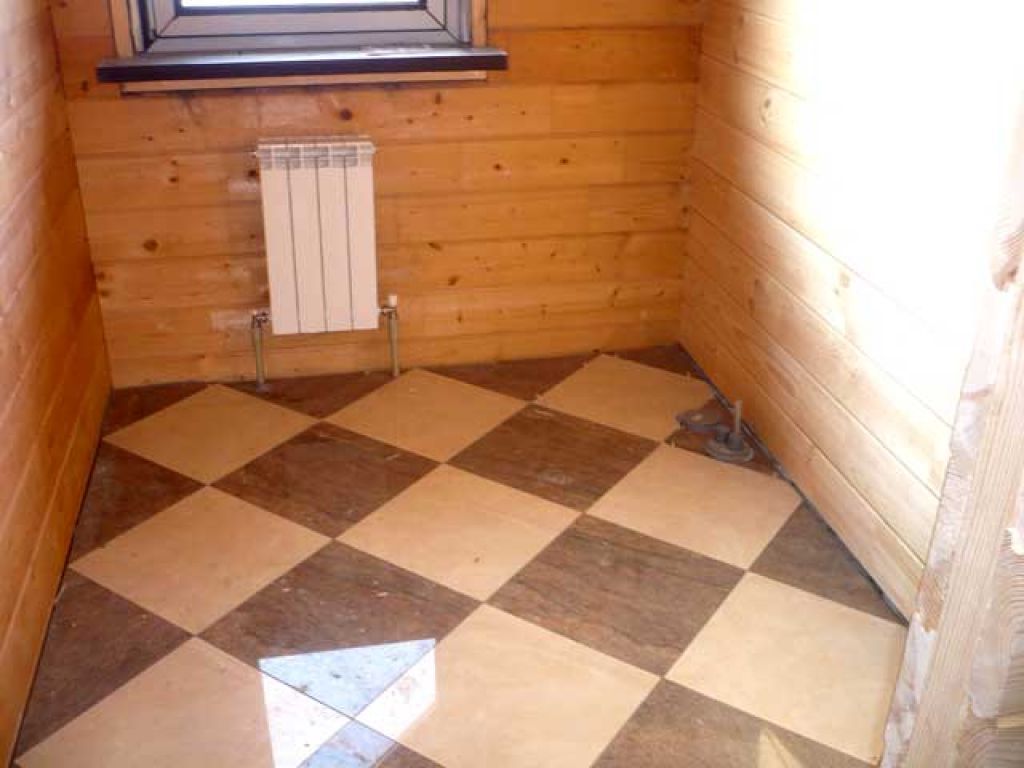
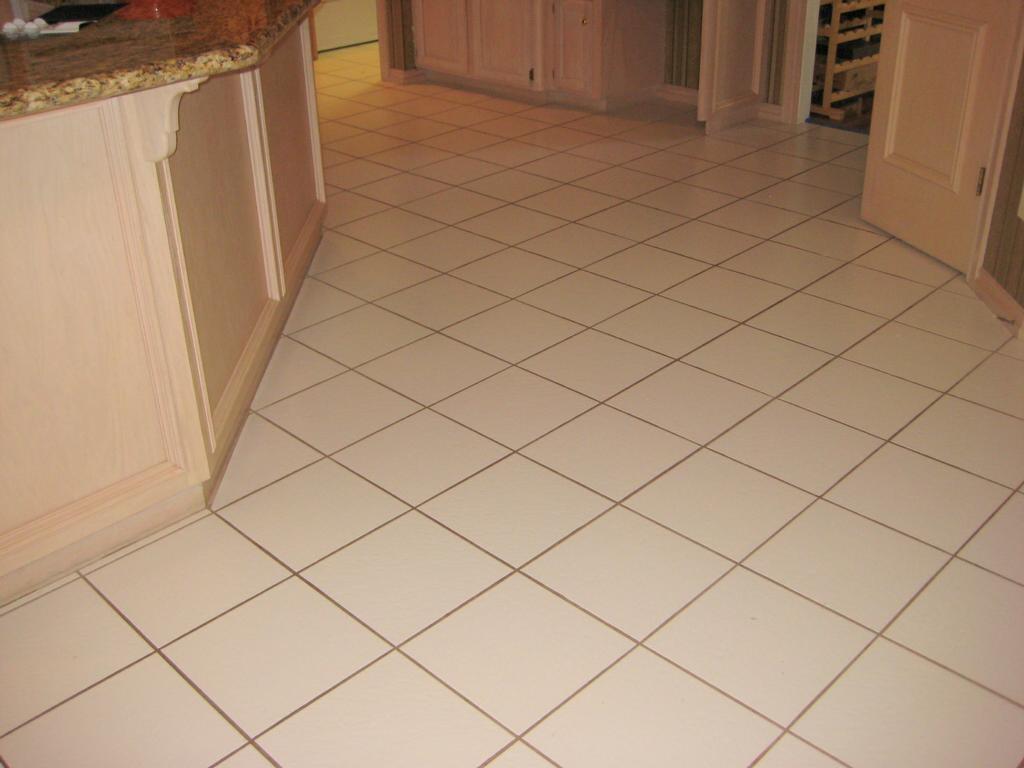
How to lay tiles on wooden floor?
Issues relating to the laying of ceramic tiles on wooden floors, can even puzzle an experienced master. Whether these materials are compatible, because the wood tends to expand and contract under the influence of moisture and temperature, and the tile does not tolerate any "movement."
Consumers are worried about the likelihood of cracking, chipping of seams and loosening of trim elements. If you try to do the work without knowing the details beforehand, then all of the above can happen. A careful study of the technology of laying tiles on the wooden floor will help to avoid disappointments and mistakes.

Is it possible to put?
Of course, you can lay tiles on the wooden floor. But before you decide on this step, it is worth thinking about the rationality of such a choice. The idea to replace the natural wood floor with a tiled floor can push only one advantage of the latter - the simplicity of hygienic care.
The following problematic nuances should be considered:
- Under the tile glue the tree will not "breathe", because of which the process of its destruction can begin.
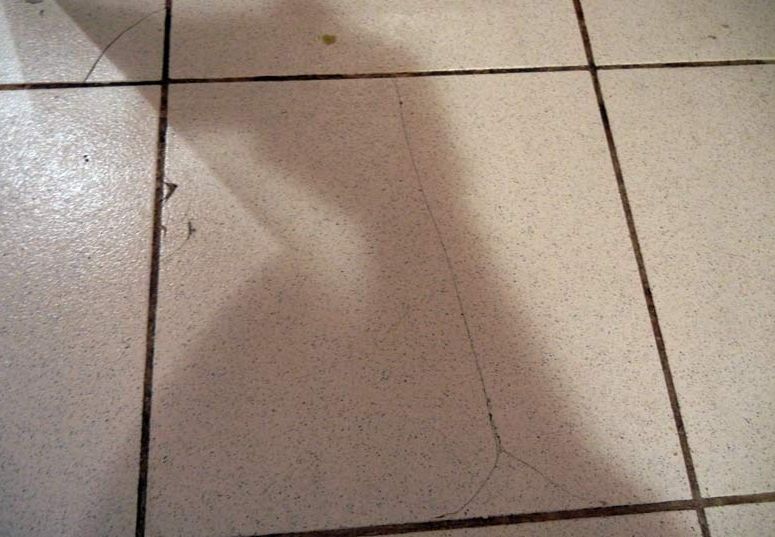
- The life of any boards is much shorter than the life of floor ceramics, their integrity can disrupt rotting or, conversely, drying out, so after 5-6 years you can get a cracking floor covering.
- For tiled flooring, a stable and static base is required.
- Laying tiles on a tree in the new house is strictly prohibited. Within 2-3 years, the building will shrink and the floors will move.
If you have decided that you need a variant of a ceramic floor on a wooden base, then you should choose the most suitable technology and purchase the necessary materials. When choosing a tile, pay attention to the characteristics of the floor covering, since it is far from being possible to put a standard tile in any room.
Choose a material for the floor that can withstand severe loads, but at the same time containing the minimum amount of chemical additives in the form of plasticizers or stabilizers. A great option would be quartz-vinyl tile.
This is a modern floor covering containing up to 80% quartz. Durable natural the material is moisture resistant and does not conduct electricity.
PVC tiles (polyvinyl chloride) - budget option tiled floor. It consists of wood flour or talc (the main filler), a plasticizer and polyvinyl chloride. The advantages of such a finish are not only economical, but also that it is practically not exposed to any chemical effects and is waterproof.
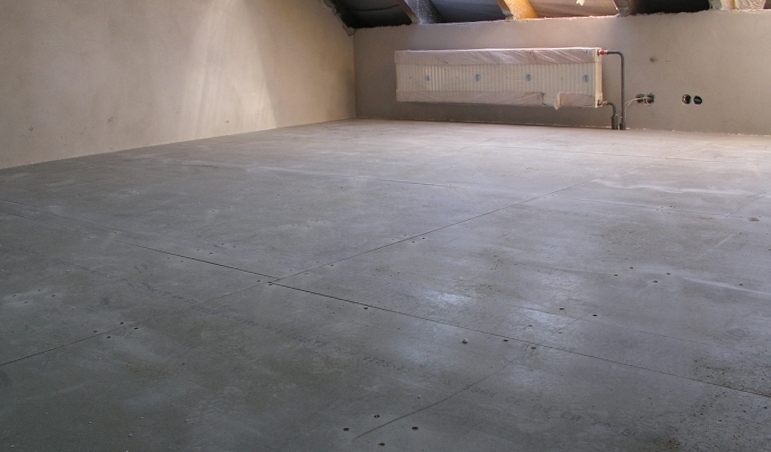
The floor device on the wooden floor
In order to choose the technology of installation, suitable for your room, you need to understand how most of the wooden floors. There are many options for the device of wooden floors. It is simply impossible to consider them all at once, so it is logical to dwell on the most frequent variations.
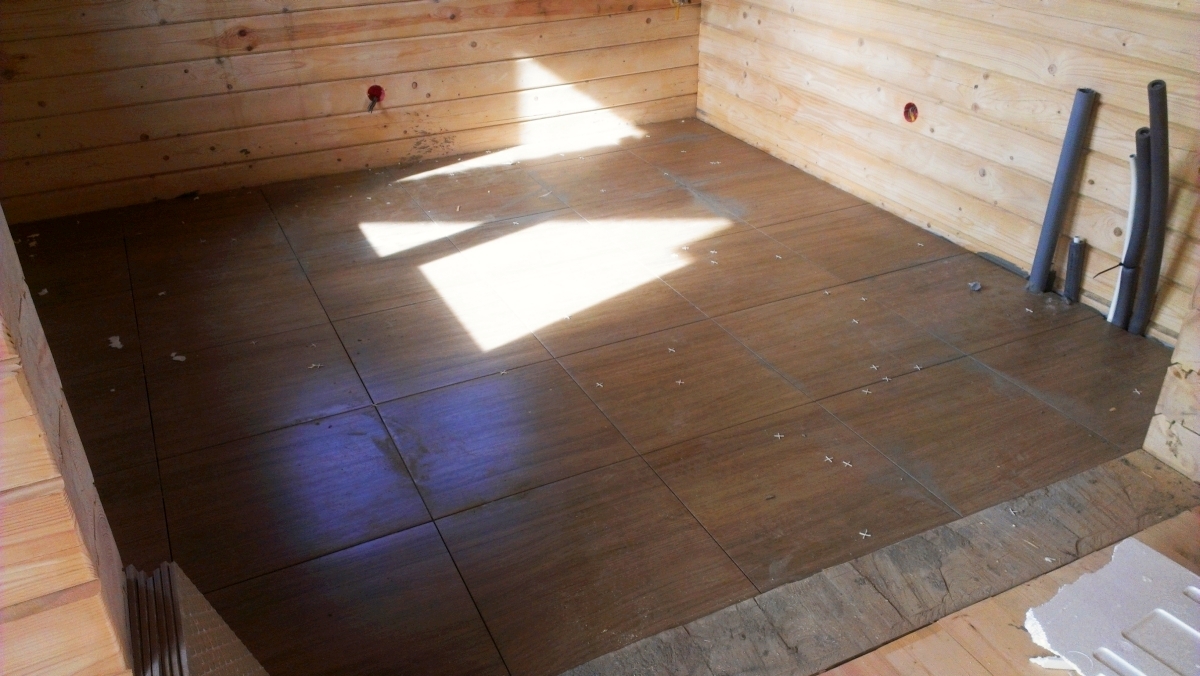
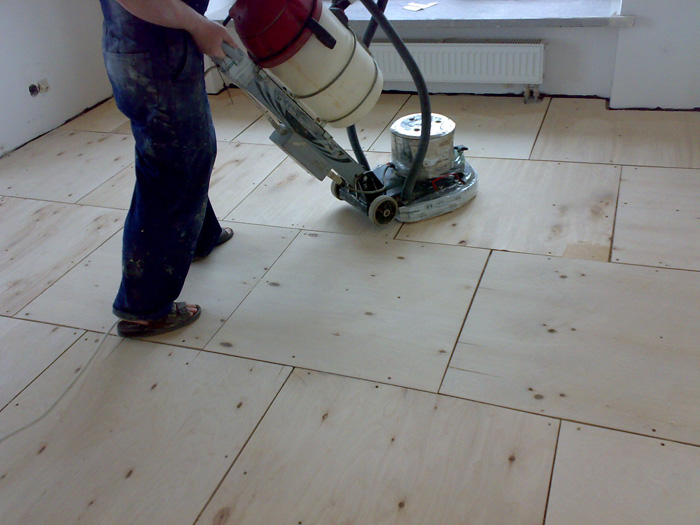
Any wooden floor is multilayered, so the masters have to deal with different “layers”.But the choice of ceramics laying technology does not depend on whether you only inherited lags, chipboard floors or high-quality floorboards. The process of tile laying is always carried out according to the standard algorithm, and there are differences only in preparation.
Mounting technology
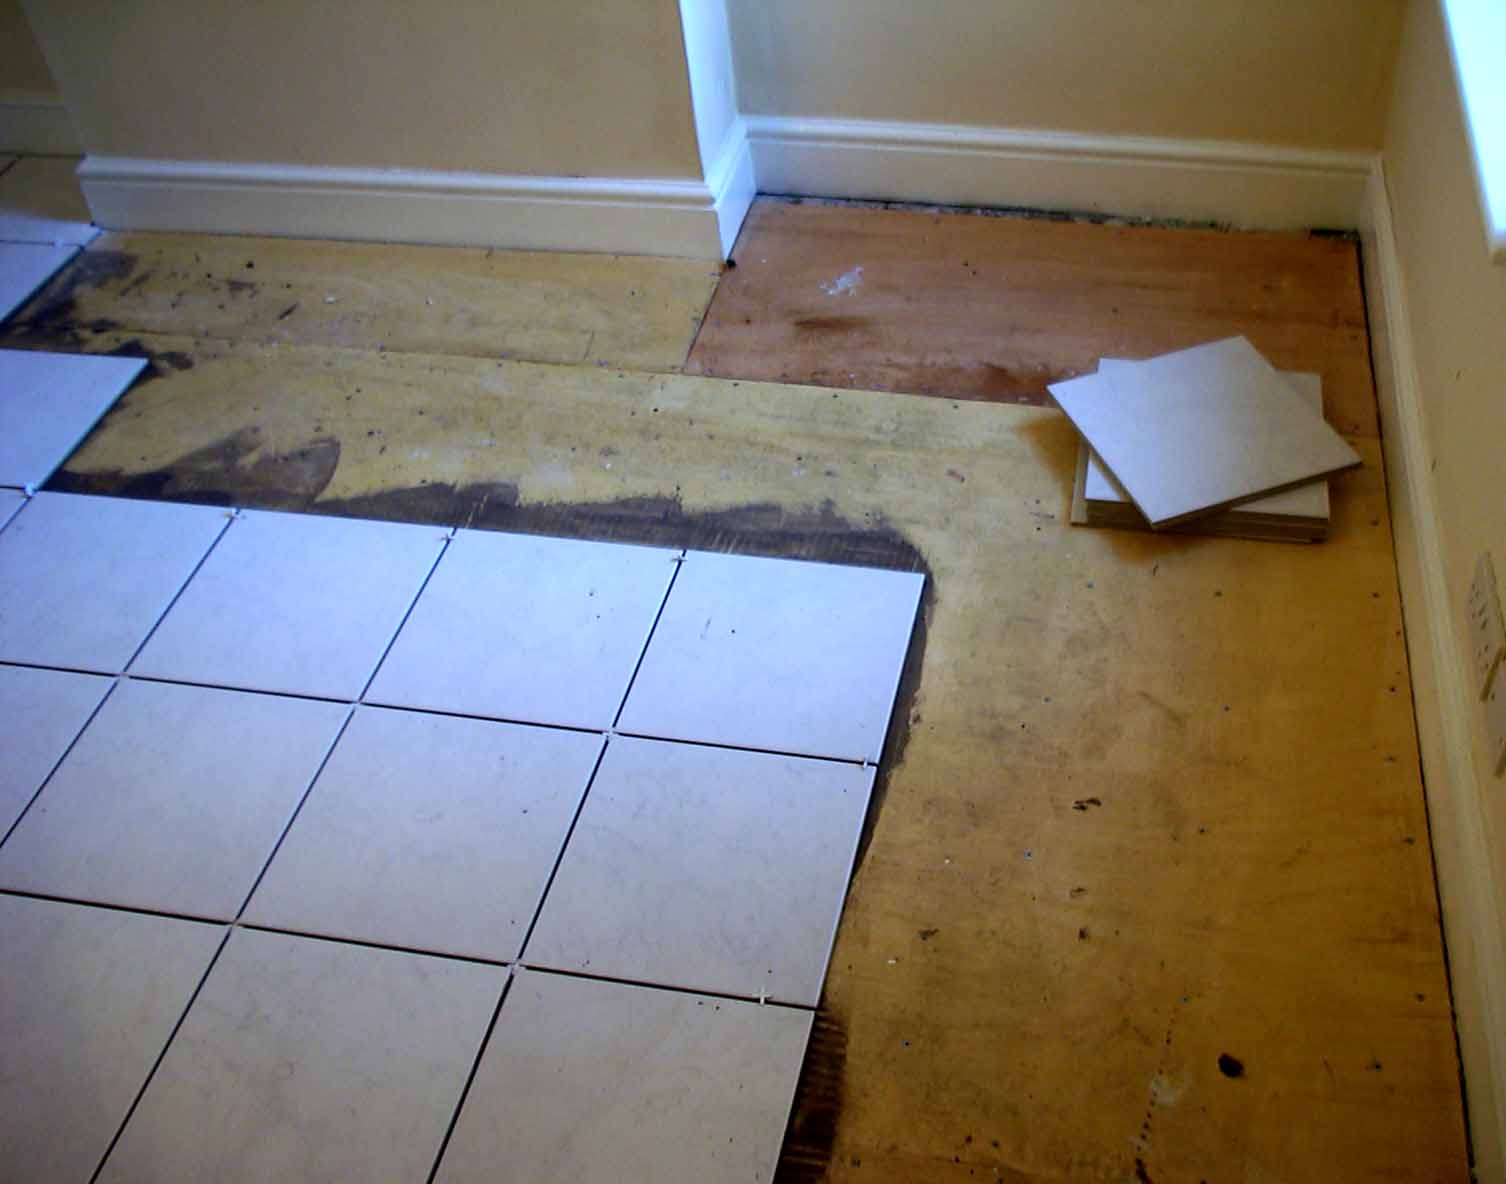
Regardless of which floor will be used as a base, you must try to create as smooth and solid a base as possible for laying the tiles. In this section, we will introduce you to the main stages of installing tiles on a wooden floor.
Mounting technology includes three main steps:
- preparation of the basis for laying of a tile;
- alignment;
- waterproofing.
A smooth base is a guarantee of simple and fast tile laying. The glue will lay unevenly on the non-uniform base, which means that over time, voids will appear under the glue mortar and the tile will simply break off or burst.. Even an experienced master without the necessary tools will not be able to conclude that the floor or walls are even.
If the house does not have a laser or water level, you should not spend money on its purchase for the sake of a single floor repair, the hydraulic level can be made of two syringes connected by any transparent tube (for example, from a dropper).

Only after completing all the steps - from preparatory to screed - you can begin to lay tiles.
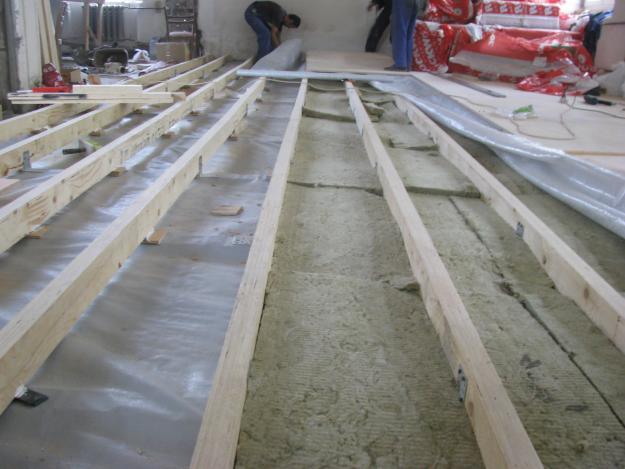
Foundation preparation
Preparation of the base in most cases consists in leveling it. In some cases, it is necessary to replace some wooden elements, such as lags, with similar ones. The main principle of work with the base is to prevent the draft of wood from destroying the tiled floor due to movements and temperature changes.
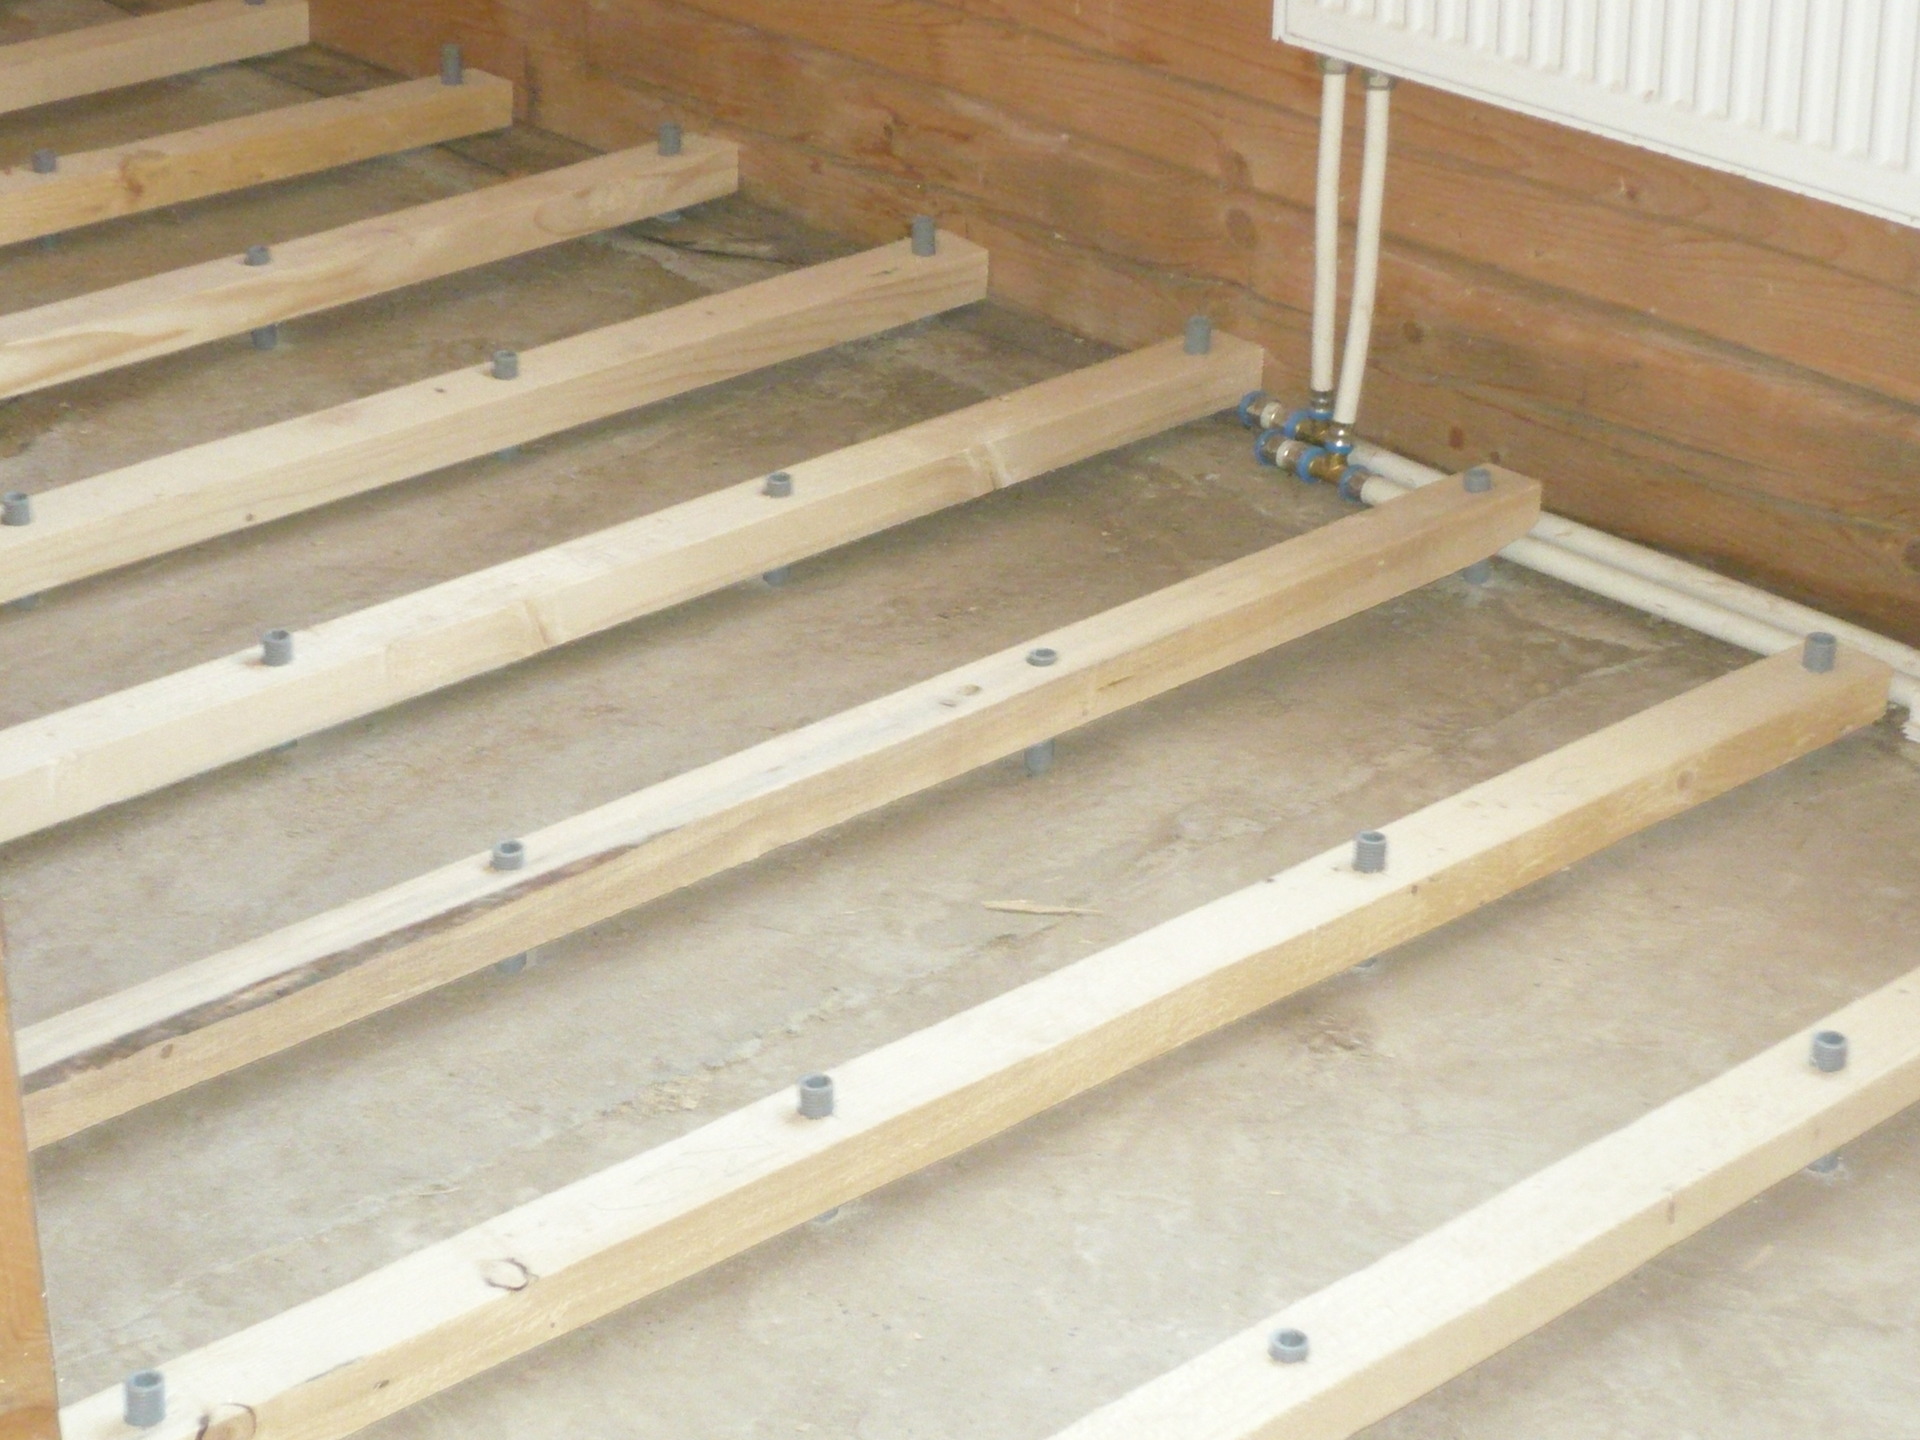
The master is given the task of constructing a specific “tray” installed above a moving wooden base. There are quite a few options for making such a “tray”, so it is recommended to get acquainted at least with the main ones.
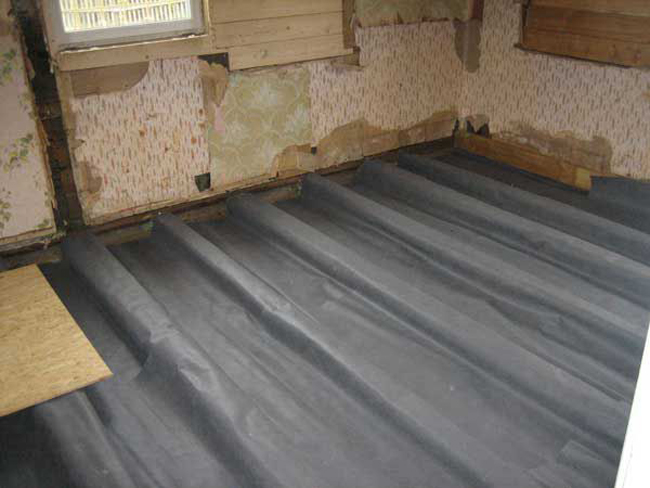
Waterproofing
As a rule, there is already some kind of insulation between the lags in the wooden floor. This may be a very different material - clay, sawdust, expanded clay. It is not necessary to remove it - install the coupler on top of heat and sound insulating materials. If there is nothing, then put a new insulation light in weight, for example, foam plastic or mineral wool. These materials do not heavily load wooden structures.
Also waterproofing can be made using special mastics or any rolled waterproofing materials. A simple plastic film is an affordable waterproofing option. Construction stapler will help to attach it to the walls of the room.
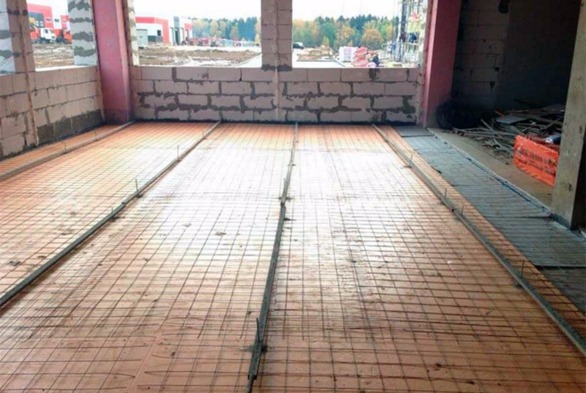
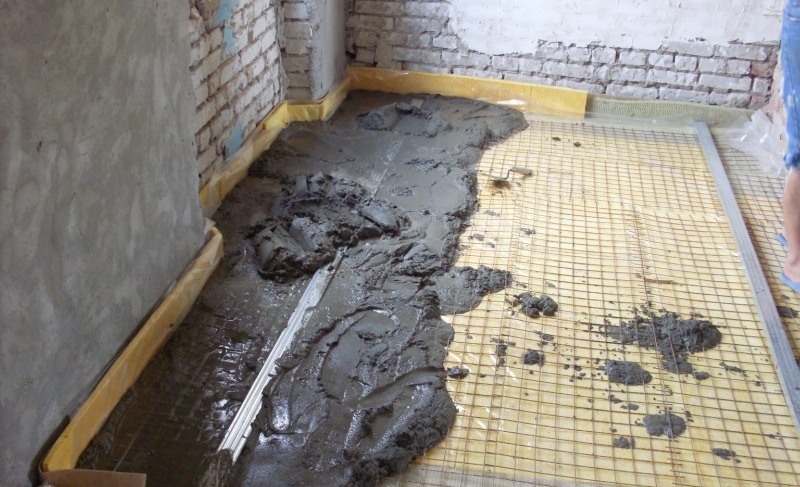
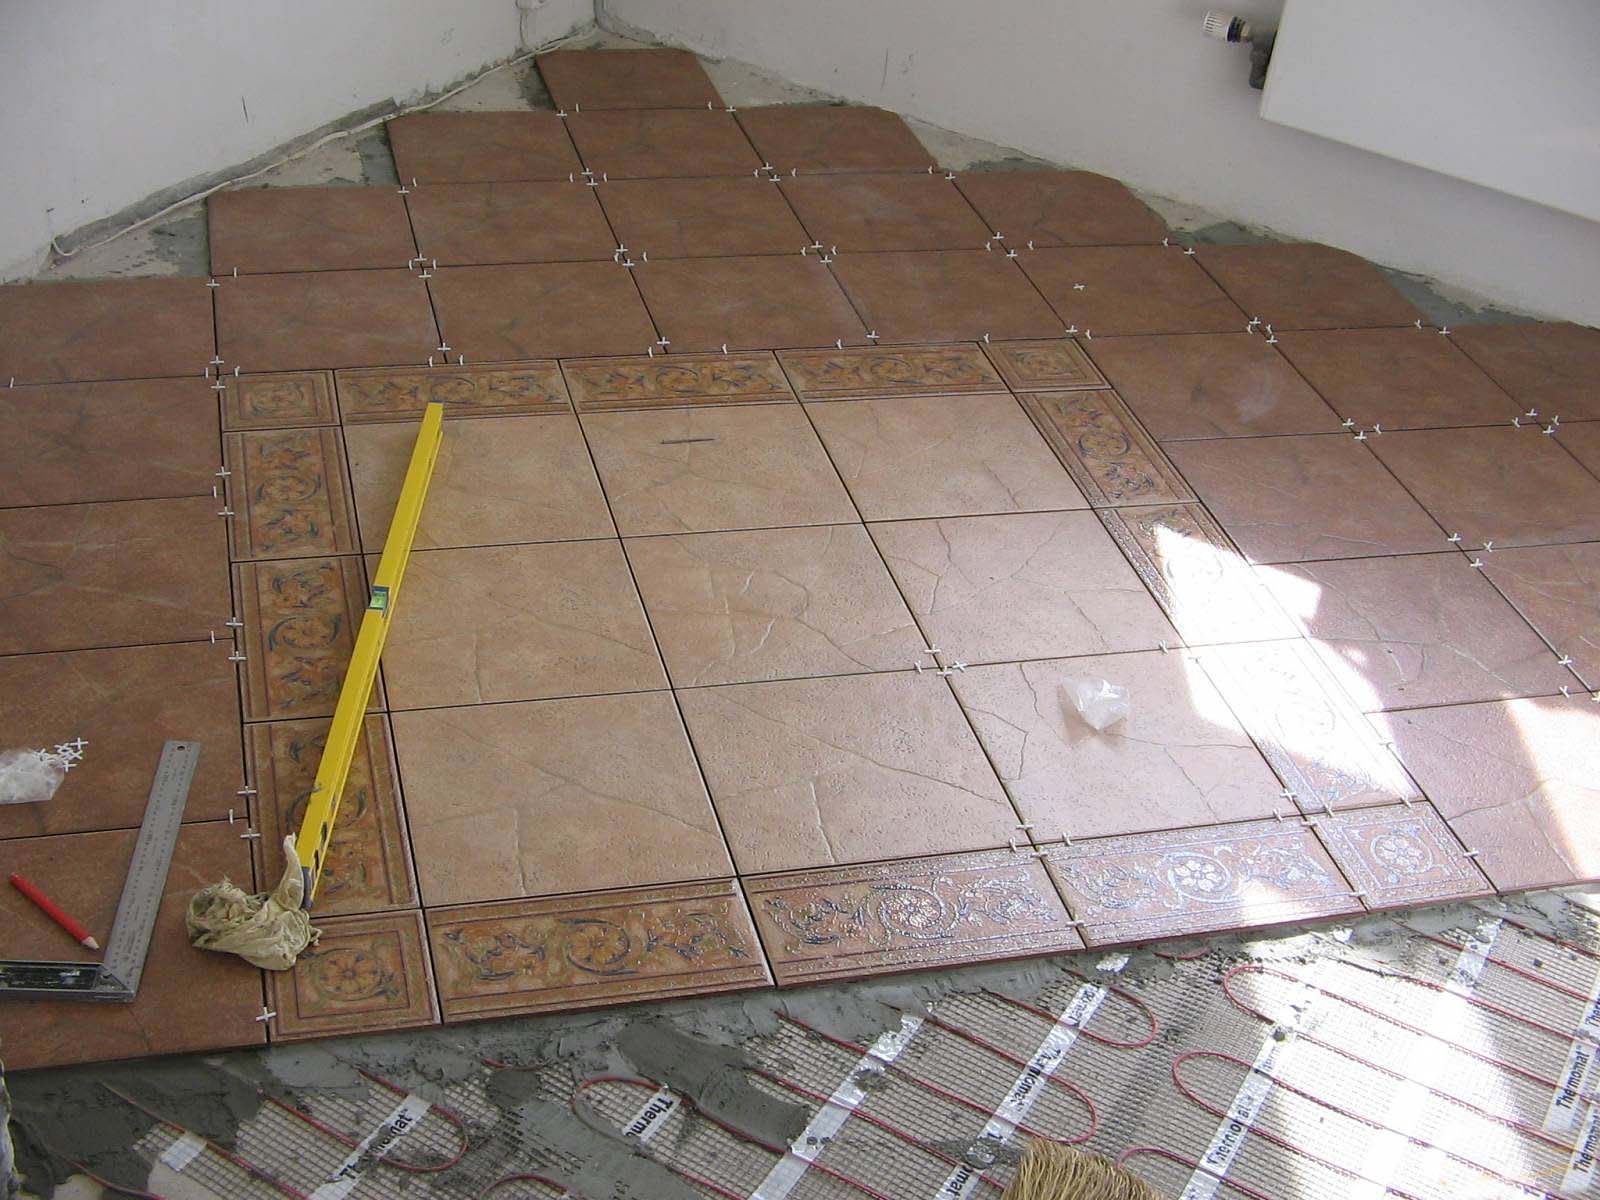
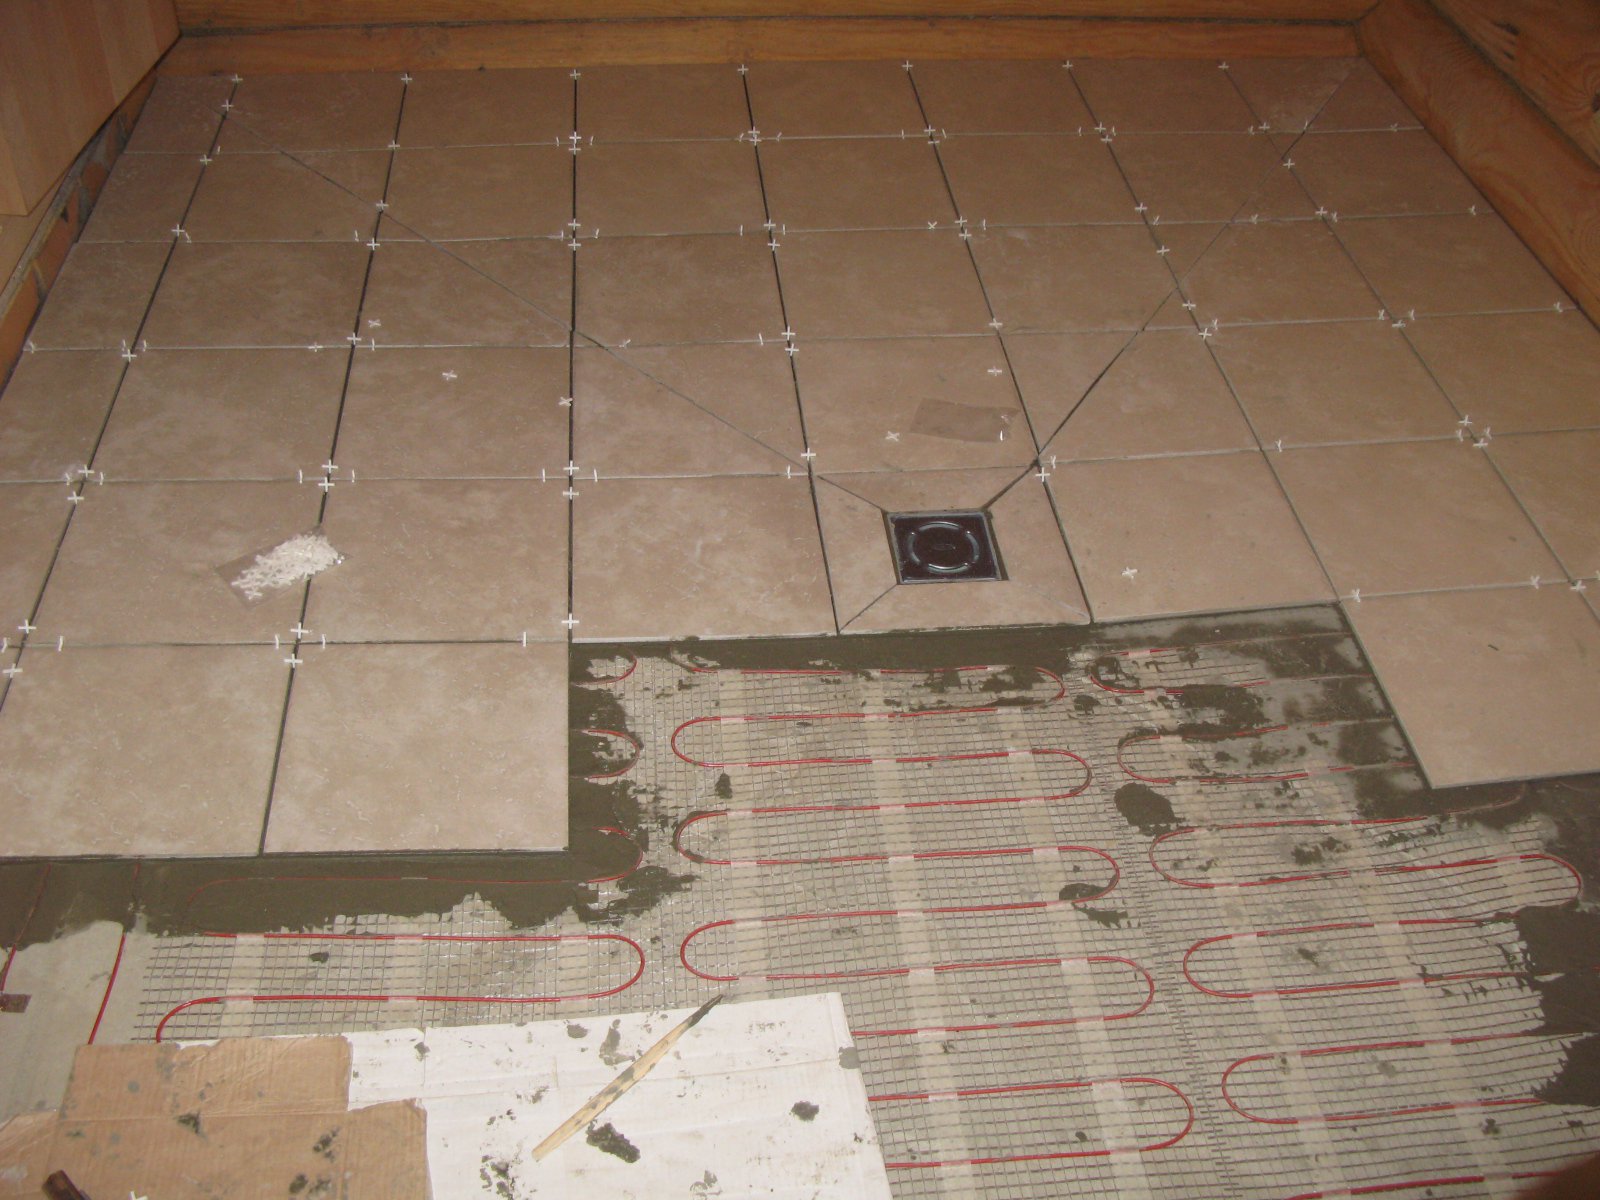
After laying waterproofing material can be made reinforcement, giving the floor greater reliability in operation. For this you need to purchase any fittings. The best option would be a reinforced mesh Ø10mm - Ø12mm, and on top you can lay a netting net. Under the rods, install supports 2-3 centimeters in height (they can be made from scraps of plastic pipes) so that the reinforcement does not touch the insulating material directly.
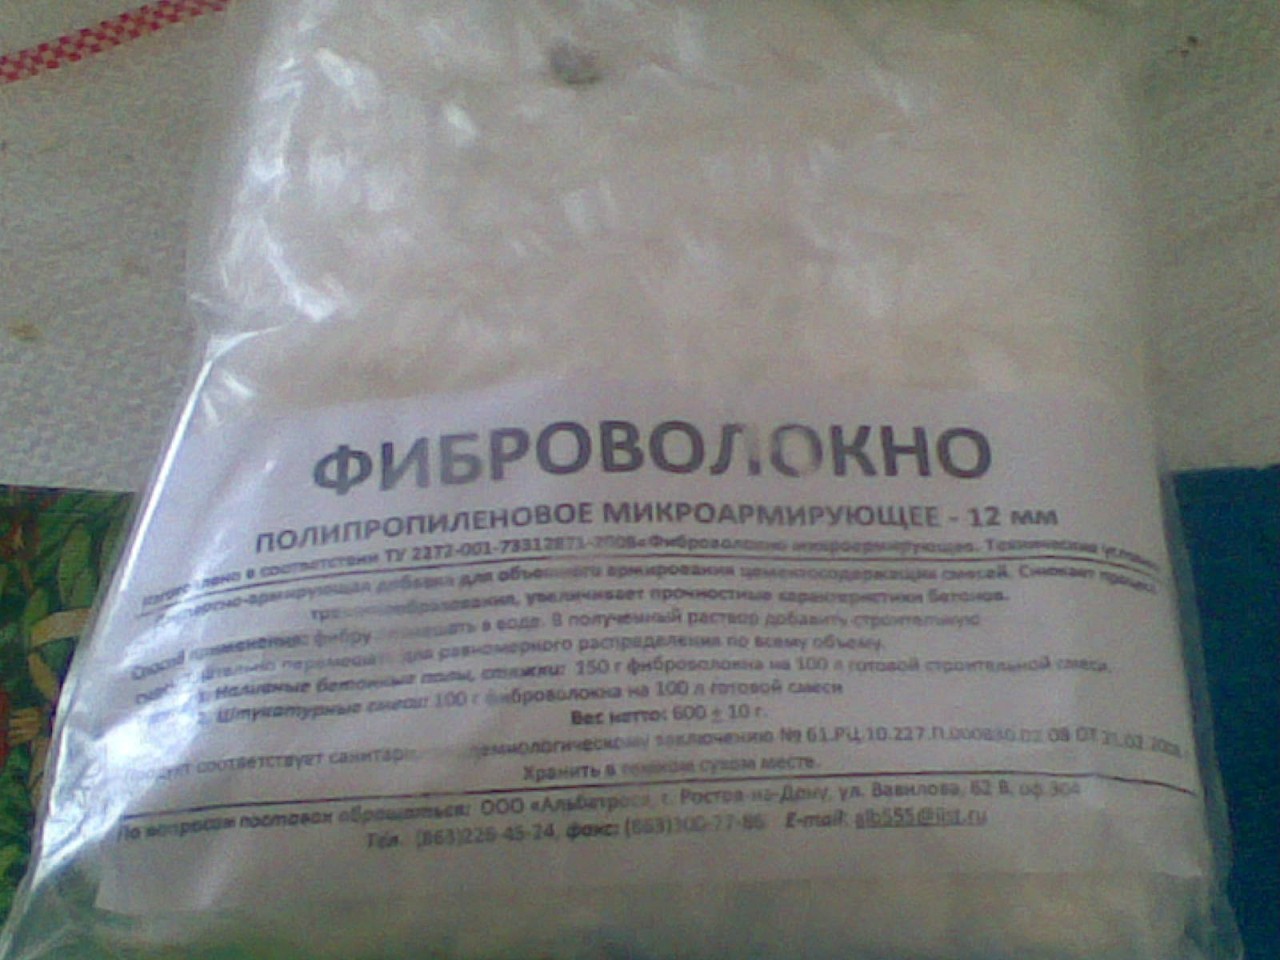
Today, in the building stores you can buy a special fiber-fiber, added to the solution for screed. Thanks to the fiber, you can do without the reinforcing mesh.
Alignment methods
There are several floor leveling technologies. Consider them in more detail.
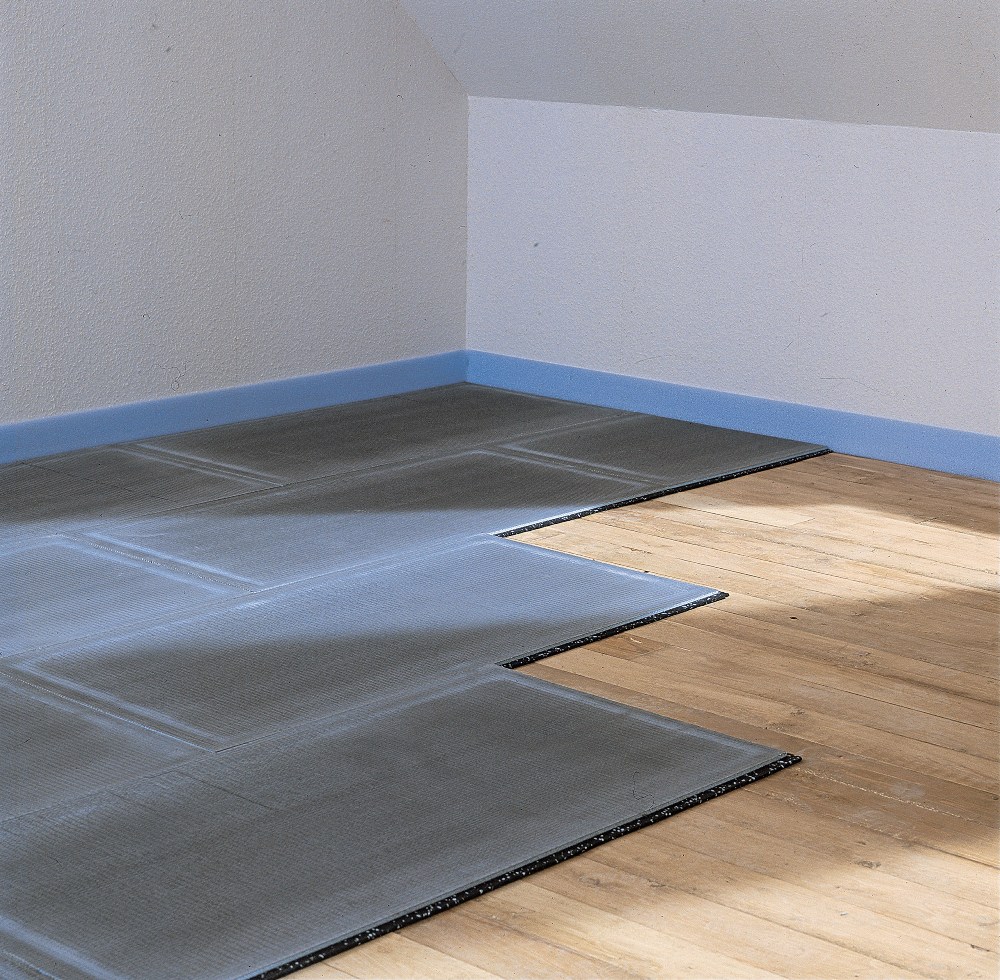
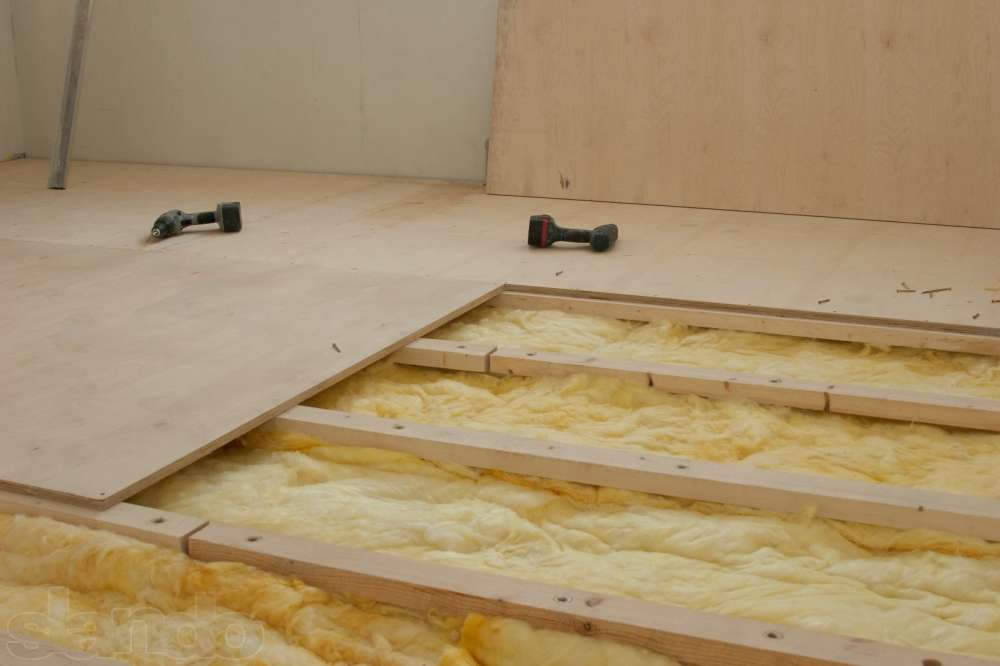
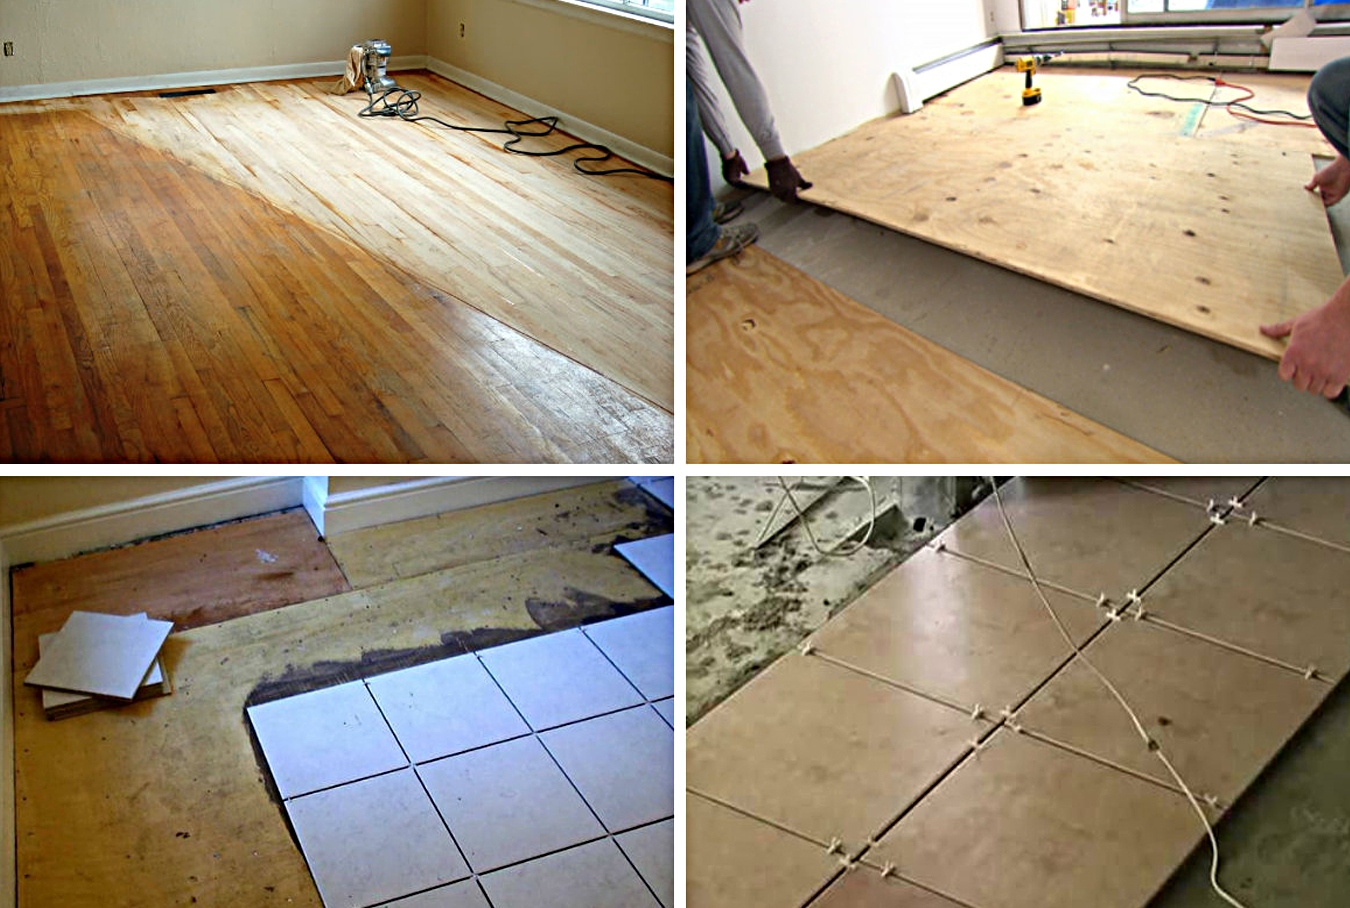
Dry leveling method
It is the most common, as it allows, at the same time as leveling, to prepare a draft floor suitable for laying tiles from various moisture-resistant materials.
This technology uses several methods:
- The use of ready-made sets of discharge "adjustable floor." They are screw plastic supports, through which you can quickly install logs and arrange plywood or other sheets.
- In the presence of the original strong boardwalk, you need to make your own lag systems or point supports with the subsequent installation of plywood flooring.
- It is possible to lay one more layer of plywood on an already existing layer with the fixing of a new layer of GKLV OSB with self-tapping screws.
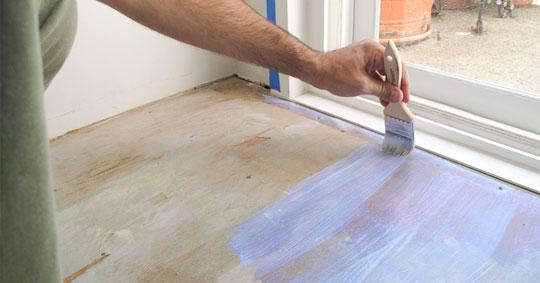
Once the alignment sheets are installed, the coating should be sanded along the seams. If the joints between the plywood sheets are more than 3 mm, then you should carefully fill the slots with silicone sealant. Do not forget to saturate the sheets of plywood with primer.compatible with special glue. After impregnation, glue can be applied to the tile (a two-component polyurethane will be suitable).
The obvious minus of dry leveling is that the floor height will increase, which means the height of the room itself will decrease. In addition, a “stair” will be formed between the floor area with tiled flooring and the floor area without finishing, which will have to be decorated accordingly.If the dry leveling is done in the bathroom or part of the bath rooms, then the level of the tile floor must be made below the level of the wooden floor, otherwise water will flood the adjacent rooms.
If this option is not suitable for you, when the tiled floor will rise above the rest of the surface, then it is better to refuse dry leveling.
"Wet screed"
It is used when full dry alignment is impossible due to the peculiarities of wooden floors.
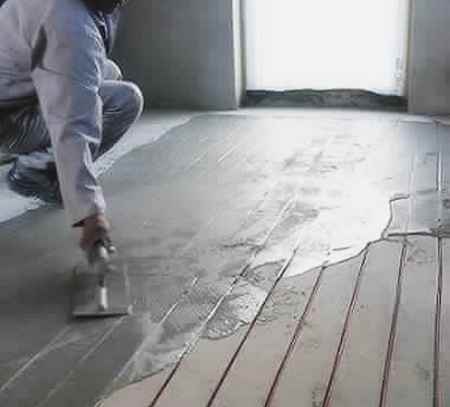
The difficulty of doing a wet screed on a wooden floor is that it is made, observing the obligatory presence of a special deformation gap between the walls, foundation and new floor. Such a pouring pattern is called “floating”; it allows the wooden elements of the floor to move without breaking the ceramic coating.
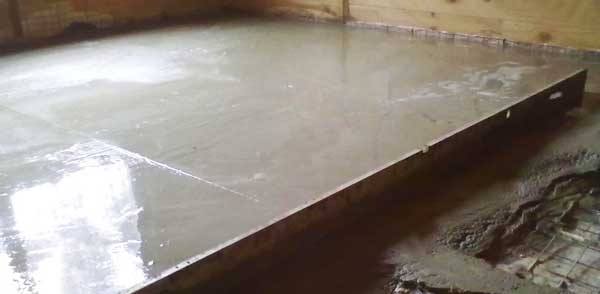
Flooded screed should not be more than 3 centimeters, otherwise the design of the floor will become too heavy. It is also not worth making the pouring thinner, as there is a risk to increase the fragility of the floor.
The step-by-step process of pouring the screed is as follows:
- If necessary, we disassemble the floor and assess the condition of the timber, beams, flooring.If any element is in doubt, replace it with a similar one.
- We install new lags (if they have not yet been installed) or strengthen existing ones with the help of additional structures, and the step between the lags should not be more than 0.5 meters.
- Leave a gap of about 1 centimeter between the ends of the lag and the walls of the room.
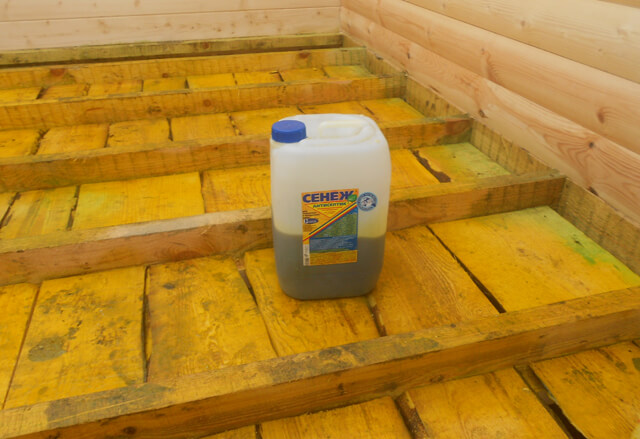
- We saturate all the details with an antiseptic for wood.
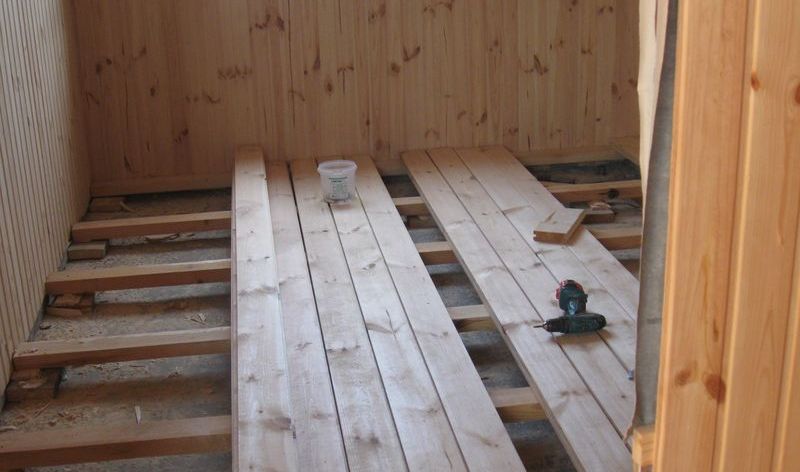
- We make wooden flooring, and even old building materials in good condition will do.
- Between the boards we leave about 1 centimeter gap - they are necessary for ventilation. If the boards are wide, additional ventilation holes can be made.
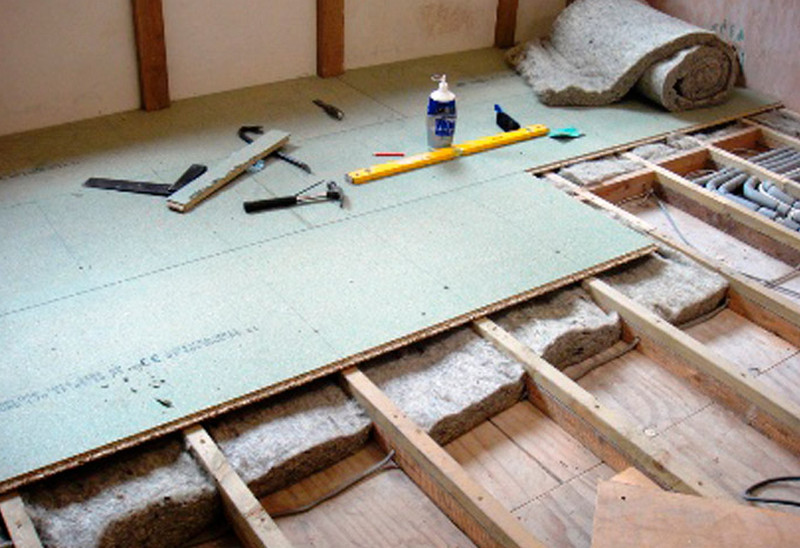
- We fasten plywood across the board to the boards. Moisture-resistant plywood is at least 1.2 centimeters thick, any other extruded particle boards are also suitable. We arrange plywood as for brickwork (there should not be cross-shaped joints of plywood sheets), and fix the elements with galvanized screws every 20 centimeters.

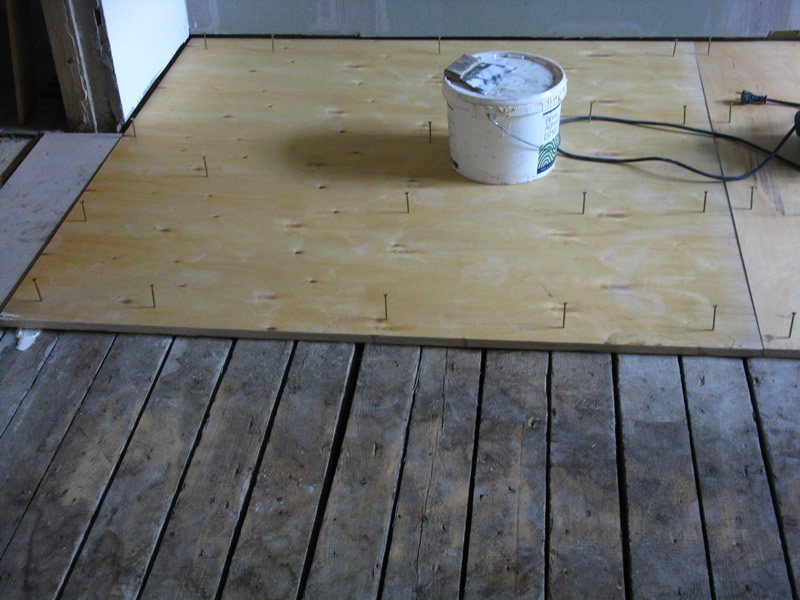
- Between the sheets of plywood we leave 2-3 mm ventilation slots.
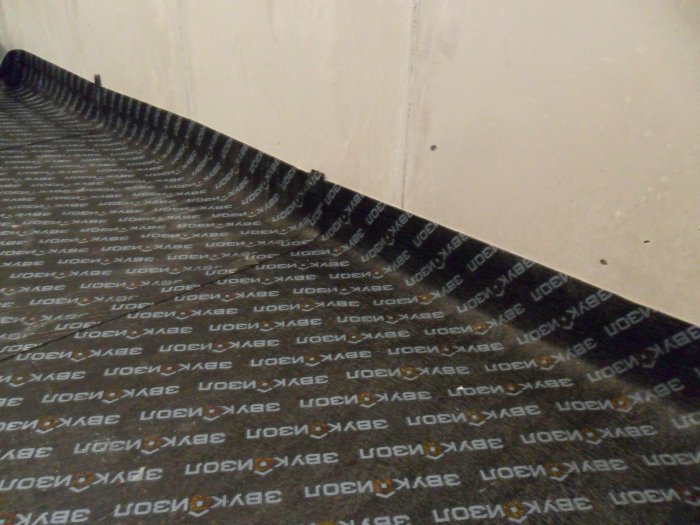
- We cover the waterproofing materials prepared flooring.As a waterproofing, you can use thick polyethylene, bitumen paper, glassine, paraffin paper. Roll out insulation rolls with overlaps and sides, fasten them with construction tape.
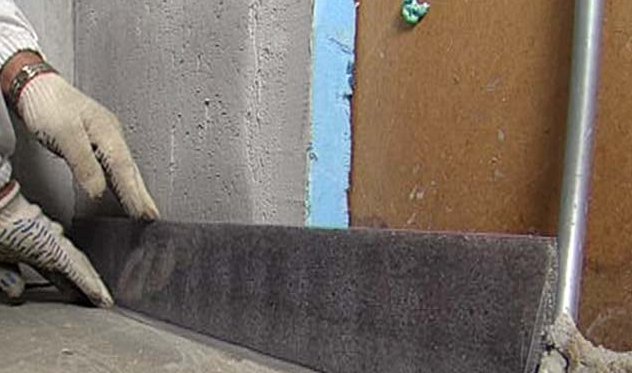
- Along the perimeter of the walls between the sides we lay a damper tape not less than 10 centimeters wide and about a centimeter thick.
- We put sleeves on all pipes.
- Fill the screed with ready-made ready-mix or self-made mortar (liquid glass (2 parts) and clean coarse sand (2 parts) are used). Homemade mixture must be shut up with clean water (part 1).
- After hardening, you can lay tiles.
- The “quick version” of the screed is a simple fixing of moisture resistant gypsum board with a special glue (two-component polyurethane). The glue is so elastic that the movement of wood will not destroy its integrity. It is permissible to lay the GVL-slab in two layers to give additional strength to the basis, and it must be ensured that the seams of the 1st and 2nd layers do not coincide.

GVL-base, like the previous version of the “liquid screed”, requires maintaining the technological gap between the GVL-plates and the walls of the room, priming the entire surface with a primer, as well as filling the joints with sealant.
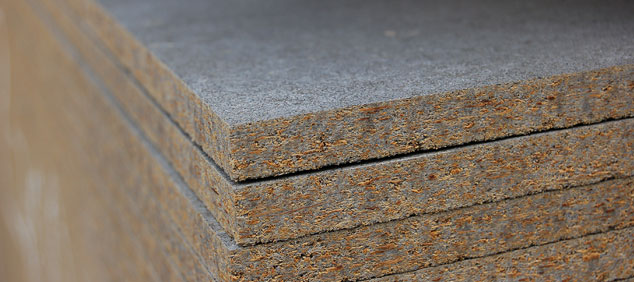
Popular material allowing to make a high-quality base for a tile floor, are cement-bonded chipboards (DSP). If you are attentive to the choice of products (make sure you have a manufacturer certificate and a product passport indicating the composition of the TsSP according to GOST), then you can be sure that you will receive an environmentally safe building material, characterized by reliability and high quality. Many professionals believe that the quality of DSP is higher than that of most modern materials with relative efficiency.
Piling
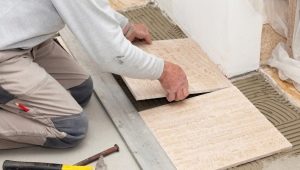
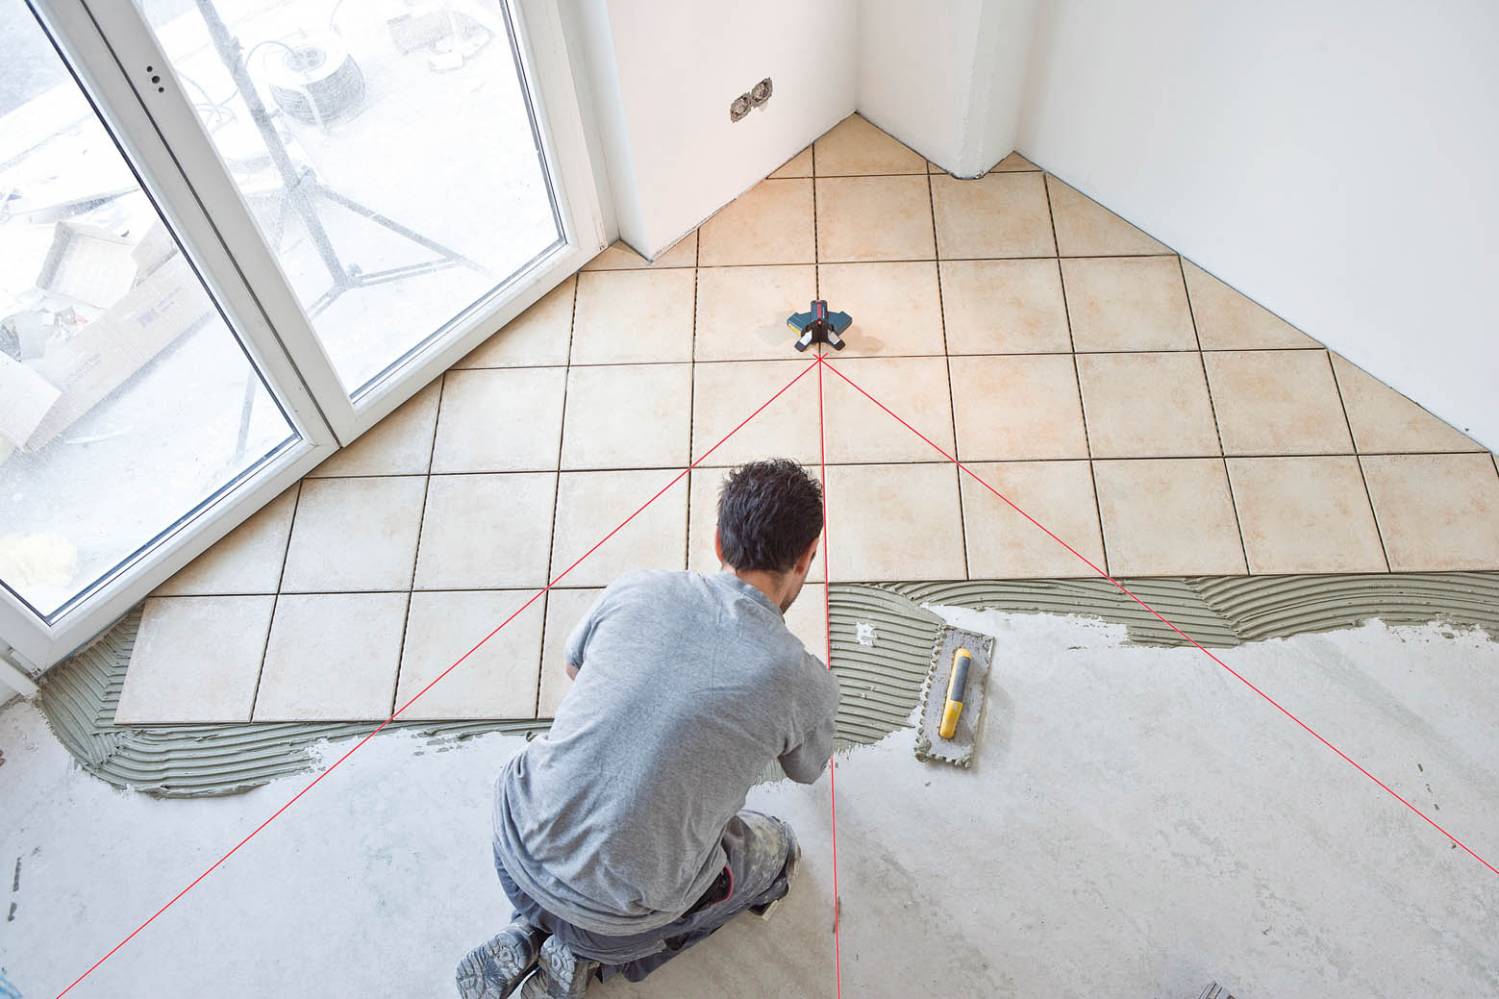
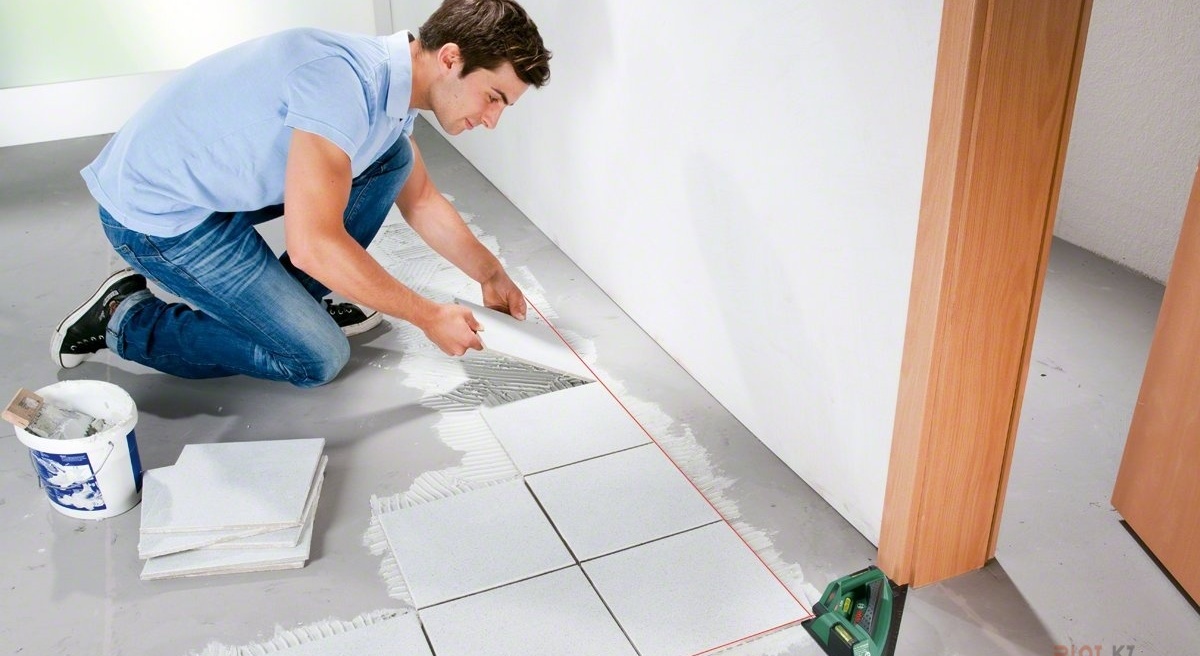
The following rules will help you properly lay ceramic floor tiles:
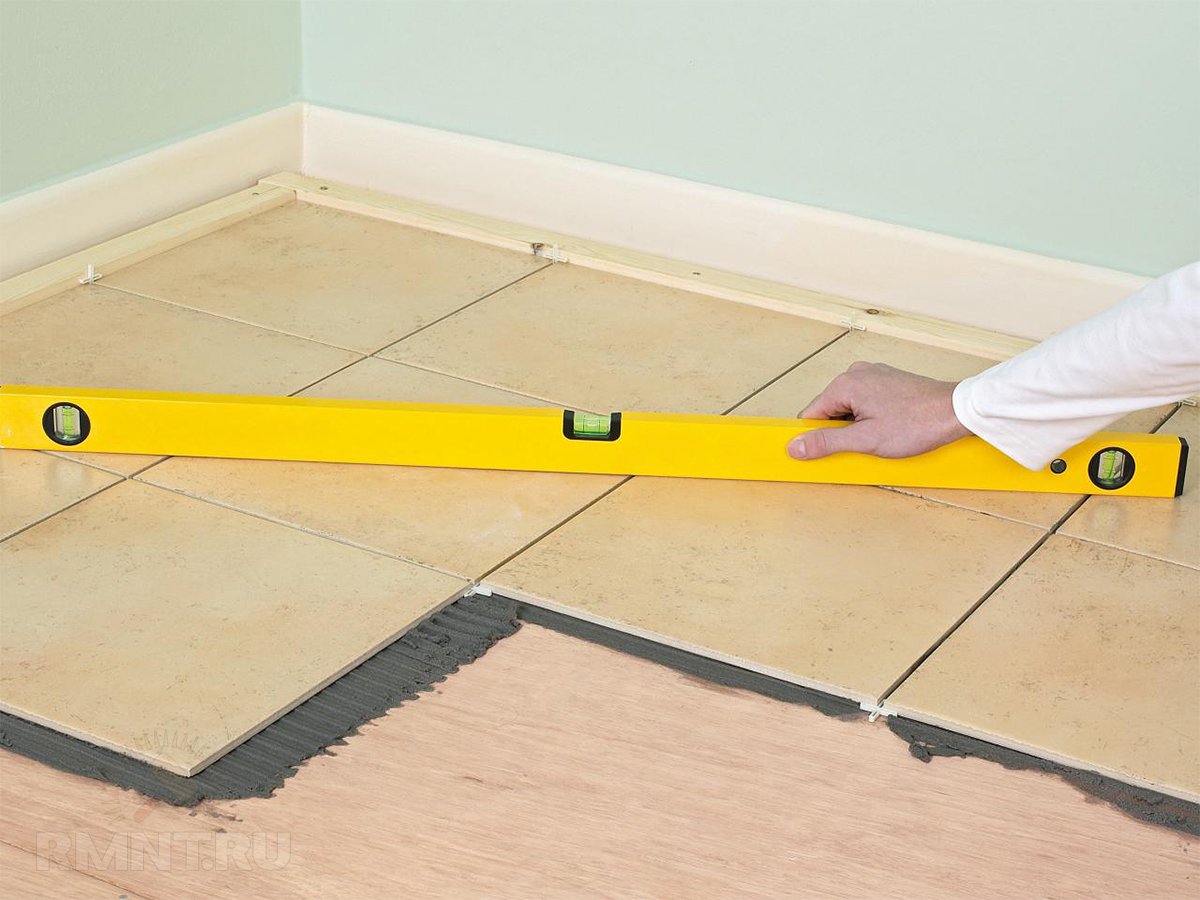
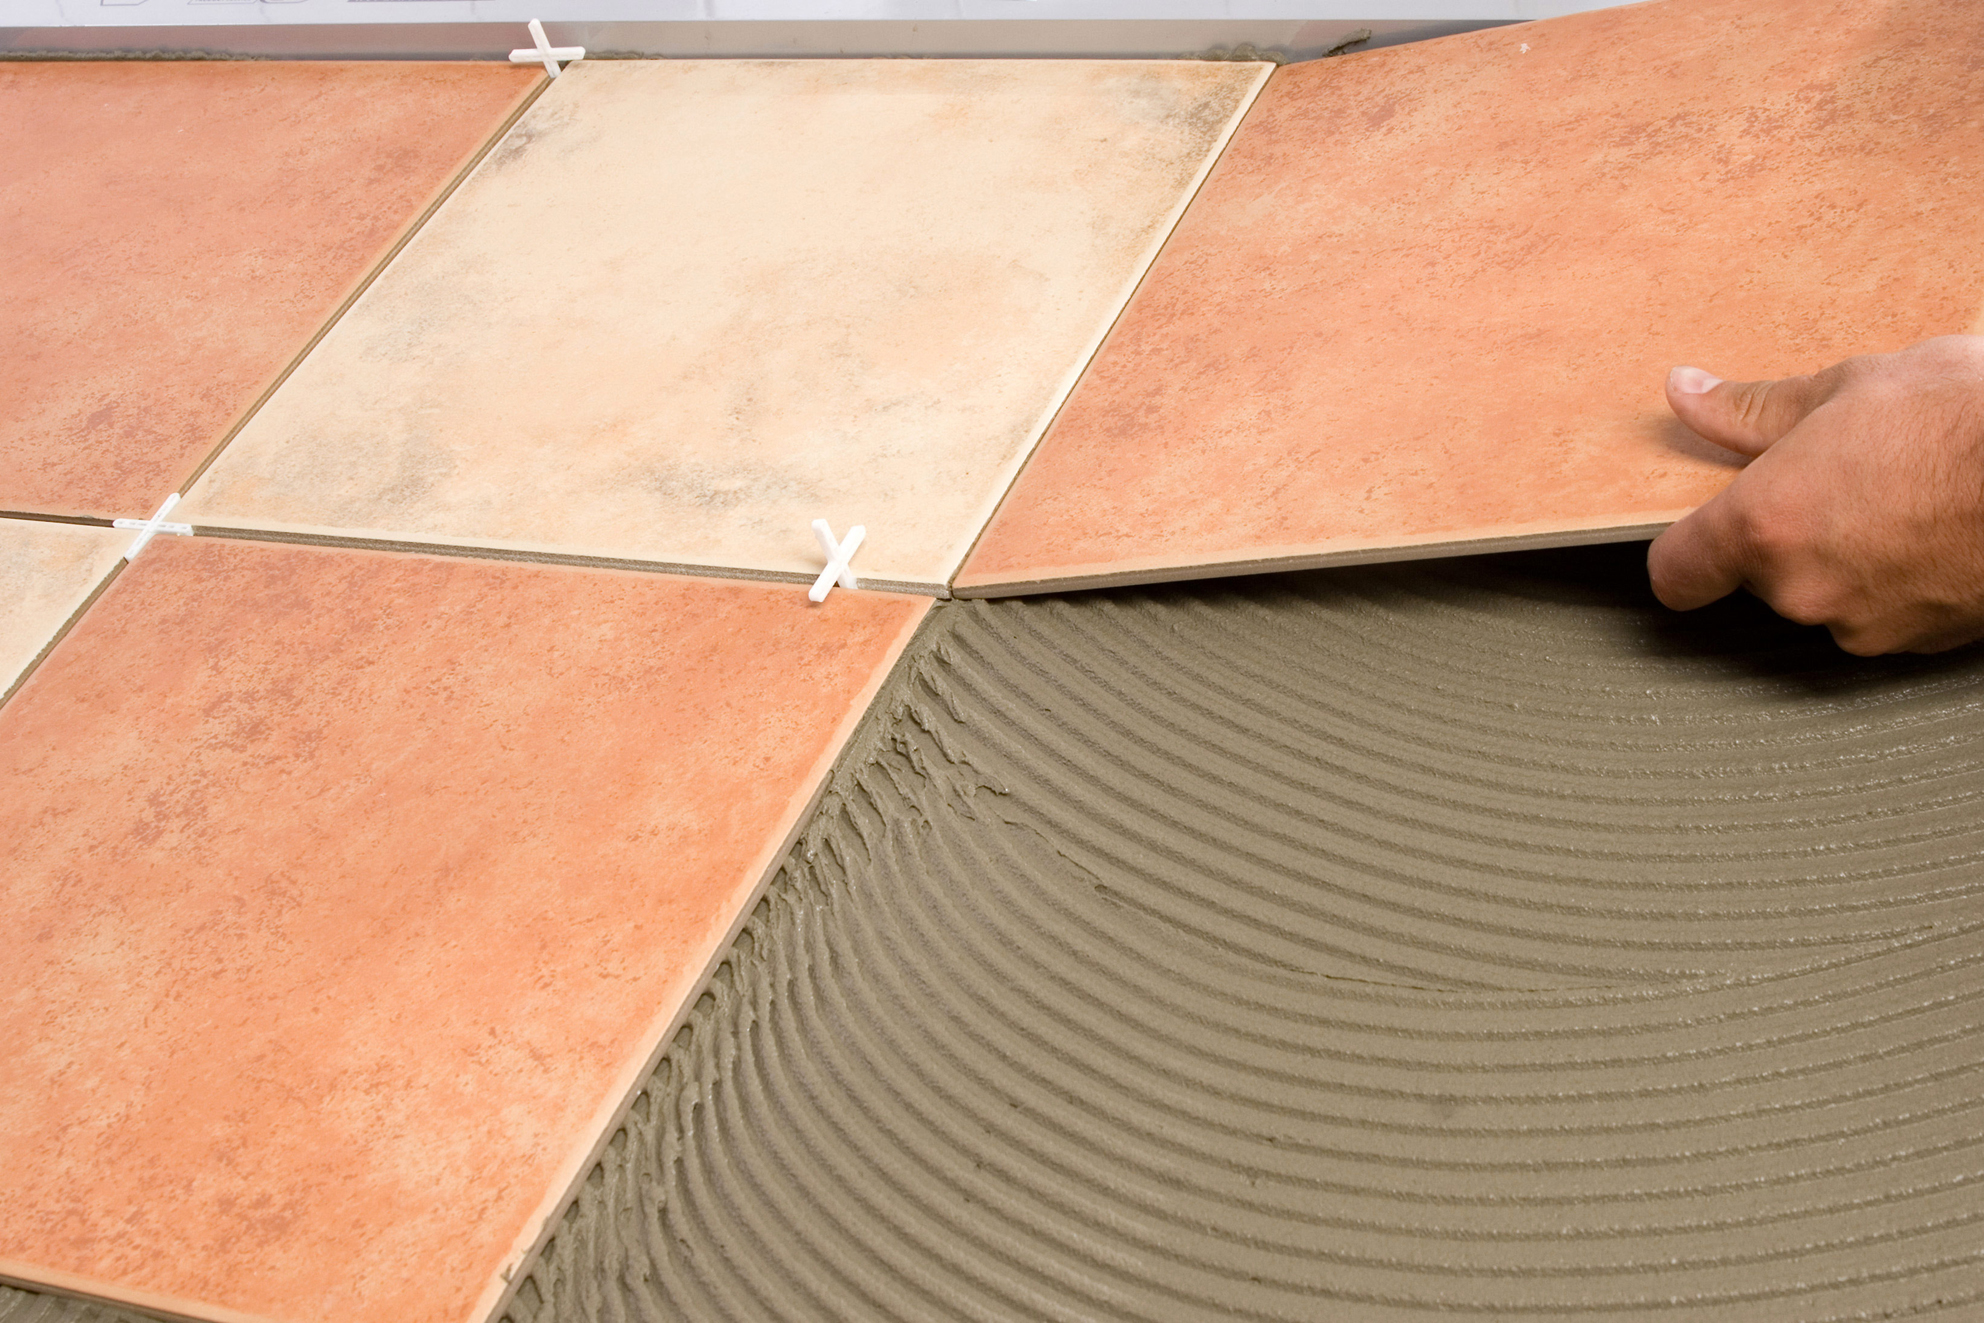
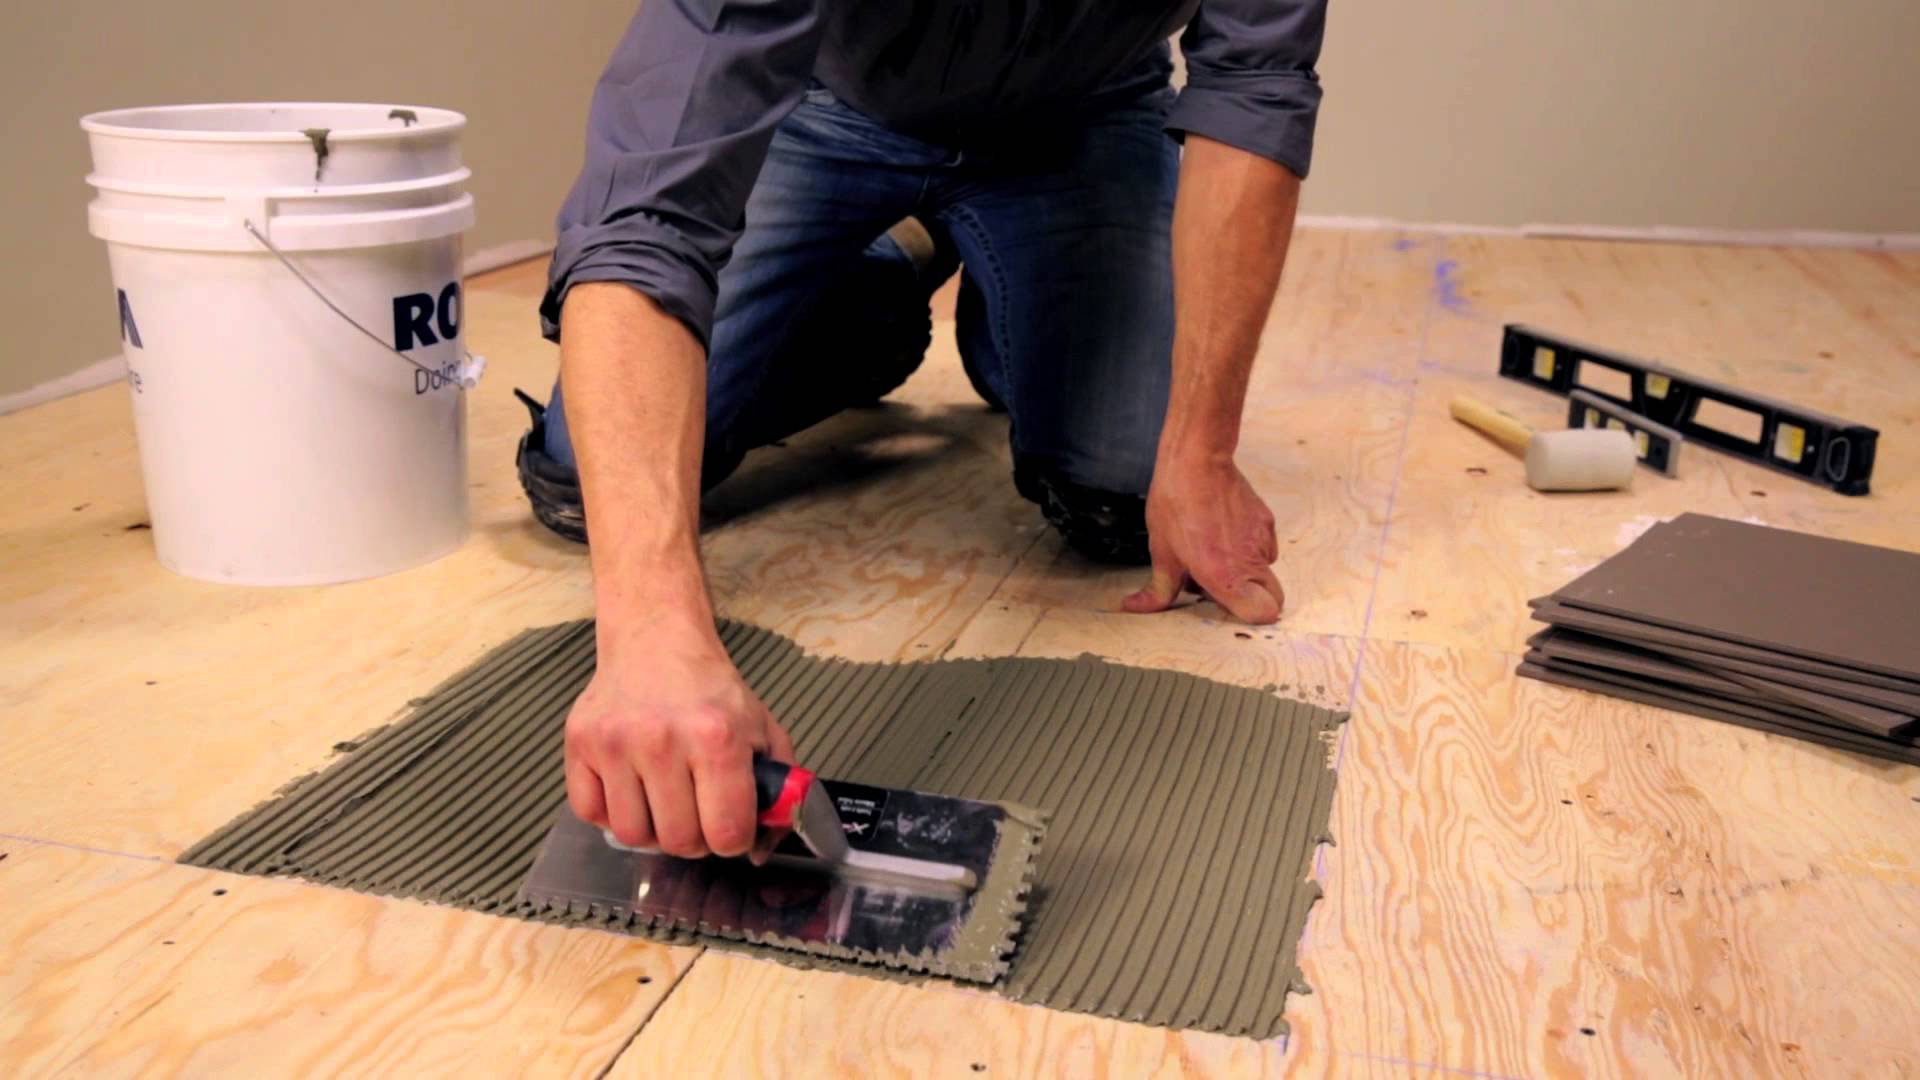
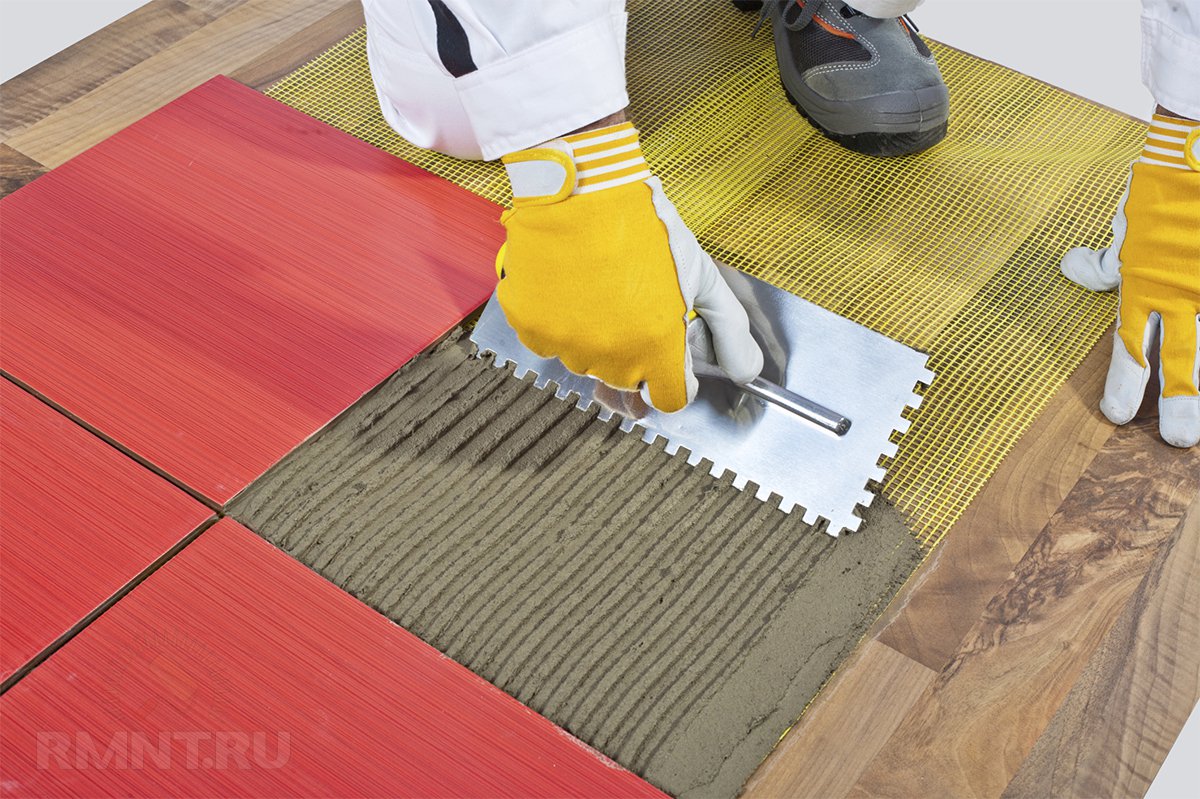
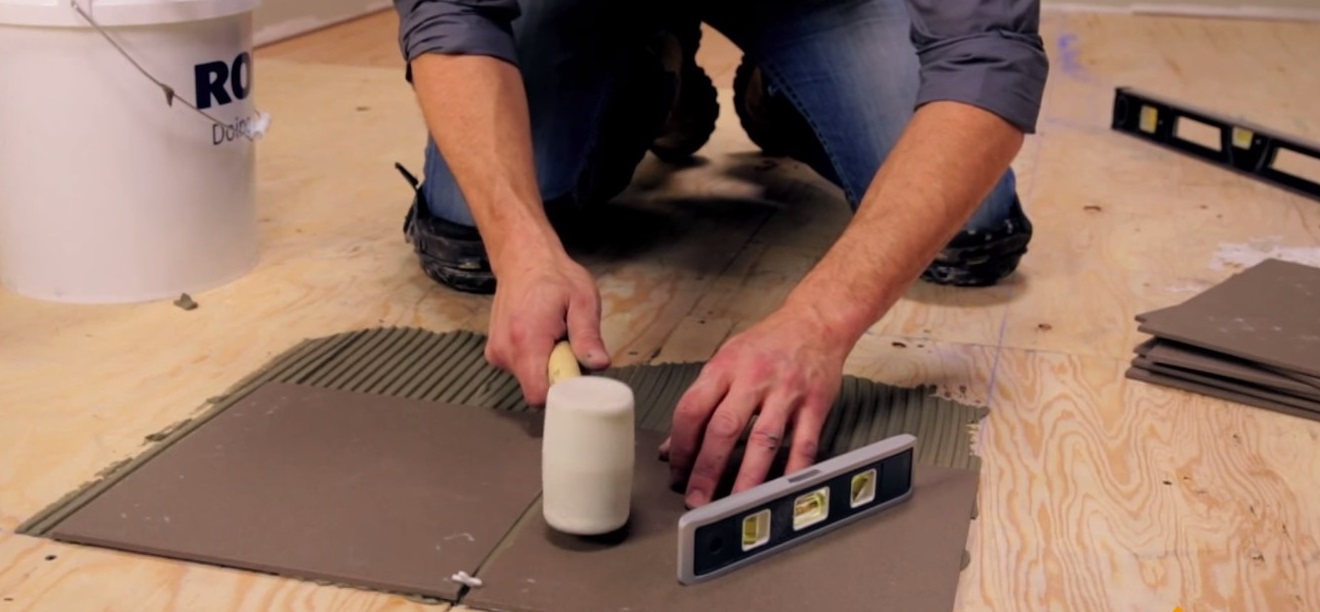
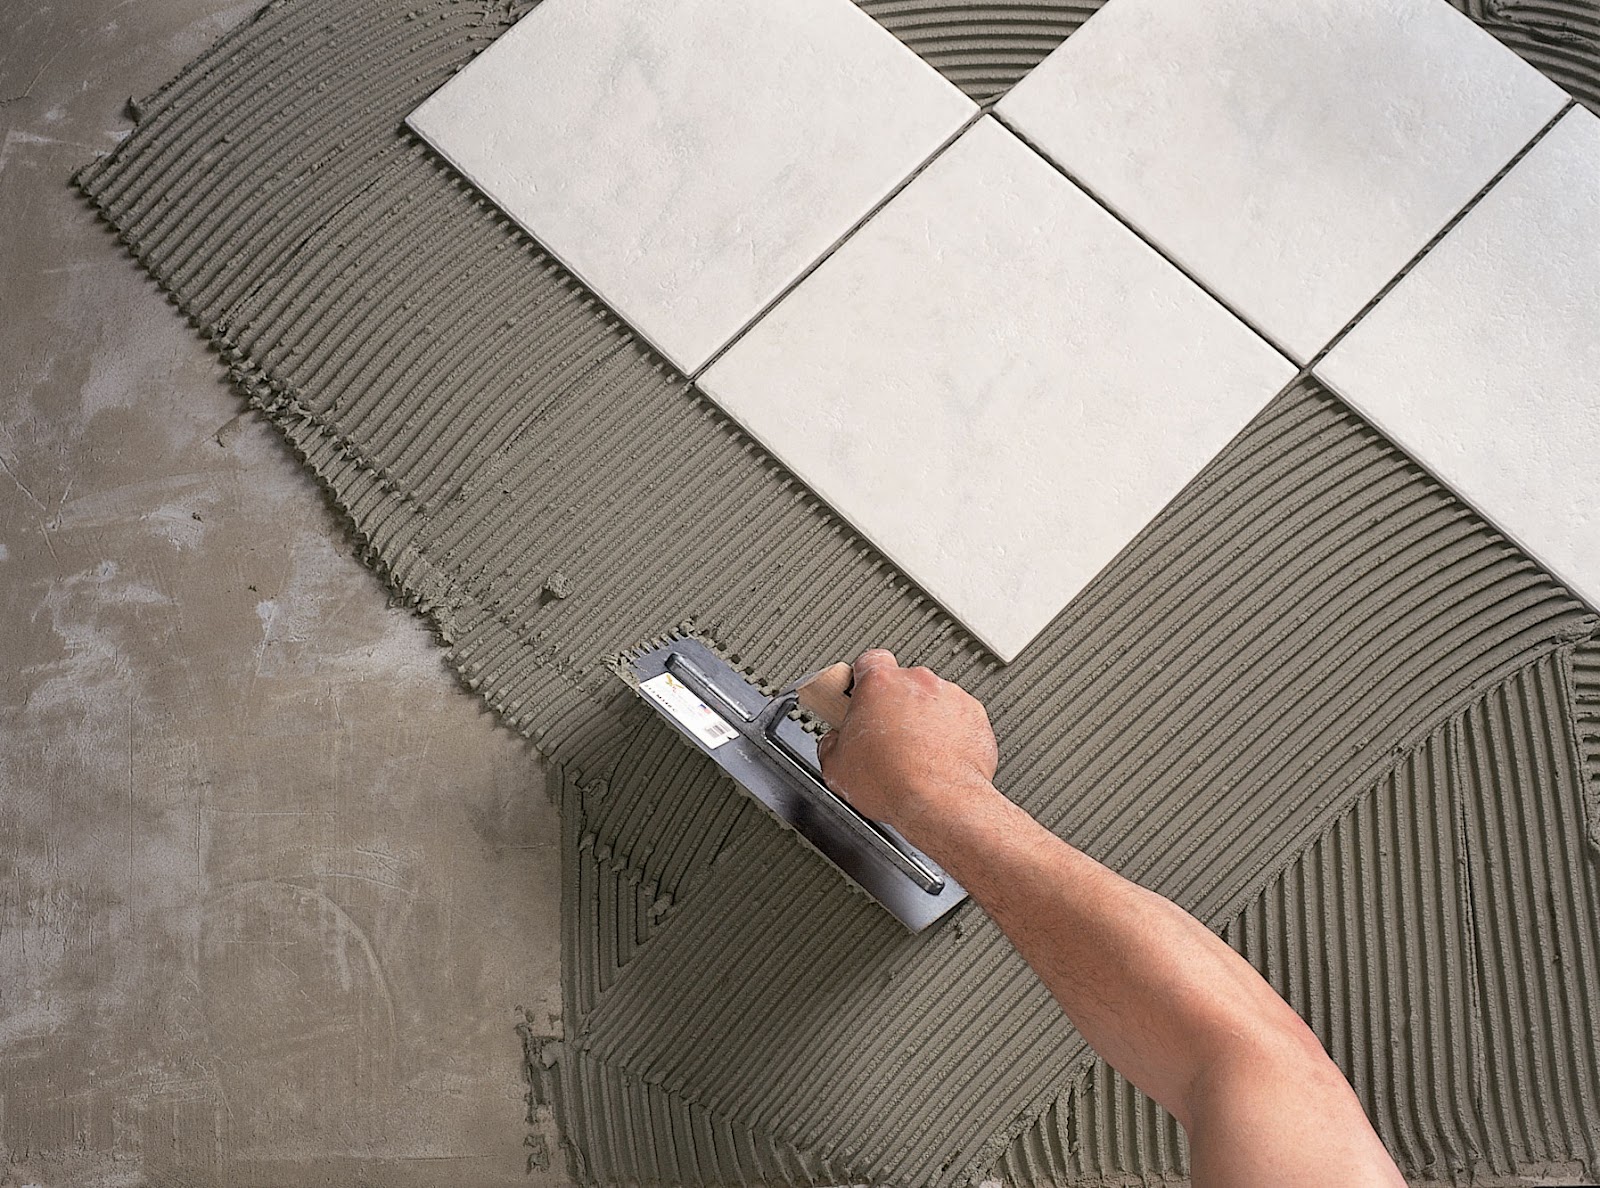
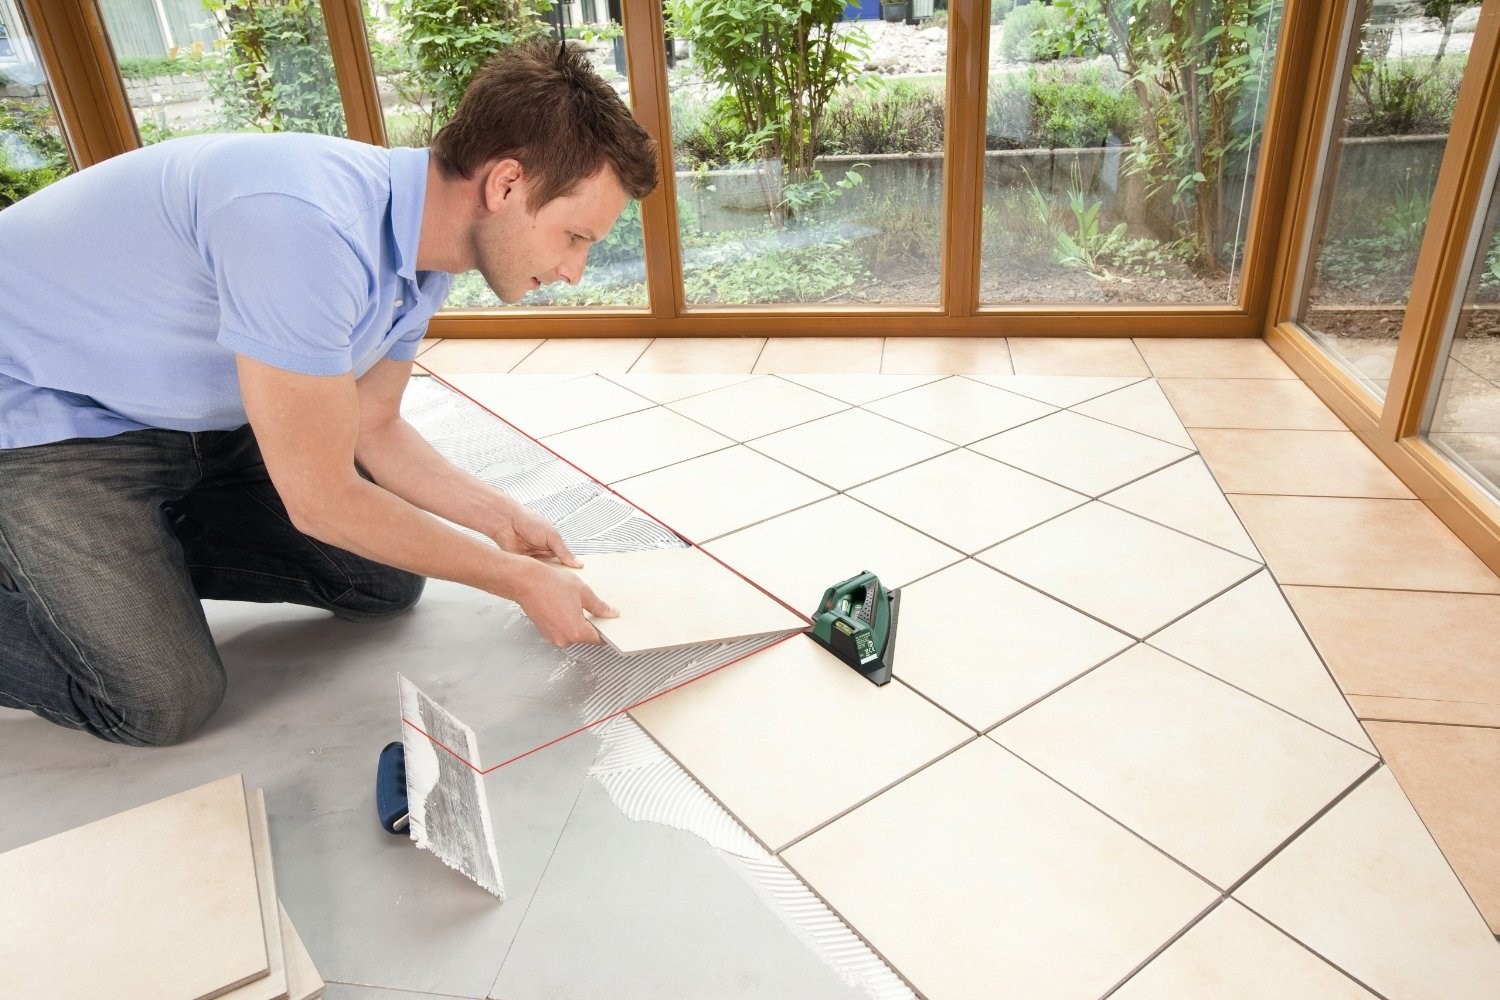
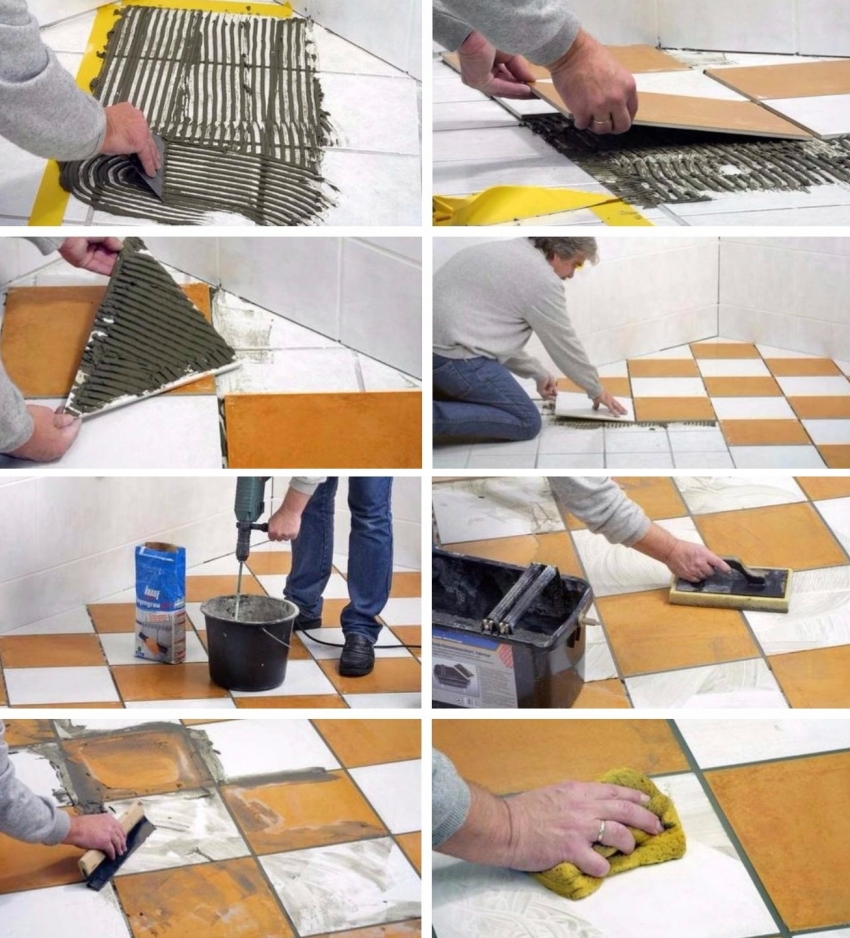
- Apply adhesive mortar “comb” - a special spatula with two edges - flat and serrated. The flat edge will help to distribute the glue correctly, and the “teeth” will make the surface even. Spatula must work in one direction (traces of the teeth should be directed to one side).
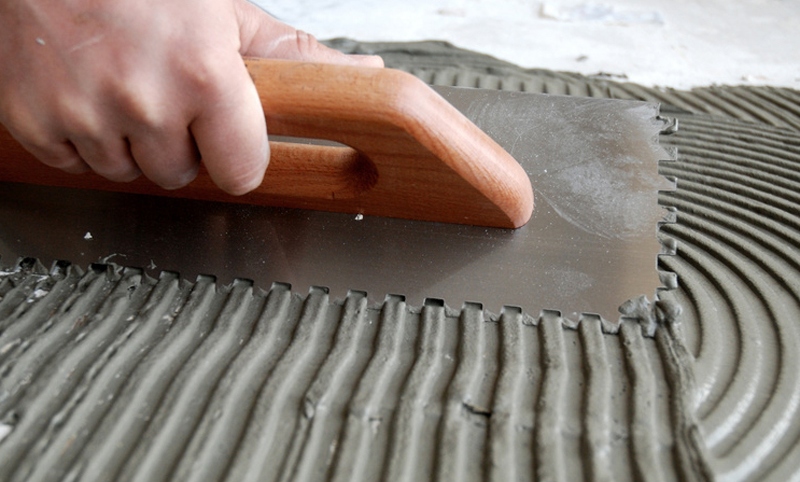
- Excess glue, removed "comb", returned to the bucket with glue, mixed and used further.
- Examine the back side of ceramic products, most often there is an arrow that allows you to determine the direction of installation relative to the direction of the applied adhesive.The grooves on the adhesive solution and the strip on the tile should be perpendicular, which will provide the most reliable adhesion of glue and finishing material.
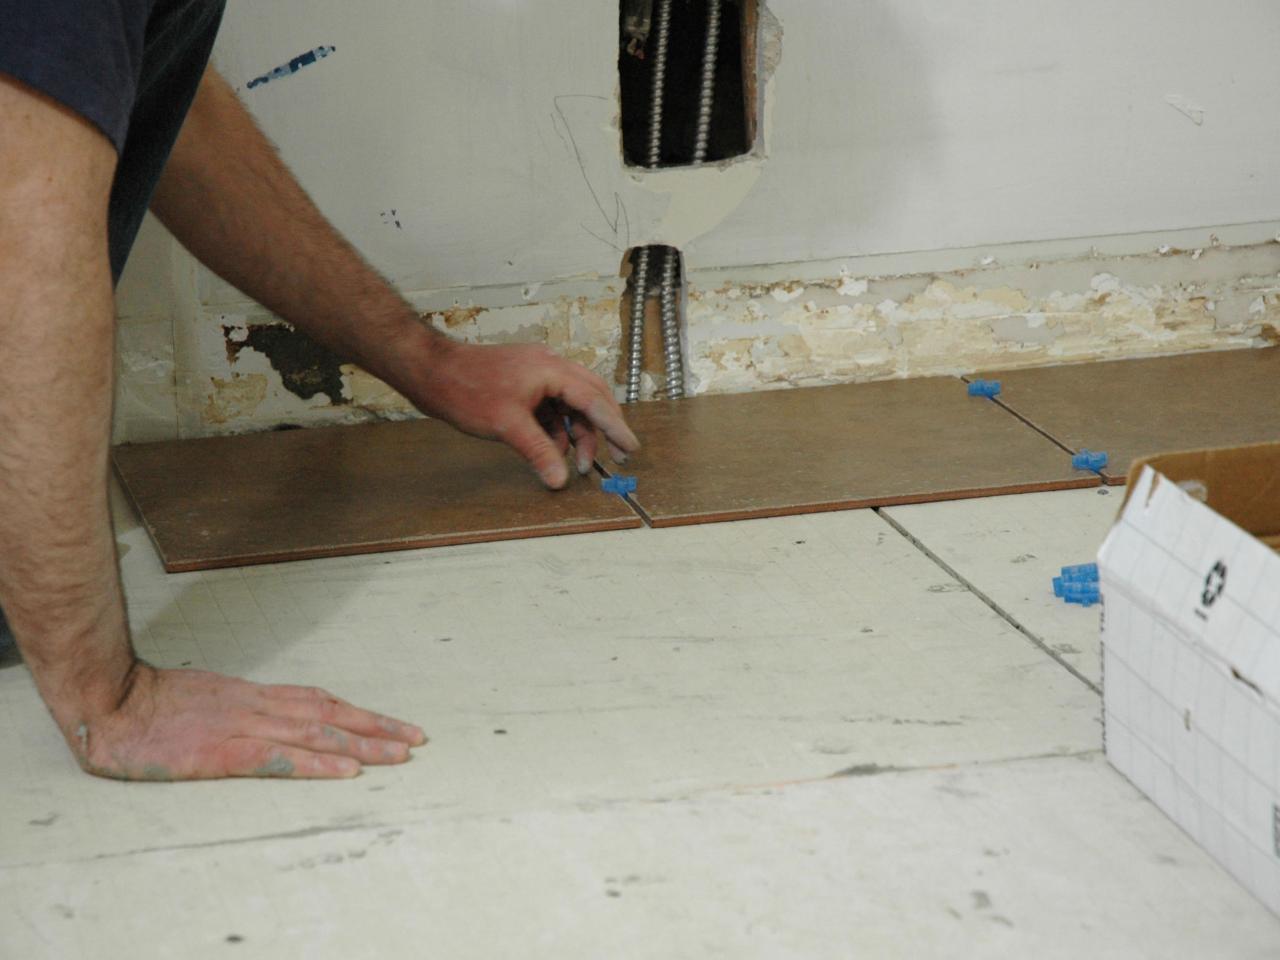
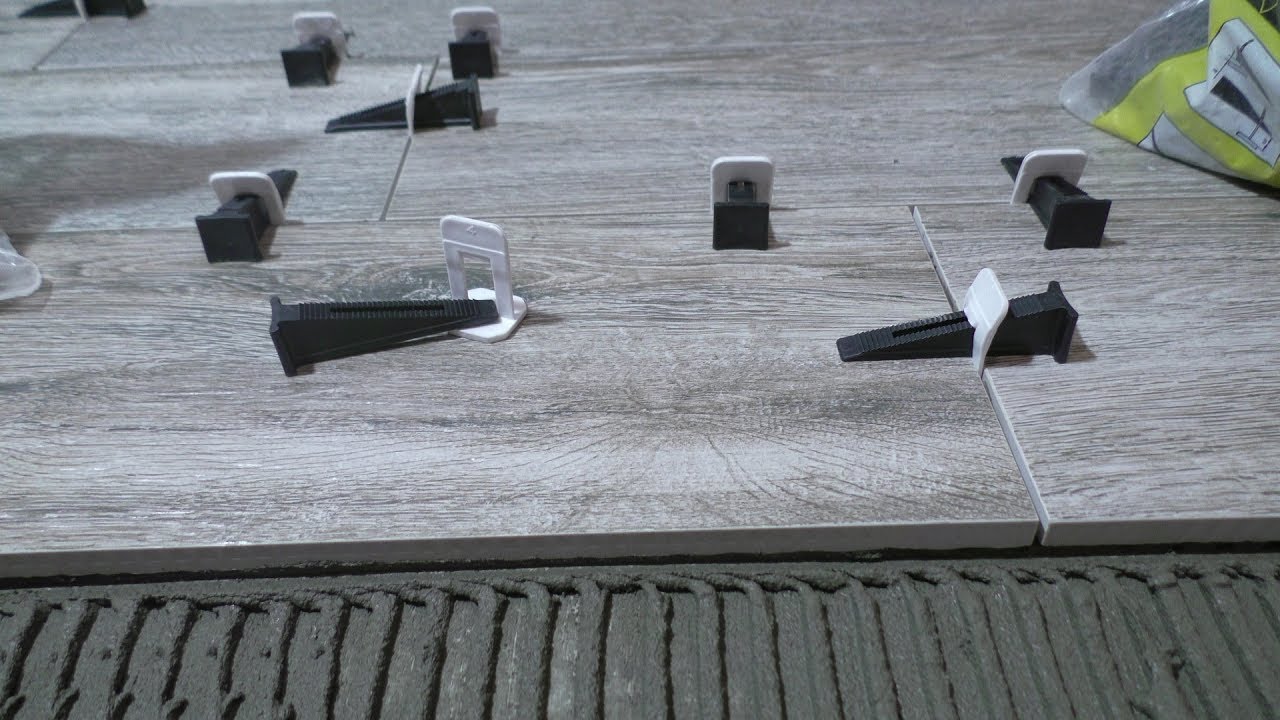
- In order not to care about the same width of the seams (even a millimeter displacement in the first row of the tile will lead to a shift of several centimeters later), use plastic crosses - special parts of different thickness. The most common option is a flexible cross-shaped parts, having a thickness of 5 mm. The plastic from which the crosses are made must be of high quality, otherwise they will break and remain in the seams upon removal.
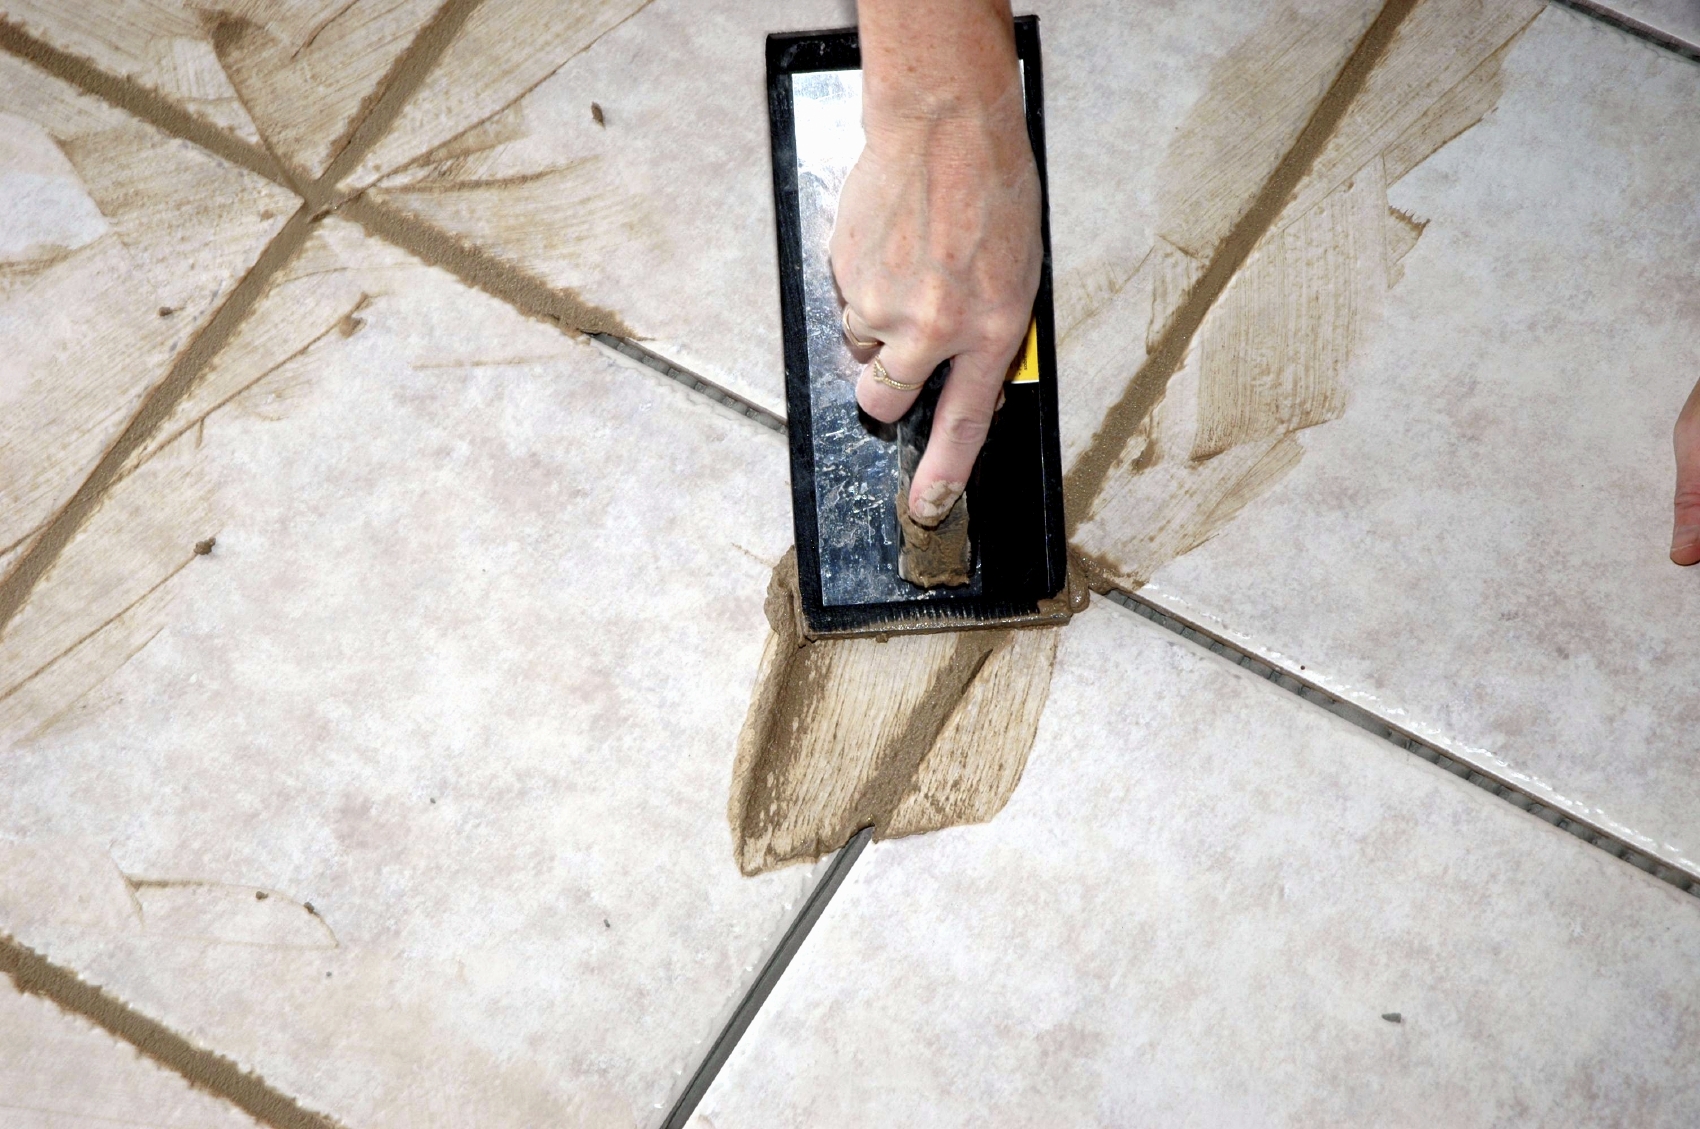
- After laying the tiles, let the adhesive mortar dry for 2-3 days, and then you can begin to grout.
- Grout solution is prepared from a special dry mixture, its consistency should be similar to the consistency of thick sour cream.
- The grout is carried out with an elastic rubber trowel (it should not bend under pressure) and adjusted, if necessary, with your fingers. If after 3-4 hours you see holes or cavities in the seams, then wear rubber gloves and “modify” the lost.
- Remove excess grout from tile with a dry cloth or sponge.
- After 1-2 days, the tile can be washed.

Installation troubles
If you only master the technology of laying tiles on the floor, then some defects in the process of floor decoration can not be avoided. But it is not scary if you manage to fix them before the solution dries. Consider the most common options for possible errors:
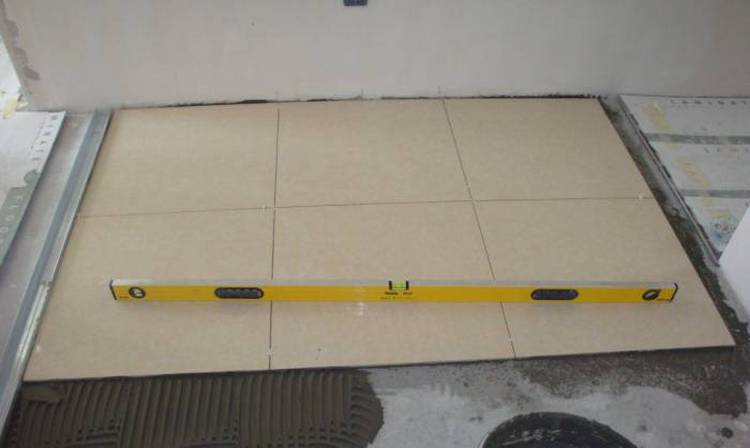
- We fix the crooked row right away until it hardens the adhesive solution. Therefore, it is necessary to check the “horizontal” of the entire row immediately after installation. If the "horizontal" is broken, the series will have to be removed.
- "Steps" - a defect that usually occurs on the walls. But the floor tiles may begin to move in steps, if the angle of the walls in the house is indirect. Cut the tile, if necessary, this will allow you to lay the cover correctly and maintain the angle.
- If one of the tiles in the row lay obliquely, it means that there is no cross in the seam and it must be urgently inserted, and the tile should be strengthened with masking tape.
- If you did not notice the marriage on the tile, then this may also be the reason for its displacement. Only one way out - remove the product and pokleit it again.
- If the tiles are too deeply embedded in the adhesive solution, then you have applied the adhesive unevenly. This often happens if you glue for the first time and apply glue solution before gluing each tile.
- Trapping tiles can happen because of unwarranted savings.Applying glue only to the corners of the finishing elements will inevitably lead to the fact that some tiles will “fail”, while others, on the contrary, will “come forward”.
- Dot application can also provoke cracks and chips, so-called “cobweb” can form on the tile. Only coating the entire surface with an adhesive solution will ensure easy and proper installation in the future.
- Such a defect as dips in the seams may occur due to the fact that the grout solution is too liquid. There is nothing wrong with that, but you will have to miss the seams again.
- Even tiles from one batch can be slightly different. To avoid differences in tiled rows, you should glue tiles from different boxes into one row.
- Tiles can be of different lengths.
Calculate the number of tiles
Despite the apparent complexity of the calculations, to make them is not difficult.
It is necessary to measure:
- the area of the entire floor or the area on which the decoration will be;
- those parts of the floor where you do not plan to glue tiles (if any);
- the area of one element of decoration.
Now you can calculate everything, for which all the data obtained is rounded up,If necessary, subtract the areas from the total area of the floor, if necessary, and divide the area of the resulting surface under the decoration by the area of one tile. We add to the result 10-15%, because trimming, breakage and scrap of a part of the material is inevitable.
On the Internet there are many sites offering to calculate the number of tiles online, for which you also have to provide the necessary data regarding the area of the space for finishing.
Tips masters
Experienced tilers have created a number of recommendations for beginners, which greatly facilitate the process of facing a wooden floor:
- If you are laying tile for the first time, it is worth trying to do it on any other surface for “practicing skills” (the storage room is perfect).
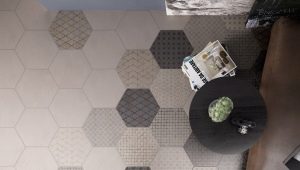
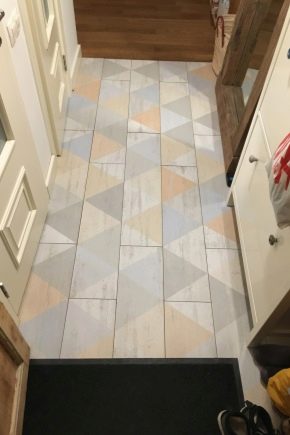
- Be sure to make a preliminary layout of tiles with patterns. Something to change directly in the process of gluing will be late.
- Schedule the location of the tiles with the ornament in advance, as in the process of laying you can get carried away and forget about them.
- Do not press too hard on the tile when laying, otherwise you will have to constantly remove excess adhesive in the joints.
- Tile removal is done only with a rubber mallet, otherwise there is a risk of splitting not one element, but several.
- If you have not found a grout of a suitable color, do it yourself, adding a few drops of the desired colorant to white.
Read more about the intricacies of laying tiles on wooden, see the following video.