Tile leveling system: pros and cons
Installing a ceramic cladding material requires that the surface is perfectly flat. This condition must be observed when laying tiles not only on the floor, but also on the walls.
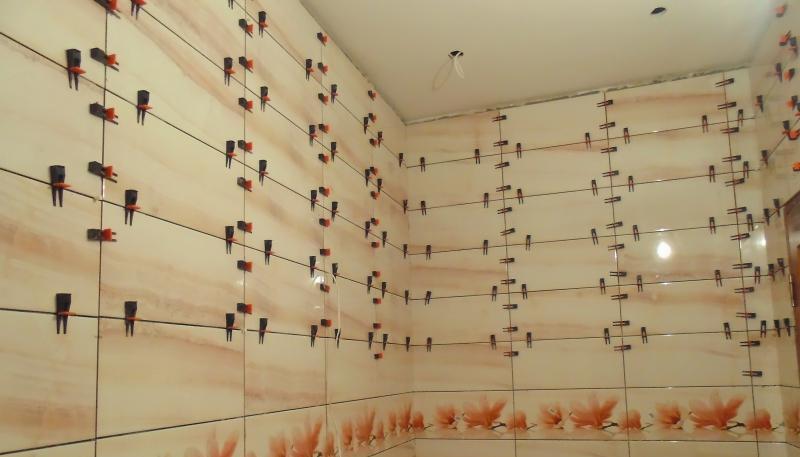
To perfectly lay the tile floor, it is not necessary to be a specialist builder. It is enough to use the SVP (tile alignment system), which is often called 3D crosses.
Special features
As you know, incorrectly laid facing covering does not just spoil the look of the interior. It can lead to serious problems.
Even a slight unevenness of tile laying has negative consequences:
- the formation of dirt, fungus and mold in the inter-tile joints;
- increased risk of injury;
- destruction of materials under the influence of various loads.
All of these troubles can be avoided by installing a tile leveling system.
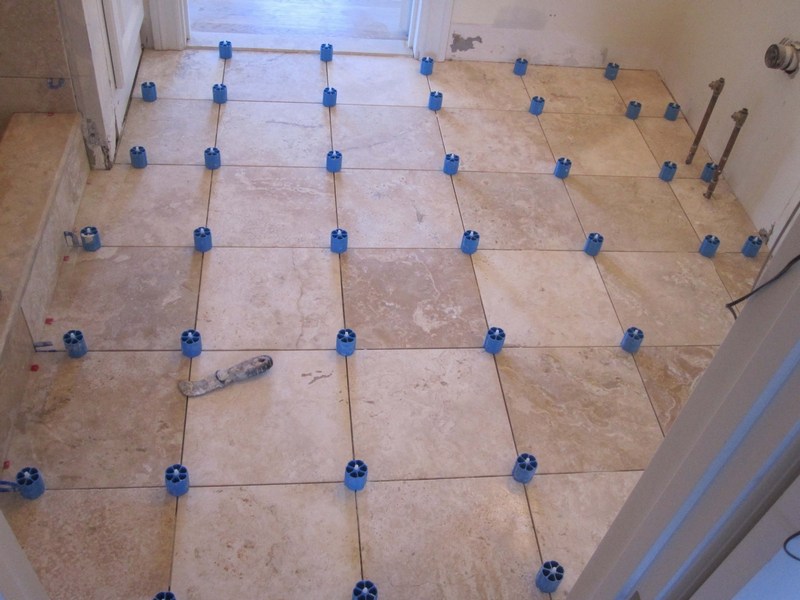
SVP is a structure used to quickly level the surface when laying ceramic and tile coatings. It can also be used for laying porcelain stoneware (with a thickness of not more than 20 mm).
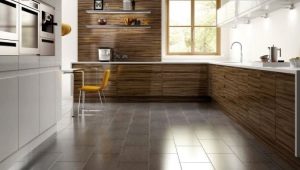
Basically, the alignment system is used when the dimensions of the tiles exceed 40 cm.. In some cases, it is used for facing materials of small sizes.
The main models of leveling structures:
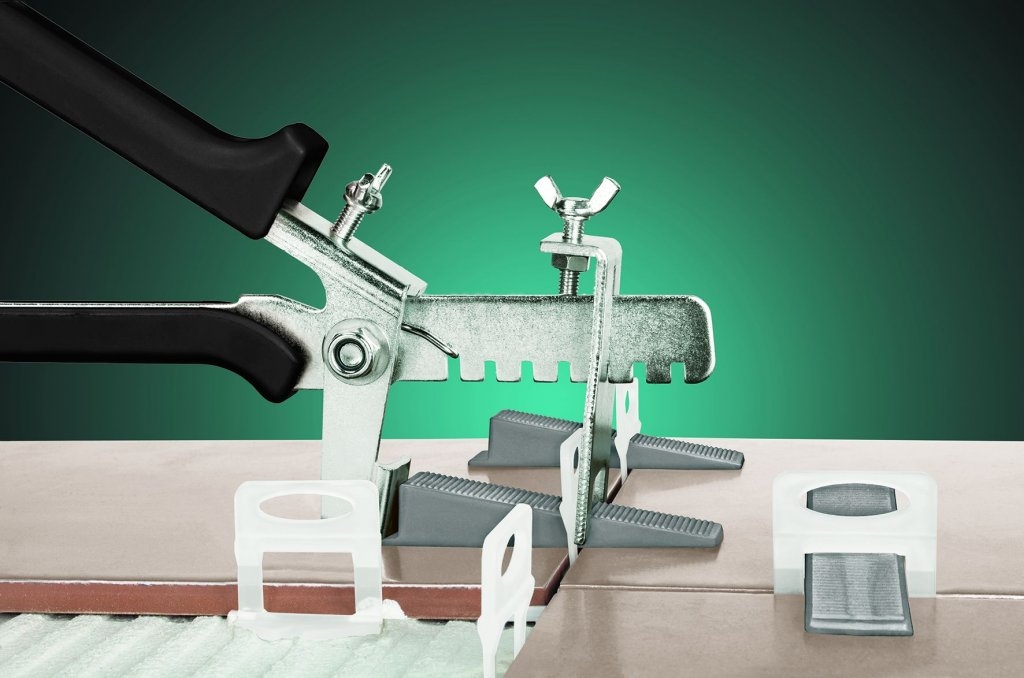
- in wedge tensioner;
- with the fixing tool in the form of a jagged strip;
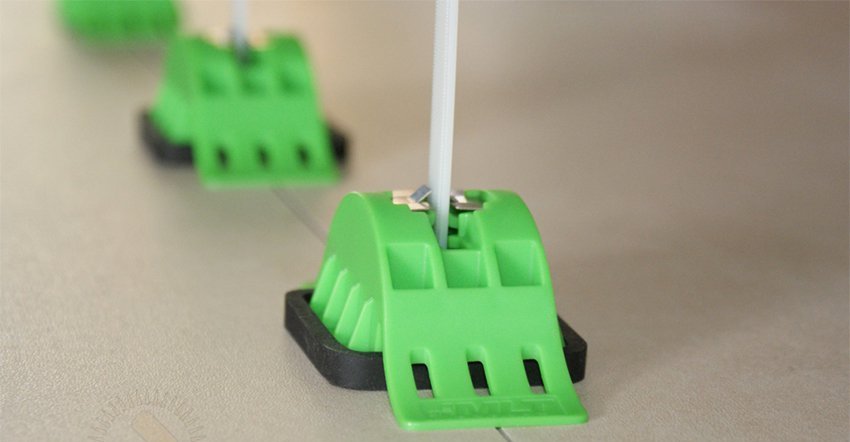
- with screw tensioner.
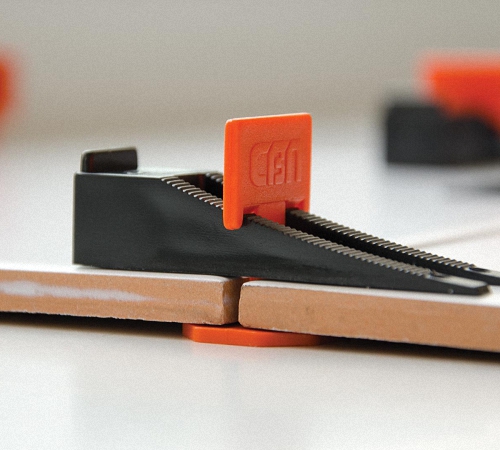
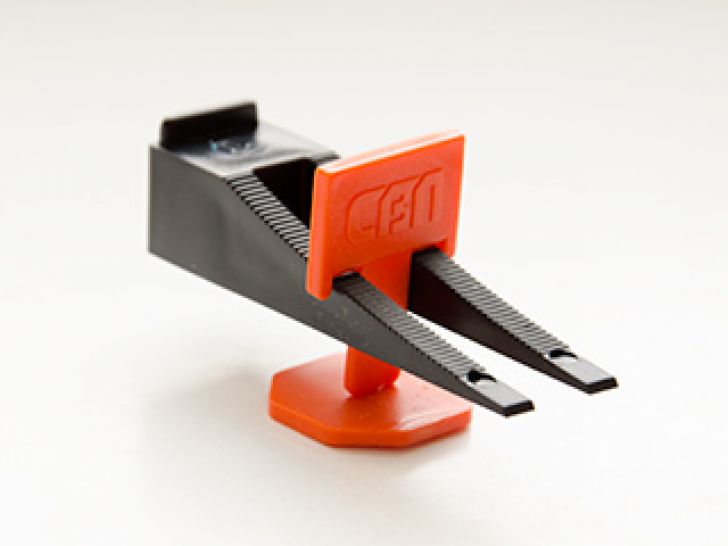
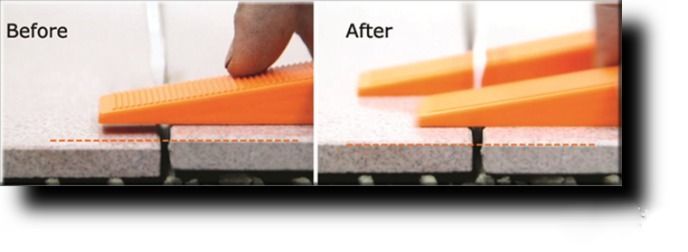
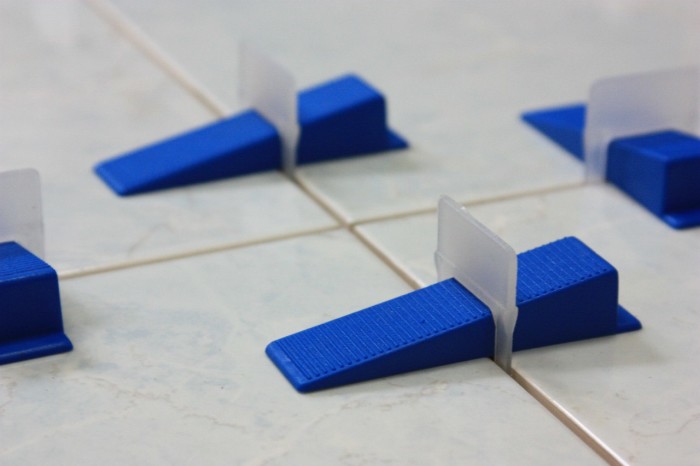
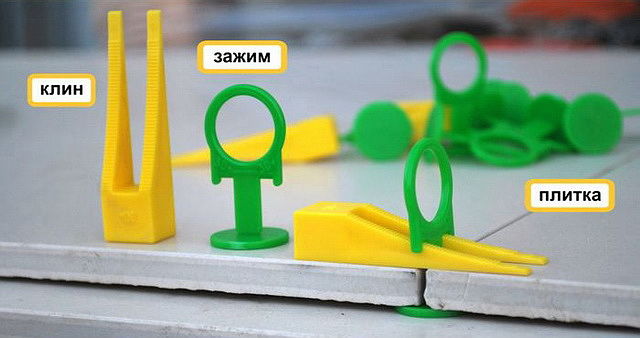
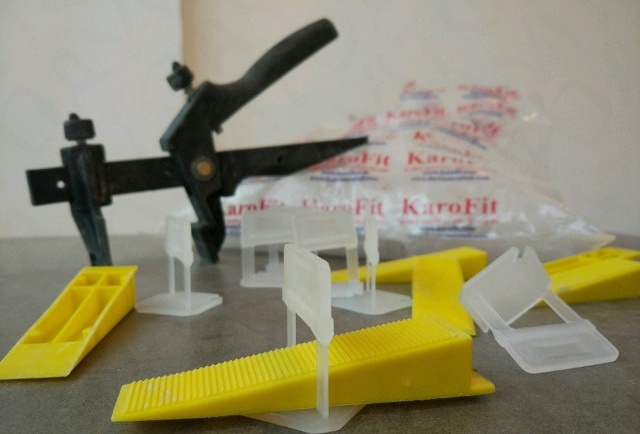
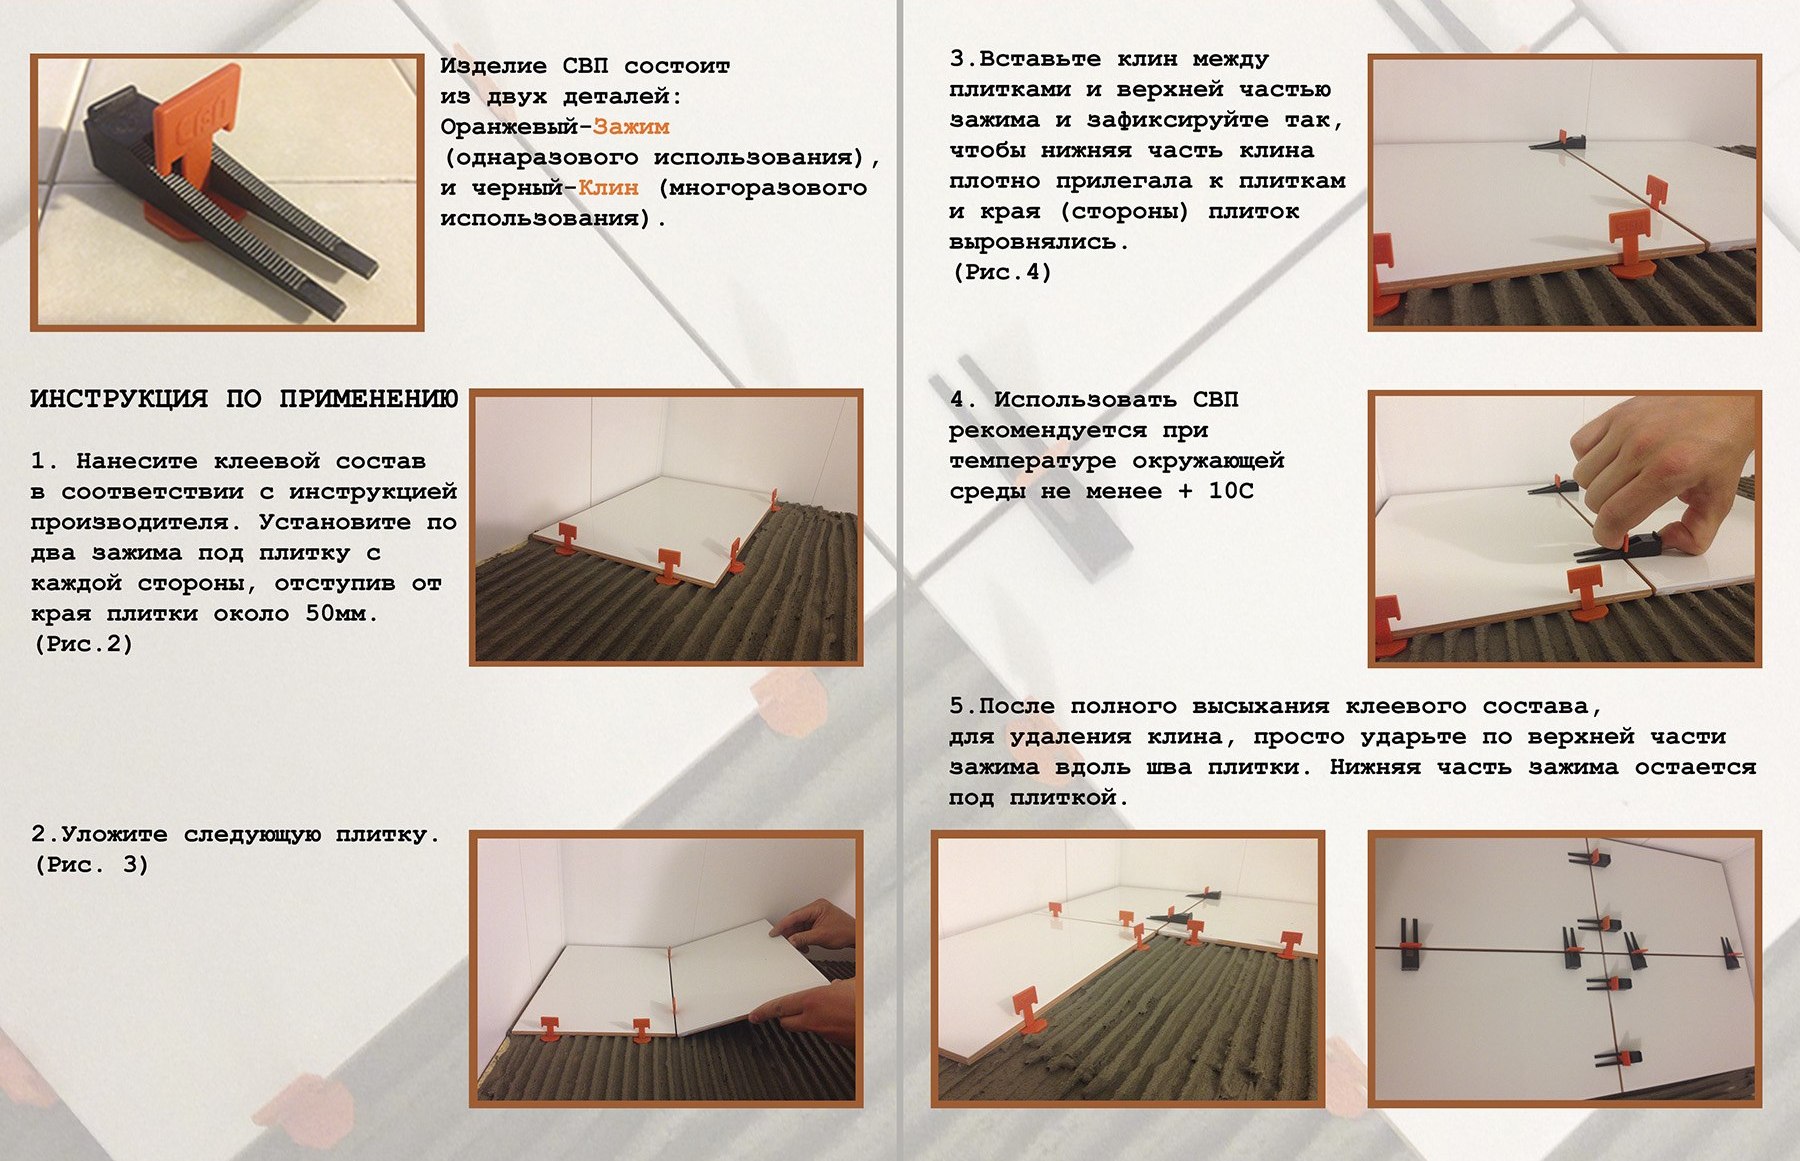
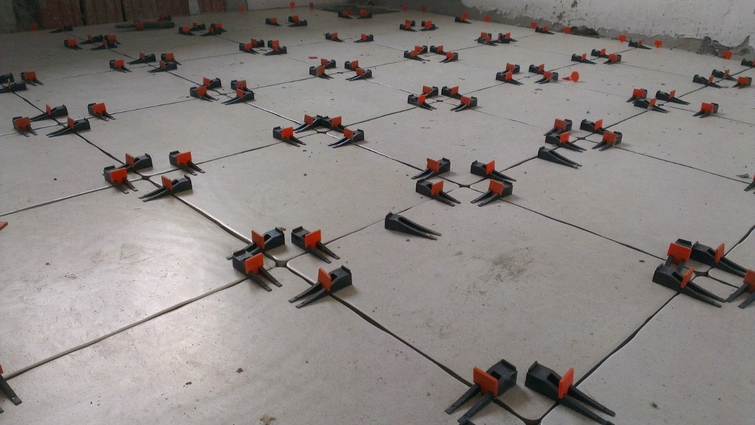
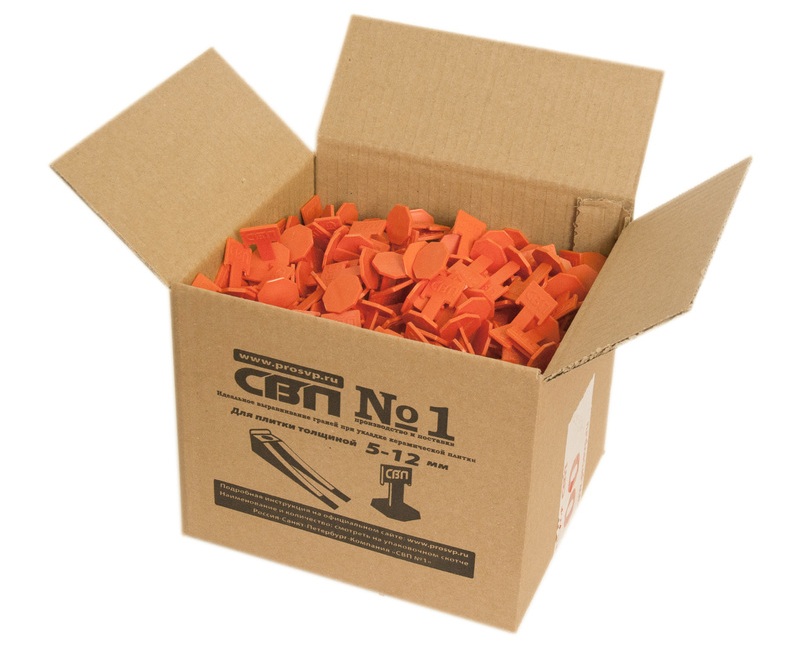
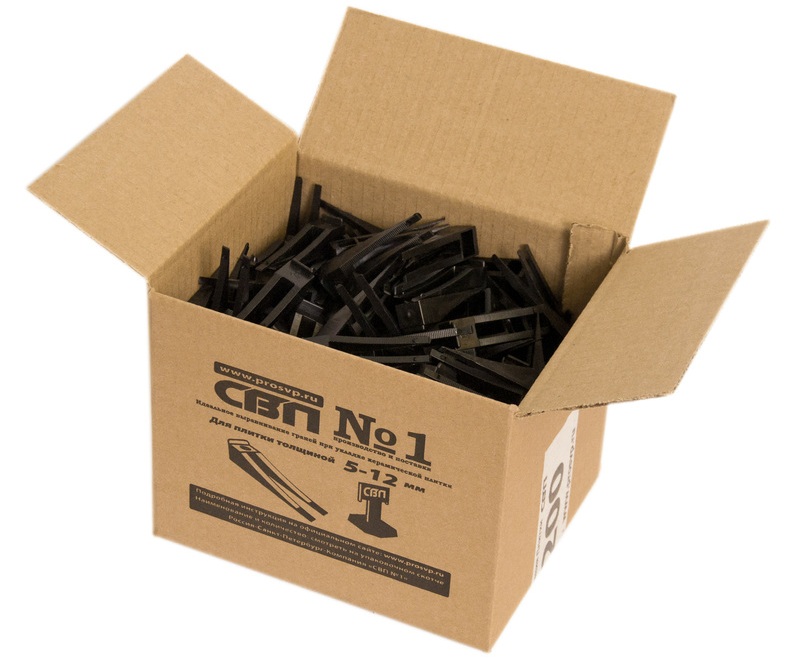
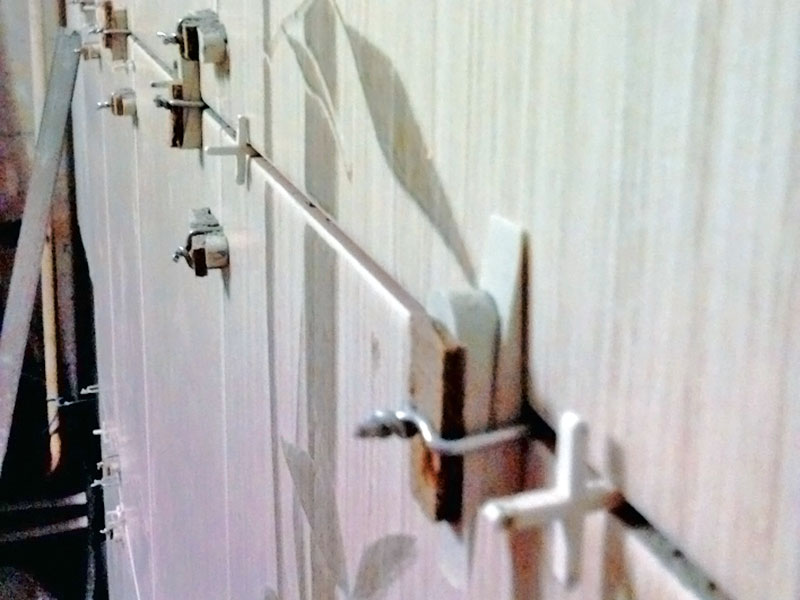
The alignment design of the first type consists of two plastic elements. One of them has the appearance of a wedge with teeth. The second is in the form of a key with an oval or polygonal base (it is a clip). The clamp is a T-shaped plastic element in which the upper part breaks off easily. This item is designed for single use. Wedge is a reusable mechanism..
Also, the design may include additional components: caps, clips, ribbons, various gauges. To work in this case, only a rubber hammer is required to beat the locking mechanism.
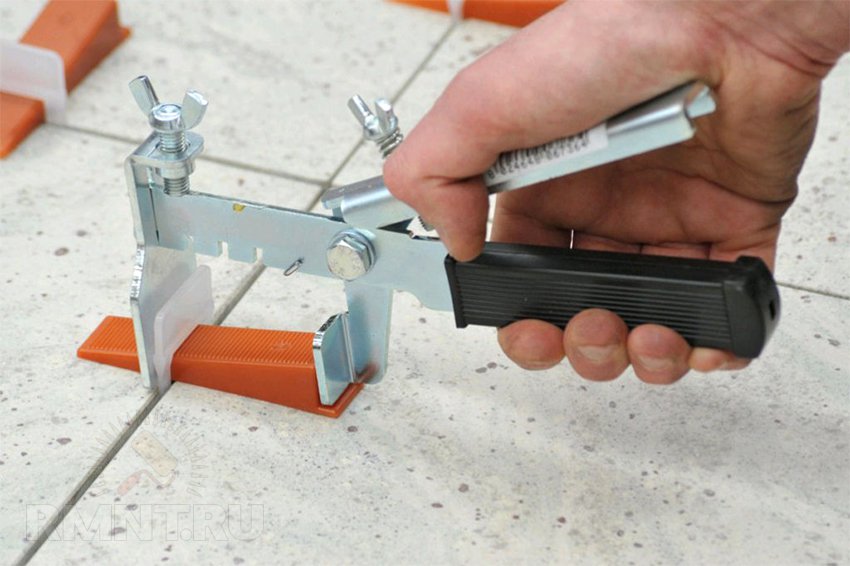
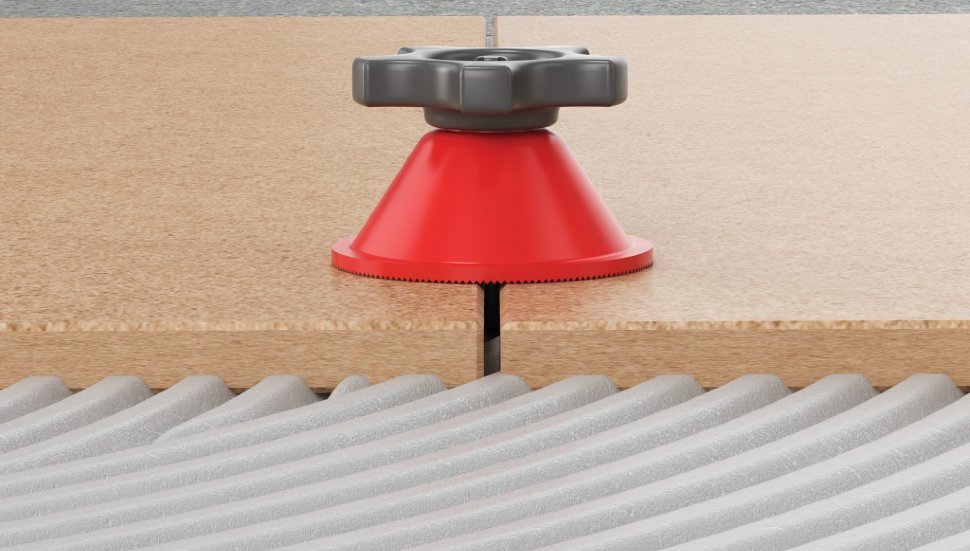
Leveling systems with fixing tools can install tiles of a wide range of thickness (from 3 mm to 3 cm). The use of such a system is possible only with the help of an additional tool. Structures with a screw tensioner are stiffened with a steel pin with a screwdriver.
There are two varieties of SVP on the level of complexity:
- Economy class. This type is used in the event that there are weakly expressed irregularities. The element of tile covering is clamped with a wedge and placed on the surface of the wall. Next is determined by the size of the seams, which should be the same. After that, all existing irregularities are aligned.
- Premium class. This device is slightly different from the economy class design. The basis of the mechanism has a curved shape. This ensures reliable automatic fixation of the mechanism.
The models of SVP differ in the constituent elements included in the device package:
- The most "running" systems in the construction market are those that consist of clamping and wedges.
- The second variation of the system includes a set of tools: mechanisms for tightening, a variety of tightening, or latches that perform the function of fastening (Litolevel from Litokol, Rubi).
Advantages and disadvantages
Reviews of the surface leveling system are different, because, like any other device, it has its pros and cons.
The advantages of the system are obvious:
- Thanks to an automated leveling mechanism, two adjacent materials are processed, resulting in a perfectly flat surface.
- The gaps between the tiled elements of the facing surface are exactly the same.
- Thanks to the installation of leveling tiles, the adhesive mortar is distributed evenly. This is important if the surface of the base of the floor has minor irregularities.
- Facing the product after drying is not subjected to deformation and shrinkage of materials.
- Installation of SVP can be made independently without the help of experts. The cost of the master’s services is much higher than the cost of the SVP, which can significantly reduce the cash costs of repairs.

However, it is worth considering the disadvantages of SVP:
- For proper and error-free installation of wedges will take some time.
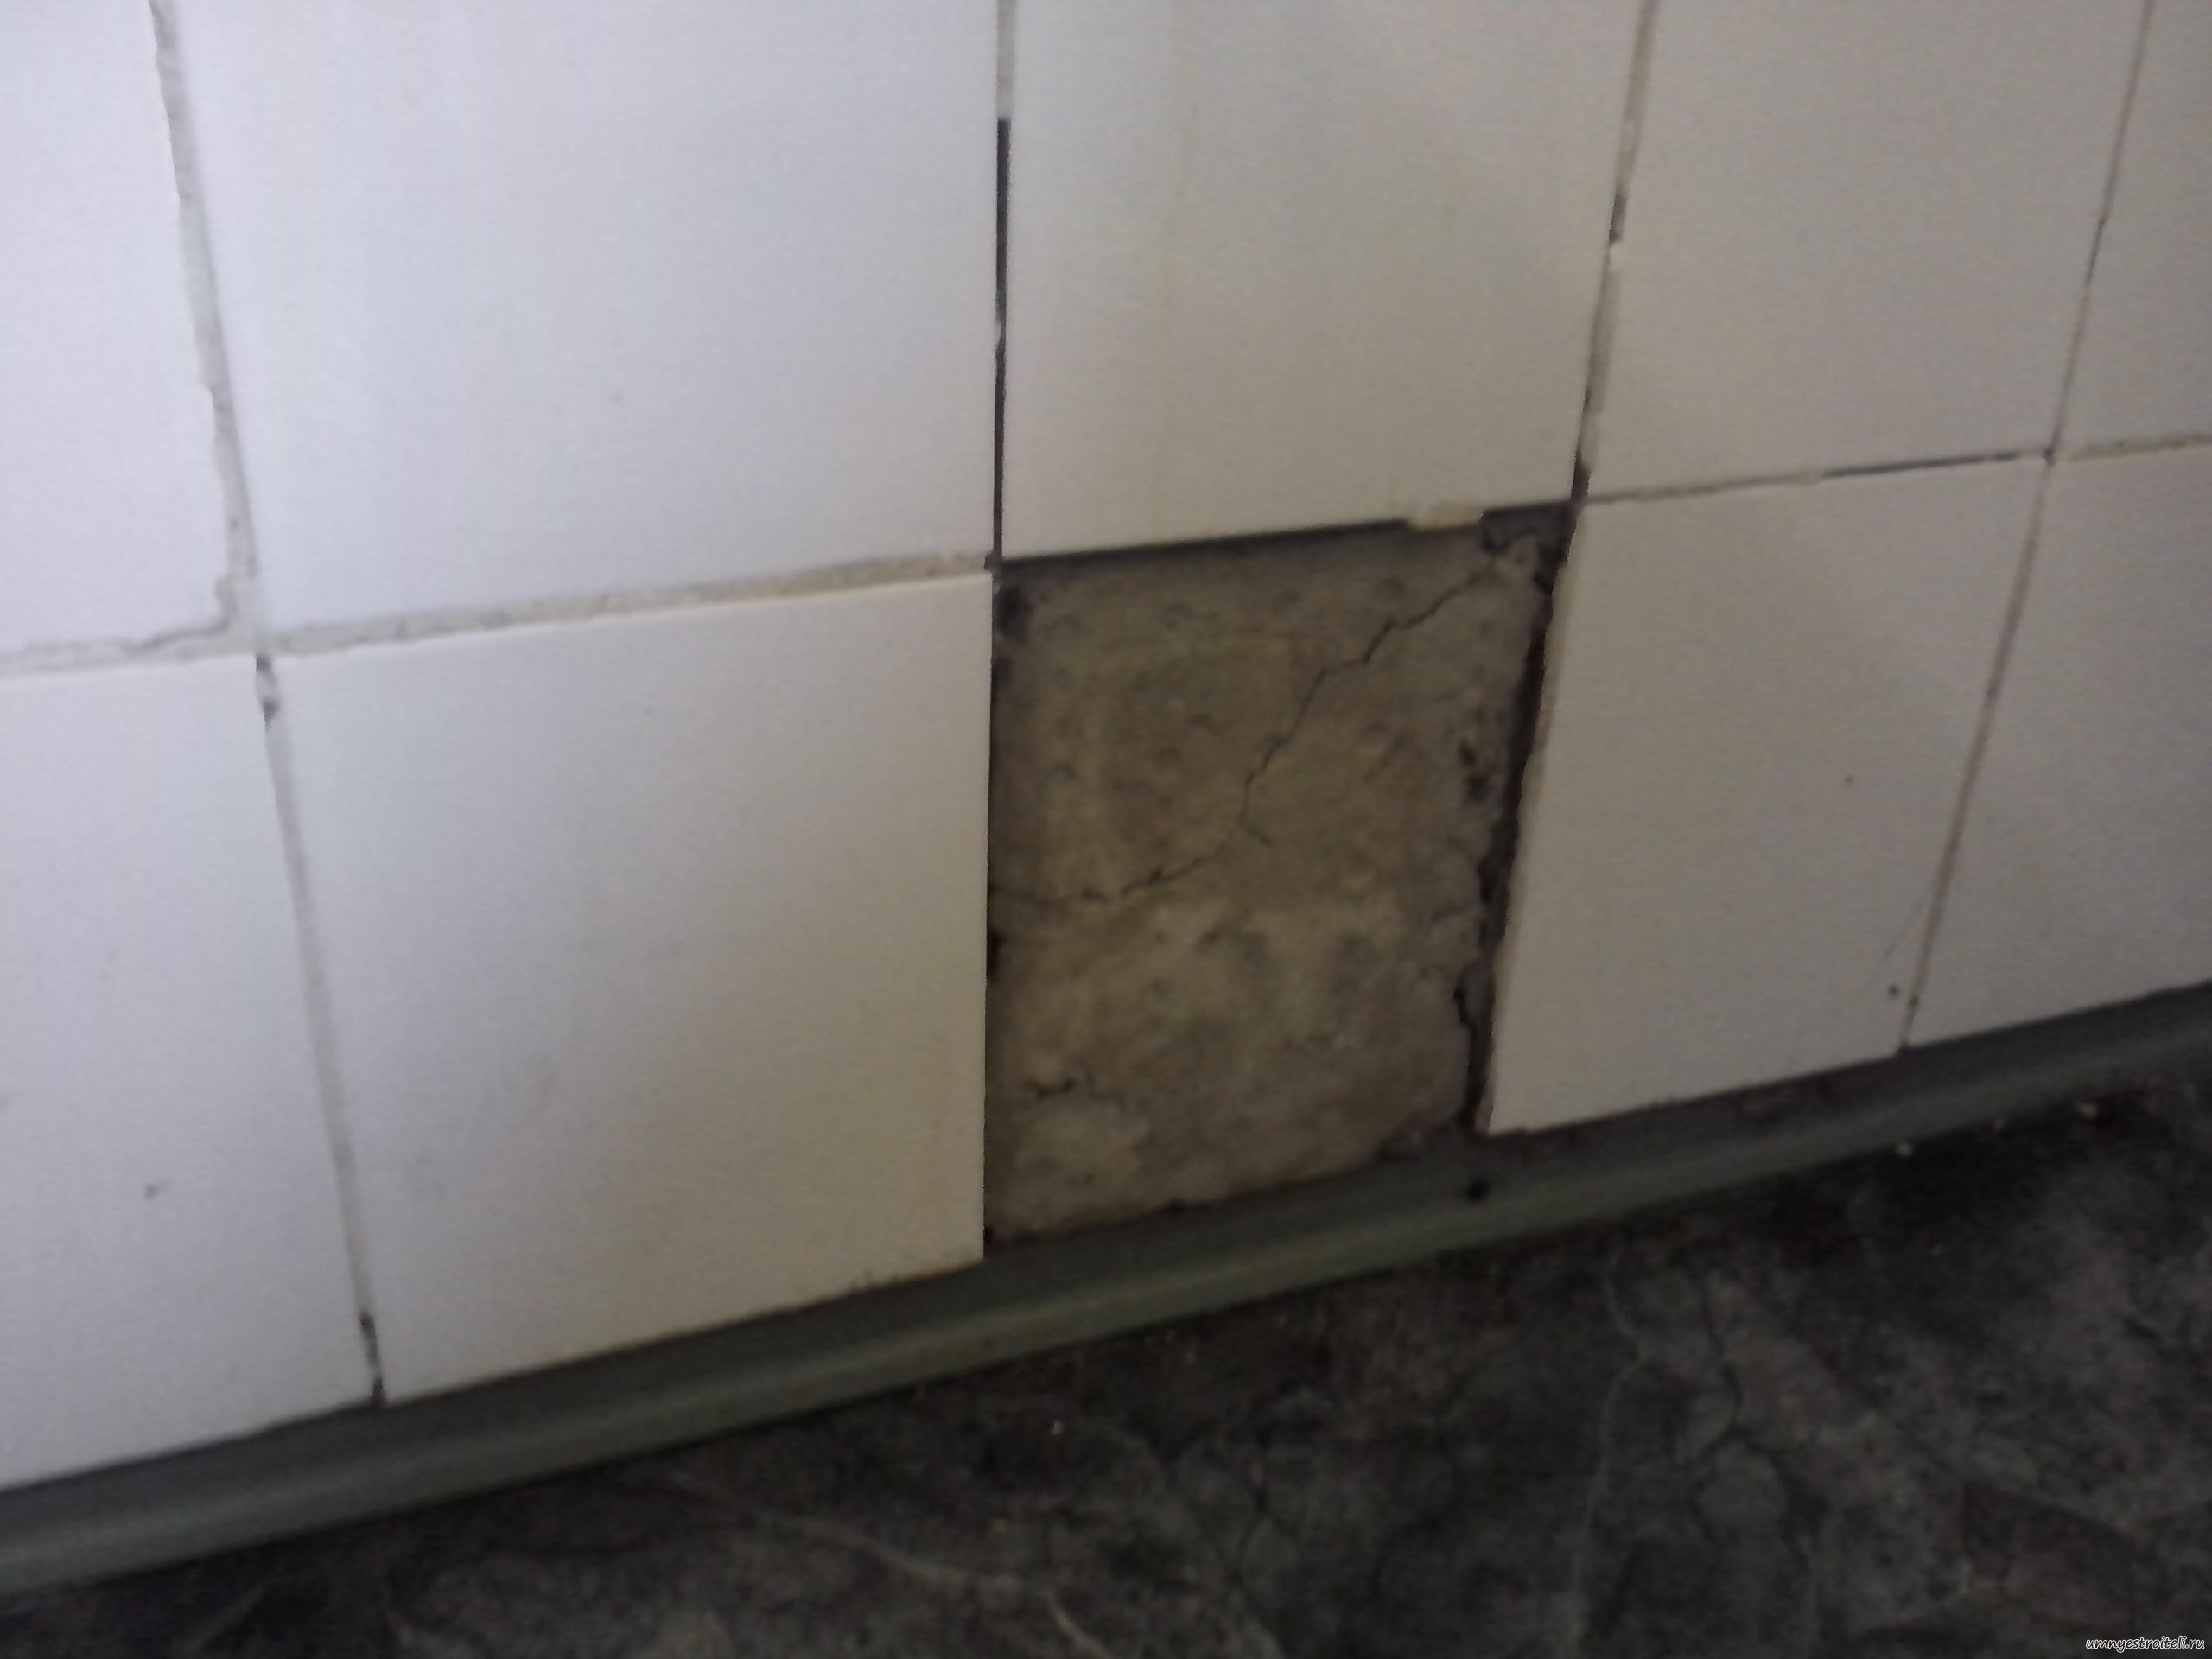
- It will be difficult to clean the seams in the future.
- Items of one-time use will have to re-buy regularly.
- There are restrictions on the thickness of the tile coating (the maximum thickness should not exceed 2 cm, the minimum - 2 mm).
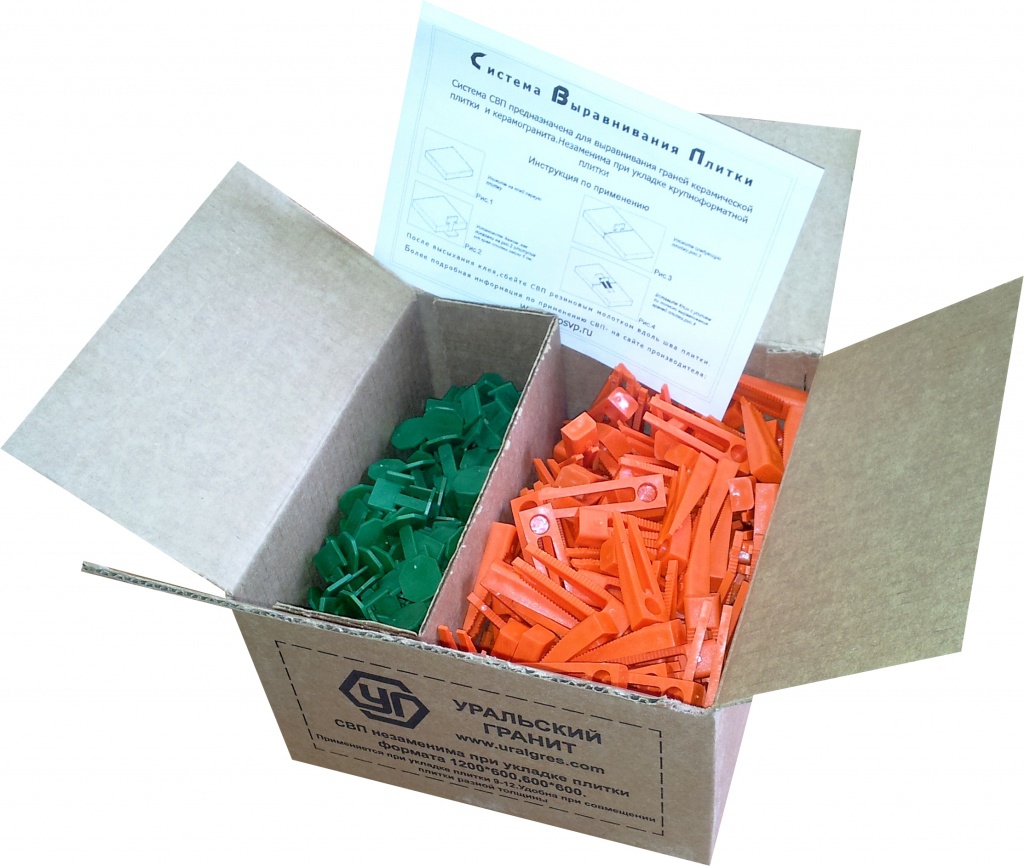
Domestic and foreign SVP
Devices made by Russian and foreign manufacturers are different. The Russian version of the SVP consists of a wedge and clamp. The overseas design includes forceps and petals.
The most popular manufacturers from Russia and Spain (Rubi Tili Level).
The Rubi system is especially known for its outstanding qualities:
- high quality construction;
- there is the possibility of fixing tile materials with a thickness of 3 to 20 mm;
- Before using the screed, you need a half-hour soaking in water, which allows you to increase the strength of the device;
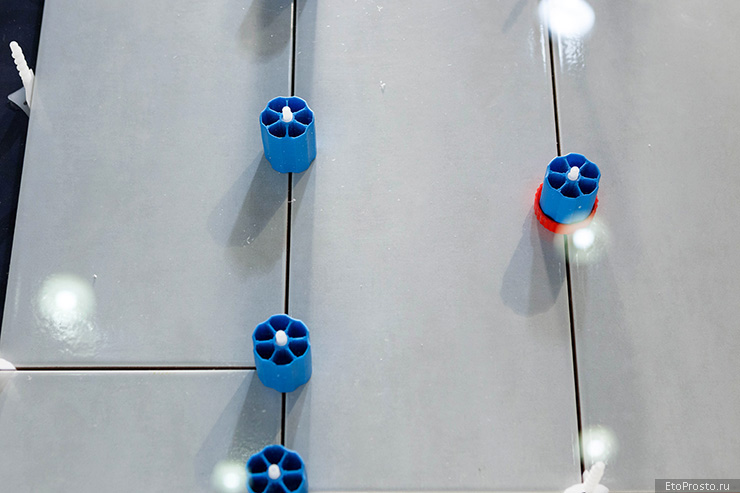
- due to the thickness of the screed (0.8 mm), thin seams can be made and adjusted with the help of crosses.
However, the product has disadvantages:
- poor fixation of facing materials (with a strong pressure on the material, a screed rupture may occur);
- production of the Rubi system is located abroad, so the price of products is high;
- delivery SVP can take a long time;
- continuation of work after a long break will become difficult (it will be very difficult to insert the screeds into the dried mixture, it will take some time to work with a screwdriver);
- caps can be used no more than 5-7 times;
- There is a huge number of analogues that are not inferior in quality to alignment.
Advantages of Russian SVP:
- reliable fixation of tile materials;
- the simplest self-leveling system, providing greater strength.
Disadvantages:
- low quality of the elements included in the alignment system;
- when a large amount of glue is accumulated under the tile, the screed breaks;
- the links of the wedges are made of a coarse material (when removing the wedge from the clamp, the tile material can be torn off with glue);
- The clamp may have an uncomfortable shape, which leads to rapid hand fatigue.
Reviews of ordinary consumers can be divided into 2 categories. The first group includes tile specialists who appreciated the tile leveling system, making sure to save time and speed of installation.In the second category are those who, having studied the simplest design and principle of operation of the alignment system, opted for the creation of a self-made design.
How to use?
The tile leveling system does not require much effort and additional tools. It will be more difficult for beginners to put elements, but the final result will please them.
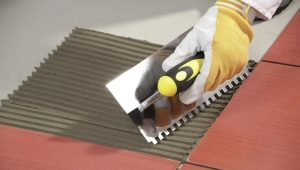
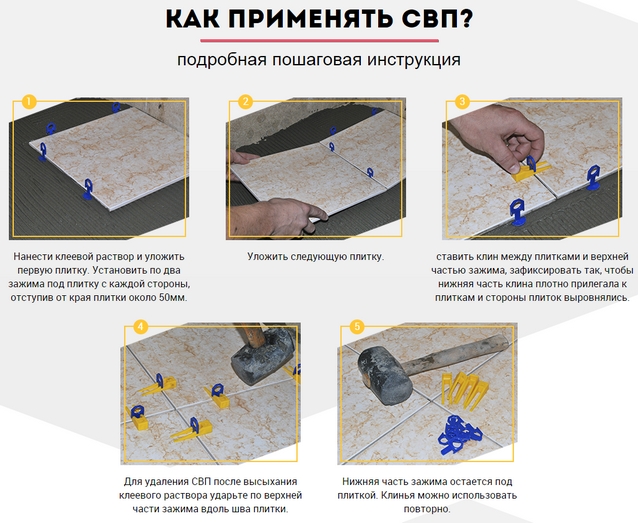
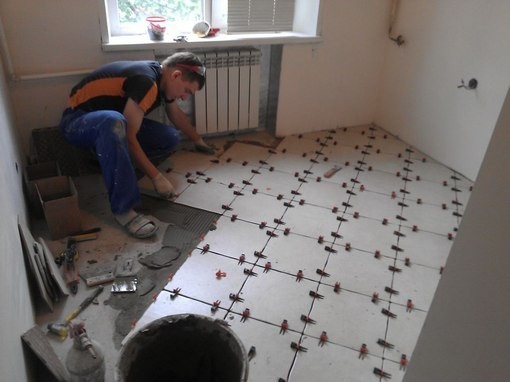
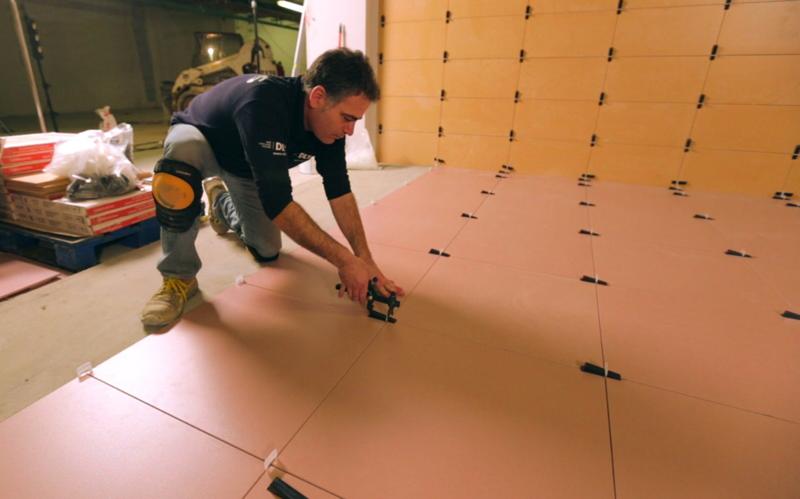
Installation of tiles using SVP is made according to a special scheme:
- The basis of a surface is cleared of pollution and dust, it is processed by primer mix.
- The preparation of the adhesive solution is carried out (according to the manufacturer's instructions). The consistency of the resulting mixture should not be too liquid, but not thick.
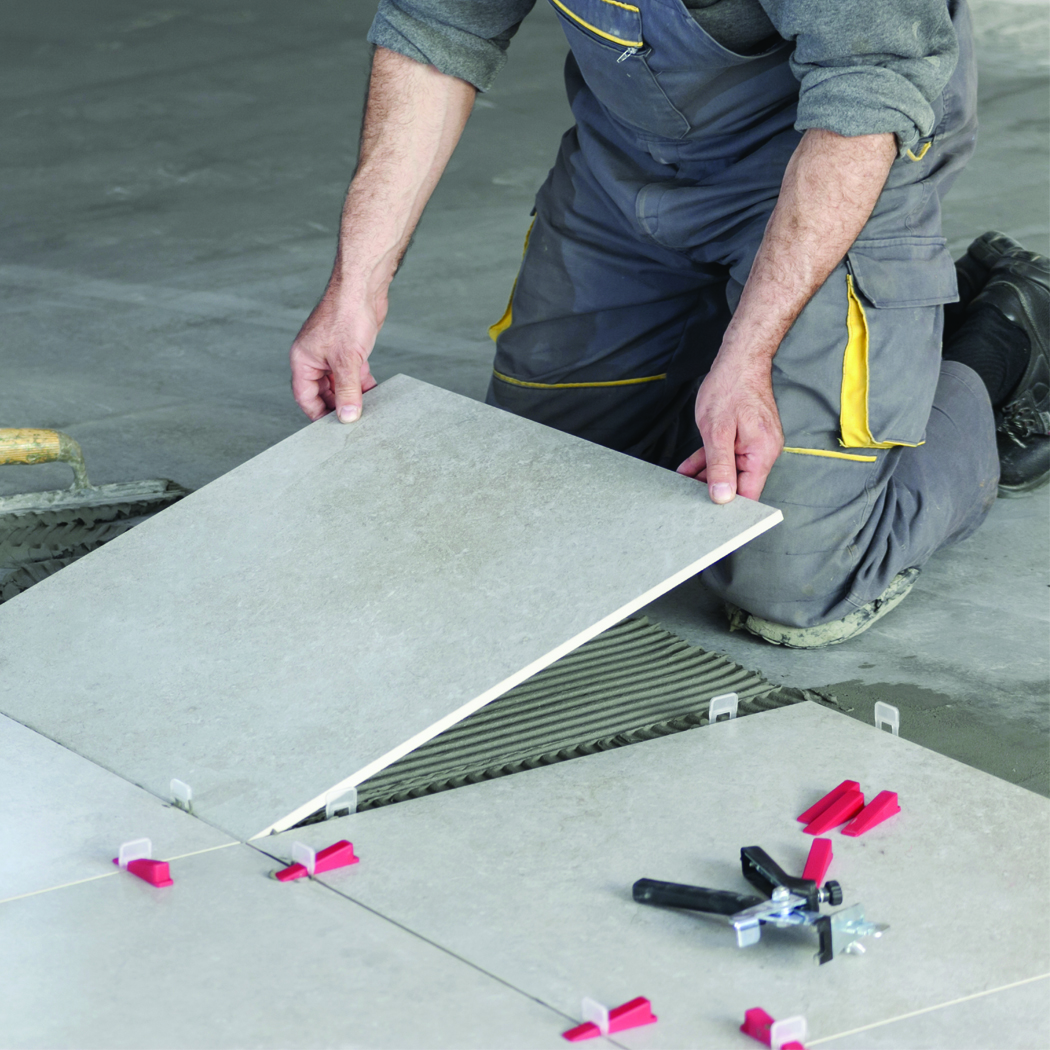
- The required amount of glue is applied to the tile surface with a notched trowel. If porcelain stoneware or Ramor is used as a cladding material, then glue should be applied both on the base of the floor and on the floor itself for better alignment.
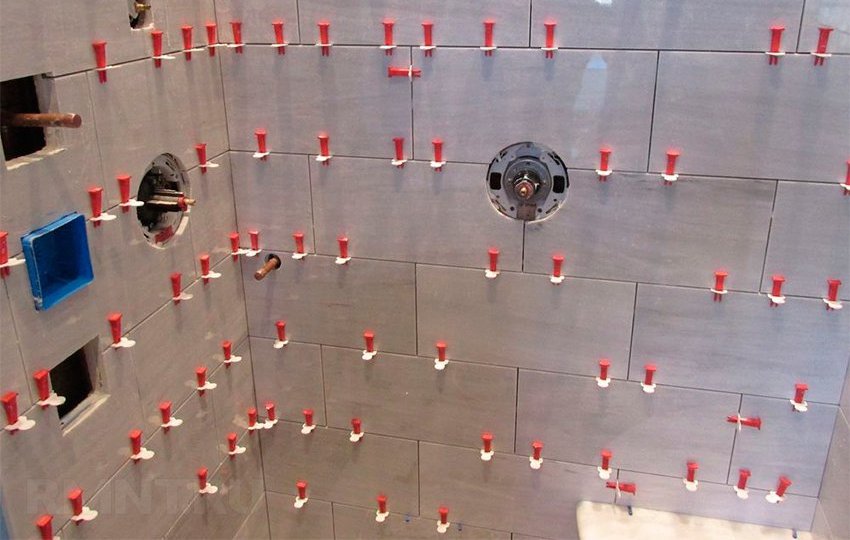
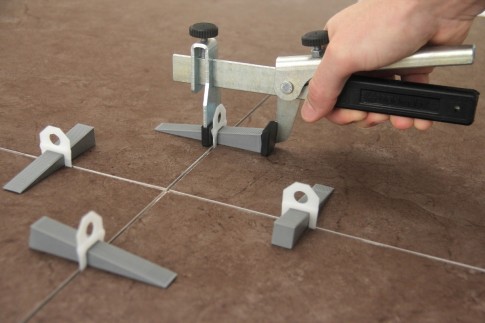
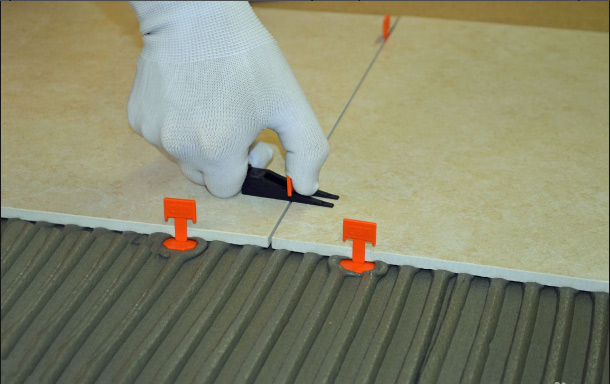
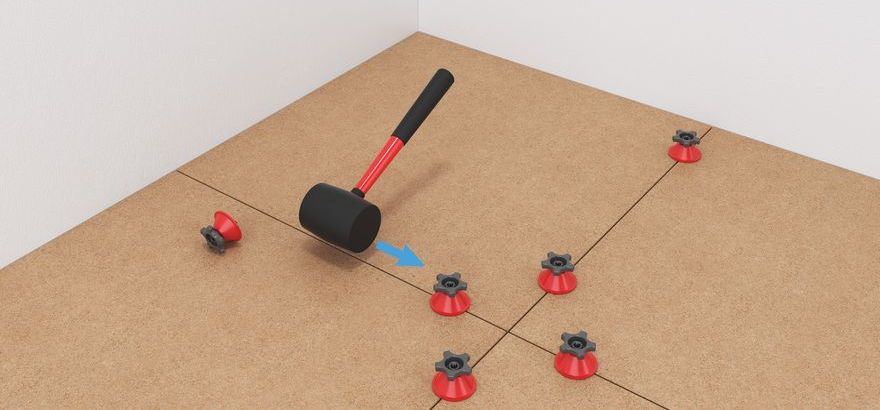
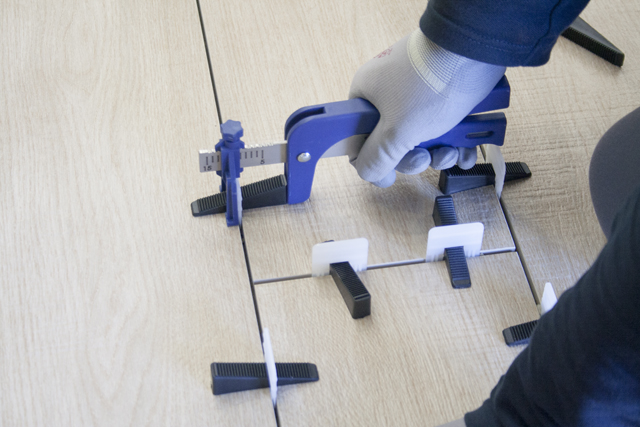
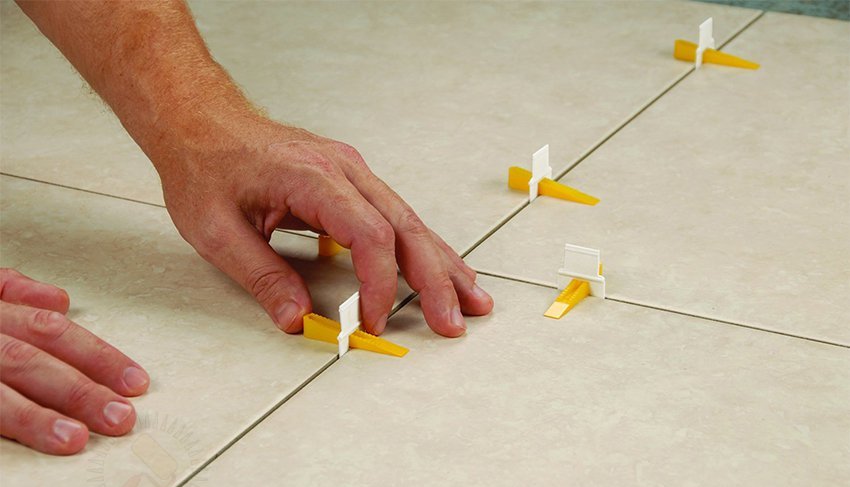
- The first tile covering is installed, which is fixed along the edges with the basis of the SVP. Clamps must be placed indented from the corners of 5cm.
- There is a laying of the second tile.
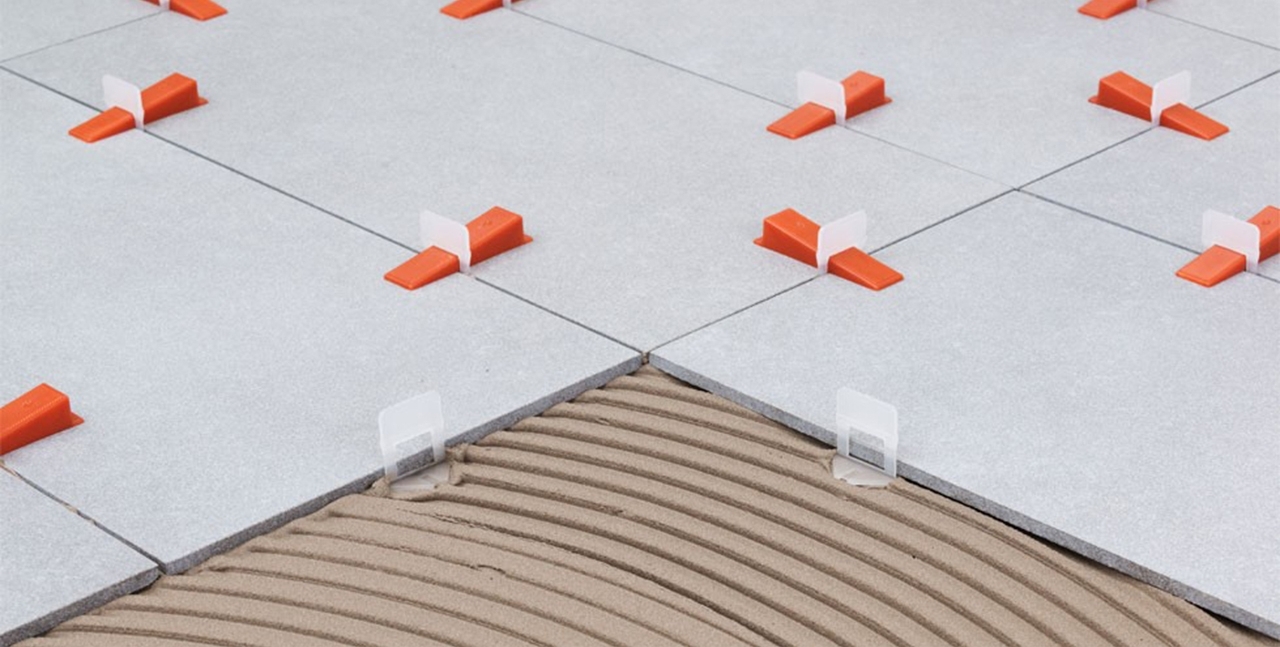
- The inserts on both sides are fixed with wedges.Some tilers additionally use crosses to maintain a uniform joint thickness.
- The clamp is flush flush.
- Clearing the seams from the adhesive solution.
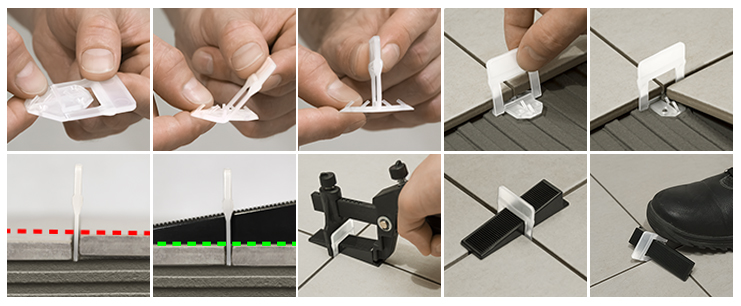
Installation clamps can be done in two ways:
- In the first case, the clamping elements are inserted 2 pieces on each side of the tile.
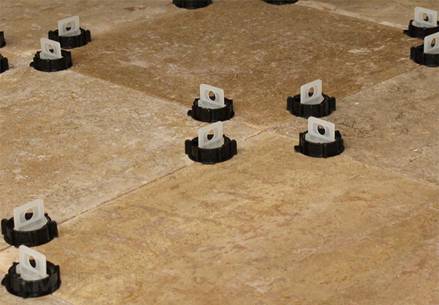
- In the second embodiment, you can install them at the intersection of the corners of the four elements.
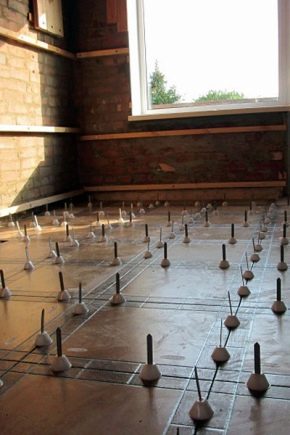
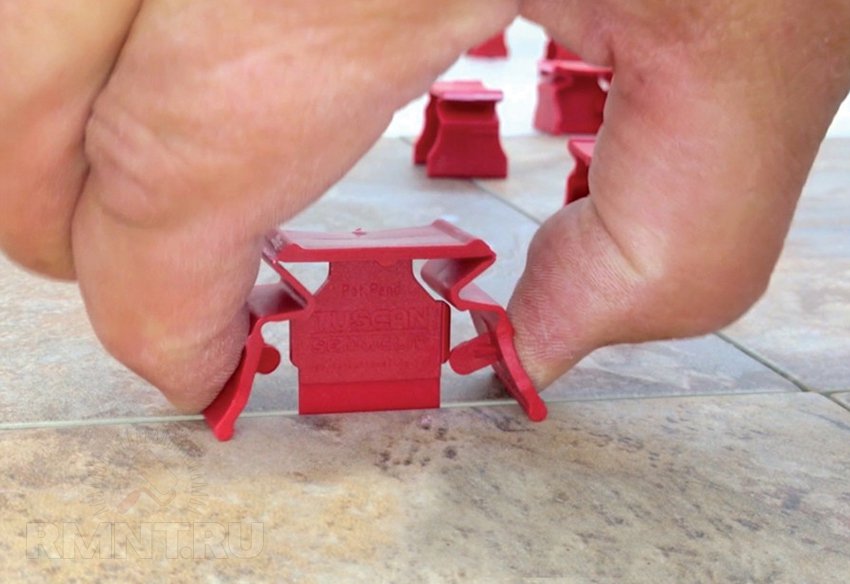
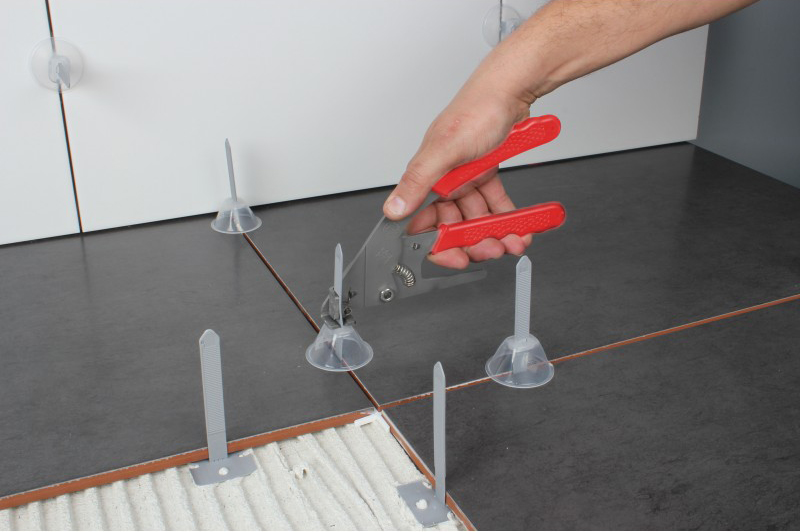
The leveling system may only be removed after the adhesive has completely dried (after 24 hours).
For this purpose, you will need a rubber mallet, which should be used to beat the retainer in the direction of the seam. Throughout the cladding work, constant monitoring with the help of the building level is necessary.
Consumption
Consumption of elements depends on several factors.
- Product quality. Poor-quality tools may break during installation, increasing repair costs.
- Owner skills. The first job of a beginner with a surface leveling system can lead to serious errors.
- Sizes of tiled coverings. If the tile size is large enough, you need to purchase additional locking mechanisms.
The calculation of the number of units is performed according to the formula C = K / S, where:
- WITH - consumption;
- TO - the number of clamps required for the two sides of adjacent tile coatings;
- S - the area of one tile material in m2.
Homemade options
The surface leveling system can be made by hand. The self-made device, unlike the factory mechanism, will be simpler, however it will allow you to lower expenses.
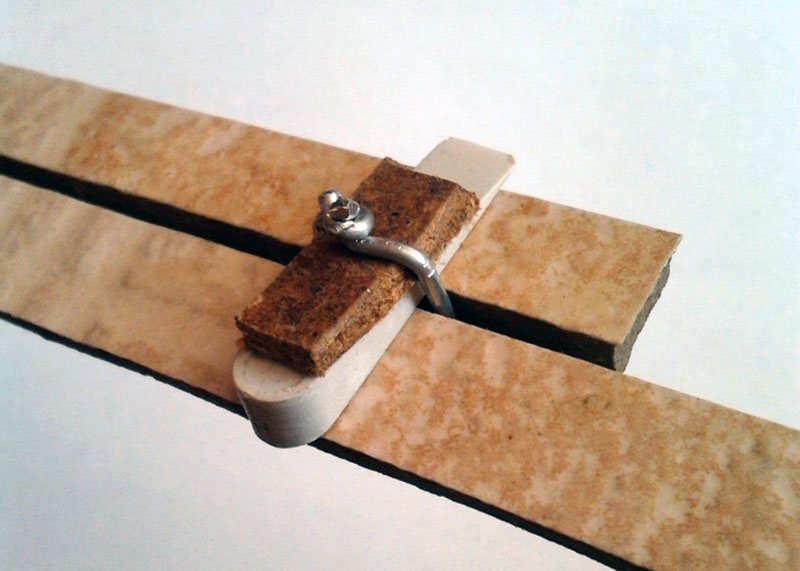
Required tools:
- aluminum wire 1.7 mm thick, which will function as a clamp;
- small pieces of hardboard (DVP), established instead of wedges;
- chopped plates mounting tape (to perform the stop).
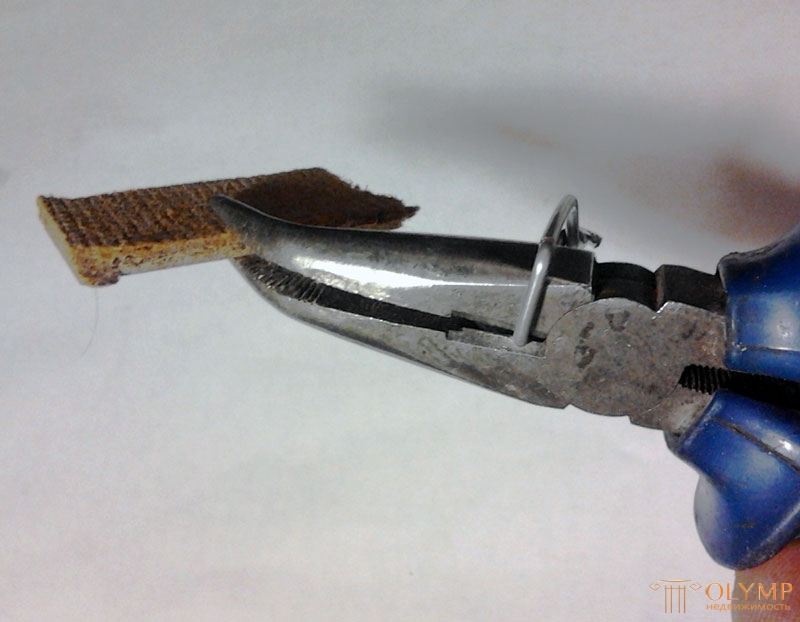
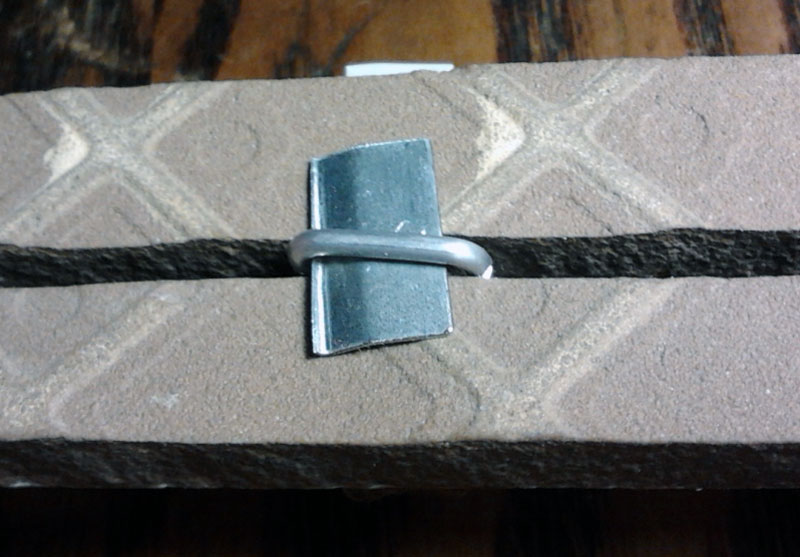
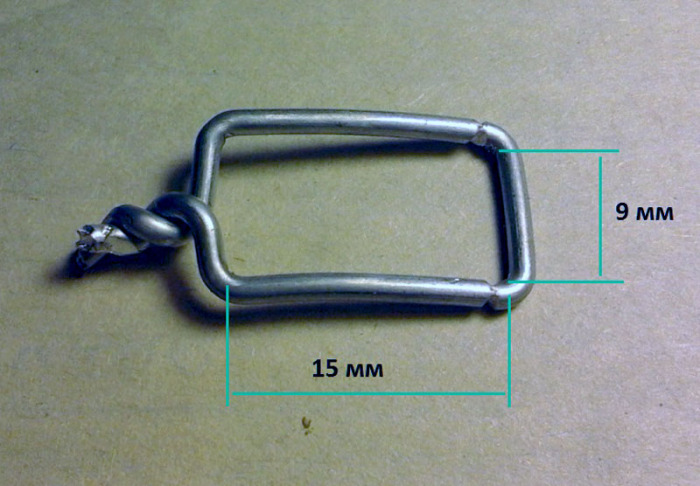
The aluminum wire is bent so that an elongated rectangle is formed. Then mount the plate for emphasis. The lower parts of the wire, which will be located below the plane of the tile material, “bite” on both sides. This procedure is necessary to make it easier to break it later..
Having established the resulting mechanism between the tiles, the upper ends of the wire are twisted into a spiral shape. Pre-under the wire, you must insert pieces of hardboard. Thus, there is a fixation of materials. After one hundred percent dry adhesive can remove clips. The protruding parts of the loop are cut by nippers.
Even an improvised device, which is significantly inferior to the factory counterparts, can significantly simplify and speed up the process of installing a tiled coating.
Useful recommendations
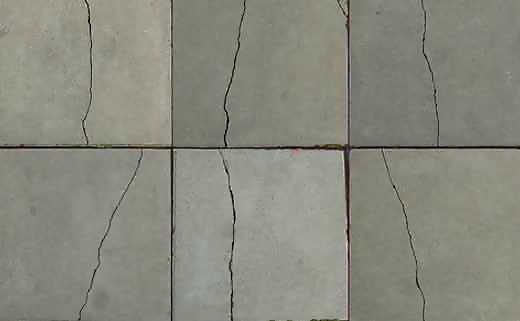
- Do not rely on the fact that the SVP will be able to eliminate all surface irregularities. Alignment occurs on the tile, which is located a higher level. As a result, the sunken tile rises, and a void forms under it. In the future, this may lead to the formation of cracks and splitting of the tile covering. Experts strongly recommend to carry out facing work, after having achieved a perfectly smooth foundation. The leveling system may be used on surfaces with a differential level of no more than 1 cm.
- You should not hope that the SVP will prevent the cracking of the tile. Laying tile coatings should be carried out on tile adhesive with a composition suitable for the selected type of coating. Otherwise, dynamic loads may cause deformation of the whole structure.

Large tile coatings must be laid on two layers of glue, otherwise the SVP will not cope with the task.
- The use of SVP is allowed at a temperature of +10 degrees. In order for the result to be impressive, you must also take into account the norms of air humidity and the presence of drafts.
- When acquiring an alignment design, it is necessary to pay attention to the quality of the mechanisms included in the system kit. There are a large number of fakes SVP.
- In order to end up with a perfectly smooth lining, it is necessary to use only high-quality tile materials.
- Save on the number of installed clips can not be. In this case, the structure will not be fixed firmly enough, which can lead to deformation.
- Before applying the SVP, experts recommend testing their skills. It is necessary to take 9 tiles and, without using glue, connect them to a square leveling system on the floor. This is necessary in order not to spoil the tile coating and leveling tools during operation.
Self-leveling structures are especially needed for laying large-size coatings.Professional craftsmen do not have to use SVP, but for beginner builders, this condition is mandatory. Proof of this will be the final flawless look of tiled pavement.
See the following video for installing a tile alignment system.