Rules for the design of the joint of laminate and tile
Now many in the repair use a combination of different materials. As a rule, in some cases the material has a different texture and thickness. Some difficulties arise in the design of the joint of laminate and tile.
In order to properly arrange the junction, it is necessary to use some rules and methods.


Special features
Tile and laminate are usually used in different places or in different functional areas. But often in the places of their joining, height differences between these materials are obtained due to the different thickness of floor coverings. Both of these materials are very popular, which is why they often come into contact during repairs.
Most often the joint between these two floor coverings is located in two places:
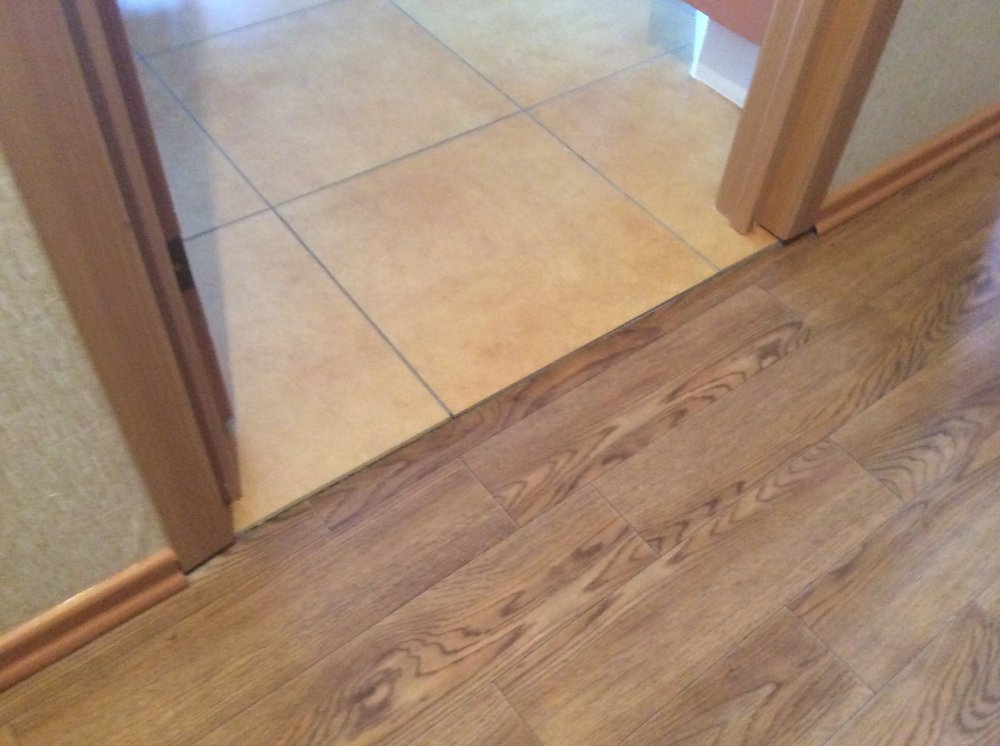
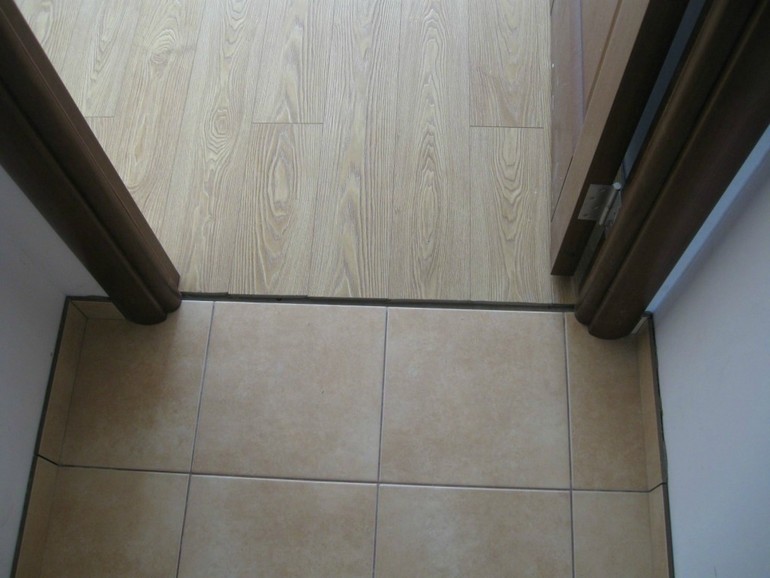
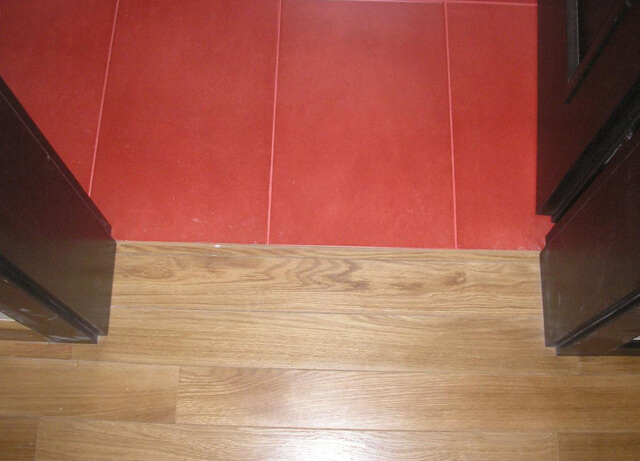
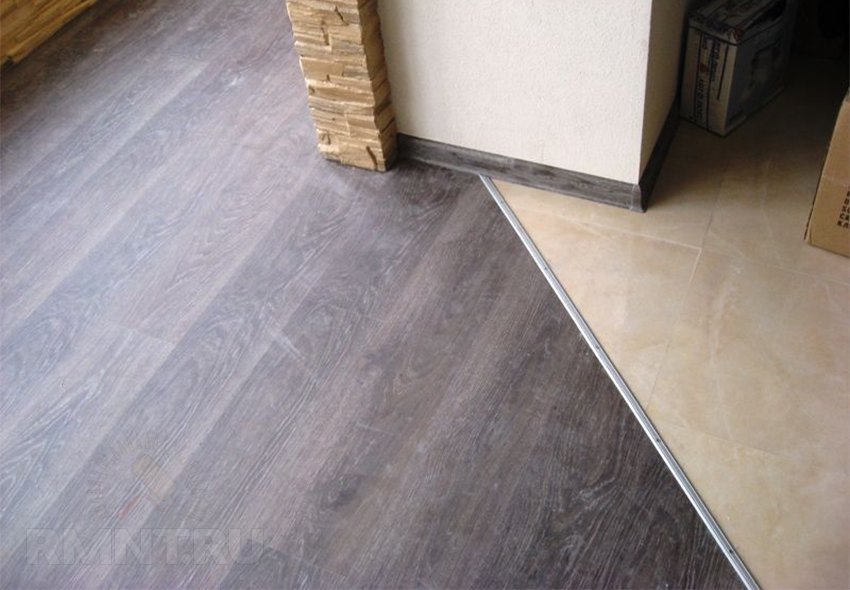
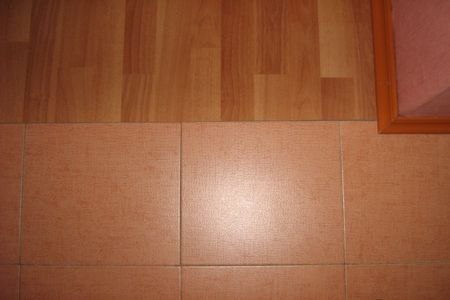
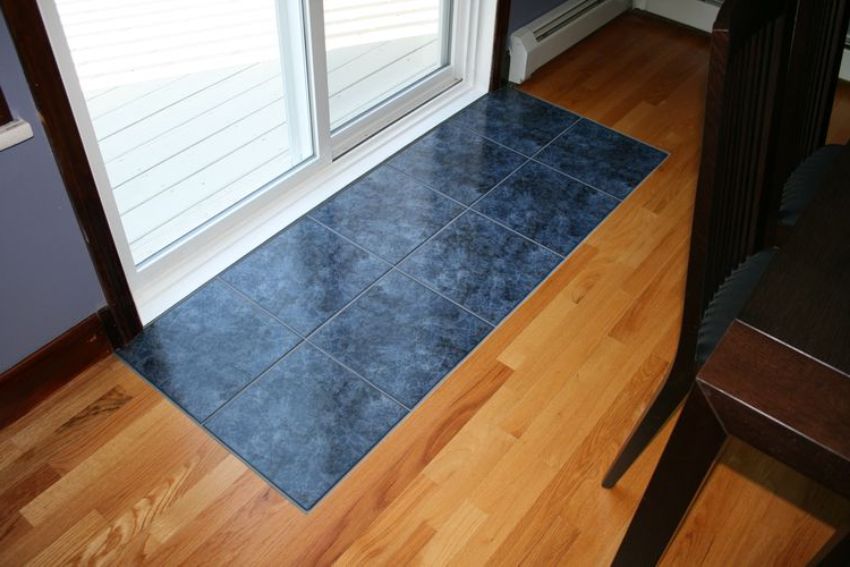
- Under the door. The peculiarity of this joint is that it combines the finishing materials of two different adjoining rooms.As a rule, in this case it is easiest to make the transition using the threshold under the door construction. A feature of such joints is that it uses a small threshold, which can be barely noticeable.
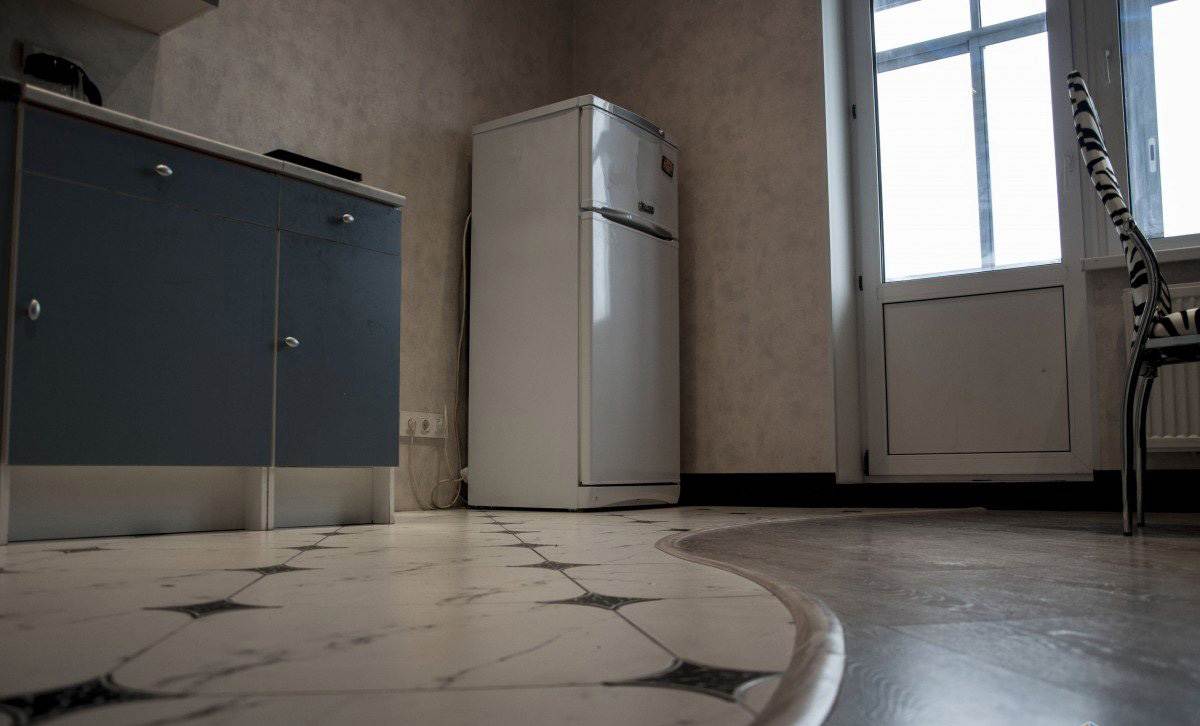
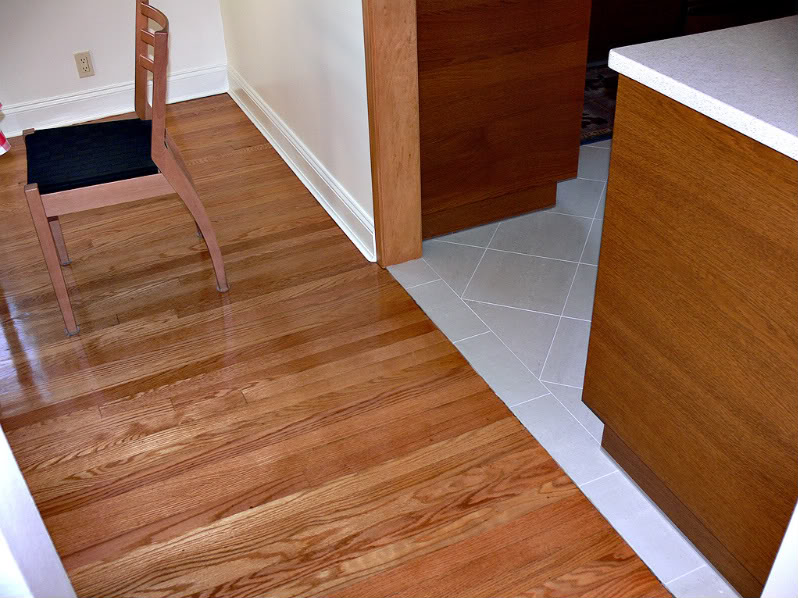
- In the same room. As a rule, this material is found in open space. Usually this option is used when finishing materials planned to be used for zoning purposes. A feature of such joints is that they are usually drawn up more naturally, without using additional inserts and explicit transitions.
Thus, the feature of joining these finishing materials is that you will have the opportunity to choose a more convenient method - with or without a nut. Both options look quite interesting and allow you to beautifully arrange the joint, but each design requires certain skills and has its own characteristics.
So, clearance without a nut requires a perfectly smooth trimming of the tileand all edges should be trimmed correctly and smoothly so that the contrast is not too obvious, and the result is worthy. The version with the squeegee is simpler, thus making the joint easier, you do not have to comply with the perfect match of the thickness of the materials.In some cases, the transition without a threshold looks coarser than with this element docking.
In any case, the combination of tile and laminate has several advantages:
- The combination of these two floorings allows you to make the room and the floors in it more practical.
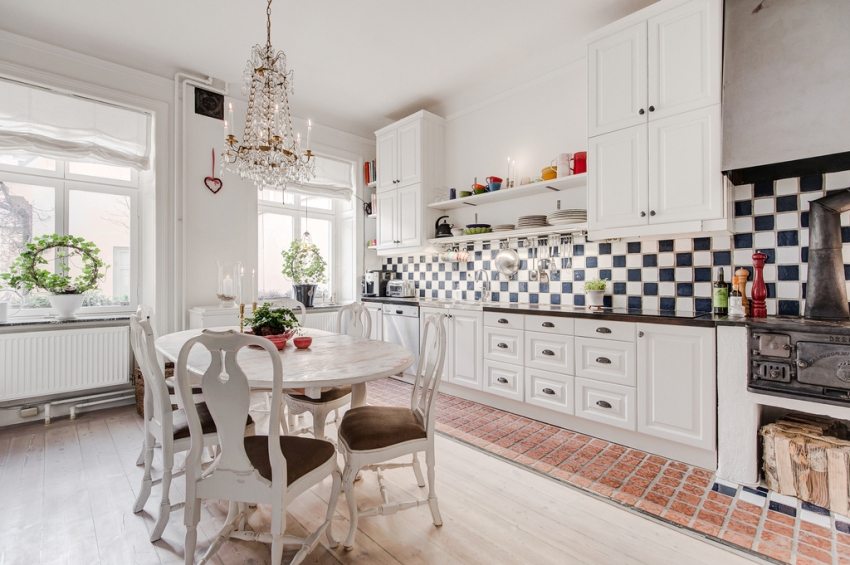
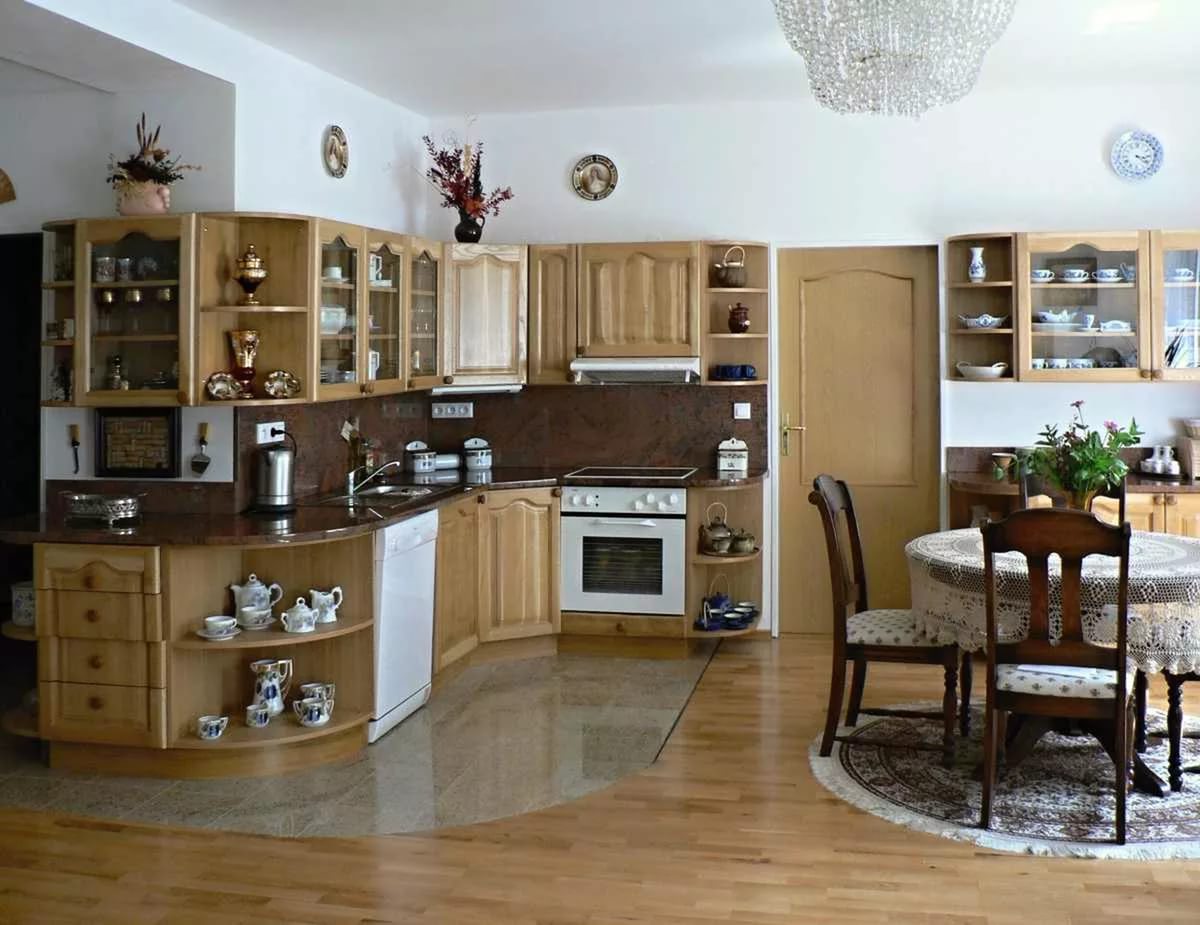
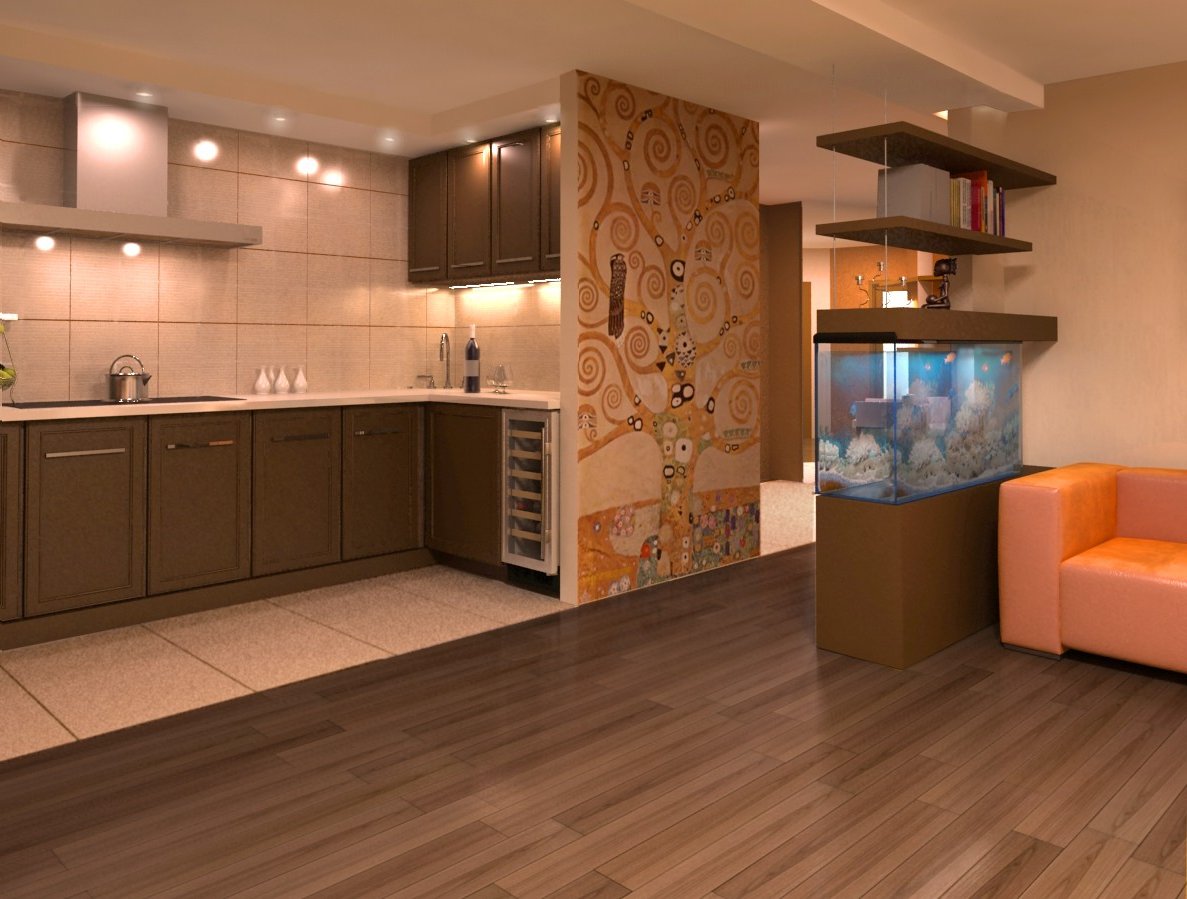
- You will not have to choose between two different finishing materials and sacrifice the durability of the tile or the presentability of the laminate, because it is possible to combine them, laying them in different zones. For example, in the kitchen area, tiles are usually laid, but in the dining area or in the living room, if it is in common with the kitchen, the laminate floor looks perfect.
Proper combination of these two coatings will protect the floors in the kitchen area and make a more interesting design of the dining area.
- Since this zoning will use different materials, you need to select them depending on the technical characteristics and functionality. Thus, you will extend the life of each floor, as it will be applied in accordance with its purpose.
- As a result of the successful combination of such flooring as tile and laminate flooring is always obtained that meets the requirements of durability and reliability.
- The combination of these materials allows you to save on the installation of another more versatile and reliable material instead of these two.
- The cost of these floor coverings is quite democratic, as is the cost of the auxiliary elements necessary for such a connection.
But not everyone will be able to competently perform the joint. First of all, it is necessary to determine the way and understand what design will look more presentable. In addition, you need to examine all the nuances of these works and correctly select the elements that smooth the docking.
Types of thresholds
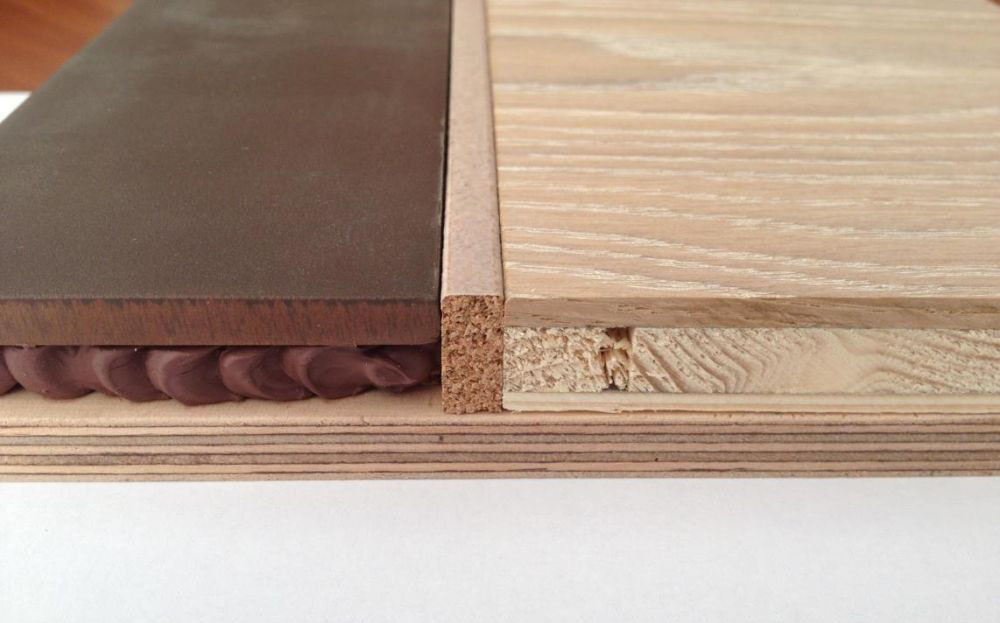
In some cases, the thickness of the floor tile and laminate is very different. That is why the design resorted to the use of sills. But they are of different types, depending on this, different elements and types of docking are used.
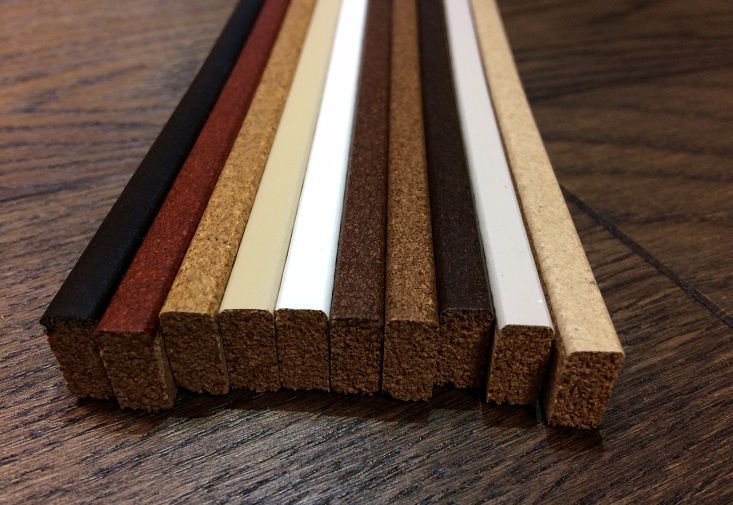
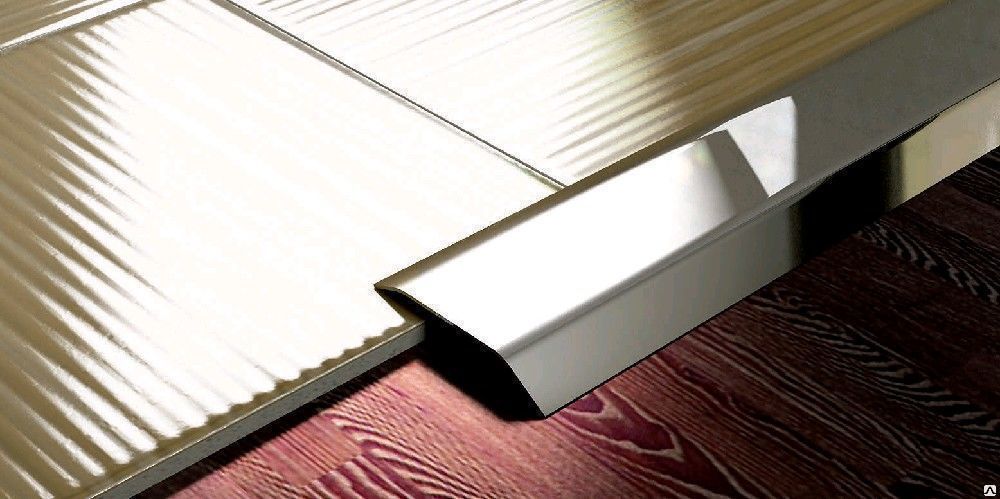
Decorative
They allow you to close any joint between different floor coverings. With their help, you can hide the gap and make the transition from one coating to another smoother. Decorative items great for smoothing out implicit differences in the height of different floor coverings. They have many advantages and do not look too noticeable, unlike other types of thresholds.
Basically, they differ in material production. The most commonly used decorative items made of aluminum or plastic. But the most reliable and presentable are wooden.. They are considered completely eco-friendly and natural. This transition looks the most aesthetic. In addition, they are able to fit into almost any interior and are suitable for many types of tile and laminate.
Decorative powders are usually in the form of slats. They can be absolutely straight or curved. Usually for registration of wave-like joints using curved elements.
Using them, you can transform the intersection of these coatings and protect this vulnerable spot from various mechanical and other damage.
The strongest are wooden and aluminum decorative powders.. But the plastic elements are not considered as reliable and can easily break from high loads, so they are better to use in places with little traffic.
Decorative powders are laid in different ways.In some cases, metallic elements make fixing points visible, creating a clear transition. Other decorative elements allow you to hide the joint like a plinth. Docking becomes more attractive and coatings look more monolithic, but still there is a small transition between the height of two different floor coverings.
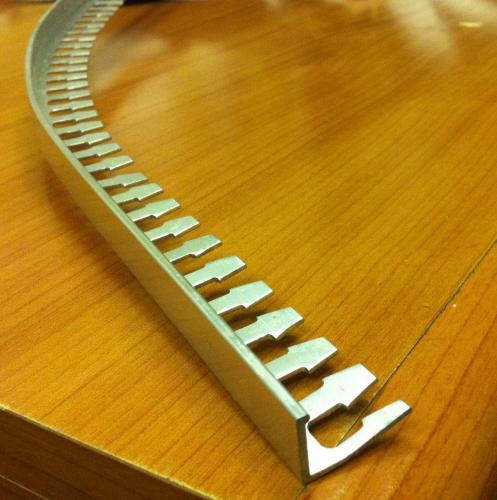
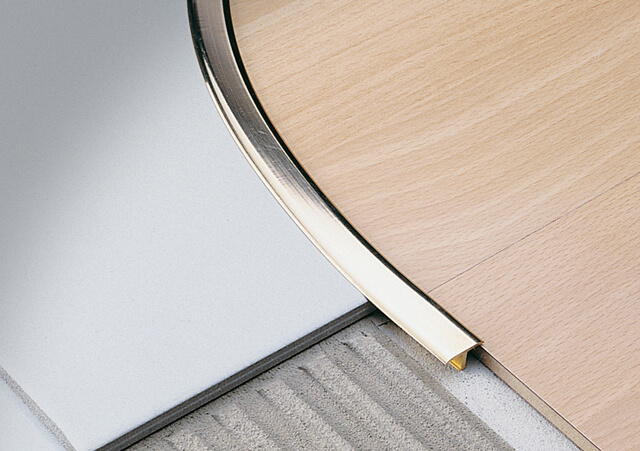
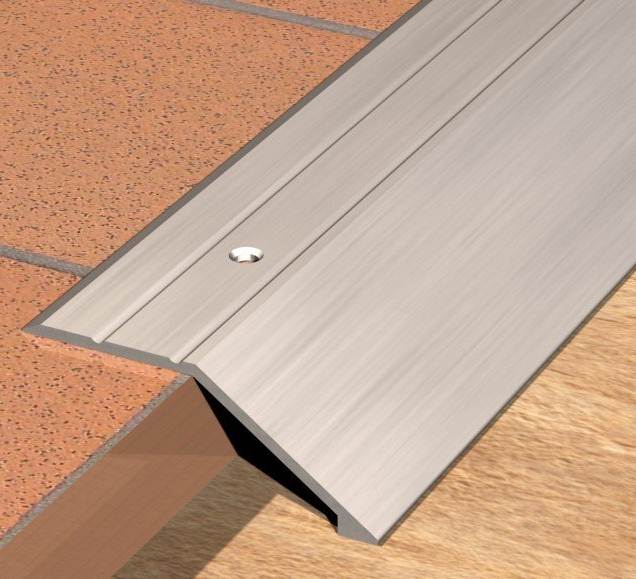
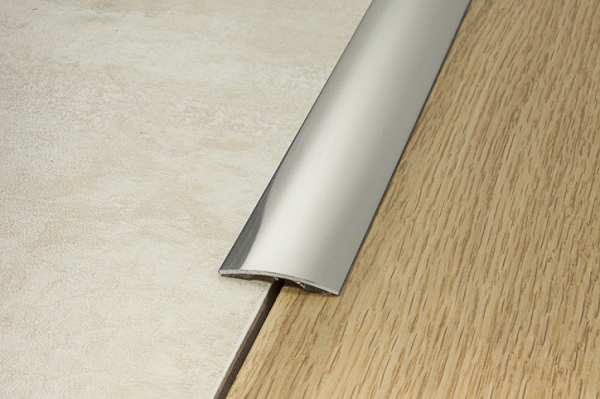
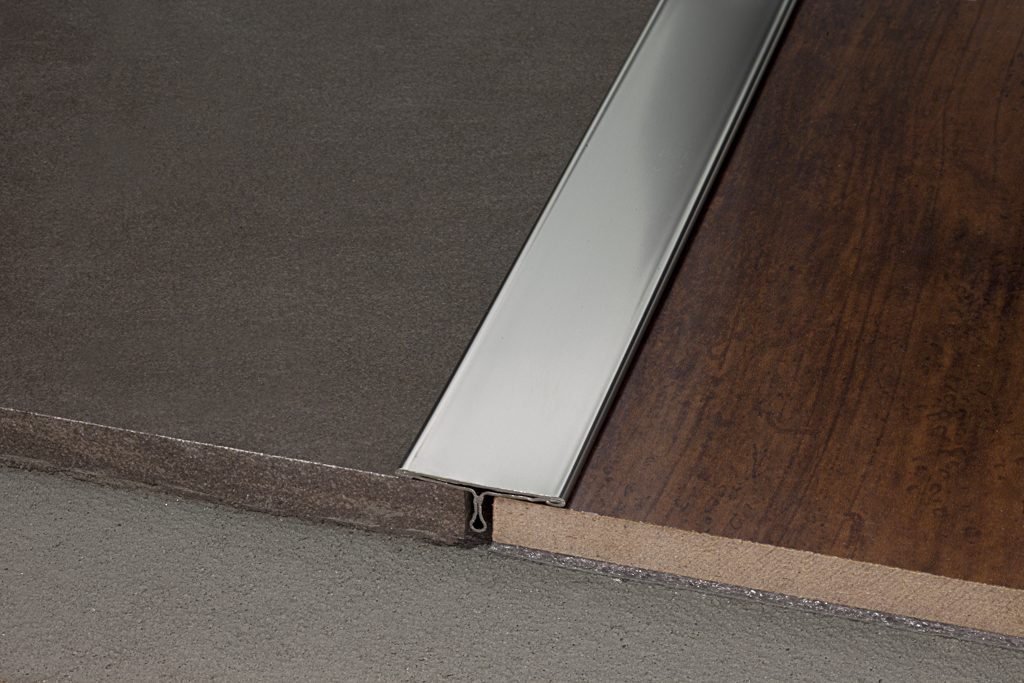
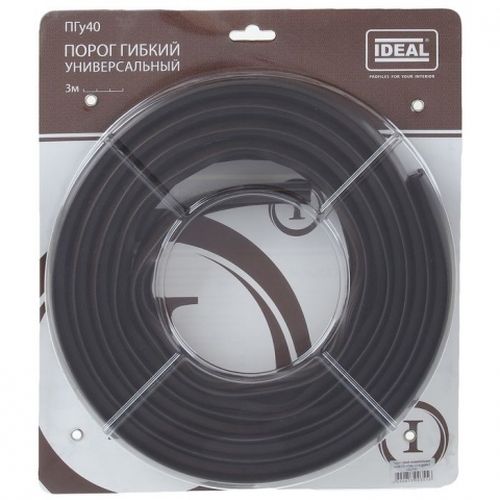
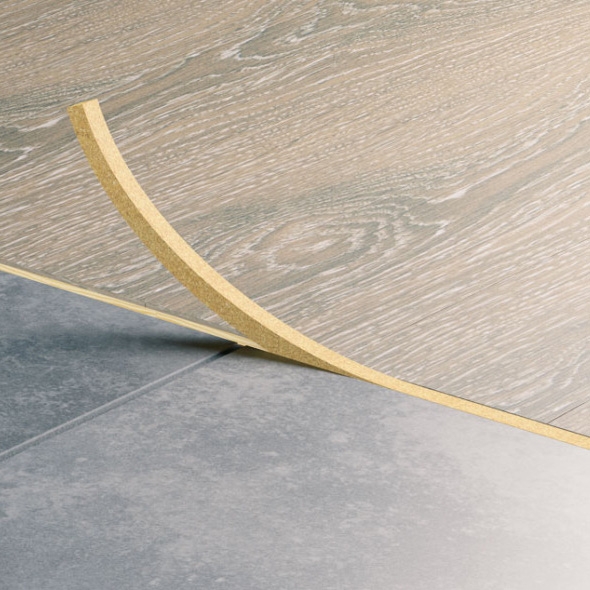
Flexible
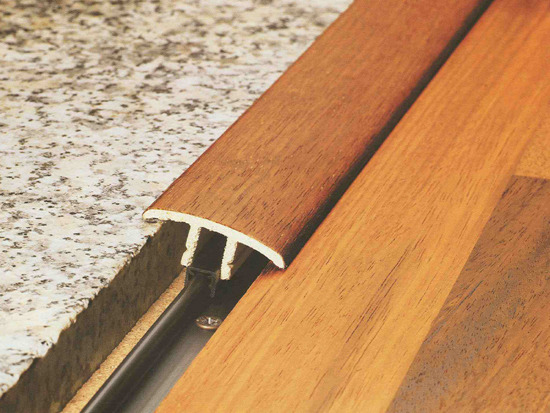
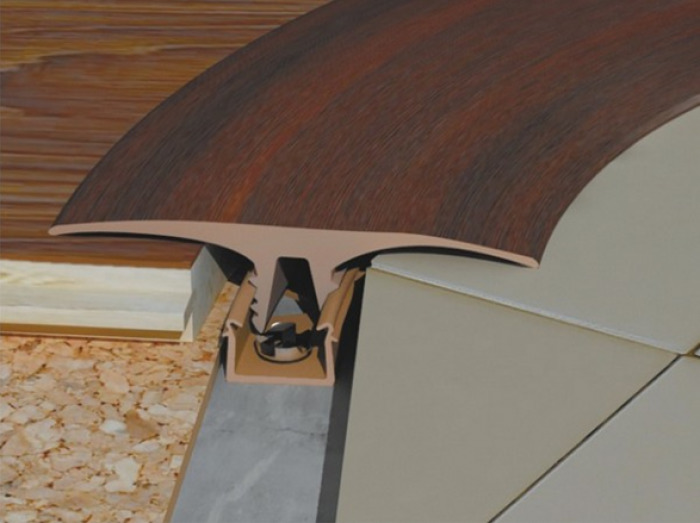
This is a universal type of nut that allows you to close the space between the elements of the tile and the laminate. It is made of metal and plastic profiles with optimum flexibility and ideal for use in combination with laminate and tile. Plastic flexible powders are used if there is a sufficient distance between two floor coverings.
The soft adapter perfectly fills the formed joints and is well fixed between these coatings. Thanks to good filling and reliable fixation, these modern thresholds are not deformed and do not move even under high loads.
Metallic flexible powders usually look like tile. Such elements look more restrained and elegant.As a rule, they are used with a minimum difference in the thickness of coatings. That is why Experts recommend removing the extra layer from the tile to even out these coatings..
Metal strips are cut with a hacksaw and fixed in the process of installing these two floor coverings. They have reliable fasteners, therefore they allow to combine coatings with high quality.
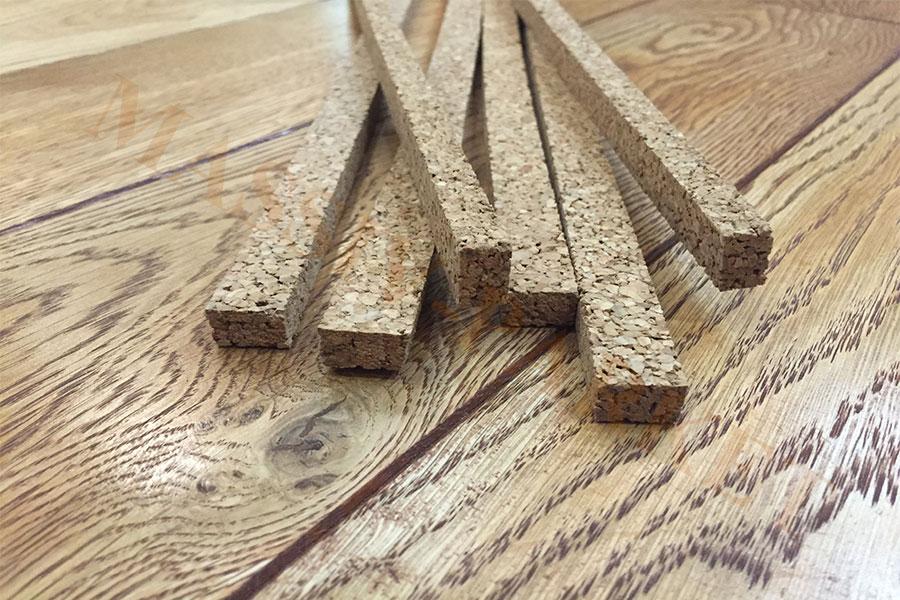
Cork
These elements are quite elastic and flexible, and therefore allow the floor coverings to move slightly during operation. It is no secret that the laminate often expands and therefore can put pressure on the joints. Cork expansion joints do not prevent the laminate from expanding and thus the joint does not distort at all with time.
Cork thresholds are environmentally friendly and look quite presentable.
Such sills are versatile and reliable, so they usually last longer than other similar decorative elements.
Threshold podium
This is a special kind of threshold that is often used in the docking process. It is ideal for those who do not have the ability to level the floor with a coupler. It allows you to hide some of the irregularities and shortcomings of flooring. The podium is a separate section in the form of an over-construction. As a rule, the multi-level floor between the main floor covering and the podium has a gap of 5 to 10 cm. But thanks to this design you will not have to cut an extra layer of materials.
Usually the most obvious contrasts are used for the podium.. The podium is fixed with special fastening elements. It is presented as a separate structure. But the thresholds in the form of a catwalk are traumatic, because you can easily stumble over them.
The canisters are divided into types depending on the material from which they are made.
Each material has certain technical characteristics:
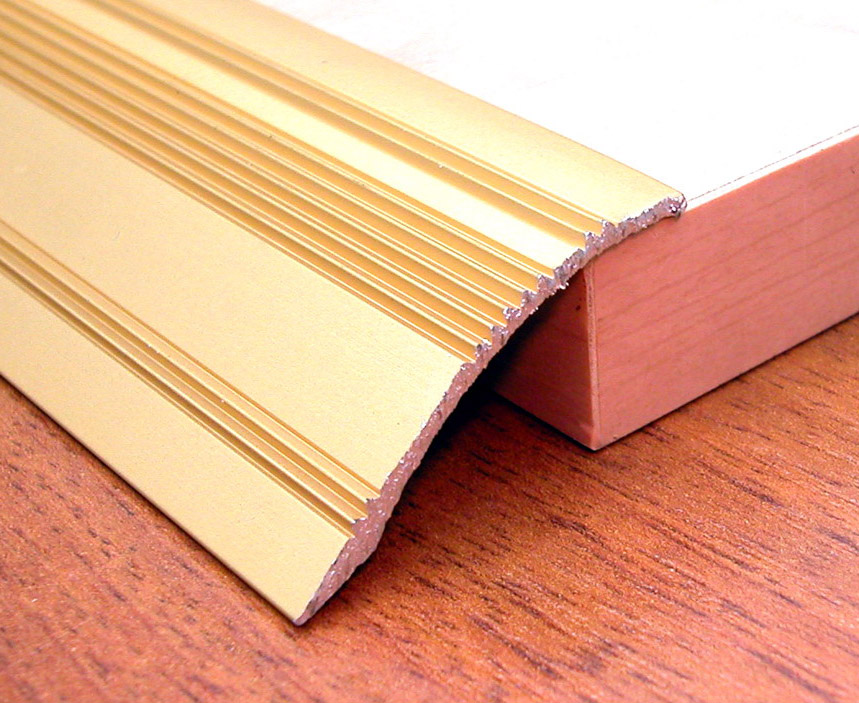
- Tree. Such joints are versatile and suitable for all types of interior and for any color tile and laminate. In addition, wooden sills are usually close to the design of the laminate. Wood elements are always harder and stronger and last longer than others. But with their help it is difficult to make zigzag or rounded joints.
- Plastic. This material is not the most durable and reliable, but with it you can create an interesting design of the joint. Manufacturers present a variety of interesting options for the design of plastic sills. With their help, you can easily make wavy transitions. The choice is so wide that it is possible to pick up a model of absolutely any color to match the coatings less noticeably or, on the contrary, contrast.
- Aluminum. These joints are the most rigid and dense. They ideally tolerate all mechanical effects and are no less durable than wood.
Some liquid materials, such as cork, sealant or other solutions, are also used as powders. They can be transparent or, on the contrary, can have color.
Manufacturers represent a wide variety of liquid formulations that have good adhesion with both tile and laminate.
The form
Now designers present several options for docking these materials, each of which is different in its form.
There are two most popular types of joints in the form:
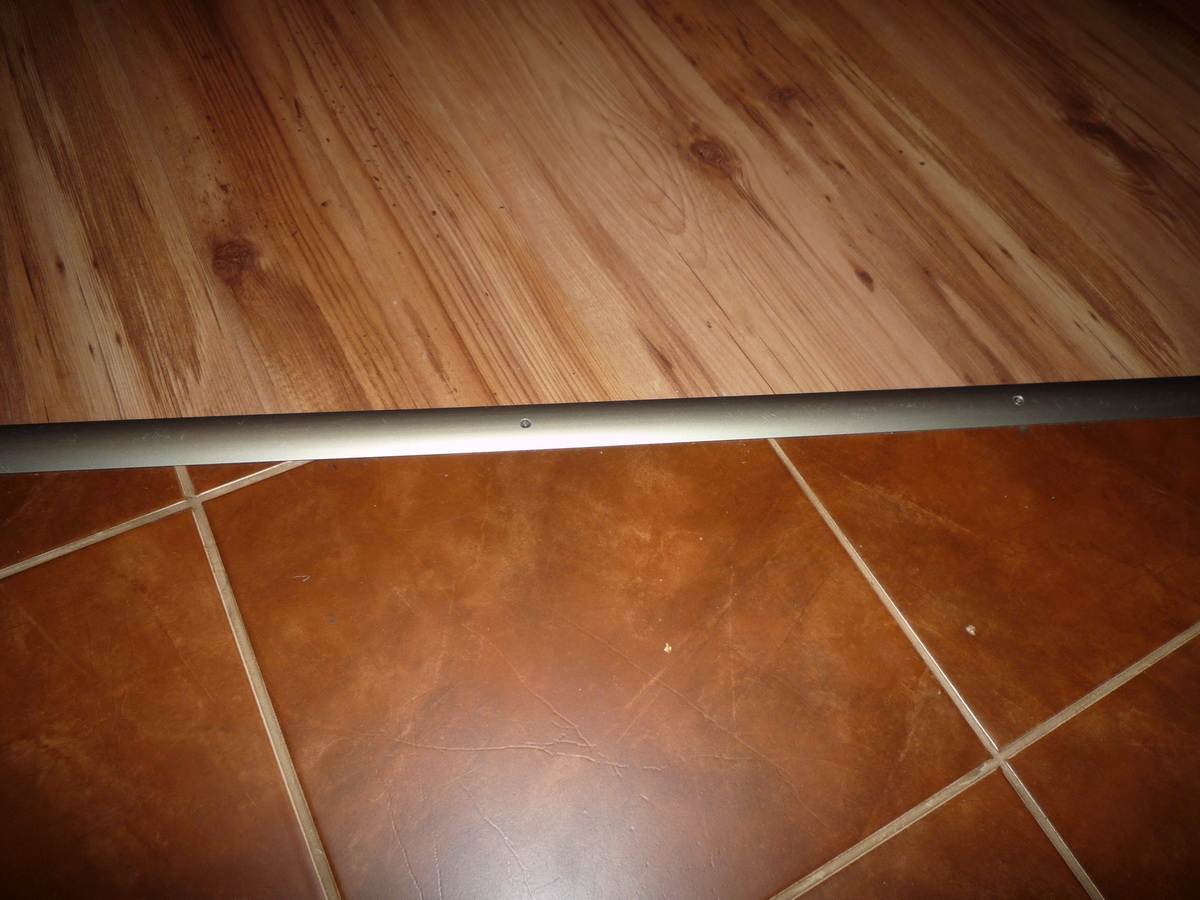
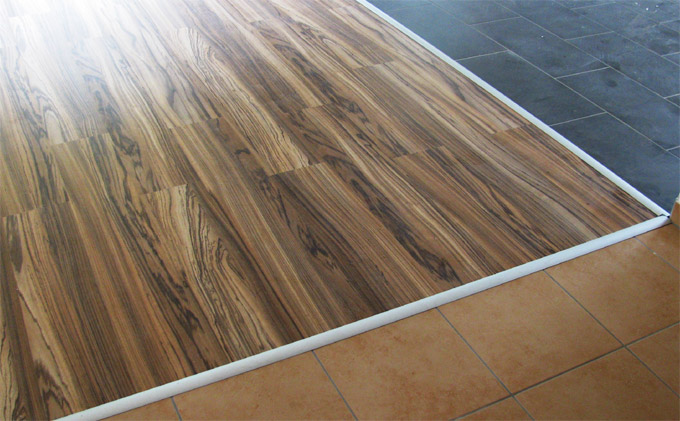
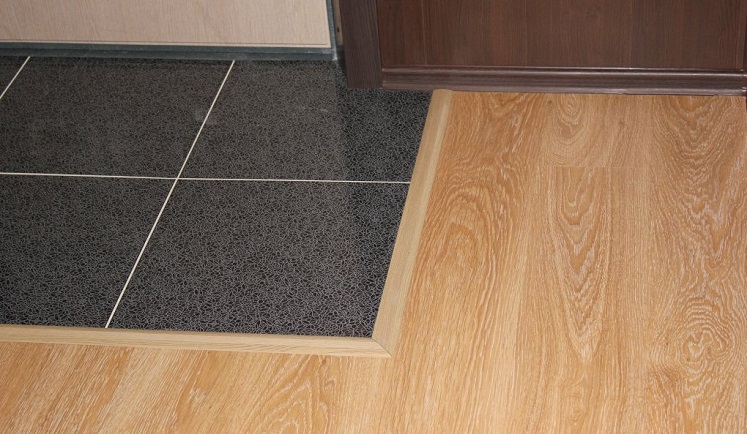
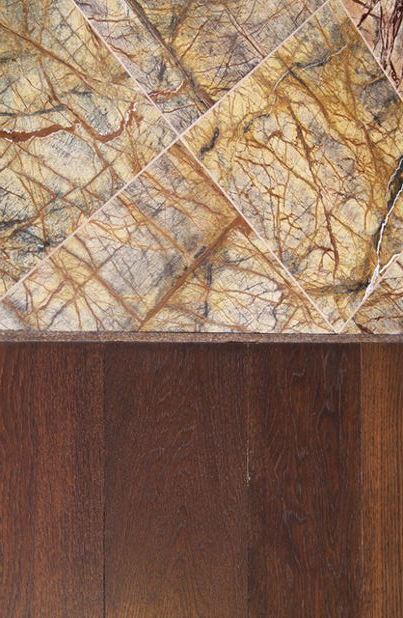
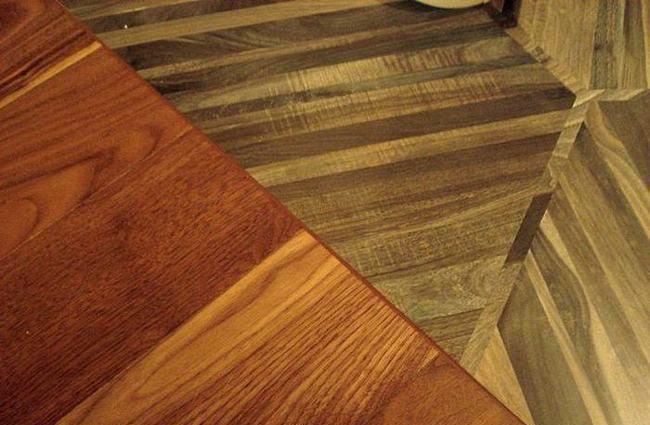
Rectilinear
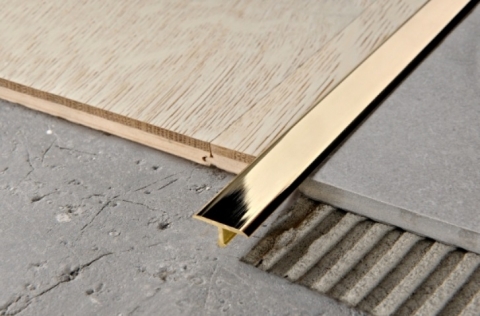
This is the usual straight or T-shaped joint, which is the simplest in execution. This is the best option that is suitable for all types of floors in all areas.. This shape of the seam will look great in the room for any purpose. It will allow you to select several clear functional areas.
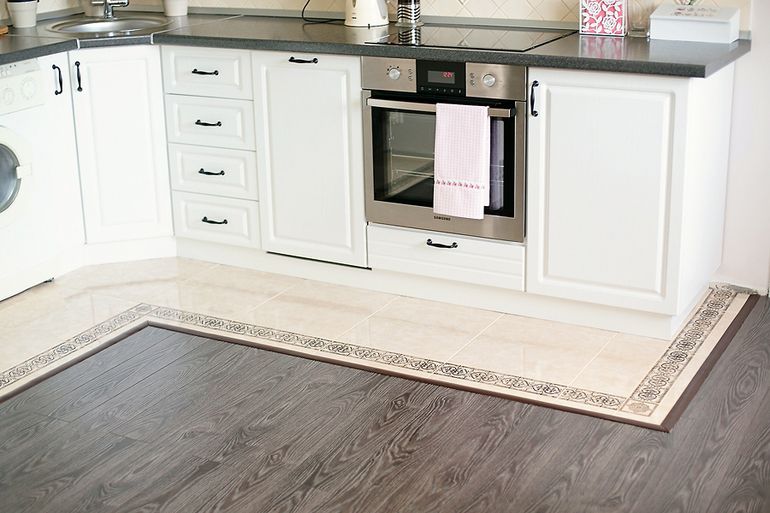
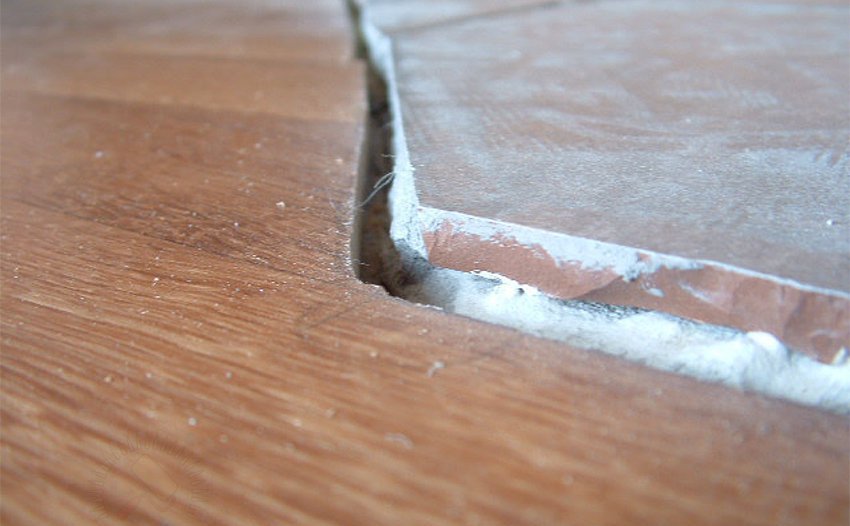
Exactly This form of docking is often used when combining materials in doorways between different rooms.. Rectilinear joint is placed in the corner of the room and even in the center. But this form of joints has some material requirements: the difference between the two floor coverings should not be more than 5 mm. Otherwise, the floors will not look so presentable, and decorative decoration of the joint will be much more difficult.
Rectilinear docking is commonly used with sills. Thus, it is usually masked by strong discrepancies between the tile and the laminate, as well as some defects in the coatings. So You can hide the jagged edges of the floor tiles, resulting from its trimming, as well as some other defects.
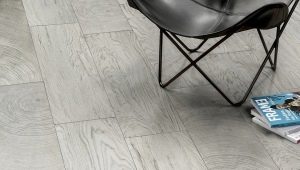
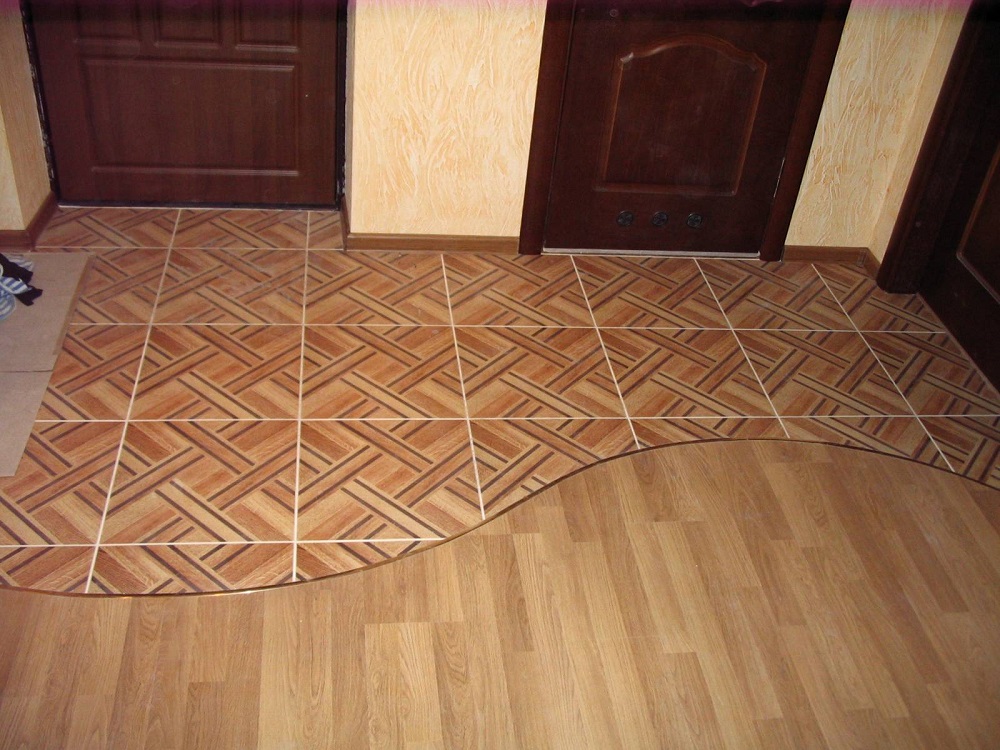
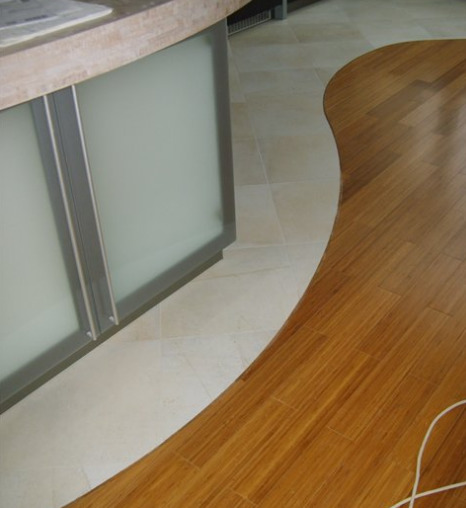
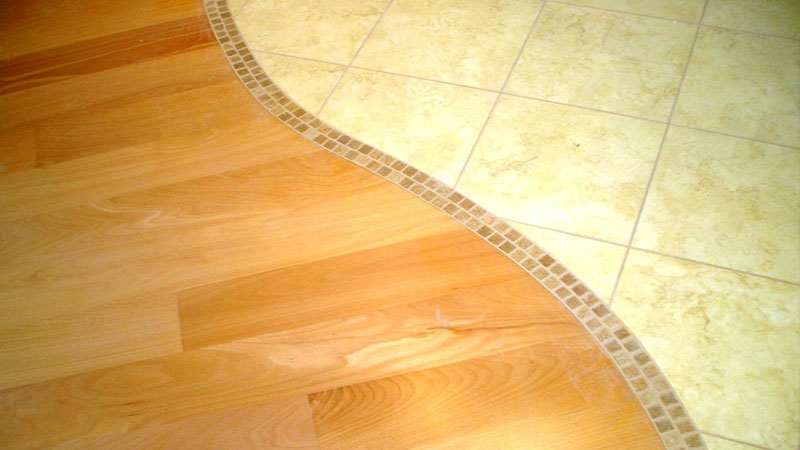
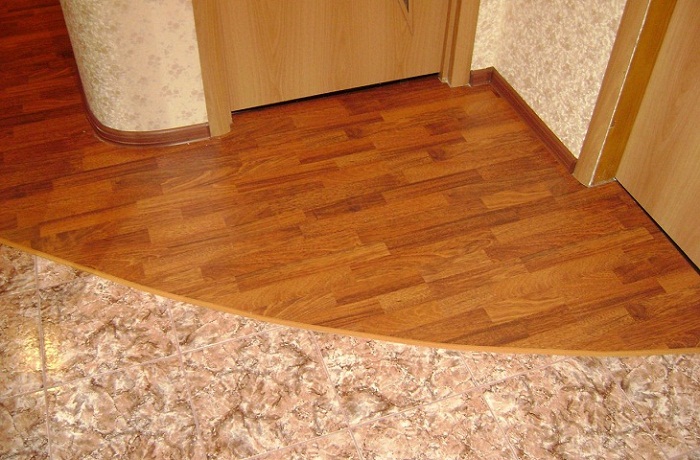
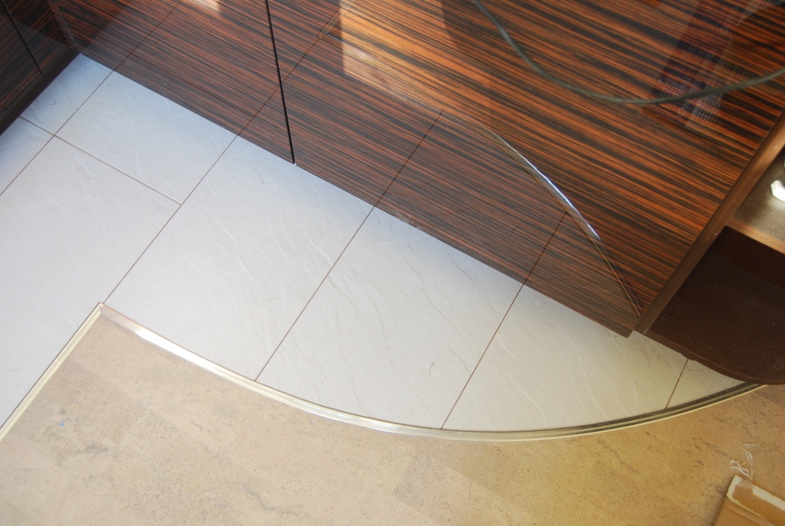
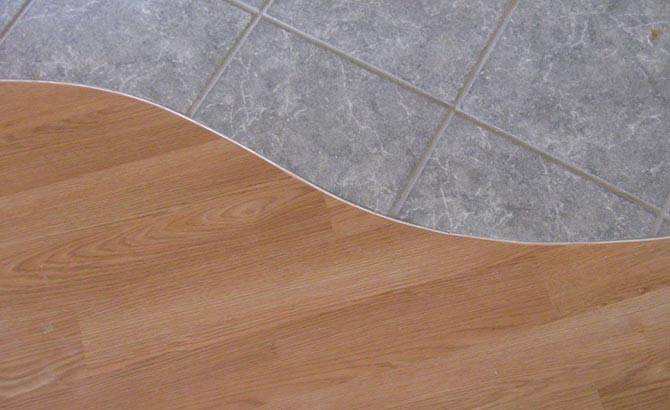
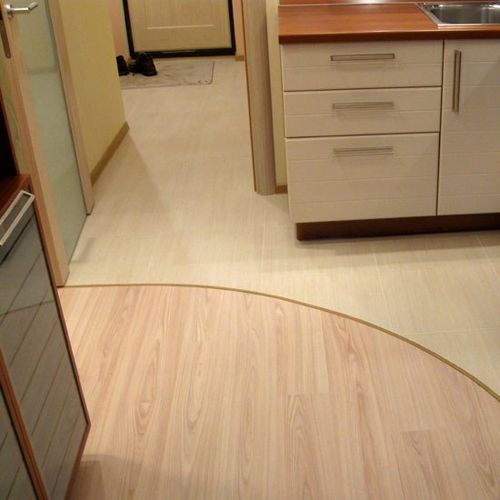
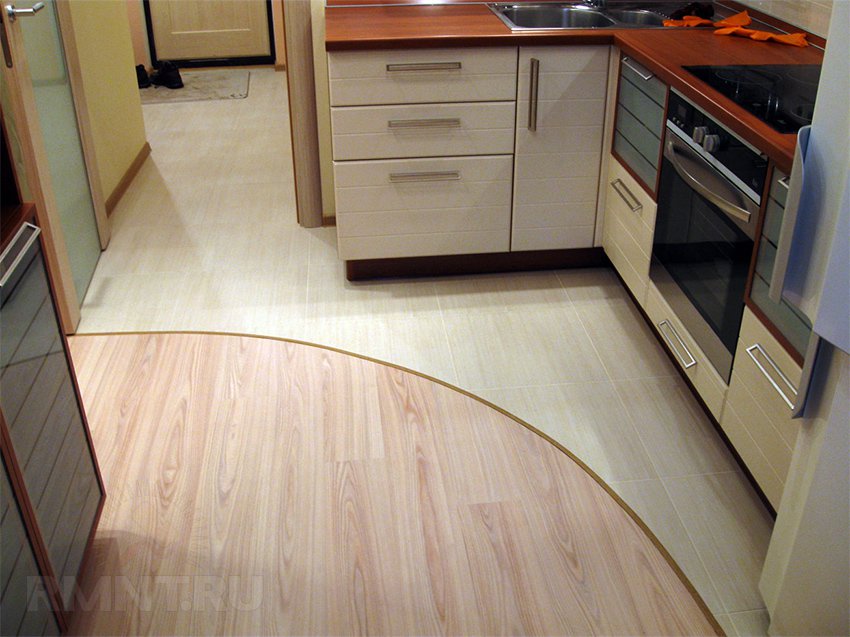
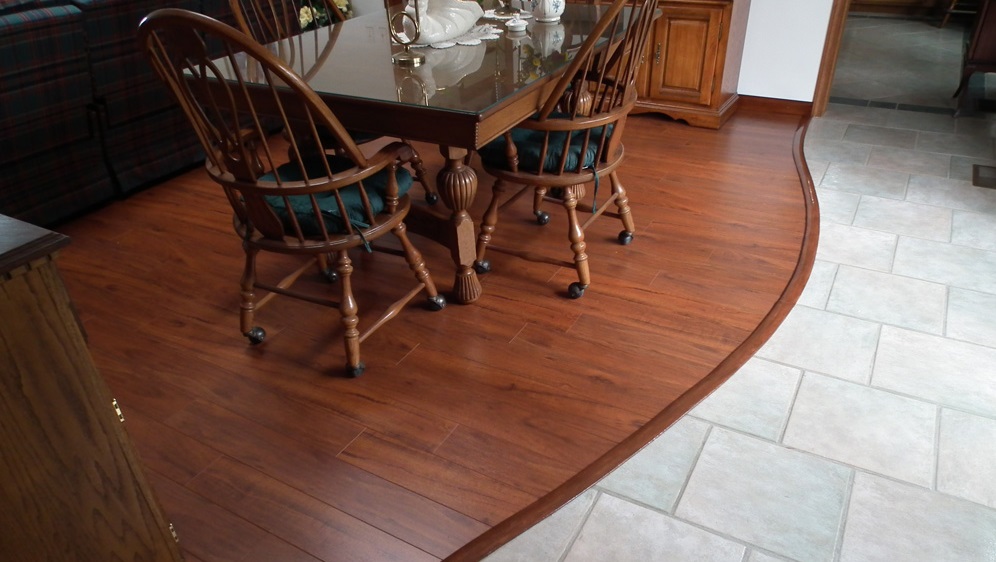
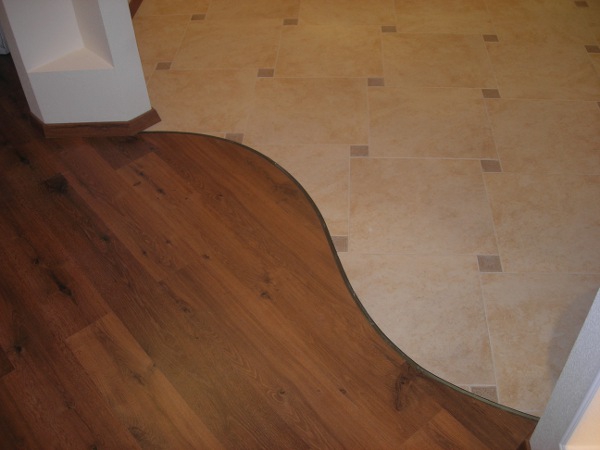
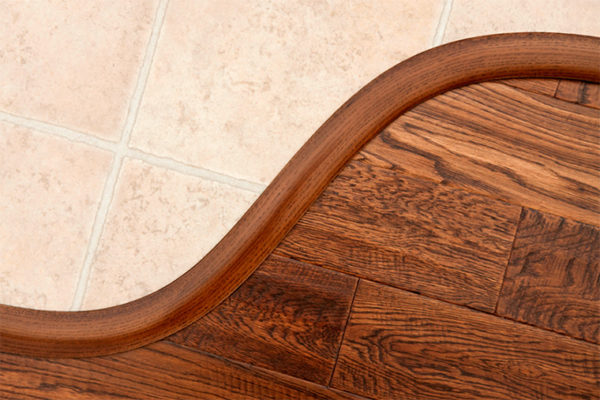
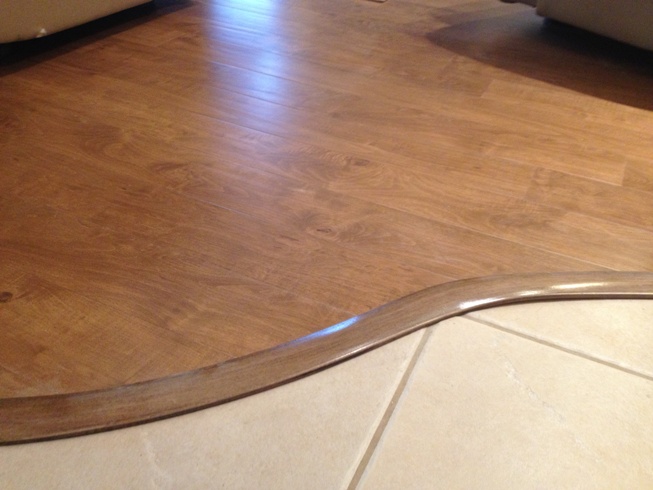
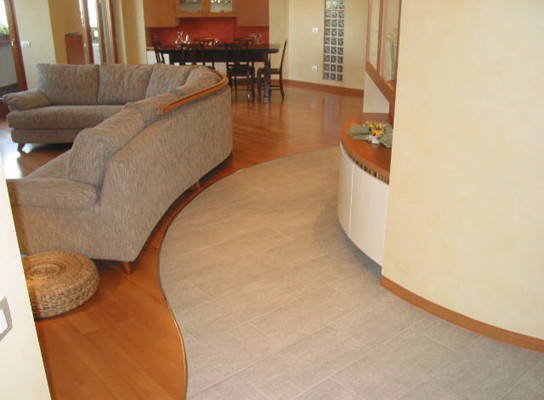
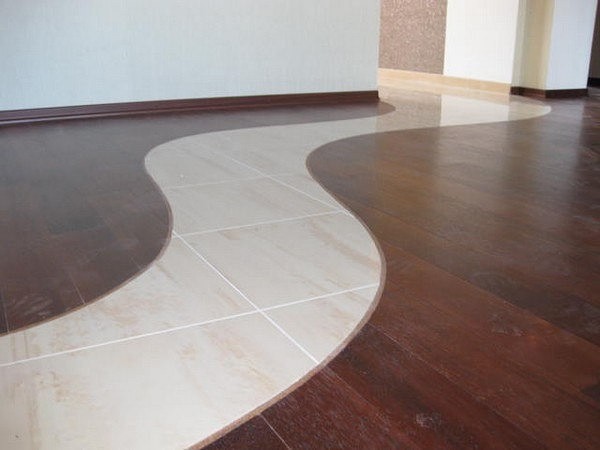
Undulating
It is more difficult to put together the coatings.Usually wave-like docking methods are used only by professionals. If you correctly arrange such a combination, the result will be impressive. Wave-like combination looks spectacular and stylish. But, as a rule, space is thus divided into a small number of functional areas..
With this design, some designers make an imitation of the waves that are on the stretch ceilings for harmonious interior decoration. With this docking, the discrepancies between the height of the materials should be minimal. For this design most often use a strip-connector, which allows you to smooth out irregularities, as well as hide small gaps.
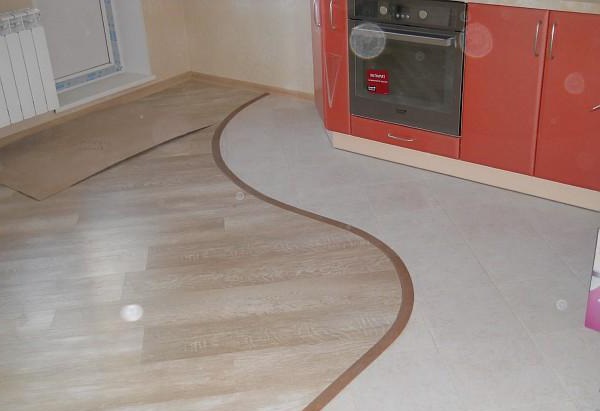
Wave-like combination can have a different look. Thus, some propose to separate the corners in a semicircle and thus organize a separate functional area. Some also make a wavy path in the entrance area of the tile, which is more durable and protects laminate from abrasion. Guests and households will come from one room to another along this path, which you highlight with other material and color.
This joint is perfect for flooring in the hallway, hallway, living room and other walk-through rooms.
How to do?
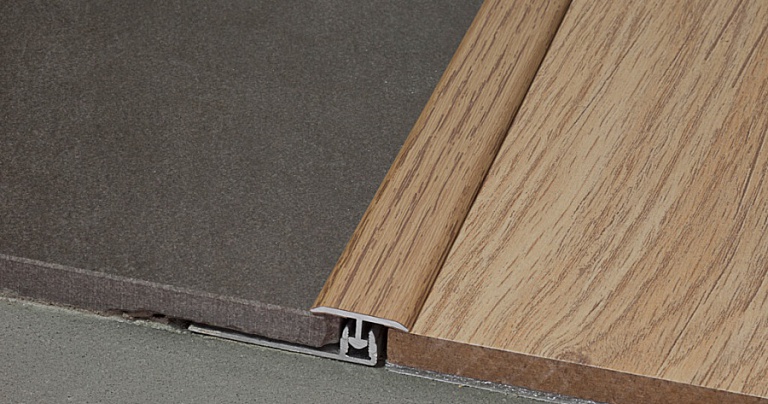
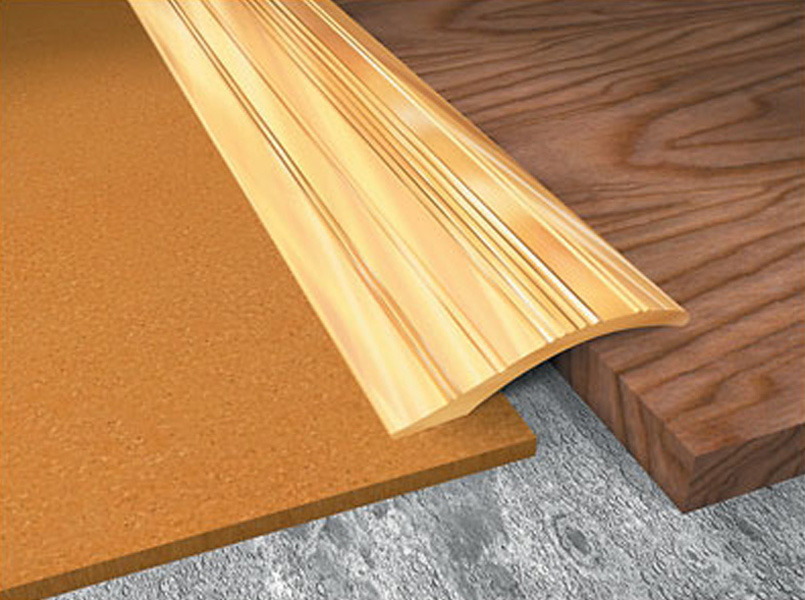
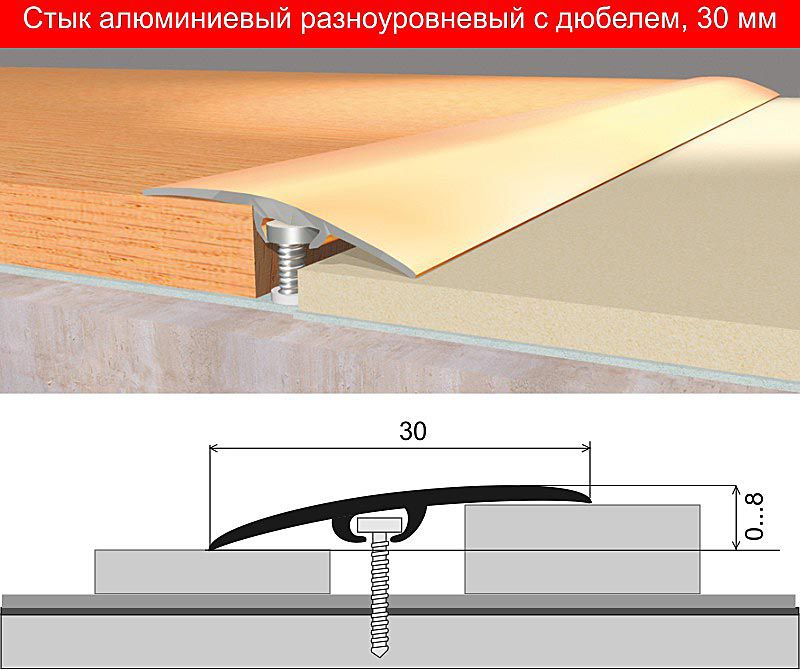
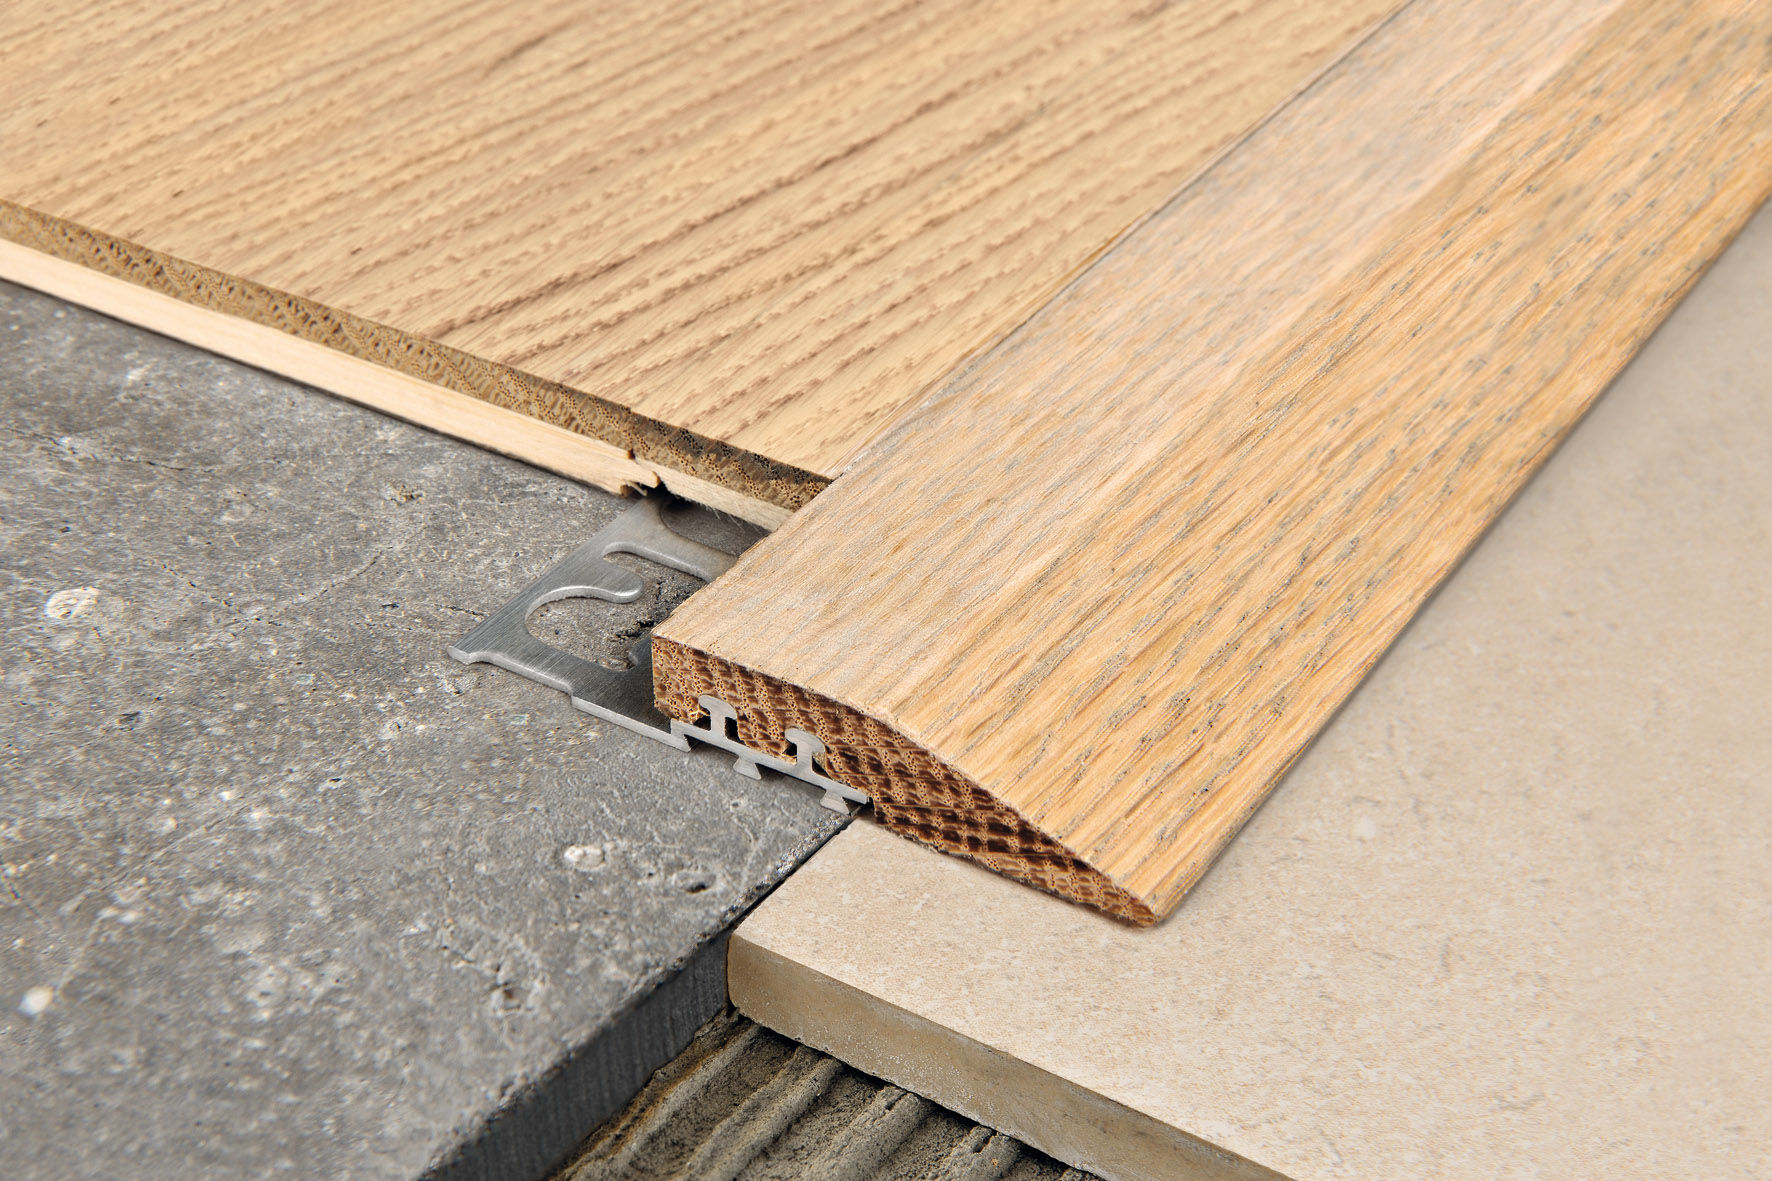
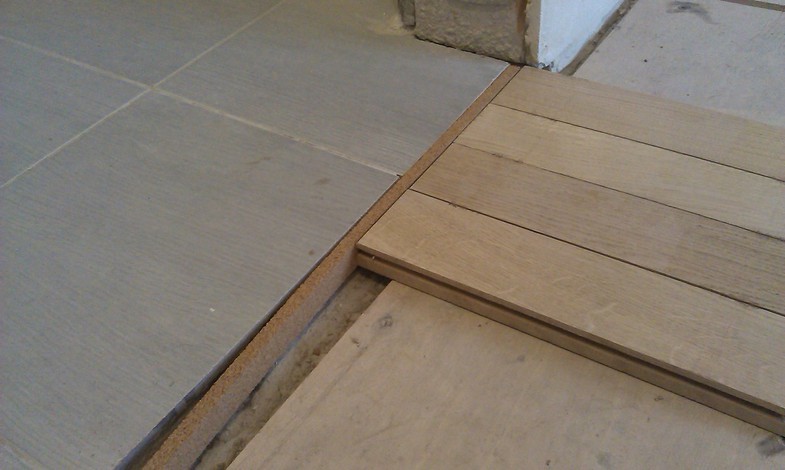
The joint with the threshold is usually used for finishing near the door in different rooms. Often this method of joining is characterized by differences in the height of these two finishing materials. Porozhek usually rises a little above the finishing materials. The canisters can be T-shaped or L-shaped.
If you use L-shaped models, then first of all you need to lay laminate, tile glued subsequently close to the edges. The remaining distance in this case must be filled with tile adhesive. It is also recommended to subsequently use grout for joints.

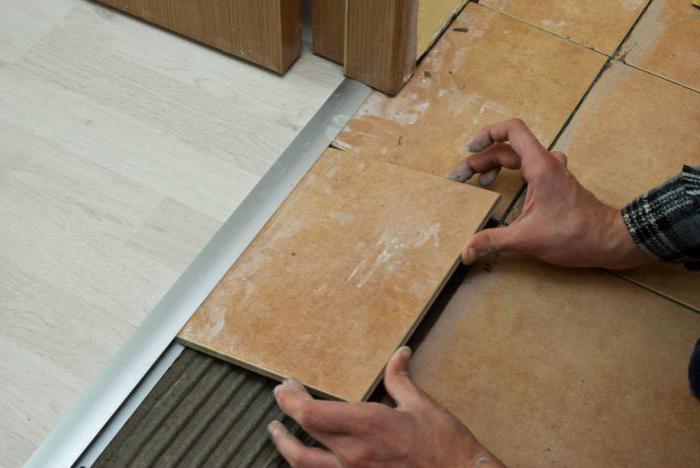
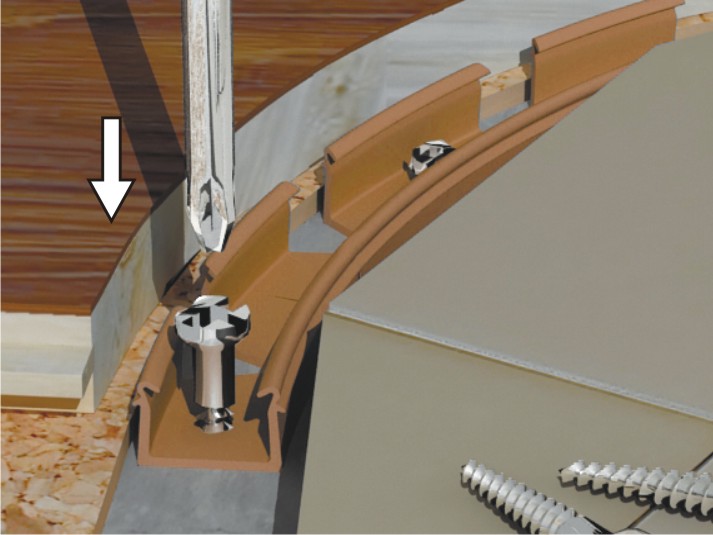
It is most difficult to mount flexible sills. Especially it concerns flexible connecting profiles from PVC. As a rule, their structure includes a base and decorative overlay, which is held on it. The installation takes place after the laying of the tile at the moment when the laminate is not laid..
Along the edge of the already installed tile it is necessary to install the base of this nut. It is usually fixed with dowels or screws. And fasteners are recommended by experts with flat hatsso that they do not protrude and do not interfere with the installation of the outer decorative part.
The top edge of the base of the PVC profile should be on a par with the finished surface.
The base must be securely fixed to the floor. If you use dowels for this, then you need to mark points for mounting fasteners and remove the profile. After that, you need to drill holes and install plastic tabs. Then you can fasten the base profile there.
Screws require drilling base. Moreover, for drilling holes, it is necessary to determine the step. The more curved the transition is, the smaller the pitch should be.. Straight joints can have quite a big step. After installing the bases you can lay laminate.
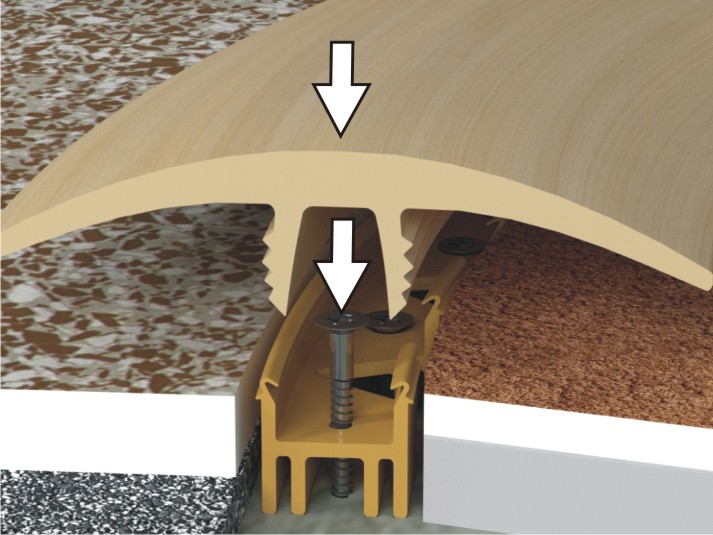
At the end of the installation process it is necessary to take a decorative overlay and begin its installation. Experts recommend with the effort to fill it in the base.
In order to simplify this process, it is necessary to press on the decorative tape with the palm of your hand and tap a little so that it goes well into the groove.
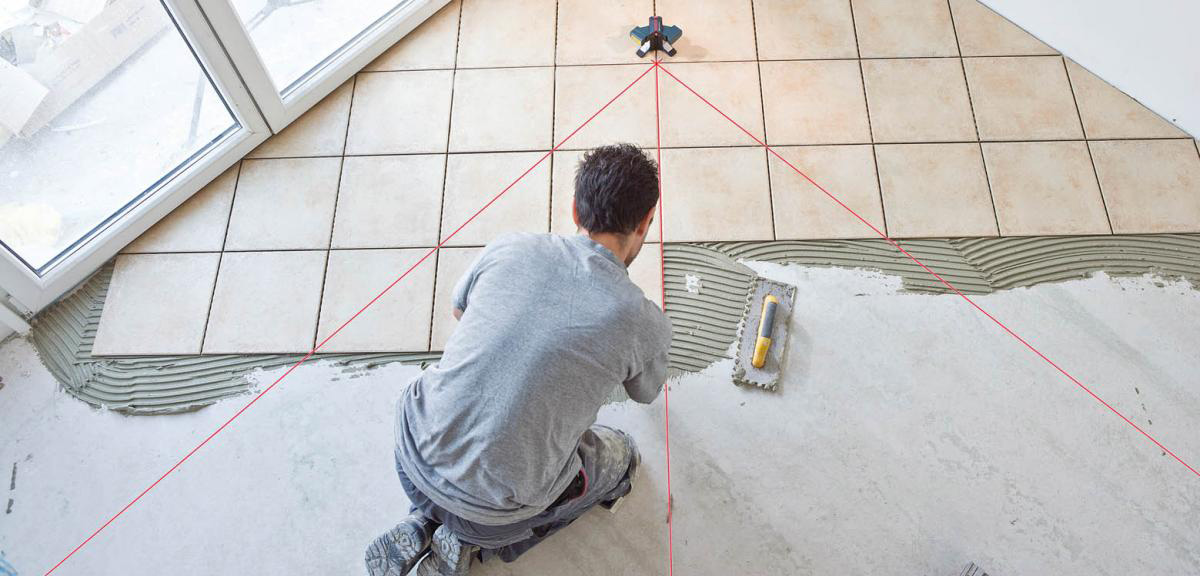
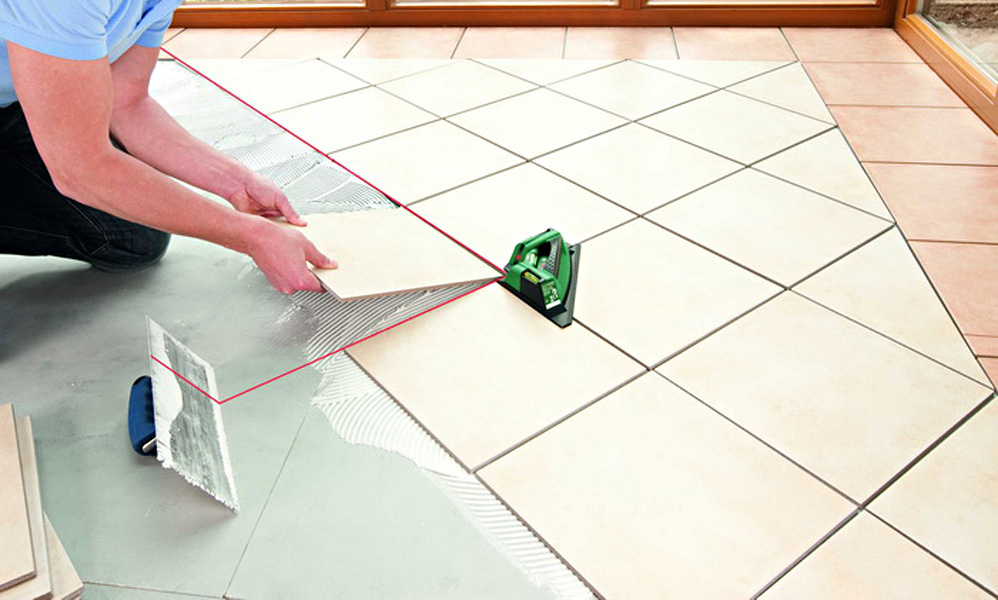
An even joint is safer and more visually attractive. It involves a preliminary measurement of the thickness of the material you purchase. Also you it is necessary to make all the templates for installation before installationsimplifying this process. Also on the floor, you must pre-mark the line that will be the joint. This process is called tracing.

Then, to design an equal joint, you need to decide on the laying of one of the materials. First of all it is better to lay tiles, since it always has a standard thickness and is much more difficult to vary. In addition, special tile adhesives are usually thicker than other adhesives. That is why it will be easier to adjust the laminate to its height. You can make a fit with the help of a special substrate, which will help to lift it.
When making a flat joint, it is necessary to calculate the width of the distance between the coatings. It must always be the same regardless of the shape of the joint, as well as the complexity of the bends. All materials must be cut and prepared in advance. Keep in mind that since you will first lay tile, it will be next to impossible to level it. So you have to make a fit.
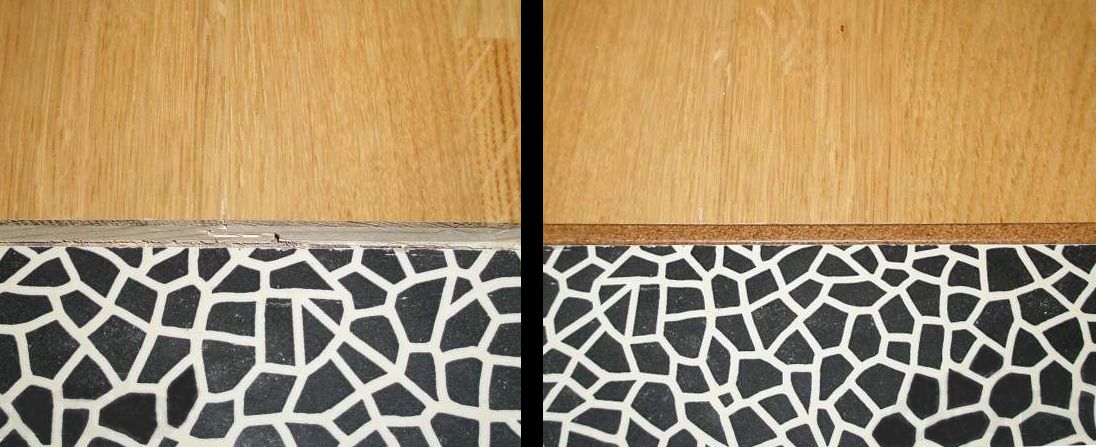
The main rule when joining laminate and ceramic tiles is the following: it is prohibited to place these floor coverings tightly to each other, since they can be affected by changes in temperature and humidity, as a result of which their dimensions can change.
The gap also provides these coatings with the opportunity to expand without damage to the entire floor. If you want to make a flat joint, it is better to fill the distance between the tile and the laminate with flexible elements that will take over their expansion.
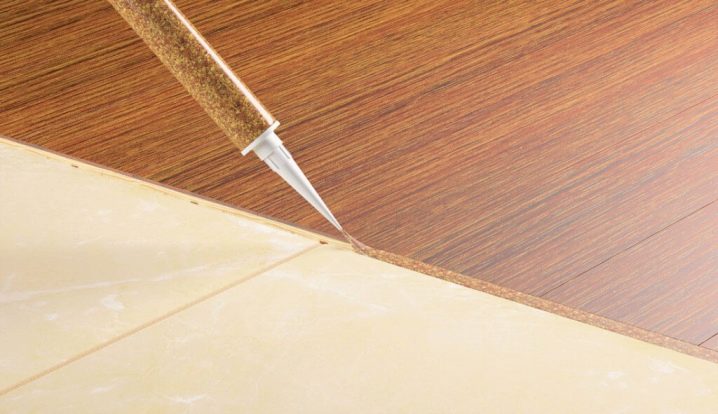
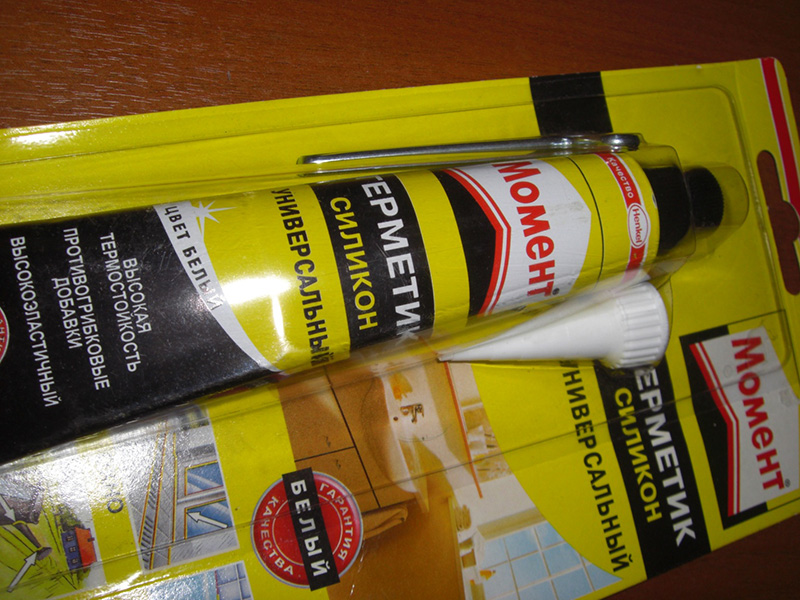
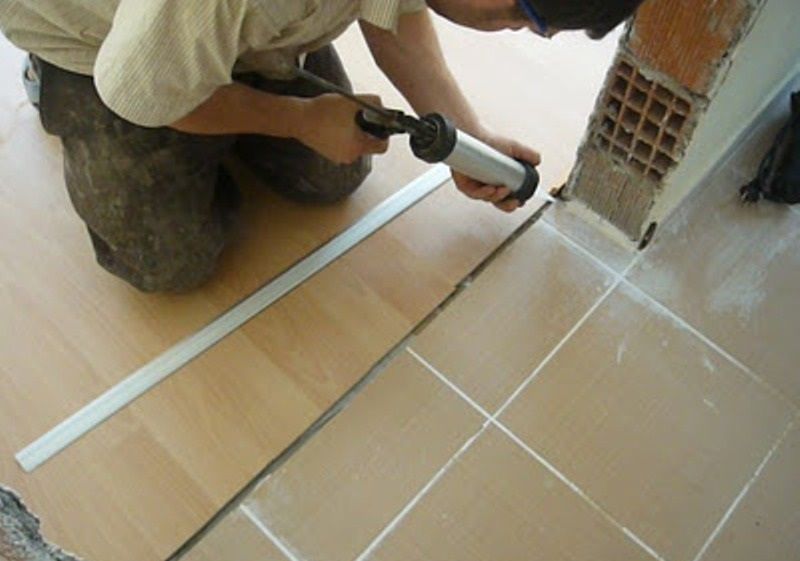
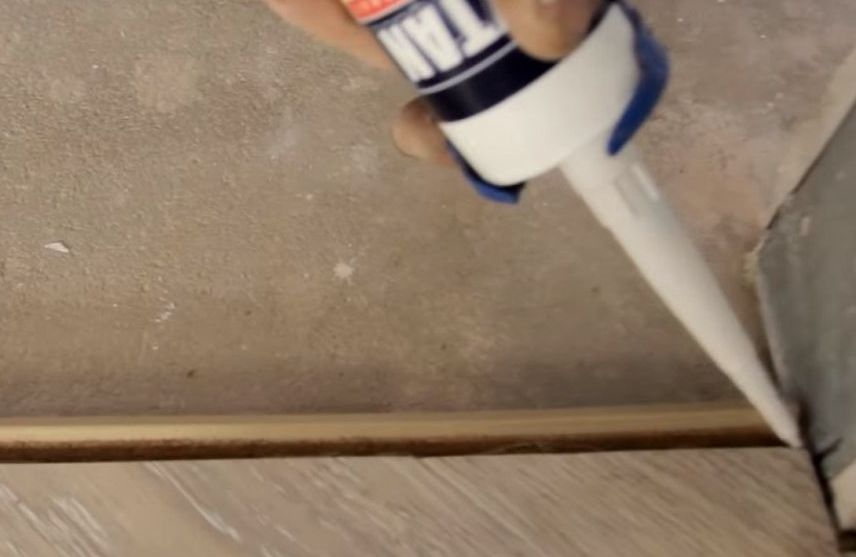
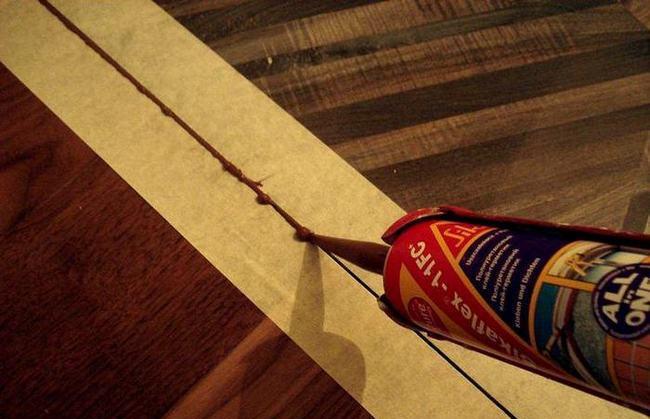
This method of docking offers a careful clearance of the gap and its ideal evenness at all ends of the joint. Exactly With this method of laying the gap must be treated with protective compounds. Thus, moisture will not penetrate into the joints. For this purpose, it is customary to use a silicone type sealant, which is considered the most flexible and versatile.

To create an equal dock, you can use a cork compensator. It is a thin strip that is covered with a protective layer of varnish or other material. Cork compensators are used after one of the two finishing materials, mainly this tile, will be laid. It is important to install it before laying the second floor covering.
During installation, it is important to trim the cork in height in order to create the perfect monolithic coating. This should be done carefully using a sharp knife.
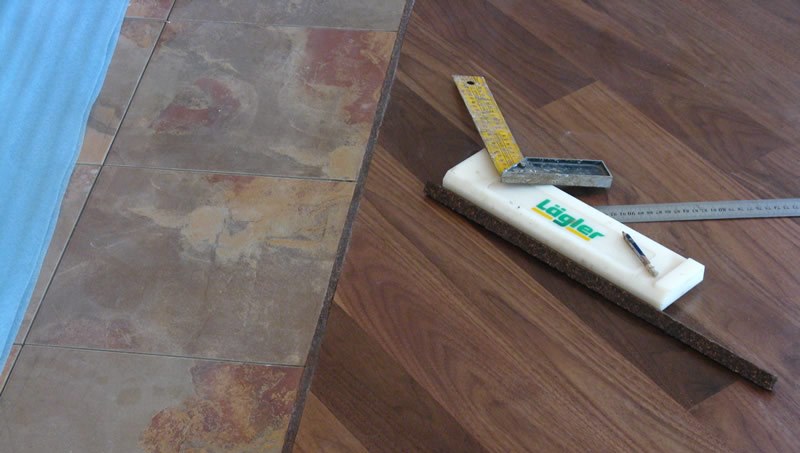
For mounting cork compensator is better to use a special glue. Also suitable for wood adhesives. Before gluing the cork, you need to ideally choose its length and cut it in such a way that it is enough for the complete design of the joint. Edges need to be well processed and sanded with sandpaper.so that traces of cutting are not visible.
For installation of cork compensators it is necessary:
- apply a strip of glue on the side edge of the already laid material;
- press the cork to this material;
- then slightly bend and apply sealant;
- after that, the cork compensator is pressed back again;
- usually a little sealant penetrates to the surface, it must be removed with a damp sponge, cleaning the floor covering;
- upon completion of installation work it is necessary to lay the second finishing material - laminate, observing the dense installation;
- The joint is better to additionally lubricate with silicone to make it more reliable.

Ways of working out
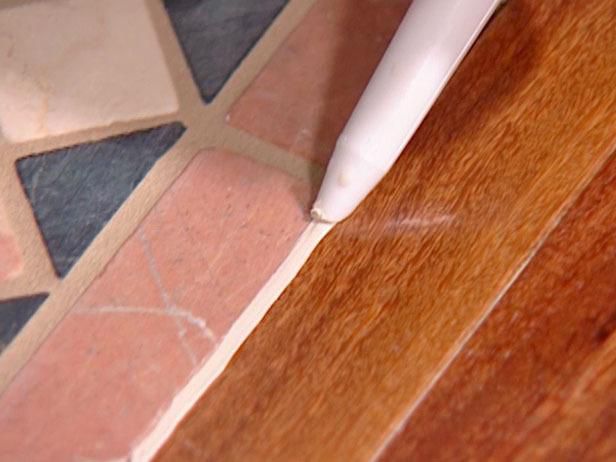
As a rule, if a docking method is used without a nut, then the question arises as to how best seal the seam formed in the process of laying. For this use sealant. Most often it is presented in the form of silicone, but other similar compositions can be found. Sealer can quickly process the connecting seams and ensure a good waterproof joint. In addition, due to the good tightness there will not get dirt and dust.
The sealant helps to smooth out small differences between the height of two different coatings. But this method of processing has some drawbacks. So, if necessary, you can not disassemble the floors in the area near the joint, treated with sealant. That is why it will be necessary to completely dismantle both coatings at the junction in a rough way, and then lay a new one.
Sealant for processing must be used as carefully as possible.. It dries quickly, so if it gets onto a tile or laminate flooring, it can severely contaminate it and removing it will be quite problematic.
That is why it is necessary to act quickly and as accurately as possible.
When installing a butt joint, several processing methods are used:
Non-detachable
For such a design is important to choose the right grout. It is desirable that he was as close as possible to the two joined materials. Both of these coatings must have the same height and the smallest distance.so that the seams are beautifully decorated. Non-detachable method involves the use of construction foam or specialized formulations.
But these materials need to be selected in accordance with their compatibility with both coatings. They must have good adhesion with both tile and laminate. Non-detachable way to design the joints is the most reliable and durable. But for this coverage to be perfectly matched. Appearance is not always attractive, but the design is more simple.
Visible
This design method is used when there is no difference in height and the joint is small - no more than 2 mm thick. With this design, tiles are usually customized to the laminate most closely.. The lumen in this case is filled with a fugue or liquid plug. The result is more attractive and simple.
But since these elements are not the most reliable and are distinguished by plasticity, the joint will not be able to withstand high mechanical loads. The big advantage of this design is that you can easily dismantle both of these materials if necessary.
Tile grouting is also often used to design joints. But for its application it is necessary to use silicone., to coat them with laminate in order to preserve its presentability. Grout is better to choose the same color as the interlayer joints.

Silicone with this method is used not only to coat the laminate, but also to partially fill the joint. It is usually about half full.. After the silicone has dried, the space between these two elements of the floor must be covered with a previously diluted grout for joints.
After this, the grout needs to be leveled. Then you need to wait until it is completely dry and remove excess grouting elements from both surfaces.
To this seam was more reliable and durable, it is better to varnish it.
Useful tips
In order to properly combine multi-level floors, it is necessary to draw in the transition zone lines-dividers, from which you will repel during the installation process. Since laminate is usually below tile, first you need to lay tile. Moreover, its installation should start from the line indicating the place of the joint. Laminate should be laid at the end of the installation of tiles.
In order to make the alignment even, it is necessary to choose a suitable substrate for the laminate, which will smooth out the difference. You need to think in advance how you will dock these covers. After all, different docking options offer leaving a gap of different sizes.
The joint should be handled most carefully. It is advisable not to get water there. This is especially true when you make it as a decorative flag. If you are using a docking profile for tile and laminate, then make sure that there are no open areas.
Porozhek is not able to fill the free space between these finishing materials, therefore in case of water getting there the laminate can be damaged. If you used a wooden threshold, then the threshold itself may be damaged. That is why you should choose the most practical and reliable sills, as well as handle the junction of water-repellent compounds.
On how to independently make the joint of laminate and tile without a threshold, see the following video.