Laying floorboard do it yourself

The floorboard was popular at all times. And today's fashion does not pass it by. Moreover, if you make the installation of the floorboard with your own hands, you can significantly save on repairs. Let's try to understand this issue in more detail.

Rules and subtleties
The first copies of this building material were presented to the world in the early 40s of the last century. A small company from Sweden set itself the task of producing an equivalent equivalent of expensive parquet. The second objective was the desire to significantly speed up the process of laying the floor, since it was necessary to sweat with a small parquet.
The presented board consisted of two layers and was not widely used. The prototype of the modern coating appeared on the construction markets eight years later. And its main difference from its predecessor was the appearance of another layer.

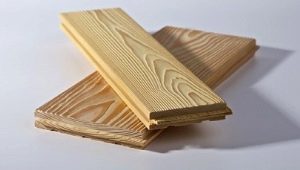
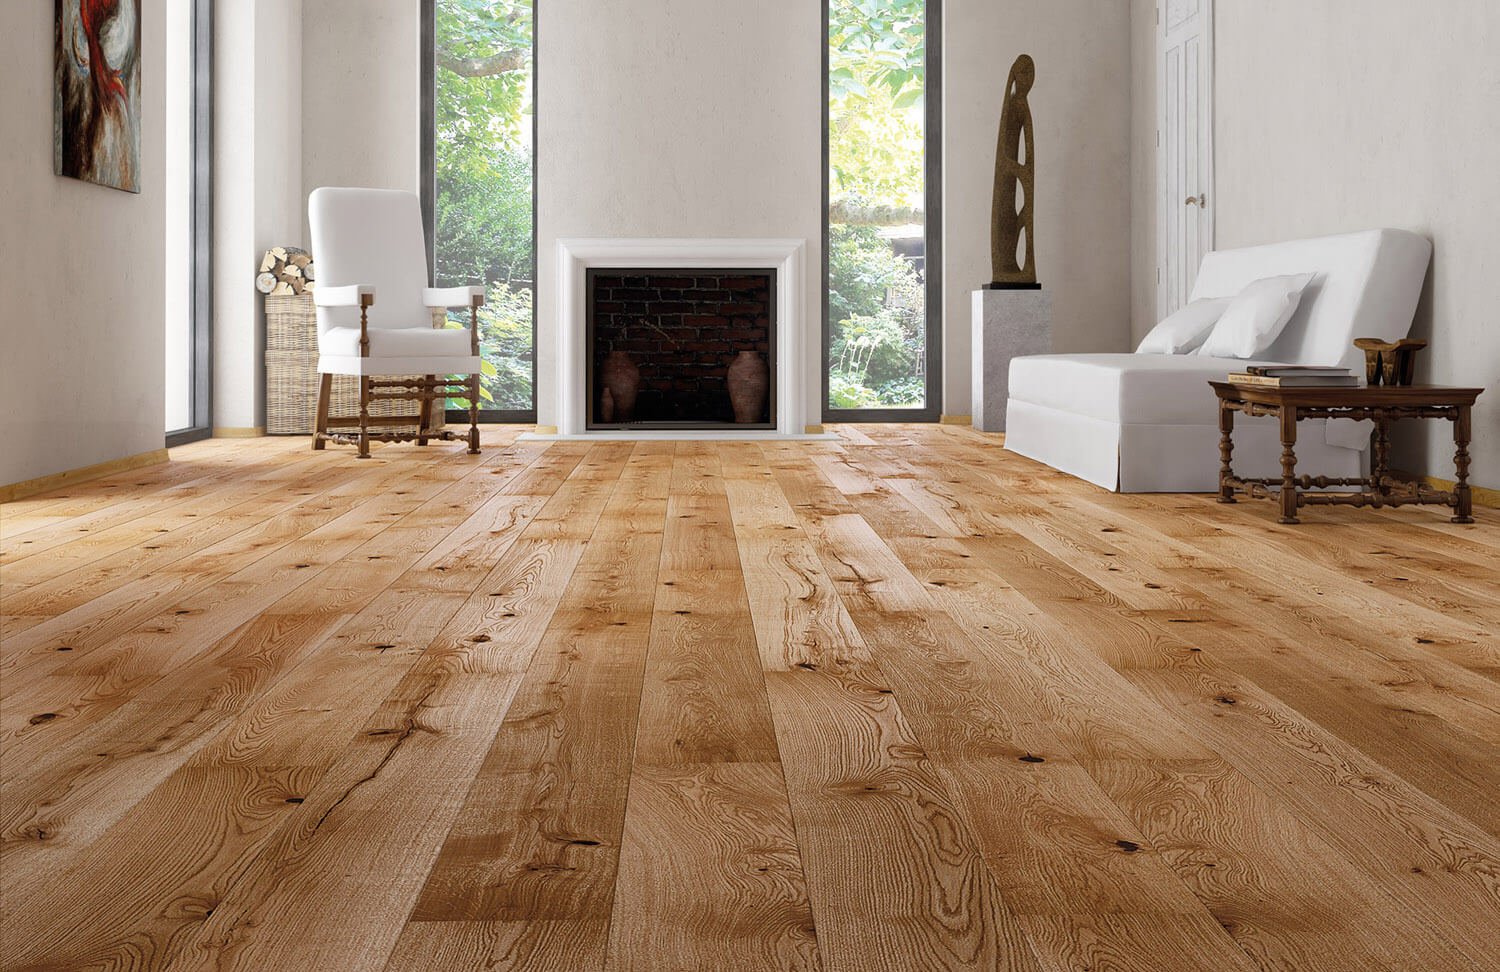
To date, the dimensions of the floorboard have differences depending on the manufacturer.Its length in its minimum size is two meters, in the maximum - 2.6 m. The width starts from 13.9 cm and ends at 21 cm. The average thickness is 14 mm.
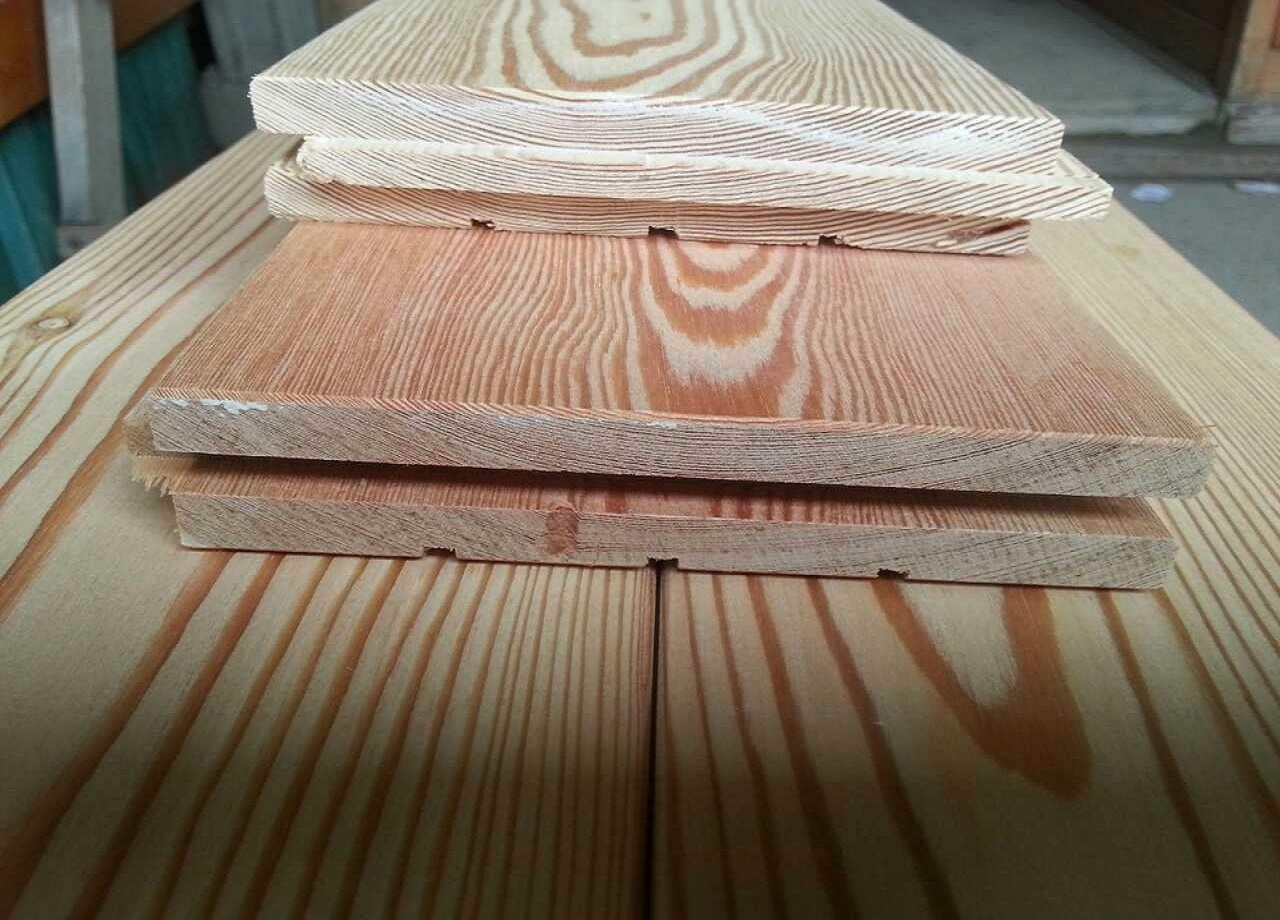
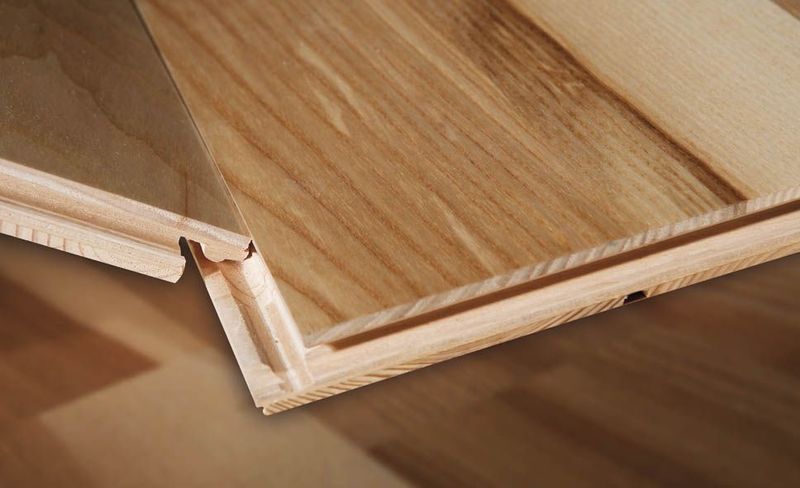
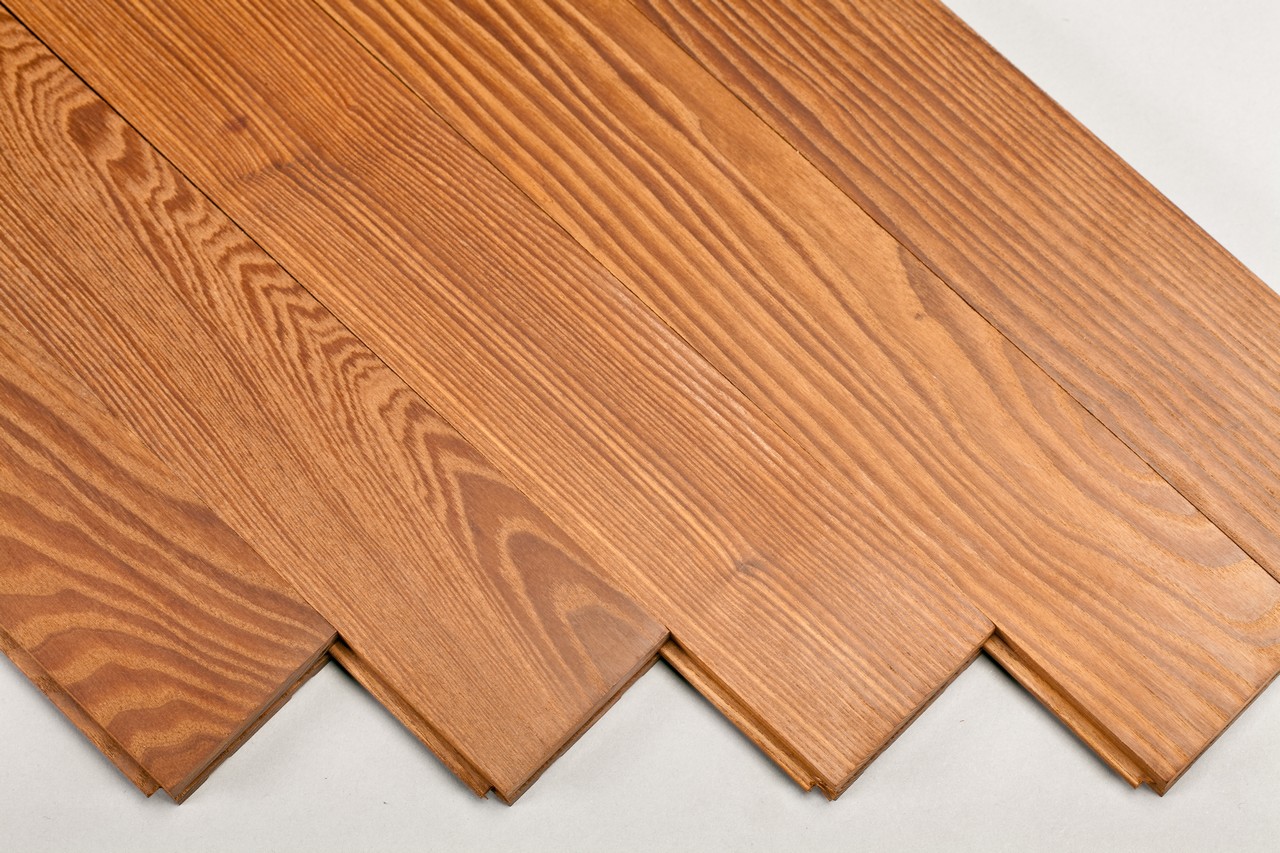
The three-layer board consists of a stabilizing layer, a base and an upper layer. The bottom layer protects the product from the concrete base. It is made of spruce veneer. Additionally, it prevents the deformation of the board.
The central layer is made from pine. Special strips spread over the entire width of the product. And directly for drawing the top layer is responsible. Depending on the price, these can be breeds of expensive and less valuable wood. Among them - oak, maple and alder. In African countries, cocobolo and mahogany are used. Fix the slats to the board with glue.
The fibers of the base layer are not parallel, but perpendicular to each other. Thanks to this, a good fixation is achieved and the building material is not deformed.
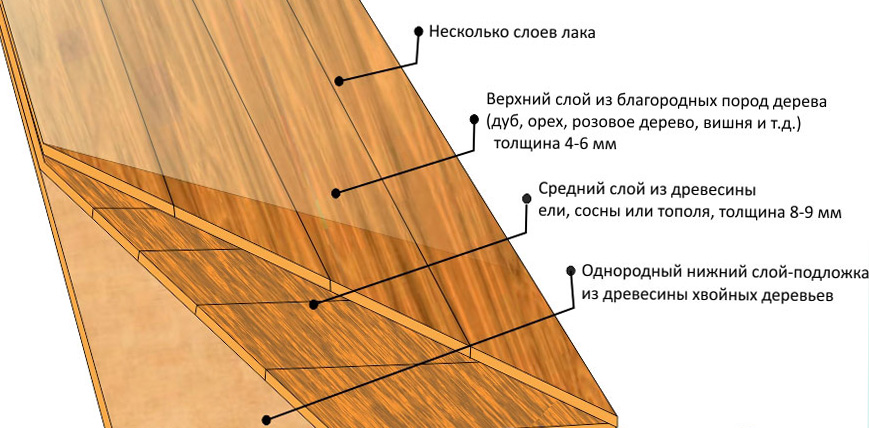
The base can be tinted or bleached to impart certain shades. Heat treatment and brushing are also performed.
The top layer may consist of polyurethane, oil or wax. Some manufacturers additionally coated with alkyd varnish.Since the face layer is polished and varnished, this building material becomes wear-resistant, moisture-resistant and serves for a long time. The main thing is to make it correctly.
It is very important to pay attention to what exactly the floorboard will fit. The floor should be leveled, capital, without chips and hollows. Only minimal difference is allowed, otherwise the board will not hold.
No need to tempt fate and lay the floorboard in rooms with high humidity - bathrooms, kitchens, swimming pools. Otherwise the laid floor will quickly become useless.
After transportation, the building material must be given to it to get used to the temperature and humidity of the room. Usually, experts wait about two days, after which they proceed to installation. The temperature in the room should be above or equal to 17 degrees, and the humidity should be moderate.
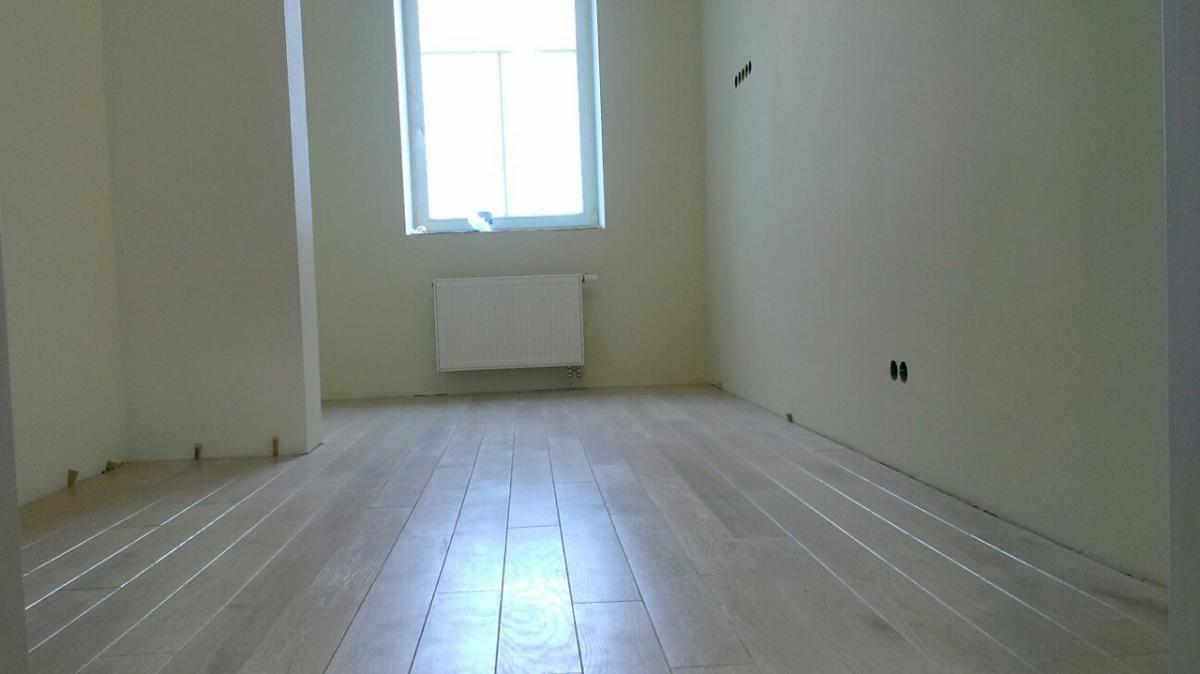
Like laminate, the floorboard is laid along the sun's rays, thus hiding seams and minor defects is achieved. Do not forget about the substrate. It acts as a noise-canceling material.
Tools and fixtures
Begin laying floorboard should only be after measuring the humidity in the room. Its performance should not exceed sixty percent. To make measurements helps the device called hygrometer.
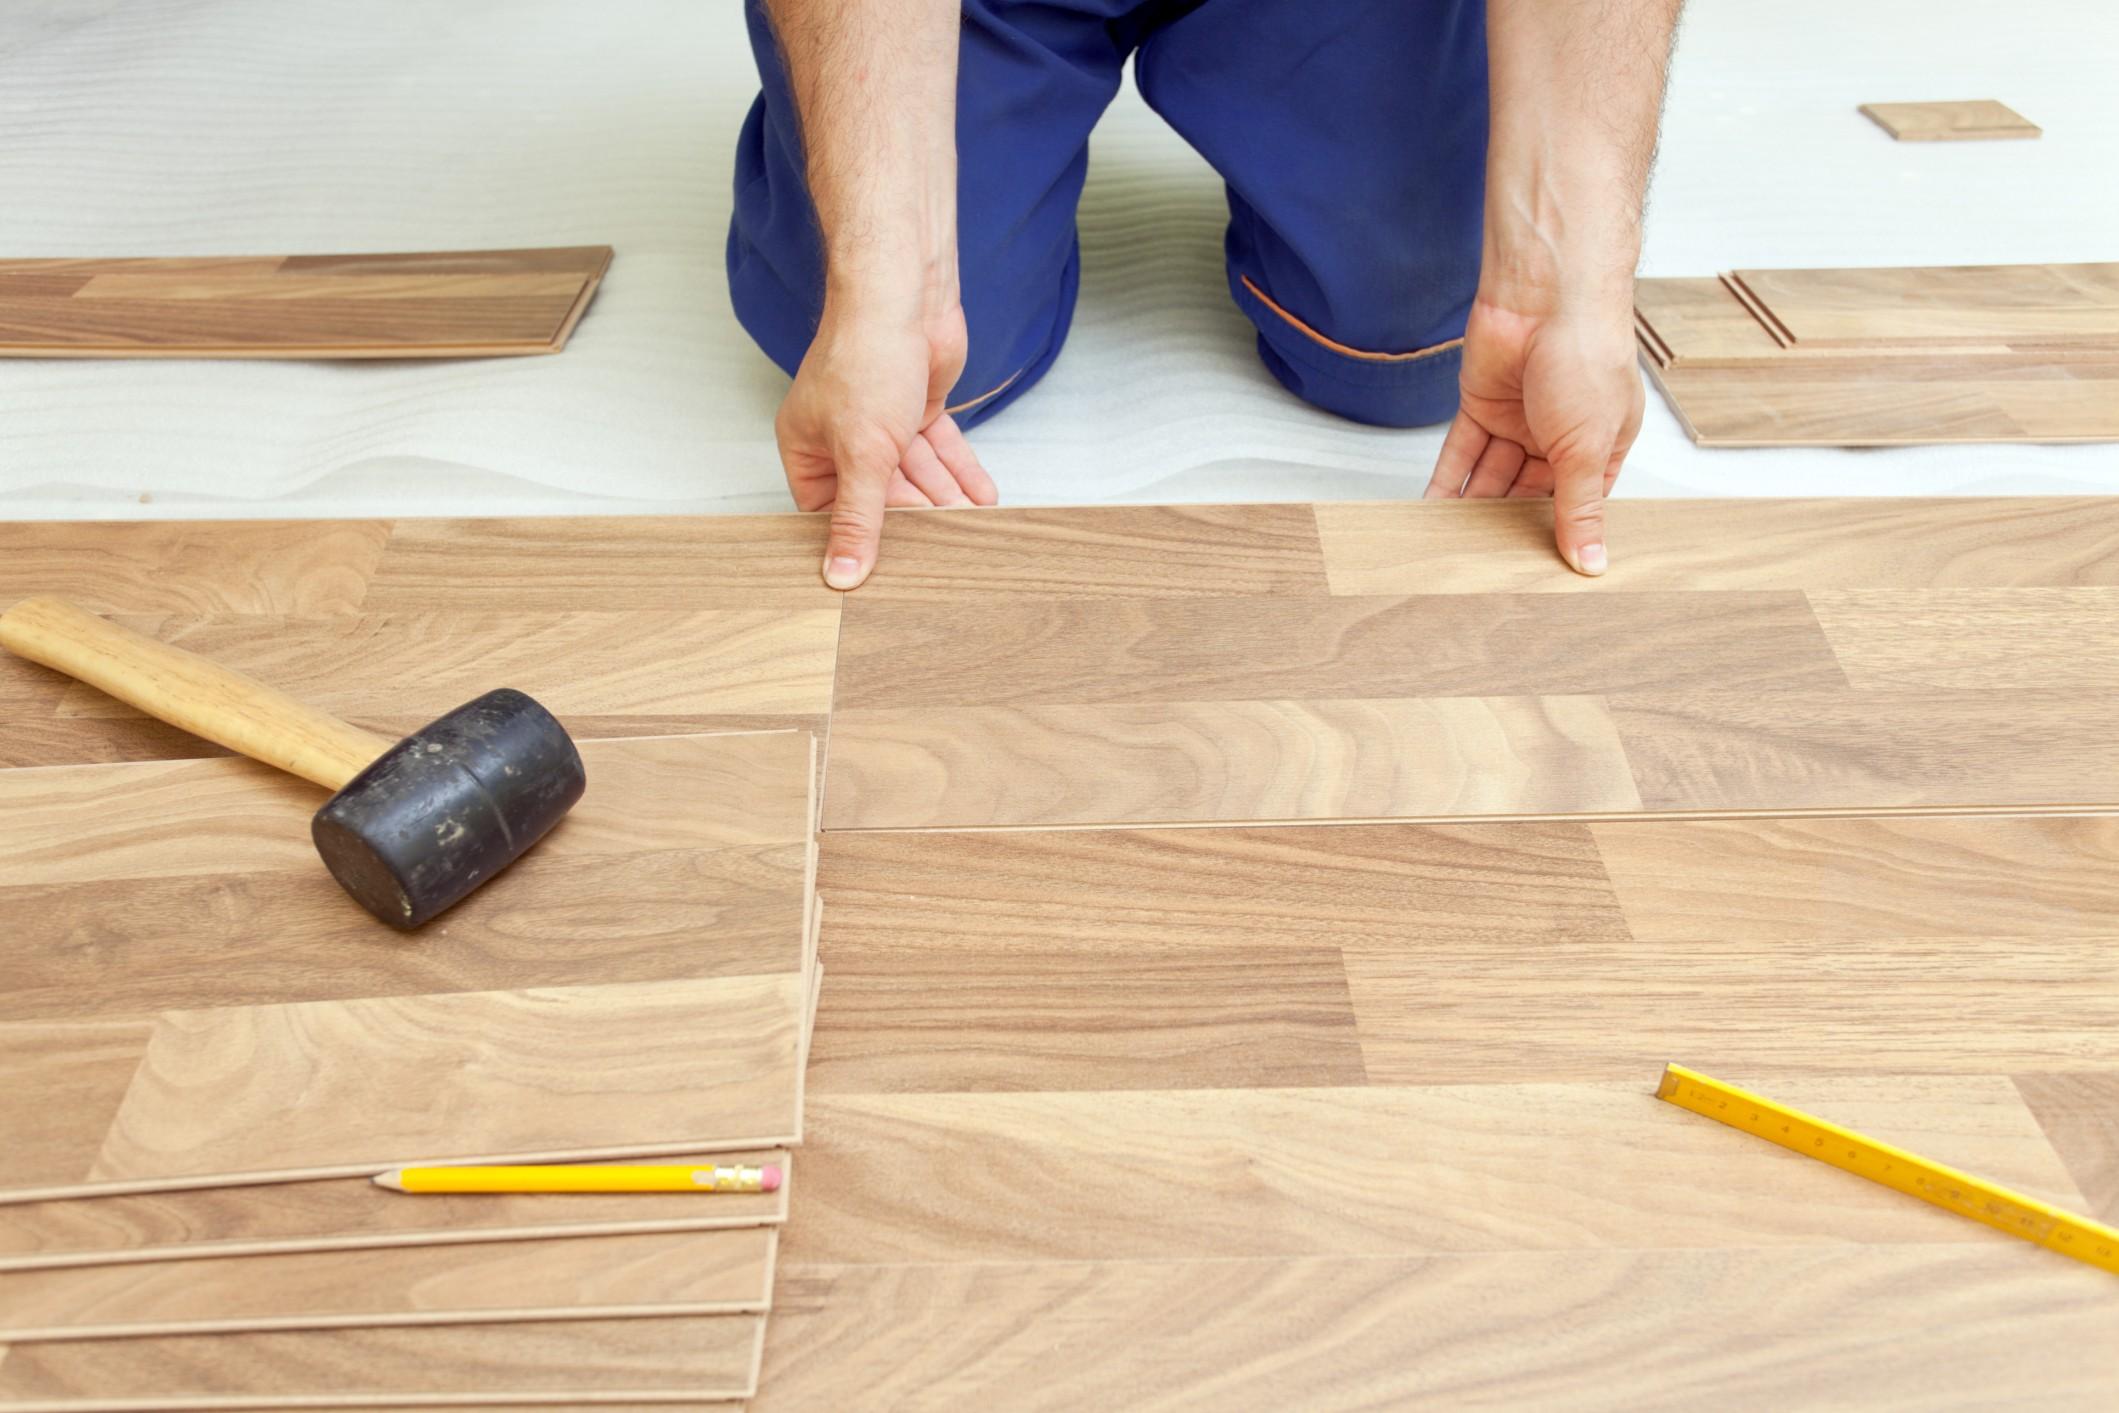
A set of tools designed for installation of floorboard:
- Jigsaw. An ordinary jigsaw made in South Korea, Japan, European Union countries or in the United States of America is suitable for domestic use. In the hardware store you can find quite good copies of domestic manufacturers. The main thing that the power of the device was not less than 550 watts.
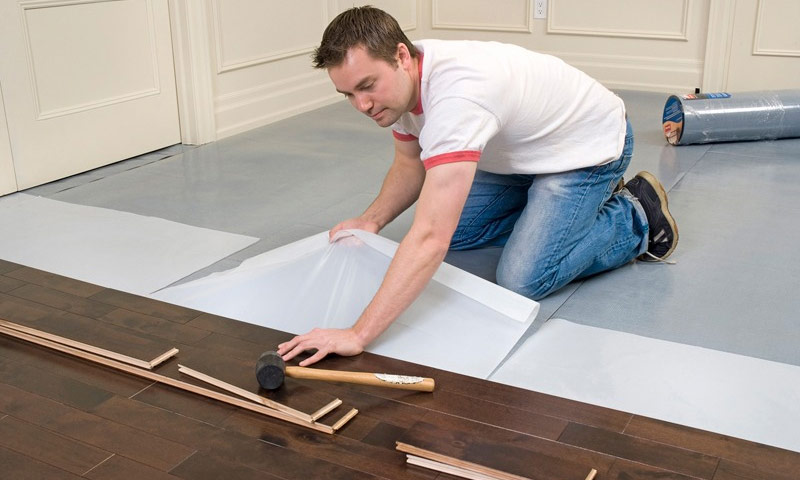
- Hammer or mallet. It is not necessary that this hand tool be from a well-known manufacturer, for domestic use any one that will be at hand.
- Tape measure and square. Suitable for measuring work.
- Pencil. You can use the building, you can - normal.
- Mounting bar. Using this device you can reduce the load on the lock joints and on the floorboard itself. Cracks and chips in this case are excluded.


- Wedges. They are used as restraints between the wall, the door and the floorboard.Remember that it is unacceptable to lay building materials without limiters, otherwise at the time of temperature and humidity drops the board may fail.
- Cutters and staples. Required to secure the last row.
- Hacksaw. A wood saw may be required when fitting the last planks.
- Perforator. With it, drilled holes designed to dock at the location of the heating system. The first holes are made with this tool, and later work is done with a jigsaw.
- Stouslo. It will be an indispensable tool when installing the baseboard.
- Sealant and notched trowel.

Types and methods
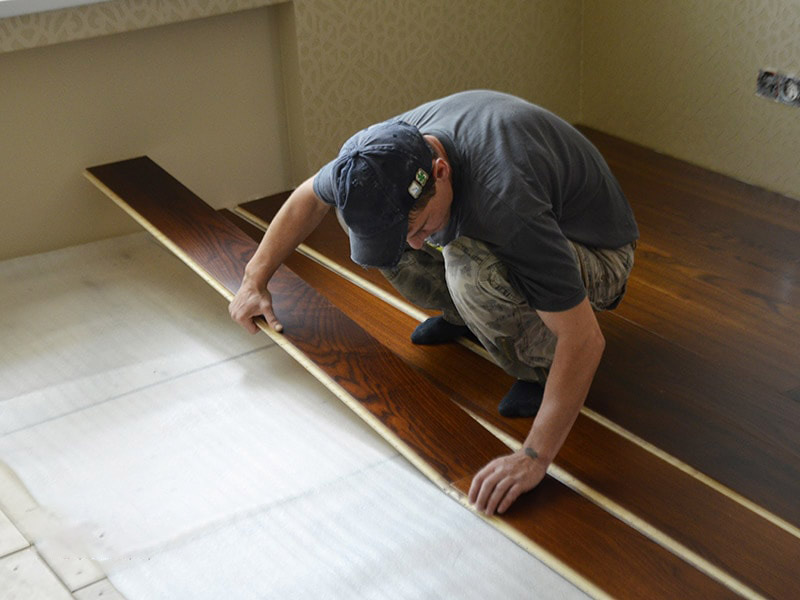
Floating method of laying the floor is the most popular around the world. Of the restrictions can only be called the size of the room - it should not be more than 60 square meters. At the same time, the base should be leveled, and the parquet board should have either a lock connection, or an ultra-block, or combines.
Masters recommends the lock connection kombilok, it is more convenient to work with him and it is reliable in operation.
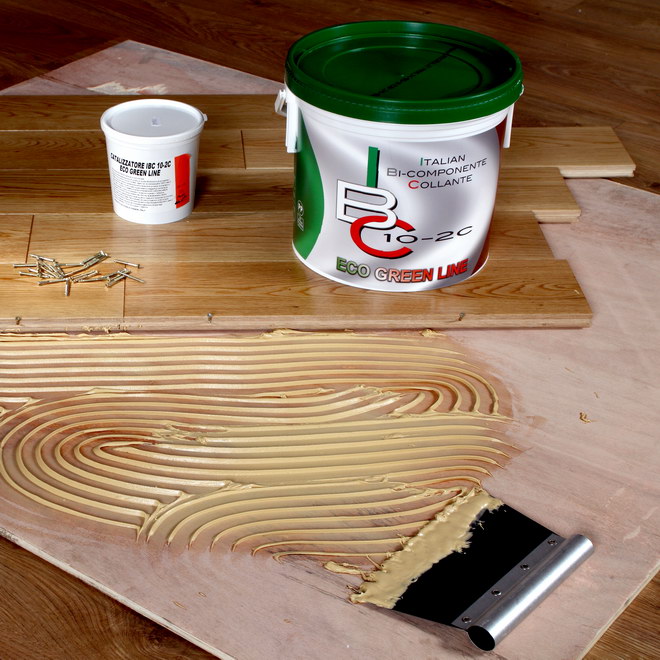
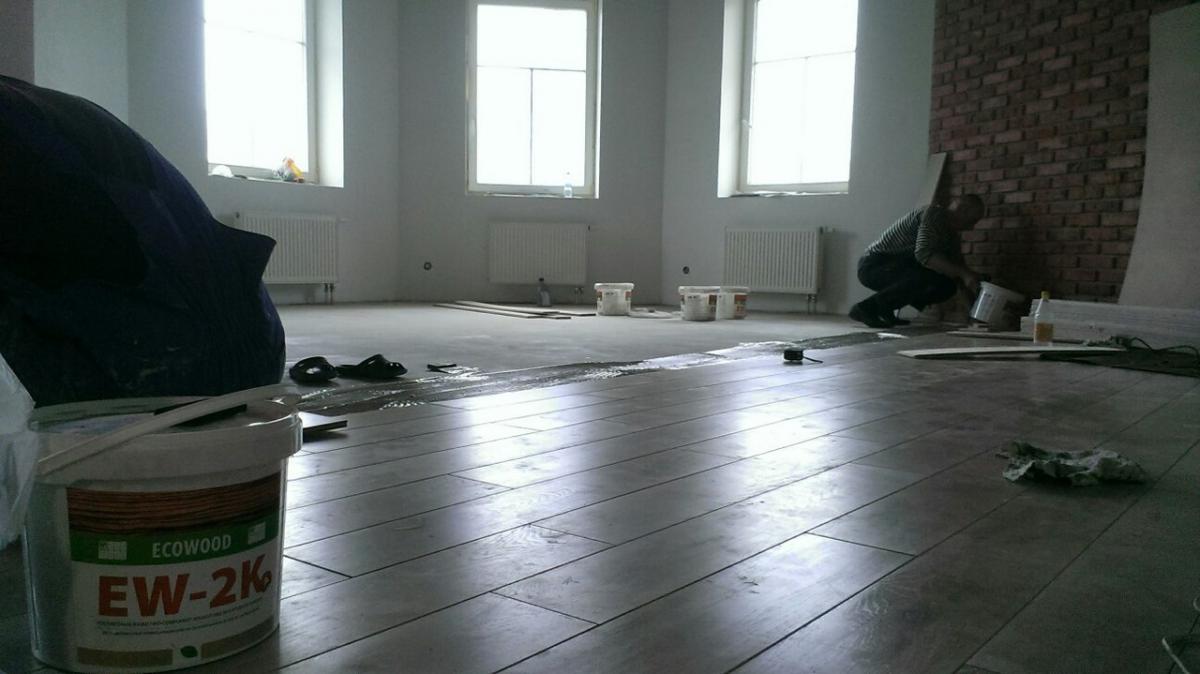
The second method of laying floorboard - on polyurethane glue.When it is, the concrete base should be leveled, the surface should be dried and dry. The moisture parameter of the screed should not exceed three percent. On the screed fit special sheets of plywood, which are subsequently polished.
Glue is applied to the surface using a spatula, floorboard to improve the effect hit with a bar. Dries glue for about 24 hours. But remember that some manufacturers advise to apply their adhesive mixtures, so it is best to get acquainted in advance with the recommendations of the manufacturer.
In some cases, experts resort to a screwdriver and screws. If you fix the board with screws at a certain angle, then it will be securely attached to the base. This method is known in the handler environment as mechanical.

Above were considered methods of fastening the board, now it is worth getting acquainted with the ways of its installation.
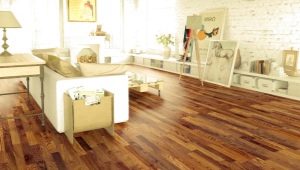
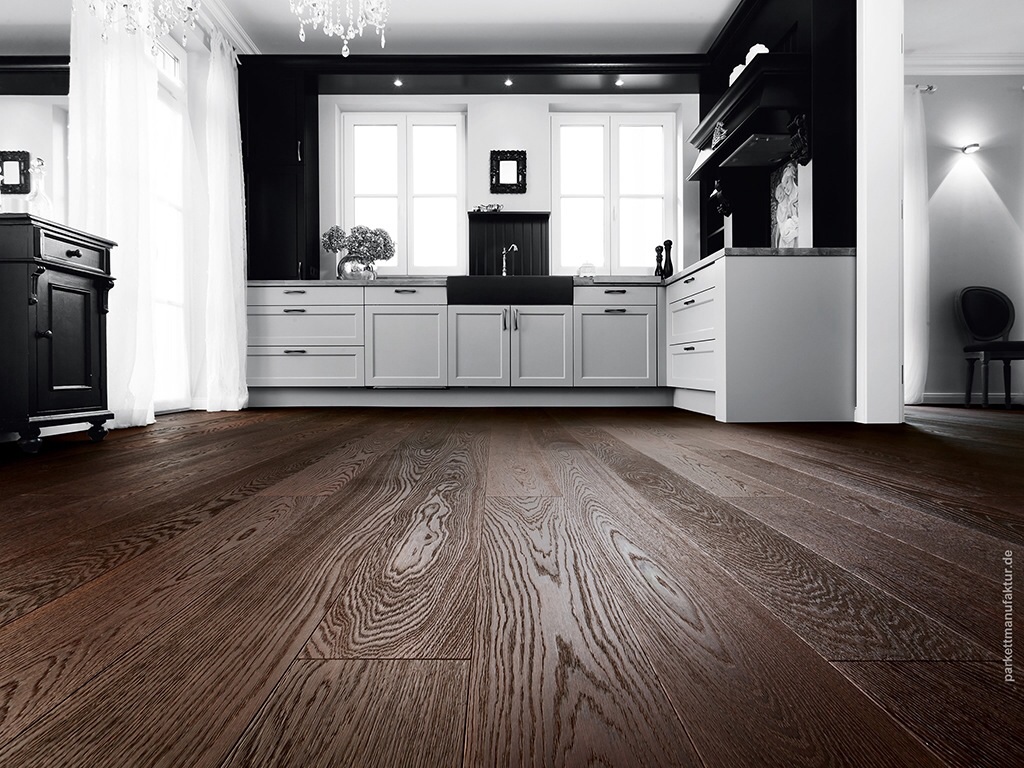
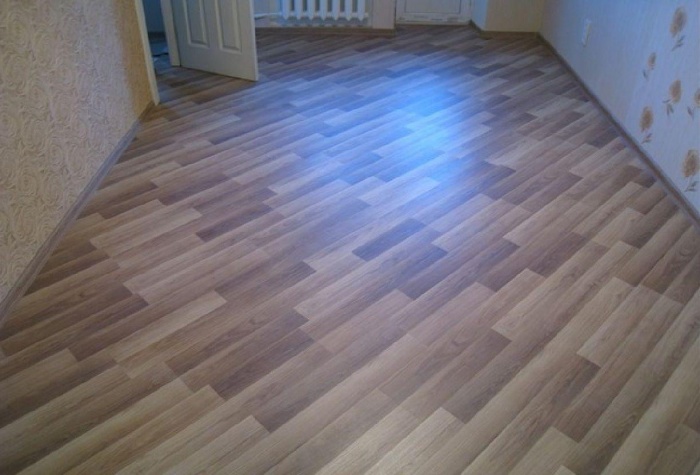
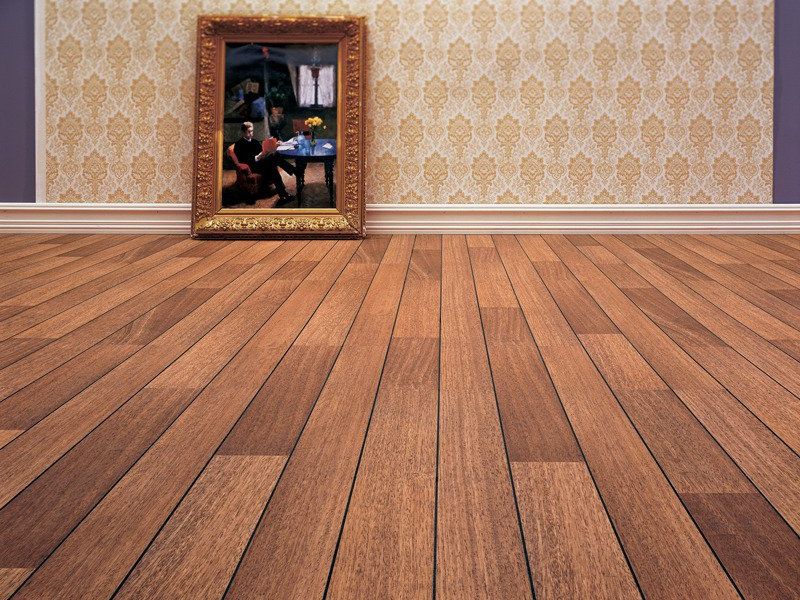
It is easiest to lay the floorboard either along or across the room. Often this method is chosen because installation does not require specific skills and experience. If you lay the floorboard along - along the length, then the room will visually become longer, and if across, then on the contrary, it will increase in width.
To enhance this visual effect will help the mirror.This must be taken into account in the premises of non-standard form.
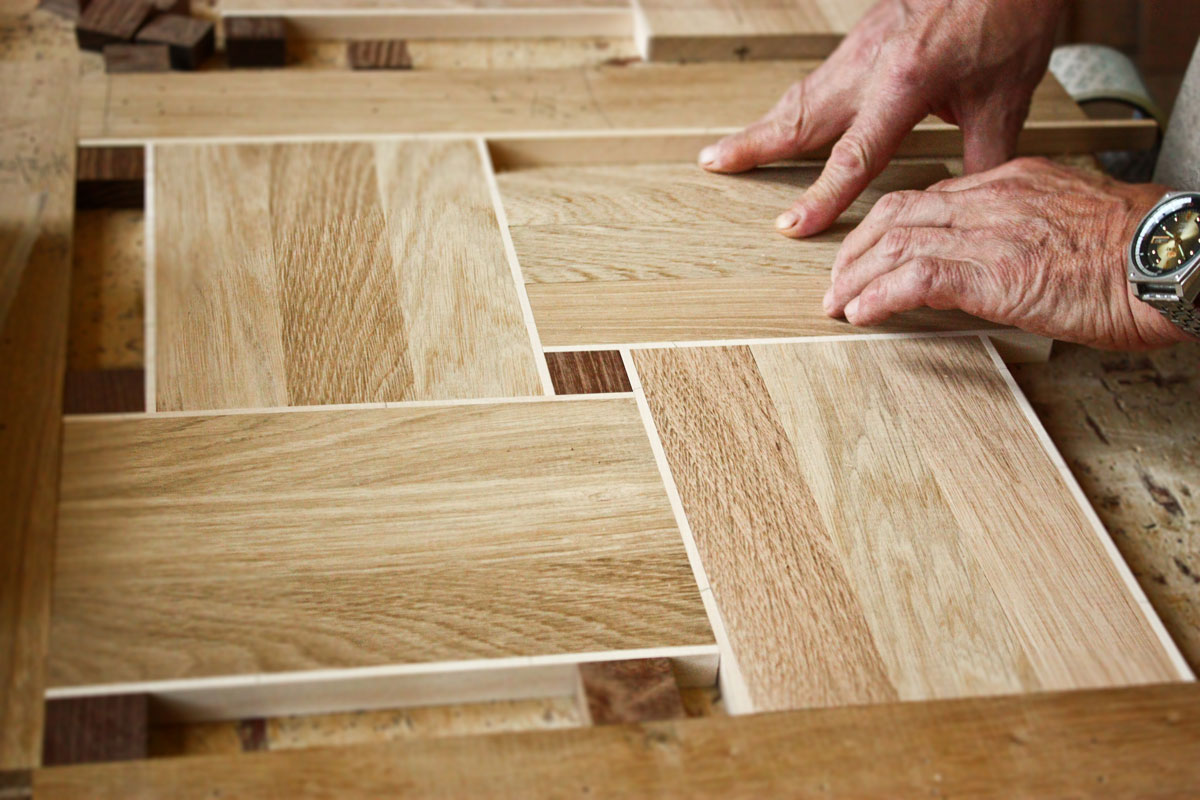
Diagonal masonry can only be done by professionals. It is less economical compared to laying along or across, as it produces a sufficient amount of trimming. From the point of view of design, the method of laying diagonally is best applied in square rooms. For proper cutting, a miter saw is required. The angle of the cut should be equal in some places to 45 degrees, in others - 30 degrees.
Laying begins in the center of the room. To maintain a straight line, you need to stretch the thread or draw a marker on the floor. The first row is the central one; it is possible to continue laying from it in one direction or in another.
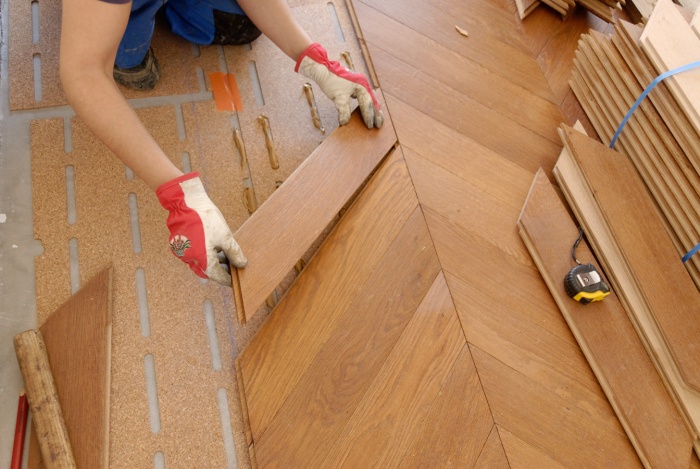
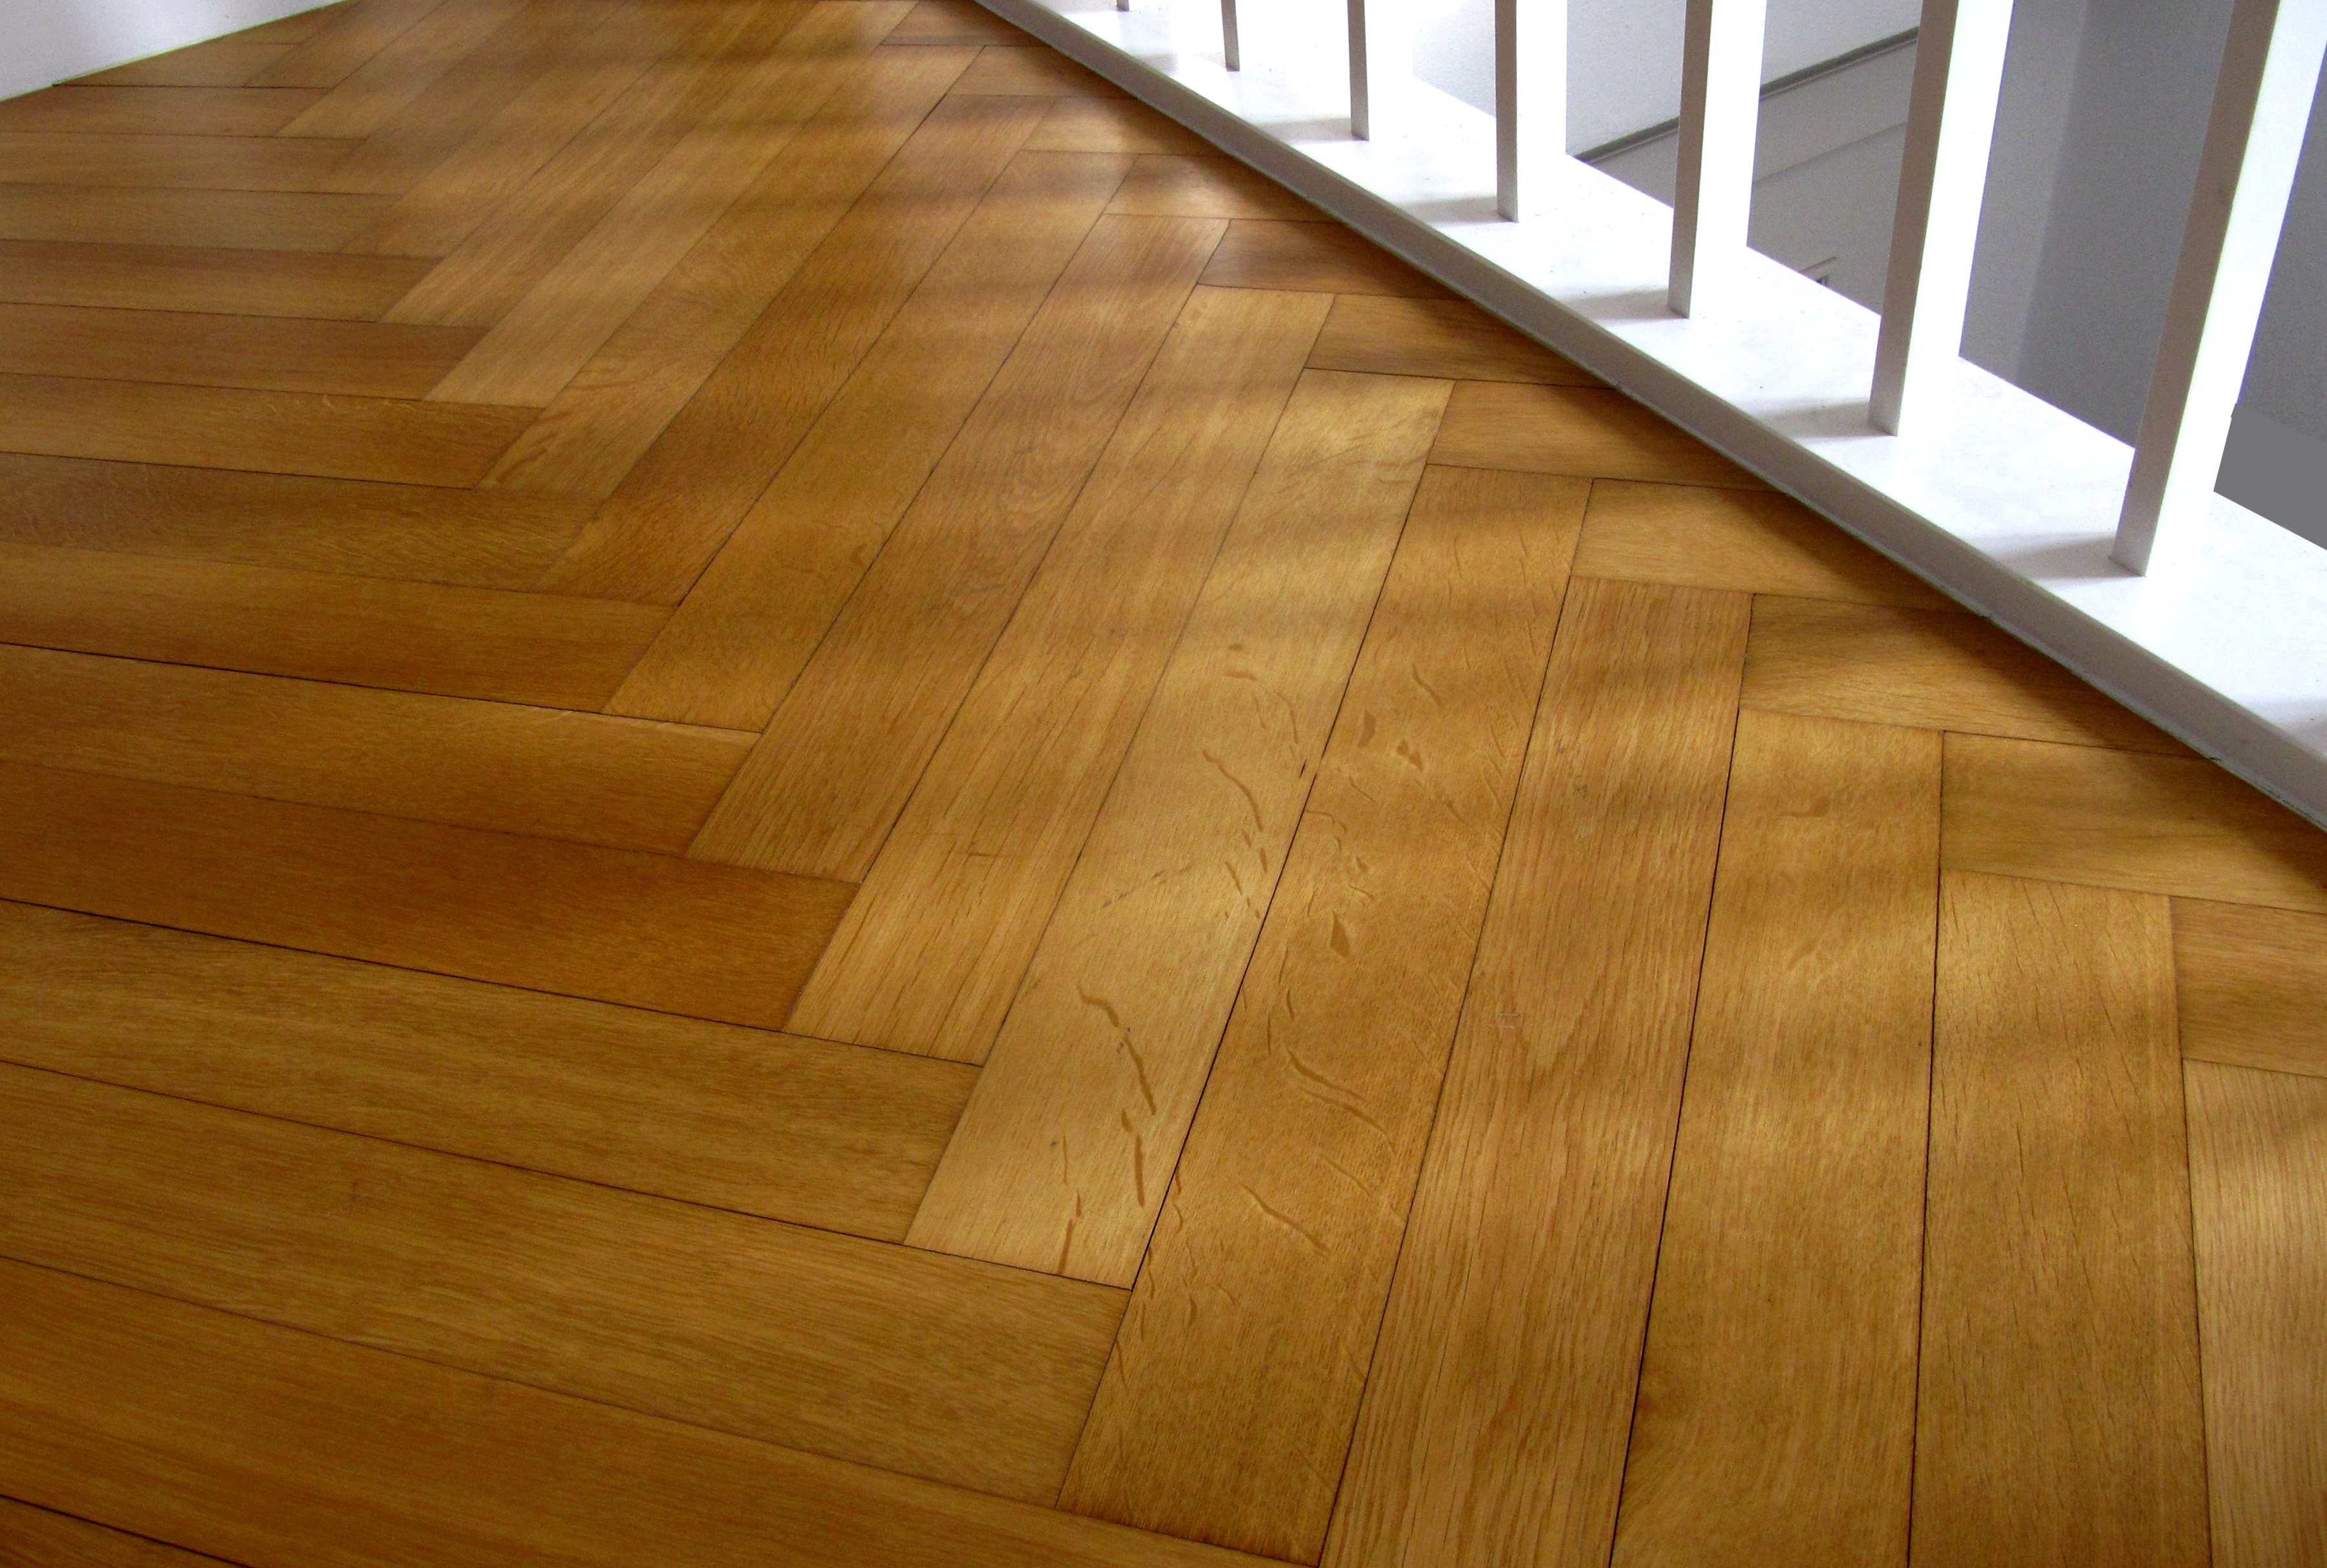
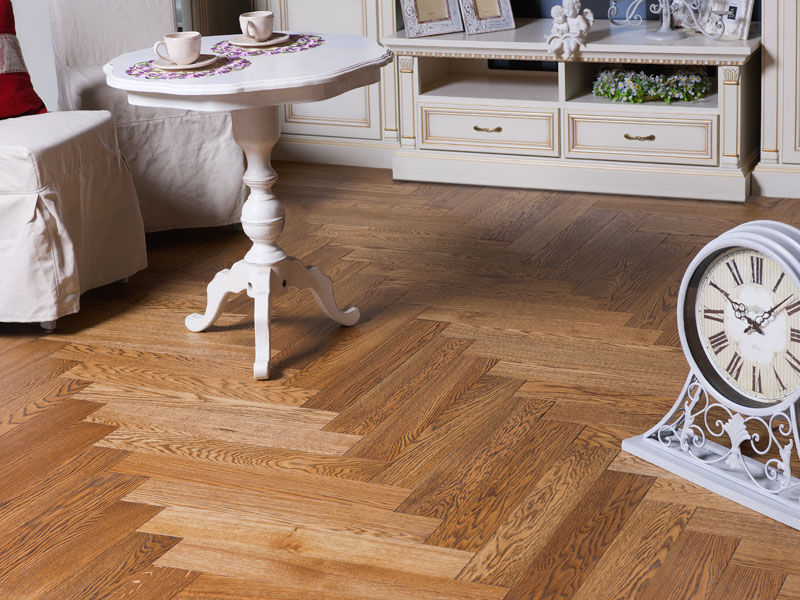
Herringbone layout is known to many since the Soviet times. In this way fit parquet. The principle of installation is no different, the only difference is only in the length of the floorboard - it significantly exceeds the length of the parquet.
The deck laying is slightly different from the longitudinal method - the displacement of the new row should be more by half of the previous floorboard.Thus, a good fixation is achieved, which means that the life of the floor covering is increased.
Foundation preparation
Before you lay the floorboard, you need to take care of the base. Draft floor not only levels the surface, but also contributes to noise reduction and heat insulation. The craftsmen recommend making a capital base and never return to it. This approach saves not only money, but also time and energy.
Draft floor has two varieties - dry and liquid. The first type is done on logs, and the second is done with concrete. For wet floors, you can use ceramics. Only need to repel from the presence in the hardware store and from the financial situation.
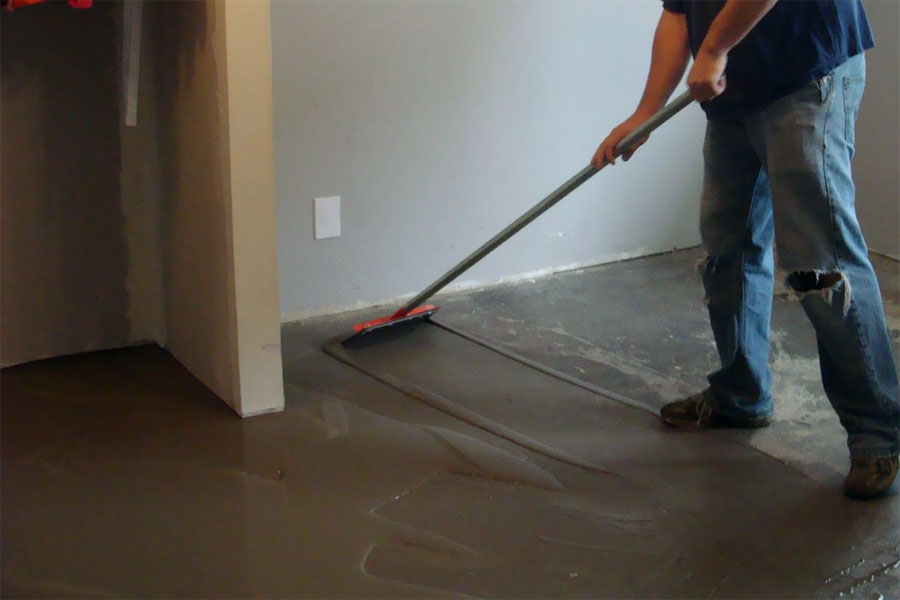
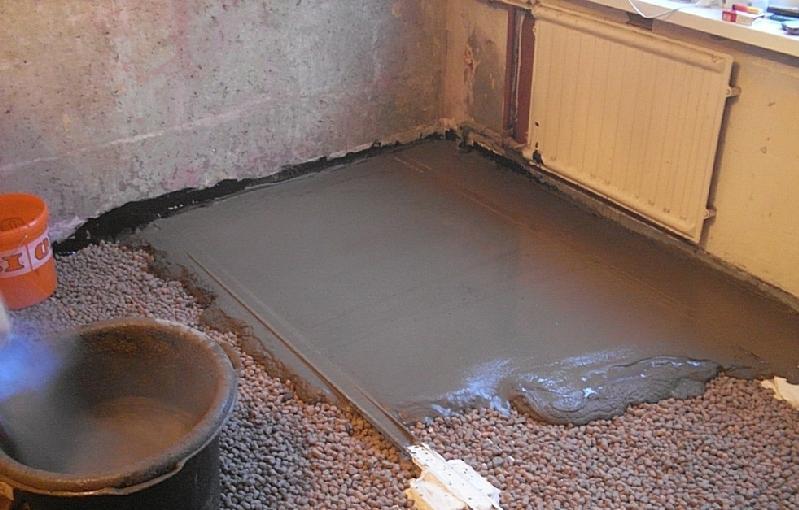
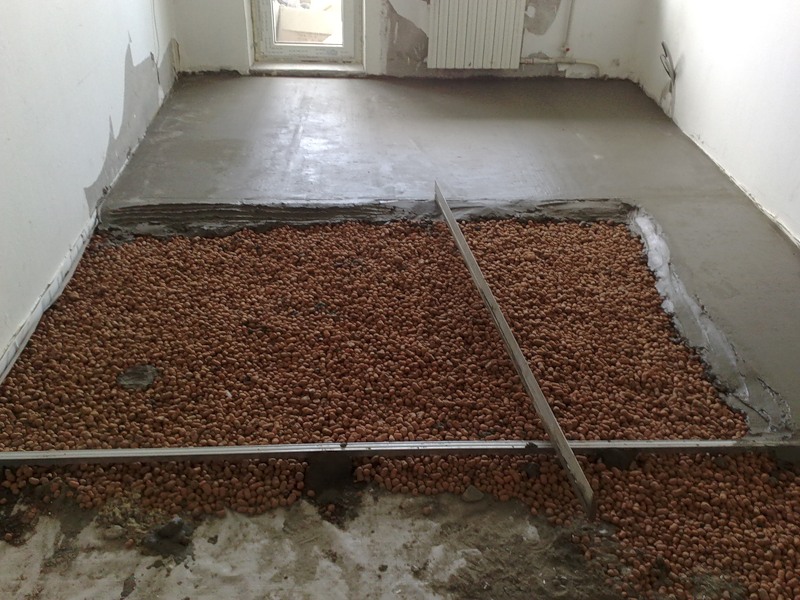
Bulk subfloor, mainly made in prefab urban homes. This is due to the fact that floors in such houses are made of reinforced concrete slabs. In country houses you can make a concrete screed, but you need an appropriate foundation for this.
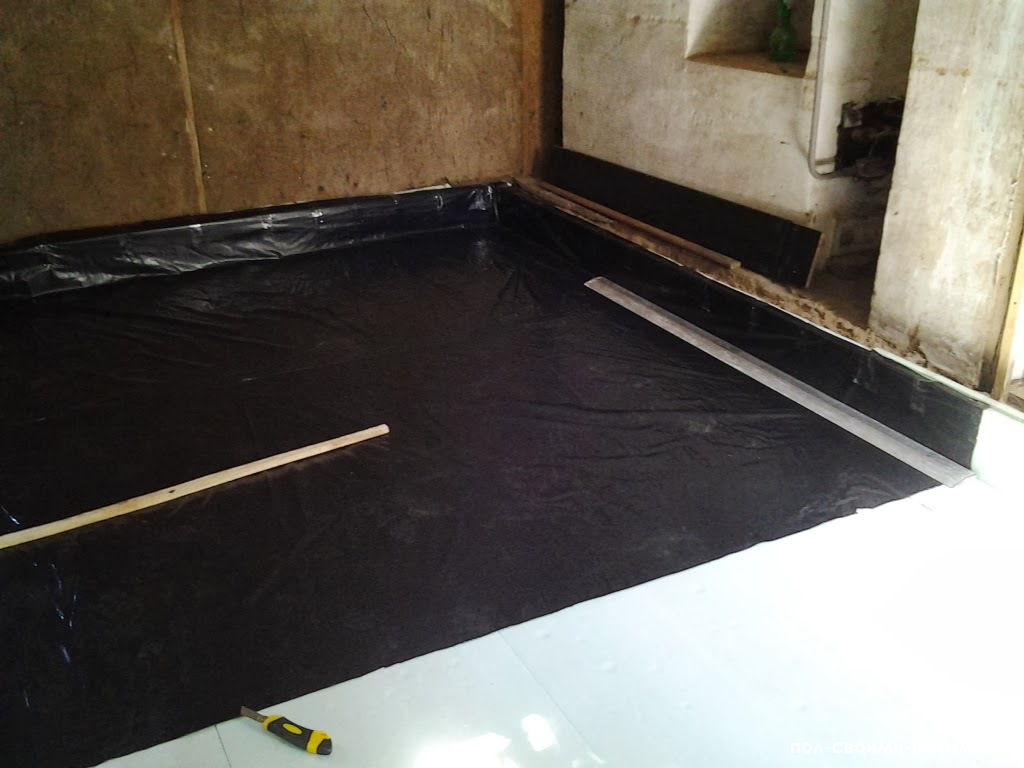
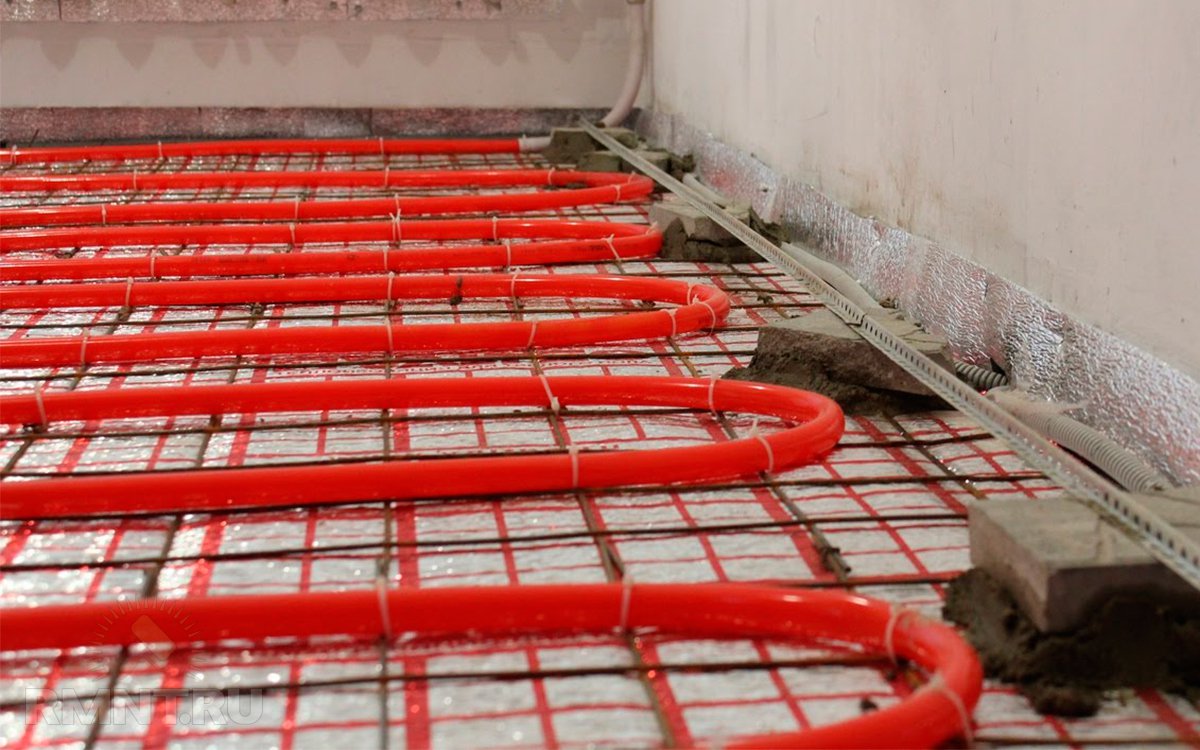
Remember that you need to pour the concrete screed only after fixing the waterproofing. For this is quite suitable polyethylene film, sold in a hardware store.
If waterproofing is not done, it is likely that the liquid concrete through the cracks will get to the neighbors living on the floor below. Therefore, the film must be fixed thoroughly, and it should be supplemented with penoflex along the edges of the room.
The next layer of "cake" is the insulating material. Of the frequently used can distinguish polystyrene and penofol. The latter has an additional coating consisting of aluminum foil, which reflects the heat. Polyethylene foam is a novelty in the construction market, its cost is slightly higher than its predecessors, but due to its unique features, the material is gaining popularity.
It will be useful to cover the insulating material with another layer of waterproofing.
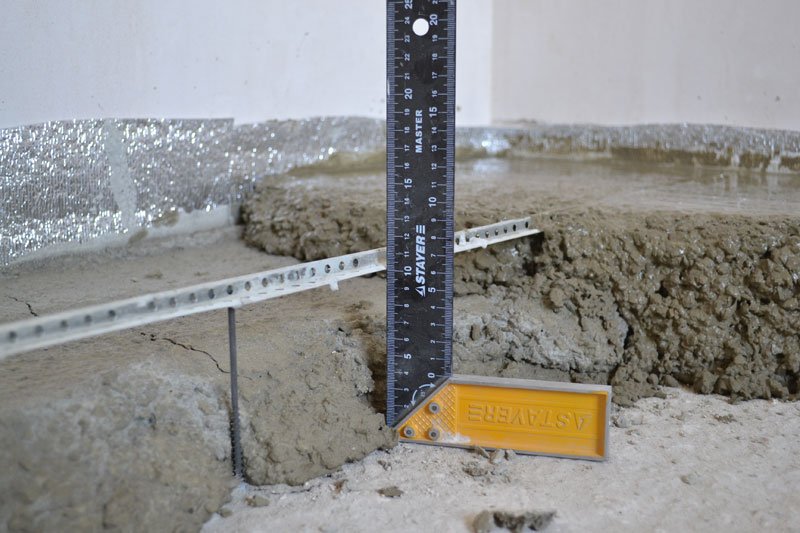
Before you flood the floor with a concrete screed, you need to set up beacons. On them the coupler will be leveled subsequently. For accuracy, you should use the building level, it should be of suitable size and characteristics.
Concrete ceramite has improved sound absorption and thermal insulation. He is the benchmark in this segment and is head and shoulders above obsolete concrete.
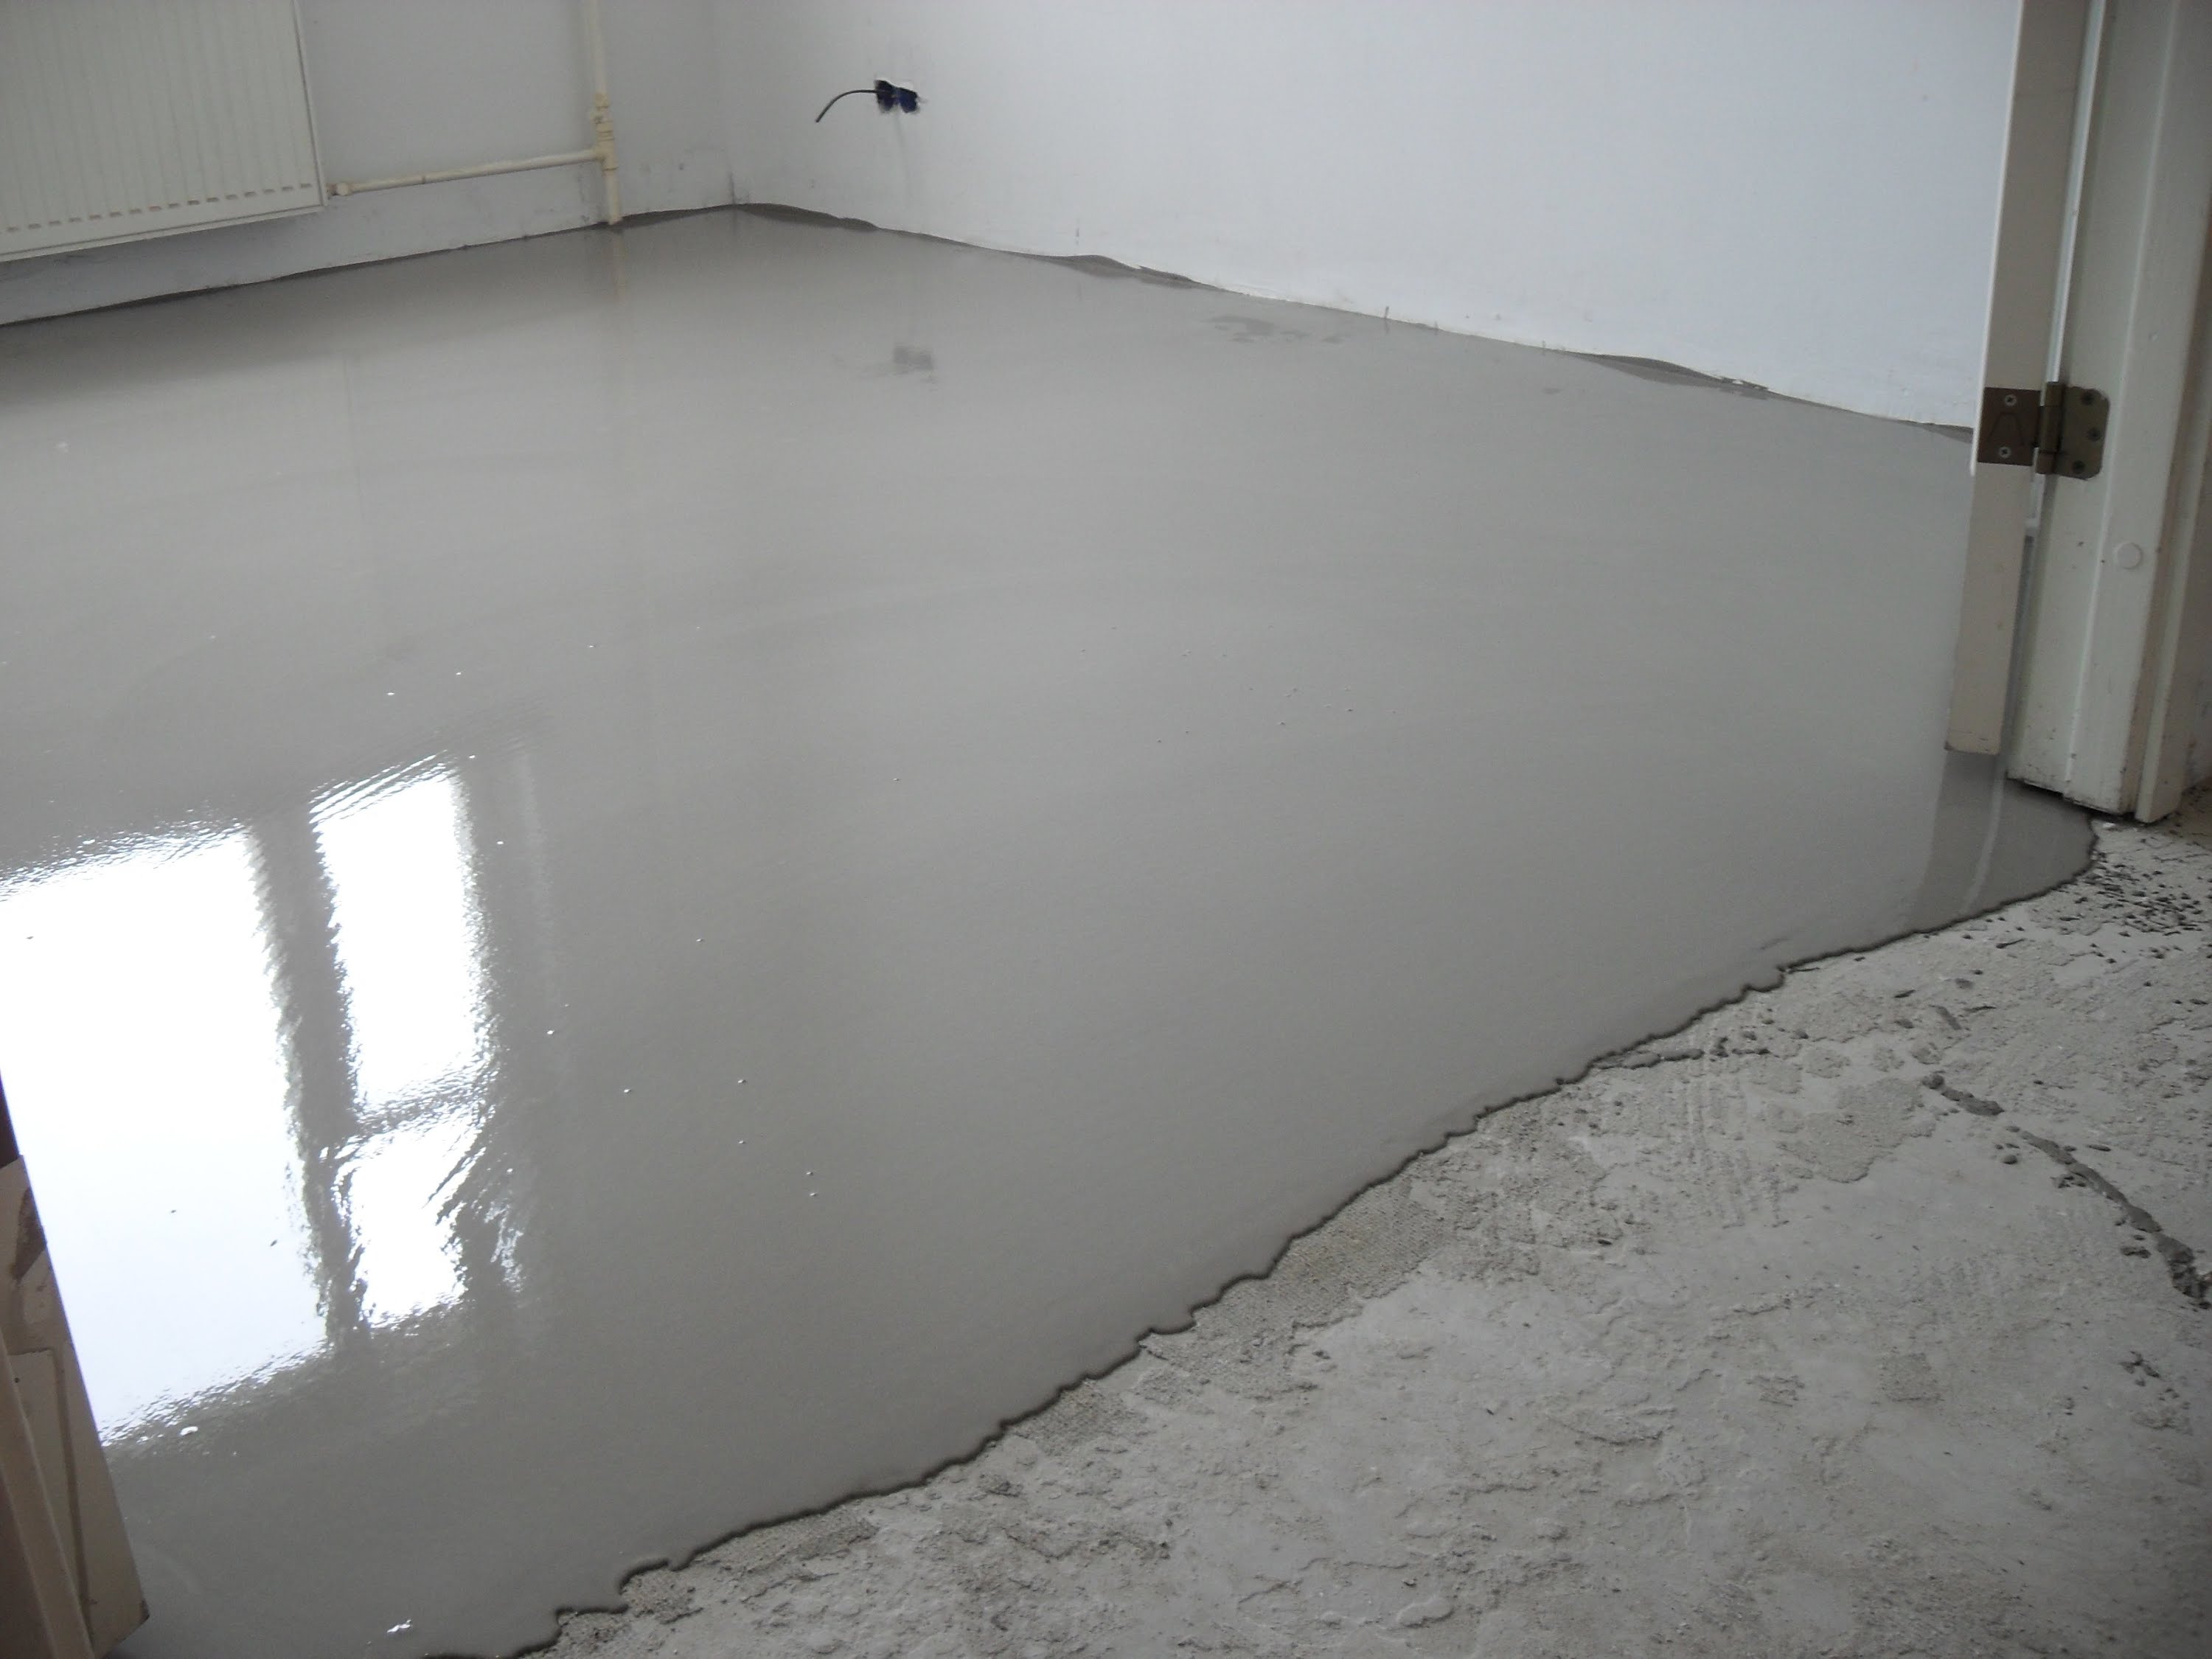
Knead the solution according to the instructions, in the future for a short time, pour it on the prepared base. The alignment of the concrete screed is carried out with the help of a tool - the rules, do not forget about the beacons. Surpluses need to be cleaned, not sparing. After the surface becomes smooth, the floor is left for drying.
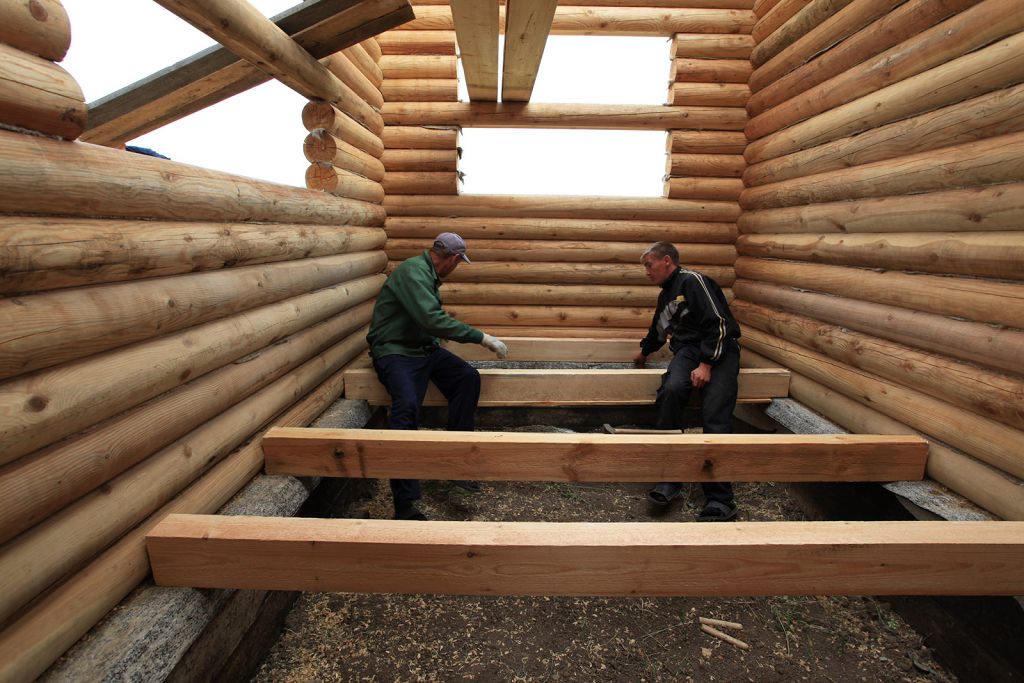
Draft wood floor mounted on a concrete base. To do this, lags are placed on the prepared surface.
In this case, the base must be leveled and not have significant distortions, otherwise the floorboard laid on such a base will “creak”. And the floor itself will be crooked.
If the concrete floor in the room is uneven, it is recommended to slightly “fix” it. It is correct, from the point of view of the handlers, to use an extra layer of tie. A small amount of the solution is enough to just trim this drawback. The next stage begins after it is completely dry.
In the future, you need to put on the screed waterproofing film. All gaps are thoroughly glued with ordinary adhesive tape. As soundproofing, you can use a natural material - cork wood or the previously mentioned foamed polyethylene. Without this layer, there is a high probability of noises when walking.
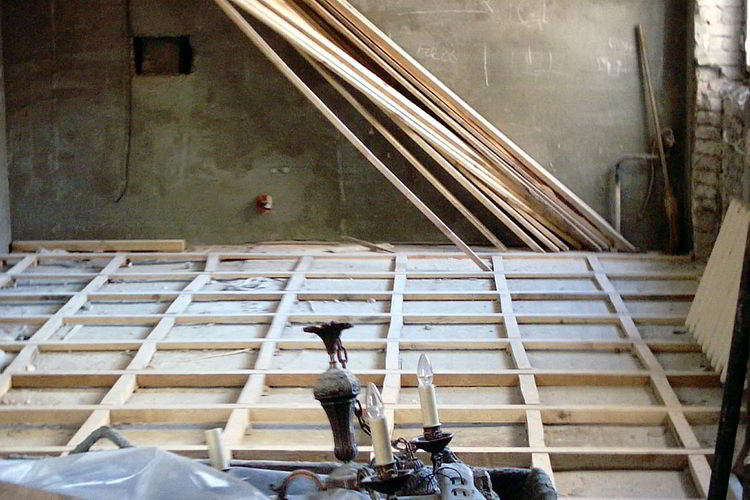
Directly for the lag it is best to use a high-quality edged board made of solid wood with dimensions of 25 x 100 mm. Save in this case is undesirable, otherwise the result will be deplorable. Remember that the miser pays twice. Lags are installed on the noise-canceling layer, the result of the work is checked all the time with the help of the construction level. Fix logs to the floor corners.
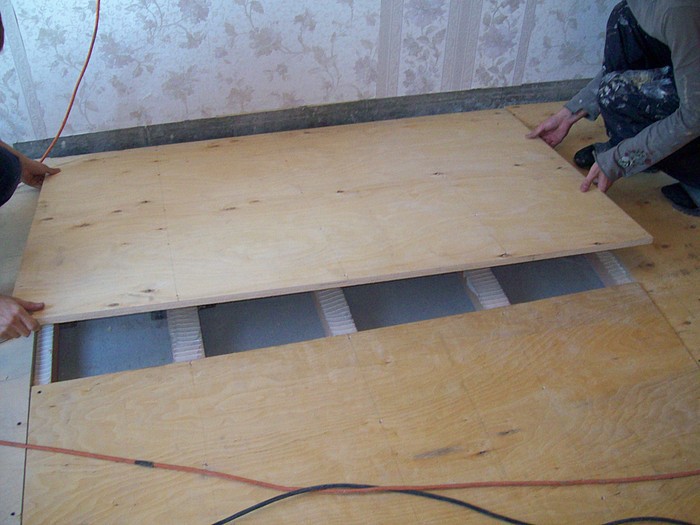
Insulation fits between the lags so as to be flush with themThere should be no projections. Plywood is laid over this structure. If the budget is limited, then plywood can be replaced with a floorboard.
Remember that the thickness of the plywood must be greater than 20 mm, otherwise it will be deformed under the weight of the flow of people. Massive furniture can also have a negative effect on thin plywood.
Plywood must be laid in a staggered manner. This contributes to the fact that the joints will not be in the same row. Installation is carried out using a screwdriver and screws. Do not forget that to lay plywood need, making indentation from the wall. It must be at least 3 cm.

If the house is wooden, then the draft floor can be installed along the bearing beams.Beams in this case will play the role of lag, which means that thanks to this, you can save a lot. But remember that pdistance between the beams should be small, otherwise you will have to "increase" the additional base of the lag.
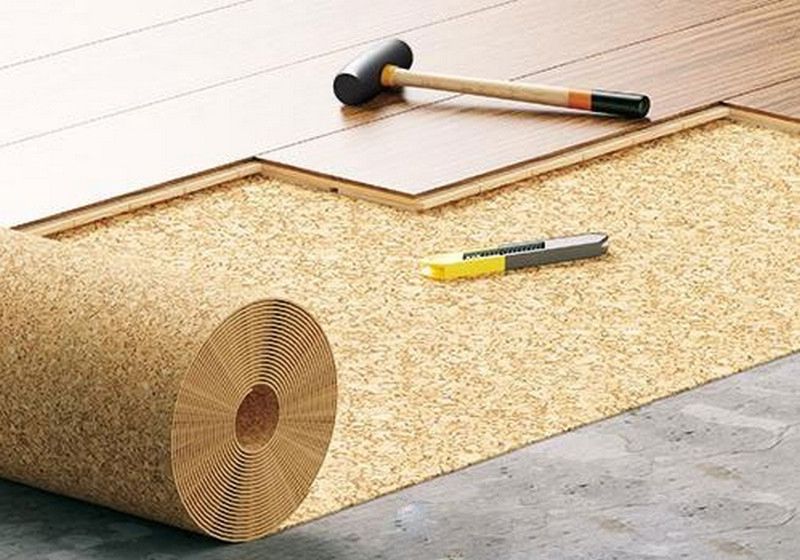
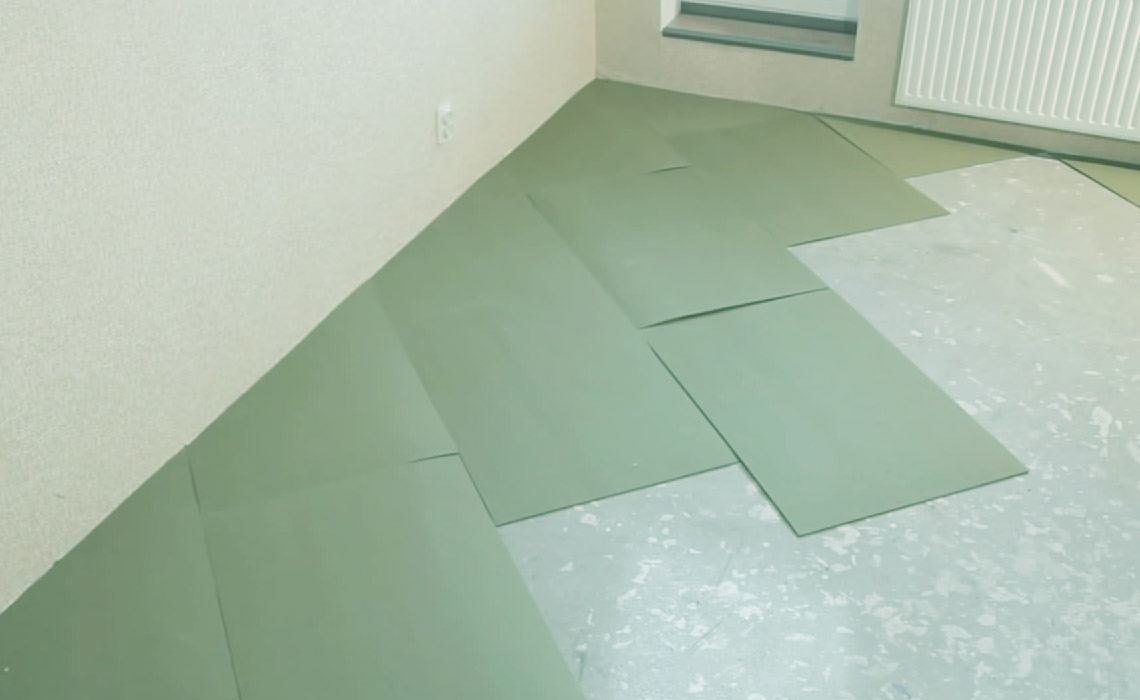
Substrate selection
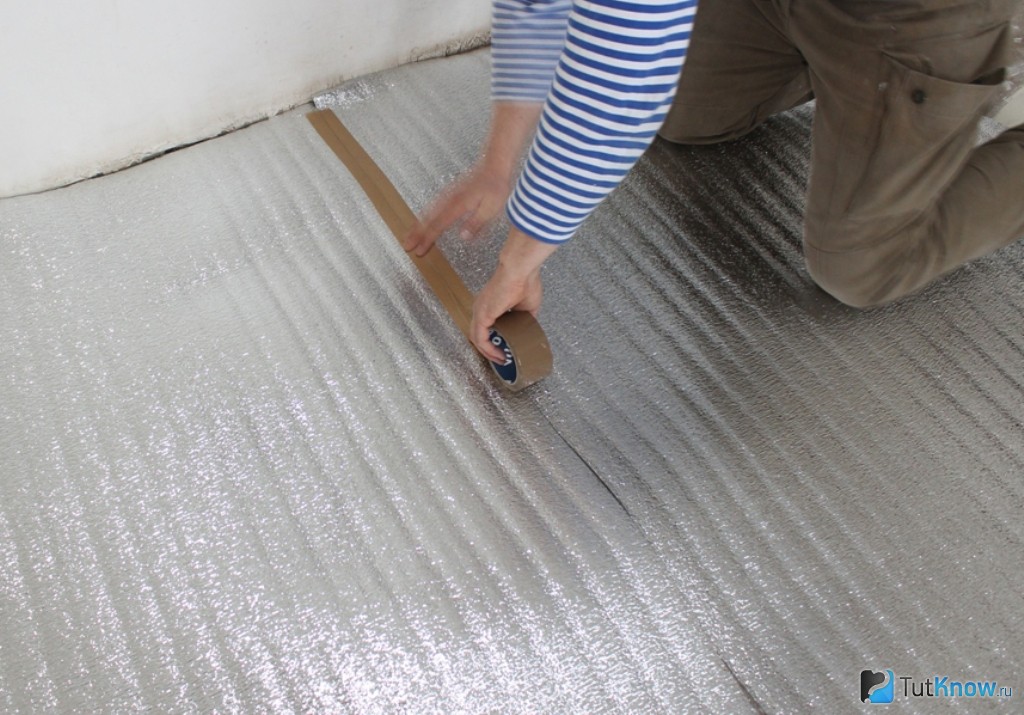
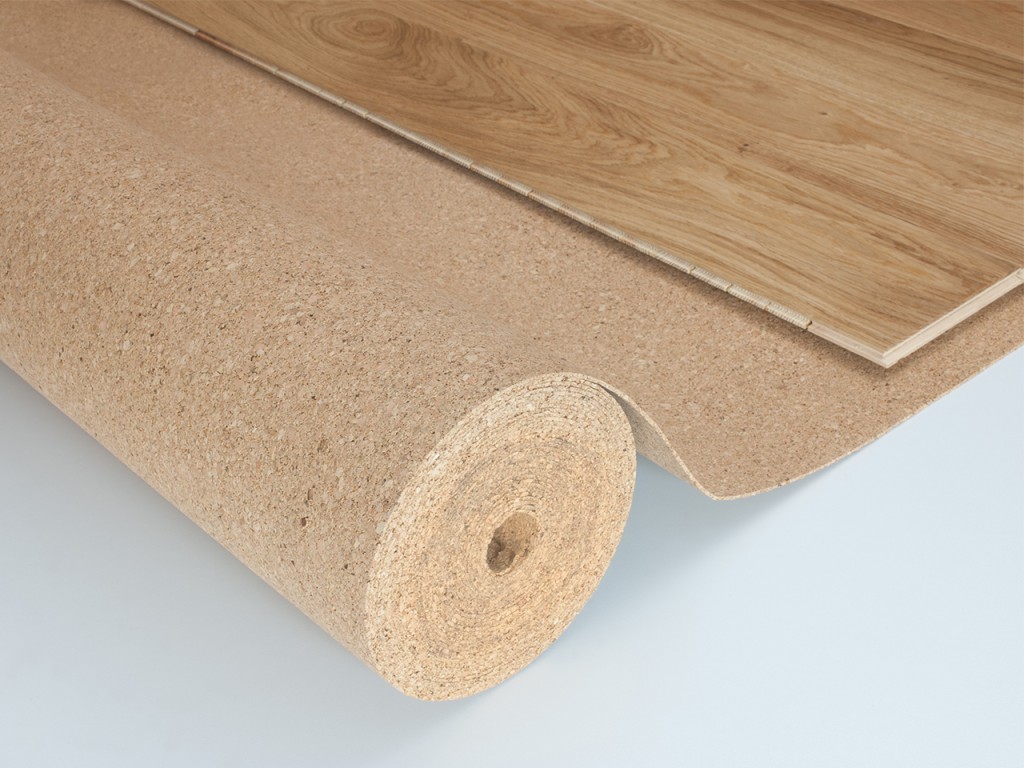
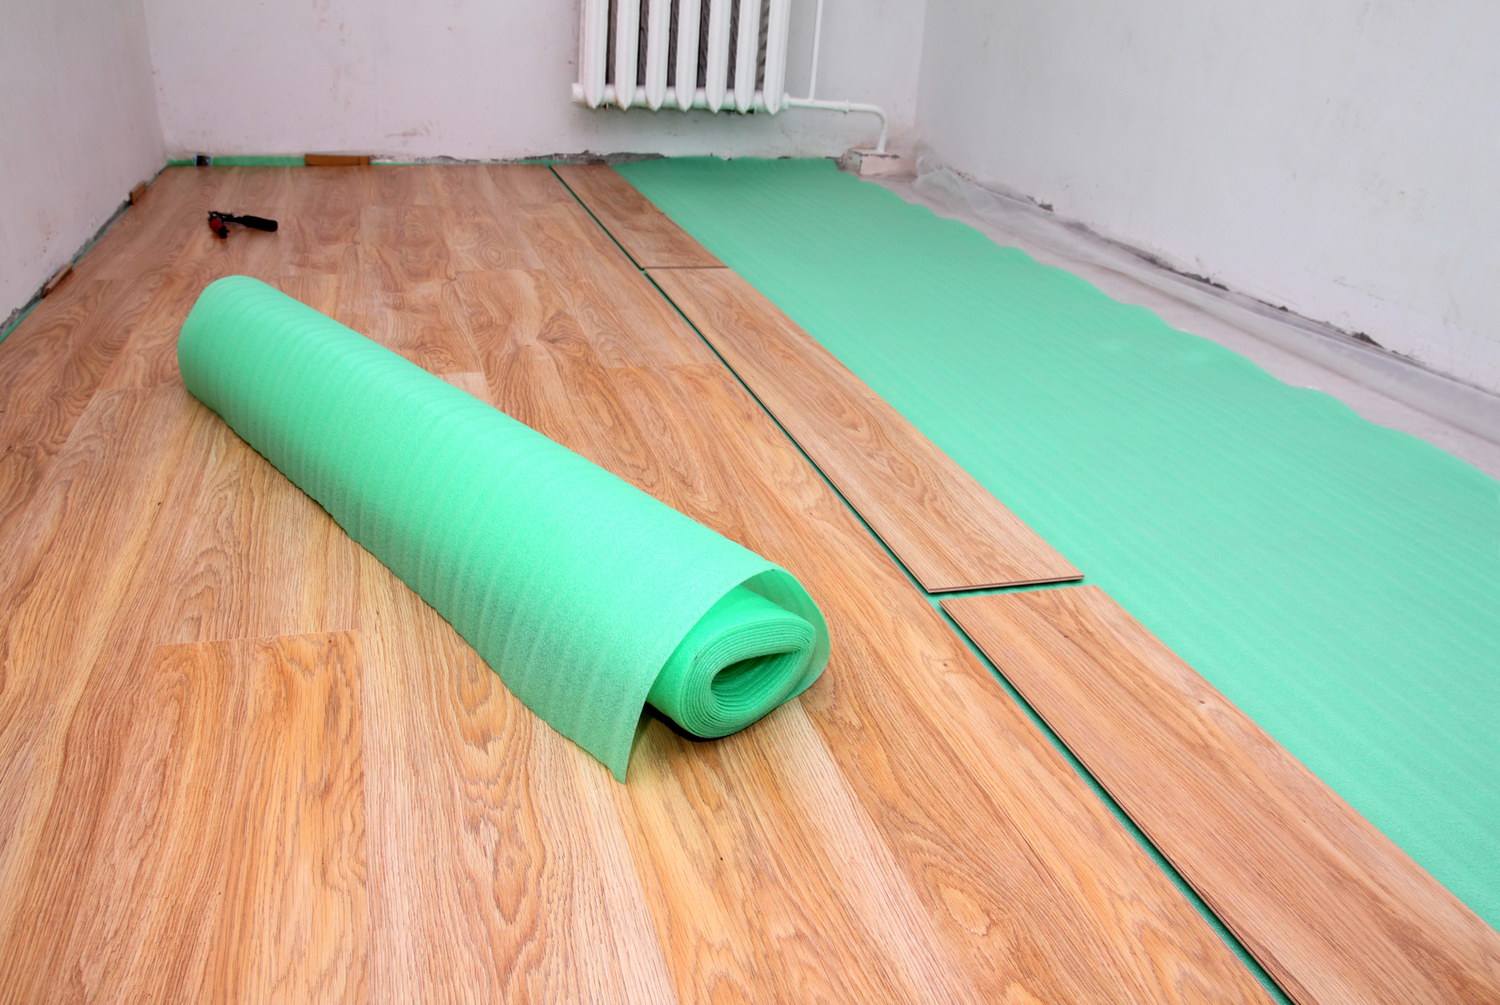
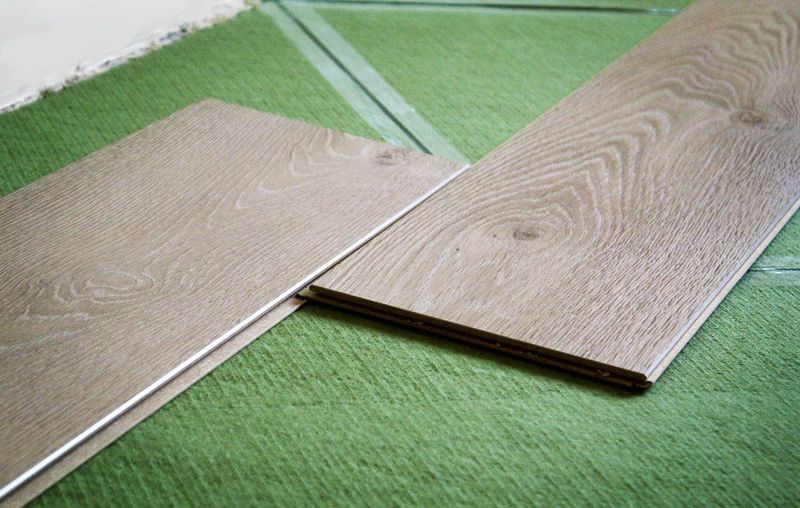
If the parquet board is laid without using polyurethane glue (or any other), then the substrate must be laid between the product and the base. Manufacturers also give recommendations on the underlying layer. This layer is in the form of non-woven rolls or is ordinary mats.
The substrate contributes to the tight fit of the floorboard to a concrete or wooden floor, thereby reducing the likelihood of squeaks or other extraneous noise.
The underlay protects the lock joint from premature failure. It retains heat well in the room, prevents damage to the floorboard under the action of moisture.
Despite all the advantages, it is worth remembering that they are achieved only if the thickness of the substrate does not exceed 3 mm. "Overdose", as in the case of tablets, leads to negative consequences, in particular, to the destruction of the locks of the floorboard.
The choice of substrate is determined by the type of subfloor.For concrete, you can use a "non-breathing" substrate. And for a wooden base - only from natural materials, because if you use polyethylene, the tree under the action of moisture can begin to rot.
The most affordable is a base layer of elastomer. It comes in three varieties. Unstitched polyethylene can be called common, in the second “place” - having a layer of aluminum foil - either on one or on both sides. And polyethylene foam, just do not confuse it with polyurethane and polypropylene.
The popularity of this synthetic material due to its democratic value, ease of installation, excellent water repellency. Material does not deteriorate under the action of the chemical environment. Unfortunately, there is also a significant disadvantage - during operation, the material may settle, which means that there will be air between the base and the floorboard, which can lead to the emergence of creaking.
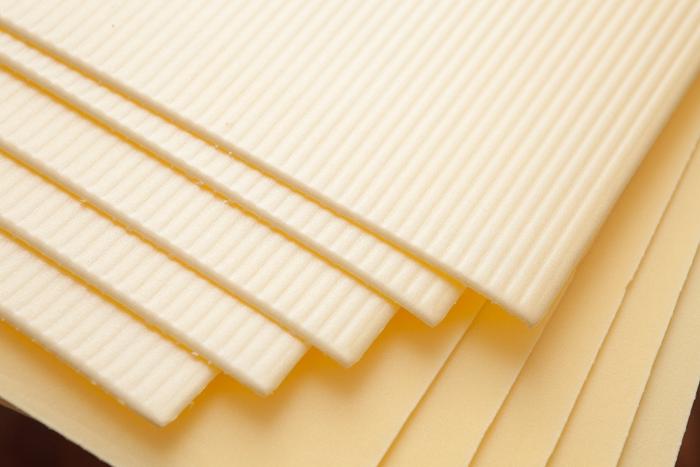
Another synthetic material is used as a base layer - polystyrene foam. On sale it can be found in the form of an accordion, there are also advanced versions with a foil heat-reflecting layer.This material is easy to install, it protects the floorboard from moisture, has good noise-reducing qualities, retains heat. Unfortunately, he also has his minus - this is a high cost.
An underlay made of pine or spruce is sold in hardware stores as coniferous mats. The coniferous substrate is suitable for any bases of a draft floor. Possesses all the previously voiced qualities, like other representatives of this segment. Of the minuses, experts note the high cost and installation - it is uneconomical and time-consuming.
In addition, like any natural material, it is damaged by pests and fungal spores. It is desirable that the substrate thickness was less than 5 mm.
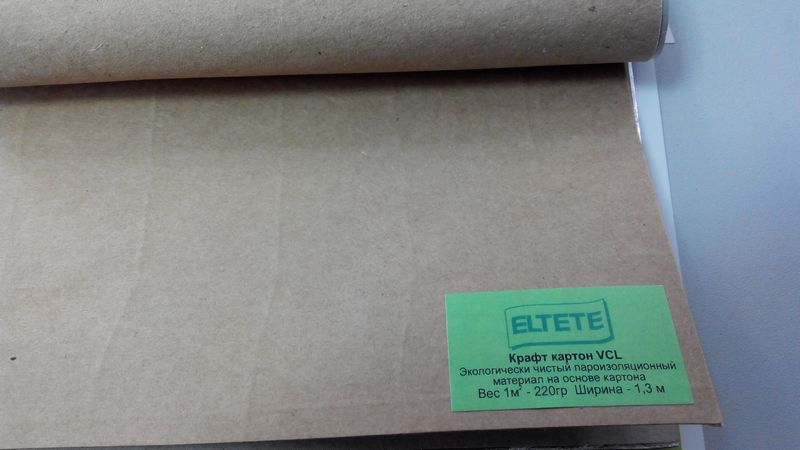
Construction cardboard was developed in the country that invented the floorboard. Therefore, we can safely recommend this underlying layer as an alternative to the others. Cardboard is very dense, it is very difficult to break, it “breathes”, has noise-reducing qualities. But like any paper, the cardboard does not tolerate moisture, laying it in the kitchens, in the bathrooms should not be. Another disadvantage is the cost.
Cork backing is available in special sheets and in rolls. This is a natural building material, obtained by pressing the bark of the tree. Oak bark is most commonly used. Glue it with different resins. Like any natural material, it is subject to the colonization of fungal spores, so you need to lay a waterproofing.
In the store there are varieties that have two layers. The second waterproofing layer is either rubber or bitumen. The addition gives the product soundproof qualities, resistance to deformation and static electricity. Depending on the presence or absence of the second layer, the thickness of the cork substrate can be either 2 or 7 mm.

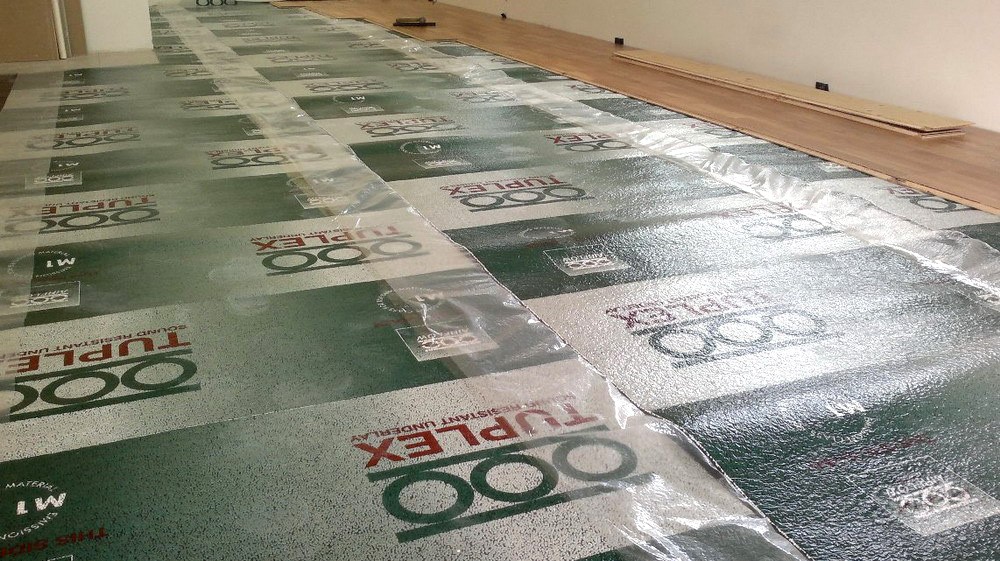
One of the latest innovations in the construction segment can be called the substrate Tuplex, which is suitable for floorboards with a thickness of over 10 mm. This is a synthetic material consisting of a double polyethylene film and filler. The filler is mainly made from polystyrene. The underlay is also suitable for the “warm floor” system. Adhesive tape is used to fix it.
The substrate for plywood is required only when leveling the base.If there is no such need, then the substrate is not needed.
You can select a false layer in any hardware store, starting only from your preferences and financial situation.
We lay on concrete
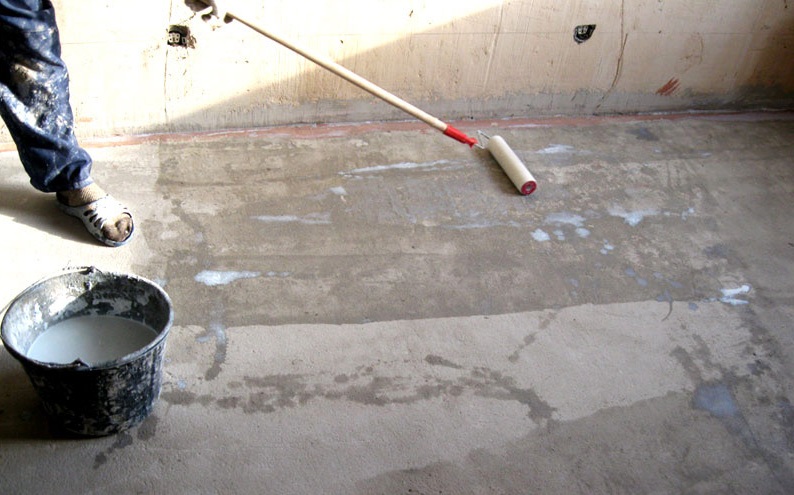
As an example, the adhesive method of laying will be considered. Before you start installing the floorboard, you must treat the concrete floor with an acrylic primer. The coating layer must not be too thick. After the primer covers the entire surface, it is necessary to wait until it dries.
Glue in its physical characteristics should not resemble liquid sour cream, it is better that it is denser. Glue is applied to the concrete base in any convenient way, preferably with a brush. It is spread over the surface with a wide metal spatula.
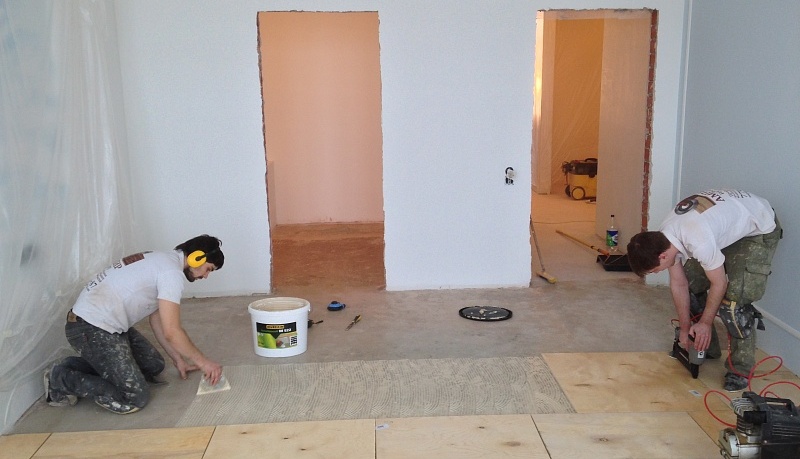
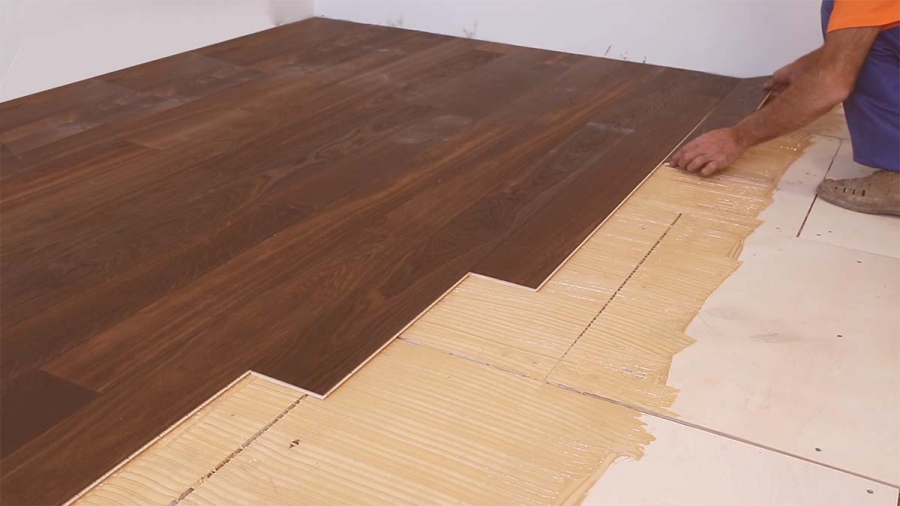
Without waiting for the glue to dry, the base layer is laid in the form of plywood sheets. Glue should be applied evenly in all areas so that the plywood is equally spaced - the work is checked using the construction level. Plywood fits in any way, there is no difference in this, most importantly, do not forget to rub the seams with acrylic sealant. After two days, the work is again checked with a level, and if the installation is carried out qualitatively, then it is necessary to fix the result - to polish the surface.
A belt grinder is suitable for this stage, it speeds up the process and performs its work efficiently. To achieve the same result with sandpaper will not work.
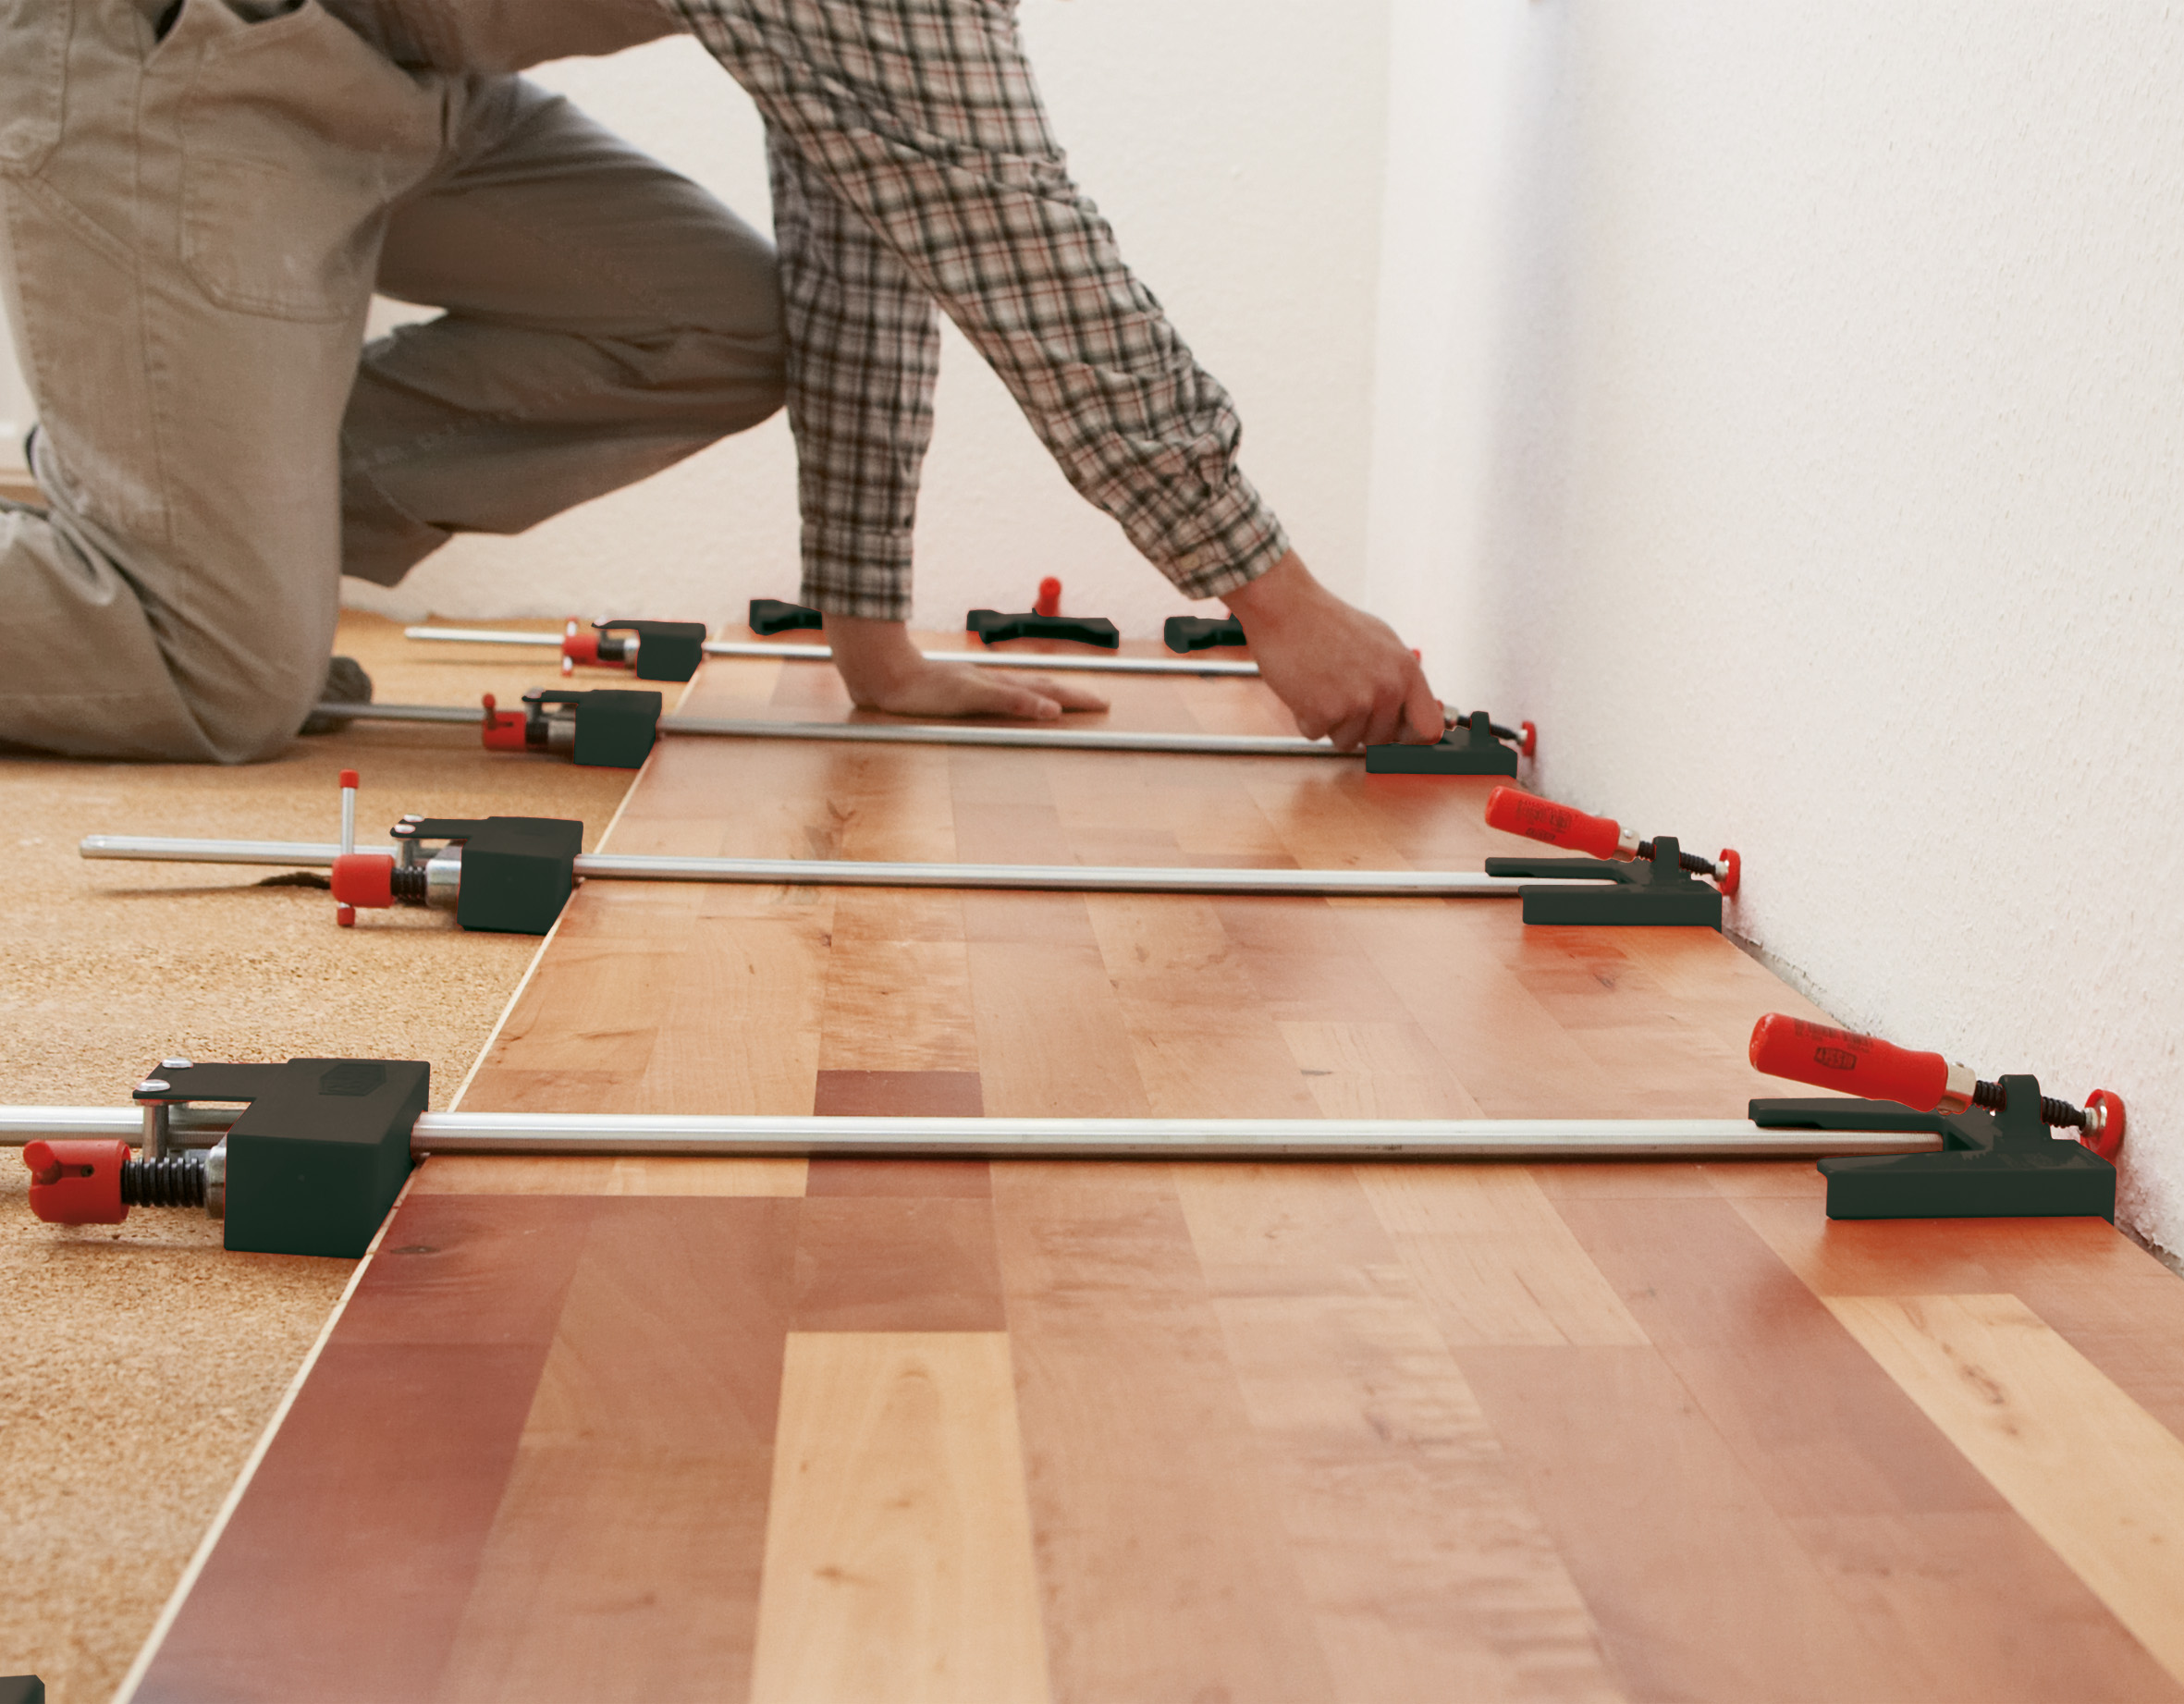
The second stage is associated with the laying of floorboard, for this is suitable either polyurethane adhesive or acrylic. First, the wedges are installed - they limit the floorboard, and the gap is 10 mm.
The glue is prepared in small containers and used in the first minutes, the board is laid spikes against the wall. To distribute the glue, you will need a trowel with a gear design.
Experts recommend applying a little glue and on the lock joint, so fixing is safer.
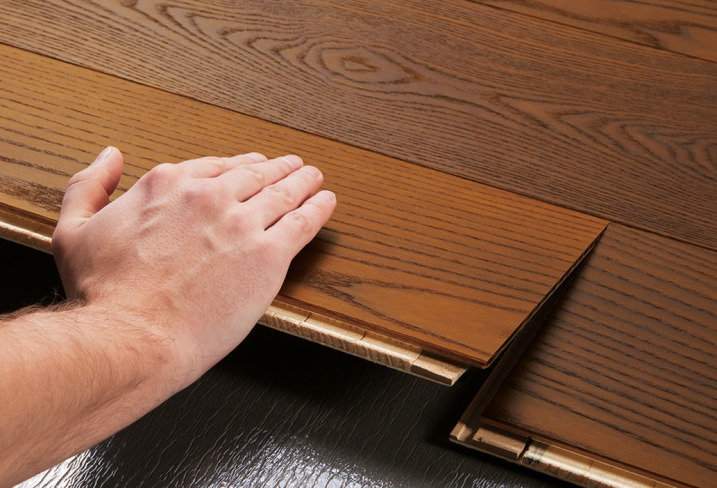
If the next row is cut to a third, then you can achieve a beautiful picture. In addition, the castle connection will keep better and will not collapse after a while. The leveling of the floorboard should be checked by the building level.
If the glue protrudes through the edges, it must be removed. After installing the floor all seams are sealed with sealant. Finishing of a parquet is done after waiting five days.
If the room has a wooden lining, the installation of the floor is made without glue and screws. The main condition is the small dimensions of the room or terrace.The castle connection in this case will cope with its task with a bang, and the floorboard will last a long time.
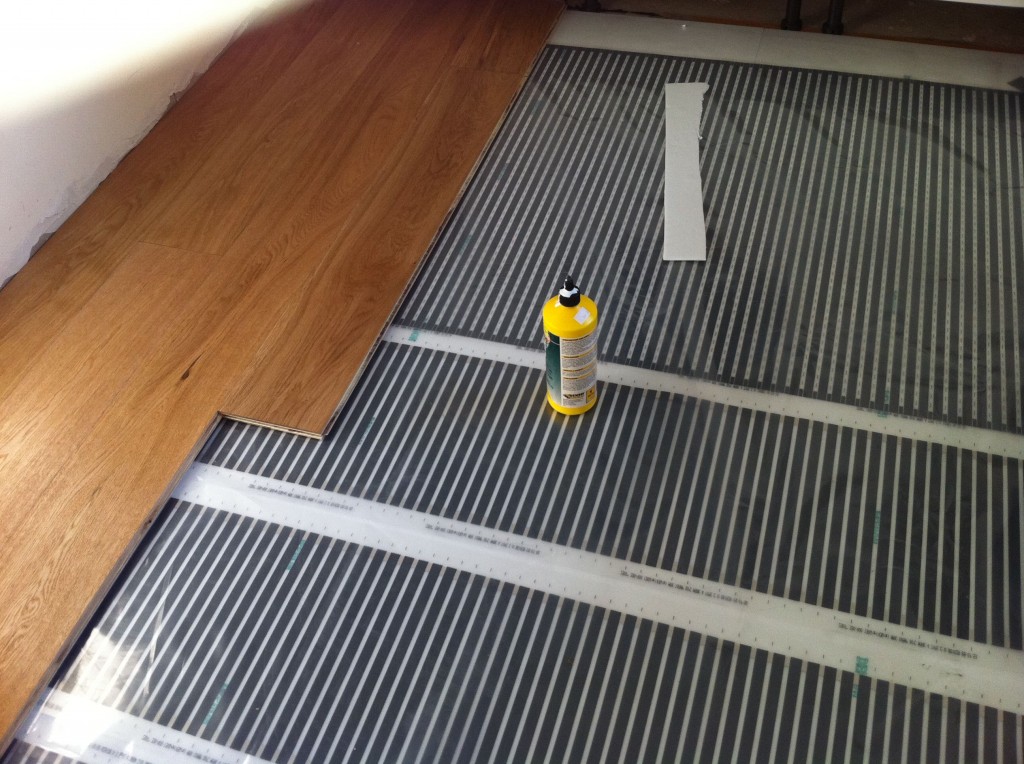
How to put on the "warm floor"?
First of all, I would like to note the fact that for a warm floor it is necessary to lay a floorboard made of either oak or walnut. It is these two types of wood that, in their physical characteristics, ensure compatibility with it, since they are not deformed under the action of temperature. If the base is maple or beech, then such a board in a short time period will fail, because their thermal conductivity is higher.
It is very important to take into account the thickness of the floorboard, and if the board is thick, then the “warm floor” effect will not be felt. The fact is that a thick tree will not let the heat out. Only products whose thickness does not exceed 14.5 mm are coping with this task.
The floor must be laid floating. With this method of laying wood is not deformed under the action of humidity and with a change in temperature. Not the last role is played by the floor heating system. Remember that wood is highly flammable, which means that there is a risk of fire.
Heated floors are infrared, water and electric type. Water and electric floor heating known to the world since the beginning of the last century. The electric heating elements are cables, but in a wooden box there is a risk of fire, and it is absolutely forbidden to install water ones in city apartments, since you can flood your neighbors from below.
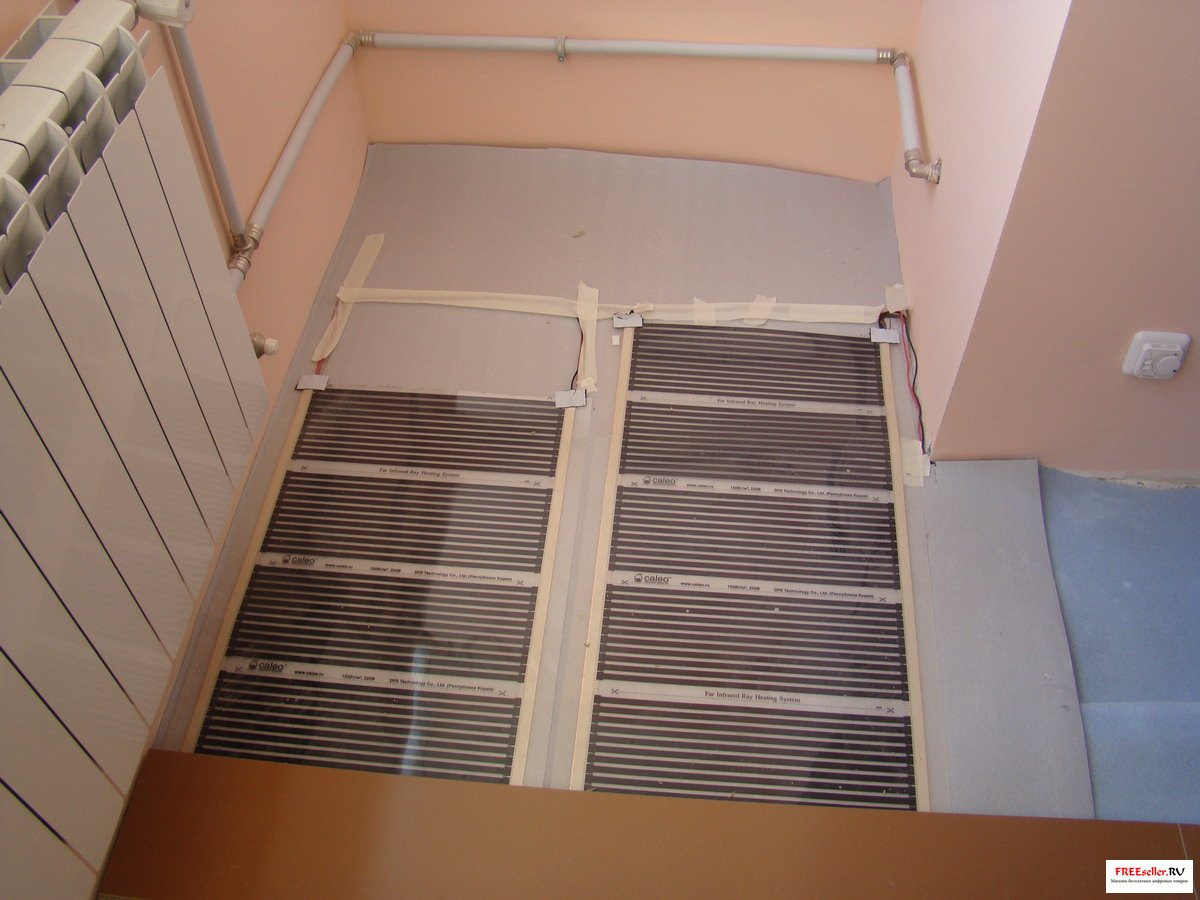
Infrared film warm floor was invented in South Korea a few years ago. This is a kind of novelty, although indirectly it can be called a kind of electrical heating systems. It should be remembered that the temperature set on the thermostat should not be above 28 degrees.
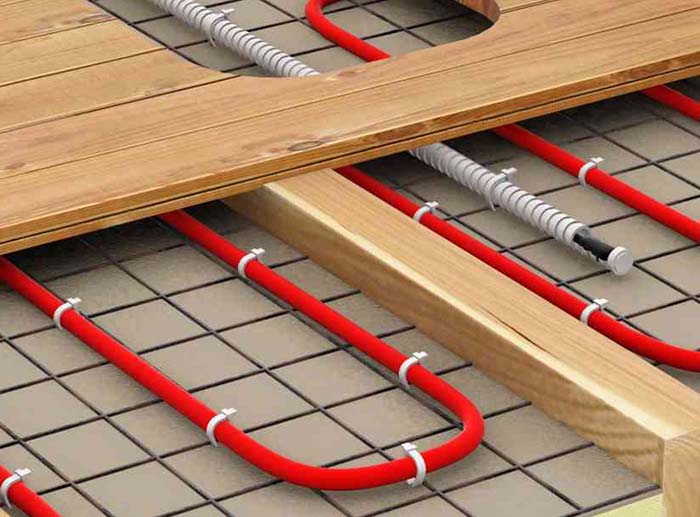

Water floor is the best option for country cottages, provided that the overlap between the basement and the first floor is done with the help of wooden bars. He has significant drawbacks, among which are:
- Worn plastic pipes. Chances of flooding the basement and damage to the floorboard.
- Problematic adjustment of temperature.
- The floor will be raised by ten centimeters.
- Be sure to have your own boiler.
There are a number of rules when installing floorboard on a heating system. First, installation is carried out only by a floating method, using plywood as a substrate. Secondly, the floorboard should not be heated to 30 degrees and above. If this happens, the tree will become unusable.
It is possible to lay the floorboard on the floor heating system itself, but for this you need to carefully study the work algorithm, and if you have doubts in your abilities, it is better to contact the experts.
Installation technology
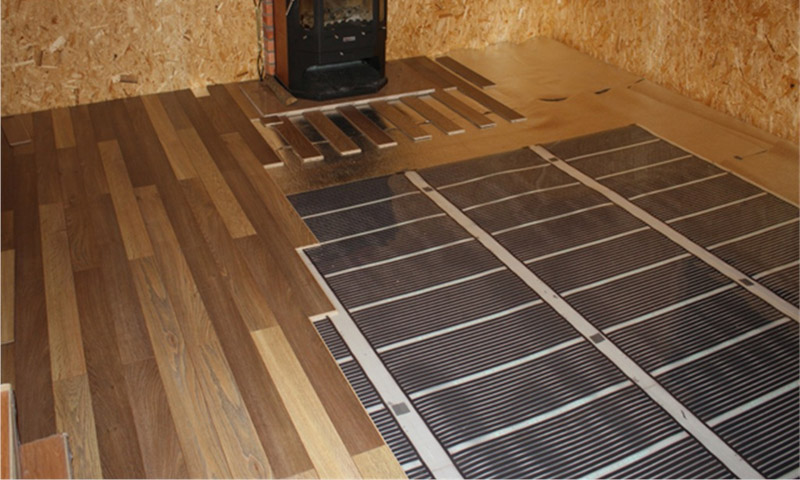
Take the infrared heat-insulated floor as an example, since this new product is easiest to install with your own hands in city apartments and in country houses.
The step-by-step instruction assumes that the installation is made on a prepared concrete or wooden base; it must be leveled, clean and dry. Swings should be checked at the building level, they should not exceed 2 mm.
For the concrete floor to be done grinding, and for the wood - scraping. After work, it is very important to clean the surface using a vacuum cleaner and a broom.
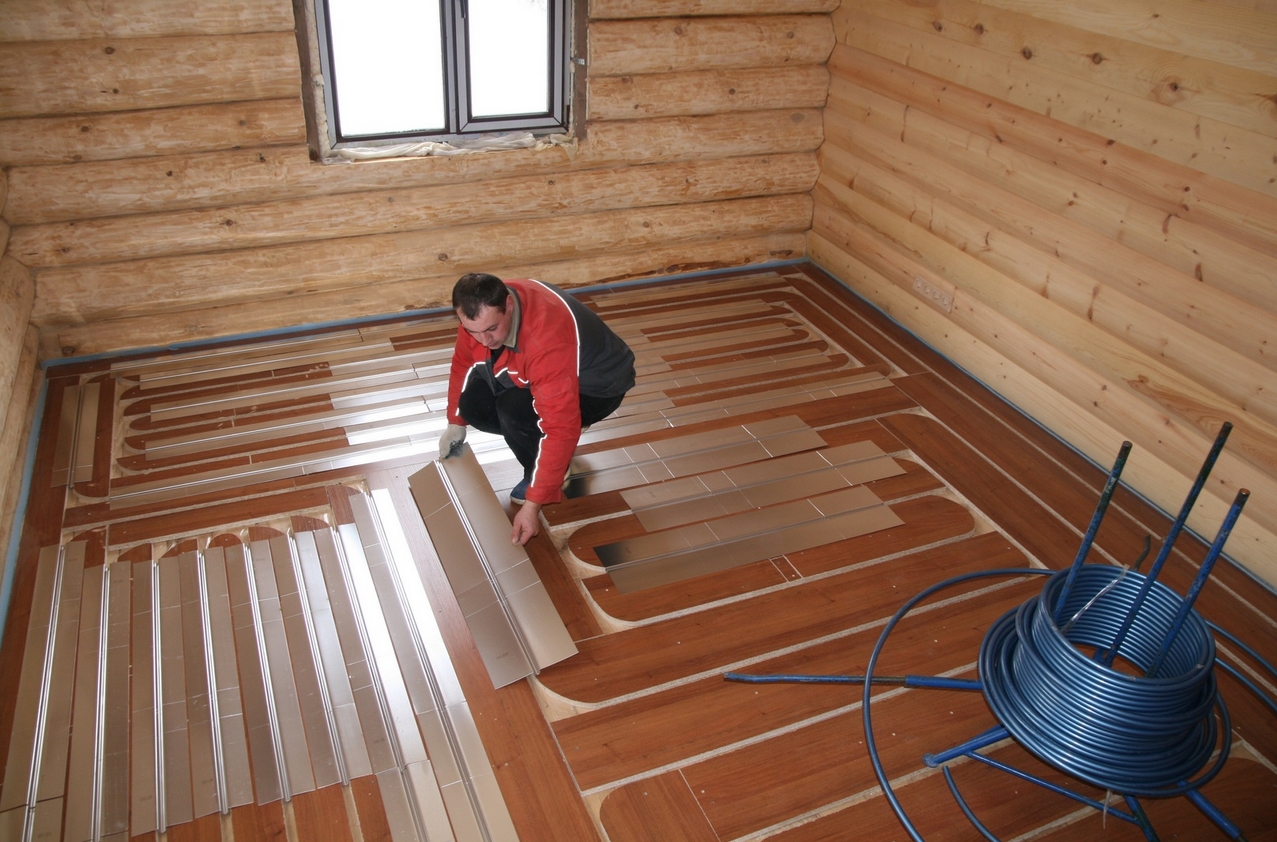
Next you need to protect the heating system from the actions of the concrete base, for this fit the base layer. Polyethylene acts as a waterproofing and heat insulation.It is important to mark the infrared floor system, find a place for the sensor and the thermostat. He is responsible for setting the temperature. Infrared mats are mounted with the film down, fixed with each other with adhesive tape. Bituminous insulation protects products from the external environment.
After all the connecting steps check the operation of the floor heating. If heating occurs uniformly, then a plywood layer is mounted on top. It is on him that the floorboard will be installed later.
Laying massive floorboard can be done by one person. Modern models with locking combination kombilok easy to install and reliable in operation. It does not matter if a two-lane or three-lane parquet board will be used, the installation procedure for all products is the same, and it has already been considered in previous sections.
How to dock?
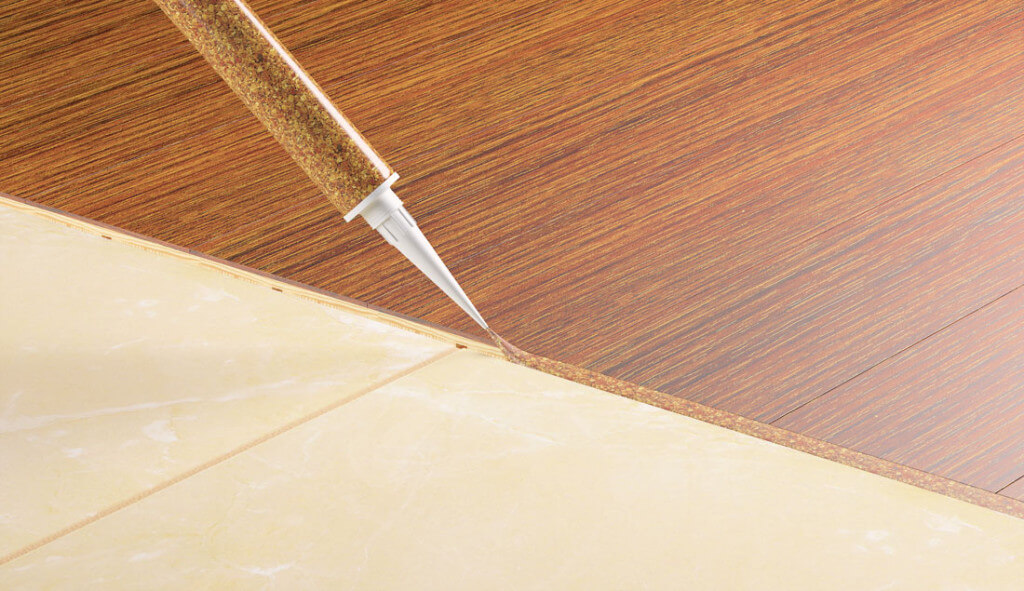
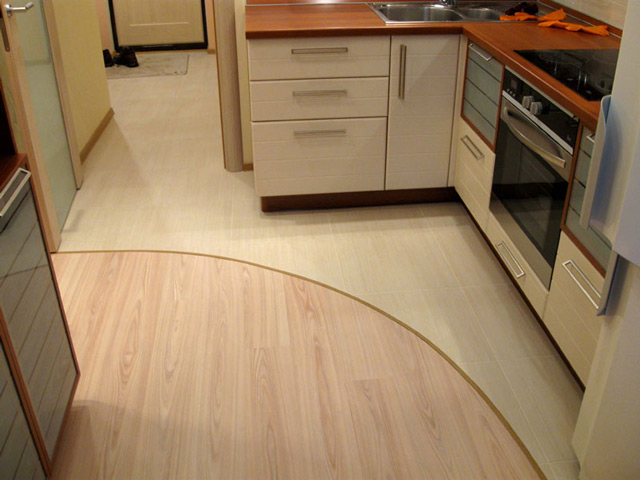
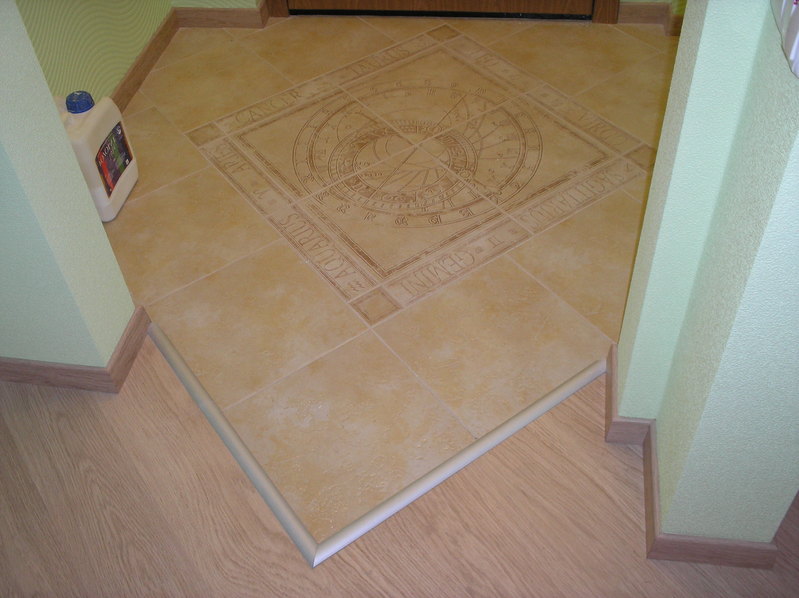
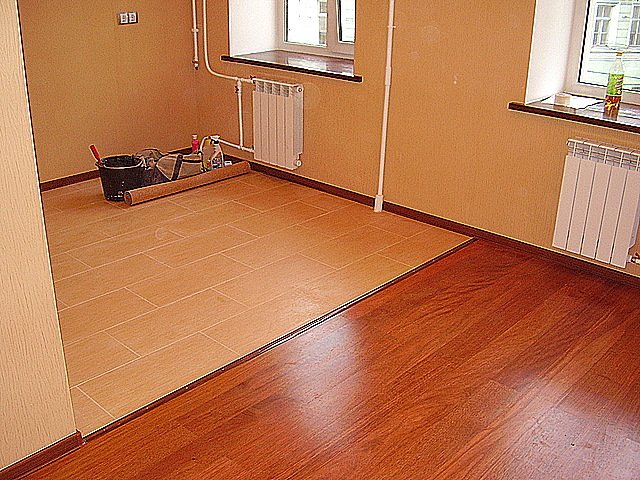
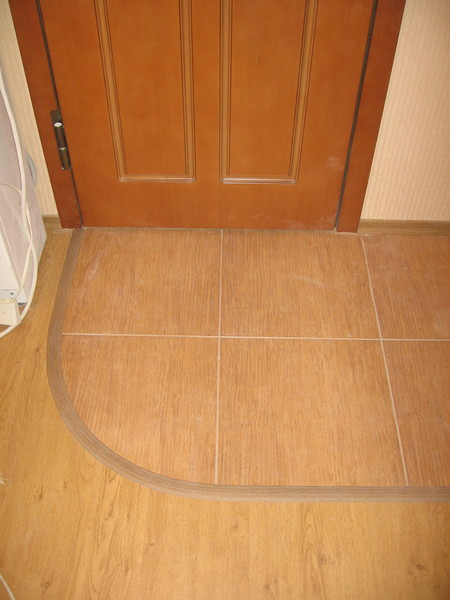
Unfortunately, the floorboard does not tolerate moisture, and in some rooms it is necessary to make the transition between the board and tile or with other building materials. Most often docking is used in the corridor - in front of the entrance door, between the corridor and the kitchen, between the bathroom and the corridor.
In studio apartments, country houses and other premises, the joint with a tile without a nut can be sealed with sealant and liquid cork. It is desirable that the sealant match in color with one of the building materials.
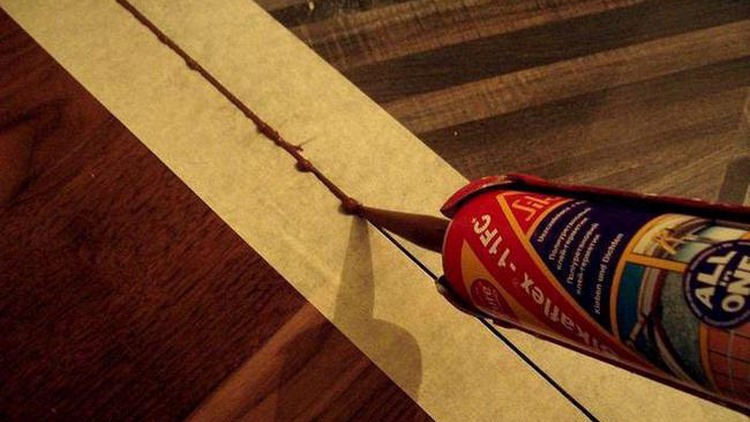
Remember that colorless sealant is universal and suitable in most cases. Unfortunately, a poor-quality substance will quickly become worthless and repairs will have to be redone. Apply it with a pistol or syringe.
Even a non-specialist in this area can apply a liquid plug, as it is similar to an adhesive. Clay fastens two building materials, does not deform and does not crumble. It is desirable to apply it after preliminary surface treatment with oil. After the glue dries, it is cut with a knife. To do this, you can use a construction or office knife.
A wooden cork, plastic or metal profile can be used as a decorative material. Cork made of wood, mounted in the joints before grinding work. The main feature of this material can be called the fact that it takes on various geometric shapes, and it looks beautiful in most interiors.Another advantage is that the lock connection is not damaged during the operational period.
Metal and plastic profiles are laid only in a straight line. Profile protrudes above the surface. From a design point of view, this is the worst option. The metal profile, as a rule, has additional openings, in them it is necessary to screw in self-tapping screws.
Remember that with a tile you need to work with a special drill, otherwise it may lose its presentation.
Features mounting to the wall and ceiling
Fastening parquet on the wall and ceiling is another recent trend. Thus, the unity of the interior is achieved, a kind of “box” is obtained. This room is suitable for placement of acoustic systems - home theater, music room and projector.
The floorboard should be fixed on a special frame, something similar was considered in one of the sections - laying the floor on the logs, only in this case the guides are located on the ceiling and on the walls.

If the skin is fixed on the wall and especially on the ceiling only with the help of a locking connection, then such a structure will fall apart, like a house of cards.It is fraught with injuries and abrasions. Therefore, screws are additionally screwed into each floorboard.
The transition between the ceiling and the wall can be left straight, but for the elegance of the master recommend the floorboard to bend. With the router, small recesses are made, after which the board “gives in”. The radius is chosen by trial and error, but remember that it must be the same on all walls. Finishing the ceiling.


Common mistakes
Often, the installation of floorboard begins immediately after its purchase. This is one of the common mistakes. The building material must “get used” to the temperature conditions of the room, its humidity.
Remember that the temperature should not be below 18 degrees. The floorboard should be idle for at least two days.
The draft floor must necessarily be leveled, only about 2 mm drops are acceptable. It is best to use cemented concrete; it gives the surface not only an aligned look, but also heat insulation and sound absorption. All further actions are performed only after one hundred percent drying.
The waterproofing and base layer allows the floorboard to be operated for a long time without a squeak, and if you save them, the result will be the opposite.
It is very important to make the laying of the floorboard in the last place, but if the room requires wallpapering the walls, then you need to start with them. Remember that the wallpaper after pasting emit moisture when dried, which means that the humidity in the room will be high.
The wooden base of the floorboard is not intended for rooms with high humidity, its performance should be normal and comply with the recommendations given by manufacturers.
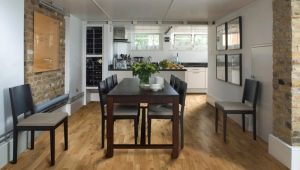
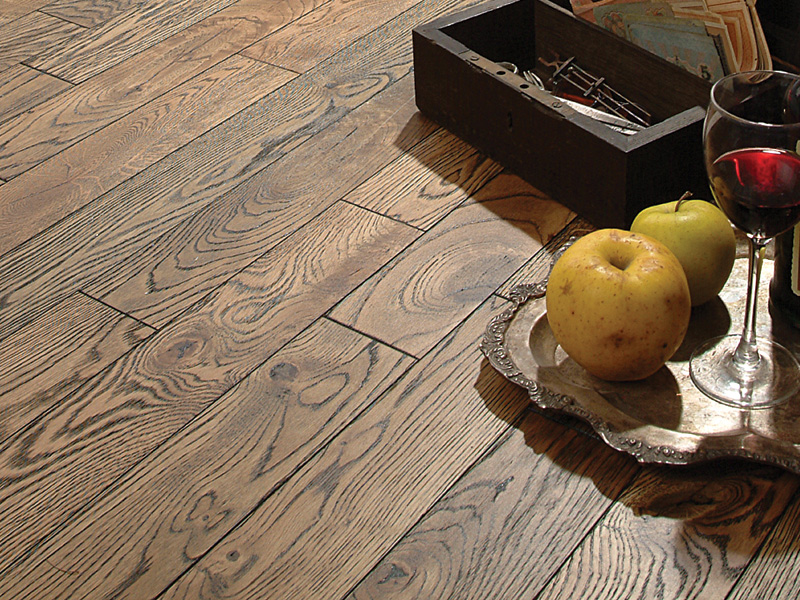
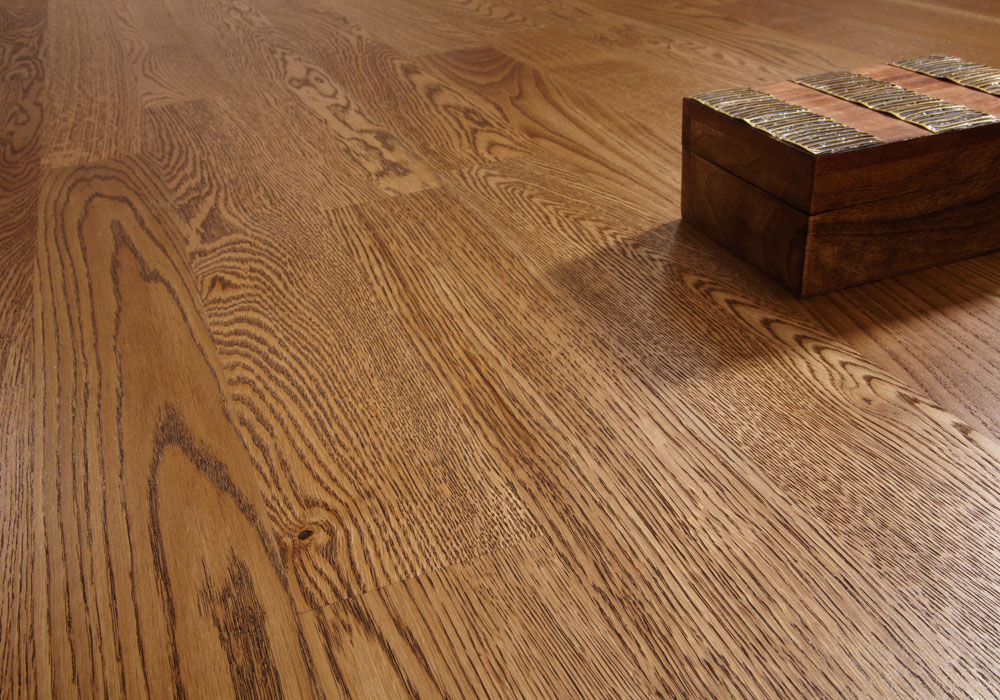
Examples in the interior
- In a country house floorboard, you can beat the top floor at the junction of the wall in the roof. Such a smooth transition is achieved by milling grooves, it is only important when mounting not to forget about self-tapping screws. Normal lock connection will not be able to sustain its own weight of the floorboard.
- In studio apartments It is very important not to forget that the parquet board does not tolerate high humidity, and from this it follows that in the kitchen or in the corridor it is advisable to lay tile or moisture resistant parquet. Docking in this case can be done in any convenient way. The apartment is most often made such a transition in the hallway, because if you step on the floorboard all the time with wet shoes,then it will become unusable in a short time.
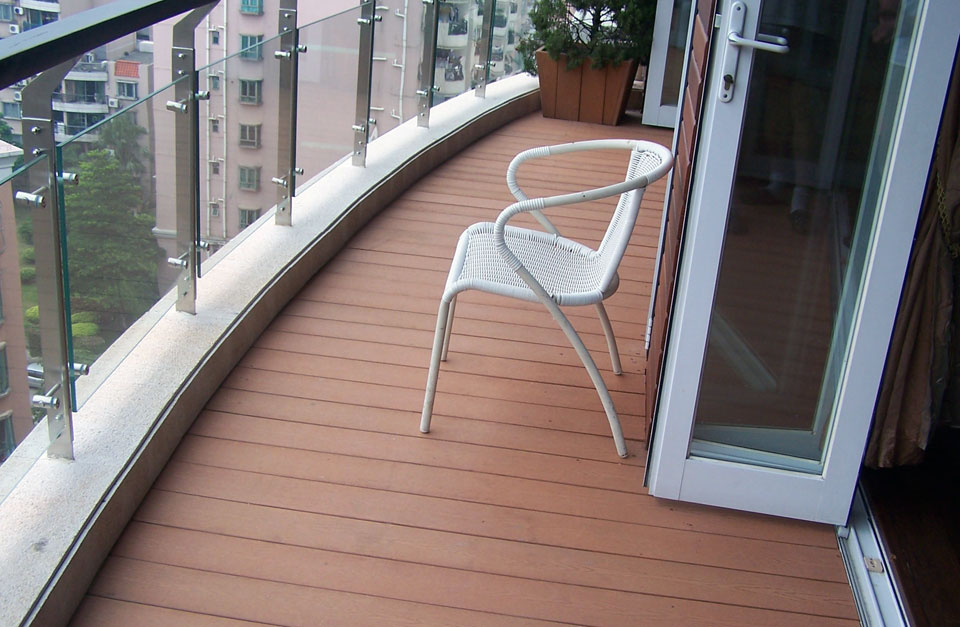
- For balcony lay the floorboard need on logs. It is important to bear in mind that the tree becomes unusable under the action of moisture, which means that the balcony must be glazed.
How to make laying the floorboard with your own hands, see the following video.