Subtleties of installation of electric floor heating
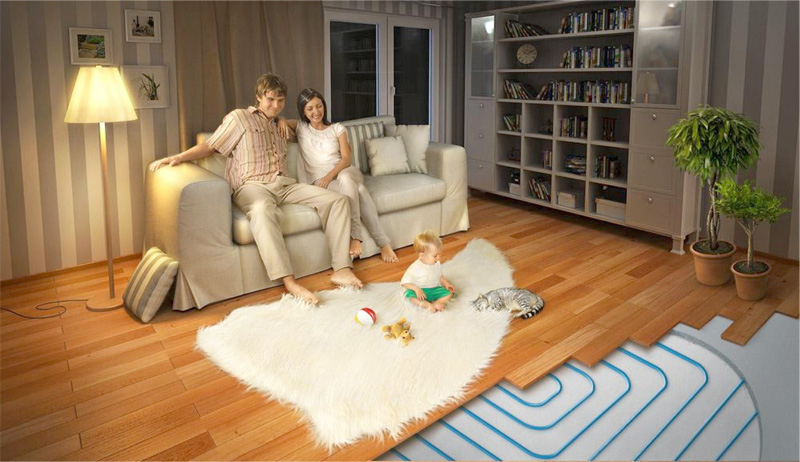
The last decade has become very popular system of warm floors. After all, it is possible to install it yourself without the help of specialists. It is also an effective way to create comfort in a country house or apartment.
Kinds
The choice of type of electric floor heating system depends on the type of heating (primary or secondary). Also take into account the size of the room and flooring.
Cable
This version of the warm floor was invented much earlier than other types. It is a wire (cable) through which heating occurs. Such a warm floor is of two types - directly cable and heating mats.
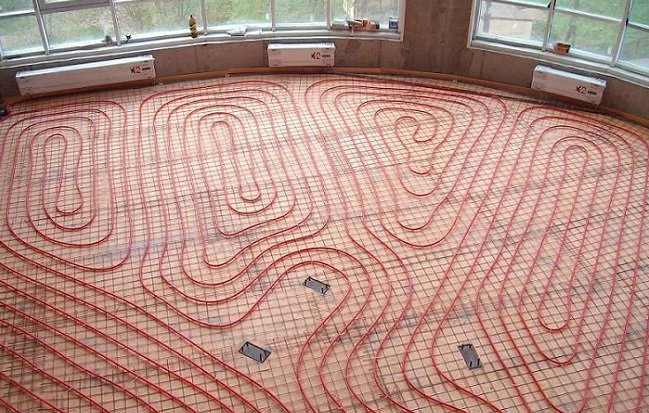
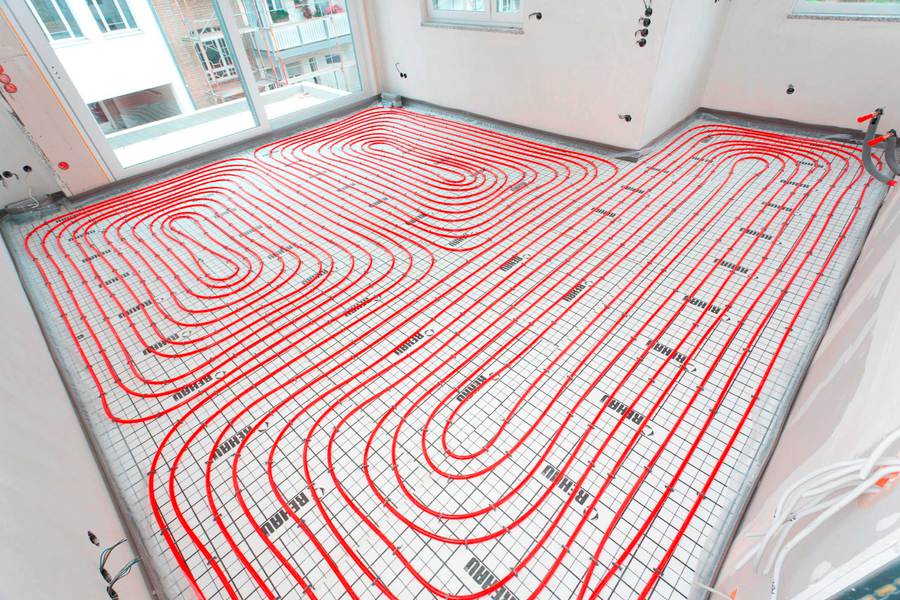
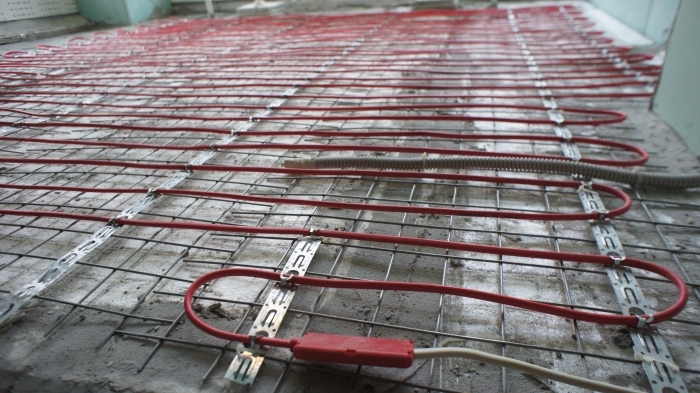
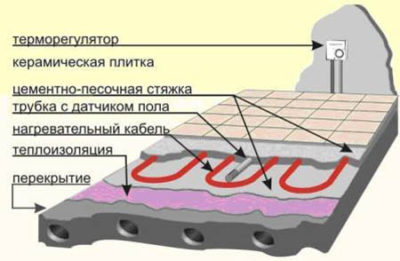
Cable heating system, as the name implies, is based on heating the cable. The system consists of a temperature controller, a temperature sensor and a wire with double insulation. This is the most time-consuming option of heating, because it must be installed in the cement screed.
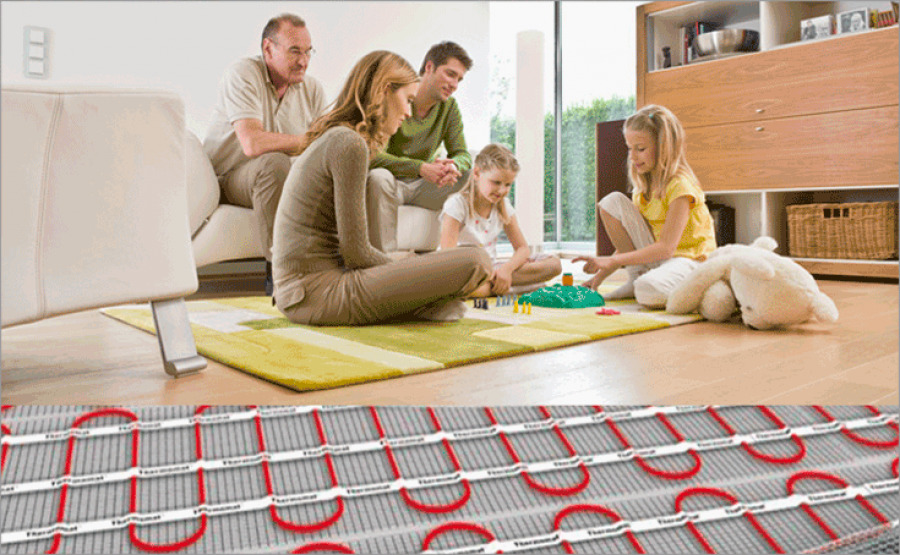
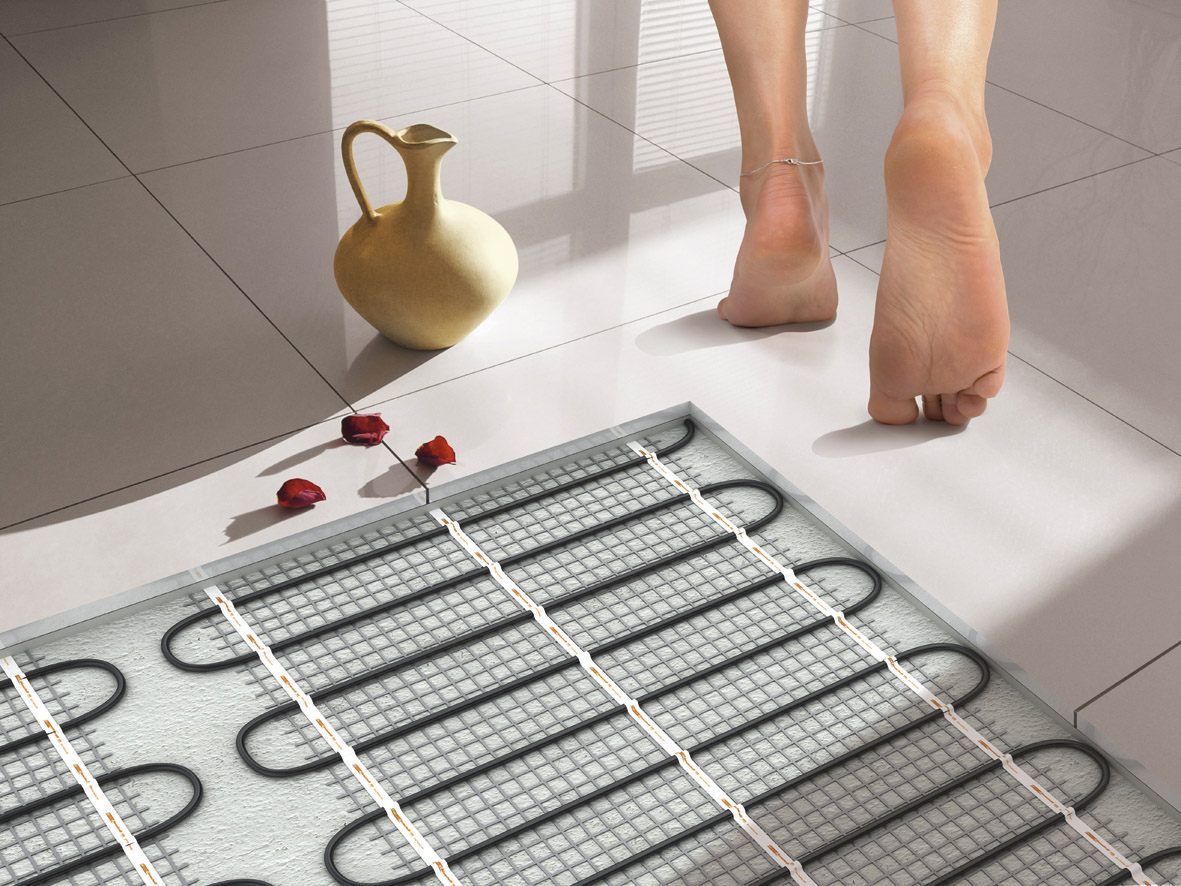
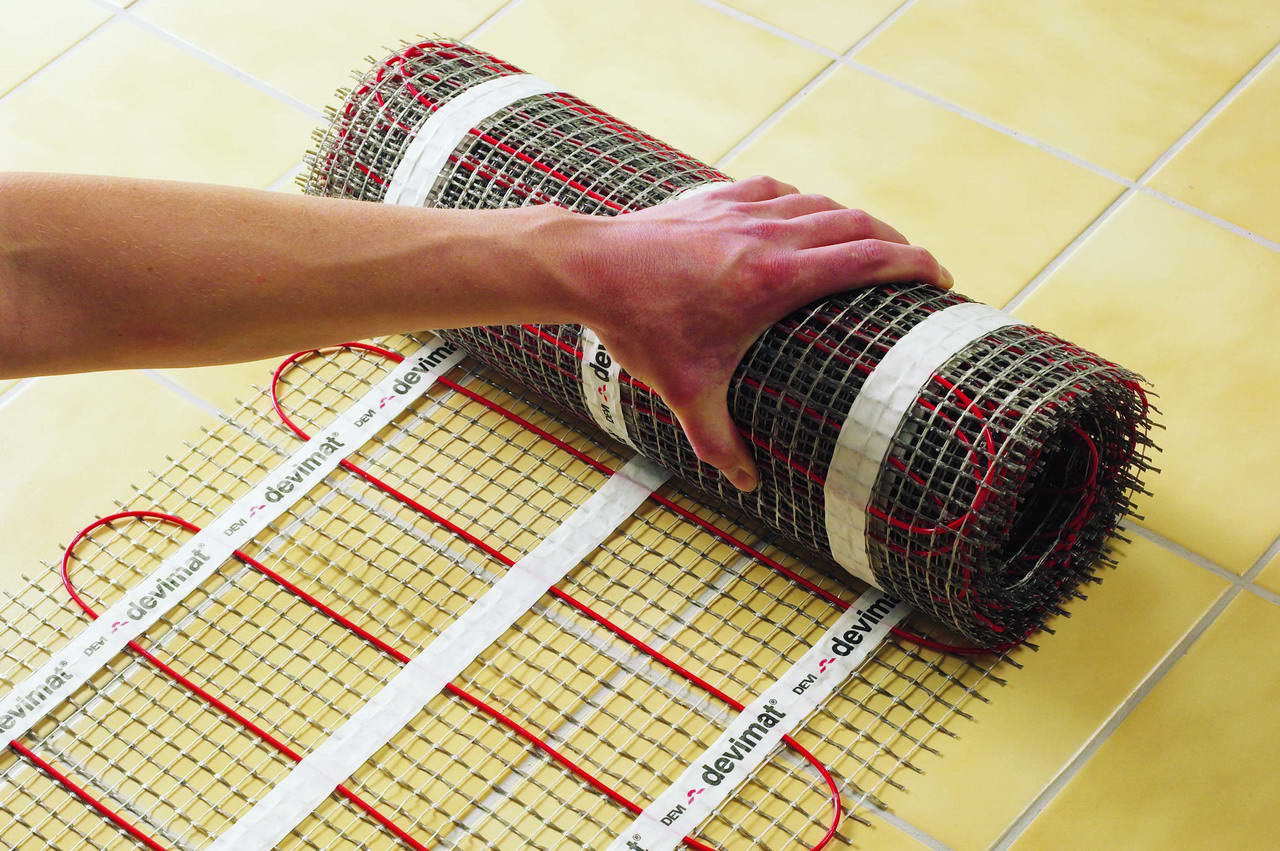
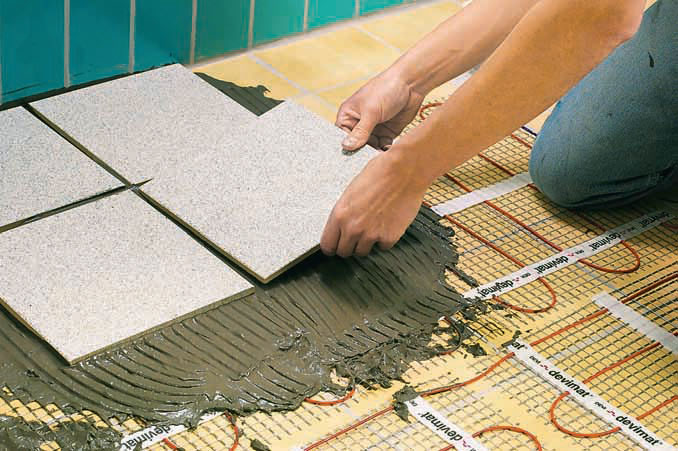
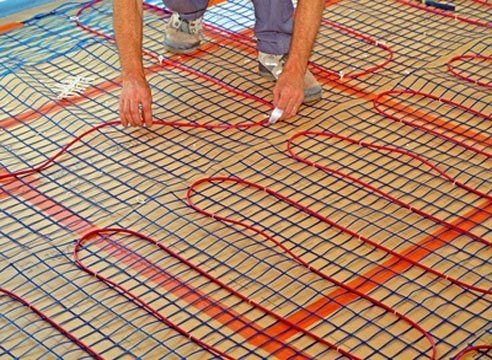
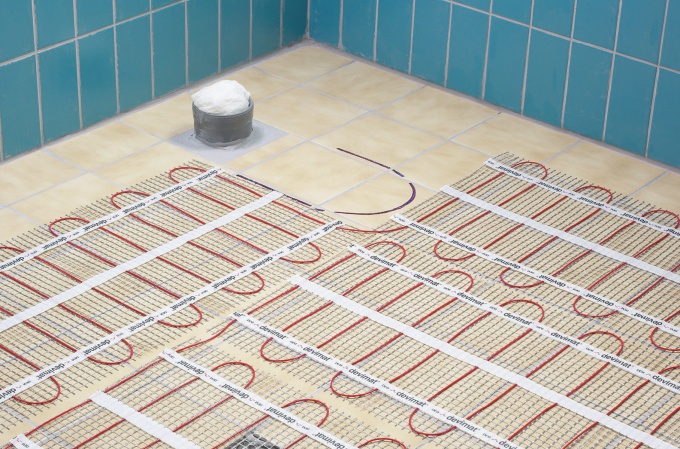
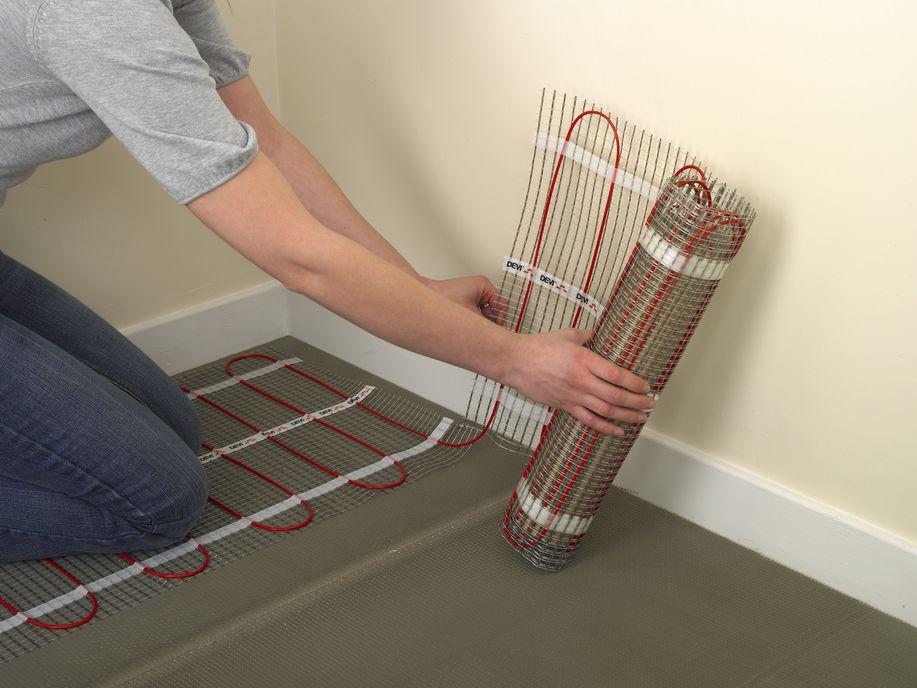
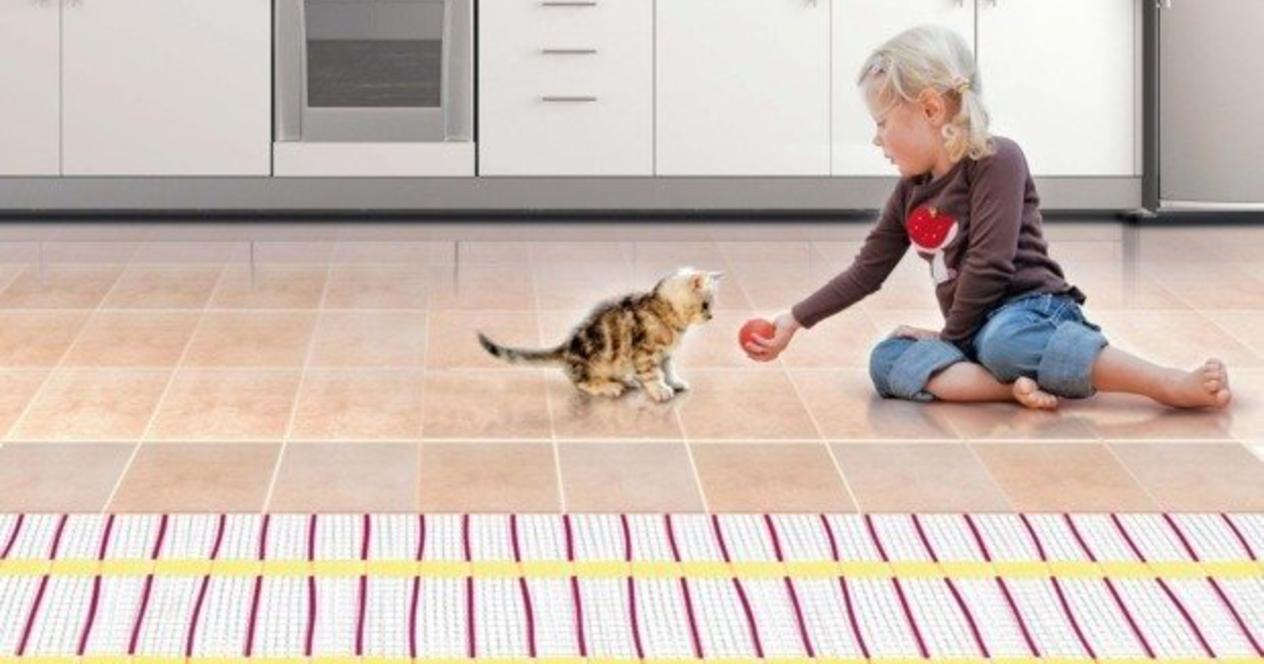
Heating mats are a fiberglass grid on which electric heating elements (cables) are already fixed. The advantage of mats is that you can install them without much effort. It is enough only to lay the heating mats on the base and connect to the network.
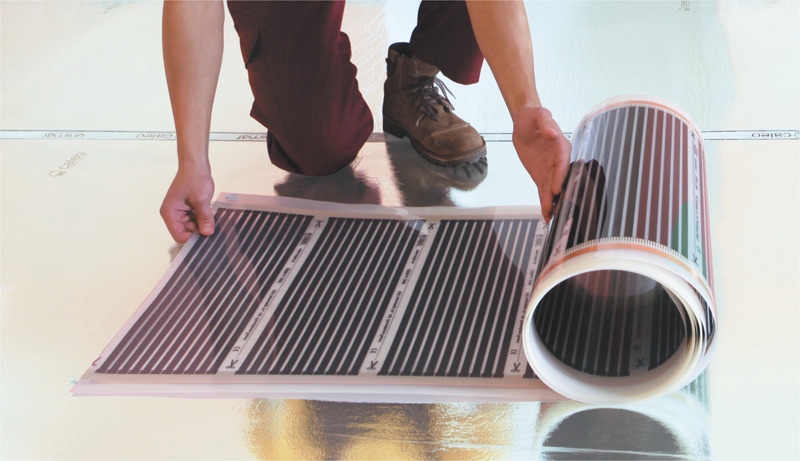
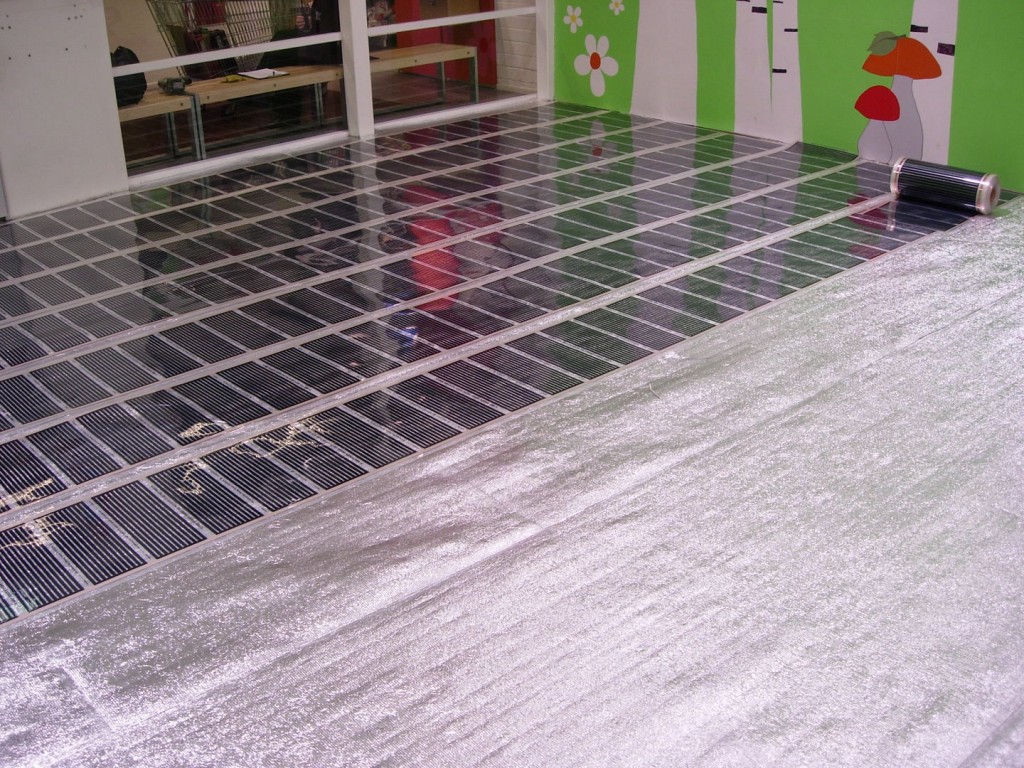
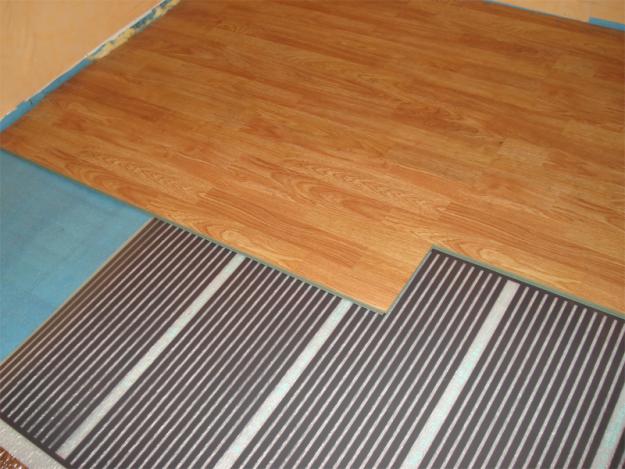
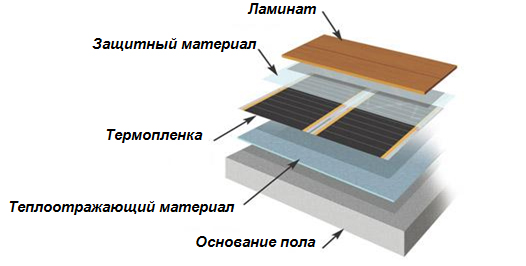
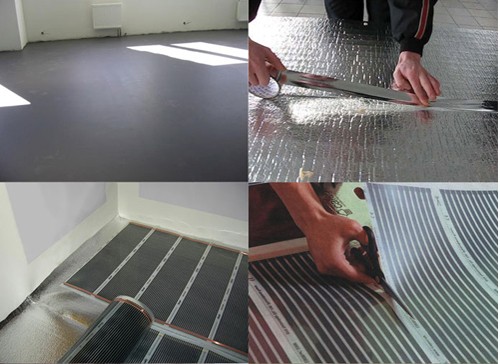
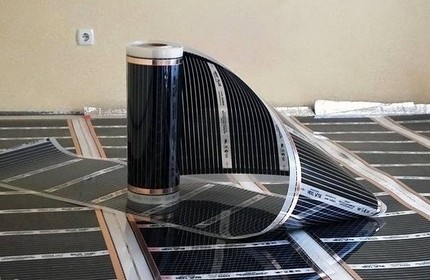
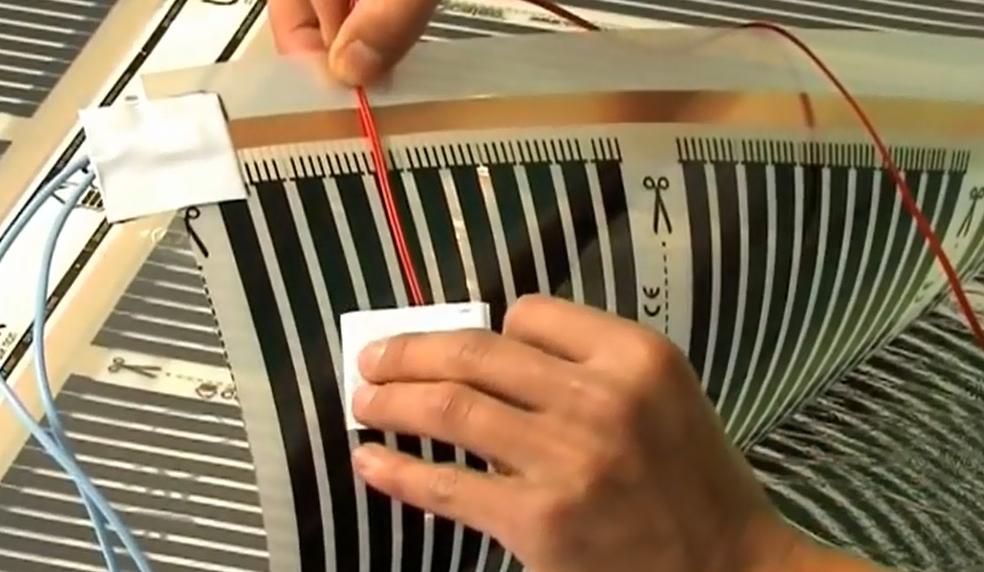
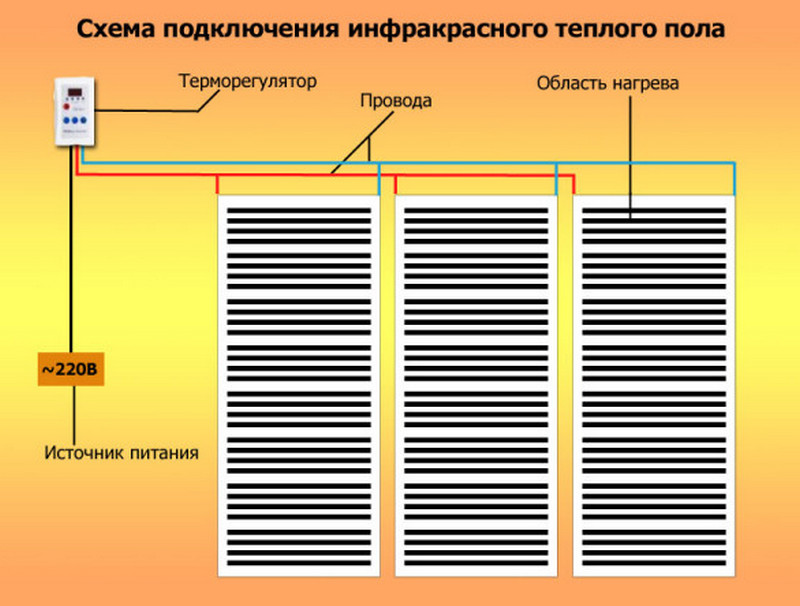
Film coating based on infrared film
Film coating is a thermal film consisting of a carbon base. An alloy of copper and aluminum acts as a heating element. All elements are connected in parallel and sealed in film. This kind of heating does not require the use of cement screed, and the topcoat is applied directly to the film.

Advantages and disadvantages
Electric floor heating has several significant advantages:
- It is possible to use both the main and auxiliary source of heating;
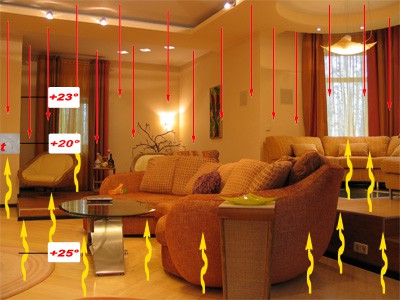
- Surface heating occurs evenly;
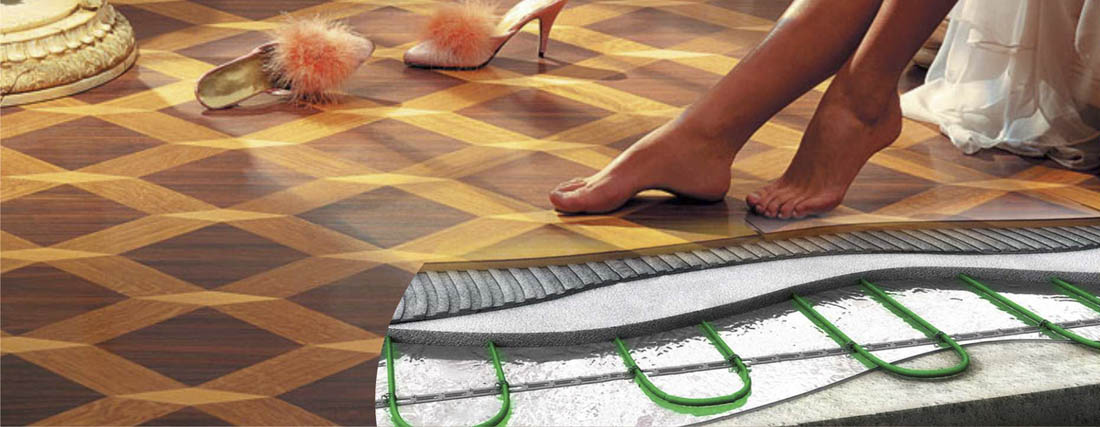
- Possibility of installation with various floor coverings (linoleum, laminate, ceramic tile);
- It is possible to independently regulate the temperature both in the whole apartment and in individual parts;
- This is an environmentally friendly product that does not harm health;
- Long service life;
- It does not occupy a useful place in the living room, thus the view of the interior does not change.
Minuses:
- The high cost of production;
- You can not use such heating under the floor or flooring, as under the influence of high temperatures, the wood is deformed;
- Cables create an electromagnetic field;
- In case of improper installation, there is a risk of electric shock.
Installation Features
There are three ways to install an electric floor:
- Installation in the screed layer with subsequent coating with flooring material;
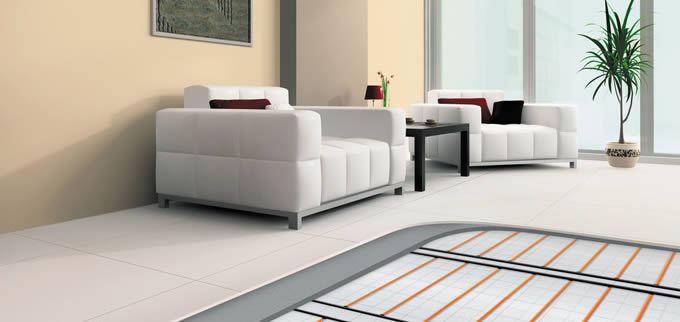
- Laying on top of the tie under the tile;
- Mounting the system under the floor covering (foil heating).
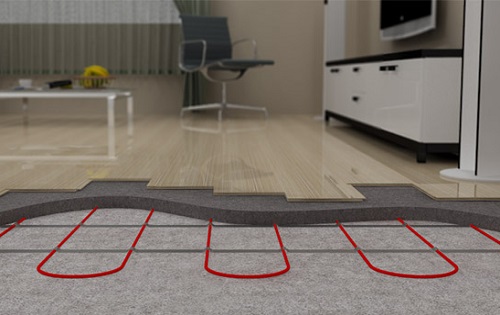
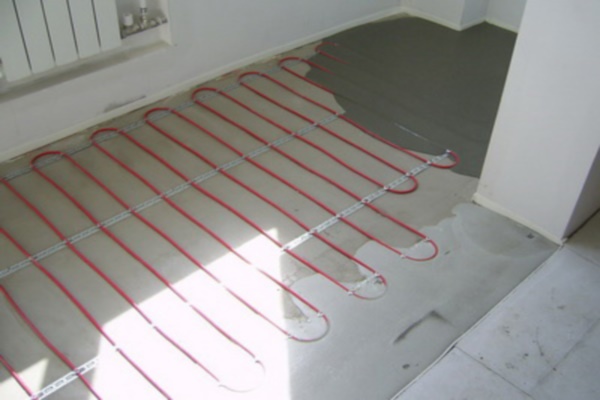
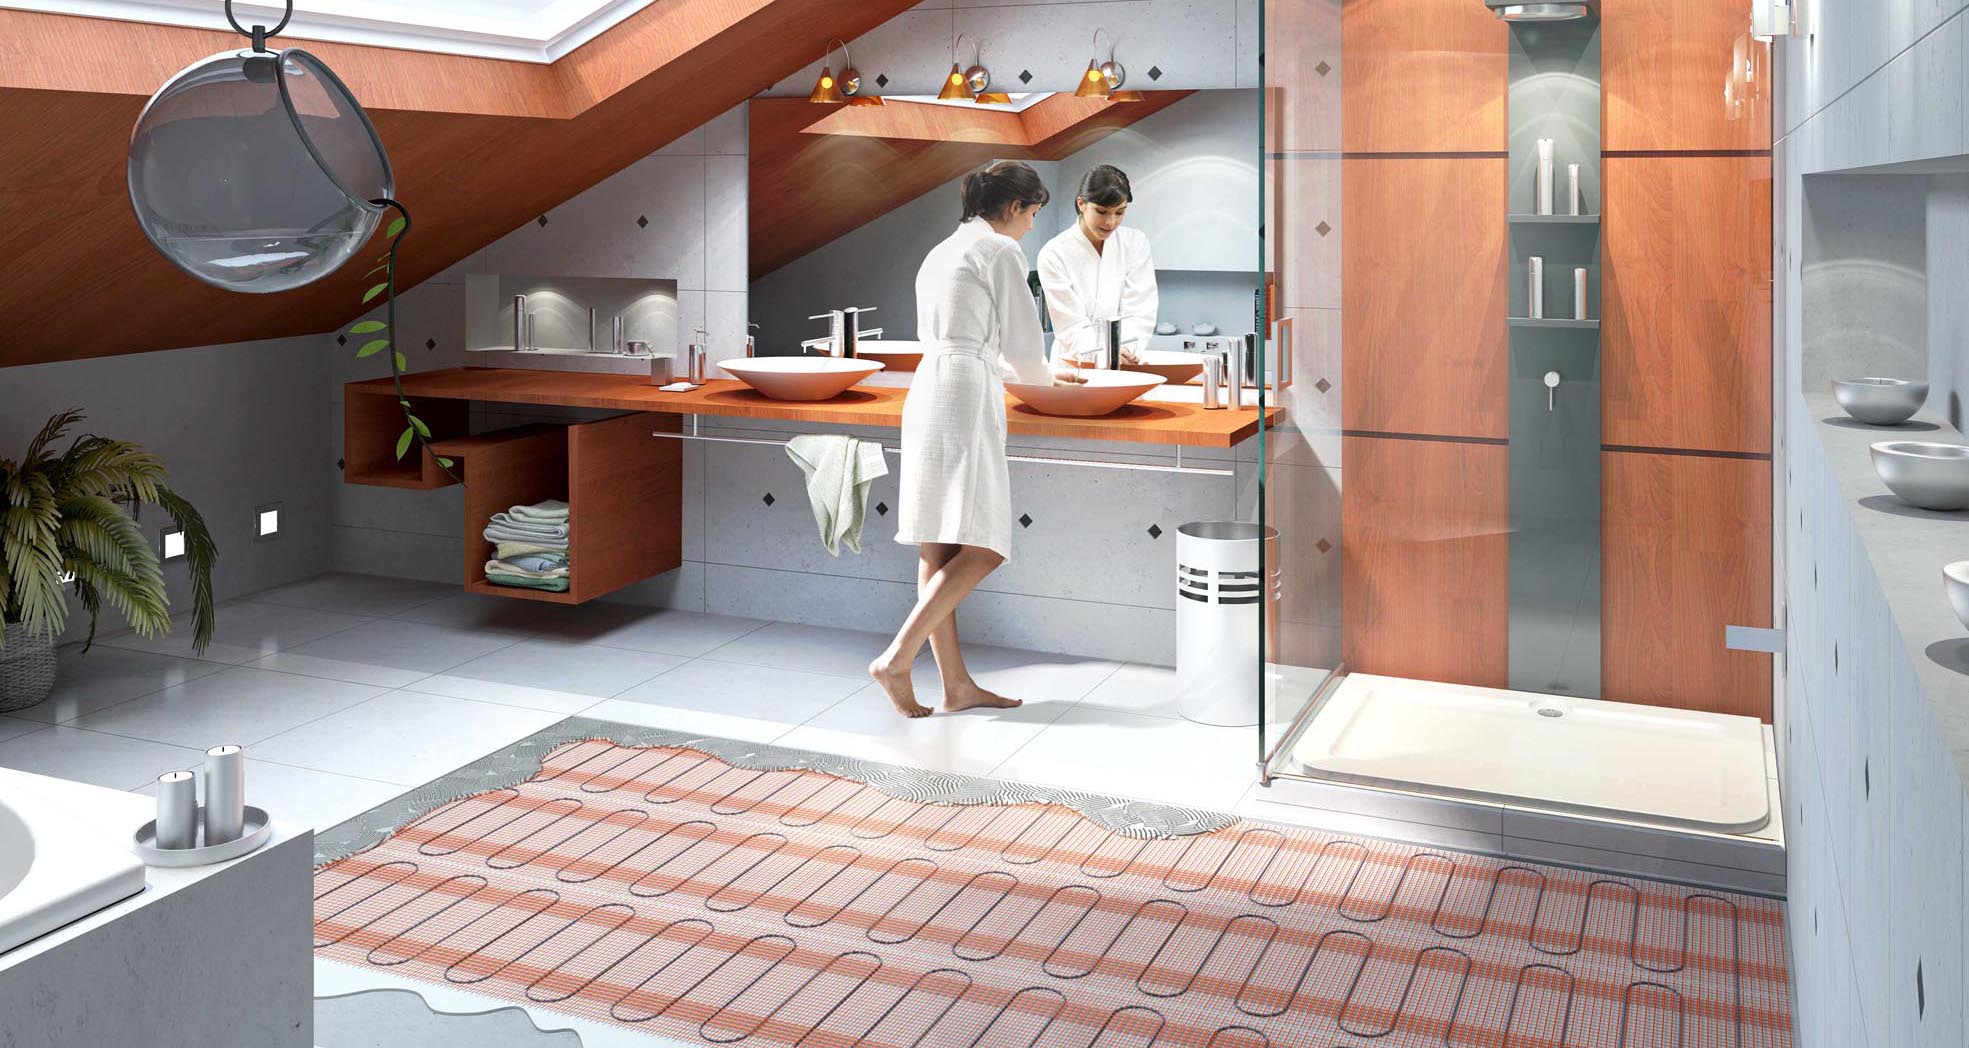
The first method of laying is used for residential premises. In this case, the installation of cable warm floors is recommended. Under the heating system is mounted layers of waterproofing and heat insulation.

Installation consists of several stages:
- Laying waterproofing material;
- Installation of thermal insulation;
- Fastening heating cables;
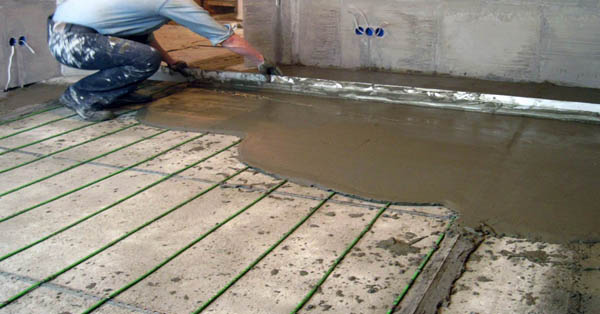
- Creating a screed.
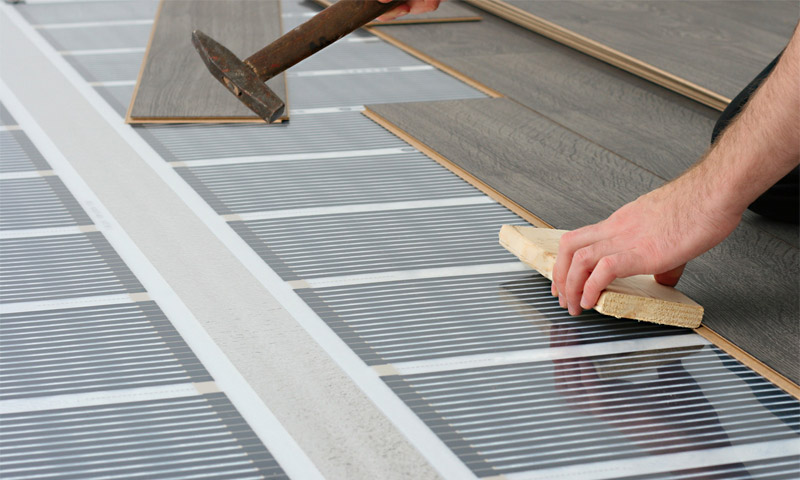
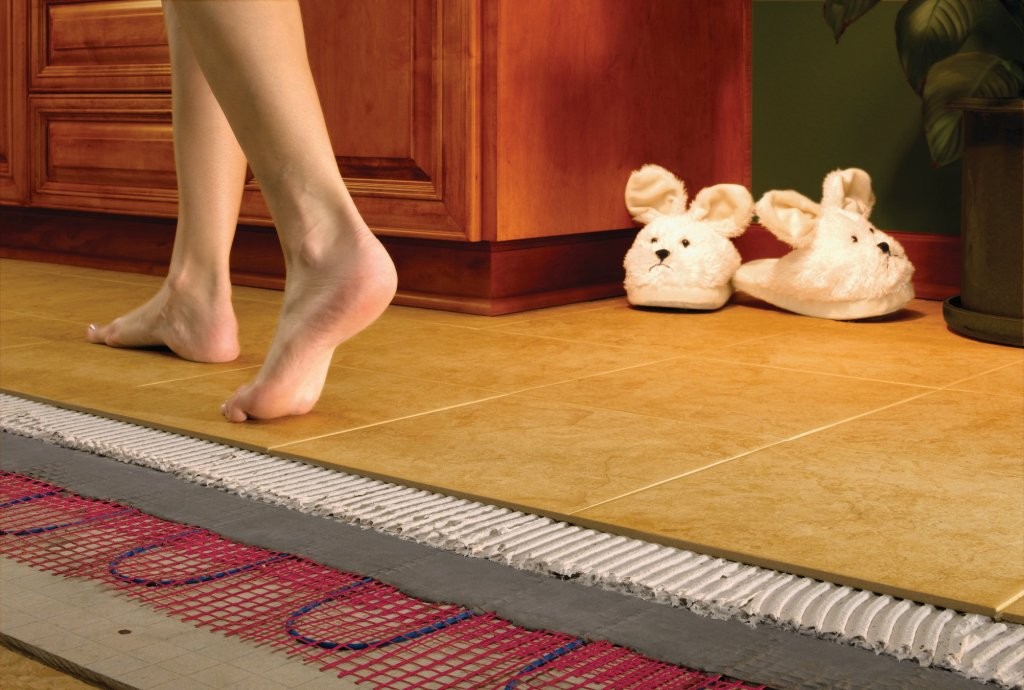
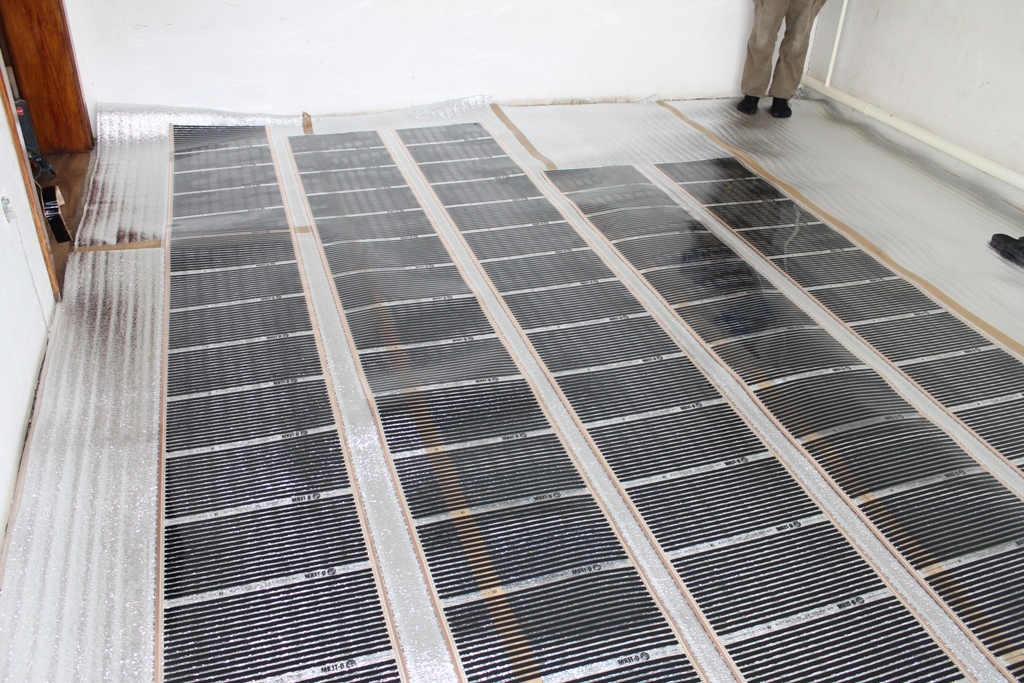
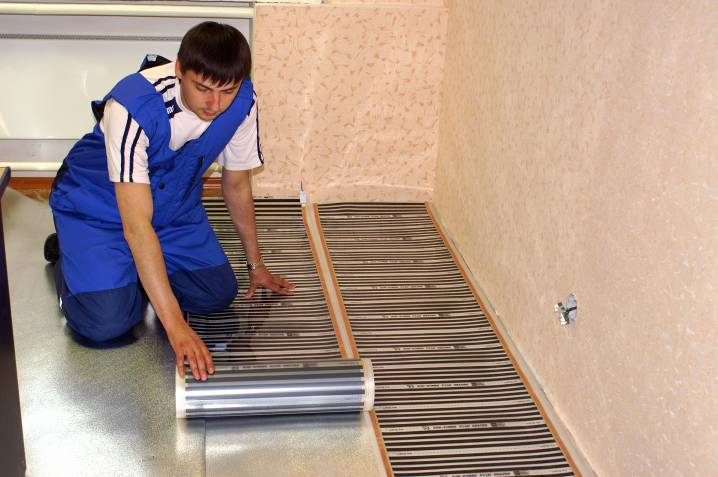
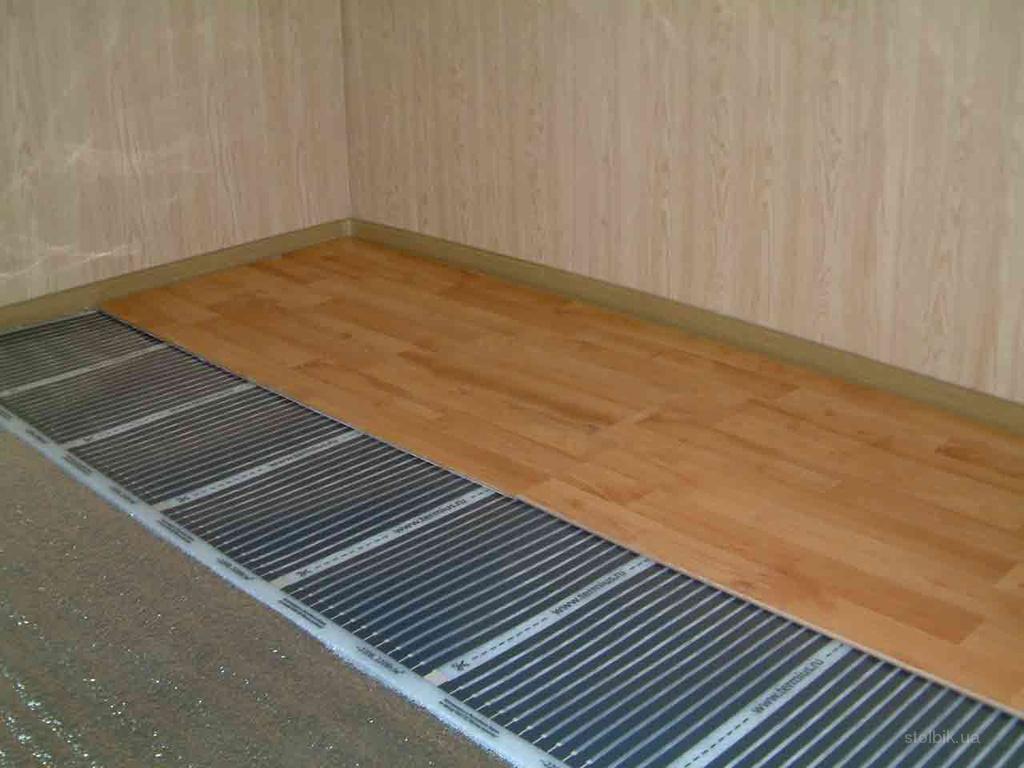
When installing an electric floor heating (ETP) under the laminate, wood flooring and linoleum use film heating (infrared film). Infrared rays effectively pass through the materials and heat the floor surface.
Installation technology:
- The required surface is covered with foiled material;
- If there is a need, then an additional waterproofing is created;
- Installation of heating elements (infrared film);
- Checking the electrical system of the heating element;
- Drawing a finishing covering.

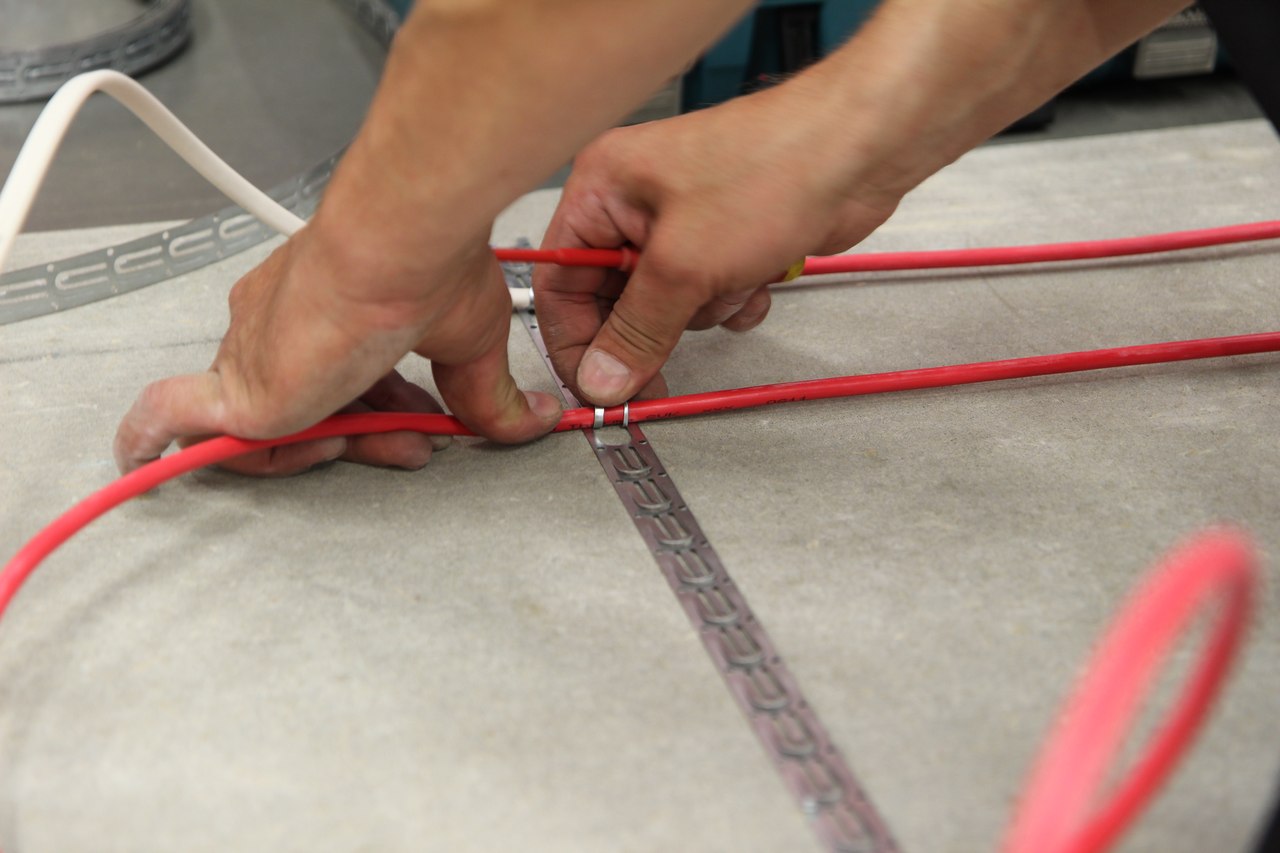
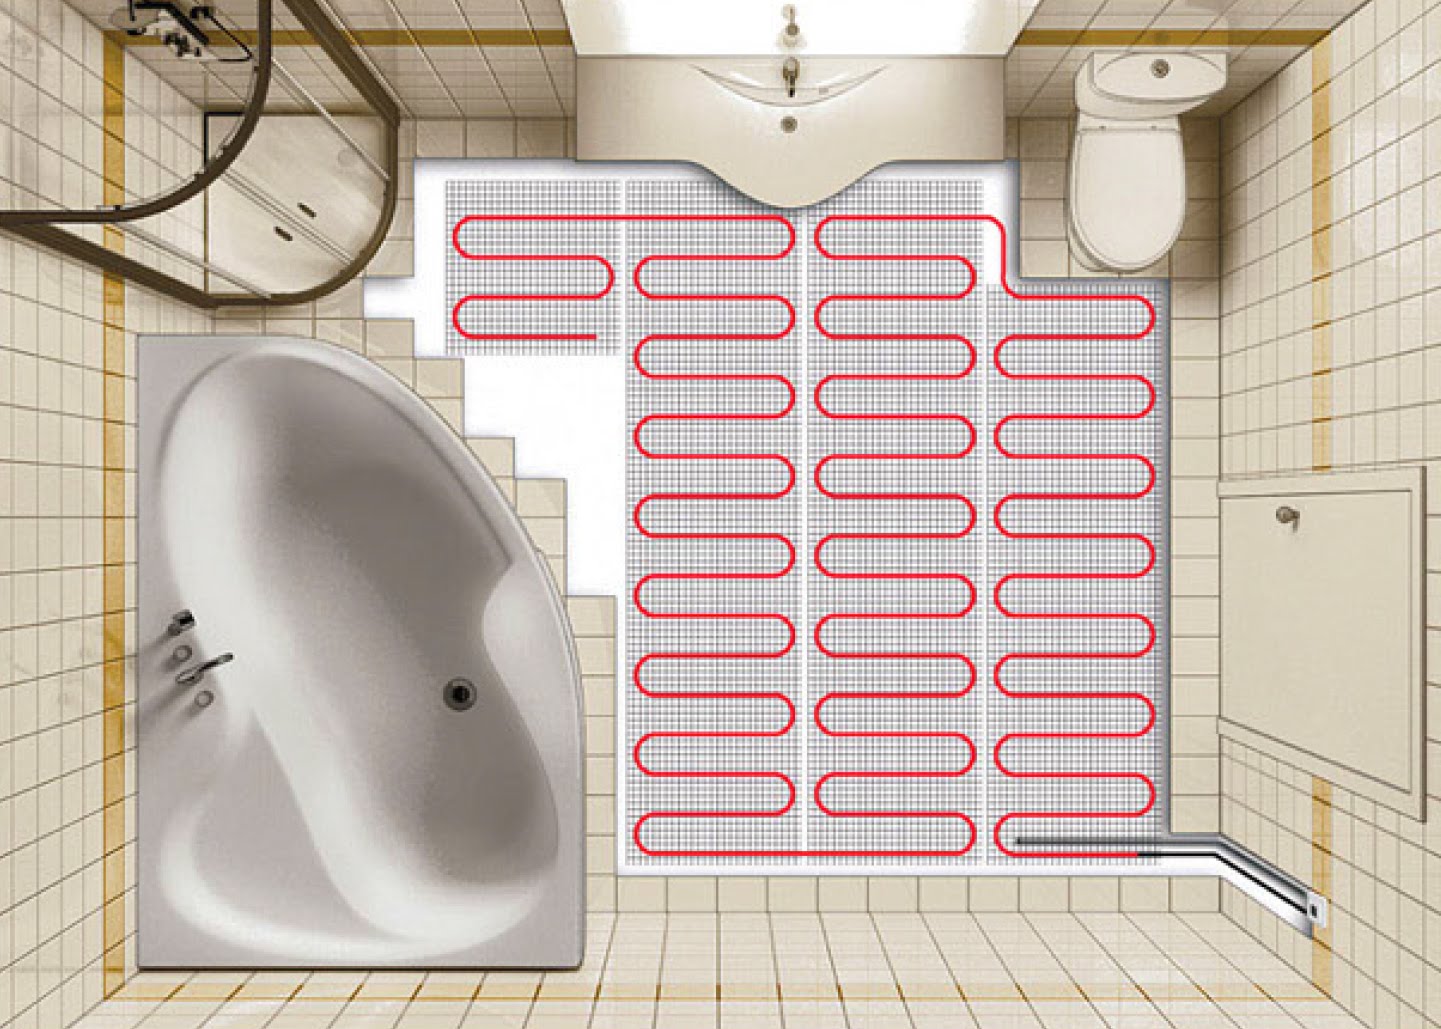
Under the tile install electrical cables and heating mats. The advantage of heating cables is that it is possible to independently determine the laying step (spacing between cable cords). Electric heating elements are fixed with mounting tape.
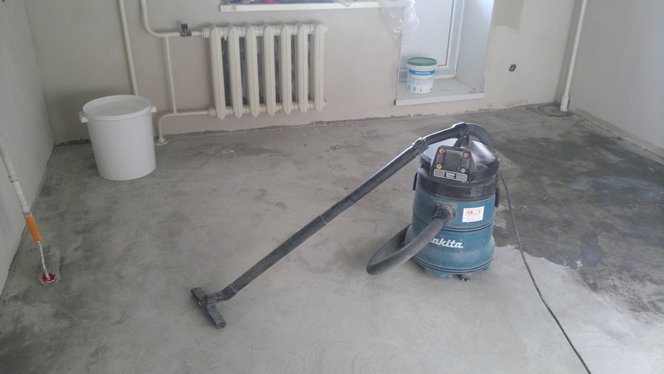
Foundation preparation
Properly prepared base for laying the electric floor is an indicator of the quality of the future floor covering.
Algorithm of work:
- The base must be clean and level. The foundation is cleaned of impurities and, if necessary, leveled using cement mixture.Cracks and fissures are carefully sealed. Concrete and porcelain tiles are leveled with a grinding machine.
- Measurement of the room. Proper measurements help speed up the installation process.
- Primer surface of the subfloor. Priming allows for better bonding of the substrate to the cement screed.
- Next, the waterproofing layer is laid using polyethylene, which should enter the wall 10 cm.
- Placement around the perimeter of the base of the damper tape. It is intended for uniform distribution of heat over the surface.
- Installation of insulation. Insulation is selected depending on the type of flooring.
- Coating reinforcing mesh. If you add microfiber or plasticizer to the screed solution, you can do without additional reinforcement.

How to calculate the material and power?
It is necessary to know the power factor in order to know whether the heating of the room will be sufficient. It also allows you to correctly determine the size and amount of material.
To calculate the power it is necessary to use the formula P1 = P2 * S * 1.3 (... 1.6), where:
- P1 - power cable;
- P2 is the heating power per square meter;
- 1.3-1.6 - a measure of the reserve, which is needed so that the heating system can count not only on its resources, but also have spare power reserves.
The required power for heating a dwelling is 120-180 watts, and in cases with a balcony and loggias, the indicators increase to 180-250 watts per square meter. Also, power can vary depending on whether the system was installed as an additional source of heat or as the main heating.
The cable length is calculated using the formula h = S x100 / L, where h is the cable length, S is the surface area, and L is the total cable length.
When laying film heating power is determined much easier: the total number of heating elements must completely cover the required surface.
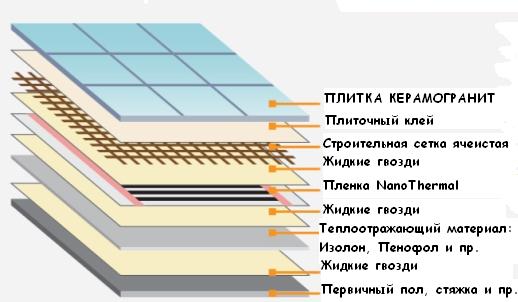
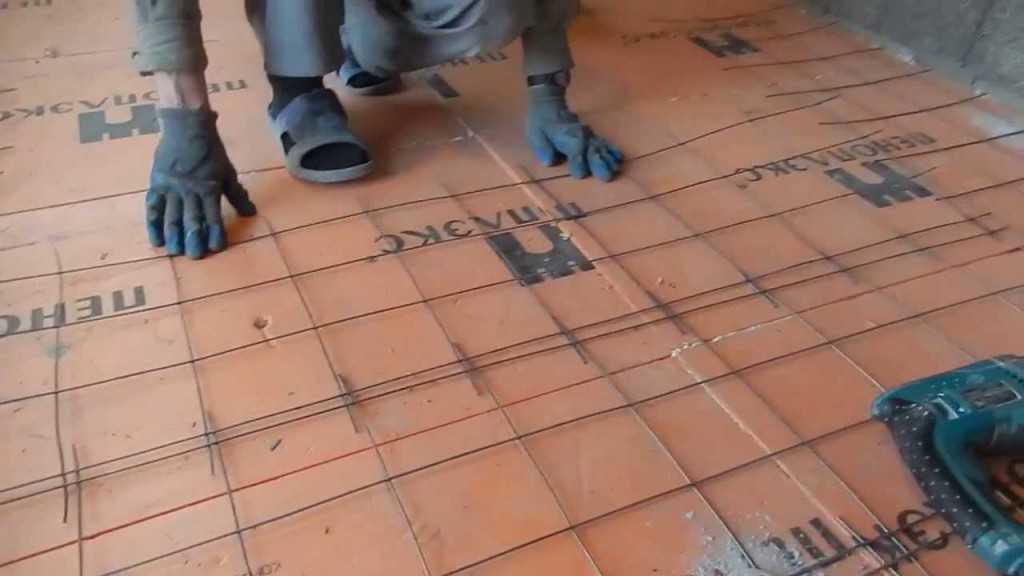
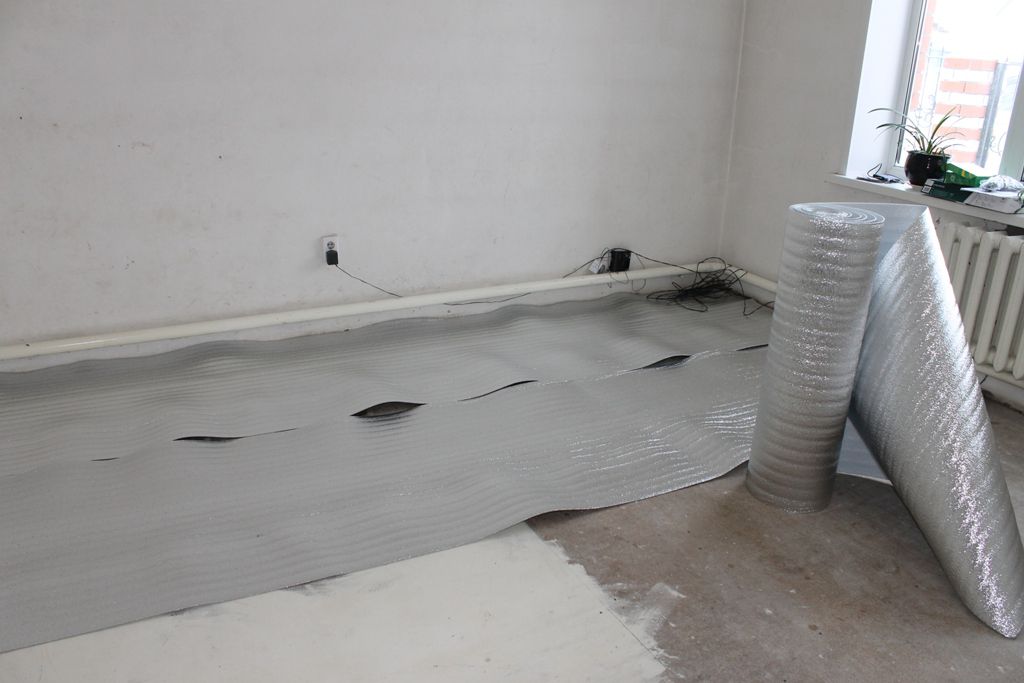
How to install insulation?
Thermal insulation is used to ensure that heat fluxes are evenly distributed. For this purpose, a material with a reflective silver coating (penofol or polystyrene foam) is suitable.
For apartments of multi-storey buildings, an insulating layer 3-4 mm thick will be suitable, and in private houses the layer should be thicker. Heat insulation material is fixed with adhesive material.
If it is necessary to heat the room with a high level of humidity (bath), then the insulation is also treated with a waterproofing material.
How to do it yourself?
Step-by-step instructions for different ETP models are slightly different. Let's take a closer look at how to mount different types of underfloor heating with your own hands.
Installation of cable floor heating:
- Preparation of the foundation to the required state (smooth, clean);
- In the bathrooms and bathrooms installed waterproofing;
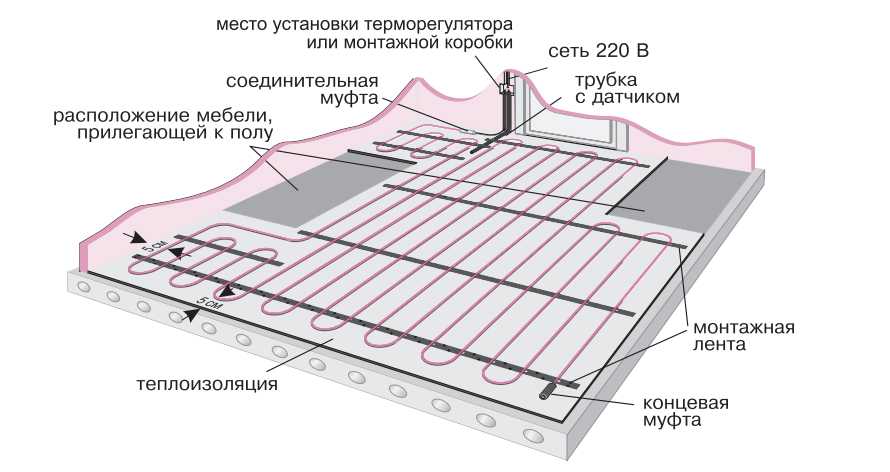
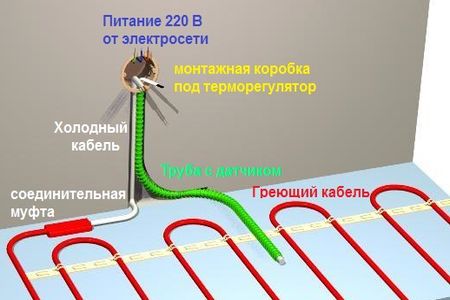
- The mounting tape is installed and the cable is laid with the necessary pitch. The end of the cable wire is output to the junction box where the thermostat will be located.
- A temperature sensor is installed in a corrugated pipe, one end of which is plugged, and placed between the cables at a distance of 70-100 cm from the wall. The other end of the pipe with the sensor is inserted into the box for connection to the thermostat.
The inclusion of the system in the network is possible only after drying the screed.
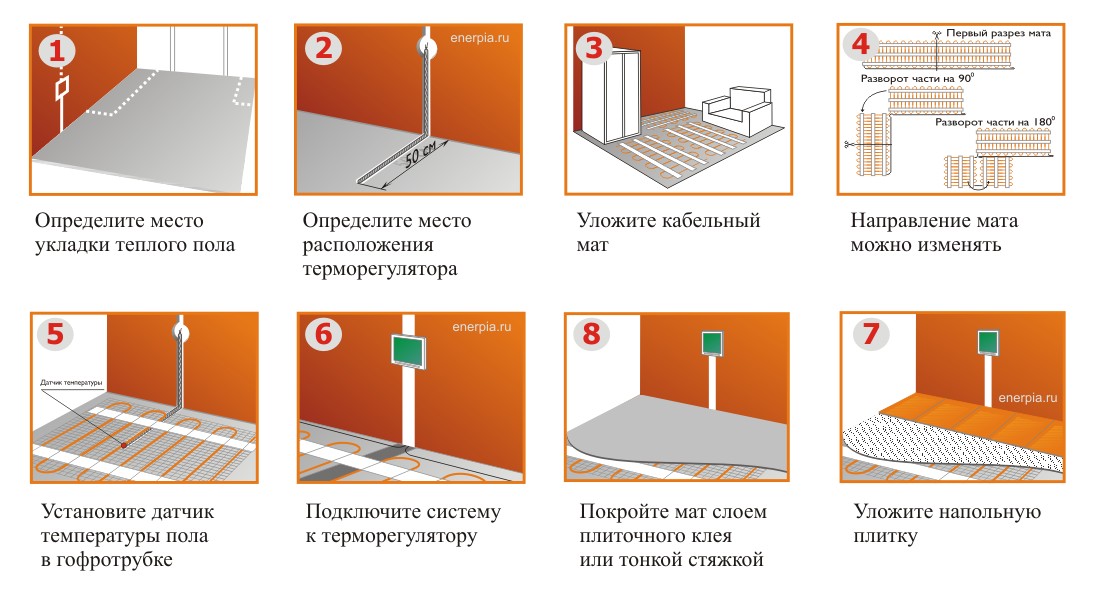
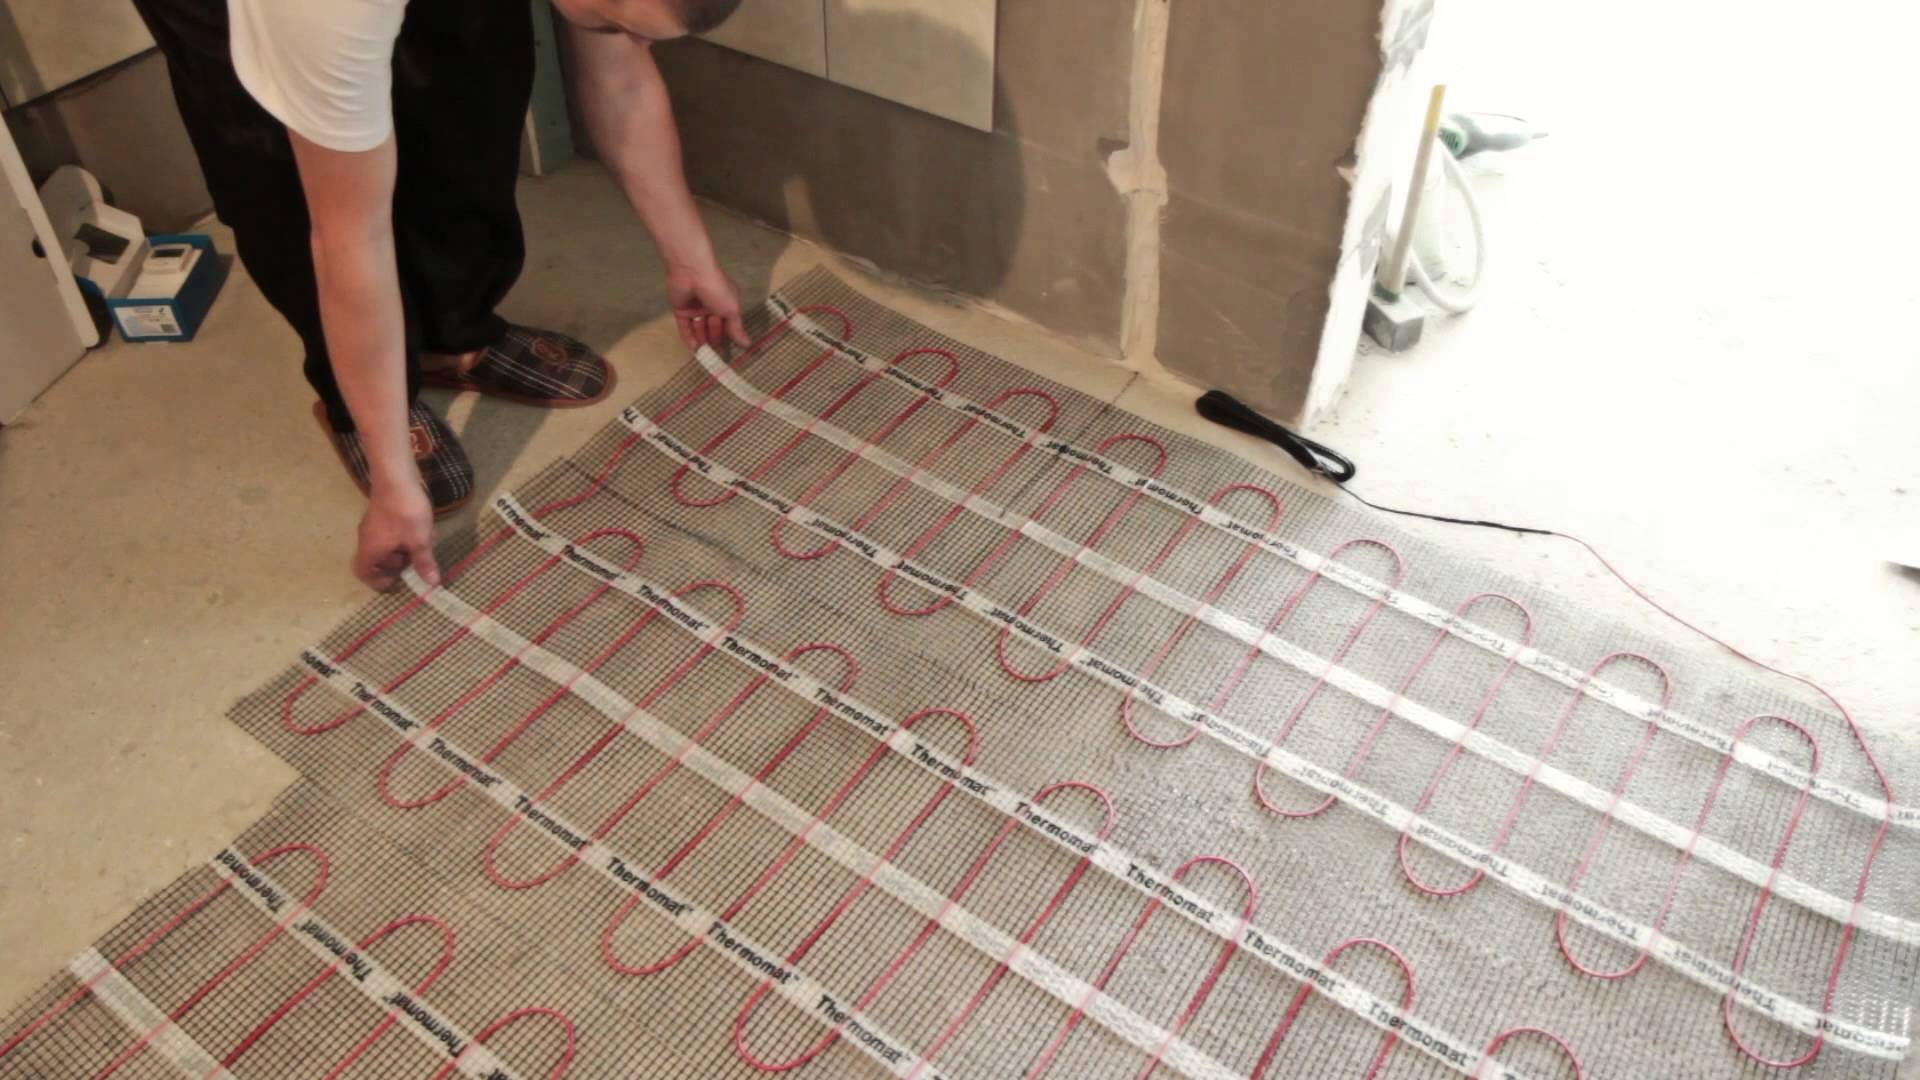
Installation of heating mats:
- On the prepared base, the mats are laid in such a way that they do not find each other, but come into close contact.If necessary, cut the fiberglass be extremely careful not to deform the heating cable. When installing a thermomat with a single-core cable, both ends of the cable wires should fit the box with the thermostat. In the case of a strong cable to the thermostat, it suffices to conduct only one wire.
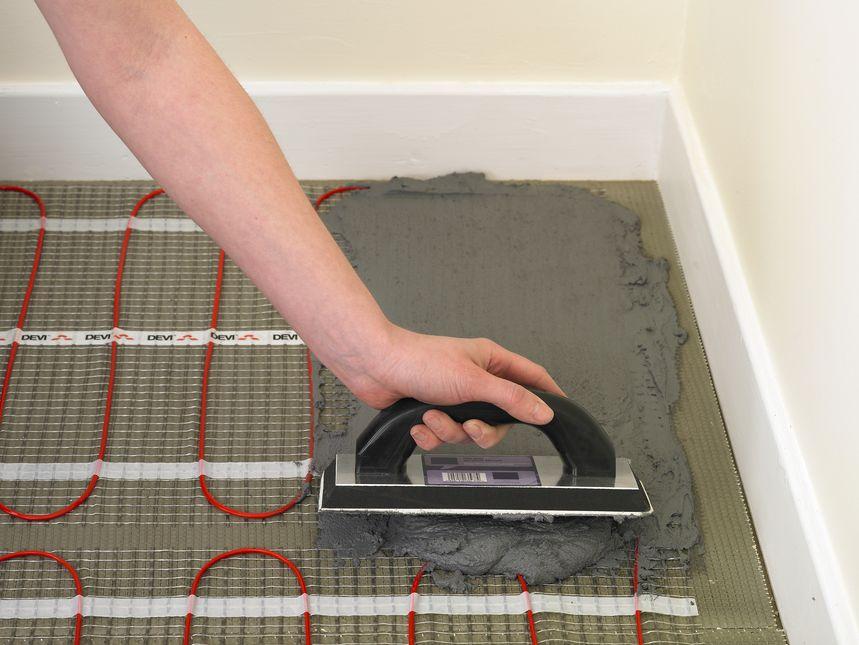
- The mat is laid on a special glue (a layer of glue - 2-3 mm), pressing it slightly into the floor.
- The temperature sensor is installed in the corrugated pipe between the turns of the heating elements. The second cable wire is supplied to the temperature controller.
- After that, it is obligatory to check the functioning of the system using a tester.

If the laying of a heated floor is intended for tile, then after checking for operability it is possible to switch to mounting the flooring. In the case of laminate and parquet board, after testing it is necessary to make a coupler 1.5-2.5 cm. The floor covering creeps only after the complete drying of the screed.
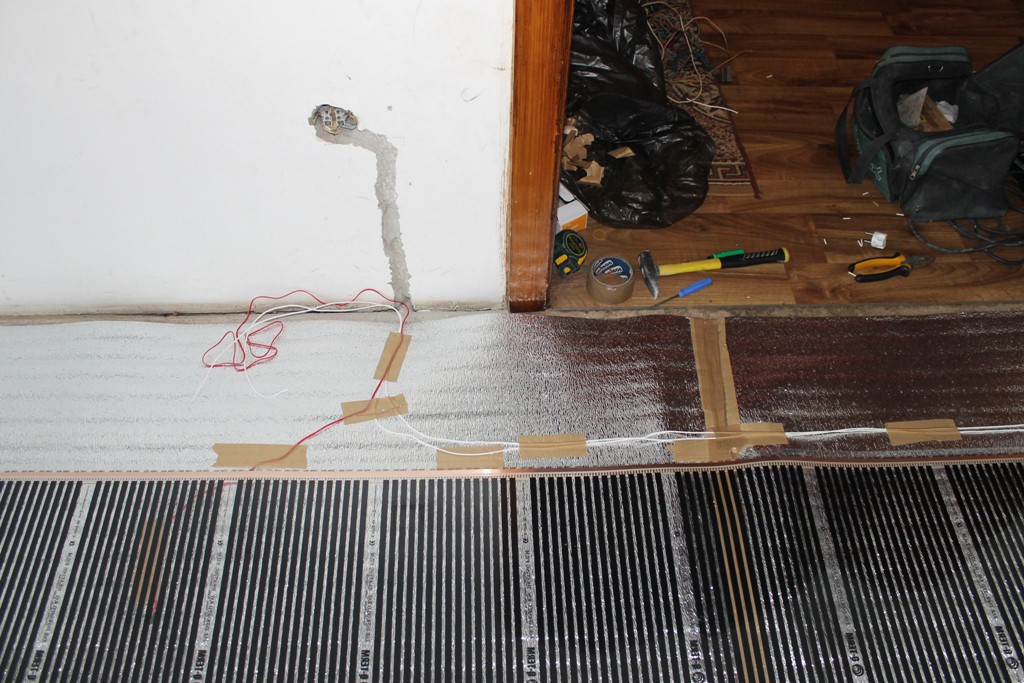
Mounting an infrared film floor:
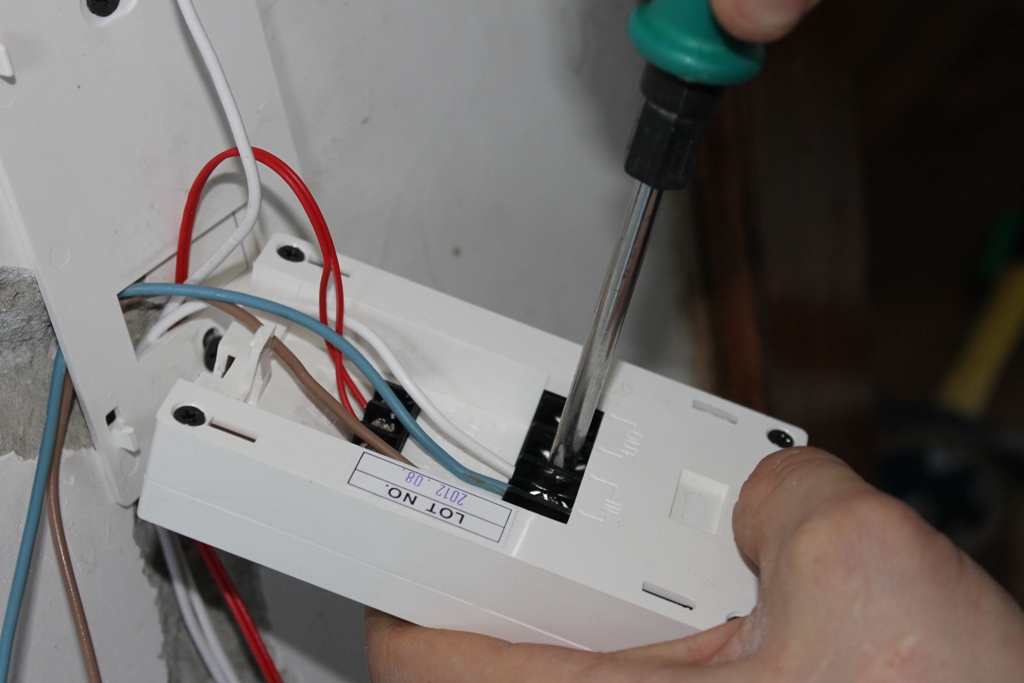
- First you need to install a junction box with a thermostat. A wall is cut into the wall to connect the film and the sensor to the thermostat. We lead the power cable to the junction box.
- The base of the floor is covered with a heat-insulating layer (no more than 5 mm thick). The joints of the material are fixed with adhesive tape.
- It is necessary to lay the infrared film heating elements down. Also, the edges are fixed with tape so that there are no changes. The location of the strips must be made in such a way that the contacts are closer to the thermostat.
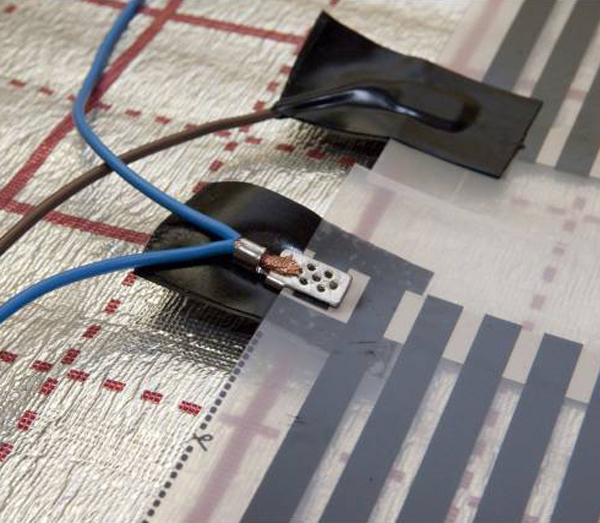
- Connection of electrical contacts and installation wire to the wall, further isolating them with bitumen insulation. The installation wires are led to the junction box.
- The temperature sensor is installed in the second section of the infrared floor in order to better receive information about the surface heating.
- Connection testing. If everything is in order, you need to turn off the system.
- Lay the plastic wrap.
- Laying the topcoat.
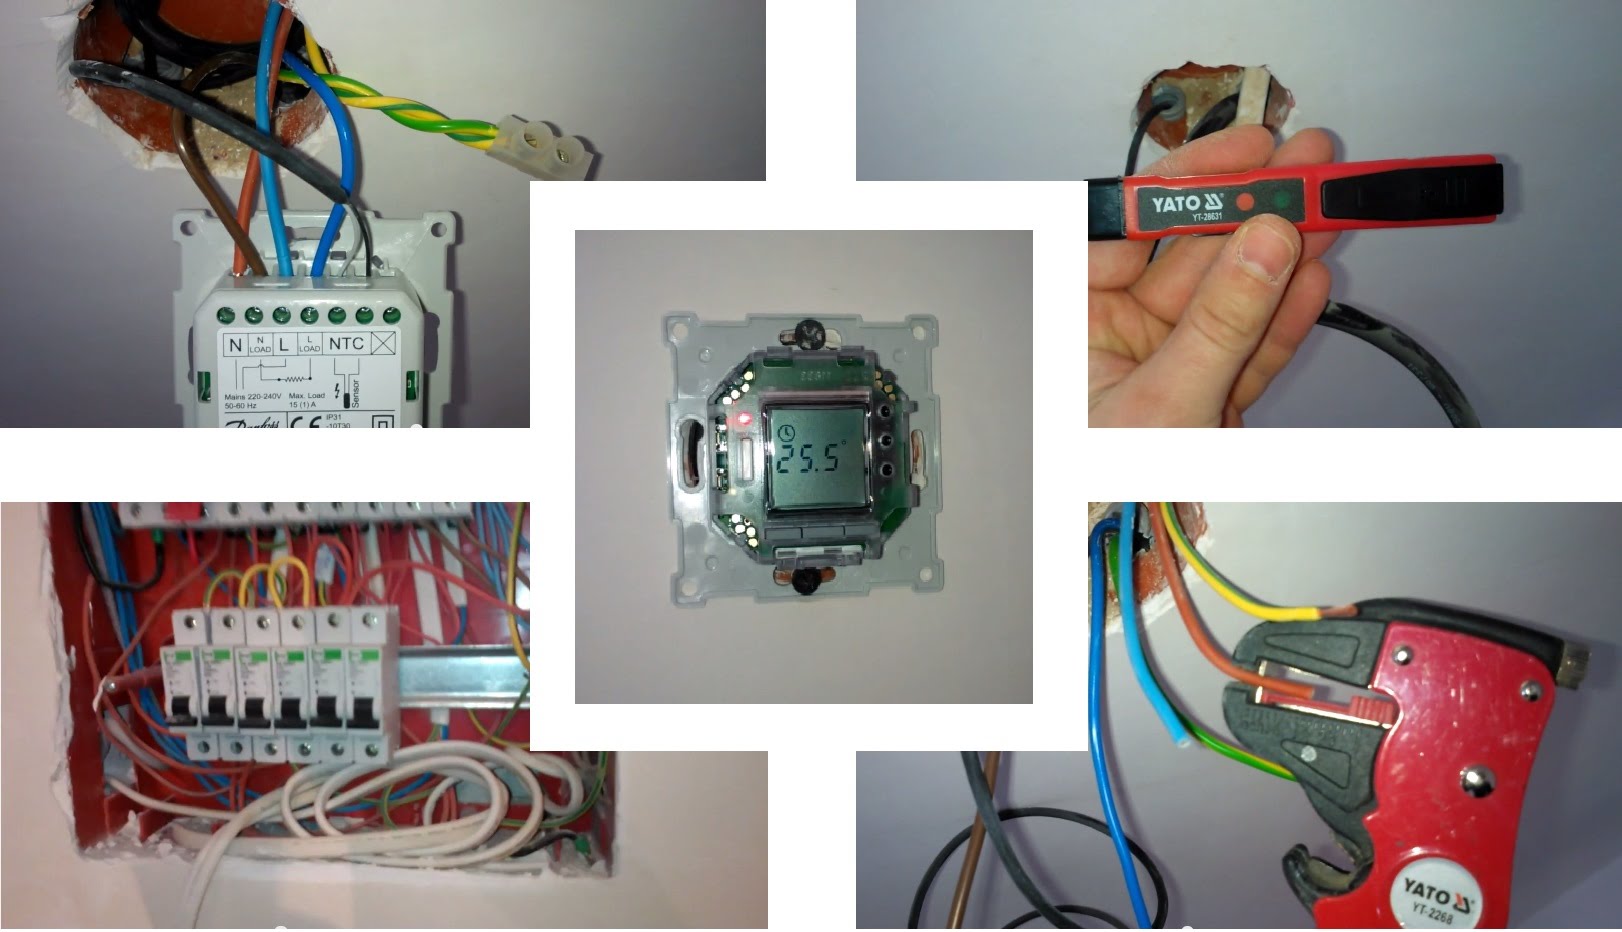
Electricity connection
This part of the installation is the most responsible. Connecting electricity requires consecutive actions:
- Test cable and wires for system resistance (using a multimeter) and insulation mats (using a megohmmeter).
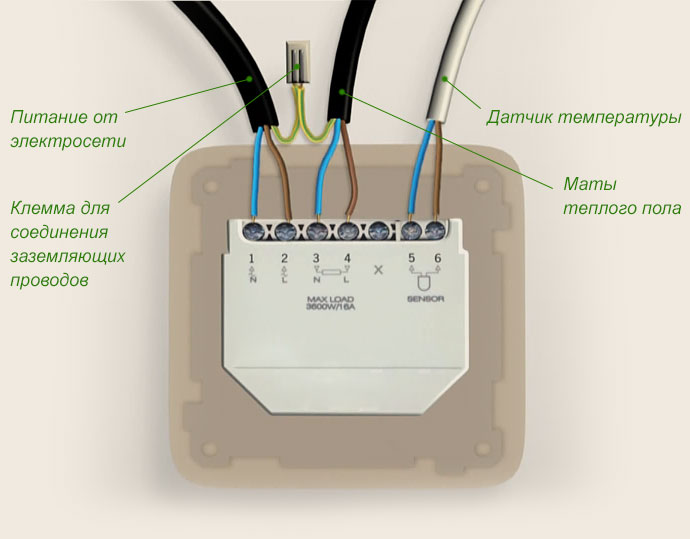
- Connection of temperature sensor, thermostat and power cable.This must be done according to the instructions included in the ETP system.
- Additional grounding of the cable and power cord, which is performed by fixing these elements with a protective terminal.
The temperature sensor is connected to the thermostat according to the instructions, after which the heating system is connected to the circuit breaker. The first launch of the system is carried out only after one hundred percent drying of the screed.
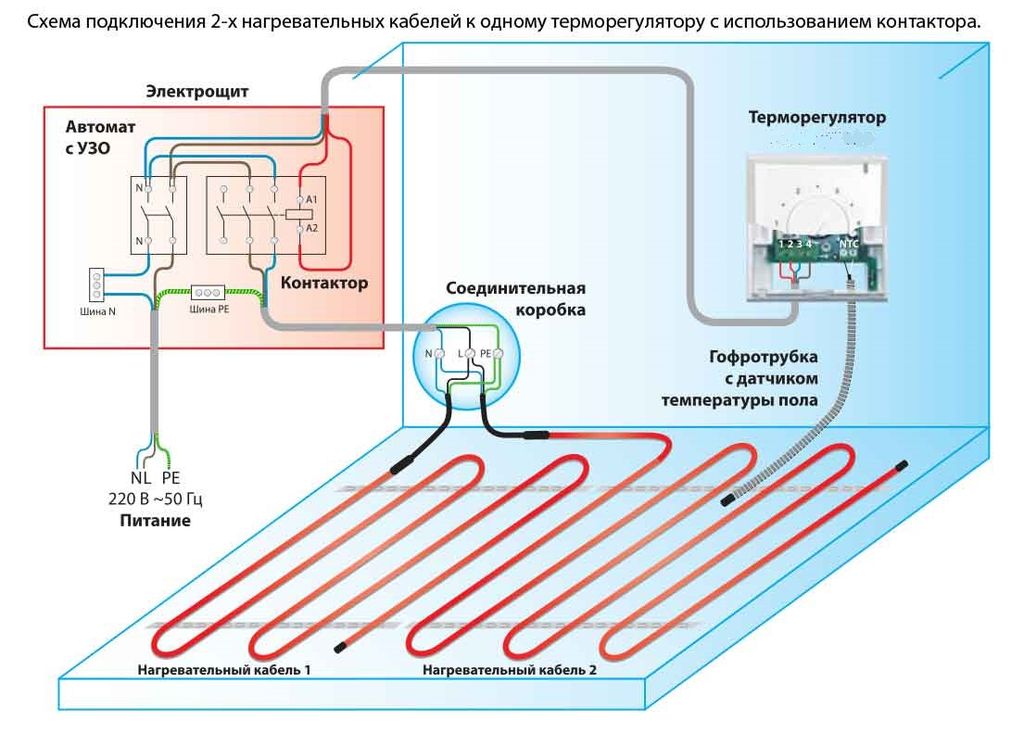
Depending on the model of the electric floor used as heating, wiring diagrams differ. Connecting an ETP is much easier than connecting a water floor. No extra connections are required (for example, to the electric boiler), but only to the electrical network.
Cable system connection:
- The temperature sensor is installed in a corrugated pipe and is placed in a prepared wall in the grotto.
- The wire of the electric sensor is connected to the thermostat. The cord itself is fixed between the turns of the heating elements.
- At the final stage, the heating system is checked with a tester. Only if, after testing and verification of indications with the instructive indications, they coincided, you can put a tie.

Heating mats:
- To begin with, the location of the temperature controller is determined.
- Mats are laid according to the installation instructions.
- The temperature sensor, laid in gofty pipe, is fixed between the turns of the system.

Connection of film floor:
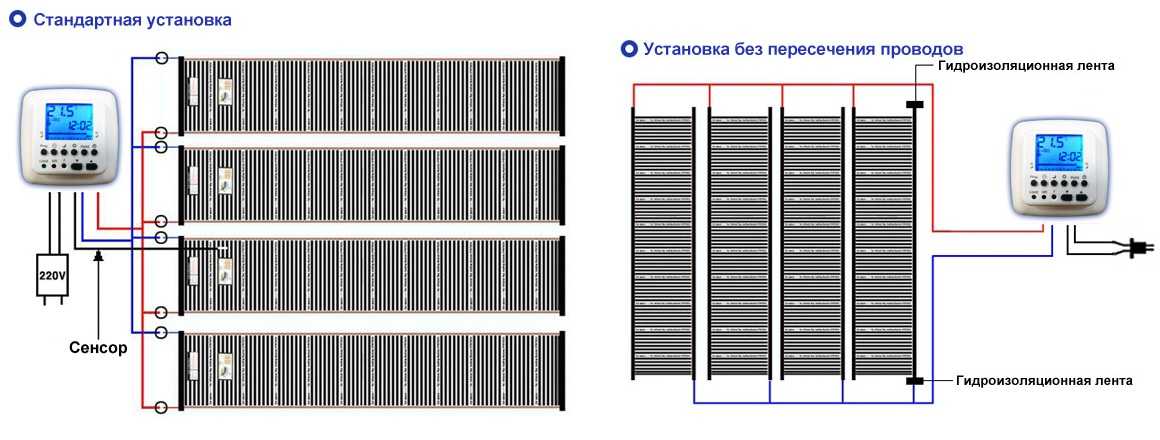
- First of all, it is necessary to connect all the rows of the film. You can use only those terminals that came in a complete floor heating. Film strips are connected in parallel. All contacts must be insulated with overlays.
- In the center of the heat insulating substrate is a pocket for mounting the thermal sensor.
- Connection of the temperature sensor and the thermal film to the thermostat and the entire system to the mains through a circuit breaker.
To make sure that the system is functioning, it is necessary to turn on the heating to full capacity and wait a few minutes. There should be no sparks and odors. After testing the performance of the system, you can proceed to the installation of flooring.
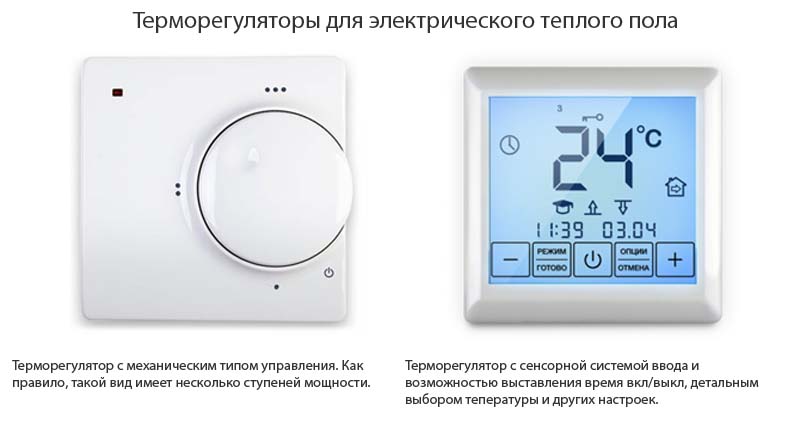
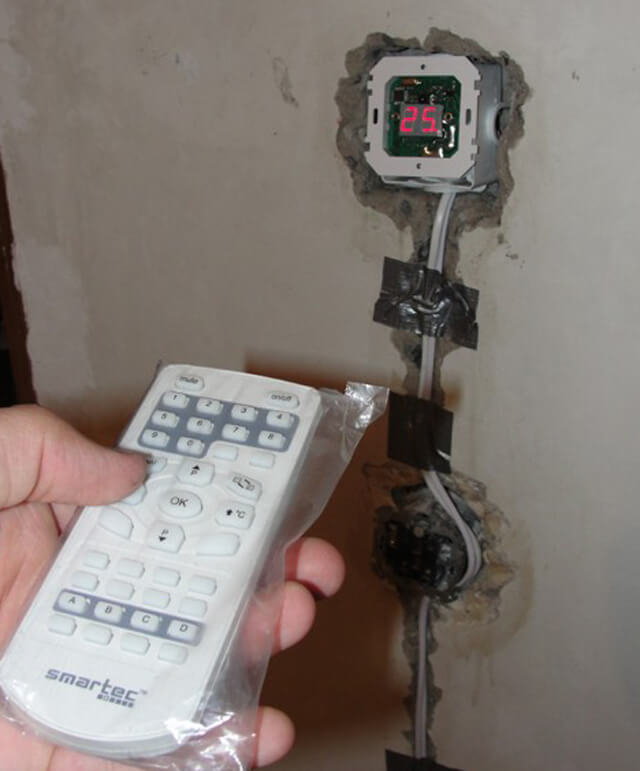
Control block
Regulation of the floor heating system occurs at the expense of the electrical unit. You can turn the heating on and off, control the temperature of the room,and also to regulate for the periods of automatic inclusion and shutdown of system.
There are several types of electric floor control panels:
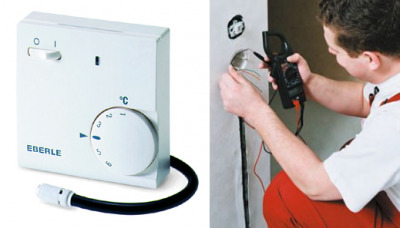
- Electromechanical the regulator is the easiest way to control. Its task is to control the heating and shutdown of the system. Manual regulator is made manually. There is a wheel connected to the controller that maintains the temperature of the floor covering. Due to its simple design, the electric control has the lowest cost and is less prone to breakage.
- Digital panel The control functions the same as the previous regulator. The only difference is that the regulation is carried out not with a wheel, but with a push-button or touch panel. The control unit is equipped with electric sensors that measure the air temperature in the room. Temperature sensors transmit data to the thermostat.
- Programmable thermostat produced by the most modern technologies. There are several temperature sensors that transmit all the indicators to the controller, which maintains different temperatures in different rooms.You can control this thermostat via a Wi-Fi network using a smartphone or laptop. When leaving the house, you can turn it off completely or turn it on to the required temperature before you arrive.
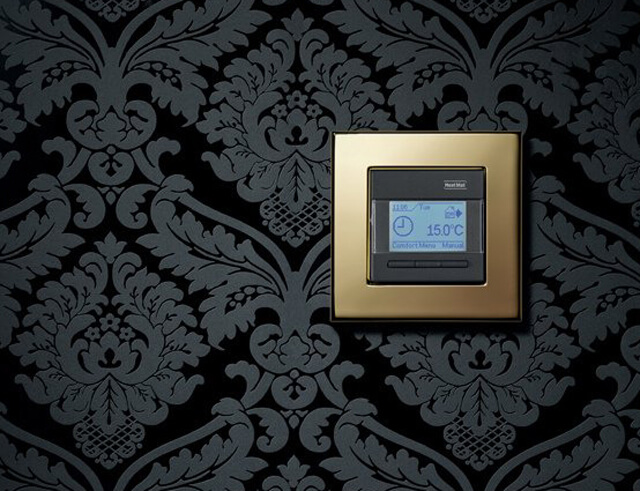
It is recommended to give preference to modern control panels, which can be configured manually. Convenience and practicality in use and different design colors will help to fit them into any interior style.
Common mistakes
The very first mistake can be considered the installation of an electric floor under a heavy massive headset. Under the weight of the materials, there is insufficient cooling of the floor covering, which causes overheating and breakage of the heating elements.
The curvature and bending of the cable leads to breakage of the entire heating system. If the film heating method is used, the failure of the system can occur due to damage to the heating film.
Incorrect control of insulation resistance during the installation period is also a common mistake for newbies. The value should not diverge from the declared manufacturer by more than 10 percent. Otherwise, you are waiting for a failure ETP.
Do not pour the temperature sensor into the screed. It is installed in a corrugated pipe, which is placed in the screed. To eliminate the breakage in the flooded sensor, it will take a lot of effort.
The installation of an infrared film requires isolating the current-carrying parts of the film. Failure to follow this rule will continuously cause current leakage and system power down. The cable installed in the heating mat is prohibited to cut. It is necessary to correctly measure out the area for heating and it is better to leave part of the room not covered by a heater.
Recommendations
Installing an electric underfloor heating is not so easy. It is necessary to take into account some useful recommendations:
- Be sure to follow the instructions from the manufacturer during installation;
- Strong cable can not be cut;
- When installing, do not step on the cable, it can lead to breakage;
- Installation of a heat-insulated floor is recommended to be carried out to a warm season;
- The size of the electric floor film should be no more than 15 m;
- Grounding when connecting ETP - a prerequisite;
- It is forbidden to fasten film materials with metal products;
- Film heating is not recommended to be installed near heaters, fireplaces.

If you follow the instructions and responsibly treat the technology of installation of electric floors, this type of heating will meet your expectations.
To learn how to install a heated electric floor, see the following video.


