What warm floor can be laid under the tile?
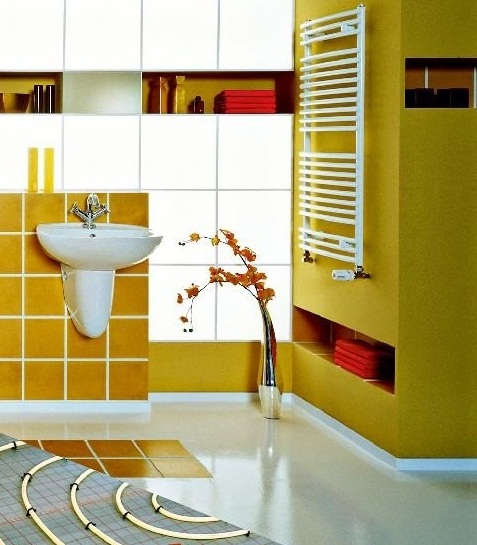
Tile is a reliable, moisture-resistant, durable and attractive flooring option, but rather cold. To eliminate this disadvantage, a warm floor is installed under the tile, which allows the material to be heated to a comfortable temperature.
Special features
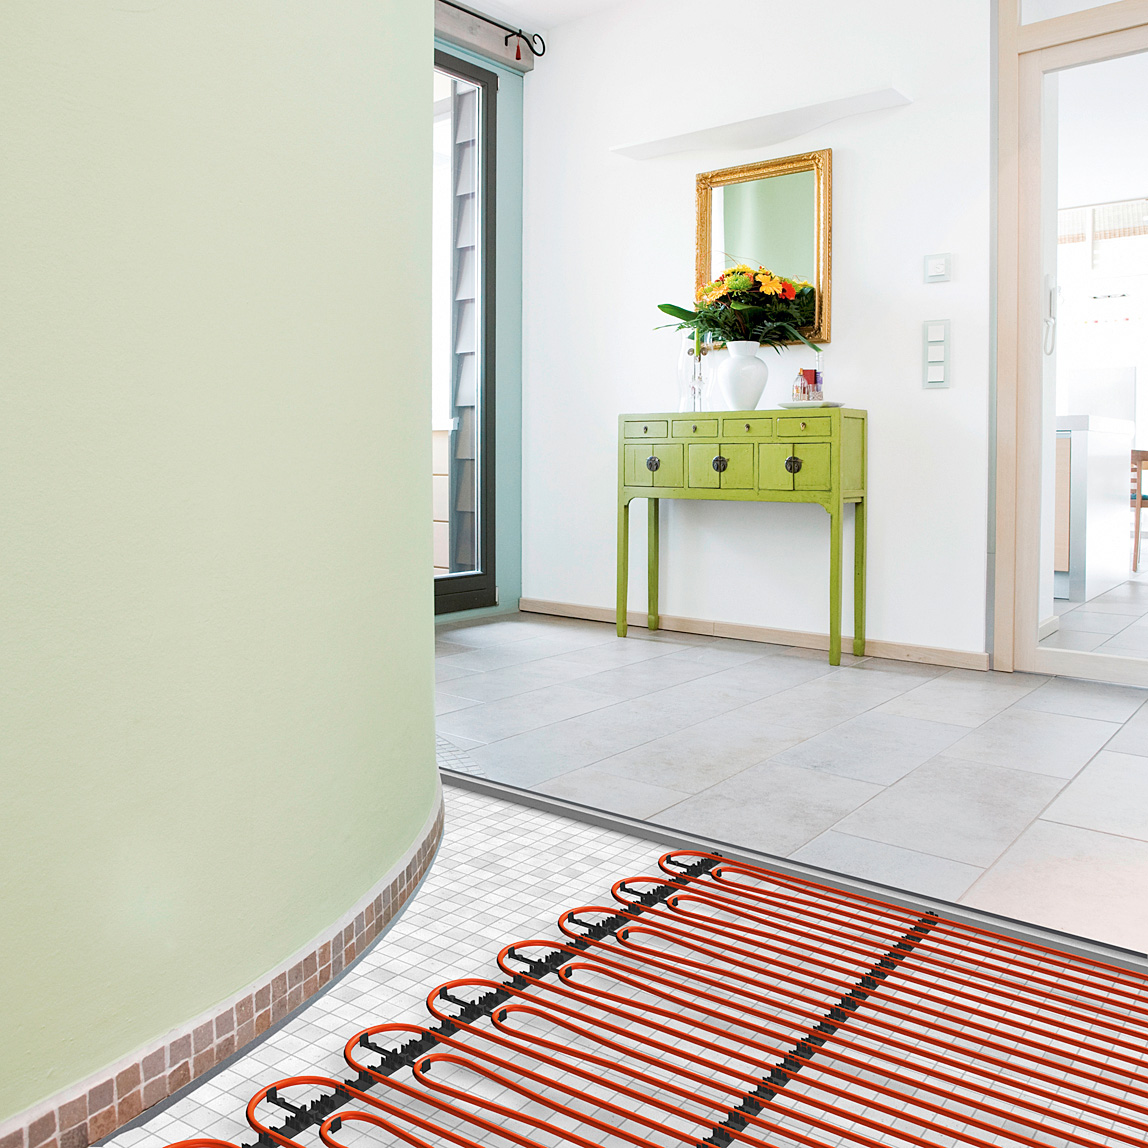
A warm floor is a system that is mounted under a tile or any other floor covering and provides heating of the latter, and from it - objects and air in the room.

The advantage of the system is the possibility of its operation in both residential and office buildings., heated and unheated structures.
Modern systems can operate by circulating hot water or on electricity.Thanks to energy-saving technologies, the warm floor will not cause significantly increased electricity bills, especially if you purchase a kit with a thermostat - when it reaches a predetermined temperature, it shuts off the system, which saves energy consumption.
It is very convenient if it suddenly became colder outside - the system automatically maintains a comfortable mode in the room.
Pros and cons of the system
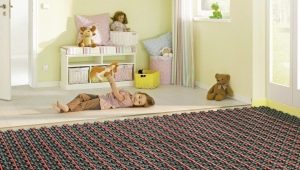
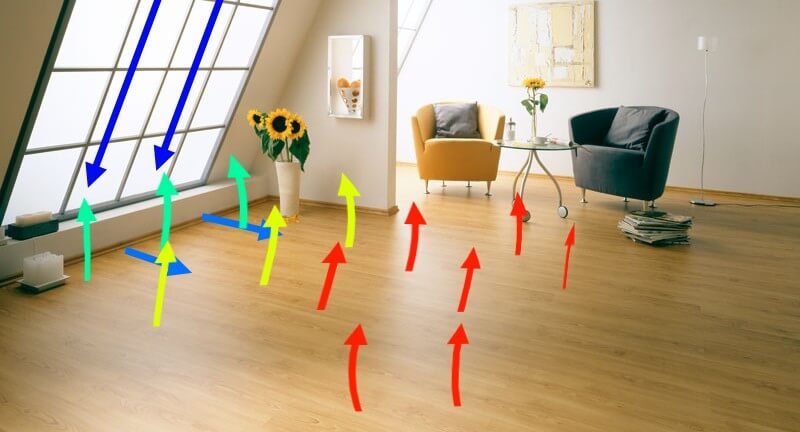
The main advantage of warm floors under the tile is that they warm the floor surface itself, and not the air masses, as radiators do. As a result, the room provides comfortable conditions - the floor is warm and the air is not too dry. It is also important that The temperature at the floor surface will be 2-3 degrees higher than at the level of the human head. Such temperature indicators are optimal for good health.
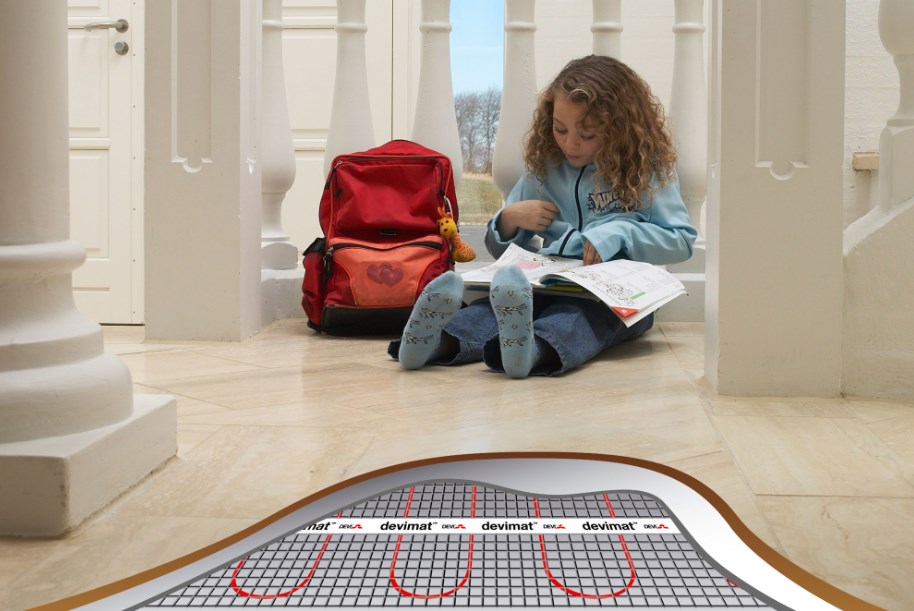
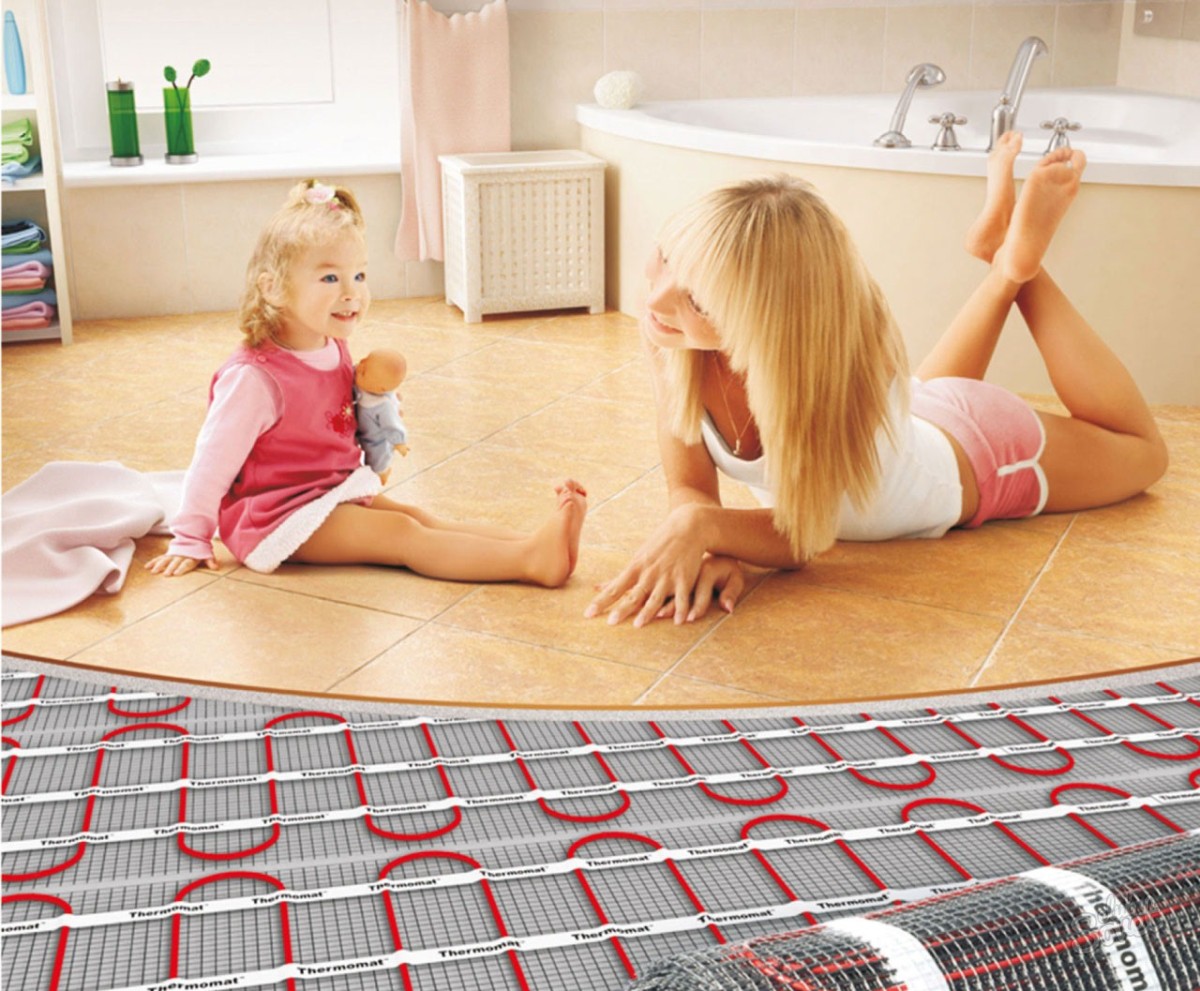
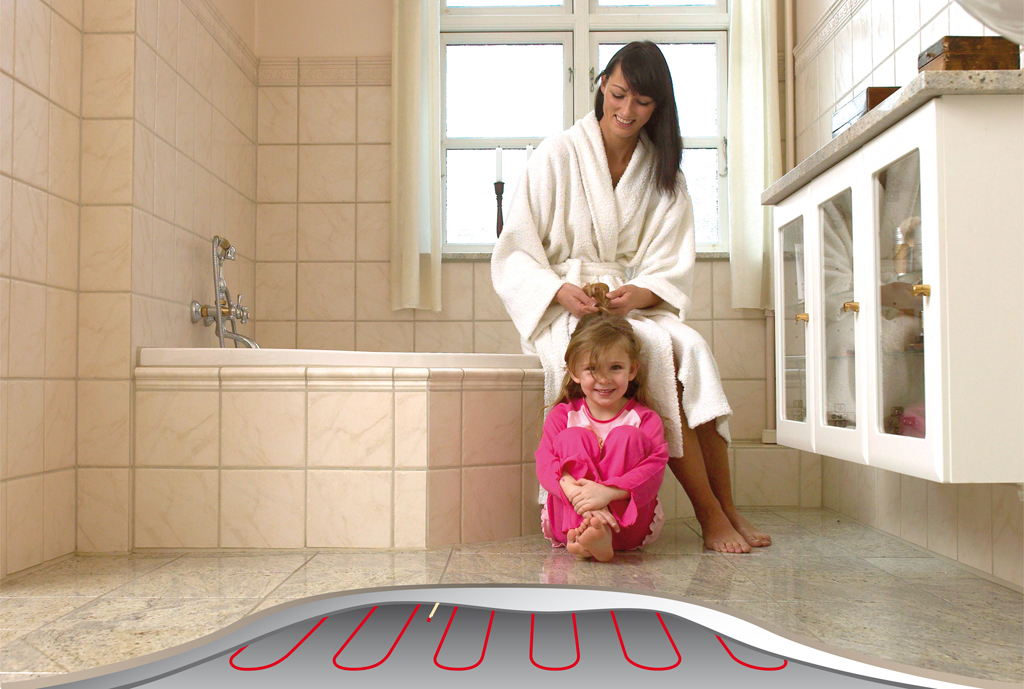
The warm floor system and its ability to “stepwise” warm the room (where warmer air masses are in the floor area) will be appreciated by families with small children. The child is constantly on the floor, in addition, his height is much lower than the height of an adult, so it is important to be sure that the flooring is warm and comfortable.
It is important that the system warms up the entire surface of the floor, while the radiators heat only the surfaces near themselves. If the sensors are properly configured and the heating elements are installed, excessive heating of furniture and household appliances can be avoided, which means their premature failure.
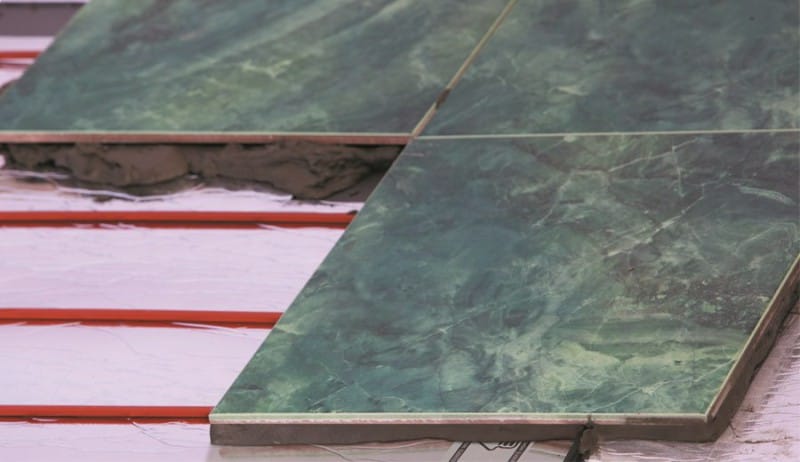
As for the flooring, the warm floor is an excellent solution for tile. The material has good thermal conductivity, so it quickly heats up and releases heat. Increasing the temperature does not adversely affect the tiles.
The only thing that should be taken care of is to choose tiles intended for laying on the floor, that is, resistant to increased loads (static and dynamic), abrasion.
There are 2 main types of warm floor - water and electric. The first one functions at the expense of pipes through which hot water circulates, the second one thanks to the heating elements working from the power supply network.

Each of these options has advantages and disadvantages.
The advantages of water heated floors include the following characteristics:
- small costs for the organization of the system;
- high efficiency indicators.
However, installation of a pipe system is a serious load on the supporting structures of the building, as well as the need to raise the floor level by 10-15 cm. Naturally, this method is not suitable for apartment buildings and other buildings with a centralized type of heating.
It is better to refuse a heated floor of this type in rooms with unstable temperature indicators (for example, on an unheated loggia), since there is a high risk of water freezing in pipes.
Finally, it is worth noting the laboriousness of installation and the need to disassemble the floor and the entire system to detect and troubleshoot.
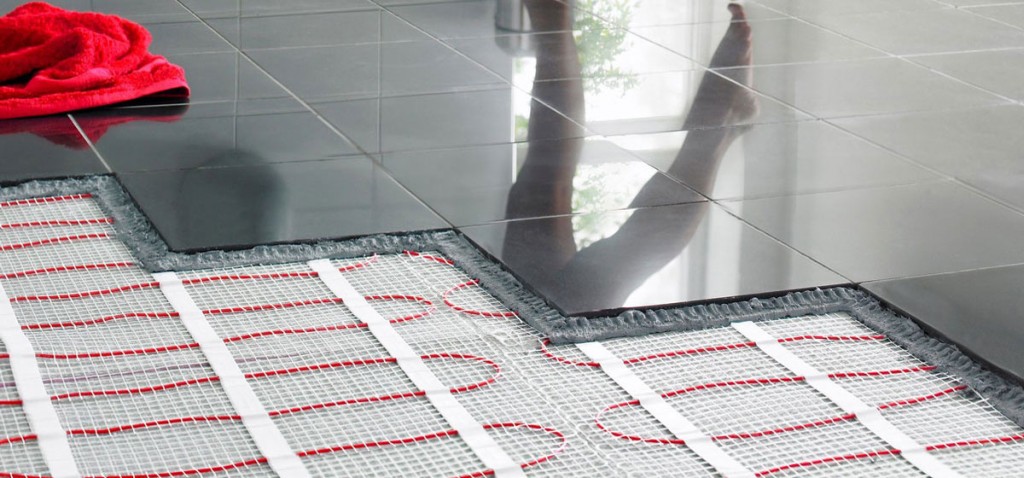
Heating mats and other types of electric flooring are much easier to install and are suitable for almost all types of premises, including city apartments. Such systems quickly heat the floor and are equipped with thermal sensors, thanks to which it is possible to regulate the temperature of the room.
Conveniently, if a separate element breaks down, it is easy to diagnose it (this section of the floor just stays cold) and replace it without dismantling the entire system.
Of the obvious drawbacks is the higher cost of the electric flooring system and increased electricity consumption.In addition, a heated floor that runs on electricity, like any electrical appliance, if improperly connected and used, can cause a fire. You will see the following video on how the installation of a heated electric floor on the basis of a heating mat is carried out.
Kinds
Water
As already mentioned, there are 2 main types of underfloor heating - water and electric.
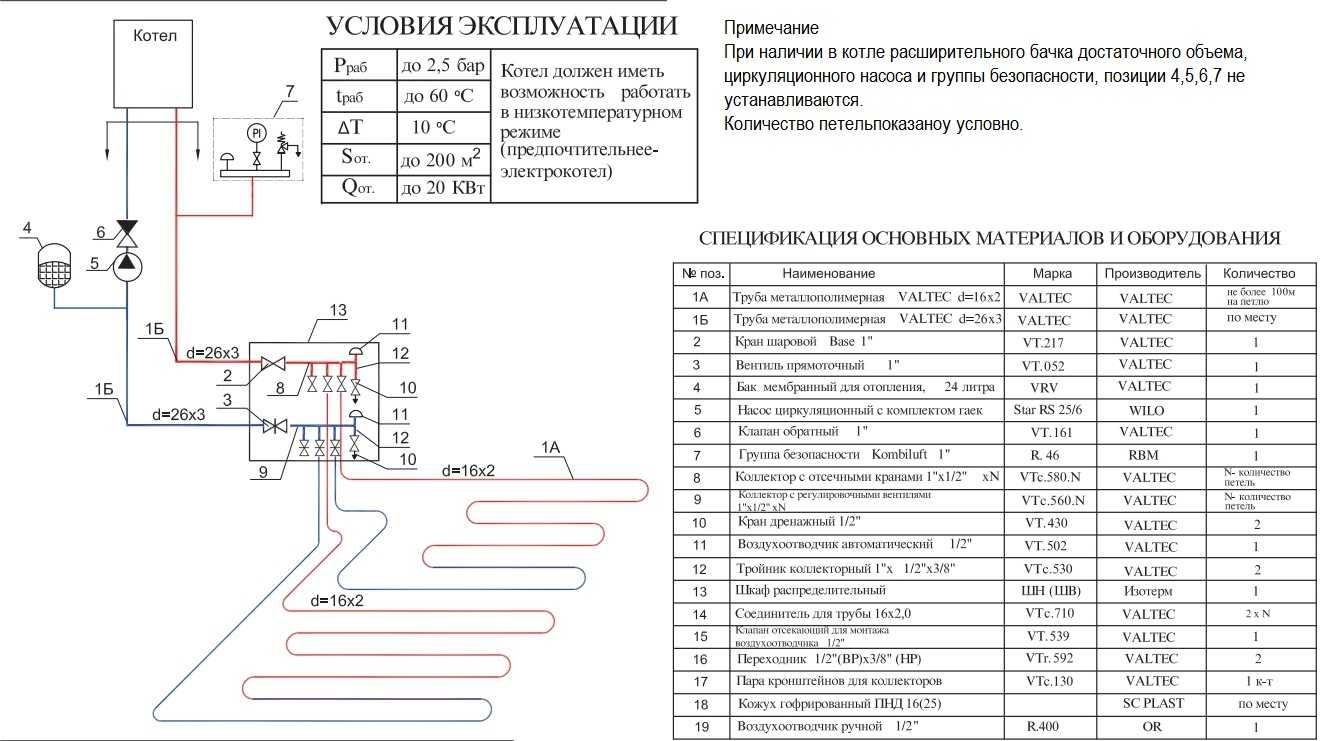
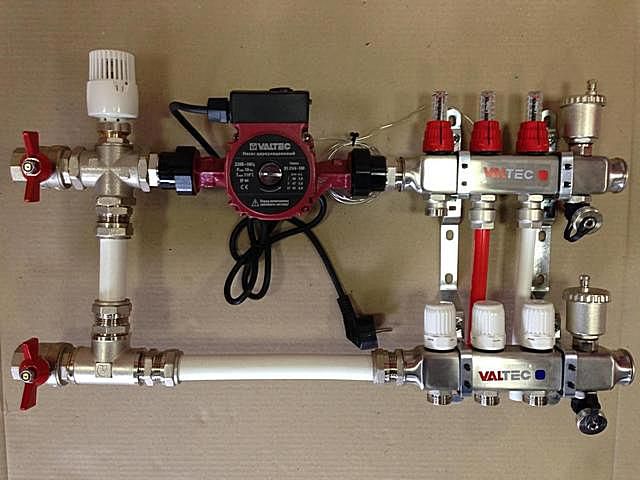
The heat carrier in the first embodiment is water circulating through the pipes. It can be supplied from a centralized system or a separate riser. In such schemes, there are necessarily pumps that provide fluid movement. In rooms of a small area you can do without installing a pump, and the circulation of the liquid is achieved under the influence of the laws of gravity.
As already mentioned, this system is not suitable for use in houses with centralized heating, as it will be cold in apartments located higher up the sprue. In addition, there is a risk of rupture of pipes and flooding of the premises below.
In addition, the floor thickness increases significantly, because it adds the diameter of the pipe, the thickness of the screed.
Electric
May have several varieties:
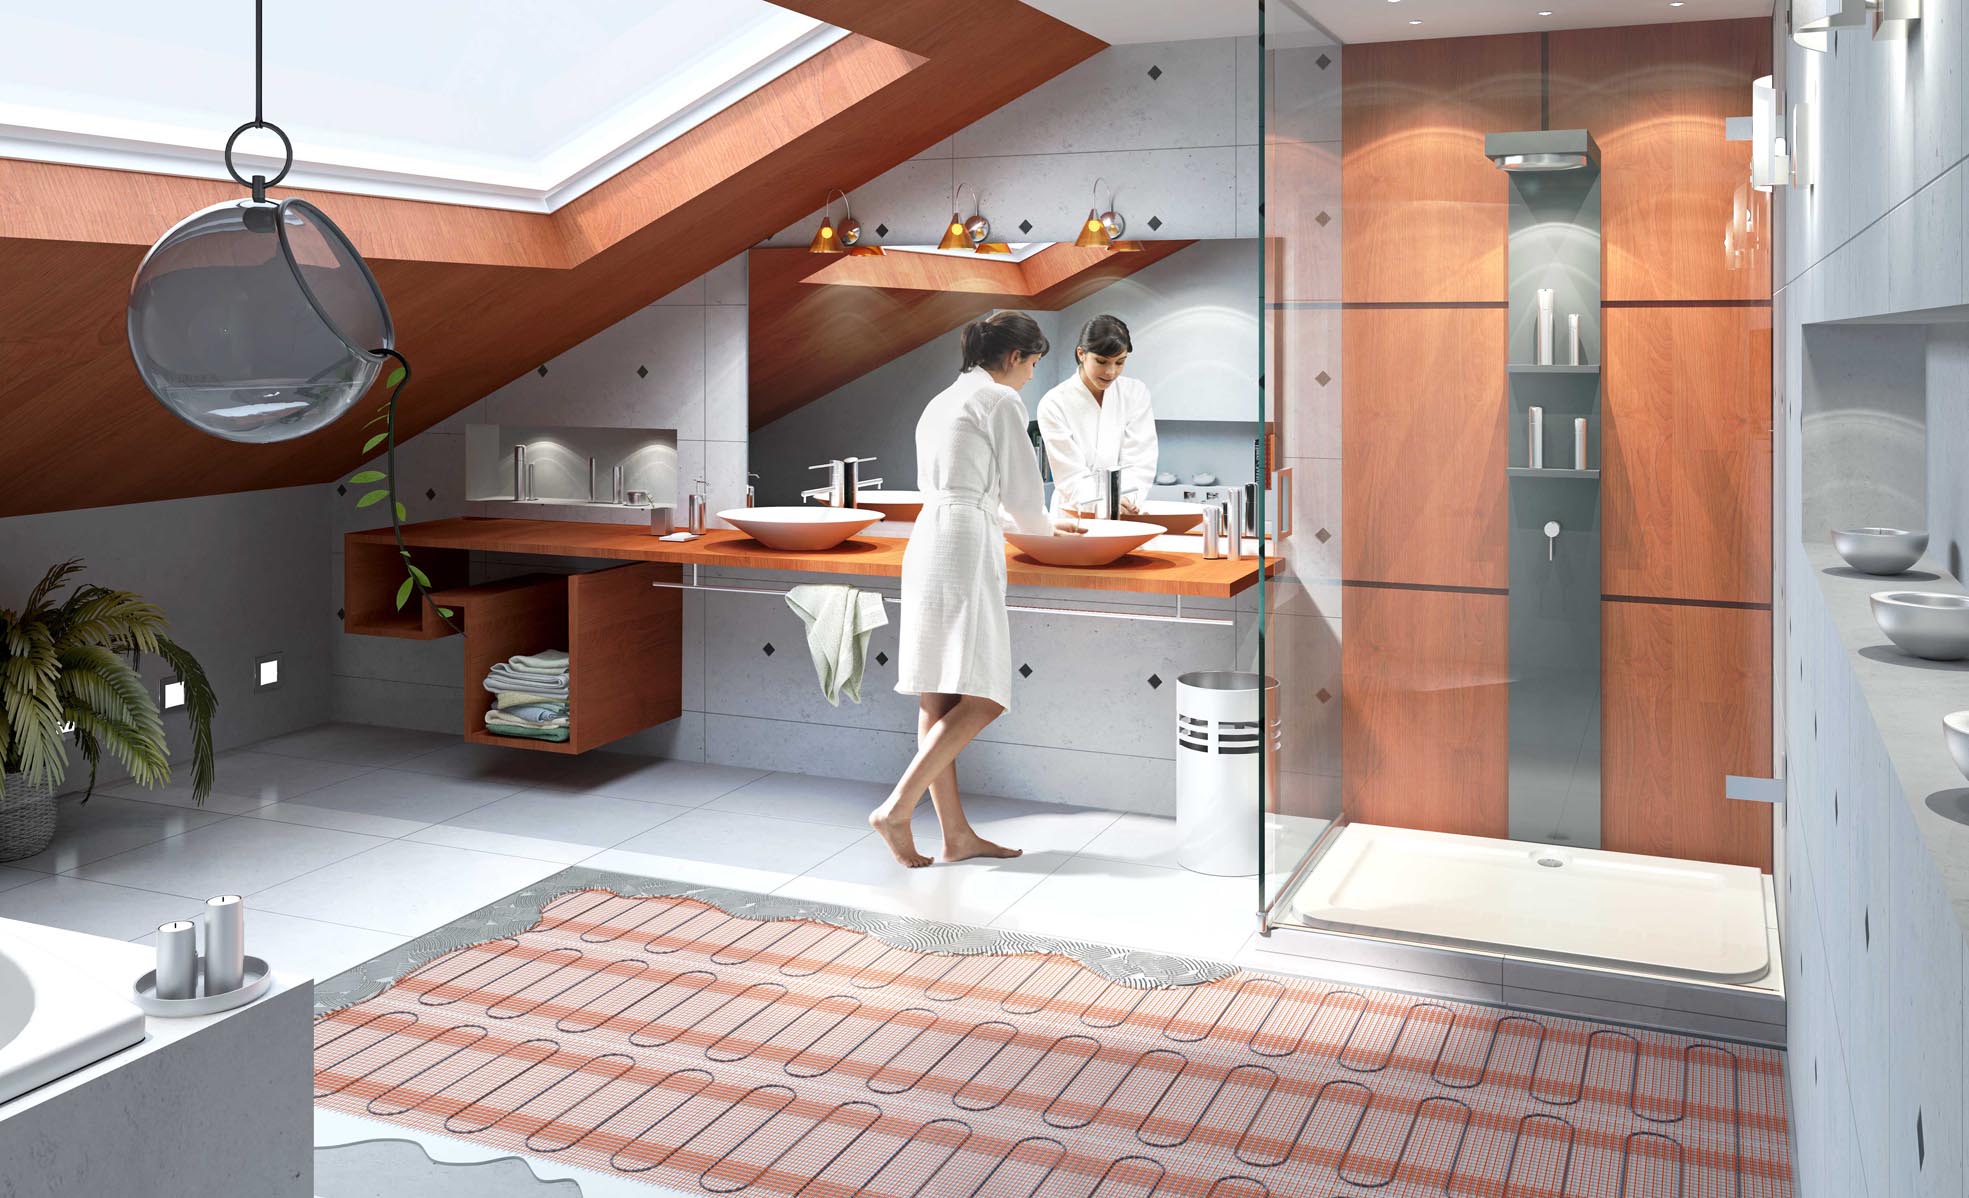
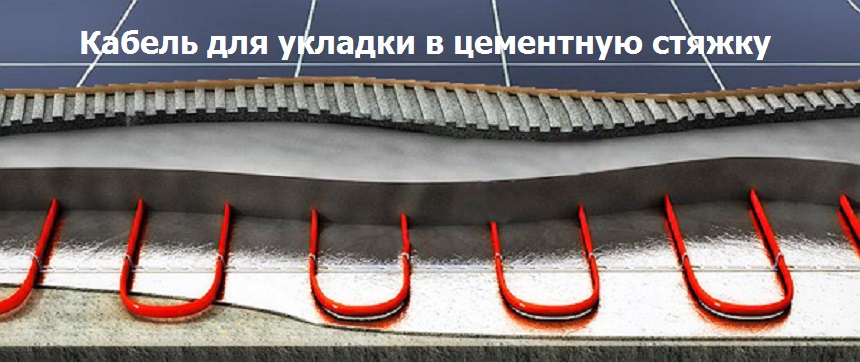
Cable
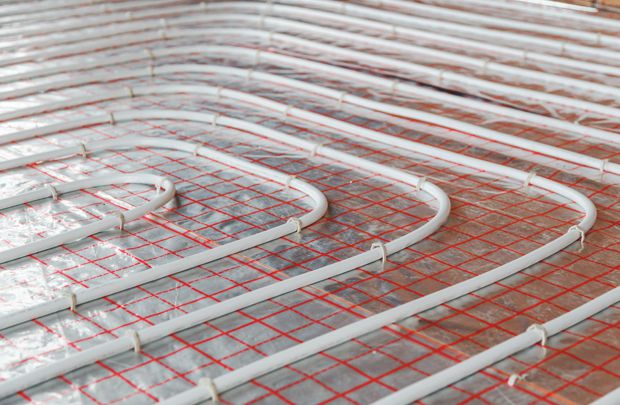
The basis of such a floor is electric wires made of special alloys that convert electrical energy into heat. This becomes possible due to the large resistance of the conductor, resulting in heating.
The heating cable is laid on the floor, the pitch is calculated for each specific room and connected to the electrical grid. When choosing a model, it is worth refusing to buy the cheapest systems, since their production of electromagnetic radiation exceeds the norm.
As for the cost, it is somewhat more expensive than the water heated floor system, but cable is the most affordable one among other electrical analogues.
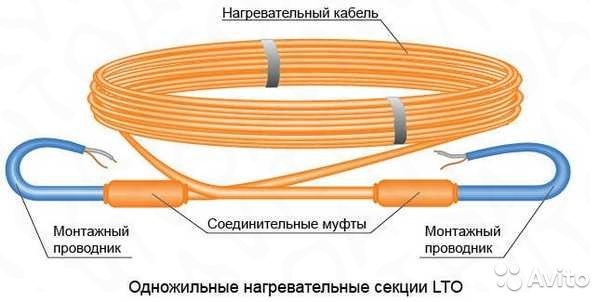
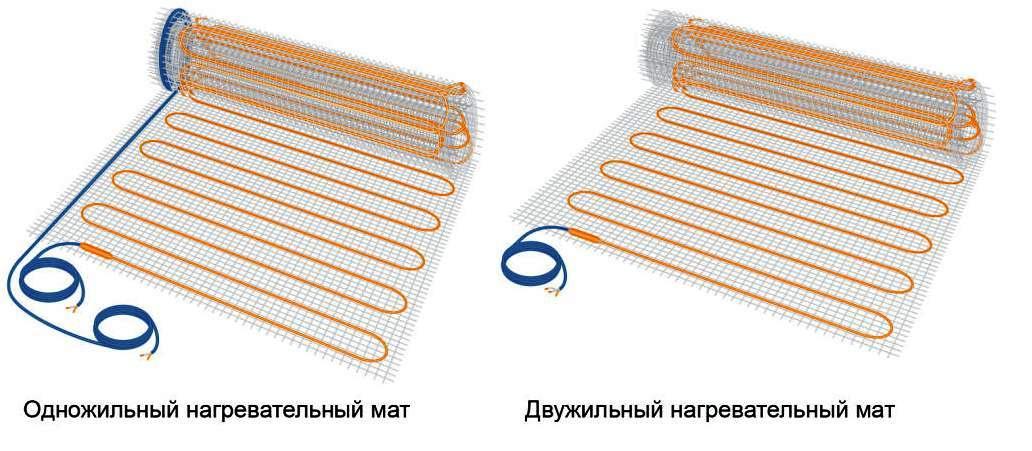
Depending on the type of cable used, they are single-core (the simplest and cheapest) and strong.
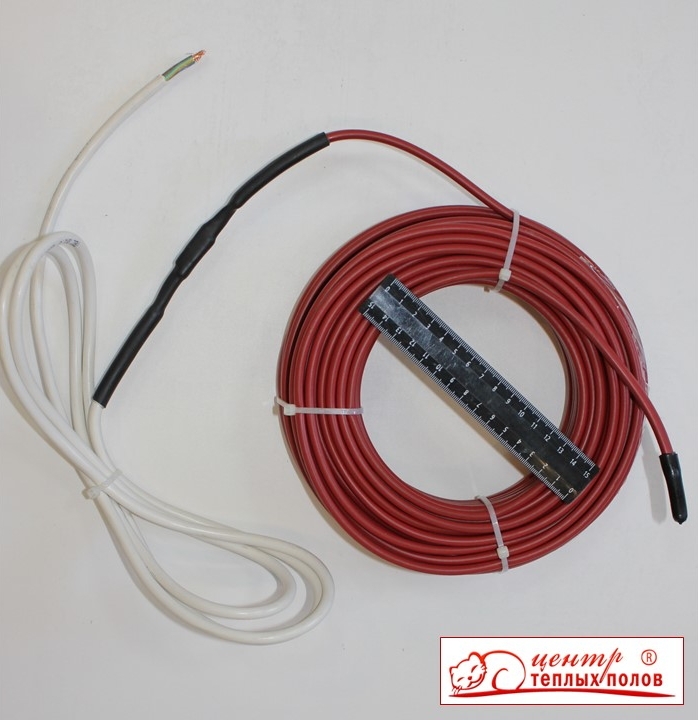
Single-core are suitable for laying under a tile, at the same time installation both ends of a wire are brought to one point then are connected to the power supply network. Maximum power per meter - up to 20 watts.
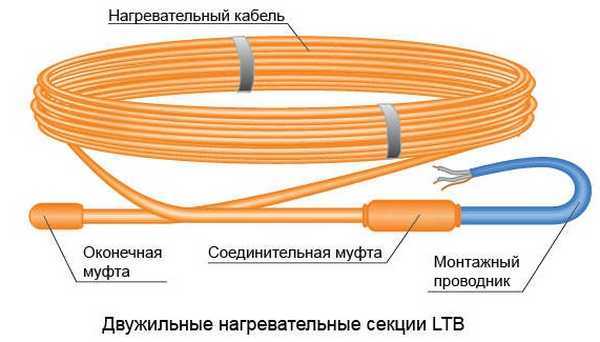
A distinctive feature of a two-core cable is the presence of 2 conductors in it,which are connected at one end. Due to this, during installation, it is not necessary to put the cable at one point, which greatly simplifies installation.
Today on sale you can find an improved model of cable floor based on self-regulating cable. Its main technical difference from single- and double-stranded analogs is the absence of metallic conductive wires. Their function is performed by a semiconductor. The heating level and power of the cable are automatically regulated depending on the temperature in the room. In other words, the cable will start to heat up less if the room is warm enough.
In addition to creating comfortable conditions and reducing energy consumption, this feature allows you to prevent a fire even if the cable turns and other installation errors are too close. The only disadvantage of self-regulating cable is its shorter period of operation compared to other cable analogues.
Cable floors are distinguished by an advantage that other systems do not have - the possibility of laying the material with the necessary pitch. For example, in places of increased cold, as a rule, on the outer walls, cable coils can be made denser, while on the floor under furniture or near heating appliances - less often.
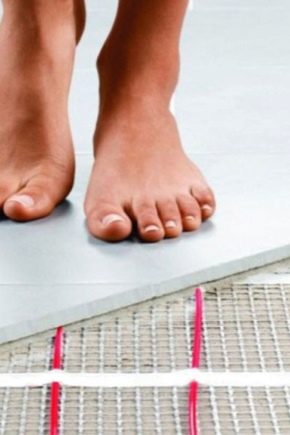
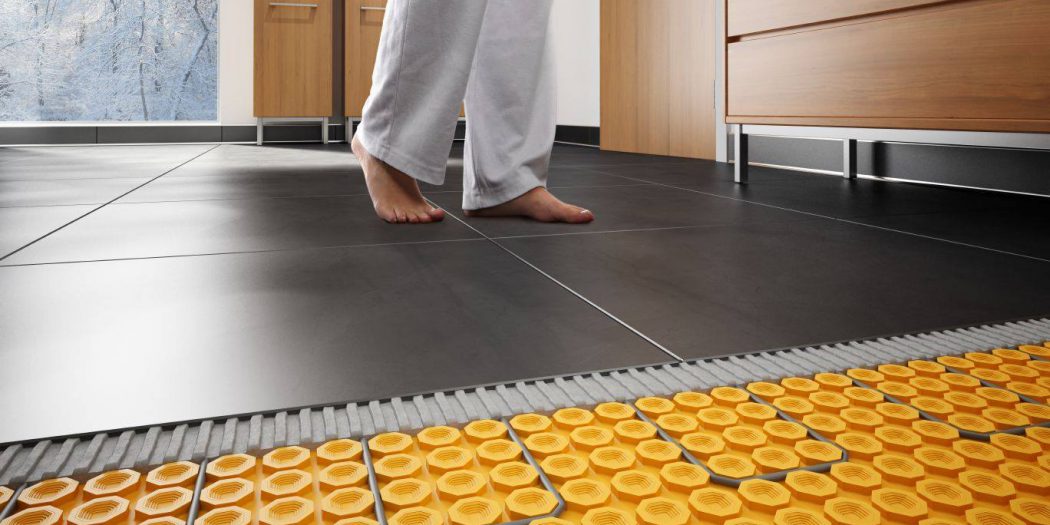
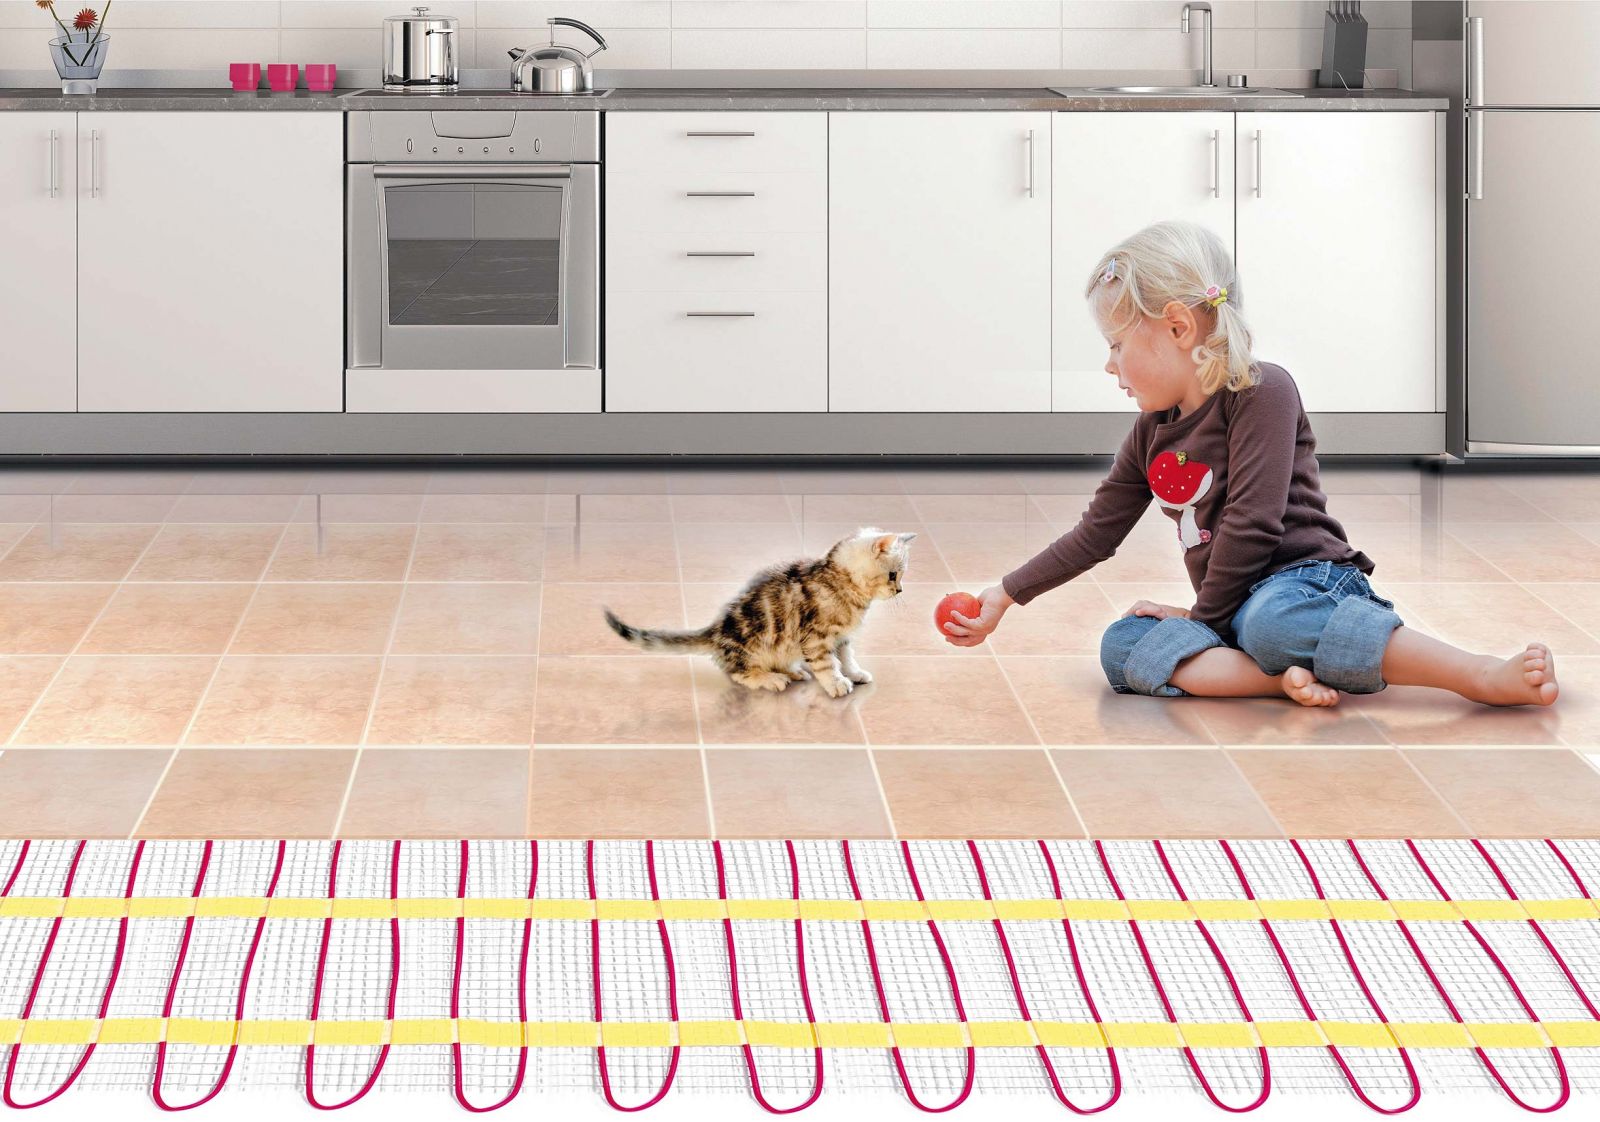
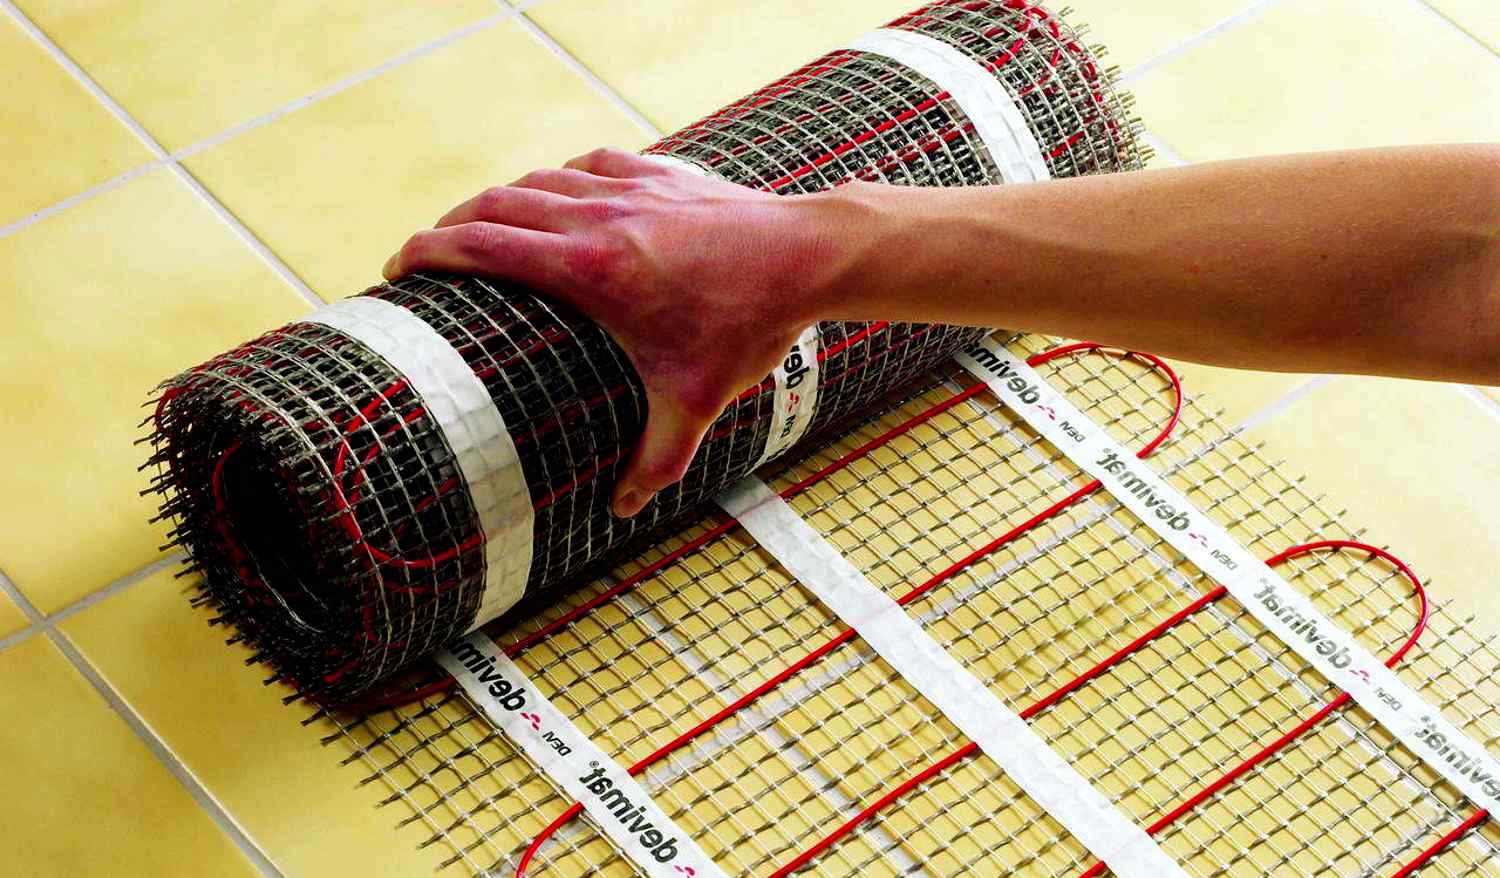
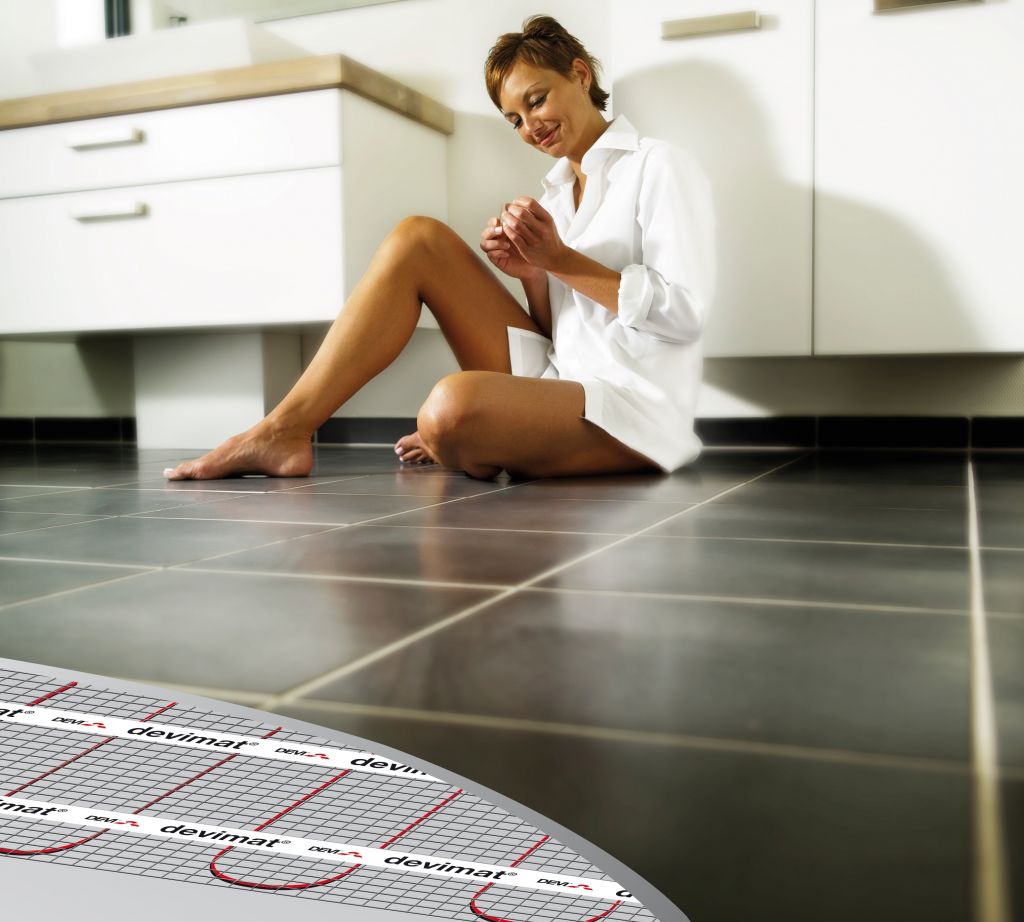
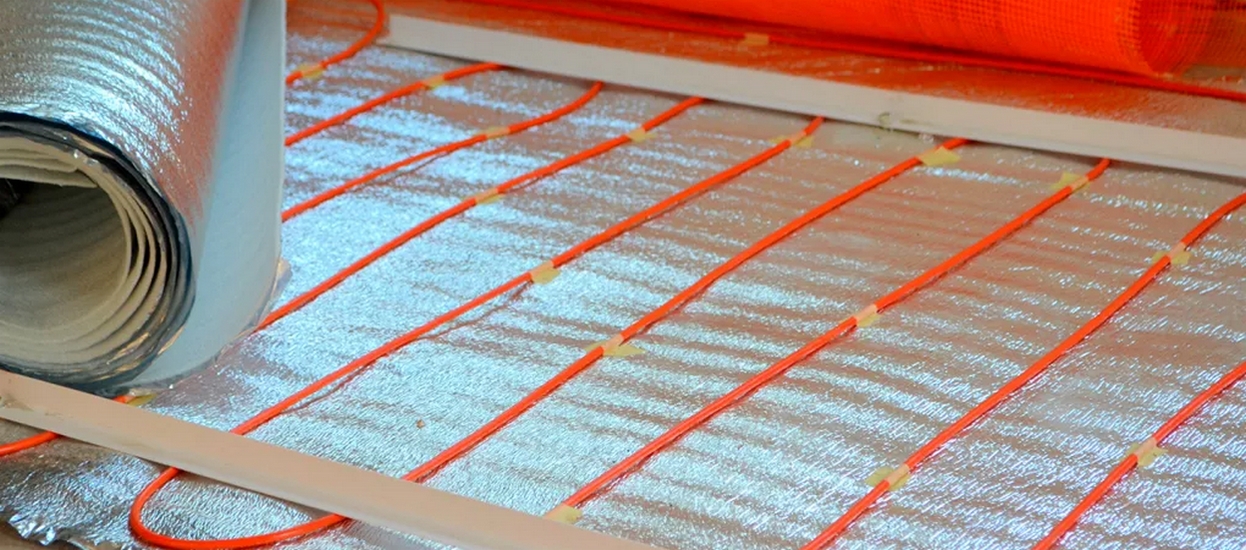
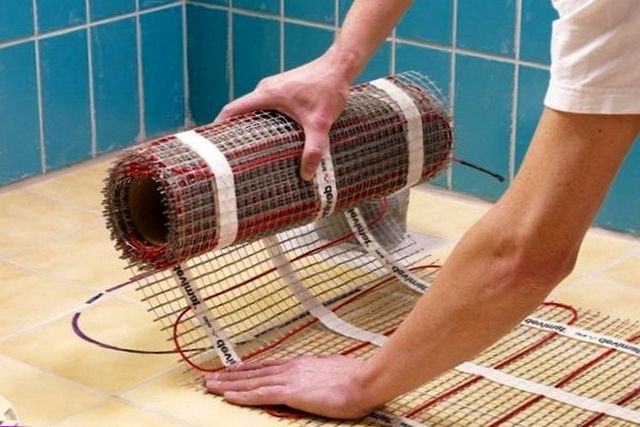
Heating mats
Heating mats are a type of cable floor heating, because they are based on single or double wire. However, if the cable floor heating is a heating mat that fits in an arbitrary (or rather, the right owner) order, the heating mats are the same wire, but fixed with a given step on the plastic mesh.
The standard mat has a width of 50 cm, the width of the cable pitch is 9 cm, the length can vary.
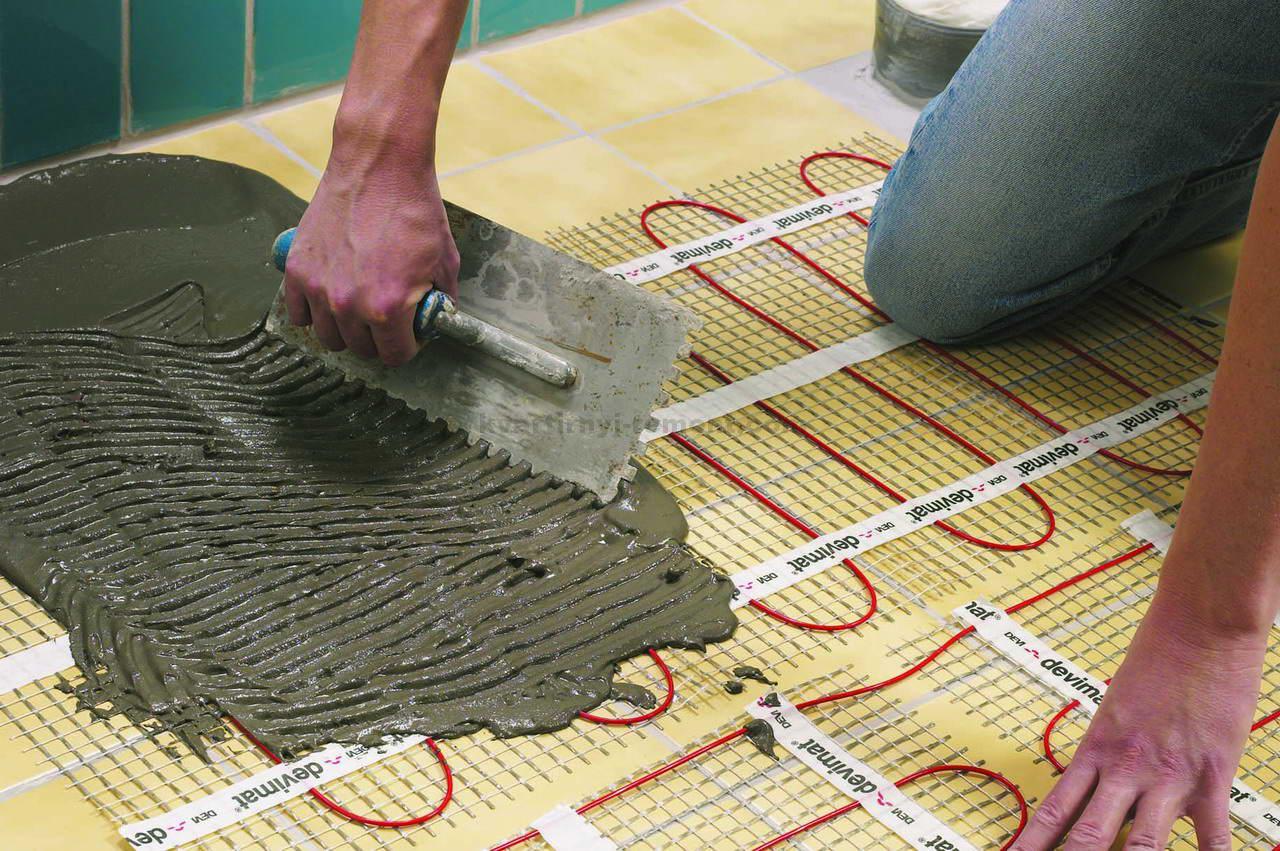
For arranging the floor under the tile, it is better, of course, to choose a heating cable. The wires used here have a small diameter, so a floor screed device is not necessary. The mat can be placed directly under the tile adhesive, whose thickness reaches 8-10 mm.
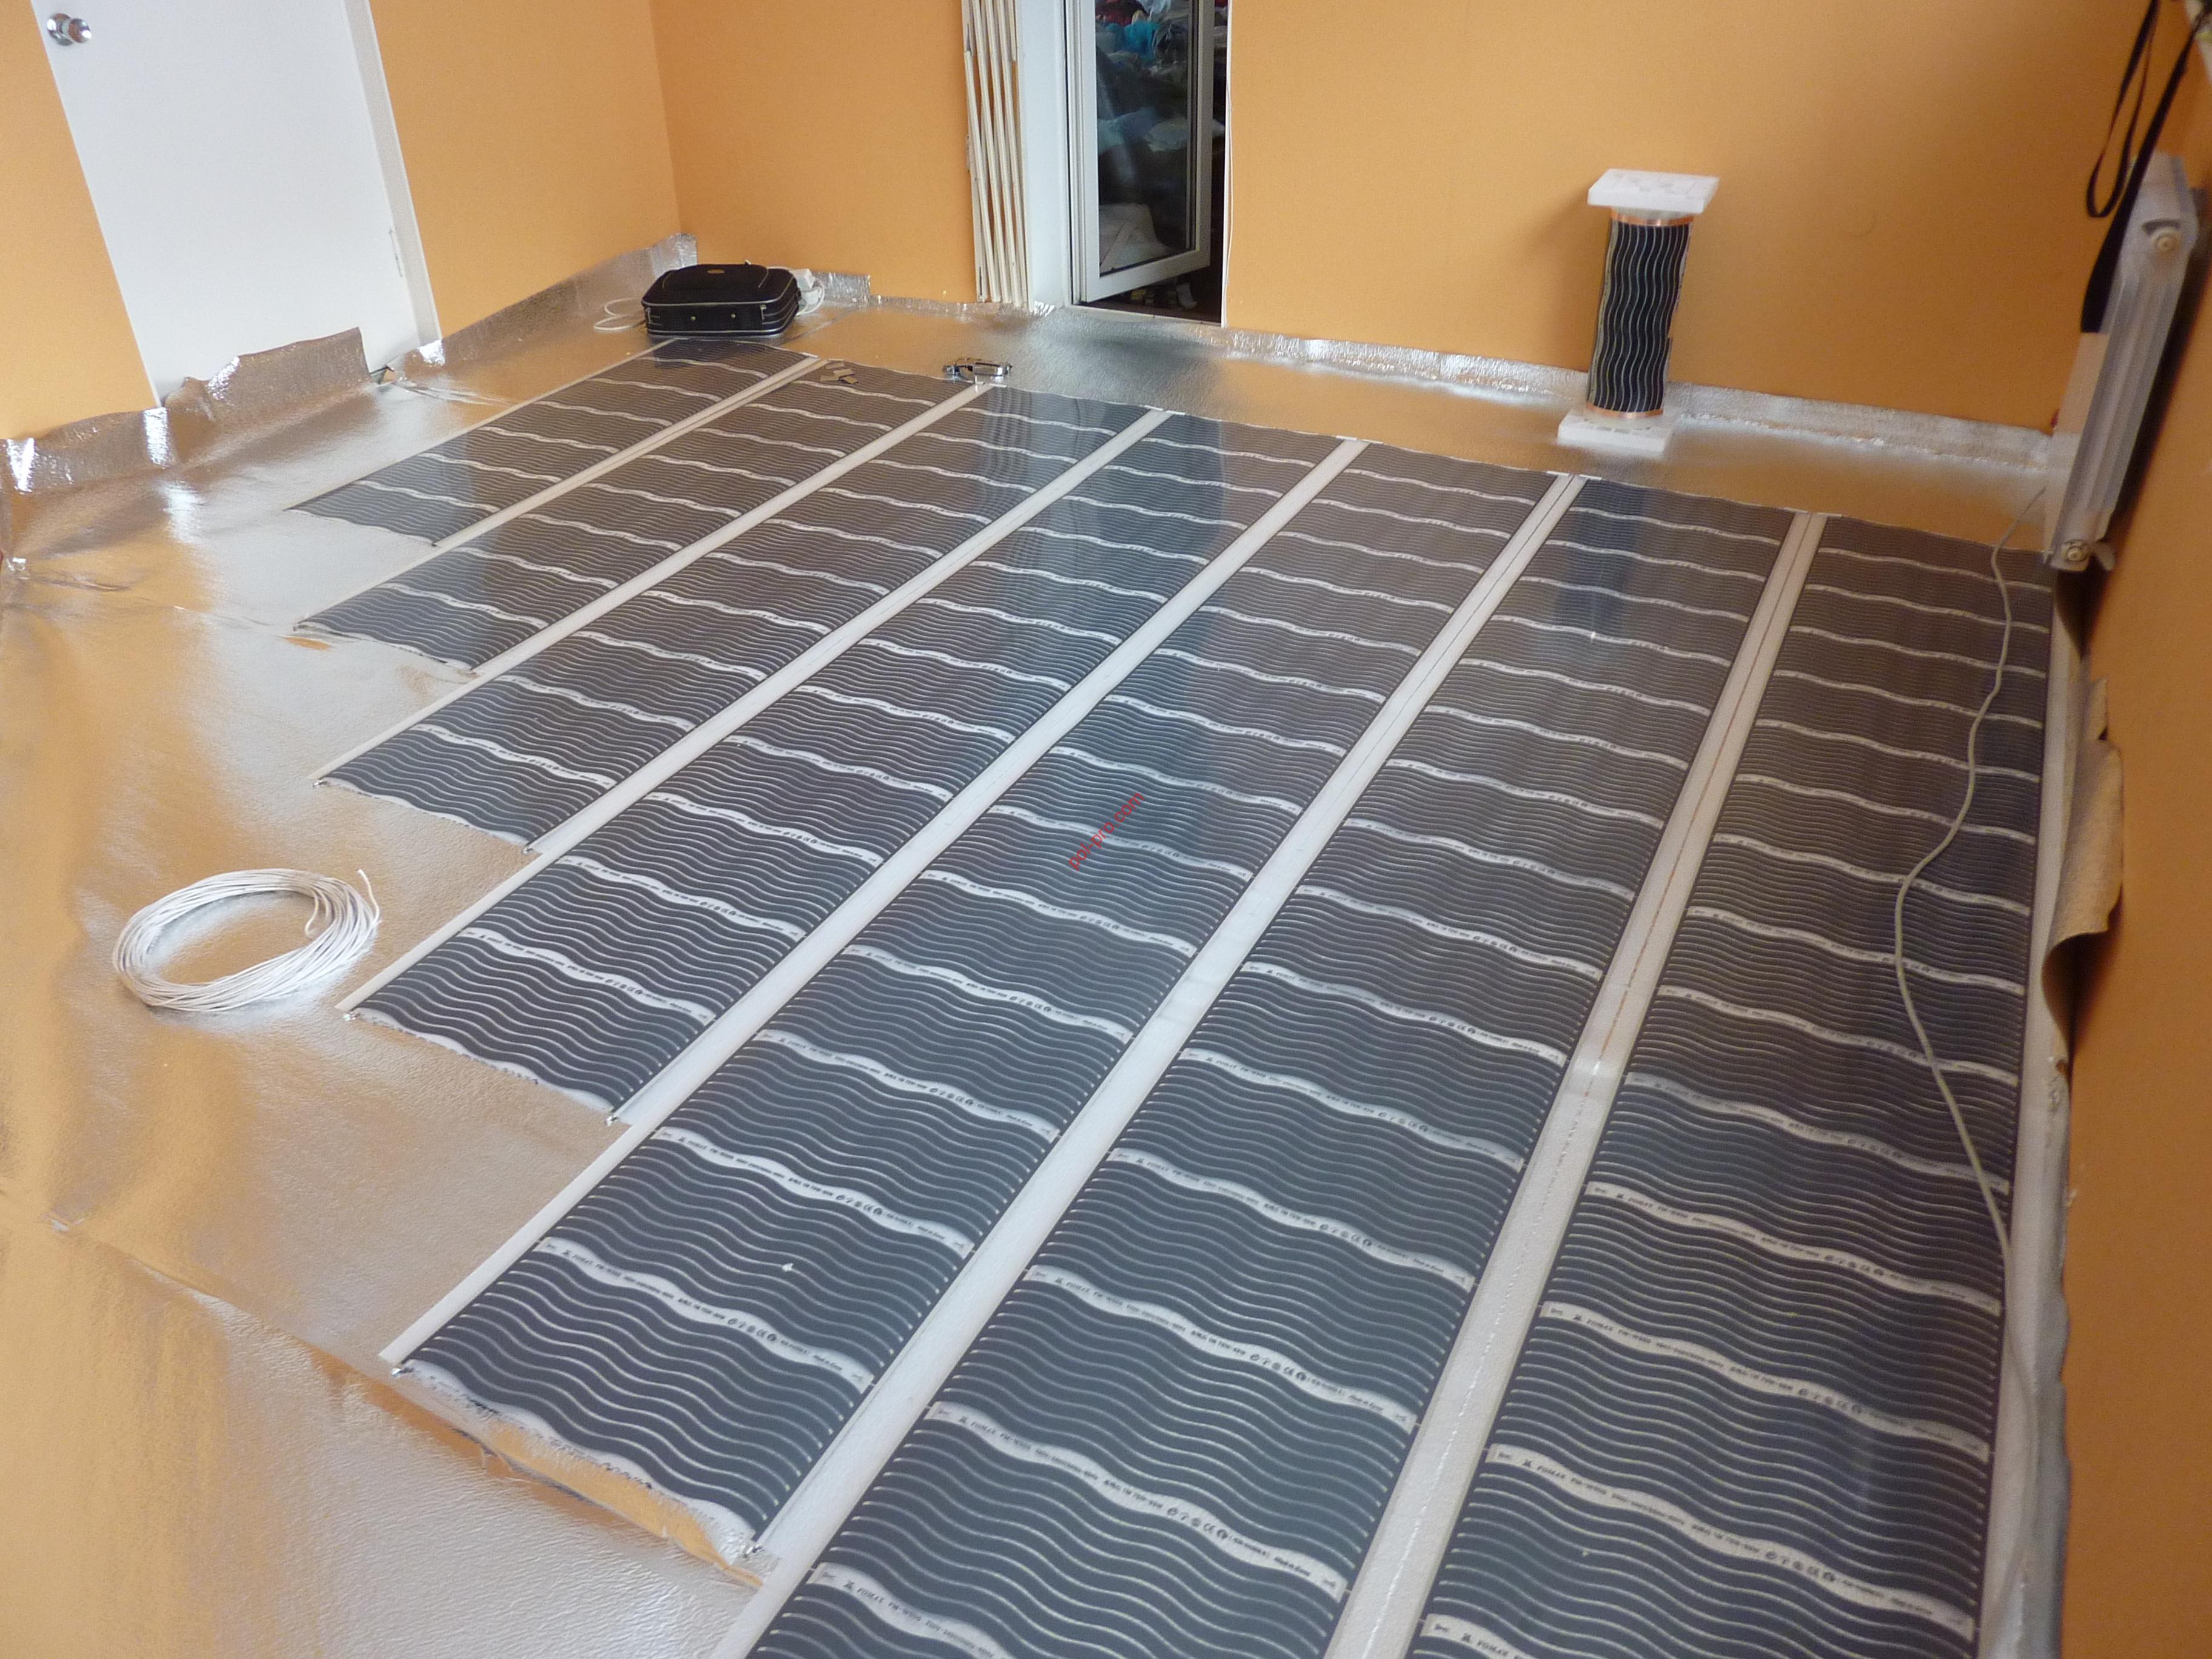
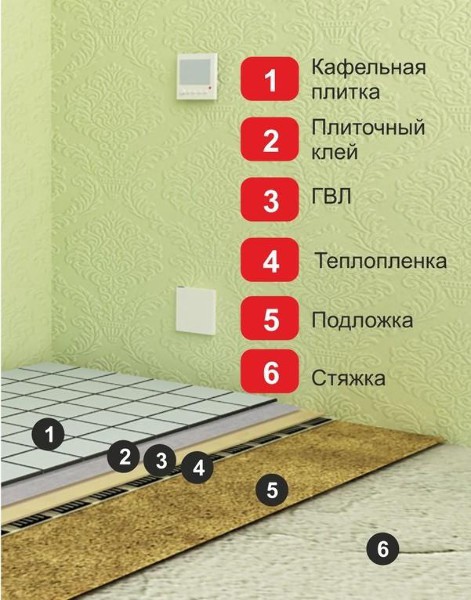
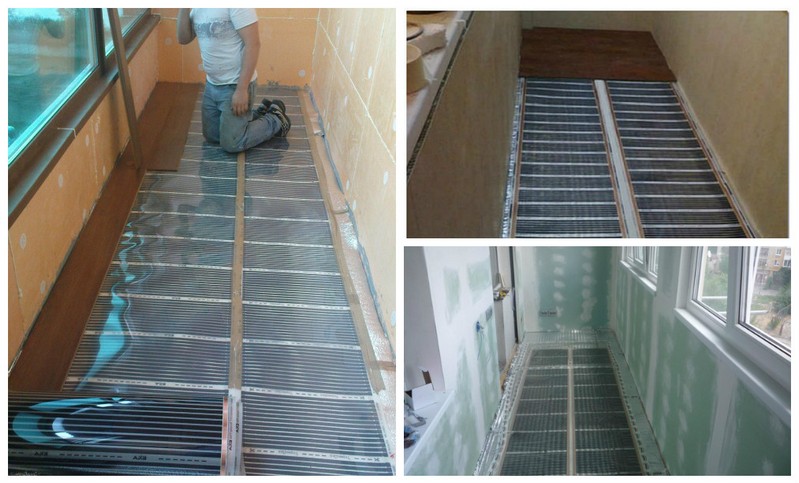
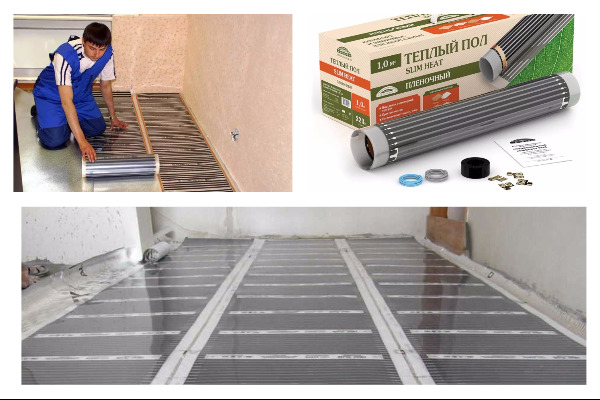
Infrared film
The material is a thin, about 4-5 mm thick, film, equipped with carbon bands. They act as a heating element. Despite its small thickness, infrared film is a true multi-layer “cake” consisting of the following parts:
- the substrate is made of materials that do not allow current;
- a heating layer represented by carbon bands;
- copper or silver-based conductor wires, through which current is applied to carbon elements;
- protective layer.
The maximum heating temperature is 50 ° C. A feature of the infrared system is that it does not heat the air, but gives off heat to objects and people in the room. Thanks to it heating turns out uniform, and air does not overdry.
In addition to the film with the heating element, there is also a version with a continuous heating layer.
Laying of the material can be carried out either as a screed (not suitable for all types of infrared film), or directly on the floor, under the tile adhesive.
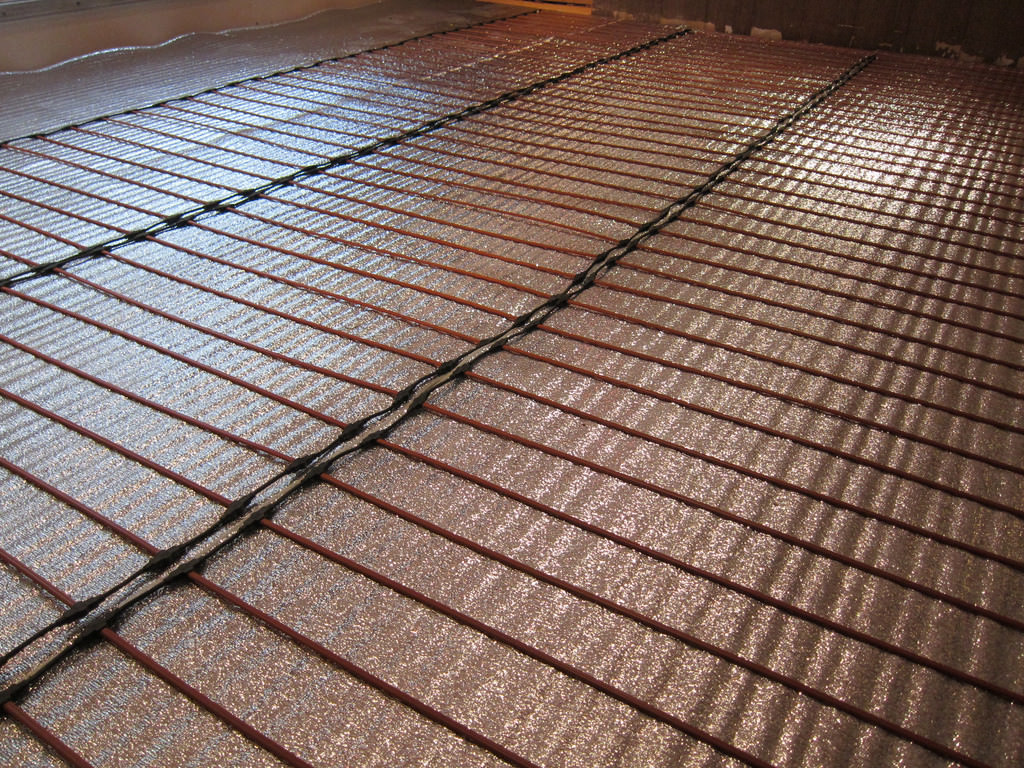
Rod
This model combines the features of cable and film floor. The heating element is the carbon rod, and the energy released is nothing but infrared radiation. The rods are mounted in a polymer film.
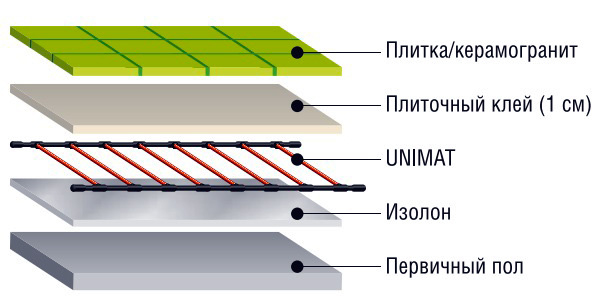
The operating temperature of the system varies on average between 50-60 ° C.

Carbon floor has greater strength than the infrared counterpart and can be mounted even under massive furniture. Not surprisingly, it is the most expensive compared to other systems.
Which is better?
Making a choice in favor of one or another variant of a warm floor, it is necessary to decide whether a warm floor will be the only source of heating or will complement others. In the first case, the calculation of power is carried out on heat losses. The average surface power is 140-150 W per 1 sq. Km. m. If the warm floor is an additional source of heat, then enough power 80-100 watts. For example, for unheated rooms, for example, on a balcony, preference should be given to heating mats, which are capable of delivering an operating temperature of up to 90 ° C. Of course, you should also take care of the insulation of the loggia, otherwise the heat loss will be enormous.

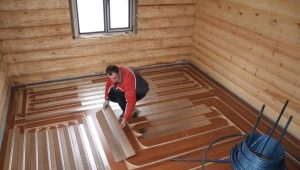
It is important to immediately determine which way - under the tile adhesive or in the screed, will be installed underfloor heating. The fact is that not every type of floor can be laid without a screed (for example, a cable underfloor heating can only be laid in a screed). However, the screed lifts the floor by 5-7 cm and gives a load to the base of the building. In a wooden house, a screed system is impossible in principle, in dilapidated buildings it can be dangerous, and in rooms with a low ceiling (for example, in “Khrushchev”) - inconvenient.
For such premises, you should choose heating mats or film floors.
When laying the infrared floor under the tile should take care of the organization of a solid base, which can be plasterboard or plywood. However, with this method of installation, the efficiency of the infrared system will be reduced, since the base material is characterized by low thermal conductivity. In other words, using a similar system for tiles is not the most economical option for heating.
Additional substrate when installing under the tile does not require a film floor with carbon rods. He is considered the most perfect.
If you are afraid that the floor will quickly fail, then choose the film version. Even if one of the elements still burns out, it will not be difficult to find this area - the tile in this place will remain cold. Then you can replace a specific burnt element without dismantling the entire system.
Systems with the simplest installation are film floors. In general, they are always easy to install and operate, however, with the purchase you will have to spend 3-4 times more than to purchase cable analogues.However, the use of film materials will be more comfortable and economical.
If the room is used irregularly, then it is more convenient to use cable self-regulating floors, which act as a kind of thermostat, reacting to the temperature of the room. Such a system is able to maintain a temperature not lower than the set one, but at the same time it itself reduces or increases the intensity of heating, based on the temperature conditions in the room.
Due to the design features, self-regulating systems rarely burn out, that is, they are completely safe, they consume less electricity.
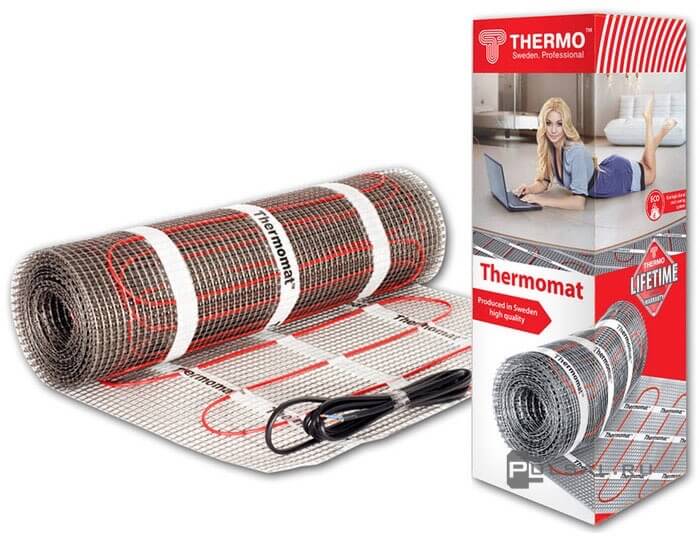
Thermomats will prove to be an ideal warm floor under the tile, especially in those cases when it is not possible to pour the screed. Due to the presence of fiberglass mesh provides an additional reinforcing effect and a stronger fixation of the mat to the floor, as tile adhesive permeates the mesh.
Heating the tile to comfortable temperatures is faster, because there are no additional barriers between the tiles and the heating elements. And when laying wires in a coupler, it first heats up, absorbing some of the heat, so warming up the tile can be long.
Laying technology
The installation of underfloor heating under tile, porcelain stoneware or clinker depends on the floor system chosen. As already mentioned, the most common options for tile are the cable system and heating mats.
If we are talking about a private house, you can consider the option of a water system.
At the first stage it is important to prepare the floor surface - it should be flat, clean, free from grease and dry. To do this, dismantle the old floor covering, if necessary (if irregularities exist), a draft screed with a thickness of 3-7 cm.

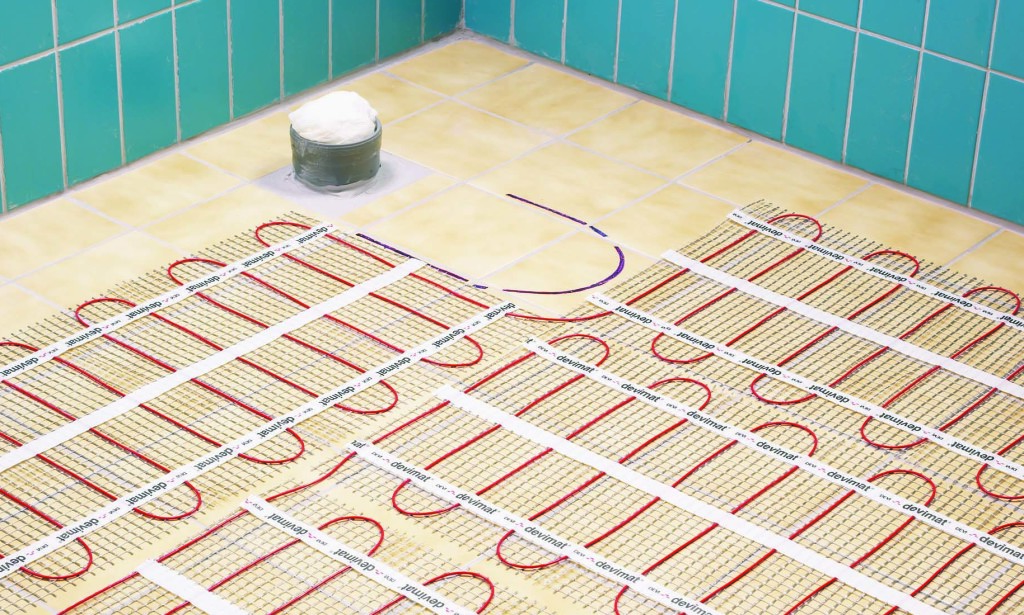
The next step is mapping the floorfrom which the distance between the steps will be clear, the direction of the cable, the amount of material needed.
In drawing up the scheme is to adhere to the following recommendations:
- From the walls and heating devices should retreat 10 cm;
- It is unacceptable to install the floor under furniture that does not have legs, as well as household appliances. This is due to the fact that heat transfer in these areas is impossible, and therefore the heat will return back, causing overheating and cable failure.
- If necessary, you can set the tracks of the heating mat in the desired direction by cutting the grid. This will save material and accentuate heating in the right areas.
At the preparation stage, it is necessary to correctly calculate the required power for heating a specific room, and based on this, calculate the amount of material.
For installation in an unheated room for each square. m required floor power from 140 to 180 watts. For heated - 80-140 watts. These values also depend on climatic conditions, the level of insulation.
To calculate the volume of the material should calculate the floor area, multiplying its length and width. From this value, take away the area occupied by furniture without legs and household appliances. The result will be the value of the usable heating area.
The next step is to calculate the total power of the heating element and its length. Linear power per linear meter can be 16-21 watts.
Consider a specific example. The room has a useful heating area of 10 m2, using a cable with a capacity of 100 W / m2. The total power in this case is 1 kW. When buying a cable of 20 W / m, its length should be 50 m.
The calculation of the number of thermomats is carried out according to the same principles - it is important to know the total heating area and the required power.
Another important point - check the wiring. It is necessary to calculate the cable cross-section by current, during which it becomes clear whether the wiring is suitable for the operation of a heated floor. If the diameter of the conductive wires in the cable is less than the required, you will need to replace the wiring with a more powerful one. Similarly check the RCD circuit breaker.
Installation
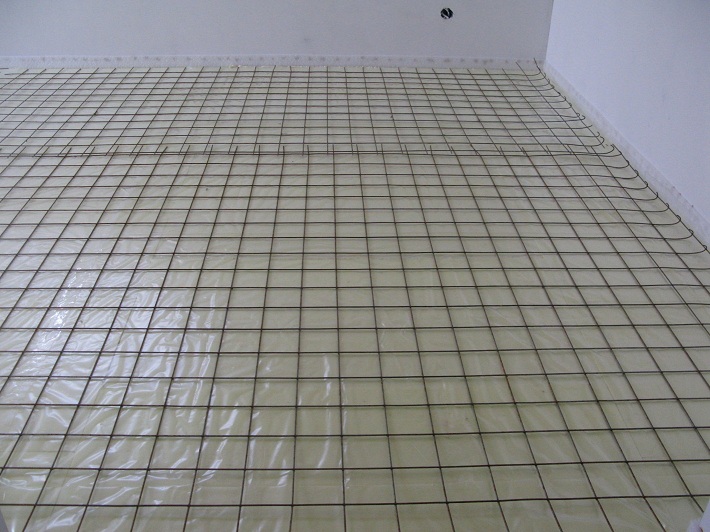
Installation of a heated floor should begin with high-quality thermal insulation of the surface under it. Optimal materials with foil layer, due to which the heat will be reflected upward to the tile.

Penofol is very convenient in use, one of the sides of which is self-adhesive, the other is foiled. It is available in rolls, which are cut to the desired length and glued together. In order to improve thermal insulation in the room, penofol is glued with a slight approach to the walls. After that, a damping tape is glued around the perimeter of the room to the insulation, due to which it is possible to avoid expansion of the material when heated.
It is also permissible to use polystyrene foam or polypropylene, however, their styling is more labor-intensive, and the height of the room when using them will slightly decrease.
A metal grid is placed on top of the insulation, which will prevent overheating of the heat insulating material and simplify installation.

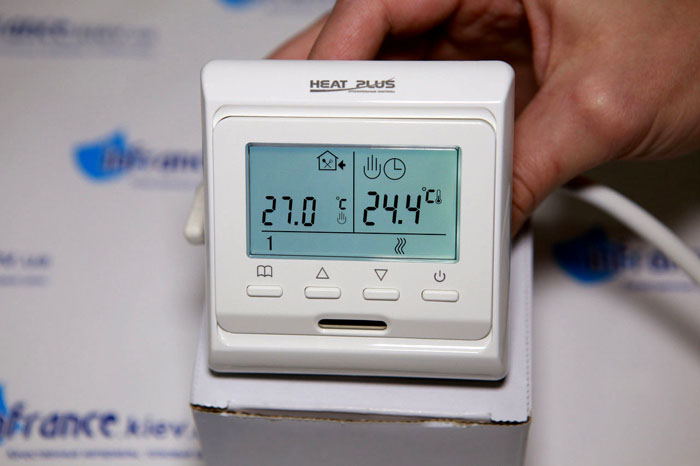
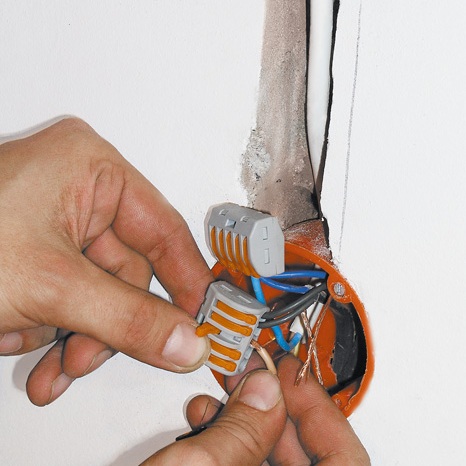
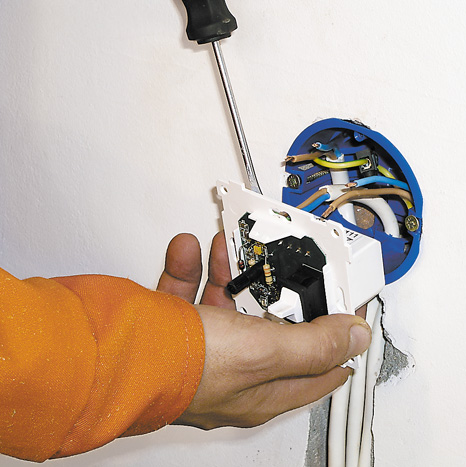
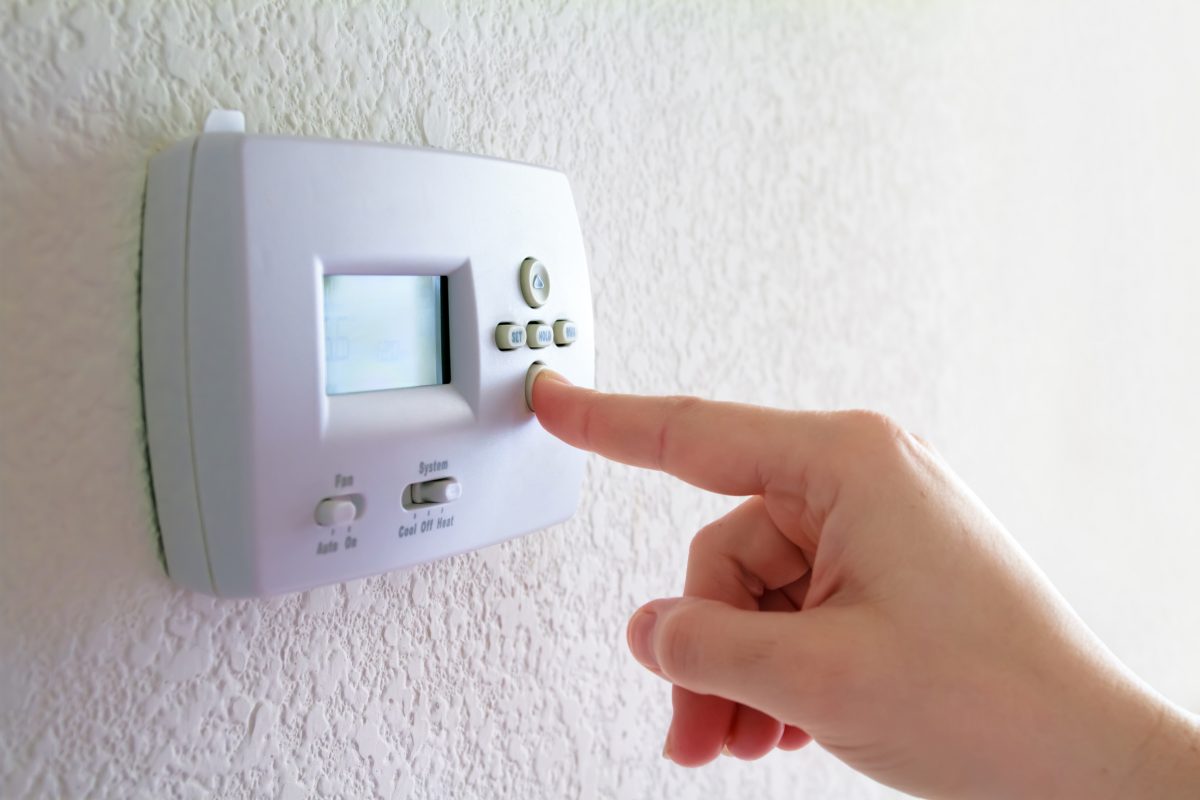
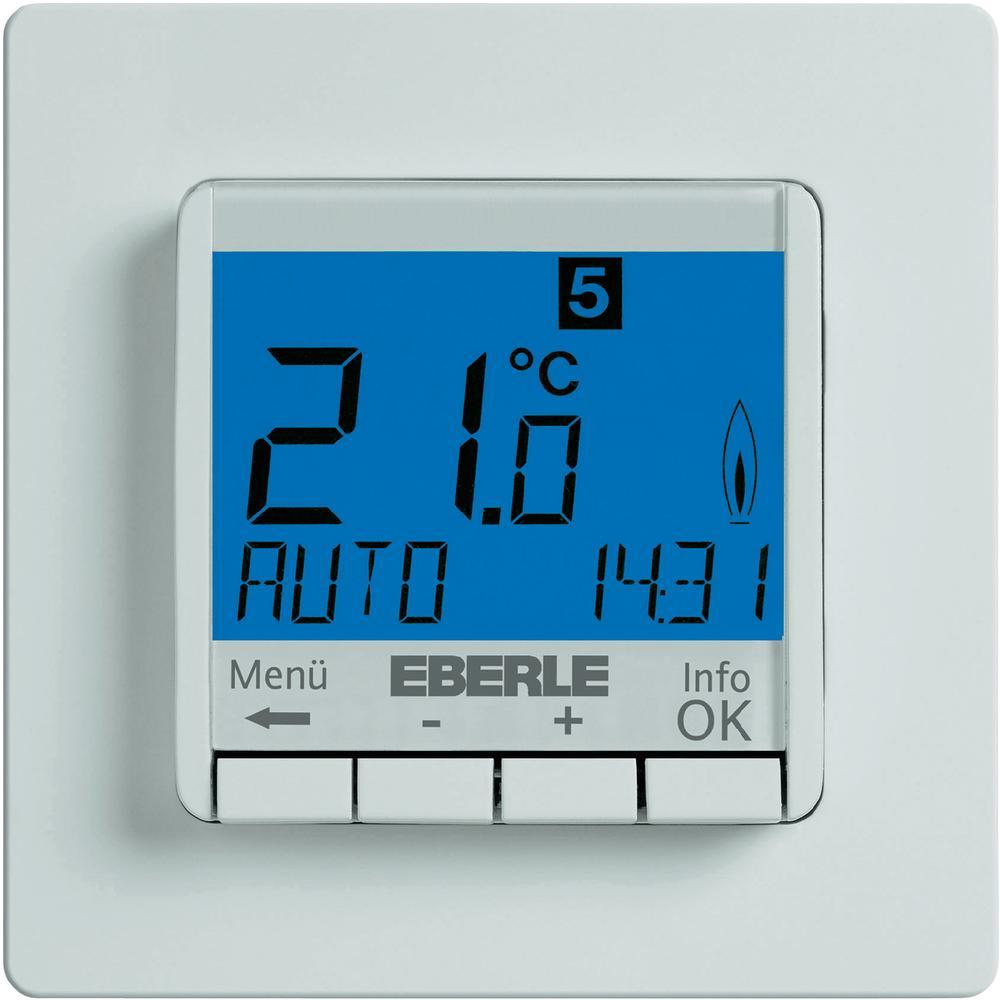
The next step is to install a thermostat.which is a mechanical or electronic controller, by means of which the desired temperature is set, the floor is turned on / off. It is mounted on the wall next to the sockets.
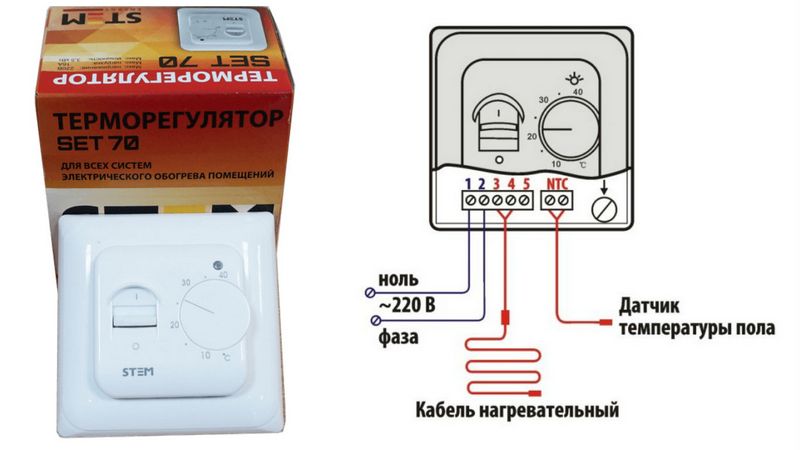
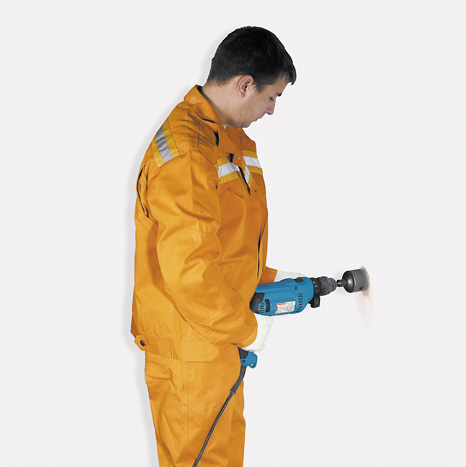
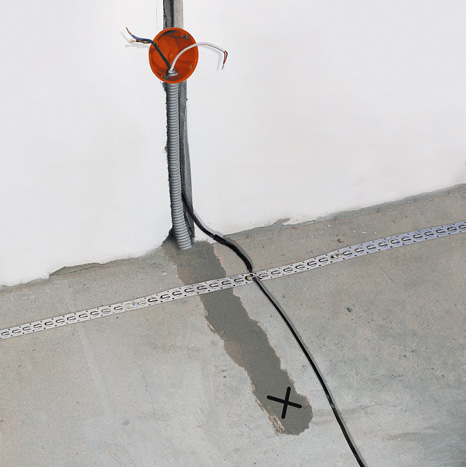
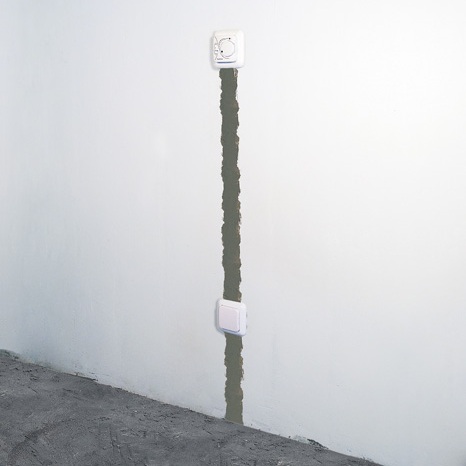
Next in the wall from the thermostat is strobe, which falls strictly perpendicular to the floor. A corrugated pipe is mounted in the gate, where the temperature sensor is placed. The pipe goes along the floor to the place of temperature control. The last is the middle between 2 turns of the cable. It is important that there are no intersections at this point.

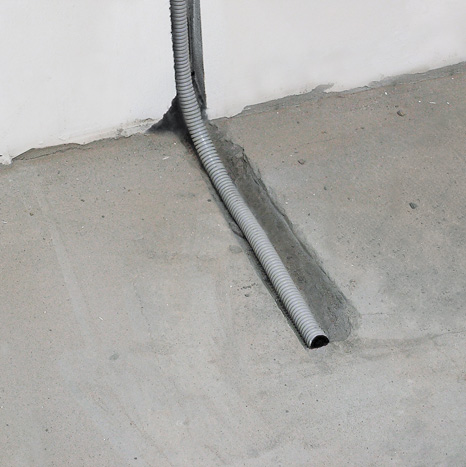
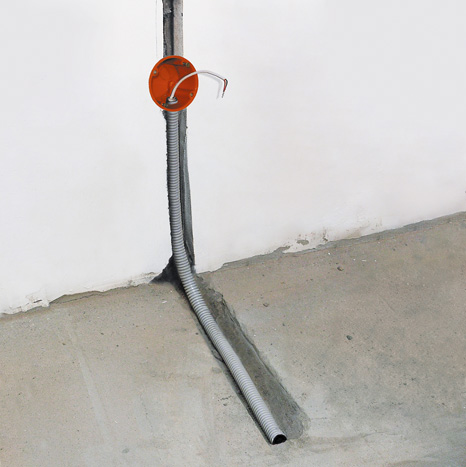

Due to the fact that the sensor is placed in the corrugation, it is protected from damage. If the sensor is damaged, you can easily remove it from the tube and repair or replace it.
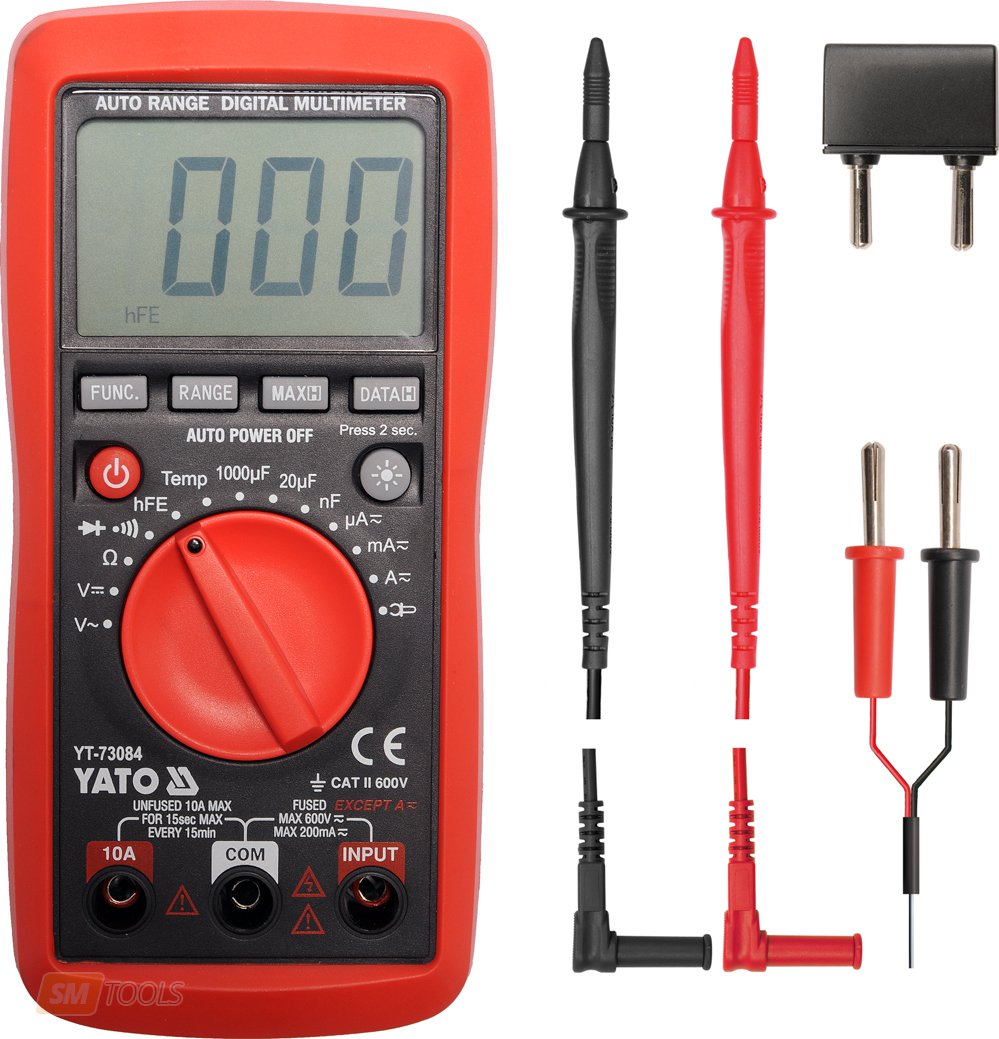
Before laying the cable or the mat, measure the resistance of the wires for compliance with the indicators stated in the product passport. Permissible error - within 10%.
For the implementation of these measurements will require a multimeter. It will also be able to find the phase if there is no special marking on the cable. Making sure that the resistance is within the normal range, you can proceed to the installation.
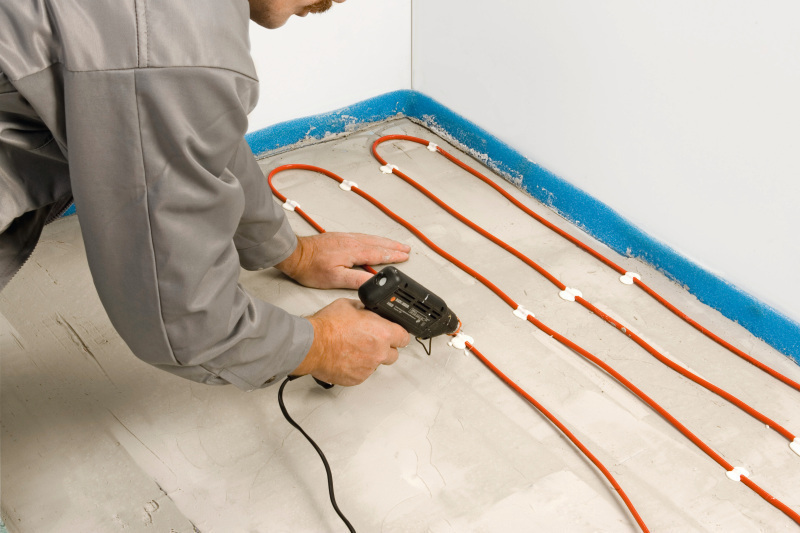
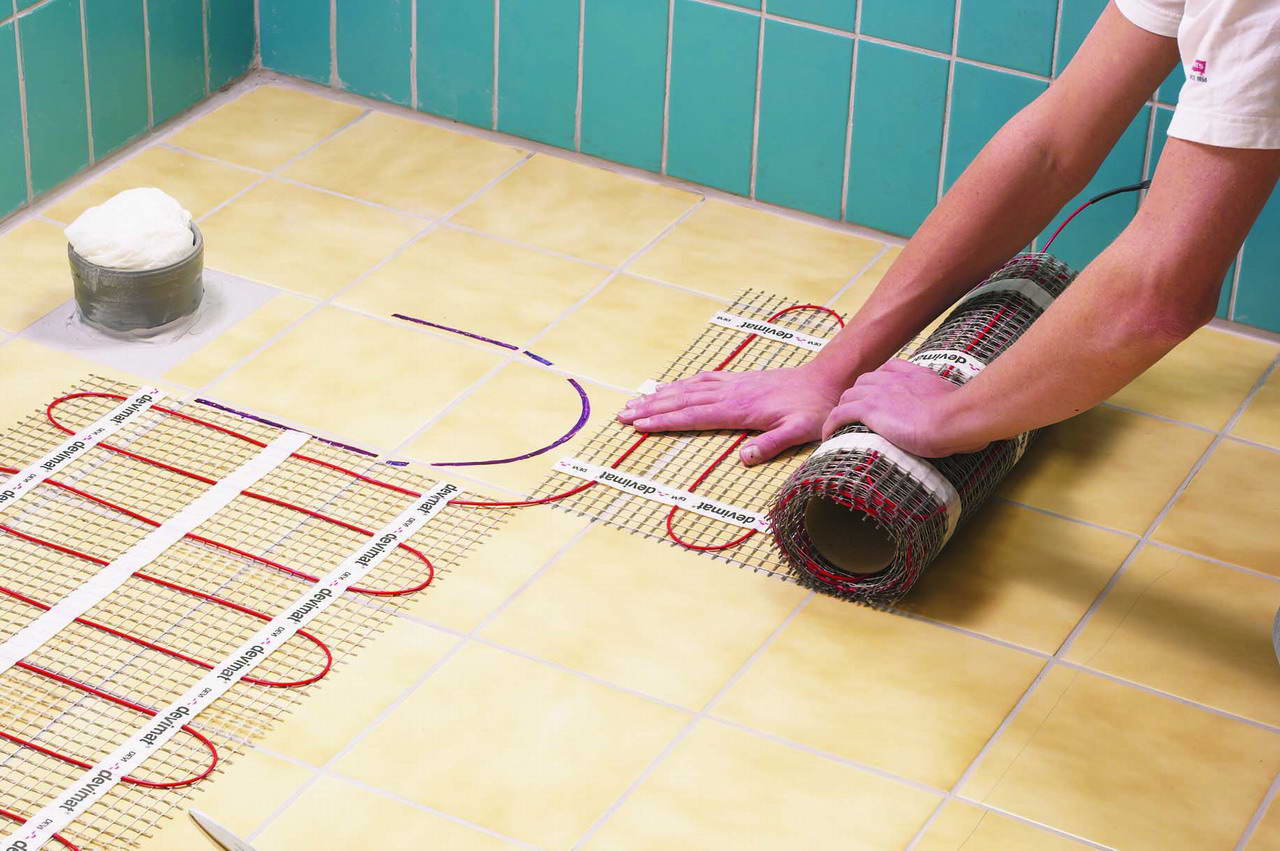
The technology of laying electromatics easier - just spread it out according to the scheme and connect it to the thermostat. If we are talking about the cable system, the cable is laid in turns with the same pitch, and for convenience it is fixed with the help of mounting foam. If the wires are mounted on a metal grid, laid on top of the insulating material, then it is more convenient to fix them directly to the grid with the help of special clamps.

At the end of laying again check the resistance with a multimeter. The result should be the same as before the installation.
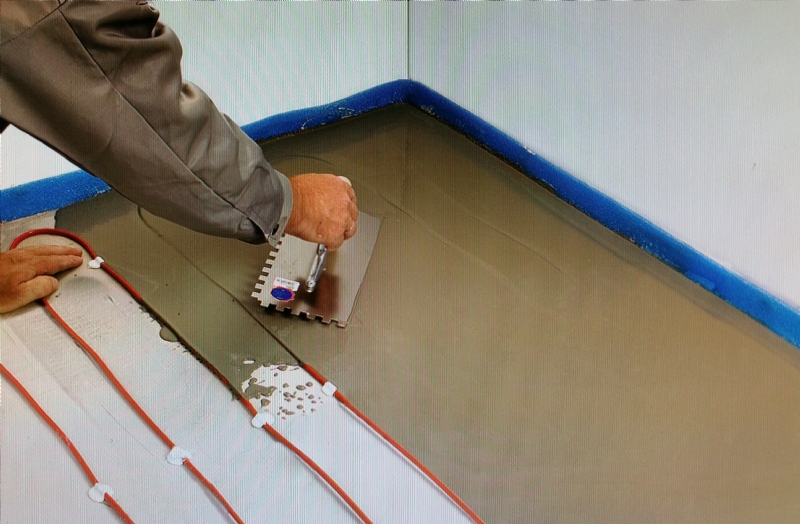
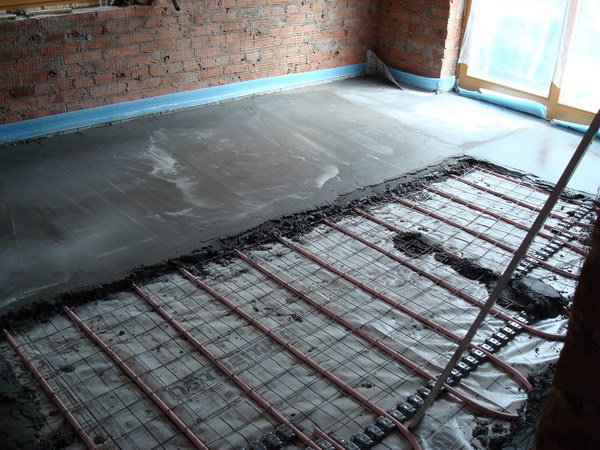
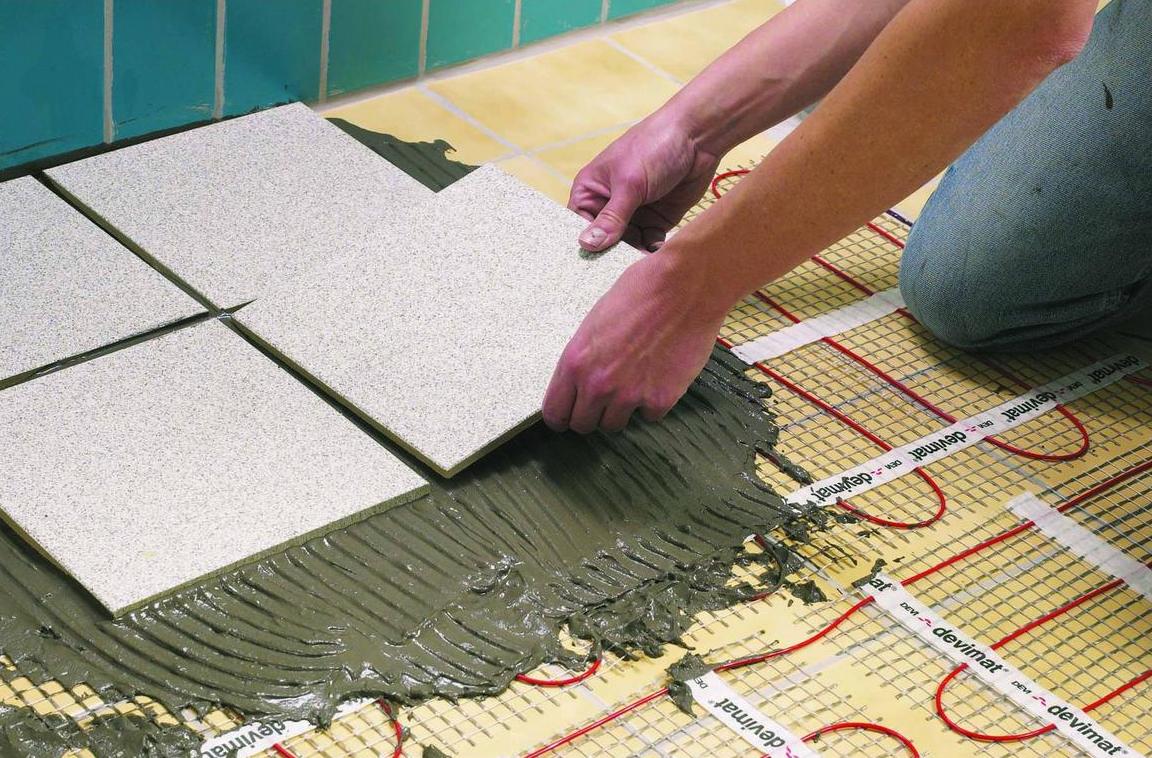
If a thermomat is used, then tile glue is immediately poured onto it and tiles are fixed. When laying the cable system, you must first pour the screed, wait until it is completely dry, and only then the flooring is installed.
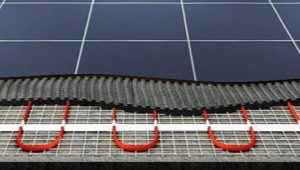
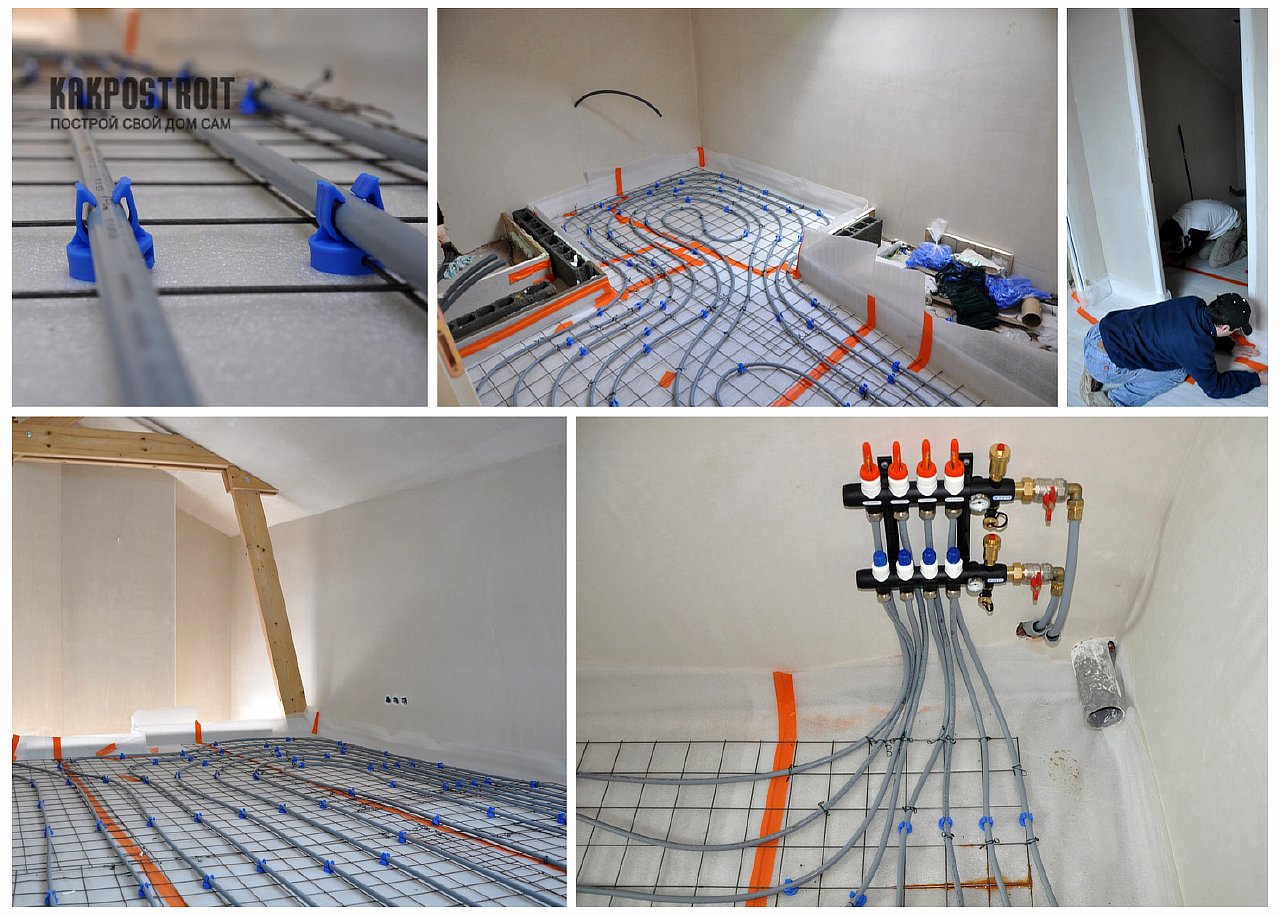
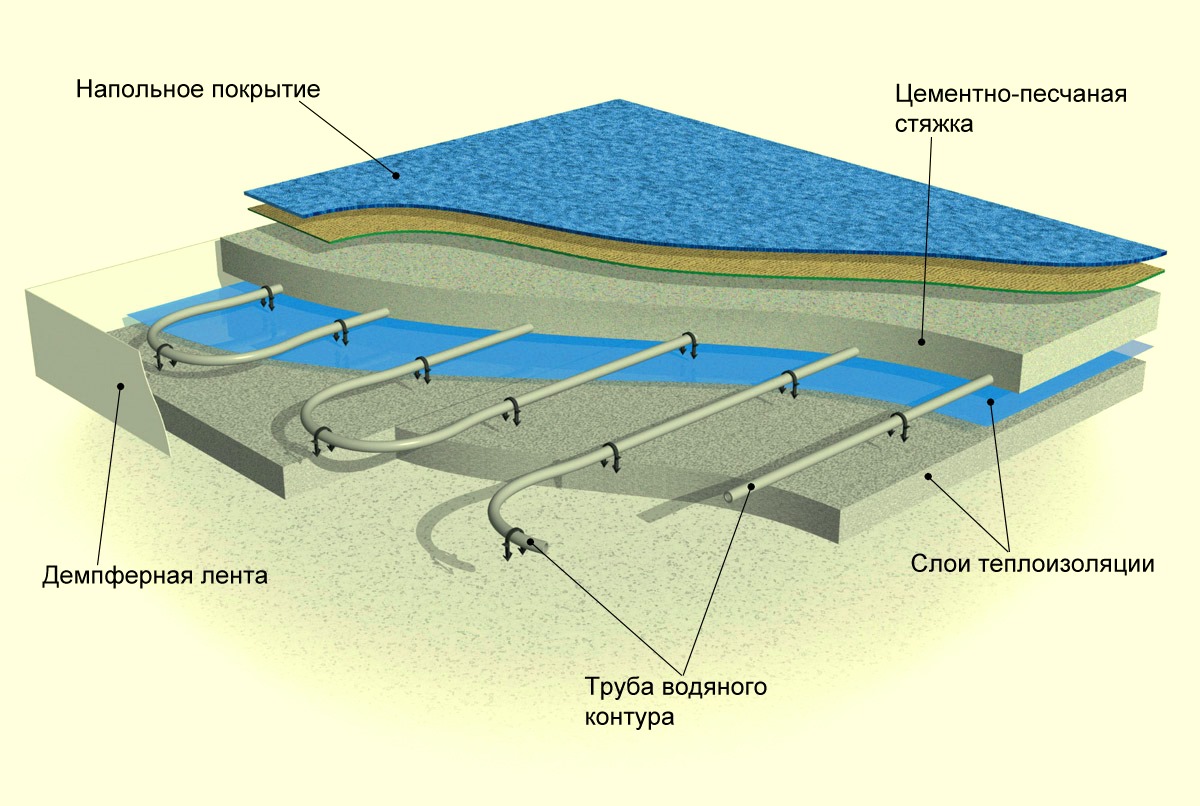
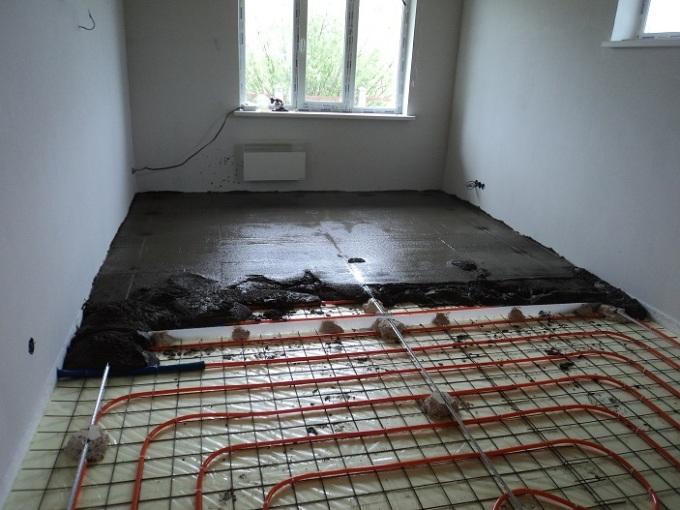
When laying a warm water floor resort to one of 2 technologies:
- The first, concrete, involves pouring a concrete screed directly onto the pipes, which ensures the strength of the coating and uniform distribution of heat over the surface.However, this significantly increases the weight of the floor (with a screed thickness of 50 mm and pipe weight per 1 m2 can reach 250-300 kg) and decreases the height of the room.
- When laying in the second way, when laying, heat carriers are mounted on wooden or polystyrene bases, laid with aluminum plates necessary for uniform distribution of heat, and covered with a finishing floor covering.
When laying a warm floor, it is important to avoid making the following mistakes:
- contact or intersection of turns of heating system cables;
- installation of the system for heating appliances, furniture, household appliances;
- application when pouring a tie of beacons that cover part of the cable;
- the absence of screed or tile glue on some part of the heating cable;
- independent cutting of the cable in places not foreseen by manufacturers (in fact, only self-regulating cable can be cut).
All these errors lead to overheating, cable breakage, burnout throughout the core. At the same time, the consequences of violations can appear both immediately and after a considerable time (up to a year) after installation.
Thermoregulation
Installation of the thermostat should be conducted not lower than 0.5-1 m from the floor. If you do not comply with this requirement, users are faced with the fact that the thermostat quickly heats up from the floor and its indicators have a large error.
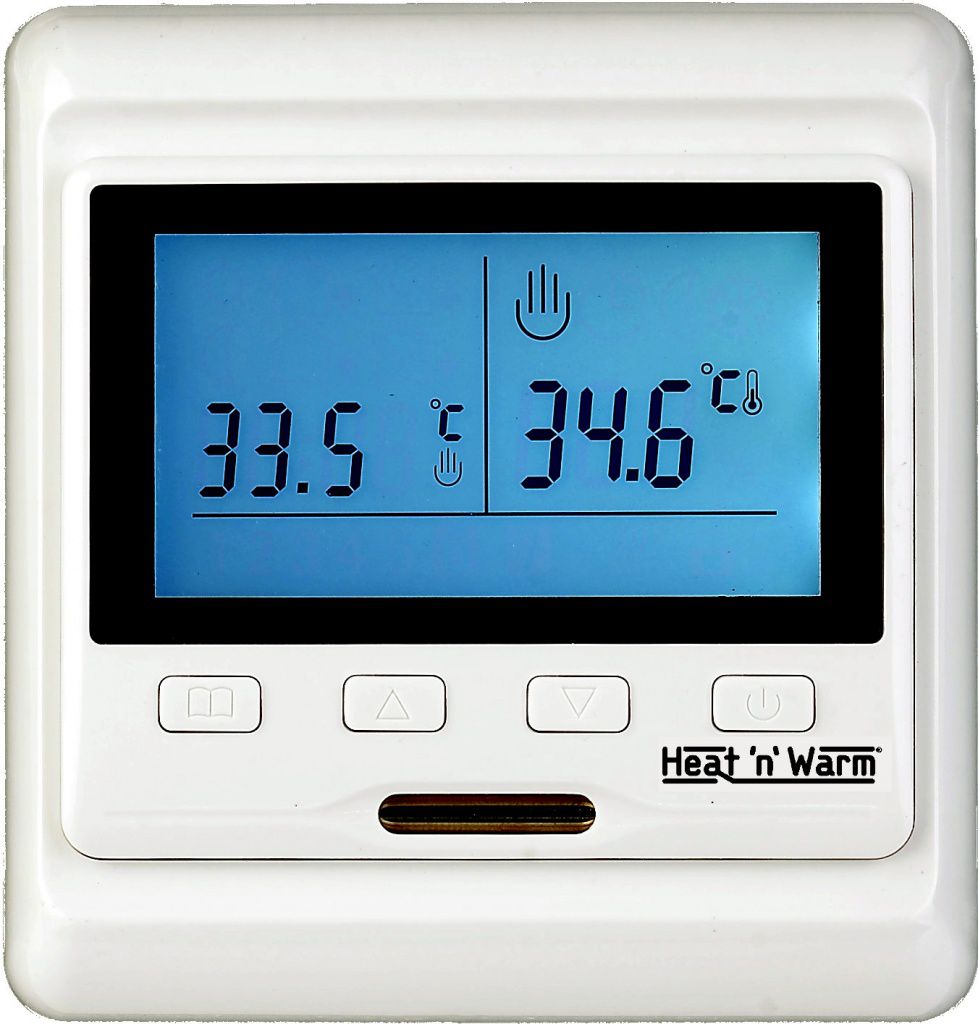
For optimal functioning, it is important not only to install the thermostat correctly, but also to check the accuracy of the temperature sensor installation. The latter is a copper posting with insulation and a special cone at one end. The sensor independently determines the temperature of the floor on the basis of the fact that during heating the resistance decreases, after which it transfers data to the thermostat. The latter, based on the specified modes, increases or decreases the heating temperature.
In principle, the use of a thermostat and sensors can be waived, but they allow you to maintain an optimum temperature with an accuracy of 0.5 ° C. This allows you to achieve the most comfortable conditions, as well as to protect the tile from excessive overheating and the subsequent destruction.
When choosing a sensor and temperature controller, make sure that their power matches the power of a heated floor.Otherwise, the readings will be inaccurate, and to protect the devices from overload you will have to install an additional starter.
It is best to stop the choice on the combined or internal sensor and programmable thermostat. The first one will transmit the exact temperature of the floor heating, the second will not only show these values, but also automatically adjust the system operation within the specified temperature ranges. For installation under the tile, the sensor must be enclosed in a special gel coating to prevent its damage.
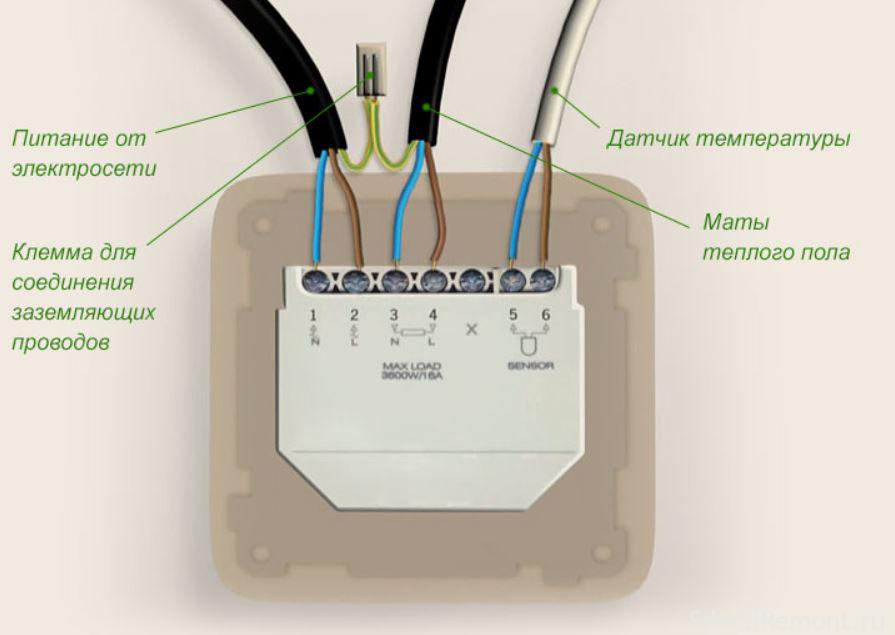
Connecting the temperature sensor is usually not difficult, if conducted in accordance with the instructions.
Health check
After the heating elements are mounted and connected, it is reasonable to check how well the entire system works. After all, if this is not done before pouring the screed or laying the tile, then in the future it will be necessary to dismantle the entire coating.
Connect the heated floor to the power supply and see how it works in all the modes provided, how accurate the thermostat data is. Note the heating time - it should be close to what the manufacturer promises in the product passport,and all areas warm up evenly.

The uniformity of heating is most convenient to check with a thermal imager. An image formed by infrared (infrared) rays will appear on the instrument screen. After receiving the picture, you will immediately notice if any part of the system is not working.
After that, you need to once again measure the resistance of the wire. To do this, use a multimeter or tester. The obtained data should coincide with those that were recorded before laying the cables or mats. Allowable discrepancies are within 10%.
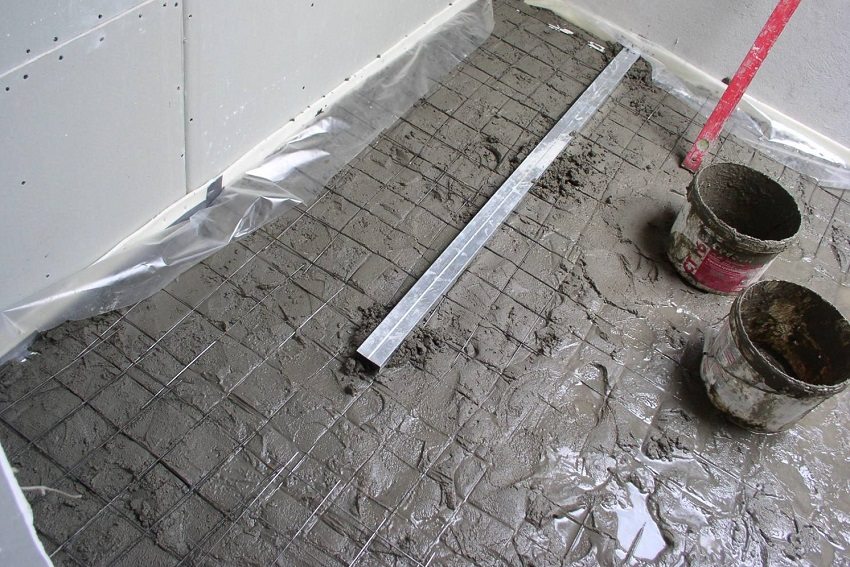
Screed
When pouring under the screed immediately after laying the heating elements proceed to the preparation of the solution.
The screed solution consists of the following components:
- sand (4 parts);
- cement (part 1);
- crushed stone (5 parts);
- special plasticizers for extra strength (1% by weight of cement);
- water (0.6 parts or slightly less, since excess water causes cracks in the screed).
Please note that the mixture does not contain expanded clay and perlite, which is associated with their ability to interfere with heat transfer. This, in turn, leads to the failure of a heated floor.
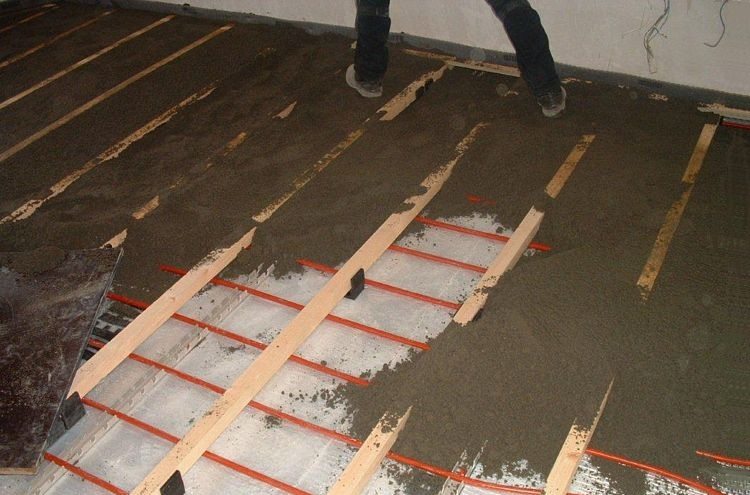
Having carefully mixed the composition, it is evenly applied to the floor using special beacons. The thickness of the screed is 3-5 cm, it is not recommended to exceed this value. The layer will grab in two days, but it will pick up the final strength after 3-4 weeks. Before this time, turn on the warm floor can not be.
Manufacturers
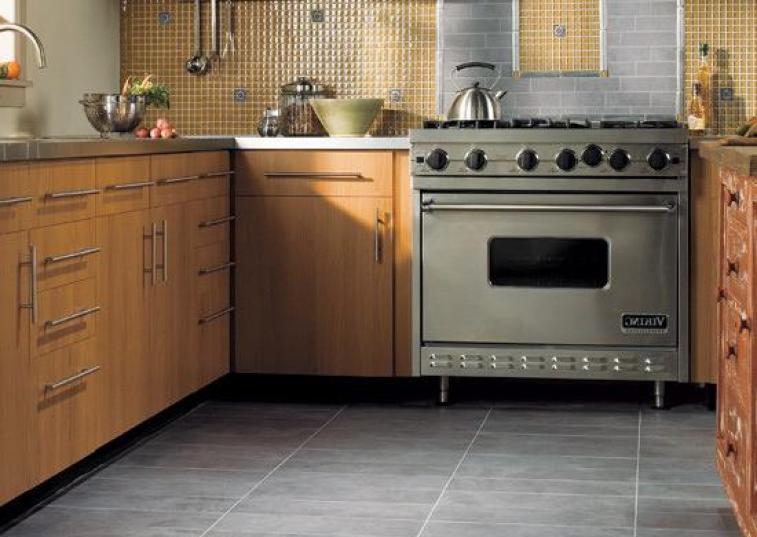
Heated floor is usually mounted under the tile in the kitchen or in the bathroom, washing, a little less this type of flooring is used in children's and bedrooms.
To achieve high-quality and long-term service of the system will help not only the correct installation, but also the choice of certified material.
Those can be called the products of the Danish company Devi. The high quality of the systems and the reliability of the manufacturer is indicated by the fact that it gives a 20-year warranty. At the same time, the web does not find a response that the cables have failed due to marriage.
It is important that the service centers of this manufacturer are in many large cities, so in case of a breakdown you can always call a specialized wizard to determine the cause of the malfunction. Consultation master is a guarantee, and therefore free.
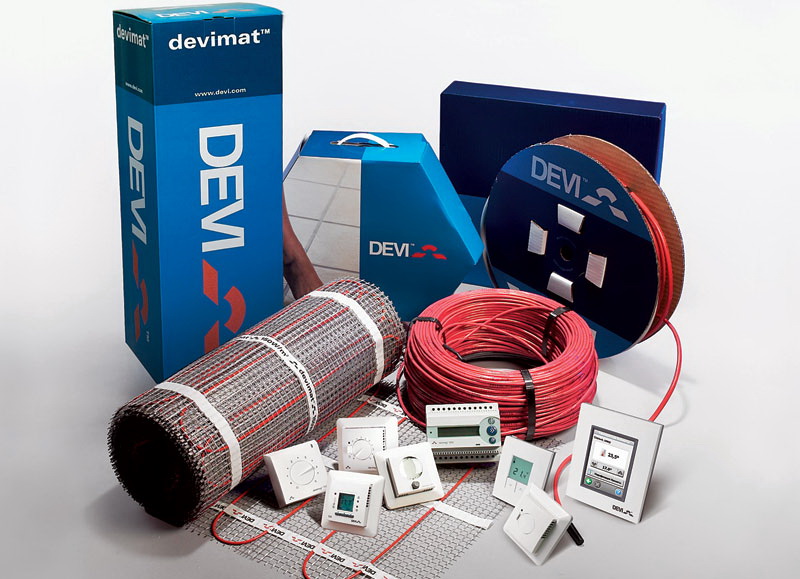
Finally, the cost of products of this company is lower than that of similar brands. The presence of a system of intellectual thermoregulation with a timer makes the operation of the floor economical, and special devices that prevent the heating of air - more comfortable.
Among domestic producers, worthy of attention, it is possible to note the company "Teplolux", in the lineup of which there are both cable systems, and heating mats, as well as film versions.
Today, the products of “Thermolux” are supplied to 10 countries of the world, which testifies to the compliance of the systems with international quality and safety standards.

Thermo mats and heating cables can also be called quality materials for tiles. As practice shows, they successfully cope with their functions even in unheated premises, suitable for installation on the street. With proper calculation of heat loss, the system can be used as the only source of heat in the room or provide local heating, acting as an additional heater.

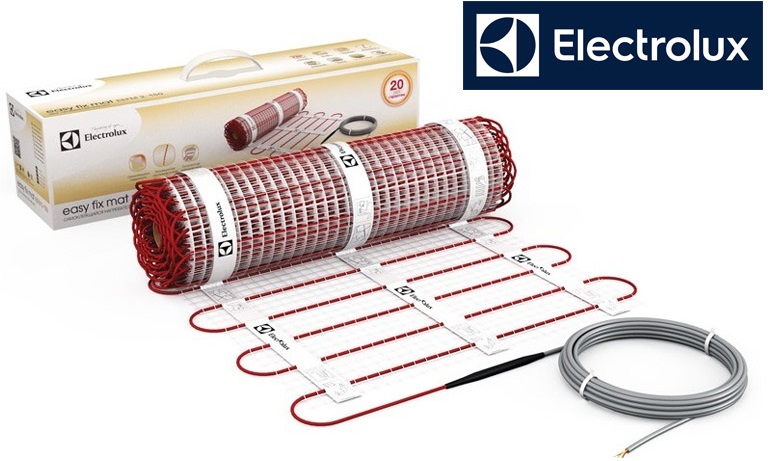
Electrolux warm floors have a lot of advantages. Under the tile is better to use mats, which are characterized by the automation of working processes, cost-effectiveness, reliability and high quality. The latter are achieved largely through the use of high-precision German components and the use of their own innovative developments. Those elements of the system that are installed indoors (thermostat, for example) are distinguished by modern design, ergonomics, and aesthetic appeal.
Among the popular systems that are relevant under the tile, called the products of the company "Teplolux". In the framework of this article, an overview will be made of the heating mats system “Thermolux Mini”. The system owes its name to the reduced diameter of the heating cable. The narrow diameter allows the use of glue of smaller thickness, which means that the “rise” of the floor will be small.
Along with the small diameter of the cable, the system boasts a miniature clutch of the pressed type. It is a product of the company's innovative developments and guarantees the most reliable, and therefore high-quality connection of the cold end of the cable and the conductor.
The heating cable is attached to a fiberglass mesh, thanks to which tiled adhesives securely and quickly fix the system.
Those who are looking for material that slightly “consumes” the height of the room will appreciate the novelty of “Shtein GmbH Germany”. These mats have a thickness of 3.5 mm and do not require the organization of the screed under the tile. The system is characterized by a power of 150W / m kV, which is optimal for installation in heated premises, and a step width of 7 cm.
Reviews
Based on customer feedback, most of them are looking for a reliable system that does not require screed and other complex installation systems. Based on these requirements, Electrolux products can be considered the optimal material.
The series of this brand “Easy Fix Mat” is popular and, according to user feedback, it allows you to glue tiles on a layer of tile glue reduced to 1 cm. The most convenient length for laying is 20 m. By the way, these same mats are considered to be convenient from the point of view of installation. They have a self-adhesive surface, so they are simply fixed end to end on a clean, flat surface.
Electrolux cables, which users call flexible, well-stretched, and easy to install, are no less trusted.Pros are also found during operation - the floor heats up in literally 5 minutes. Most buyers note that the price is higher, though, compared to many other systems, but it is justified.
If we talk about the similar characteristics of the floor and its lower cost, then good reviews are received by domestic brands and Korean manufacturers.
Successful examples and options
As a rule, the tile as a floor covering is chosen for kitchen and bathrooms. To make the material warm and comfortable allows the use of a heated floor system.
For those who want to “mess around” with the floor as little as possible, it is recommended to choose heating mats, and then fix the tile to the adhesive immediately. The latter is better to choose large sizes with modules 25-30 cm. Laying in this case will be easier and faster.
For bathrooms that differ in small sizes, too large tiles will not fit - the proportions of the room will be violated. Preference should be given a smaller tile or mosaic.