Installation of the ceiling "Armstrong"

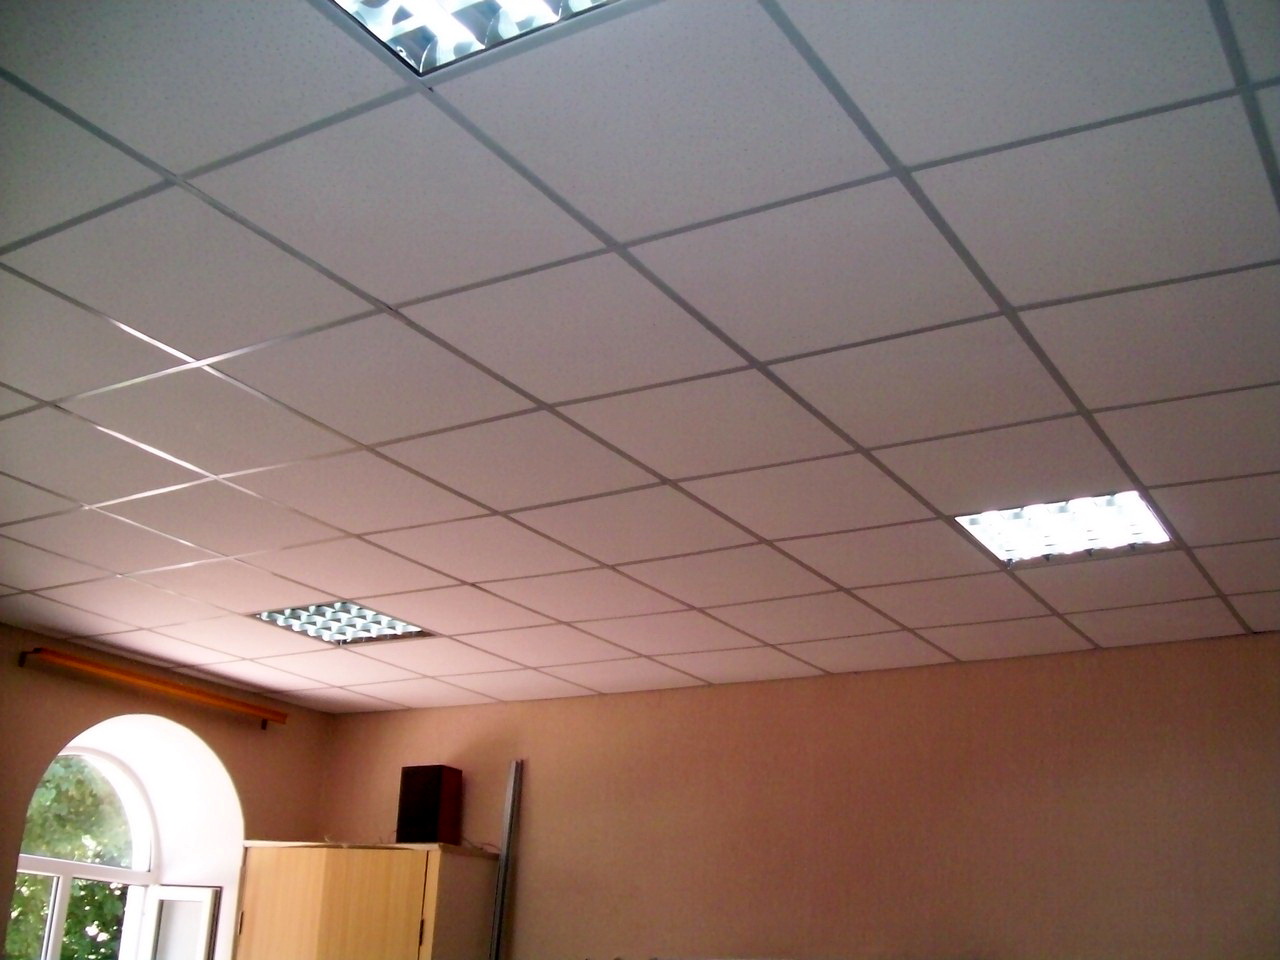
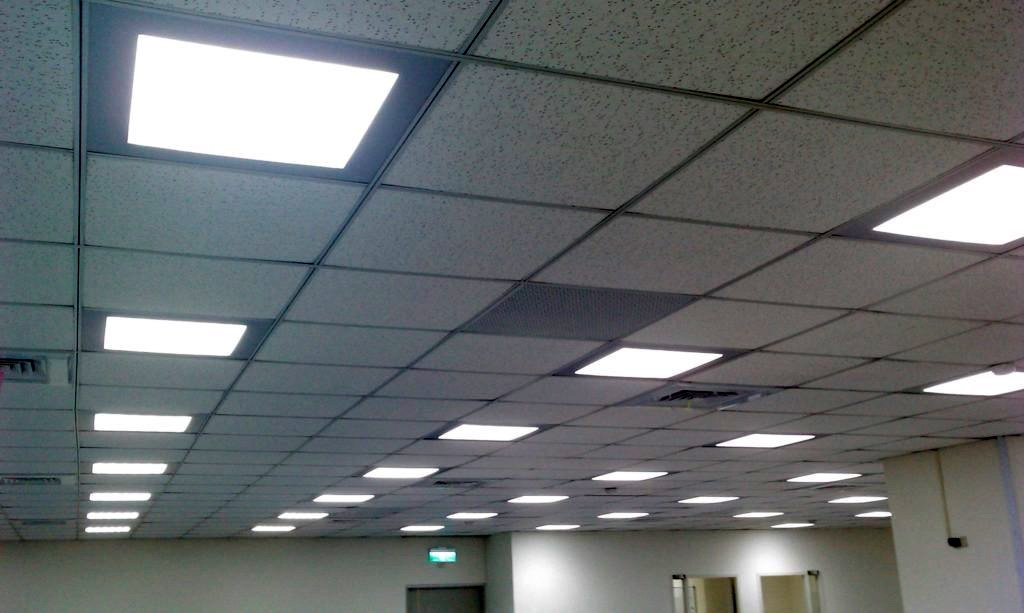
Suspended ceilings "Armstrong" are a convenient and functional solution for rooms whose height reaches 3 m and more. Often, such cellular decoration is used in public places: schools, offices, medical institutions and gyms. In rare cases, such an approach to the arrangement of the ceiling is possible in private homes.
The uniqueness of the Armstrong suspended ceiling lies in the fact that it is very easy to install it yourself. Even if this is done for the first time. Recalling the children's designer, its framework easily gathers, and plates are successfully inserted into the formed cells. Let's take a closer look at all the main components of this universal wonder-ceiling.
Device and accessories
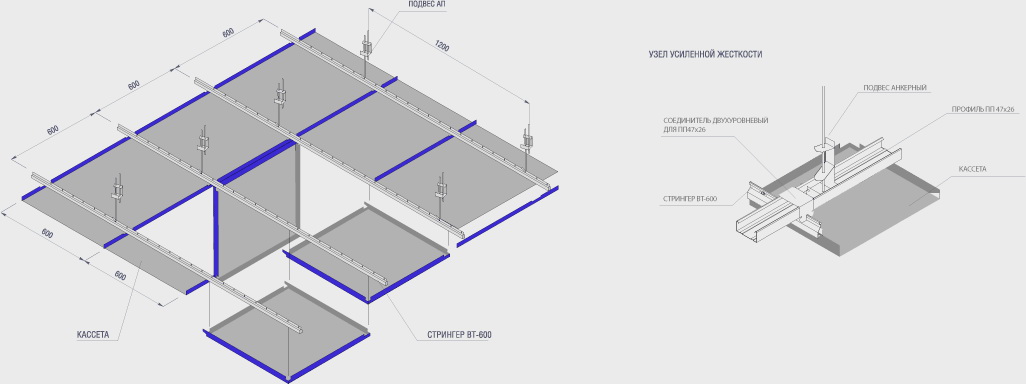
So, the main part of the construction is a metal frame that is attached to the ceiling and walls of the room. This box has the following components:
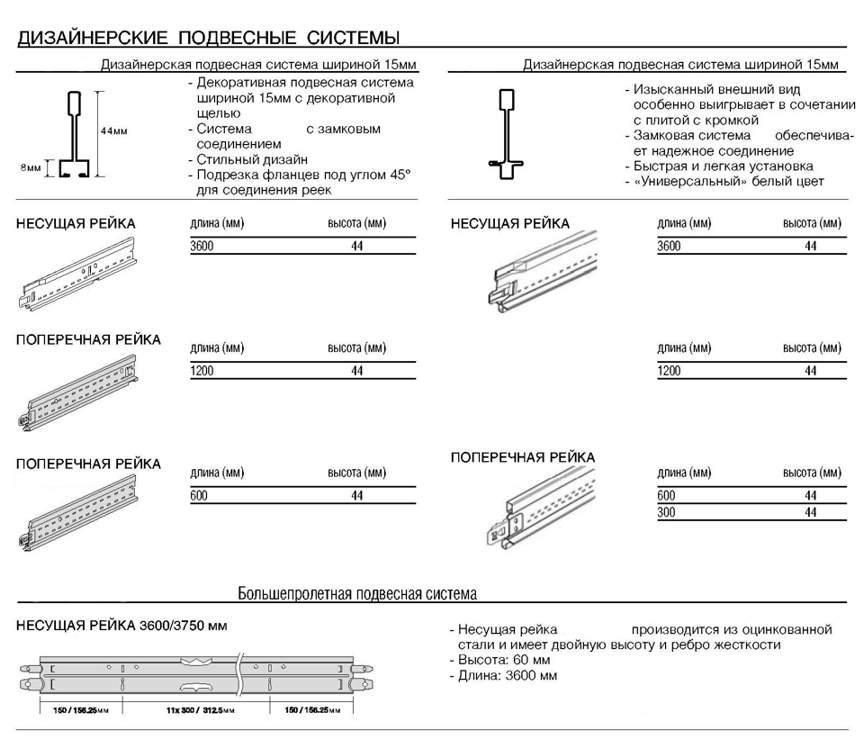
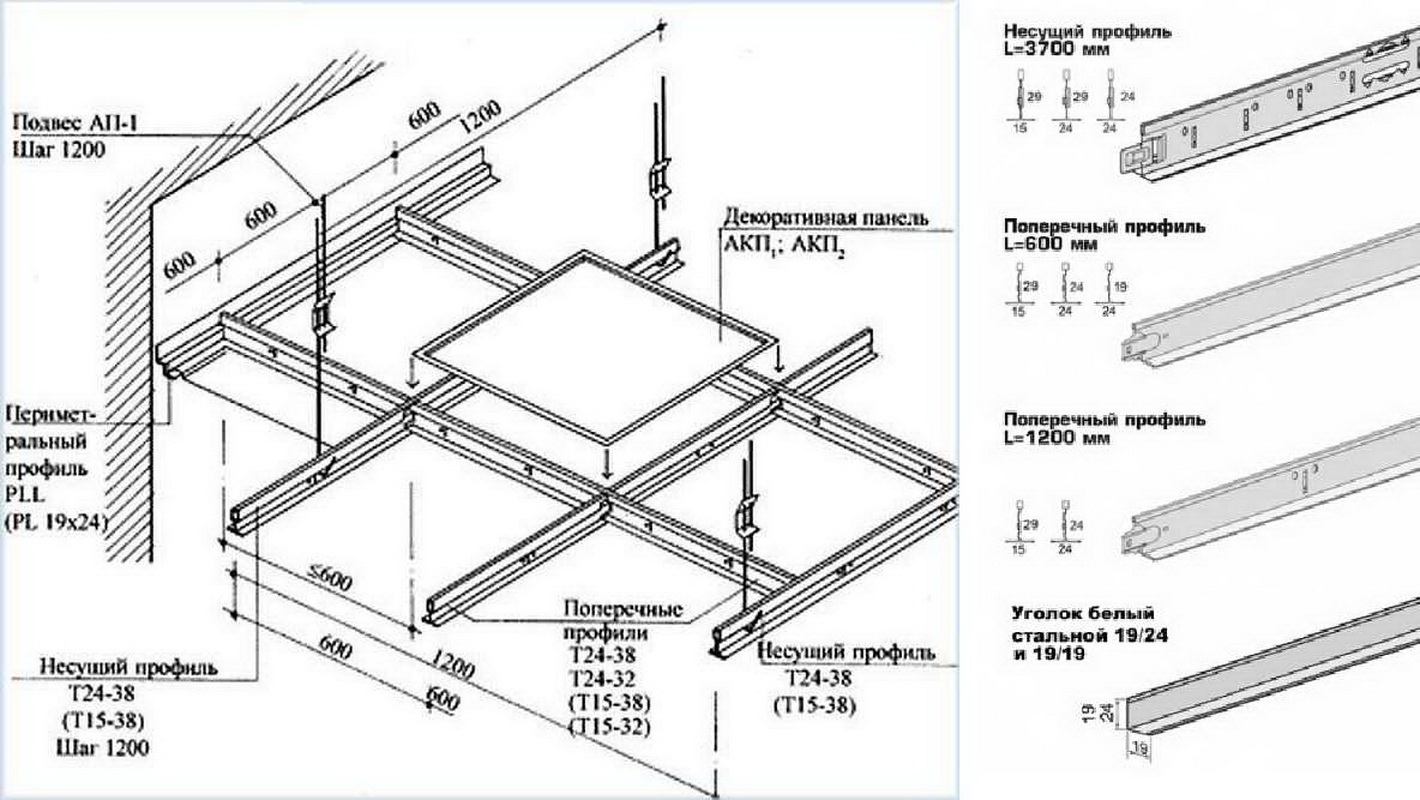
- Wall (angular) profile, sometimes also called perimeter due to the fact that it is mounted directly on the wall around the perimeter of the future ceiling. Most often it is an L-shaped profile.
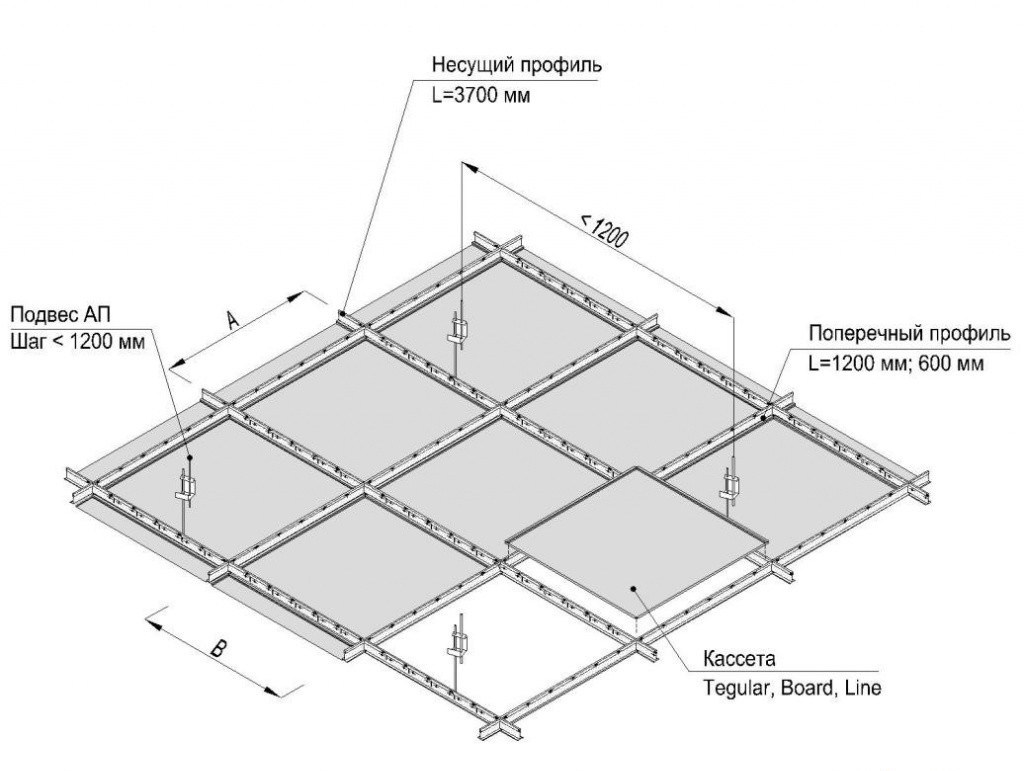
- Carrier profile - metal rail, installed parallel to the wall profile, has a length as close as possible to the length of the room. They act as guides of the whole structure.
- Transverse T-profile acts as a connector for parallel carrier rails, thereby forming Armstrong ceiling tiles.
- Suspensions they are two metal rods connected by a butterfly spring. One rod tends upwards, ends in a tight loop, attached to the mounting node. The second - rushes down, ends with a hook, clings to the carrier rail. Thanks to the spring, you can adjust the length of the suspensions: while compressing, its rods can be moved apart and shifted as far as necessary; releasing the “butterfly”, you will fix the hooks firmly enough. Manufacturers announce the presence of three variants of this component: standard adjustable from 120 mm to 150 mm, shortened - from 75 mm and extended - up to 500 mm.Basically, when installing a suspended ceiling, a standard type euro suspension is used.
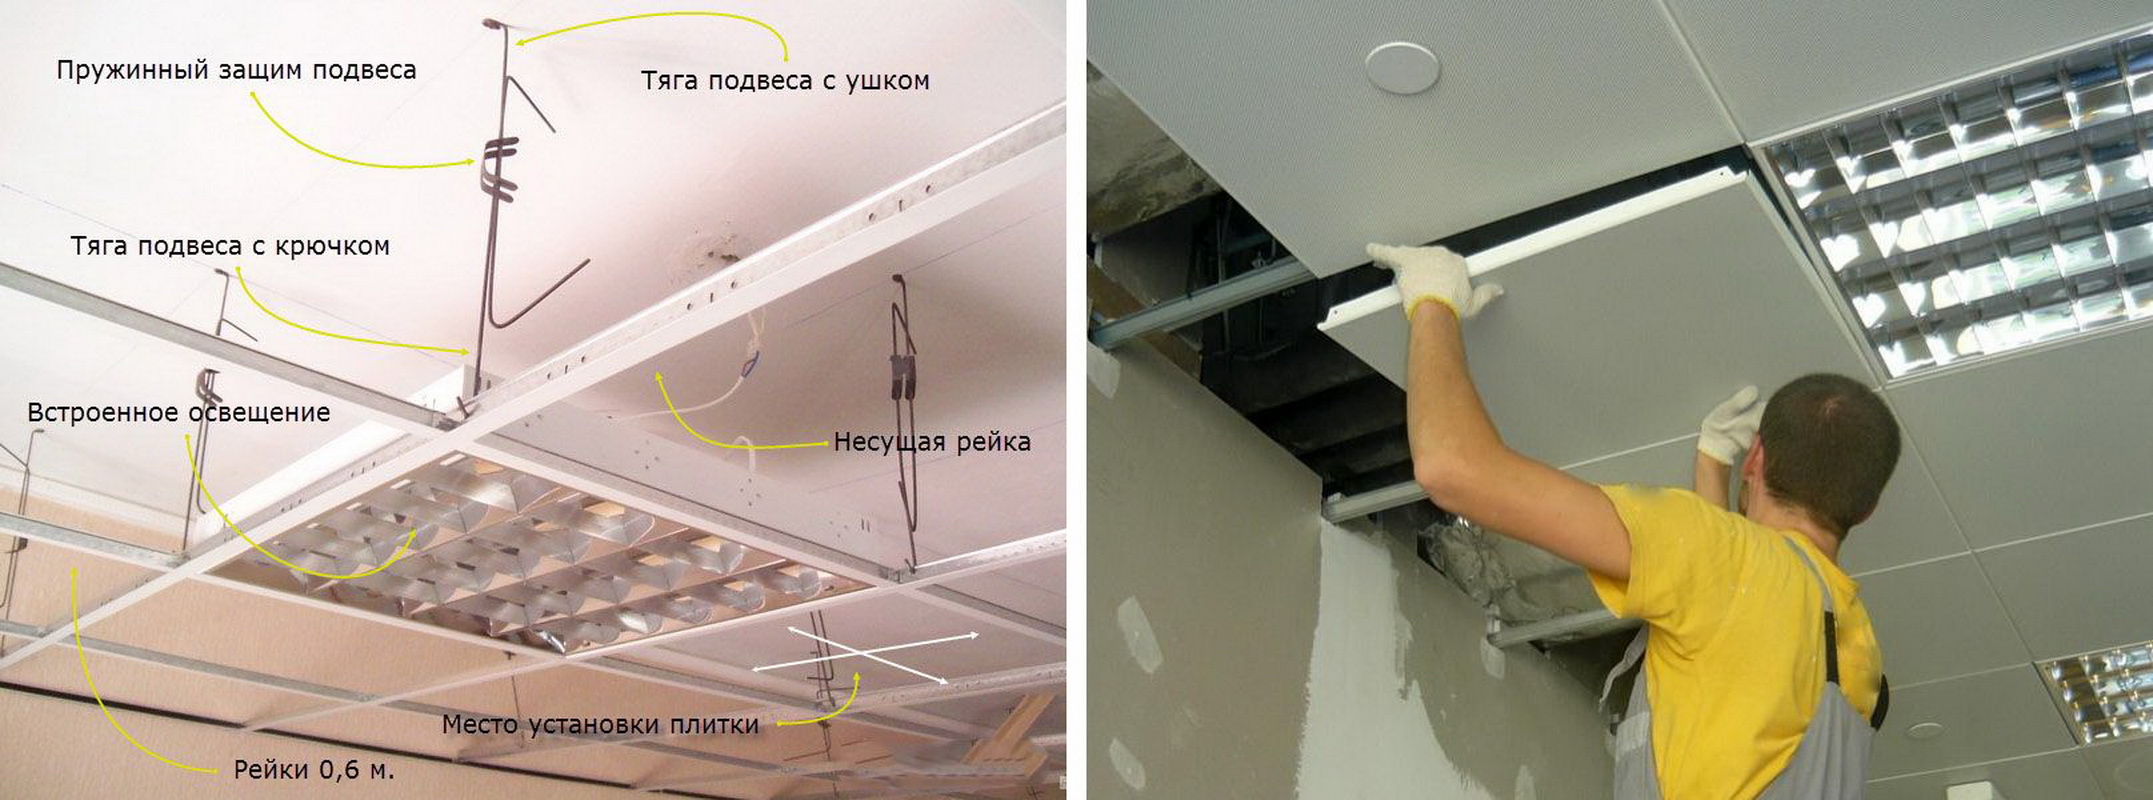
- Mounting knot - the usual dowel, on the end of which is a hook. In such a role can be a screw or a metal collet, depending on the material of this ceiling and the planned load on the node itself.
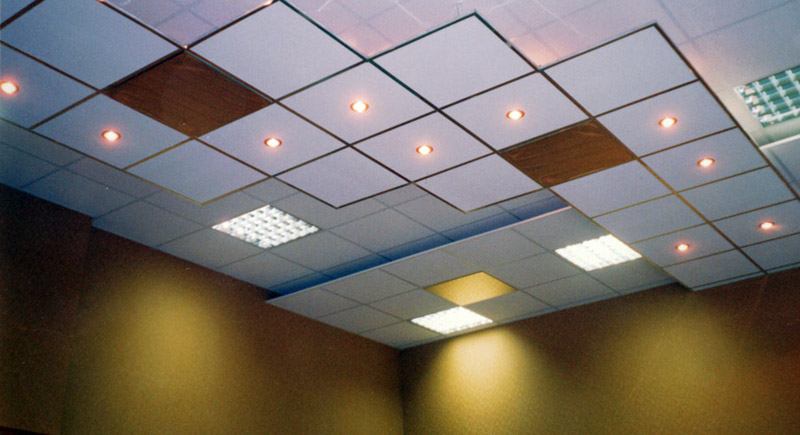
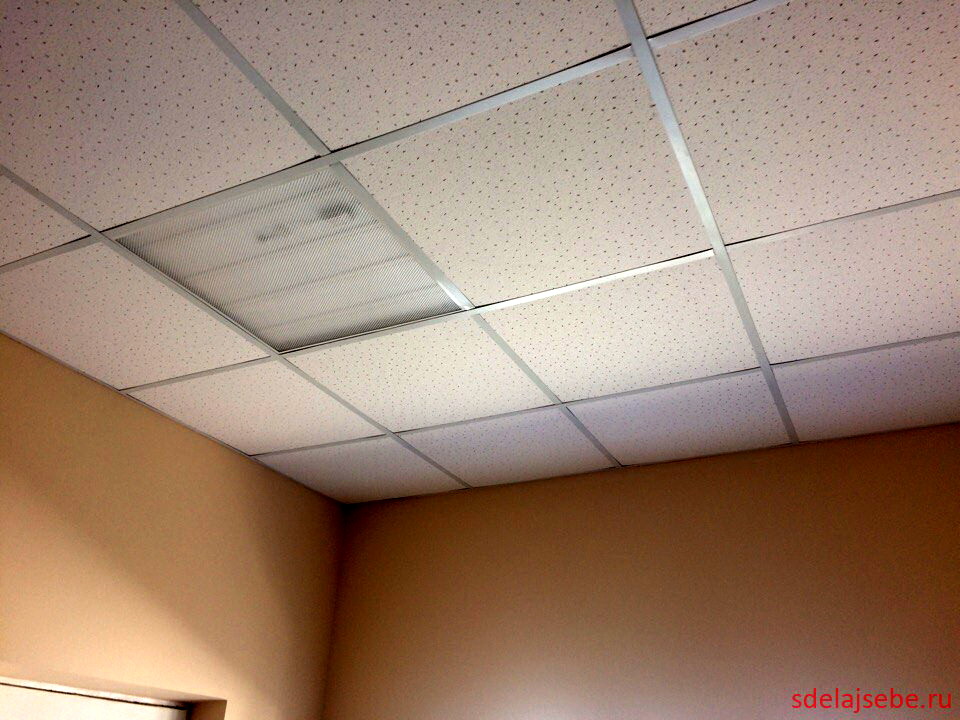
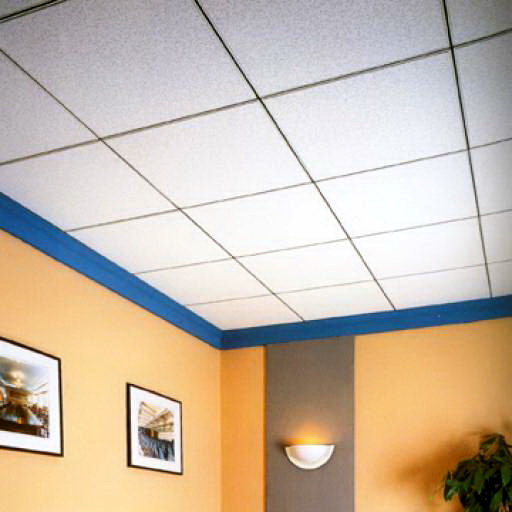
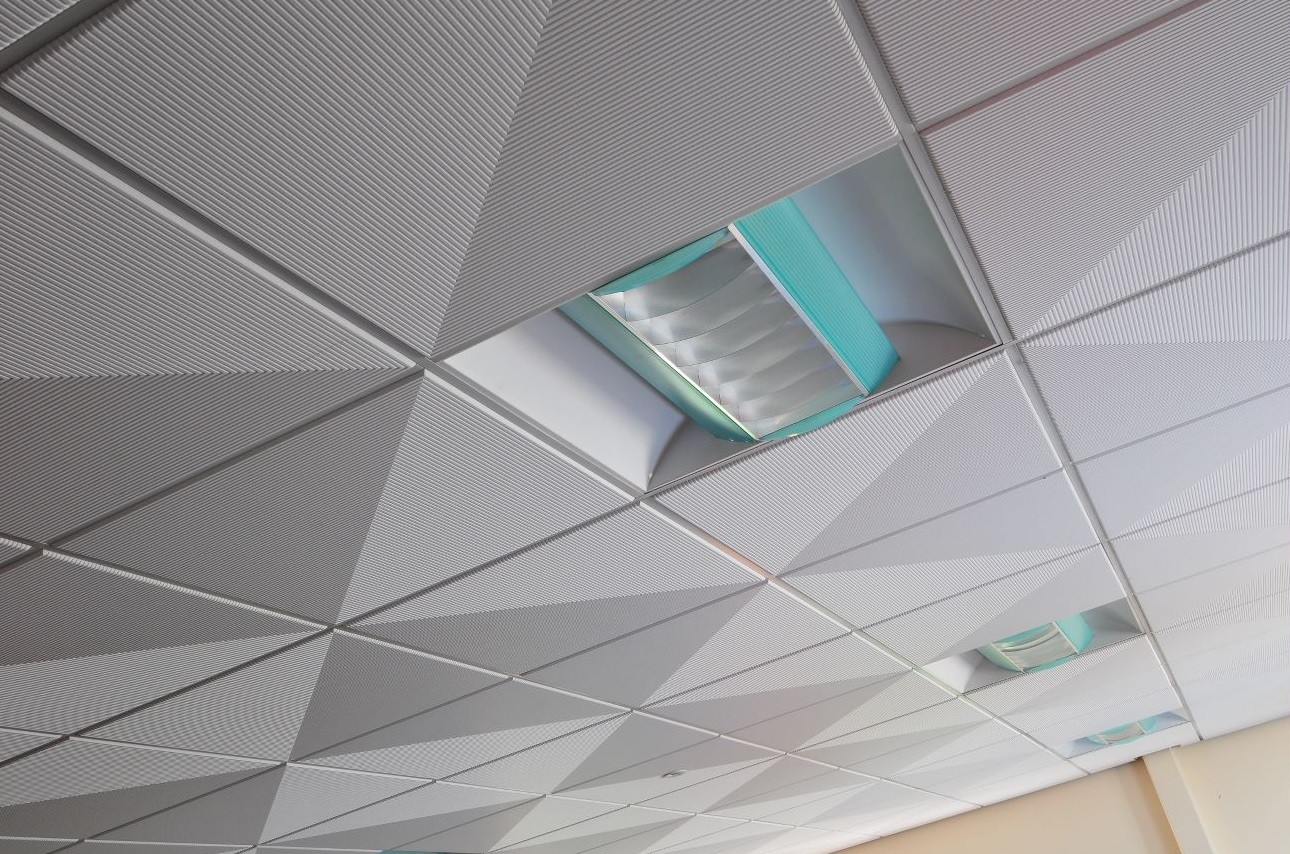
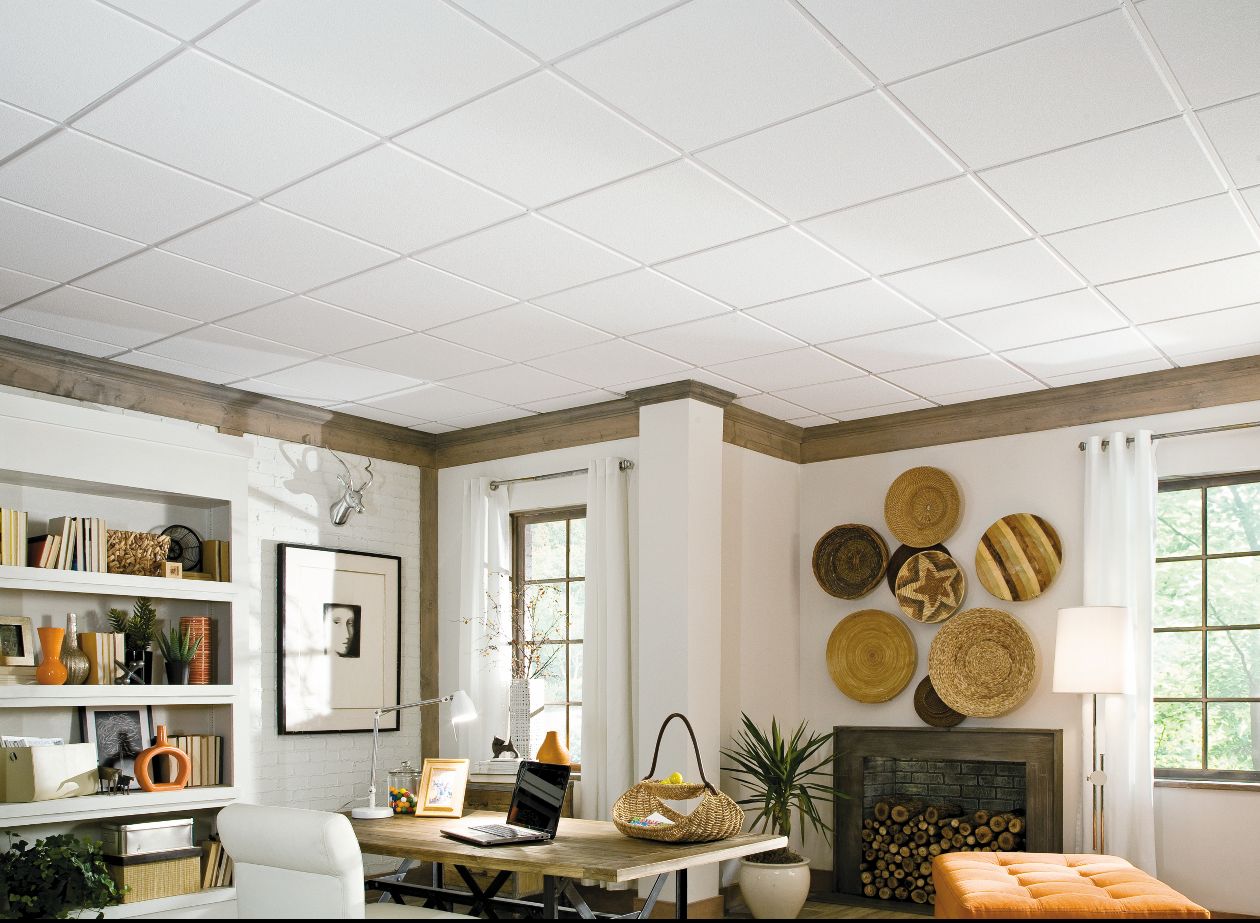
- Slabs - directly functional part of the ceiling "Armstrong". Previously used coating in two sizes - 120cm x 60cm and 60cm x 60cm. Today, the former are history, and square plates are used to design the ceilings.
In more detail it would be desirable to stop on a covering. So, there are six types of "Armstrong":
- Economical. The cheapest type of stove, which is very easy to absorb moisture, even if the room just high humidity. Because of this, they can quickly lose their shape or bend over.

- Luxury - "Prima". More durable than the previous form, moisture-resistant, have increased sound insulation.
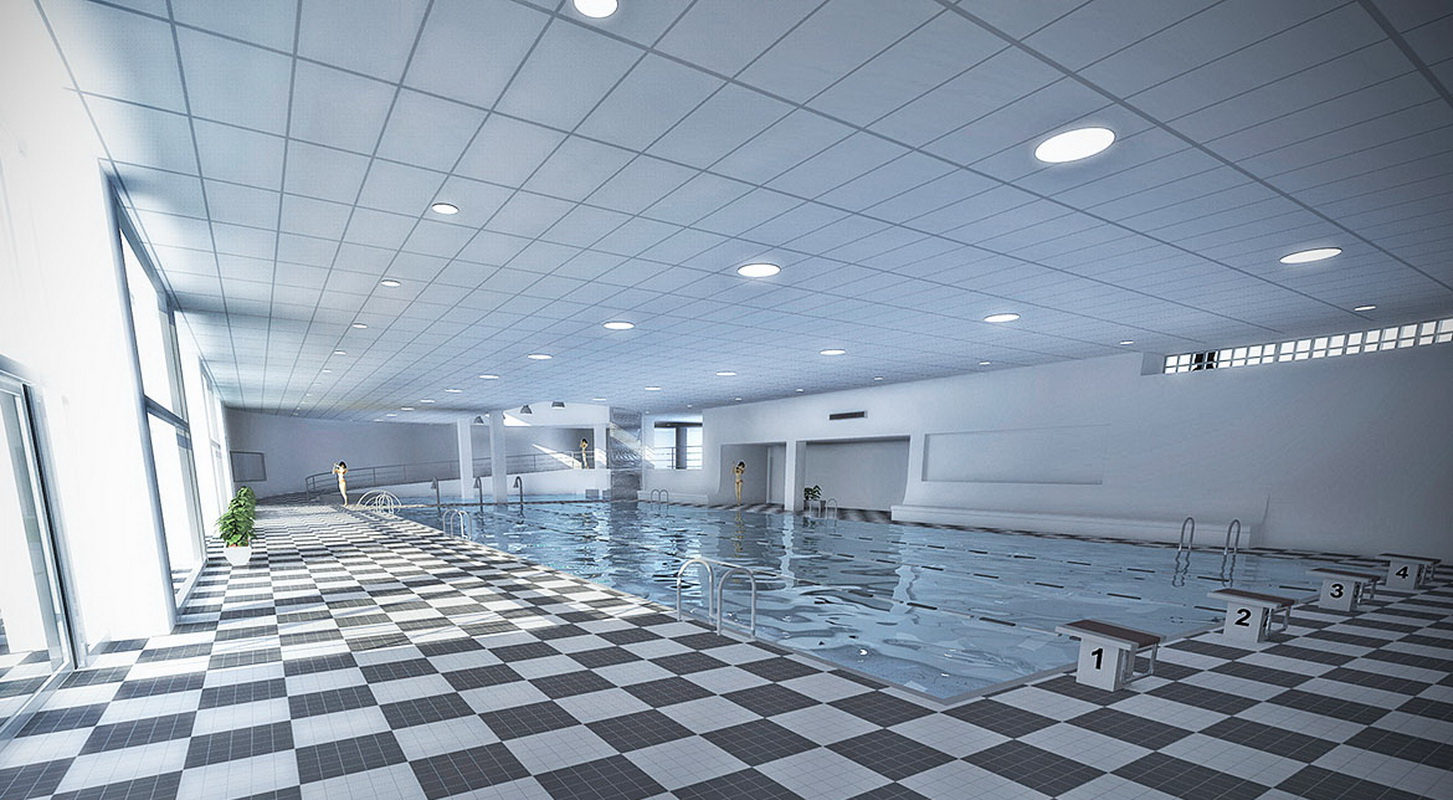
- Moistureproof "Armstrong" speaks for itself. You can not be afraid of even flooding from the neighbors on top. The plate is not deformed and does not become heavier under the weight of moisture.
- Acoustic - provides the maximum soundproofing. Most often used in noisy areas: shopping and gaming rooms.

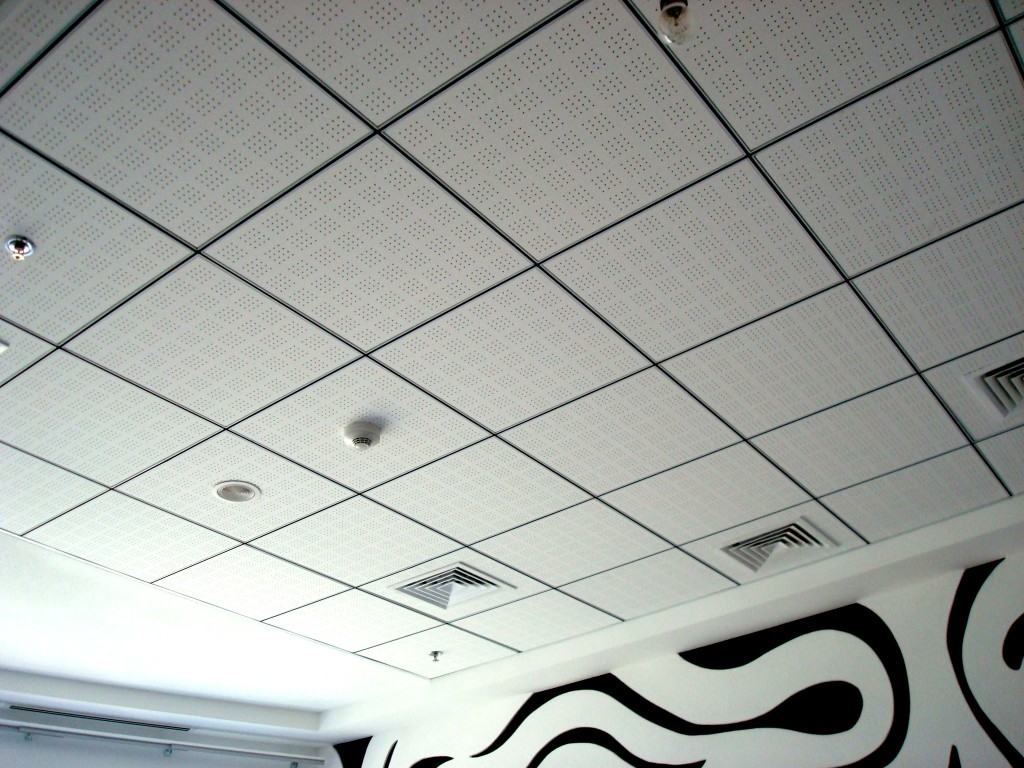
- Hygienic view ceiling plate, designed for use in areas with high sanitary requirements: catering, medical facilities.

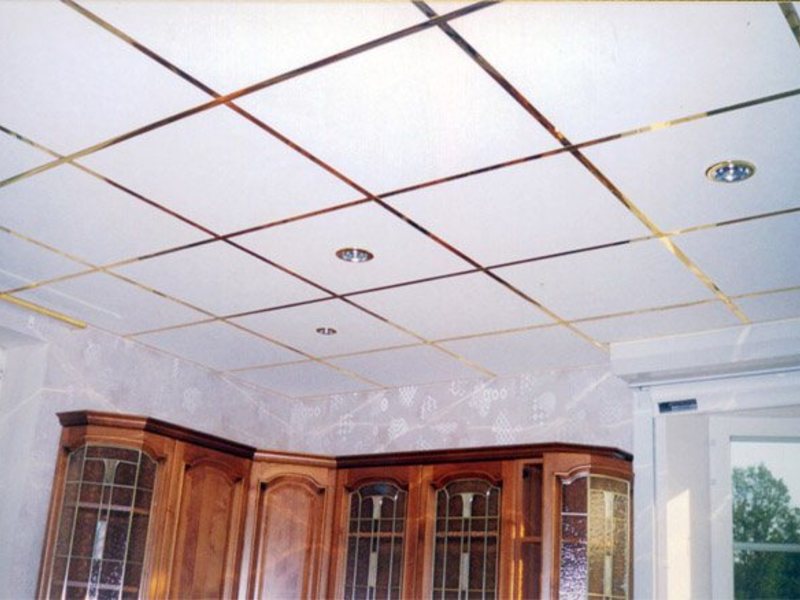
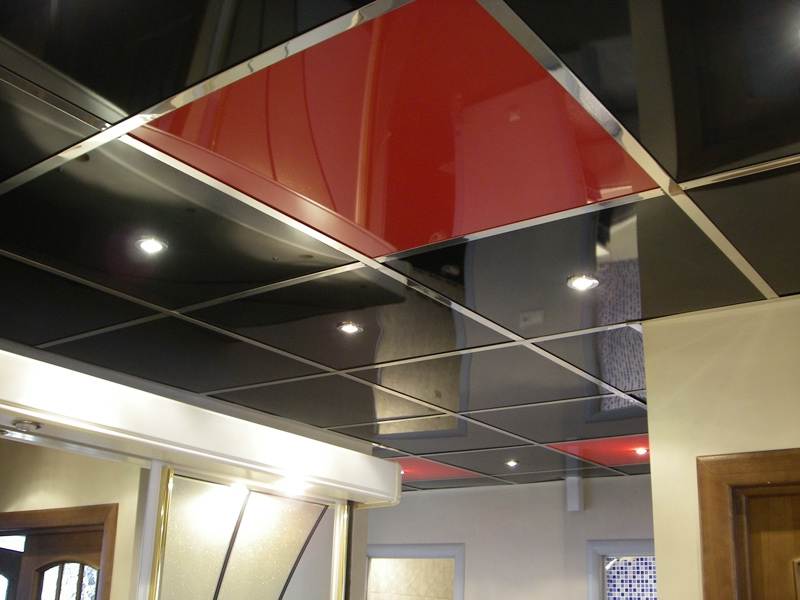
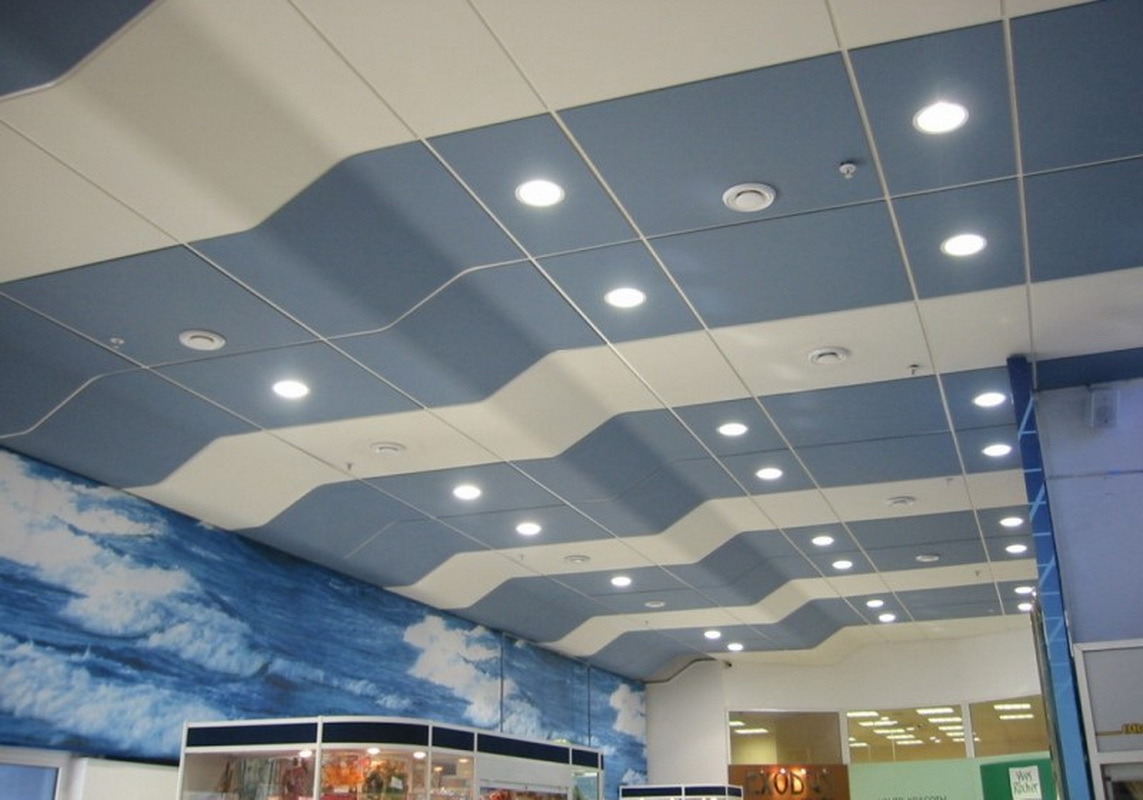
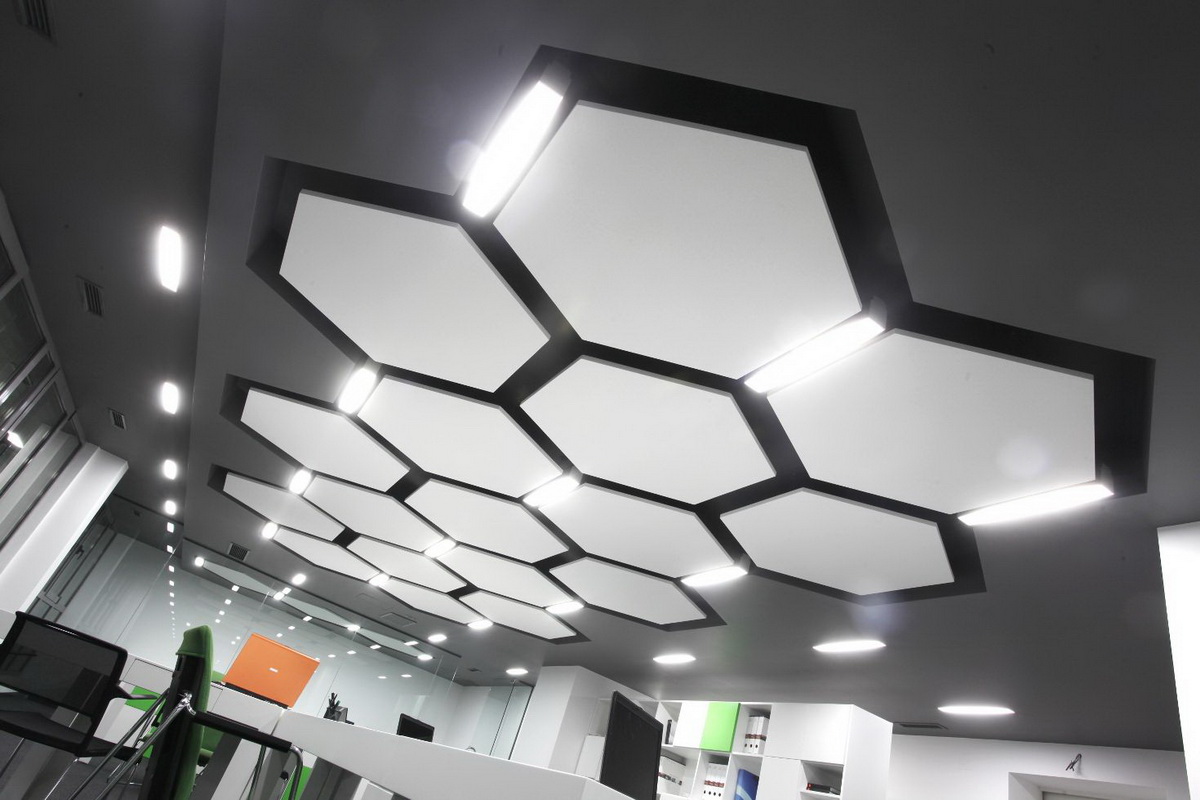
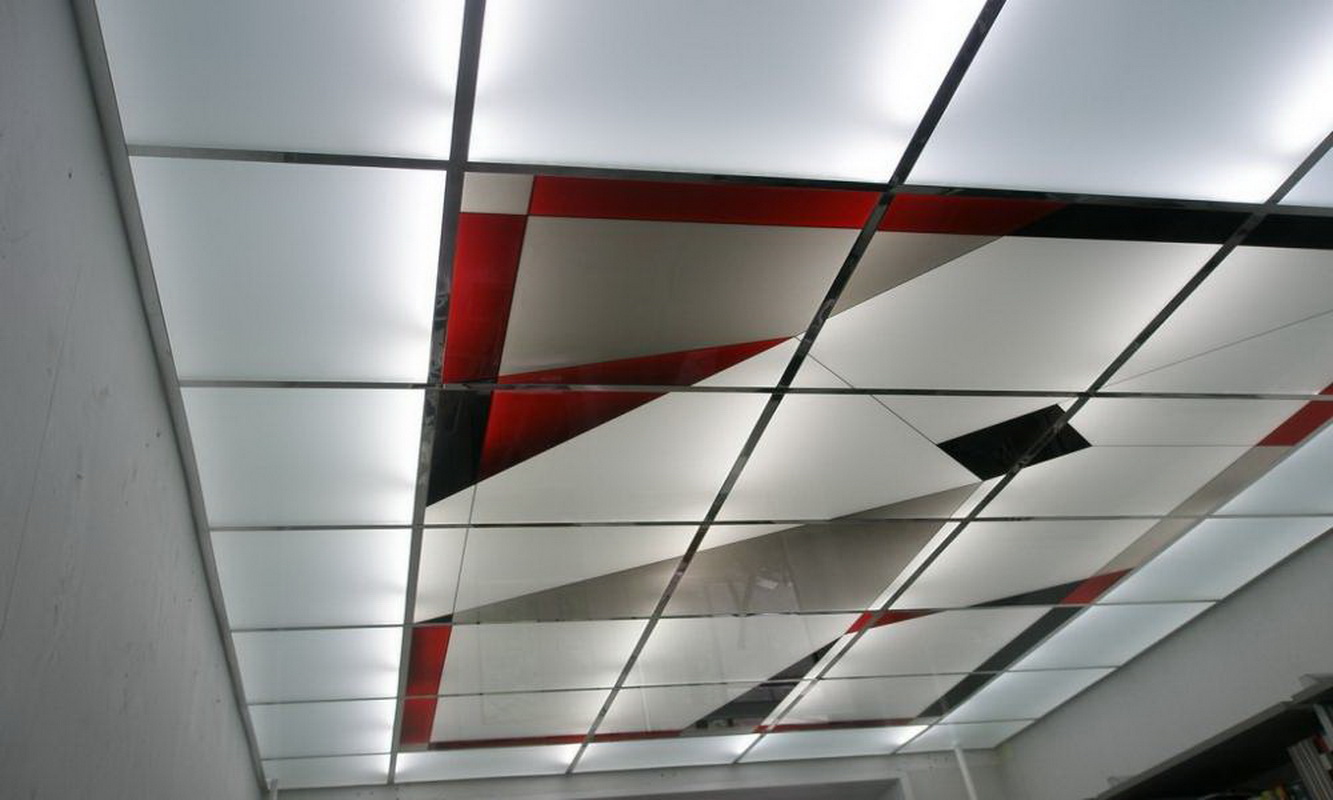
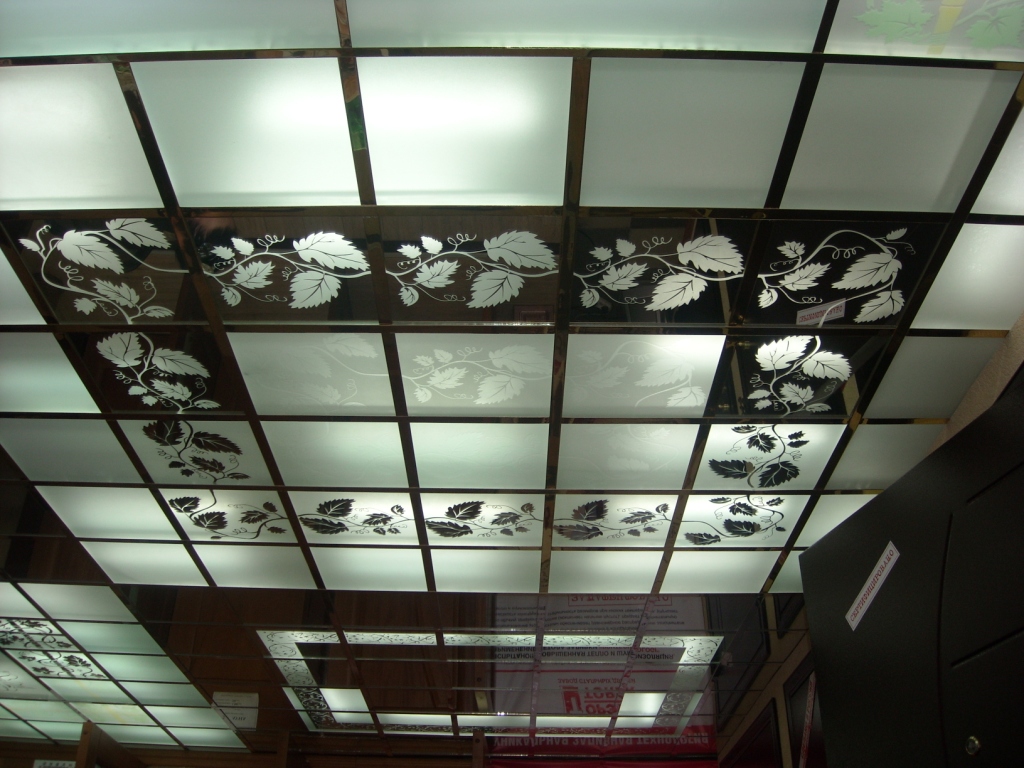
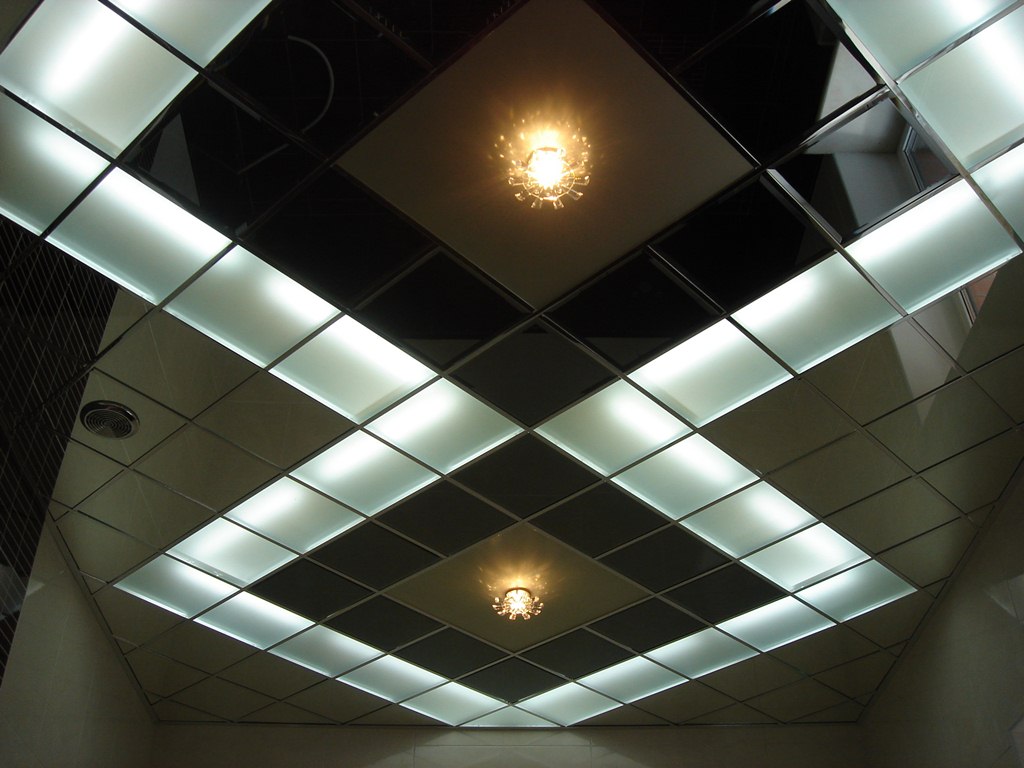
- Designer Armstrong not very common, but even in its rare cases it remains very popular. Mirror, glass, wooden plates and plates with drawing 3D drawings - the excellent decision for rooms with original design.


Speaking about the materials of which the plates for the suspended ceiling are made, mention should be made of metal, plastic, mineral fibers (mineral wool), polycarbonate, wood, steel and aluminum.
Before proceeding with the purchase of materials and installation of the ceiling, it is necessary to take into account several important characteristics of the web, to make all the necessary calculations and measurements and develop a plan-scheme for the installation of the frame
Dimensions
The size of the standard Armstrong ceiling plate is 60 x 60 cm. The thickness of the plate can be from 0.8 cm to 2.5 cm, which affects the choice of a canvas. Given that the false ceiling is lowered by 10-15 centimeters at least, then this parameter should be carefully studied, comparing with it the height of the room. The weight of ceiling tiles is calculated on the basis of a square meter of material. On average, this figure varies from 2.5 to 8 kg.
As for such individual characteristics as moisture resistance and sound insulation, they are completely unique for each individual model. It is worth noting that this in no way affects the basic dimensions of the plate. Knowing the basic parameters of Armstrong ceiling tiles, one can proceed to the calculation of the amount of material for purchase.
Material calculation
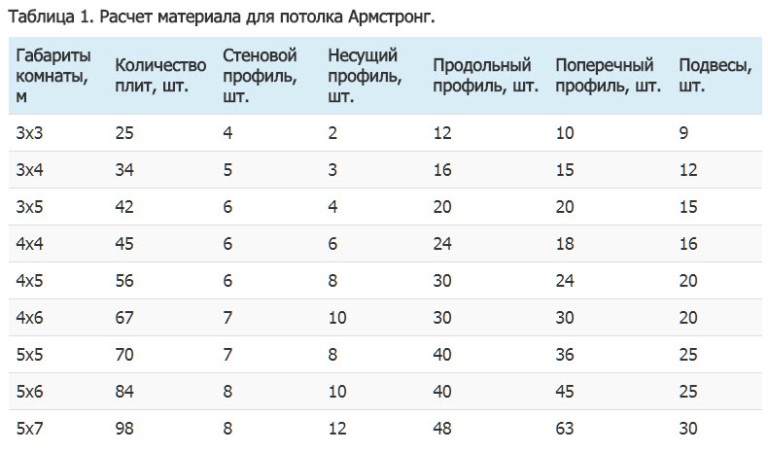
There is a whole system for calculating the amount of material needed to cover the ceiling. For example, as can be seen from the table, the consumption rates of plates and components vary depending on the area of the room.
The entire subsequent calculation is made by substituting the necessary values in the formula:
- To calculate the number of plates required to cover the entire surface of the ceiling, you need to multiply the area of the room by a constant (constant value) - 2.78.
- Corner profiles are calculated by multiplying the perimeter of the room by 3.
- Bearing slats or guides are purchased in an amount equal to the area of the room multiplied by 0.23.
- The number of transverse profiles that must be purchased is equal to the product of the area of the room by 1.4.
- Suspensions should be purchased 0.7 pieces per 1 m2.
Also, the necessary consumables for the arrangement of a false ceiling can be counted with the help of various online calculators.
When buying plates for the ceiling "Armstrong" do not forget about the spare squares. Professionals advise to acquire 10-15% more than you calculated, in order to avoid unpleasant situations with shortage, mechanical damage and other things during the installation process. Also, thanks to a reasonable storeiness, you can replace one cell with another at any time without having to search for a suitable canvas, call the master and so on.

Installing a suspended ceiling "Armstrong" on their own, also pay attention to the availability of the necessary means for a comfortable and maximum accurate process.
Required tools
There is an opinion that the installation of the Armstrong ceiling takes no more than 1 daylight day (with room space up to 15 squares). And this opinion is not mistaken if you have all the necessary tools on hand to make the process of installing the plates as easy, comfortable and accurate as possible. So, you will need:
- building level;
- roulette;
- drill or punch, if installed in a concrete room. If the ceiling is planned to be installed in a wooden frame, then all profiles can be fastened with ordinary nails. When working with plasterboard coatings are used screws;
- Phillips screwdriver or screwdriver;
- scissors for metal;
- screws, dowels, screws, anchor bolts and other trifles, which are most often found in the arsenal of any home craftsman.

The most pleasant positive moment in the installation of the Armstrong ceiling is that all their components are universal. That is, any details, if they are in your home, will fit them perfectly.
Installation and finishing their own hands
Installation of any ceiling begins with a drawing. Having drawn your future Armstrong on paper, you can mark up directly on the draft ceiling. First of all, you need to decide on how far from the last your suspended structure will be located. This indicator is influenced by one main factor: the presence of additional elements in the false ceiling. These can be lamps, fans, split systems, or even just wires that did not work, did not want to, and did not work out to be hidden in the walls.
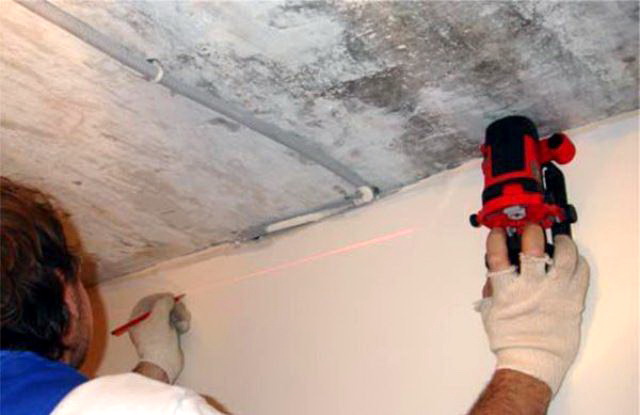
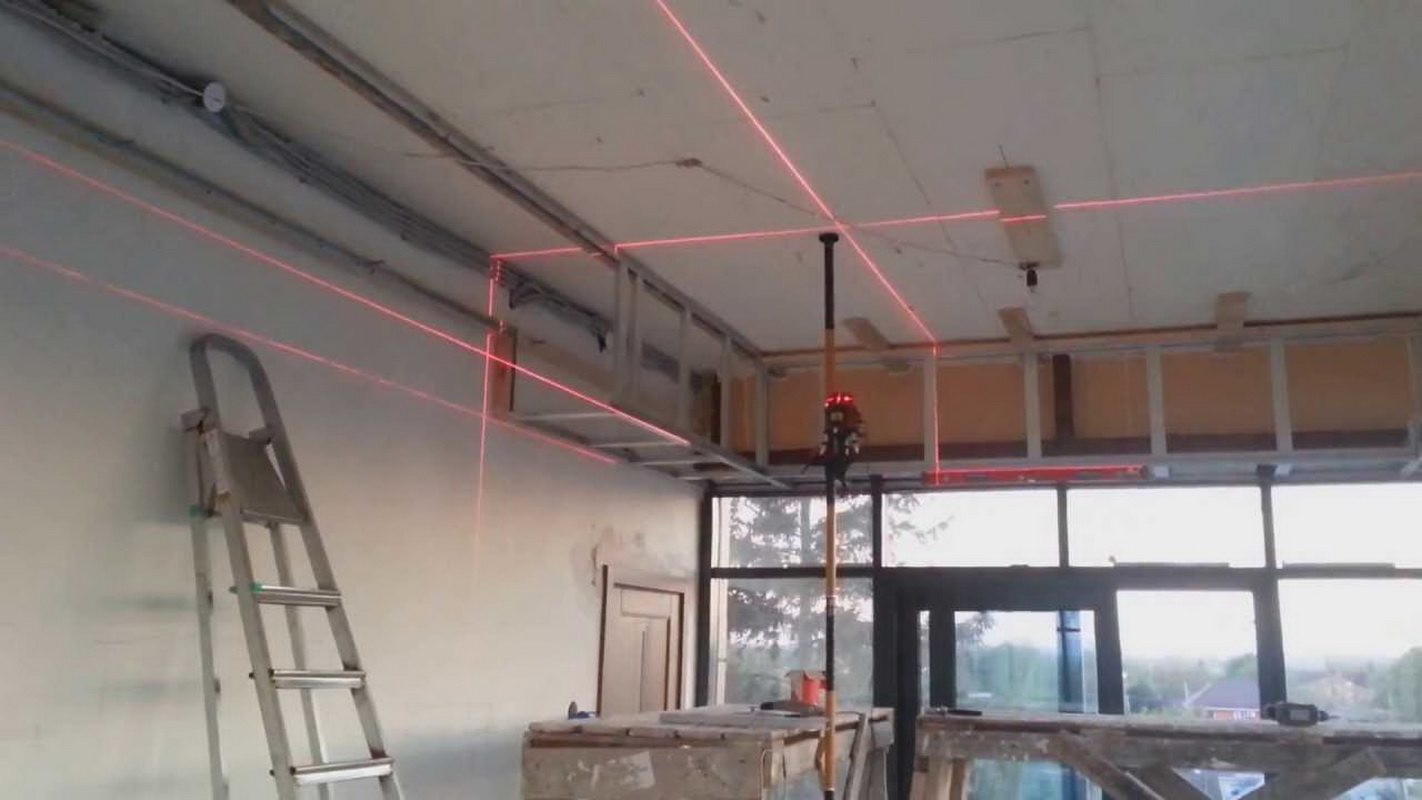
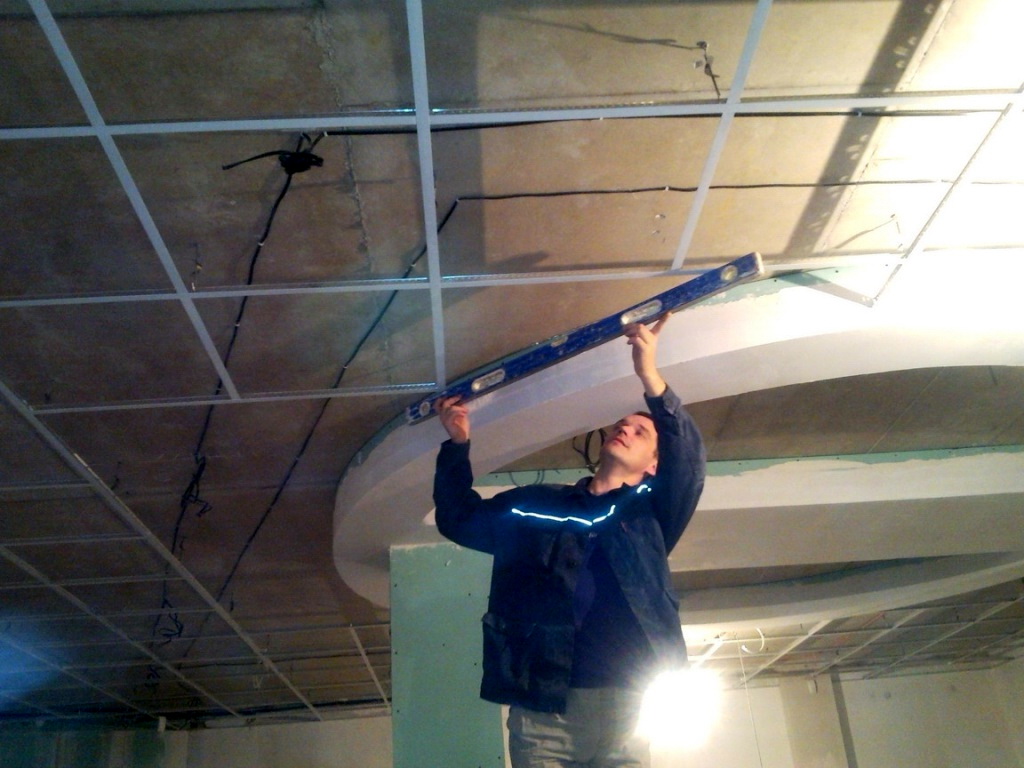
We start marking the ceiling.With the help of the level we make marks in the corners of the room at the required height. Then these marks are connected using a tracer or infrared level with straight lines. Professionals also advise to measure the distance from the floor of the room to the notches. Thus, the lowest point to which the suspended ceiling will fall is determined. Now everything is in place to properly assemble the Armstrong frame.
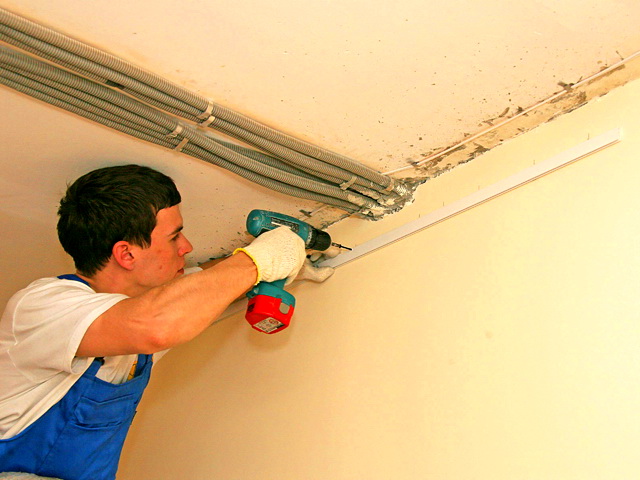
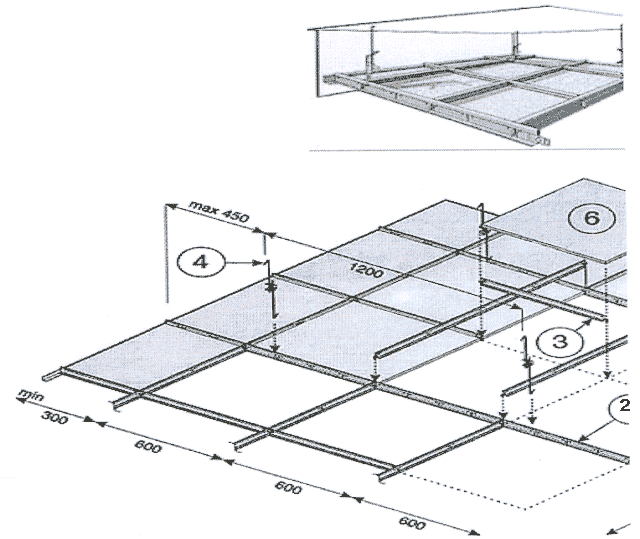
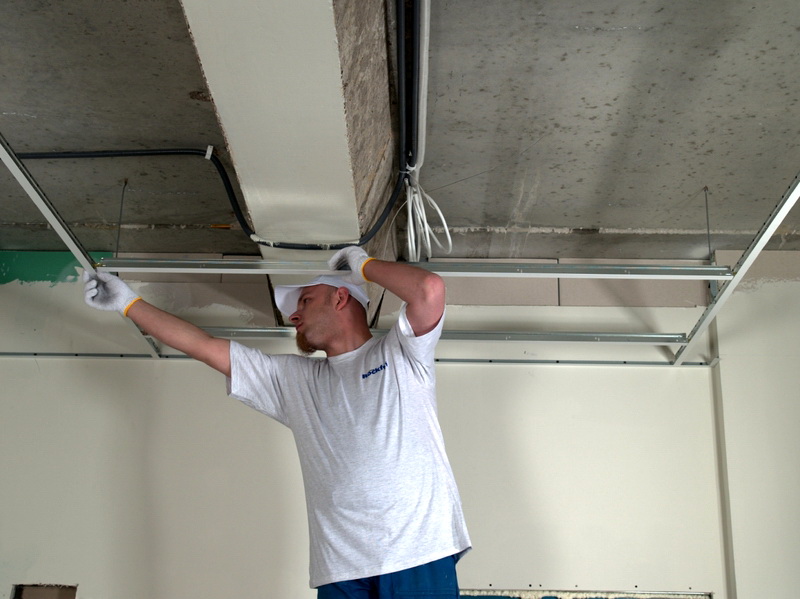
When the marking is ready, we begin to mount the perimeter or angular profile. The main feature of this process is fastening in such a way as to form a regiment. And the upper edge of the profile fell just on the drawn strip. The necessary fasteners are installed at a distance of 40-50 cm from each other. All angles are cut at a 45 degree angle.
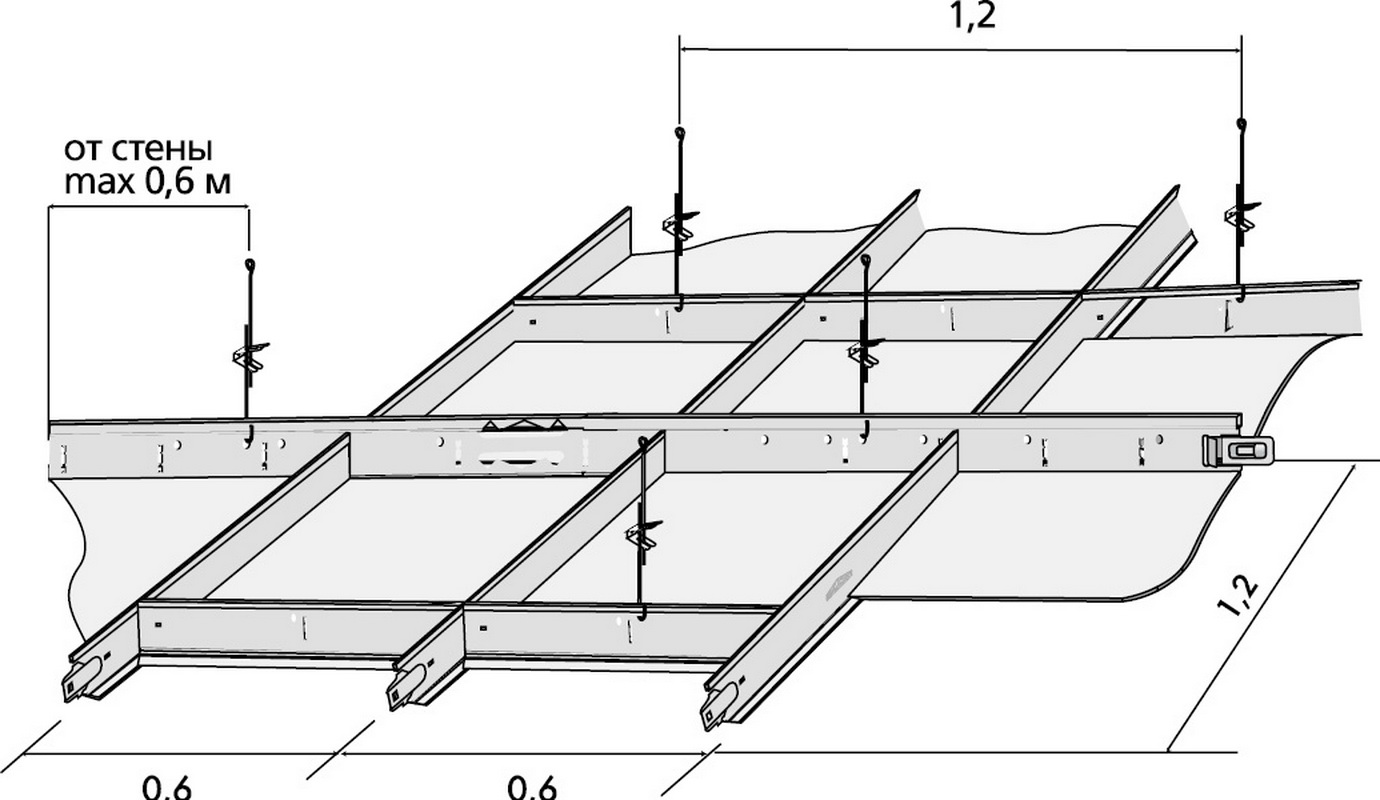
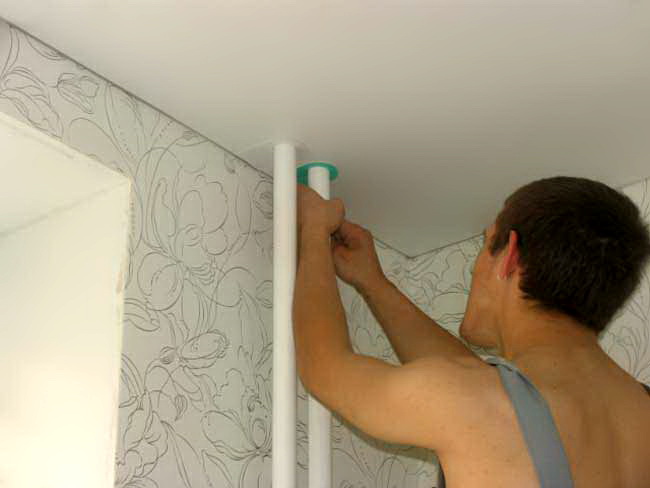
Further instructions suggest installing suspensions. To do this, you need to make holes with a perforator in the old ceiling, into which the fixing units are inserted. The distance between the dowel-hooks should not exceed 1.2 m, and from each wall they should move 60 cm. Also, the load on the frame of the ceiling should be taken into account. The larger it is, the closer the anchor hooks should be to each other, on which you should immediately hang the hangers. "Butterfly" adjust the length of the part. It is important to ensure that their ends are flush with the perimeter profile.
In the approximate map of the installation of suspensions, you can see at what distance and in what quantity they should be placed. Here the green crosses are the main fixing unit, and the beige ones are optional, which is installed as needed.
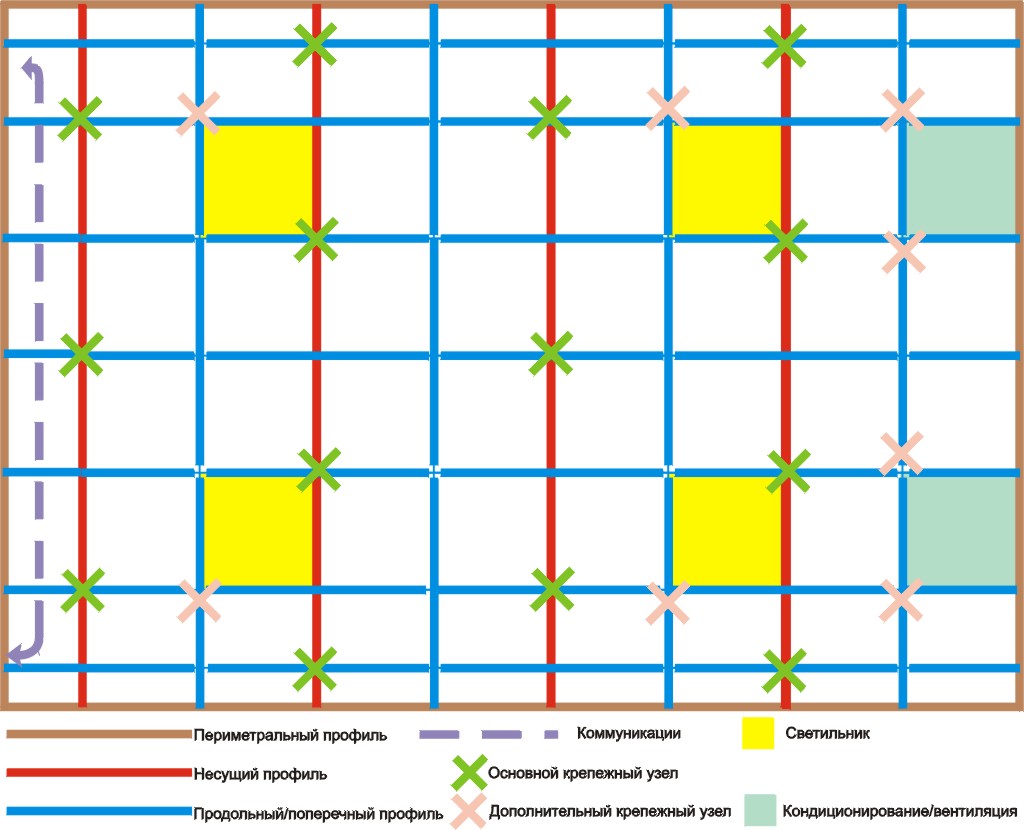
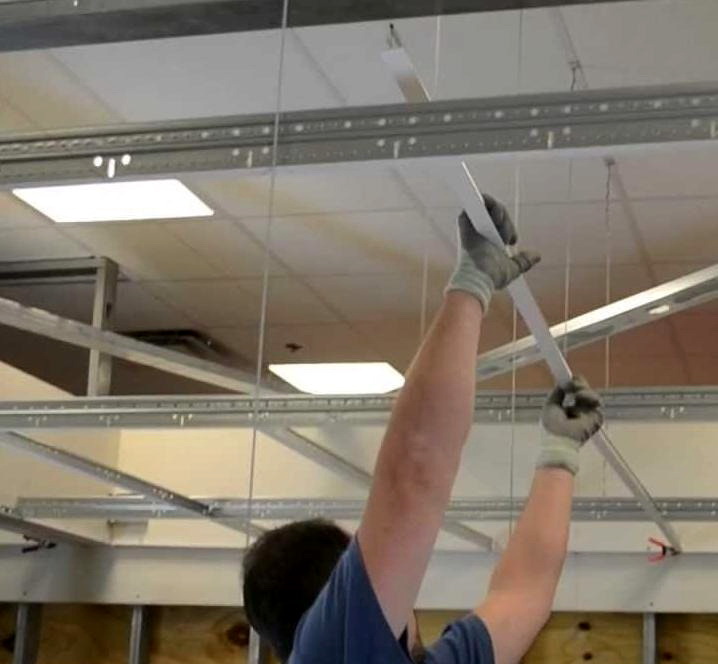
The next step will be the layout of the supporting profiles or guides, which should be located parallel to the corner rail of one side of the room. Many professionals advise to collect cells for the plates at the beginning, but sometimes the collection technology does not allow this. Now you need to exactly attach the rails to the hooks of the suspensions.
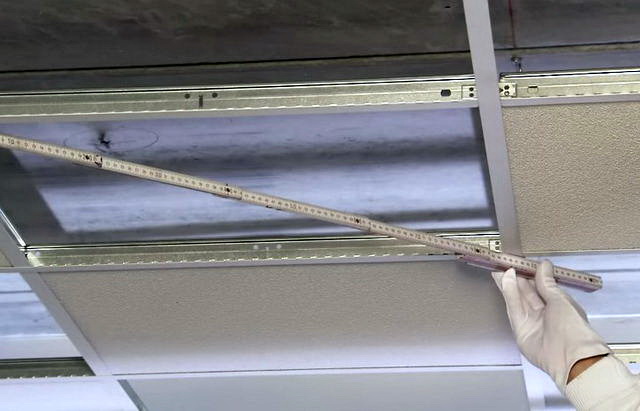
Cross profiles must be mounted on the carrier in steps of 60 cm in order to form a square cell for the future web. You can install them not perfectly smooth, but under the diagonal.
It should be remembered that to mount a false ceiling of such a non-standard form is only possible for professionals. The technological feature of the Armstrong ceiling does not always allow installation in a special way.

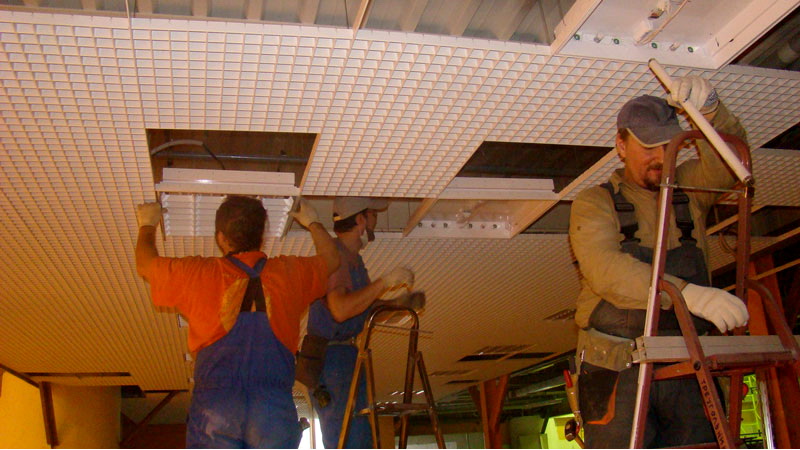
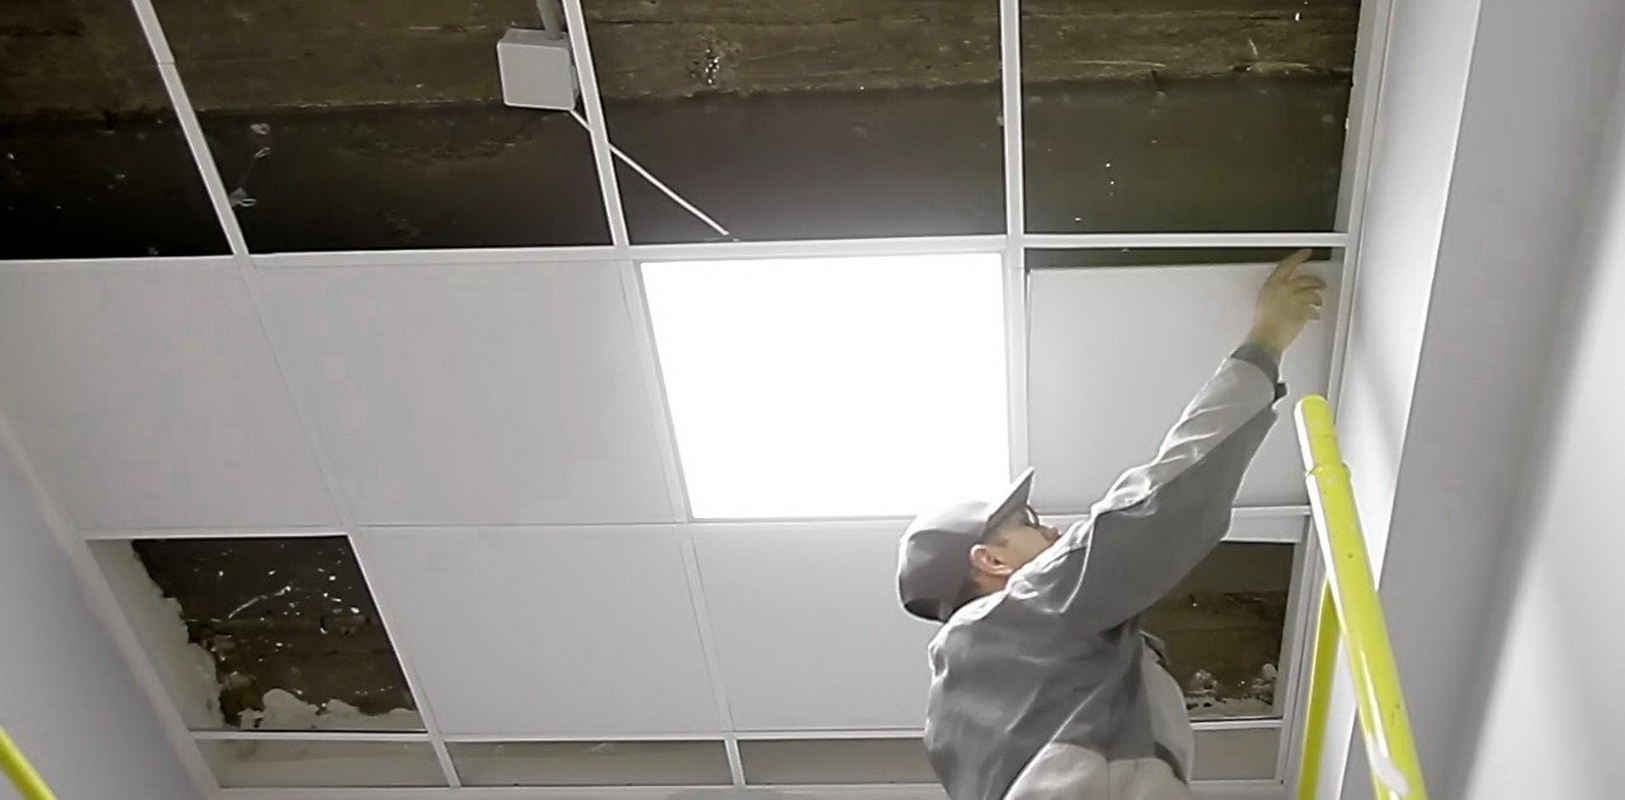
When the assembly of the frame of the suspended structure is completed, you can proceed directly to the installation of plates.The rules of the collection of "Armstrong" are that the canvas must be fastened by inserting each sheet in the allotted cell. The first to put the plates that carry a certain functionality: with built-in lights, ventilation grilles and split-system. Then continue with blind squares from the center of the room, gradually moving towards the edges.
Light movements of the hands of the plate are introduced into the interceiling space and fit into the cell. In case of insufficient joining of the web with the cell, it is impossible to press it from above. You need to gently push the corners of the square below.
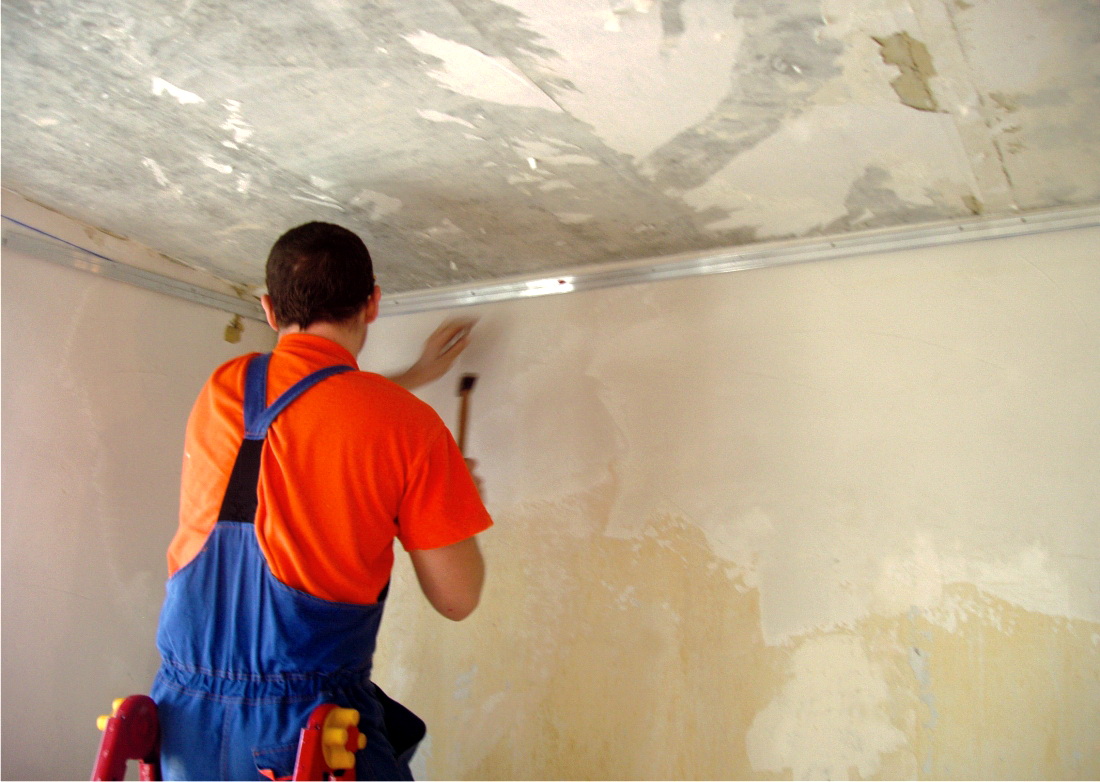
When starting to install new ceilings, make sure that the old ones are not wet, loose or faulty. After all, the longevity and appearance of the Armstrong suspended ceiling directly depends on the state of the base. The advice of professionals who will fit in not only during the installation, but also in further operation will help to achieve maximum efficiency in the process of mounting such a design.

Useful tips
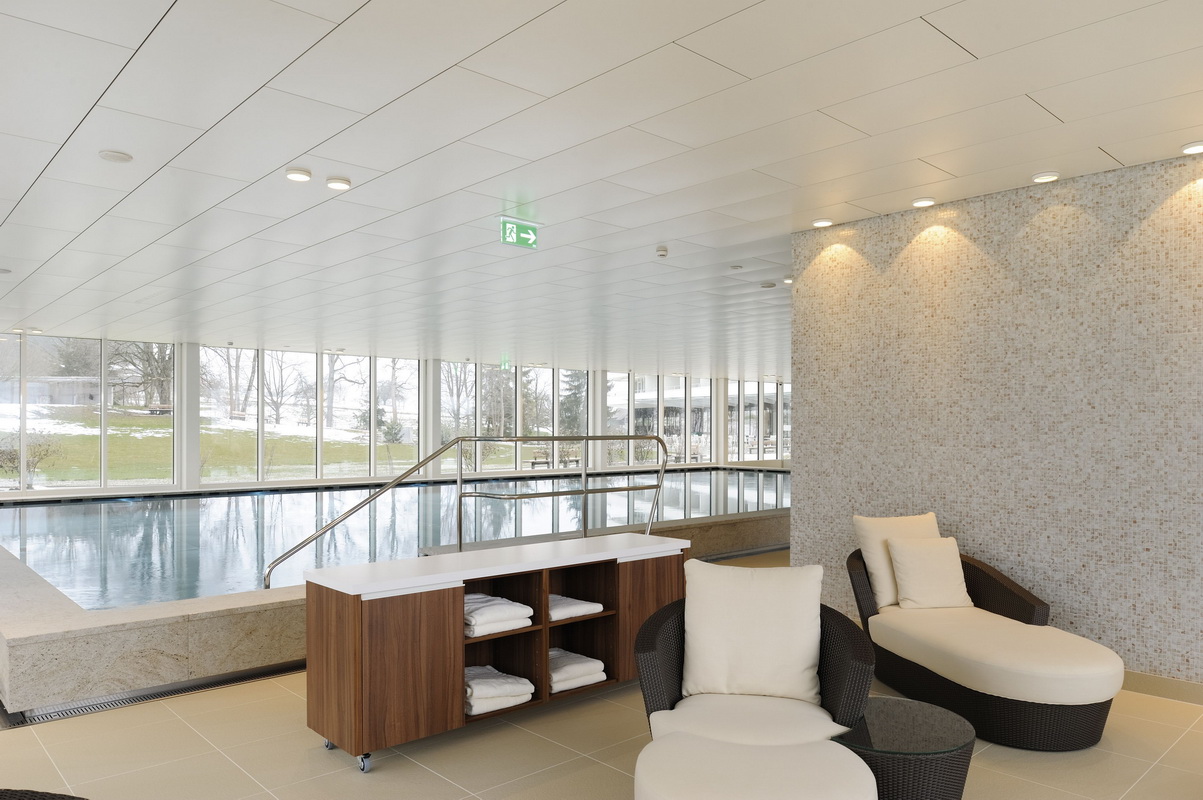
A variety of materials used for the manufacture of Armstrong ceiling plates allows you to choose the most suitable model for each specific room.Of course, you can use universal canvases, but not only the visual characteristics of the ceiling, but also its functional features may suffer from this. For example, experts advise the use of moisture-resistant plates in rooms with high humidity: swimming pools, gyms.
Panels that absorb the maximum sound will be appropriate in large shopping centers, restaurants and nightclubs. Design options are most preferable for interior decoration of private houses with high ceilings or cultural institutions.
Since for load-bearing rails it is best to use a solid rail, the length of which coincides with the length of the room, special locks are available for sale at the ends of such profiles. Thanks to them, the slats are easily increased. A malleable metal is very easily cut to the required size with metal scissors.
Starting installation of the Armstrong suspension system, it is necessary to take care of drawing up a detailed assembly scheme. It is necessary to display all the main components of the frame of the new ceiling, laying of communications, places for the installation of lamps and blind plates.This will help both to select the required amount of consumables, and visually assess the details of the future design.

If you need to repair the suspended ceiling, you should resort to the basic rules of dismantling:
- first of all blind plates are removed;
- the second stage is the disconnection of all electrical appliances and the removal of these structures from the ceiling;
- the following are removed longitudinal and transverse profiles;
- the last stage of dismantling is the removal of the bearing rails.
If you decide to get rid of the Armstrong suspended ceiling forever, then another step will be the dismantling of the corner profiles and hangers with fixing units.
If you chose an apartment as a room for such a construction, then you should immediately abandon the standard euro hanging. How, then, will the ceiling be fixed? Galvanized corners come to the rescue with a pair of holes on the self-tapping screws, which will become fastening knots.
As suspensions it is necessary to use copper wire harnesses. It should be borne in mind that their length should also not exceed the height of the gap between the ceilings. Thus, you save up to 5-7 cm in height of the room.But remember that in this case it will be much more difficult to install ceiling lights and use this space as a kind of cable channel.
For installation instructions for the Armstrong ceiling, see the following video.