Lighthouses for plaster: types and application
For any work you need to have the right equipment, especially when it comes to repairs. Performing high-quality plaster of any surface, you must use beacons. There are several variants of such devices and they are used for different purposes. To get the perfect result, it is important to understand all the nuances associated with this equipment.
Purpose
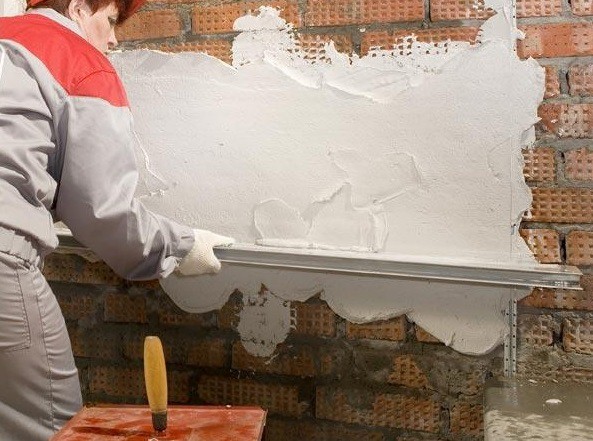
When repairing a house or apartment, the main focus is on the walls and the ceiling, because these elements have not only a decorative function, but also ensure the strength of the building and its long life. For high-quality work on removing cracks and leveling walls, it is first necessary to plaster them. This process requires not only certain skills, but also the necessary tools that will make repairs faster and more successful.
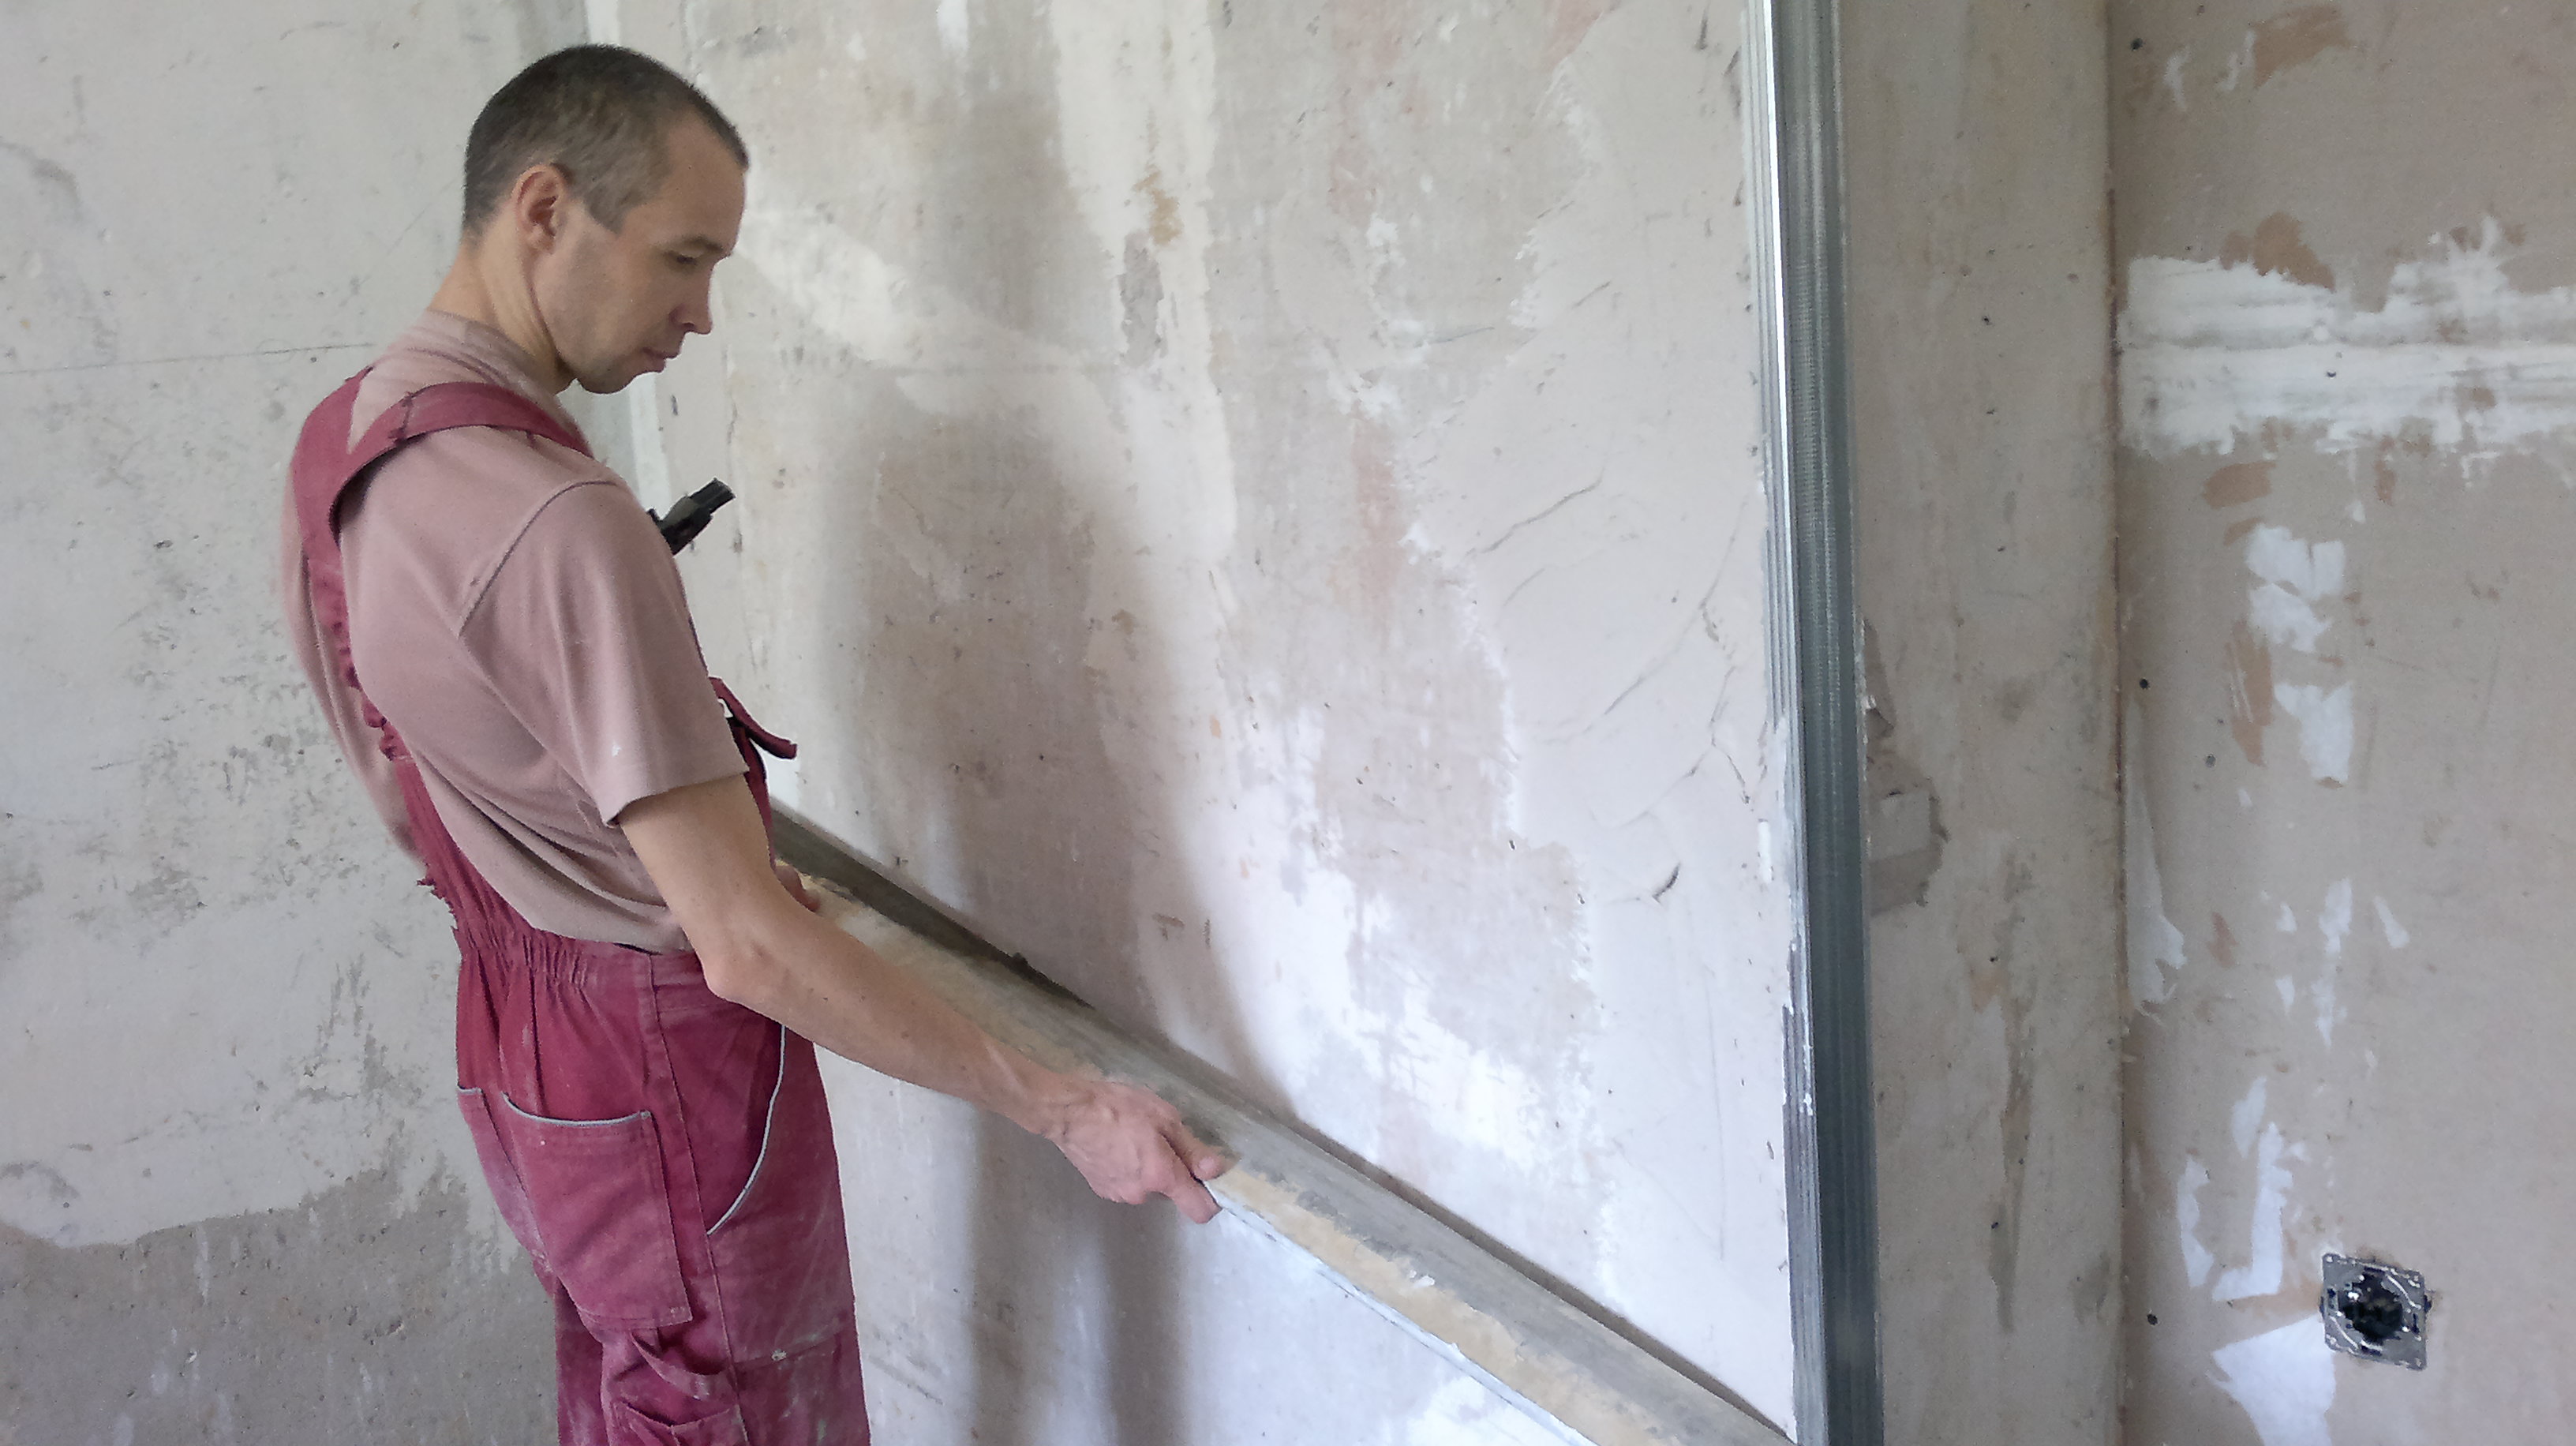
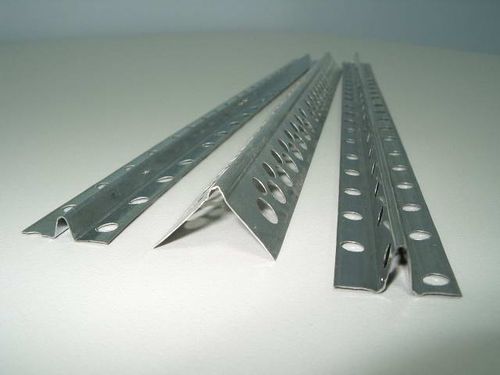
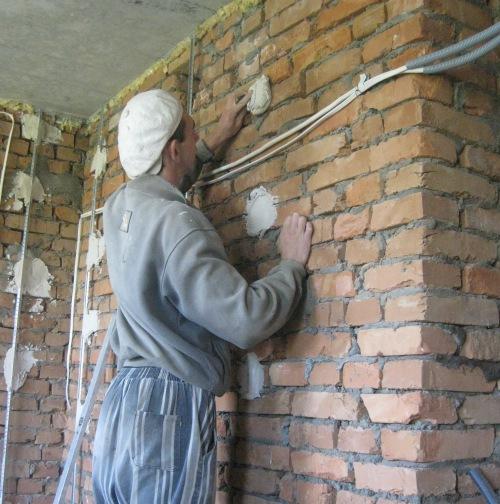
For proper plastering of walls and ceilings in conditions of a problem surface, lighthouses are used. These are special devices that help to find the necessary reference point for creating a perfectly flat surface, without resorting to expensive methods or services of specialists. Such beacons can have different lengths and sizes, and externally represent a perforated structure.
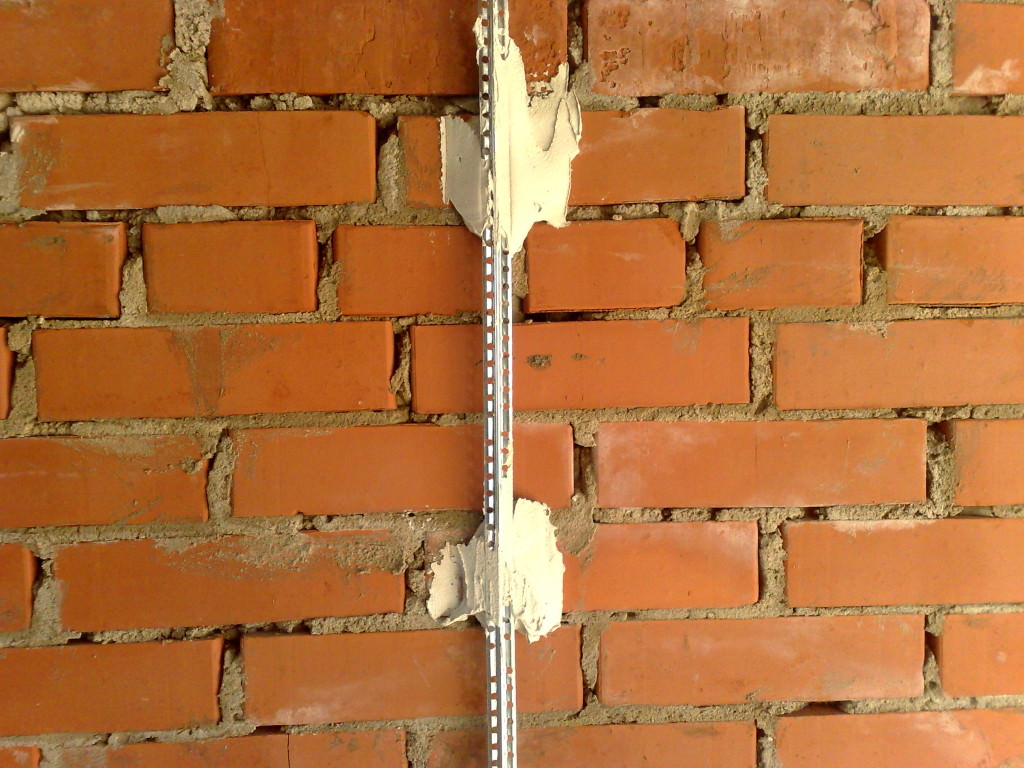
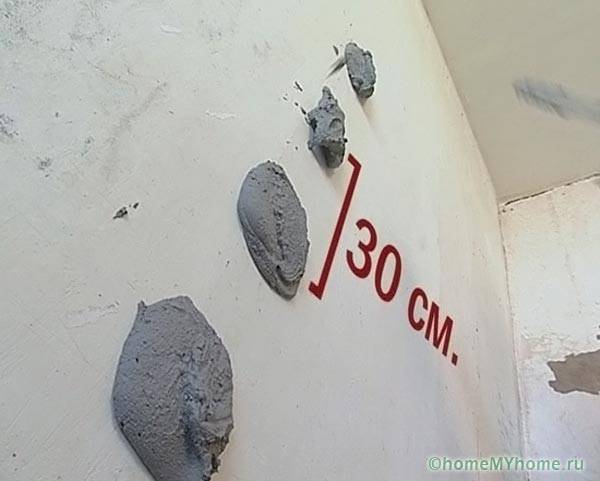
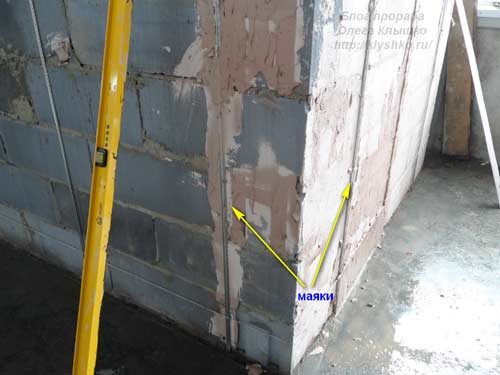
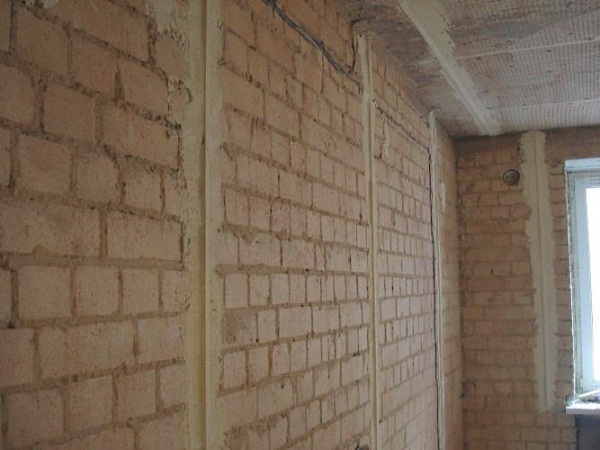
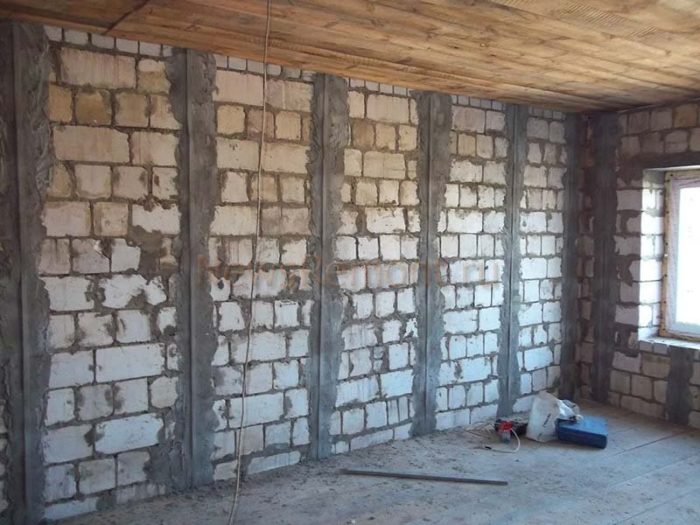
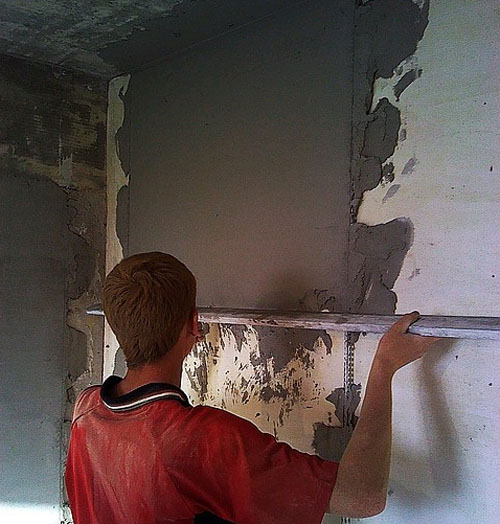
The plaster beacon needs to be fixed to the wall at the place of the depression in order to set a reference point on which to level the surface. It is important to install it on several fastenings in order to put it firmly on a wall or ceiling. Immediately behind the lighthouses, there is a dowel-nail with a thread, which will be the main guideline of evenly applied plaster.
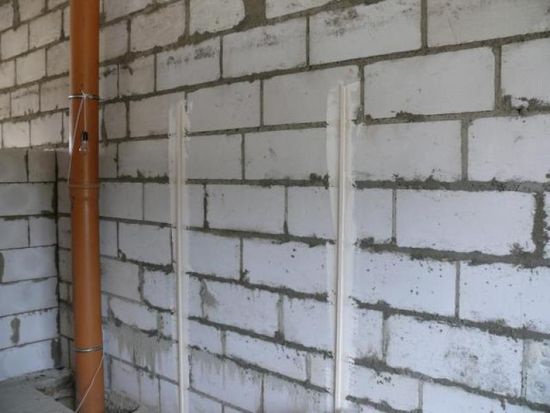
The lighthouses need to be fixed on the plaster mixture by sketching it on a wall or ceiling with a distance of no more than 30 cm.
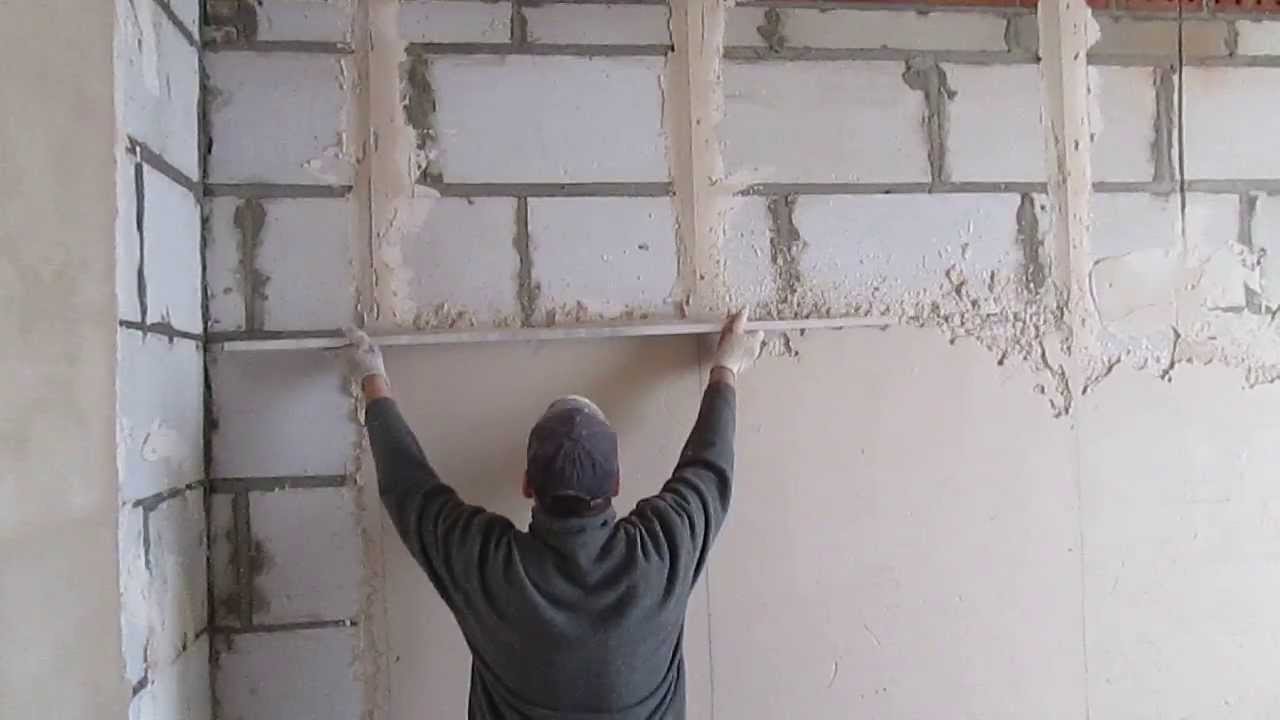
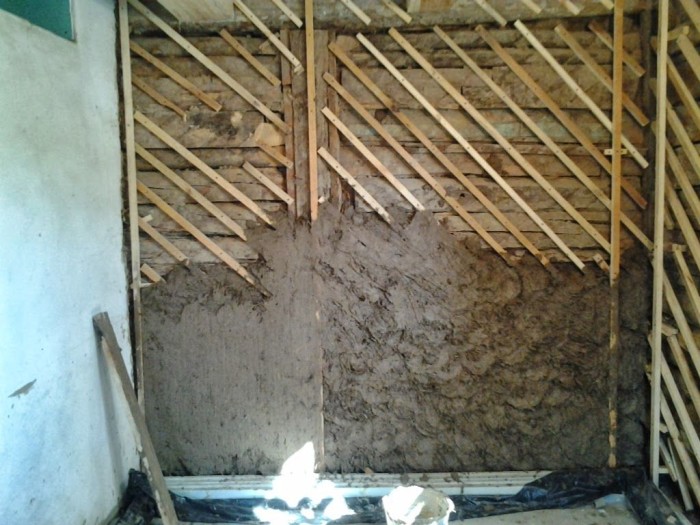
Since there may be several options for working with a wall or ceiling due to a variety of problems, some types of lighthouses are available. Such a diversity makes it possible to obtain an optimal result with the use of a minimum of forces and resources. The wall prepared for plastering looks like a surface with defects, on which the slats are installed, which serve as the basis for the future flat surface.Properly selected beacon will significantly help in the work.
Types and sizes of guides
For different types of work there are guides of a certain type and size. They differ in material, which is convenient in certain cases, because it is important to know what kind when you need to use. Allocate lighthouses:
- Metallic - The most popular option among builders. You can buy it in any store where there are building materials, because there are no problems with the search. Any person without special training can use it. Sizes can vary from 3, 6 to 10 mm. Small use is quite rare, and medium and large are used most often. The choice of option depends on the degree of surface roughness - the larger it is, the wider the sides of the profile should be. The popularity of this type is due to the convenience of working with them, because with the help of scissors you can get the necessary length of the profile for any section. In addition to many advantages, there are a number of drawbacks - these are irregularities in the product, which occur in the event of problems in production or problems with transportation and the reaction of zinc to plaster and oxidation of beacons, which leads to rust stains on the walls.
To avoid them, you need to remove the beacons after plastering.The flexibility of the beacons makes it necessary to make a special solution for pouring them in order to strengthen the structure for the work. You can use clips to securely fasten the element on the wall.
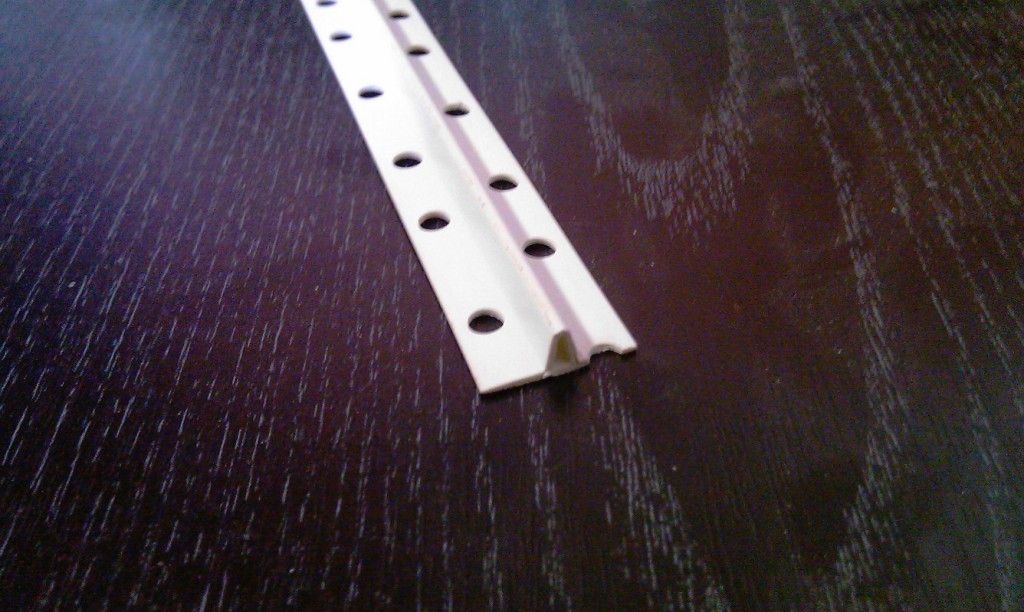
- Plastic beacons very similar to the metal, but have both similarities and differences. Such parts are made of heavy-duty plastic, which gives them less weight, but greater strength, which makes it much easier for an unprepared person to work with such beacons. Resistance to deformation is also an advantage of this option. Under any influences, the profile will remain as it is. Due to the peculiarities of the material, such beacons can be left in the wall, without worrying about the appearance of rust. Plastic beacons have several drawbacks - it is low resistance to temperature, which does not allow the use of plastic outdoors, especially in the winter season. The impact resistance of such lighthouses is also weak and they will not withstand the effects of weight or heavy blows.
If the beacon profile is incorrectly fixed, then it will deform or bend from the rule or weight, and this will affect the evenness of the ceiling or wall covering.
- Reusable steel profiles have a high price, because they are used more than once. It’s convenient to do this in work for builders who constantly use beacons in their work. Such devices have high strength due to the fact that they have a galvanized profile, therefore they do not need to be fixed thoroughly, they will not lead, which means the result will be positive. Despite all the convenience of these beacons, there are some disadvantages in them - this is the cost, which is several times higher than the previous options, and the possibility of damage or breakdown when extracted from the frozen solution.
- Homemade make it possible to use in the form of beacons all that is at hand. It can be a metal pipe or a corner, but you can also use wooden slats, which professionals use least often. You can use the profile for drywall, but in this case, the amount of the solution will be much more than with other options.
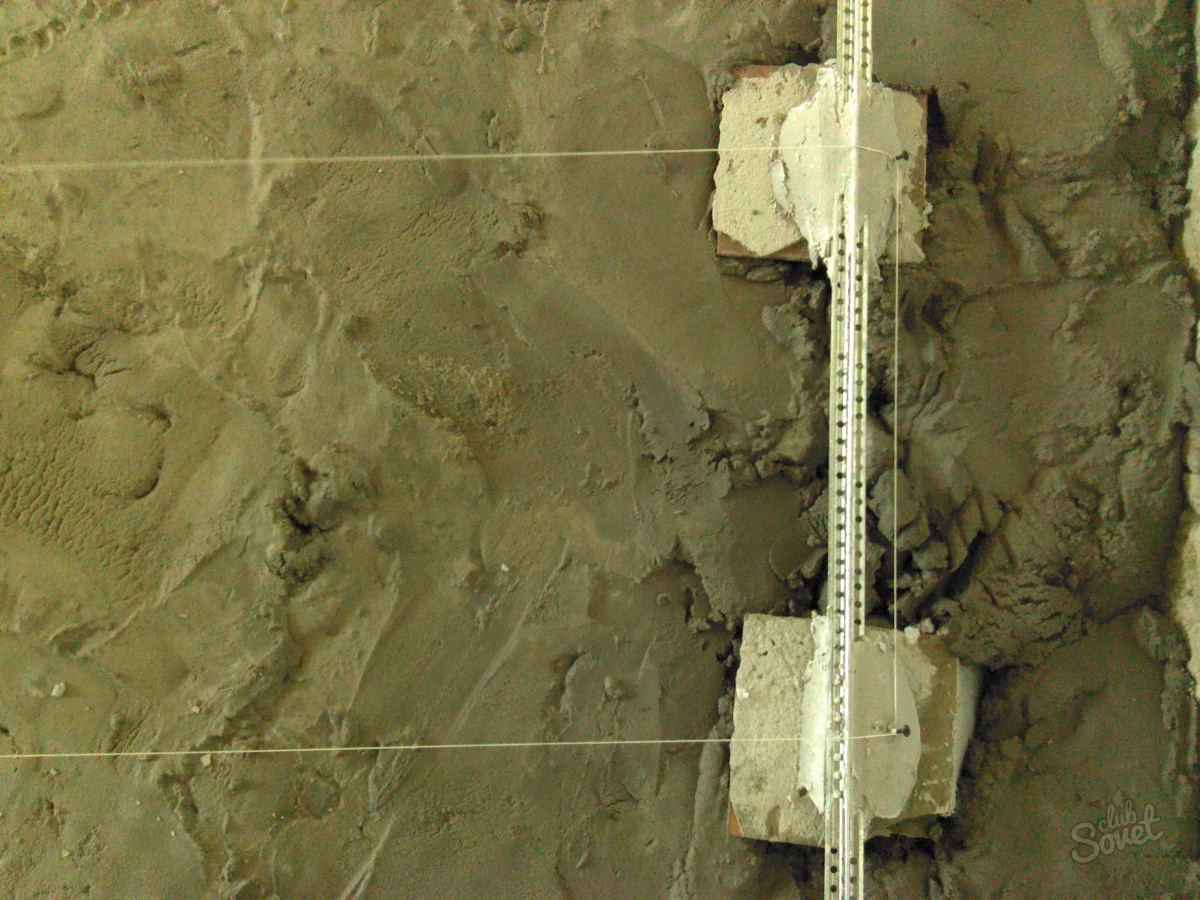
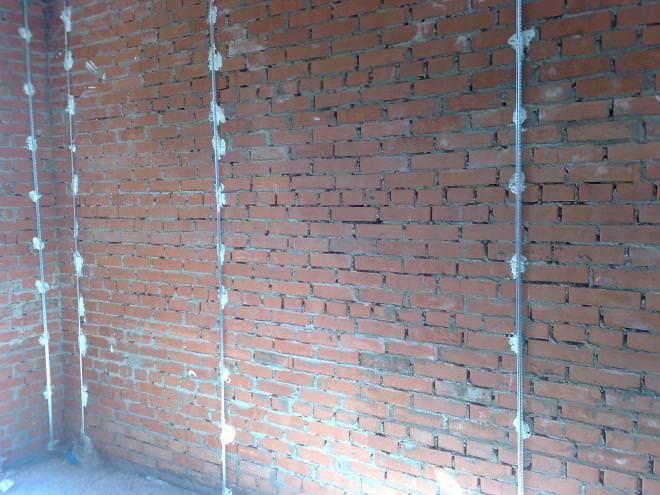
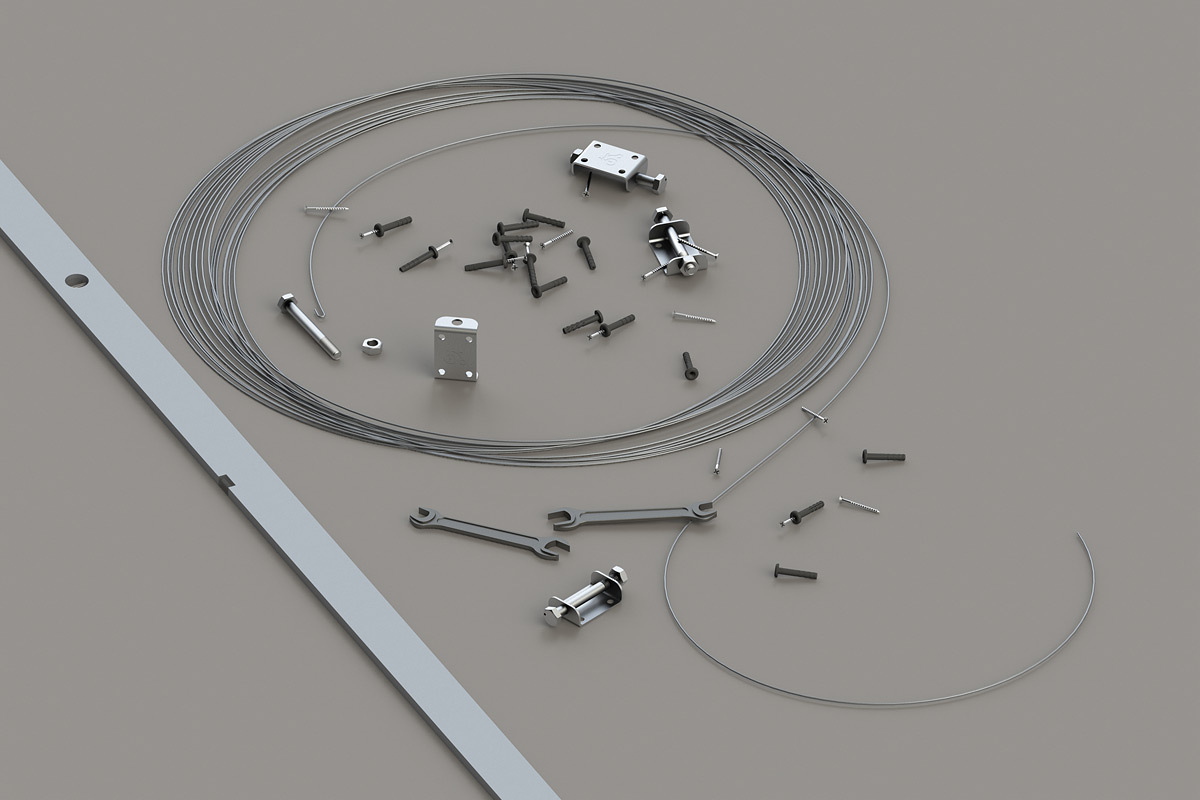
- Strings - This is the easiest and most inexpensive way to use lighthouses. To install you need to have with you screws, thread or wire and drill. Making holes for dowels, you need to twist the screws and tighten the thread at the level with which the plaster will be applied.It is important to make the layer slightly thicker than the surface, the upper ball of which is cut off by the thread, creating a perfectly flat surface. This stage is done when the plaster hardens a little.
There are some drawbacks here. So, installing the screws incorrectly, and the thread will be attached unevenly, which means that the walls or ceiling will have flaws.
- Gypsum. For the application process, you need to prepare the surface of the wall and fill it with nails under a certain level, and also check them with a plumb line. A plaster solution is applied to the nails and removed to the cap, forming the same beacons. After the wall is plastered, the plaster beacons need to be removed by knocking them out. This option is quite difficult to use, because it is applied by professionals.
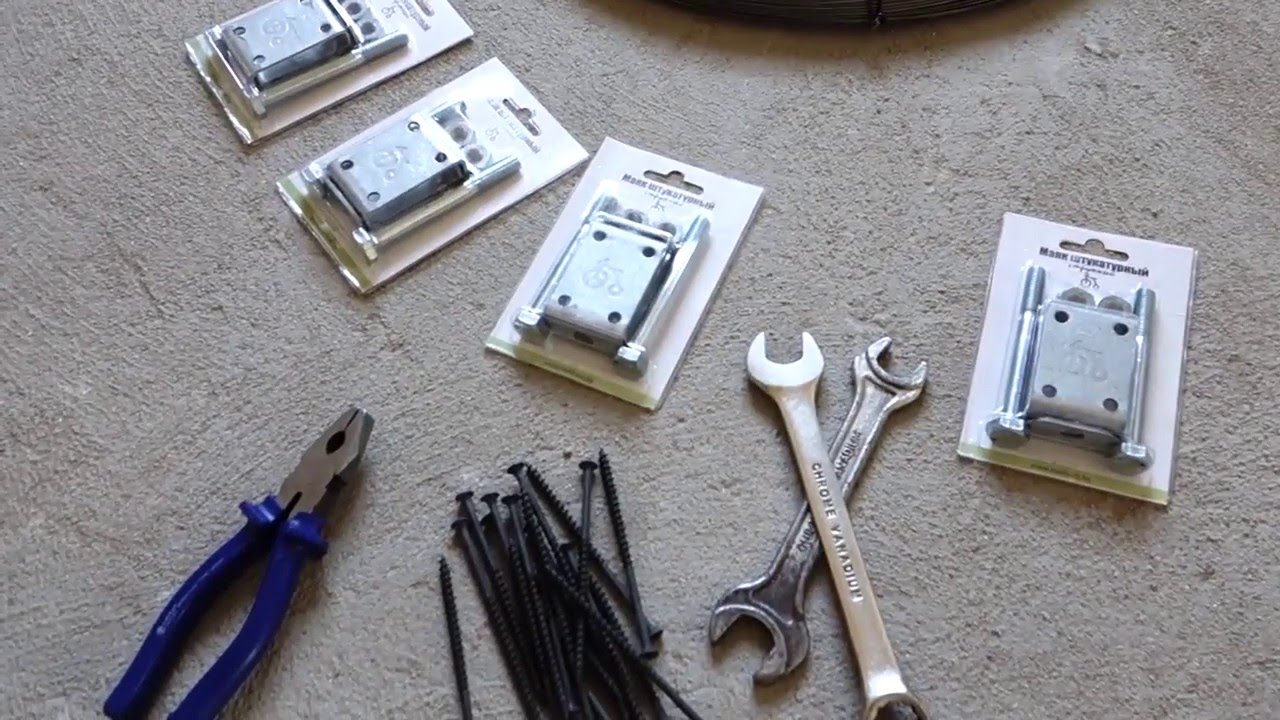
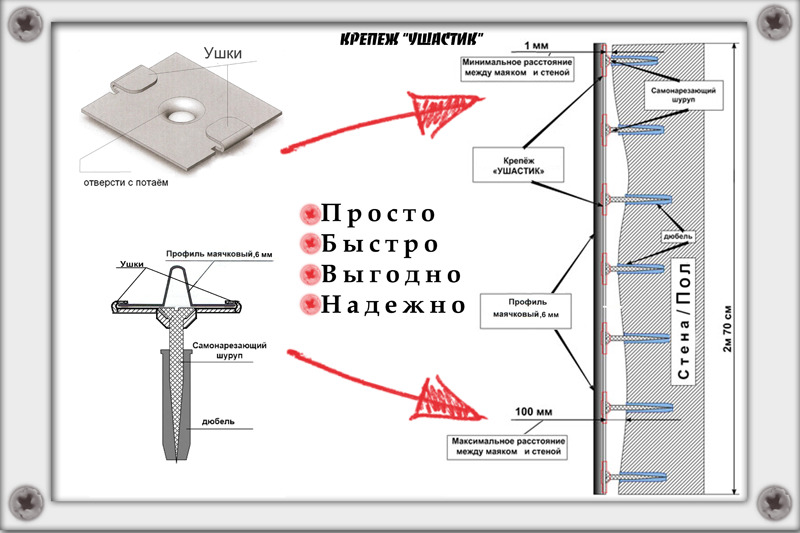
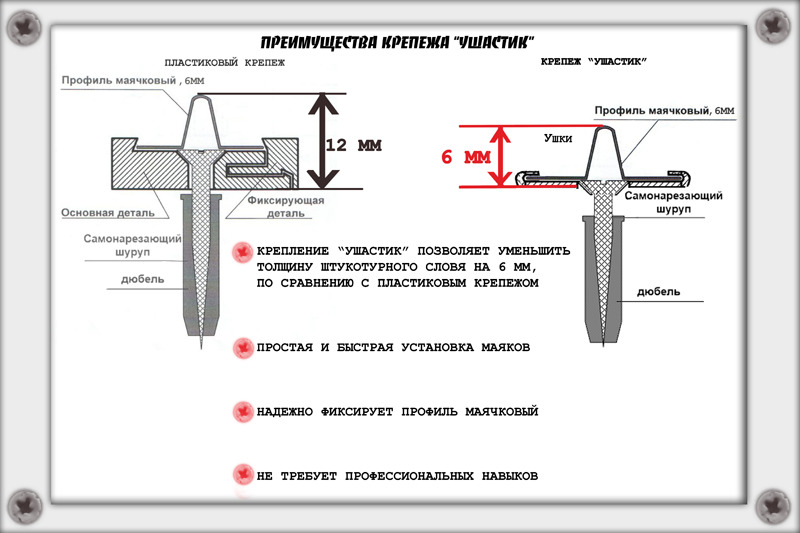
- Fasteners "eared" has something similar to metal lighthouses, but has a number of features. It is fastened to the wall quickly and securely, in addition, if desired, it can be dismantled and reused. The ease of operation ensures the popularity of this mechanism. The holder in this case can be both a clip, and plaster. The mortar method is more convenient in the case of large drops in the wall or ceiling.
How to choose?
The choice of a particular type of lighthouse depends on its characteristics. So, if you take into account the material from which the profile is made, the plastic variety is used if the lighthouses will not remain in the wall or their operating conditions are very comfortable and without sudden temperature drops. A steel lighthouse will be much more reliable, because it is not affected by temperature, moisture, chemicals, fungus. When using them, you can leave beacons in the wall both indoors and outside.

If you focus on the size, the beacons can be from 3 to 30 mm. You need to choose a beacon that will correspond to the size of the wall irregularities. The thickness of the plaster layer is applied so that the top layer can be polished, without reaching the lighthouses. If we talk about the length of the profiles, they can be from two to six meters.

Small sizes are used in the usual repair of residential premises, and large dimensions are used for work in warehouses, etc.
You can also focus on the shape of beacons, which can be T-shaped and V-shaped. The first type is mounted in the corner of the room, the second - on the entire plane of the wall.Corner structures are convenient to use when arranging windows, for which fixings should be minimal and the material durable. Metal structures in this case will be more promising, because it will better protect the angle of the window from damage, cracking or any other impact.
If we talk about homemade lighthouses, they are used when there are no purchase options at hand or if there are no funds for them. The easiest way to use the strings that are tightened on the screws. You can do the same with a small wire diameter, which is convenient to remove the top layer of plaster to ensure a smooth surface.
Markup
You can markup in two ways - simpler or more complex. In the first case, you need to follow these instructions:
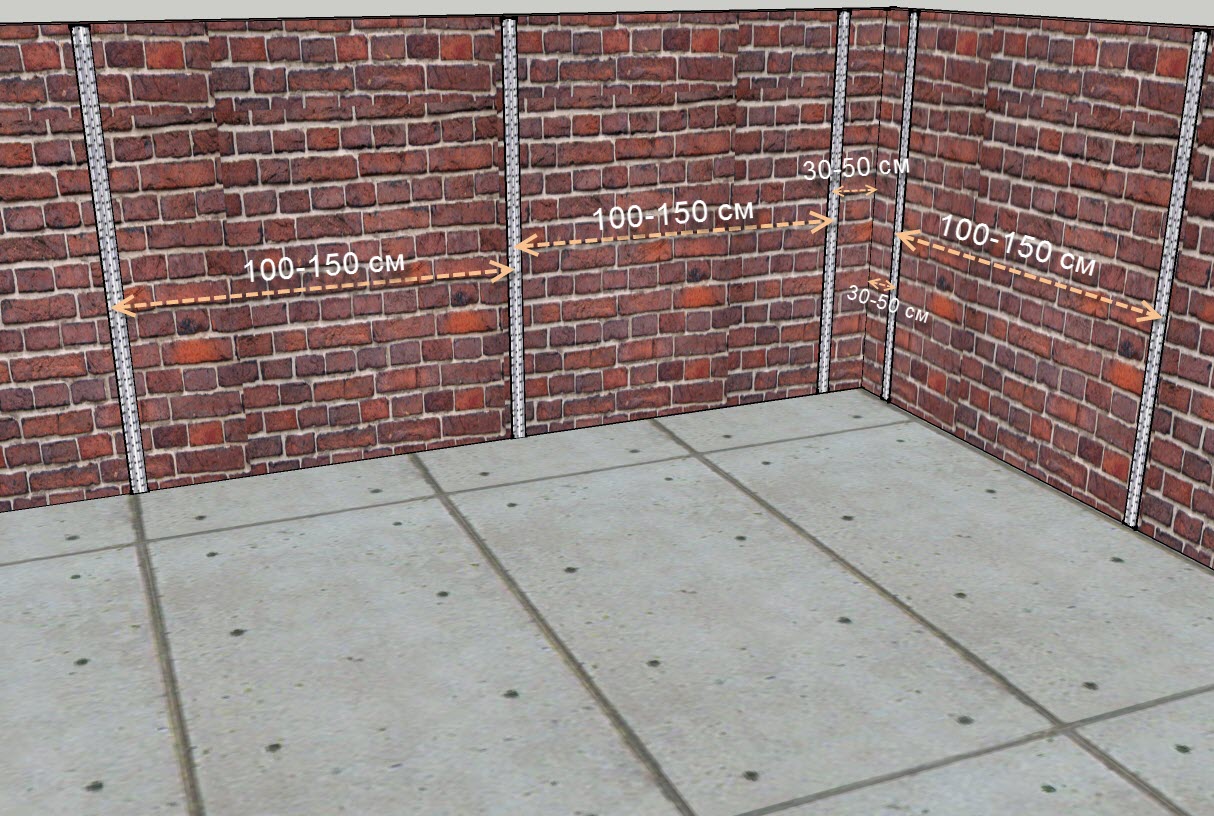
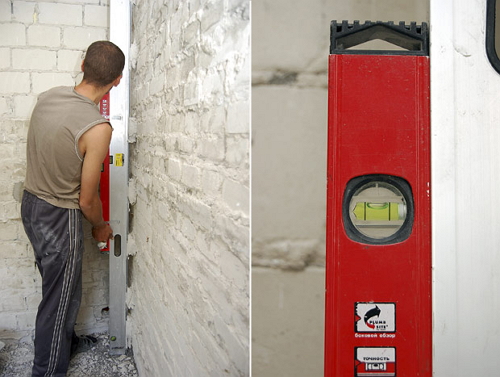
- Indent from the corner by 30 cm, and from the floor with the ceiling retreat by 15 cm. After that, a vertical strip is drawn from the bottom up, which is checked using a level.
- The distance between the finished lines is checked and divided by 1.5 m, which will give the required number of beacons. The profile is cut to 30 cm less than the height from the floor to the ceiling.
- Holes for dowels are made at the top and bottom of the line and installed.
- Lining the wall with new stripes with a distance of one and a half meters.
- A thread is wound on the screws and stretched from one to the other.
- The level of the caps of the screws is aligned to a position that allows you to level the wall.
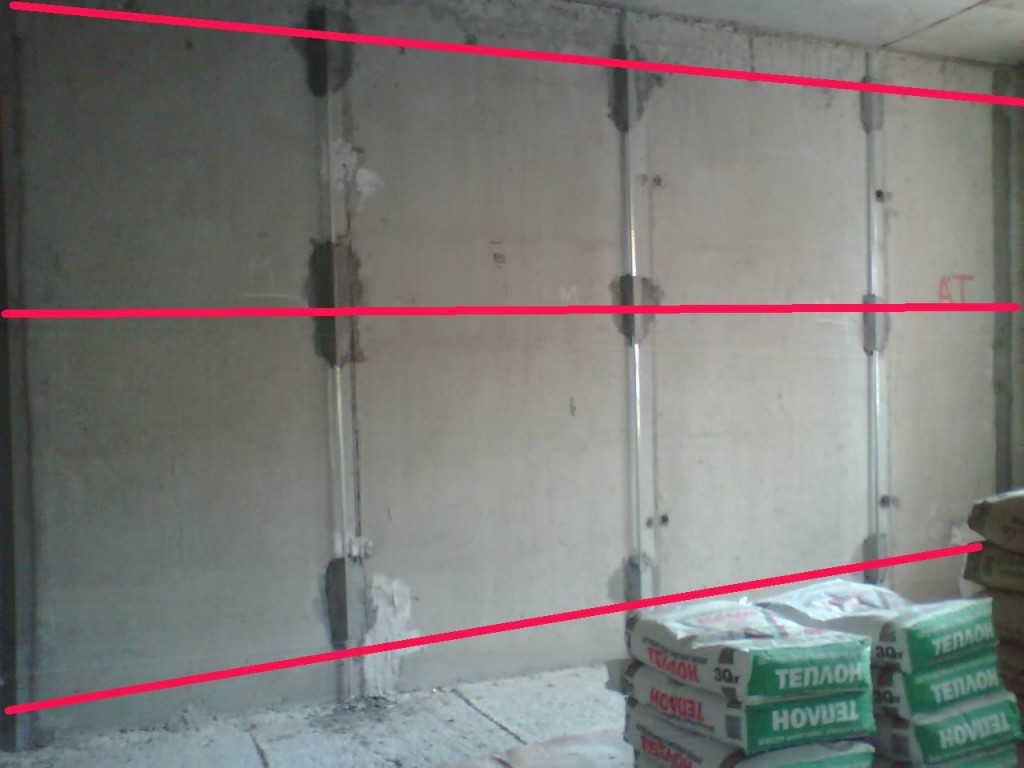
- It is necessary to tighten the thread diagonally, checking the resulting plane. The thread should slightly touch the highest point of the wall. After that, the threads are removed, and the wall is covered with a primer.
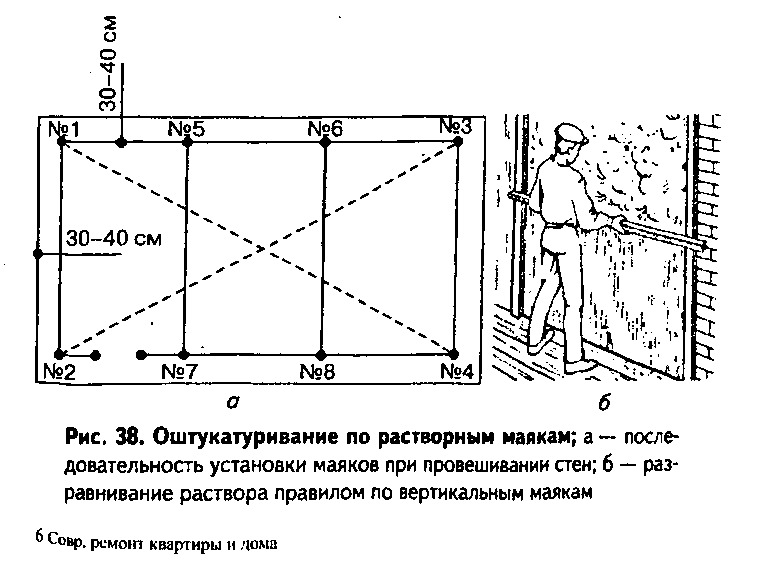
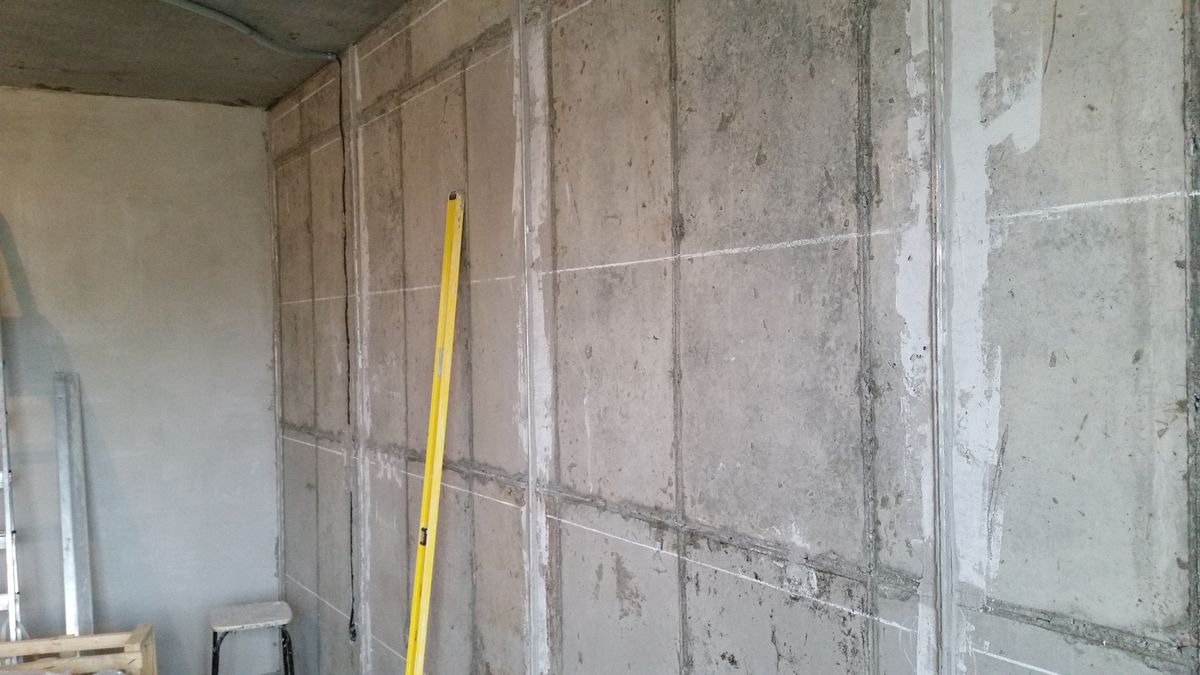
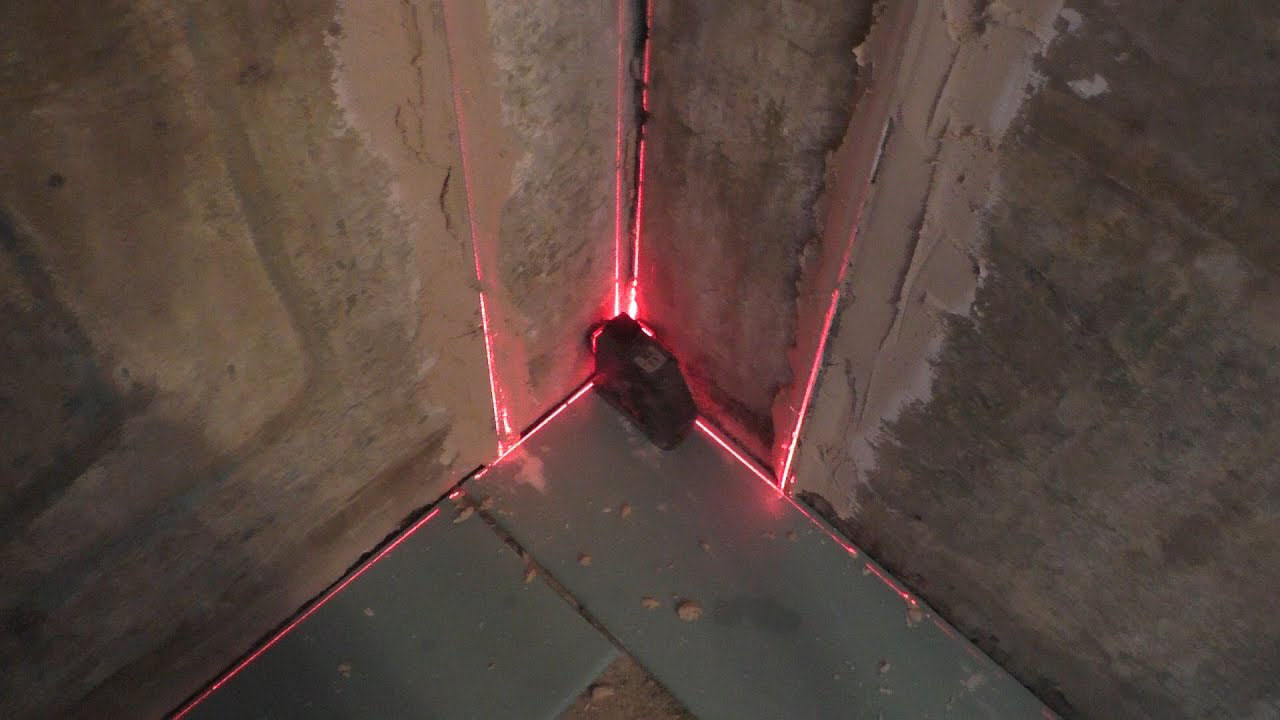
The second option requires the use of a laser level. If it is available, then it must be placed near the opposite wall from the one where the repair will be carried out, and turn on the cross-level. This will give the opportunity to get the exact thickness of the layer of plaster. On the wall will be visible marks on which you can draw lines with the same indents, which were considered earlier.
When this stage of work is completed, the level is set at 40 cm from the wall in the corner of the room, after which the vertical line mode is selected.
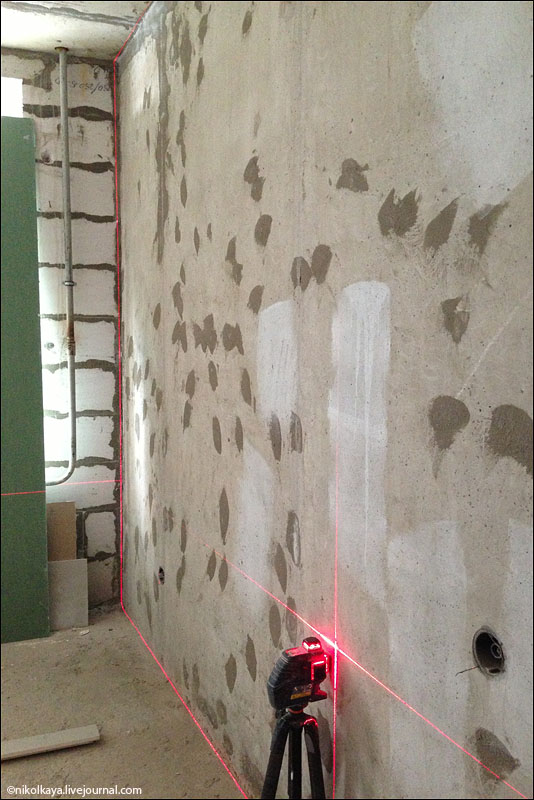
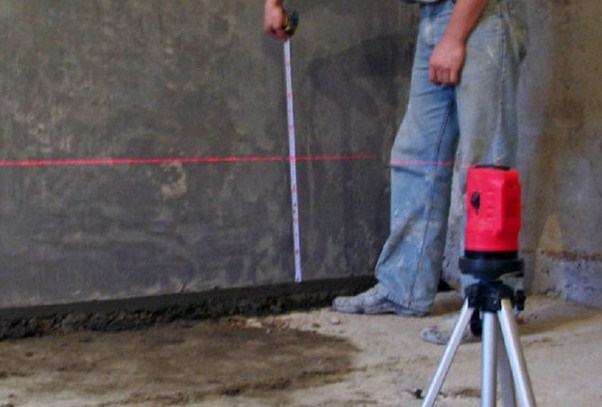
In this case, you need to find the place where the beam to the wall is closest, then with a half-meter ruler mark the point at 35 cm.Next is the preparation of the lighthouse and the application of glue on the wall. Gluing is performed until the beacon coincides with the laser level mark.
Installation
After the preparation is completed, you can proceed to the installation process itself. To fix the beacons on the wall or ceiling, there are three options:
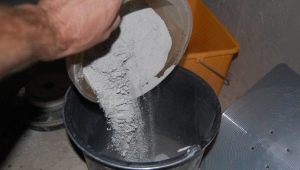
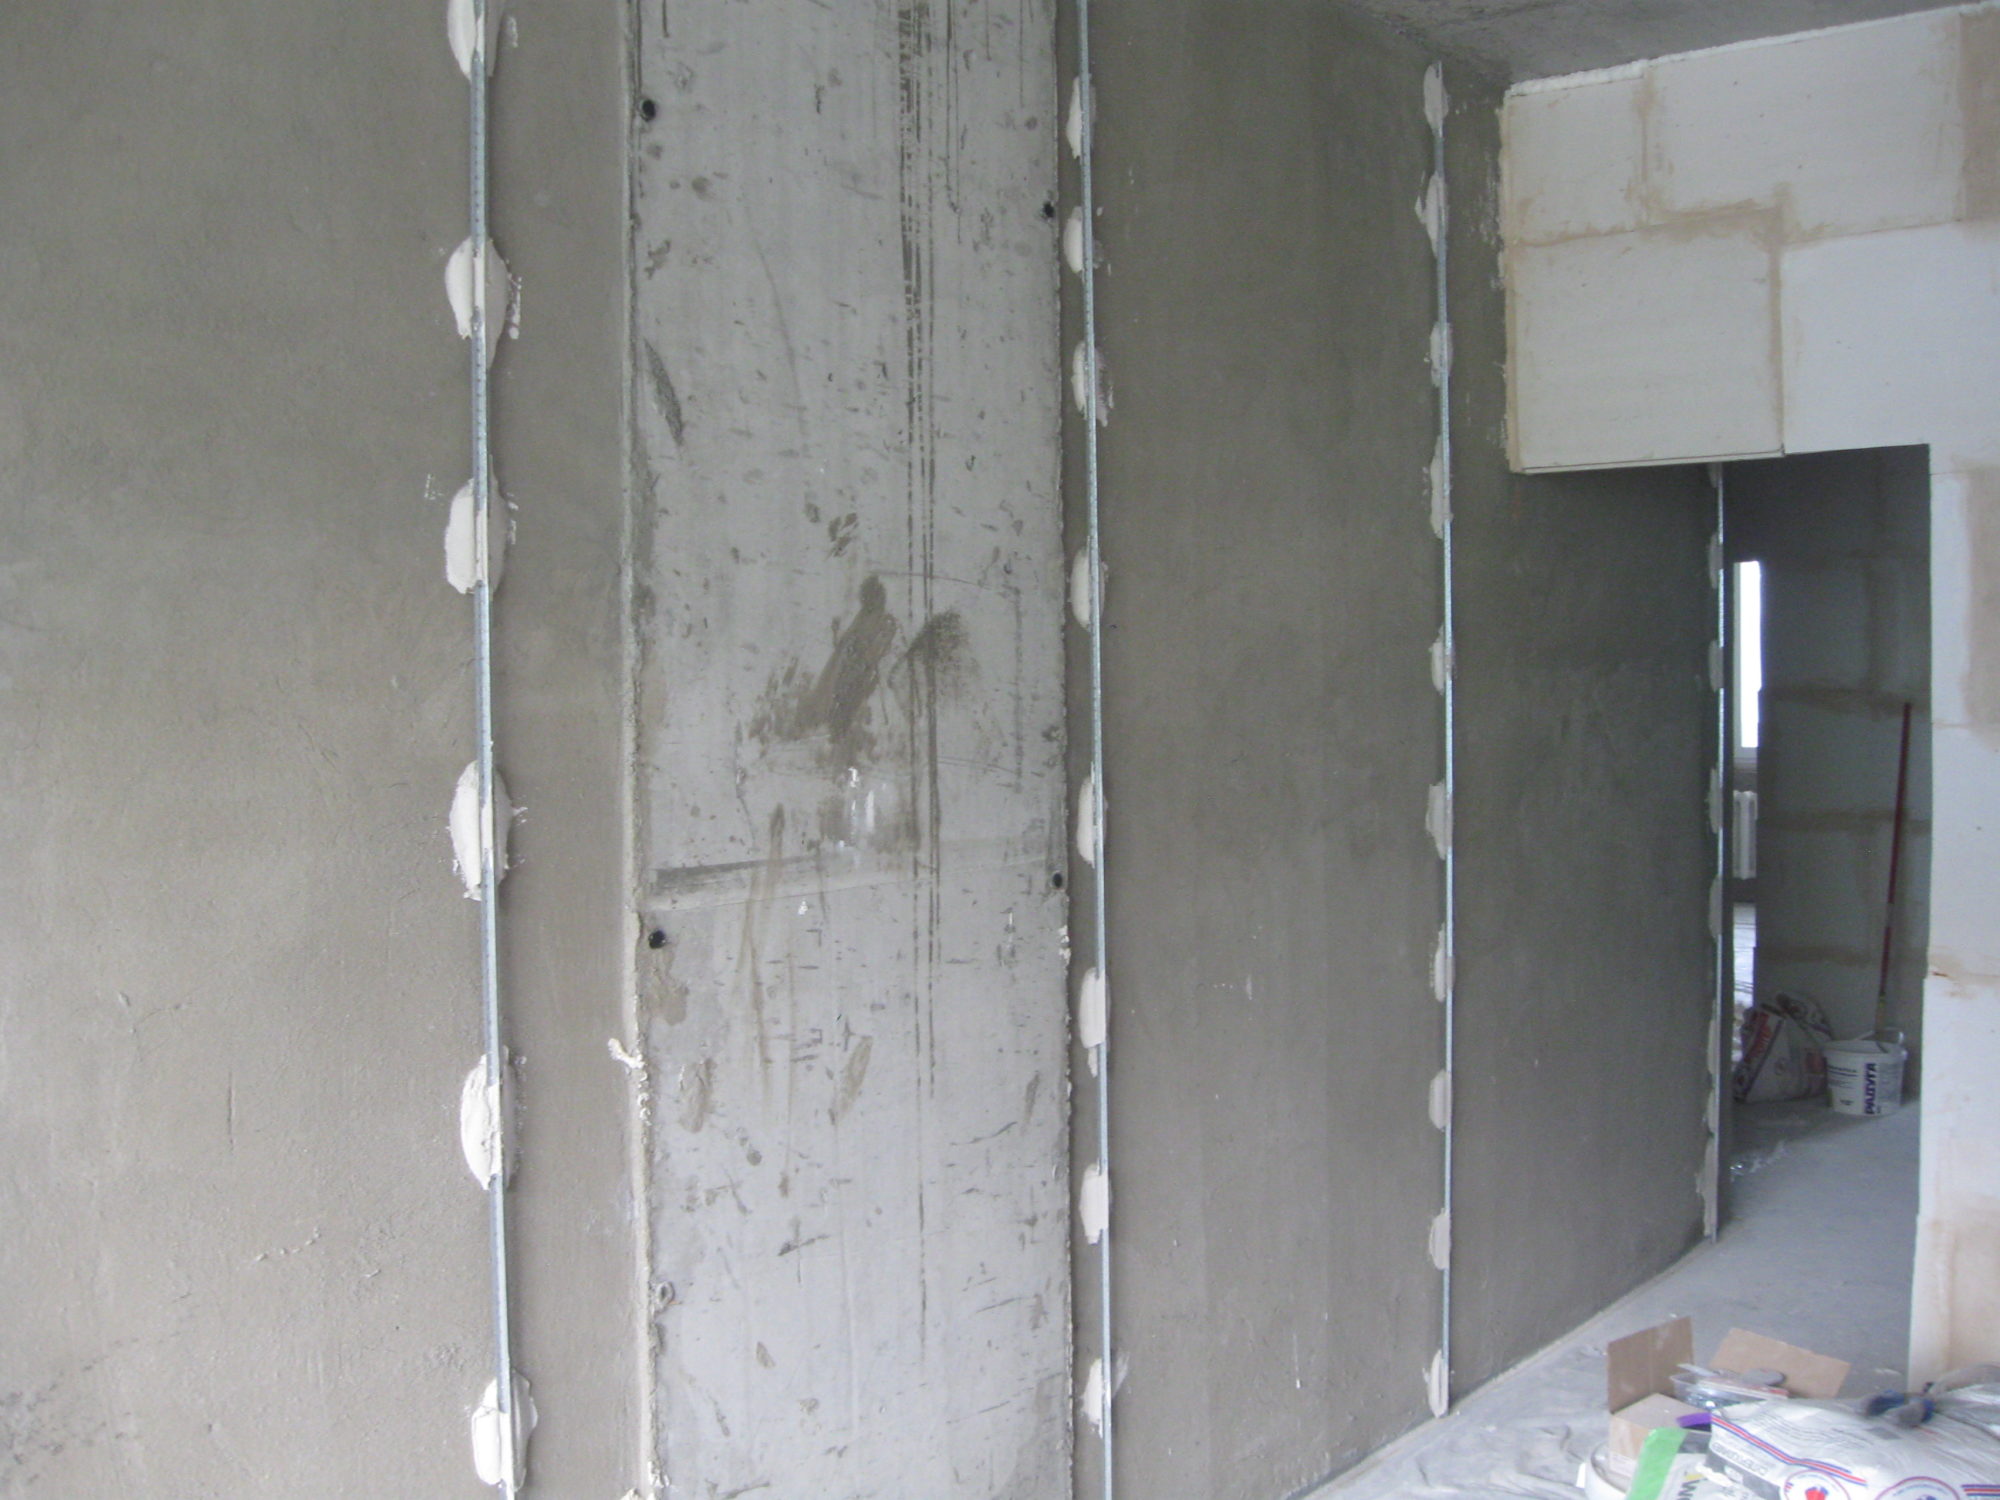
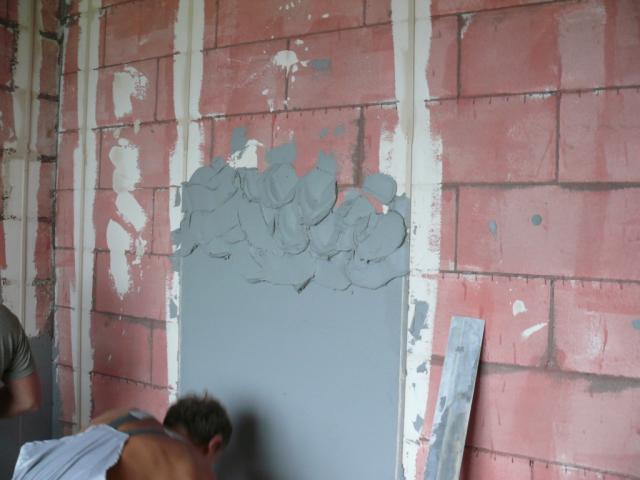
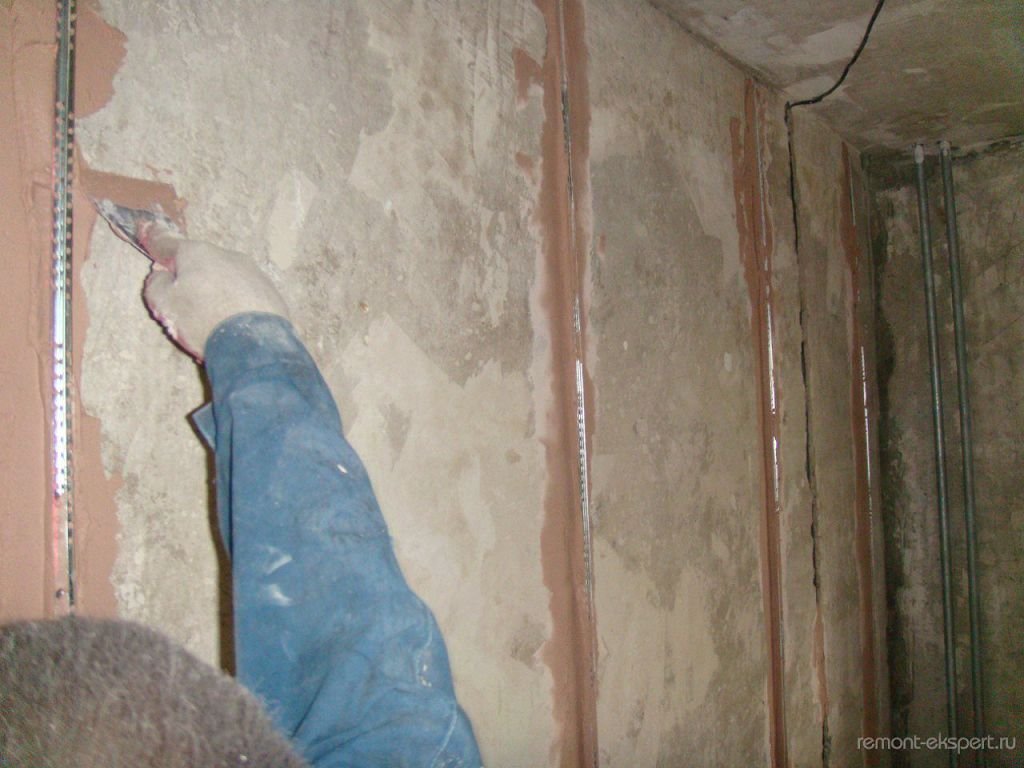
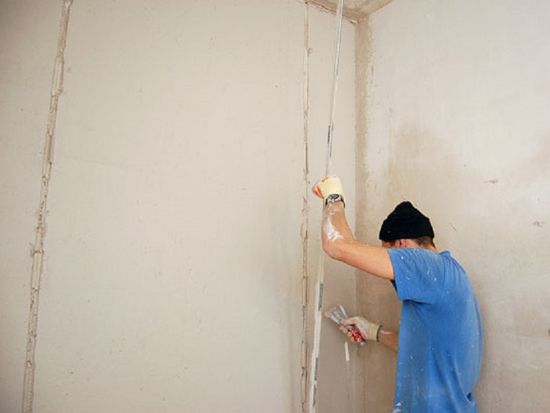
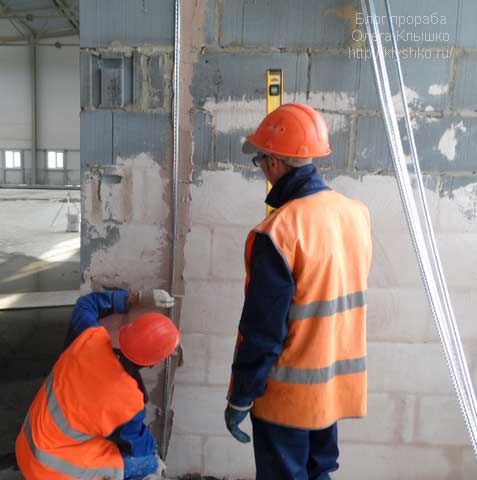
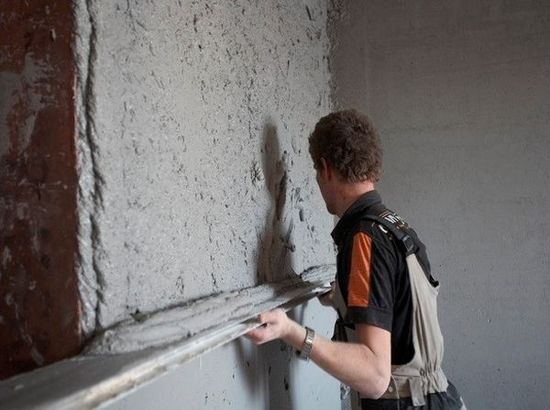
- Fastening with mortar or glue. The solution is prepared according to the instructions on the package. For long drying options, it is better to add alabaster, which will help to quickly cool the mass. The finished solution should be applied to the wall by marking. The profile should be ready in advance, because it just needs to be attached to the solution and slightly pressed. Landmarks for the beacon are self-tapping screws, but you can use the laser level, if it is. After aligning the beacon, a solution that is not needed must be removed.
- Fastening with fasteners. After the appearance of the lighthouses themselves, a system was developed for their attachment. So, with the help of special clips, in which screws are pre-inserted, they are attached to the wall. The distance between them should be at least 30 cm. The fastening helps to increase the work rate, but the consumption of plaster increases, because the thickness of the layer with this method increases by half a centimeter.
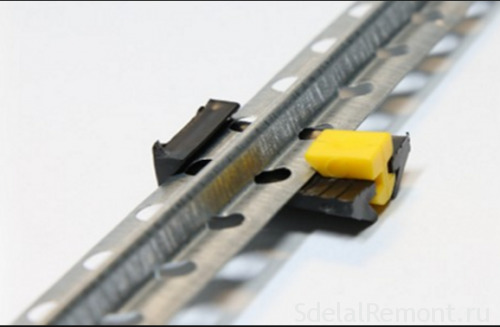
- You can mount beacons and with the help of "eared", made of metal. The lighthouse is placed near the wall and, step by step, is fixed with “ears” to it. In this device there is already a self-tapping screw, which is screwed to the required depth, and this ensures the installation of the level for plaster. It is easy to assemble them, but it is much more difficult to remove them from the finished structure.
It is possible to make the wall completely even with your own hands, the main thing is to know exactly what is needed for this and stick to the technology. It is best to remove the lighthouses from the wall, from whatever material they are made. This will provide the best and most importantly - durable result.
What to replace: alternative
Before modern lighthouses appeared, the use of wooden slats was the most popular option. They were installed on a plaster or cement mortar and leveled with a plumb line. This is not the most convenient and reliable material, as over time the tree begins to swell, which makes the wall surface uneven.
Another option was to use sawn wood chips, which were glued together with special materials. Among them arbolit, chipboard and MDF.Due to its structure, such material does not deteriorate and is not distorted even by moisture, which makes it possible to make high-quality repairs for many years. This option is still used today if it is not possible to purchase modern lighthouses.
Making repairs is a real art, and in this case you need to properly use the tools and accessories to help create quality work on any surface, both inside and outside the room.
Tips & Warnings
If there are not enough funds for repairs, it is most advantageous to use metal lighthouses, because how they help to make the plaster layer as thin as possible, saving on materials. Only 1 cm of the solution, which can be removed, will make it possible not to use 10 liters per m2, and for large premises the savings will be in bags.
If it is not possible to remove the lighthouse from the wall, then it is possible not to do this, but it is recommended to remove the lighthouses and seal the remaining space from it with the solution with which the wall was plastered.
You can make beacons from the mortar itself, for which the unevenness of the walls is determined, self-tapping screws are mounted to the required depth, and beacons are made from their caps.When they dry up, the main solution is applied to the wall, which is leveled using floor to ceiling rule. It is important to work smoothly and slowly, and remove all excess solution in a common tray. The rule itself must remain the same shape, not deform from the weight of the solution.
Gypsum beacons are more convenient, because they freeze faster and are much stronger in operation. Before you apply the solution to the wall, it must be moistened with water in order to work faster and more conveniently. In this case, the rule itself is preferably treated with a waterproof paint or impregnated with a drying oil, which has been preheated.
If possible, then for the installation of beacons and work on them you need to hire masters. They know how to put beacons and work on them much faster, and the result is many times better.
But there are cases when there is no opportunity to hire a brigade and no one has to ask for help, then it is important to arm yourself with knowledge and do work slowly in order to be able to learn from your mistakes.
There are a number of errors that significantly affect the outcome of repairs, the effort expended and funds for it:
- The wrong place for a lighthouse.If you install it not in the deepest place on the wall, then the layer of plaster will be much larger, which means that it will take a lot of repair funds.
- Defective lighthouses. The metal profile has a thin material, therefore it bends from loads. To fix it, you need to make a minimum interval between fixtures or report a solution under the profile itself in the case of larger-scale fixings.
- The lack of dismantling works with lighthouses, which then can rust and tread or crumble and violate the integrity of the surface.
Given all the mistakes and tips, you can plan the work correctly to rationally distribute power, finances and time, and eventually get a smooth wall and ceiling.
In the video below, see the modern method of high-quality installation of beacons under the plaster.