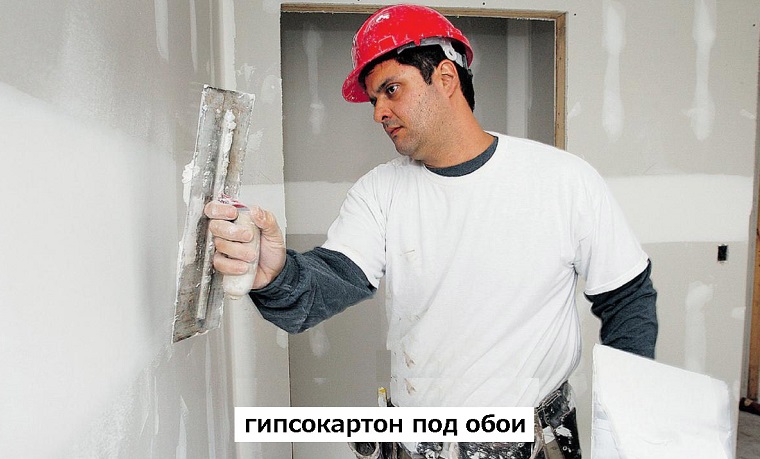
How to putty drywall?
Currently, the problem of uneven walls is one of the most common in the overhaul. You can solve it with the help of a popular material - drywall. If you want the finishing on plaster bases to look more aesthetically pleasing, they must be subjected to additional processing. To do this, make a high-quality puttying floors.
Why do you need it?
Drywall is a very popular material, because working with it is very easy, and it is inexpensive. With the help of gypsum sheets, even the most “ugly” uneven surfaces can be leveled. However, even after their installation, you should not immediately start finishing.
It is desirable to process plaster sheets with putty. Many home craftsmen wonder why additional work is needed, because drywall already has a perfectly flat and smooth surface. Of course, carrying out such work is not always necessary, but more often, puttying is simply not enough.
Putty is necessary in order to carefully seal up the various parts that spoil the aesthetic appearance of the finish. These elements include inaccurate joints between sheets of drywall, corners and noticeable caps of self-tapping screws. In addition, puttying is simply indispensable if you are planning to paint plasterboard bases.
Gypsum sheets only seem perfectly flat. During installation and transportation of such building materials acquire new surface drops. At first glance, such defects can not be noticed at all, but after painting they will become evident.
In order not to encounter such a nuisance, it is necessary to coat the plaster bases with a putty, then uneven patches will be invisible.
Also putty plaster is necessary in the event that you are going to decorate it with wallpaper.This is necessary so that after some time you could easily remove the old canvases without damaging the drywall, because without an intermediate layer, such a finish can pull the base material along with it. After that, you will have to completely change not only the wallpaper, but also the entire lining, and this will take much more time, effort and money from you.
Currently, in stores you can stumble on low-quality plasterboard, initially having uneven surfaces. As mentioned above, it is not always possible to notice such defects, and you can find a defect only during the repair work. In such cases, putty is also indispensable.
Species
There are several types of putties. Each of them is designed for certain conditions. Let's get acquainted with these finishing materials closer.
Cement
Cement based compounds are the most popular. They can be found in almost any store building and finishing materials. Such mixtures can boast excellent strength characteristics and moisture resistance. Due to these characteristics, they can be used in the design of rooms such as kitchen, bathroom or toilet.
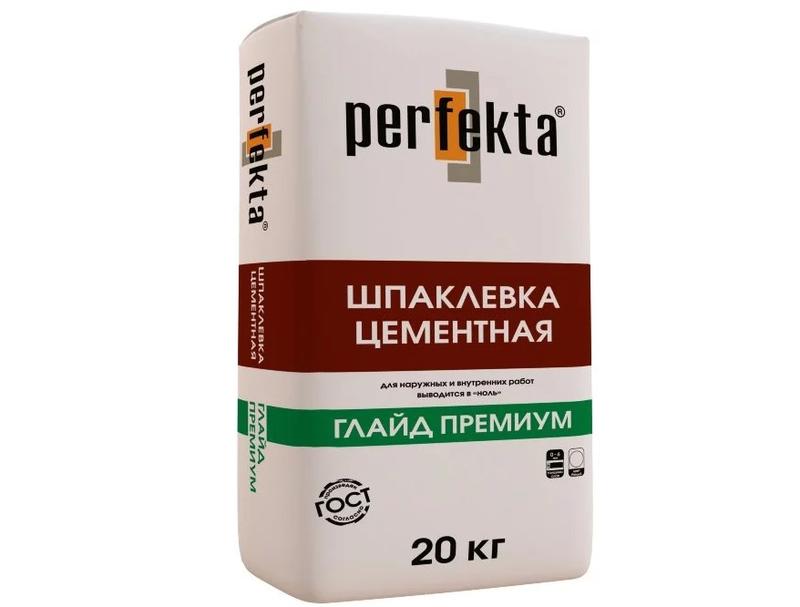
However, it is worth noting that for the preparation of gypsum walls for painting under normal conditions, cement formulations are used less frequently. This results from the fact that similar solutions over time give considerable shrinkage, and also differ in longer period of full hardening.
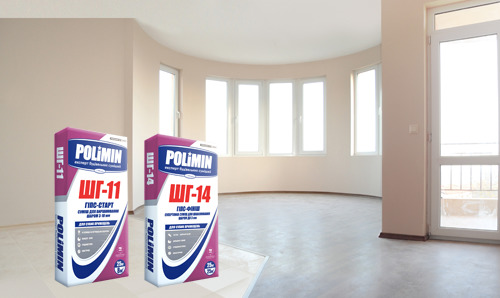
Plaster
The second most popular are plaster-based putties. Such mixtures have enhanced adhesion with drywall sheets. In addition, they are distinguished by their versatility, a fairly fast setting and ease of processing.
Of course, plaster fillers have their drawbacks. The main one is the fear of dampness and moisture. That is why Such mixtures are not recommended for use in rooms with a high level of humidity.
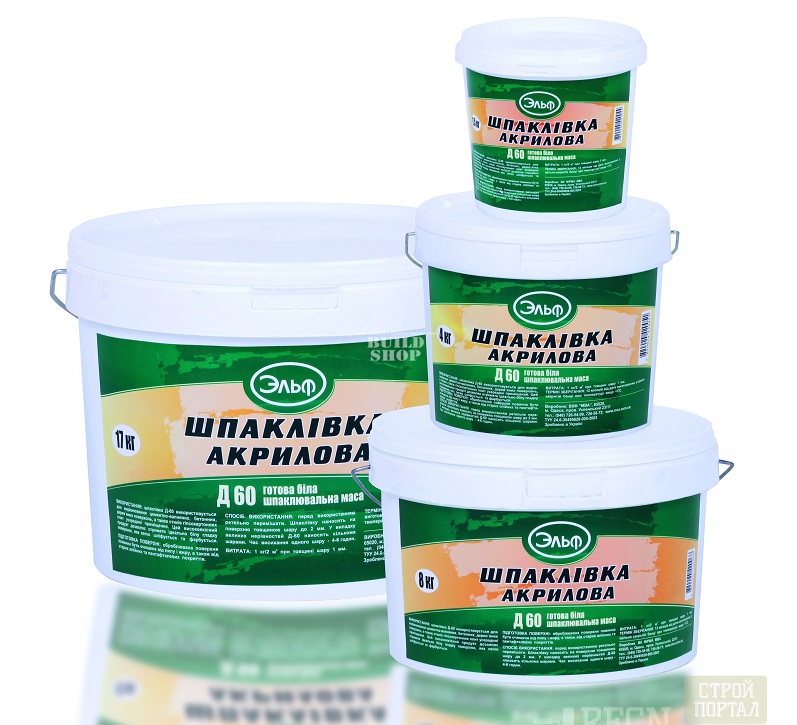
Acrylic
Polymer-based compositions are very popular because they have virtually no drawbacks. They combine all the best from other types of putties. True, such mixtures are expensive, but their service life and other operational characteristics fully justify the price.

How to choose a putty?
Before proceeding to the selection of putty composition, it is necessary to determine the direct type of room in which it is planned to carry out finishing work.From this fact it depends on which putty is best and how long it will last in the conditions provided.
Finishing putty before sticking any type of wallpaper can be made using a special composition, however, in recent years, many consumers opt for universal solutions, because the range of their application is much wider. Such products can be safely applied to the base and the finishing layer.
Be sure to keep in mind that different types of putty are suitable for different rooms.
In the kitchen, bathroom and toilet, as a rule, a high level of humidity is maintained. For such environments, special GVL is often used, which is not afraid of dampness and moisture. In addition, in these rooms, tiles are most often laid on the ceiling, so the putty should be chosen for maximum wear-resistant, moisture-proof and durable. Polymer and concrete compositions are suitable for this description.
In the living room, cozy bedroom or children's room conditions are considered more benign, since these rooms are dry. In such situations it is quite possible to use a simple plaster putty.
In dry spaces, where a higher temperature is always maintained, it is recommended to use high-quality polymers or gypsum mixtures. It is better to refuse concrete options, as in similar circumstances they can give appreciable shrinkage.
The most common and popular today are inexpensive concrete and gypsum mixtures. Of course, they have their drawbacks, but there are also a lot of advantages.
The best option is acrylic filler. Such mixtures can be purchased in large packages. Such products are relatively inexpensive and enough for several applications. In addition, if the mixture is universal, then it can be safely used in the decoration of a variety of rooms.
Tools and materials
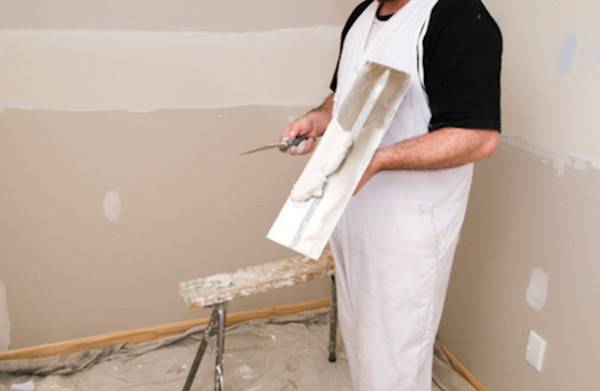
Drywall puttying is not the most difficult process that almost any home craftsman can handle. However, before proceeding directly to the finishing work, it is necessary to stock up with all the necessary tools and materials. You will need:
- net container in which you will mix the putty solution;
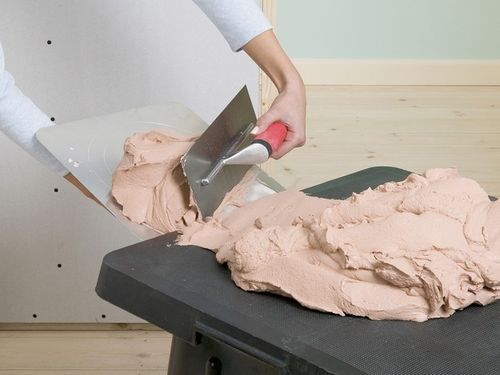
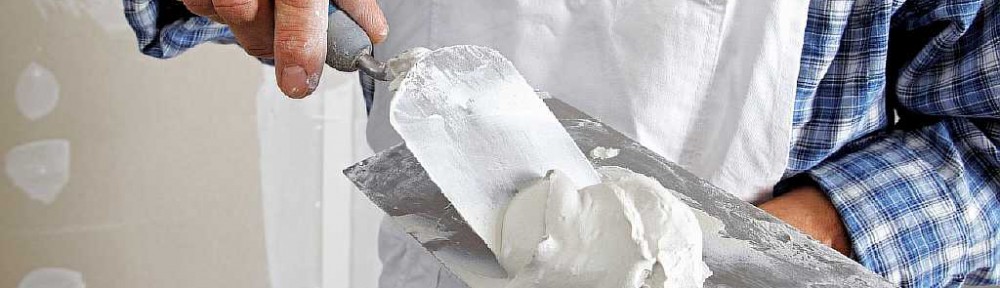
- putty itself (keep in mind that its consistency should be creamy);
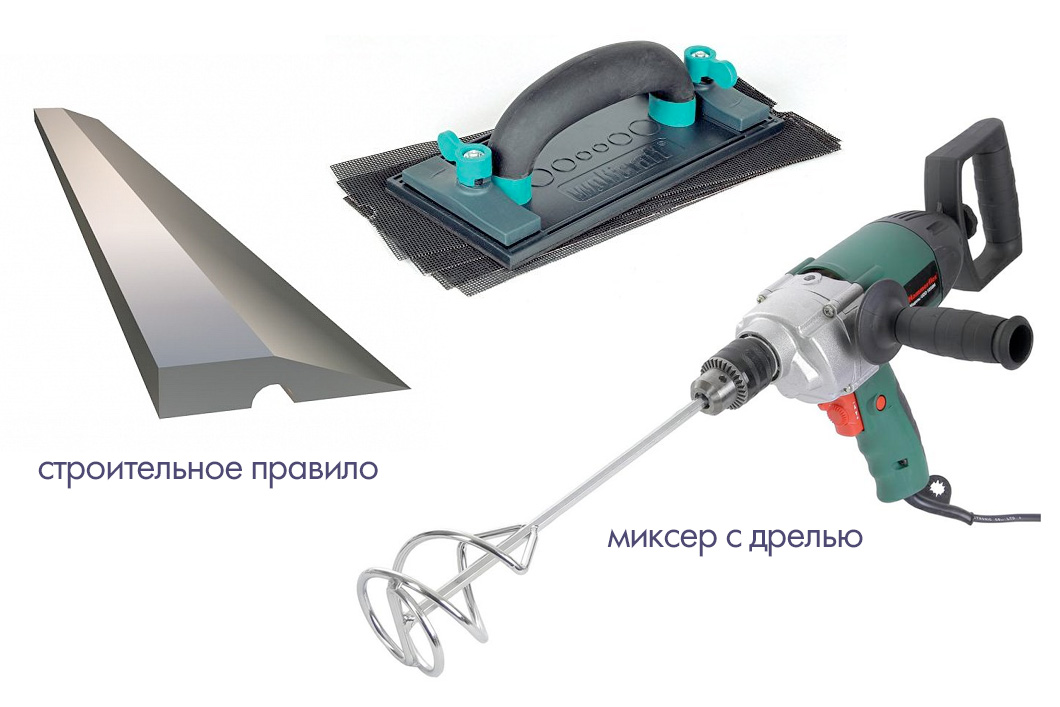
- special construction mixer (you can use an inexpensive drill attachment instead);
- narrow and wide spatulas;

- rubber spatula;
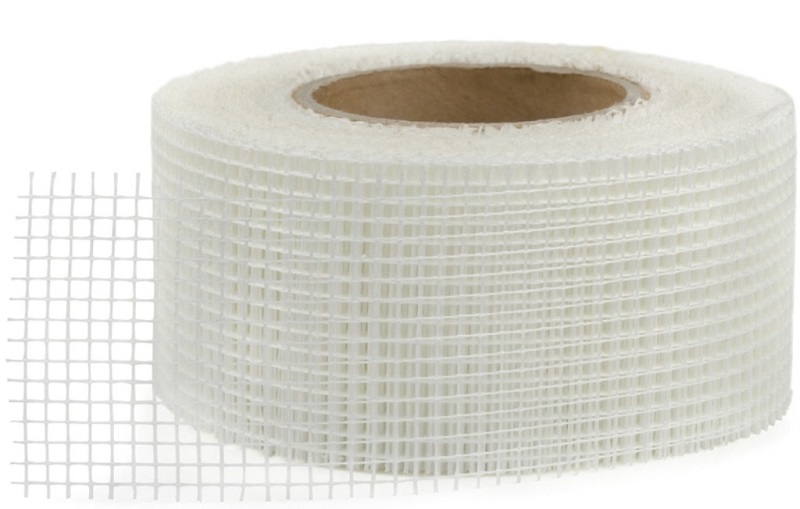
- reinforcing tape;
- emery;
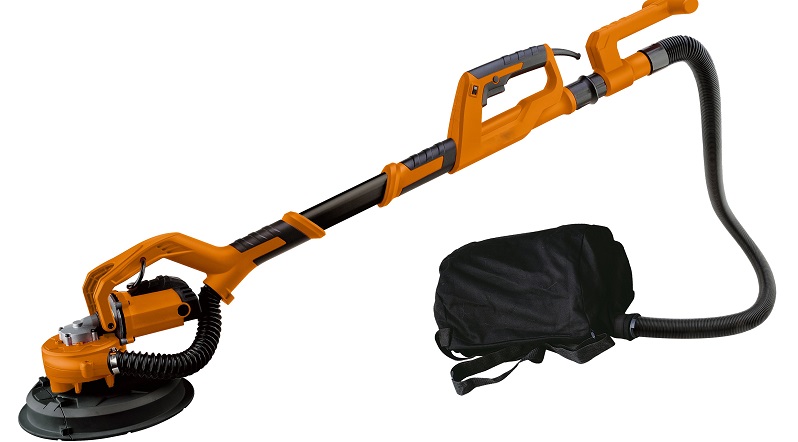
- special tool for grinding (it can be both electric and manual).
All listed devices and materials must be of high quality. Only if this parameter is observed, the result of finishing work will not disappoint you in the least.
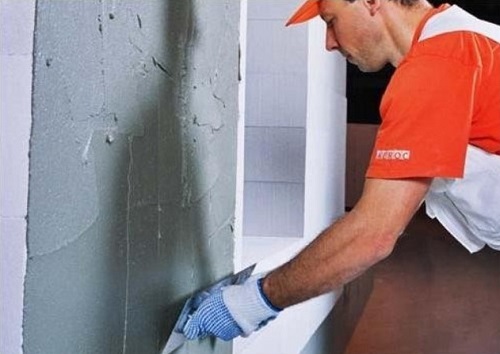
Surface preparation
You should not begin to putty gypsum board without proper preparation. This stage is one of the most important in such work, so it is not recommended to neglect them. Consider all the stages of preparation of the KGL framework:
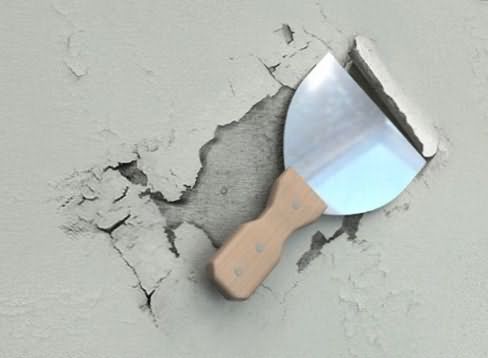
- First, the walls must be cleaned of any dirt, dust and grease. Otherwise, it will not be possible to achieve high-quality adhesion of materials. In addition, you will need to get rid of the former finishing materials, if they remained on the ceilings.
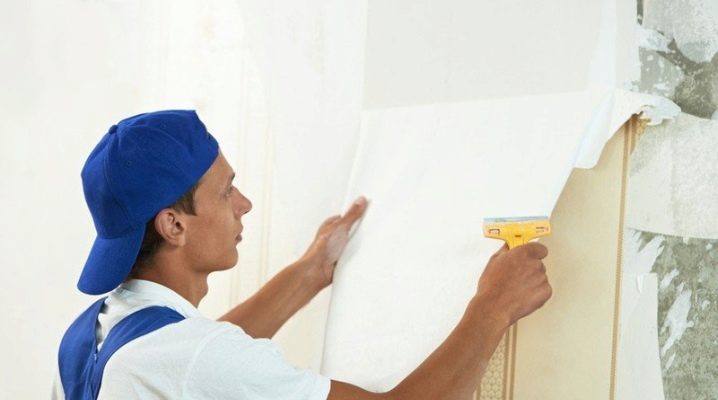
- If the walls were previously pasted wallpaper or paint was applied, they can be removed with emery cloth.
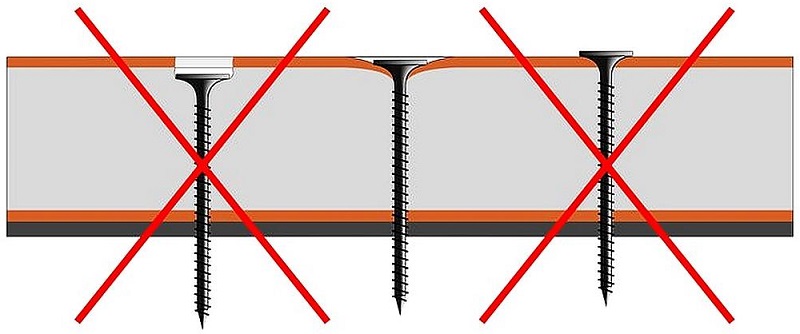
- Be sure to check the strength of the screws. If they strongly protrude beyond the walls and cling to the spatula, then they need to be screwed in tightly so that the working base is more accurate and easier to finish.
- After that, the cleaned surface of the base should be trimmed with a special primer. It is necessary for the decoration of walls and for the ceiling. Its layer will provide better adhesion of finishing materials. In addition, the putty will be much better and safer to engage with the ground.
- Next, you need to wait until the primer is completely dry. As a rule, it takes about a day. Only after that it is permissible to proceed to the direct plastering of the drywall base.
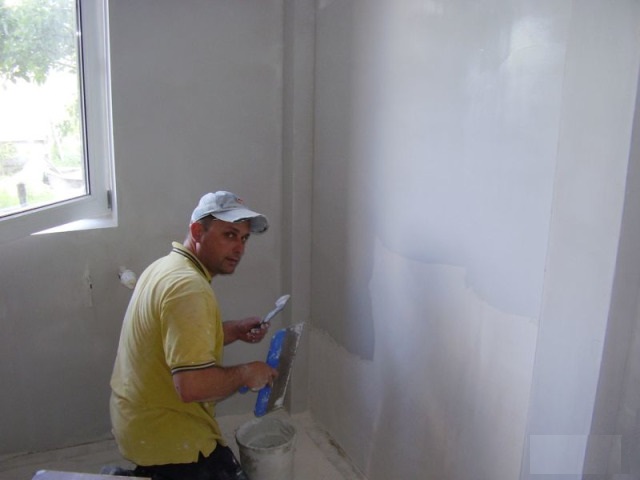
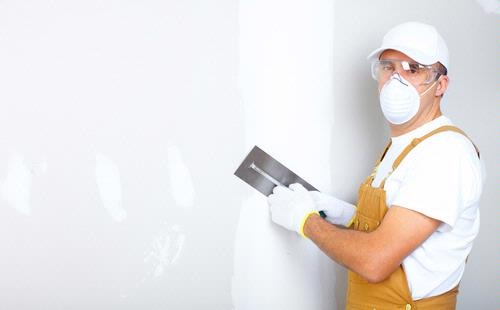
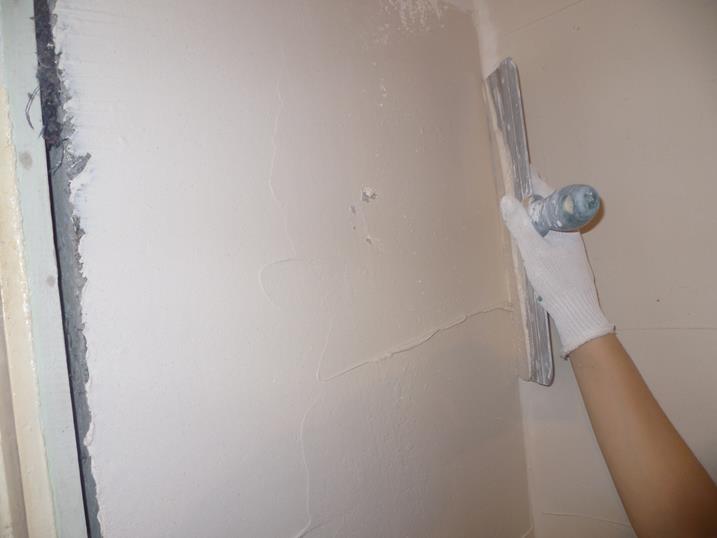
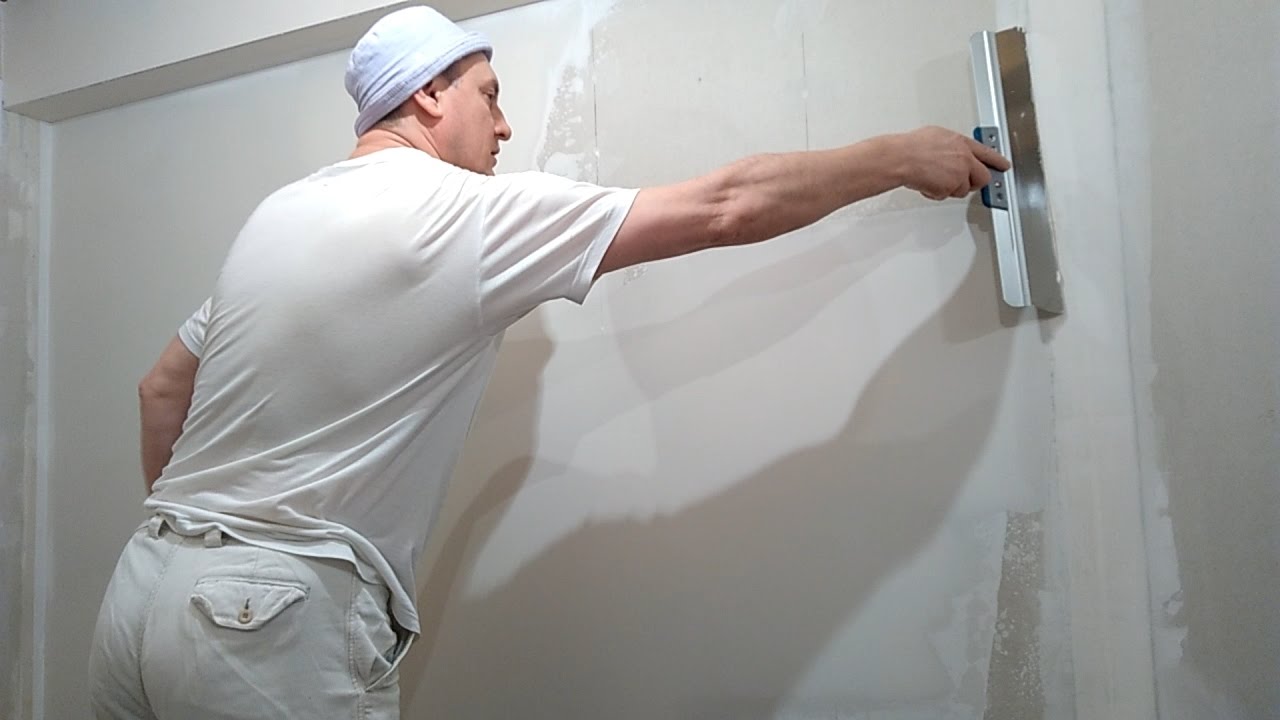
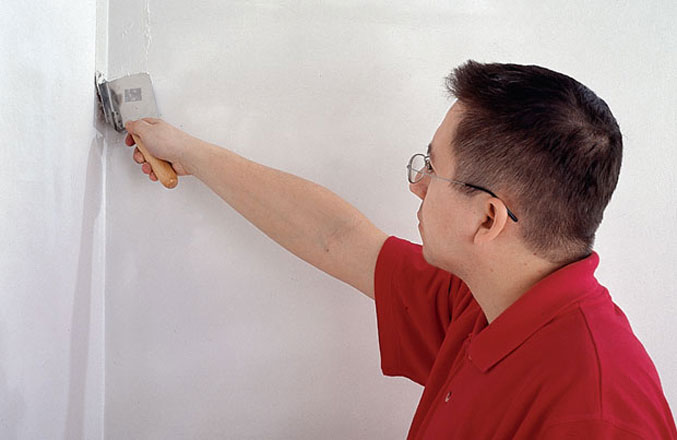
Application technology
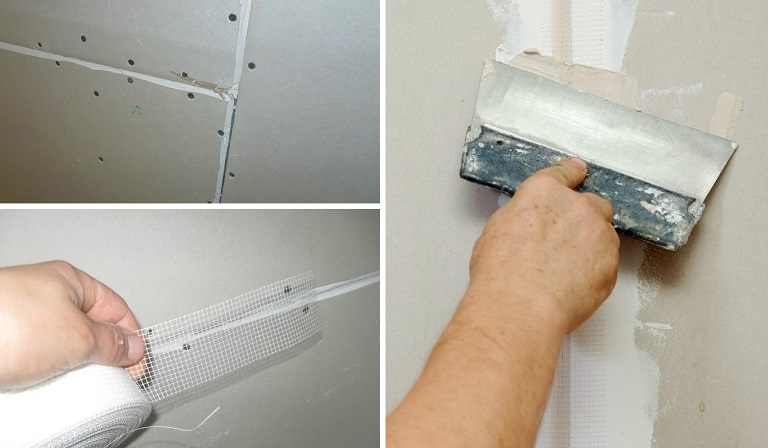
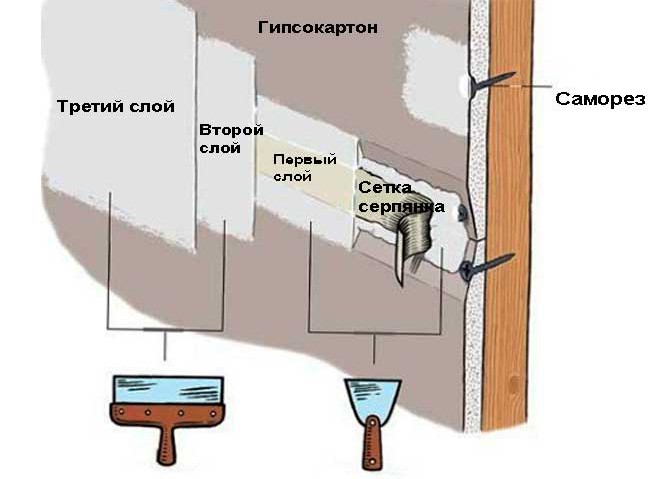
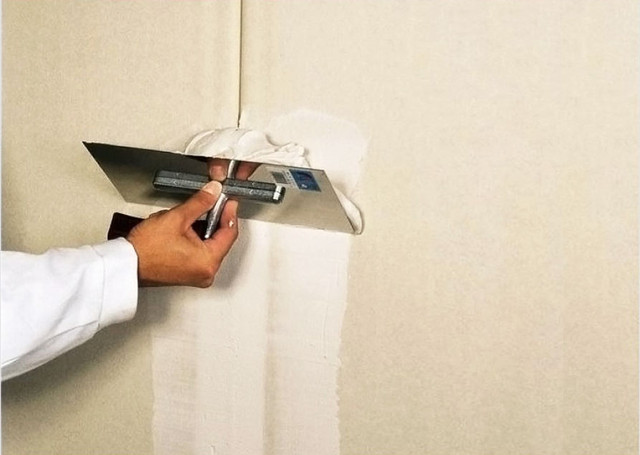
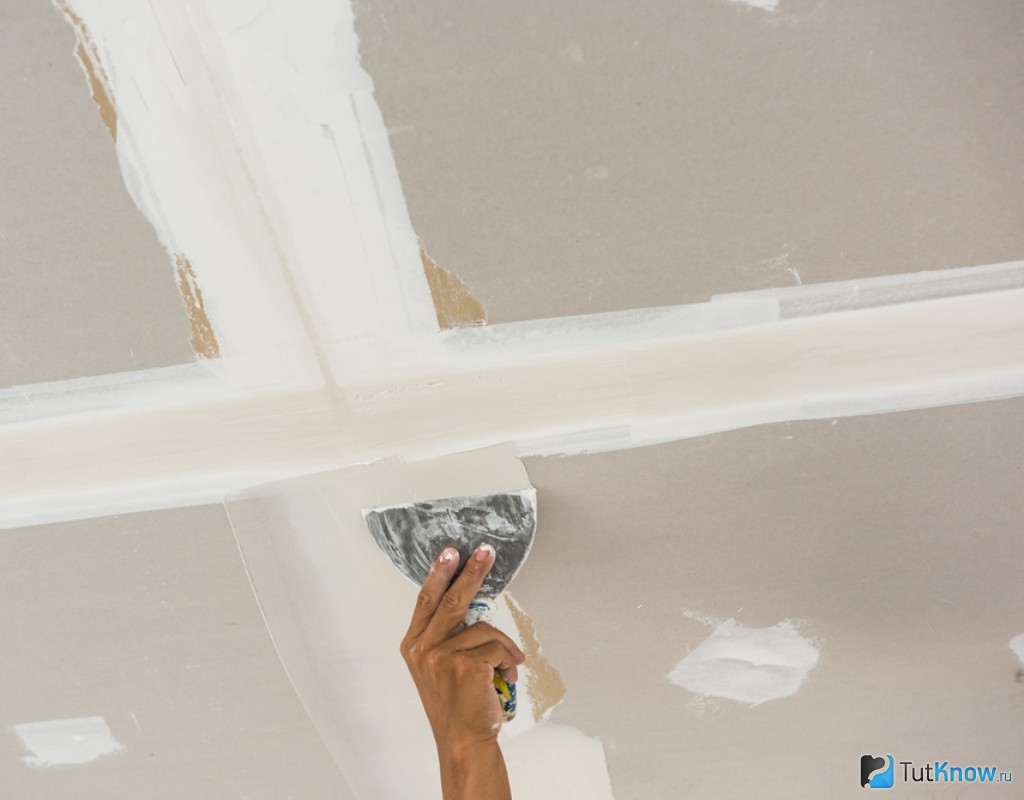
When you prepare the surface of the base for subsequent finishing, you can proceed to applying the starting layer of putty. You will need to carefully process the seams of the base and the gaps. As a rule, starting putty compounds differ in coarse-grained structure. Such coatings are ideal for pre-leveling.
Starting puttying must be done not from the very bottom, but from the middle of the seam being trimmed up and down. Thanks to this simple technique, you will be able to avoid ugly overlaps when putting putty.
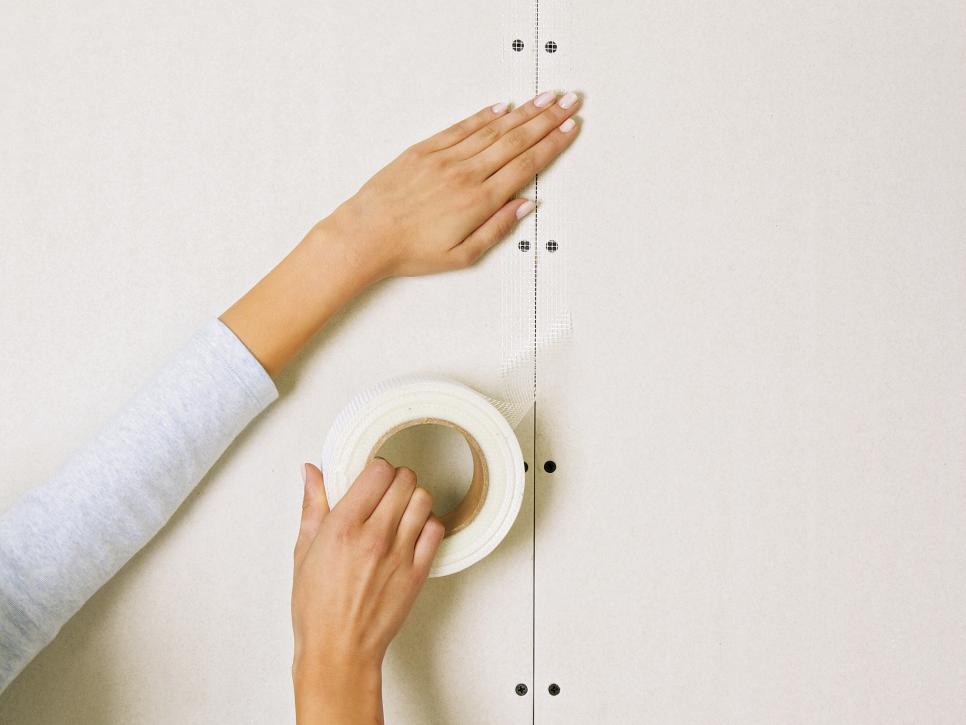
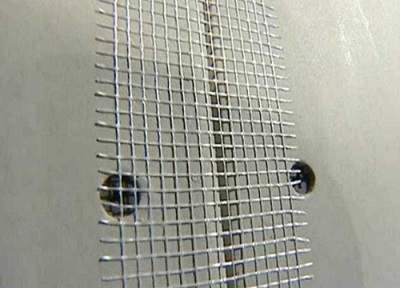
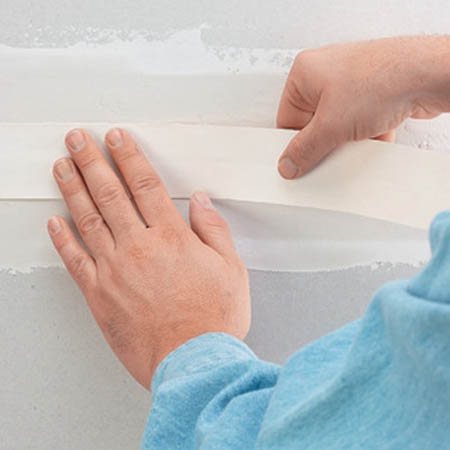
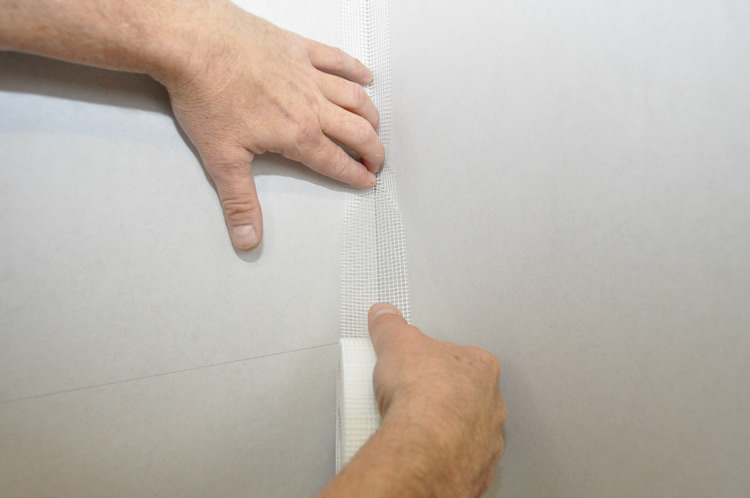
After that, to add extra strength, it is worthwhile to install a special reinforcing tape. Similar items are sold in almost any building materials store. The installation of such an addition will ensure the reliability of the connection of all joints and seams, as well as the long service life of the finish.
Without reinforcing tape just can not do if you plan to decorate plasterboard foundations or paint the paint mixture. It must be carefully put on the joint with the already applied starting layer of putty and properly leveled. Try to avoid any irregularities and protruding elements when mounting the tape.
After all the steps performed, you should wait until the putty is completely dry and harden. As a rule, the drying of such materials takes 24 hours. Of course, much depends on the level of humidity in the room. If it is above the norm, then the putty mixture can dry longer.
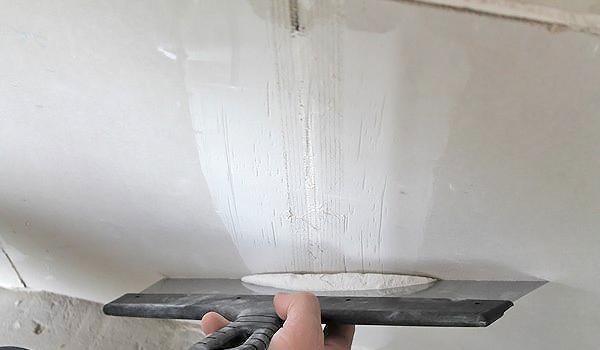
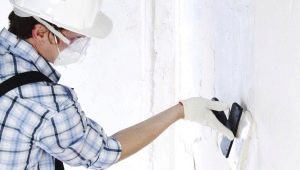
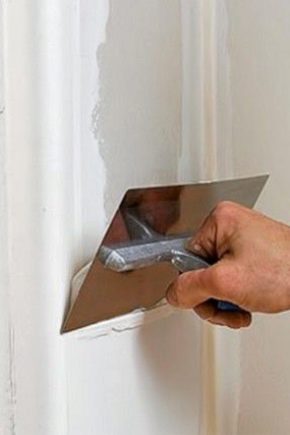
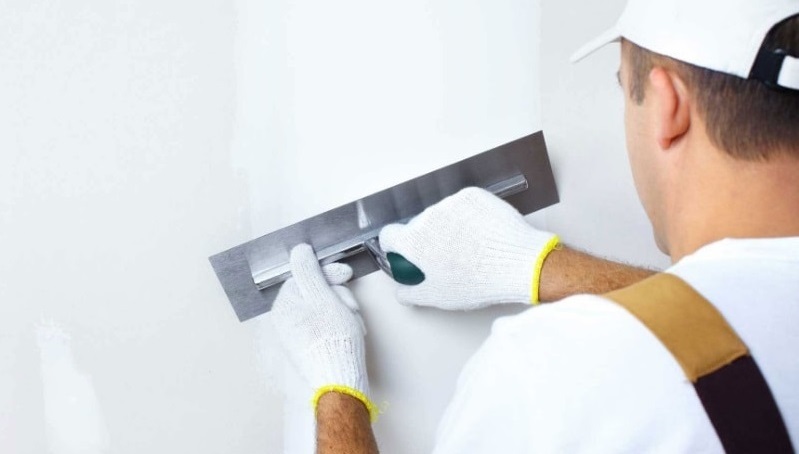
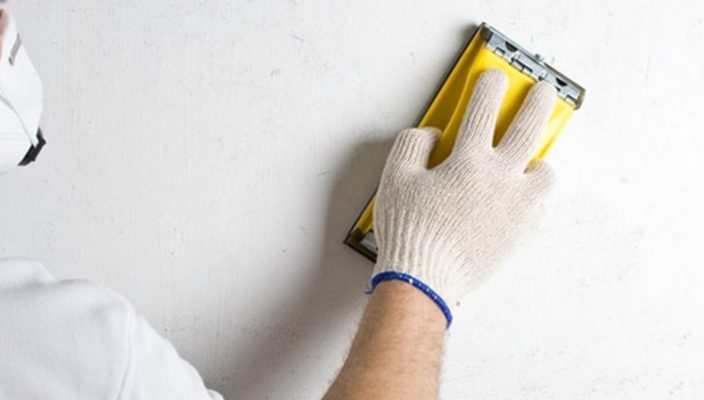
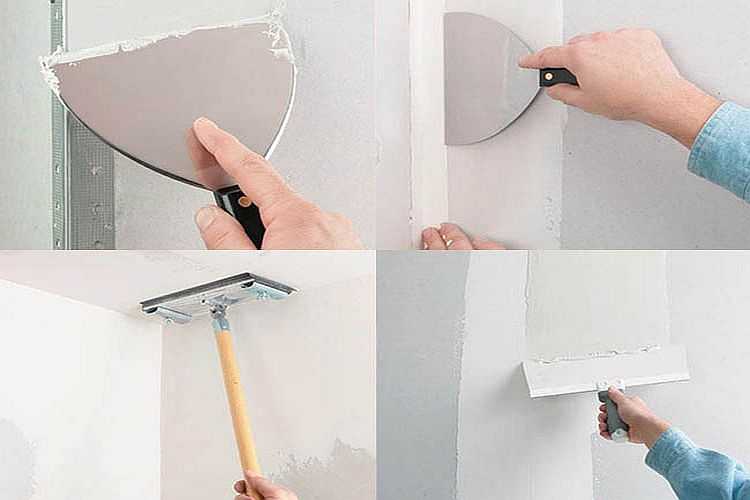
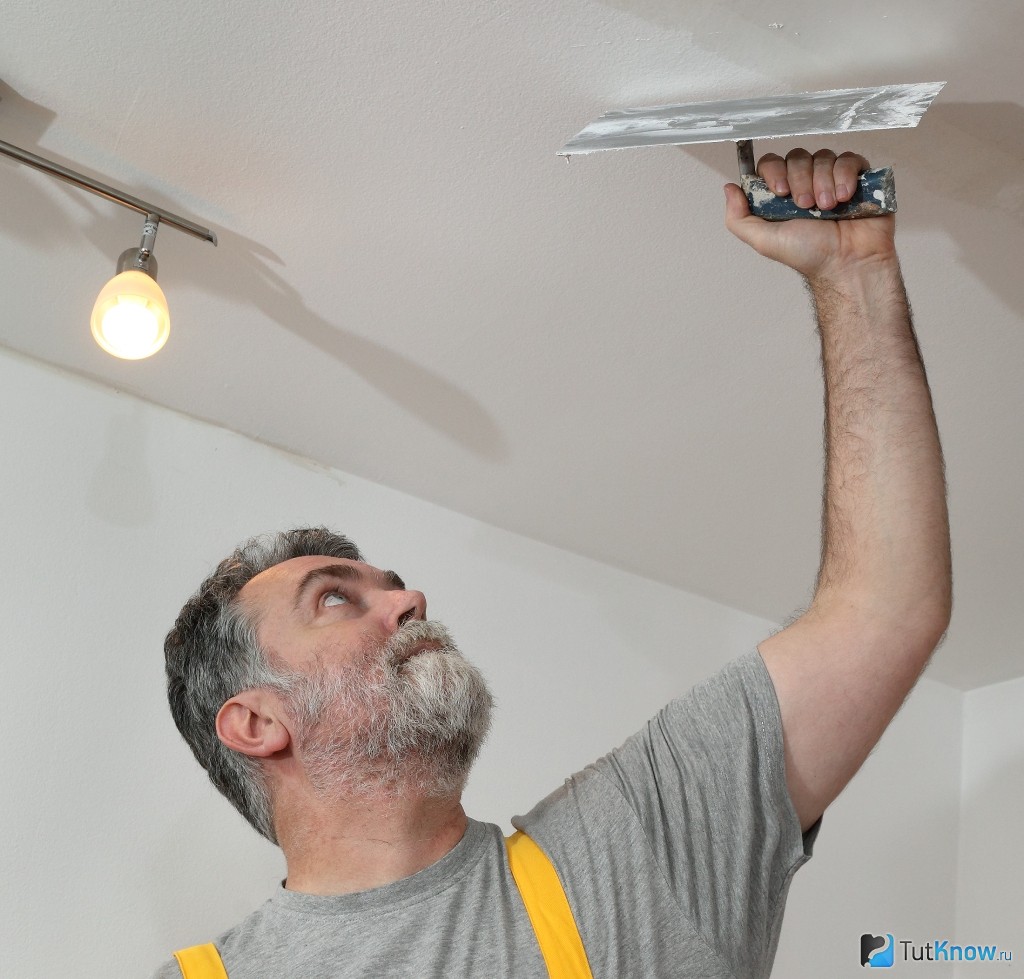
When you putty drywall putty with your own hands, after it is completely dry you will need to carefully polish the surface. Do not forget that before applying the finishing layer all seams and other elements should be as smooth as possible. In addition, it is necessary to ensure that no parts go beyond the boundaries of the bases.
Seam-coated seams after drying must be wiped with a special wet grout. Using this method, it will be possible to achieve a perfectly flat and neat base. After that, give the grout to dry completely. Next, the seams must be re-treated with primer (buy special primer mixes for drywall).
Only after that you can proceed to the application of the final layer of putty.
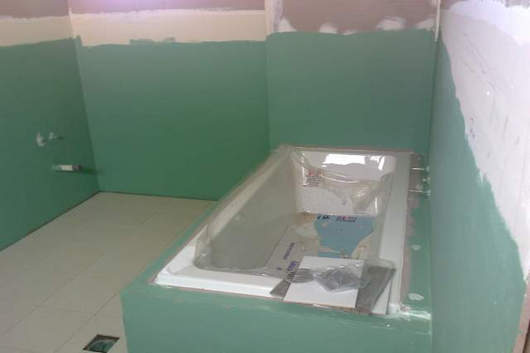
Most often, the finishing putty has a fine-grained structure and a simple white color. Before applying this solution, it is necessary to make sure that the plasterboard bases are completely leveled and do not have any defects.
Experts strongly recommend finishing plastering drywall in a room with windows closed. Take care that there are no drafts in the room. If you ignore these recommendations, the putty layer on gypsum bases can get ugly cracks. Get rid of them will not succeed - will have to redo the work.
According to experienced finishers, finishing putty putty is not necessary if you plan to paint drywall surfaces or paint them with paint. For such purposes, it is possible to make only the initial treatment of the bases.
If you follow this simple step-by-step instructions, then plastering plasterboard walls will not take long. The main thing is to treat responsibly absolutely all stages of work, without neglecting any of them.
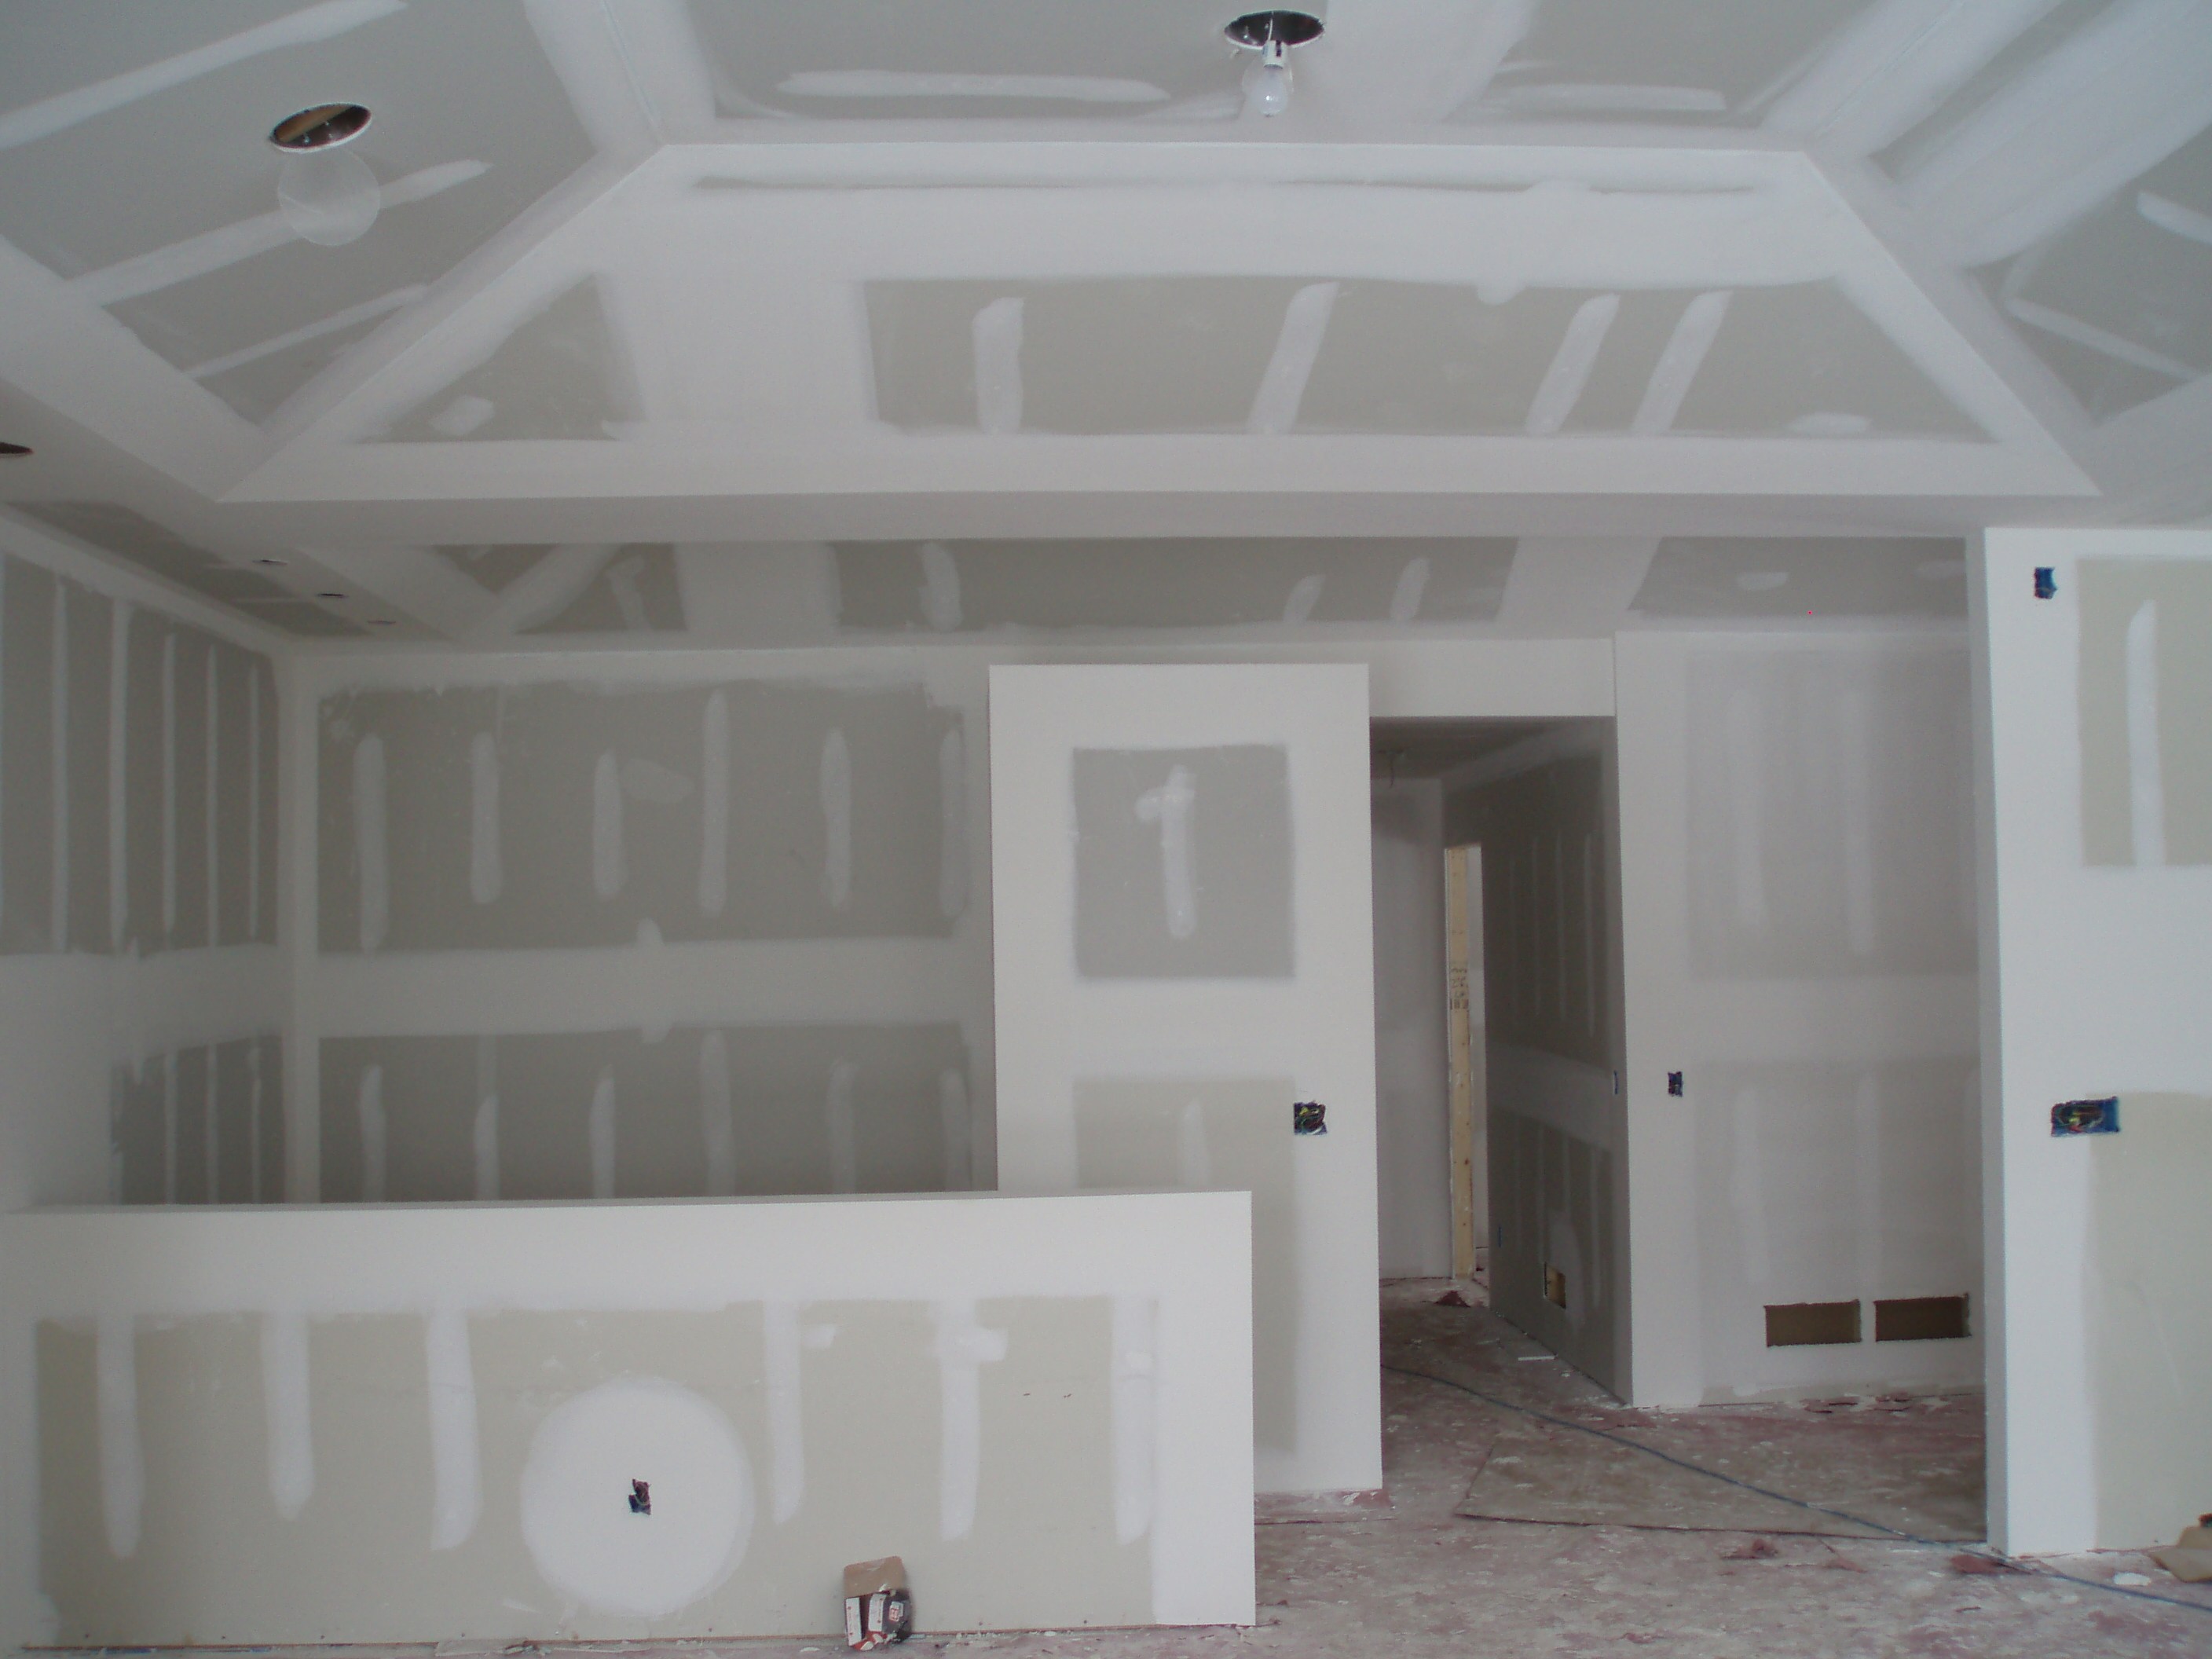
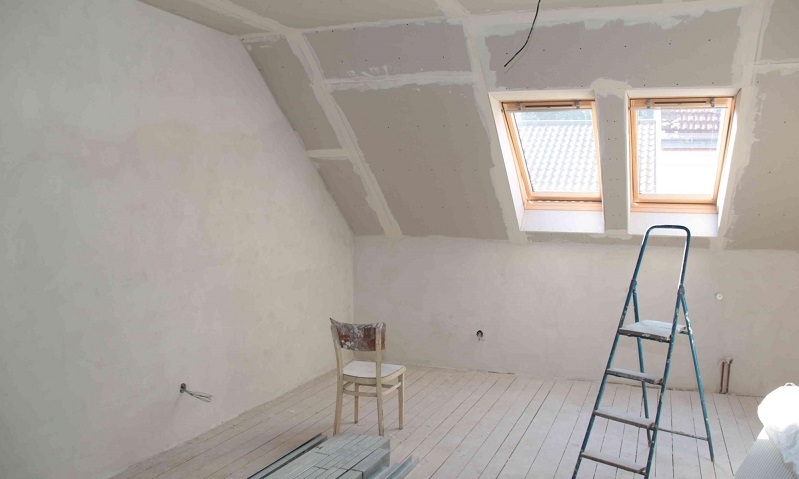
With the help of drywall, not only the walls in the dwelling, but also the ceilings are leveled. Moreover, beautiful multi-level boxes are often made from such materials, which look spectacular on the ceiling, especially if they are complemented by suitable style lamps.
The technology of finishing the drywall ceiling is not much different from the wall options. However, there are some differences.Since the edges of plasterboard sheets are cut to half the thickness at an angle of 45 degrees and move a few centimeters from the floor, the remaining gap must be filled with spackling mixture. In the process of drying, the solution will swell and tear apart the gap, firmly fixing the GCR sheet.
Thanks to this technique, it will be possible to avoid problems associated with the appearance of cracks and chips in the corner sections of the drywall.
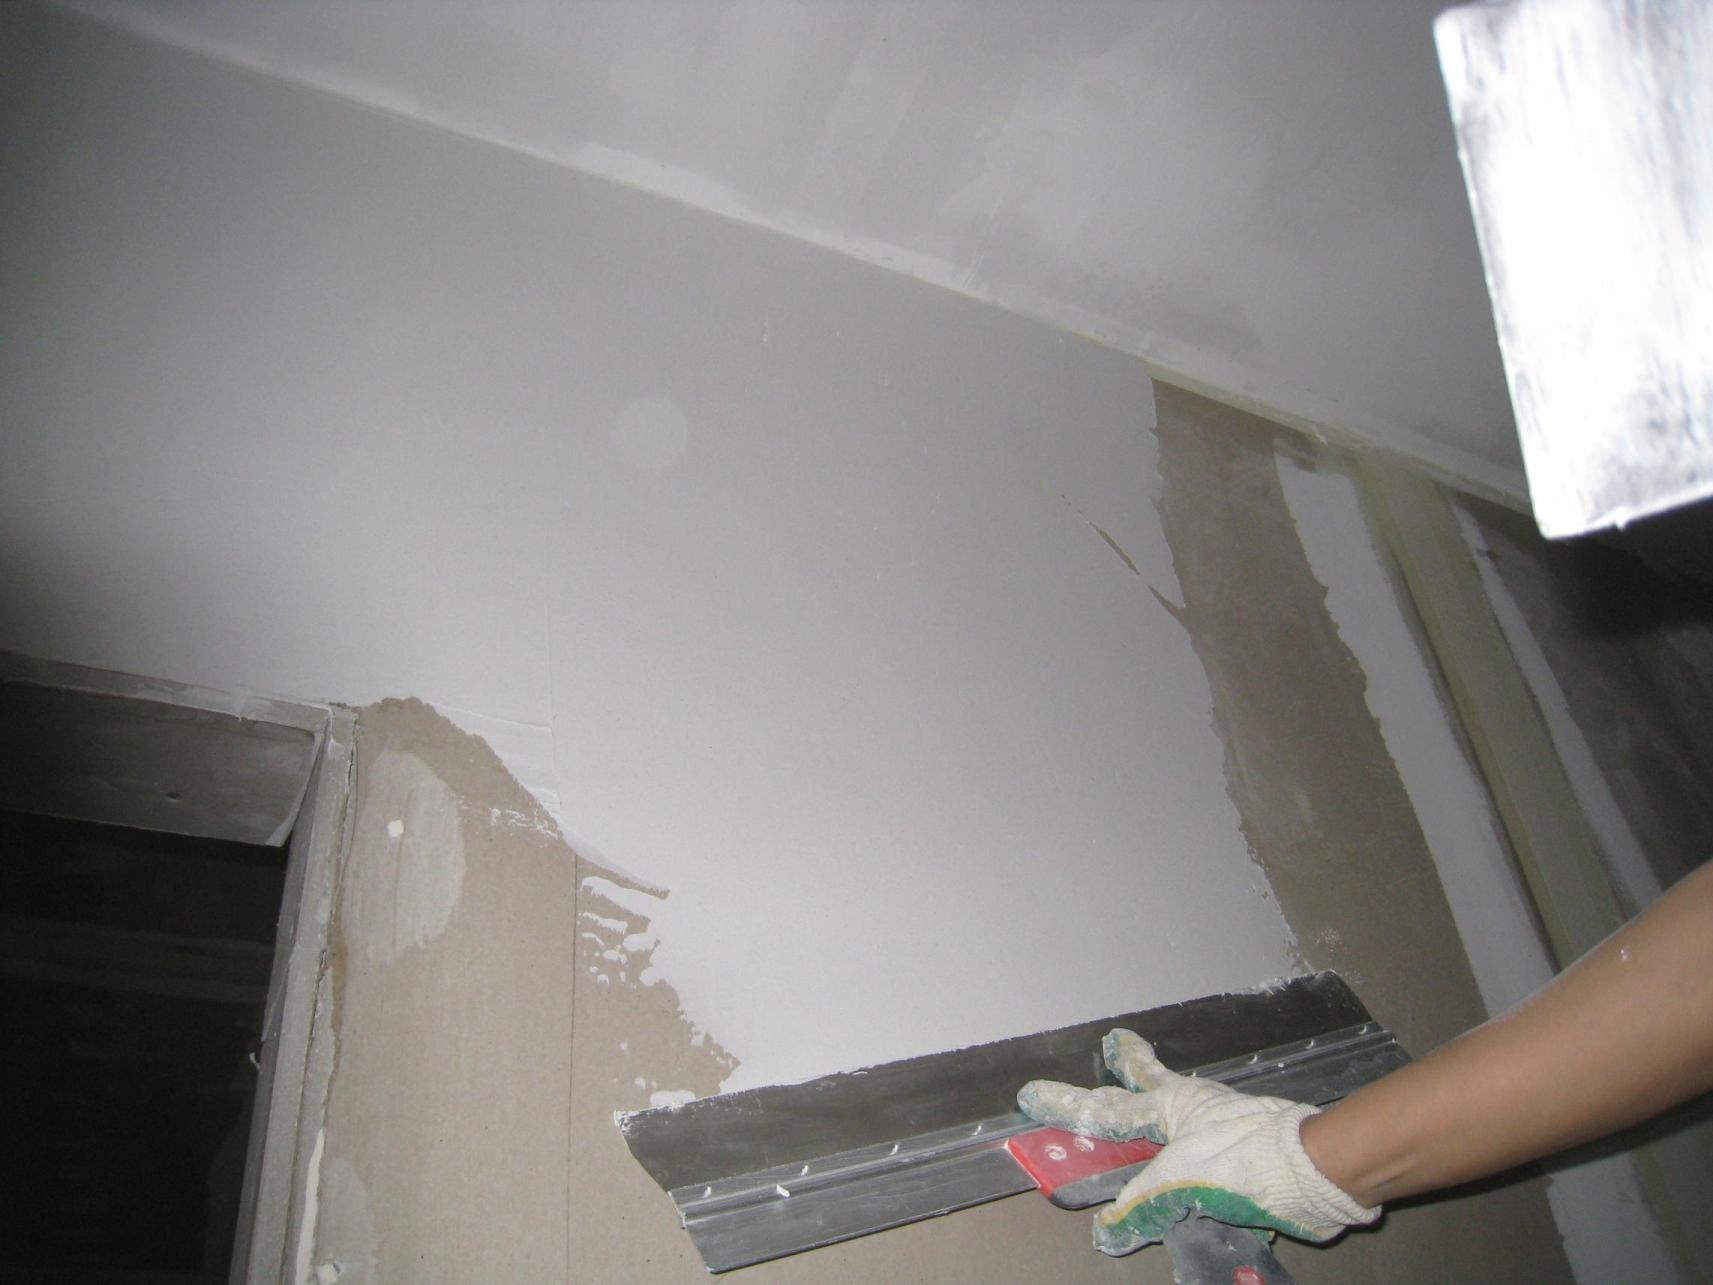
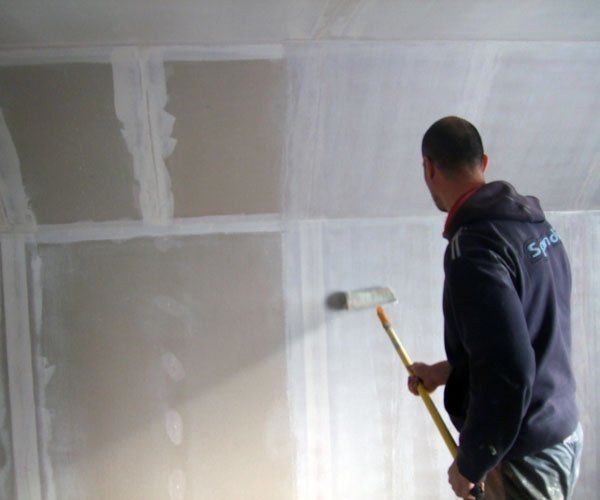
The joints should always be filled with filler, and then leveled with a short rule. To ceiling longitudinal seams were more accurate and reliable, they are recommended to glue the reinforcing mesh. Next, the gaps need to be filled with putty and carefully leveled. Do not forget about filling all the holes that were left from the fastener parts. When the putty on the ceiling is completely dry, it is necessary to prime all seams with a special compound designed specifically for gypsum plasterboard.
When the primer layer dries, it is necessary to glue the longitudinal and transverse joints between the plates with a special banding tape. It should be glued to a special aqueous solution of PVA. If you do everything according to the instructions, the surface of the ceiling will be as smooth and level as possible.

Please note that The plasterboard spackling technique on the ceiling requires that all corners and seams be glued with a special bandage tape. It must be glued to the joints, which were previously treated with a special aqueous solution of PVA. In addition, these items should be carefully aligned using a conventional trowel. All air must be removed from the joints. As for surplus adhesive mass, they can be removed quite easily with an ordinary wet sponge.
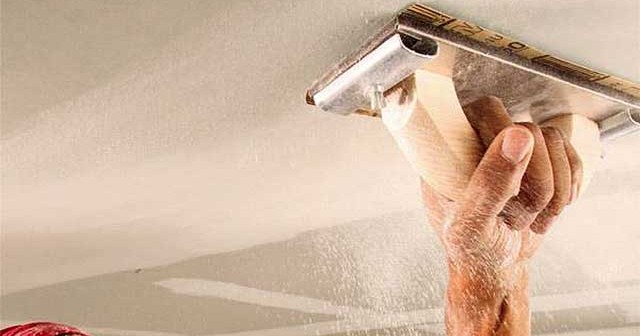
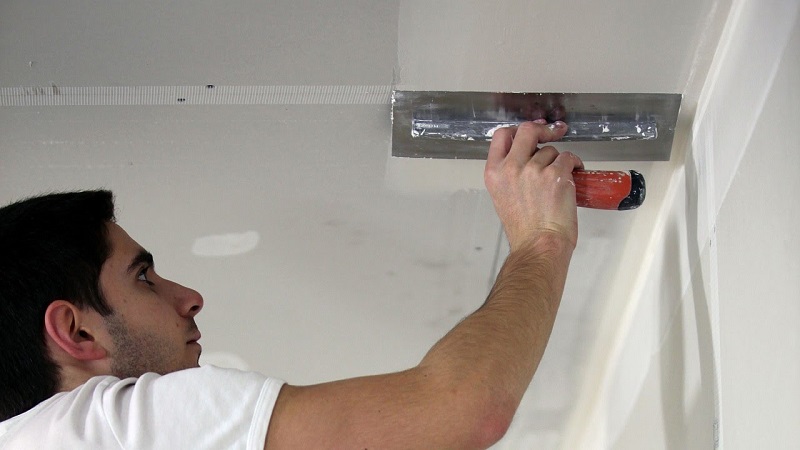
When the bandage tape dries, it can be covered with a finishing layer of putty. Its thickness should be about 1 millimeter. After that, you need to wait until the applied layer is completely dry. Then it is necessary to cover the joints once again with a spackling mixture in order to better level the ceiling.
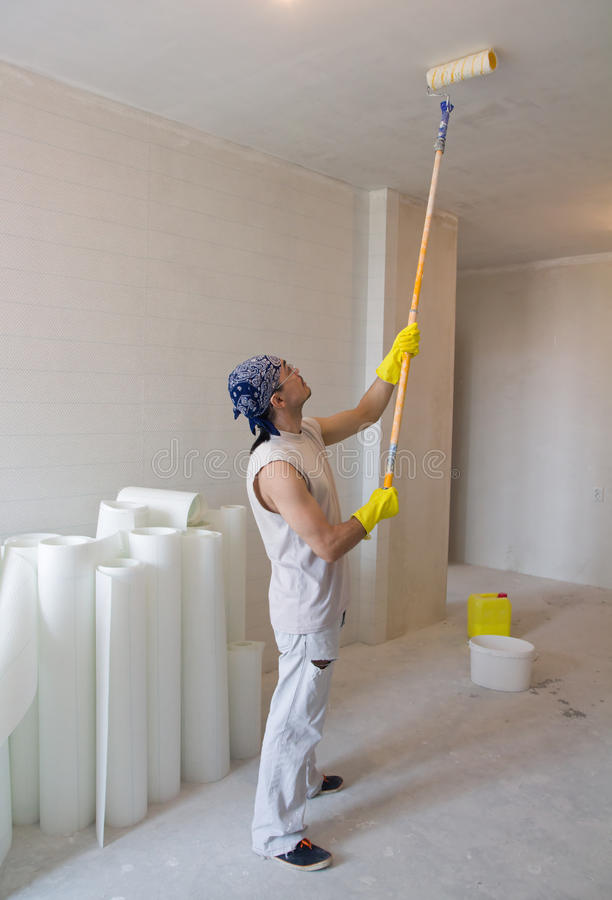
When all the layers of putty dry, the ceiling can be trimmed with decorative materials. For example, paper (and not only) wallpaper or plaster popular. However, for other finishing coatings it is necessary to apply another one - the finishing layer. It should be thin.
The final layer of putty is applied with a wide trowel. As a rule, the width of such tools is about 45 cm. The first layer should be applied as accurately as possible and evenly. Try to avoid differences in thickness. As for the second finishing layer, it is necessary to eliminate small defects in finishes. Thanks to him, the ceiling looks more aesthetically pleasing and neat.
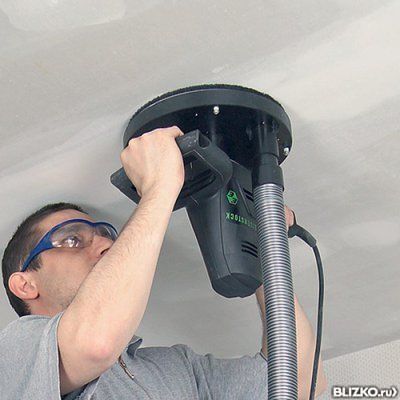
When the finishing layer is completely dry, the ceiling must be machined with a grinder.
Finish corners
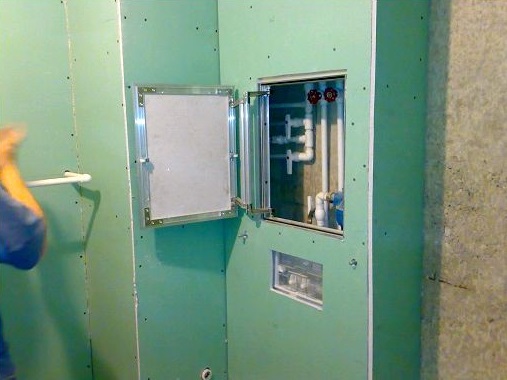
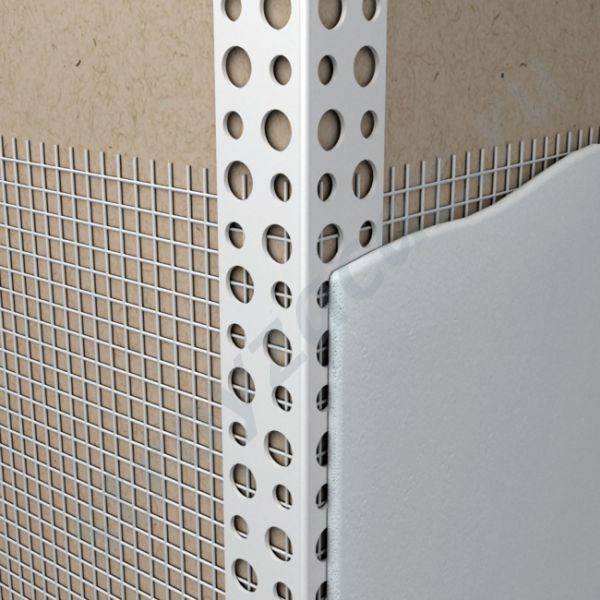
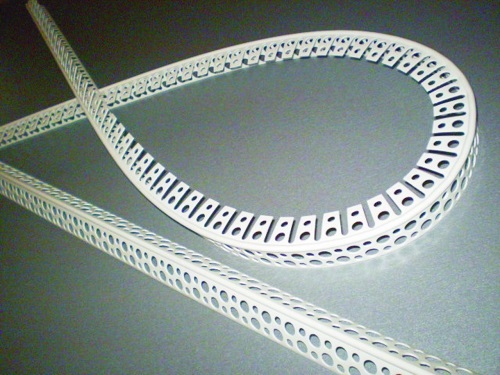
Special attention should be paid to the finishing of the corners of drywall constructions. To external elements were more durable and reliable, there are special corners. Perforated plasterboard parts are made from plastic or metal.
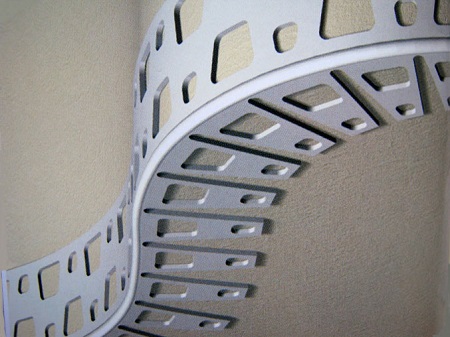
For complex arched bases, plastic corners are most often used, since they bend and quite easily fit in a bend.
At simple external corners, as a rule, metal corners are attached. Of course, you can also use plastic options. In this case, the choice is not so fundamental.
First you need to make sure the proper quality of the corners.Aluminum parts are often deformed during transport. The damaged area will not be able to fully straighten and fix on a straight surface. It is better to put aside such elements.
Cut the desired number of corners. Then you need to put on the corners of the base putty. Its layer should be 2-3 cm with a small tubercle. At this stage, leveling does not need anything. Put the perforated corners on plasterboard bases with a putty. Push them down so that the filler layer crawls out through the holes.
Now you need to flatten the speakers cover, so that they cover the corners themselves. Next you need to wait until the trimmed areas are completely dry. The second layer of putty should be applied after a couple of hours.

If you make out a two-level ceiling of plasterboard, then you can not do without special arched corners. However, there is another way to install such parts along rounded edges - with a stapler.
It is necessary to finish correctly not only external, but also internal corners of plasterboard constructions.
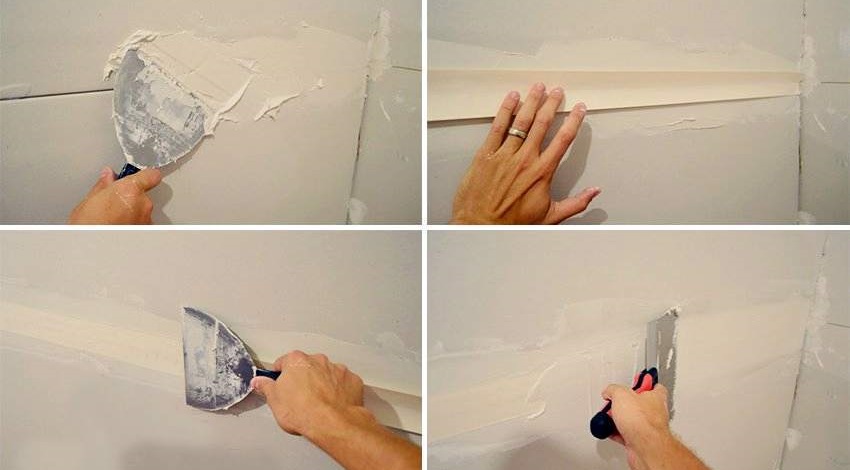
First, they need to glue serpyanka.It can not be bent at right angles to embrace at the same time two sides of the angle. Because of this, over time in this area will appear ugly "wrinkles". For each side you need to glue the individual elements serpyanka.
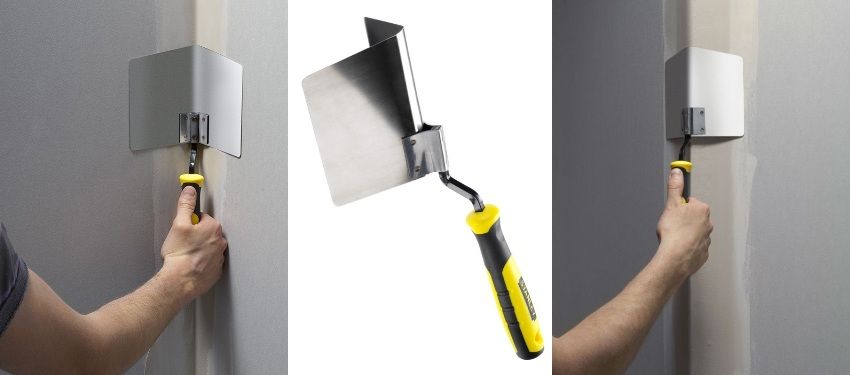
Next, you should apply the putty mixture with a spatula having a width of 20 cm. Putty should be pressed as tightly as possible into the slots if they are present in these areas.
If you trim the plasterboard ceiling, the most difficult thing in this work is to seal the gaps around the perimeter of the ceiling, when the gap between the plasterboard and the ceiling is about 2 cm. Such flaws often allow installers, but you will have to correct such errors.
To begin with, the remaining slots must be filled with putty without using serpyanka. It is recommended to apply the putty mixture to the edge of the drywall sheet, so it will be much more secure. When all materials grab, you should cut off the extra parts with a knife. After this, it is necessary to attach the serpianka and re-putty of the inner corners.
Useful tips
If you firmly decided to self-finish the plasterboard bases with a putty, then You should rely on a number of useful tips offered by experts:
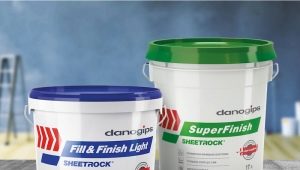
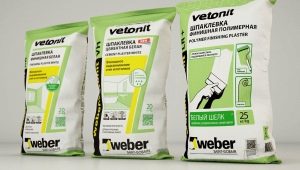
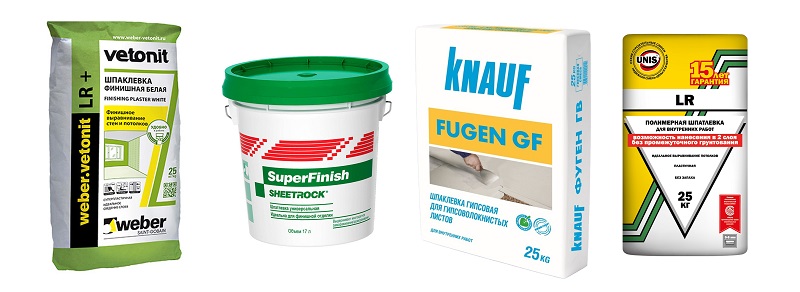
- The first thing that professionals advise to take into account is the need to acquire putty mixtures from reputable manufacturers. The most popular today are companies such as Knauf, Vetonit, Sheetrok. Their products boast excellent quality, and working with it is not difficult.
- Pay attention to the texture of putty. The composition should be liquid, resembling sour cream.
- If you do not want to independently prepare the putty mixture, then you should purchase a ready-made version. Such compositions can be used for finishing immediately after purchase. However, it should be borne in mind that such a product cannot be stored for a long time - this is what distinguishes it from dry mixes.
- It is very important to putty the screws on the bases correctly. It is recommended to do it crosswise - in this way the putty fills the heads of fasteners better.
- Follow the location of the screws. It will be better if you drown them in drywall. However, there are such cases when they are twisted too deeply.Then they should be unscrewed, and next to install new screws, then putty all the holes.
- Do not detract from the value of the primer in such finishing works. It must be evenly distributed over the entire area of gypsum sheets. Experts recommend the use of special water-soluble compounds - they are absorbed into the upper layer of the base, but do not penetrate into its inner part.
- Experts do not recommend the use of fiberglass mesh in such finishing works. Currently, there are many alternatives to such parts that are better and more reliable.
- For the reinforcement of corners, a special spatula with fine teeth is best suited.
- It is very important to choose the right corners for a drywall construction. If you make out the arch, then the metal parts you absolutely do not fit. Choose more plastic specimens, such as plastic corners.
- Do not forget to properly ground the corners of drywall constructions.
- When finishing the ceiling, it is recommended to perform grinding with the lights on. Then you can immediately notice any defects and errors on the ceiling structure.
- Pay attention to the quality of plasterboard. At the joints there should be no discharge sheet. Such flaws lead to excessive accumulation of air in the damaged areas, which then adversely affect the decorative finish.
- Be sure to clean the joints between the plasterboard from any dirt and dust. Must be clean and fasteners. Otherwise, the putty will not hold on to such a foundation tightly enough. Over time, she may fall off from him altogether.
- If you do not plan to glue wallpaper onto plasterboard bases or paint them with paint, then it will not do with rough putty. You will also need to produce a high quality finish.
In the next video, see the master class on plasterboard putty.