How to finish the walls with laminate?
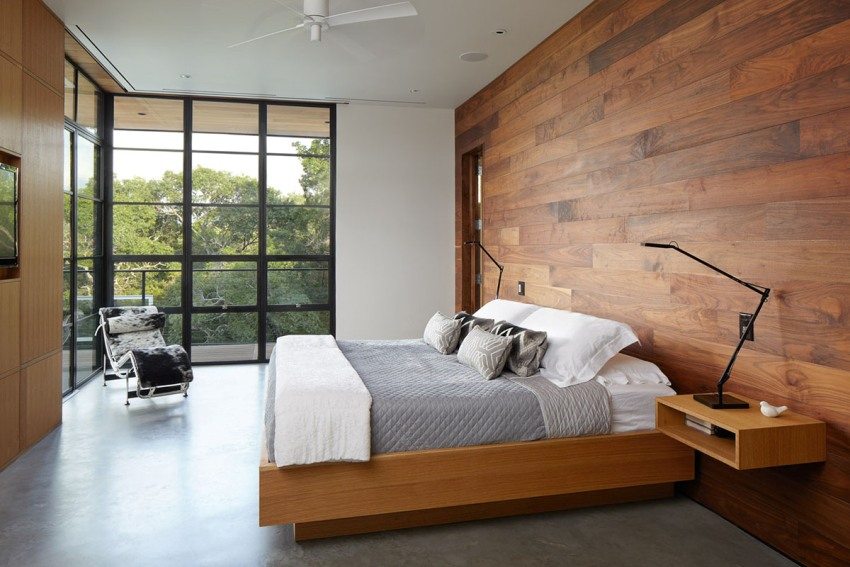
The search for original solutions leads to the use of finishing materials for other purposes. A striking example of this approach is the laminate finish on the wall surface. But this does not mean that it can be done as you please. Be sure to consider all the subtleties and nuances, only then the result will be positive.

Coverage Features
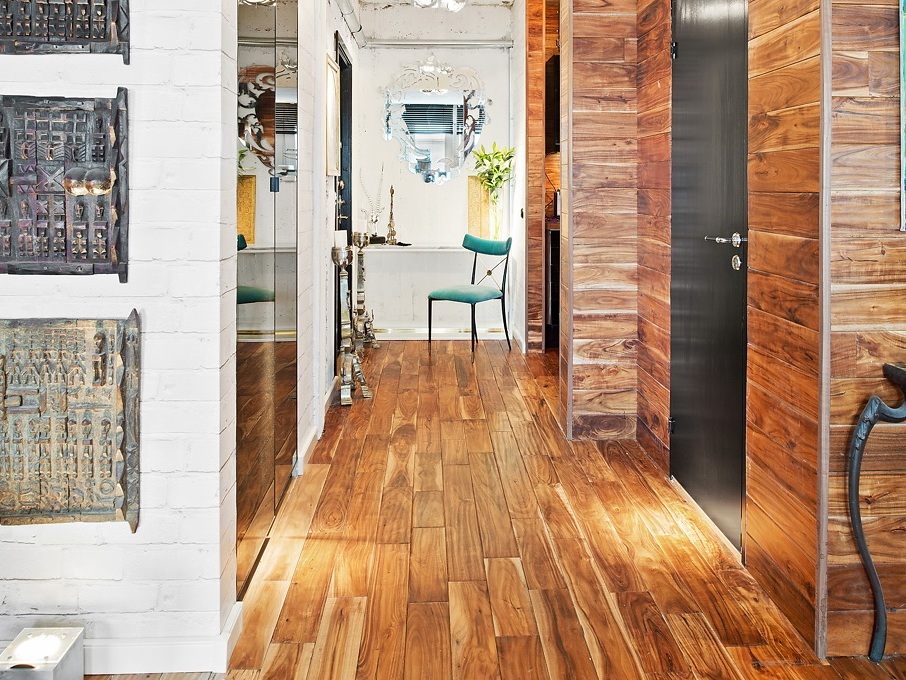
Decorating the walls with laminate is unacceptable for kitchens, because under the action of excessive moisture and temperature fluctuations, it will swell and warp. To avoid such effects will not work out in any way, there is no protection against them. The same reasons do not allow us to recommend this coverage for cellars, basements, storage rooms. But in the hallways, where deviations from normal room conditions are rare and insignificant, such a finish is quite acceptable.
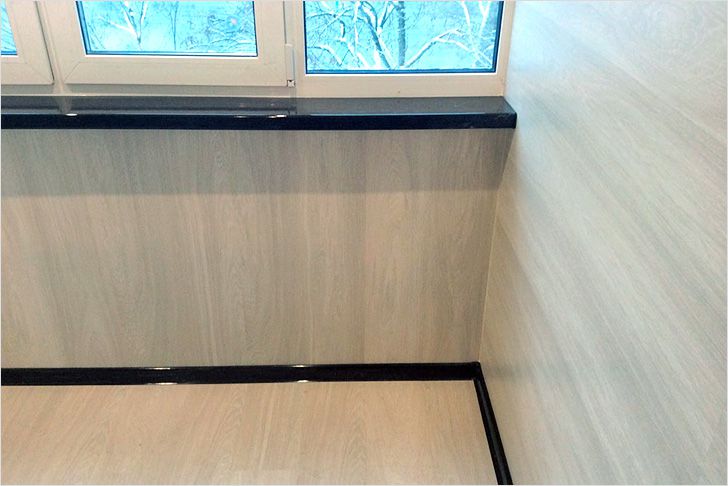
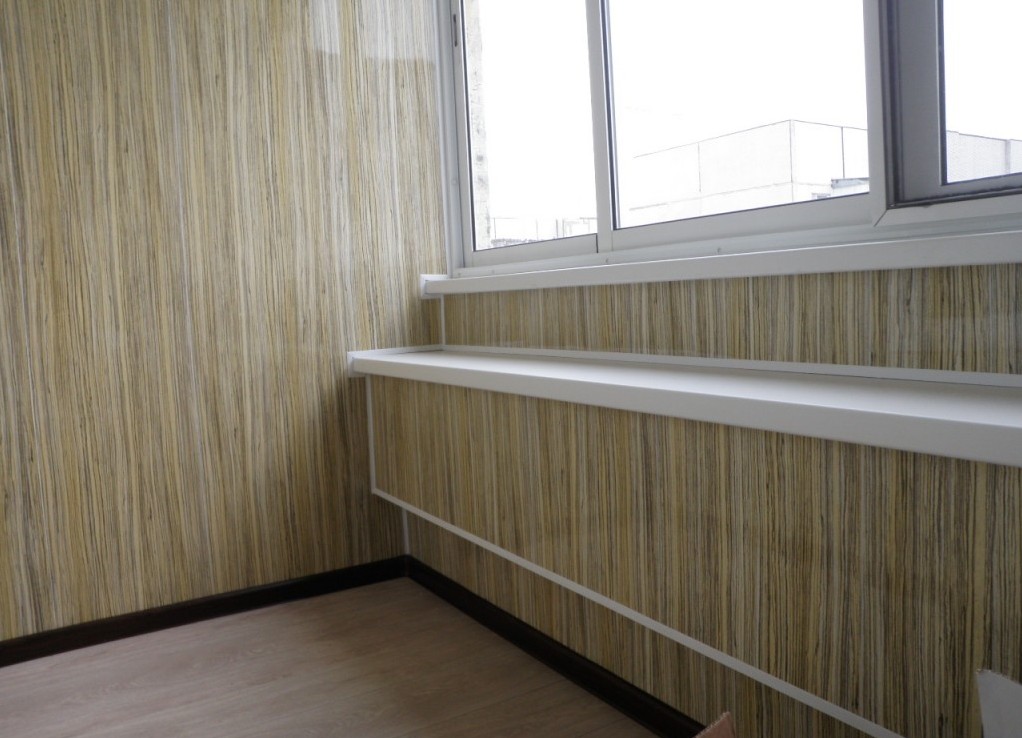
To sheathe a laminate balcony is not a good idea. No matter how hard they try to equip the premises, changing the conditions from season to season will certainly affect the coverage.
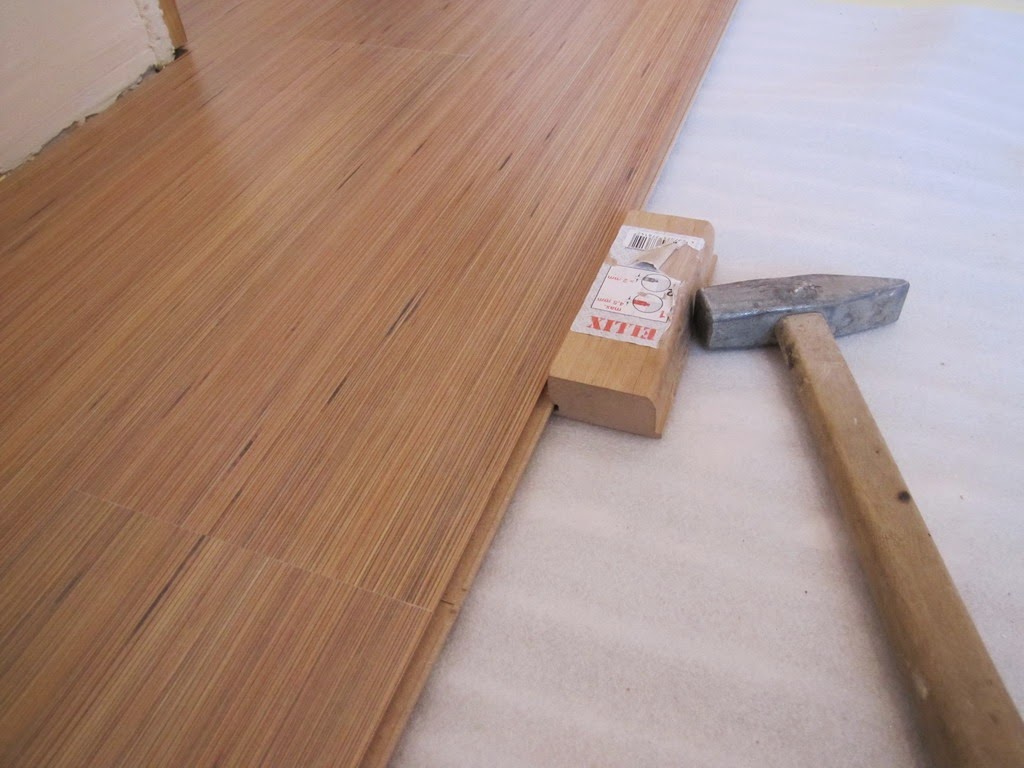
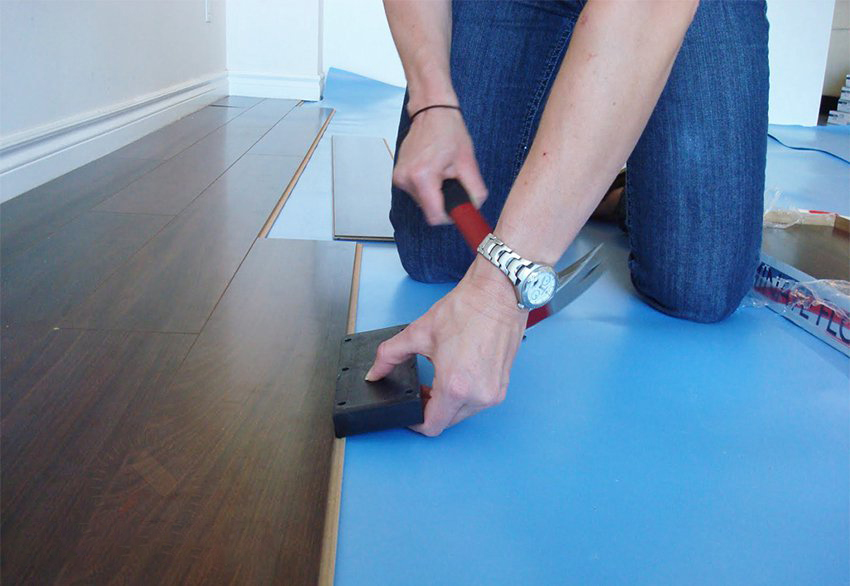
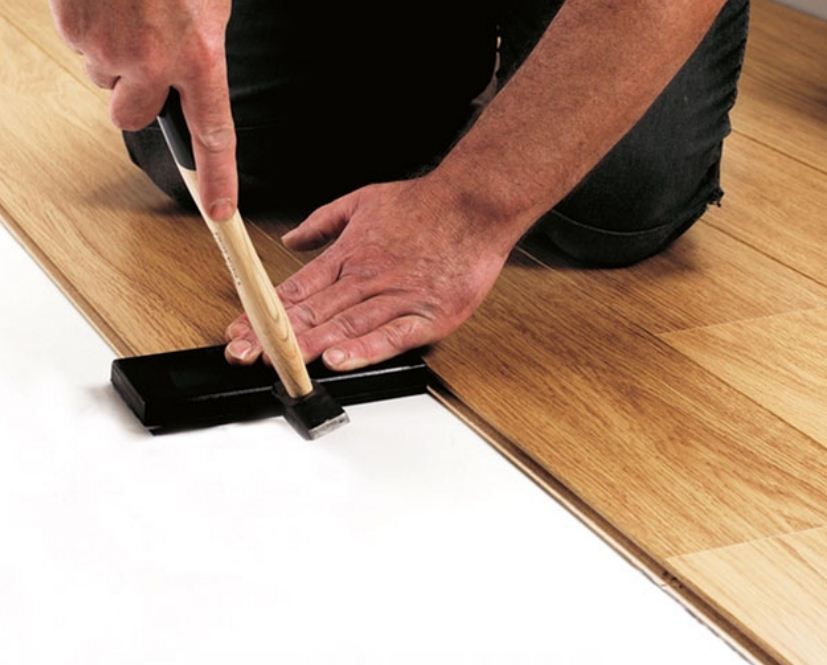
The bar of the click product can be customized exactly with the help of a tool; no effort will be enough to do it manually. The boss is most often applied and a hammer is hit on it, so the blows are evenly distributed in strength.
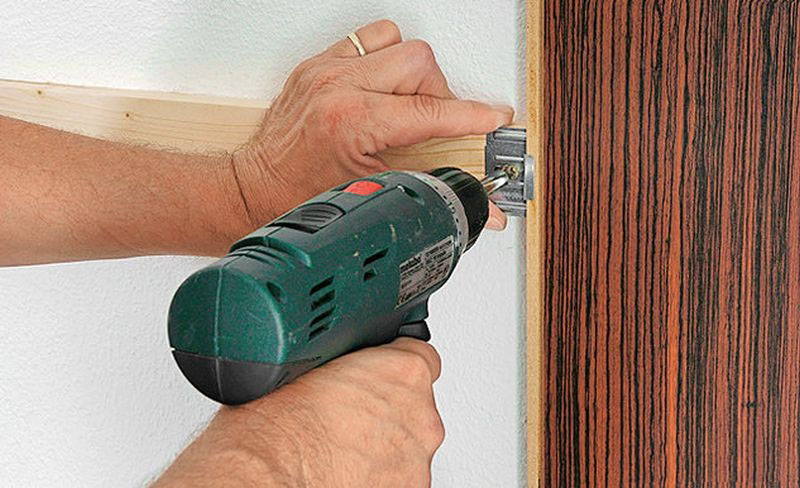
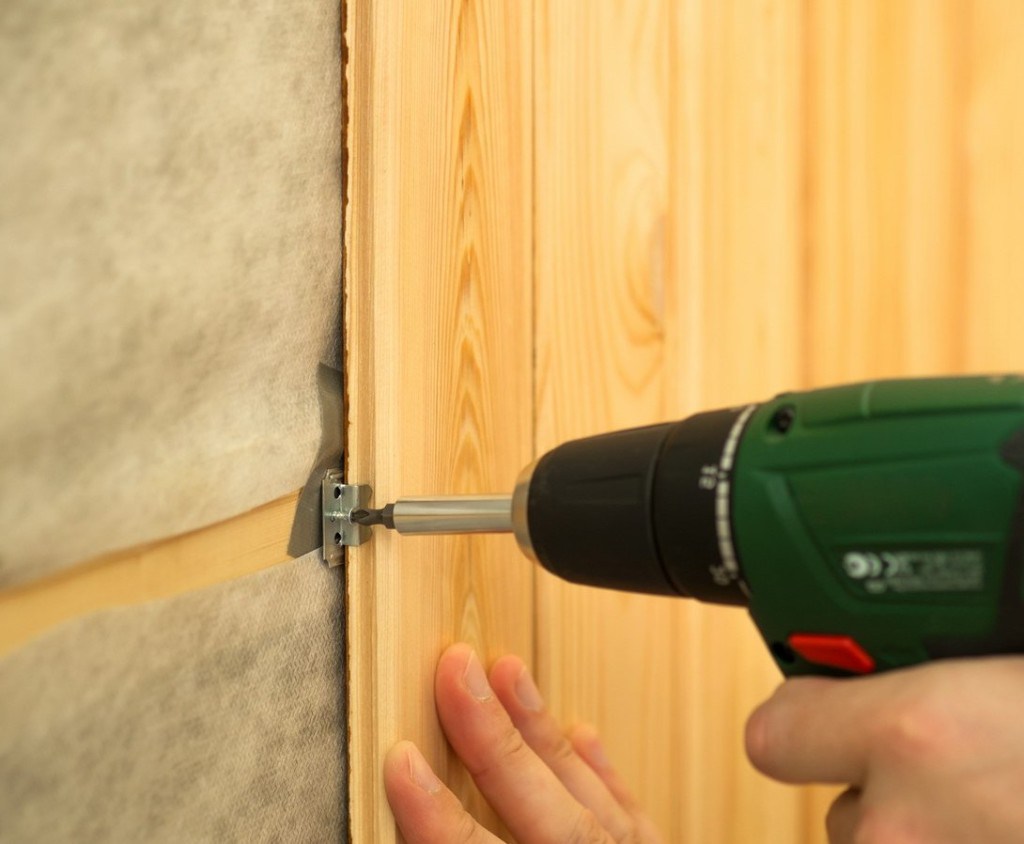
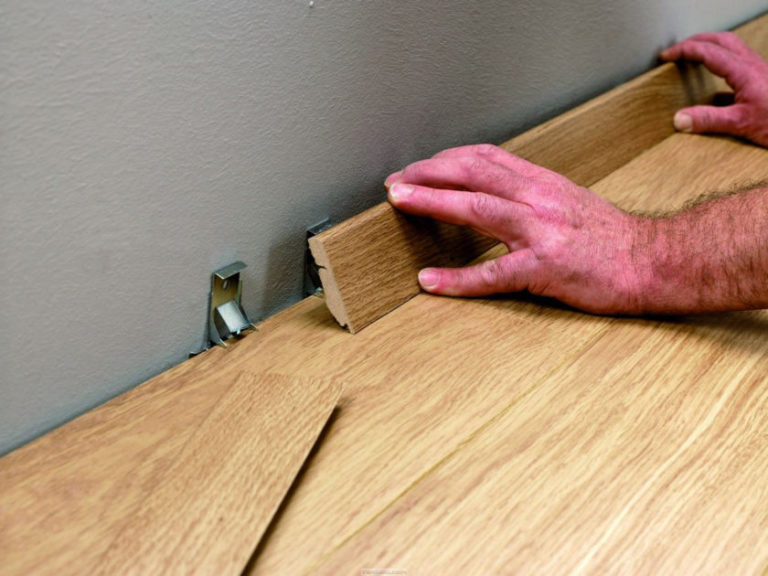
Laying laminate on the wall can be done with the help of the rule (hook), mistakenly called by individual masters clamps. The indentation along the outer border is created by expansion wedges, and it is desirable to have a double set of such tools in case of their failure. To make a wall covering with a laminate with the help of an obreshetka is most reliable, it will help to achieve high strength, strengthen sound insulation and heat insulation. But note that the design will inevitably be limited. Glue the same way only helps to form the original design.

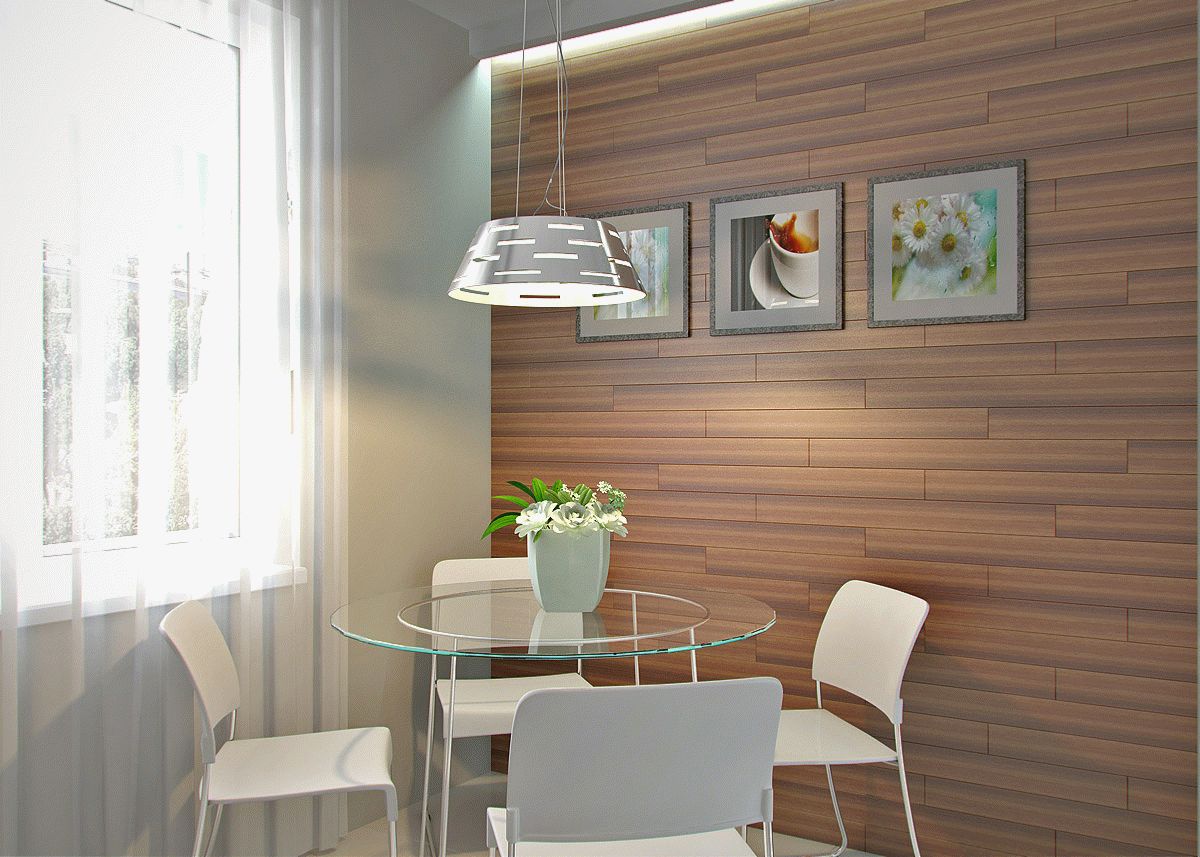
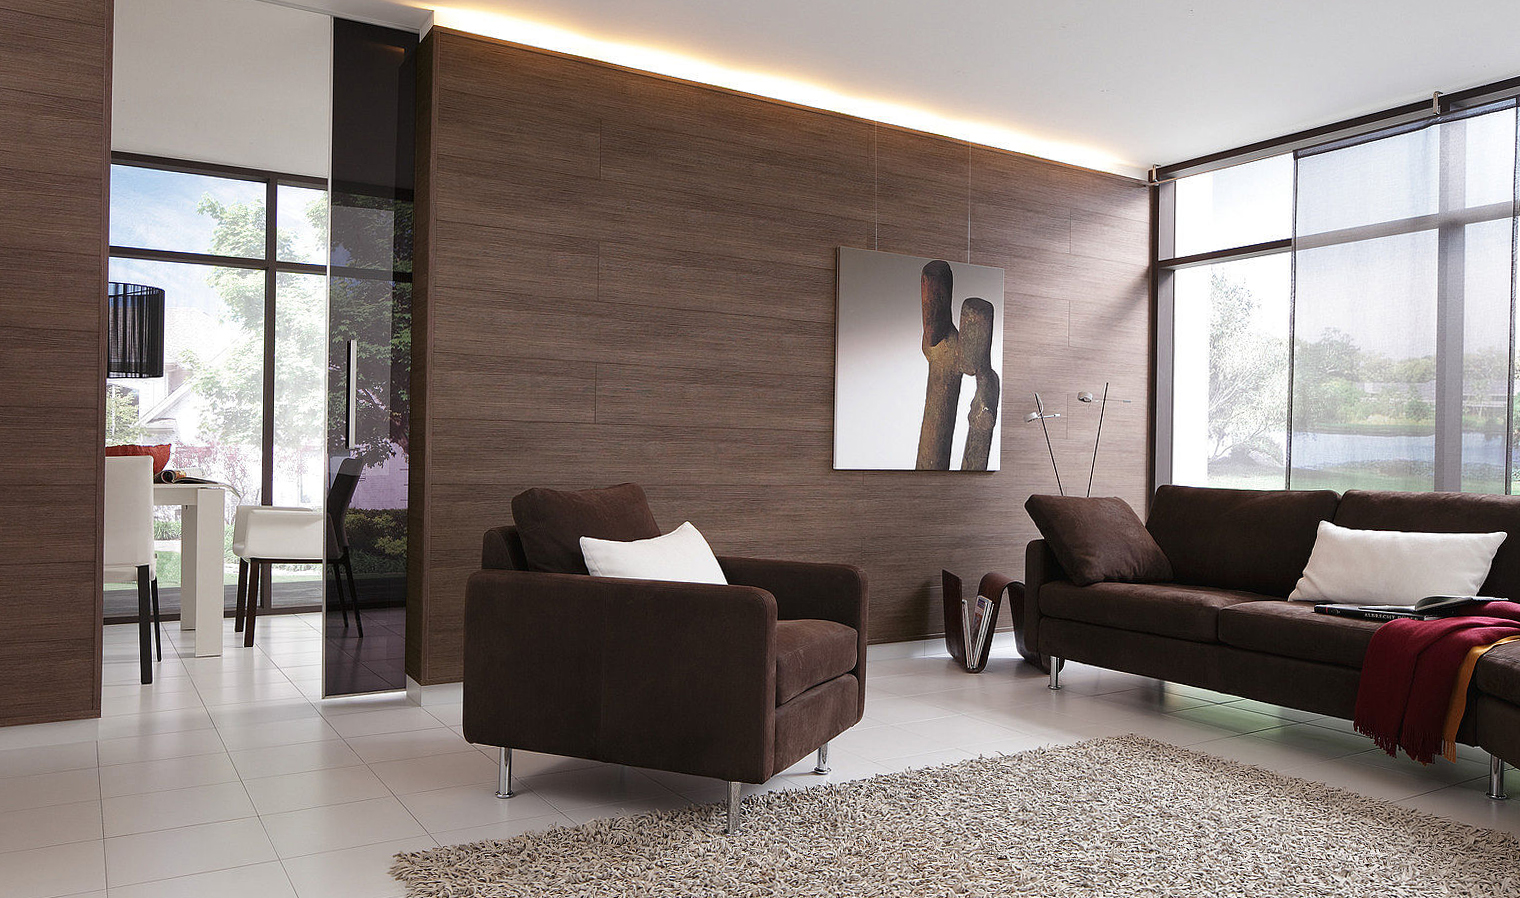
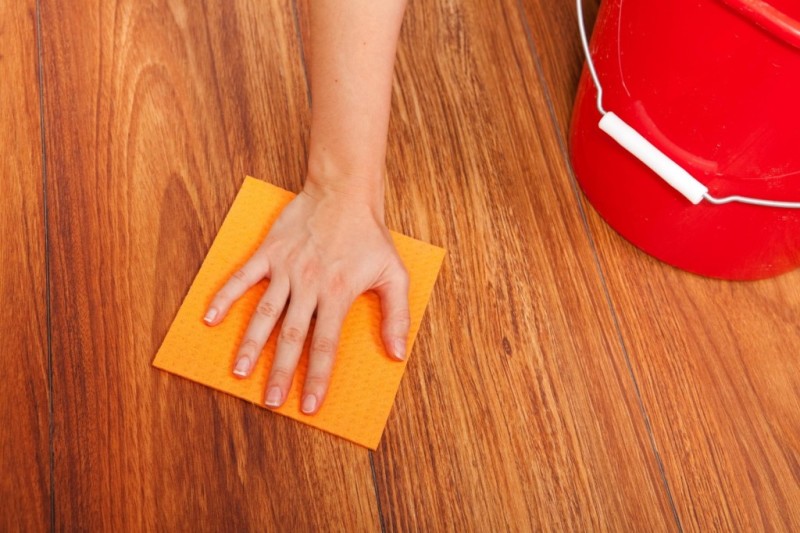
Laminate flooring is very durable (it lasts so long that you will not wait for wear and, rather, just want to change the furnishings). In this case, the coating is completely safe and can be disposed of in the simplest way. Decorating the walls with laminate is much more economical than using wood and even lining or MDF, but not inferior to them in external elegance.There are a lot of textures and colors mastered by technologists, and they will fit into any kind of interior. An important factor - easy care. Only occasionally need to rub the wall with a polish.
What if the walls are uneven?
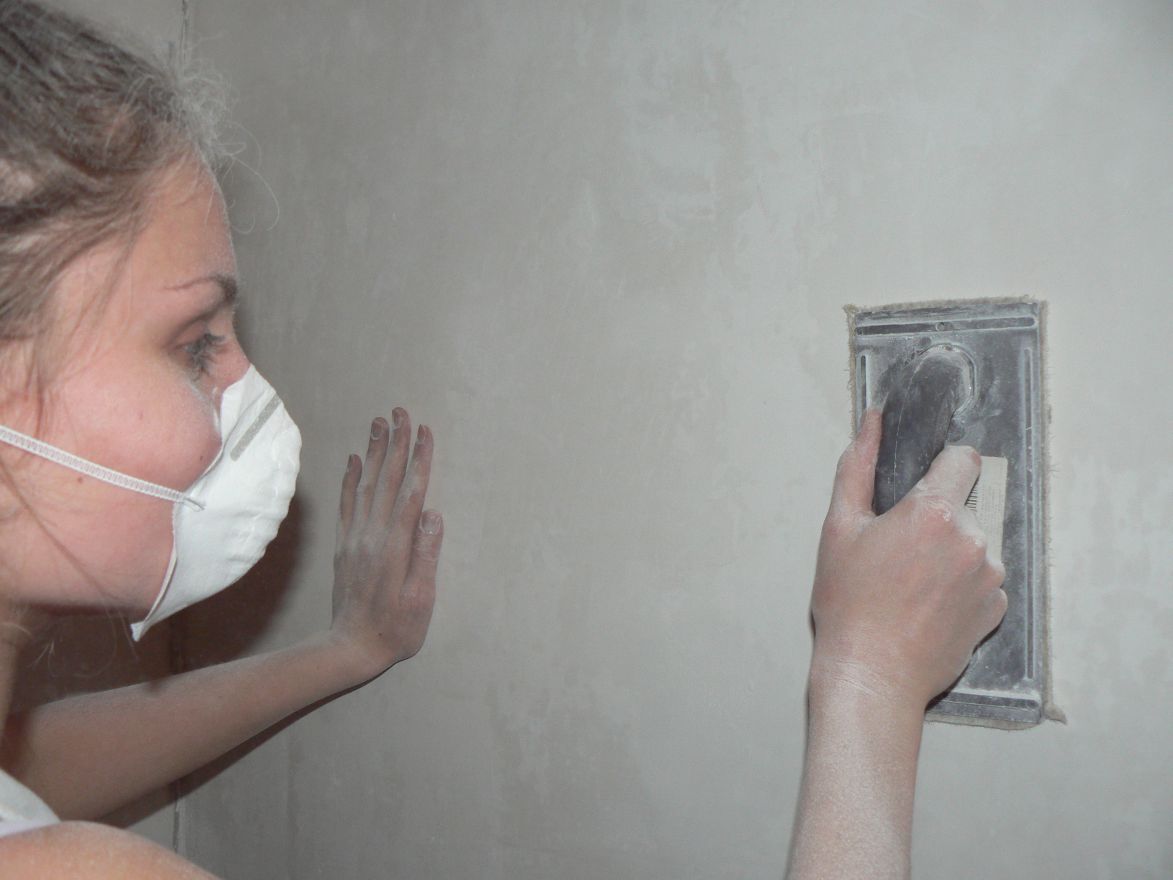
First of all, you need to carefully check whether they are really uneven. Take a rack, the size of which is equal to the height of the wall without taking into account the plinth. Important: before the start of the test measurement plaster layer, the trim should be removed so that they do not distort the result. The rod is moved vertically, the slightest bulges and dips are marked with a pencil. Speakers need to scrape or churn using chisels.
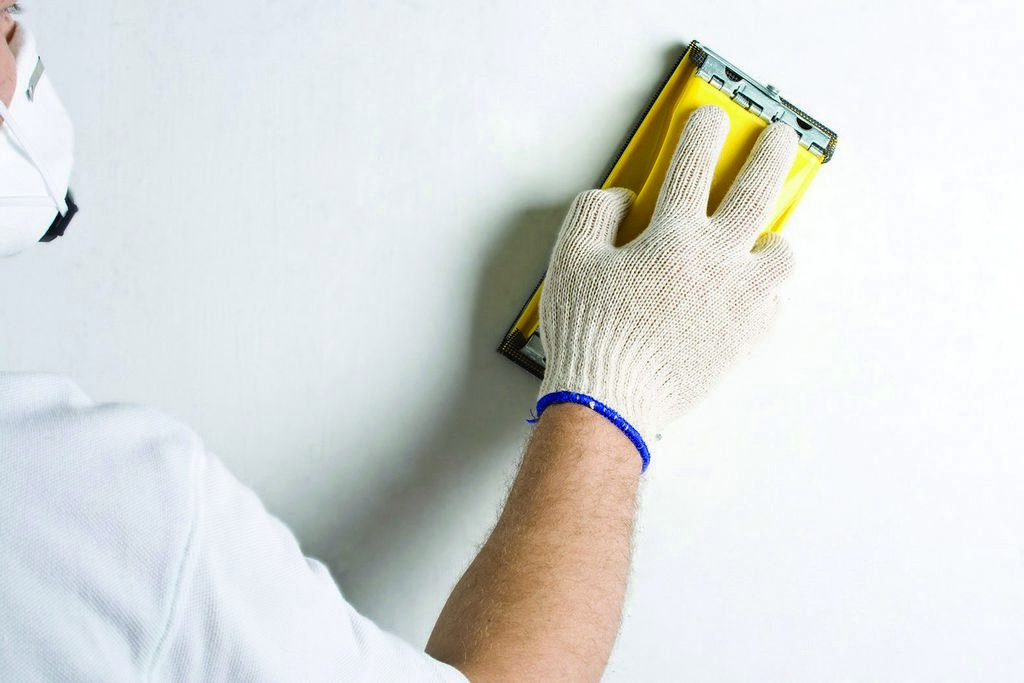
The pits are filled with putty and rubbed. Such simple methods will strengthen even the most uneven and chaotic wall. Evaluate how smooth the control rail itself is also not particularly difficult. Attach it to the wall and draw a pencil around the contour, rotate 180 degrees and attach the ends of the rail to the end points of the line. With the full coincidence of both lines, you can safely use this tool in your work. But the slightest deflection or bend indicates that you need a different rail (which, of course, check in the same way).
How and what to fix?
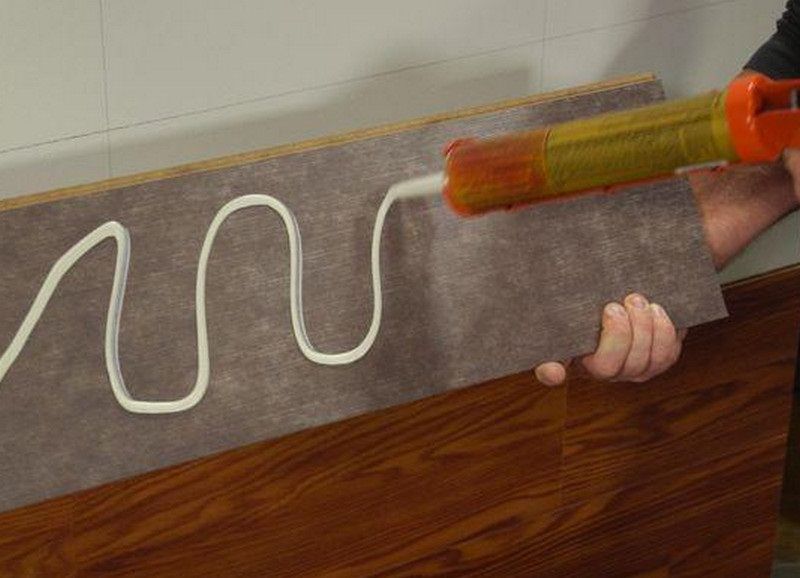
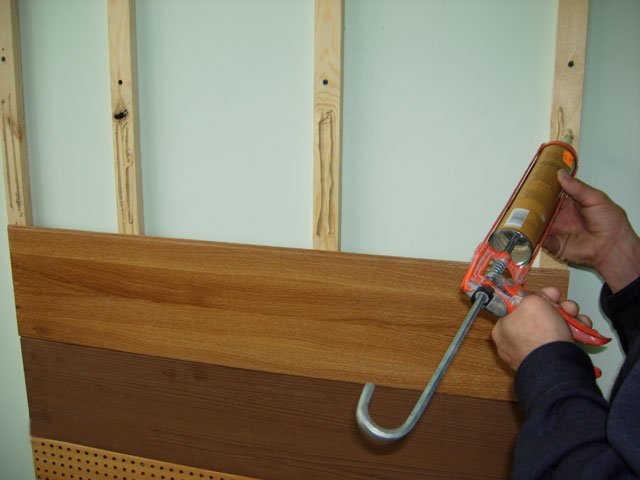
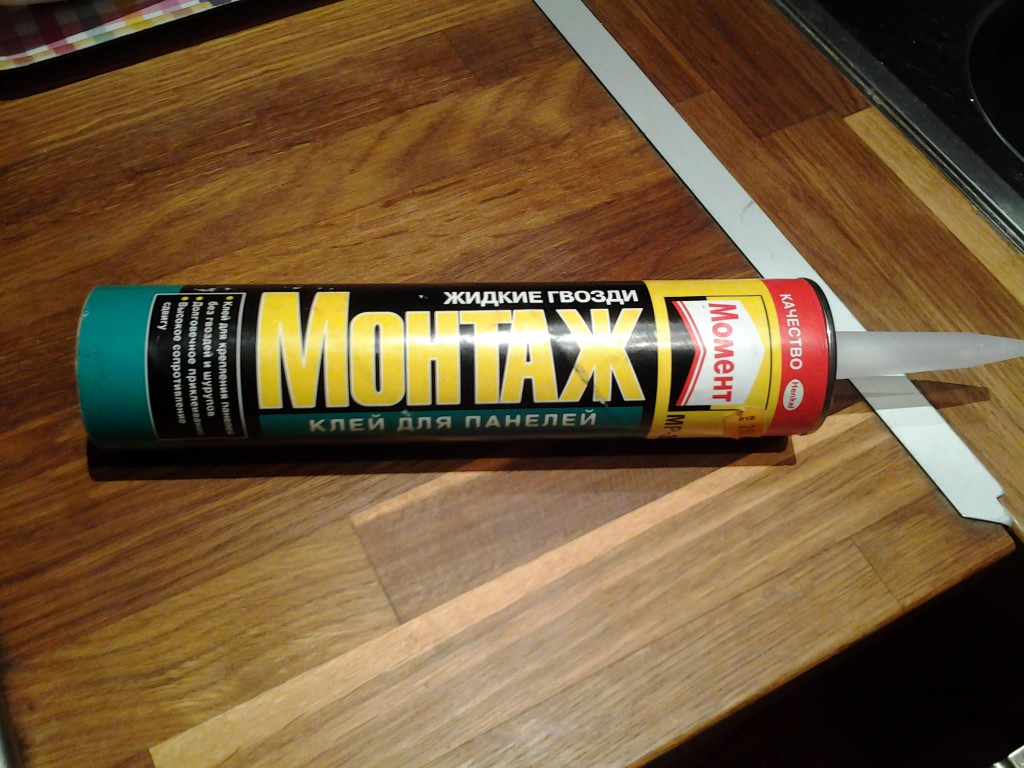
Fastening adhesive laminate should occur on a flat surface. For holding use liquid nails or construction silicone. The seamy side of the panel is covered with glue in the form of a zigzag, after laying the strip with the same glue, they coat the end, and proceed to the next chain. If the glue liquid has protruded on the boundaries of the blocks and lines, it is immediately removed with a soft cloth made of natural fabric soaked in cooking acetic acid.
Laminate, which is put on the glue, can not be fixed on the crate, it has too little contact strip with the support.

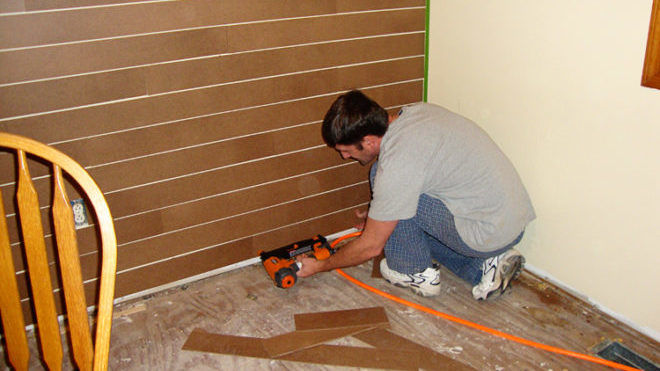
Groove type laminate is equipped with the same lock. It is permissible to unfold this coating without smearing the tongues with glues. Because the boundaries of the individual boards will not be stained with adhesive. If you do not want to glue at all, you can nail the product to the surface in the manner of an ordinary lining. It is attached to a lattice made of wood with furniture studs or adhesive cloths (the second variant is also suitable for an iron base).
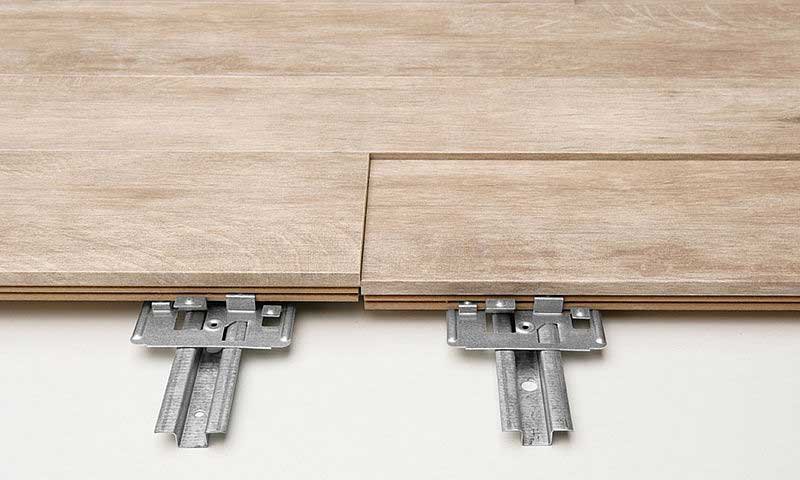
For wall layouts, you can also use a click format laminate - an improved version of the sheet piling. The rift of the ridge is pear-like, as is the structure of the canals.The connecting structures push the lobe in the niche by tilting the pre-block. Then twist the product to the base and at the same time slightly press, so that the lock closes. The clique type of laminate is good in high hardness.
Climers with a click coating are incompatible. If you apply them, snap lock will not work. But it is quite possible to self-glue the block on the crate of wood.
Ways
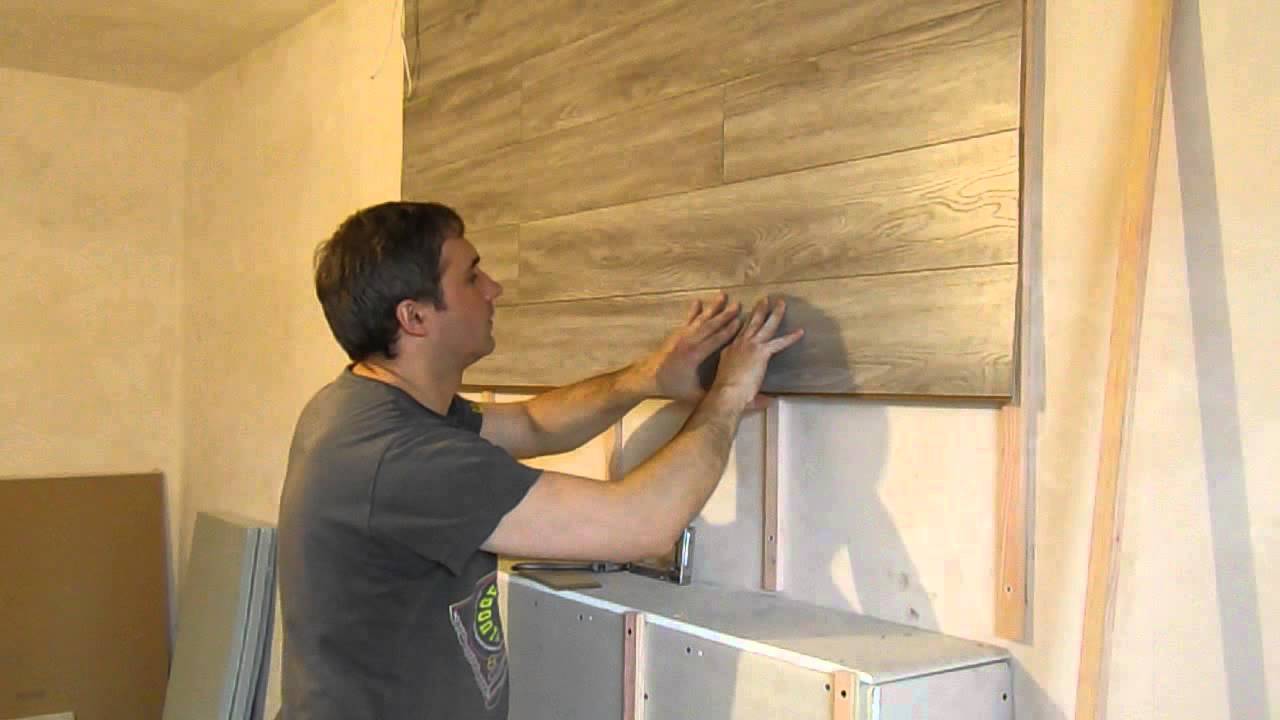
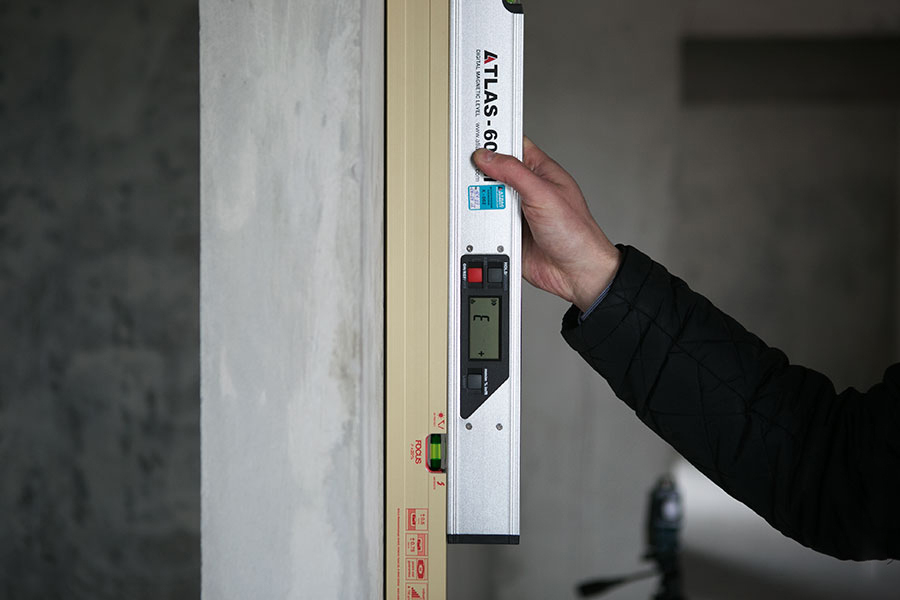
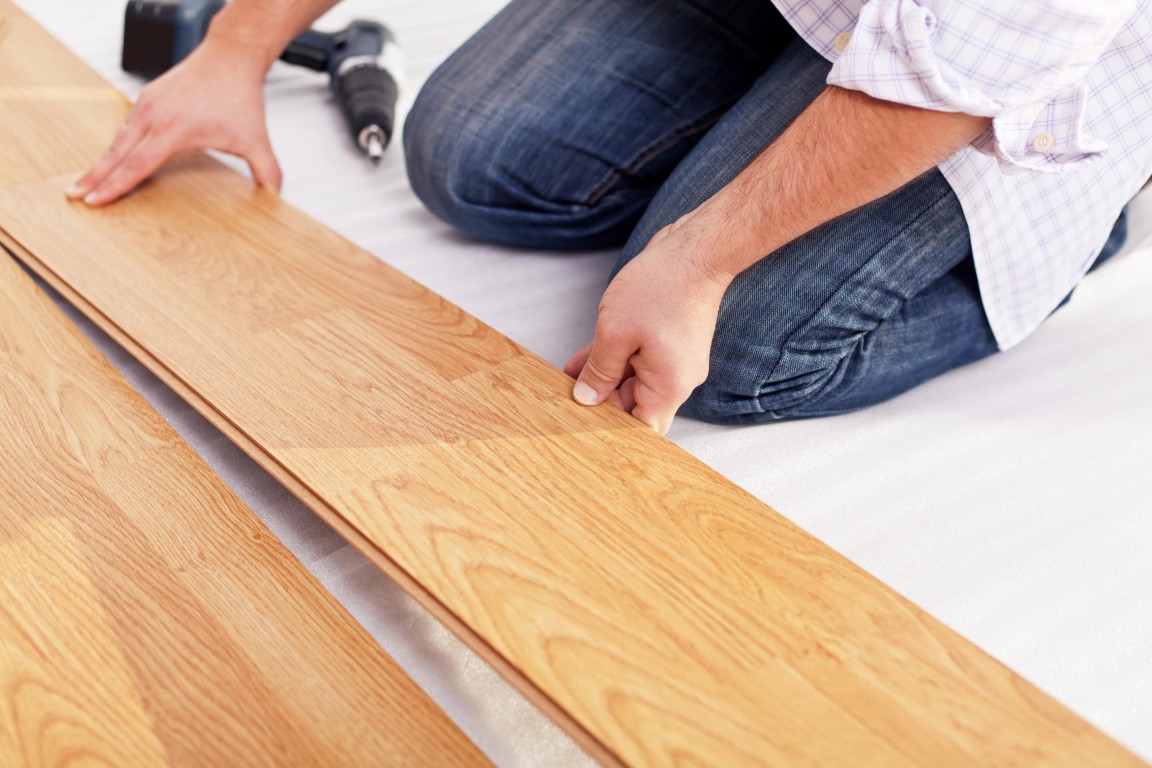
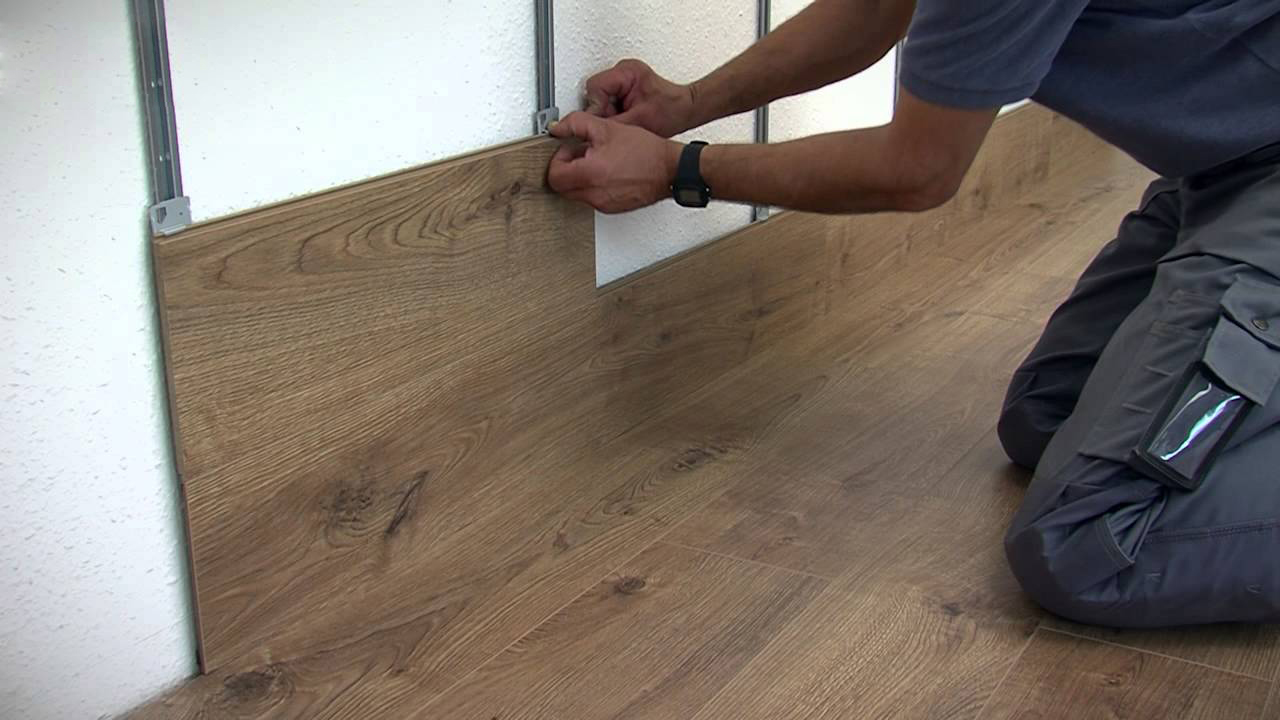
You can attach the laminate to the walls either with glue and liquid nails (but you will need to thoroughly align the base and prime it), or with the help of a batten grill (but it will take up some of the space, therefore it is not recommended in small rooms). If you decide to nail the cover on the entire wall or on its upper part, the work begins from the ceiling to the floor; decorating the lower half of the walls is from the floor up. In order for the planks to be fixed thoroughly, check the correctness of their installation using the construction level. When there are locks in the panels, they should be glued like this: first, you should glue the surface with adhesive, then put it into a lock, and only after that attach it to the wall.
If you think that one glue is not enough, additional strengthening of the structure with nails or staples is permissible. The tongue-and-groove board is attached to the crate with clamps at the top and bottom.
Additional elements
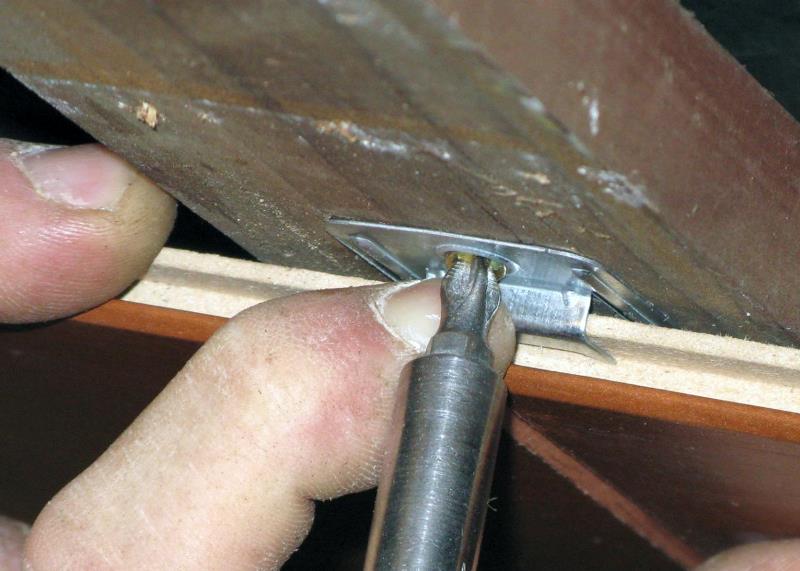
The choice of objects to strengthen and retain the structure is extremely important. Most ordinary seemingly klyaymery are available in a wide range, and by purchasing an inappropriate product, you devalue all your work. The thicker the panel to be held, the larger the tongue diameter should be. Compared to other types of mechanical fasteners, kleimer valuable low risk of splitting panels. They are great even in rooms with significant humidity. The staple with a serrated protrusion is hammered into the board and held by self-tapping screws; a bracket with a flat protrusion will help to press the bulging part of the click lock to the wall or crate.
Selecting liquid nails, specify sure the area of their application. They are both universal and designed for interior work. Very dense laminate on the walls do not attach, therefore it makes no sense to use liquid nails to hold heavy objects.Acrylic composition can not be used at low temperatures.
Close the end of the laminate on the wall is not so simple, but this problem is solved. According to experts, it will help profiles in the form of the letter P, which are made from a variety of materials - there are aluminum, and plastic, and even wood. Alternatively, you can purchase a flexible rubber sill. You can attach all these blocks with the same liquid nails or glue-sealant. Edge tapes are also sometimes offered, but any method should not disturb the color harmony of the canvas.
A separate topic - guides when wall mounting laminate; step between them should not be done more than 0.6 meters.

How to lay?
Laminate, becoming more wet, swells. And therefore, no matter what method of installation you choose, be sure to make a gap of 1.5–2 centimeters from the corner over the entire perimeter. Splitting wedges on the walls can help with this, but there is a far better solution. Bottom put completely flat boards or slats of the required thickness, which are wrapped in a thin plastic film. And on the sides you can already safely use the wedges, there they will not be squeezed out by the weight of the skin.
Experts recommend that after completing the work, put a plinth on the gaps, so as not to accumulate there garbage and dirt.
Laying paintings should start from the left far corners, it is conducted in the course of hours. It is more comfortable for left-handers to work on the right against the clock. Installation of laminate coating is allowed both vertically (from left to right) and horizontally, with the second method being preferable. Holistic stripes, contrary to imaginary evidence, is not simpler and not cheaper. The joints running in one line are required to be covered with baseboards attached to the mounting nails.
The technology involves drilling mounting holes directly through panel joints. And even in the case when the wall is faced with unbreakable strips along its length, you will have to put baseboards every 170 centimeters or even more often. Non-explosive panels support each other only in one direction, and if there is no additional reinforcement, the lining can be folded.
No matter how well you try to mount the coating, no matter what quality nails, glue and glue are used, these retaining elements may stop performing their function.Excessive convergence will create increased mechanical stress.
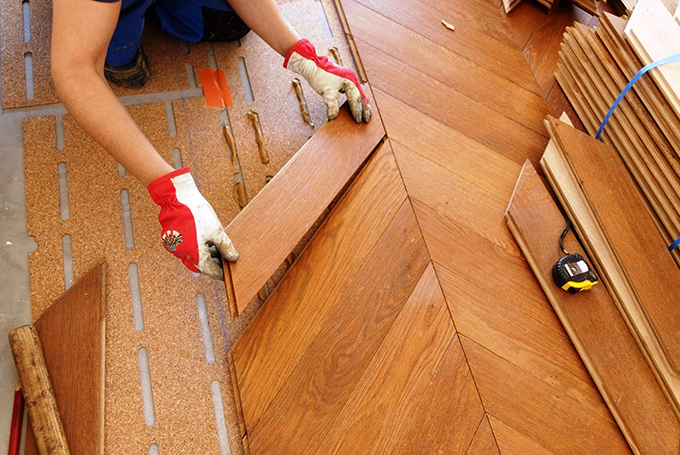
It is best to lay the laminate using the comb method: strictly in the middle cut as many strips as would fit in half of the horizontal rows. When ten lines can be laid in height, five bands are required to cut. Installation is variable: one piece, then cut, again a whole block. Such a solution will make the load on the fasteners as uniform as possible.
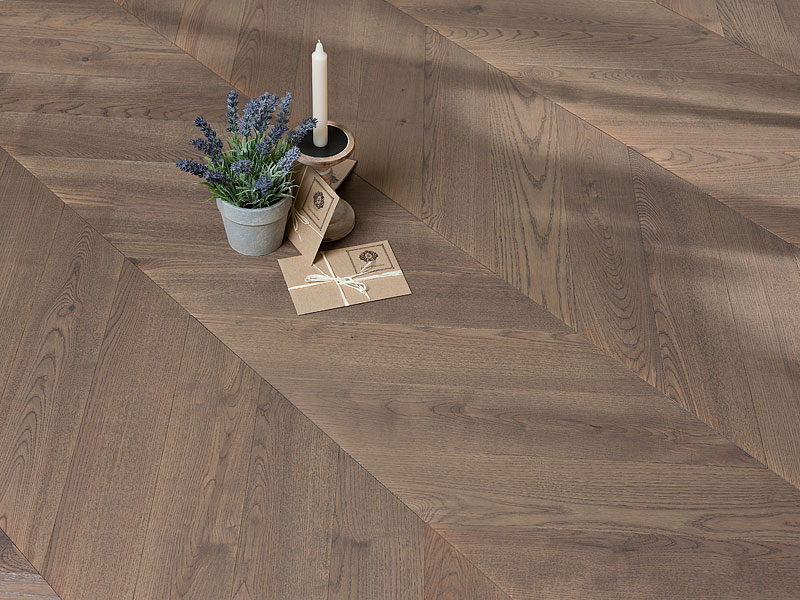
In some cases it will be more interesting to lay out the laminate in a diagonal way; then it is taken in two different colors. But if you do not have solid experience in working with such a coating or special training, it is not recommended to take up diagonal styling. Putting the coating vertically on the glue is noticeably lighter: you will, of course, have to clean and level the wall, but you will not pay for the elements of the sheathing. You can limit the panels of only two types (long and complementary).
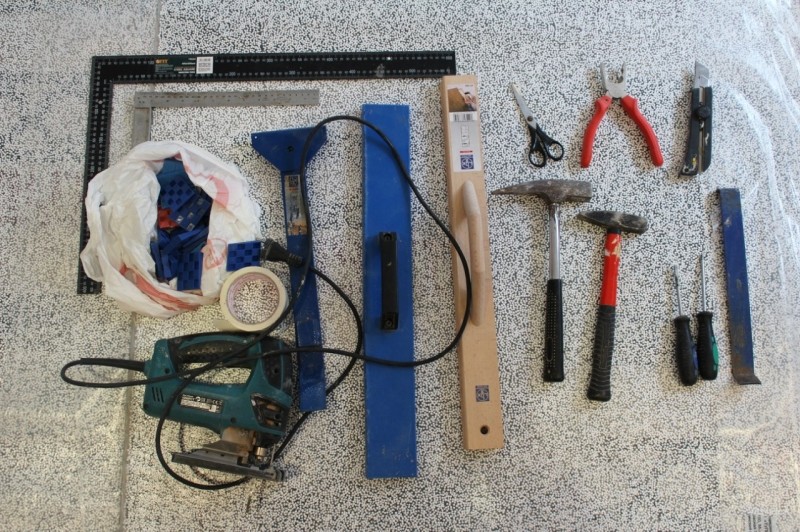
To install a laminate with your own hands, buy an electric jigsaw, it will help to cut the panels as accurately as possible, and later it will be useful for other works.You will also need consumables, a tamping hammer, a short (up to 40 cm) ruler and a square, a tape measure, restrictive wedges, a tamping block, a bevel cutter, a saw, a drill and a perforator. To finish the laminate wall, which was previously covered with wallpaper or painted, using a spatula or a perforator with a nozzle, the coating is removed. The final removal of irregularities is achieved with sandpaper.
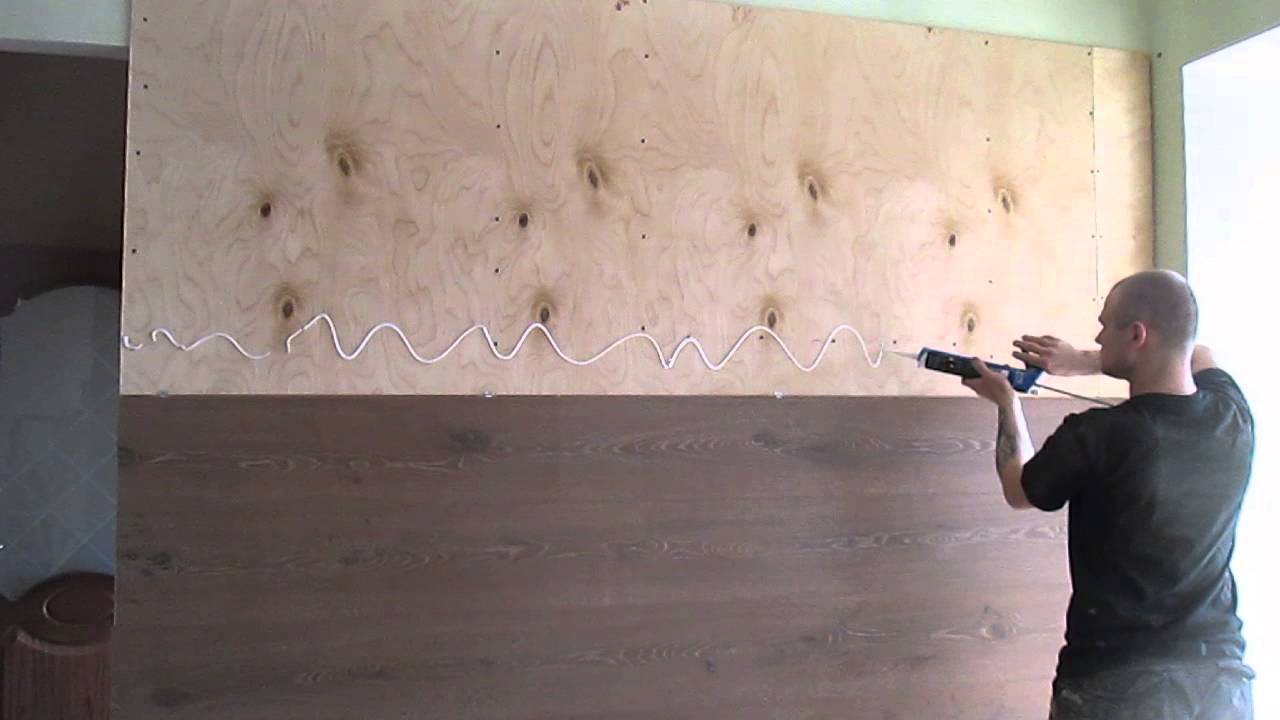
Having decided to create a wall with illumination, immediately lay all the cables, make a diagram with their placement and points of connection (connection) in order not to get confused in the future.
Detailed process of laying laminate on the wall, see the following video.
Important nuances
Laminate is not only beautiful and aesthetic, it allows you to seal up the gaps in the balconies and loggias. With proper selection of coverage will serve you at least one and a half decades.
Always consider the likely mechanical load and risk of abrasion. If you have to clean the walls often or there are cats in the house, too thin plasterboard coatings will be unacceptable.
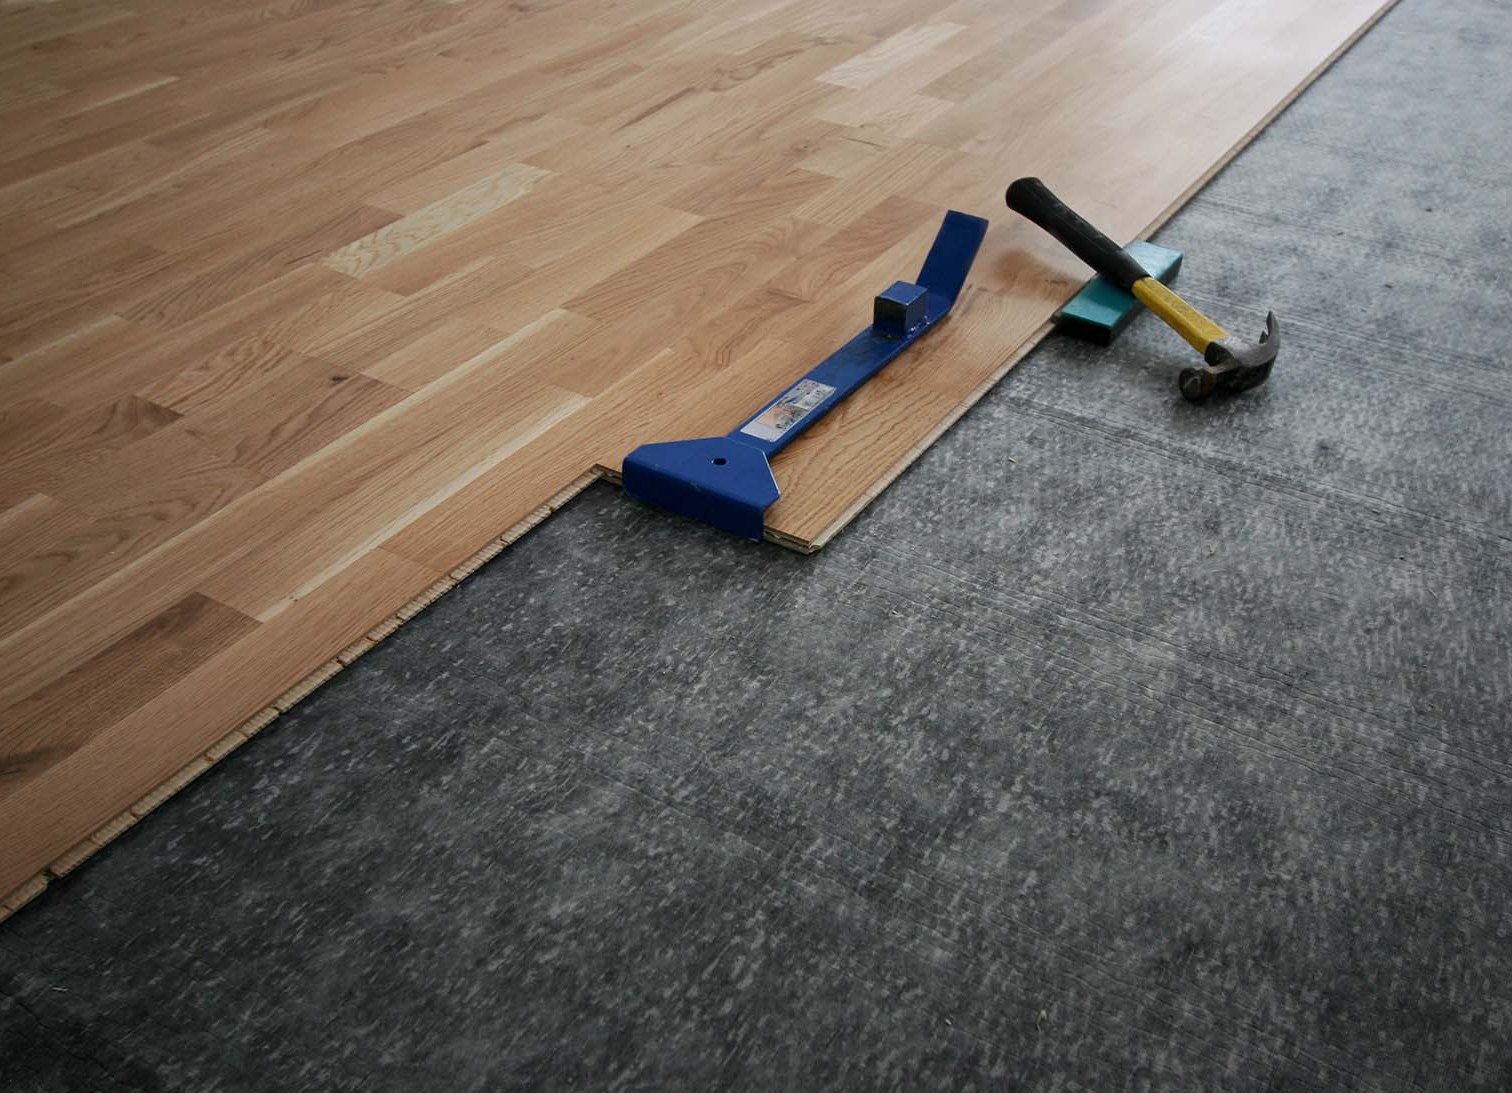
Fitting and trimming will inevitably increase the material consumption, because the resulting total figures of the need for it can be safely increased by 10%, then the necessary reserve will be created.As already mentioned, the indentation around the perimeter should be 1.5-2 cm, it is set on the sides with spacer wedges, and the bottom with a special board or plank. Always use a lug for tamping; if you beat the hammer without it, directly, you can create curved slits. With the help of the rule (hook), you can attach the last row in the corners, for this knock with a hammer or hand on the surface of the "flag".
When creating the batten, it is recommended to use slats of 3 centimeters, the distance between the screws should not exceed 40 millimeters. The slats themselves should be at a 90 degree angle relative to the panels, so first outline what and how it will be installed.
The exact distance separating the edge of the laminate from the wall boundary is determined individually, taking into account a number of nuances. If you can not find this distance, you should seek the help of professionals.
Enough when using coverage never deviate from these rules to avoid many serious problems.
Design options
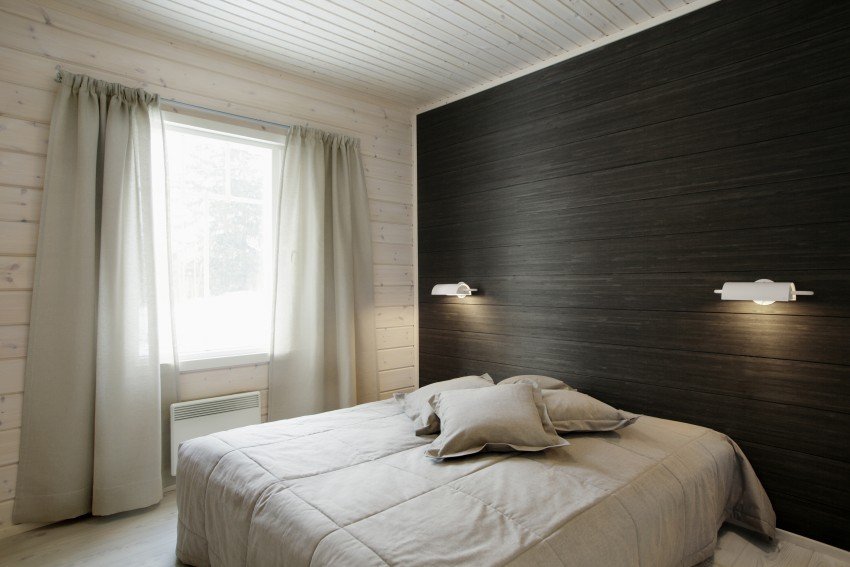
Having laid out from the additional panels the lower strip with a length of 0.6-0.8 meters, then up to the ceiling the wall of the corridor can be sheathed with the main panels.Horizontally looking connection closes on baseboard. Vertically directed joints are fixed with parts of the same product at a certain interval, and it starts up along the lined acrylic surface. So it turns out the romance of the Middle Ages, appropriate in the bedroom and in the living room. Replace the torches can fluorescent lamps.
If the main blocks are used in the lower part of the hallway walls, and a completely white stripe is left above, you can create a screen for illumination using LED strips. It is not necessary that such a screen was at the top. Another design option in the apartment: the wall is light above and below, and a dark strip is laid in the very middle. It is possible to beat dark colors with paintings and interesting photographs, decorative ceramics, applications and other original solutions.
The attic design will look good if you cut off the complementary strips by a third of the total length, put a comb on the top and bottom, and take the middle part with the main panels. Depending on the color, they create light or dark surfaces.
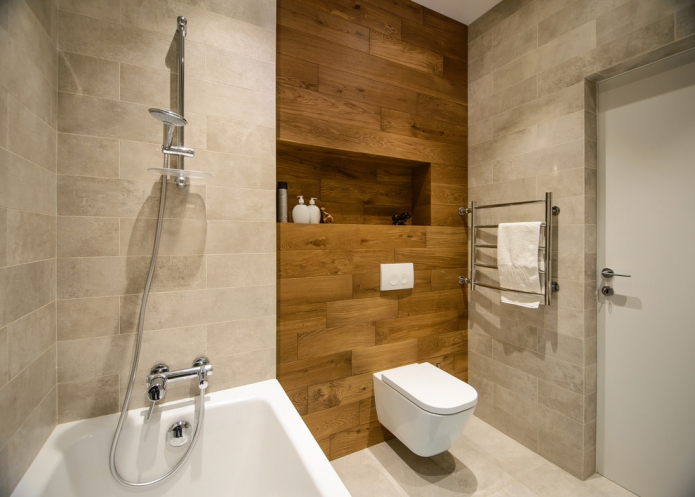
For a bathroom and a toilet, walls that imitate the appearance of a chessboard will do well: the main and auxiliary strips are used in the same quantity, cut into squares.You can add originality by gluing on separate “cells” symbolic images of pieces made of sheet plastic or even simulating a set of sketches.
On the internal loggia and the balcony, you can allow yourself the maximum freedom of expression: the main and auxiliary panels are sawn in proportions of one to two, an arbitrary pattern is laid out of them, or simply “artistic clutter” is created. Consider that improvisation is good when it is prepared. First, lay out the intended combination on the floor to make sure that there is enough space on top of all parts and there will be no failure. Then in fragments, transfer the composition to the wall.
There are a lot of options for decorating walls and ceiling with laminate, but we must be more attentive to the design of narrow rooms. Use computer simulations and number the segments or create a simulating application of colored paper on the table (number the pieces on the back side). This decor can be stuck to the wall, completing the composition.
Beautiful ideas in the interior
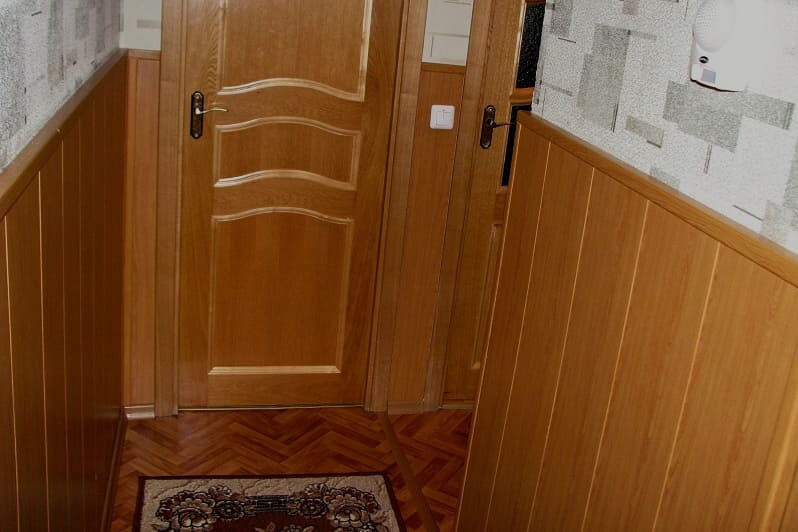
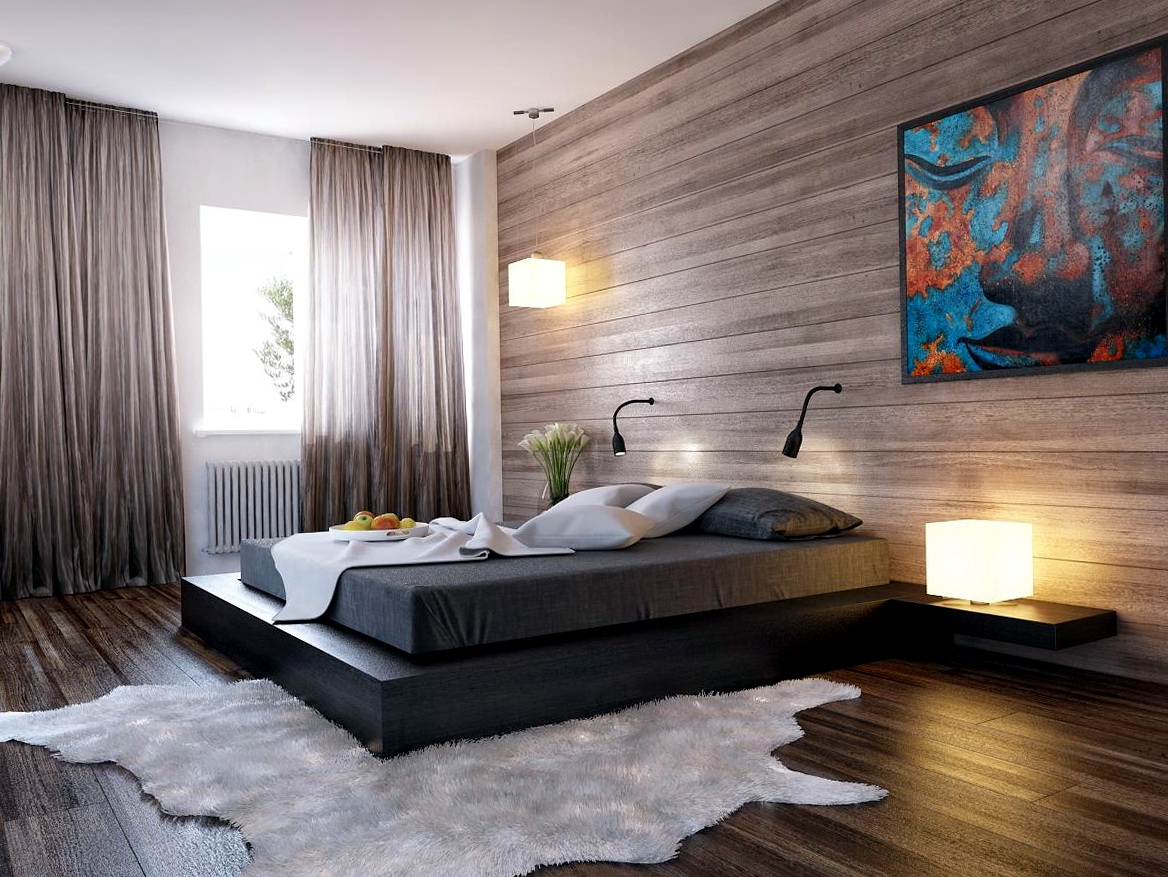
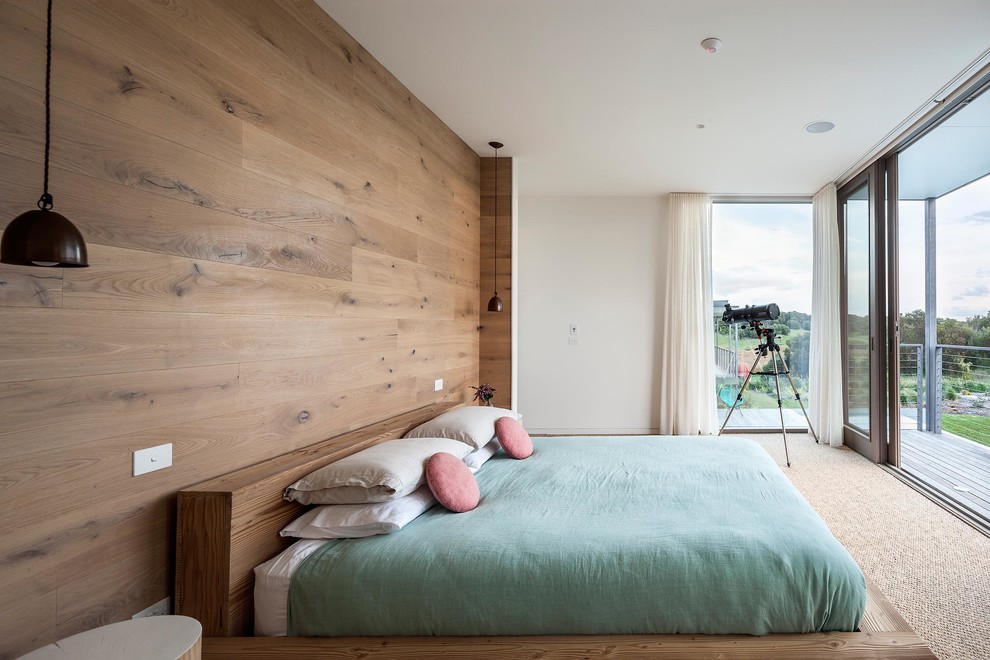
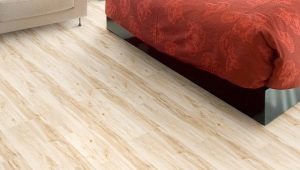
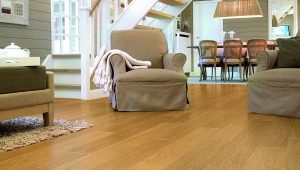
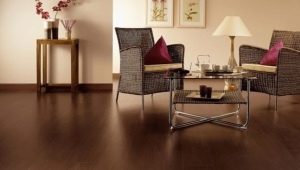
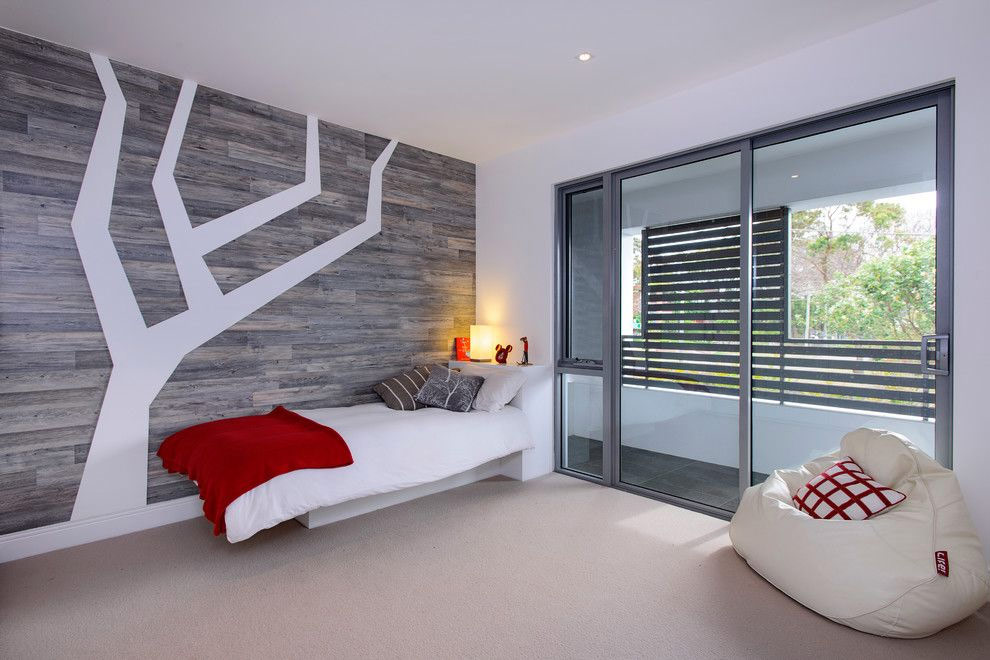
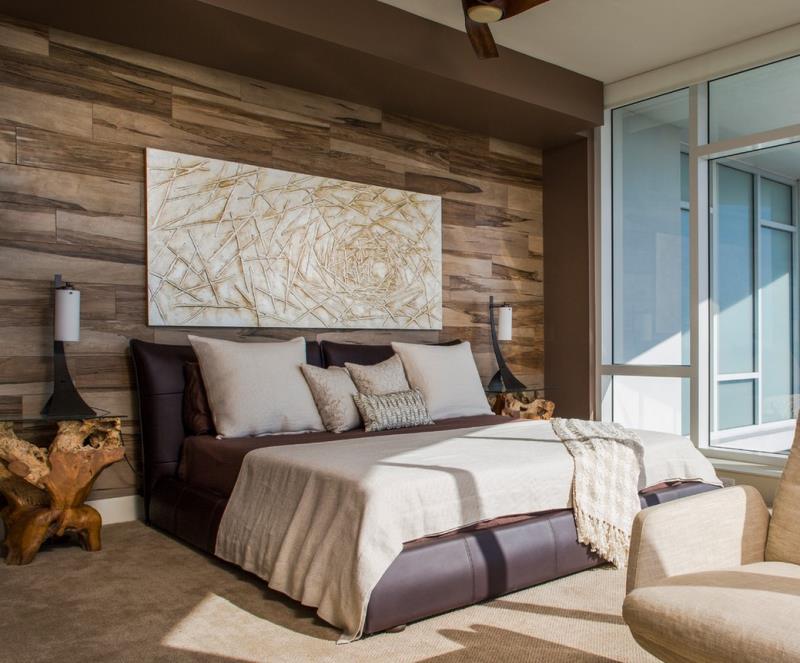
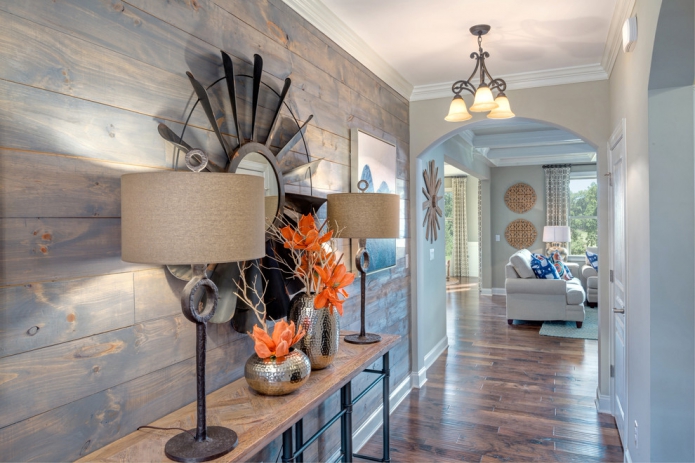
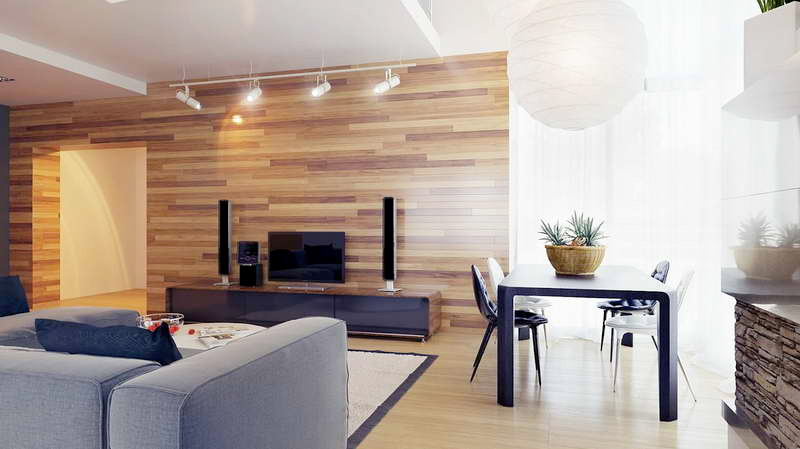
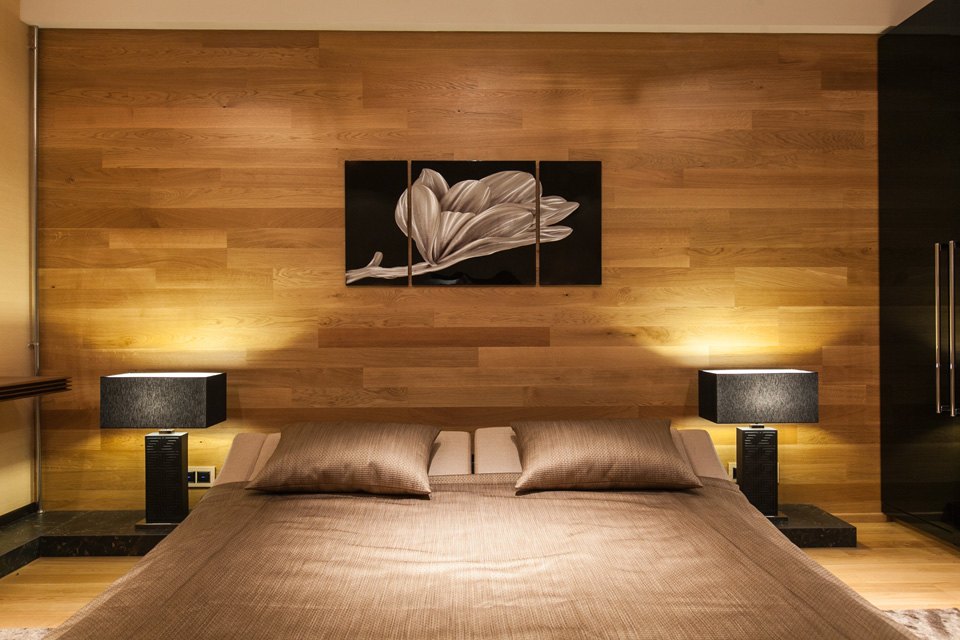
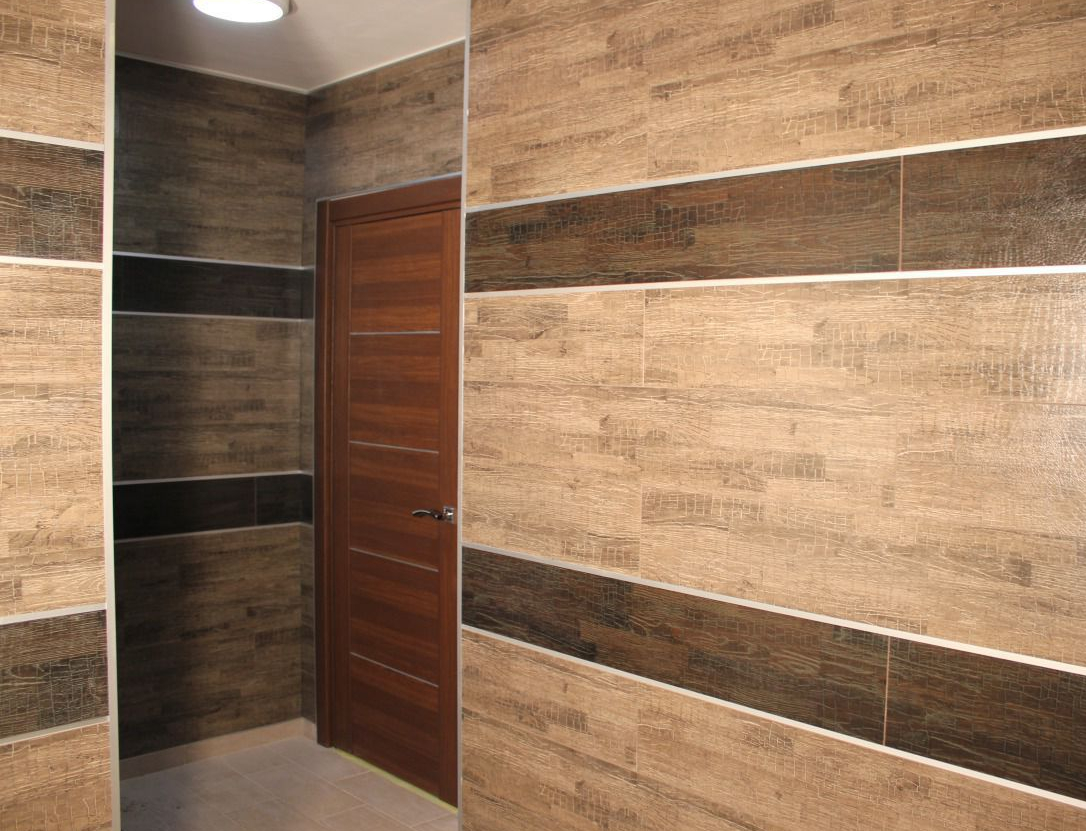
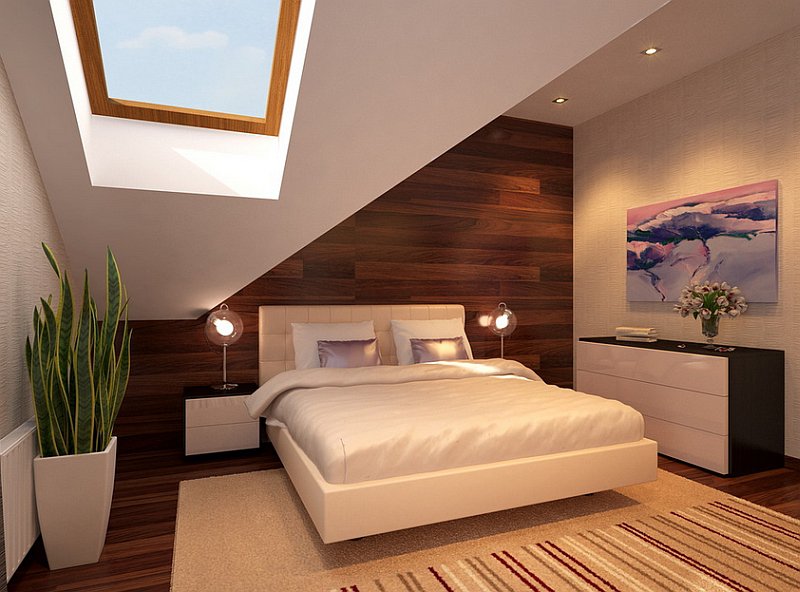
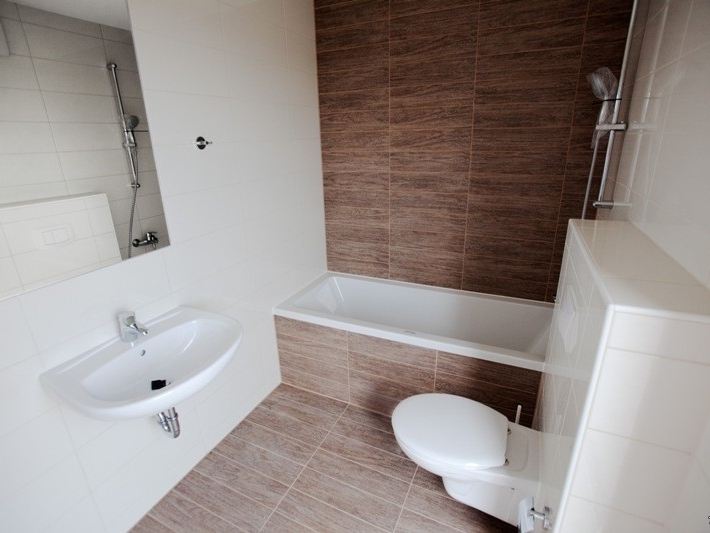
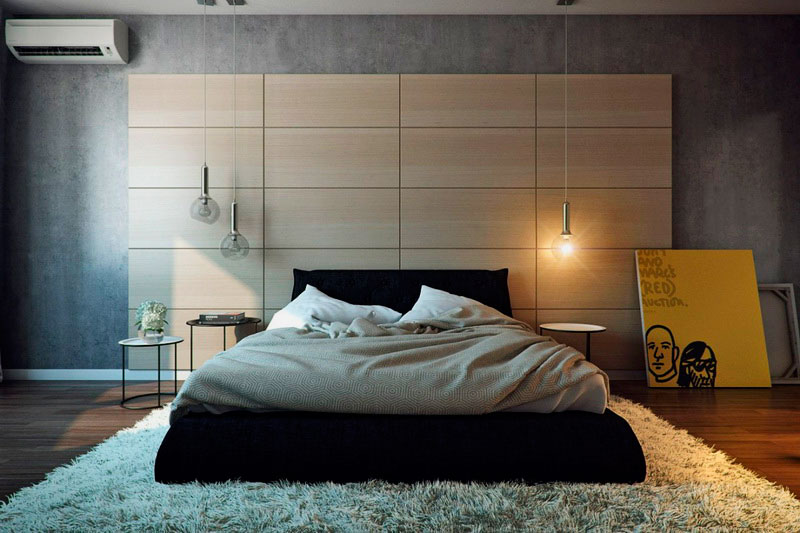
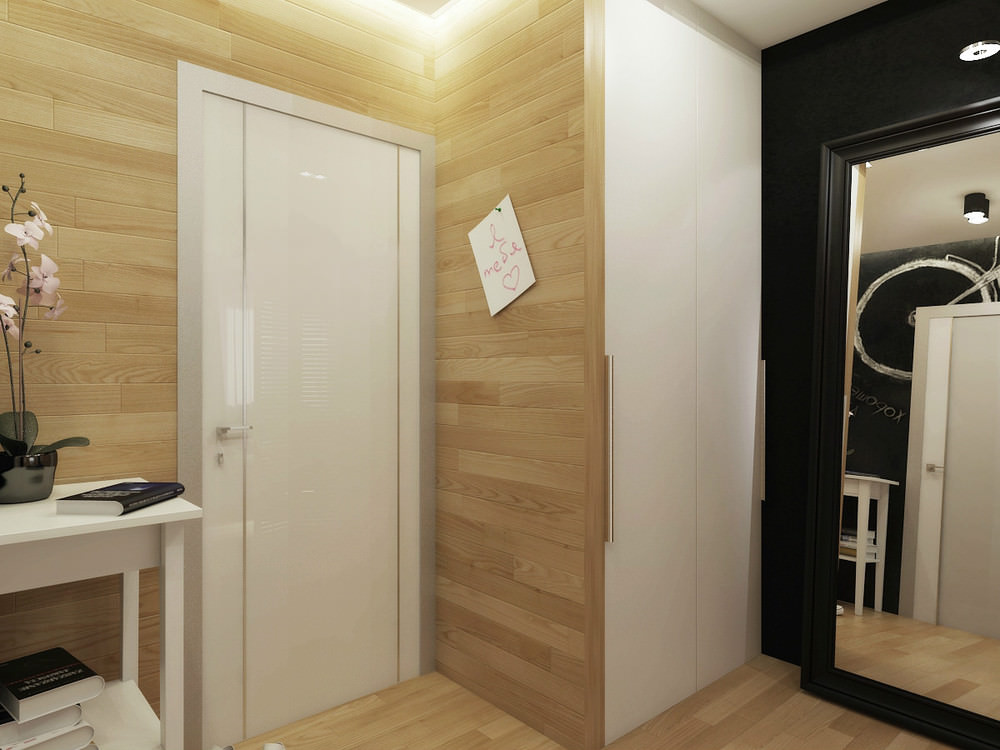
The design of rooms for different purposes may vary.In the hallways, they usually decorate the entire surface of the walls - from below with laminate, reproducing the look of wood, and from above - with wallpaper that is lighter. In the kitchen, you can pick up a coating that simulates cork, marble, wood, granite and tile. For bedrooms, it makes sense to select solutions that depict natural wood - they will make the view more respectable and richer. As an option, consider using panels with dissimilar patterns, colors, and patterns. It is advisable to select plots as gently and gently as possible, which will bring a feeling of warmth and comfort to the room.