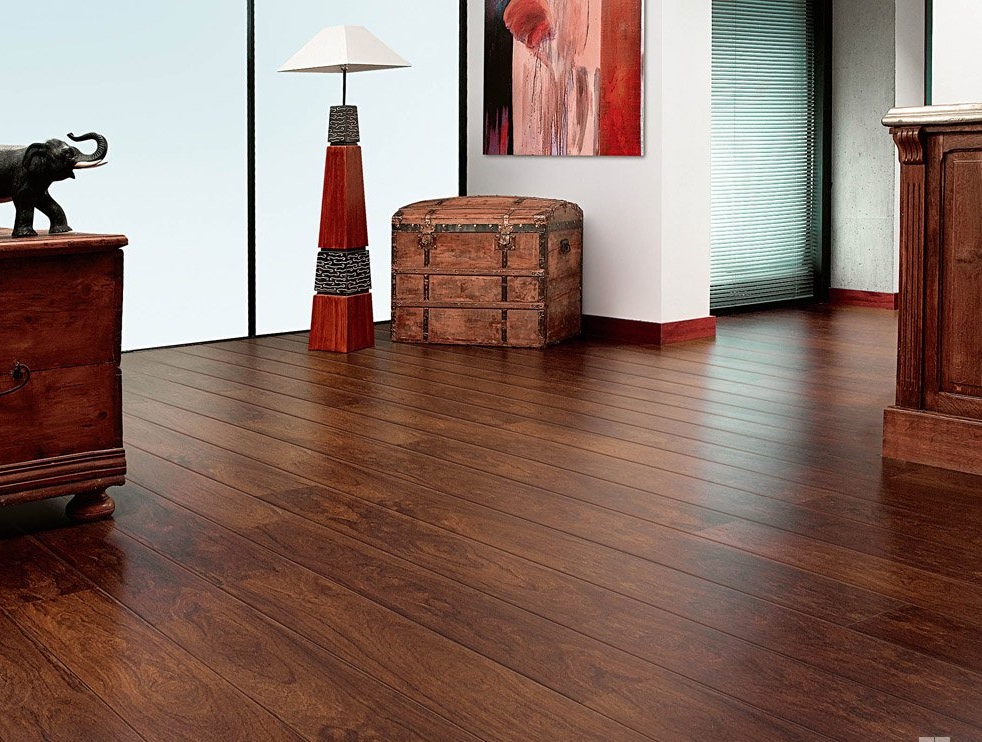
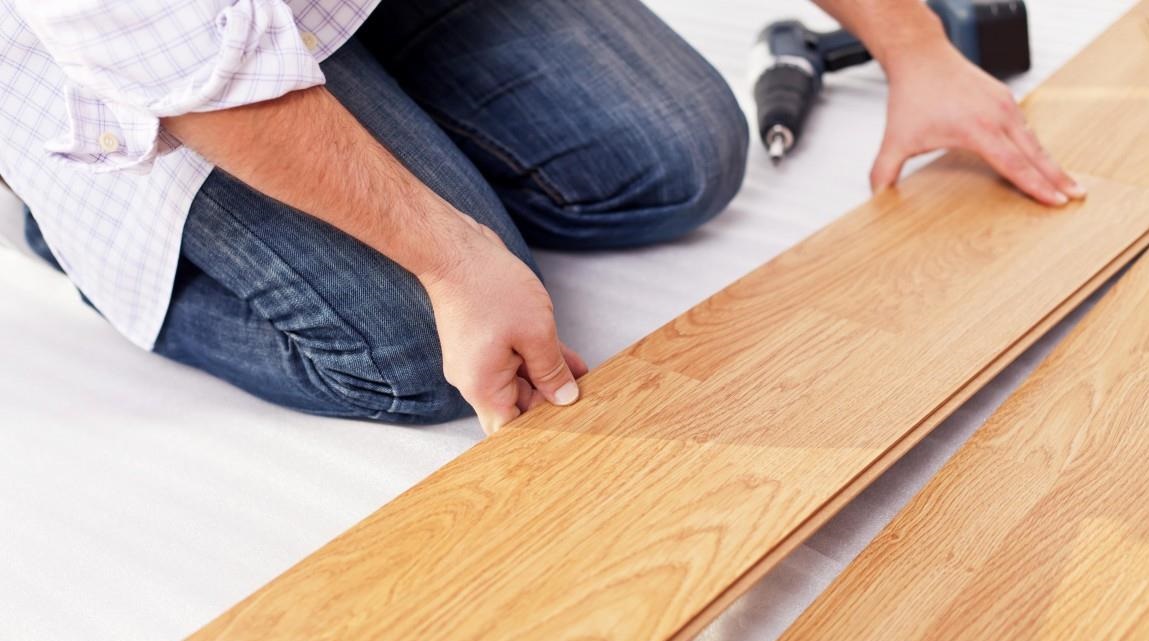
Do-it-yourself laminate flooring: step by step instructions
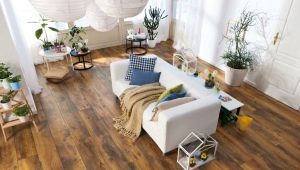
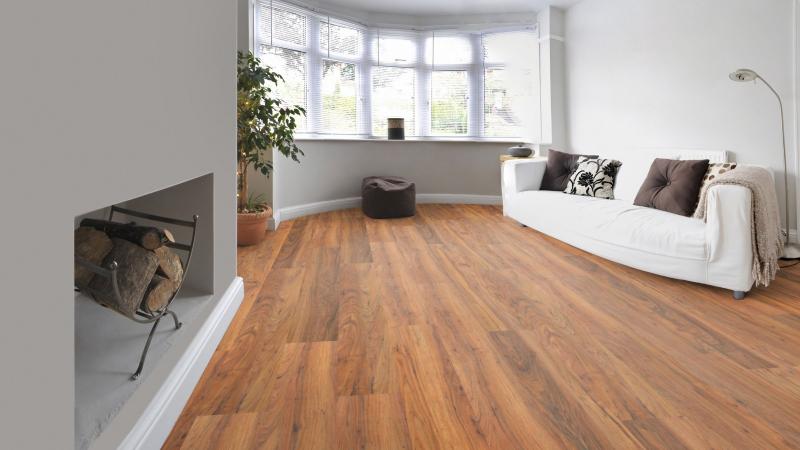
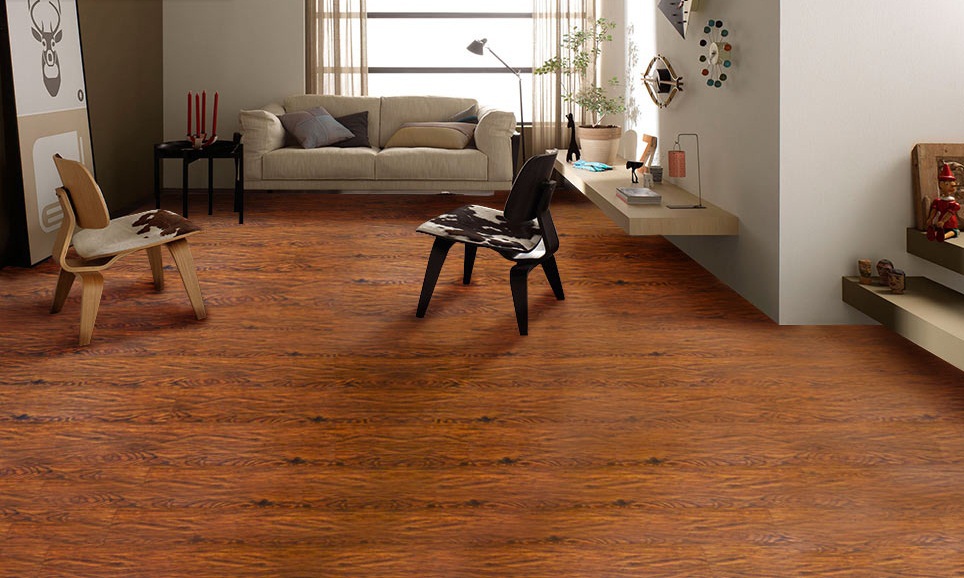
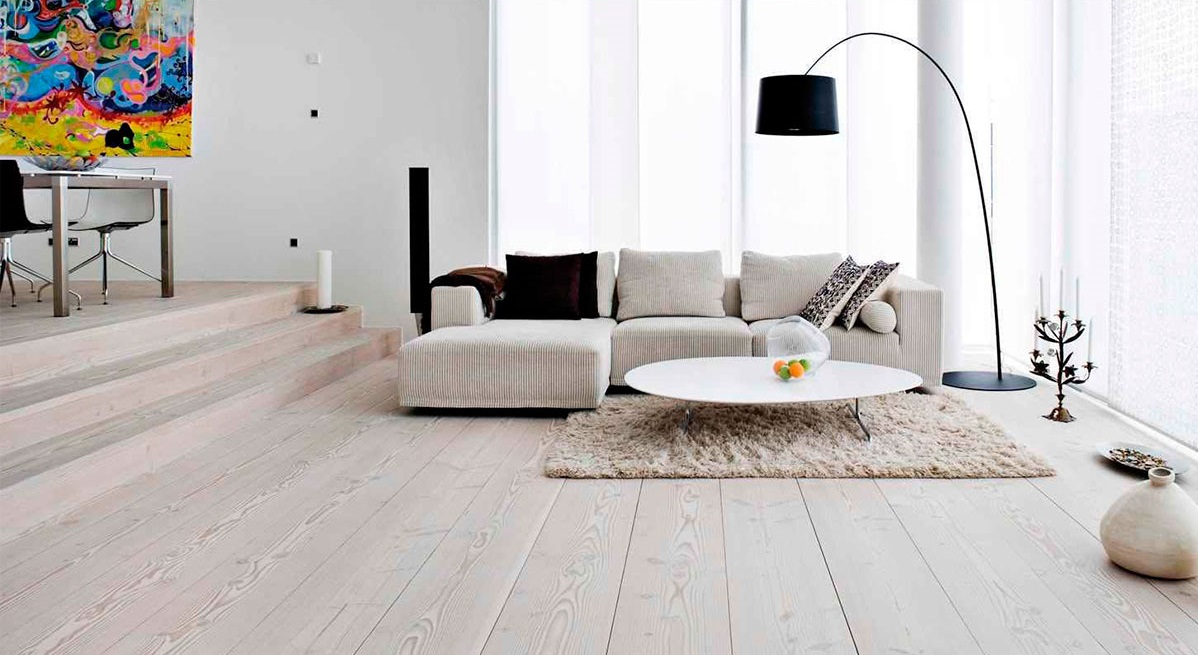
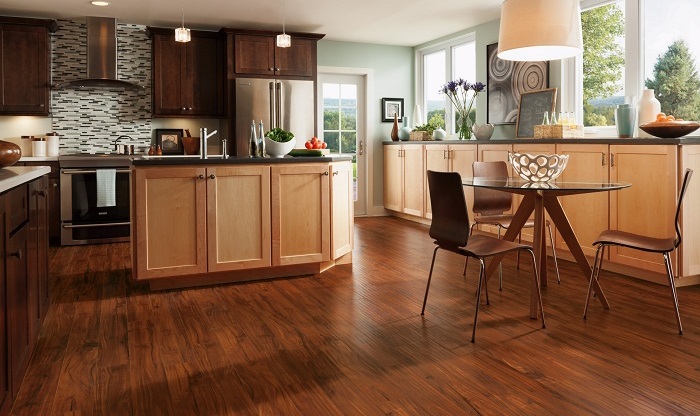
Properly laid laminate is the comfort of your home. Classic and vinyl, with a decorative and natural top layer - each type has its own advantages and disadvantages, one thing unites them - the possibility of laying with your own hands.
Types of laminate
Each type of coating has unique characteristics. To choose the desired option as a floor covering, you need to familiarize yourself with its main types and study their properties.
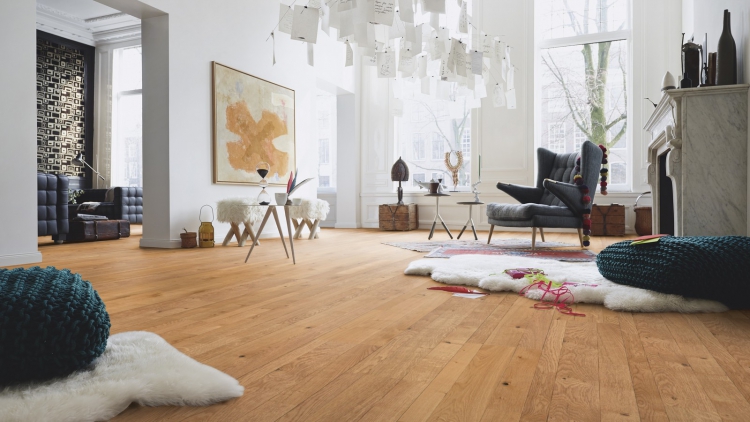
Classic laminate
His characteristic:
- basis - HDF or chipboard;
- durable and wear resistant;
- UV protected;
- stain resistant;
- without a special substrate that comes bundled or purchased separately, has a boom;
- tactile cold material;
- some options are mounted on the "warm floor";
- heat resistant;
- safe with formaldehyde emission class E1, E0;
- The coating of 33-34 classes is impact-resistant, moisture-proof or waterproof, designed for increased loads and implies a long service life - up to 30 years in a residential environment;
- some surfaces — glossy, lacquered — are difficult to clean;
- they may not be equipped with anti-slip compound - such can be dangerous to use;
- any class is exacting to the base;
- this covering is not mounted in not heated houses;
- moisture-proof classes do not withstand high humidity: their laying in the kitchen and in the bathroom does not make sense;
- antistatic properties of the coating (if any) will allow to clean less often and, possibly, save from static accumulation in the floor;
- locking system provides the possibility of rebuilding and repairing the damaged area, instead of replacing the entire floor;
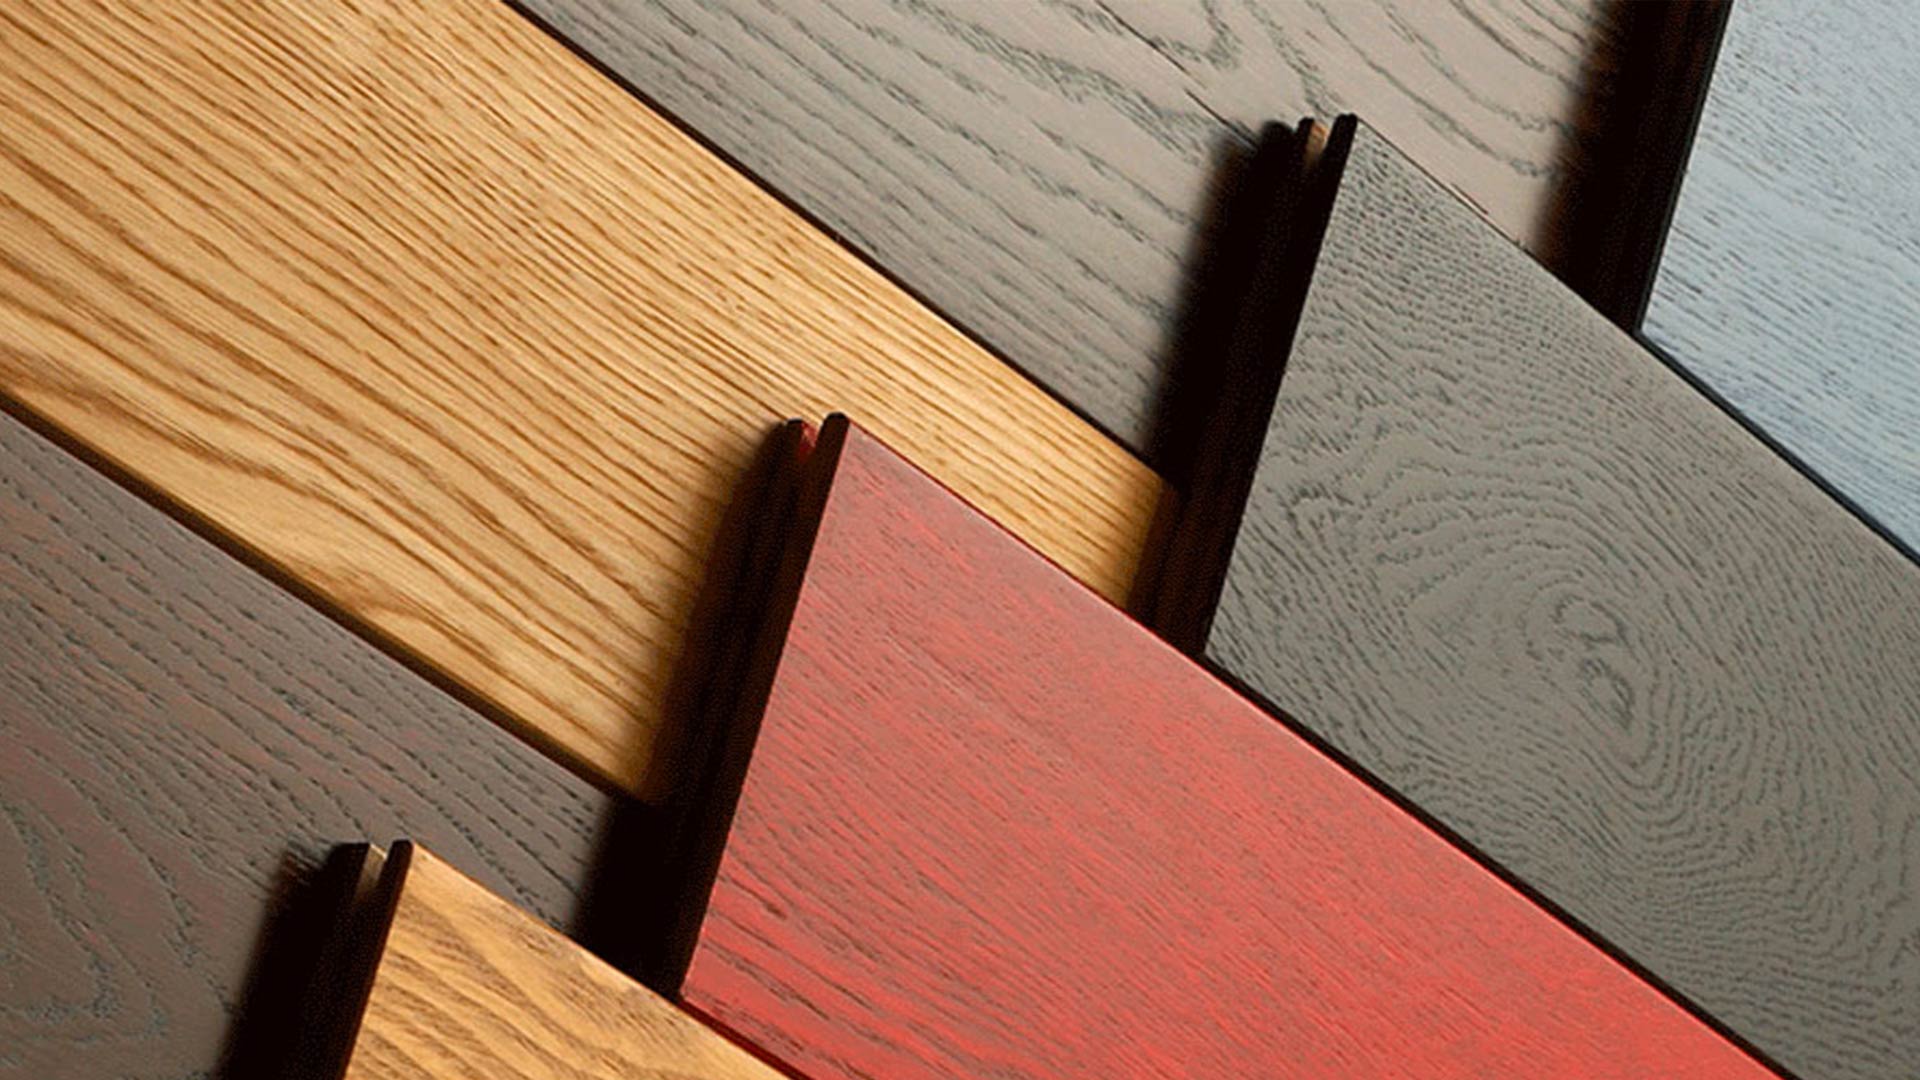
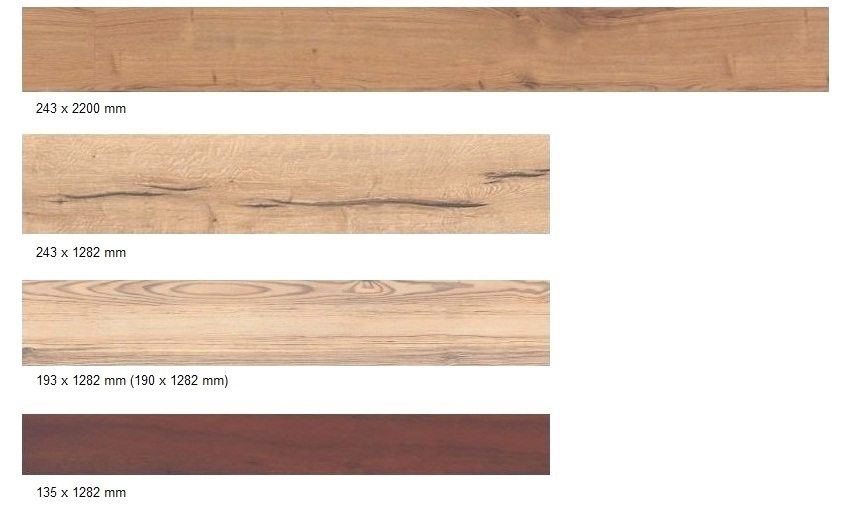
- forms, sizes - from short and narrow boards to long and wide; colors, colors, textures, the presence of designer models provide a wide choice of the discerning consumer;
- the cost of coatings of the upper classes is not democratic, but it is not as high as the cost of quartz-vinyl laminate.
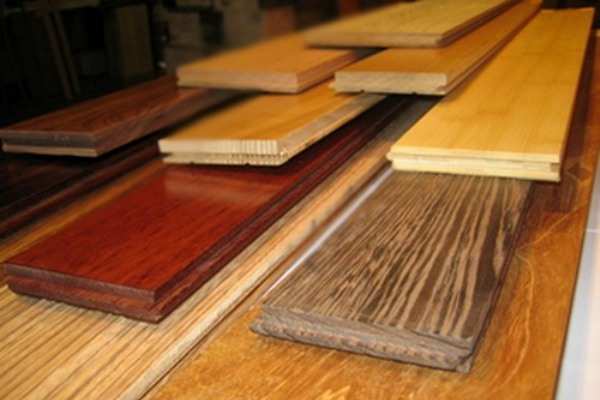
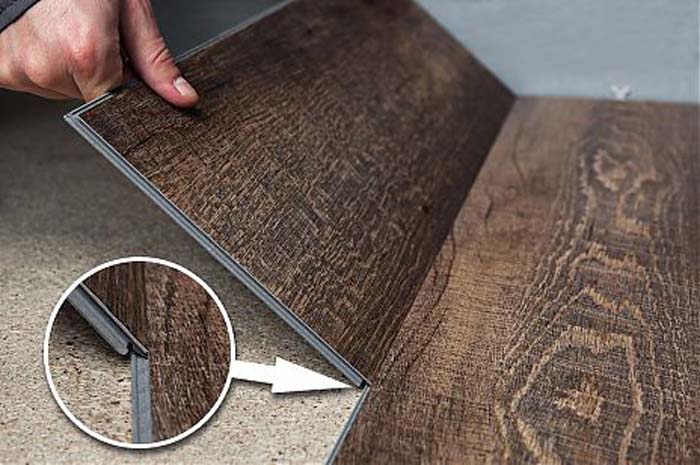
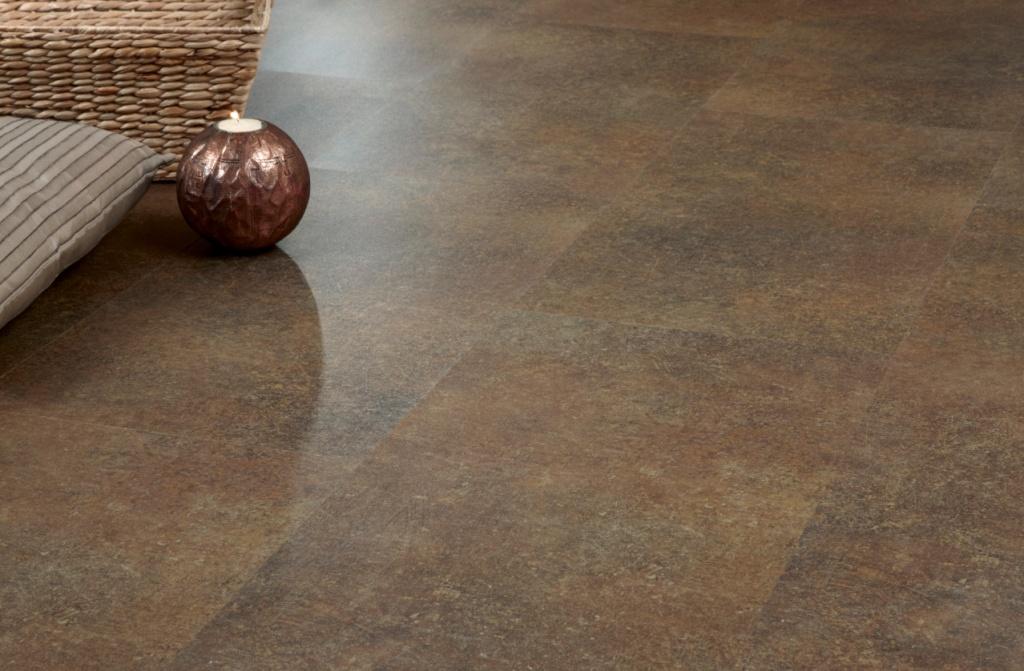
Vinyl laminate
The coating is hard, made of composite plastic, completely waterproof, but not wear-resistant.
Characteristic of flexible quartz-vinyl laminate:
- Manufacturers claim a high level of safety of this material on the grounds that it does not contain formaldehyde and is heat resistant, while modestly silent about phthalates - an additive in the composition for the flexibility of the product, which penetrate into the environment throughout the entire operating period, and accumulate over time body, causing him significant harm.
- This laminate is approved for use in children's and medical institutions, despite the fact that it releases toxic substances, such as phosgene and dioxins, during combustion.
- It is durable due to the content of a large percentage of quartz (up to 75%), wear-resistant, polyurethane with corundum or without protection of the decorative layer. Fiberglass reinforces PVC backing.
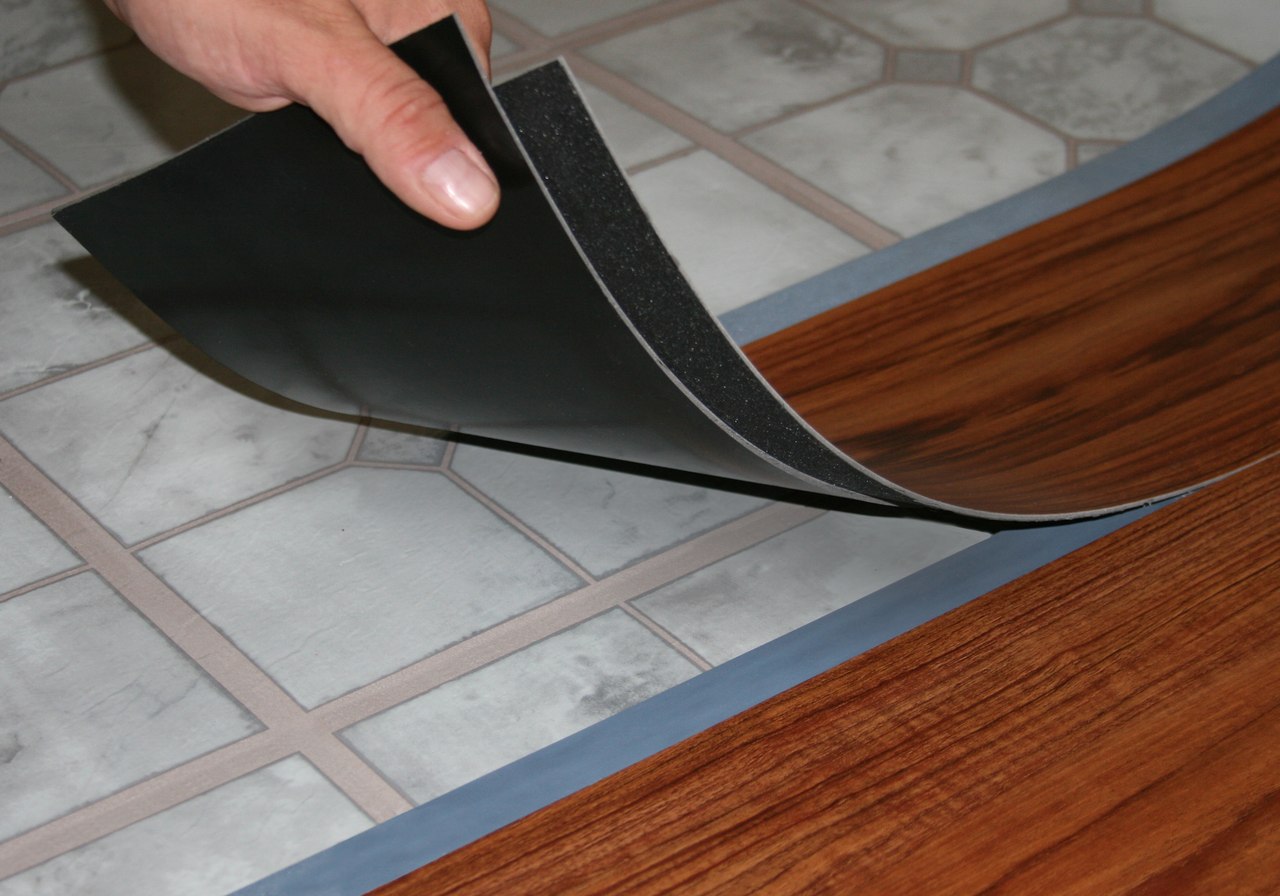
- Fully water resistant, they can even finish the shower.
- It has antistatic properties.
- There is a function of noise absorption, it does not need a substrate.
- The surface is warmer than the surface of ordinary laminate.
- It can be mounted on a heated floor with heating t not higher than 28 ° C.
- Easy to clean, but capricious in installation.
- Demanding to the base, but fits into different types of coatings - cement, parquet, plywood, tile, chipboard.
- Glue-laid vinyl floor is difficult to repair.
- It has anti-slip components in the upper layer.
- The shape and size of a chipboard floor, a variety of decor - imitation of stone, tile, wood, leather.
- When laying the material is cut with a knife, the thickness is 2-3 mm, the higher the class - the greater the thickness of both the entire coating and the protective layer.
- There are models with a chamfer, but there is no diversity.
- The price is one of the highest for flooring, comparable to the cost of natural wood flooring.
- Rubber is contraindicated for this coating due to a chemical reaction with it.
- This floor can be used in unheated houses - in country houses, it is intended for residential and public premises.
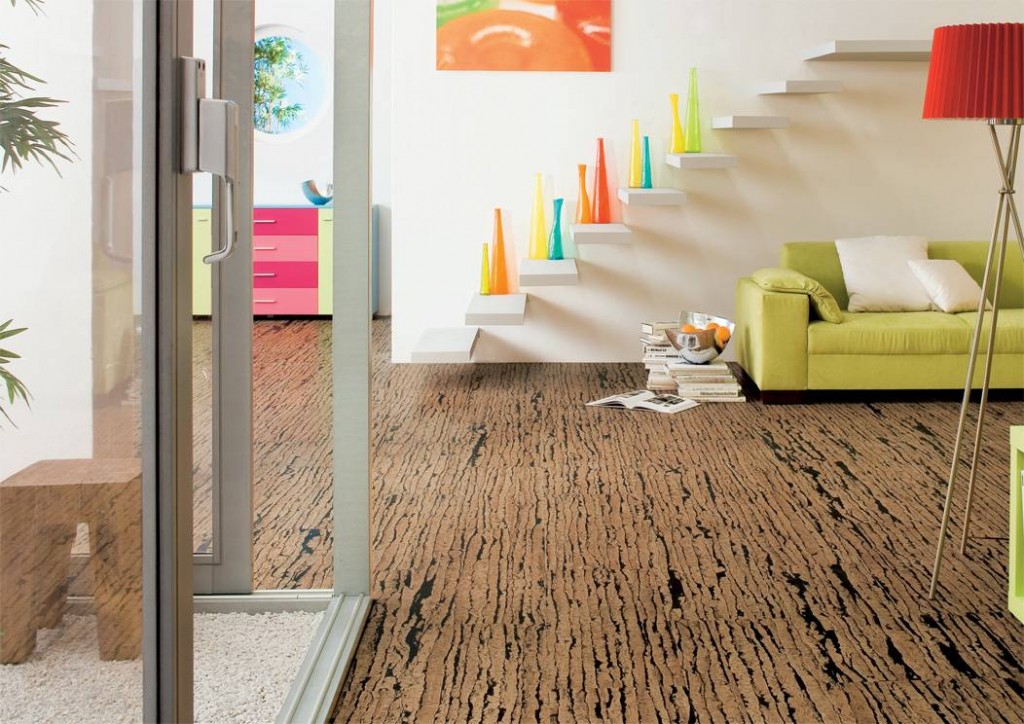
In addition to these two types of laminate there are several options for multi-layer flooring, but more natural and environmentally friendly than these two: HDF parquet board, modular marmoleum and cork laminate. All of them are coated or soaked with oil, varnish, wax. Bung
Cork cover - warm, but soft, even a protective film will not save from dents. Natural linoleum in marmoleum laminate and veneer of valuable wood in the floorboard make these coatings attractive in composition for consumers. They are produced in all classes, there are lock fastenings with moisture-resistant impregnation. They are suitable for different living rooms, the only exception is the bathroom.
As you can see, the choice of laminated floor is great, the buyer will find the one that he likes and can afford.
What is needed for work?
Having defined the appearance of the laminate in terms of its composition and external qualities, it is necessary to understand what is required for its installation. Flexible tools require fewer tools than classic laminate flooring.
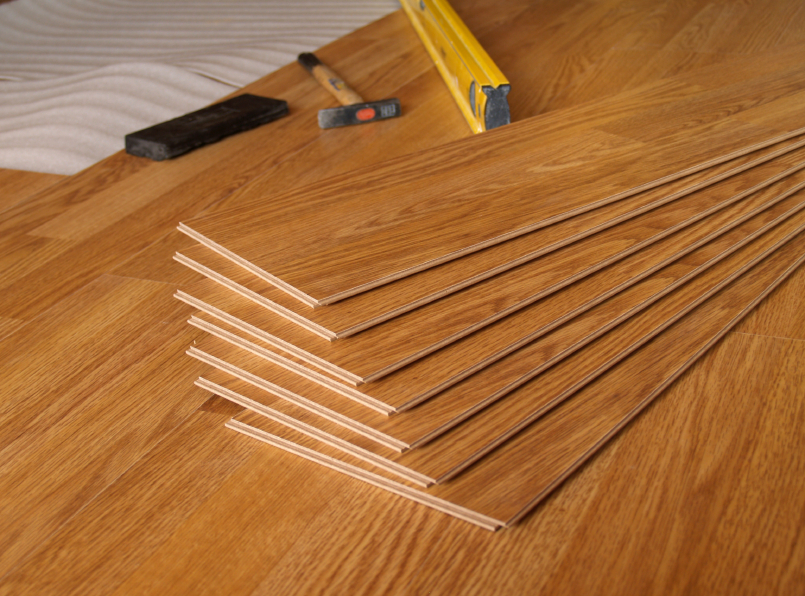
A set of tools and materials for laying ordinary laminate do-it-yourself:
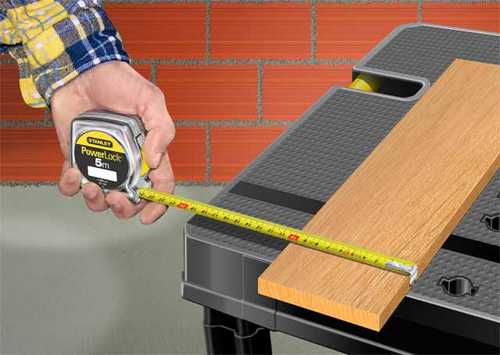
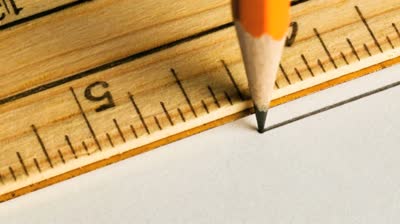
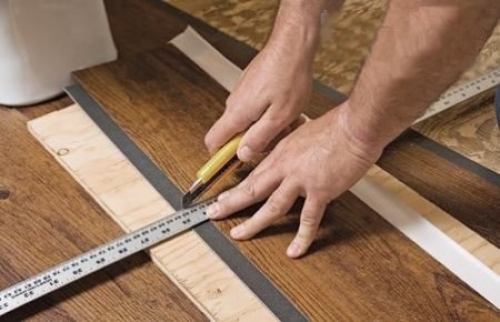
- pencil and ruler or gon;
- roulette and level;
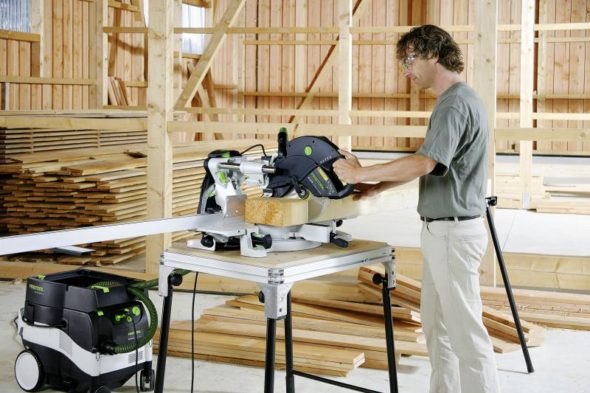
- hacksaw or grinder, circular saw;
- a hammer and a wooden block for fit;
- guillotine - a machine for cutting panels without dust and noise (optional, but very convenient);
- picket and perimeter spacing wedges for clearance;
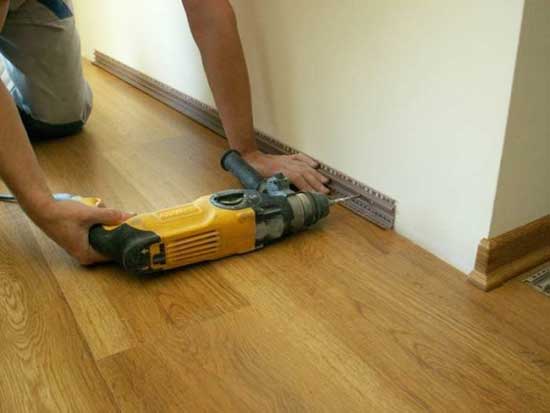
- drill (for plinths);
- antiseptics and refractory agents for bases made of wood;
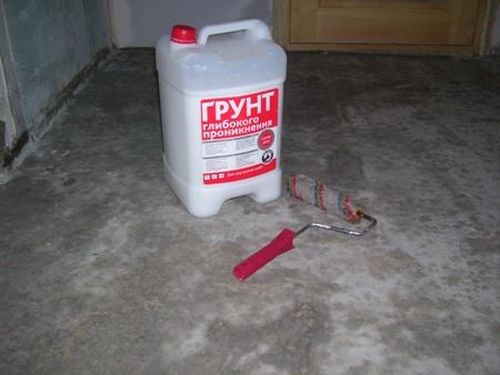
- primer for concrete, cement or plaster;
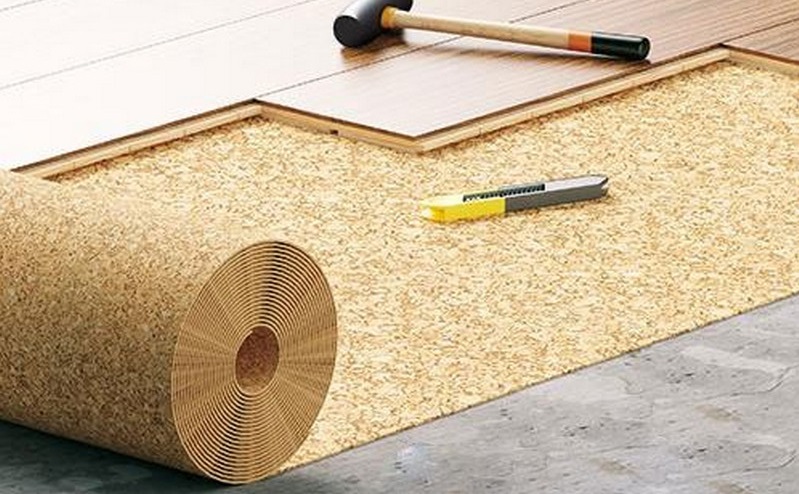
- leveling, self-leveling floors or dry screed (plywood, chipboard, OSB);
- substrate up to 3 mm thick;
- waterproofing, if the base is concrete - for wood is not needed.
Quartz-vinyl coating perfectly cuts an ordinary stationery knife. In order to incite its strips with locking joints, a wooden mall is needed.
In addition to the above tools for laying the usual laminated floor, you may need synthetic mastic if the locks of the selected coating have not been treated by the manufacturer with similar tools, but not based on beeswax, as it does not lay down unevenly, leaving stains unreducible. It is useful only in this situation. After processing her locks and joints, you will provide a more convenient assembly, protect the locks from mechanical damage and improve the locking hitch, and at the joints block the entrance of moisture and debris. Some formulations are designed to return aesthetic qualities to the coating.
Factory processing of locks to cover the other composition is prohibited, there is a chance to spoil it, while it can not be improved.
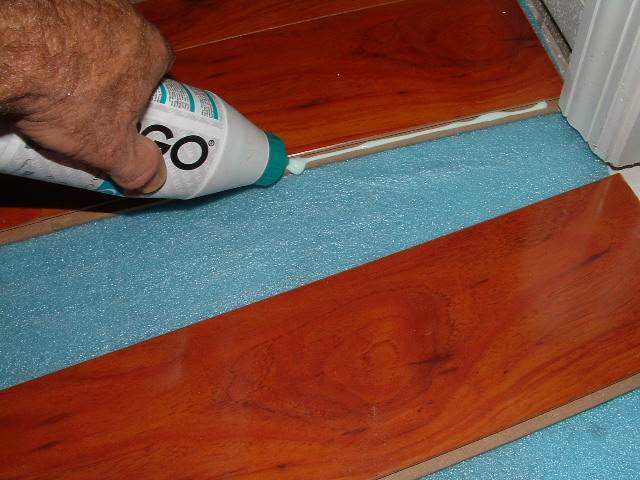
Sealants for the treatment of old, sold seams you will not need it soon, if it happens at all. But when it will be necessary to close the joints weakened during operation, keep in mind when choosing a sealant that its color should match the color of your panels. Common sealant colors: wenge, pine, spruce. It is also important to find a high-quality water-repellent compound.
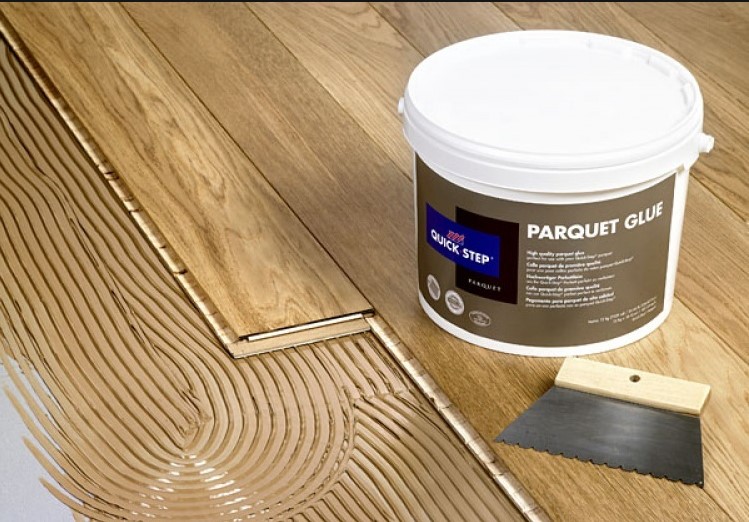
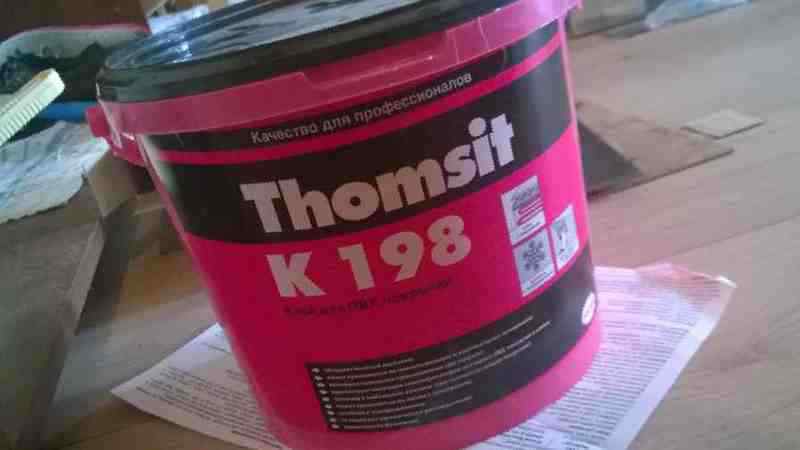
Nowadays, the “floating” method is mainly practiced: not fixed to the base, independent of it, but using glue. In this case, you will need a special glue designed for these types of material, for example, Thomsit has already managed to earn universal approval. The displacement of the next row of bars relative to the previous one occurs by half. PVA, like any other water-based adhesive, is absolutely not suitable for laminate. Its use, instead of carefully sealing the joints, will cause the boards to swell.
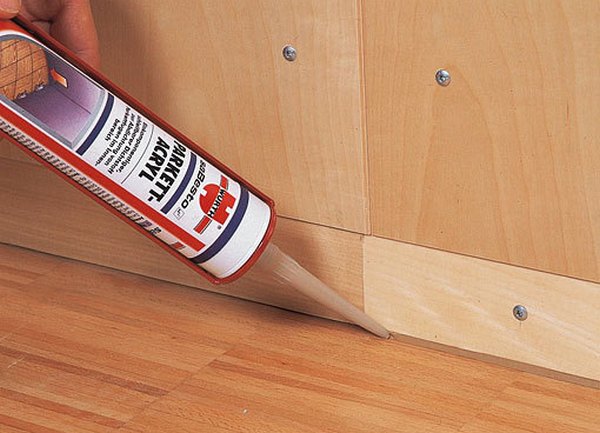
The method of laying the coating with glue is called a method of sealing the seams: when each new board is attached to the ends with glue to the endsprevious boards. So it turns out durable waterproof connection, the dismantling of which, as you understand, is impossible. If this suits you, then this reliable way is for you. As practice has shown, this method of installation is more reliable than the castle mount. The main disadvantage of this method is the inability to install the coating on the "warm floor".
Next, you need to calculate the amount of material.
How to calculate the material?
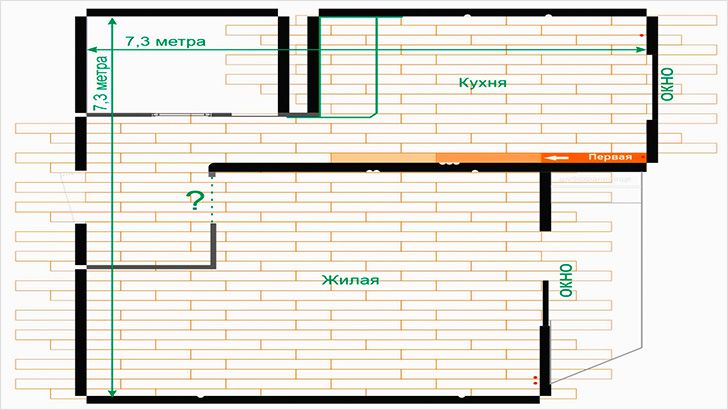
The amount of material depends on the area and geometry of the room, the chosen type of installation, the shape and size of the panels. You can resort to the seller’s calculator on the Internet, but the error in his calculations is great. More precisely, you yourself will calculate, having drawn up a floor plan with all the existing projections and apertures, but you can check with the calculator later.
First, determine the type and collection of the coating to find out the dimensions of the panels and their volume in the package, then take the minimum 5% error for a defect in the package or appearing during installation. After that, select the type of installation - figured, deck, diagonal: the further error in calculations will depend on it.
The main types of laying and the final calculation of the material:
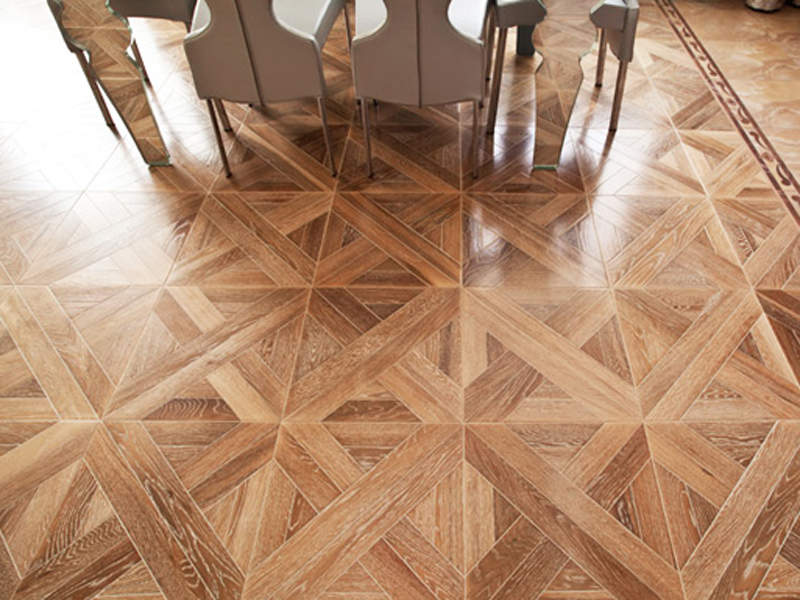
- Figured - the most difficult and costly, it is necessary to make a 30% error on it.
- On the diagonal must be added 15%.
- From the point of view of complexity for beginners, the most optimal deck installation is up to 8%.
Do not try to “save”, thinking that you’ll find everything and do it without mistakes and faults: miser pays twice. Your savings will result in additional costs and expenditure of effort to search for the material in the right quantity and exactly the collection that you initially chose. Not the fact that quickly find and find it at all.
Calculation example
Suppose you chose a collection Original stamps Balterio: its board dimensions are 126.1 * 18.9 cm, in a package of 8 boards. You have a deck view of laying, and the final footage, according to your drawing, is 30 m2. (126.1 * 18.9) * 8): 10,000 = 1.9 m2 in one package, then take 5% for scrap, and finally - 8% error for deck type of installation. We divide our 30m2 by the volume of one package - 30: 1.9 = 15.79 packs * 1.05 = 16.58 * 1.08 = 17.9 packs, that is, we need 18 packs.
Note that the material consumption also depends on the level of mastery of the handler. The first time you should choose a simple deck installation, to get acquainted with the material and evaluate their strength for further work.
If your house has old floors, it is important to calculate the load on them, based on the laminate weight indicated on the package and the possible need for a screed that will only increase it.

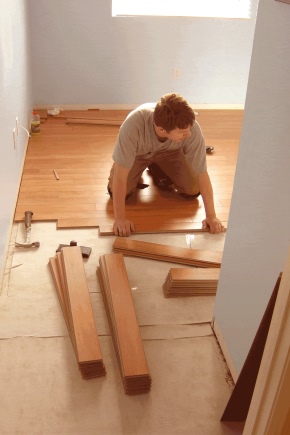
Step-by-step instruction
This implies checking all purchased packages for the complete identity of the panels in them. Of course, to do it better at the stage of purchase, and not at home. But you can exchange and mismatch with the main, material. So you can identify a mismatch of shades or castle connections. Soak laminate before laying 1-3 days in the room where it will be mounted. The type of coverage depends on how many days of acclimatization you need. "Warm floor" off the week before. Laying occurs at normal air t: from +17 degrees C, at humidity of 40-70%.
The moisture rate for sand-cement, plaster screed - up to 3%, for boards - 12%.
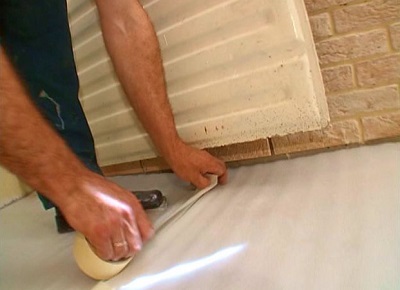
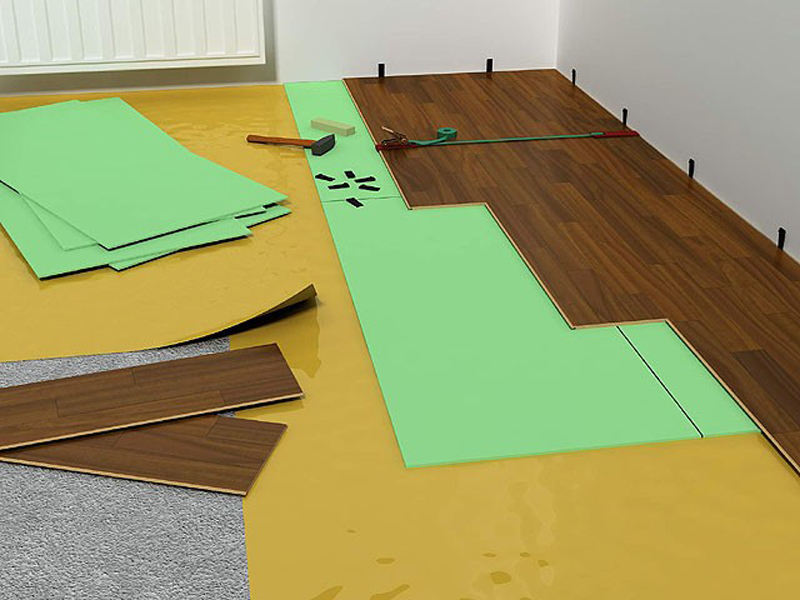
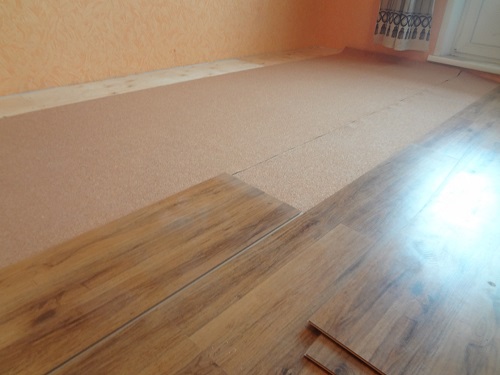
To properly lay the coating, you must strictly follow the instructions for laying the manufacturer. If you have a concrete base, you must put a waterproofing film overlap at least 15 cm, securing tape. Behind it lay the substrate corresponding to your coating.The stages of installation are the preparation of the base with the subsequent laying of the laminated floor.
Foundation preparation
By the beginning of this stage of work, the material has already been selected and purchased, it depends on it what the basis will be. Vinyl floor can be laid on several types of old flooring (parquet, tile), which will need to be leveled, filling up the gaps and eliminating the height differences.
Vinyl - the material is thin, all the irregularities will be immediately noticeable, can not withstand the castle connections, to crack on drops.

Preparation includes:
- Alignment of an old uneven floor or its dismantle with the subsequent coupler.
- Waterproofing flooring on a concrete floor, but not wood.
- Laying the substrate corresponding to the base, it is necessary for the coating with a particle board. Vinyl and quartz-vinyl do not need it. The exceptions are cases when the cement screed went with a rough rover, there were large fractions: here it will be needed - from a cork or foam. Then isolation will be improved, the crunch and differences of the base will be eliminated.
- The final step will be the installation of "warm floor" if it is planned.
The best solution for a vinyl floor will also be the dismantling of the old coating, but it is also possible to lay it on its aligned surface.The main thing is that the base for this type of laminate should be smooth, dry: with a 5% moisture level; clean: so that it can be swept, vacuumed, cleaned without the use of chemicals. The gap must be patched up, polished at the finish.
Old parquet can be sheathed with plywood, and tile the floor to level a special composition.
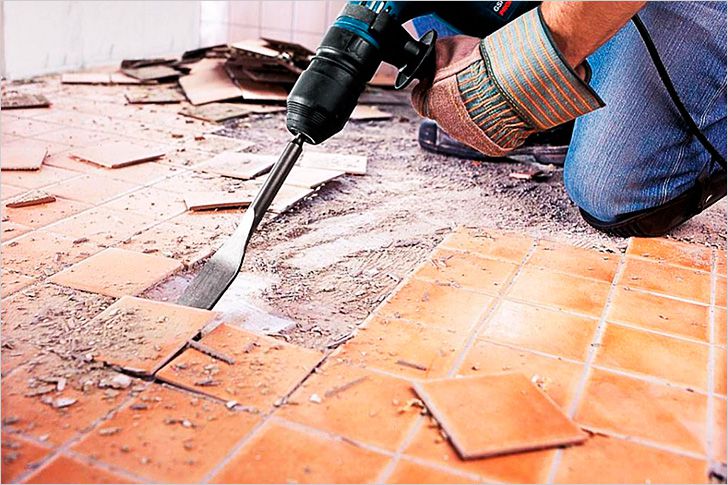
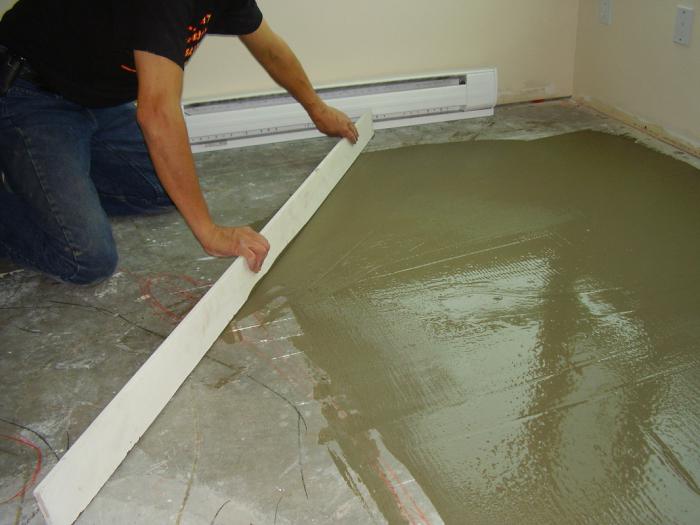
Before finishing the installation, it makes sense to arrange a test assembly to make sure that the calculation of the material is correct and the desired picture, if any, is assembled correctly. Between disassembly and screed or leveling, you must check the base with a level to determine how and how to level the floor. For conventional laminate, all previous coatings must be removed. After leveling, the height difference should not exceed 2 mm for every 2 m.
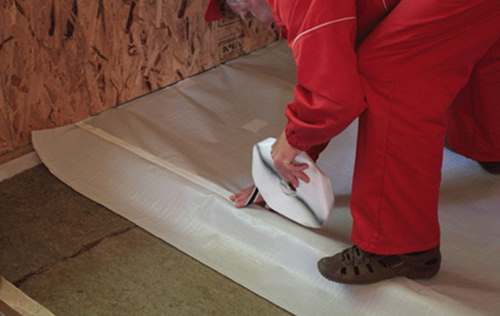
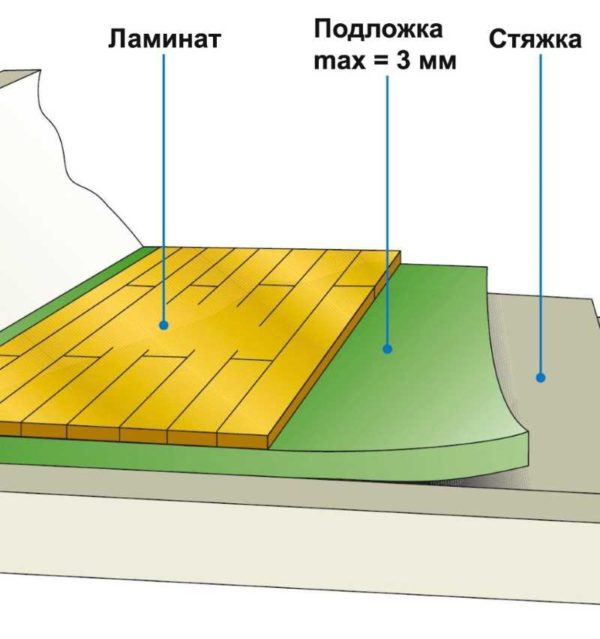
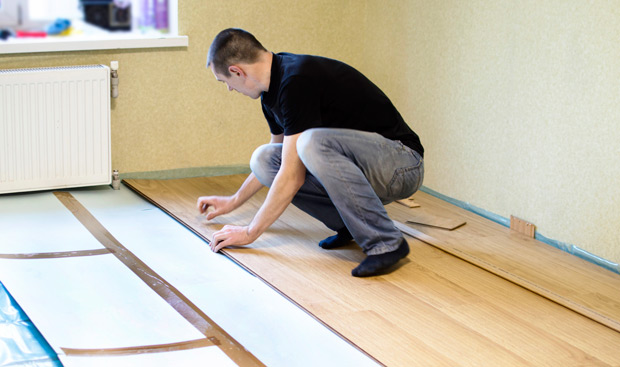
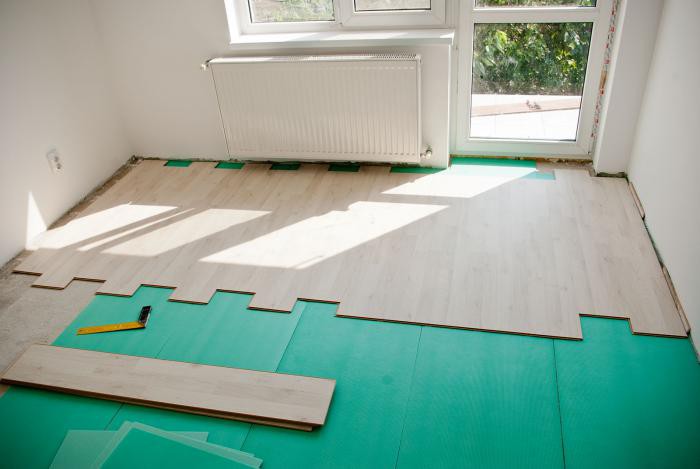
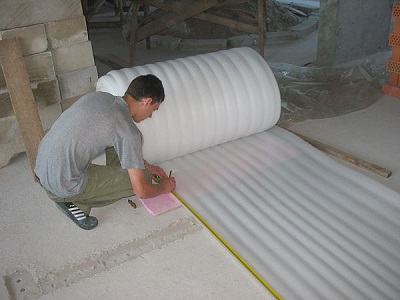
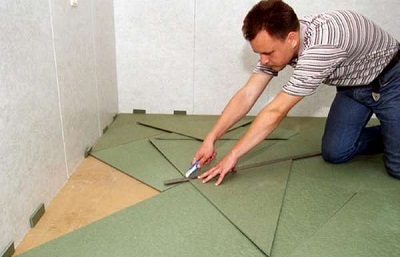
The smooth surface should be dry and clean. Next comes the waterproofing flooring - for concrete and the substrate, unless it is a built-in option. The thickness of the substrate should not be more than 3 mm.

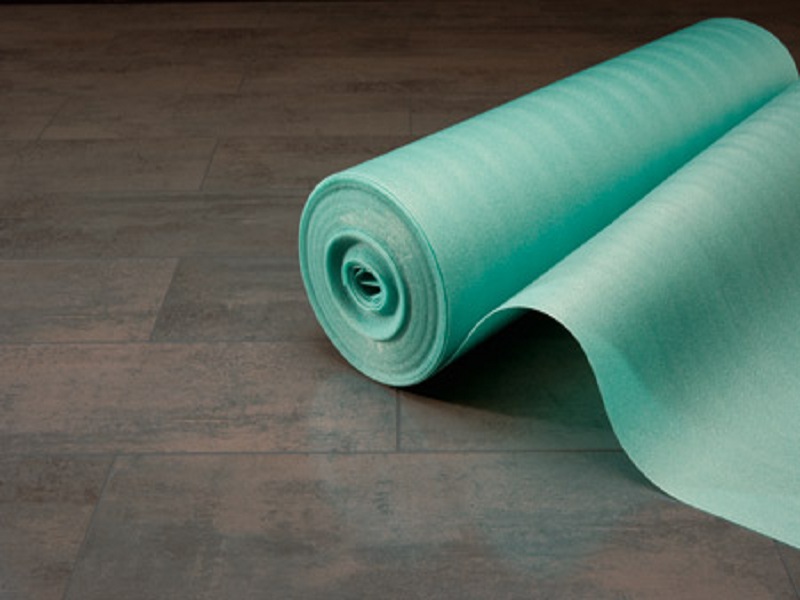
The substrate can be rolled or sheet: it is laid end-to-end, fixing with adhesive tape.
Layer drawing for laying ordinary laminate
Depending on the type of base preparation, it can take from several days to several weeks. But on the other hand, this type of work will become a guarantee of high-quality coating operation in the future.
Installation
On a concrete floor with a substrate
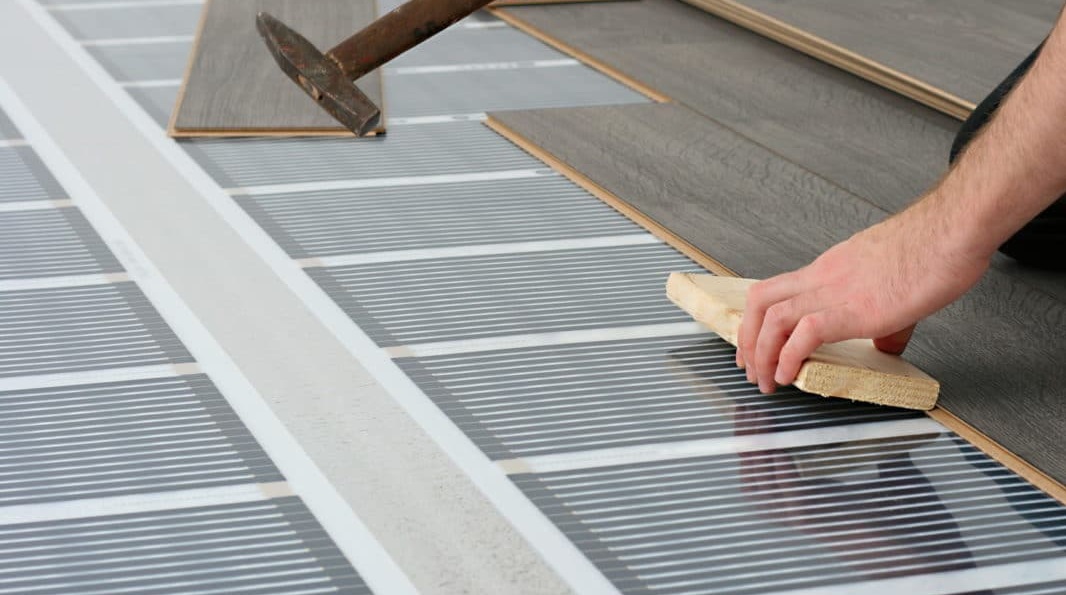
If you were unable to purchase material with a built-in noise insulation layer, the laminate needs a noise insulation substrate. It does not soundproof, but rather dampens the noise of steps, plays a cushioning role at elevation differences. no more than 2 mm. If you fold it in several layers as a base, instead of serious preparation, you can quickly and permanently destroy the laminate floor.
Apply it only for its intended purpose.
It is possible to assemble a high-quality finish coating with careful attention to the choice of the substrate. The market offers many types of it:
- This could be an NPP — an inexpensive substrate that is suitable for concrete. It is not suitable for wood substrates, such as plywood, chipboard because of its waterproofness. Easy to install, poorly isolates noise and loses volume during use. Any polyethylene backing spreads end-to-end, not overlapped, held together with tape.Remember its maximum thickness of 3 mm.
- EPPS - extruded polystyrene foam. Produced in slabs and rolls "accordion". EPPS with perforation is needed for a floor heating system (for concrete, DSP). This material is stronger than the first, there are options with 20% enhanced acoustic effect.
There is one drawback - the high cost.

- There are more natural types of substrates - coniferous and cork agglomerate. Both options are not different budget price. Among the shortcomings: the cork can crumble over time, absorbs moisture.
- The combined Tuplex backing made from cork granules and rubber has dielectric properties. Suppresses noise and vibration. Suitable for concrete and wood, does not require the use of waterproofing.
Bitumen-cork material is also installed without it, durable, with good noise insulation, but it is not suitable for a floor heating system.
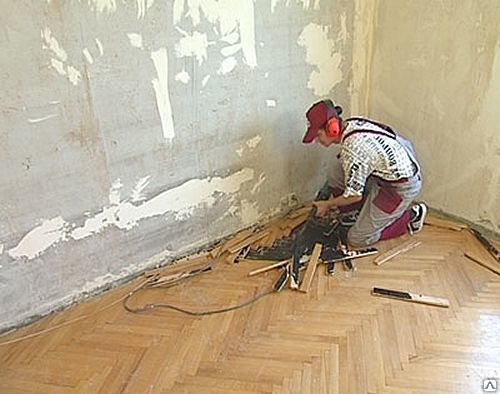
On wooden floor
Laying sheets of plywood or particleboard on the old wooden floor is not difficult, aligning and processing antiseptic if necessary. So you can strengthen the old floor, providing a flat base for laying laminate. Waterproofing with a waterproof film is not necessary here, will play against a woody base, for which steam and air is important. The substrate must be breathable - coniferous or cork agglomerate.Both options are suitable for wooden bases under the floorboard and conventional laminate. Conifer mounted butt-on, diagonally. Cork is an oak bark granulate mixed with resins and pressed. The cork substrate absorbs well and retains heat.
However, with all the advantages, the cost is too high.
Ways and types of laying
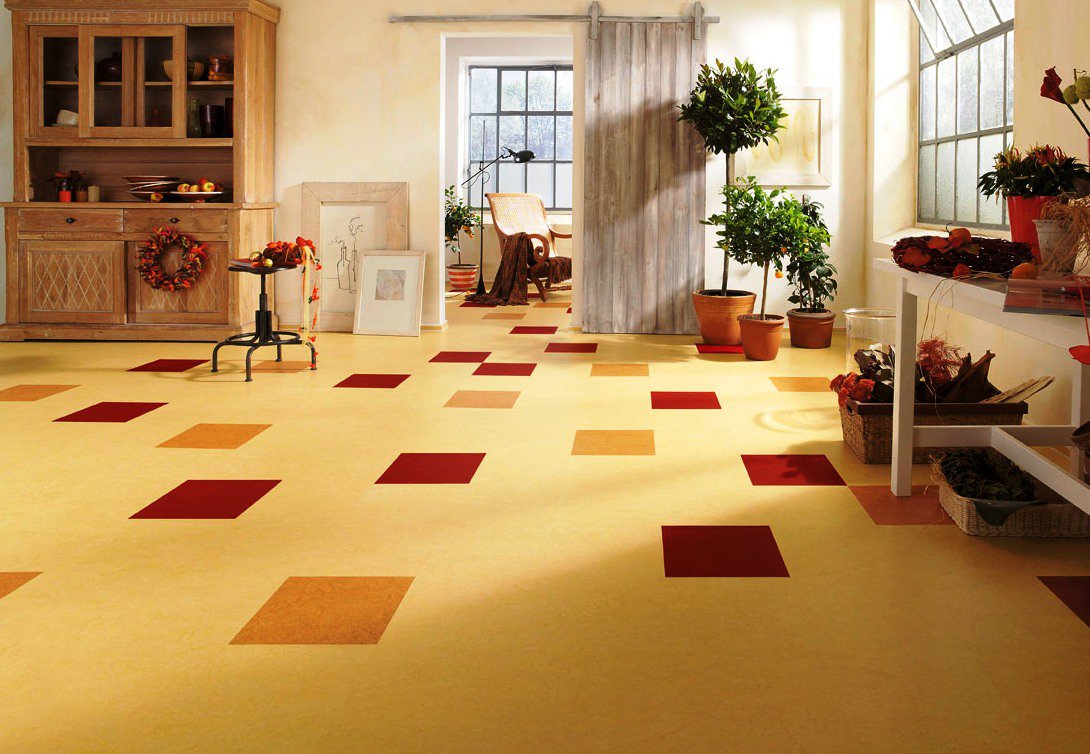
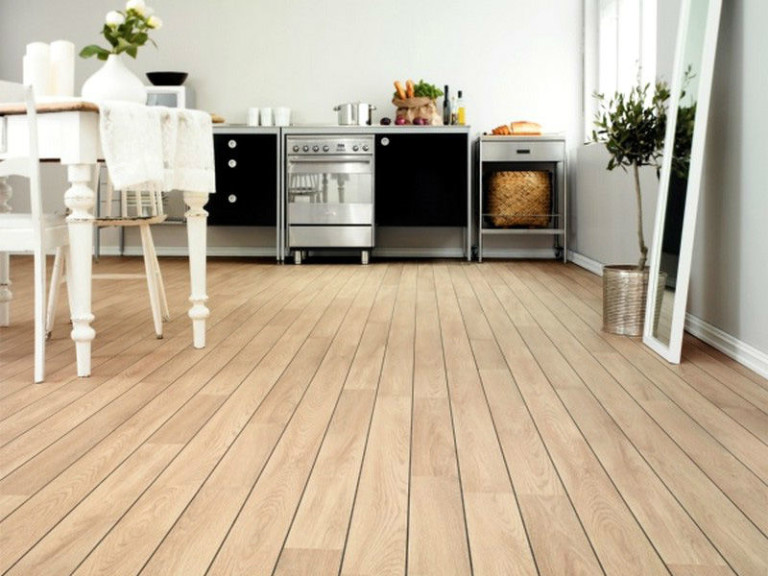
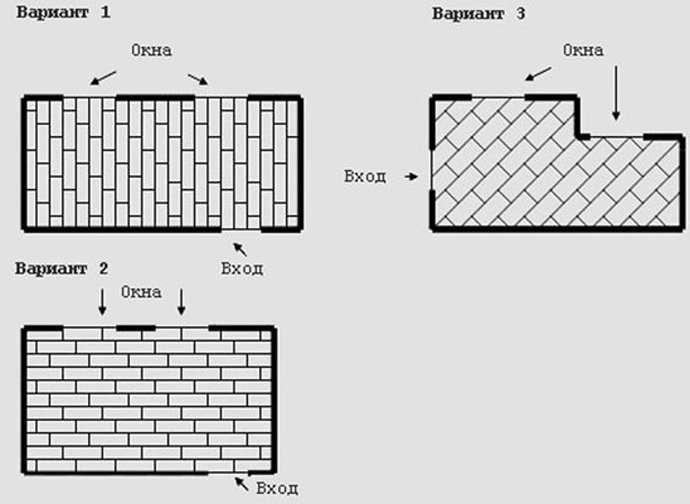
The main options for laminate layout:
- in the direction of the rays - along the luminous flux - for a smooth coating;
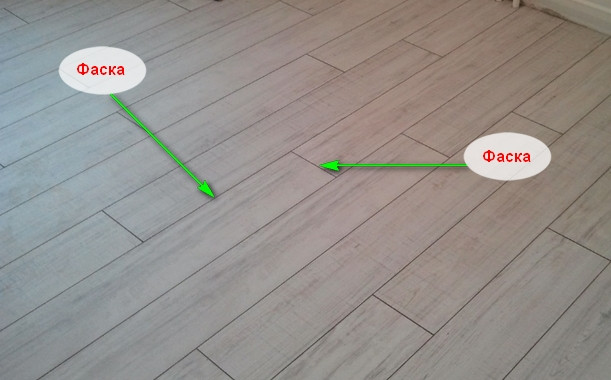
- across the luminous flux - for 3D models and coating with a chamfer;
- in the direction of travel - reduces the load on the joints;
- diagonally - increases it.
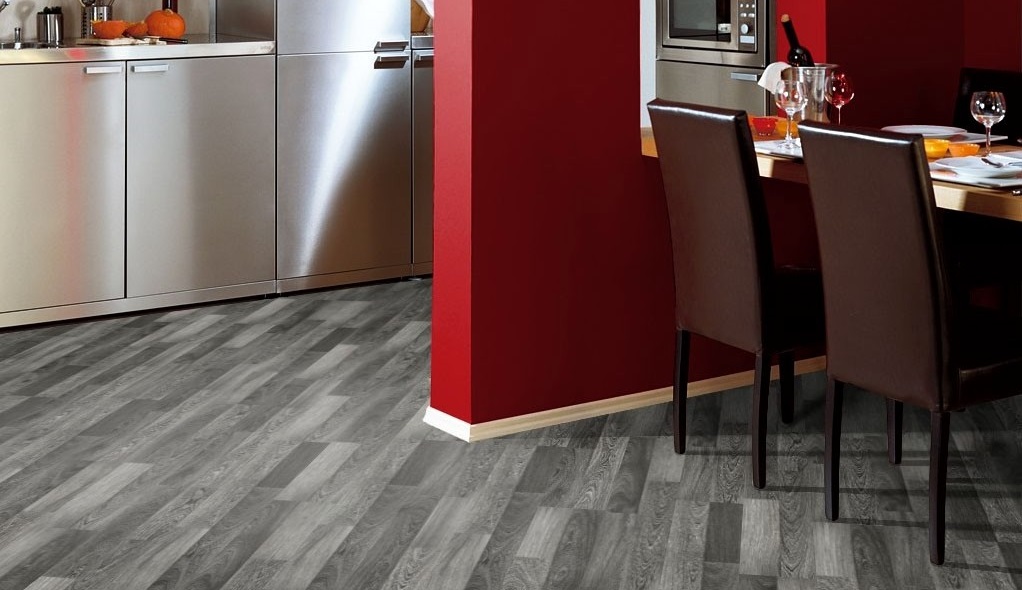
Diagonal styling in the kitchen
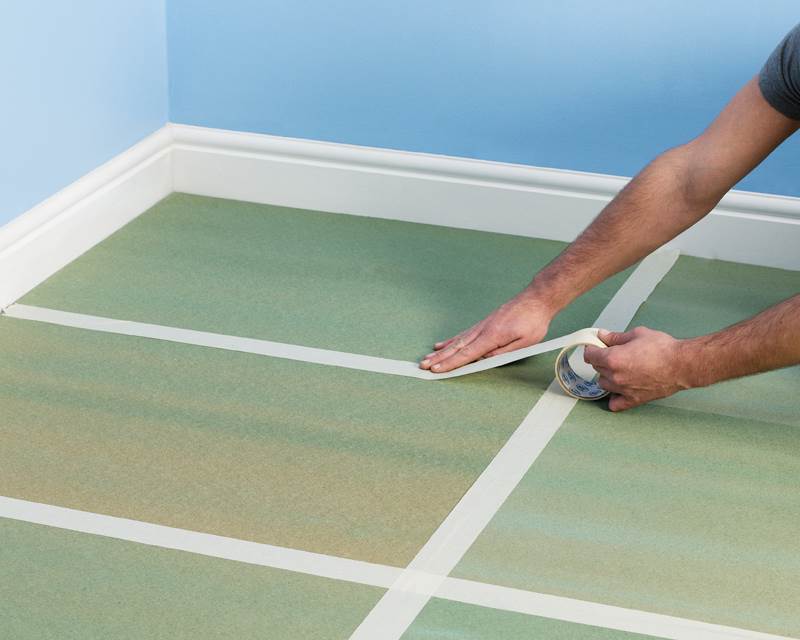
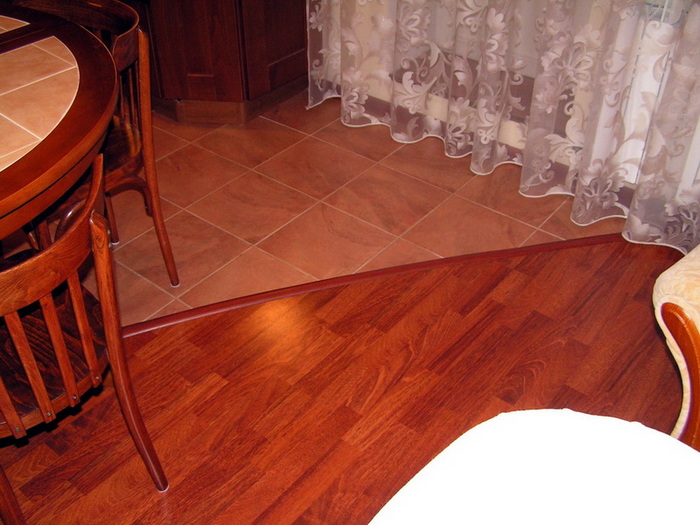
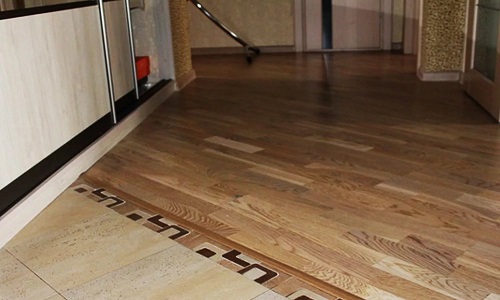
Determine how you will lay the floor: without thresholds, continuously throughout the apartment or in each room separately, then closing the joints with the thresholds of a suitable decor. The latter method is safer from the point of view that your coating does not exactly swell at the seams due to the absence of gaps unforeseen by the manufacturer to compensate for changes in the geometry.
Scheme of common deck installation:
- half board: move 1/2 length relative to each other, but in this case the seams are too prominent;
- by one third: each board shifts only 1/3 of its length, as a result, a natural look of the coating is achieved;
- chaotically: the displacement at different lengths, then not the best hitch of the panels is formed.
The basic rule of installation is not to lay across the course of the movement, otherwise the joints will be worn out ahead of time, and in general the floor will last less.
Decking in the kitchen-dining room in blue and white
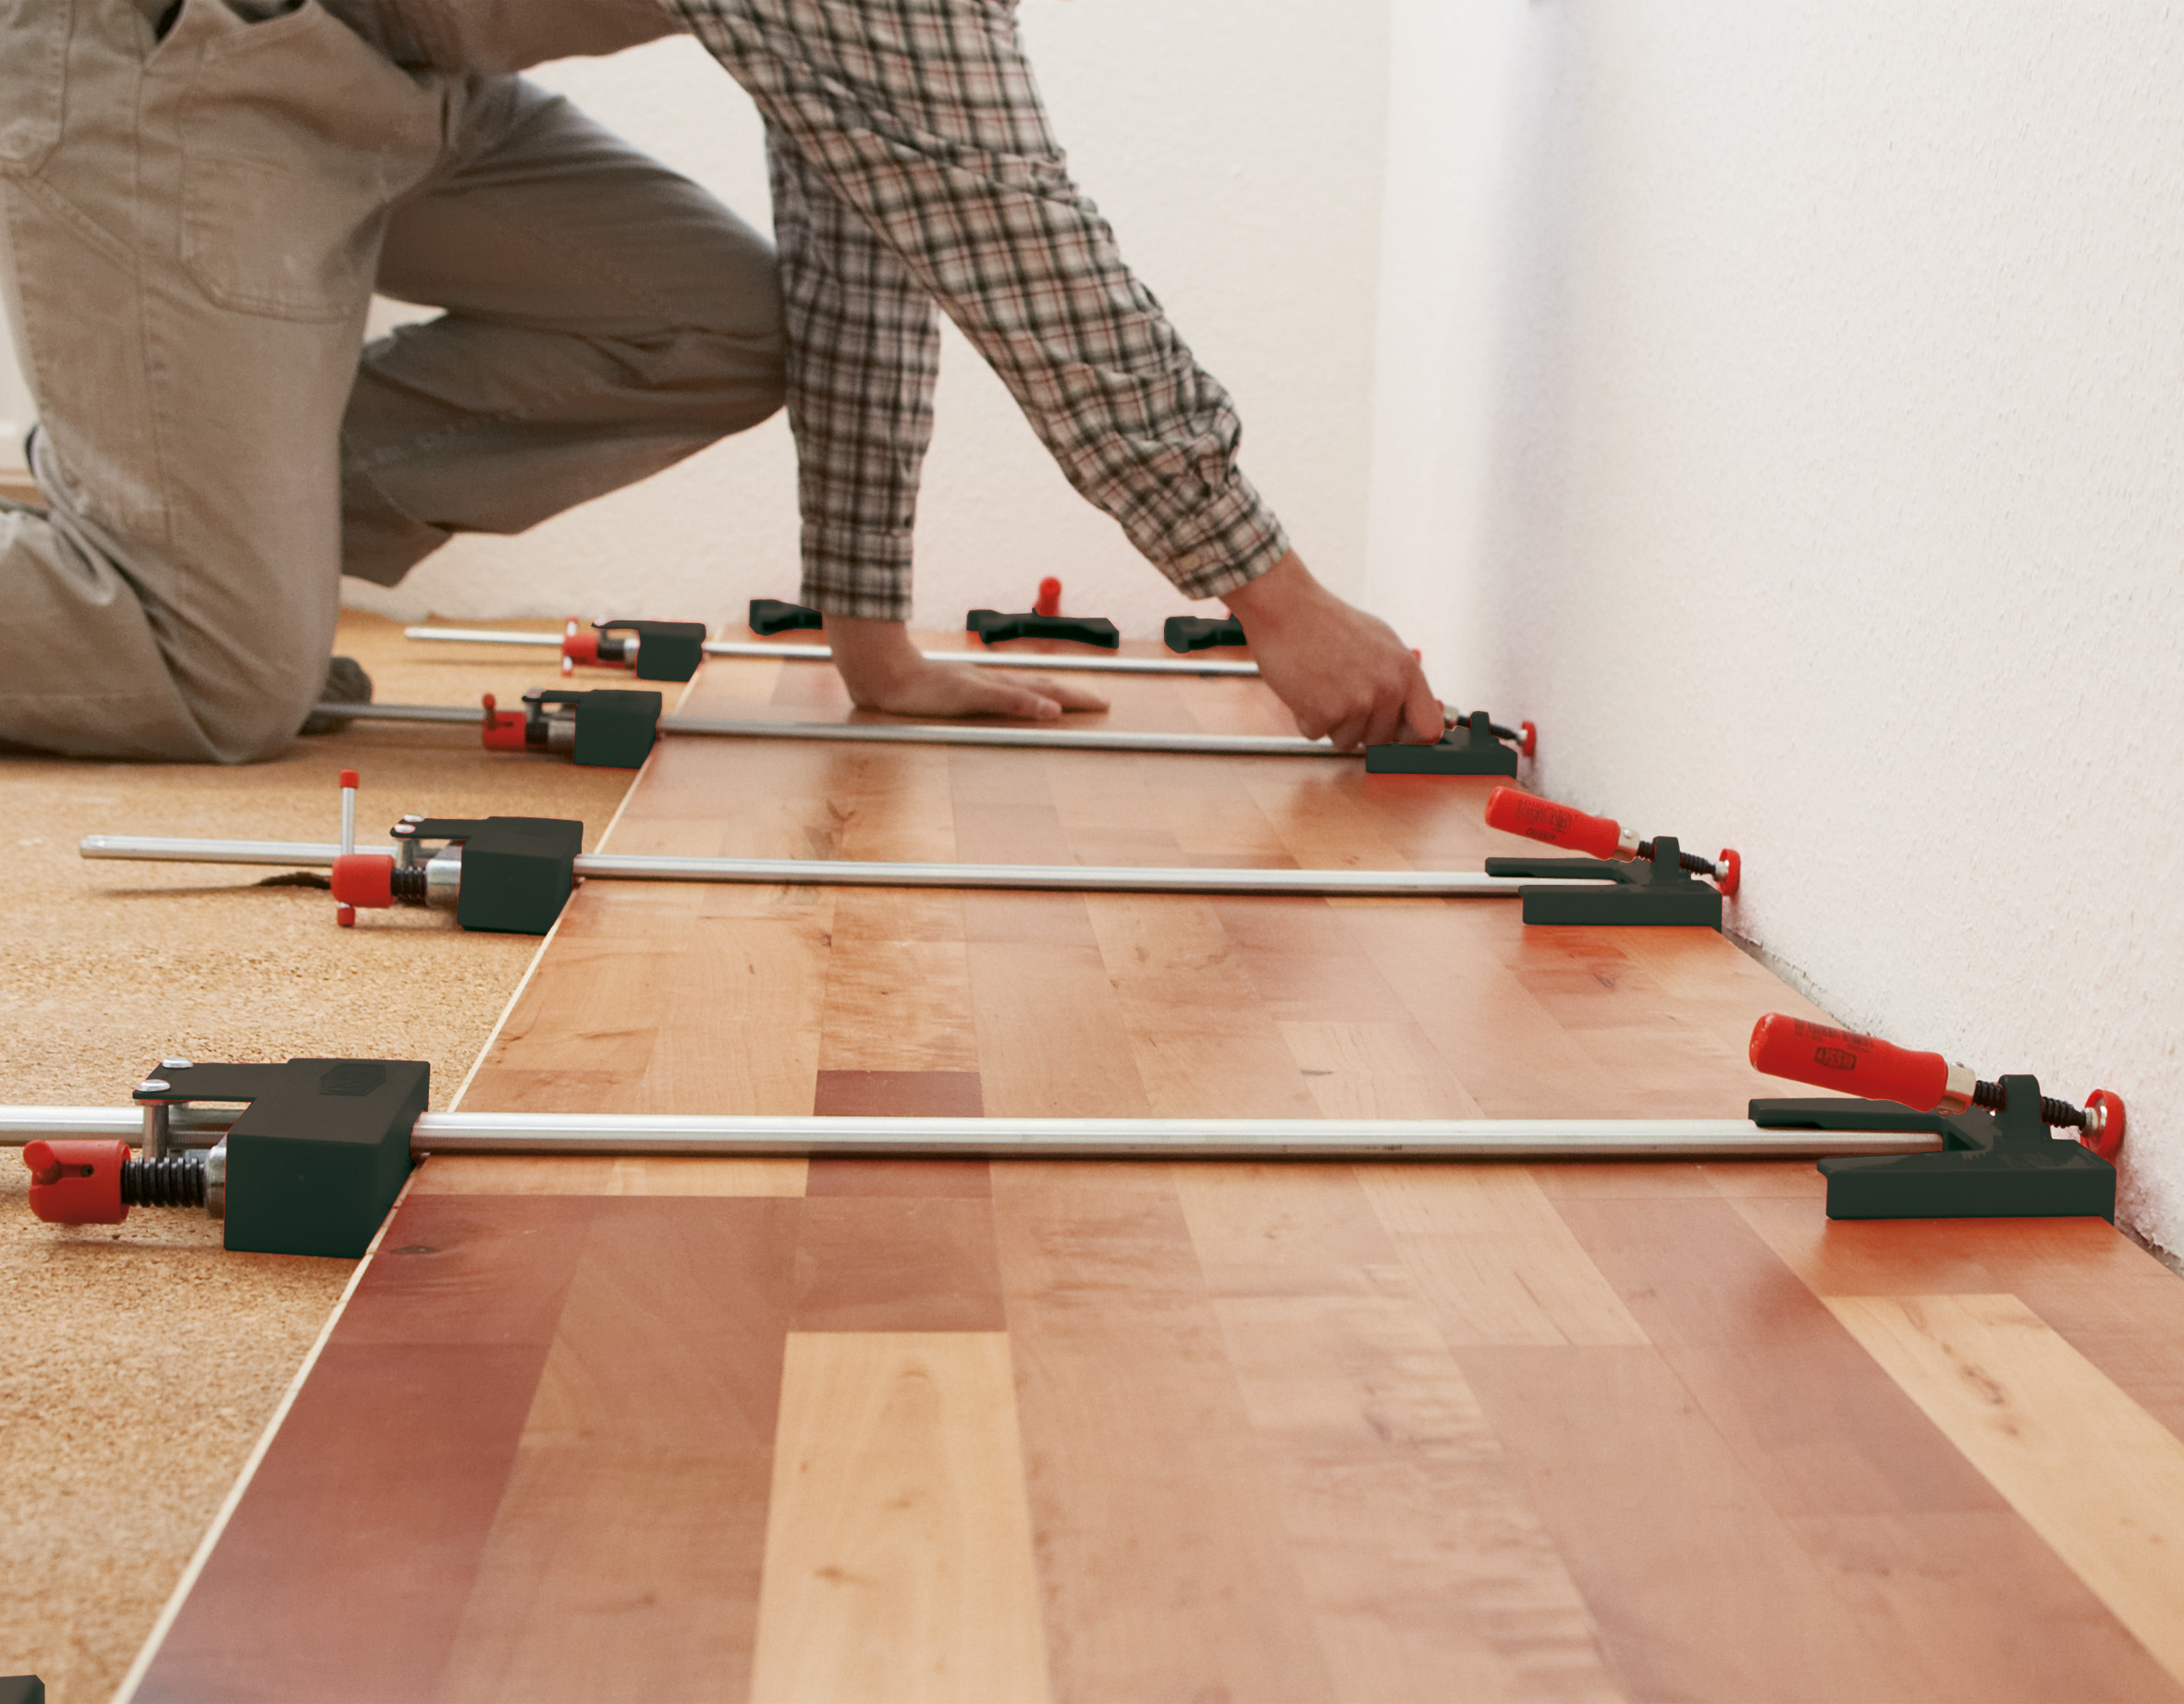
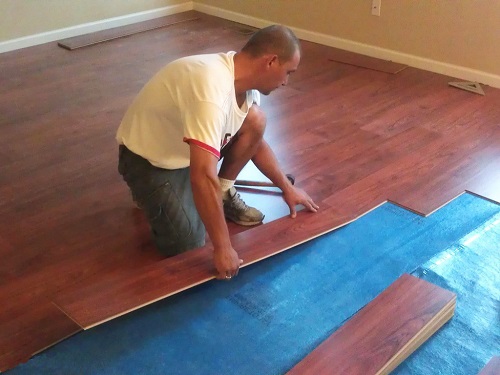
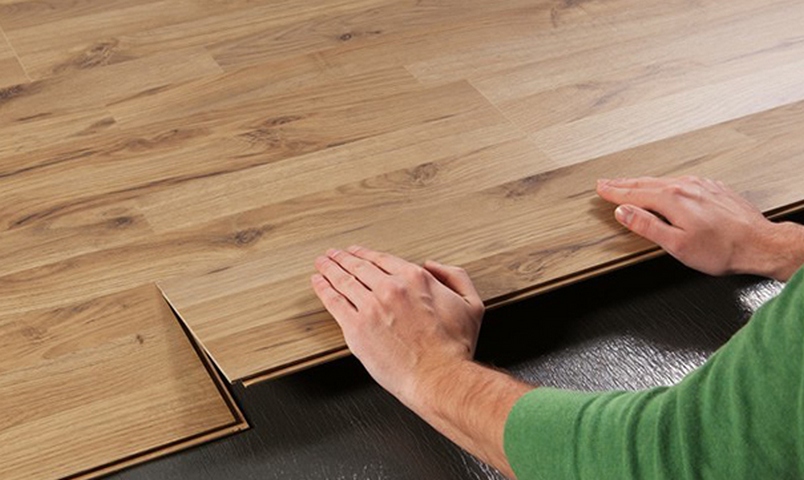
The technology of deck laying classic laminate with key fastening:
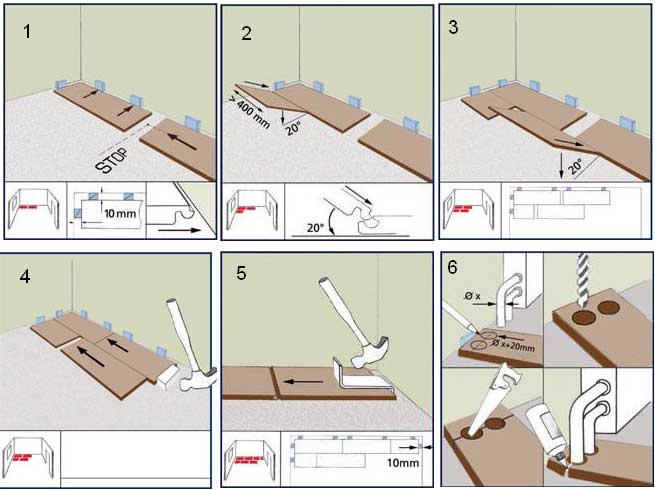
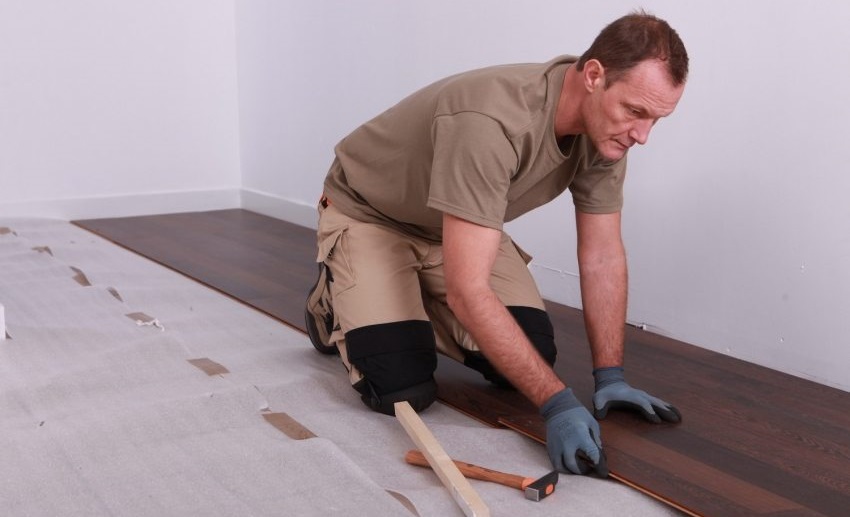
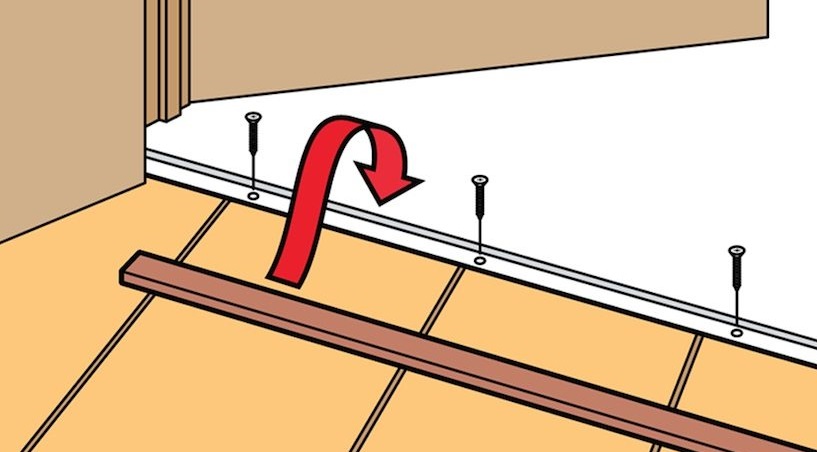
- Between the first row and the wall, it is necessary to place wedges of equal thickness (1.5 cm) every half meter - this is a thermal gap, it goes around the perimeter.
- The panels of the first row are sequentially attached to the fence of wedges and joined with short ends at the right angle.
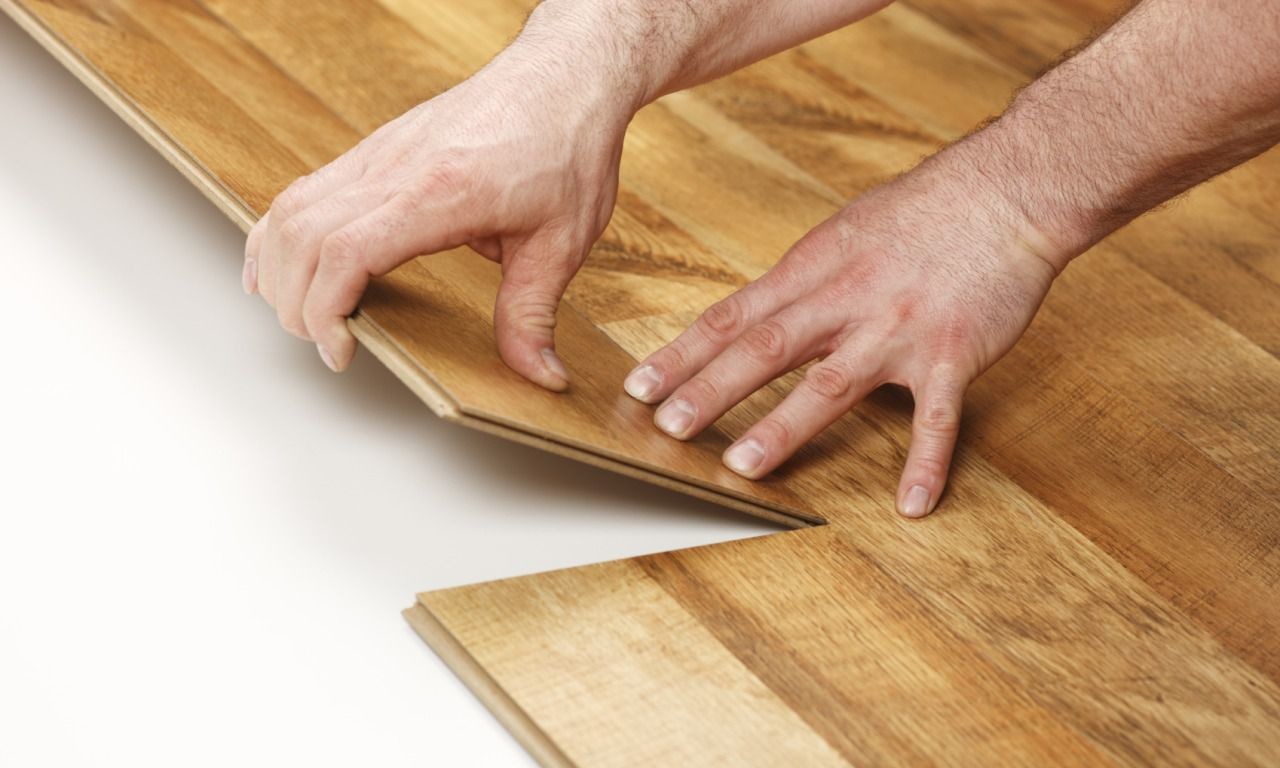
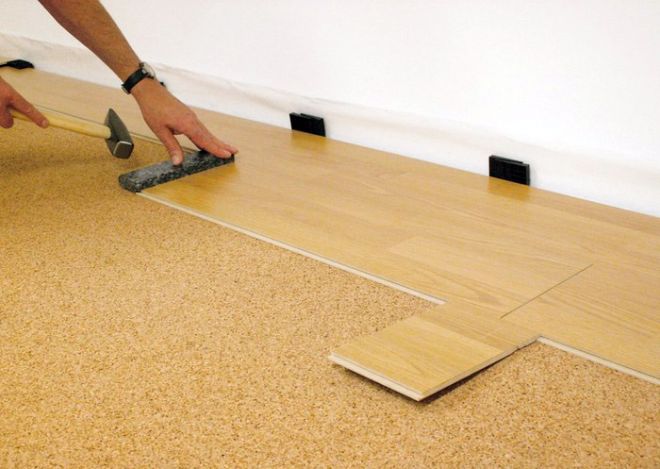
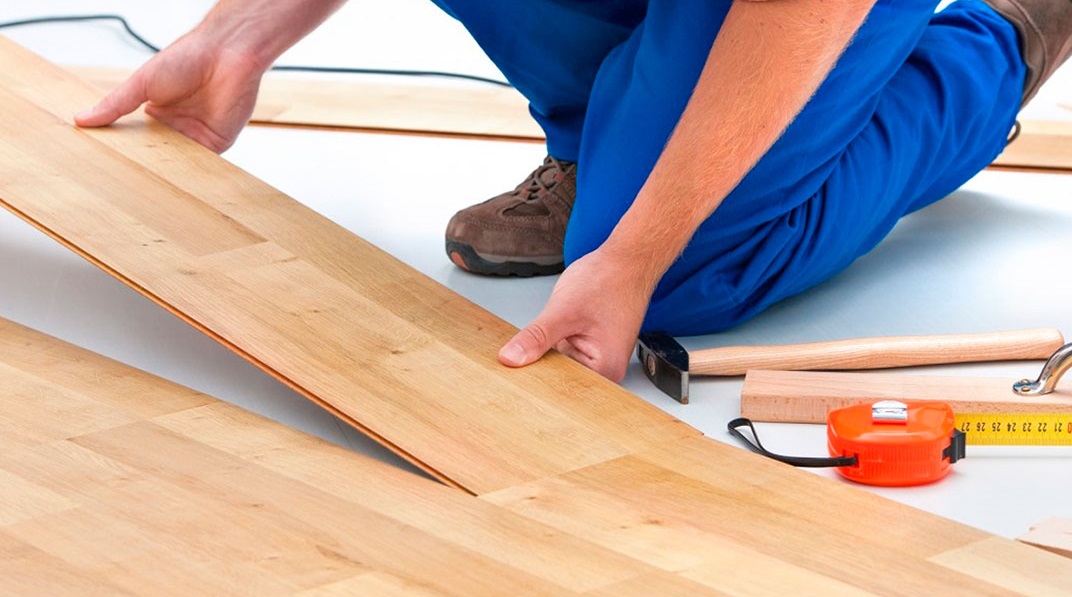
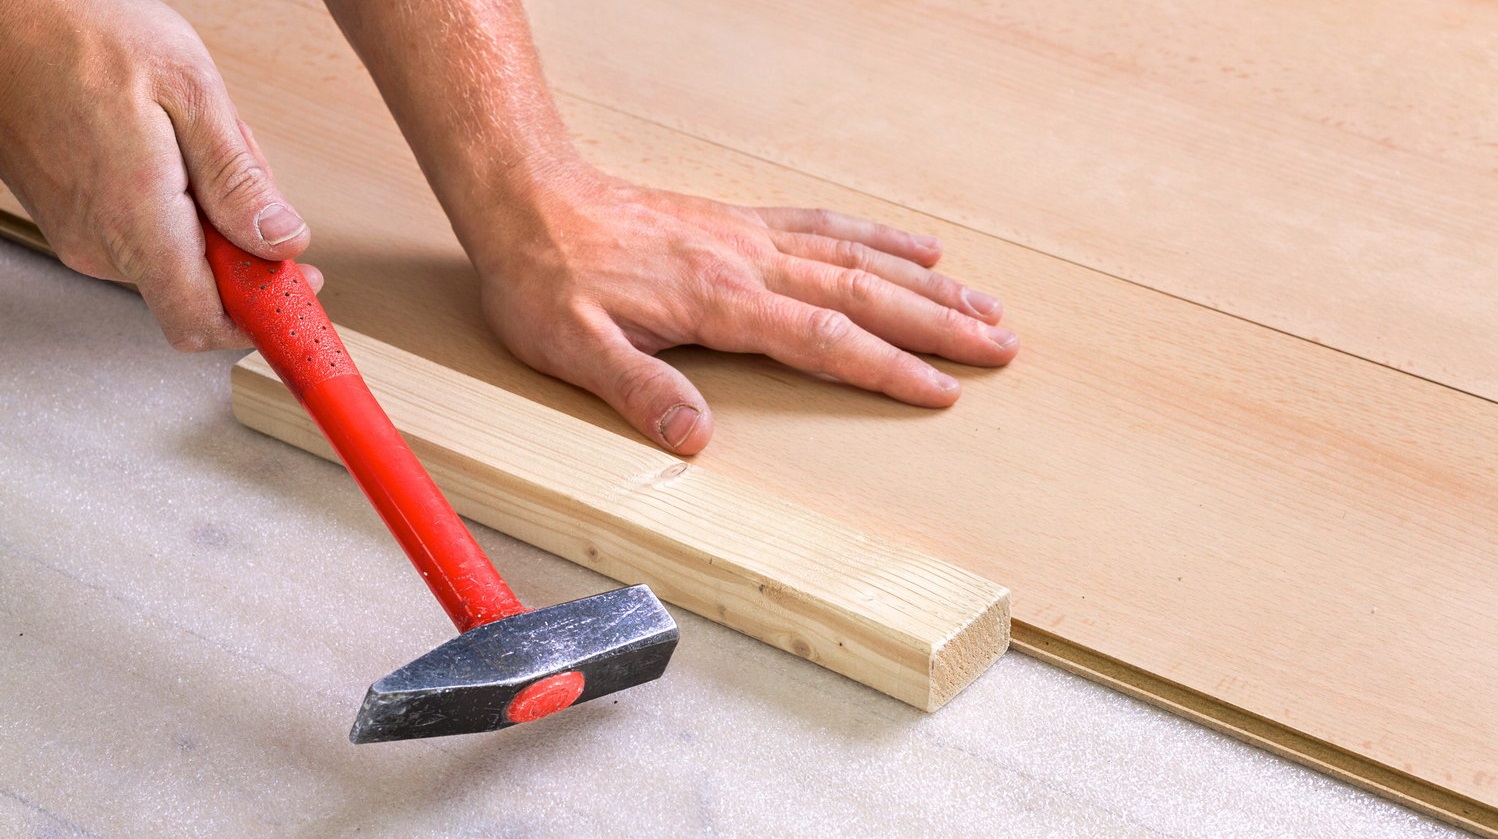
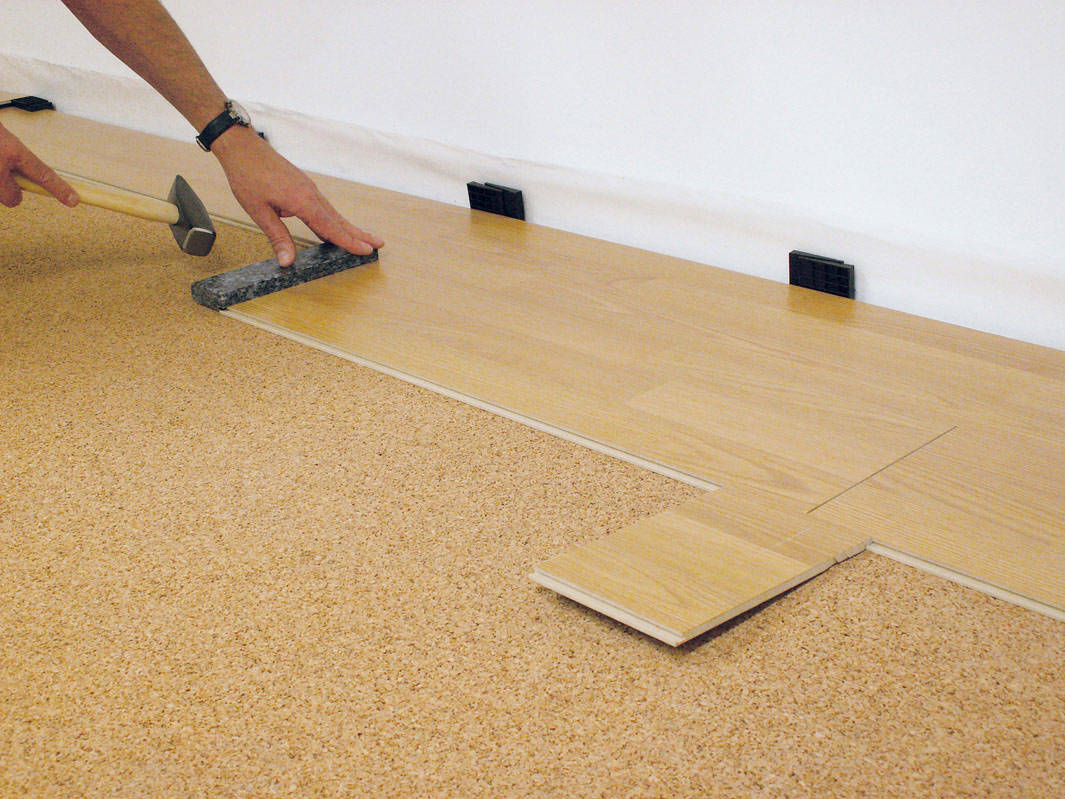
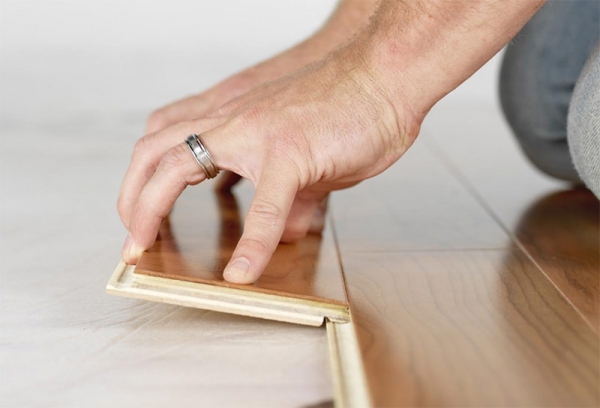
- The second row is connected to the first ends of the long side in a straight line or joined by an angle. The first in the second row is a panel with a length of at least 30 cm. For a neat tamping of the panels, a bar is used.
- For rounding up of structures, pipes, a section is cut out in the panel with a margin of at least 1 cm, which will subsequently be closed with an overlay. The last row will probably have to be narrowed, sawing up to the desired width of the panel along, that is, along their long sides.Installing the last row, remove the wedges, mounting the baseboard around the perimeter, which is attached to the wall.
Choosing this simple type of installation and the desired direction of it - by light or across the rays, you will achieve the desired aesthetic effect and cope with the installation technically, equipping the house with a strong solid floor.
Difficult places
When self-laying you will find difficult to install space - stairs, heating pipes, doorways, cracks. The latter are sealed in the preparation phase of the foundation. In order not to leave a gap between the jambs and the new floor, it is necessary to file the bottom of the rack of the door frame to the thickness of the coating. The joints between the rooms formed as a result of reasonable discontinuous laying of the floor are sealed with decorative aluminum thresholds.
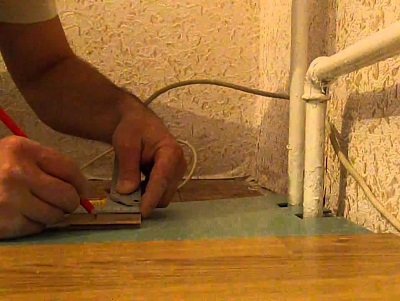
To take into account the change in the linear dimensions of the coating in place of the heating pipes in the path of the laminate floor, It should cut the area under the pipe with a diameter of 20 mm more. Then he will not bulge and warp in this place.
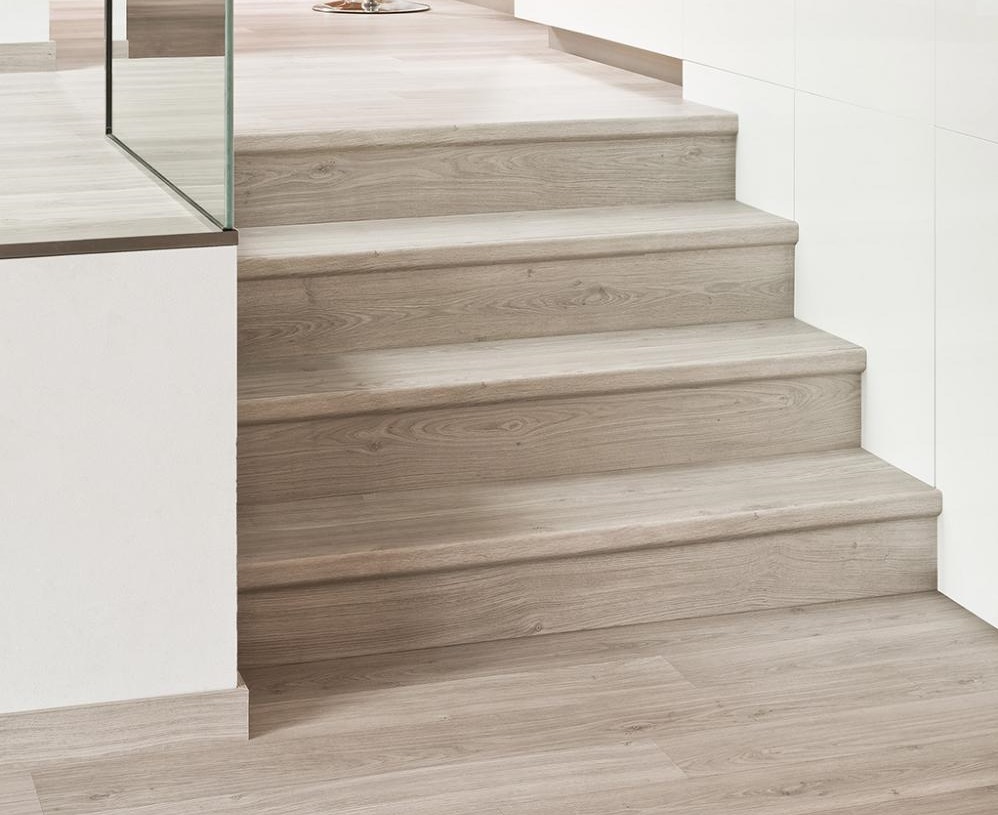
Finishing the stairs with this material is not easy to name. If you are going to sheathe the stairs, get the thresholds for interior and exterior corners.
Useful tips
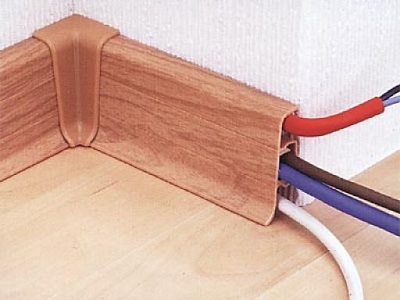
Upon completion of the installation of the floor covering, it is necessary to install baseboards. Experts advise to choose plastic, as hiding irregularities. Wooden suitable for smooth walls. Skirting boards are mounted to the walls, and the wires should not fall into the gaps between the floor and the wall. For the wiring there are grooves in which you need to place it. Waterproofing in the apartment, starting from the second floor, may be missing. And felt pads on the legs of furniture will protect the coating from scratches.

Designers and styling specialists recommend across the rays of light lay laminate with a four-sided chamfer 33-34 classes, with good locks, and without a chamfer or with a double-sided chamfer it is better to lay it out in the direction of light, that is, perpendicular to the window. So the view will be more harmonious - the rays will illuminate on the long side the beautiful texture of the wood, and loose seams, if this happens, are less noticeable.
Builders advise to provide additional heat and sound insulation: if you need to improve these qualities of the floor without a heating system, you can use sheets of plywood or chipboard, sewed them with a concrete base. The concrete floor leveled in any way, as the basis under a laminate, does not need them: after readiness of the basis follows laying.But you can solve these problems with the help of these inexpensive materials, making it as smooth as a prepared concrete floor.
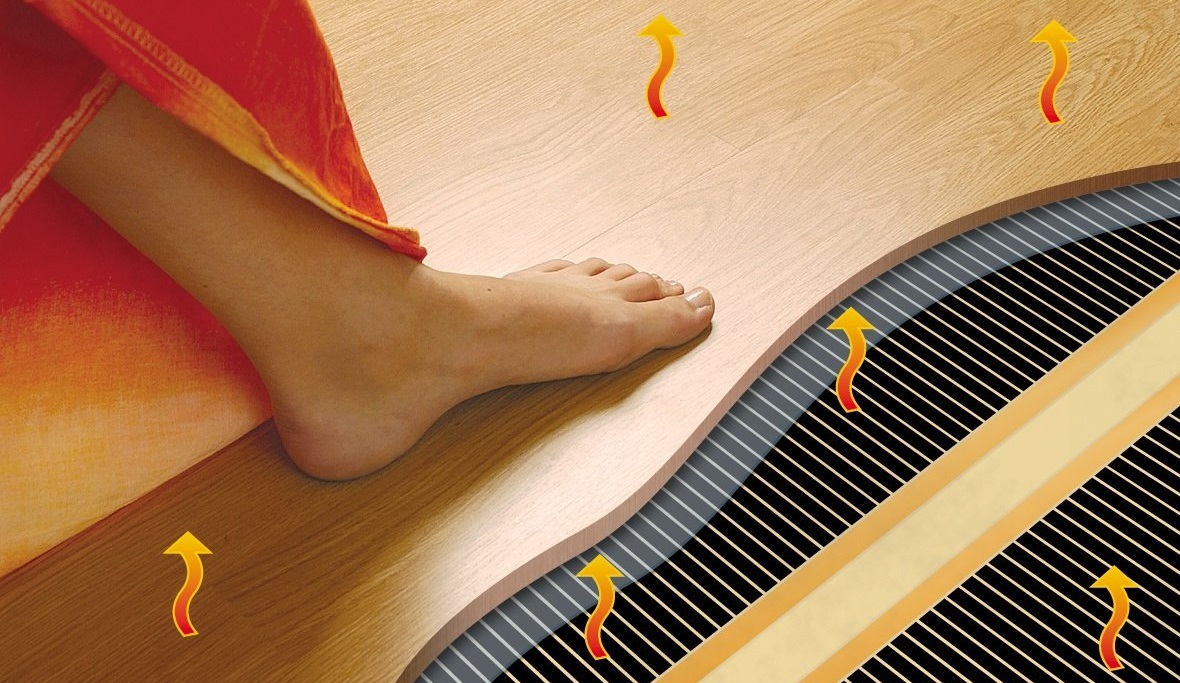
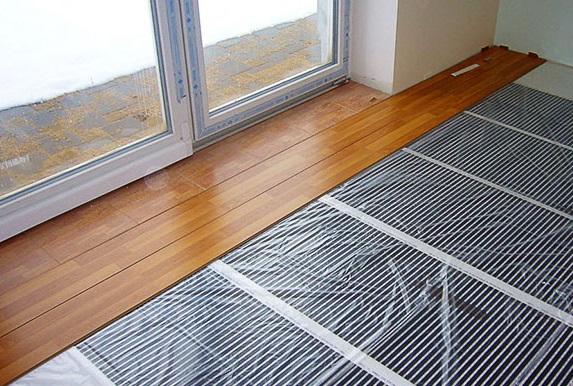
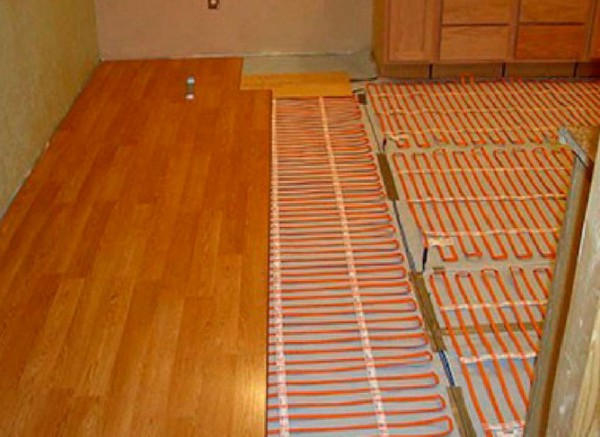
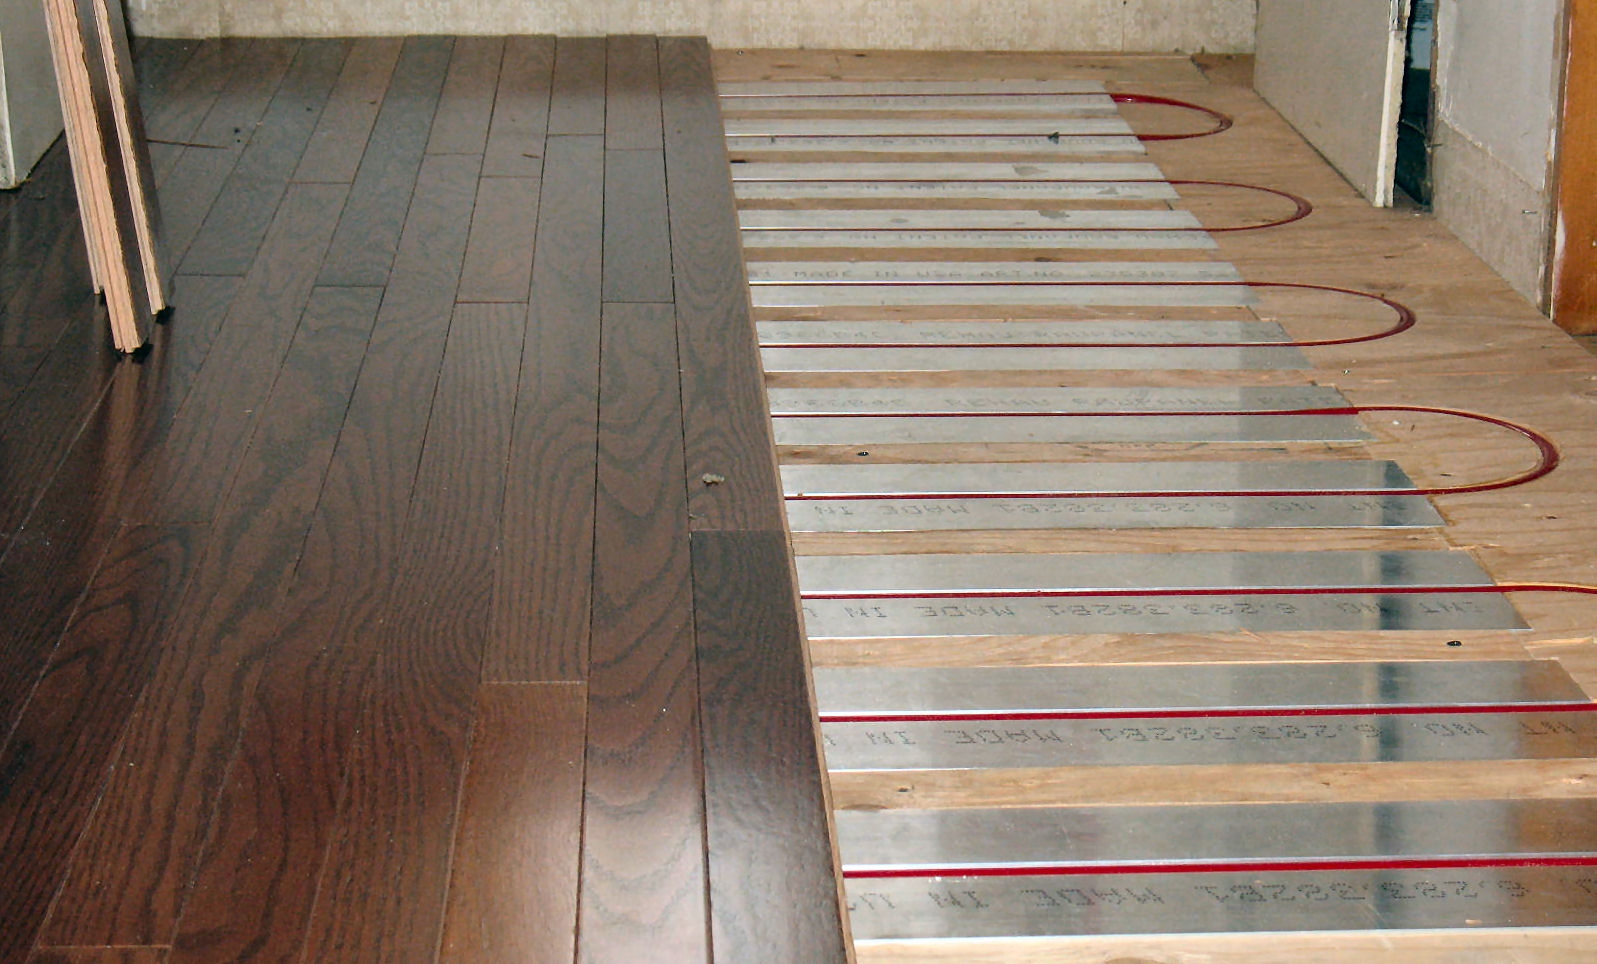
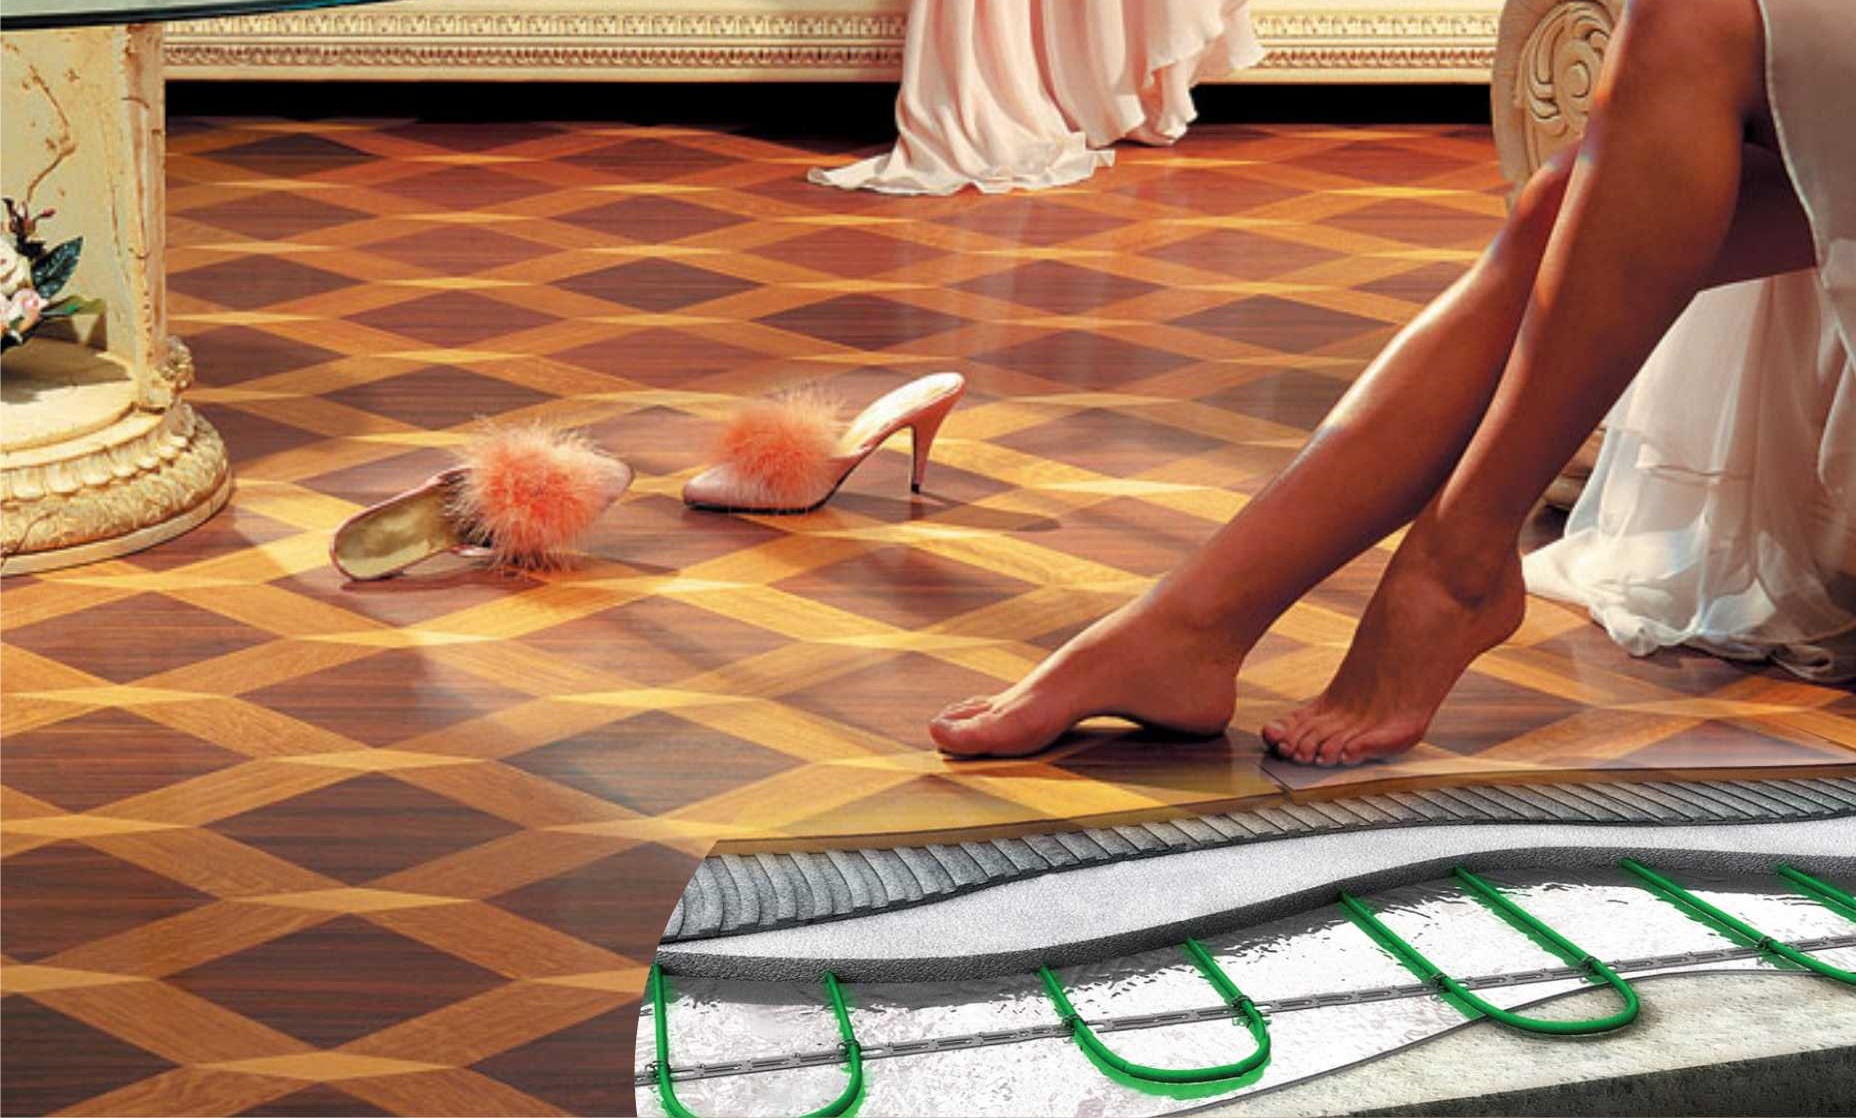
Warm floor
Choosing and installing a floor heating system is a responsible business, with which you can also cope yourself. To help you useful information:
- Under the floor heating system should be a layer of insulation (due to which the heat rises), as well as waterproofing - on a concrete base.
- This may be an electric or water floor heating system.
- Do not heat rooms with different climatic conditions in one continuous system, for example, a room and an unheated balcony.
- The moisture level of the finished screed before installing a warm floor does not exceed 3%, it is checked with an improvised means - plastic film (S = 1 * 1 meter), under which there is no condensate on the dried screed after 24 hours.
- If the thickness of the screed exceeds 3 cm, heat transfer will be ineffective. It is also inadvisable to lay laminate for one floor heating system on another system that is not suitable for it: a water system on an electric one, for example. All specifications are shown in the certificate of coverage.
- A conventional laminate can safely be heated up to 25 ° C, for control there is a thermostat - with water heating it is programmed to the maximum value t.
- The coefficient of thermal conductivity of 0.05-0.15 laminated coating is suitable for heating systems.
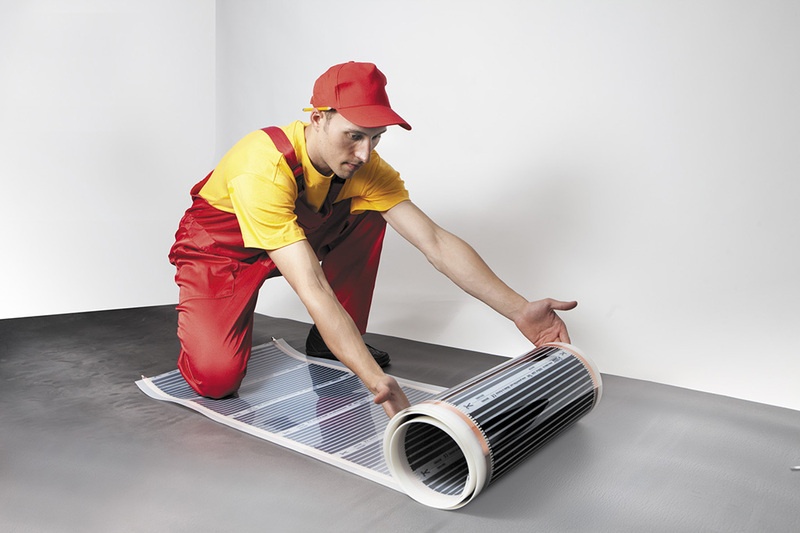
- From the electrical systems under the laminate it is necessary to choose the infrared floor, as the safest and most effective. Cable does not fit as economically unprofitable. All this is a difficult installation technique.
Whatever type of laminate and the way of its layout you choose, we wish you the strength and courage to perform laborious, but grateful work on preparing the base and laying this multifaceted in all respects coverage.
For more information on this issue, you can see in the next video.