Plasterboard hangers: varieties and their characteristics
Drywall - a popular building material that allows you to create complex structures. As a rule, sheets of plasterboard are fixed to the support, which is assembled from additional elements. One of the main parts from which the drywall mounting frame is assembled is a suspension. Different types of suspensions allow you to realize the planned repair plan as much as possible and achieve a good result. In addition, many of them give additional strength to the structure, which improves the safety and resistance to deformation of the framework for fixing drywall sheets.
Purpose
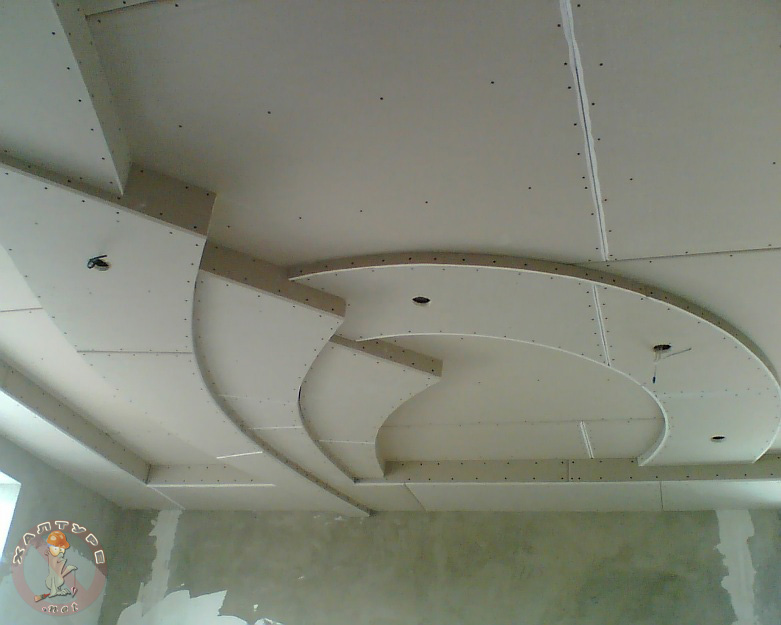
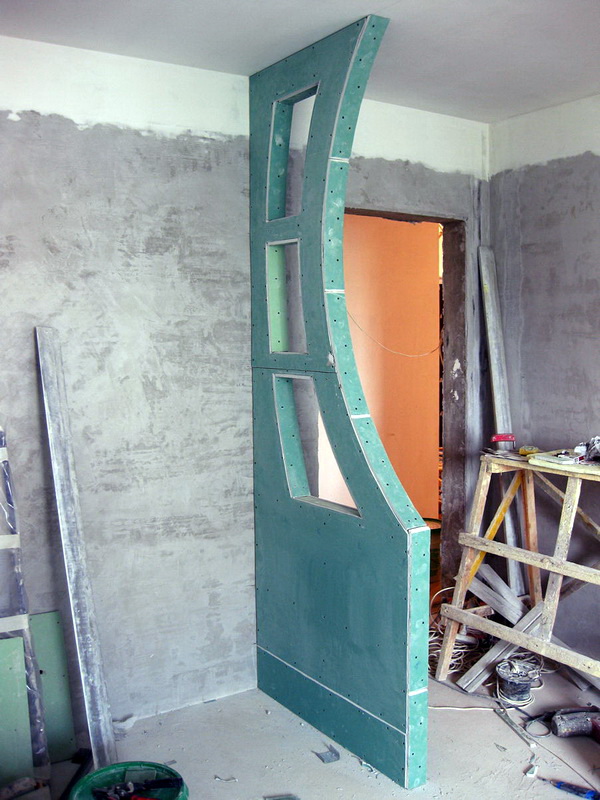
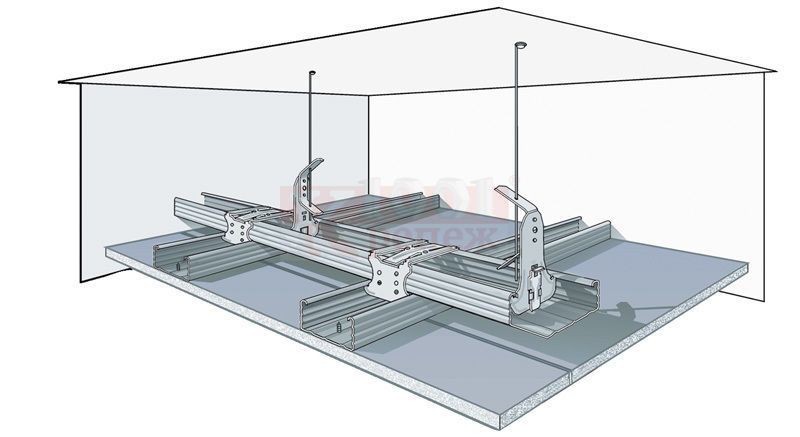
Suspensions are used to assemble the frame in cases where the surface that needs to be sewn up with sheets of plasterboard, has height differences or other irregularities. Hangers allow you to create a reliable fastening of the profile and guides for the sheets. Stretch and suspended ceilings, wall structures with complex geometry can not be installed without special suspension systems. For each case, apply a certain type of product.
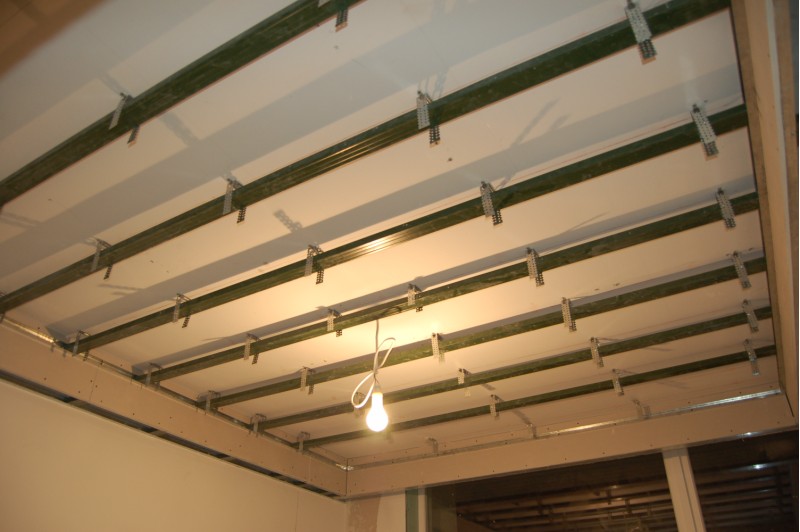
Suspensions allow you to create space behind the wall or under the ceiling, in which communications such as electrical wires can be hidden. Also in the formed space can be built-in shells built-in lamps and chandeliers.
Suspension for gypsum sheets (gypsum board) traditionally made of galvanized steel, which has excellent anti-corrosion properties, which means that it is not afraid of moisture and temperature changes and will serve if it is correctly installed for 5 years or more. You should know that the greater the thickness of the suspension part, the greater the load it can withstand.
Attention! If the repair is planned to be carried out independently, then it is necessary to follow the recommendations for choosing the type of suspension for certain tasks. Non-observance of these rules may lead to unpleasant consequences (for example,structural strength or its geometry may be significantly impaired).
The same applies to the work of hired masters: it is important that they follow these rules.
Types and their characteristics
Depending on the purpose and scope of application, suspensions for plasterboard structures are divided into:
- straight;
- with clip;
- nonius suspensions;
- butterflies;
- vibro-hangers.
Straight
This suspension is the most popular of all varieties used for the installation of plasterboard. It is a simple galvanized steel plate. Its undoubted advantage is that its shape can be changed in the process of work and give a u-shaped look. This fastener can withstand a load of up to 40 kg.
Can be used for:
- creating a framework for the subsequent plasterboard plasterboard of the ceiling with an uneven surface;
- assembling a frame for facing walls or ceiling;
- pre-leveling any surface.
Direct suspension is easily attached to concrete, brick and stone surfaces, the poet can be used in a variety of areas.
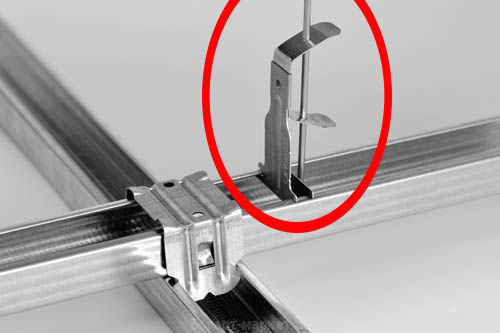
Anchor
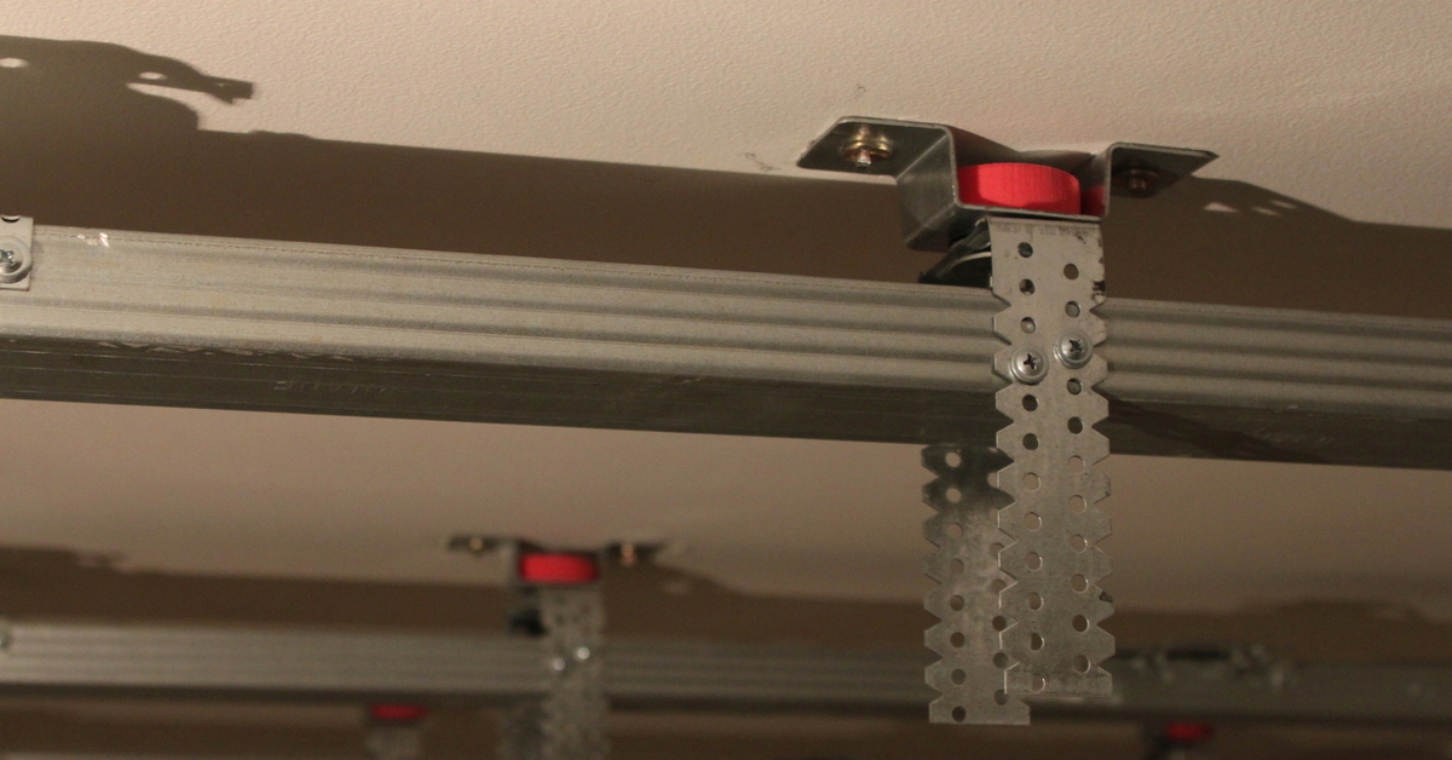
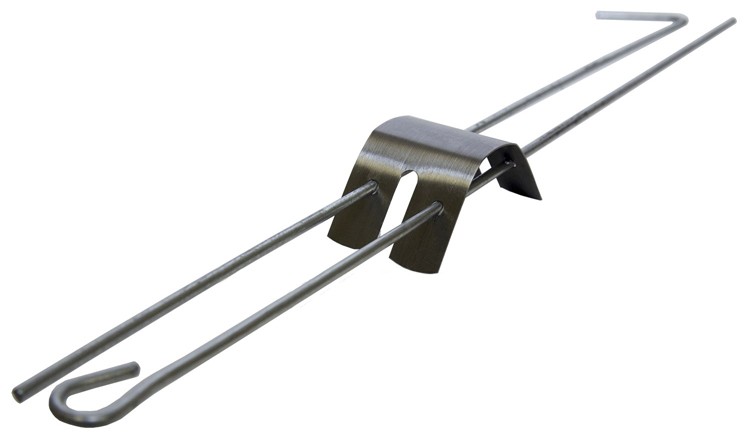
Hanging with a clip is used for fixing false ceilings of plasterboard.Thanks to these elements, you can create the required size of the space above the ceiling, that is, you can adjust the height of the assembled structure. This is possible due to the use of wire thrust. On one side of such a suspension is an anchorage, and on the other - a clamp. Height adjustment is carried out by floating suspension elements.
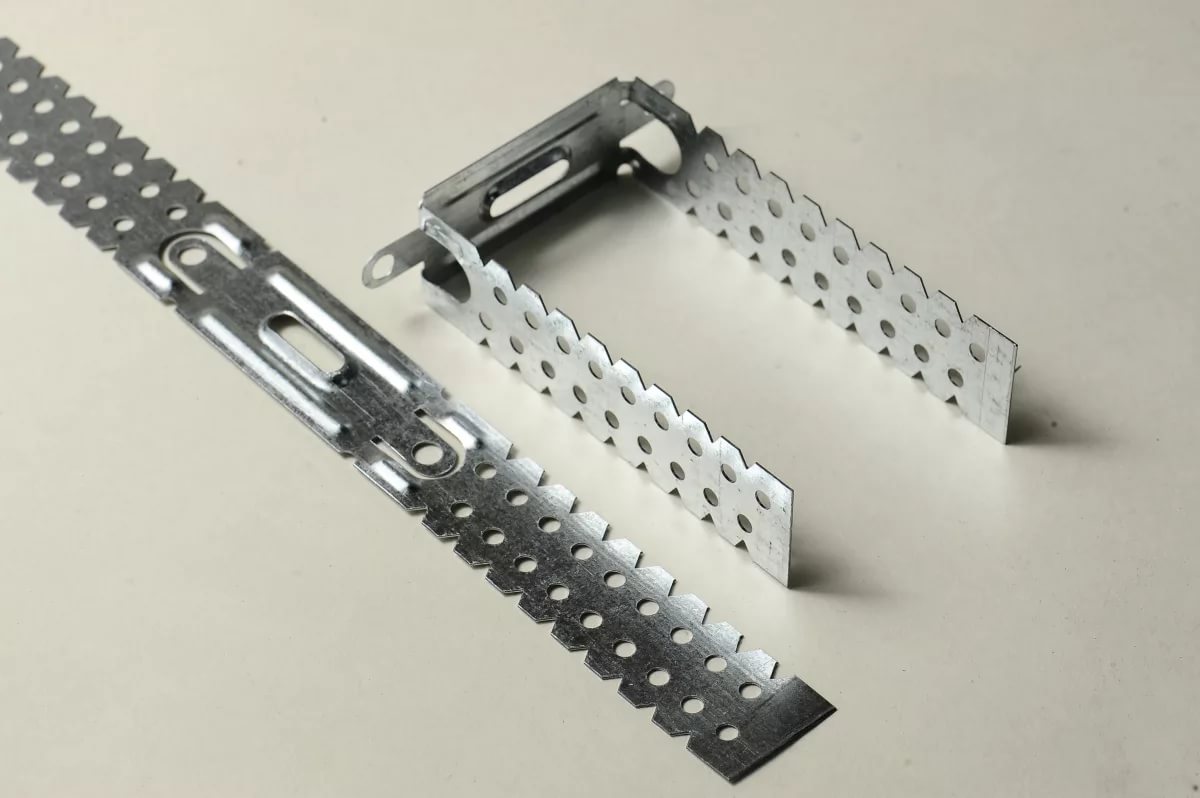
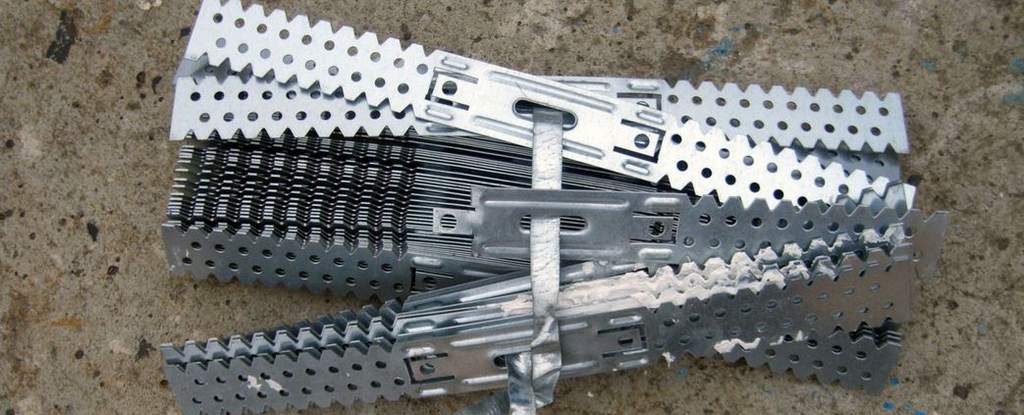
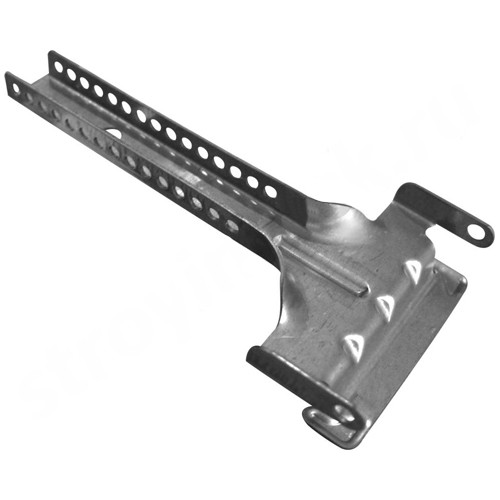
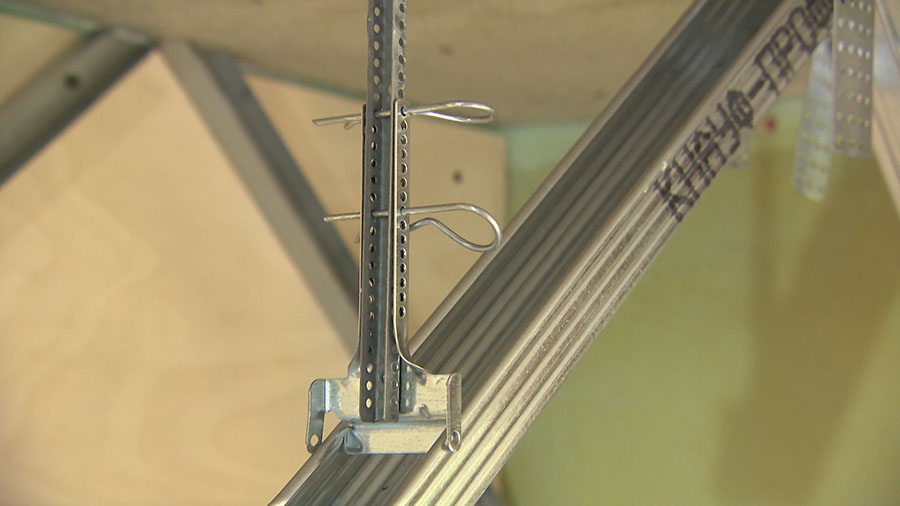
Vernier
Required to give the structure additional rigidity. It consists of the lower part, represented by a clamp or fastener with holes for screws. Usually there are a lot of fastener holes, it is necessary for convenience of fastening in the right place. The mounting bracket (clamp) is needed to hold the suspension in the desired position.
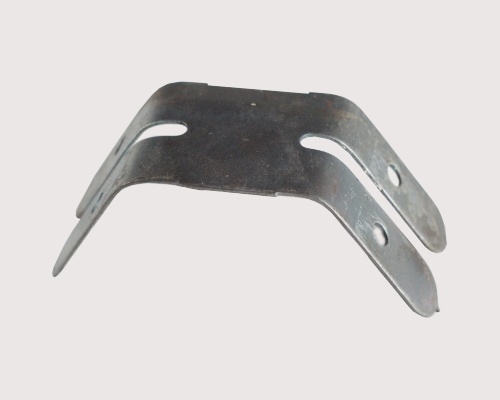
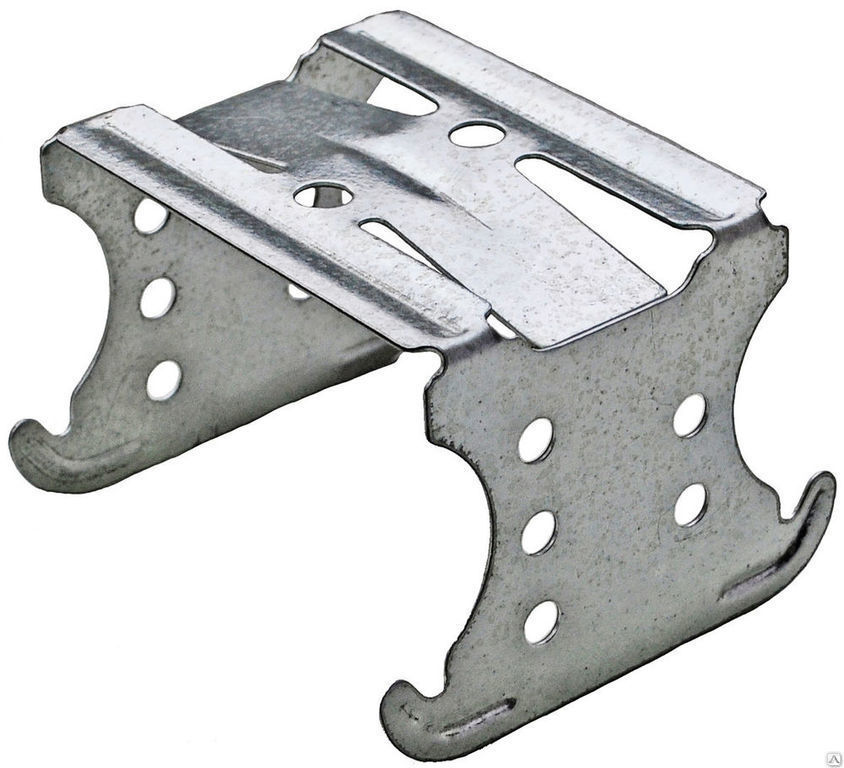
Butterfly
This is a special suspension that has a u-shape and curved edges that snap into the profile and allow you to create the most reliable fastening.
Vibrating hangers
Used for sound insulation. The design of this part contains a spring element that prevents the transmission of sound waves from overlapping. Able to withstand loads from 15 to 50 kg. It is used both for sheathing plasterboard walls and the ceiling.
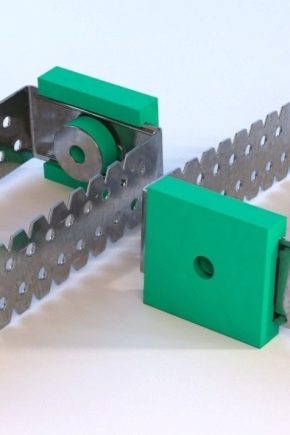
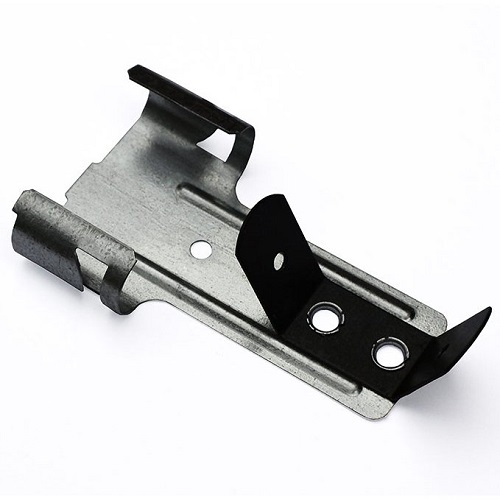
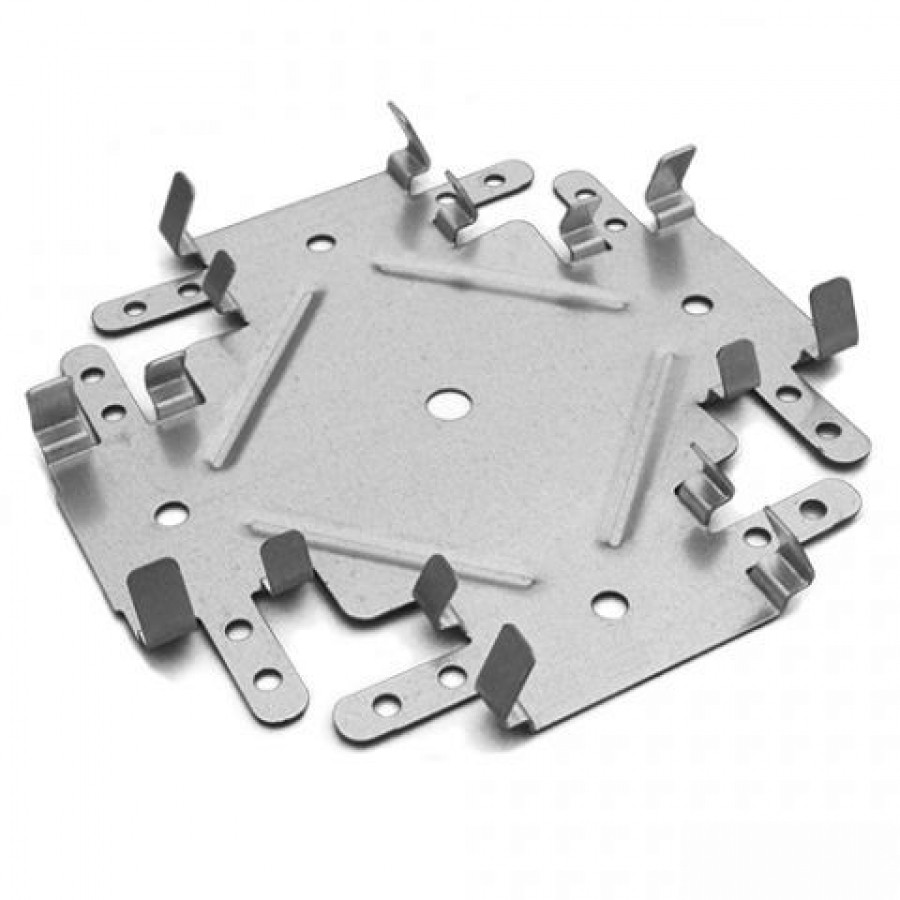
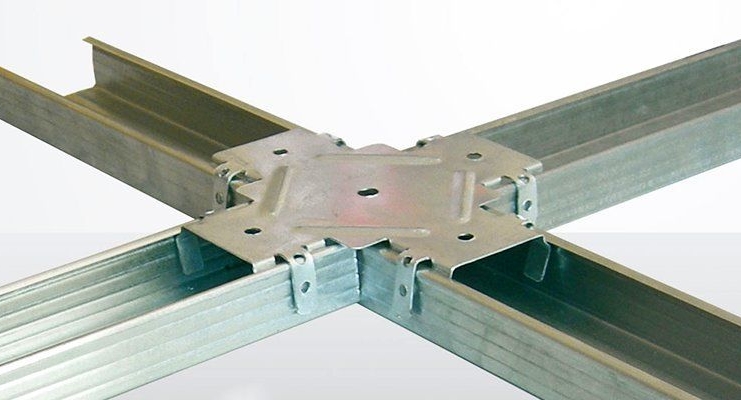
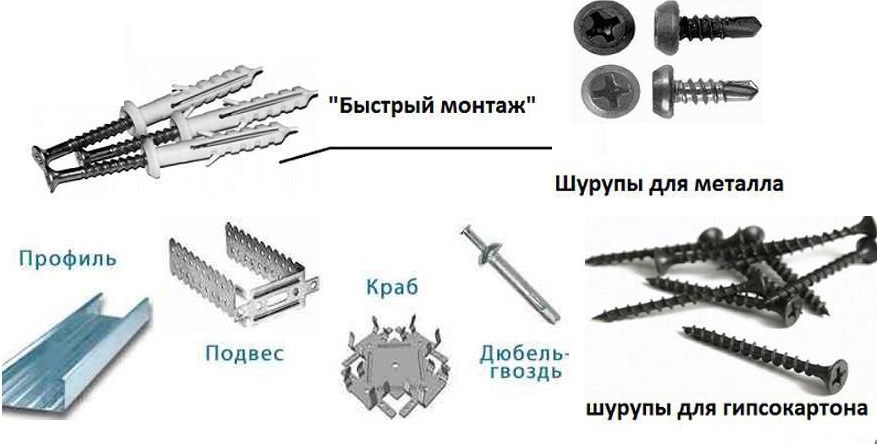
Crab
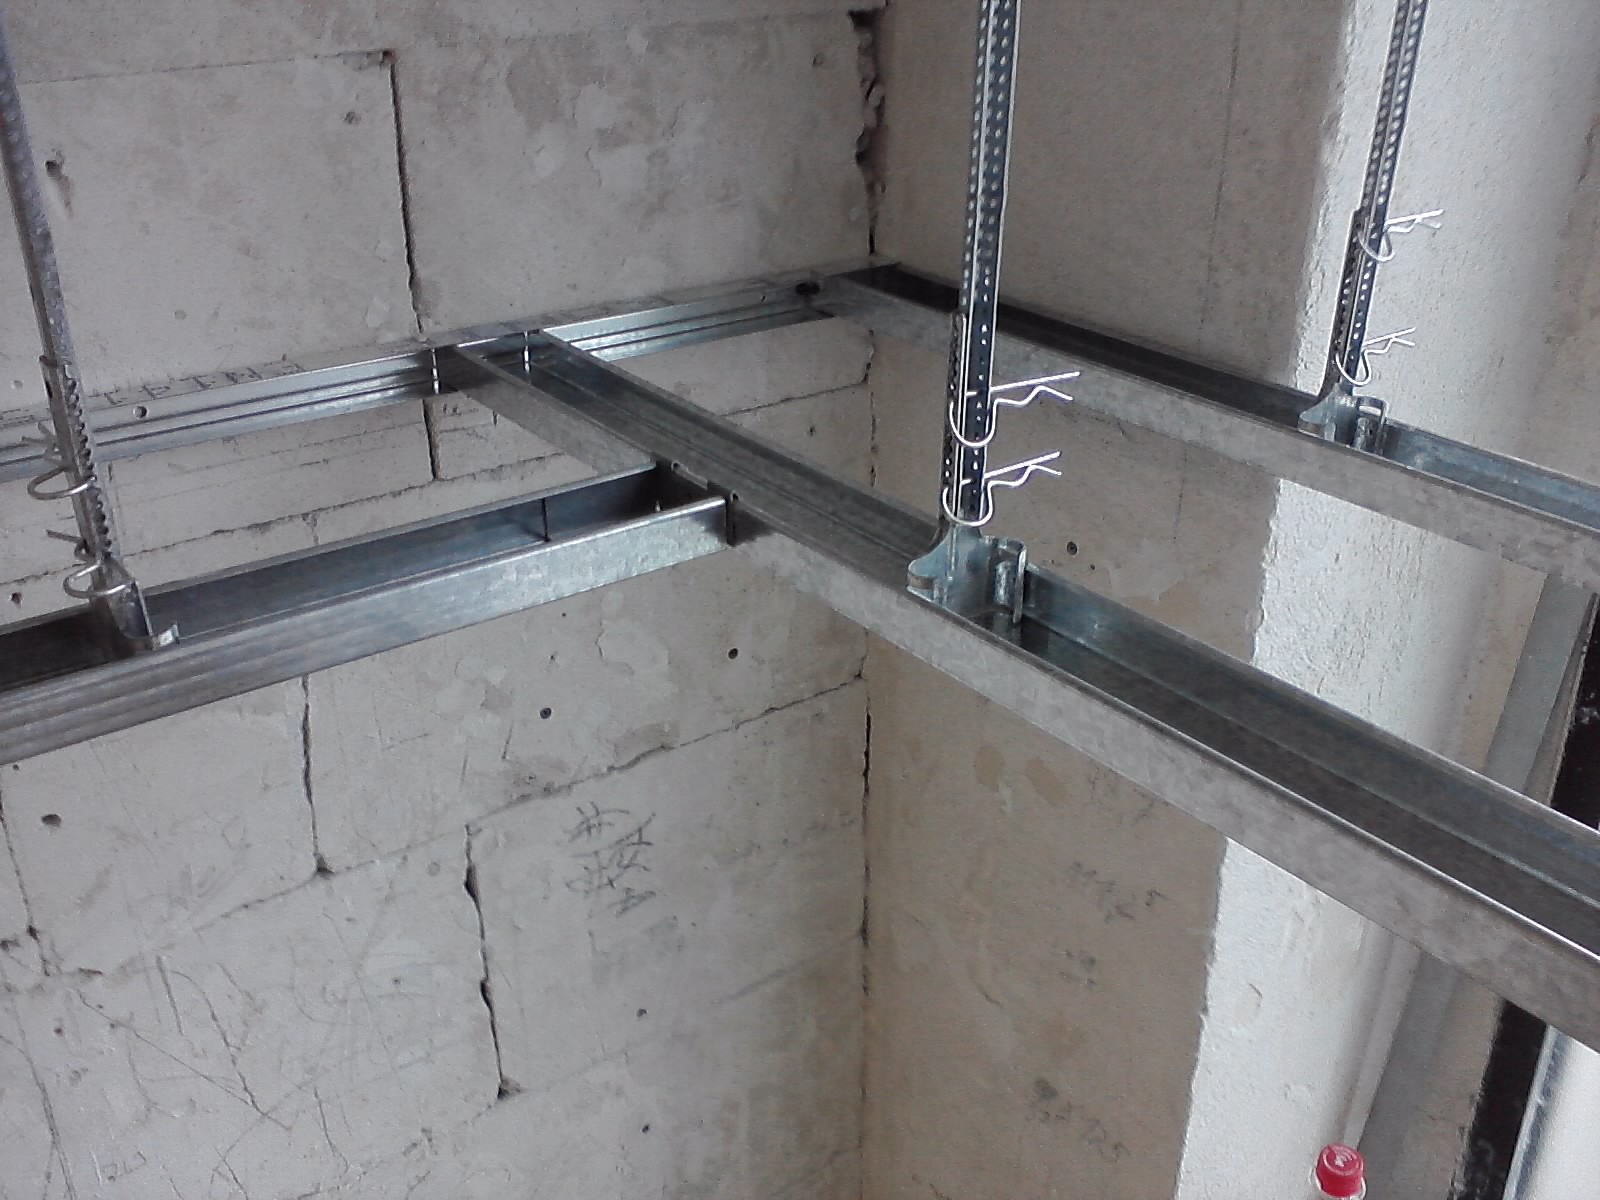
Crabs are also used to connect structures - special fasteners for CD structures. It allows you to mount a strong frame in the shortest possible time. Crabs are used not only for suspended ceilings, but also to create a metal frame of walls, which are subsequently sheathed plasterboard. These fasteners are very durable and can withstand significant loads and prevent deformation.
Dimensions
Choosing the right type of suspension depends on its size, as well as for what purposes it is needed. Straight lines have dimensions of 12.5x6x3 cm, so if a grandiose construction of large dimensions with a complex geometry is planned, then using this type of fastener is unlikely to achieve a satisfactory result. In such situations, it is justified to use suspensions with a clip, whose length is from 0.5 to 1 m.
Elongated suspensions, which are available from some manufacturers, can also be used, or it is possible to extend the existing suspension with your own hands. For this, one element is screwed to the other with bolts (usually two are enough).
At what distance to put?
It is also important to calculate the number of necessary suspensions.This value directly depends on the load that it is able to withstand, taking into account the fact that a drywall sheet with dimensions of 1200x2500 cm has a weight of 22 kg.
Suspension can withstand the following loads:
- straight line - about 40 kg;
- anchor - up to 25 kg;
- nonius - up to 40 kg;
- vibration mount - from 12 to 50 kg;
- butterfly - about 40 kg.
Thus, the vibro-suspension is able to withstand the greatest load, so they will need less and more anchors. On the basis of the permissible load, it is possible to understand at what distance from each other the suspensions can be placed and how many will be needed.
It is important to take into account the recommendations on the location of profiles and suspensions, as well as allowable indents. The distance between the profiles is 60 cm, and the distance from the walls is 30 cm. The frontal indent is up to 1 m.
How to fasten?
In order for the installation of the construction for wall cladding of the GKL ceiling to be as convenient and correct as possible, all materials and tools must be prepared in advance.
You will need:
- profiles;
- suspensions;
- dowel-screw;
- metal screws (seeds);
- drill;
- perforator;
- long rule (at least 2 m);
- rope or cord;
- construction plummet.
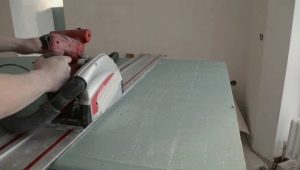
TInstallation technology includes sequential steps.
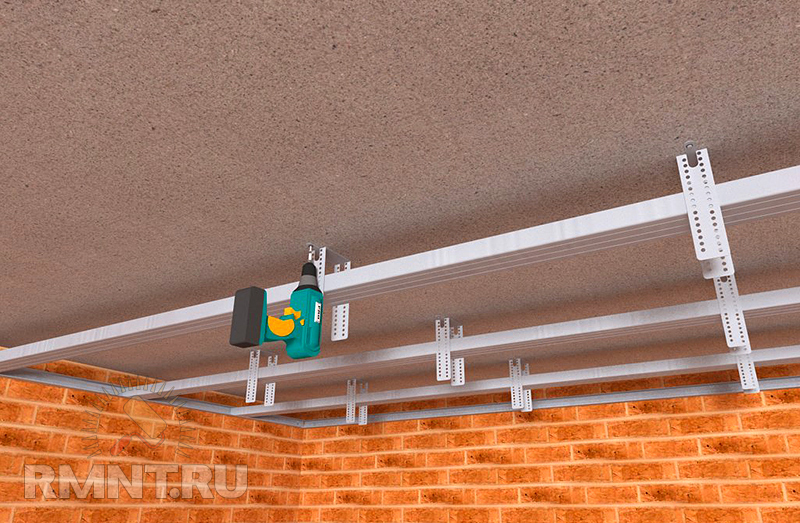
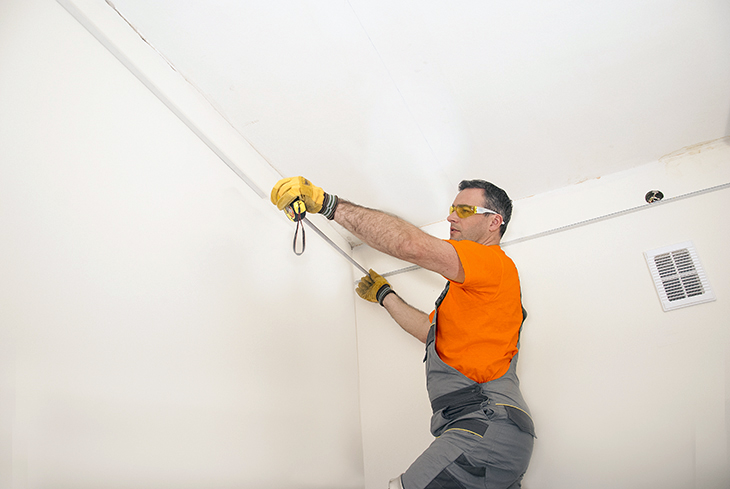
- The marking of the working surface. To do this, on the ceiling or wall are marked lines fastening guides.It is important to consider that the line of attachment should be lower than all irregularities (if it touches the ceiling). For this it is convenient to use the rule.
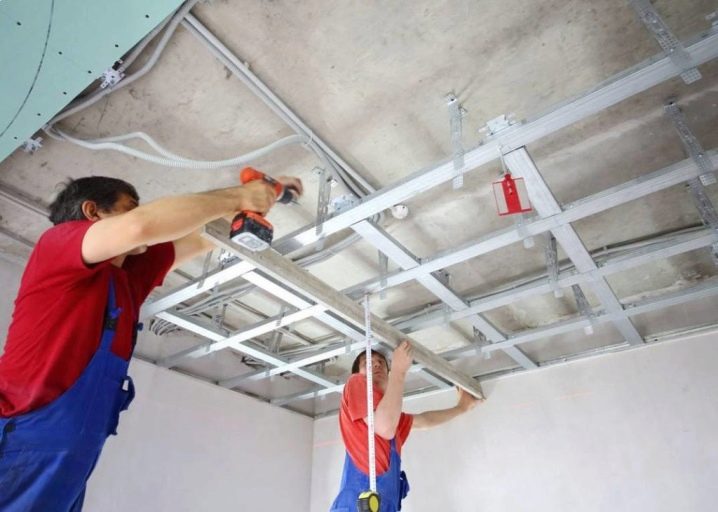
- Through the profile pressed to the wall with a perforator, holes are punched in the wall. After that, the dowel-screws are screwed into them with a drill.
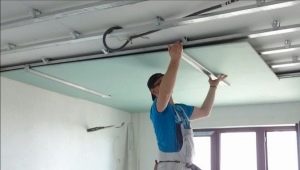
- Suspension mount. They are installed along the axes of the profiles. Each suspension is attached with two dowel-screws. They can be screwed both in the center of the suspension, and at its edges.
- Each profile is trimmed to the required length. Then they must be inserted into the guides and fixed in a horizontal (for the ceiling) or vertical (for the walls) position.
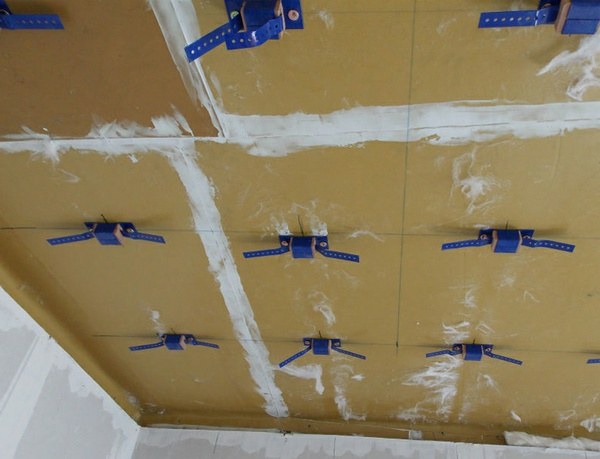
You should pay attention to the fact that insulation and noise insulation are arranged after mounting the suspensions and before fixing the profiles. Insulation plates are worn on the “ears” formed by the hangers, and their edges are bent inward of the frame.
Self-made repairs always deliver more joy and satisfaction. With the help of drywall to create a unique interior in the premises has become easier. And suspensions in this matter play an important role. Their variety will allow to realize the most courageous fantasies in a short time.
Tips on how to properly secure the gimbal can be viewed in the video below.