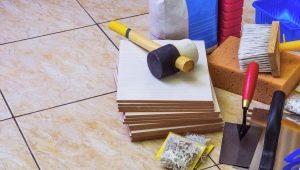
Plaster bucket "hopper": types and application
No modern master will ever lose sight of developments that improve the quality of work. One of these devices is considered to be a plastering bucket “hopper”. This device is aimed at mechanization of the workflow. In this article we will examine the scope of its use, we will study the distinctive nuances and learn the varieties of this device.
Special features
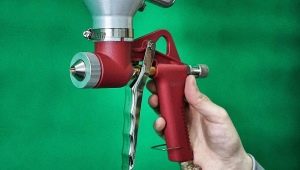
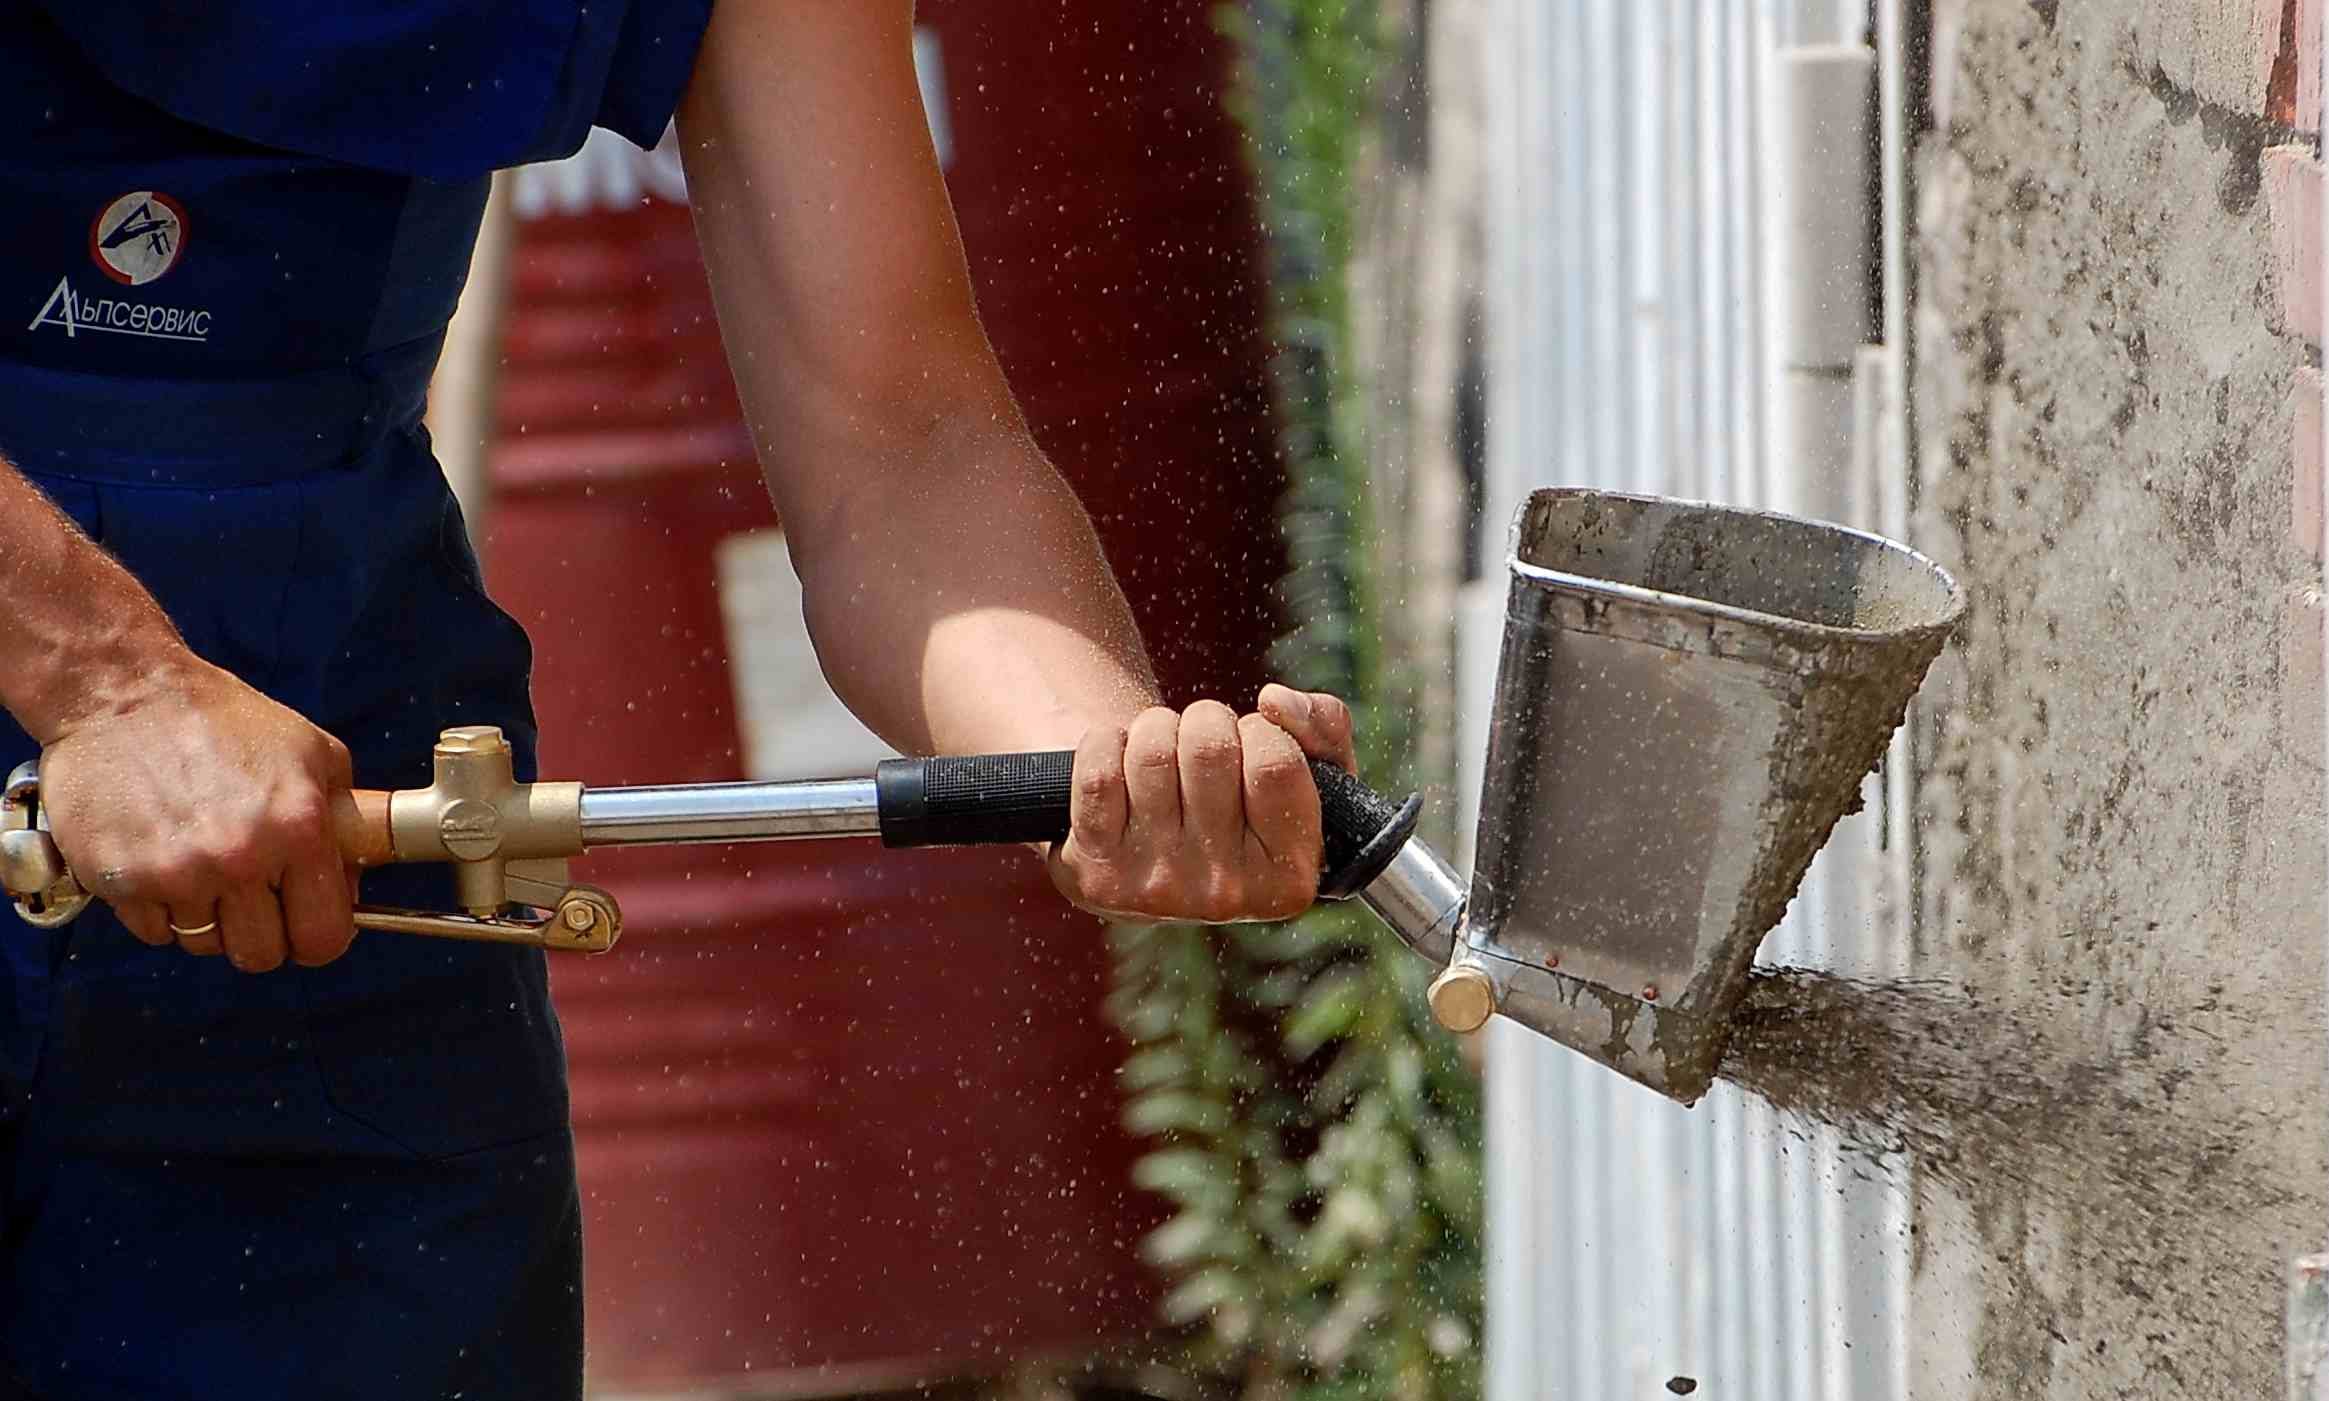
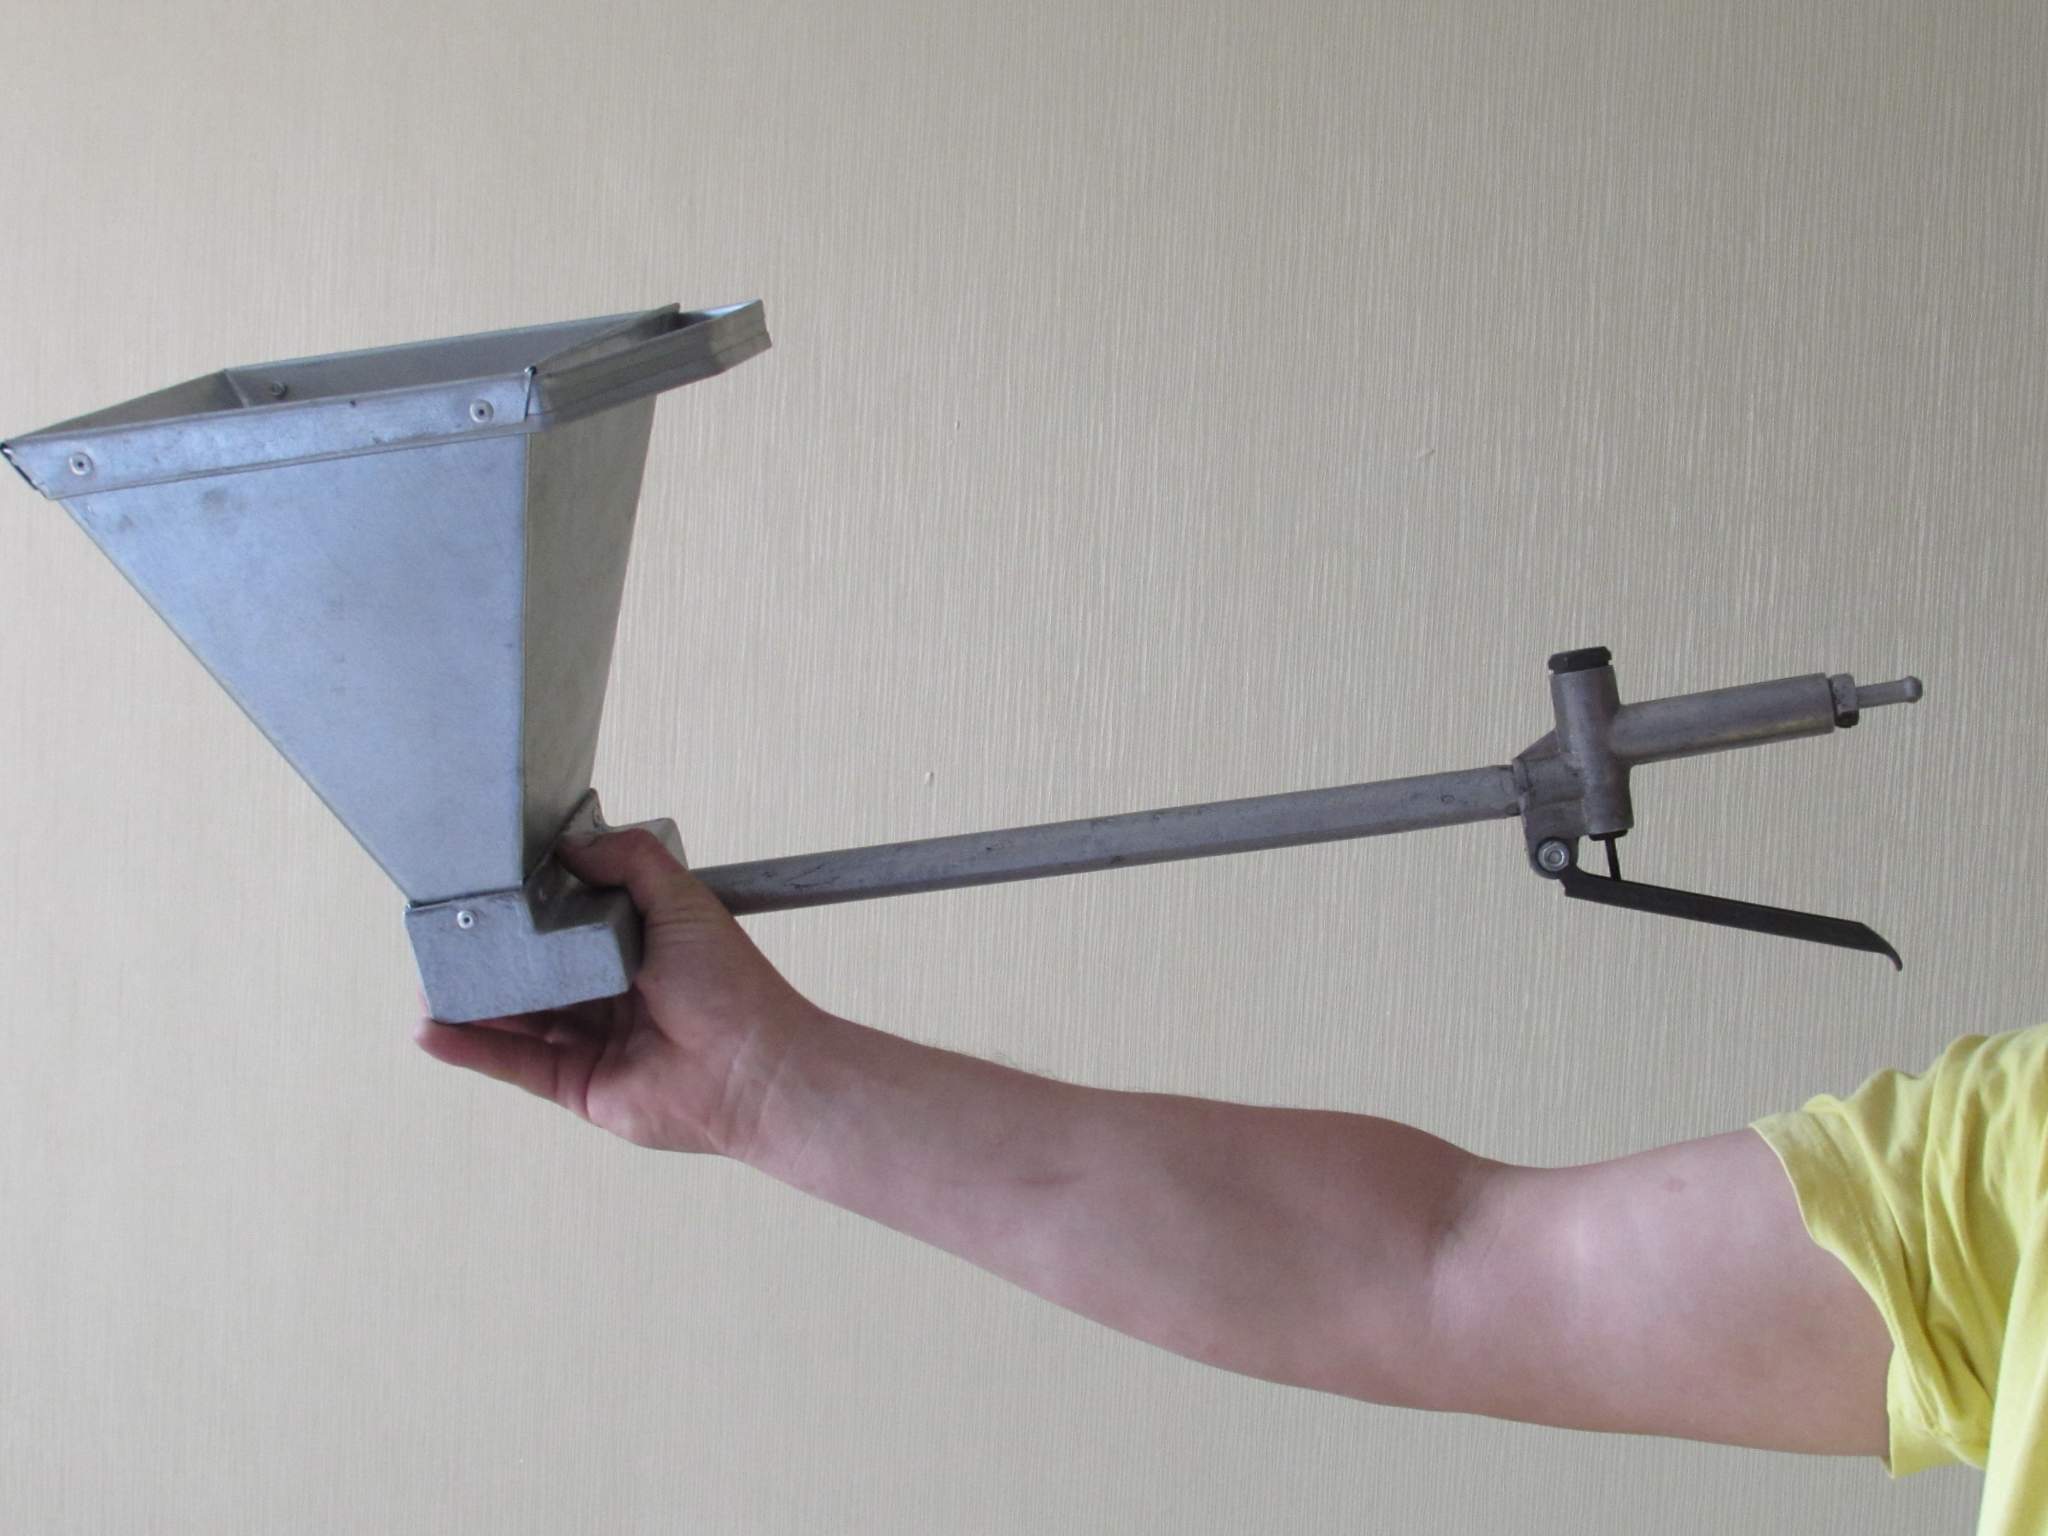
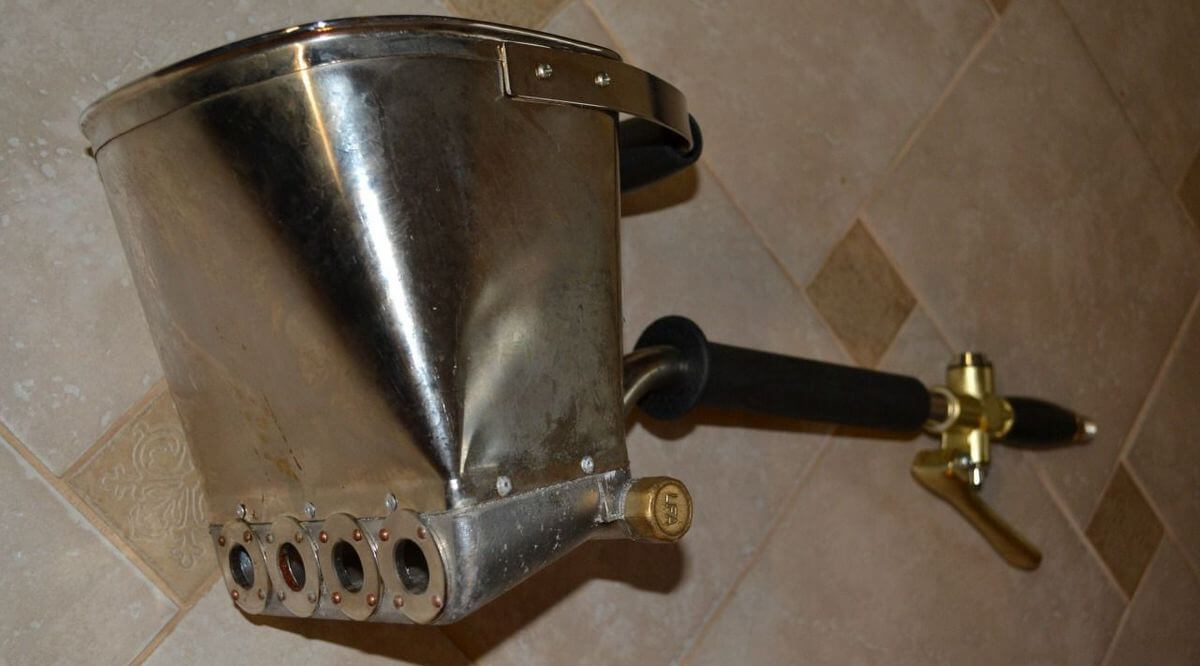
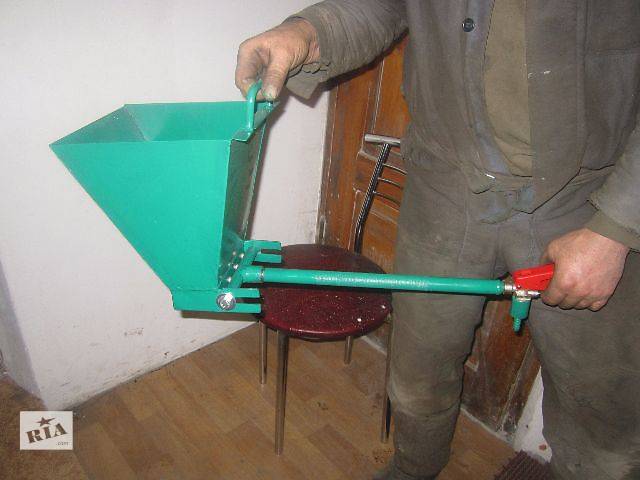
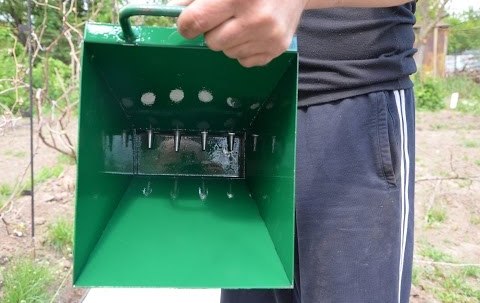
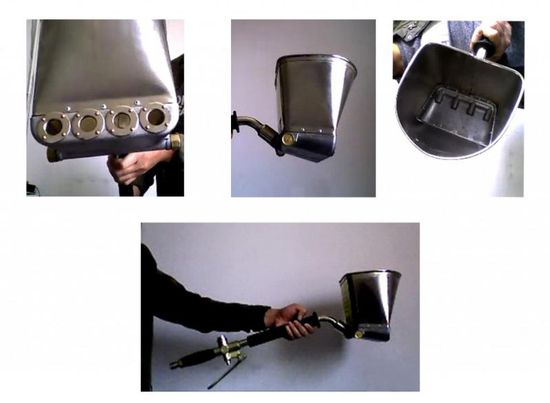
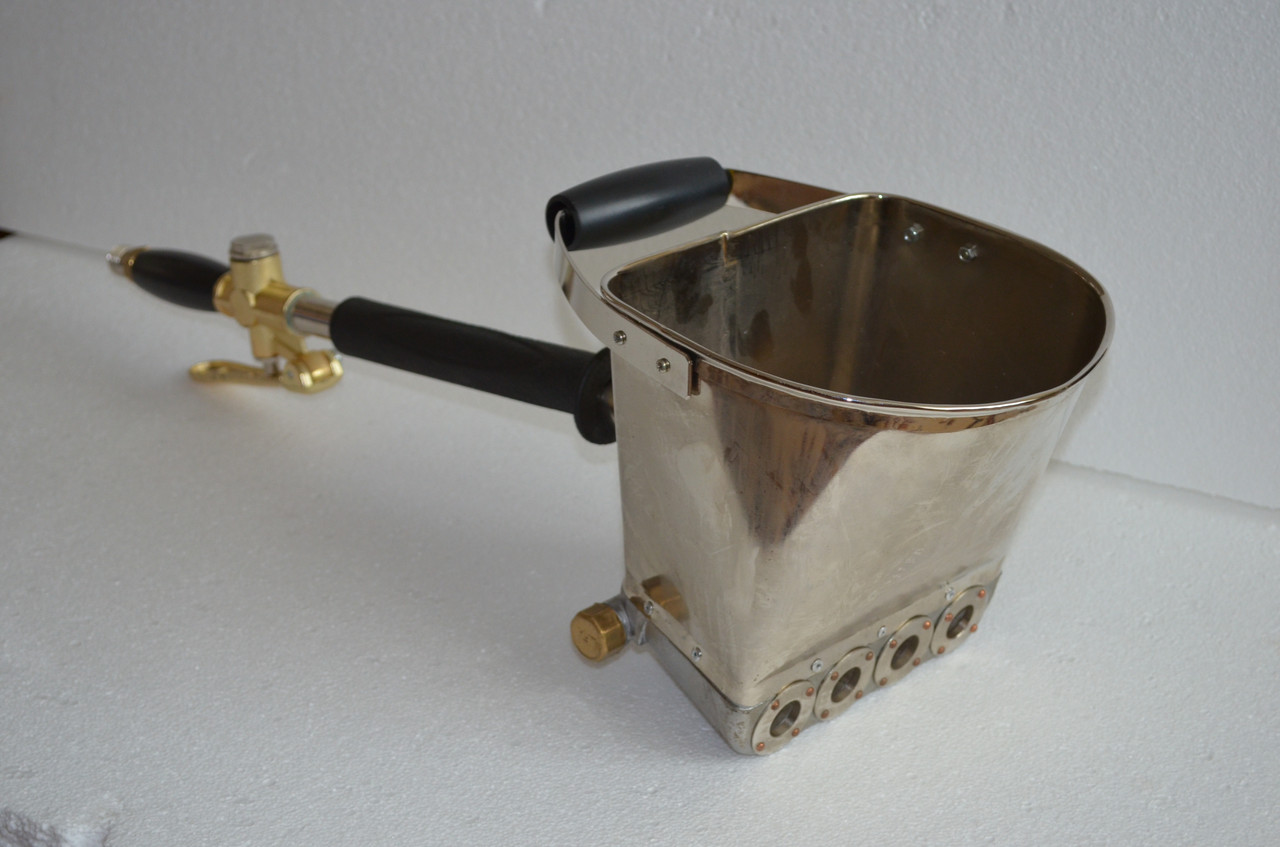
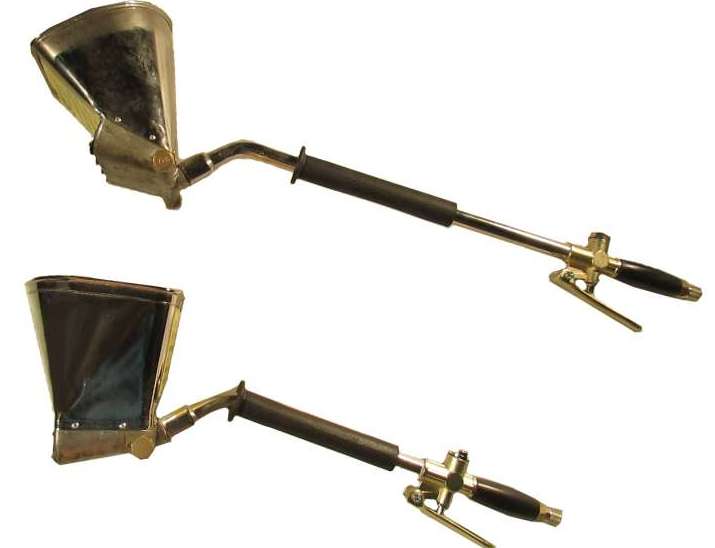
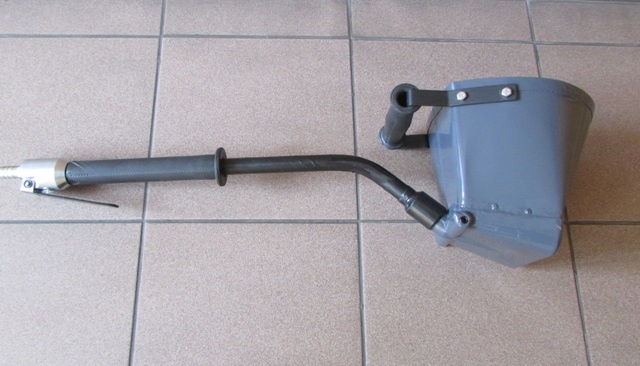
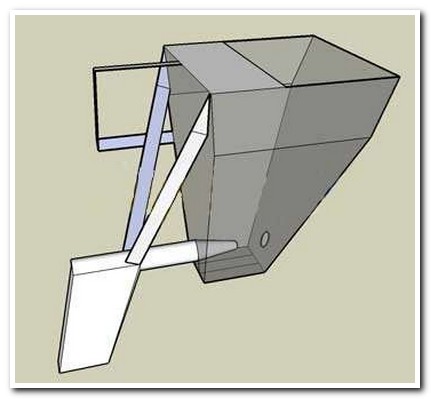
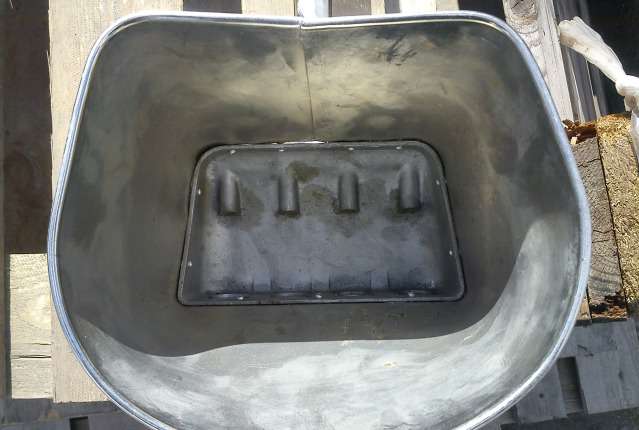
"Hopper" in translation from English means "jump", "jump". This property is transferred in principle of operation. Externally, the device is a bucket with a handle, from a nozzle which mechanically sprays finishing material onto the surface of the base to be treated. From the front side, the bucket has a special hole, from where the plaster mixture is fed directly to the wall.
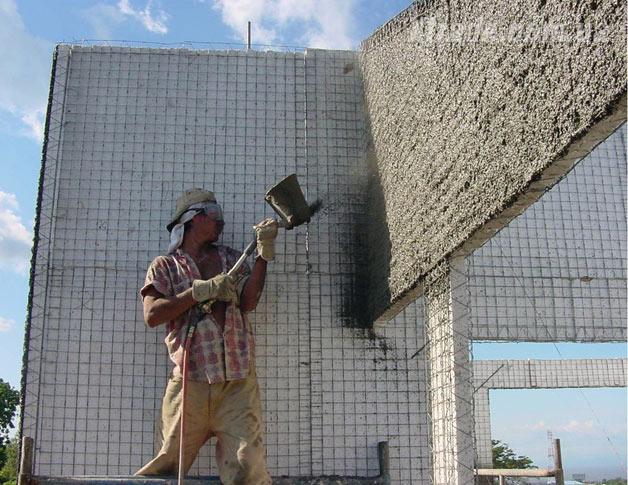
This is a kind of assistant wizard, due to which you can quickly perform high-quality finish planes. The device does not provide for work in small areas. Its distinctive feature is the distribution of plaster mixes in the shortest possible time. To empty one serving takes no more than a few seconds. Within 1 hour, the hopper can consume up to 60 cubes of solution.

The use of a mechanical method saves the mortar mixture up to 40%. Masters call such a device pnevmokovshy. The purpose of the device is quite extensive. In addition to plaster, it works with other finishing mixtures. For example, this tool copes with the application on the surface of cement-lime and adhesive compositions, as well as mixtures based on gypsum and paints and varnishes.
The design of the plastering hopper is fairly simple. However, it has the function of adjusting the feed rate of the existing mortar from 5 to 10 seconds for 1 portion of the plaster mass. This allows varying the thickness of the applied layer, based on the choice of the mixture and the planned finish. For example, to apply a relief finishing plaster it will take more.
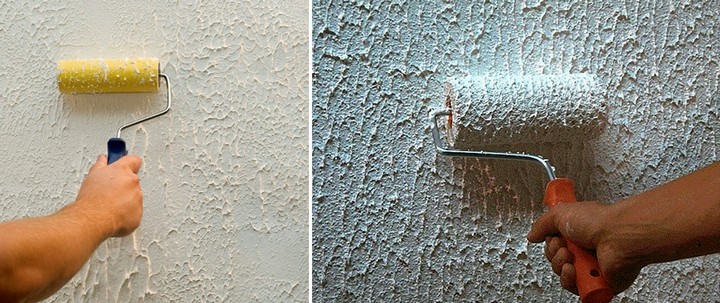
The principle of working with a bucket is simple. Bring all the solution at once (it does not have time to dry). After they fill the bucket and empty it over and over again, until they cover the entire area to be treated with plaster mixture. After take the rule or a wide spatula and level the base.
If you need to perform a relief pattern or other finish, which requires additional time, the foundation is prepared no more than 1 wall at a time.
Advantages and disadvantages
Denote the main advantages of the "hopper":
- Greater grip. Due to the pressure and impact force of the mixture on the base, adhesion with the surface is enhanced.
- It is intuitive to use. Even a beginner can use such a device, and the quality of work will not be affected. The joints of different portions of the solution will not be visible.
- Simplicity and convenience of a design. The tool has a comfortable handle. You will not be distracted by adapting to it.
- Its sizes are variable. You can choose the most optimal option for yourself, based on the amount of planned work.
- Spray accuracy. You do not spend extra material, while the thickness of the treated surface will be more uniform compared to manual work.
- The use of finishing materials of different composition and color. In addition to the fact that the "hopper" can be used not only for plaster, it is suitable for interior and facade work.
- Wide range of. The market for such products allows you to choose a device from a reliable and high-quality material that is resistant to rust.
- Affordable price.You will be in the budget, at the same time save time, get high-quality and durable coating.
- Ease of care. If you regularly wash the device after work, it will serve you for many years.
- Finishing the plane with a complex configuration. He will apply the compound where it is difficult to make a regular trowel or spatula.
- Variability of a complete set. Industrial products are equipped with additional compressors, due to which it is possible to work with surfaces of different types.
- High marks from professionals. Experienced builders note the relevance of using the "hopper" as an auxiliary device when working with different mixtures.
Note the disadvantages of the plasterboard:
- The applied solution must have a certain consistency. If this is not adhered to, it will drain from the surface of the treated bases.
- This device is not considered for purchase, unless it is planned to use it permanently. If you need to trim a small area one-time, to buy such a tool does not make sense.
- The quality of the treated surface is directly dependent on the preliminary preparation of the base.If you ignore this fact, the quality and durability of the trimmed plane may suffer.
- According to estimates by professional craftsmen, in the case of several layers applied, the time spent on spraying is not too different from manual work.
- Untimely cleaning of the device is the reason for its breakage. The dried solution clogs the nozzle, which, when the unit is turned on, disables it automatically.
Kinds
All models of plaster bucket-hopper have their own classification. Conventionally, all types of products supplied to the construction market can be divided into 2 types:
- wall;
- ceiling.
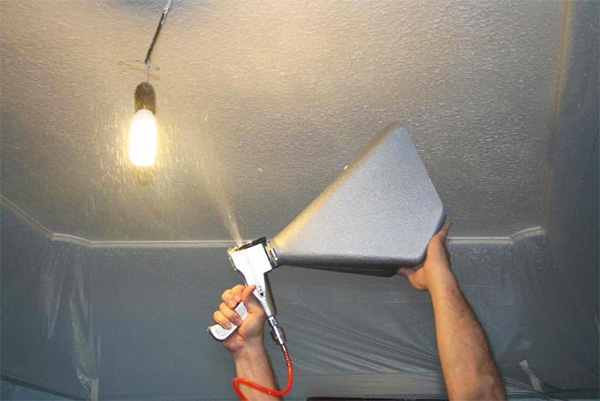
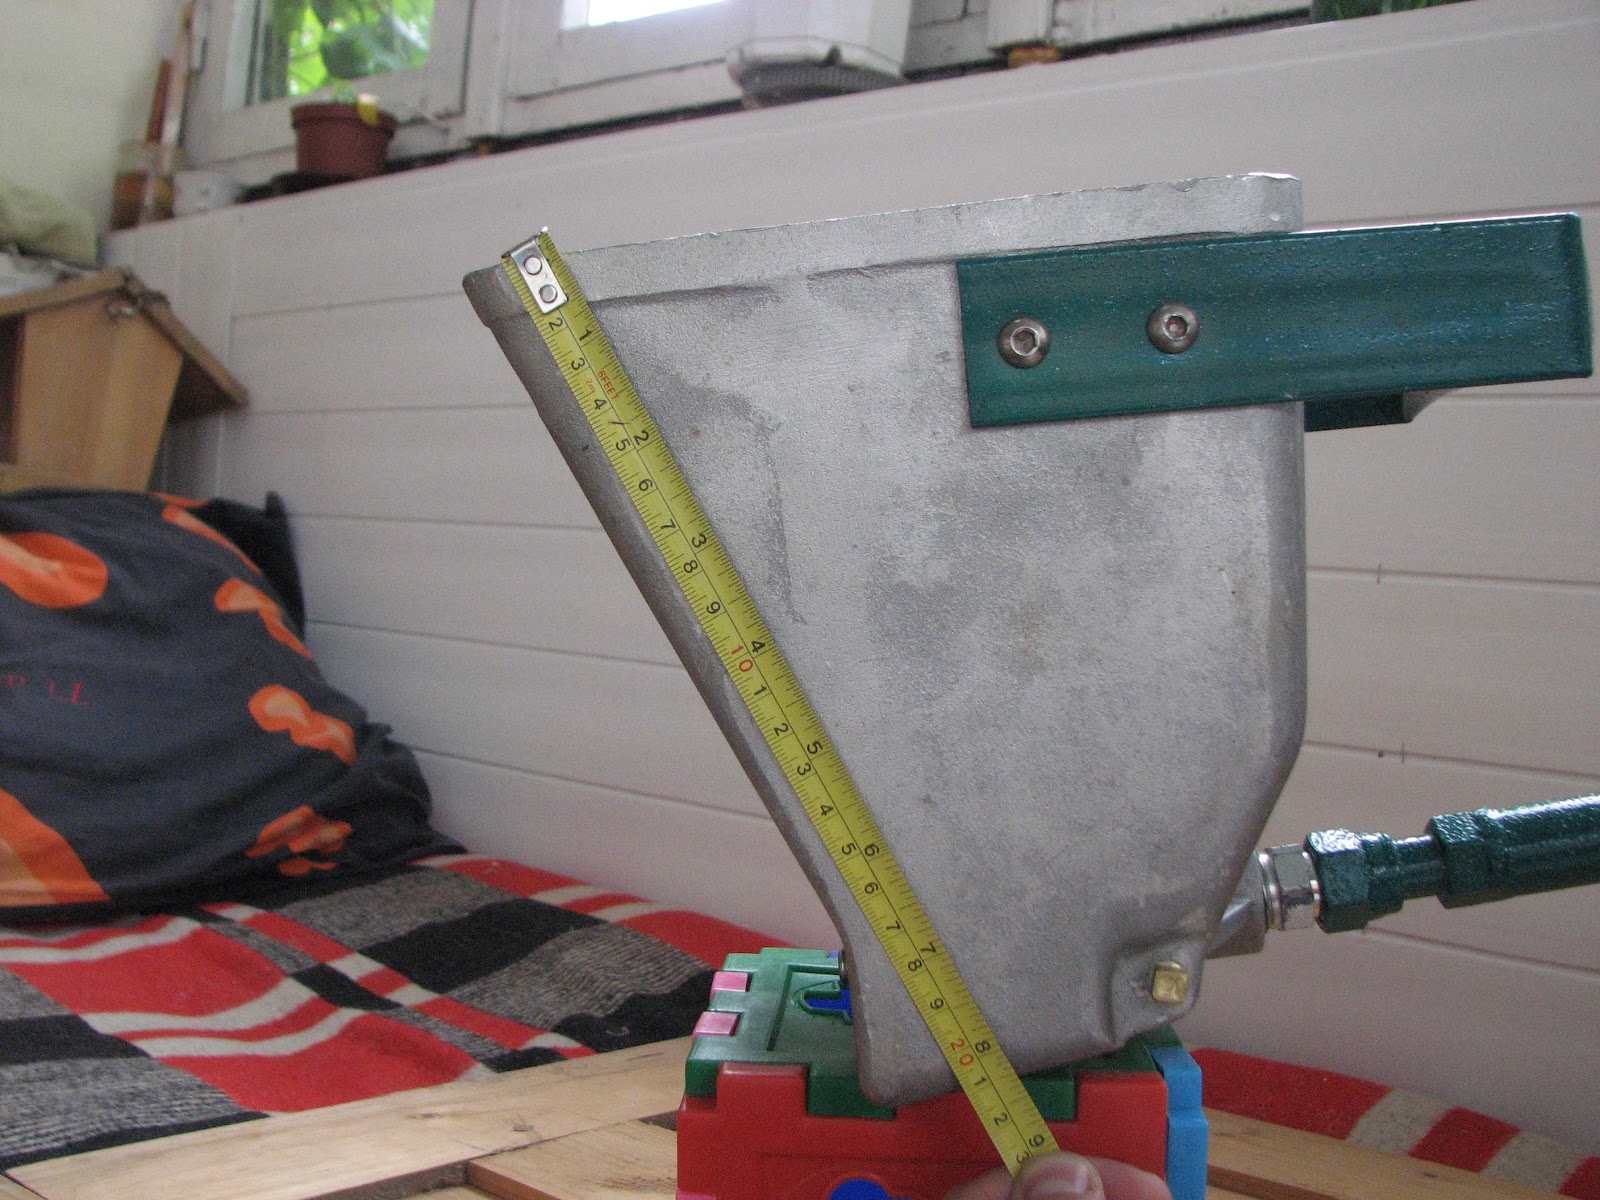
Their difference lies not in the parameters, but in the features of the structure itself. They differ in nozzle. This is expressed in a different angle of inclination with respect to the treated surface. At the wall tool the angle of inclination is 45 degrees, at the ceiling analog it is straight (90 degrees).
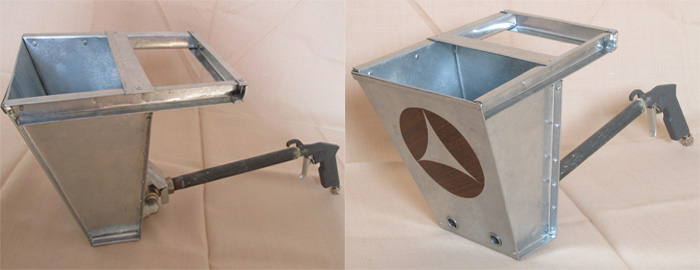
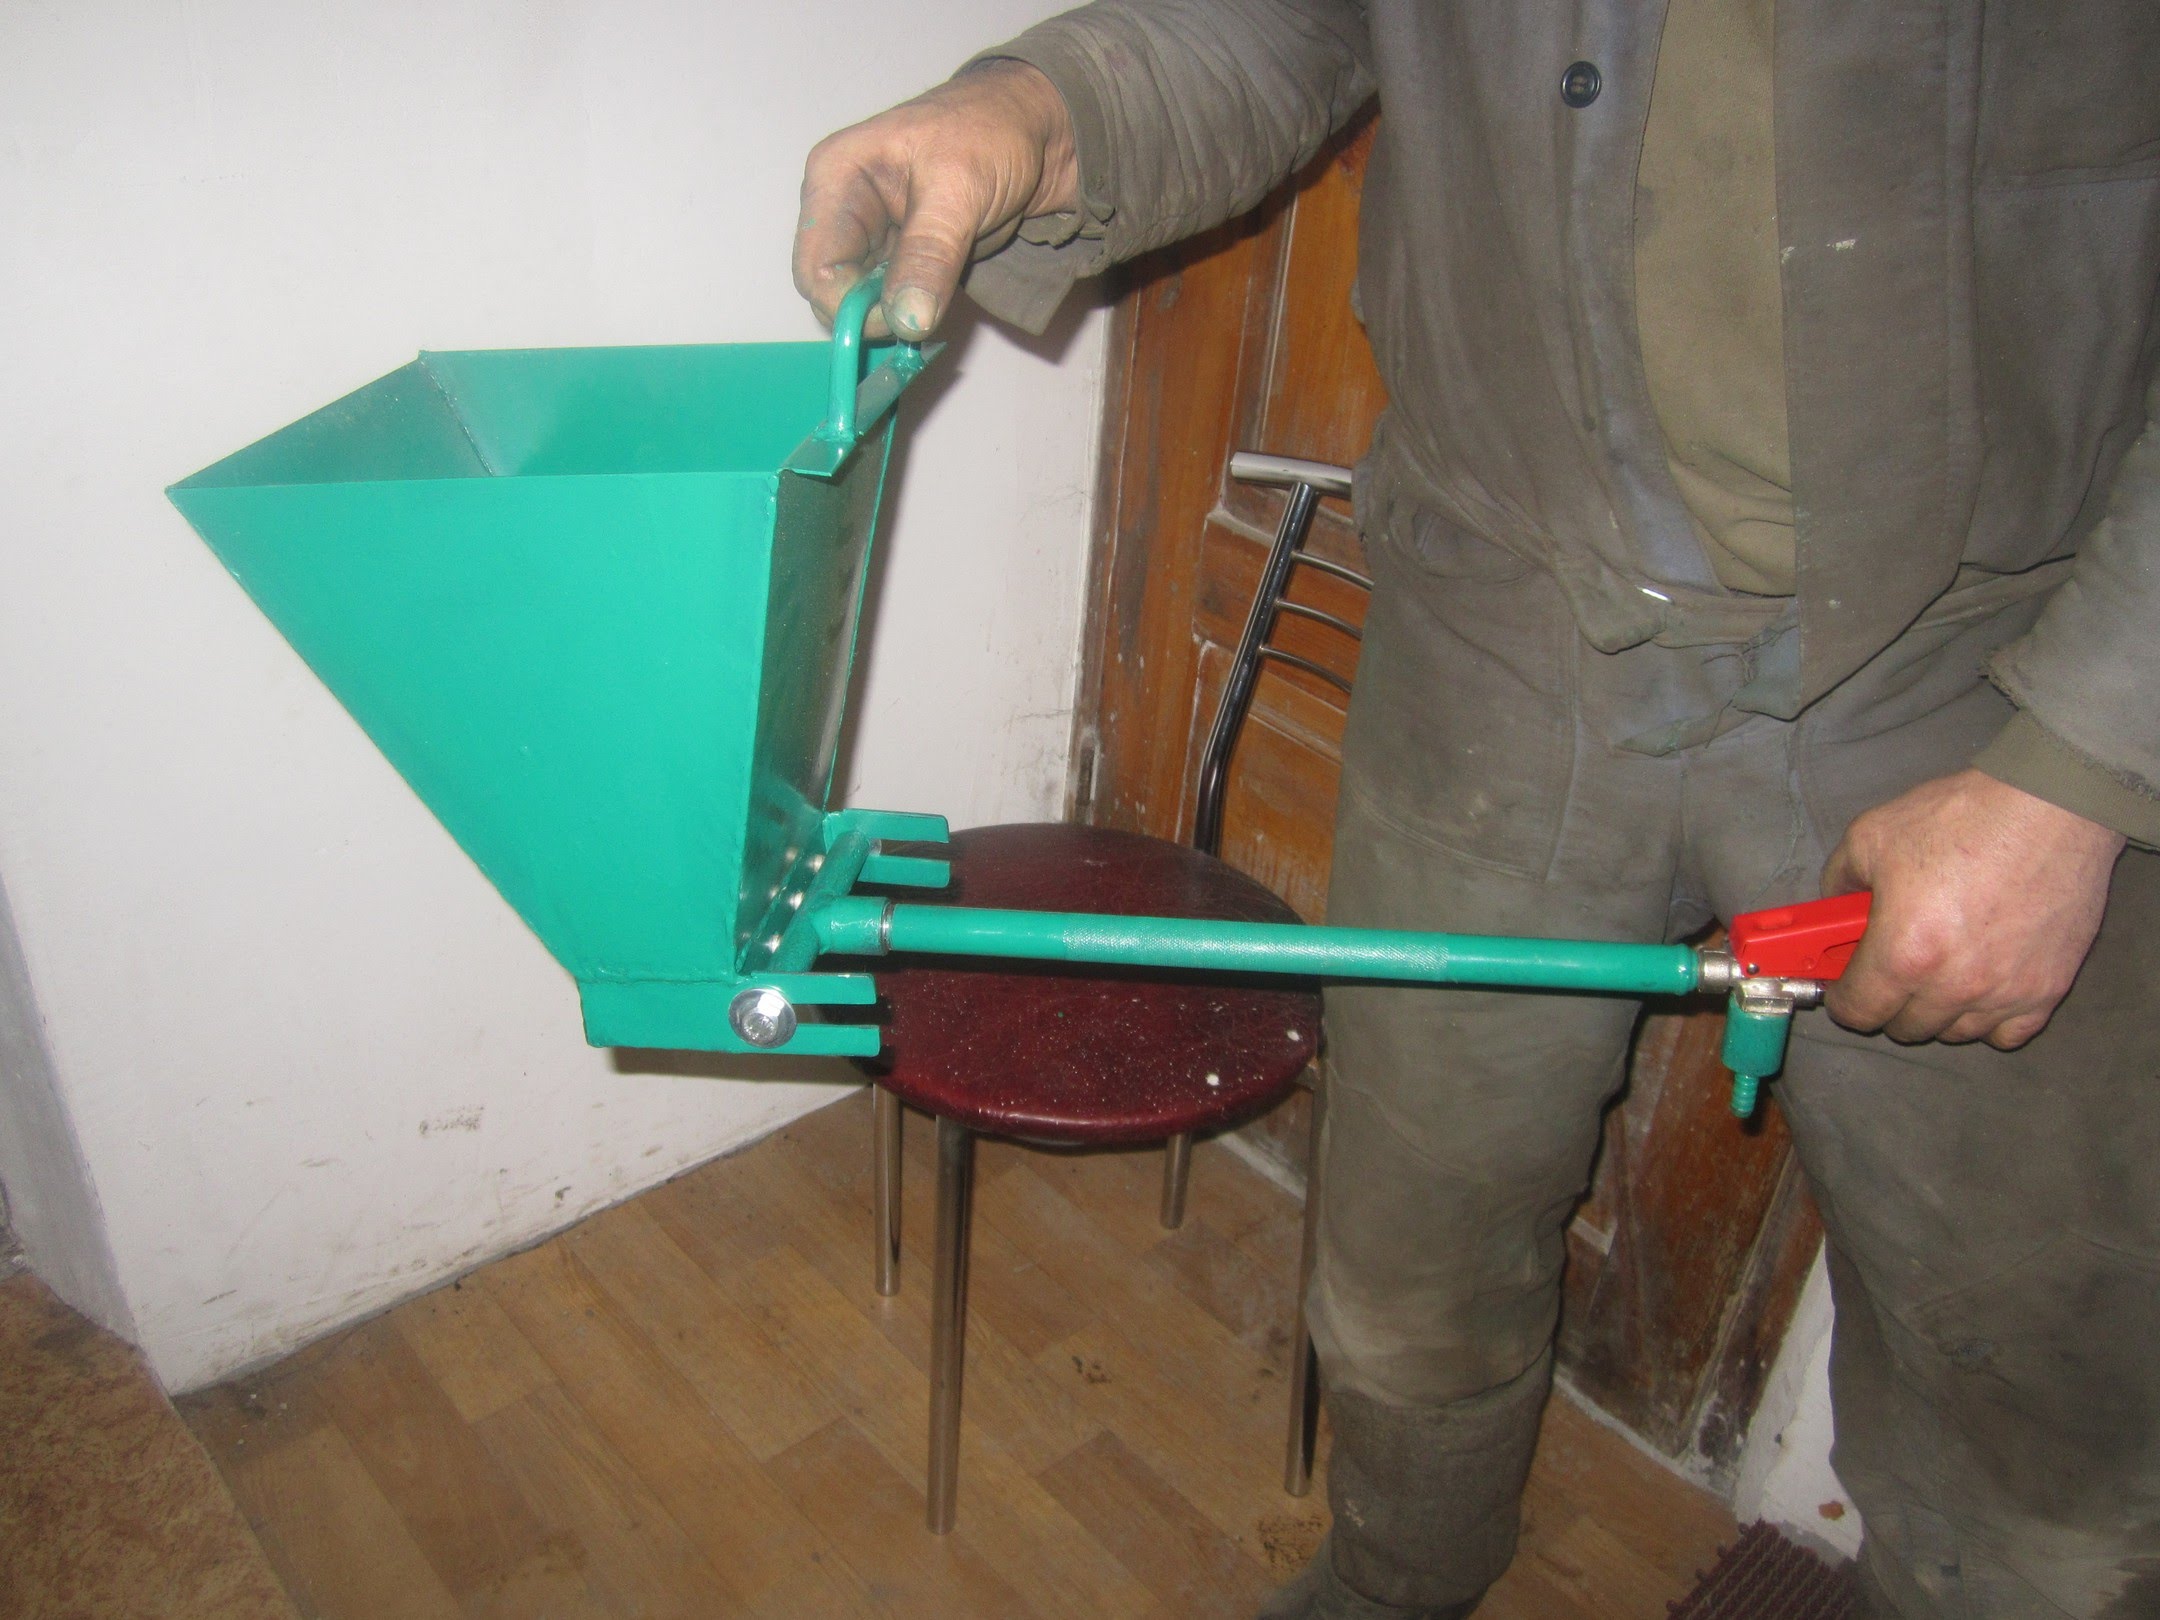
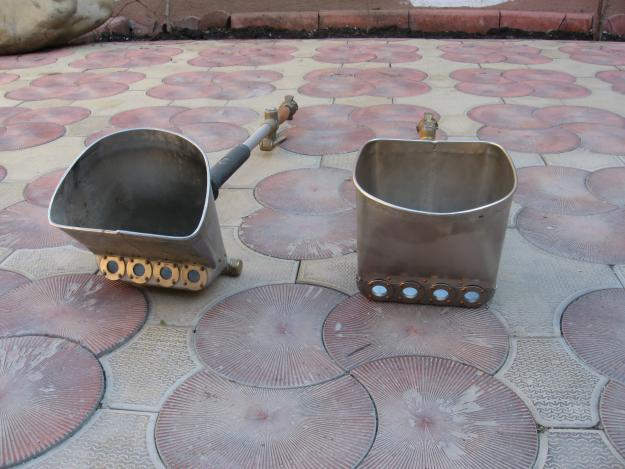
Plastering buckets are homemade and industrial. The difference between them is obvious. Self-made ladles differ in smaller power. However, they are considered more versatile, despite the fact that they often do not have several nozzles at the same time.Industrial products have a network connection. The design of self-made devices, in addition to the bucket with a long handle, sometimes resembles a gun with a bucket located above it.
Usually, to speed up the working process, the nozzle for a specific type of material has to be installed before spraying (for example, for painting or applying glue). However, home devices often cannot cope with concrete. The disadvantage of hand-held “hoppers”, created by themselves, is the fact that they are not intended for finishing the ceiling. This must be taken into account when making the product yourself. In this case, the "hopper" will have to redo or purchase a specialized device.
Scope of application
Depending on the type of plastering pneumatic tools, its scope is different. When choosing a different finishing material in the construction industry, the plaster bucket can be used for:
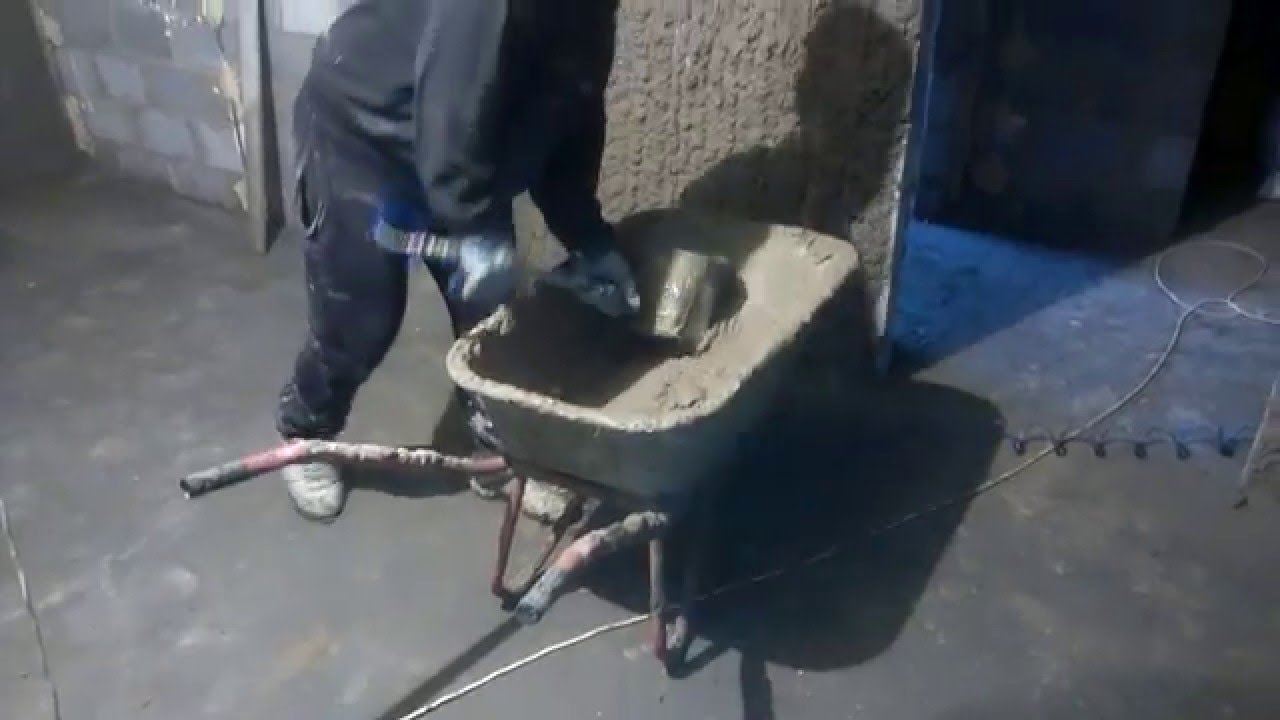
- concrete application;
- wall decoration facades of private buildings;
- work with glue;
- paint bases;
- liquid wallpaper distributions;
- work with silk plaster;
- drawing impressive plaster mix.
With regards to textured plaster it is worth noting that the bucket copes with certain types of coating. For example, it contributes to the creation of textures "bark beetle", "fur coat", "shagreen" and Venetian plaster. It can be used when working with multicolor and mosaic paints, cotton coatings, blends with glass and foam chips. It is also suitable for spraying cork. At the same time, in addition to gypsum and cement mixtures, the device allows the use of the following compositions:
- gunning;
- calcareous;
- clay;
- glass fiber concrete;
- hydro insulators.
In addition, it is intended for all types of ready-mix. However, consistency matters in each case. Too thick pasty mass evenly distribute the bucket.
How to use?
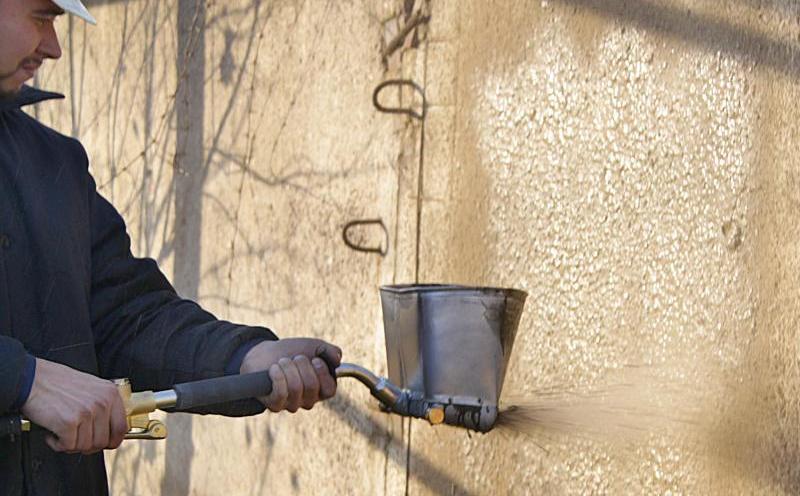
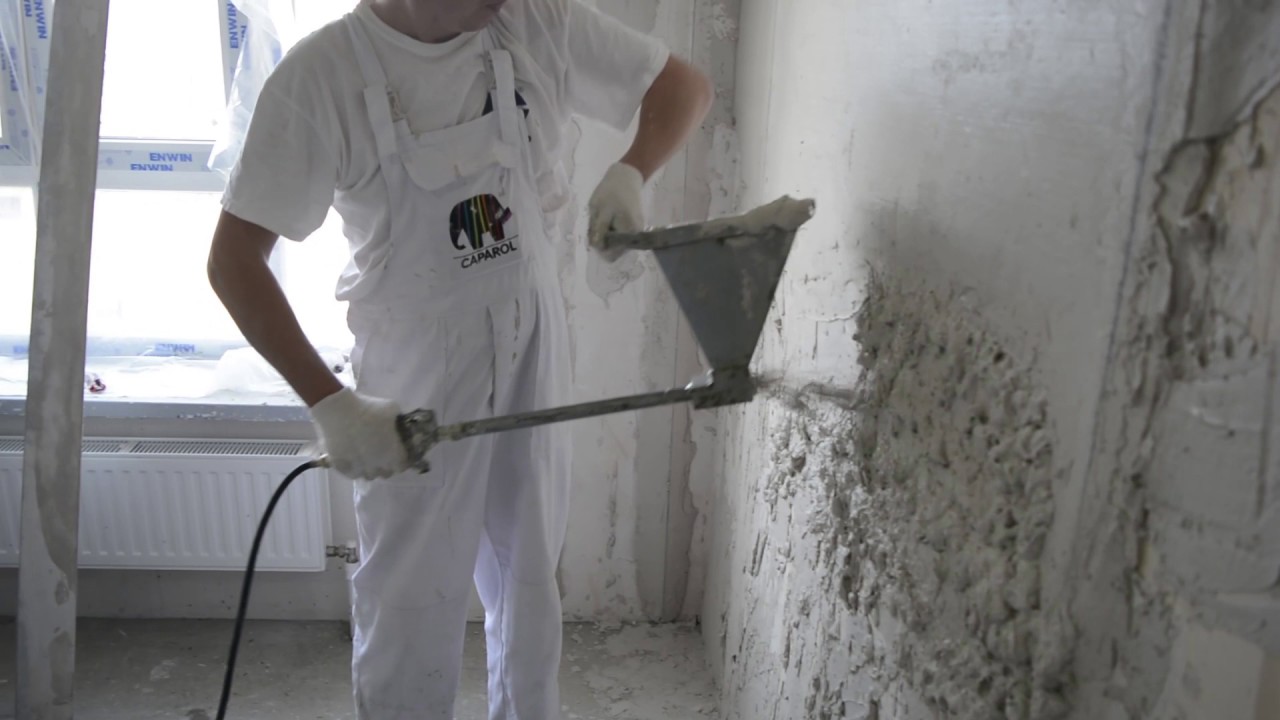
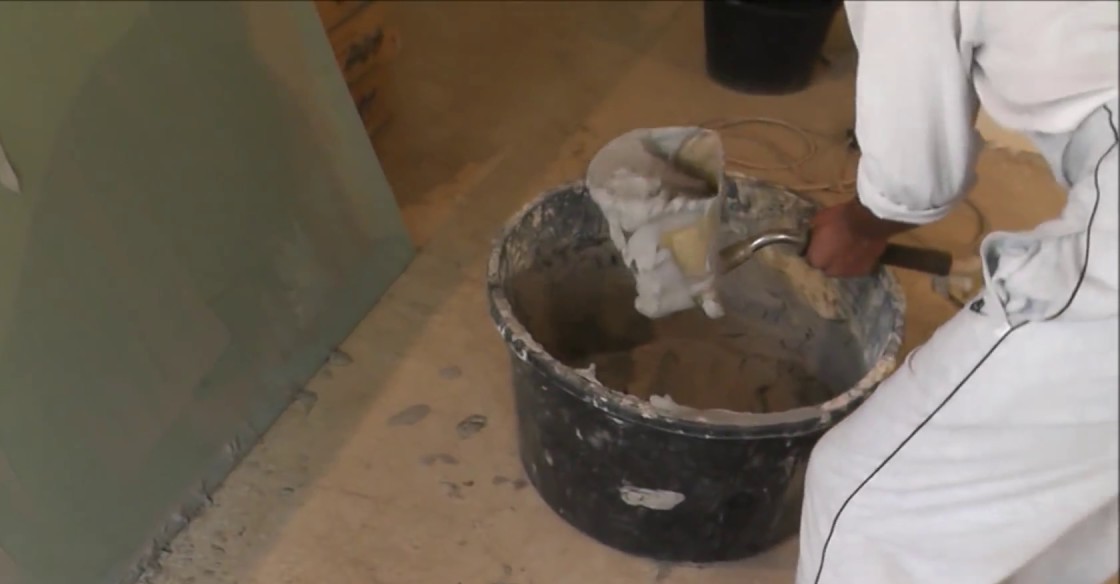
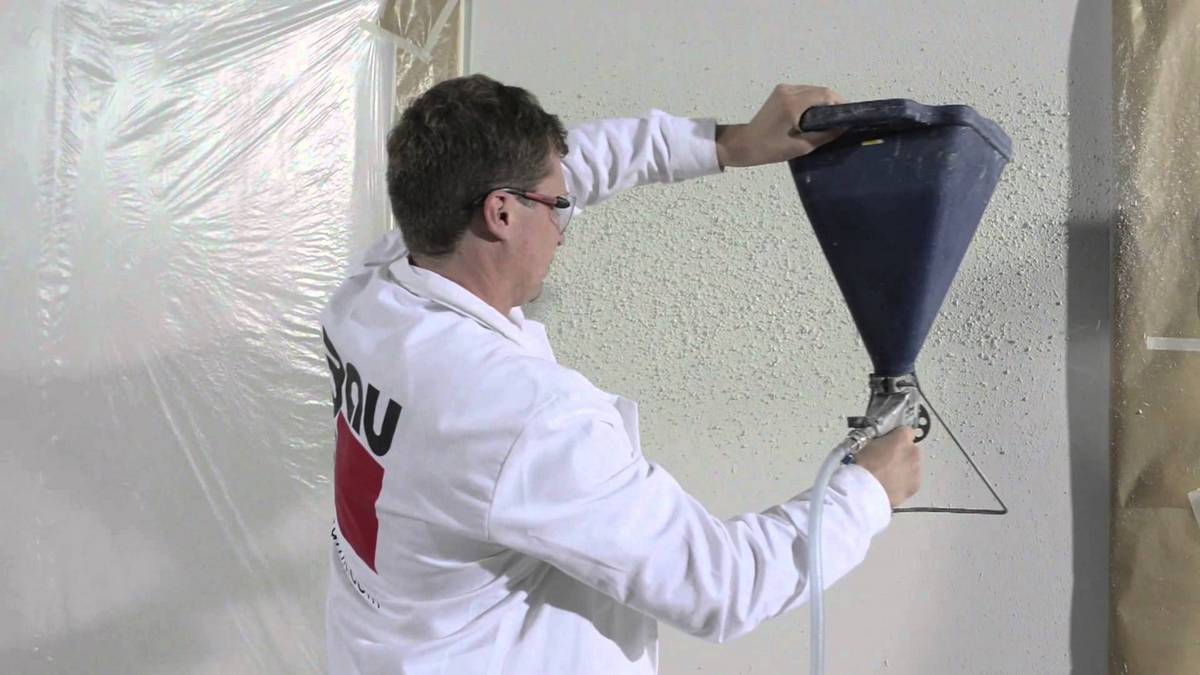
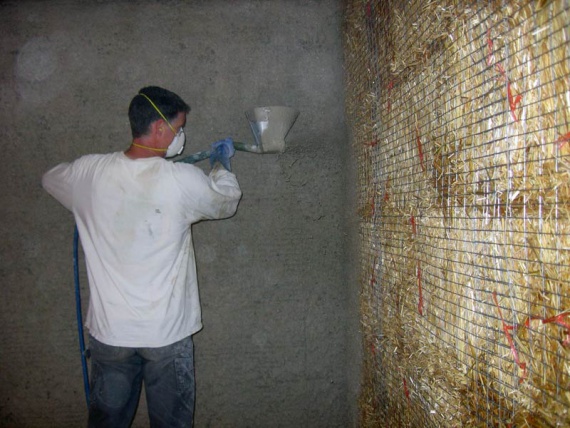
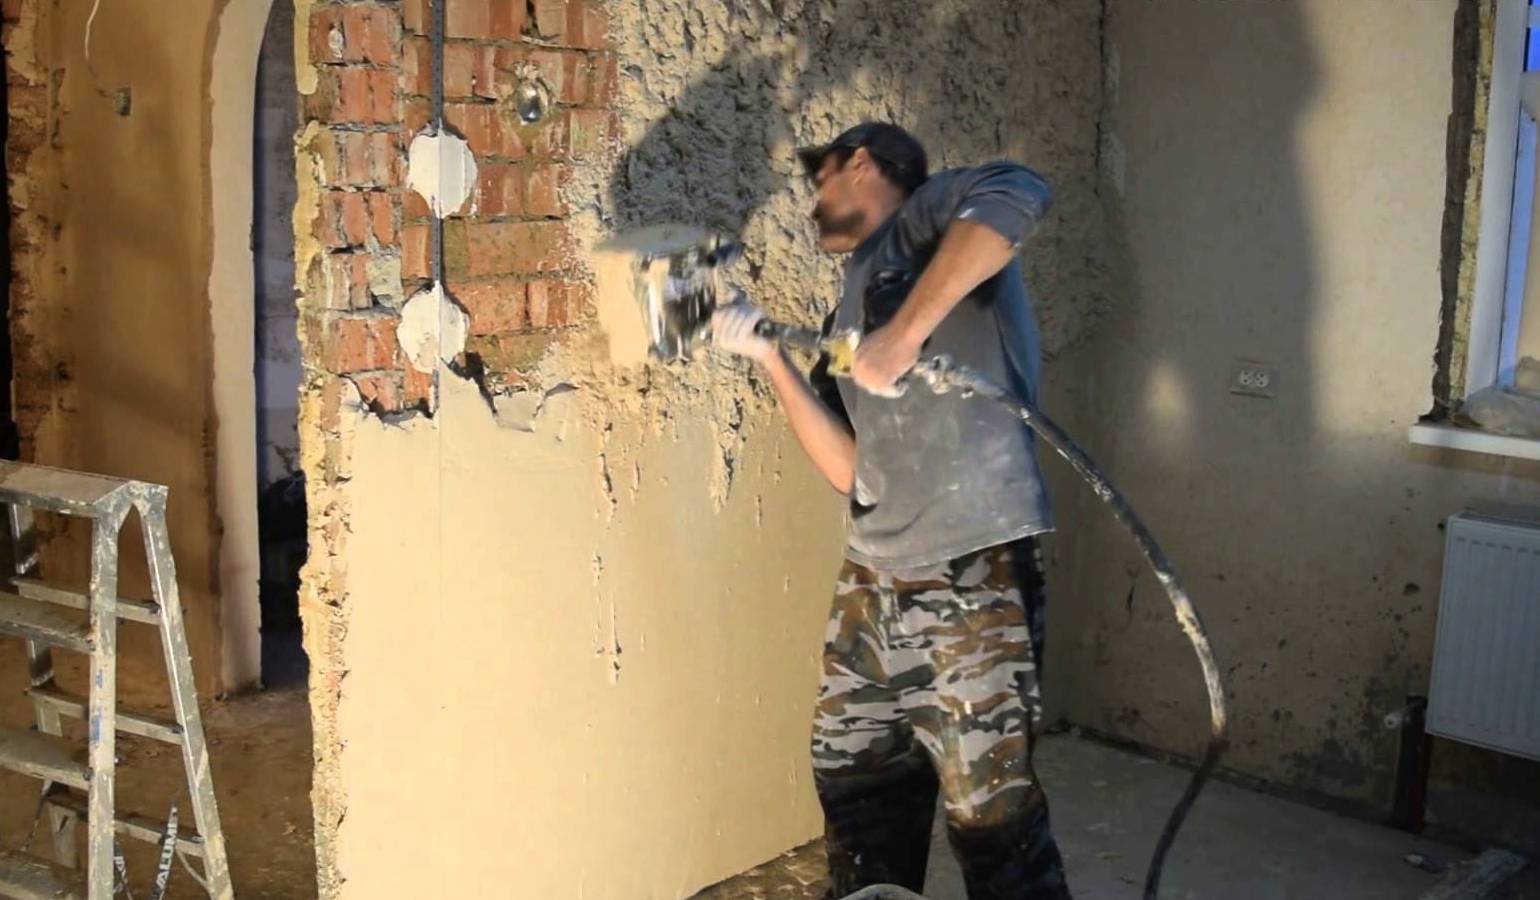
Before using the auxiliary unit, the surface is moistened and lighthouses are set. Reinforcement mesh may be needed. The hopper is filled with the composition and sprayed on the base. The distance from the nozzle to the treated surface is about 4-5 cm. When performing the spraying, the bucket is gradually moved so that the layer of the applied mixture is uniform.
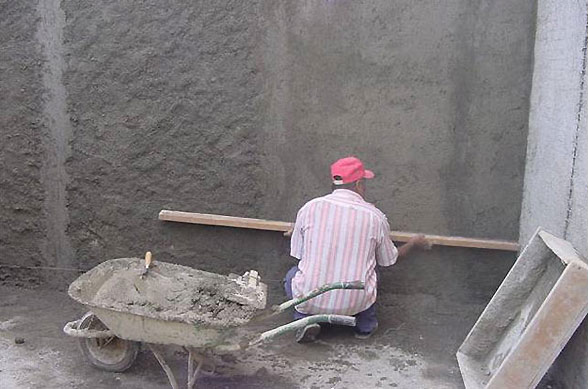
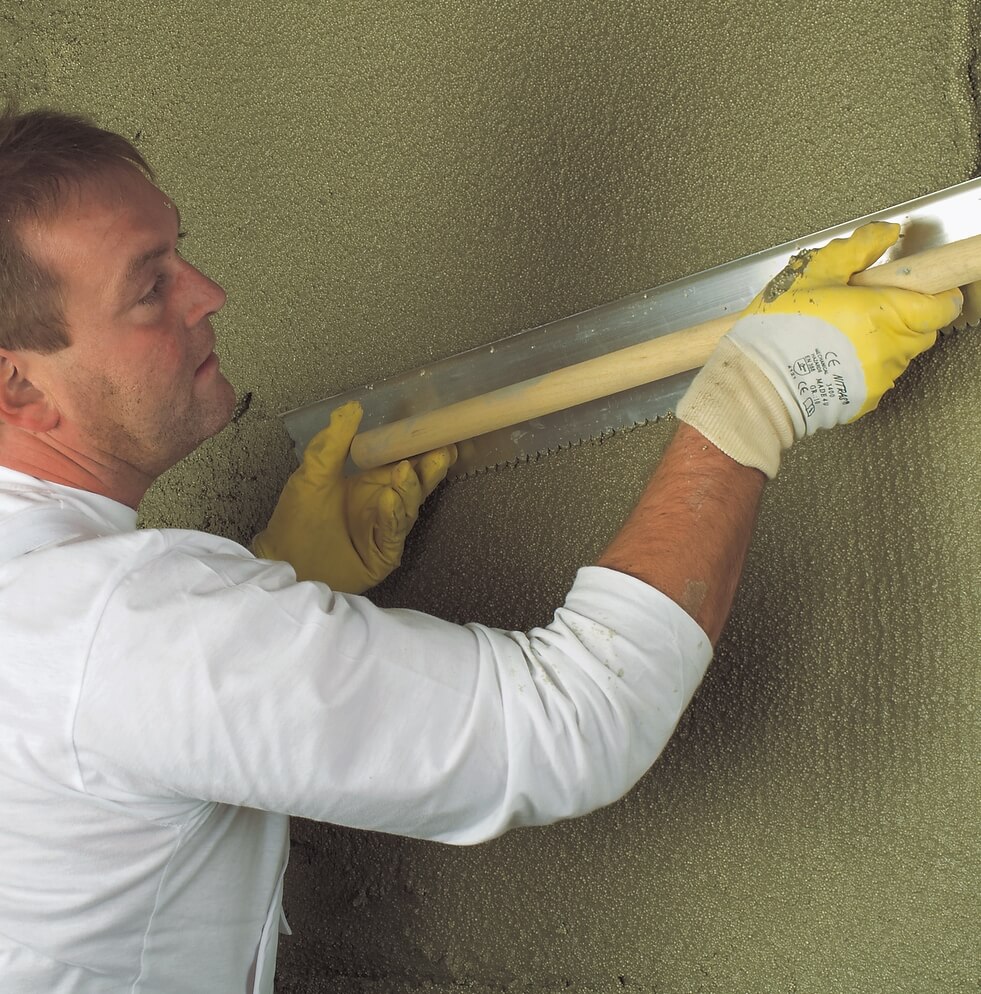
After the plaster has been applied to the wall, it is trimmed. If necessary, perform a textured pattern. The bucket is immediately cleaned.
During the work with this device it is necessary to use goggles, a respirator and working clothes. Equipment will protect from particles of the composition, which can get when spraying used mixture.
How to do it yourself?
Despite the fact that the “hopper” has a reasonable price, it is often done at home with their own hands. Usually it does not take much time if there are drawings, the necessary materials and a set of tools. When working you may need:
- metal sheet with a thickness of 0.4-1 mm (suitable steel, aluminum);
- air gun or steel tube (D = 1⁄4 inches);
- nozzle;
- washer 1 or more (depending on the number of nozzles, D = 10 - 12 mm);
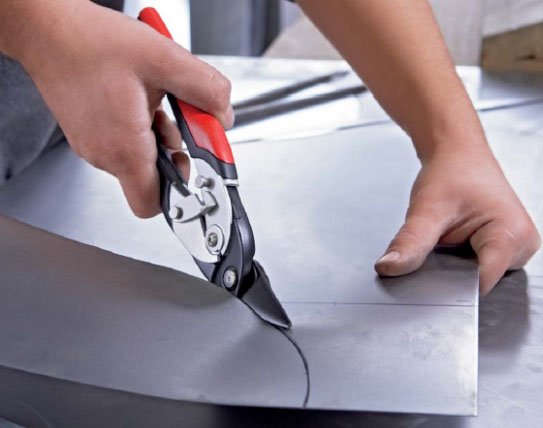
- scissors for metal;
- Bulgarian;
- electric drill + drill;
- metal ruler;
- marker.
To simplify the task of installing a plaster shovel, it is better to choose a ready-made scheme by downloading and printing a drawing with all dimensions indicated. For example, it will be a bucket for 6-8 kg of solution. The following instructions are as follows:
- The scheme is transferred to a sheet of metal.The scan should fit on the sheet accurately, eliminating the shortage of raw materials in any part of the drawing. If the material is not enough for a solid scan, it is divided into several parts.
- The pattern of the bunker is cut out on the outlined contours, using scissors for metal or grinder.
- Metal detail sweep "hopper" bend on the designated bottom plane.
- With the help of a welder or autogen, a shovel is assembled into a one-piece construction.
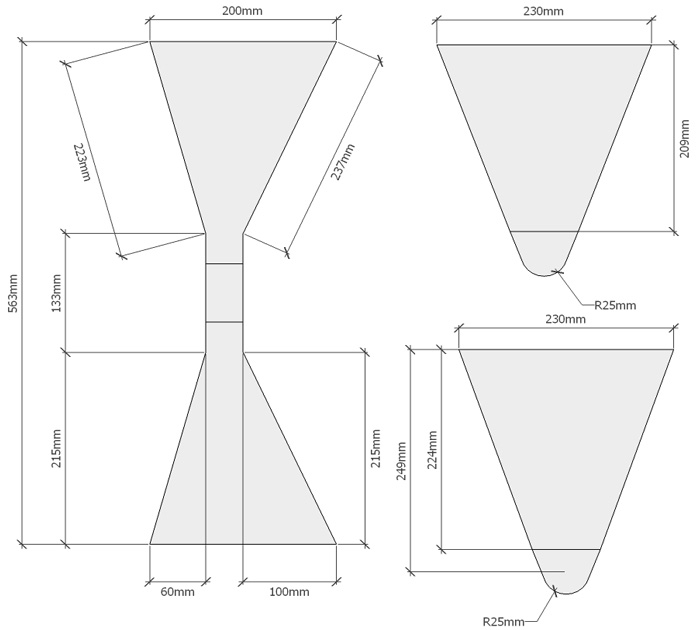
- Produce fixation handle. Attach the handle with the inlet hose fitting with air.
- At the bottom of the hopper make holes for nozzles, which are then fixed by means of steel washers on both sides.
- Opposite the nozzles install the spray.
- To redistribute the mechanical load to the side walls of the bucket attach the reinforcing plate.
- It is necessary to determine the power of the compressor and connect it to the bunker. Then you can try the unit in operation.
If you are determined to make a plastering bucket for finishing the walls yourself, consider several important nuances:
- Creating a design, take care of the presence of the cover. It can be folding or removable and is necessary to prevent the solution from leaking when the bucket is tilted.
- Do not use for the manufacture of "hopper" tin. This material under the weight of the solution is rapidly deformed. Ensure that the thickness of the metal does not exceed 1 mm.
- Replacing the pneumatic valve with a ball valve is not allowed. This will cause an increase in consumption of the mixture used, since the valve is not able to instantly shut off the supply of the mixture.
The size of the outlet depends on the type and consistency of the applied material. The larger the bucket hole, the greater the distance between the nozzle and the base to be treated.

See how to make a plastering hopper dipper with your own hands in the next video.