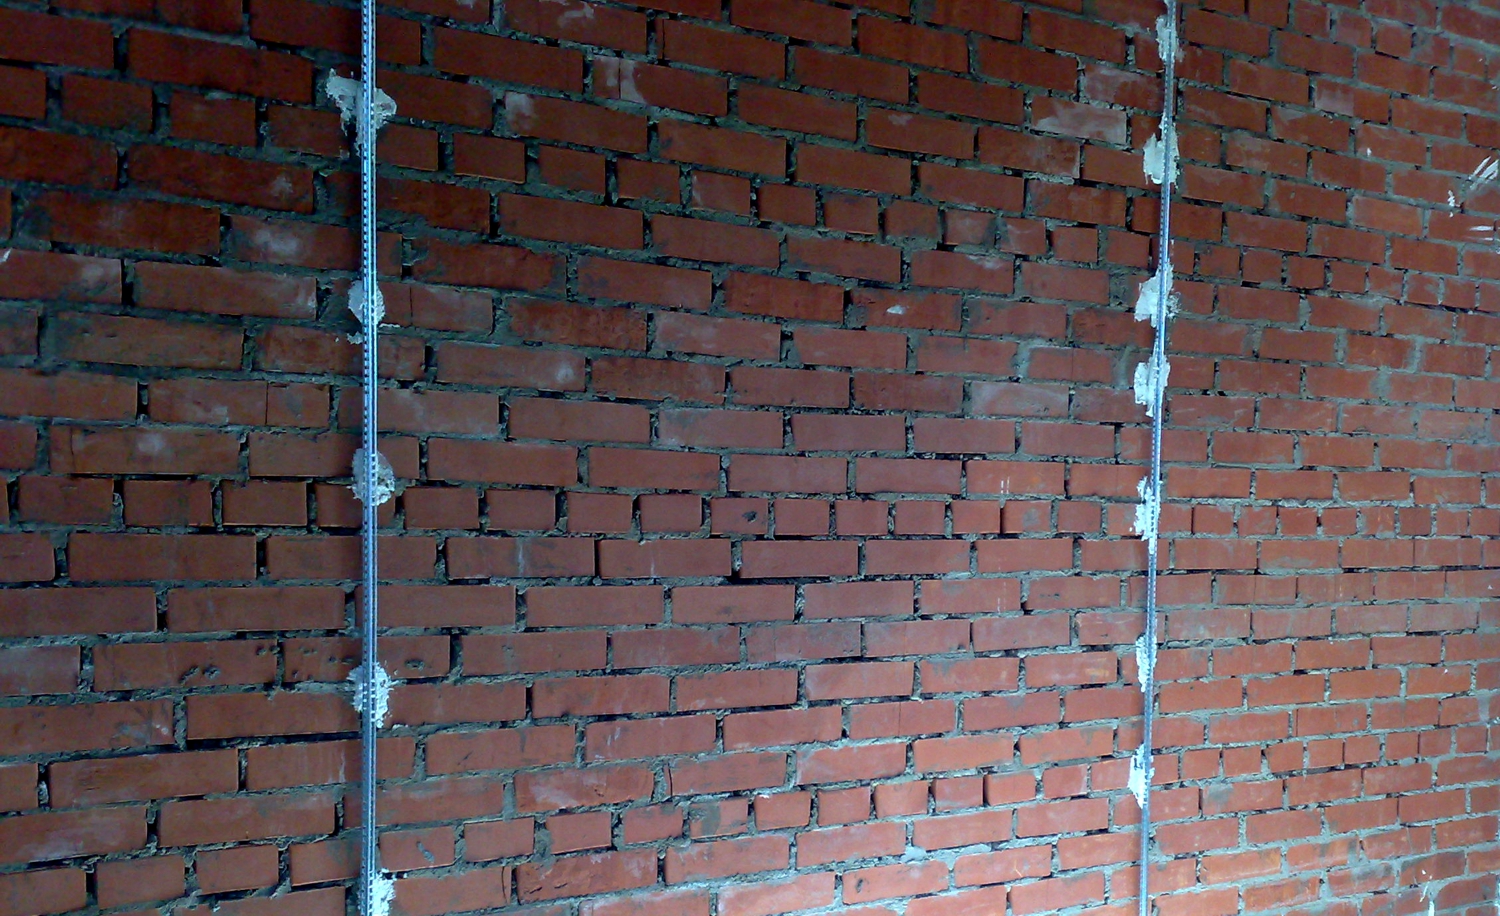
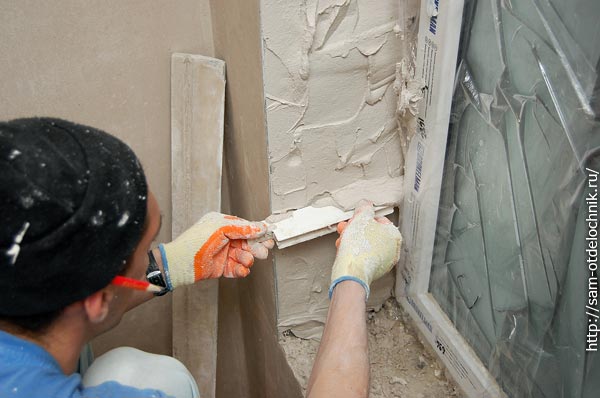
Installation process of beacons for plaster walls
Stucco on the walls is a very valuable coating that allows you to cope with many types of irregularities. But in order for the plaster layer itself to lie flat and not create problems, it is required to use special beacons. The process of using them has a lot of subtleties and nuances that all those who are thinking about making repairs with their own hands should know.
Special features
Installing beacons not only allows you to significantly simplify the facial finish, but also to reduce the consumption of materials. Beacons will set the horizontal and vertical lines, which will need to work. Therefore, there is no doubt that the work of securing them is really important and necessary.
Kinds
A lot of plaster beacon options are produced and manufactured in artisanal conditions. And each of these types has a strictly limited scope.In any case, such products are guides for the main working tool (rule), which helps to level the solution applied to the wall.
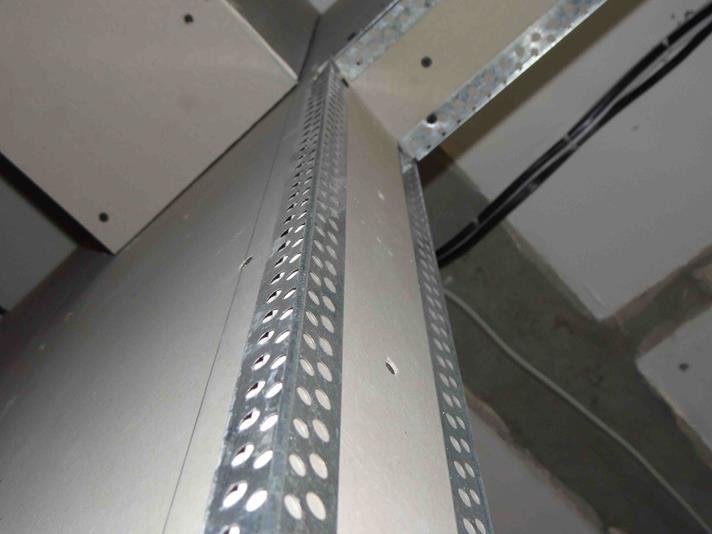
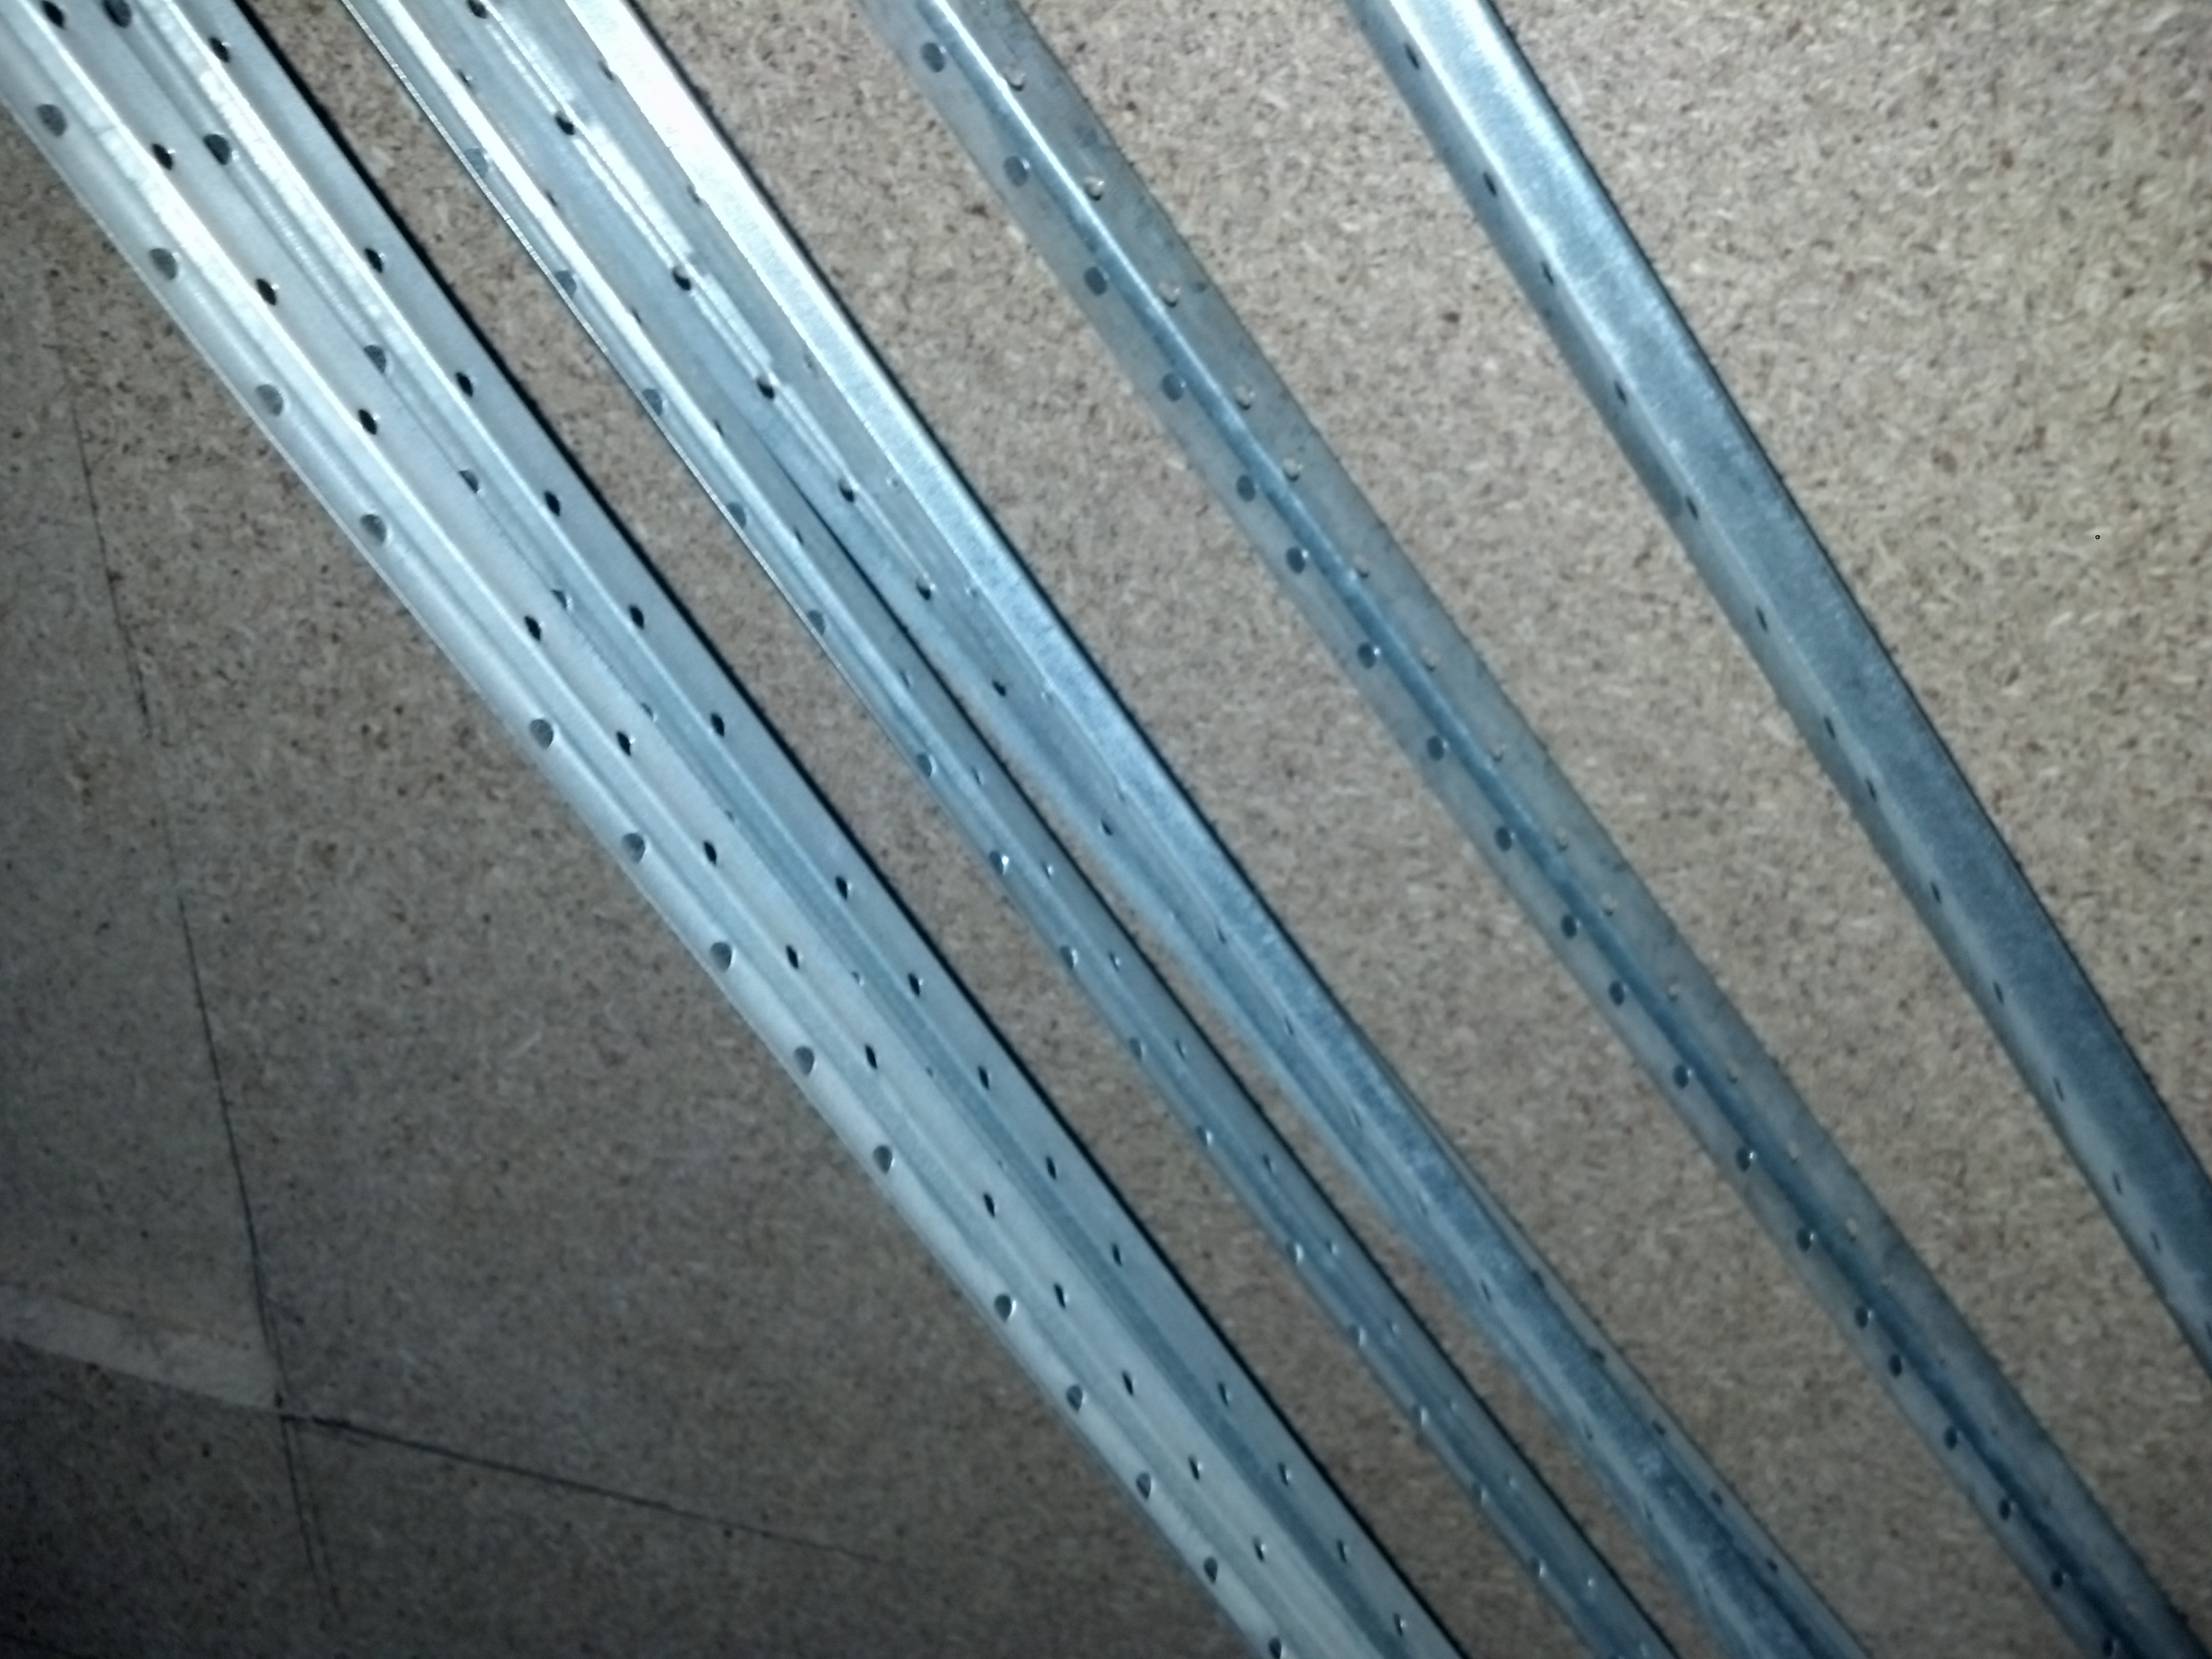
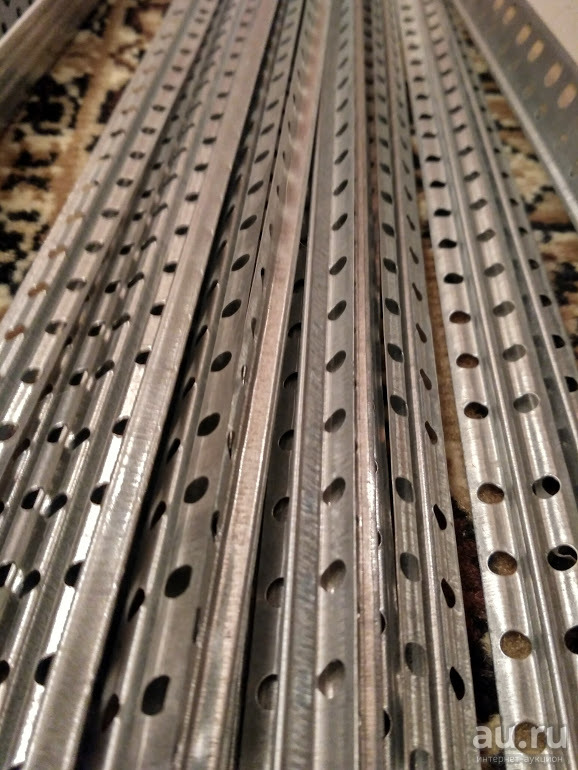
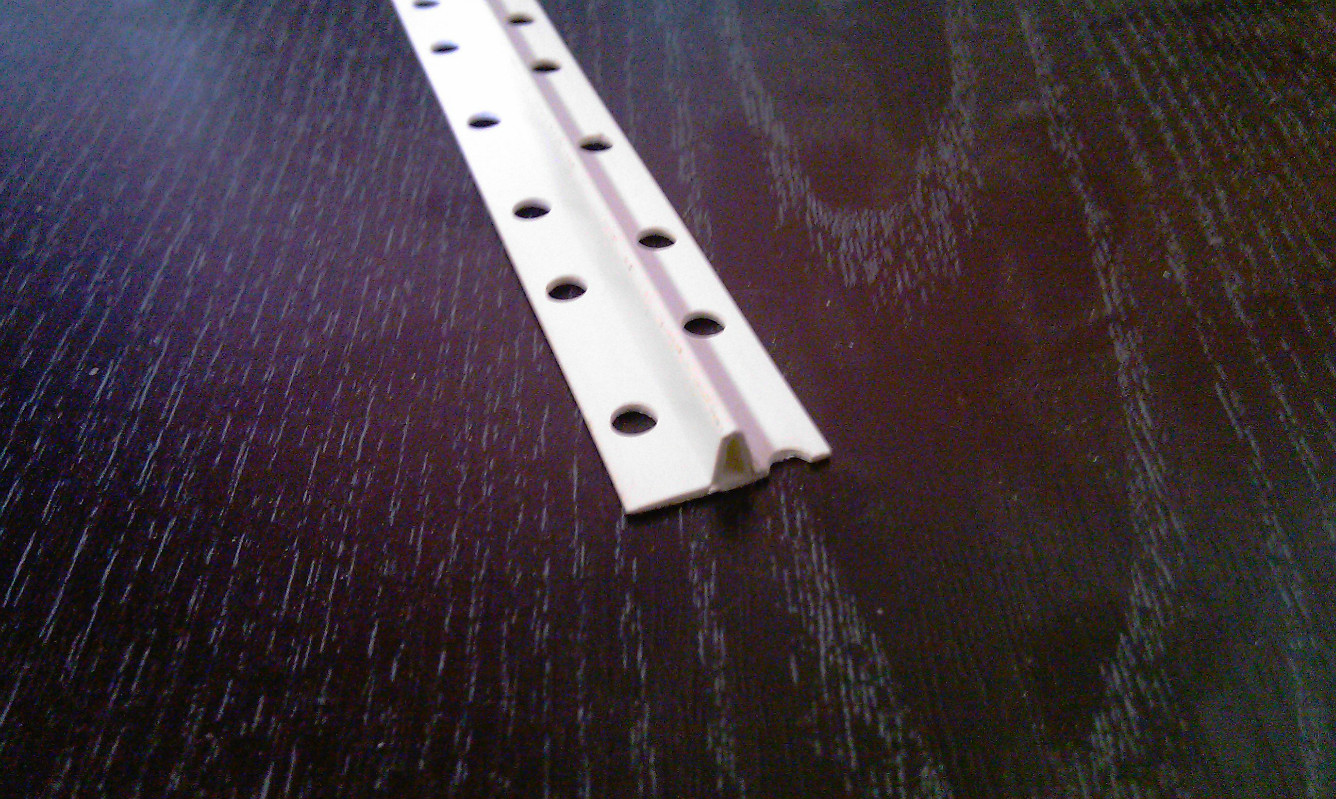
At the industrial enterprises are issued perforated profiles. Their length is 270 or 600 cm, and as raw materials are used:
zinc coated steel;
aluminum;
plastic.
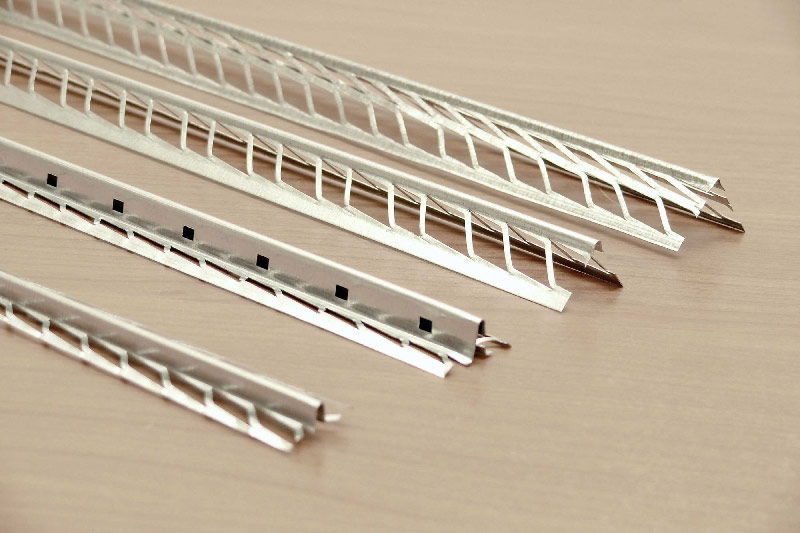
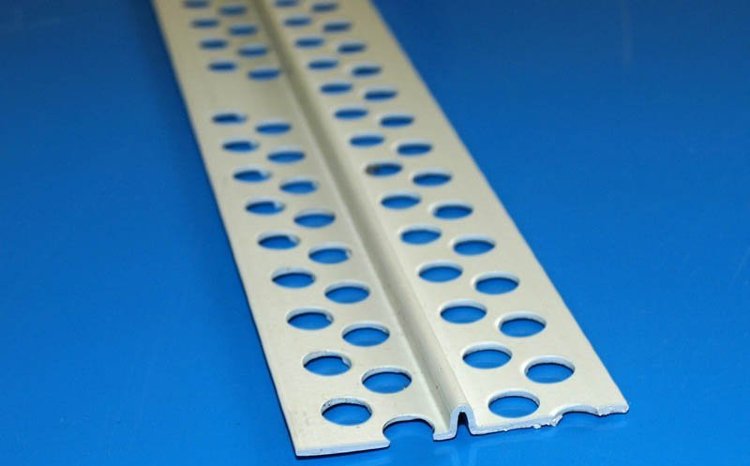
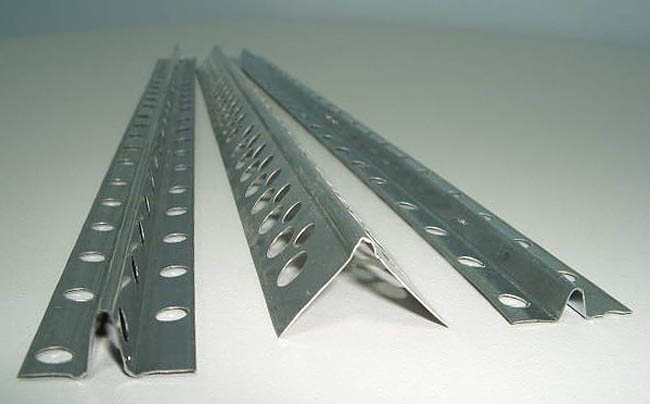
Straight mounts have a projection in the shape of a Latin letter V. This detail also turns out to be a guide when plastering. Taking a tool with a protrusion of various sizes (from 0.3 to 3 cm), builders can vary the thickness of the layer being created.
Usually, the thickest beacons are used to finish the outer walls. But inside the building, if the plane is slightly broken, there is enough of the smallest protrusion.
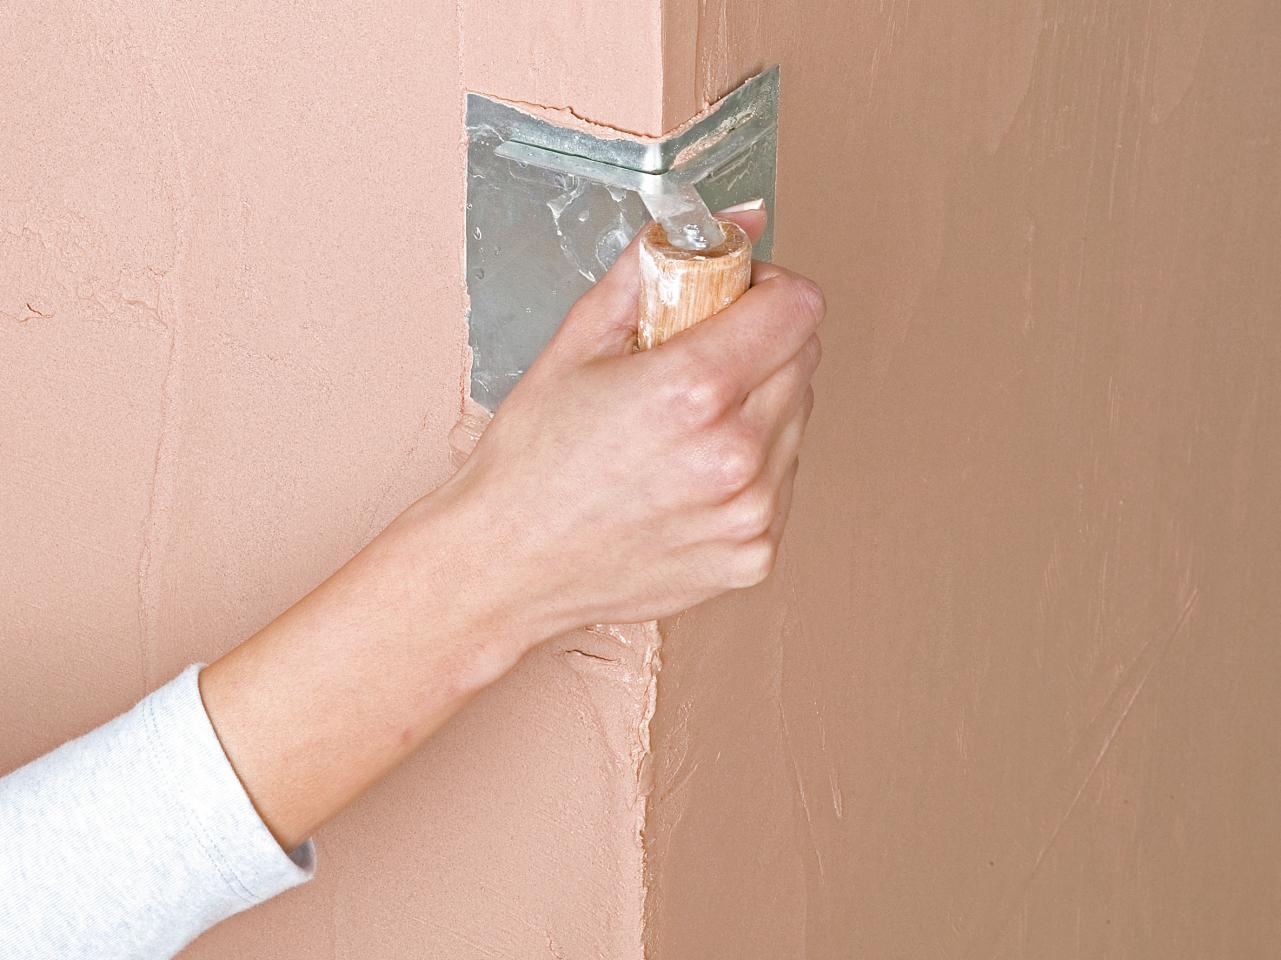
With the help of corner beacons, surfaces are easily aligned and external corners are created. (hence the name). It is not difficult to recognize such products, they, besides the protrusion already mentioned, are equipped with shelves located at an angle. But increased functionality results in excessive softness of the structure, which is often damaged during operation. This drawback is deprived of reusable elements, in addition they do not need to be carefully fixed.
It is important to remember that even metal lighthouses can be damaged if they are pulled out too late, and the cost of such products is high.
When you need to finish the surface of wood, often used as beacons bars of similar materials. Attaching to the screws repeatedly increases the pace of work, since there is no need to wait for the mortar to harden before applying the plaster.
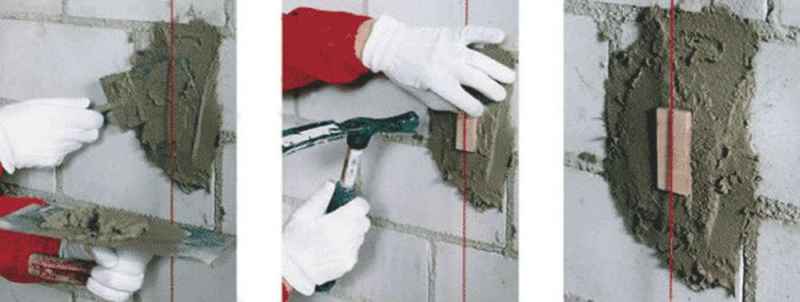
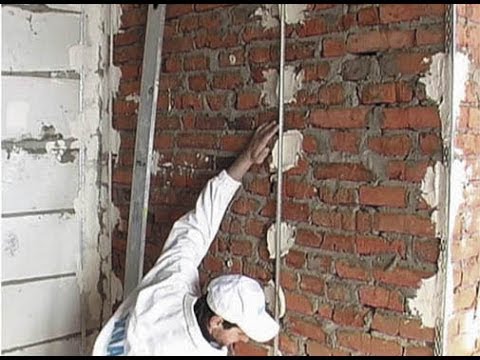
In the presence of the master make beacons of the plaster mass itself. Initially, with the help of a level, a line is planned, strictly along which screws are put. Then the solution is applied, it is either shaped using spatulas, or pressed out of the line with a wooden bar.
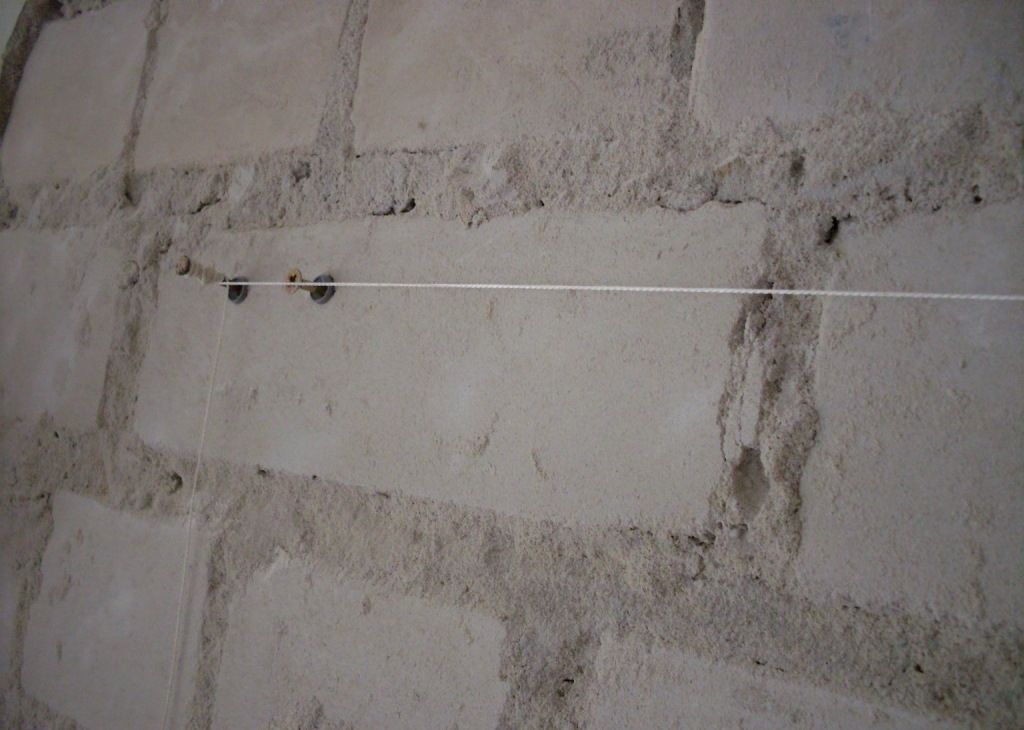
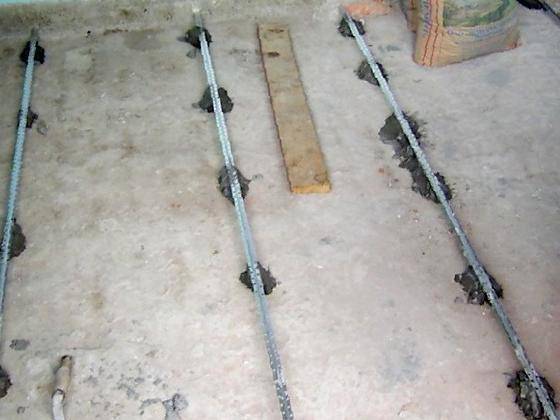
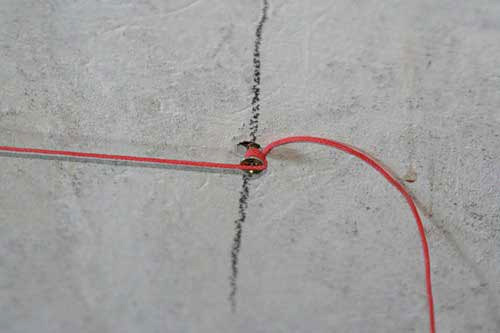
String type homemade lighthouses is considered quite interesting. In this case, a smaller number of screws is used, and in the interval between them they pull the wire. Self-tapping screws are inserted into dowels for which holes are pre-drilled. The remaining free space allows you to smear the wall with plaster to the very top. When the solution has not yet had time to grab, the string and screws are removed. The remaining holes must be filled with the same solution.Considerable experience is required for this type of work, because the slightest mistake will lead to the curvature of the surface.
Masters involved in laying plaster, came up with a lot of other types of lighthouses. These are wooden slats, steel profiles, corners, and various pipes, and even profiles for the installation of drywall.
The cost of such solutions attracts many, but it must be borne in mind that when using them, plaster consumption increases, albeit slightly.
Gypsum plaster beacons can also be made by hand. And if you use such mixtures for metal structures, you can simplify their fixing.
What to choose?
There are many versions of beacons on the market, many of them can not even buy in finished form, but to do it yourself. But one way or another, you will need to first select the appropriate solution. For repairs in an apartment or in a private house, structures of a length of 270 cm are mainly used. There are larger ones (600 cm), but they are mainly used when working in industrial enterprises, storage facilities or in public buildings. Profile in the form of a Latin V is suitable for the vast majority of manipulations with plaster.
Varying the distance between the corner and the shelves, you can set the exact thickness of the upcoming layer of the mixture.The corner profile needs to be bought along with the usual one in order to finish the wall borders with the highest quality.
Among builders (both professionals and amateurs), the overwhelming majority prefer metal beacons. Their main advantages are:
affordability;
widespread (you can buy anywhere);
quick setting of plaster;
ease of handling;
wide size range;
the ability to create a flat surface even on a small radius.
It should be noted that metal structures may be subject to a violation of the geometry. This may be caused by a manufacturing defect, and irregularities in transit, and poor storage. Therefore, it is necessary to carefully check the quality of all parts in order to prevent negative consequences.
Of course, this should be done not only in the store, but also when the goods are brought home. Often metal lighthouses rust, so they must be dismantled after applying all plaster.
Plastic products are similar in characteristics to steel, but it is noticeably lighter than them, but at the same time they are quite strong.Even if the beacon is deformed, its appearance will remain unchanged for a long time. Damage during storage and installation is completely excluded, but only with strict adherence to technology. Plastic is not prone to corrosion and it can be safely left in the plaster layer. But you have to reckon with the problems:
destruction at low temperatures;
the likelihood of breakdown on impact;
risk of deflection when working, if the guides are fixed incorrectly.
The use of reusable steel lighthouses makes sense mainly professional builders. Such products need only be fixed at certain points, and immediately can be used. The acquisition of such structures for work on one object is economically unprofitable. It is necessary to remove them until the plaster is completely hardened. Otherwise, there is a high risk of deformation of the lighthouses. Those who seek the greatest savings, try not to buy branded products at all, but to do everything with their own hands.
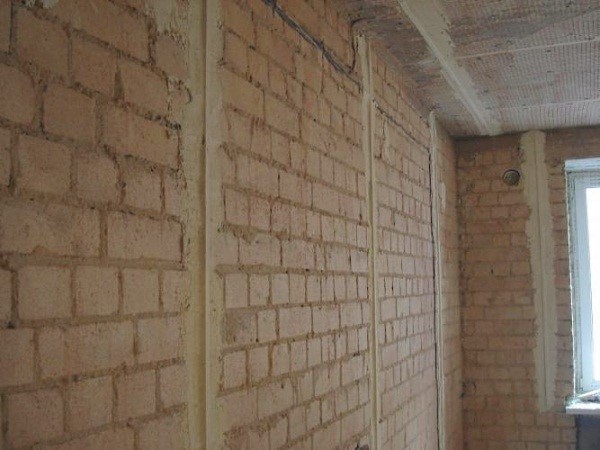
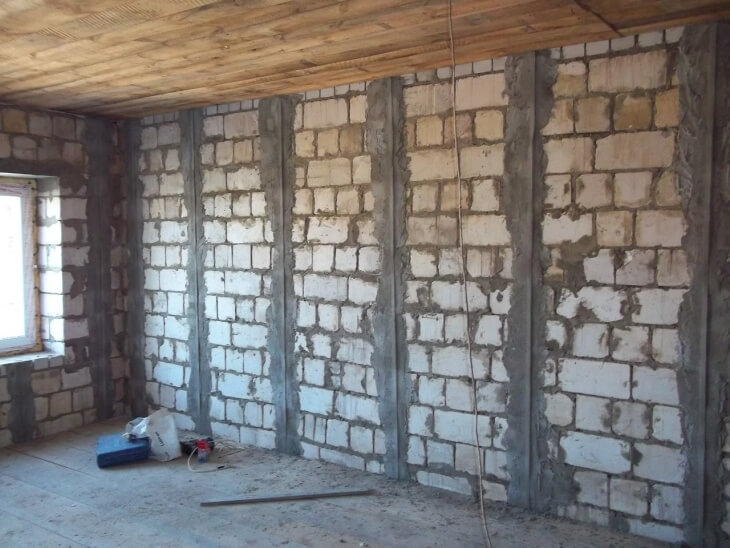
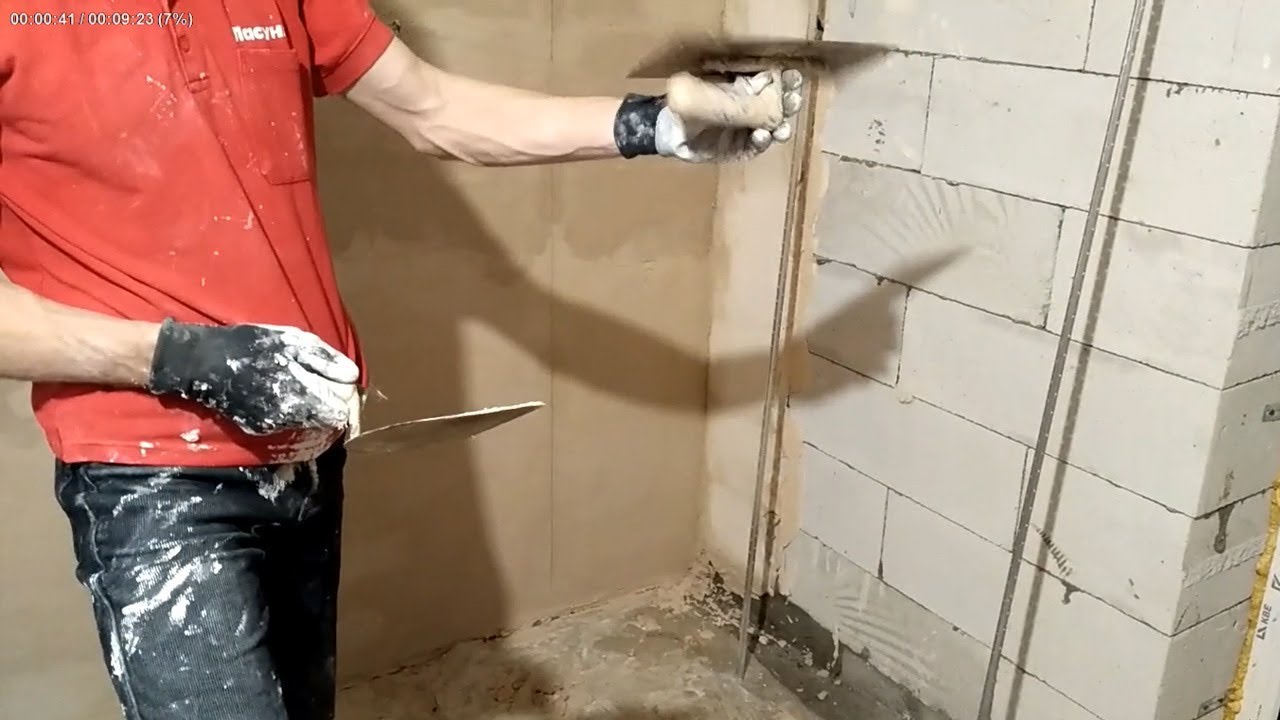
Brick plastering is done using thick slats. They are placed below and above to regulate the size of the layer being created.Brick walls can be plastered using steel elements, and if such structures are located in a building, it is permissible to use plastic parts.
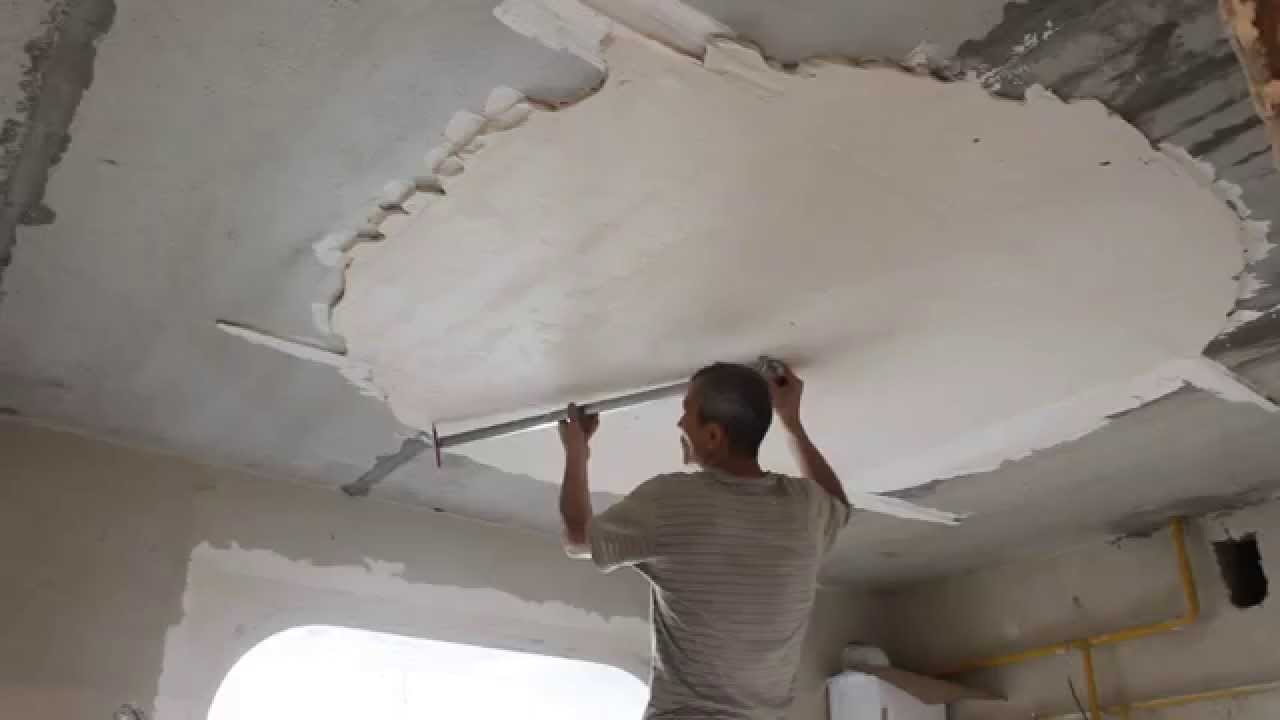
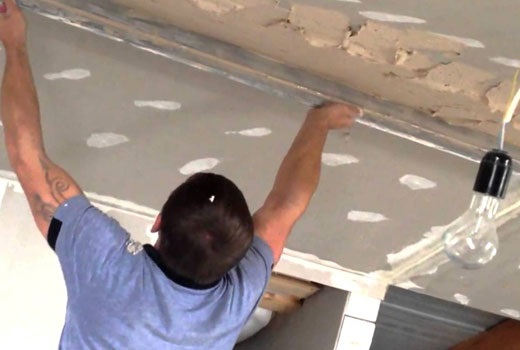
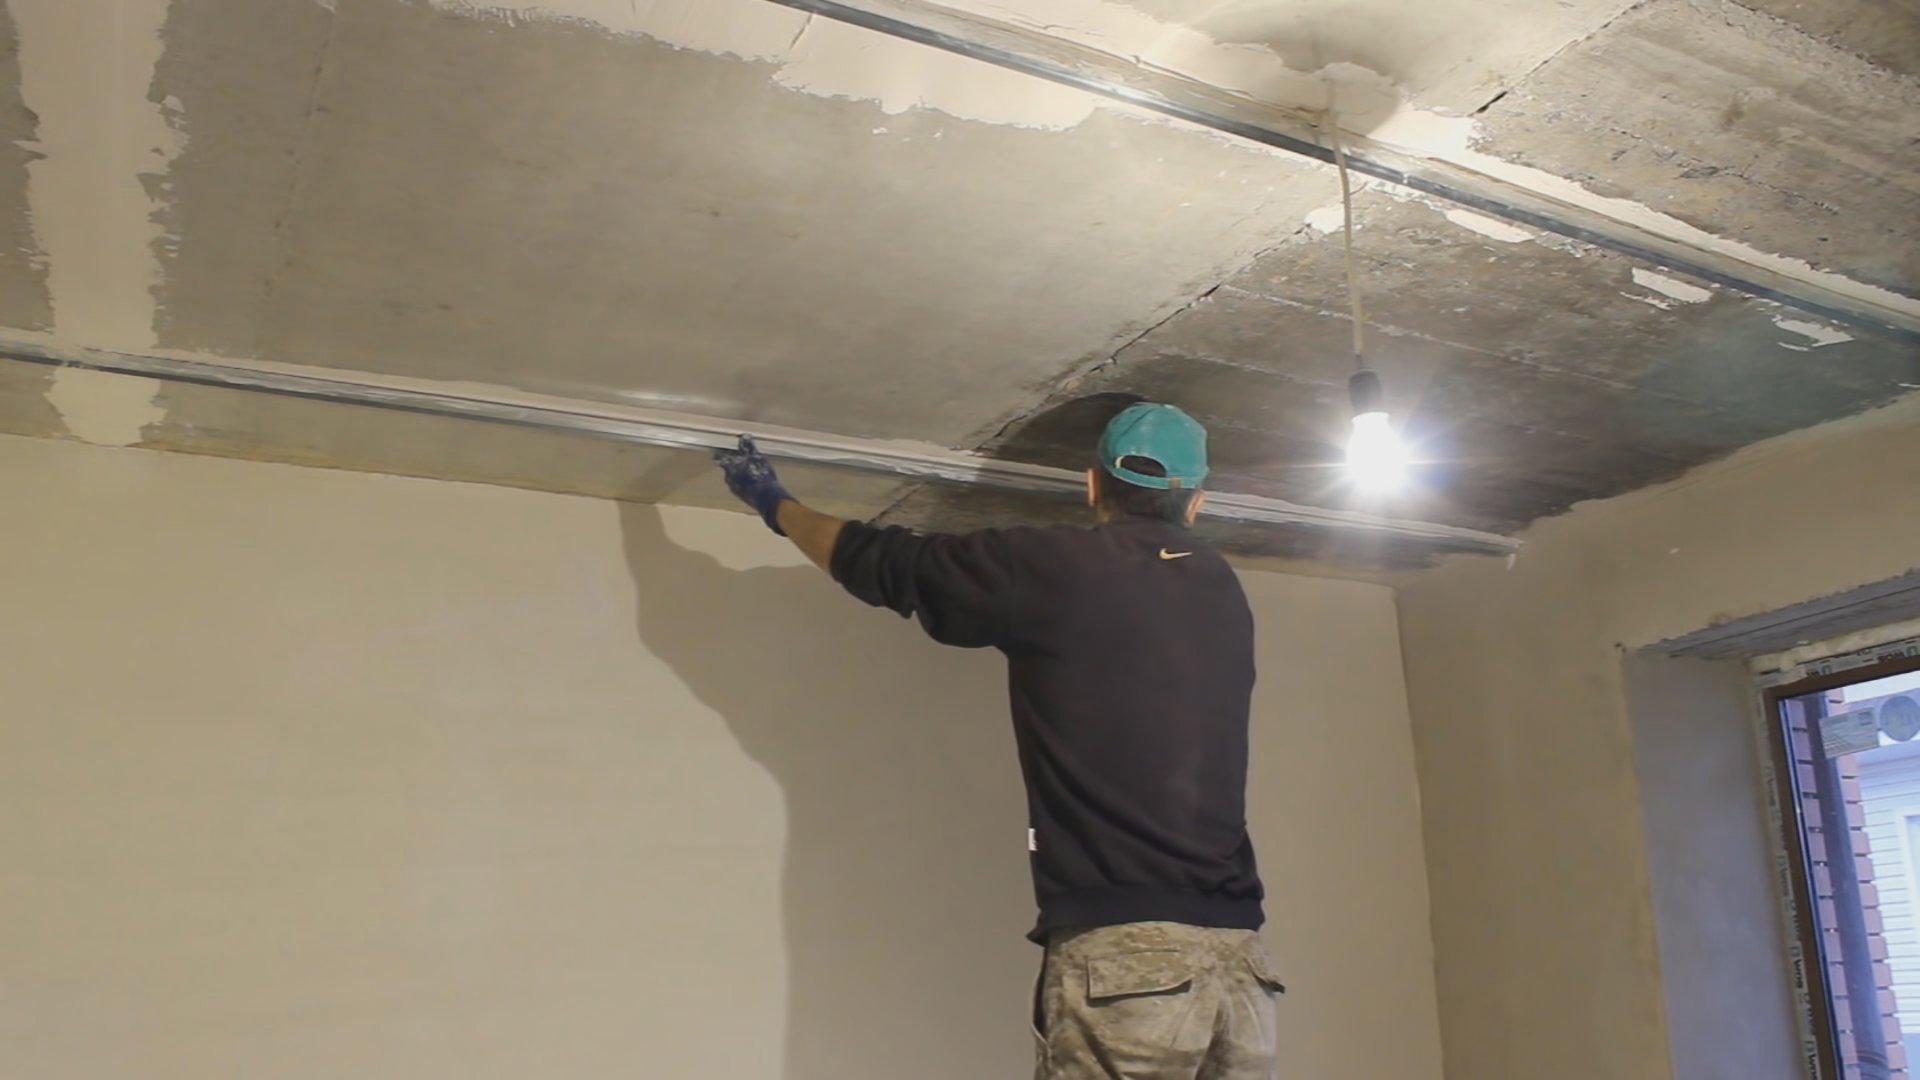
Its features have a selection of beacons for decorating the ceiling. Most often there are used perforated products in the shape of the letter "T".

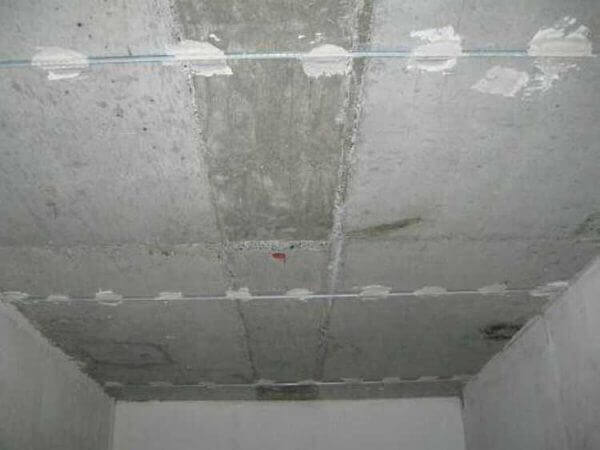
Such things will be useful if the plaster layer does not exceed 1 cm. When a large amount of coverage is needed, a solution is placed at the right points, and then signs are placed on it. The disadvantages of perforated beacons can be considered their increased price and low speed. Somewhat less wood bars are used; their length and height are practically unlimited. Problems with wood are caused by its absorption of moisture, therefore it is recommended to soak them in water before using such beacons so that the size does not change.
The hardest thing to create on the ceiling beacons from the plaster itself. Due to objective reasons, it is kept rather poorly, and in case of any carelessness, workers tend to fall from the ceiling. The total time of such work is more than with the two methods already described. But after finishing plastering of the plumbing, there is no need to close the resulting furrows or voids.
Consumption per 1 m2
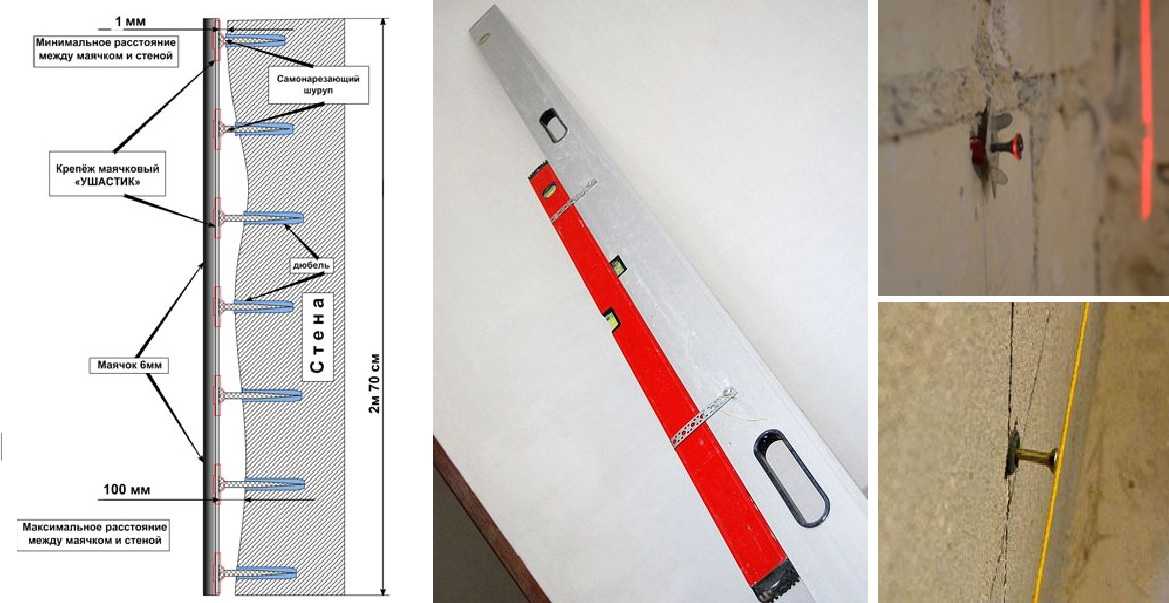
The usual distance between the beacons is 1.2-1.7 m, this is determined by the length of the rule. But the step is influenced by other circumstances. So, the leftmost and rightmost guides should not be closer to the border of the wall more than 150-200 mm. Beginners can reduce the gap to 100 cm, and experienced professionals often increase it to 2 m.
When you need to plaster half a circle, beacons on the wall are placed at the top and bottom, and the work is carried out using a template with the necessary radius, which helps to distribute the solution.
Markup
Prior to the installation of beacons is required to mark the treated surface. There are a number of options for how to do this, and in each case there are positive and negative sides. The easiest way is to install line pointers on the same solution that will be used for finishing..
- They begin to work, retreating from the angle by 0.3 m, and from floors and ceilings by 0.15 m.
- Conduct a clear vertical line, its severity is checked by level.
- The same operation is repeated on the opposite side of the wall.
- Once this is done, it is required to measure the gap from one line to another.
- The resulting distance is divided into sections of 150 cm (this will determine the required number of lighthouses).
- The designs are notched, ensuring that they are 300 mm lower than the ceiling height.
- At the top and bottom of all the lines are drilled notches, they are fixed dowels.
- Now you can draw the wall with stripes, the distance between them is strictly 1.5 m.
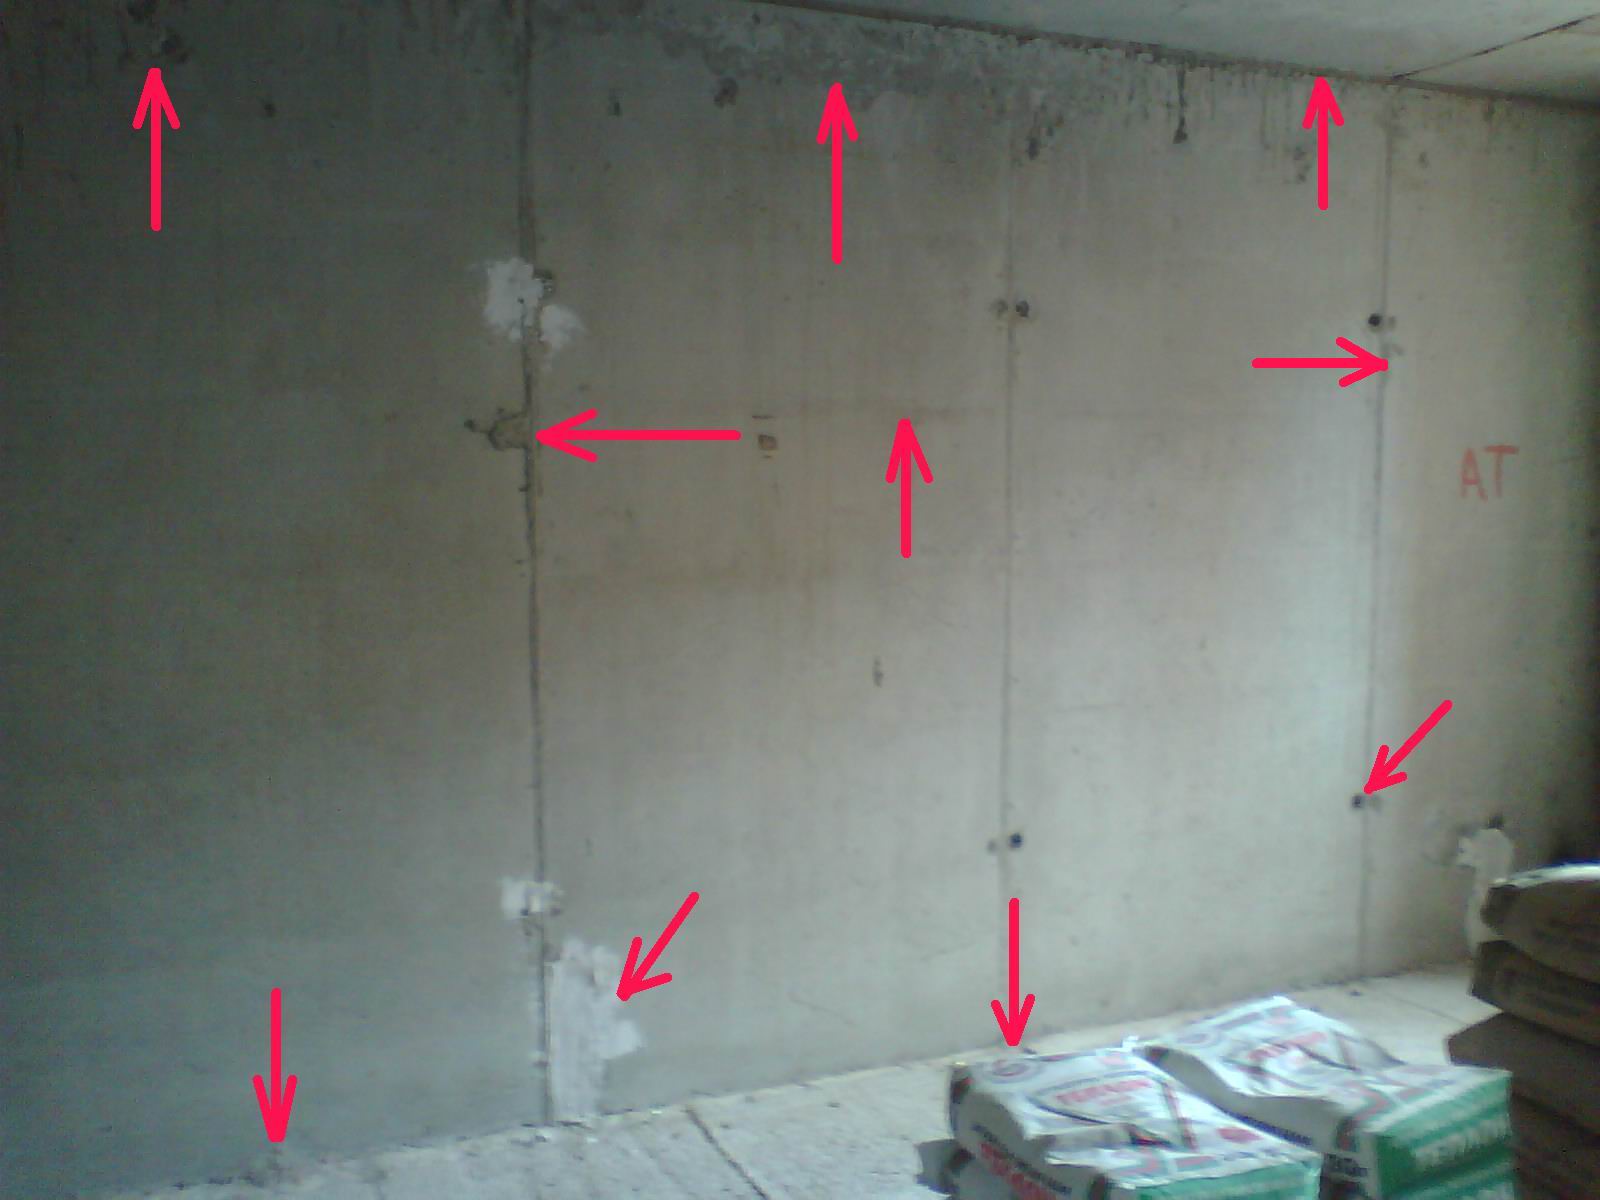
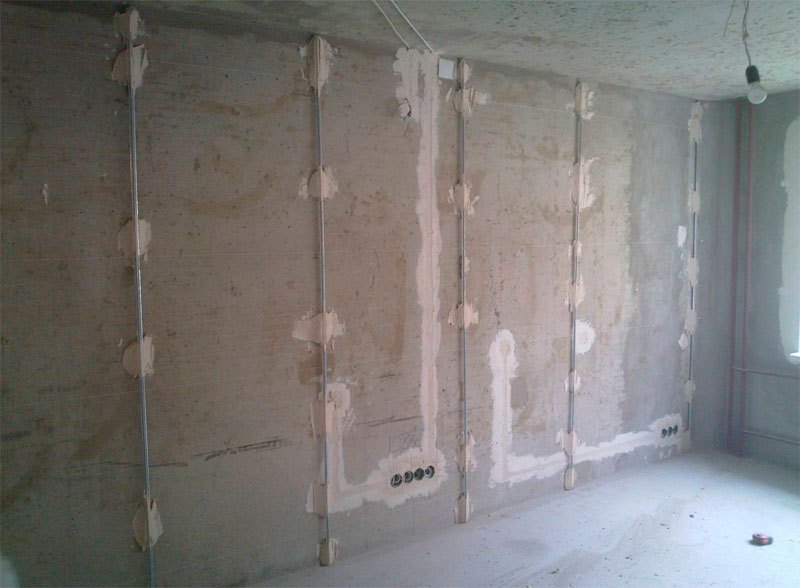
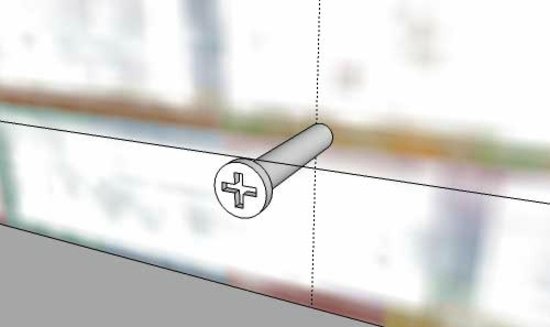
The technology means that the screws are wrapped in the holes, and their heads are connected by a pair of threads. Where the extended strip and lines intersect, drill holes and insert dowels to install the screws.
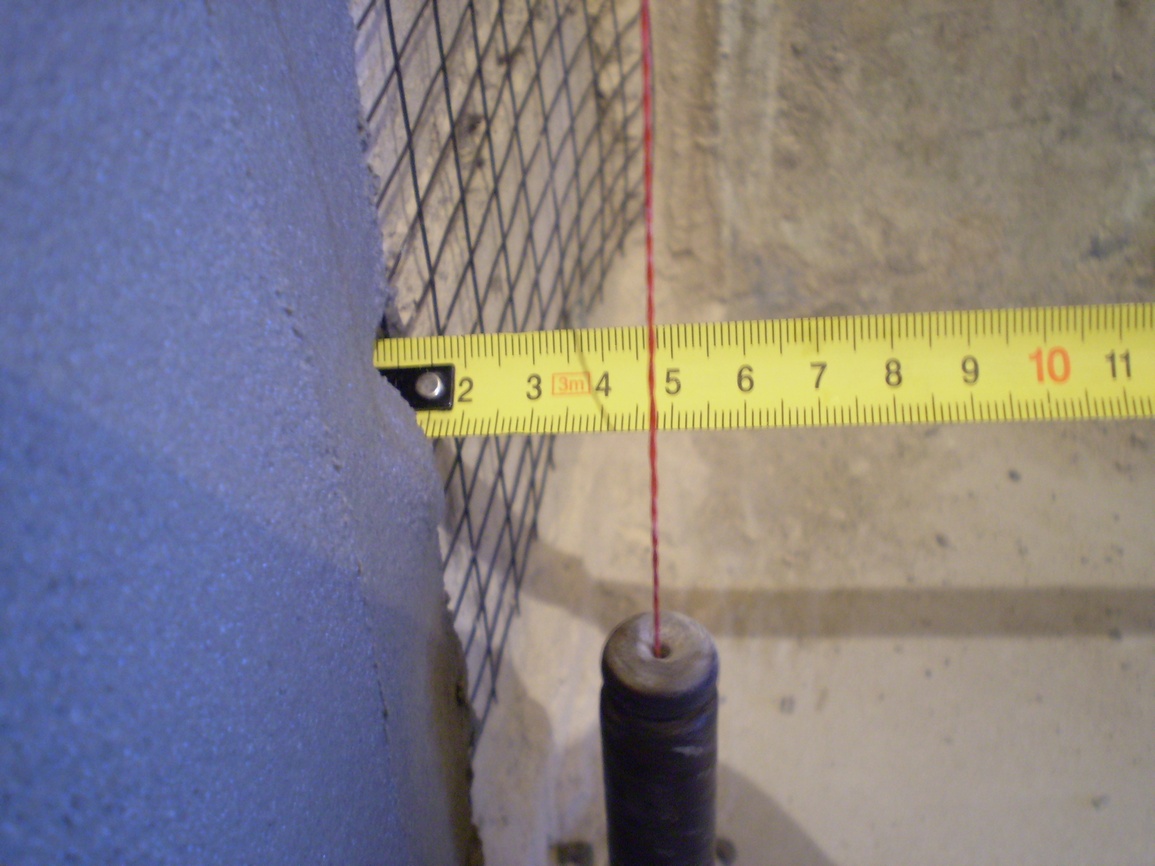
Now achieve the same height at the tops of the screws. Calculate it by adding:
distortion of the horizontal plane;
pointer thickness;
reserve (5 mm).
The amount received shows the required offset of the fastener from the wall. As soon as the screws are exposed, they pull the threads along the diagonals. Conducting a beacon under the whole plane, they see that the product touches the threads slightly (but does not pass freely and does not tear them). Cords are removed, then the wall is covered with a primer. Such is the professional device of plaster beacons.
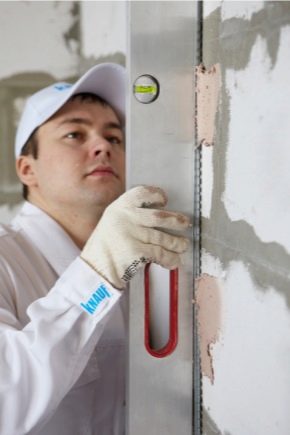
How to set?
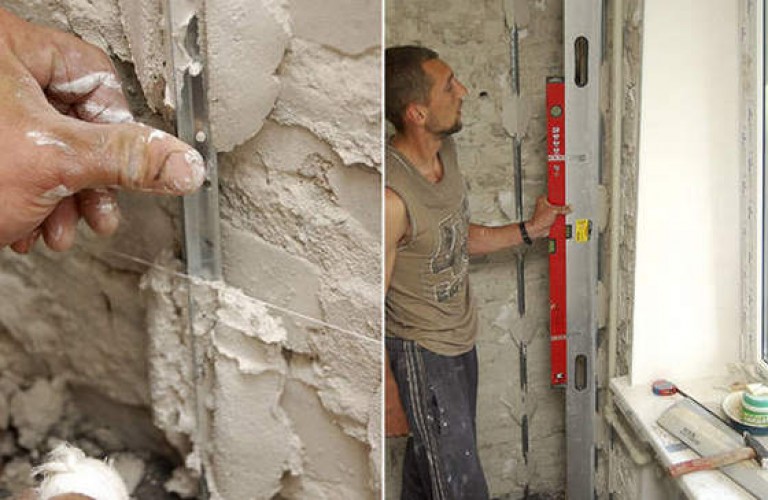
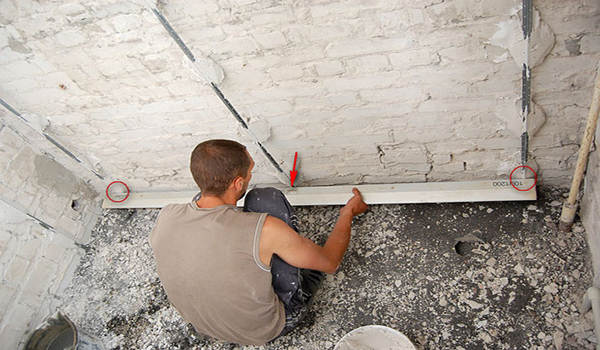
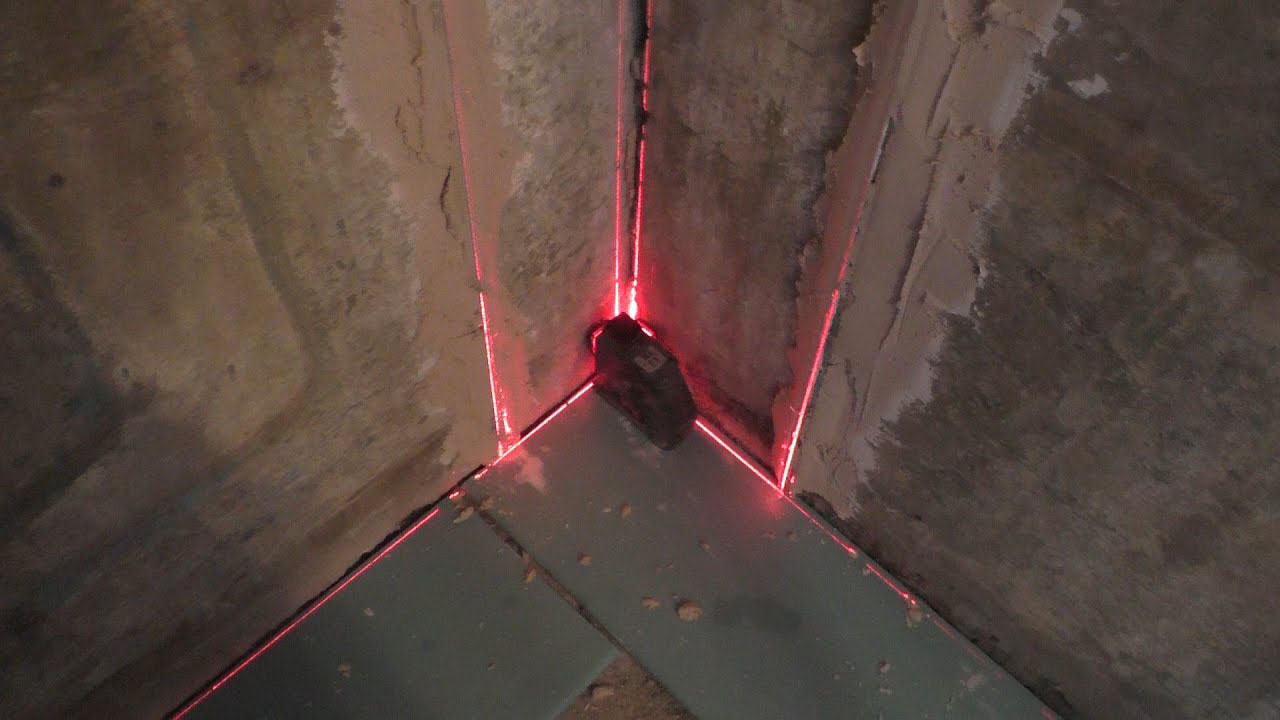
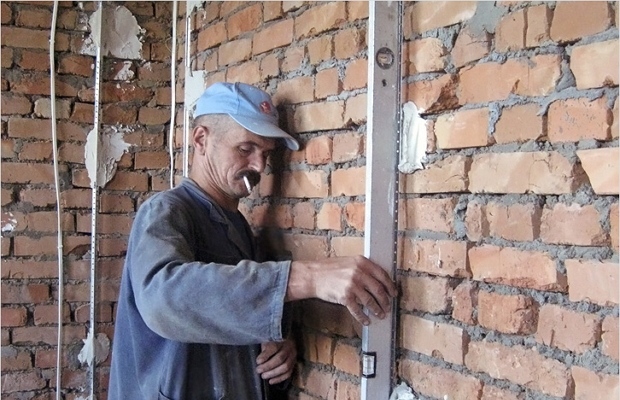
It is necessary to work on exhibiting lighthouses very carefully and carefully. Whenever possible, it is worth checking the flatness of the bands and the landmarks themselves using a laser level. Only a rare home wizard owns such equipment, but it is worth the money.
First of all, they are looking for deviations of walls from the horizontal, which are determined by placing the apparatus against the opposite wall and including the cross level. This technique allows, without additional training, to determine the required thickness of the plaster.
Marked with a laser beam will help to draw verticals on the wall, indents are defined in advance.
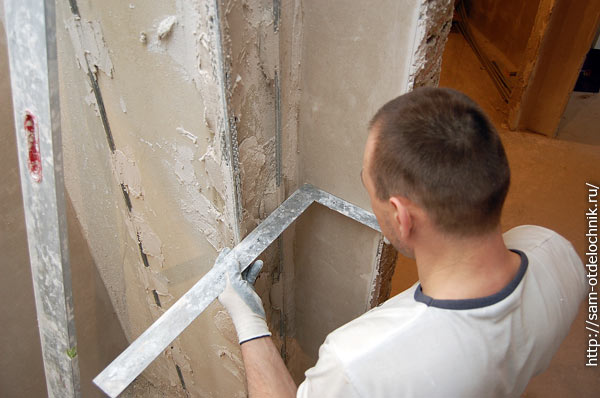
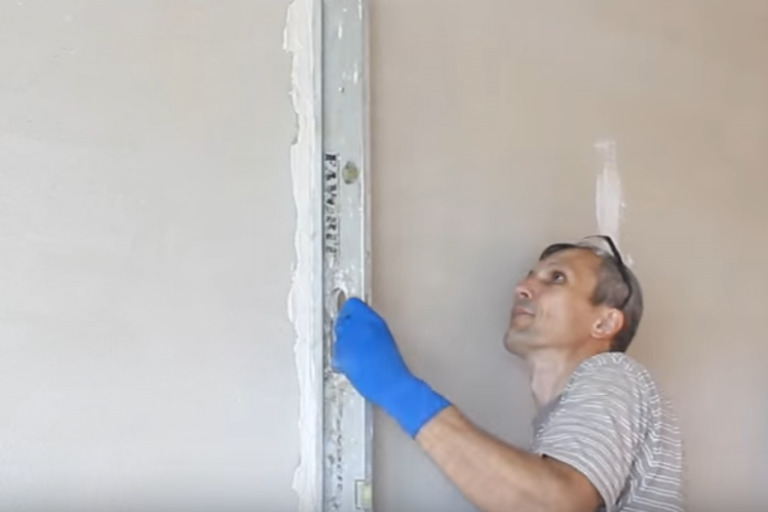
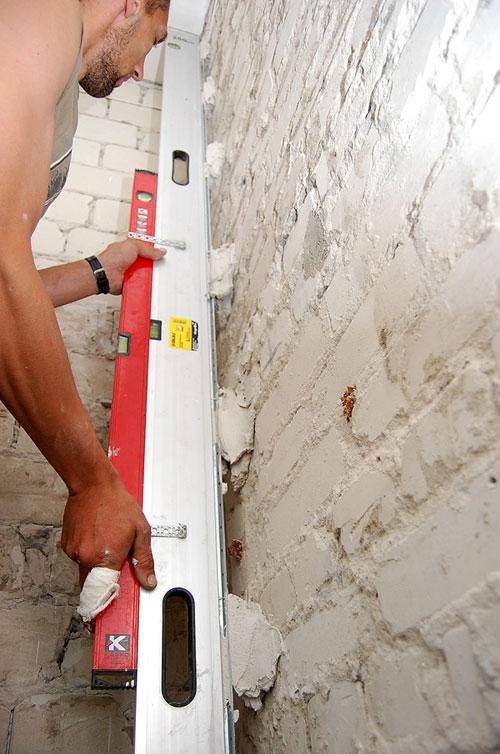
Now it is necessary to establish the building level at a distance of 0.4 m from the surface of the angle and orient the line vertically. A point is sought where the gap between the line and the wall is minimal. Further, on the surface of the rail with a length of 50 cm, a place is marked equal to the distance just determined with the addition of the thickness of the beacon and the reserve distance. The glue is lined with glue, the lighthouse is tightened with the help of a reiki, ensuring that the mark coincides with the laser line.
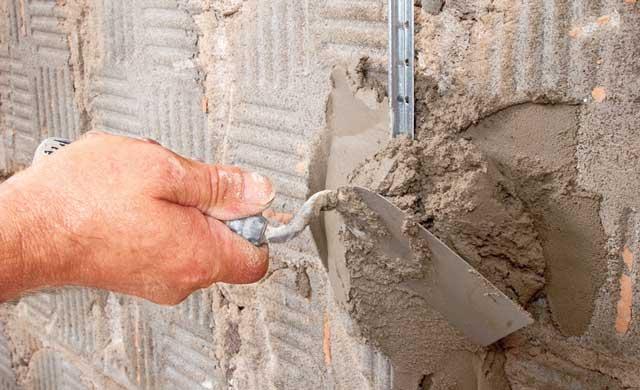
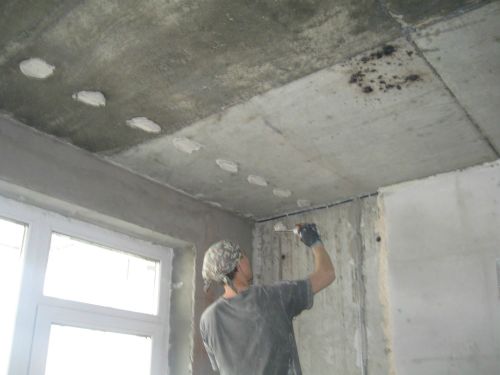
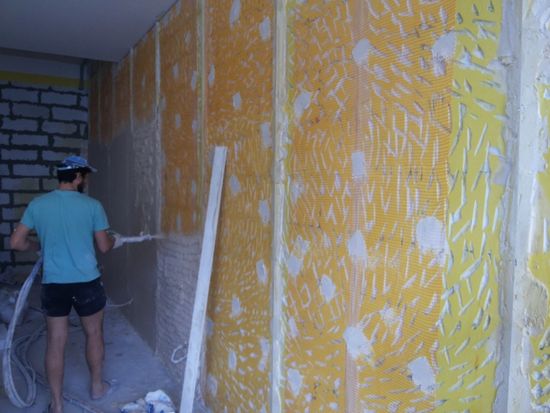
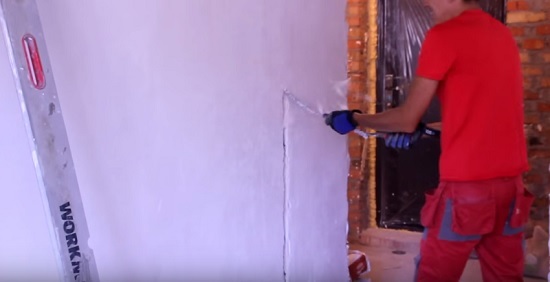
Now you can install beacons. When working using three different approaches. The most common option is the use of mortars or adhesives. In this case, the instructions prescribed by the manufacturer are strictly observed. The addition of small portions of gypsum or alabaster helps to reduce the drying time of cement or lime mixtures.At the beginning of work, the mass is applied in small portions, the distance between the points of its installation is 150-200 mm.
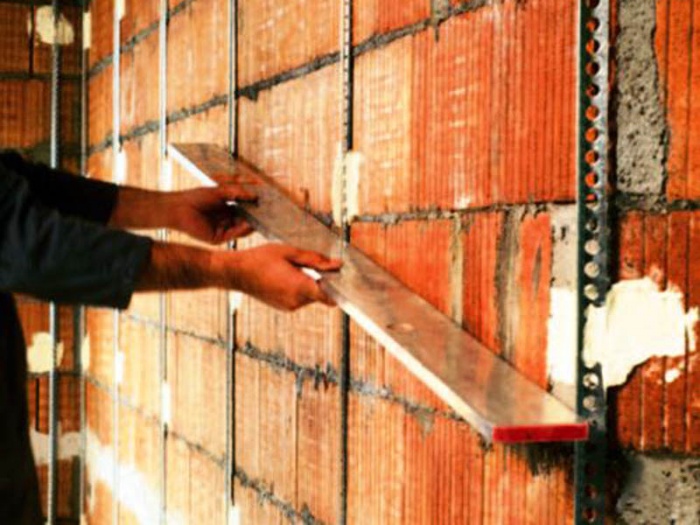
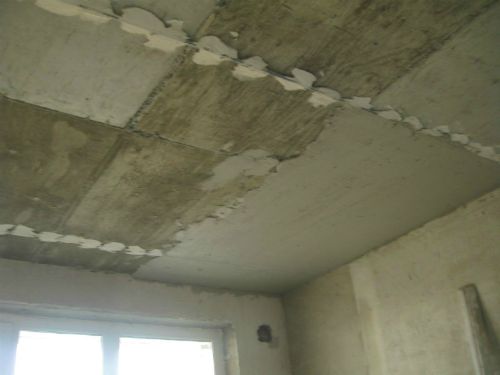
Then take a pre-cut profile, put it to the solution and to the wall. If the simplest method of marking was originally used, the beacon is placed on the same level with self-tapping screws. But it is much more correct to measure the compliance of the mounting points with a laser. The excess solution is removed and begin to install the following beacons. That's all the details with this version.
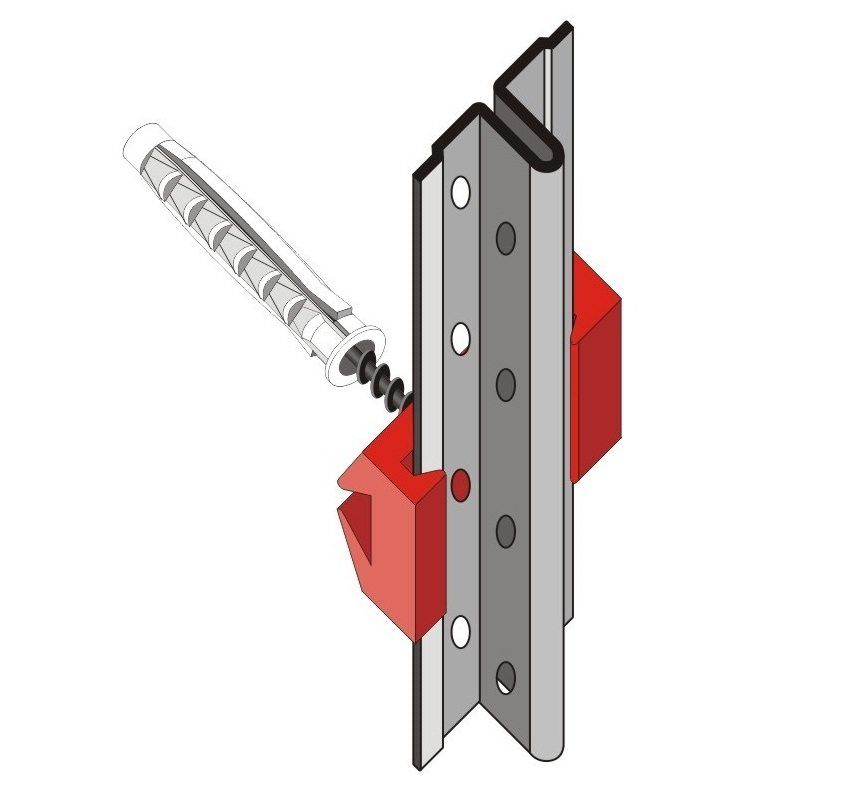
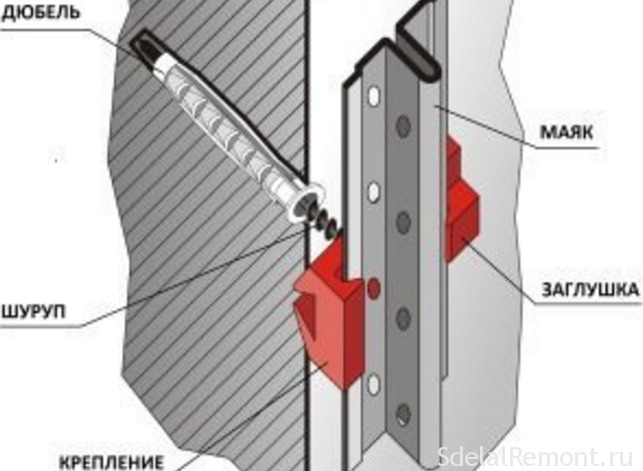
Lighthouses can be set using special fasteners, which are made of plastic. To install such parts, you will need to initially remove the retainer on the product and attach it over the cap of the screw. The screws are screwed in 0.3 m increments, after which the beacon is mounted, and the fixing part returns to its place. This solution allows you to spend a lot less time on work. But it will be necessary to increase the thickness of the applied plaster layer by 5 mm, and therefore the total cost of repair increases.
In the recent past, painters and plasterers for placing beacons self-sliced legs with a hole inside, taking as a basis fasteners for drywall sheets.Now similar designs are produced in lots and sold through construction stores. The hole is used for threading the screw, which is then twisted to the desired depth.
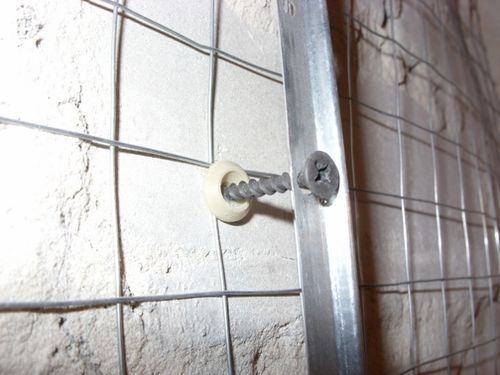
To fix the beacon, you need to press to the base and work with steel ears alternately. Additional reliability of the connection gives treatment with round pliers; This technology is simple, but you need to keep in mind that removing the beacon will be much more difficult than delivering.
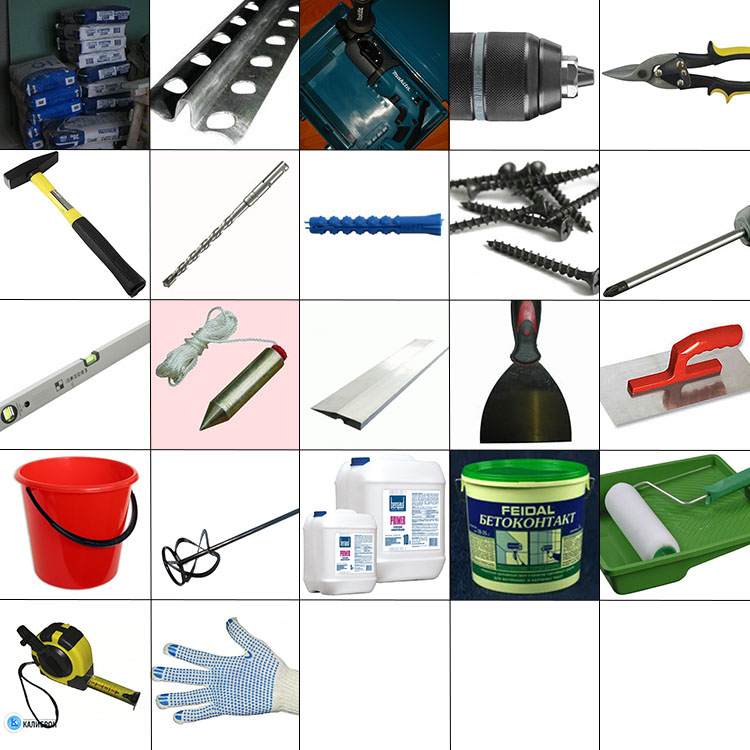
The step-by-step instructions for fixing lighthouses with their own hands cannot do without mentioning the tools that should be used in work.
- In addition to the attached products, you will need trowels, perforator, levels, trowels, tools for leveling corners.
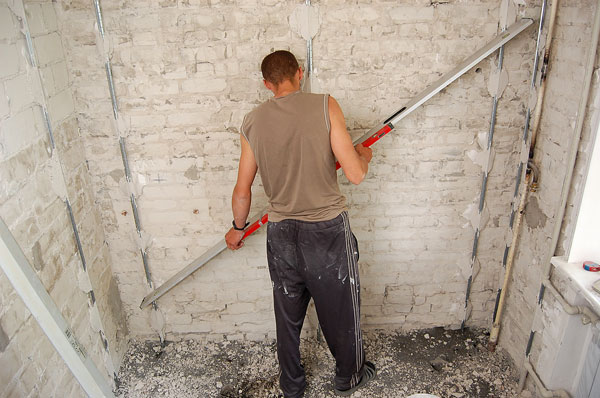
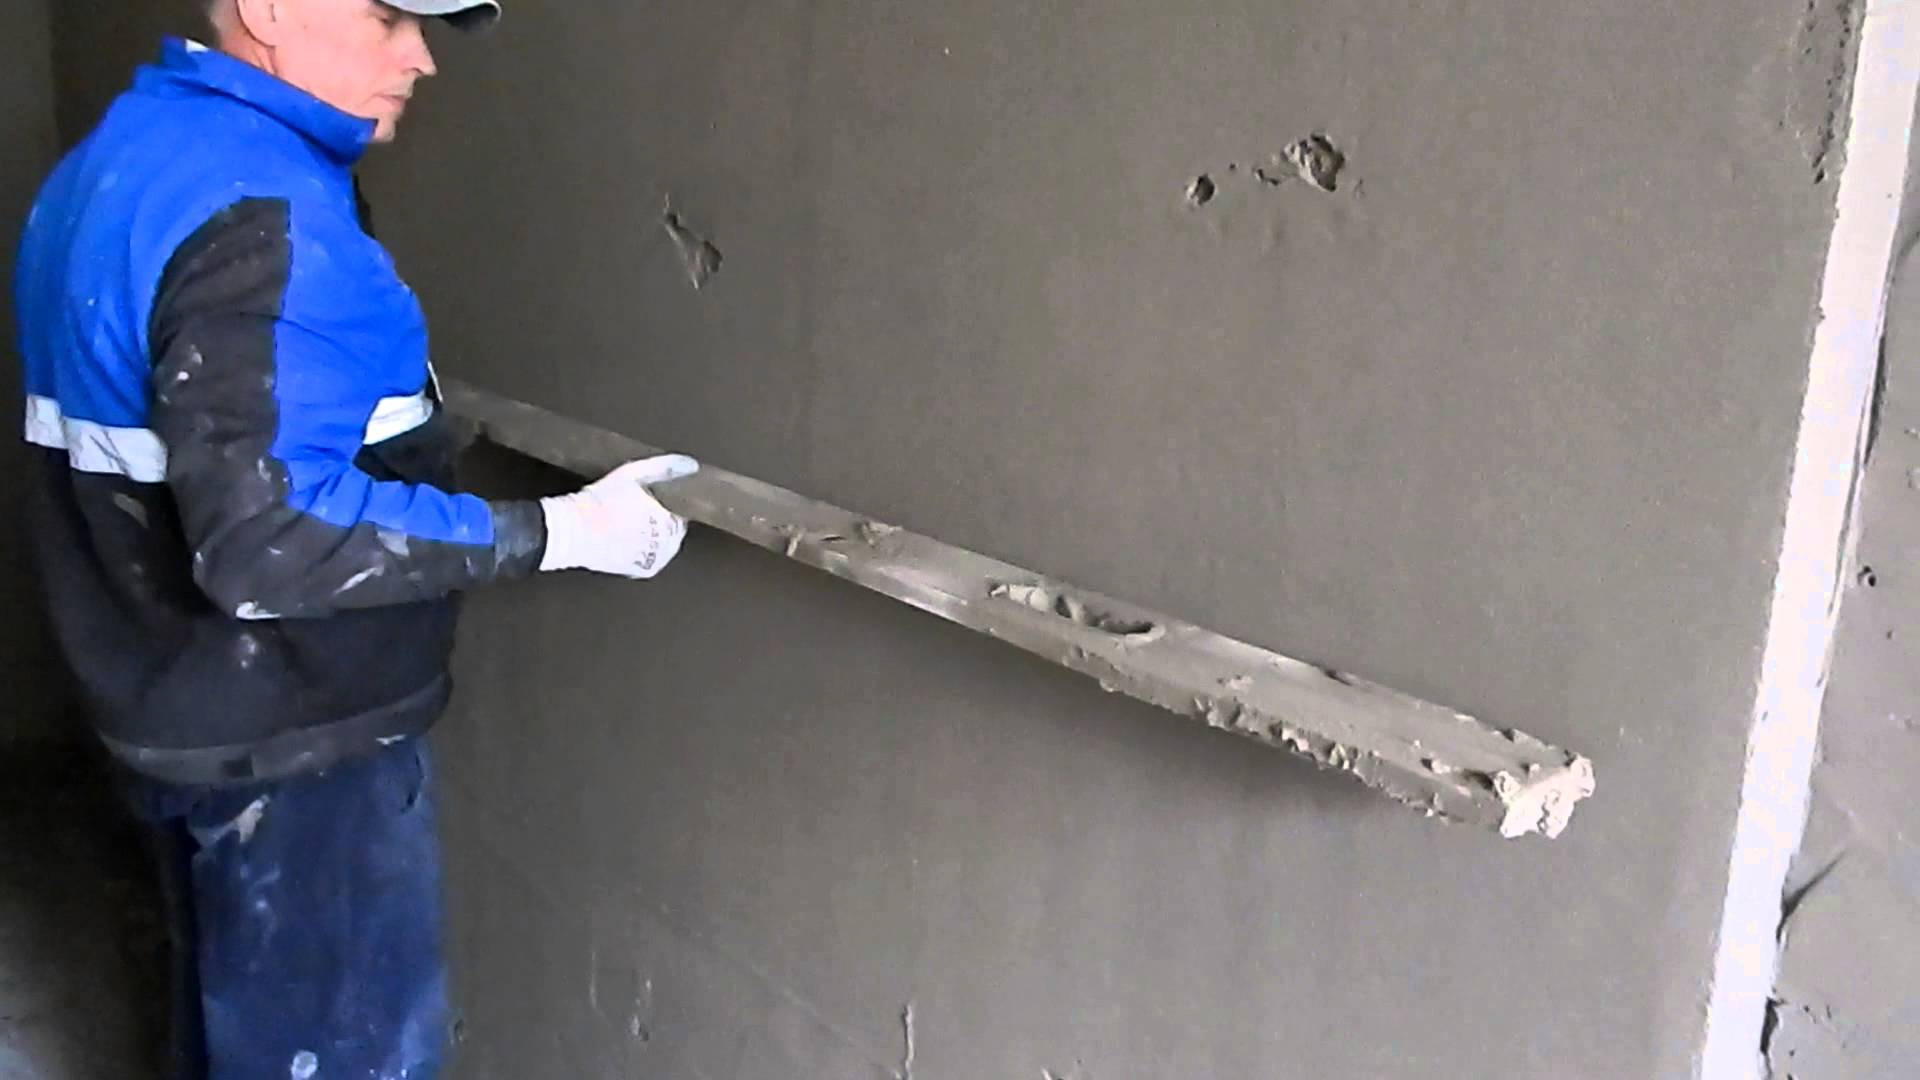
- The rules that apply and level the solution are short and long.
- In addition to such devices, construction cords, tape measures and grouting tools are used.
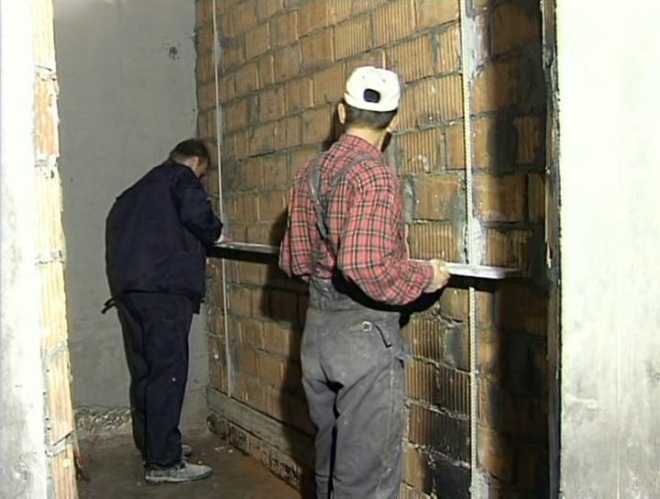
Usually, a pair of lighthouses are exposed from opposite edges of the wall, and only then other necessary parts are installed.
Some of the minor protrusions are sometimes more profitable in terms of expenditures and the effort spent on knocking down rather than leveling.To fix the beacons on the solution, you can without rails, mark the surface and calculate the required thickness is required in the same way as in other cases. The first beacon is set using a long rule. Trowel the solution is placed in the gap from the wall to the rule. After 5 minutes it is required to remove the excess mixture of the horizontal rule, which is carried out on the control points.
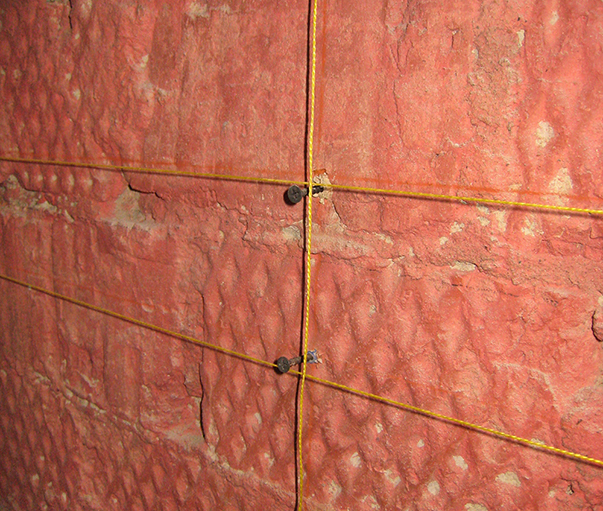
To work with strings correctly means to use a completely different technology. Builders will need a plumb and screwdriver, pliers and mortar, a hammer and a hammer drill, a pair of strings, dowels and screws.
Gradually act as follows:
recede from corners on 150-200 mm;
four holes are made in the right places (angles of an imaginary square);
put dowels into the holes;
tighten the screws, leaving a reserve of 10 mm;
put the solution under the strings so that they do not sag.
You can glue not all lighthouses. Heavyweight wooden structures cannot be fixed in this way. When the beacon is glued, you need to carefully check the verticality of its location. It is desirable to evaluate this property using a level, but if it is not there, you can use a simple plummet.When it is found that the geometry is broken, the thickness of the putty of the putty is changed and thus the properties of the material are corrected. They work in this way consistently with all the lighthouses without exception.
Regardless of which of these methods is applied, you definitely need to spend some time and have some skills. After all, the solution must necessarily dry after application. Such a lack is deprived of the most modern approach - a brand mount under the lighthouse. All marked lines are provided with holes, the pitch of which is 30-50 cm. Dowels are inserted inside, most often 6 * 30, allowing to fix the ShSGD self-tapping screws.
Carefully check the cap level, so that they form an inseparable plane.
On top of the screws, polyvinyl chloride mounts with slots for mounting the guides are placed. Having finished installation, fix a level by means of a stub. Simple plastering implies vertical and horizontal deviations of a maximum of 0.3 cm per 1 p. M, and at the most 1.5 cm for the entire height of the wall. When an artistic composition is supposed to be created, the value of tolerances is reduced to 2 mm by 1 p. .
Advantages and disadvantages
Accurately expose the lighthouses, as has already become clear, is not difficult. But there is another question - is it really necessary. Professional plasterers often do not use any pointers, compensating for their absence with an acquired eye. For those whose experience is measured in tons of mixtures and kilometers of finished walls, there is nothing surprising in this. But sometimes newbies can take on such work, only they need to be prepared for constant corrections of errors.
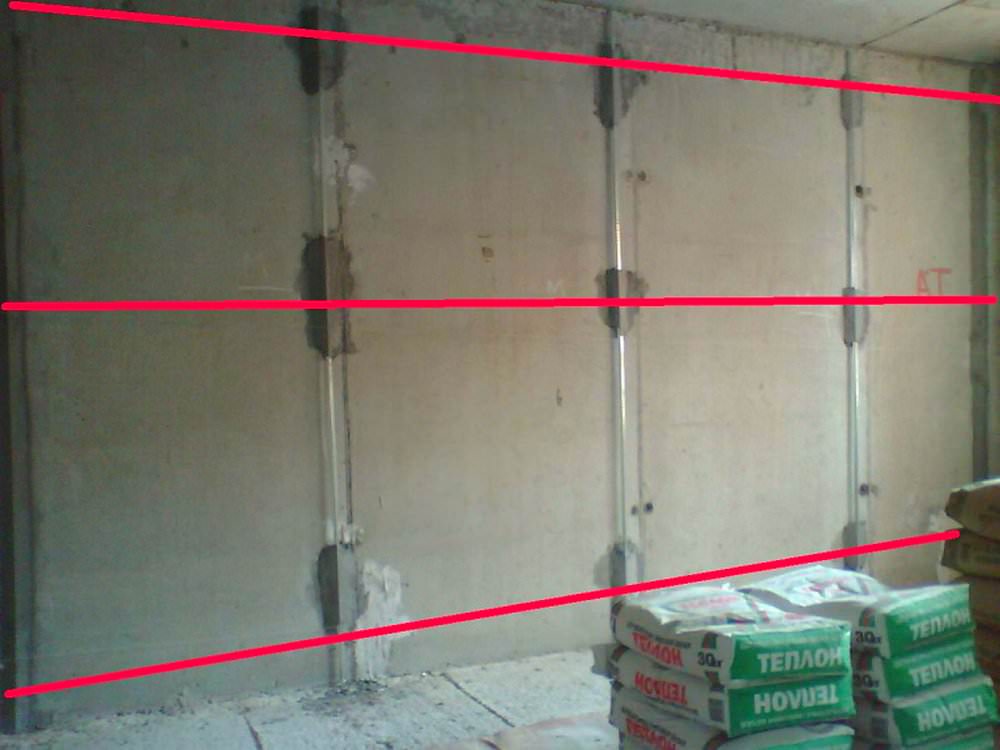
But even the highest-class experts do not plaster large walls without lighthouses. Only in small areas can you work this way. The mobile level helps to control the flatness of the plaster laying (they are checked all the areas separately). Along with this tool, it is possible to use general levels - that is, nails hammered at the ends of the wall with tied threads. Such devices are prepared in the upper and lower parts of the wall.
Even such ancillary control does not allow work to be done quickly. If you throw a solution on a large area, the slip will be too large.
Plastering a ceiling without beacons is simpler than walls.But you need to prepare a reliable support and to provide free access to the surface of the vessel. Along with the thread attached to the nails, a mobile lamp is of great help - in its rays insignificant defects are detected immediately.
Tips and tricks
When the plaster has been applied, the lighthouses must be removed. After all, even a first-class zinc coating only postpones the onset of corrosion, but cannot prevent it at all. To get the job done quickly when using dry beacons, you need to get rid of any irregularities on them. Otherwise, the rule will be very difficult to move. Removing the string direction indicators is required only when the solution is completely frozen.
In this case, the strings are twisted, and the screws should be removed from the wall. Some users believe that string constructions work the most correctly. But this is not entirely true, since crucial to the quality of work are:
preparation of the original surface;
its original condition;
the size of the processed wall.
When choosing beacons, one should focus primarily on the type of plane and the material used.
It is recommended to make wall measurements and installation of beacons from the most convex part of the surface. Drywall pointers are used in the same way as those made from metal. If the width of the strip is 4 cm (as a rule, this is the norm), it is best to fix it with a starting putty. In the decoration of external walls such devices can not be used.
When the base is loose, tin lining can be used. Whenever possible to reduce the height of the lighthouses you need to use it. After all, "some" 1 cm will save up to 10 liters of plaster. Therefore, when finishing the wall 3x6 m, it is possible to save 6-8 bags of the mixture. The lighthouses created from the plaster itself must be very carefully rubbed.
The most difficult areas for work are the corners of rooms, perimeter windows and doors. It is in these places that the most likely to encounter a significant curvature of the created surface.
To save money, it is necessary to abandon the guide plaster and use ready-made fixtures. Sometimes chopies are driven into holes, and then screws are partially screwed into them to regulate the thickness of the layer being created.
On the technology of installing beacons for plaster, see the following video.