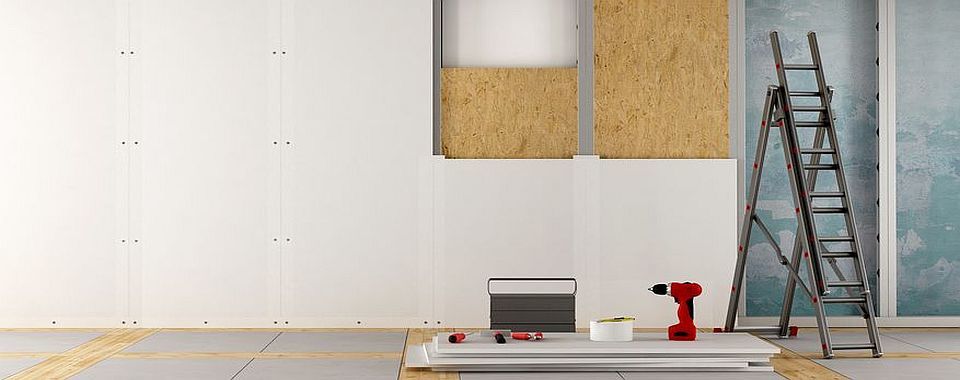
How to fix drywall to the wall?
Drywall is used very widely. But many people do not know how to mount it, attach it to the wall. Simple knowledge allows you to perform this work in an effective manner and without any problems.
Special features
Drywall - a convenient and practical material that allows to level the walls. But not everyone knows how to work with him correctly. In each case there are some nuances that need to be taken into account. The universal requirement is that the target wall must be carefully studied. It is necessary to find out the type of material, deal with all defects.
To install drywall to align, insulation, protection from noise and other purposes need to be different.
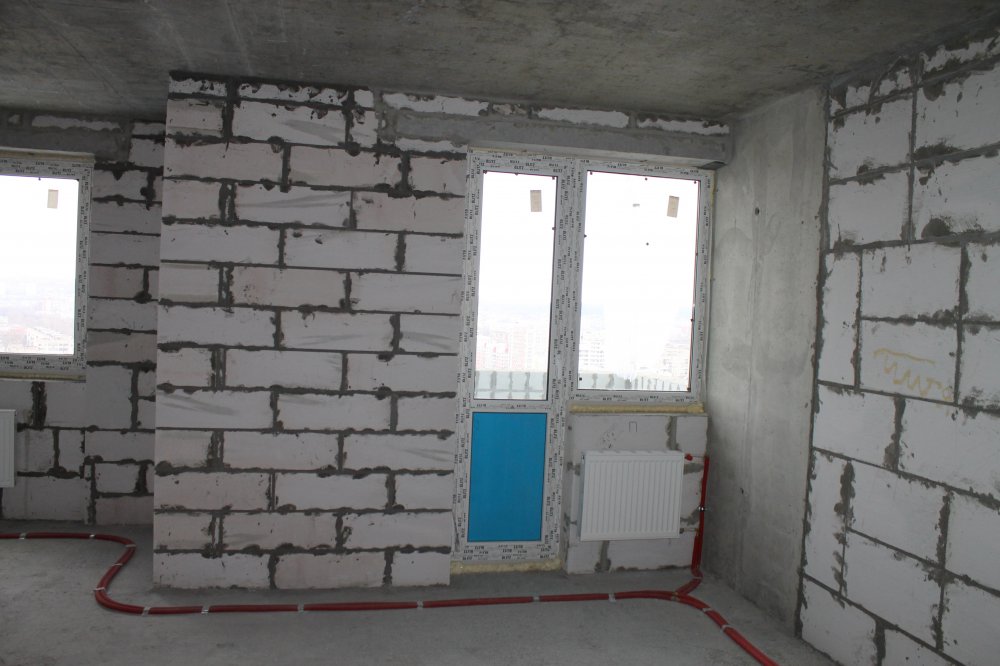
To the concrete wall having ideally plain surface without external deformations, sheets of gypsum cardboard can be glued. Preparation is reduced to the impregnation of an antiseptic mixture and primer.Then the surface is marked for the sheets, the glue is prepared and the finishing material is installed. There must be a gap of 0.5 cm between the blocks, the cross-shaped joints are unacceptable. In the presence of recesses, beacons should be used: so the speed of work will increase.
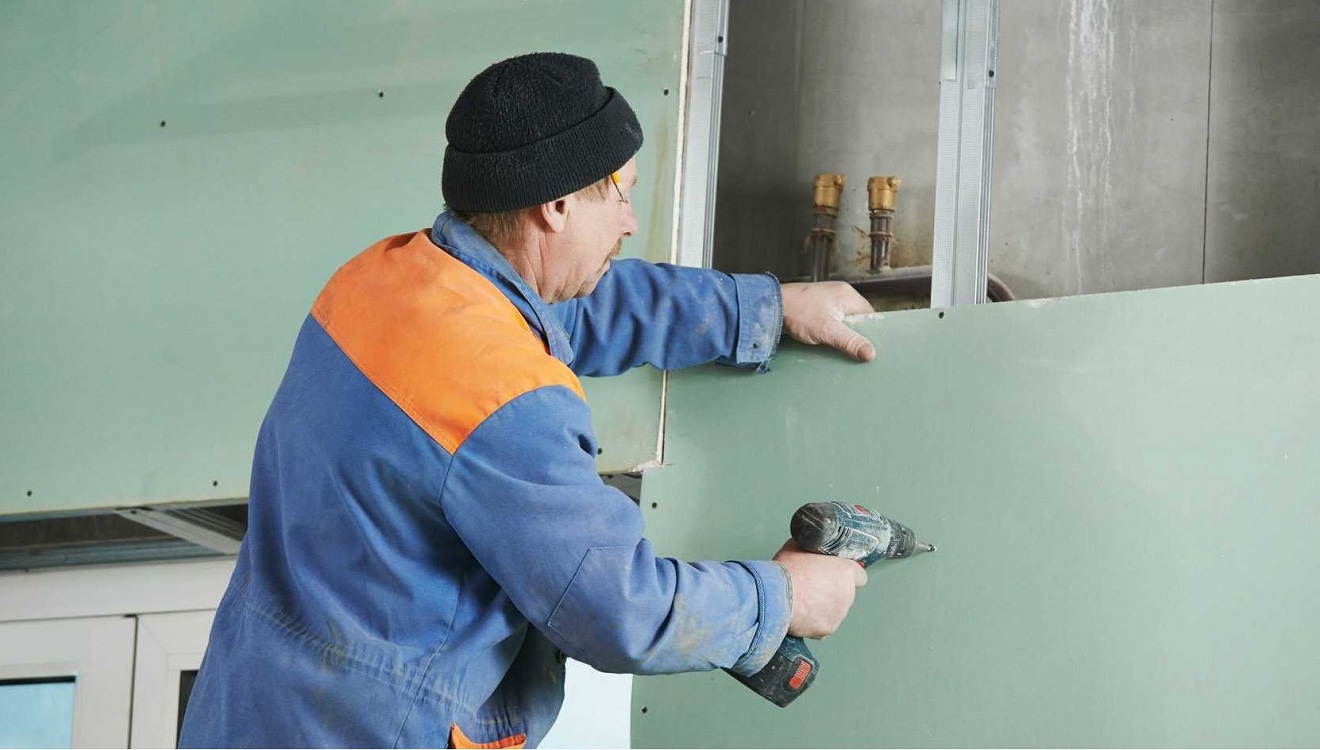
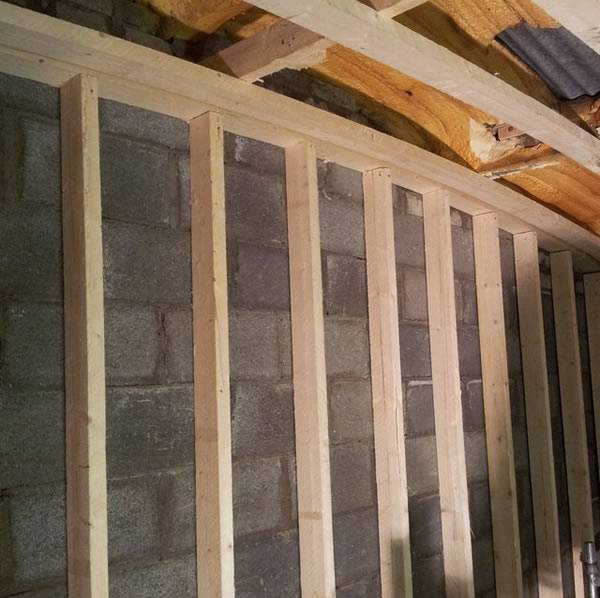
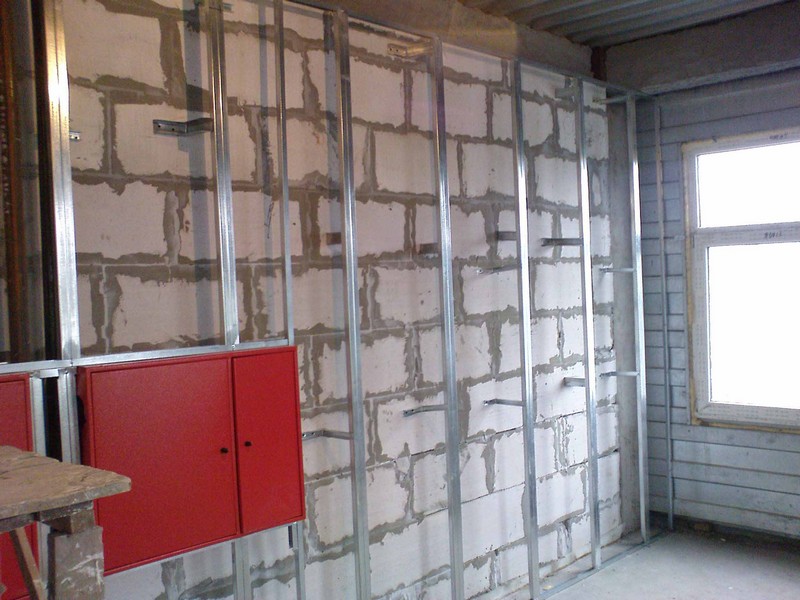
Joining drywall to concrete is possible using frames. They are wooden, aluminum with an external zinc layer. The builders make the exact choice themselves, focusing on the properties of the target surface and its future use. Most experts do not initially think about choice, preferring wooden structures. The slats are preferred, their fixing points are marked, then dowels should be attached in these places.
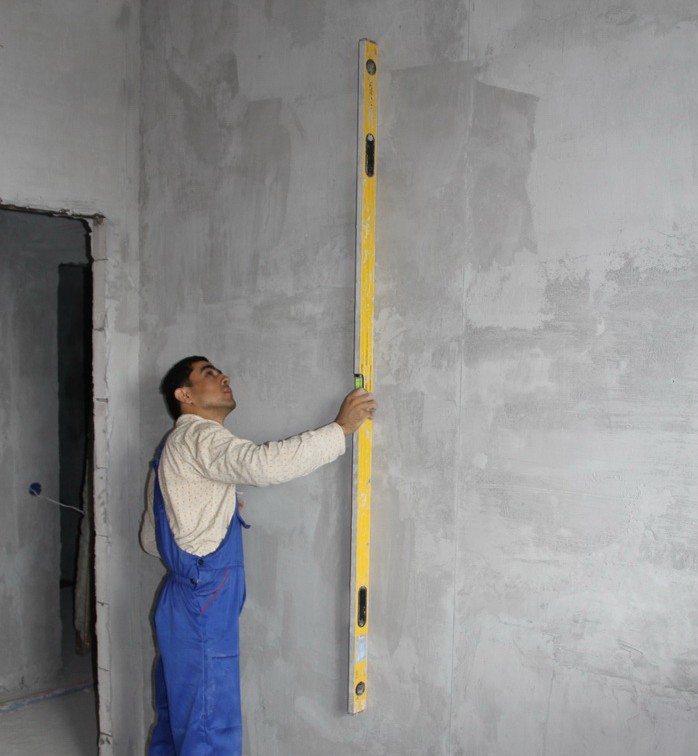
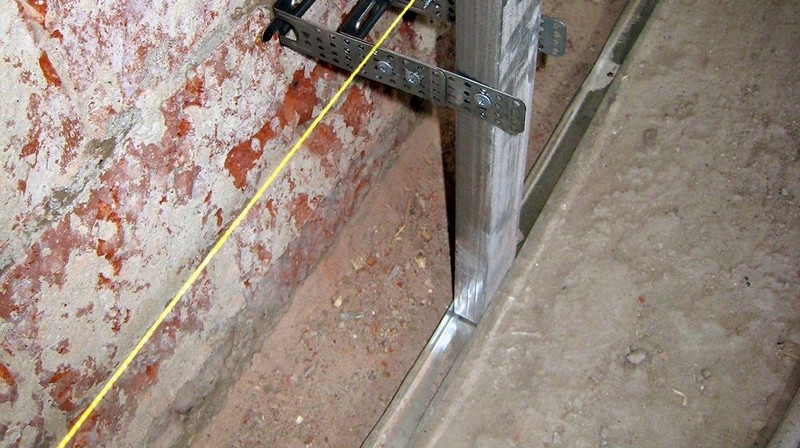
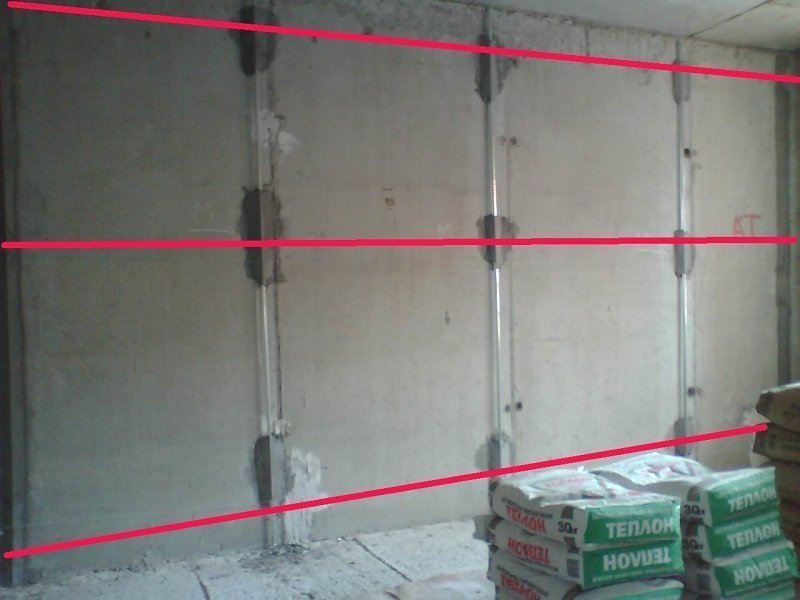
When working with a brick wall of an old building, non-residential building or garden, it is permissible to use only metal profiles. There is too much chance of a collision with high humidity, blowing and temperature jerks. To attach drywall to surfaces made of different materials, you must first mark the walls, drawing an extremely flat line (this will be a level feature).It is recommended to use for work not a simple construction level, but a spirit level. Putting marks on the adjacent walls, their level is checked on a concrete wall and in all corners, seeking to keep lines in the thrust.
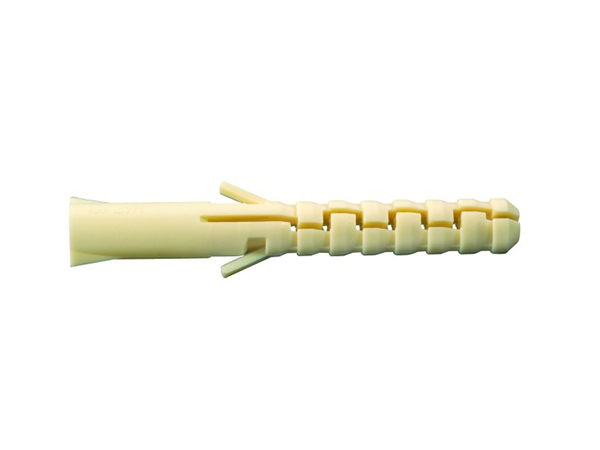
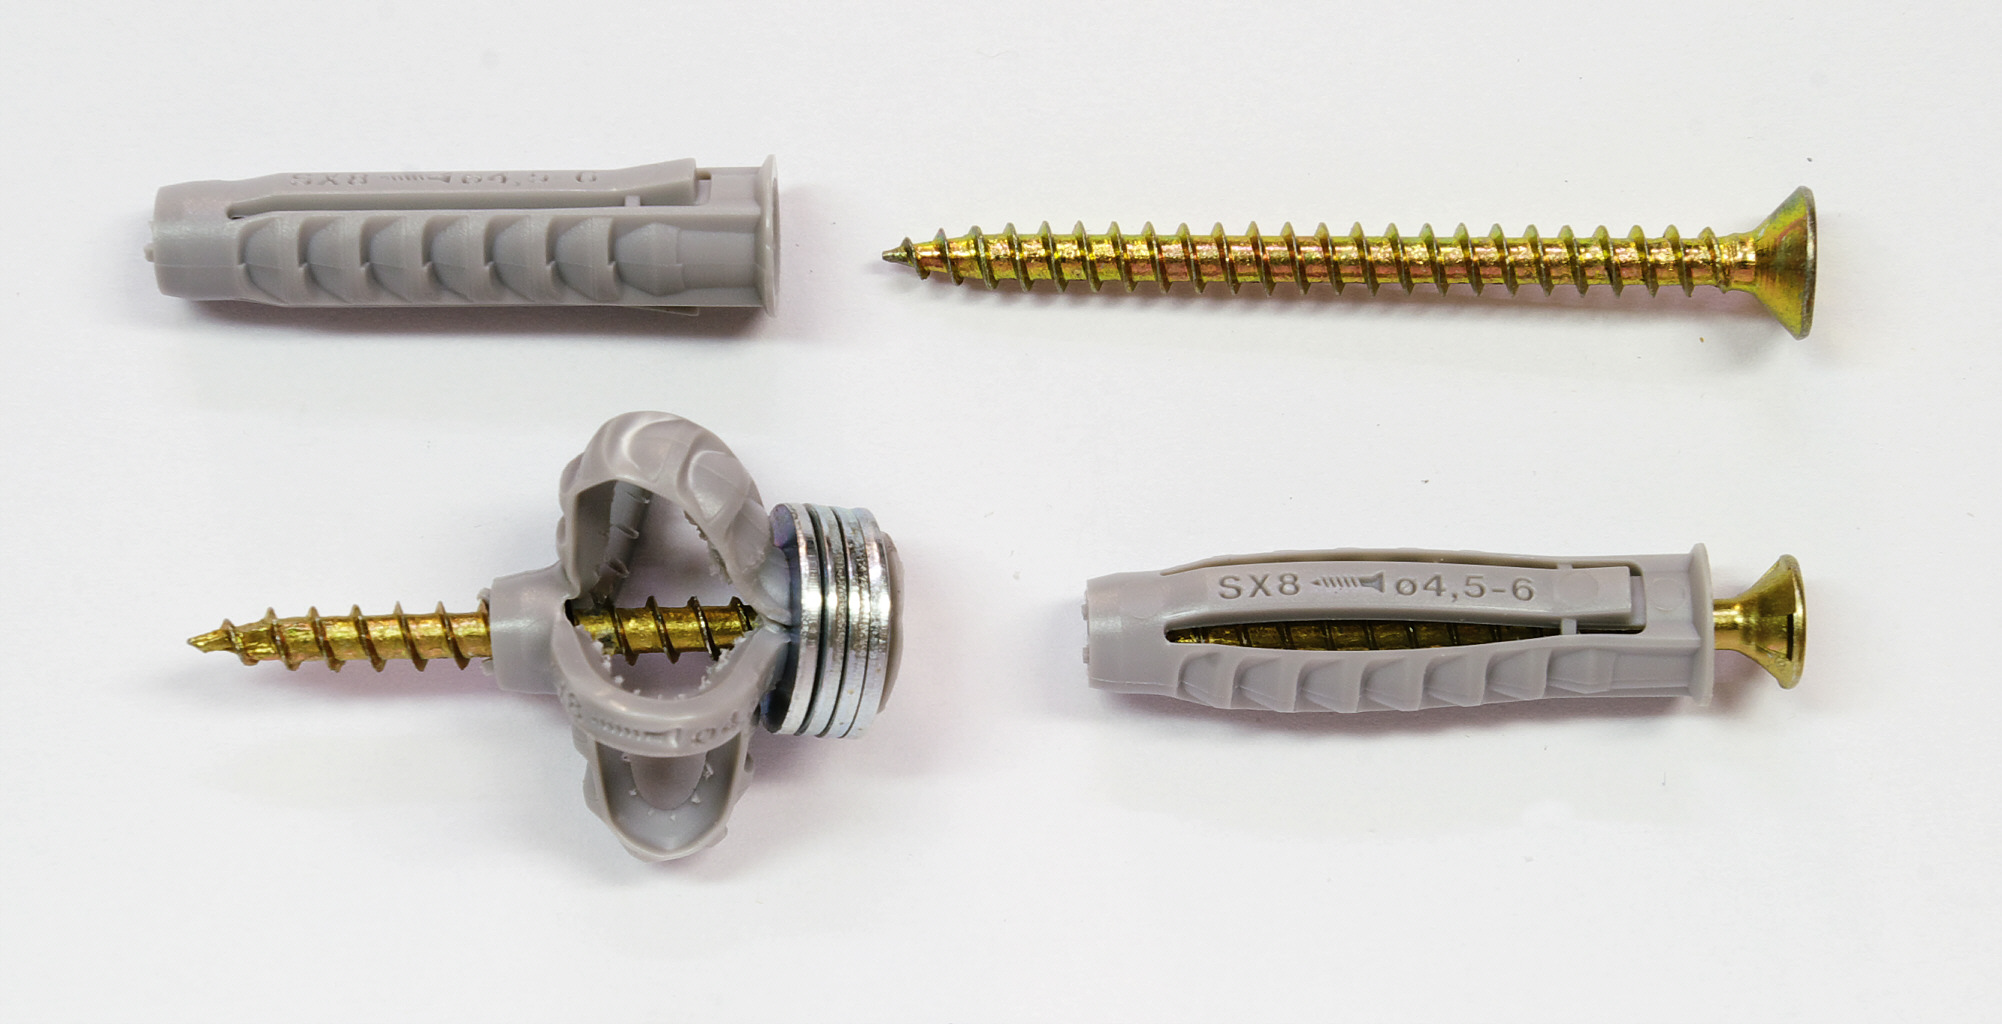
As for the ways to level the walls in the house using drywall sheets, in any case screws or plastic plugs must be used. It is forbidden to use dowel-nails for vertical fastenings. Indents from walls do as much as possible symmetric. To attach the material to the concrete massif, there is only 1 option: the use of metal dowels, which are able to transfer considerable mechanical stress.
It is worth staying on the plasterboard finishing of structures made of aerated concrete. This material is quite soft, therefore it is advisable to use nails or small screws for fastening.
When it is necessary to achieve maximum resistance to tearing out force, it is worth applying wedge-shaped nails.
It is worth remembering that metal fasteners in all types of concrete are easily destroyed due to chemical processes occurring inside. For connection it is worth taking screws with a thread on all body.It is unacceptable to use bonding elements made of rusting steel, not covered with a layer of zinc. In this case, nylon dowels are considered the best fasteners, they are reliable, serve more than many other connecting nodes.
In an effort to save money in decorating houses made of aerated concrete, use glue. It will help reduce costs and ensure maximum space in a small room. At the same time, the adhesive bond will not affect the quality of masking of the defects of the base material and the improper wiring. But aerated concrete will have to thoroughly clean and dry. Only in this case will the clutch be normal. The thickness of the seam created is influenced by the severity of mechanical surface defects.
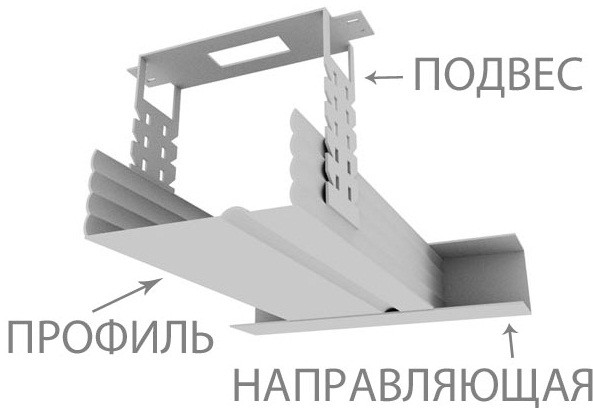
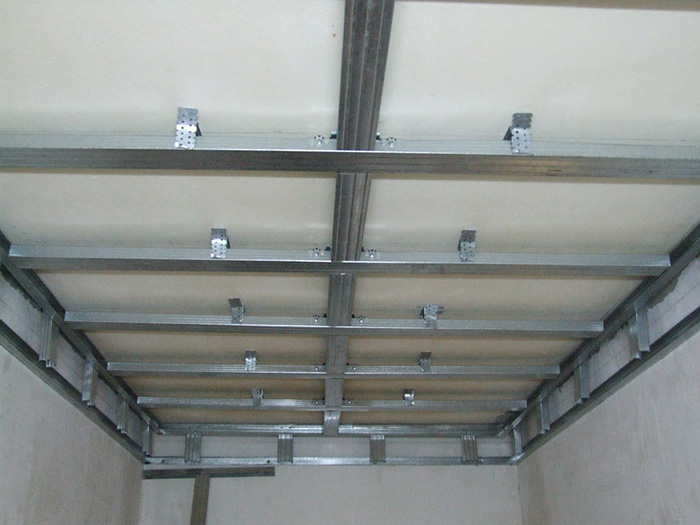
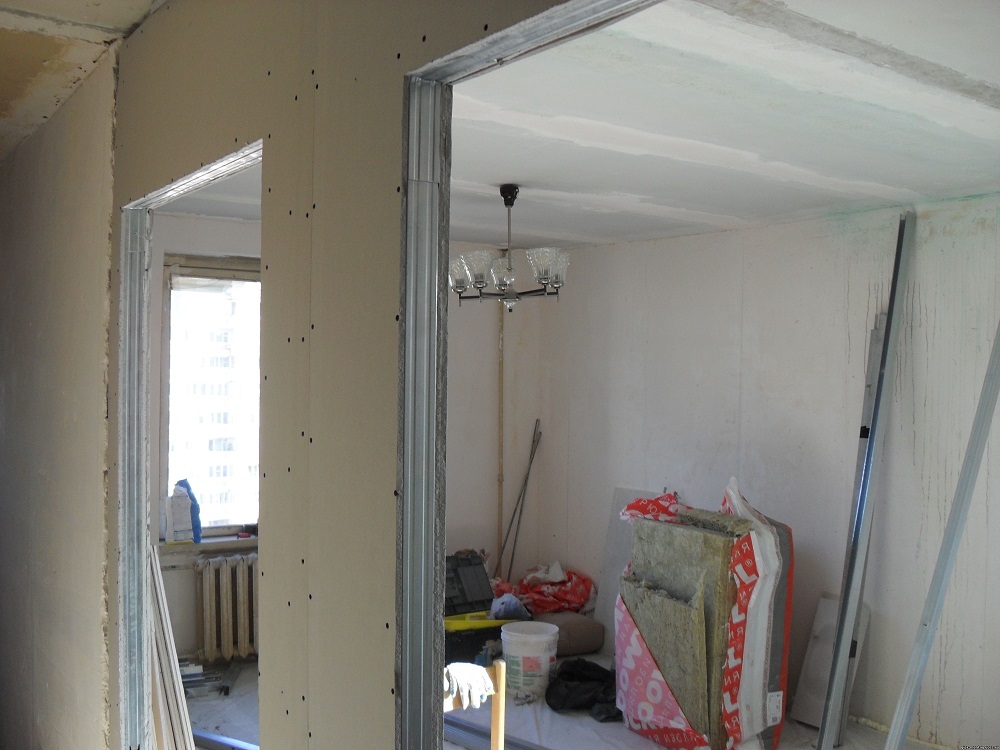
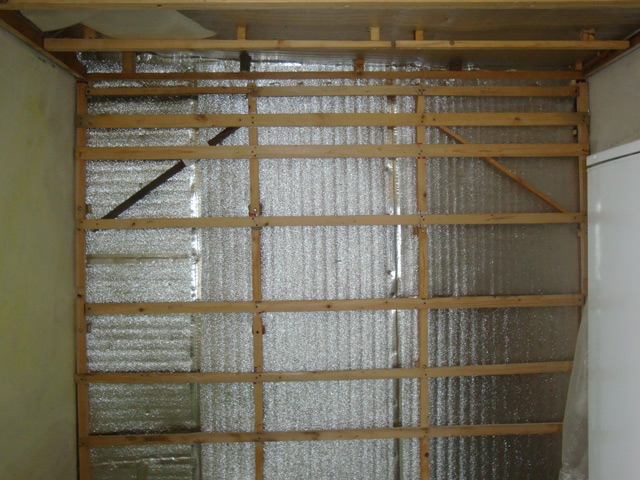
Frame mount
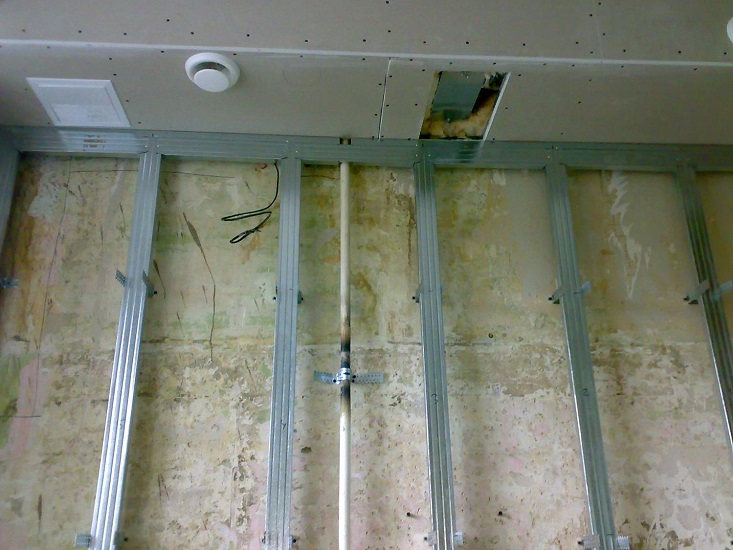
Consider in more detail the mounting of drywall to the wall on the basis of the frame. Let us dwell on the types of profiles and mounting.
Profile types
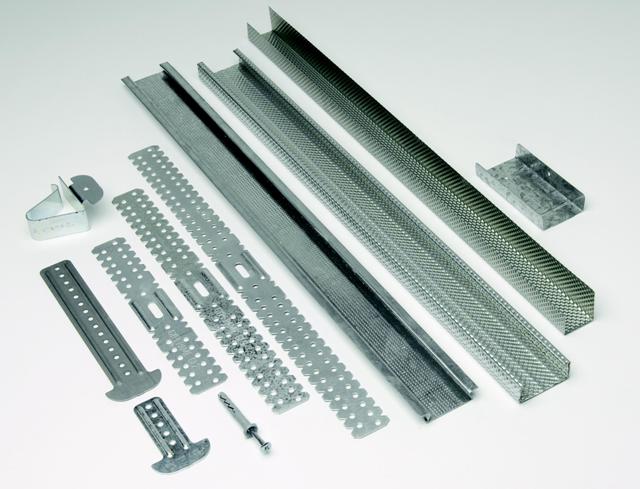
For fixing drywall, you can use various kinds of profiles. They all boil down to two key options:
- wooden block;
- metal block.
Quality steel, treated with hot zinc, has an extremely long service life.Rather, the tenants will move to a new house because of the demolition of the old from decay, than a similar compound is degrading. Galvanized metal is extremely resistant to invasions of aggressive insects that can break down the strongest wood in a few years. The stability of the shape and size of steel is also a significant plus. Not a single tree species is insured against changes in proportions due to changes in humidity. The difference lies in how these changes are expressed. Even a slight change of proportions leads to cracking of the skin and the divergence of the joints.
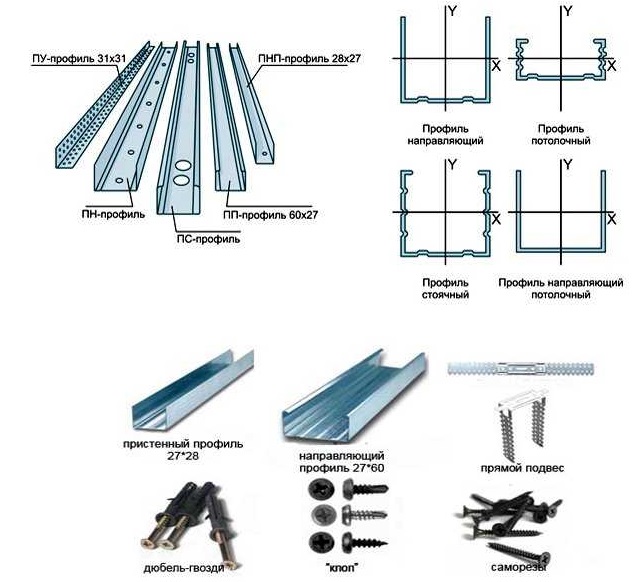
Metal profile is different in performance:
- The rack option is marked with a “PS” mark (in the import version “CW”).
- Guide is usually denoted as "Mon" or "UW".
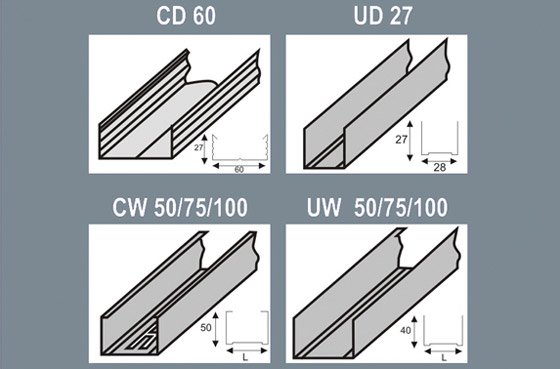
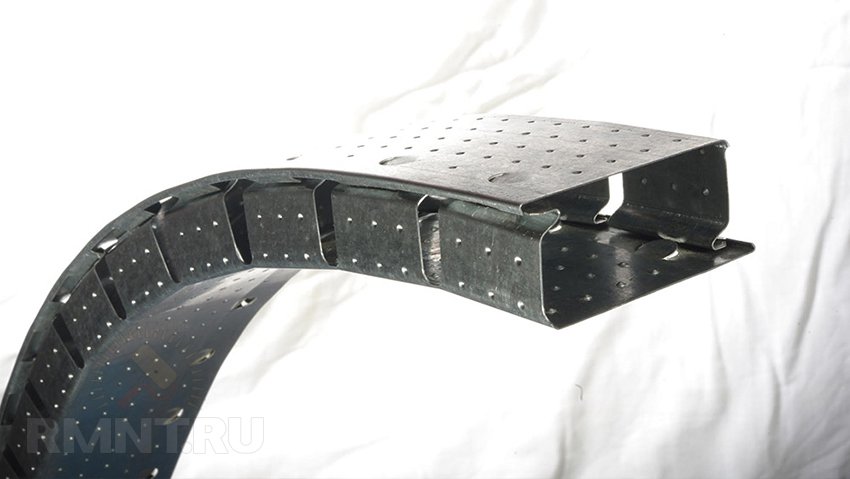
- There are two main types, but they are designed to work with ceilings, not always suitable for walls ("UD", "CD").
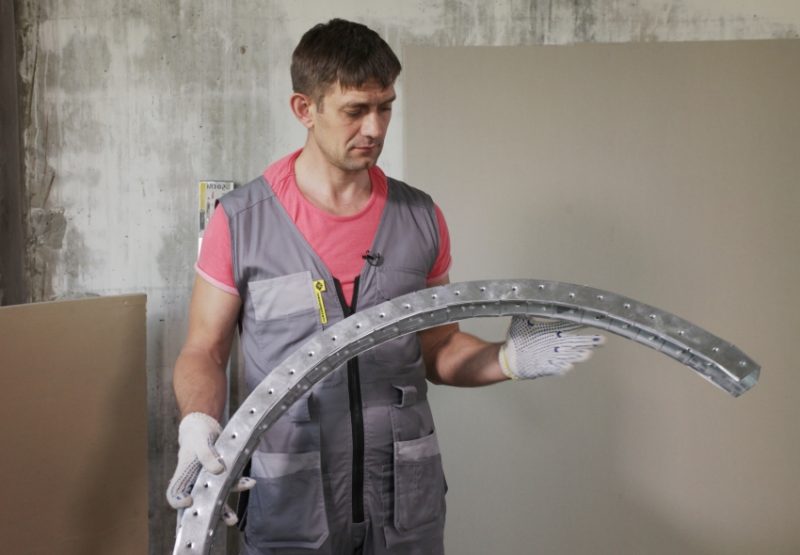
- The supporting role has a flexible arched profile. The purpose of its use - the formation of arches due to a slight bend radius.
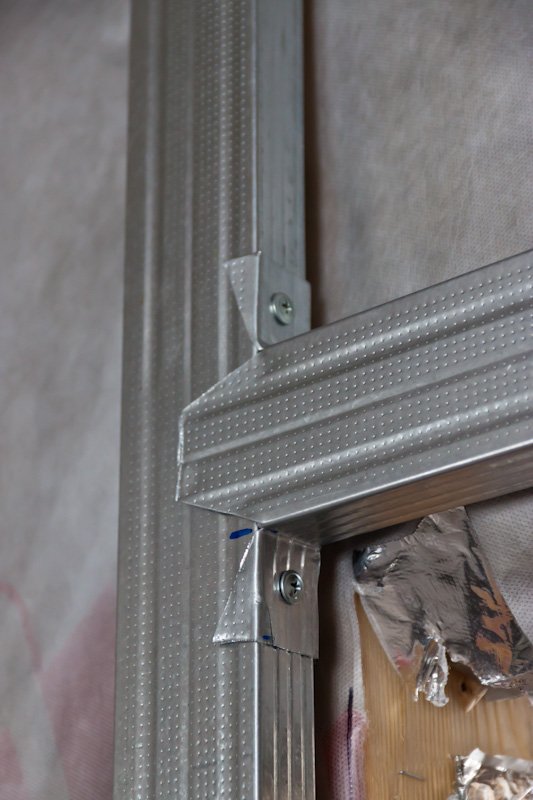
Corner structures are put under the putty to make the outer corners of the walls, openings of windows and doors stronger.
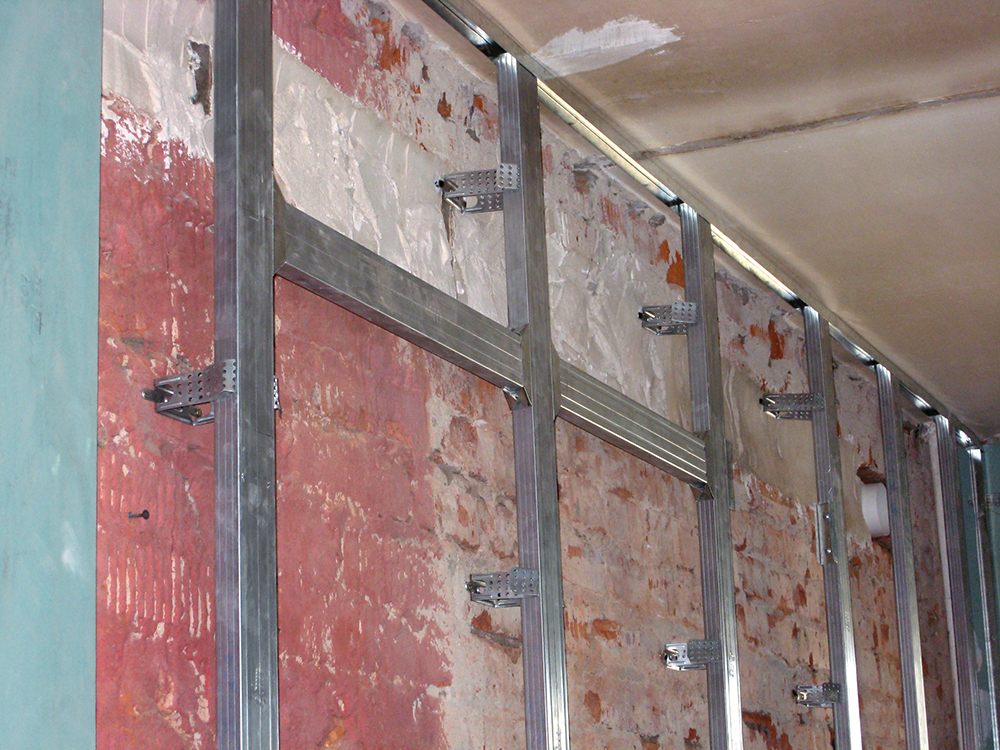
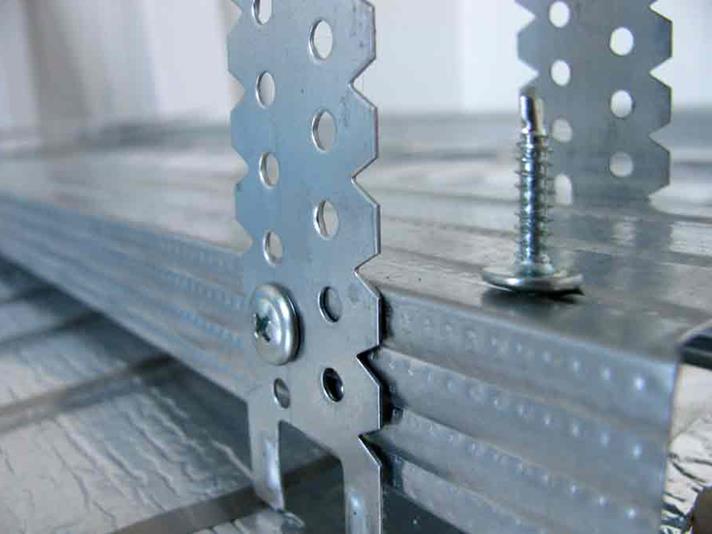
Part of the angular profiles produced from polyvinyl chloride. Plastic reinforcing corners are sometimes equipped with reinforcing meshes. With the help of a rack profile you can assemble vertical racks for a wall or partition frame. Auxiliary function of it - the preparation of jumpers that separate the rack from each other. This decision helps to make the frame harder.
The guide profile type is put in capital structures (floor, ceiling, adjacent to the walls to be finished). Inside it is possible to make the ends of the racks. The ceiling profile (normal and guide), in addition to the ceiling grid, turns out to be a valuable fixture when leveling walls with significant (more than 5 cm) deformation. The racks tolerate a bending effect well, but the profile for the ceiling is mounted using direct and adjustable suspensions. If the length of the lugs is not enough, you can connect a pair of direct suspensions in series to widen the gap from the main wall to the facing material.
Choosing racks, you need to focus on their size. (the wider the product, the higher its resistance to bending). The length of different manufacturers varies from 250 to 600 cm, but the problem is that it is not always possible to find a complete set in the shop windows. Usually there are guides (wall and ceiling) of 3 m, as well as racks 3 and 4 m.When the available length of the profiles is not enough for the intended purpose, a straight connector can be used. In some cases, apply the type of cross, the so-called "crab".
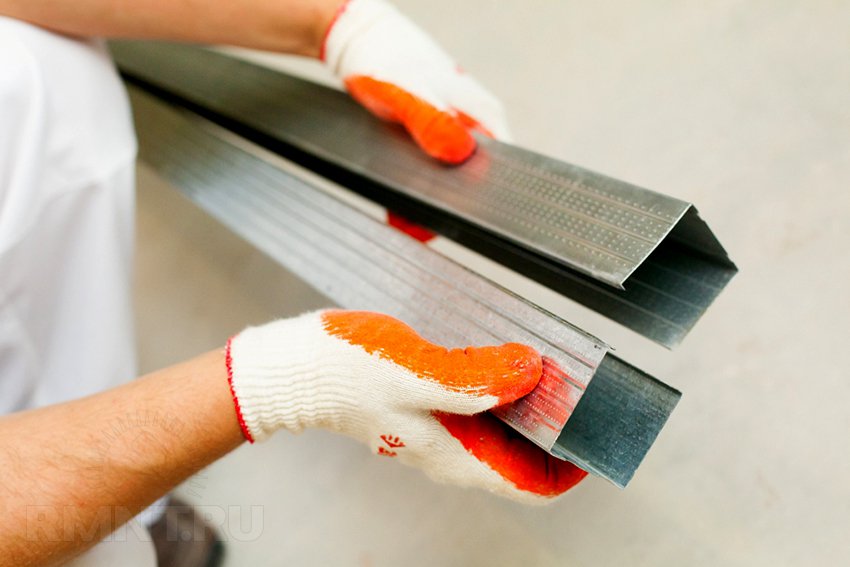
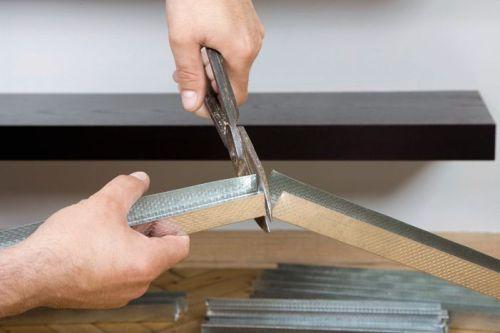
The real cost of the profiles is determined not only by one section and the length of the material: the thickness of the structure also plays its part. Premium designs with a thickness of 0.55 mm are approximately 50% more expensive than an economical option with a thickness of 0.4 mm. Any galvanized profile can be cut only with metal scissors. Abrasive cutting with a grinding wheel damages the zinc sheath. Because of this, in the future, the material can quickly rust with the slightest contact with moisture. The strength of the surface determines the size of the installed fasteners.
How to attach?
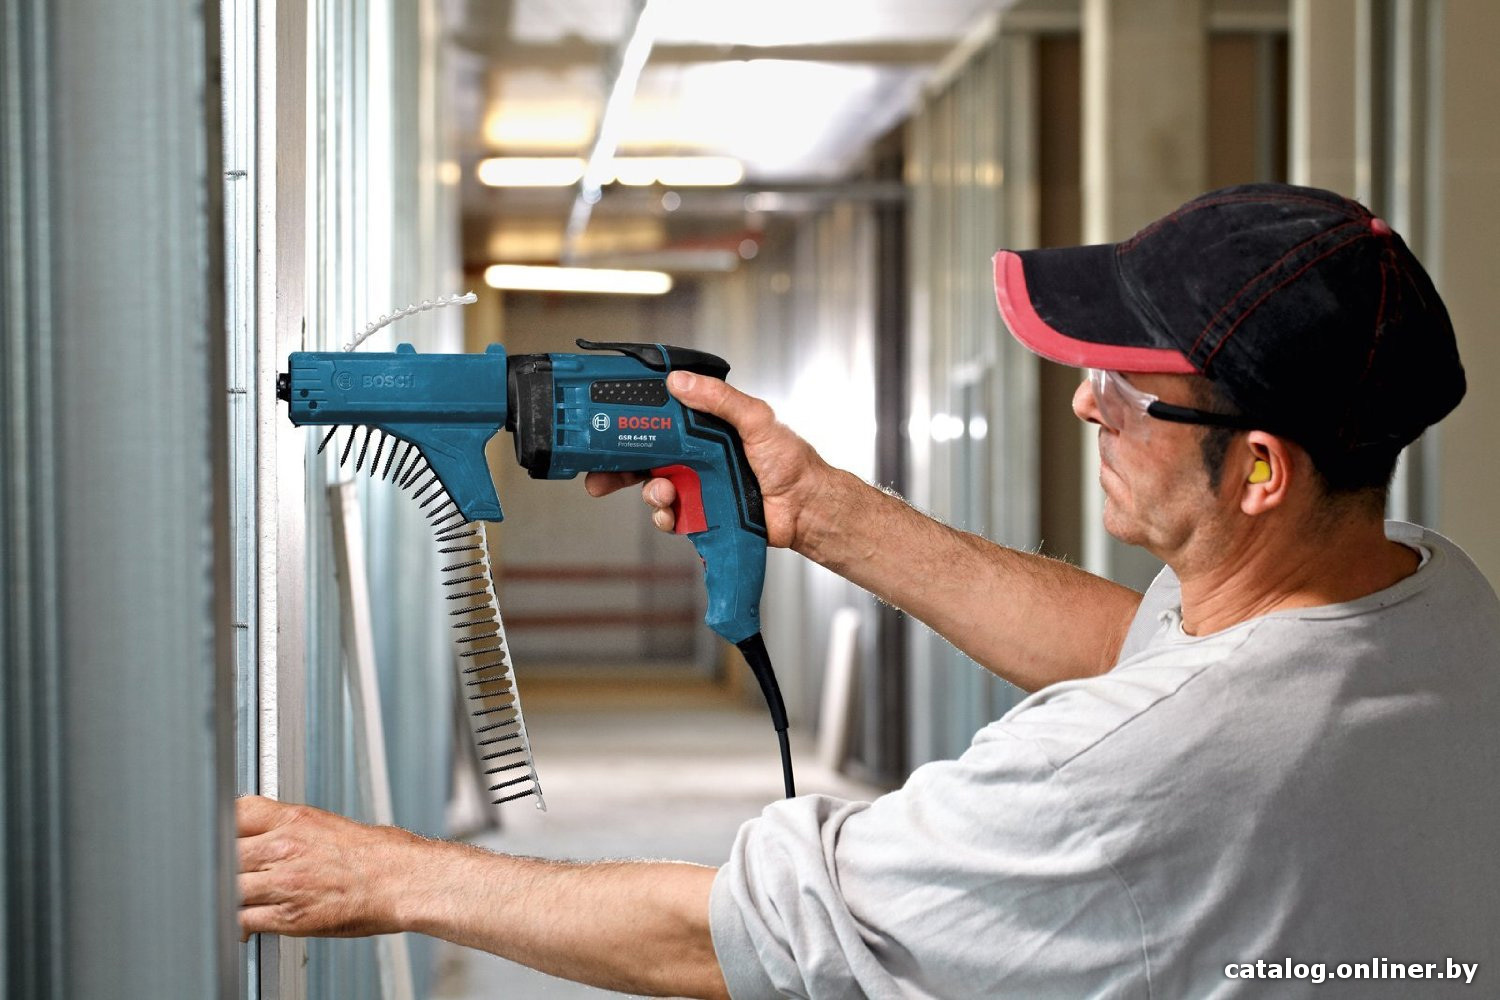
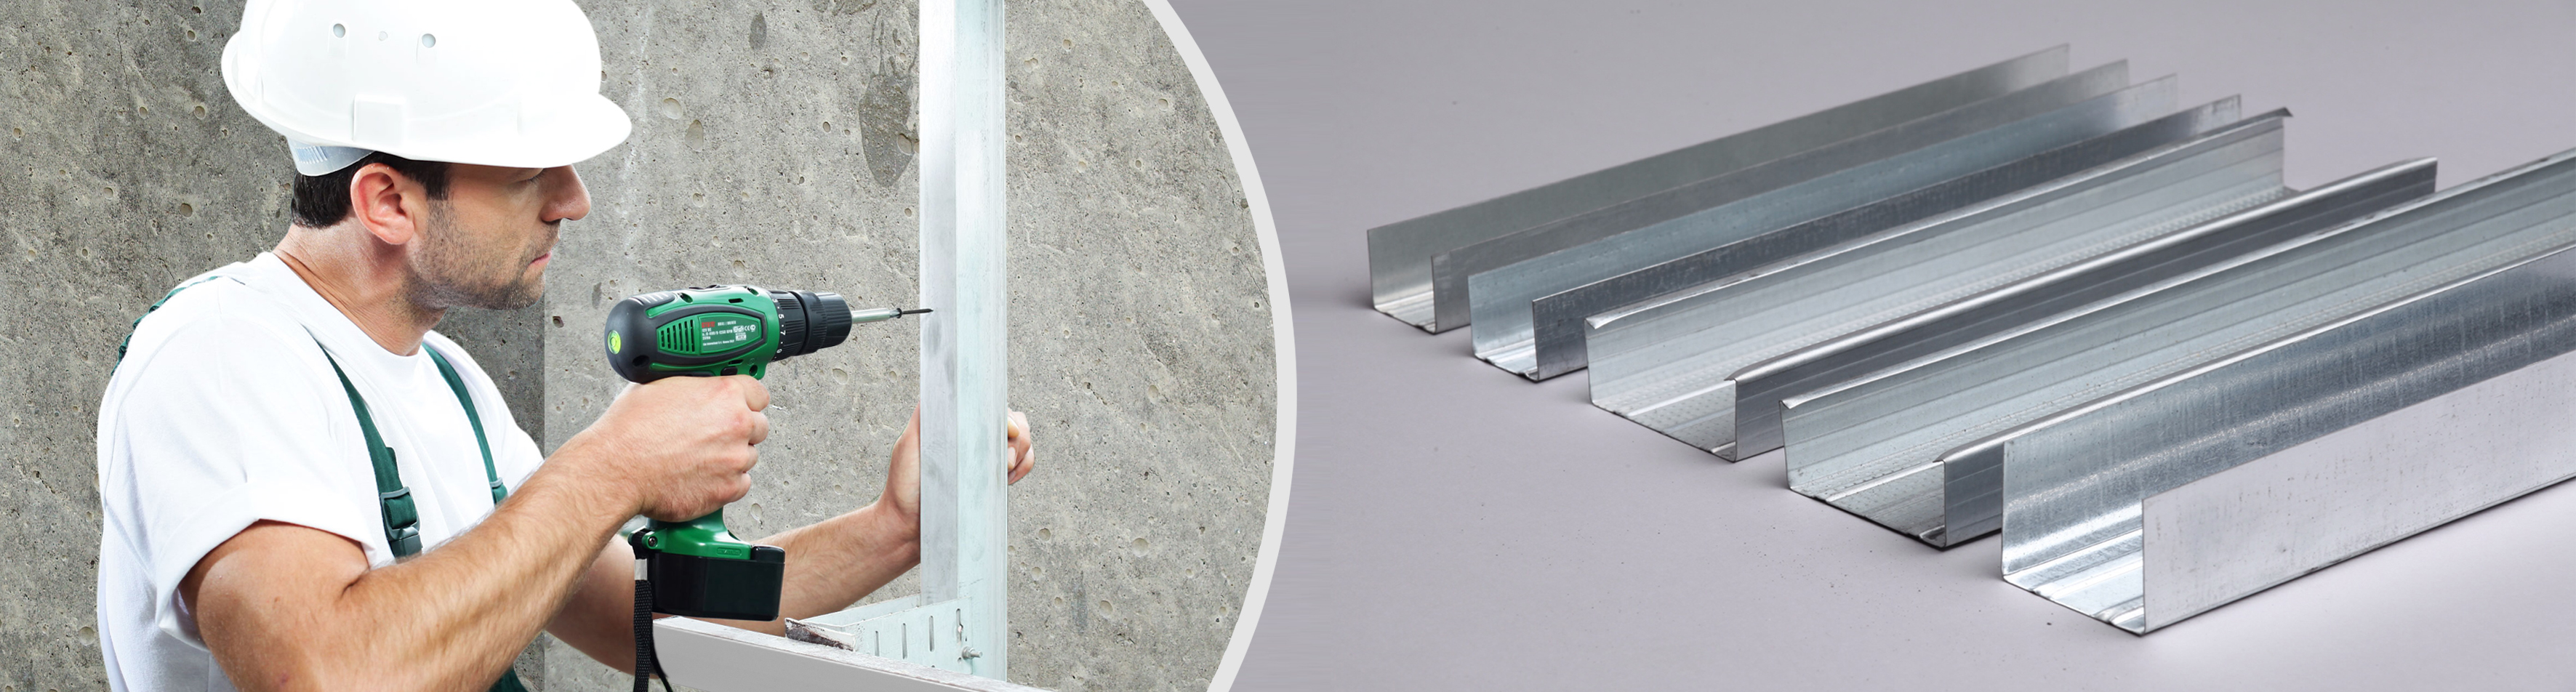
A dowel of size 4x0.4 should be inserted into heavy concrete, and 8x0.8 cm - into loose concrete. The guides should be fixed after drilling with a perforator; the drill bit is inserted directly through the pressure profile. The dowel-screw inserted into the punched hole is twisted (this scheme of work allows fixing the structures without unnecessary problems). The pitch between the anchorage points is approximately 50 cm.Suspensions for the profile on the ceiling set with a gap of 0.6 m.
On walls where they transfer the smallest loading, they are mounted with a step of 80 cm.
Guides in wet rooms should not be installed with wooden chopik. These items dry out too quickly and fall out.
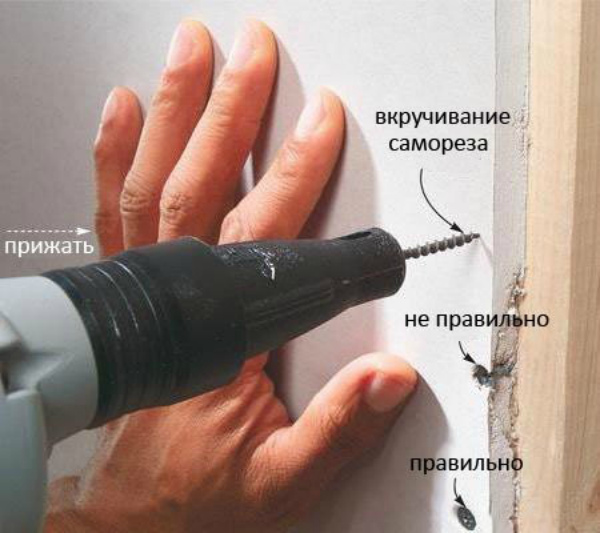
Among self-tapping screws, the best results are shown on metal products, the length of which is 0.9 cm. It is difficult to screw in the screws with screwdrivers, therefore experienced builders always use a screwdriver. The gaps between the racks or the elements of the batten are 0.6 m. The pitch is measured from one axis of the frame to the other.
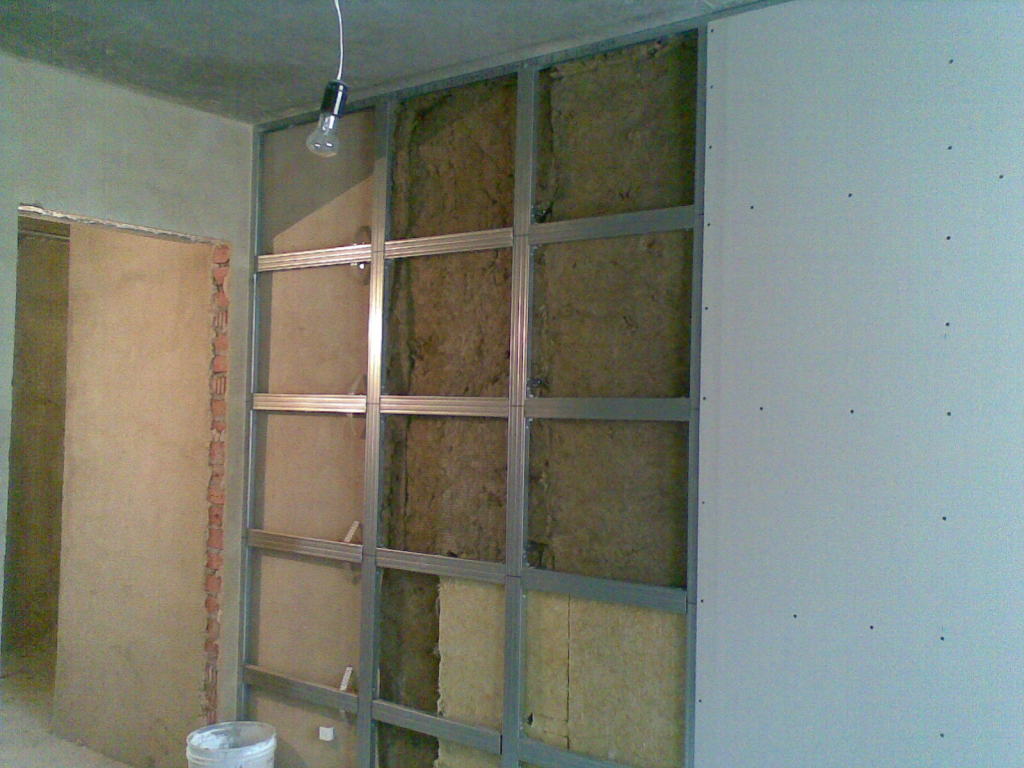
When it is known that the structure will be subjected to significant loads, the gap between the profiles is allowed to be reduced to 0.3 m. The only condition is the multiplicity of the width of the gypsum board and the chosen distance. To strengthen the partitioning frame, it is not at all necessary to use thicker racks or to bring them closer together. Into each rack, bars are inserted with a section of 5x5 cm. Also, using the technology, you can link the racks themselves (they put one into the other or fix them closely).
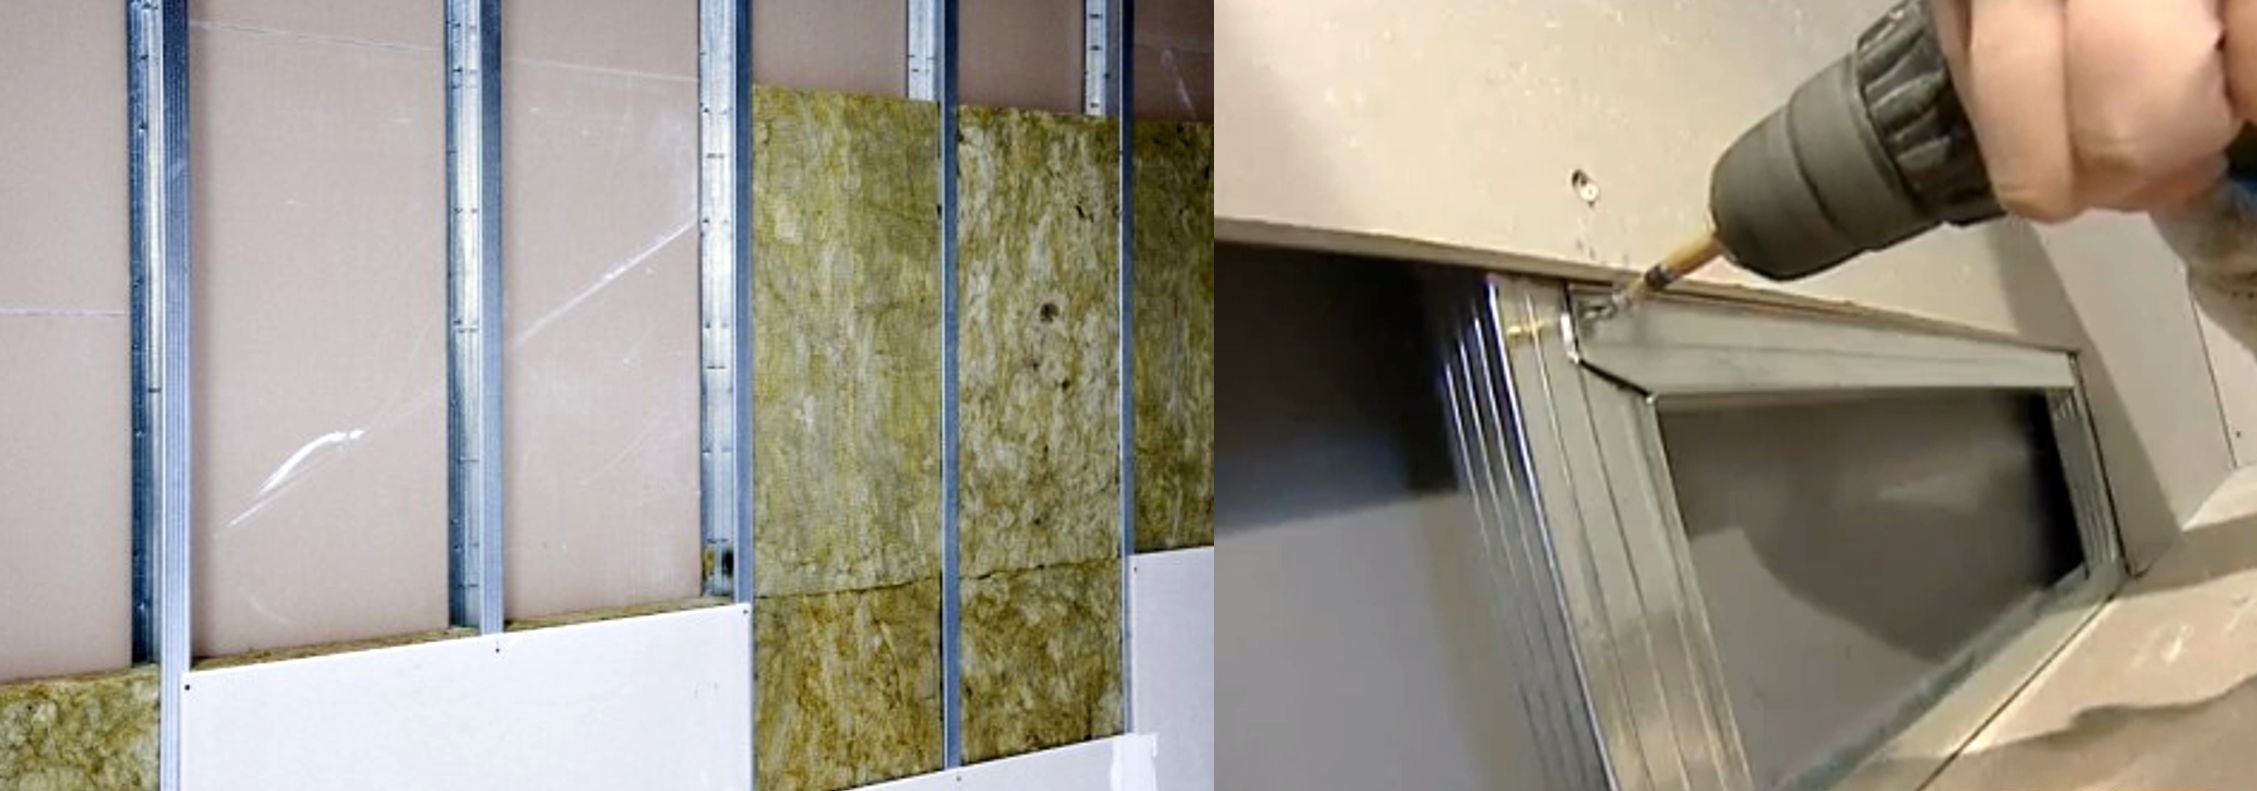
The use of a damper tape helps to increase protection against extraneous noise. Due to it, the transmission of sound waves from drywall to the capital elements of the house is disrupted. If you need to install a door or window block (including made of metal), you need to attach it to the side profiles and the jumpers running horizontally. For connections in such cases, self-tapping screws are used with a length of 1.6 - 3.2 cm. In order to increase the tightness and strength of the structure, it is advisable to use assembly foam in advance.
Creating partitions is quite simple:
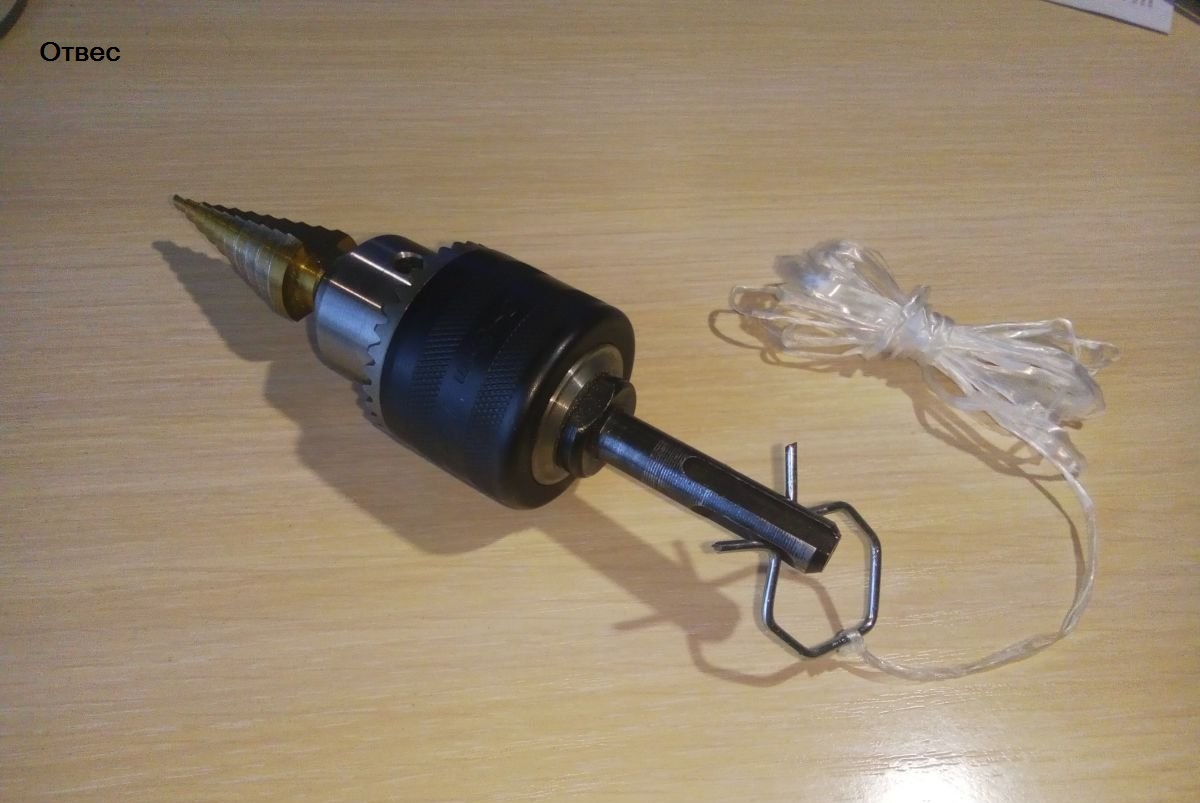
- First, take a plumb and mark the axis on the floor, ceiling and adjacent walls.
- Then along this line mount guides.
- Racks mark on ceilings and floors, for this, too, use a plumb.
- Marking should be kept available for observation even after the frame is closed with a GCR layer. It will be easier to attach sheets when the racks are hidden.
- Racks pruned lengthwise and put on the labels. Each of them is attached to the guides on both sides.
- The step-by-step instructions for soundproof partitions look different. It requires the creation of a pair of autonomous frames, the gap between which is only about 1 cm.
Regardless of the composition of the work performed, it is necessary to carefully select fasteners. They should be:
- visually smooth;
- standard value;
- with a solid galvanized layer.
To properly mount the frame of the profile for drywall, you want to use quality parts.
Their choice in itself is rather complicated. It is unacceptable to take profiles thinner than 0.55 mm. It is worth trying to use them, as soon as the rapid erasure of the thread is found. The store is best to go with a caliper at the ready.
The next verification step is to search for signs of rust. But even if they are not, you need to pay attention to the abundance of lubricant (almost always due to its attempt to mask the poor quality of the element). If a profile is twisted or differs from a part with a normal shape, it is better to refuse to purchase it. During the work such designs will deliver many problems. Screwing the screws with your own hands will go easier if the notch is made as uniformly and efficiently as possible. Excessively large ribs in the shelves of products of the category CD are not allowed
Even the best profiles will not work properly bolted, if the fasteners are bad.Visual inspection of the tip is insufficient, it is worth taking a metal plate with you and try to wrap one or two screws into it.
The presence of fasteners with broken parts, poorly ground elements or poorly cut slots is unacceptable. It is undesirable to use profiles with burrs, dowel-nails with swollen plastic stoppers. Only when on all points things are in order, you can buy goods.
If it is decided to use wooden bars for the frame, their moisture content should be from 12 to 18% (it is impossible to ensure a lower value, more depreciates all the work). First, the timber is laid horizontally and secured with anchors. Then put the slats vertically and attach them to this bar. From the rails to the batten, it should remain approximately 1 cm. The step between the vertical structures is 0.6 m. Before screwing the drywall, it is advisable to measure it again to make sure that all parts are even.
Glue mounting
The description of the manipulations, inevitable when choosing the frame method, is simple. But since at each step you can make mistakes, and the total work time is quite large, at the slightest opportunity, even professionals try to put drywall on it.The advantage of this option is that you can forget about the finish of the frame and less noise, since most often you can do without a punch.
However, the adhesive method of connection has two sides.
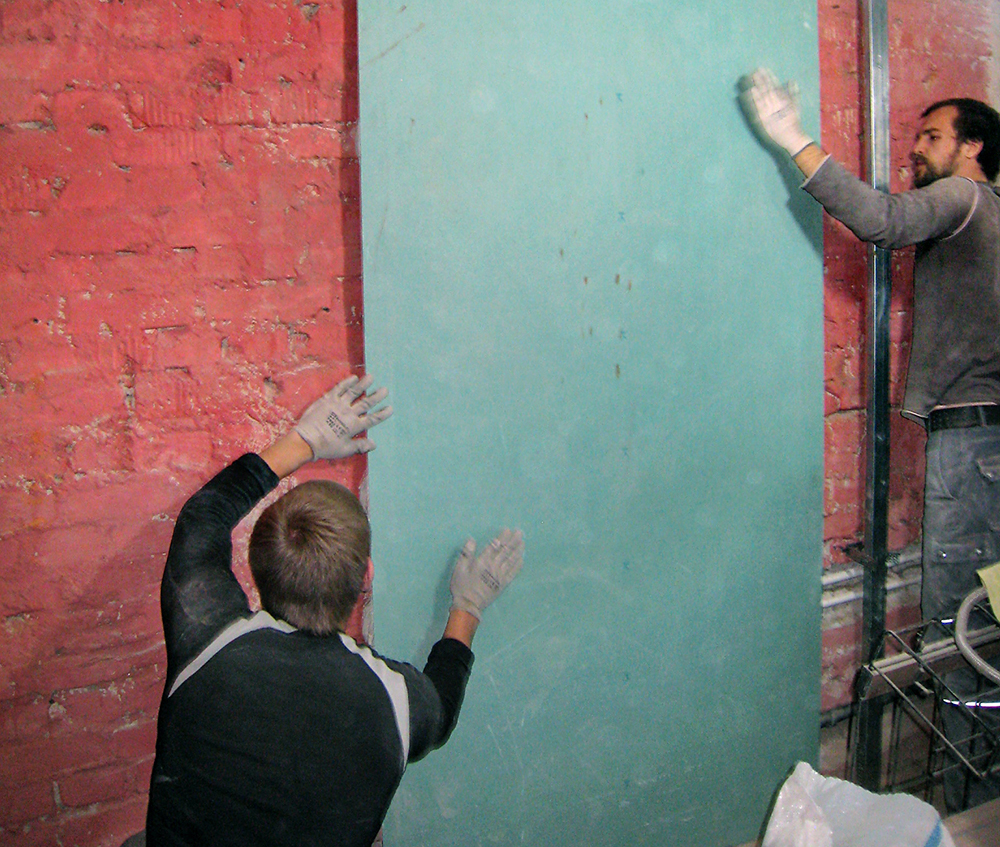
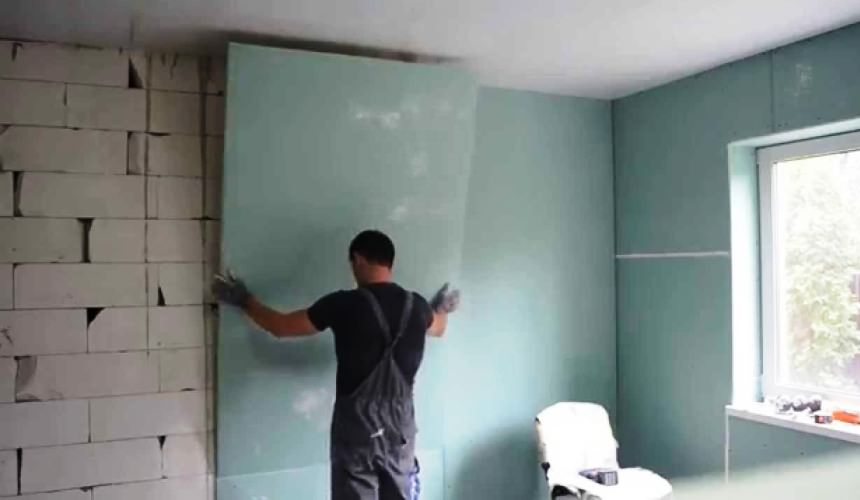
Before you stick the sheet to the concrete, you need to complete any internal work.
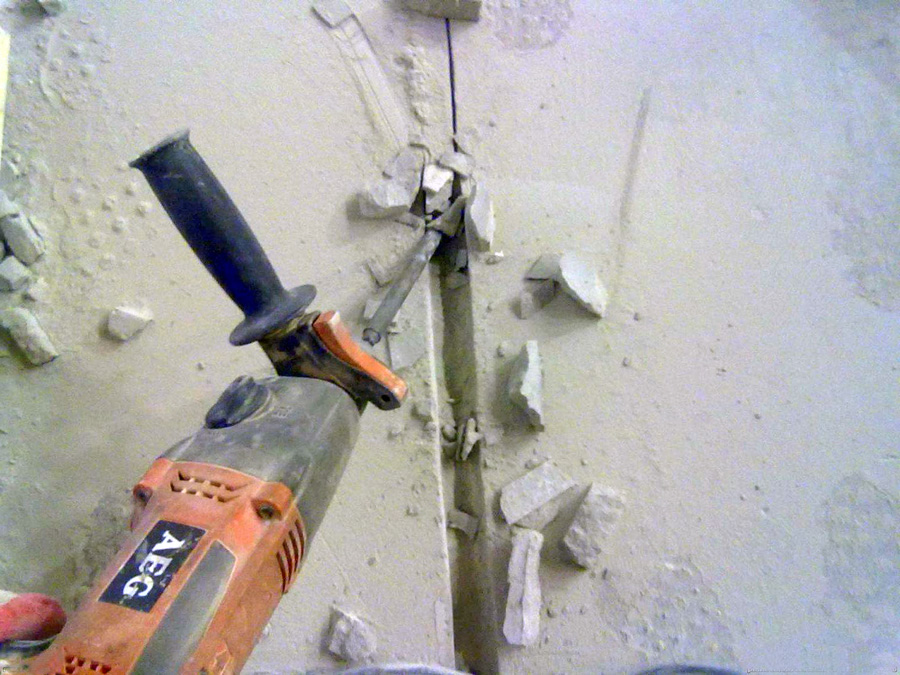
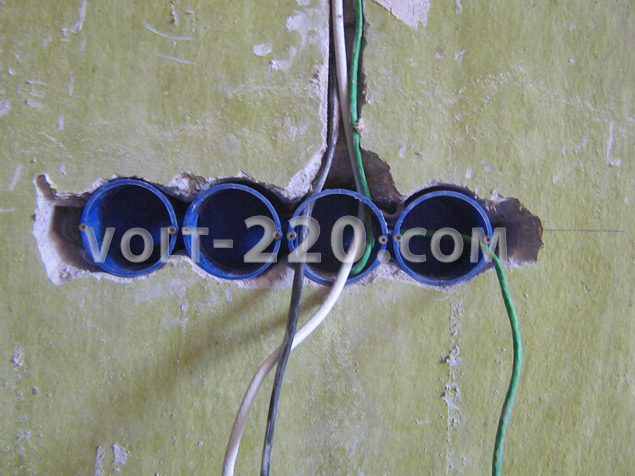
In a thin layer of glue will not be able to lay electrical wiring. Therefore it is necessary to pick up a puncher and make with it the necessary strokes. After 40 - 50 cm the wires must be fixed with special clamps. And you will need to prepare nests for podrozetnikov (that is, you can not do without a diamond crown).

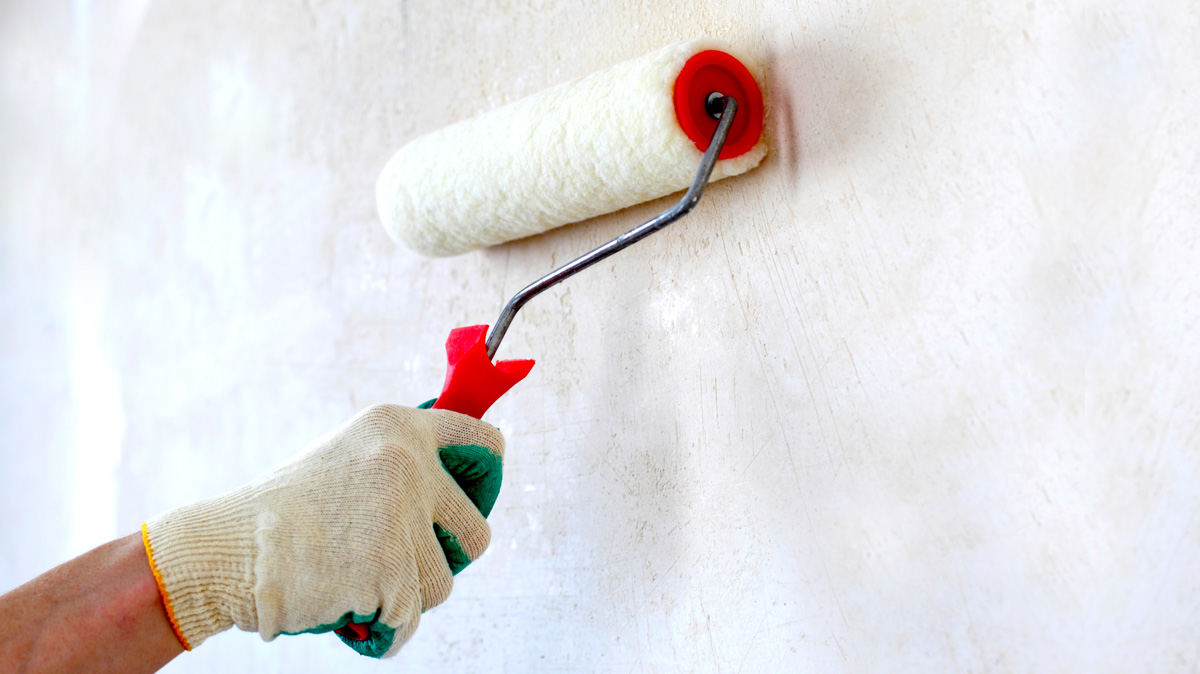
But all the works have been completed (or there is no need for them on this wall). This does not mean that you can immediately take up the drywall. Surface must be primedand if the concrete is open, the preparation is finished. Much more difficult with the walls painted with paint (especially oil). Removing it with tools will inevitably create clouds of dust, grinding wheels will make noise again. Applying a primer directly on top of the paintwork material is much easier, but no one here will give a guarantee of quality.
It is recommended to use soil formulations category concrete contact.
Fastening sheets with glue should be carried out strictly in accordance with the instructions to it:
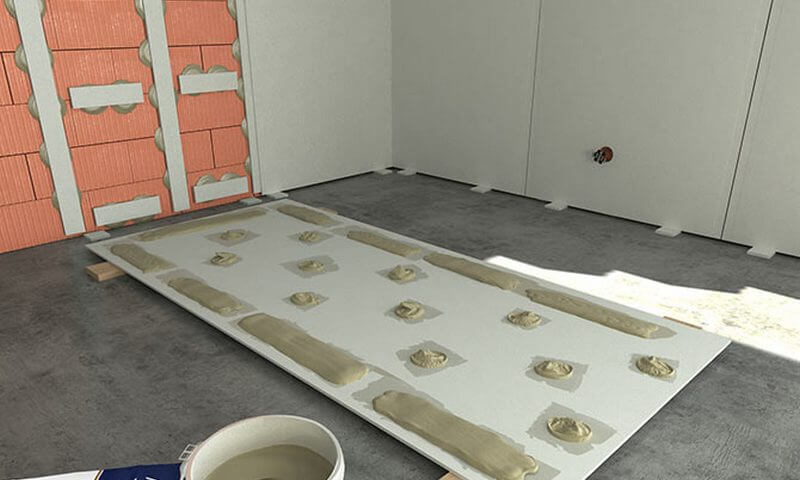
- Most mixtures are diluted in small portions so that the prepared composition does not have time to dry up while working with one sheet.
- It is necessary to smear a plasterboard with a glue with a notched trowel, and to put the composition correctly means to smudge it over the entire surface.
- Formally, you can only cover the perimeter and make a thick strip in the center, but the larger the adhesion area, the better.

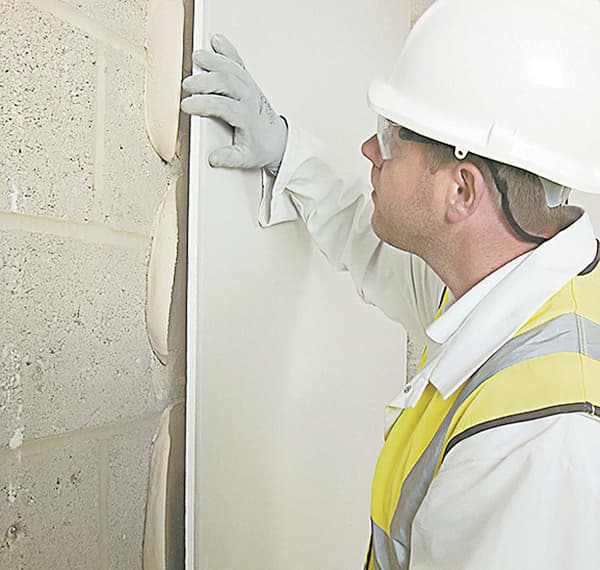
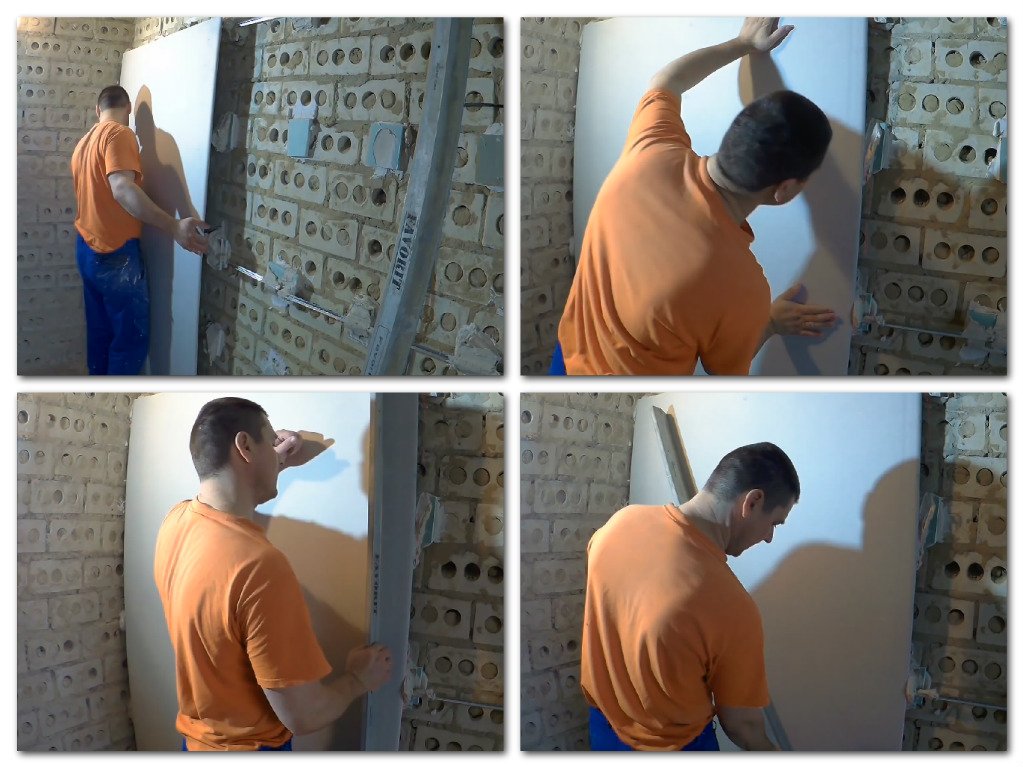
Attaching the sheet to the wall, it is not pressed immediately tight, and look at the correct installation. And if necessary, correct it. Leveling is carried out with the help of a plaster rule, which should not be pressed excessively hard. Even at the preparation stage, it is required to remove all protruding screws and other fasteners. The brick base can be adjusted with plaster from a mixture of cement and sand.
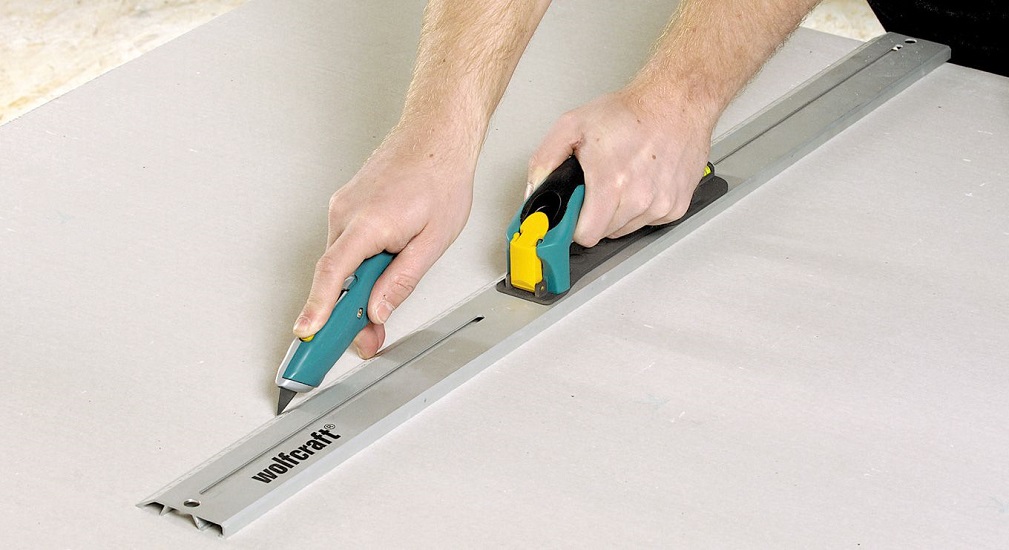
Advance it is necessary to prepare installable sheets. It is much easier to cut them to the right size and prepare holes on the floor, rather than trying to do it on the wall.In apartments, where the ceiling height is standard, a 250 cm long sheet will cover the entire gap. But if the room is higher, it is necessary to mount the gypsum horizontally.
When marking pay attention to the fact that the number of joints was the smallest.
On any kind of walls that need to be aligned, they are looking for 2 of the most prominent areas and connect them with a line. Then, retreating to the thickness of the sheet, put a check mark. Using a level or plumb line, you need to move these lines to the ceiling. Knowing that the relief is 5 mm or less, you need to cut the sheets in size, smear the back side with glue (it is applied in broad strokes around the perimeter and in the middle). Glue drywall need from the corner. In rooms with the correct geometry it is permissible to bend the sheets to a right angle at the points of the joint, sawing through the material with a cutter.
Put the bottom of the lining with a thickness of 10 - 15 mm should be removed on the second or third day, the gaps filled with sealant. It is necessary to glue drywall only at temperatures from +15 to +20 degrees. In this case, the coefficient of humidity should not exceed 70%. If the walls are almost straight, the curvature does not exceed 2 cm, it is necessary to work a little differently.The glue is laid out in the form of a kind of cakes with a diameter of 1.5 and a height of 2.5 cm. Each fragment should be higher than the existing defects, between them the intervals are 200 - 300 mm.
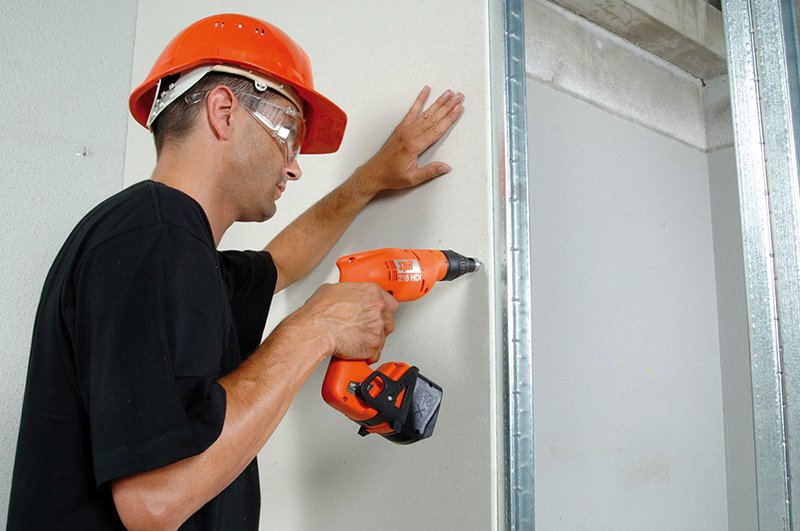
How to fasten the screws?
Screw drywall on screws - quickly and reliably, if you strictly adhere to the technology. To do this, it is not even necessary to prepare a special frame, if the curvature of the walls is less than 5 cm.
Along with screws you can use:
- dowels (optimally for brick or concrete);
- screws (for metal with pre-drilled holes);
- nails (if the base is wooden).
The surfaces of wood are pre-suspended by a plane or a small ax. To improve the base of foam concrete, apply a hammer drill with integrated chisel. Sheets of plasterboard are placed with a gap of 250 - 350 mm, they are distributed on the wall in a checkerboard pattern. Heads of self-tapping screws and other fasteners are supposed to be embedded in the material. Hardware relies not to tighten up to the stop, so as not to damage the material.

Useful recommendations
- With a relatively large surface curvature, drywall should be glued using beacons, their width is 100 mm.These lighthouses form a kind of frame.
- At the intersection with the floor and under the ceiling itself should be glued horizontal stripes. The role of these strips is the reference task. Vertical lines departing from horizontals will become a crate. All items are inspected by level until the adhesive mass has hardened.

- You can save drywall, if instead of splitting the sheet into strips, dissolve it into neat squares. In the absence of factory chamfers, subsequent finishing (painting) is performed only after they are cut with a knife. Sheet joints should be filled with specialized putty.
- If not gluing was chosen, but fastening with screws, the screw length of these parts should allow them to pass through the casing completely and fix on the crate.
- The most practical self-tapping screws - drill. Their diameter is 0.39 cm, and length - 0.95 cm. These structures can be screwed into the frame itself.
On whether you can glue drywall on the foam, see the following video.