The technology of mounting the duct from the plasterboard on the ceiling
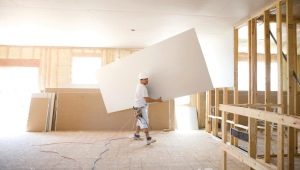
In the course of repair work, the ceiling finish is not the last. The overall perception of the entire interior of the room depends on how the ceiling surface looks. Open pipes, ventilation systems, electrical wiring and other communications do not add aesthetic appeal to any room. In order to hide them, and at the same time to give the ceiling surface a presentable look, most often they install a box made of plasterboard. Competently and beautifully self-assemble the box - the task is not easy, but it is doable, the main thing is to study the design features and follow the instructions clearly.

Special features
The main feature of the box is the material of manufacture, namely drywall. It is lightweight, but rather durable material, consisting of gypsum, covered on both sides with cardboard. Cardboard sheets perform a protective function and protect the gypsum core from mechanical, chemical and other damage. Thanks to the cardboard, the internal stress of all layers of the material is restrained, and also provides support for stretching the sheet.
In the installation of the box can be used in different density and purpose of the sheets.
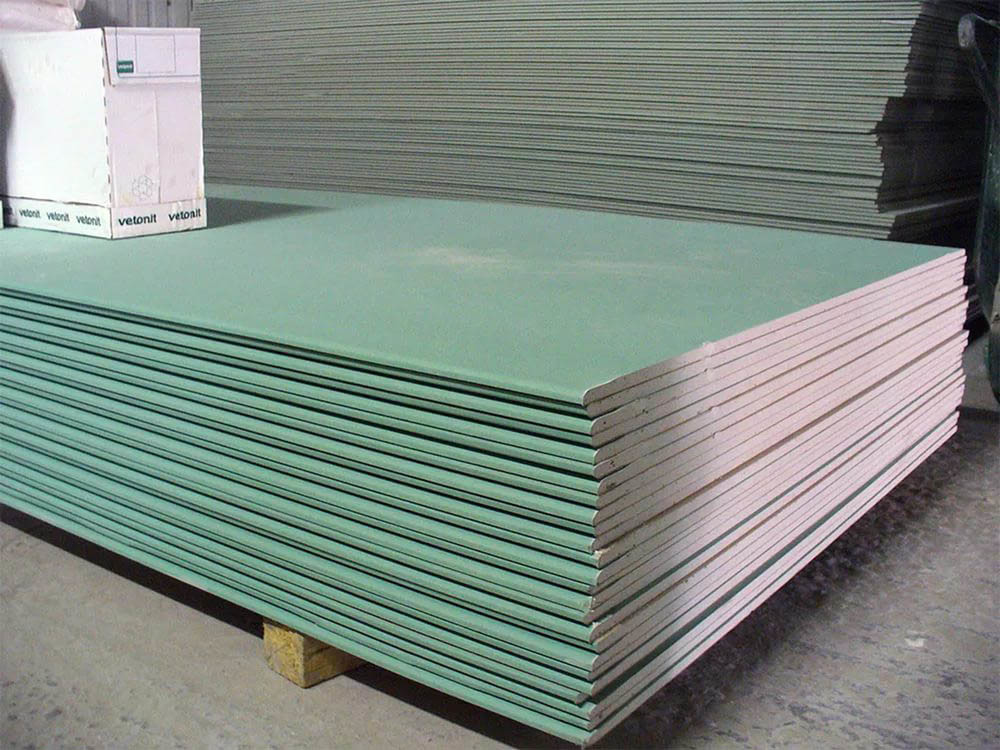
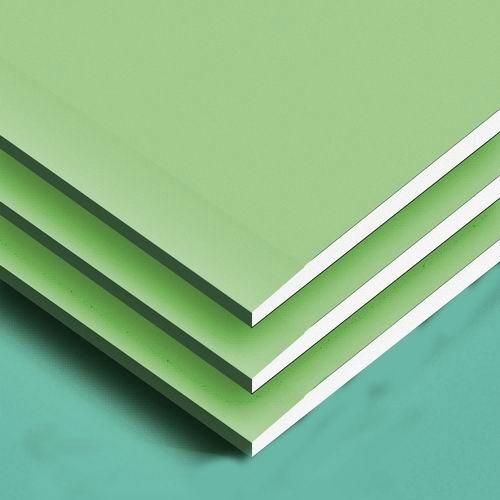
- Moisture resistant sheets GKLV, produced by manufacturers in green color, are used for decoration of rooms with a high level of humidity: bathrooms, bathrooms, garages. Resistance to moisture material acquires due to the impregnation of its layers with a special composition, which also added components that prevent the development of the fungus.
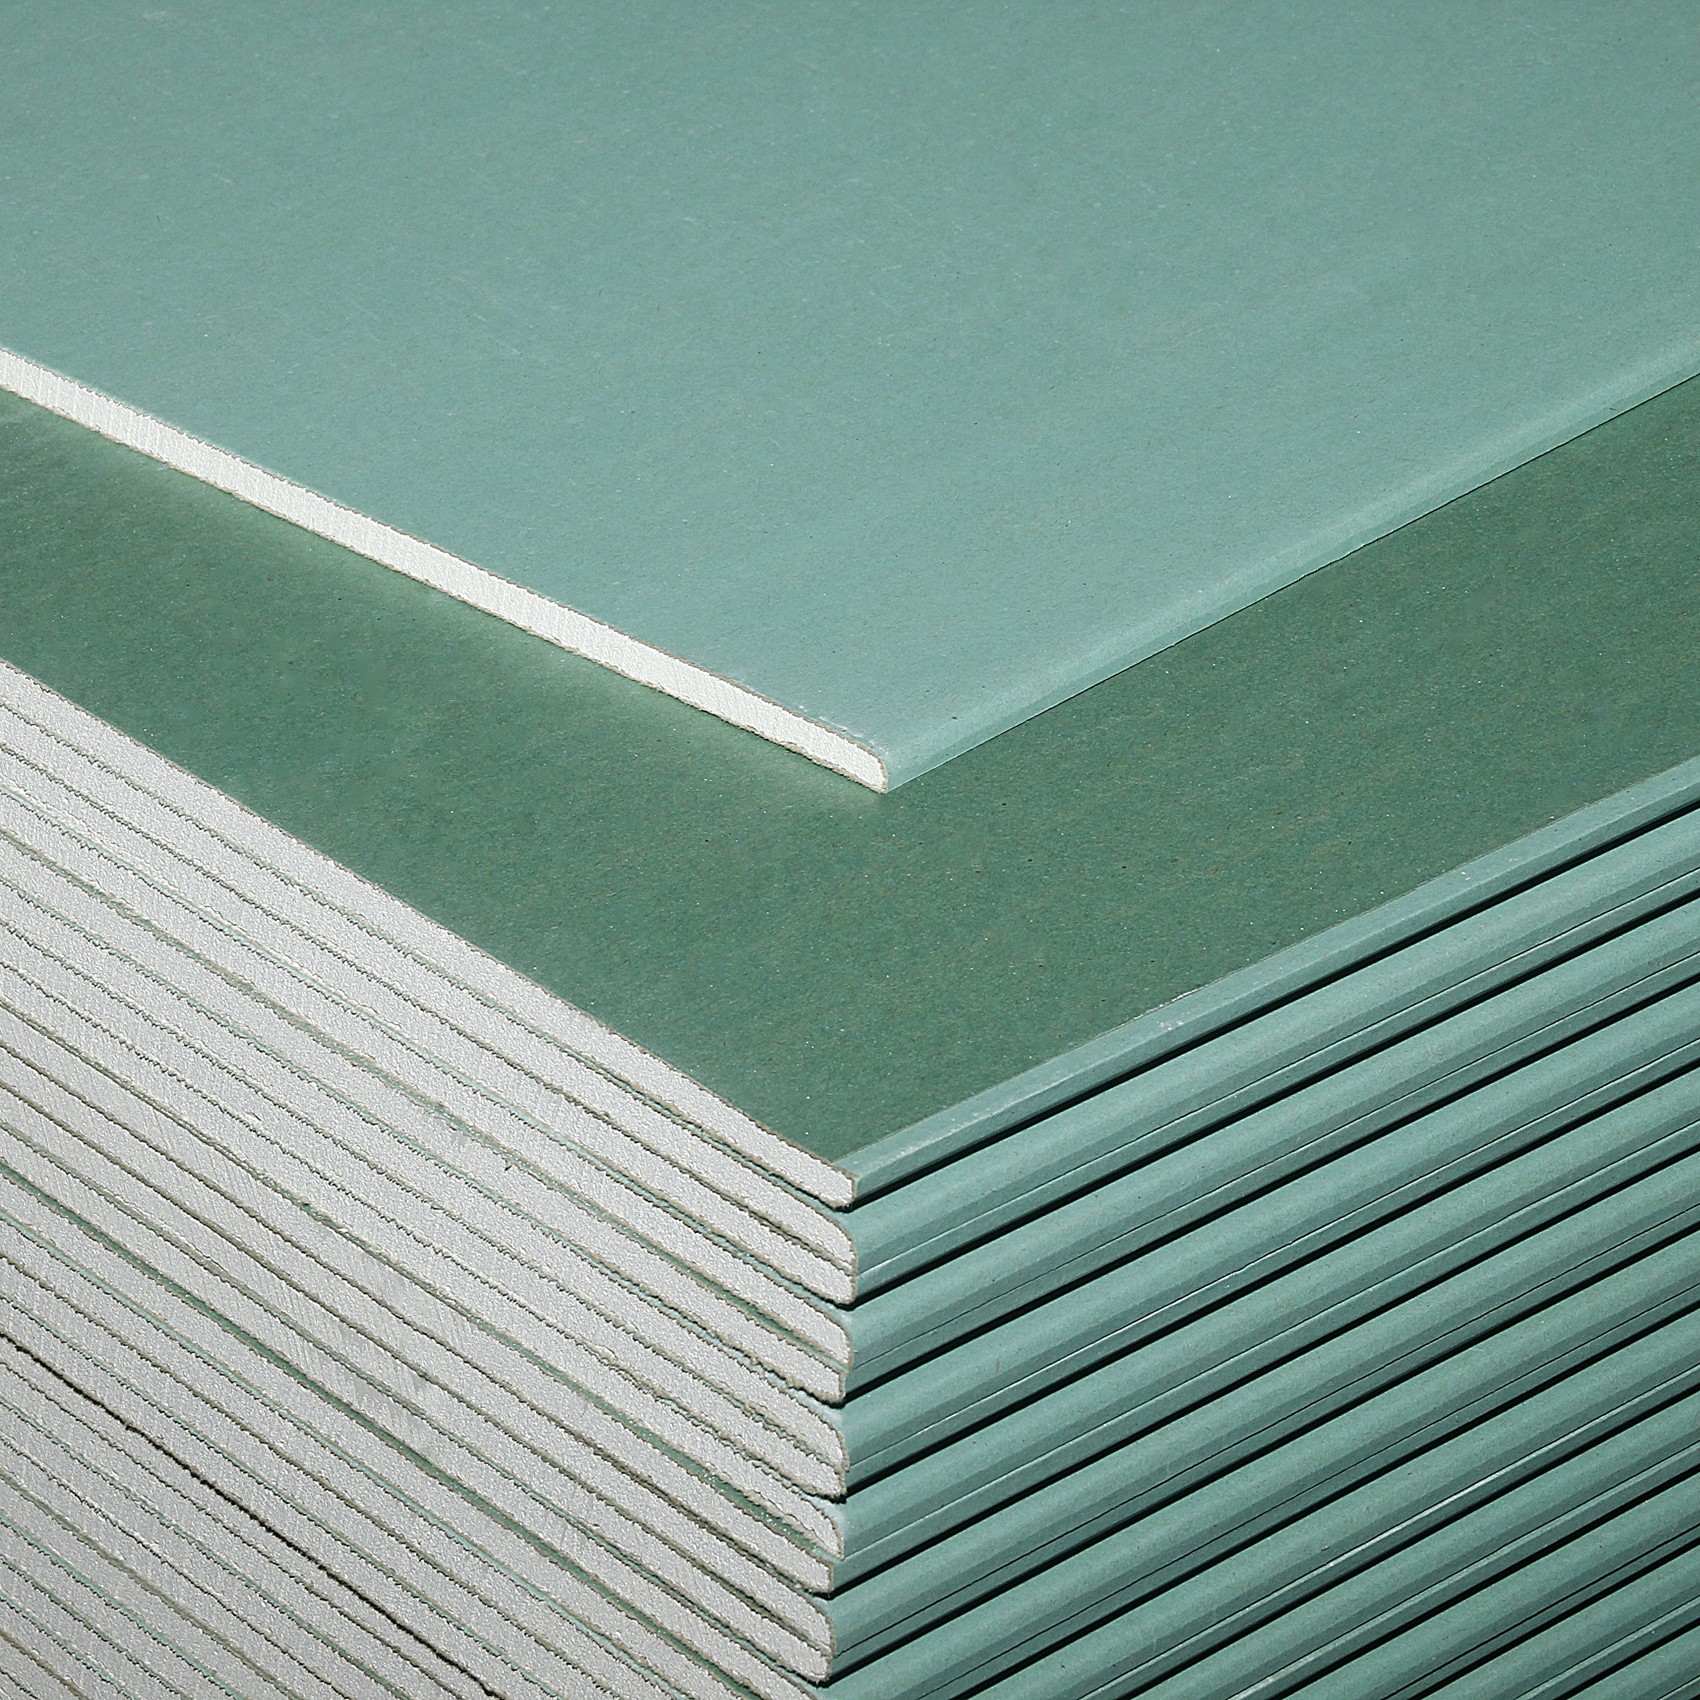
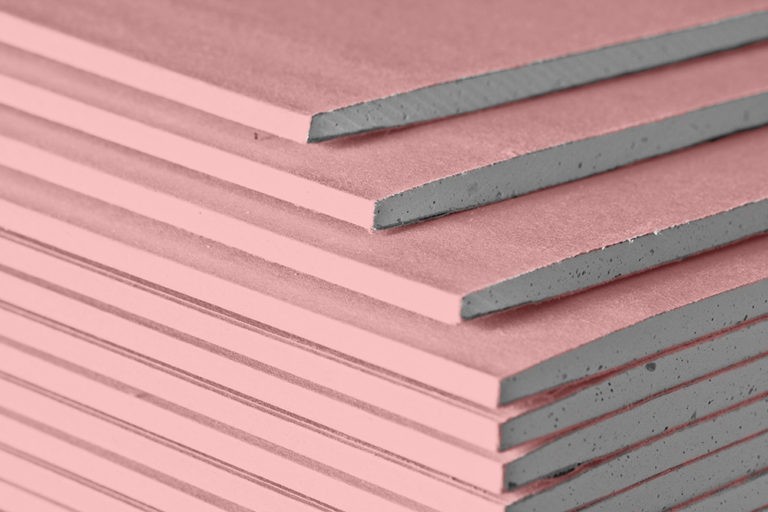
- For fire resistant sheets (GKLO) drywall, having a pink color, is characterized by resistance to high temperatures. In these sheets, in addition to gypsum and cardboard, there are fiberglass and clay, in addition, water is present in the gypsum core (20%), so this type of gypsum cardboard can hold on when exposed to open fire from the moment of ignition 40-45 minutes.
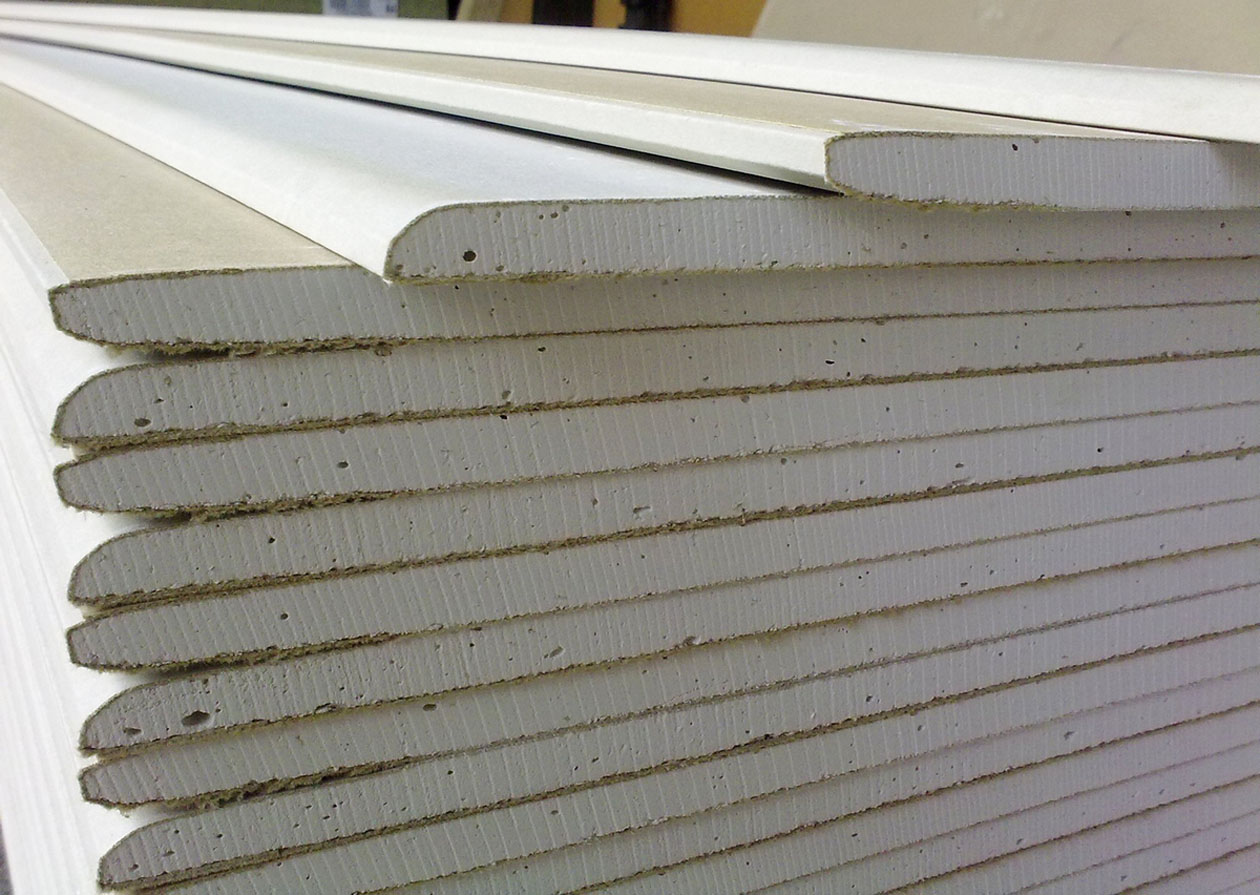
- Ordinary sheets of drywall (GCR) have a gray tint. They are usually used in dry rooms where the humidity level is close to normal and does not exceed 70%, and for the box no additional protection is required.
- There are also universal types of drywall (GKLVO). This type is simultaneously resistant to both the effects of moisture and fire, so the boxes from it are most in demand in industrial buildings.
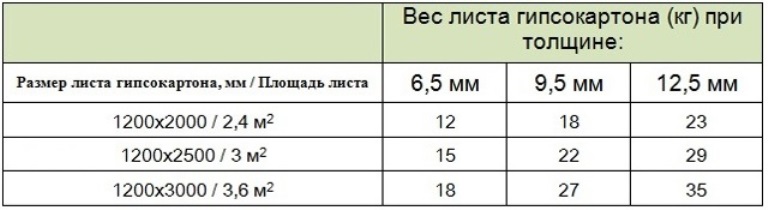
The density of drywall sheets also have differences. To date, manufacturers produce items with different densities, their thickness varies between 6-24 mm. For ceiling structures, sheets of 9.5 mm are considered as the optimum thickness; they are easier to assemble compared to denser specimens (12.5 mm and higher).
Unlike density and purpose, there is no such diversity in sheet sizes, their width is within 120 cm, and the length is either 250 or 300 cm.
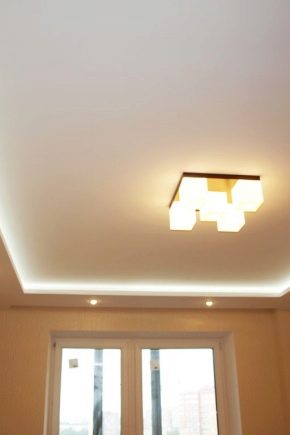
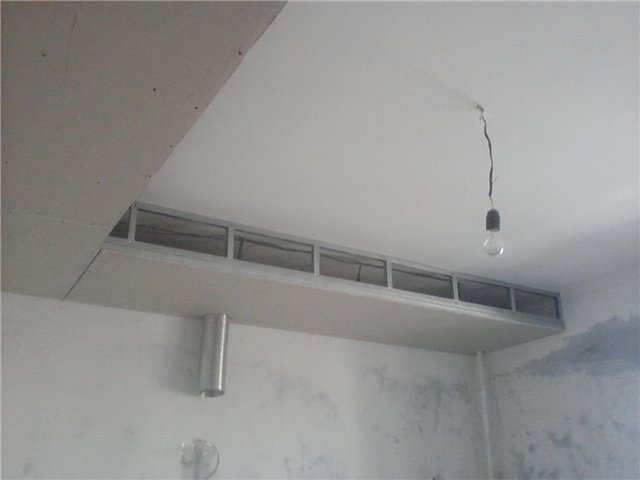
Fastening the ceiling construction of a drywall box gives a lot of advantages compared to its absence. This is not only an opportunity to hide aesthetically unsightly communications, but also to equip the room with additional lighting fixtures precisely in the place where the owner needs it.The box is a great place to accommodate all kinds of sensors and other equipment that should not be visible. In addition, without a box it is impossible to construct a multi-level ceiling that transforms any room.
Gypsum ceiling box is a multifunctionality and aesthetics in one embodiment.
Instruments
Regardless of the shape and purpose of the box, its installation will require tools and additional materials to help fix the structure on the ceiling.
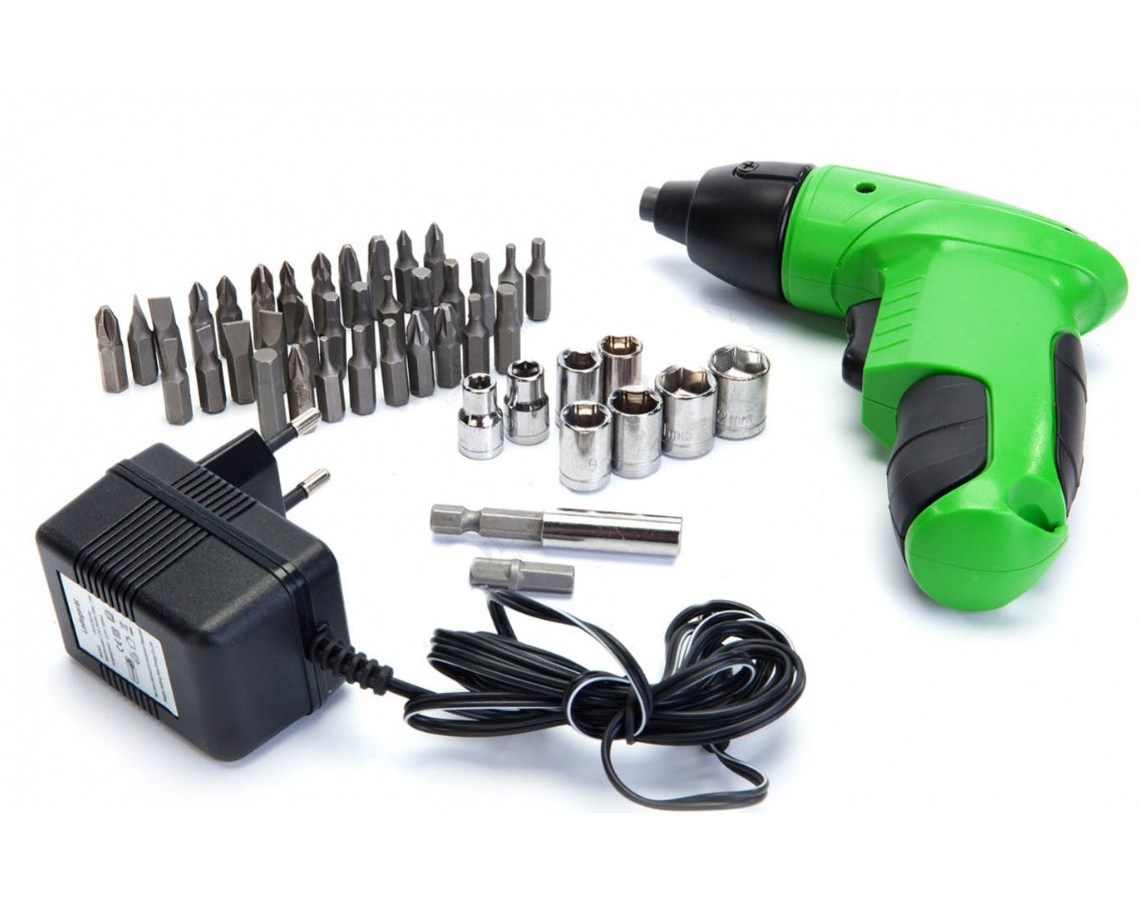
- Frame installation is not possible without perforator or drill. The choice of tool depends on the material on which it is planned to strengthen the box. For reinforced concrete, stone and brick, a perforator is more suitable, and if you need to drill a hole in softer materials, you can use a drill.
- Without screwdriver and special attachments for drywall is indispensable when lining the frame sheets. In addition, it is used to secure the frame on the surface.

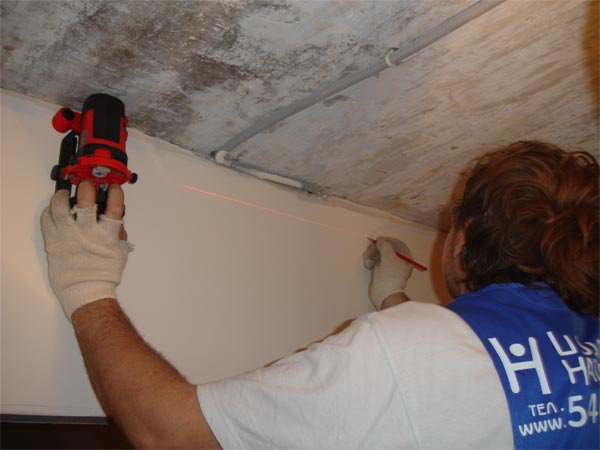
- In order to calculate the size of the box and correctly place it around the perimeter in the right place, you need to draw a plan and move it from paper to the design site. The markup of the future design produced by the water (laser) level, paint cord, tape measure, pencil and construction angle.
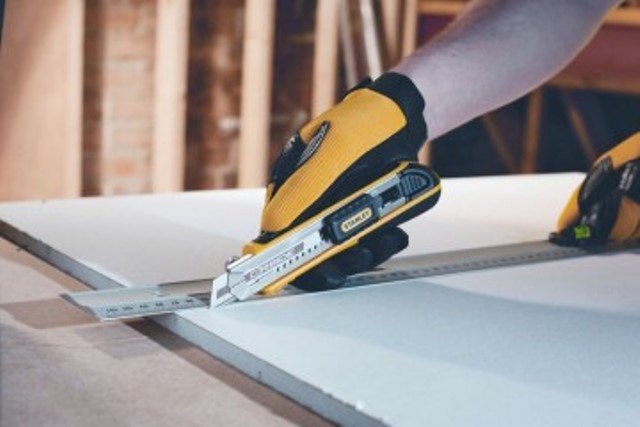
- Cut the drywall sheets will help ordinary paint knife with a convenient length adjustable blade. Using a rasp, the trimmed edges of the gypsum board are leveled, and the planer helps to remove a neat chamfer from the trimmed and end edges of the sheet.
- In order to cut galvanized carcass profiles, use special scissors for metal, well preserving a protective layer of zinc on the profile. When cutting material, zinc closes the cut, thereby preventing corrosive changes in the metal.
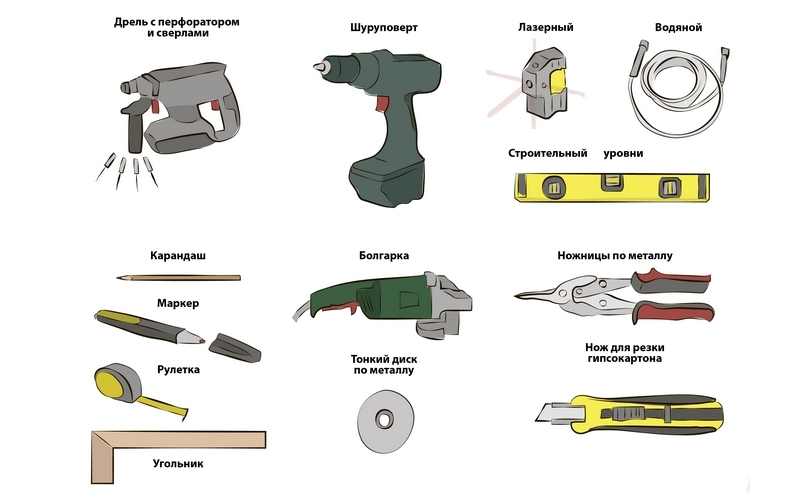
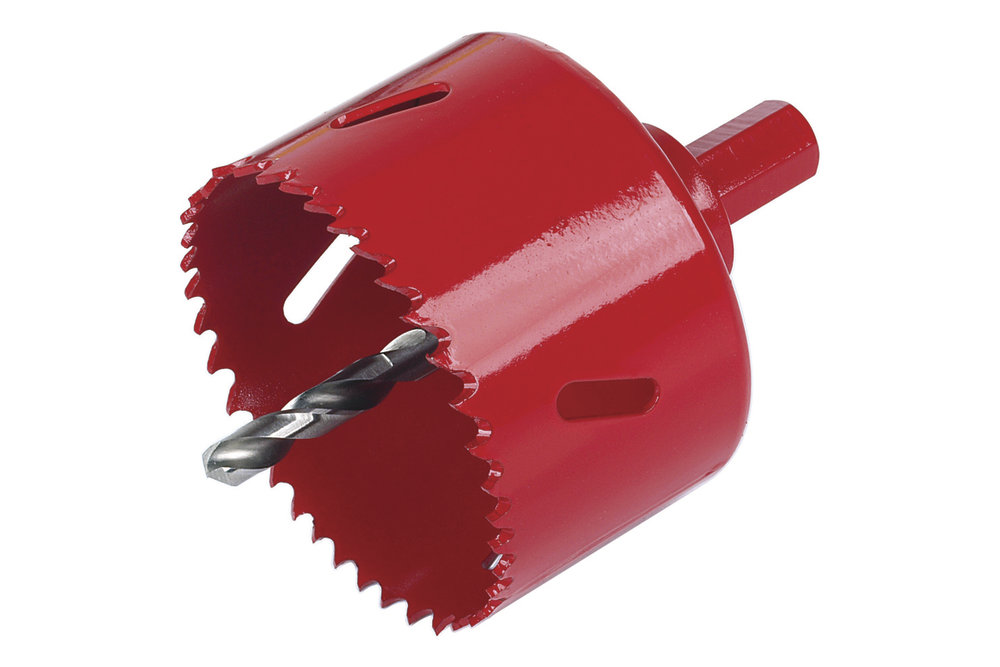
- Core mill it is useful if it is planned to make holes for lamps in the installed box. The desired diameter is selected according to the size of the lighting.
In addition to the tools used in the installation process of the box and the sheets themselves, additional materials will also be needed., without which the installation of this facility is impossible.
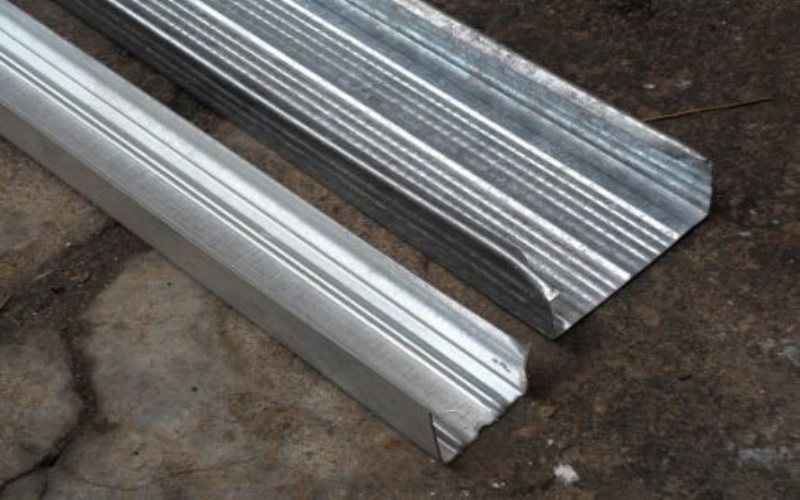
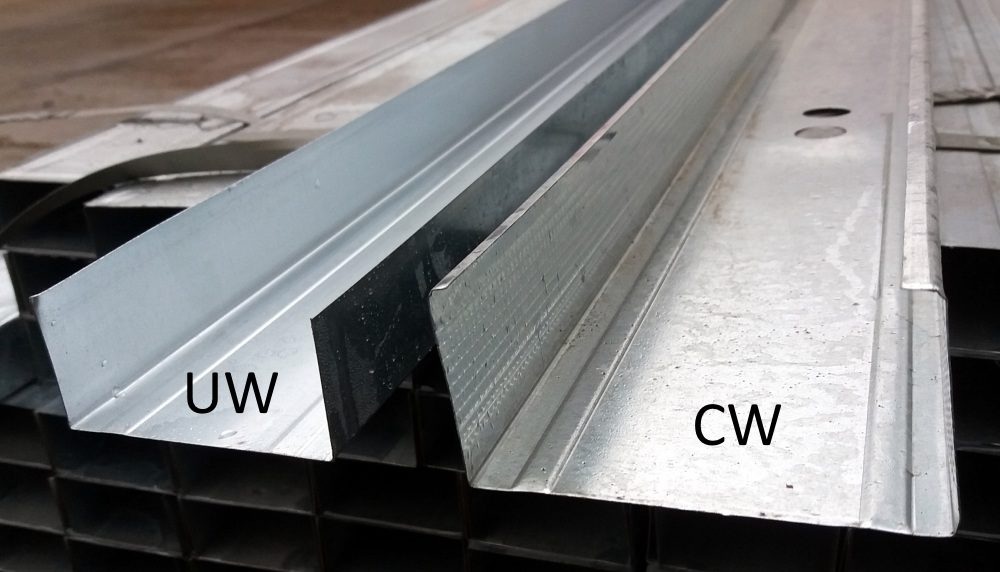
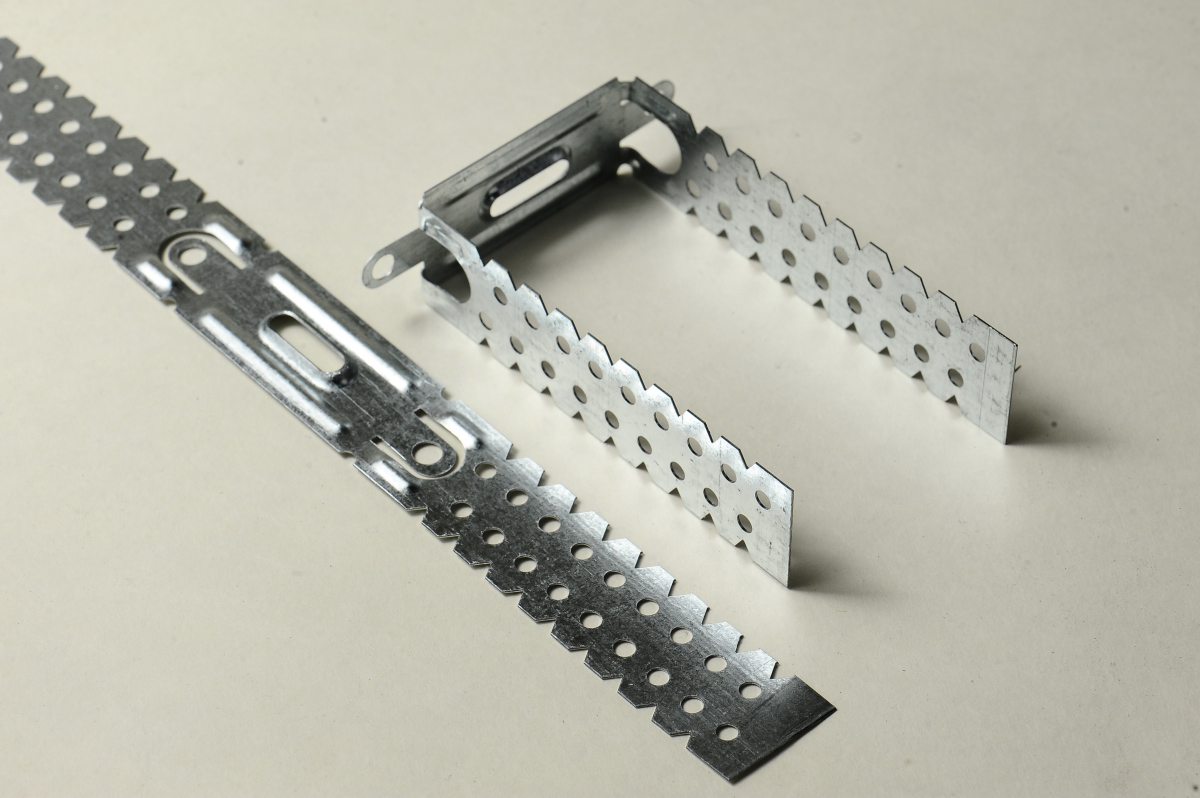
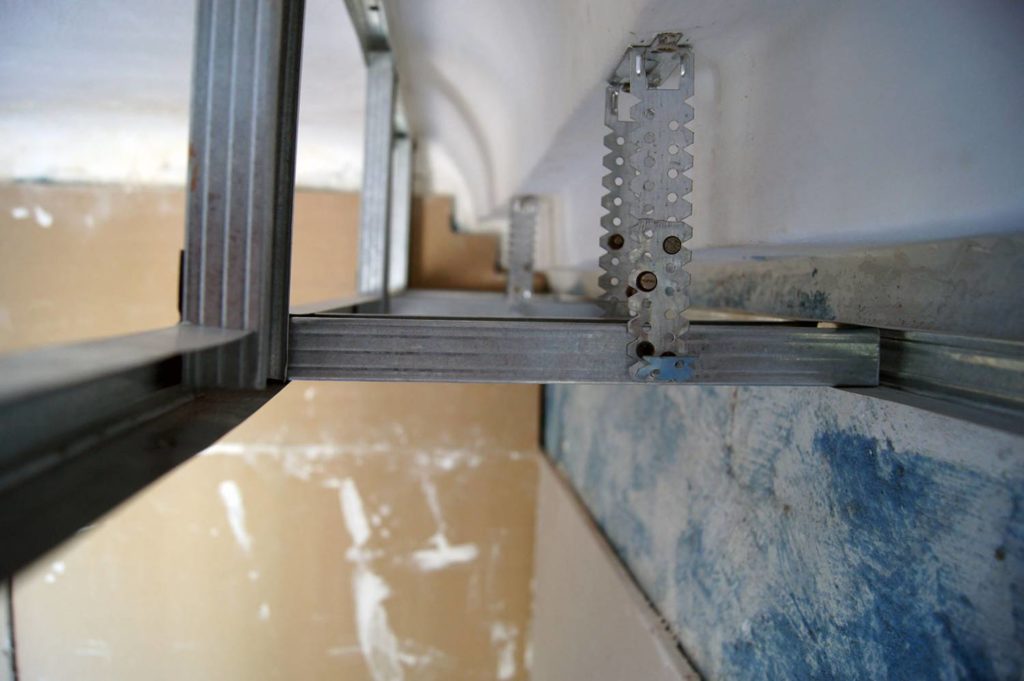
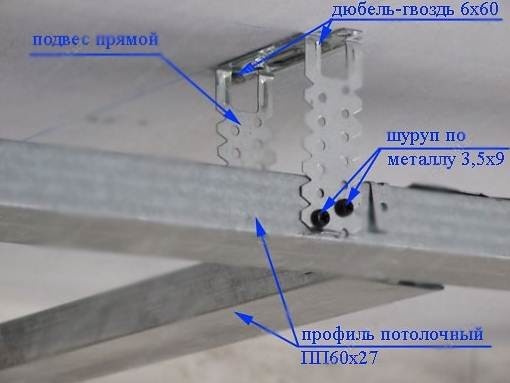
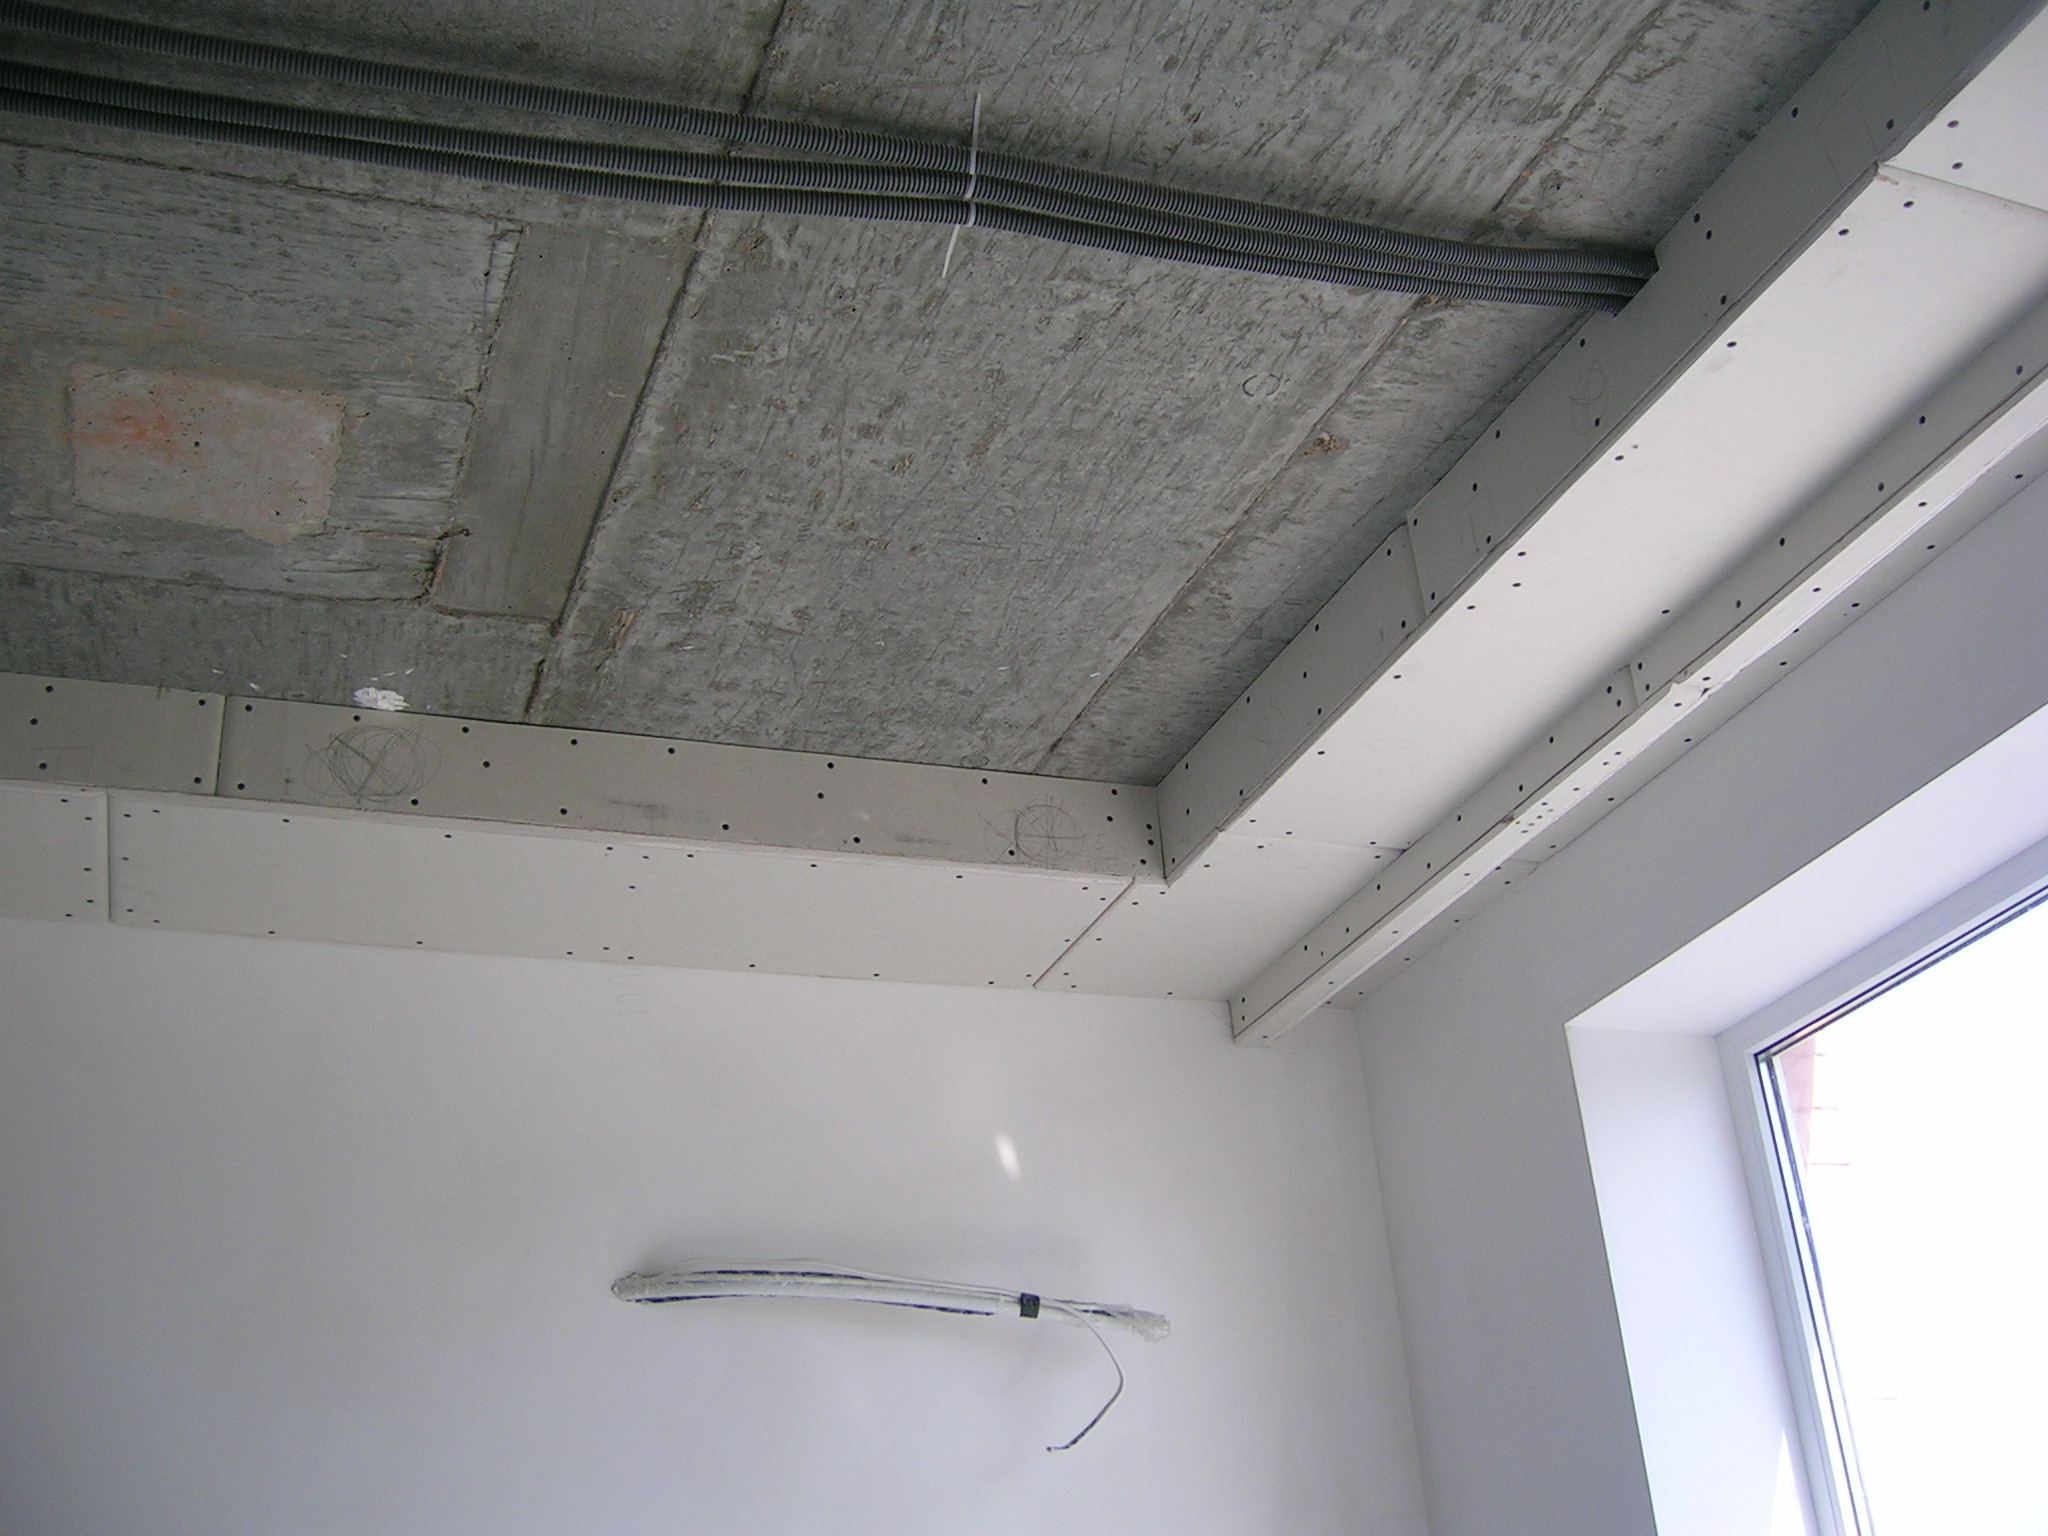
- As a framework used profiles. The carrier function is performed by profiles marked with CD, and profiles with UD marking are used as guide elements.Profiles with CW and UW markings are used if the box design is conceived as a multilevel system with figured shapes.
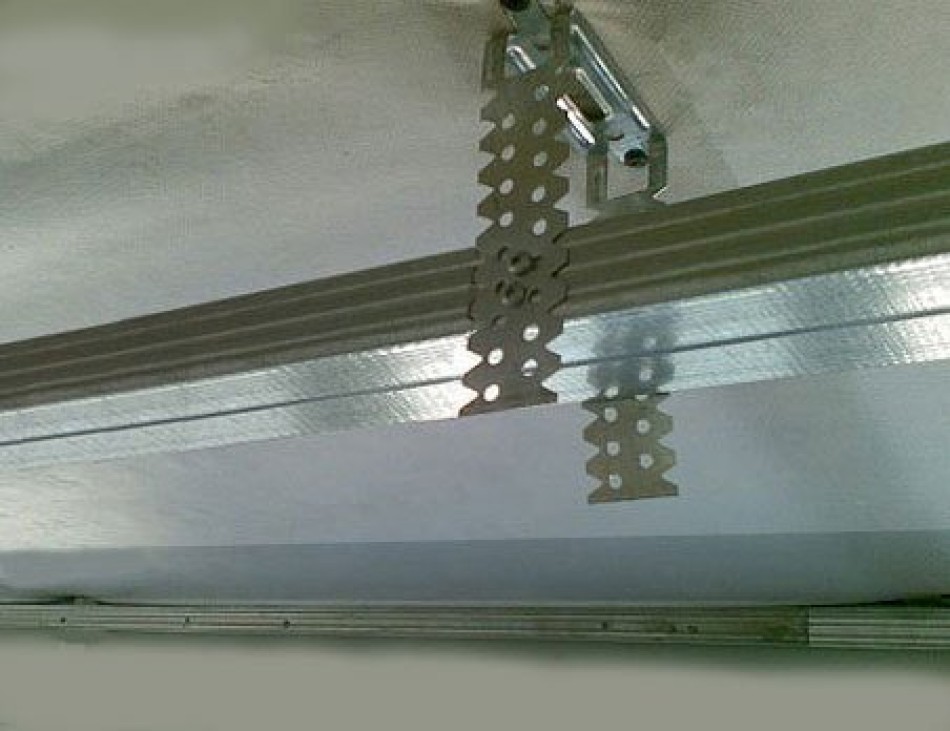
- Used as fasteners band or wire suspensions. Belt-type suspensions with perforations help to fix the box on the rough ceiling surface. Wire hangers are used if the need arises for a lower arrangement of the structure. Most often, wire suspension elements are used in rooms with high ceilings (from 3.5 m and above).
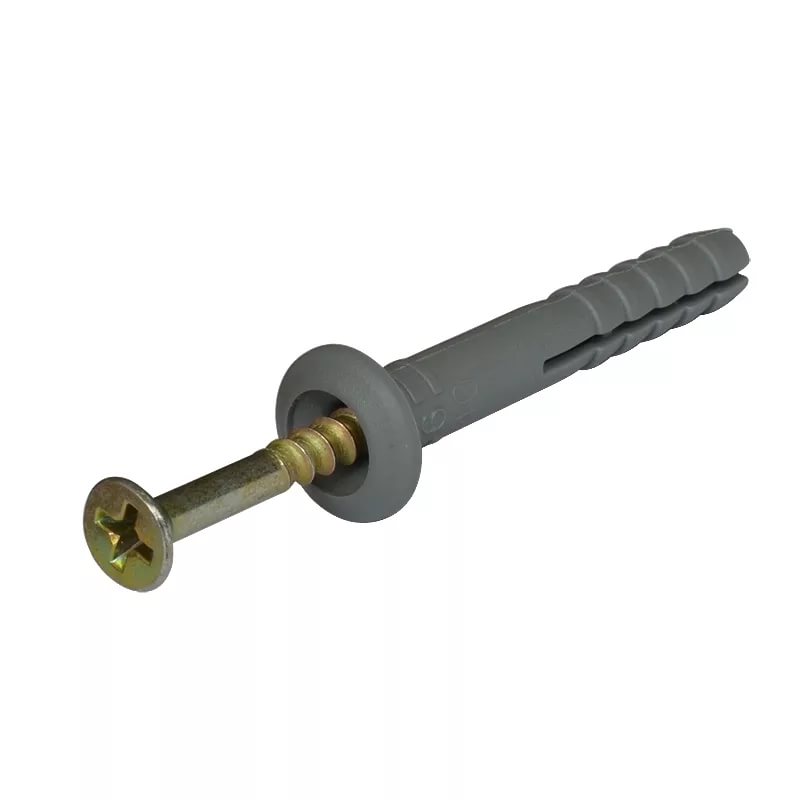
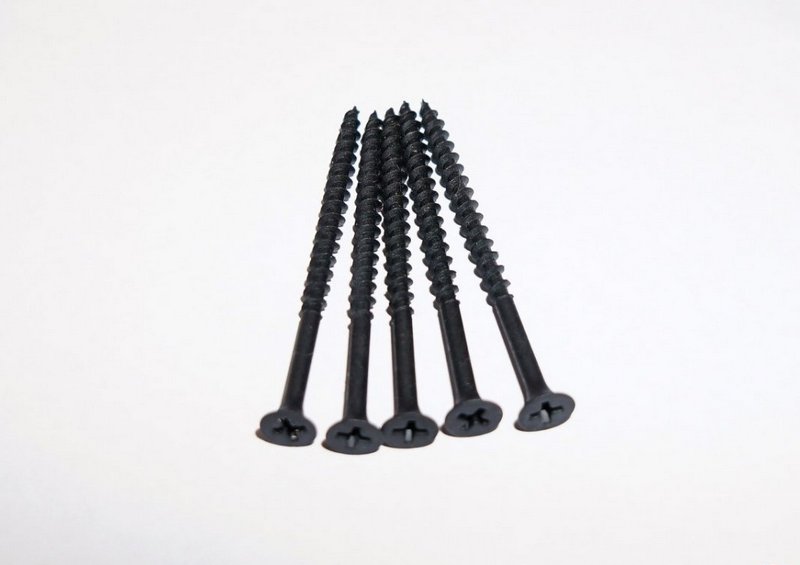
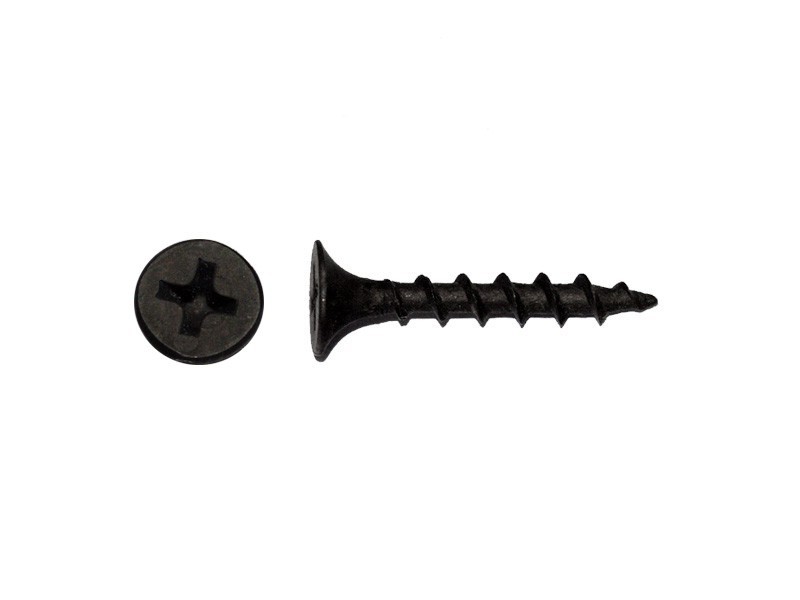
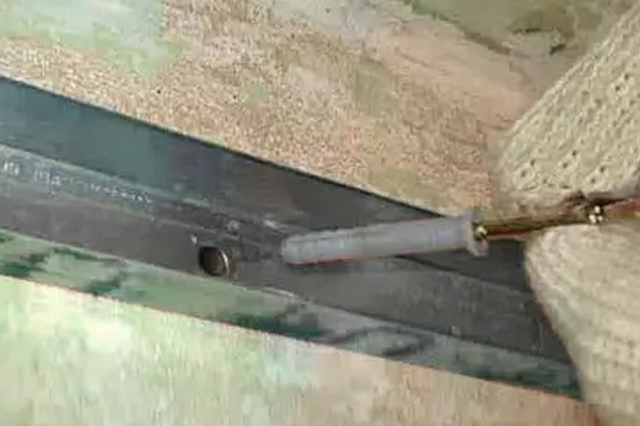
- To secure the frame to the surface can't do without dowels with a diameter of 6 mm and self-tapping screws with a size of 3 * 70 mm.
- For fixing profiles with each other are used. self-tapping screws other size, their length is selected on the basis of the thickness of the profile wall. As a rule, specimens with dimensions of 3.5 * 9.5 mm or 3.5 * 11 mm are used. Fixing plasterboard sheets to metal profiles is carried out using phosphated self-tapping screws having a diameter of 3.5 mm and a length of 25 mm.
Subtleties of construction structures
Regardless of what size the box is installed and in which place of the ceiling surface it will be located, you should first prepare the base surface.
First of all, you need to clean the construction site from old finishing materials. Then putty holes and cracks on the ceiling surface itself, and near the inlets of the pipes.
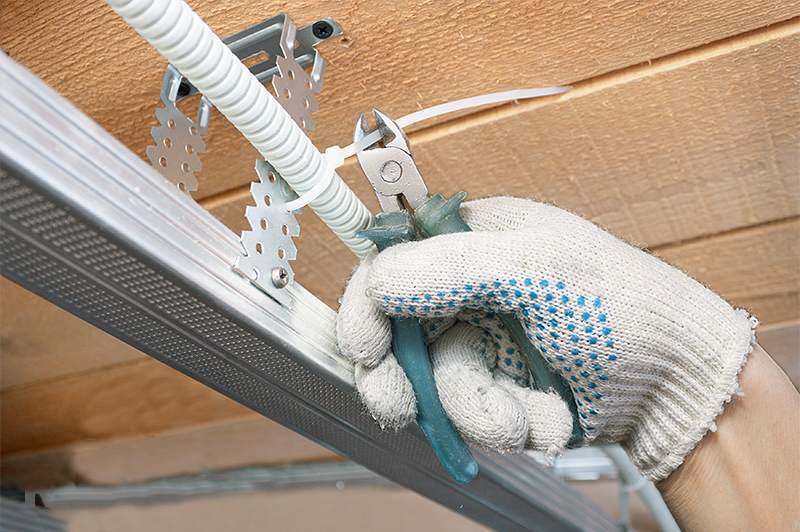
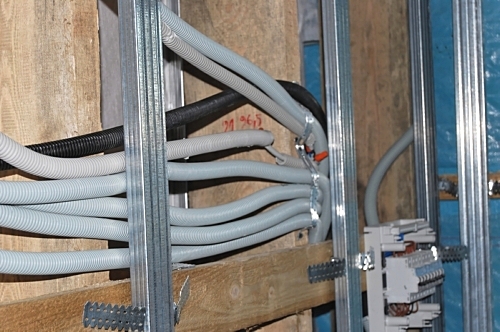
It is better to remove the hanging electrical wires in a special device - a corrugated hose, and fix the structure on the ceiling. After that, you can begin to prime the surface of the pipe to be hidden. Carrying out this procedure will help keep the metal surface from corrosion. This is a kind of protection of the plasterboard surface from the formation of rust stains. After waiting for the complete drying of the primer on the surface, you can begin to mark the future design of the box.

Markup
In order to properly assemble the structure, it is necessary to begin to make markup. Any marking begins with a drawing, which takes into account the dimensions of the room, the location of the box and interior preferences. When in doubt, arising from the size of the structure, it is better to draw the box design on large-scale paper with respect for proportions.
The diagram must indicate the places where the suspensions and guide profiles will be attached.In addition, in the drawing it is necessary to take into account the location of the holes for the pipes, as well as to provide the location of the holes for the lighting devices if the installation of lamps is planned.
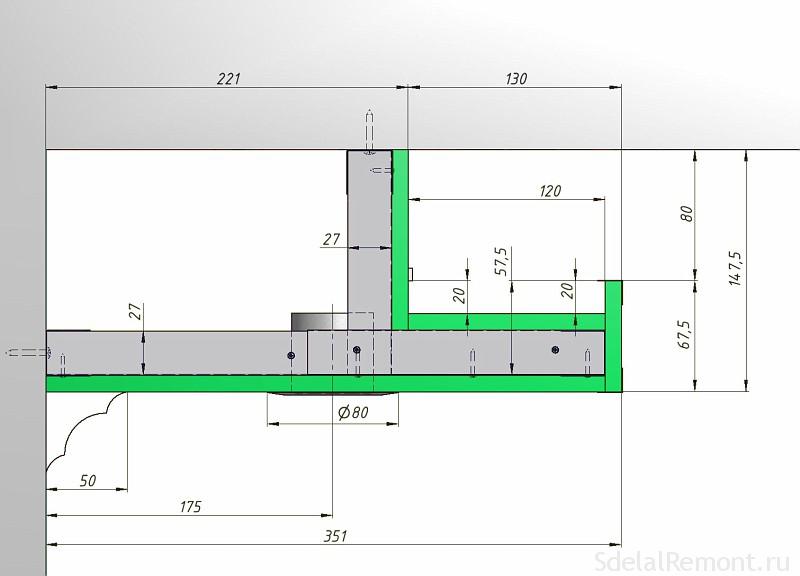
After drawing up the drawing, taking into account all the nuances and details, you can proceed to marking the location of the structure. To determine the depth of the box, it is necessary to take into account the dimensions of the hidden communications, or if the installation of luminaires is planned, their length. In addition, the thickness of the sheets is taken into account when marking. The distance between the rough ceiling surface and the sheets when installing fixtures should be slightly more than the length of the device. As a rule, 1-2 cm is added to the length of the luminaire for safe operation.
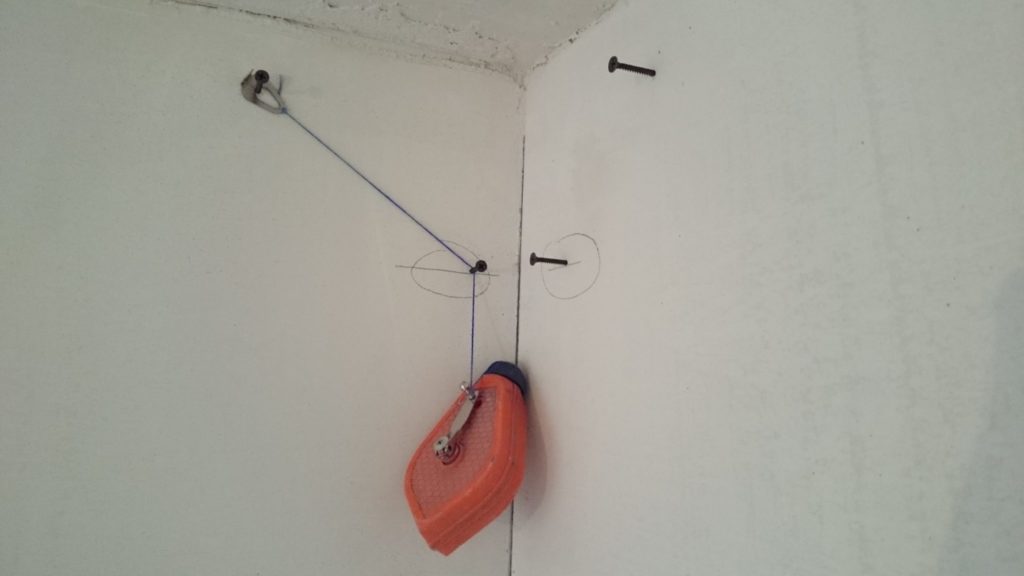
In order to make the first mark, you need to determine the angle with the lowest location, and measuring the desired distance from it, put points on both walls.
The number of such marks depends on the size of the box. If the structure will occupy the entire surface of the ceiling, then marks should be put in all corners on each wall, and if you plan to install the structure only on a part of the surface, then marks should be only in those corners that will directly touch the box. On the ceiling, the marks define the future boundary of the structure.
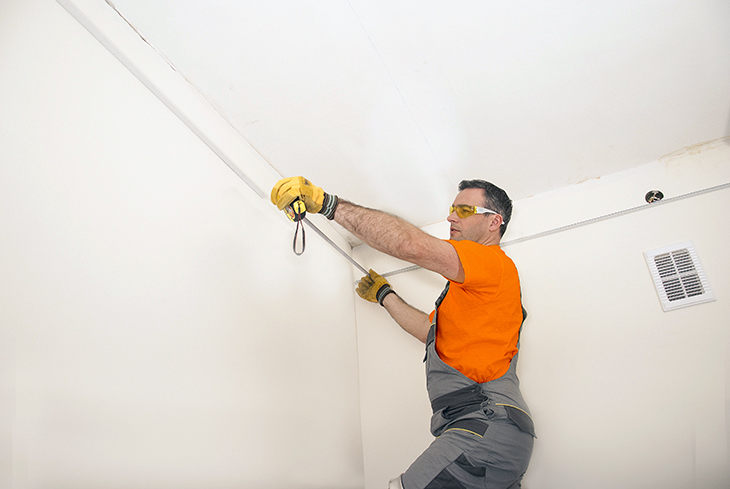
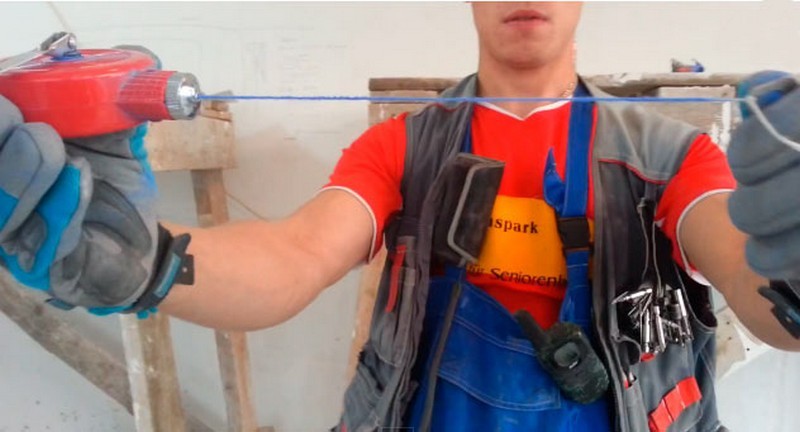
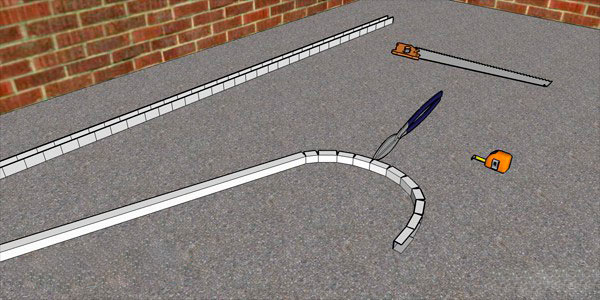
In order to describe the desired level of the frame, you can use different means, but it is more convenient to use a dye thread, which you must first pull and then abruptly release, so that a clear line appears on the surface. But you can use this tool for contour drawing only if you plan to install a straight duct. For the piece of the product will have to draw outlines by hand.
Approximate lines will serve as the location of profiles, where the step of fixation depends on the dimensions of the box and the weight of the structure as a whole.
Manufacturing frame
Installation of the box - a responsible matter, so you need to carefully assemble the structure carefully and carefully. There is a certain scheme that is suitable for most frames, because the main stages of installation are unchanged regardless of the shape of the box.
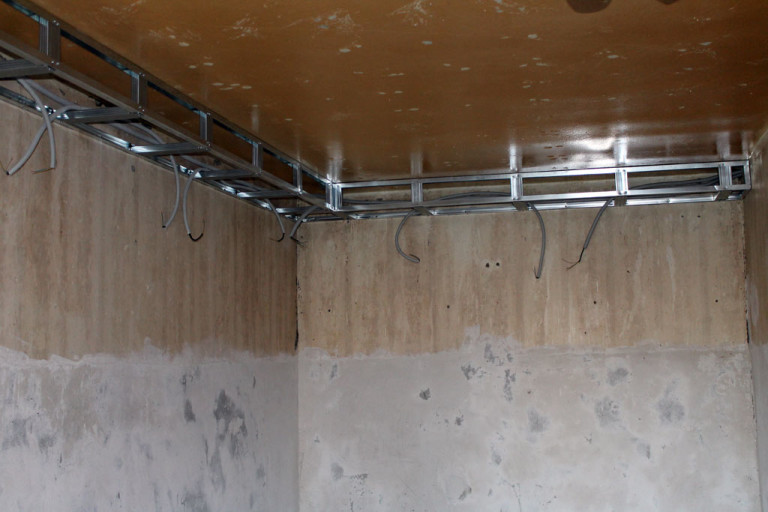
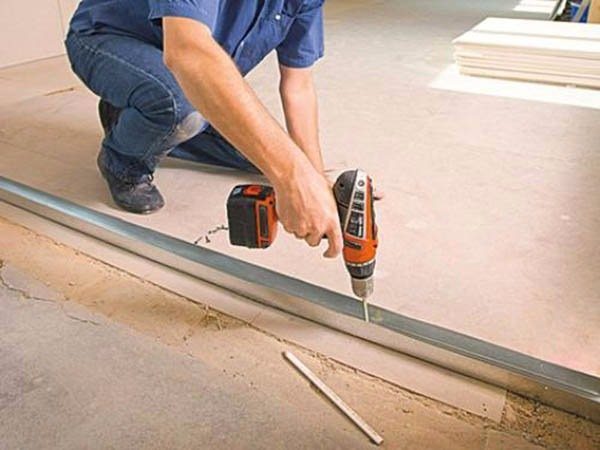
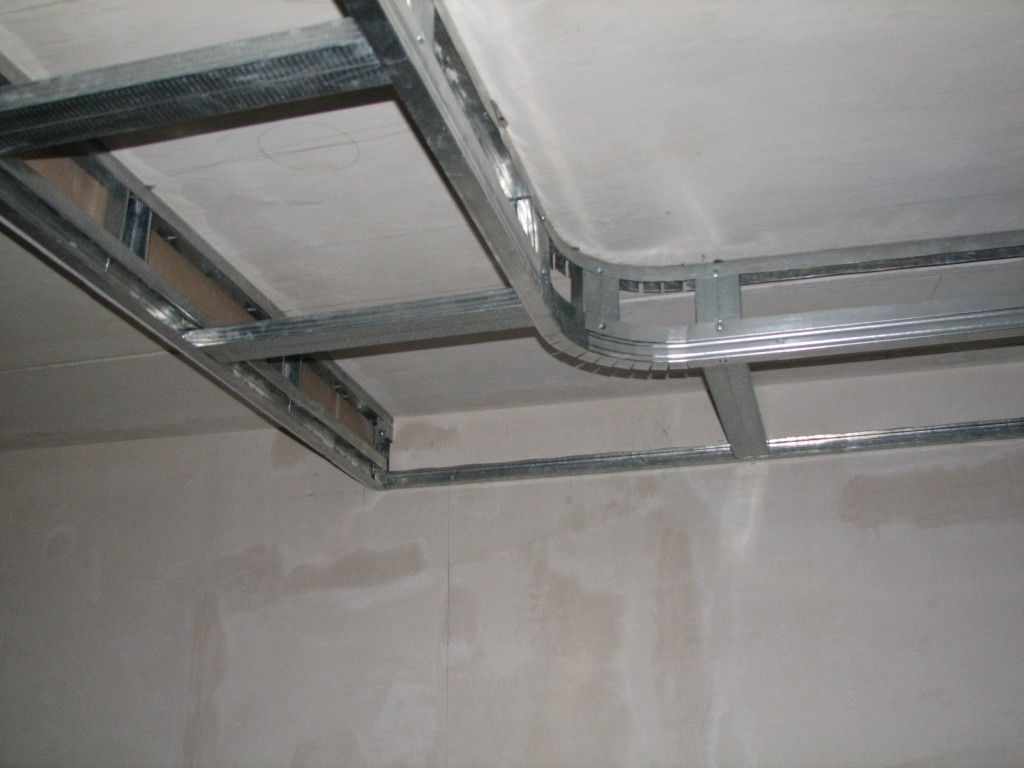
- In order to properly make the frame for the box with your own hands, you need to cut the guide profiles UD of the desired length and spread them out on the floor according to the drawing.
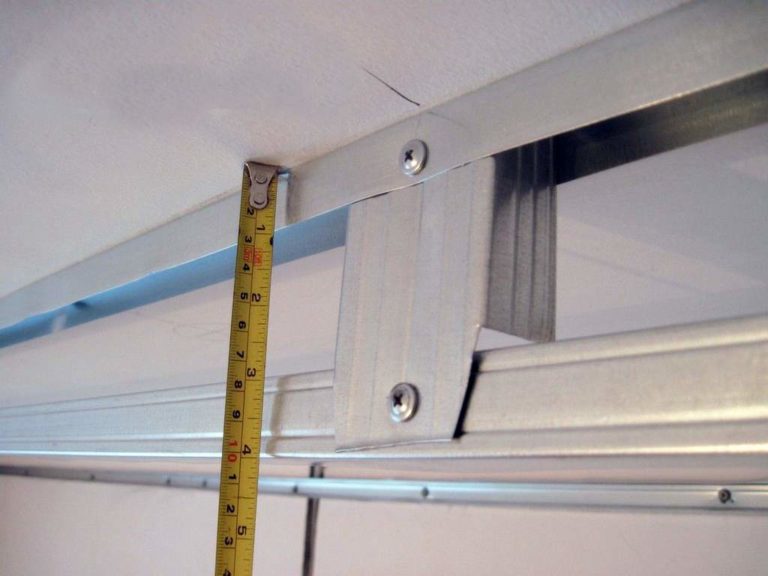
- Separate profile elements are fastened with screws. If there are no mounting holes in the profile, it is better to drill them in advance.The distance between them should be between 30-60 cm. The best option, according to experienced specialists, is a step of 30 cm. Such a distance between fastenings makes the structure more rigid and durable.
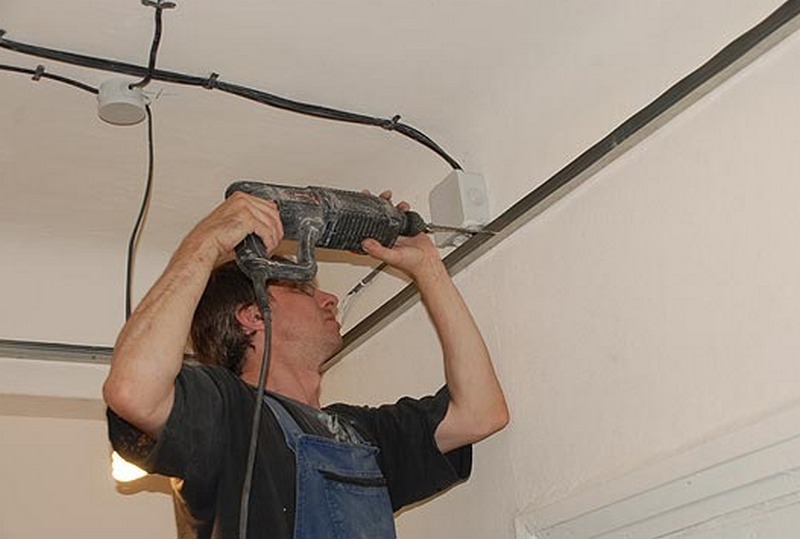
- Holes for dowels are drilled on the fastening line located on the wall using a perforator or a drill. They should coincide with the holes in the profile. Experienced craftsmen attach the profile directly to the surface without first drilling the profile and wall. Then, similarly, the UD profile is mounted on the ceiling.
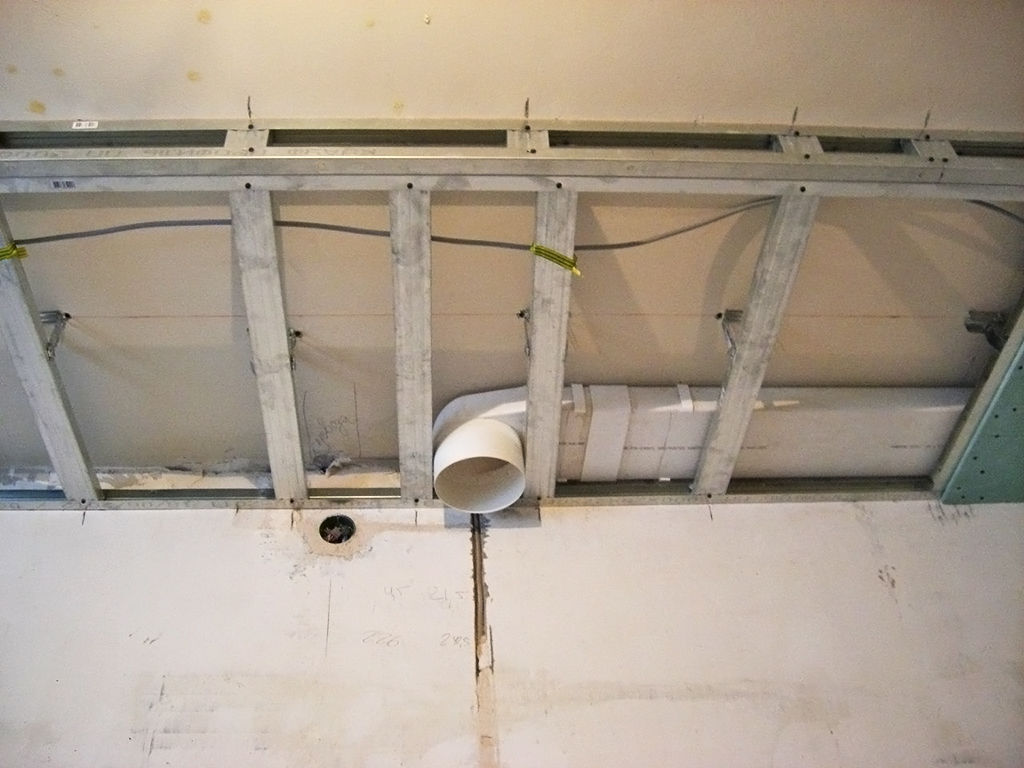
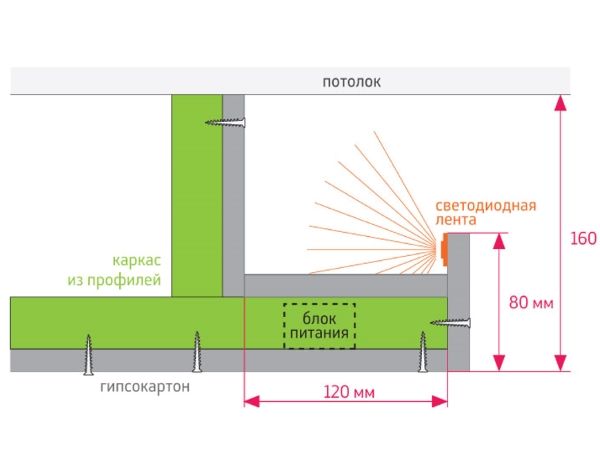
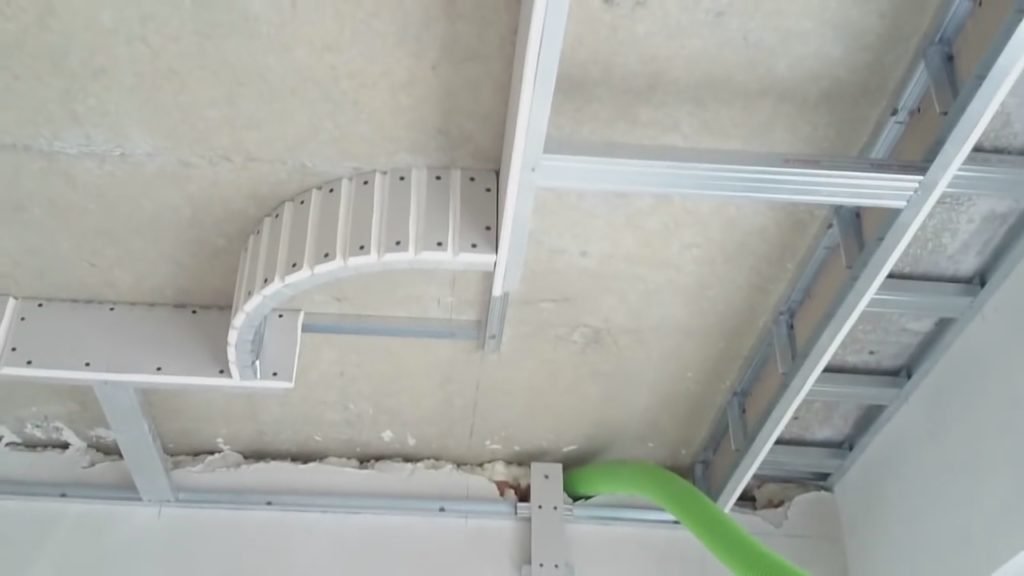
- After the UD profile is bolted around the entire perimeter of the markup, you can proceed to the preparation of the CD profile. It must be cut to a length equal to the depth of the box. If, together with the installation of the box, it is planned to install the backlight, then the CD element is cut in a special way. On the side facing the floor, a figure is cut in the shape of a letter P, its depth should be equal to the width of the base of the UD profile. For installation of a conventional box without a stretch ceiling, the profile CD should simply be cut to the desired length.
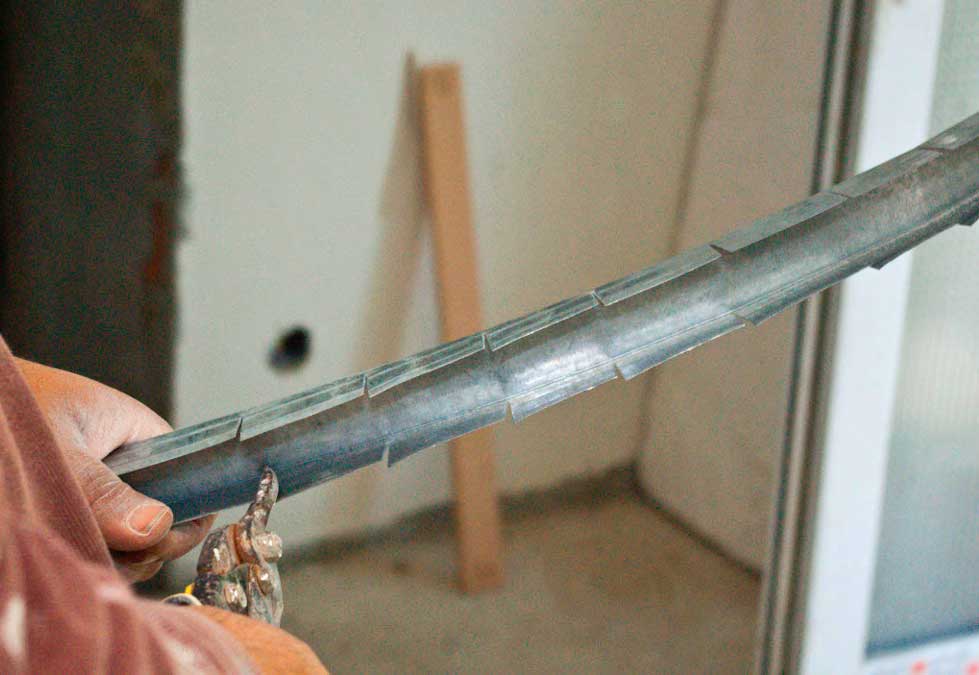
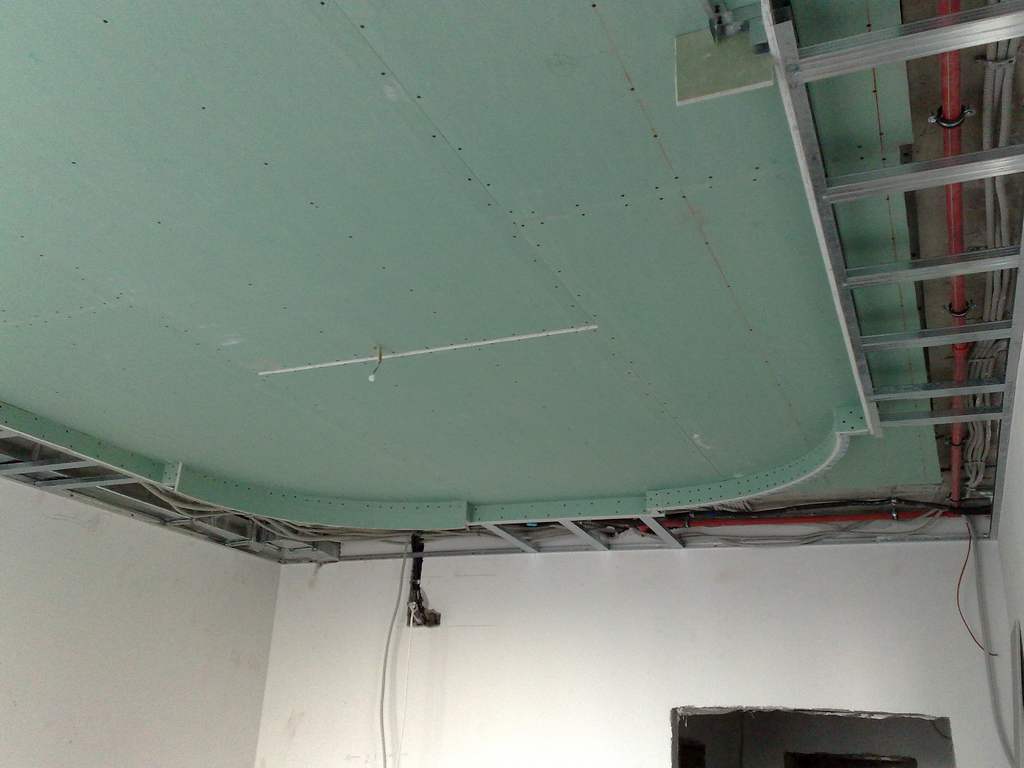
- Sometimes the frame, or rather, its front end should be designed to have a curvilinear shape.To bend, you will have to either use a finished copy, or make cuts at regular intervals in the side bars of a regular profile.
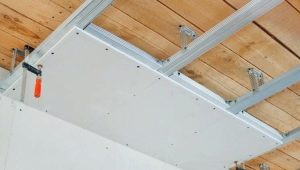
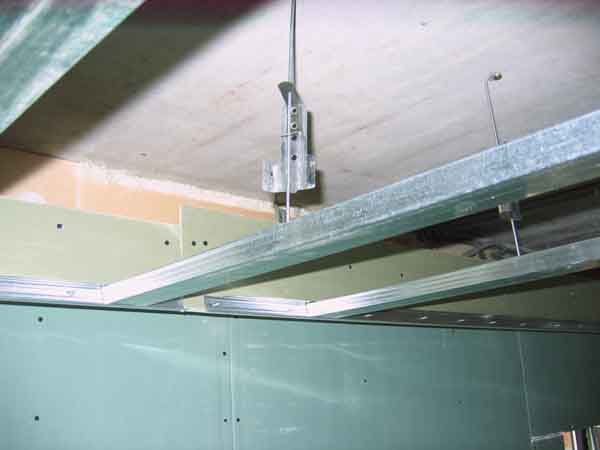
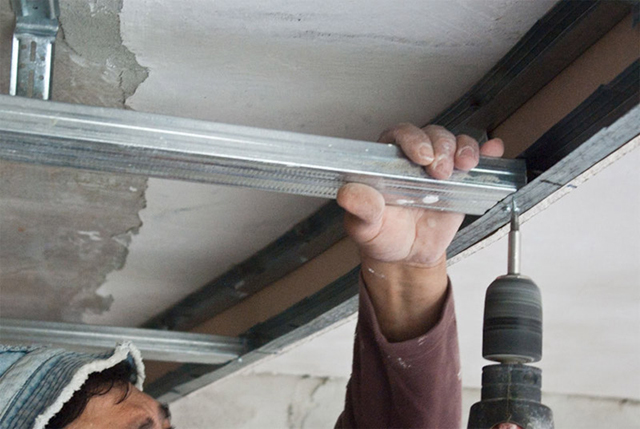
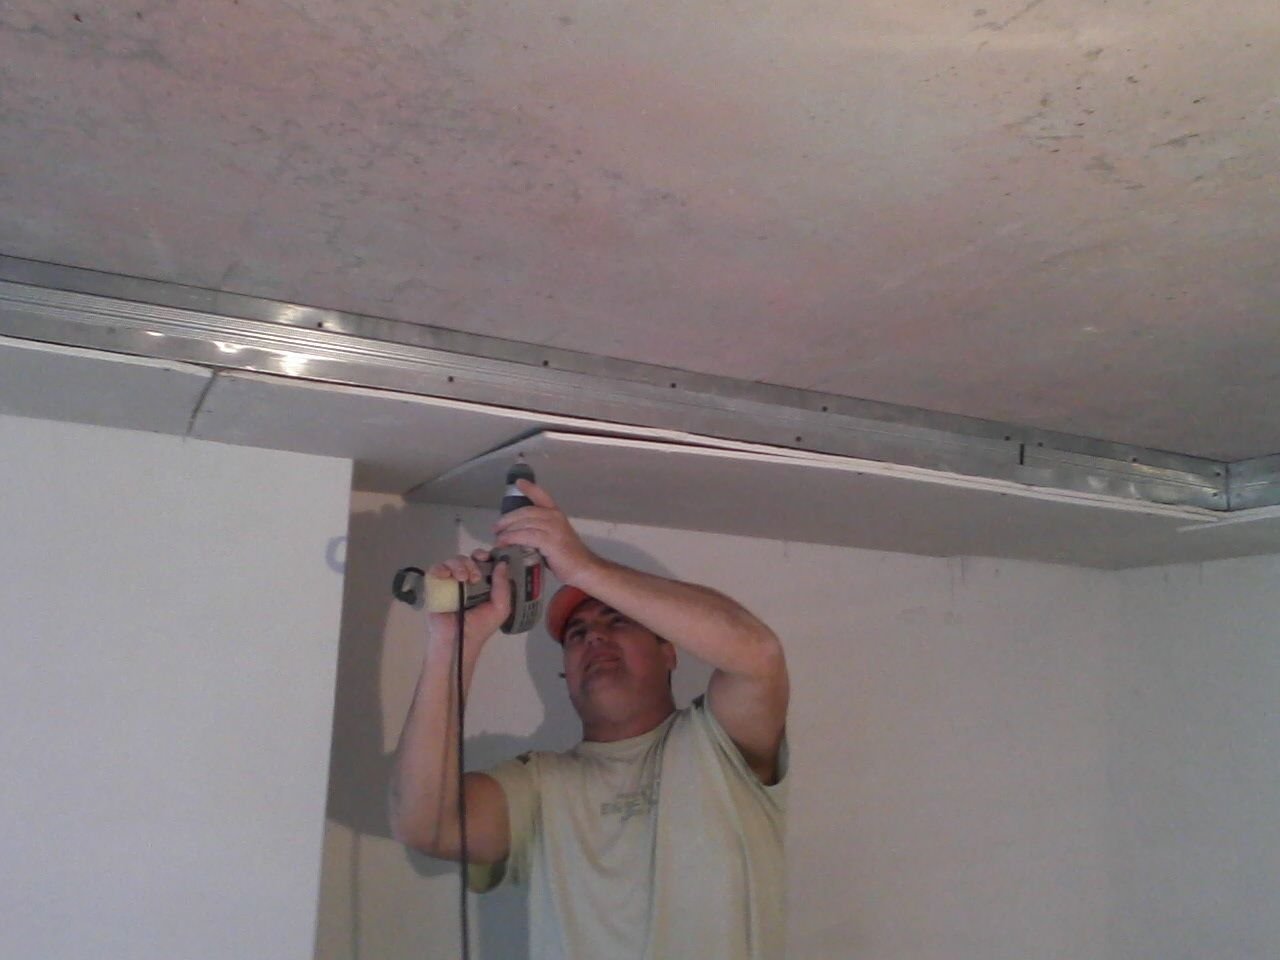
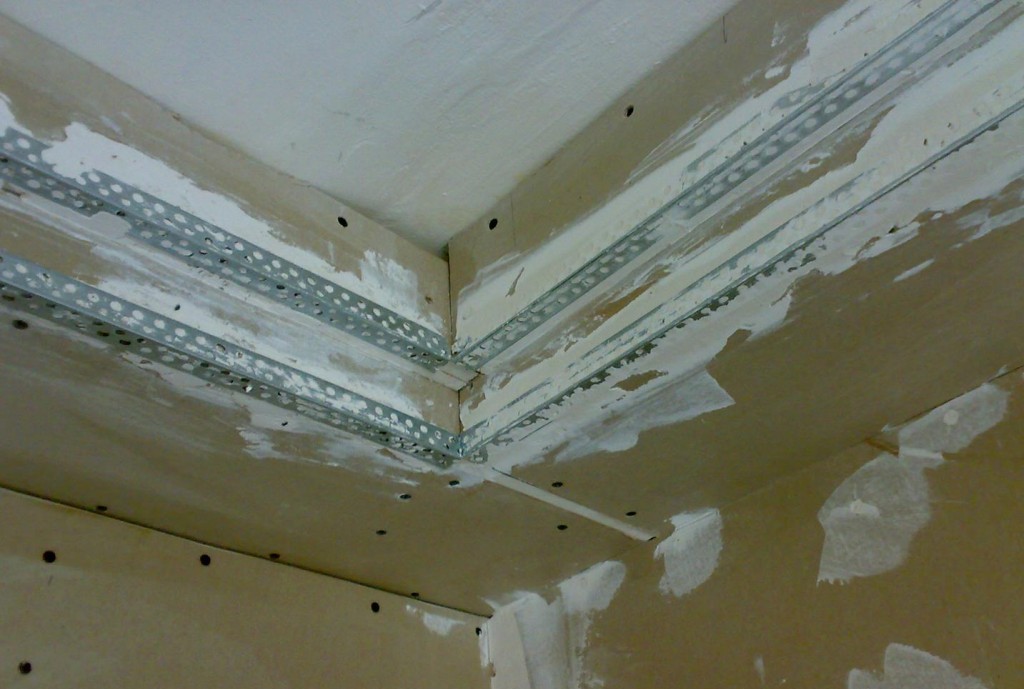
- The next stage of installation will be the fastening of the CD profile to the UD profile located on the ceiling surface. The distance between these elements should be in the range of 30-40 cm. Profiles CD form the basis for the future wall of the duct.
- After that, you can start cutting suspensions, their length should correspond to the depth of the box. Attach hangers need according to the marks on the ceiling surface. They are needed if the distance between the future walls of the box exceeds 60 cm.
- The next step in the installation of the box will be the formation of its bottom. To do this, you must connect the profile UD, attached on the wall with CD, attached to the ceiling. It is necessary to install the UD profile strictly perpendicular to the wall surface with a step of 60 cm. Fixing with the help of self-tapping screws UD profile is the final step in the installation of the frame.
Installation
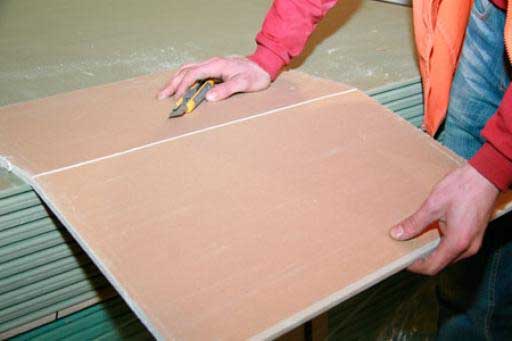
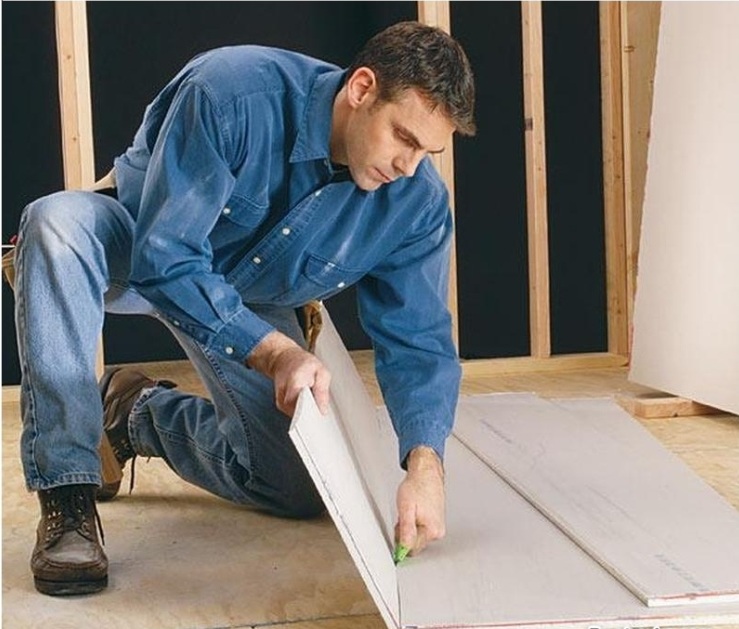
For the installation of boxes required sheets of certain sizes, so first they need to be cut. There is a rule that helps to quickly and accurately cut off the desired sheet size.
- The prepared sheet is laid on the floor, mark the desired value, putting at least two marks.
- To obtain a smooth cutting line and the connection of two marks, a profile is used, which is pressed strongly against the surface of the sheet, and then an incision is made in the top cardboard layer.
- In order to break the plaster layer evenly, the sheet should be placed either on the surface, so that the cut part hangs down, or put it on the edge. The remaining cardboard layer is cut, turning the sheet.
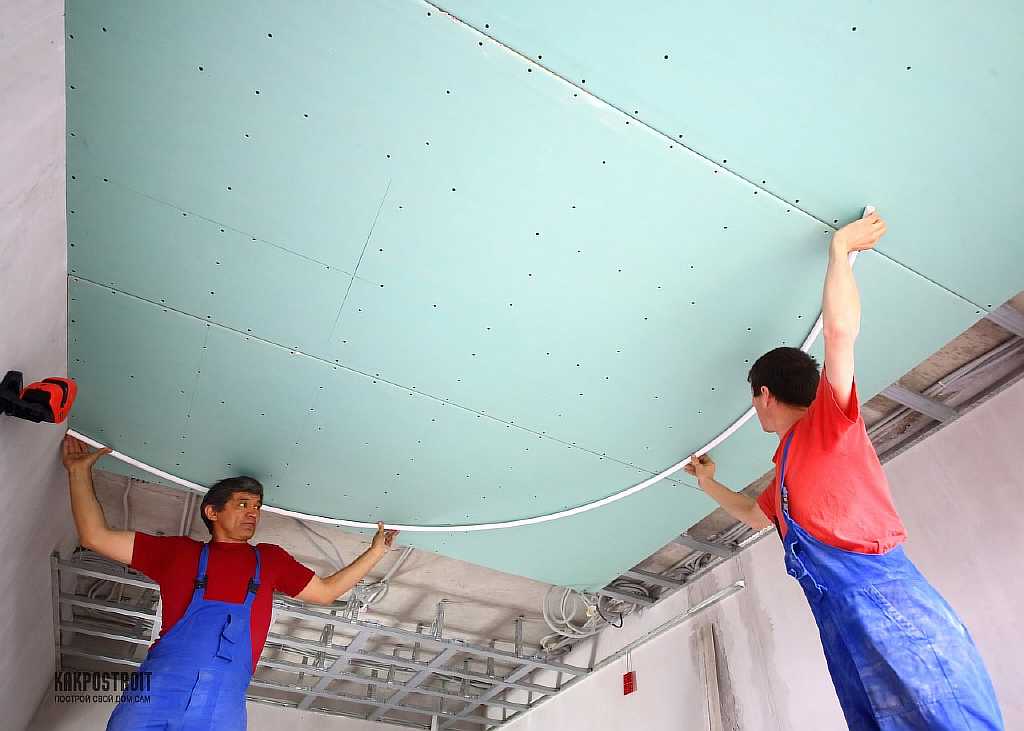
Sheet fastening should start at the bottom of the structure. Start mounting better from the wall from the corner. Covering the bottom can be done in small fragments, the main thing is to correctly calculate the dimensions of the sheet. Each side should reach the metal profile so that it is possible to secure the fragment from all sides.
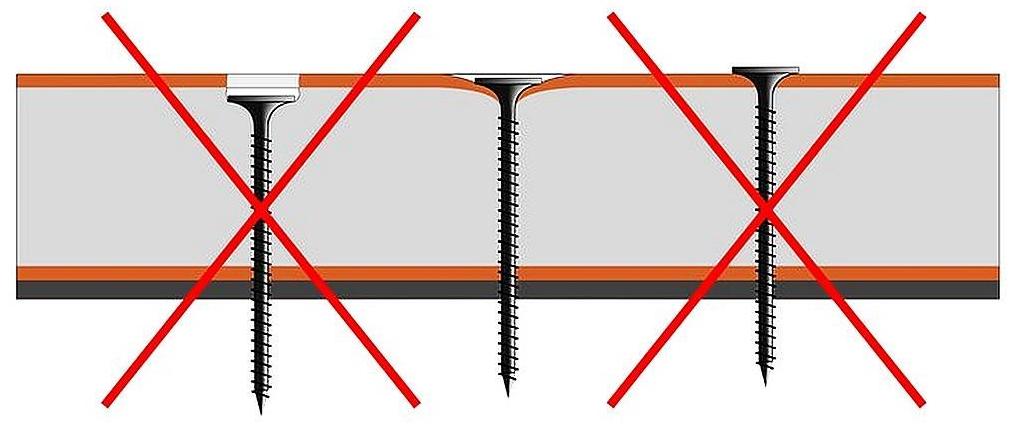
When screwing screws should be careful. You do not need to drown the heads of the screws too deep or, on the contrary, leave them to rise above the surface.
The best option is to slightly drown them in the surface of the sheet, 0.5 mm is enough. For a more tight fit of the sheet to the frame, the distance between the screws should not exceed 17 cm.
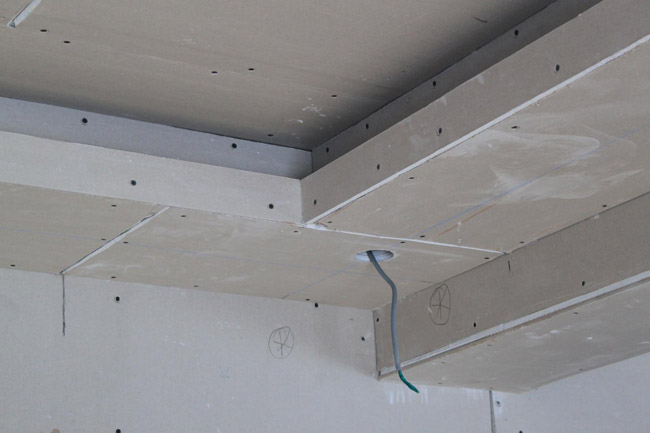
For the formation of a simple single-level box installation ends after fixing the side wall,but to install a more complex structure, it will be necessary to make another framework, especially if the second level is small. Two-level boxes are mounted after full covering with the frame sheets in the same sequence as the first levels.
Finishing work
Regardless of the number of levels and the shape of the box, their surface needs to be finished. Drywall has a suitable surface for lining with virtually any material, whether it be wallpaper, paint or even ceramic tile. But like most materials, plasterboard sheets, which sheathed box, in need of preparatory work.
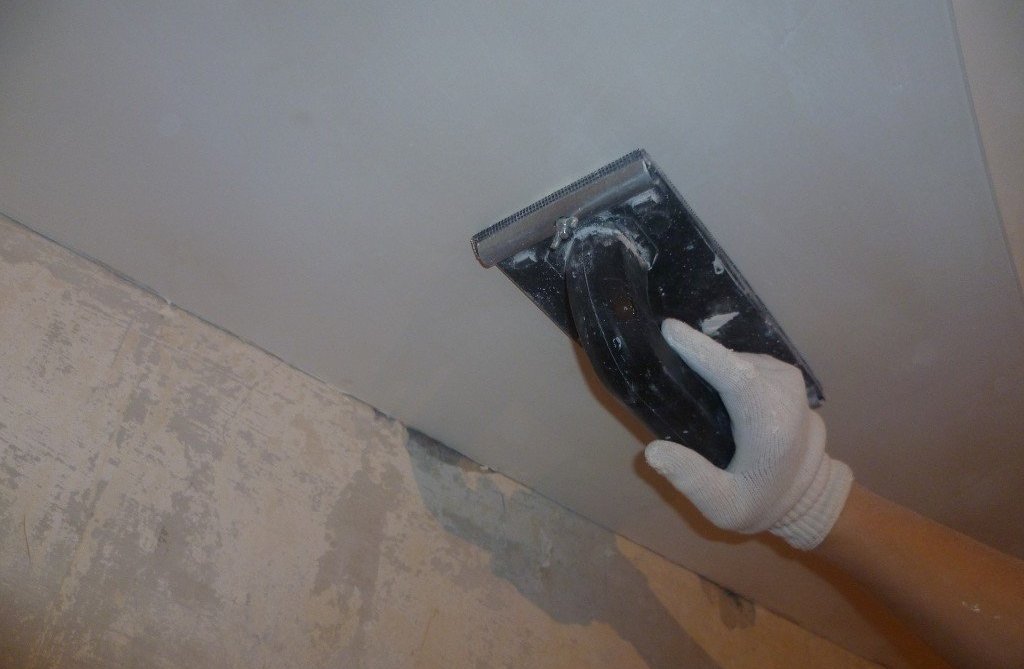
Begin to finish the box with a thorough primer surface. Processing the box with a primer composition will significantly increase the adhesion between the sheets of the box and the facing material.
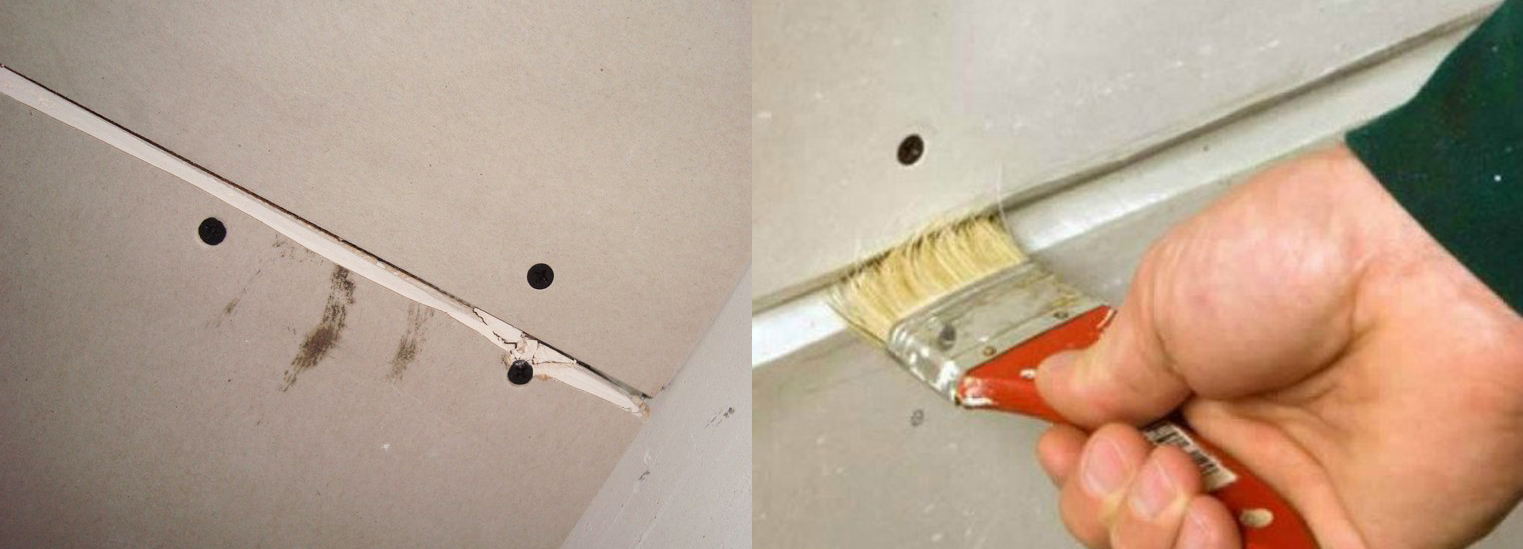
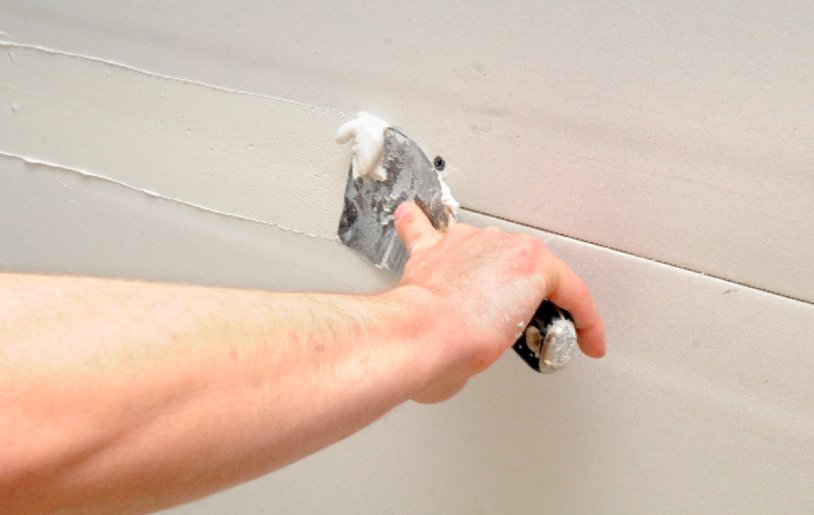
After complete drying of the applied layer, you can begin to puttying. First you need to close up with a narrow spatula all the seams, joints, ends and caps of the screws.
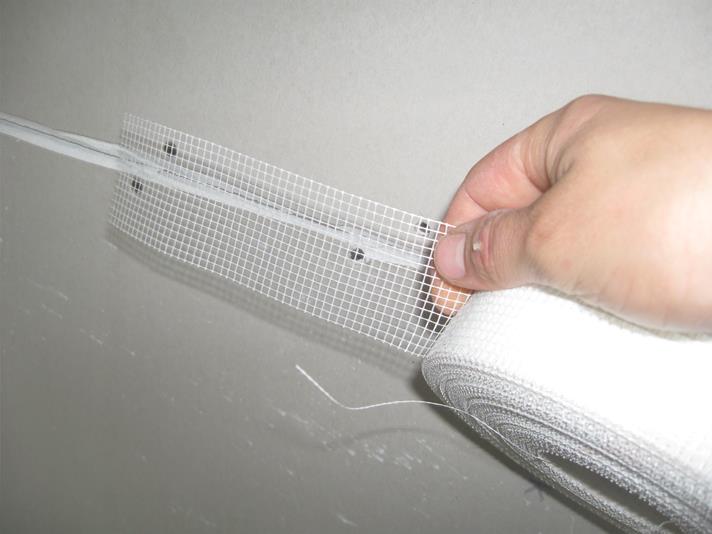
For joints use a special serpyanku tape. It is applied to the applied layer of putty, slightly pressing inwards, and then put a new layer.
The ceiling box should have a perfectly flat surface, so professionals to achieve the desired result in the processing of seams use a little trick. Along all the seams, a cardboard sheet layer is removed equal to the width of the tape, the treatment is carried out with a primer, and only after that the tape is attached.
For processing the outer corner joints of a regular and two-level box, a perforated corner is often used. It protects the structure from mechanical damage. The corner is placed on a thin layer of putty and fixed onto a sheet with a construction stapler.
The caps of the screws are treated similarly. After the putty has dried, the treated surface of the box is leveled first with a trowel, and then polished with emery paper. Then the surface is re-puttied and primed.
Tips and tricks
The installation technology of the box is simple, but there are some nuances, taking into account that you can avoid many mistakes.
- If the installation of the box is carried out near the pipes, then it is better to make the distance between the wall of the box and the pipe somewhat larger than planned. This will prevent metal elements from overheating and excessive expansion.
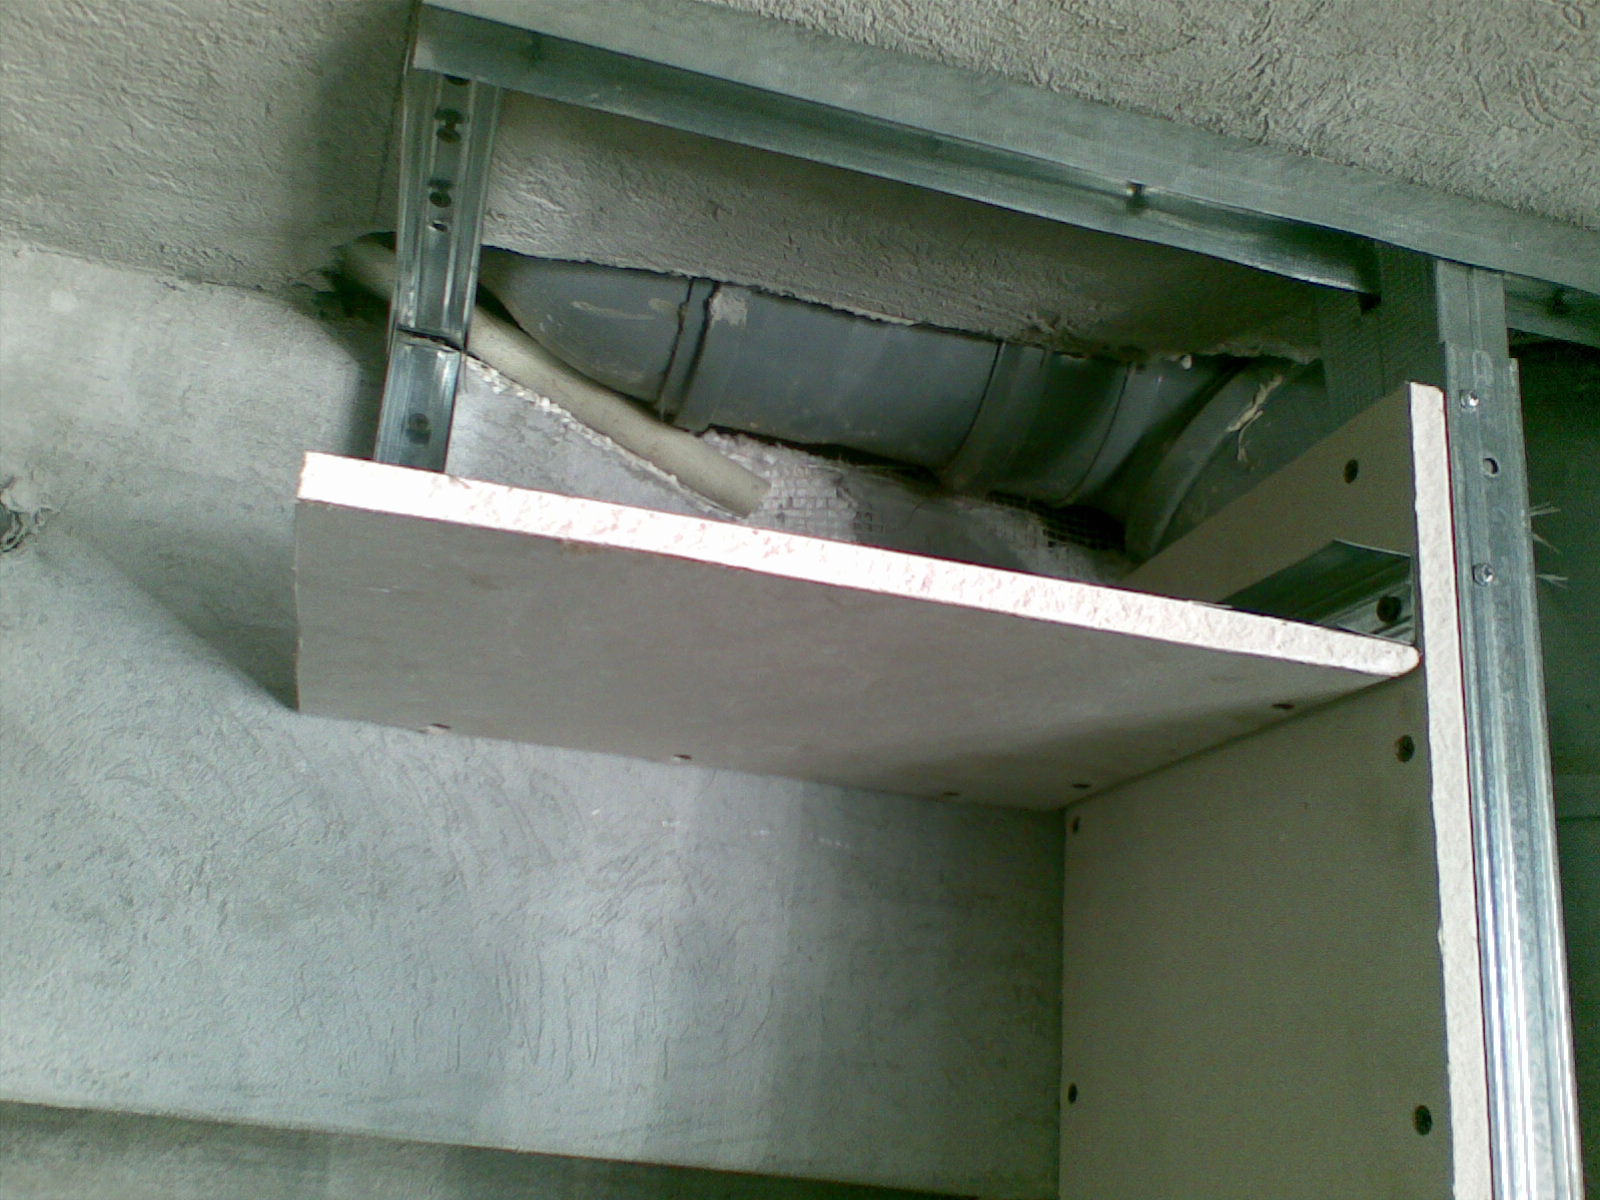
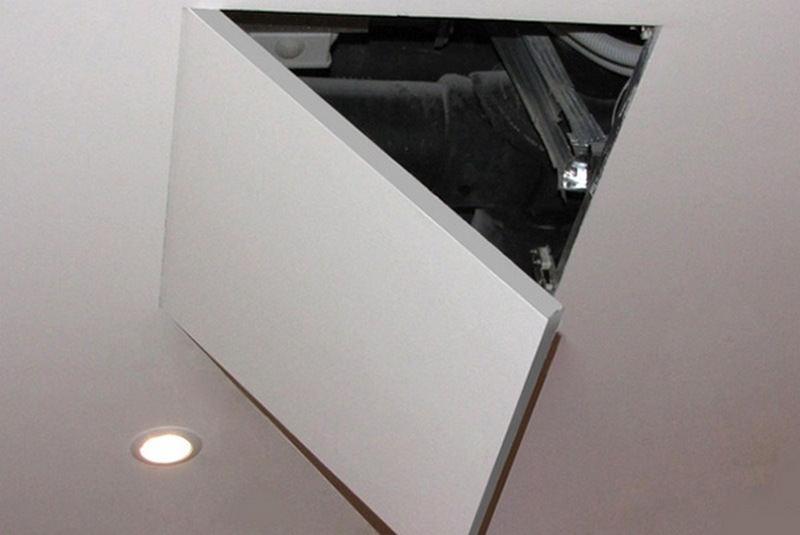
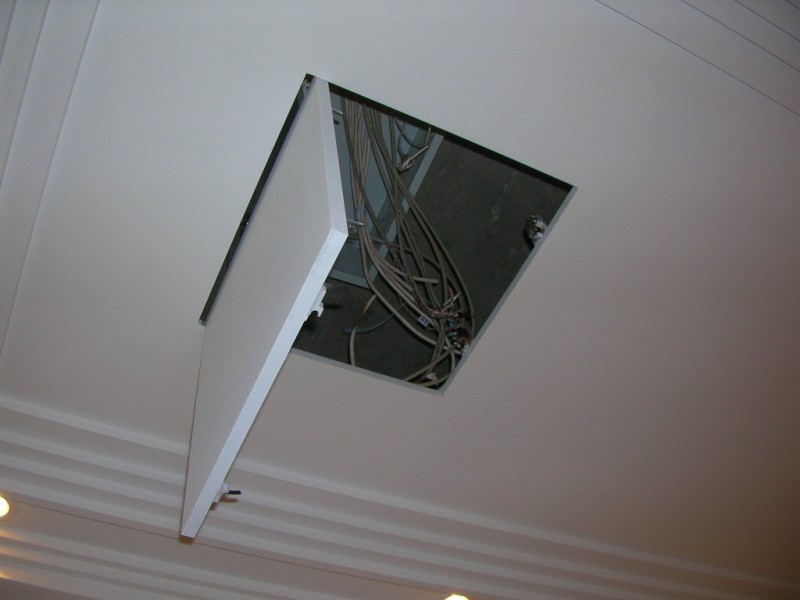
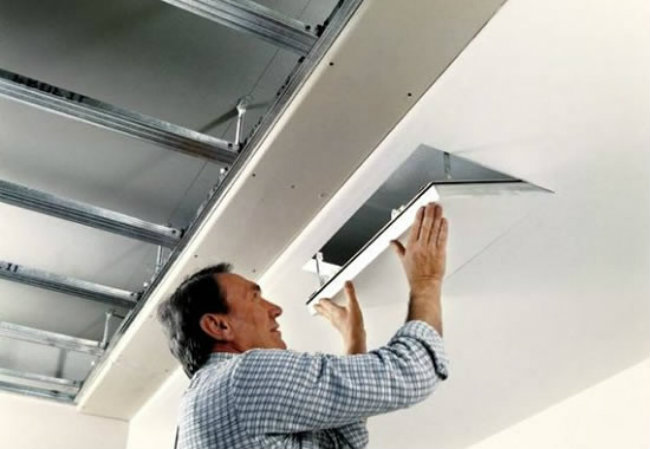
- When installing sheets, you should think about the location of the hatch. Its presence will allow you to get quick access to hidden communications.
- If the shape of the box has a rectangular oblong shape, then it is better to place the sheet at full length. So the joints will be less, and the design is stronger.
- The use of quality materials ensures long-term operation of the structure, so they should be bought from trusted vendors.
How to make a box of plasterboard on the ceiling, see the following video.