Features of the device flooring on wooden logs in a private house
The construction using lags is one of the most popular ways of flooring in both individual and multi-family housing construction. Lags represent a wooden support (sometimes metal or reinforced concrete) in the form of long wide beams, laid perpendicular to the overlap. Logs can be installed on beams, support columns or monolithic slab.
Advantages and disadvantages
The floor design using lags is a “pie” consisting of several layers, each of which carries its own functional load. First, overlaps are laid with logs, a wooden base is carried out, a vapor barrier membrane, insulation, waterproofing film, and a finishing base are laid. Most often, such structures are used in private village houses, but some time ago the floors on the logs were installed in apartments (especially in panel houses from 1960-1970. Buildings).
Also the wooden floor on the logs is done on the loggia or on the balconyif you want this room to be warm. In the bathroom or in the toilet, that is, in rooms where there is a high probability of leakage, which can negatively affect wooden structures, most often they make a foundation in the form of a concrete tie.
The main advantages of the floor on logs:
- Availability of material. Since logs are usually made of wood - a relatively inexpensive material, the device of this design will be relatively inexpensive.
- Environmentally friendly material. In a country house, most of us would like to be closer to nature, so the best option to meet such needs is wood.
- The load on the floor or the ground is distributed evenly.
- This design makes it possible to save money, and not to carry out any concrete foundation.
- The construction with the use of lags is universal, since it is possible to lay both wooden and any other floor coverings on it.
- The technology of the device of such a foundation is quite simple and is available for implementation in-house.
- Wooden beams have significantly less weight compared to a concrete base. This is of no small importance when the floor is arranged on the second and higher floors. Floor on logs will not greatly increase the load on the overlap.
- If the base has slopes, then using special substrates for lags, you can easily solve this problem without additional costs. In the case of a concrete screed, this would entail the performance of additional work and the purchase of materials, which would lead to a significant increase in the cost of construction.
- Convenient design for insulation. That is why this floor plan is most often used on the first floor of a country house. On the second and subsequent floors it can also take place (only here the layer of insulation is changed to soundproof material).
- Convenient design for the location of communications. In the floors of the lag you can lay all the necessary networks for a private house: water supply, sewage, electricity. In this case, if necessary, they can be easily reached.
- Ventilated underground. Since there is free space between the lags and the base, it is ventilated, which provides favorable microclimate conditions for residents.

The main disadvantage of floors using wooden lags is that they are not resistant to moisture.
But with proper installation, the organization of a sufficient level of ventilation in the technical underground, the use of high-quality vapor and waterproofing materials, this "minus" is easily reduced to a minimum.
Floor device
Since the floor is the basis of the whole house, which is more than the other structural elements is exposed to various factors (load, humidity, wear), The material of which it is made, has certain requirements:
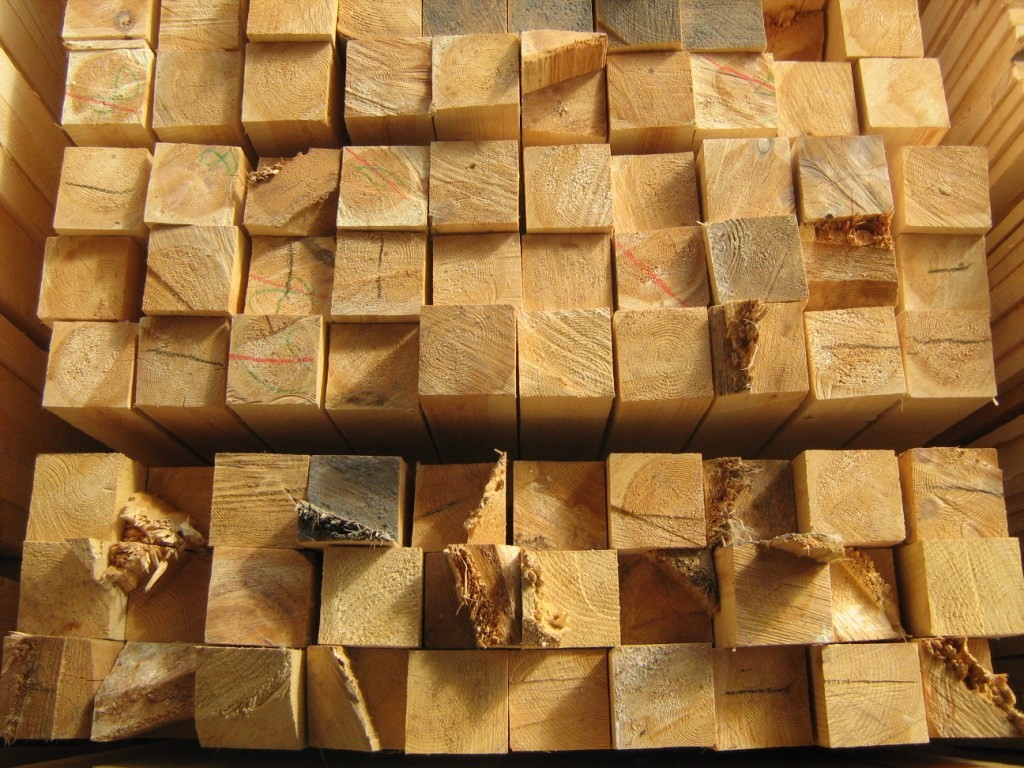
- Humidity of wood - no more than 12%. It depends on humidity how long the wooden lag floor will last. Therefore, it is important to comply with the above rule.
- Wood for mounting the floor on the logs should not have defects: chips, cracks. greenery. Otherwise, the floor will not last long and its quick repair is inevitable.
- Antiseptic treatment of wooden elements with special compounds that prevent rotting and fungus.
- Fire treatment wood.
- Use high quality material.For the arrangement of floors on wooden logs, the most suitable are such types of wood as fir, pine, oak, larch, ash.
The best time for arranging the floor on the logs is the period at the end of the heating season, when the optimum humidity level is created inside the room, and therefore the tree will absorb moisture in minimal quantities.
If the work is carried out in the summer, then it is better for them to choose the time when the dry and warm weather lasts for at least two weeks.
The choice of cake for the floor, arranged in lags, depends on:
- type of base. Floors can be arranged on the ground, on the slab, on the pillars (with the ventilated underground);
- the floor on which the device is held floors;
- type of finish flooring. It is likely that the owners can design the device floor with water or electric heating.
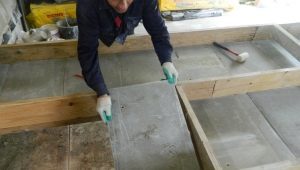
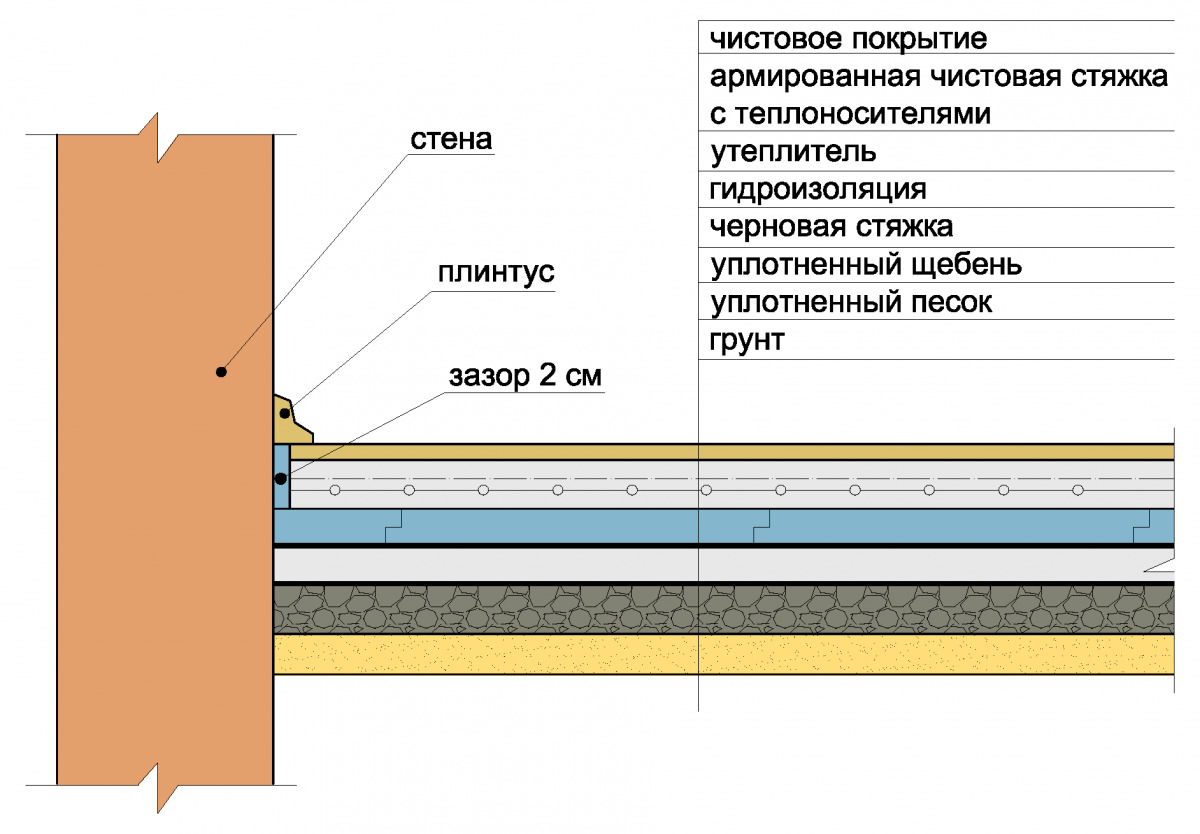
On concrete base
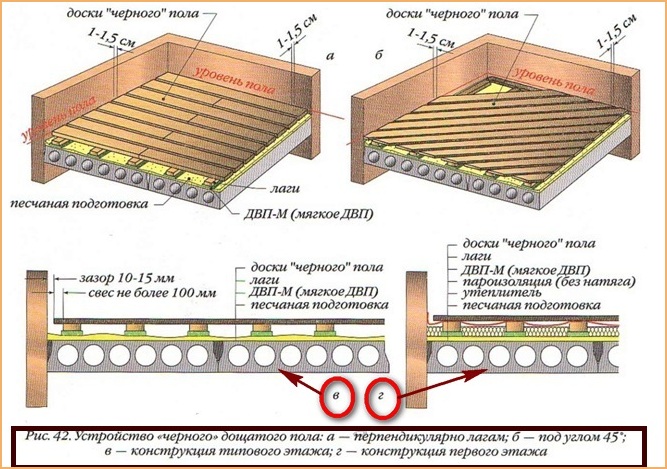
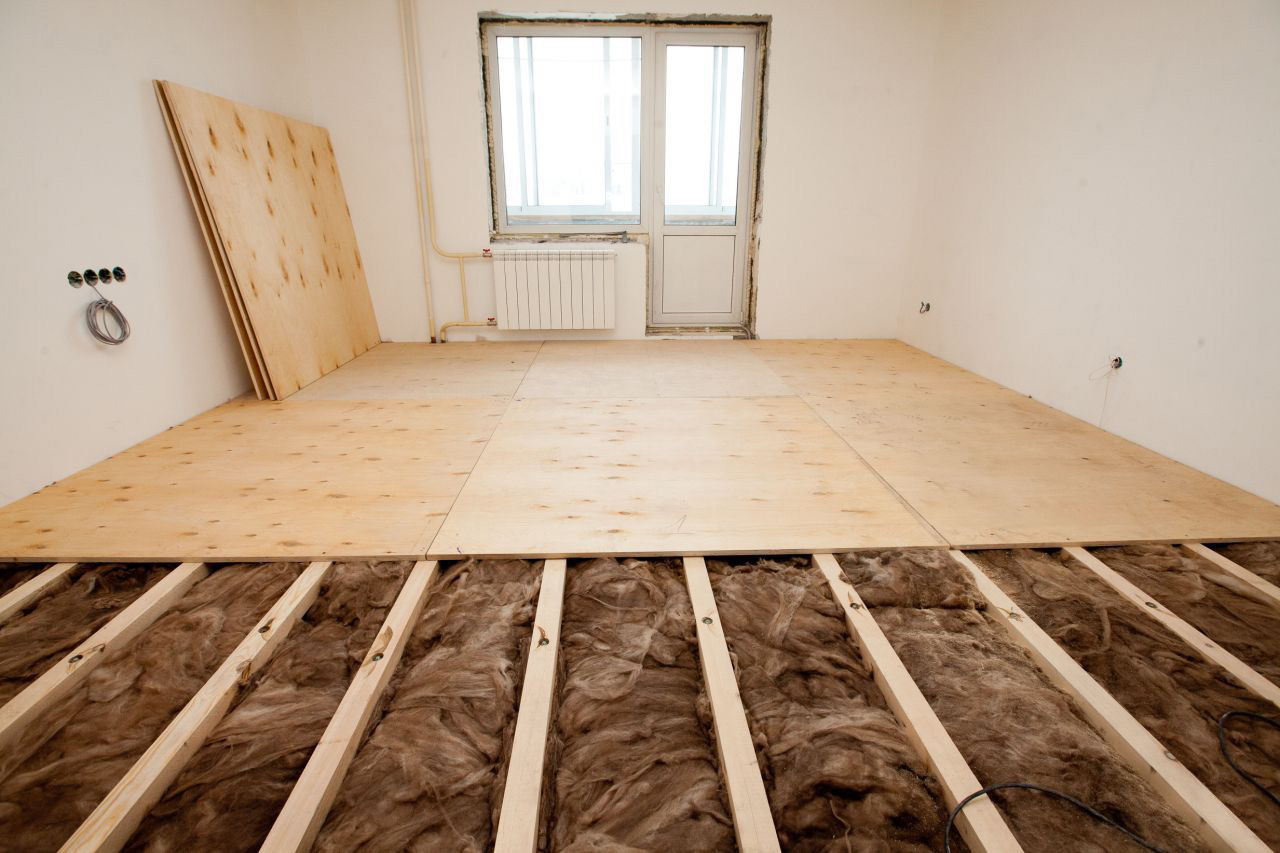
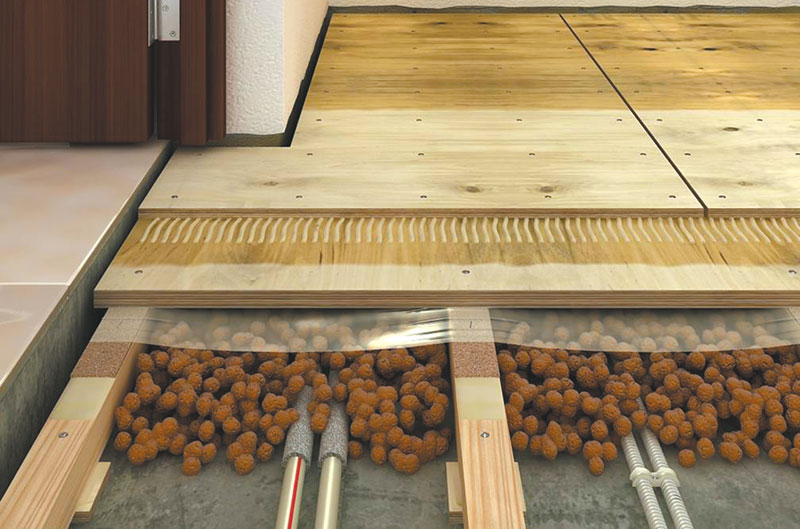
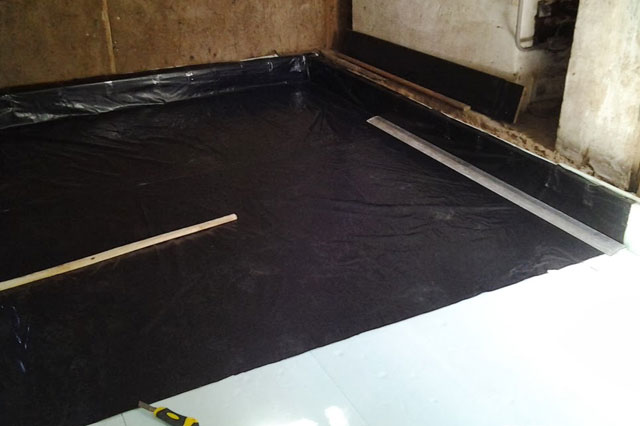
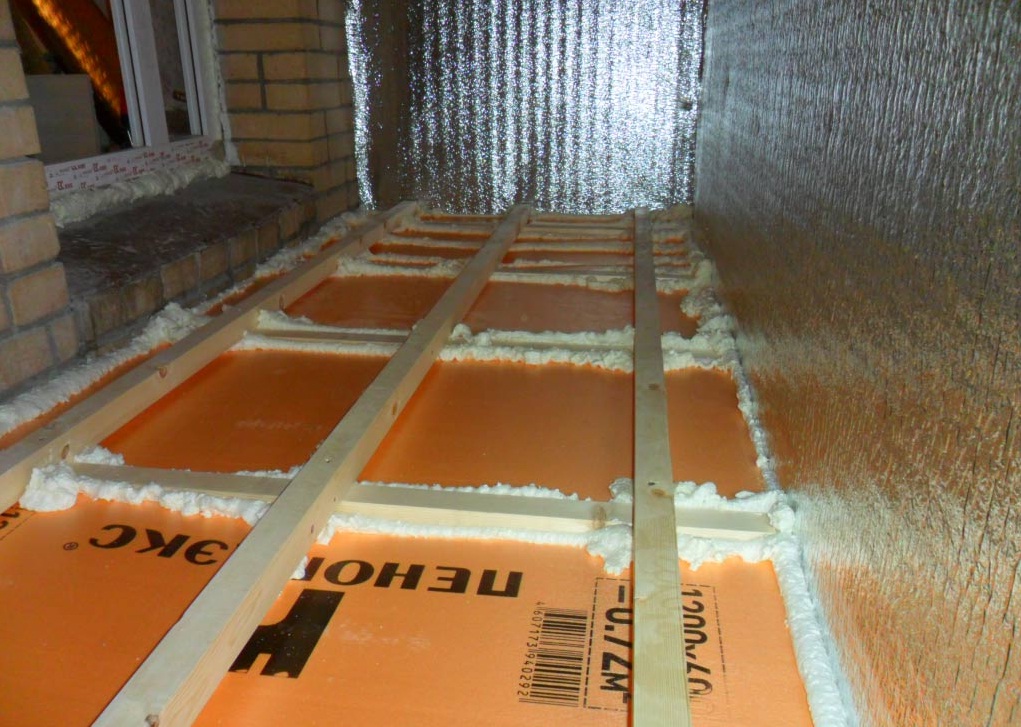
The easiest option is the device floor on the logs. First, a waterproofing material (asphalt, roofing felt, roofing sheet, polyethylene or polymer membrane) is laid on the base. Next, lay the lag bars and put them on the level. Between them lay insulation (expanded clay, sawdust, foam, expanded polystyrene, mineral wool).
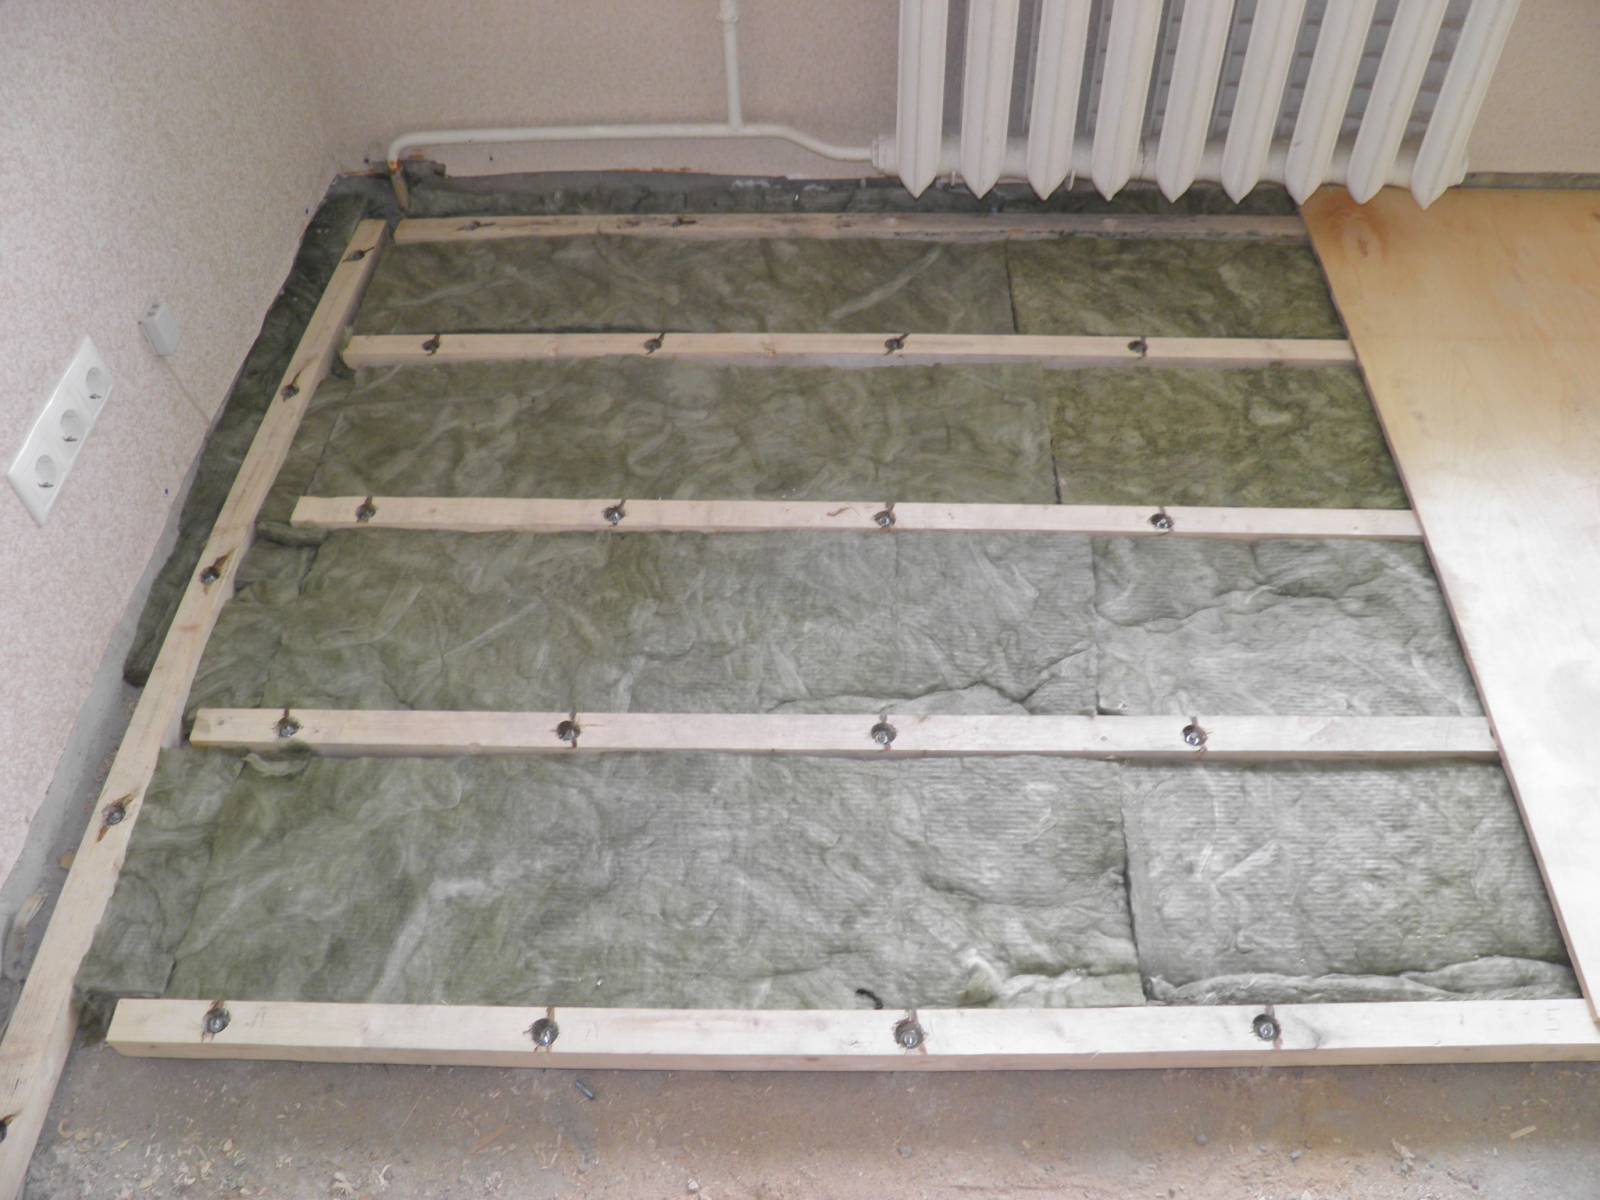
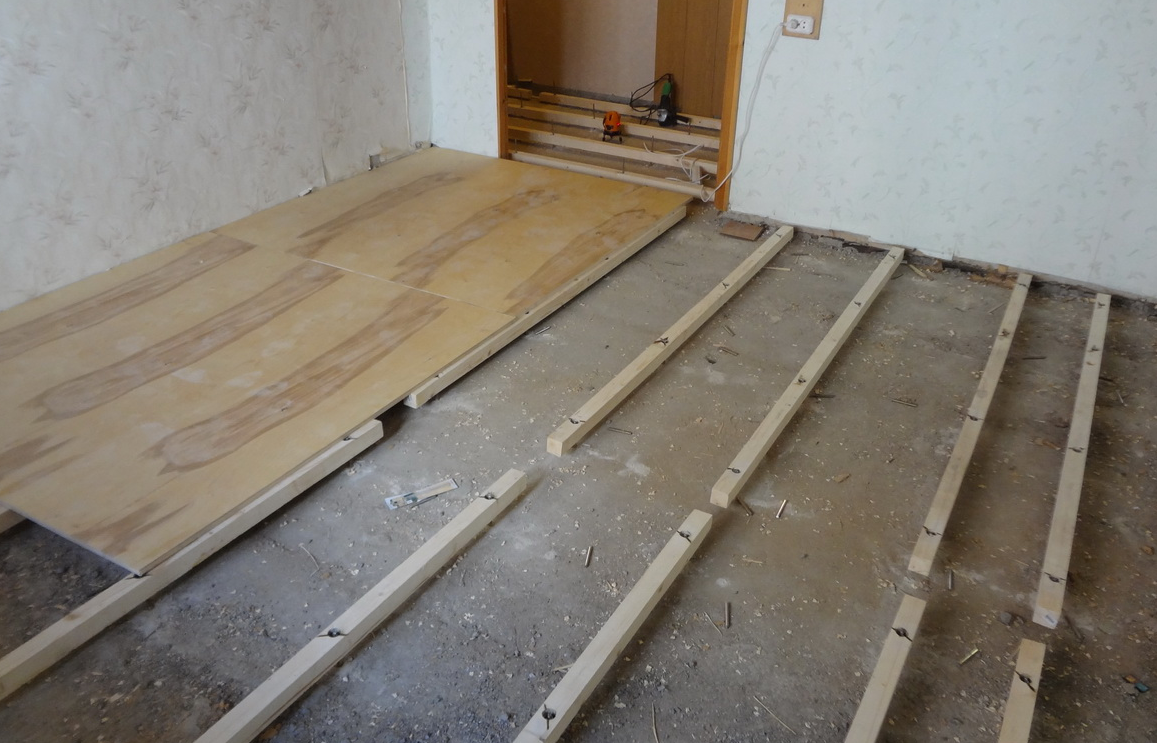
Further, a vapor-waterproofing film is laid over the overlapping lag with the obligatory gluing of the joints, which is attached to the logs by a bar. Floorboards are laid on top.
On the ground
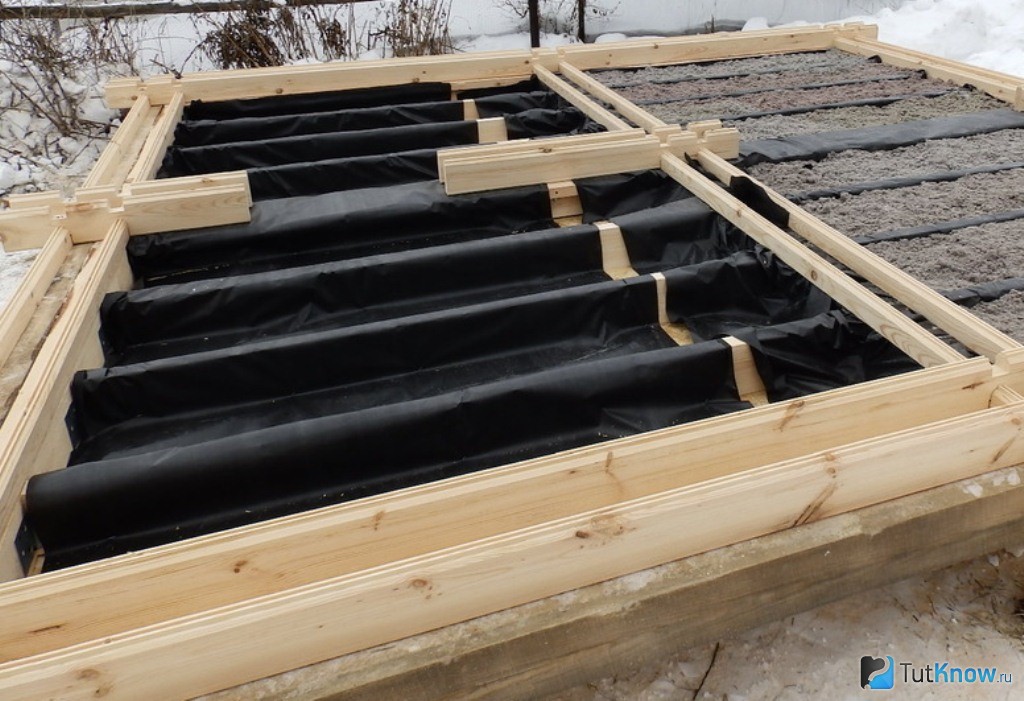
This is a variant of the so-called cold floor. It is more suitable for warm climatic conditions or for arranging the floor in country houses for summer living. Before starting work, the fertile soil layer is removed, the ground is tamped down and covered with rubble, then clay is poured and tamped down. It is important to remember that the height of the bed should be three times the height of the lag.
Lags are treated with an antiseptic solution and embedded in the bedding with a mandatory attachment to the foundation base. After that lay floorboards.
There is also a warmed version of the device of the floor on the ground. To do this, they also remove fertile soil and tamp the soil. Next, cover the soil with a layer of waterproofing. Next, pour the rubble and pour it with cement milk.
After the cement has set, the waterproofing is again laid and the gypsum-fiber (GFL) or wood-fiber boards (FIB) are laid. Poured on top of expanded clay and perform the coupler.Lags are installed on the coupler, on which a floorboard is nailed.
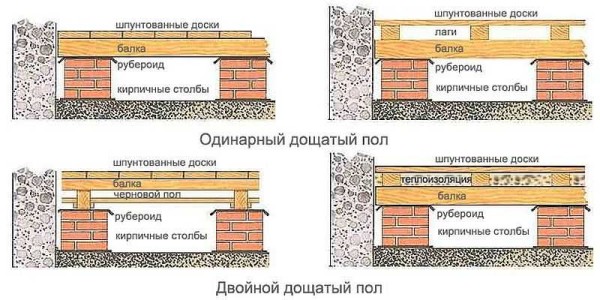
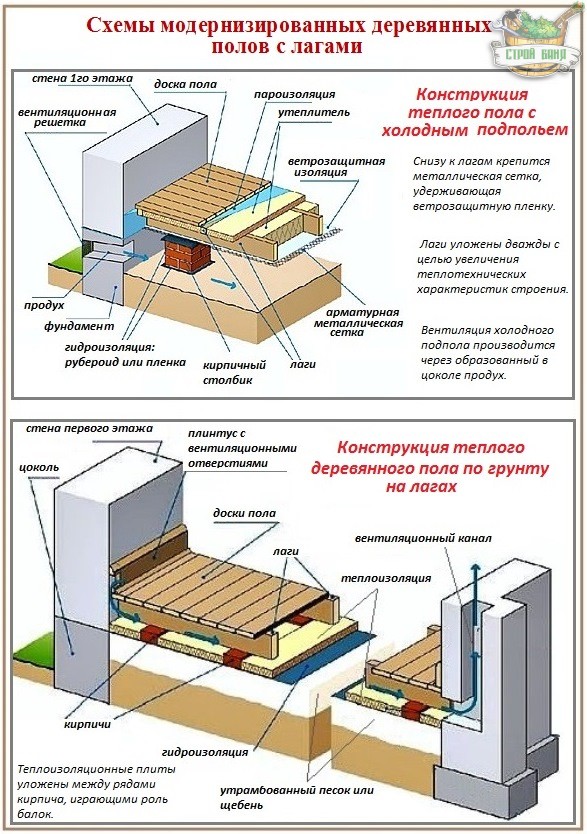
With the underground
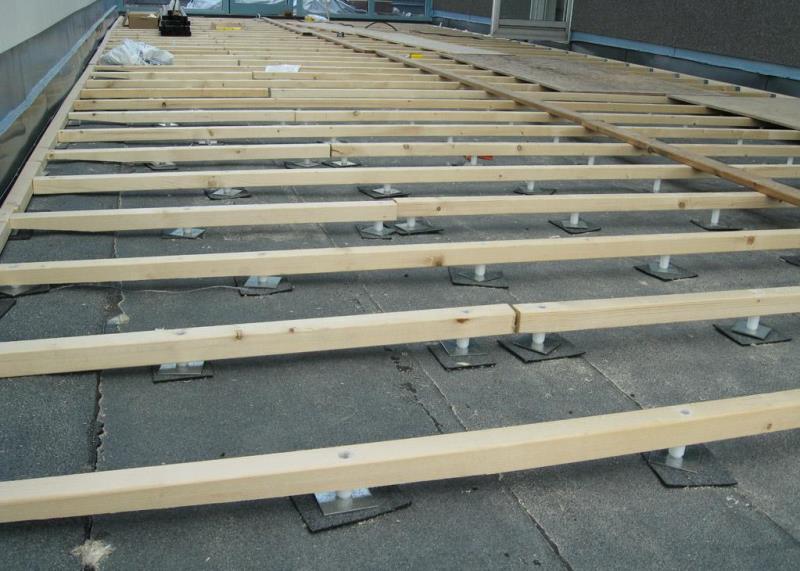
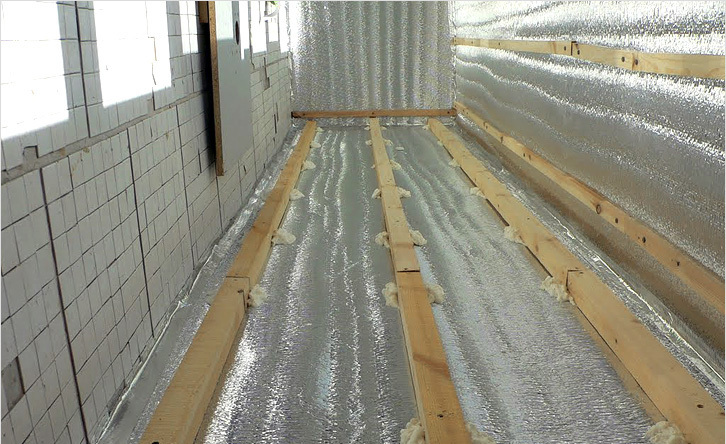
A ventilated underground is created when lags are stacked on columns (with a strip foundation) or made hanging (with pile-foundation foundations), when there is not too much distance between the support points. The floor can be cold or insulated. To insulate the underfloor, a non-moisture wicking insulation such as foam plastic, expanded clay, foamed polypropylene or foamed polyethylene is placed on a layer of waterproofing material.
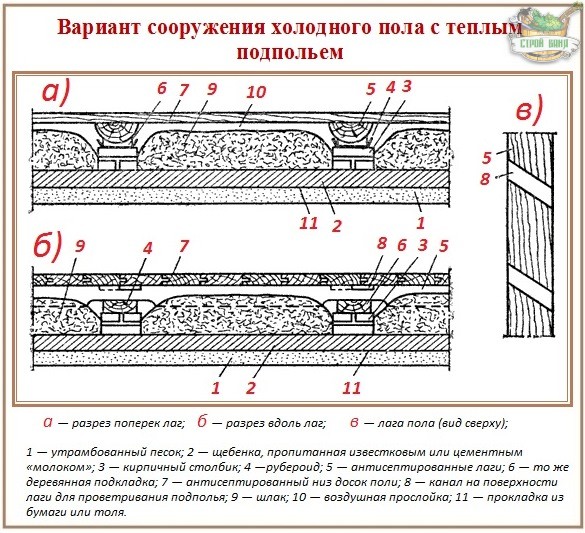
At the same time from the top level of insulation to the beginning of the subfloor should be a distance of at least 50 mm. The floor structure itself may have a double or single floor of the boards, be warmed or not.
All possible options are presented in the figure below.
Materials and tools
Depending on the type of foundation, the following materials and tools may be required for arranging the floor according to lags:
- Timber with a rectangular or square section, the size of which depends on the number of support points, the size of the span and the distance between the lags.
- Concrete blocks or bricks, waterproofing material (resin or roofing material) for the device columns at the device floors with the underground.
- Antiseptic compounds and flame retardants for the treatment of wooden products.
- Crushed stone, sand, clay with the device floor on the ground.
- Expanded clay, cement (concrete), gypsum fiber board or fiberboard with the device floor on the ground with insulation.
- Insulation, the type of which is determined by the type of base of the floor.
- Paroizolyatsionny membrane, waterproofing film.
- Cranial bar and unedged board for the device of the sub floor.
- Brushes for applying antiseptics and fire retardants.
- Devices for tightening and fastening lag.
- Massive grooved edging board or plywood.
- Level and roulette.
- Jigsaw, screwdriver, wood saw, hammer.
- Nails, screws.
- Putty for leveling the floor before laying the floor covering.


Installation design
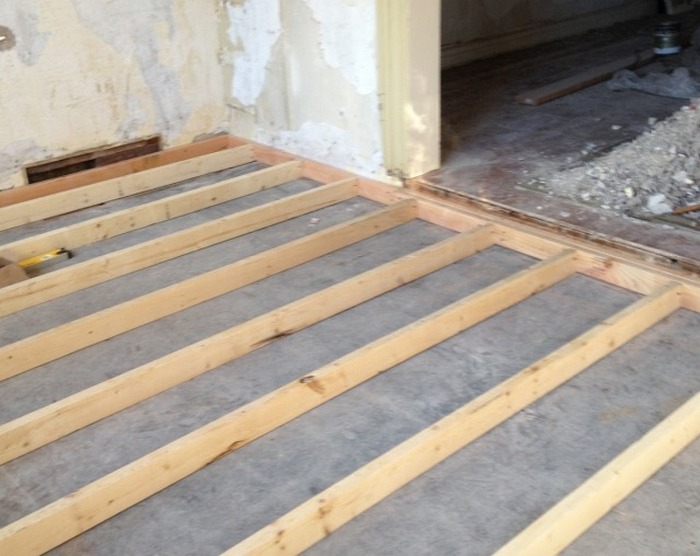
Consider an example of installing a classic floor design with a ventilated subfield.
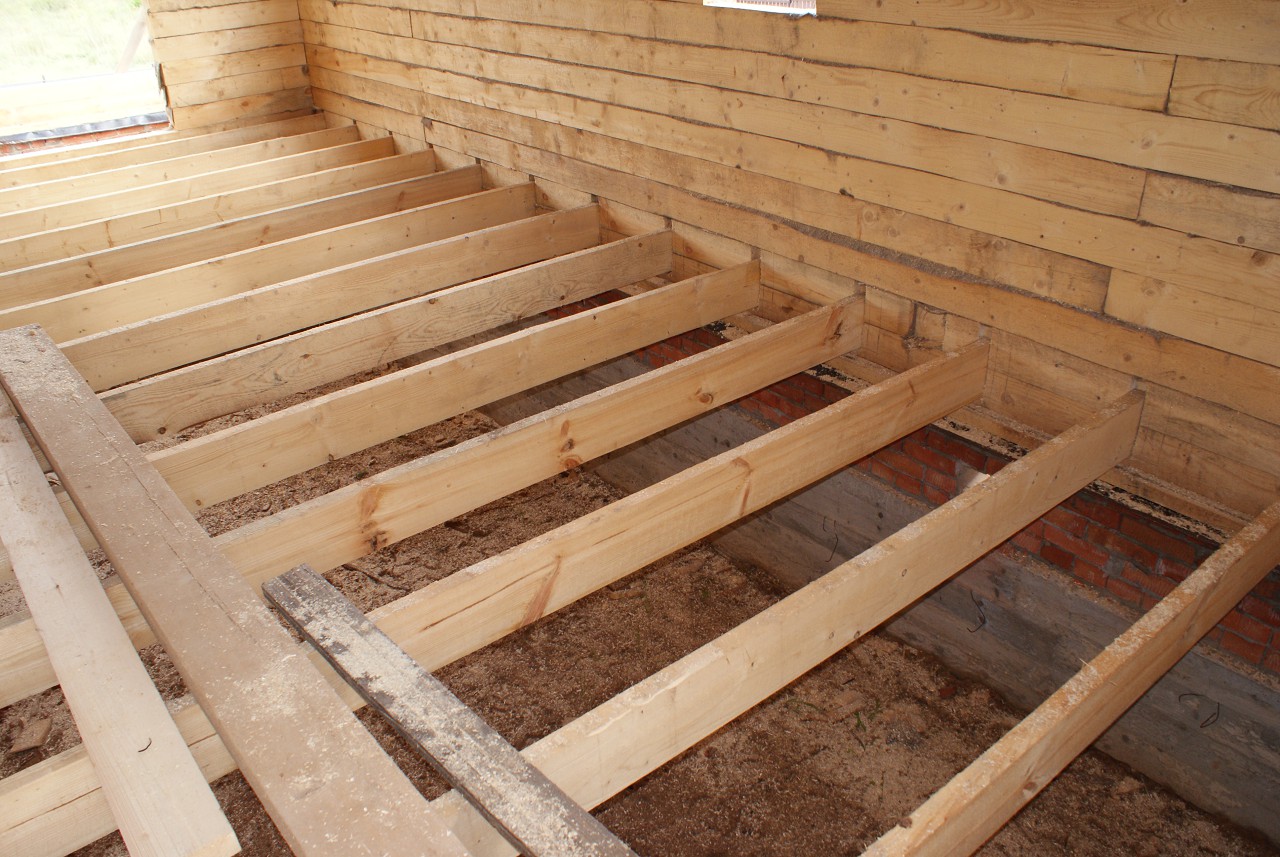
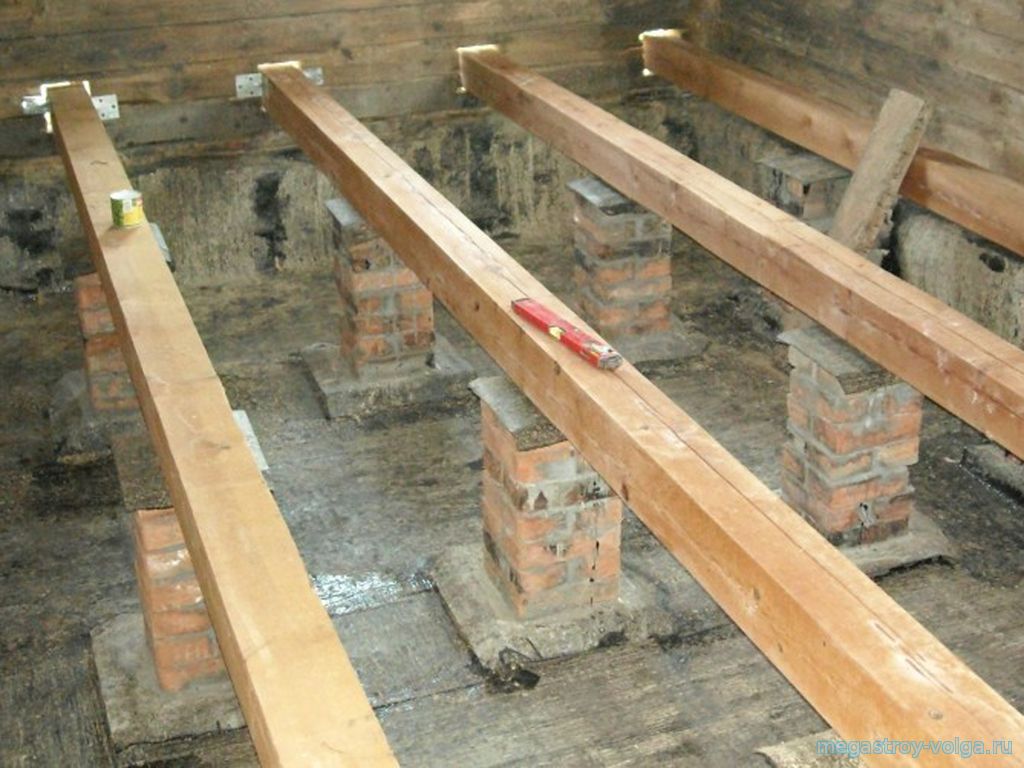
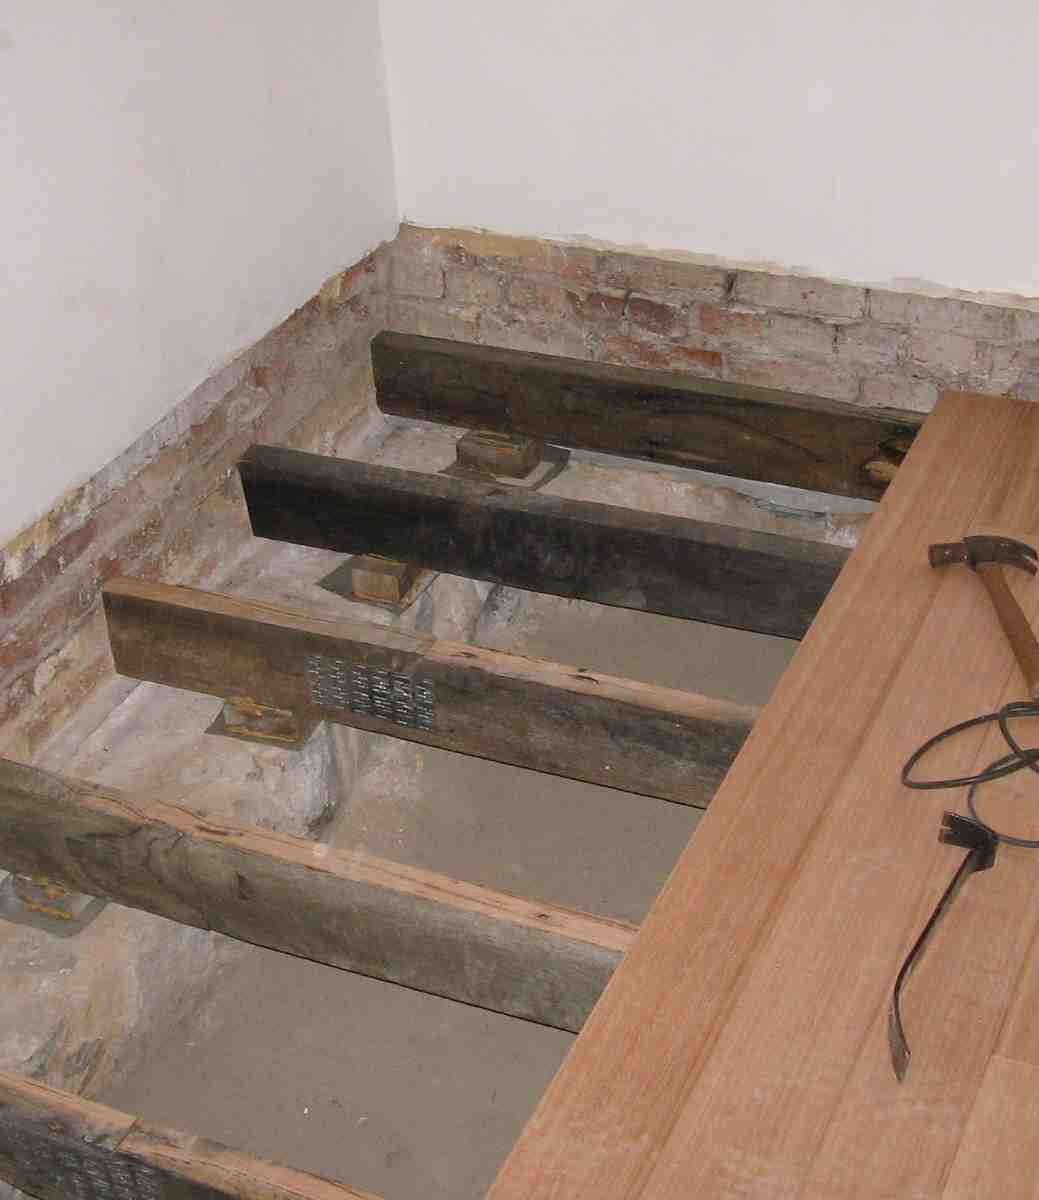
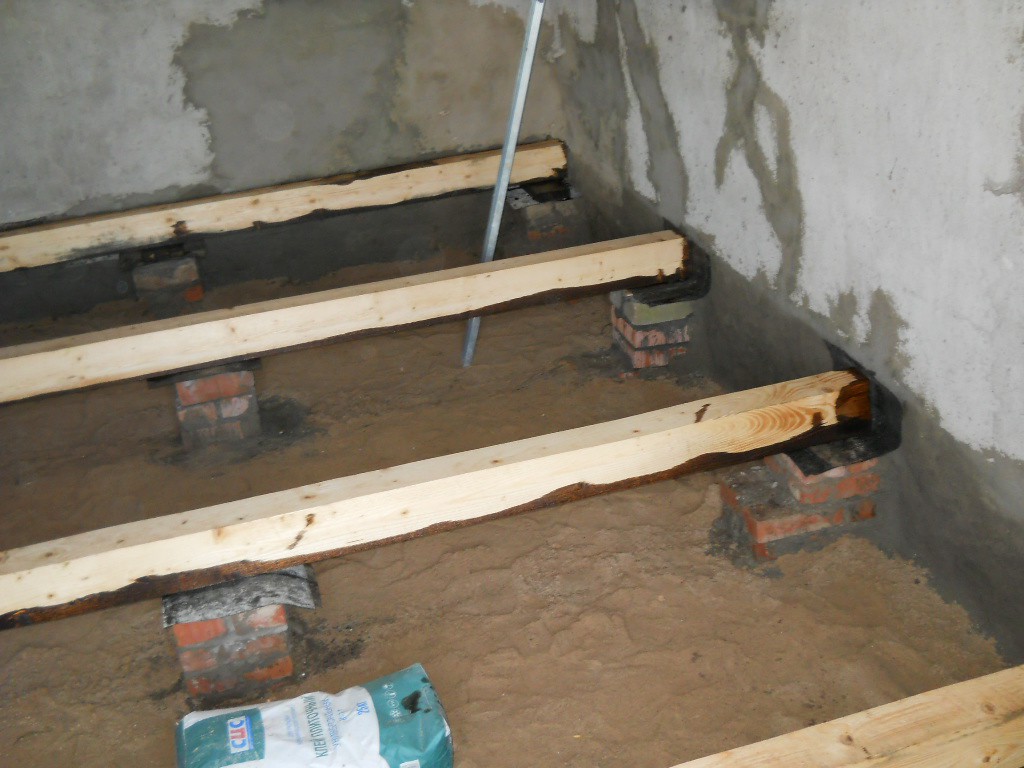
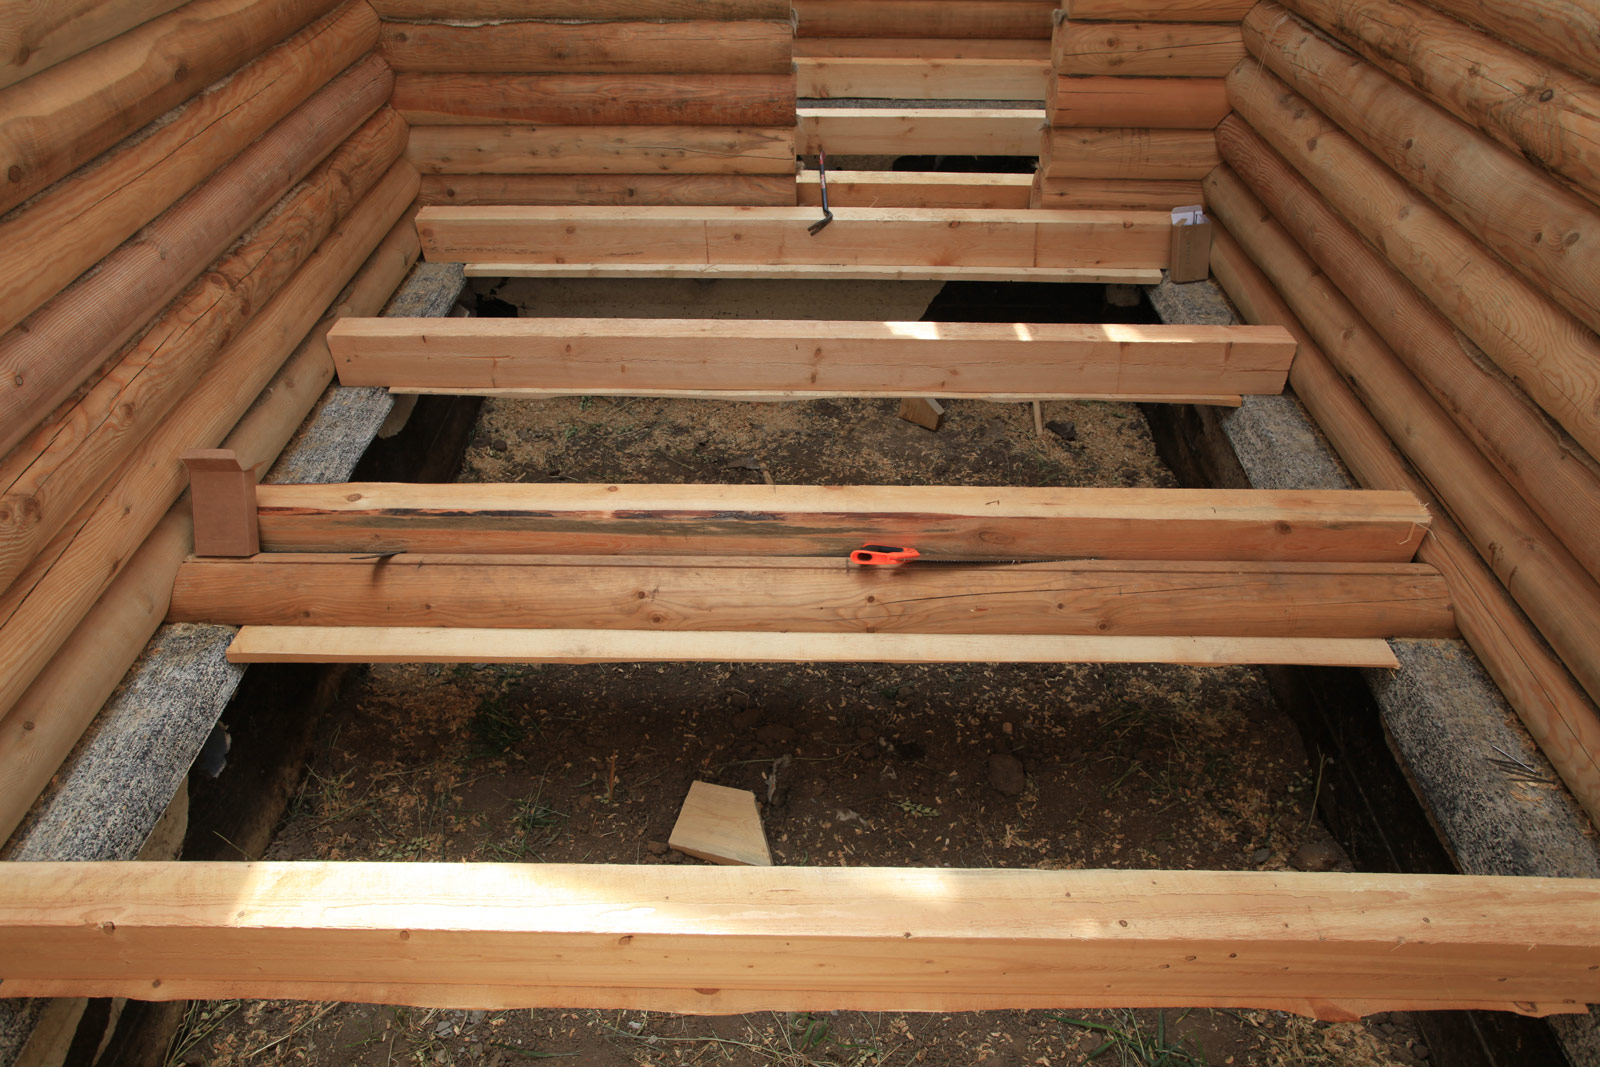
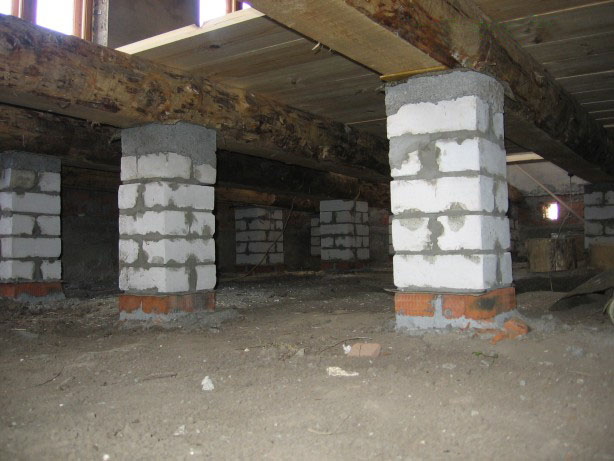
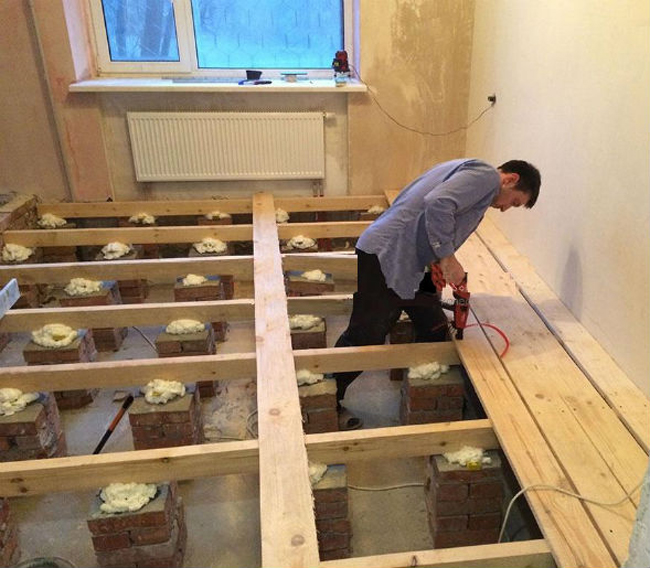
In order for the floor in a private house to serve for a long time, it is necessary that it has a high-quality, reliable basis. As a rule, logs are laid on the supporting beams laid in the foundation. In their absence, the device for the floor of the logs is complemented by work on the construction of support pillars.
First you need to correctly identify the places where the supports will be placed under the lags, and calculate the number of columns on the basis that the distance between them should be 0.7-1 m.The pitch between the supports depends on the dimensions of the cross-section of the beam for log. The larger they are, the greater the distance between the supports.
To determine the locations of the supports on the embedded beams at a specified distance, marks are made and threads are pulled over them. The same actions are done on the perpendicular side of the underground. The points of intersection of the threads and will be the installation points of the pillars.
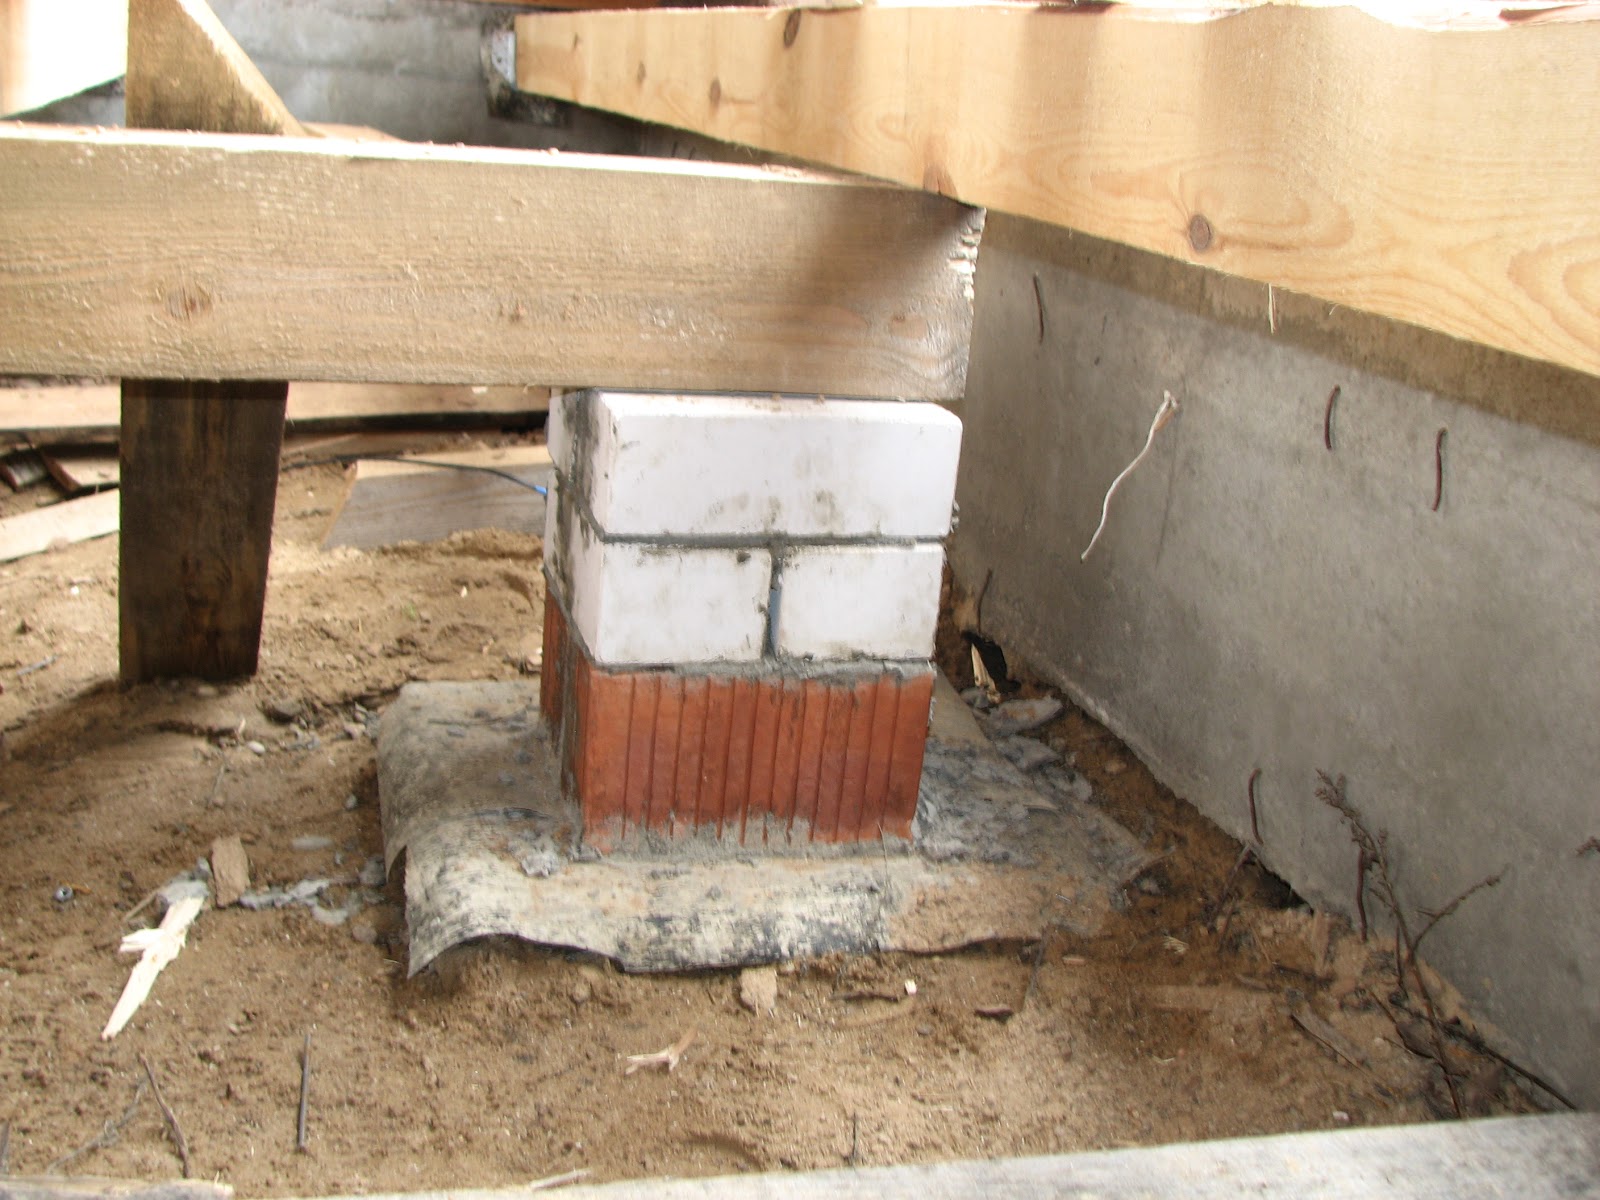
Usually the pillars are in the form of cubes. At the same time, it is necessary to understand that the higher the bar, the more stable, and, therefore, the wider it should be. The columns under the logs are made of brick or concrete blocks. You can also use resistant cuts of large wood.
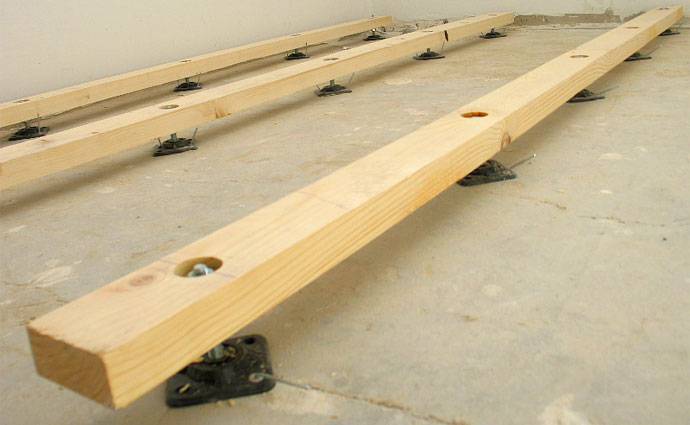
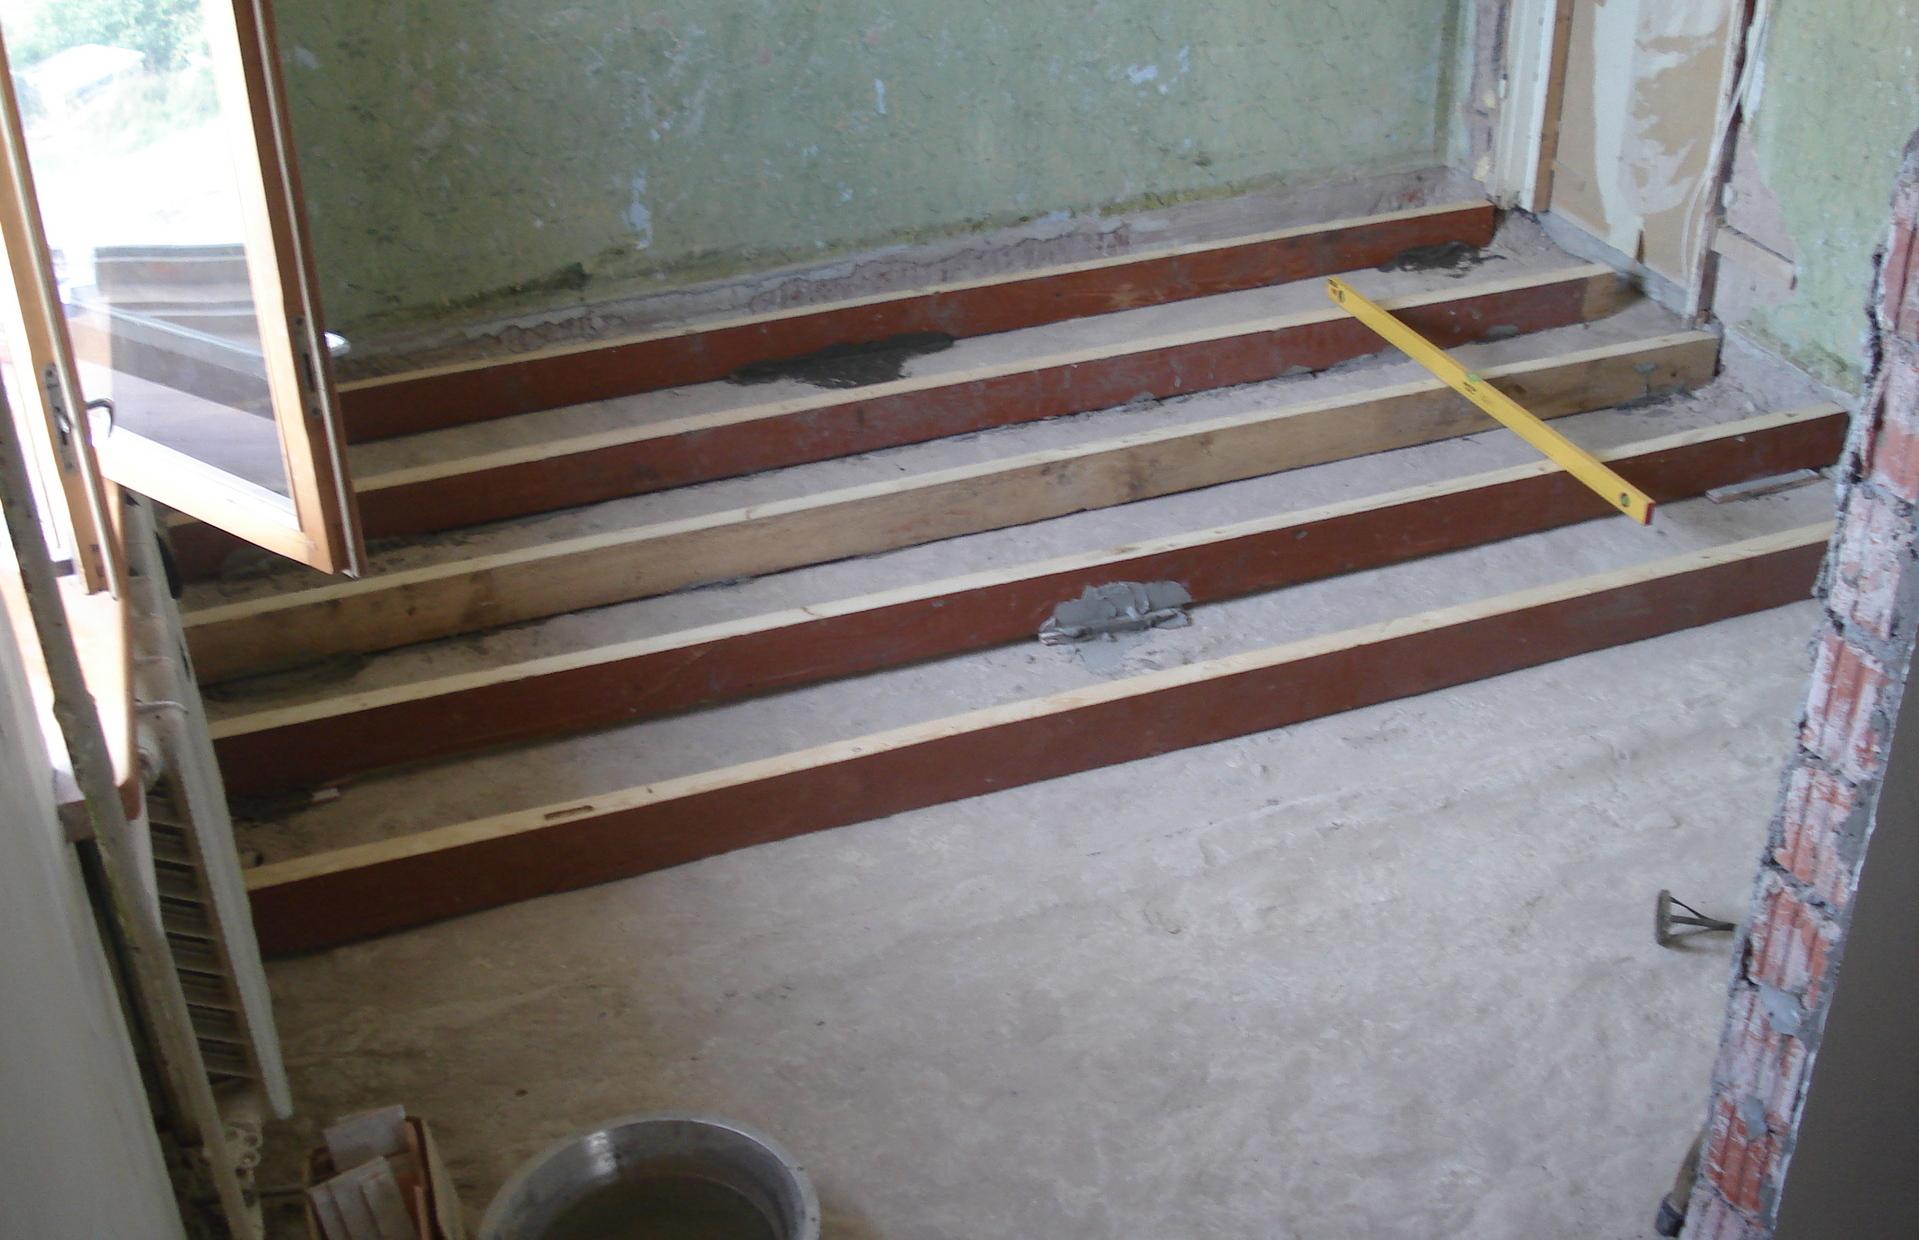
On the support fit ruberoid in two layers or another type of waterproofing. The space between bedside tables is filled with slag, expanded clay or just covered with a thick plastic wrap. After the above preparatory work proceed to the laying of beams, which should be firmly fixed to the supports. The beams are laid directly lags.
In that case, if the length of the lag or beam is less than the length of the room, then they are joined to each other on support cabinets and fastened with self-tapping screws.Lags and beams are attached to the supports with special metal angles.
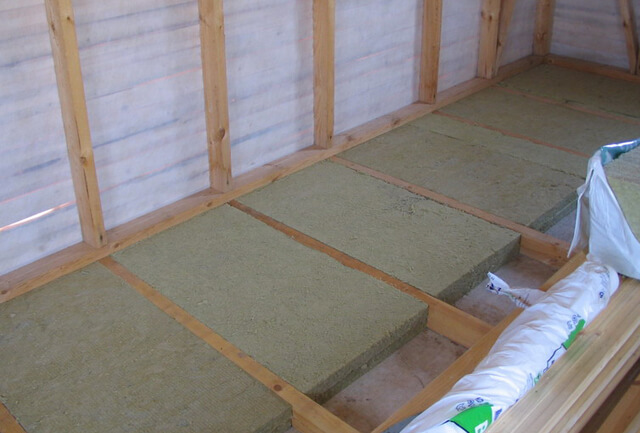
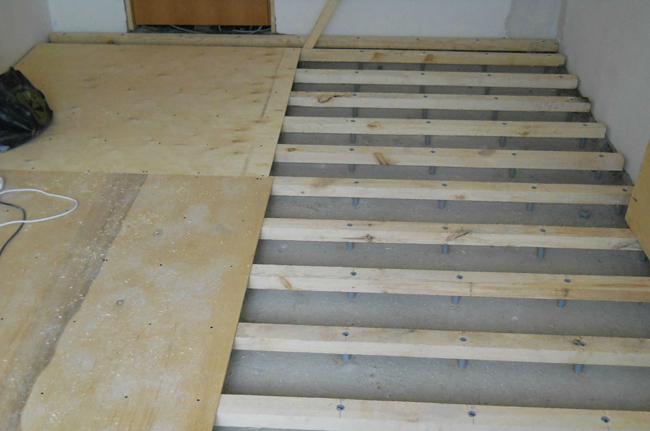
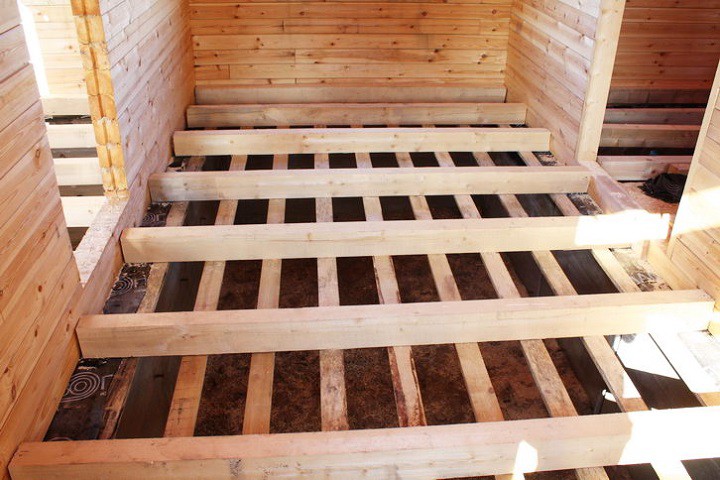
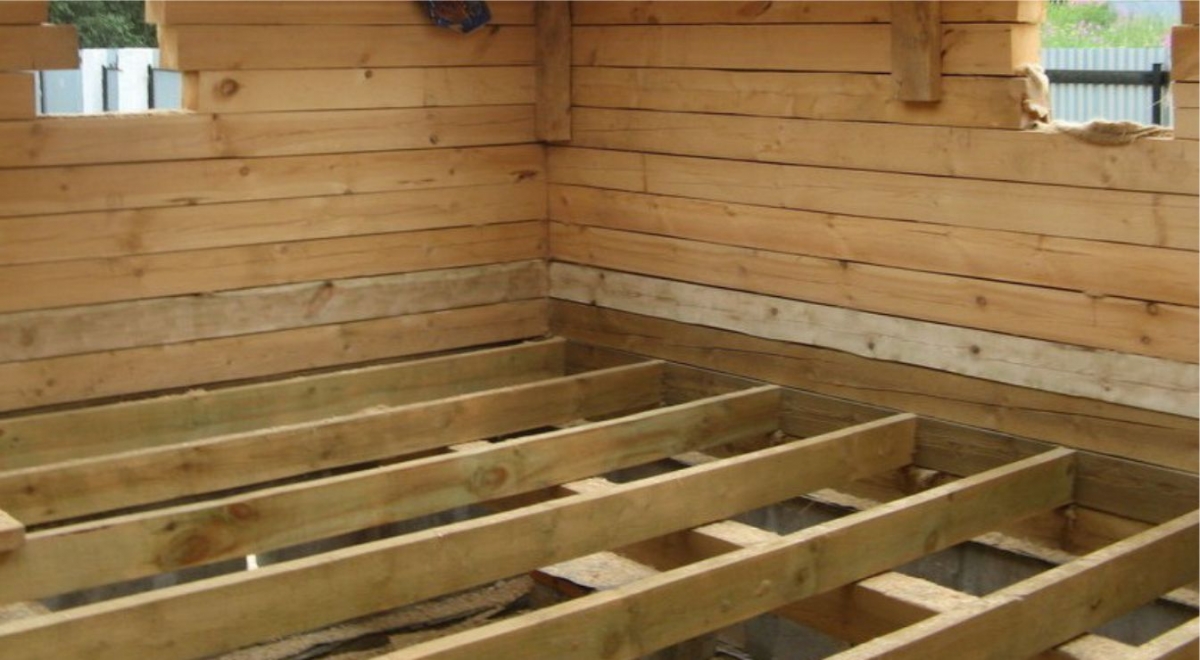
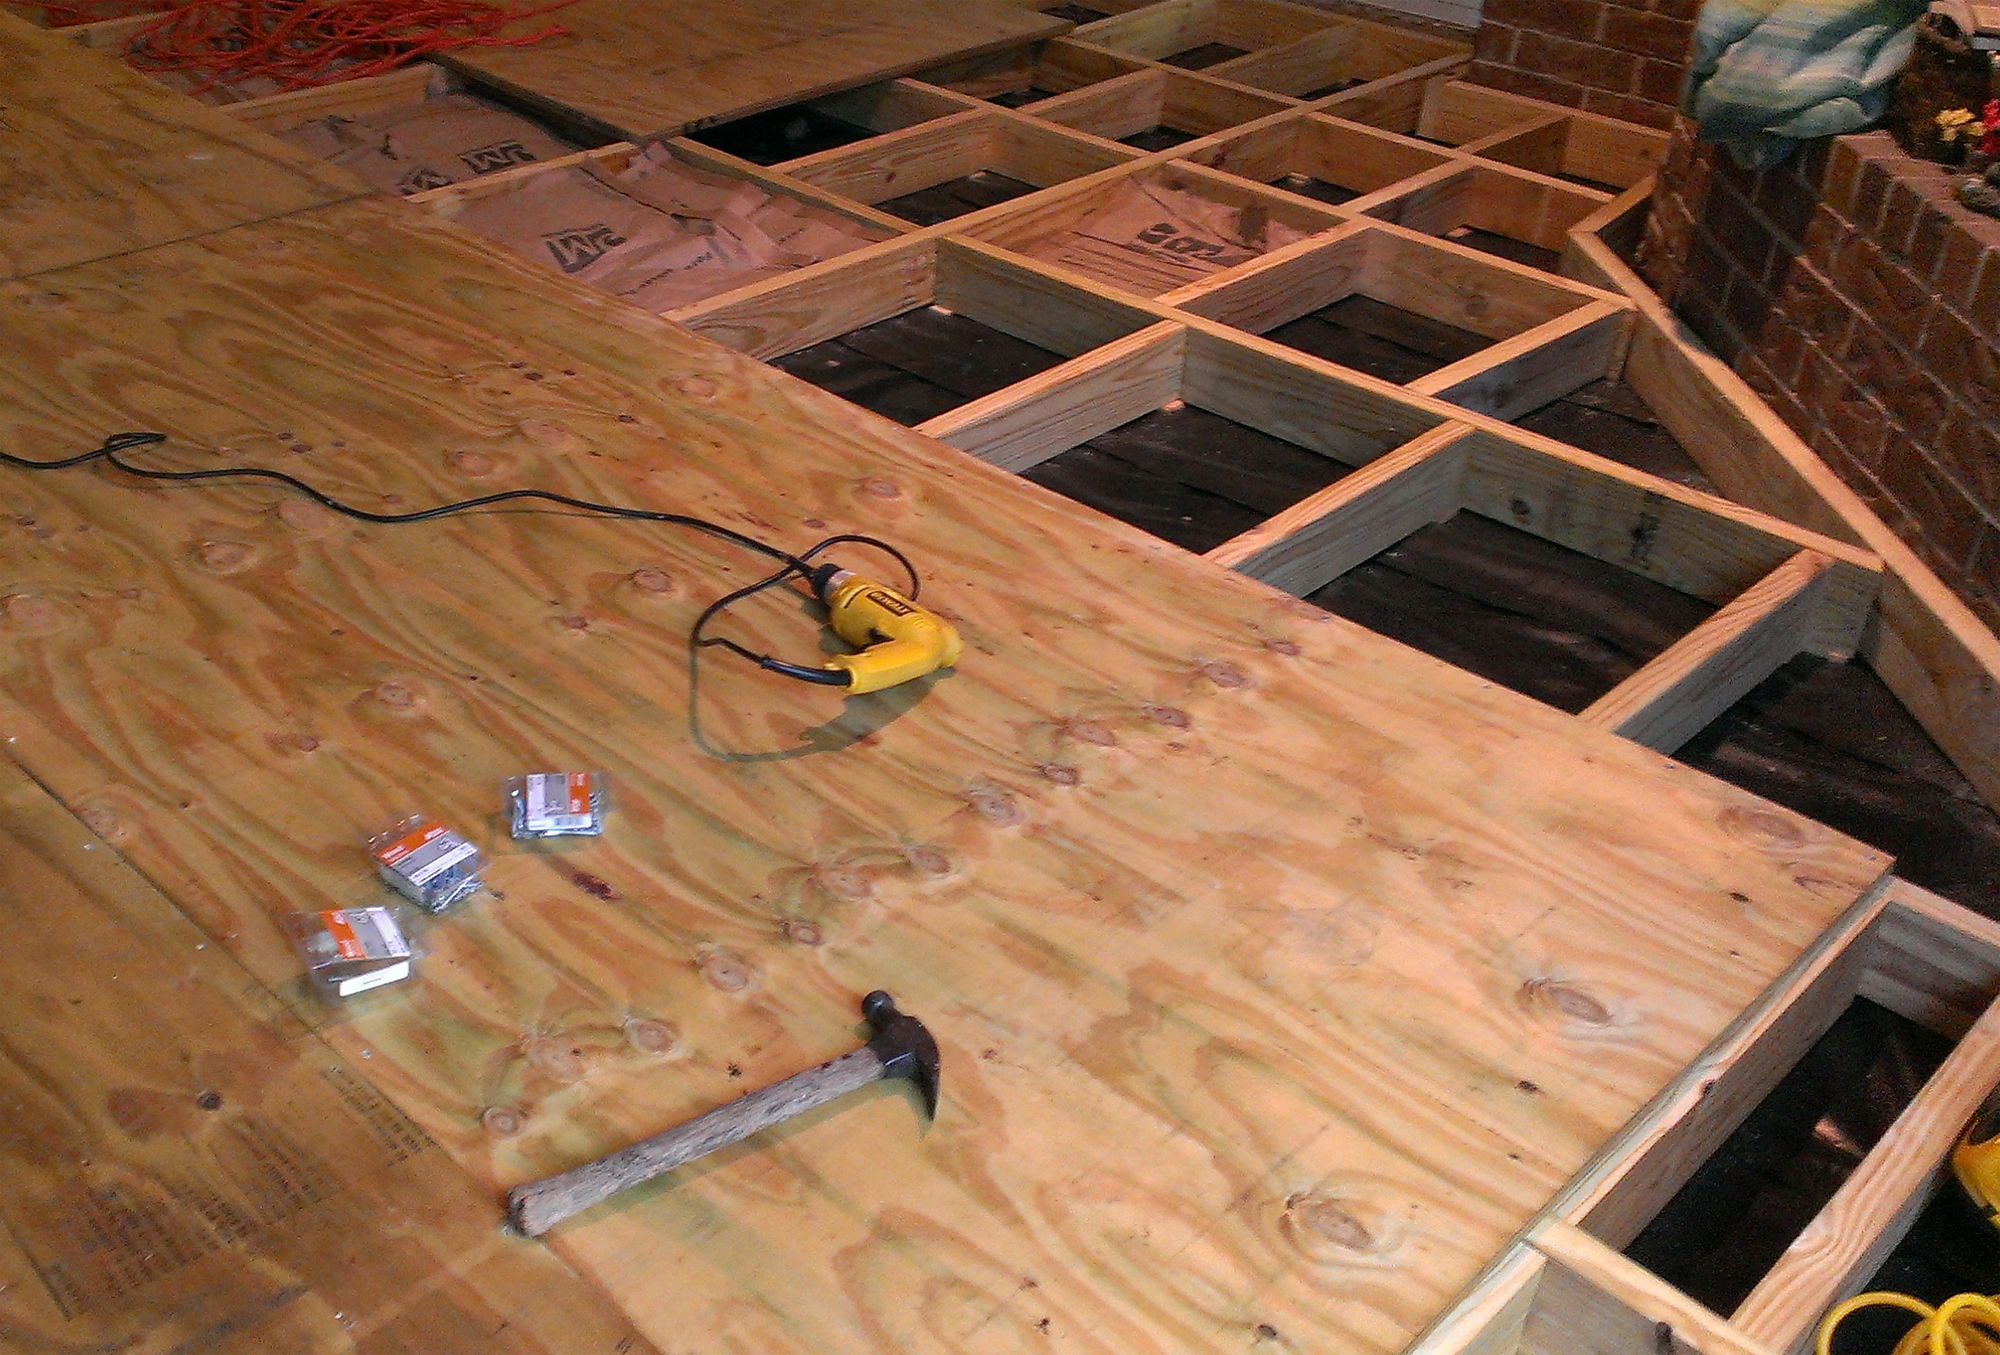
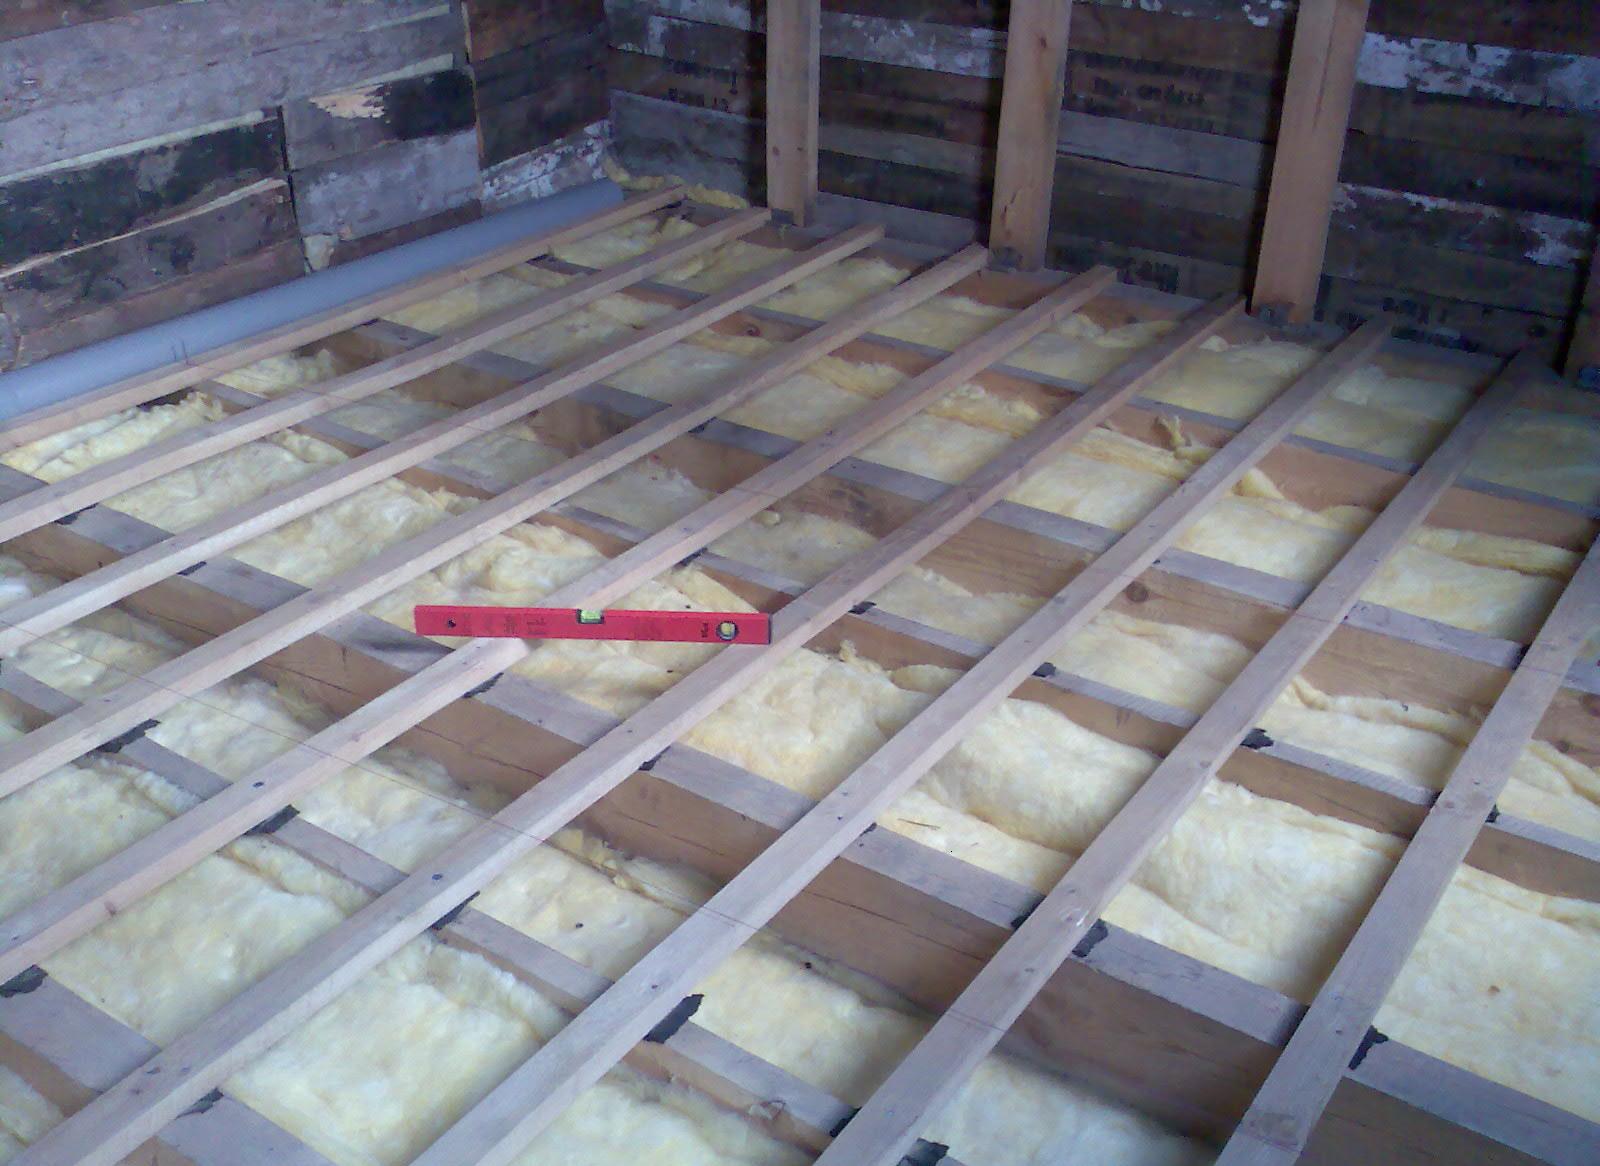
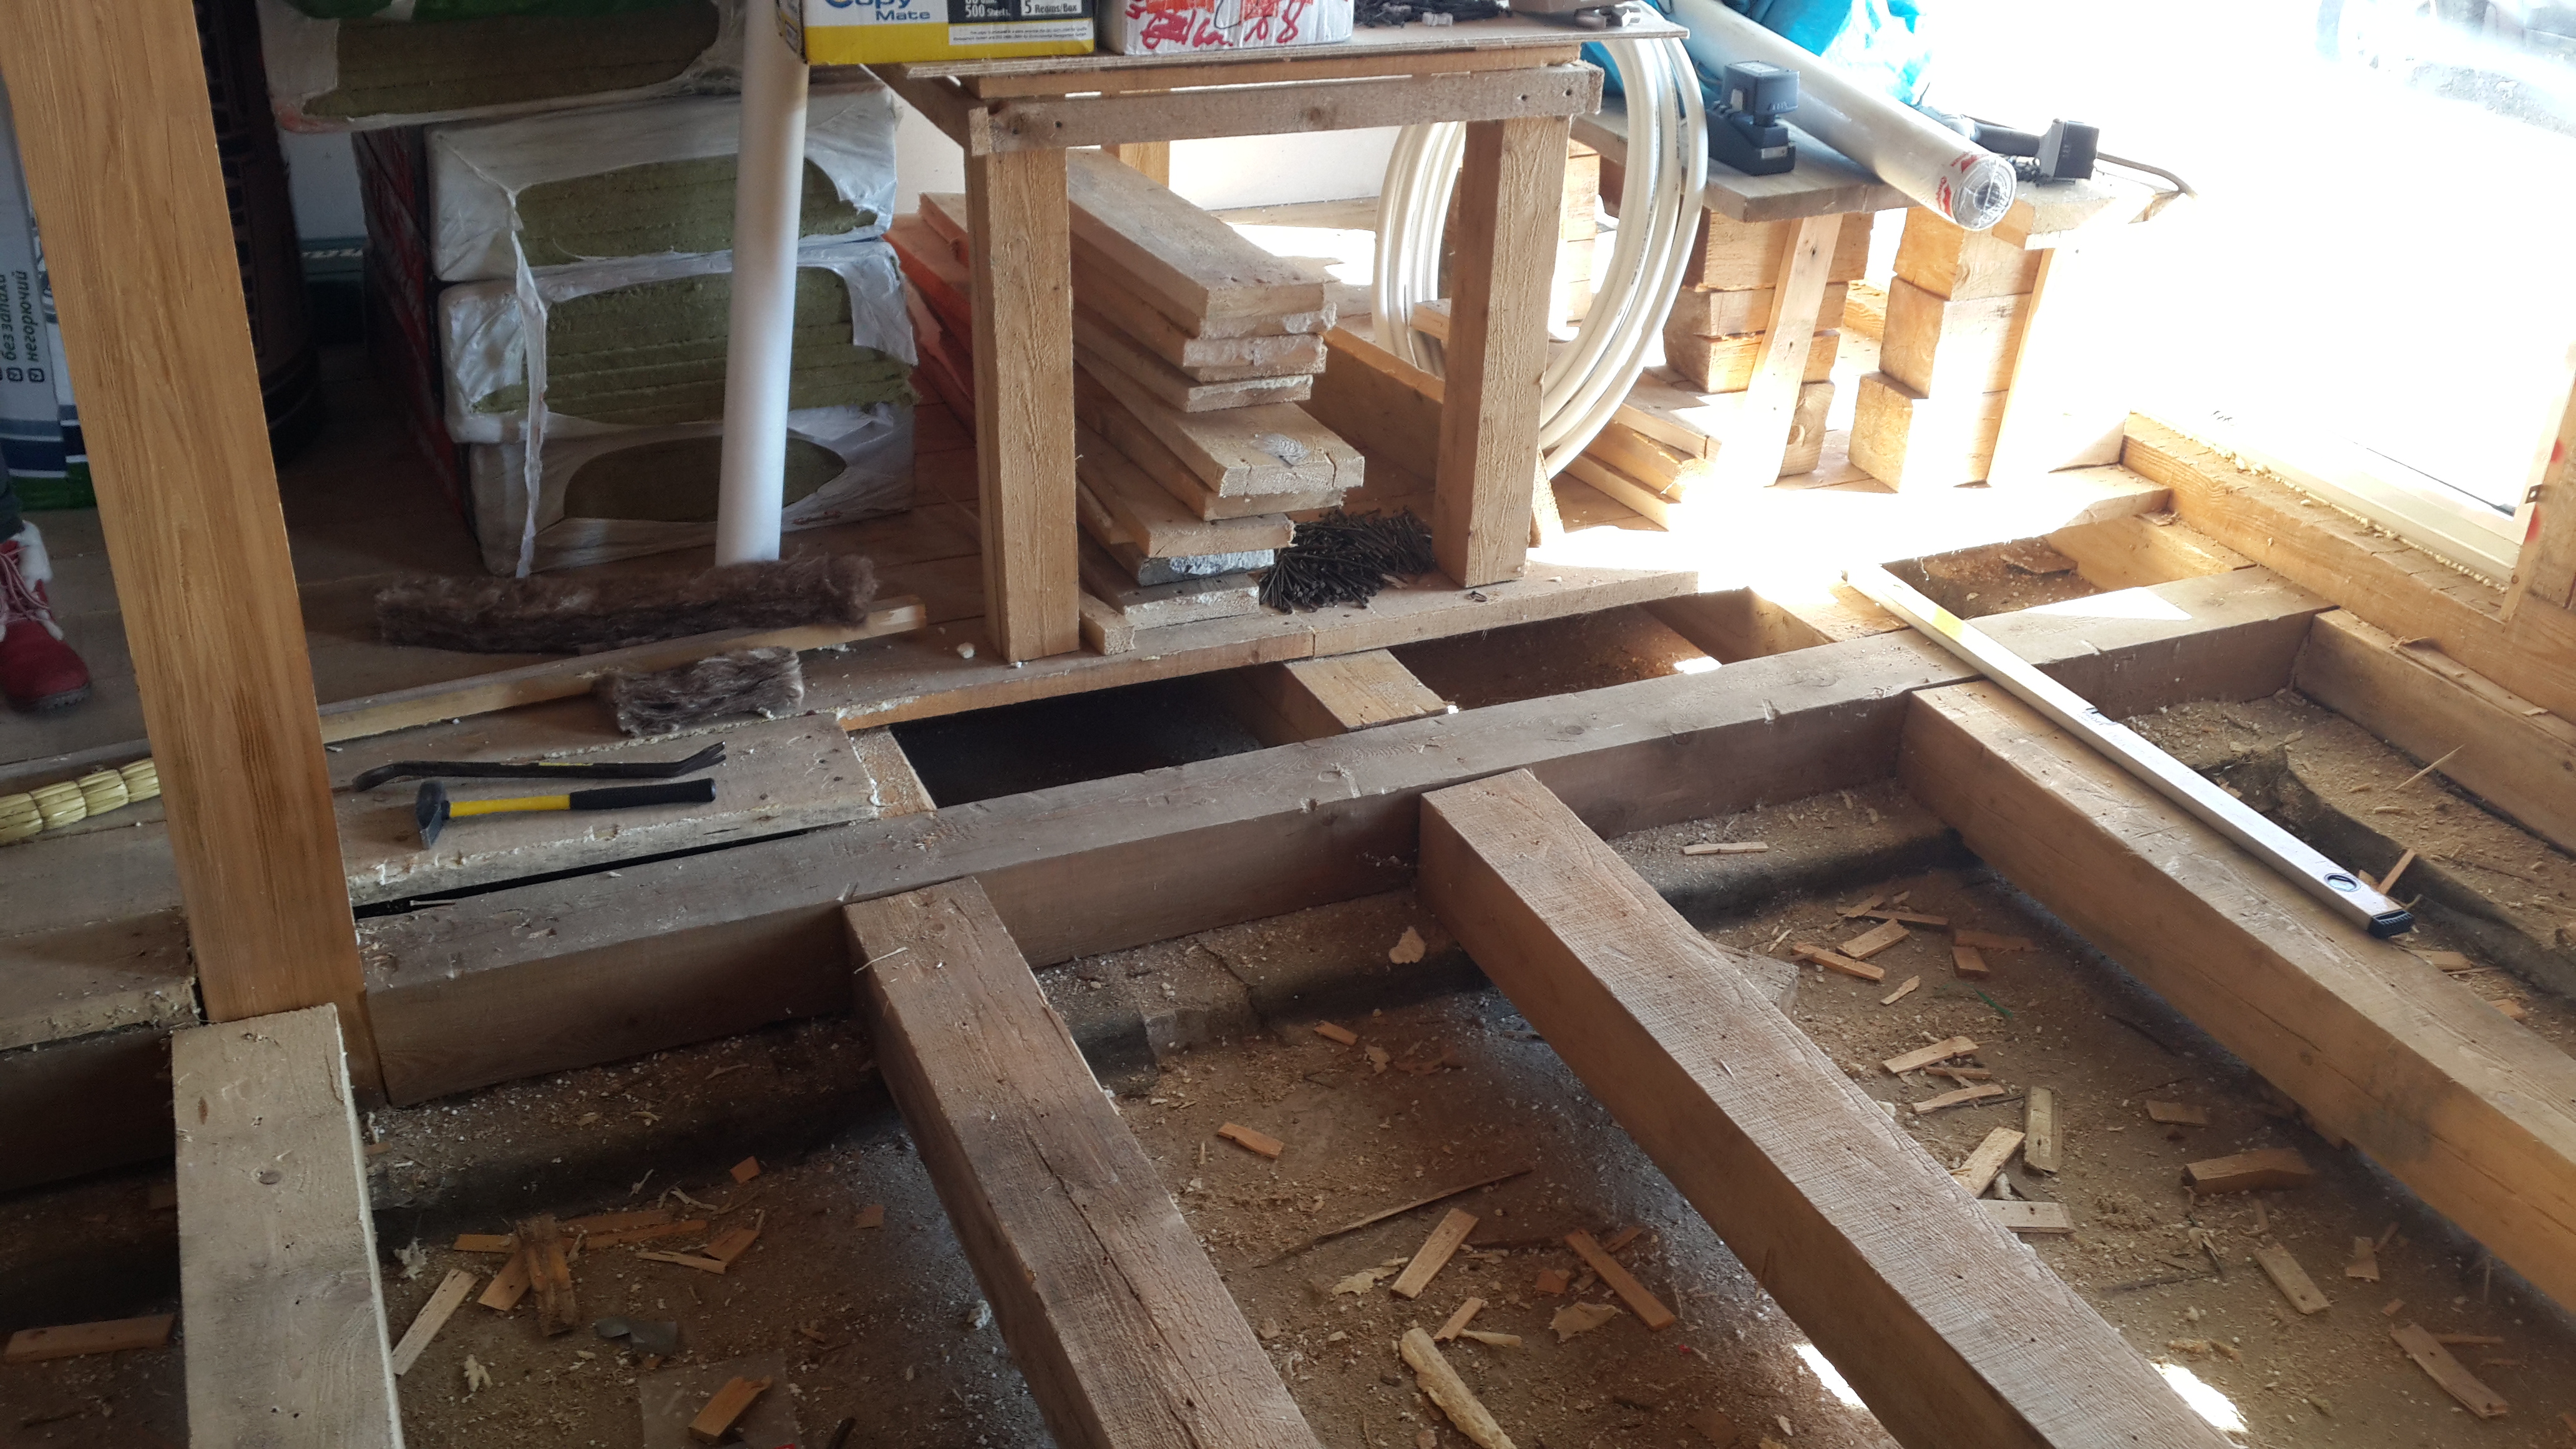
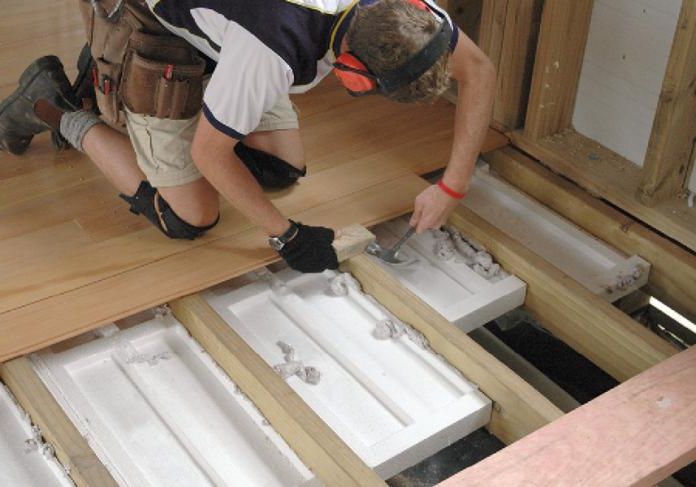
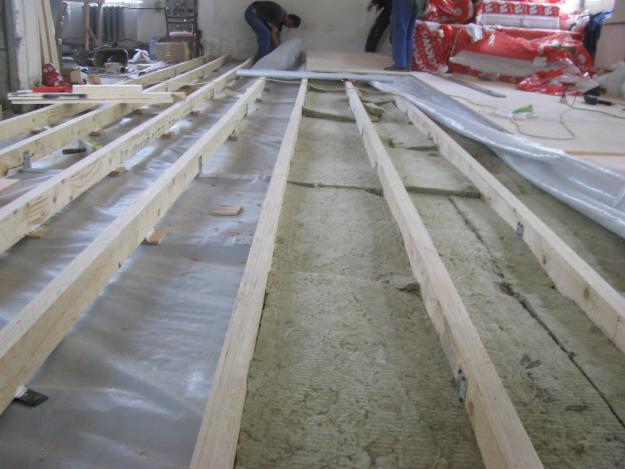
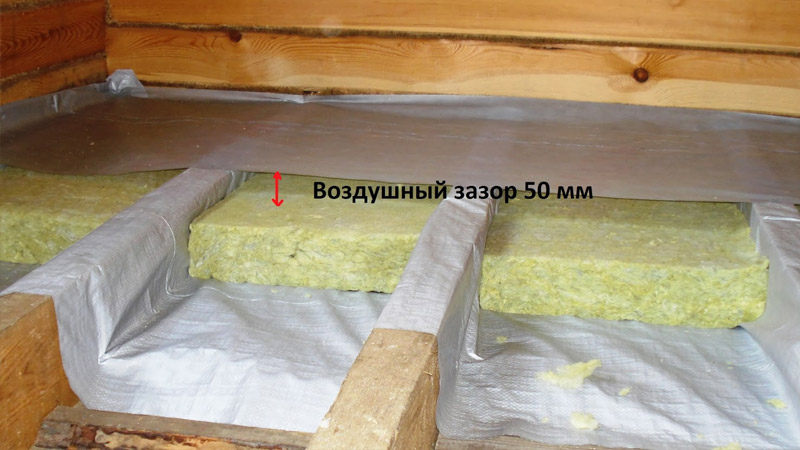
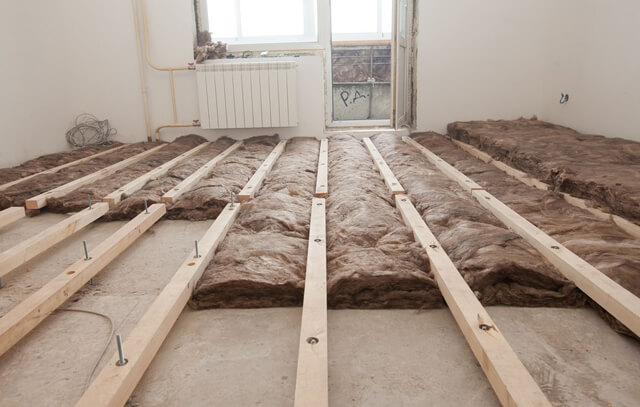
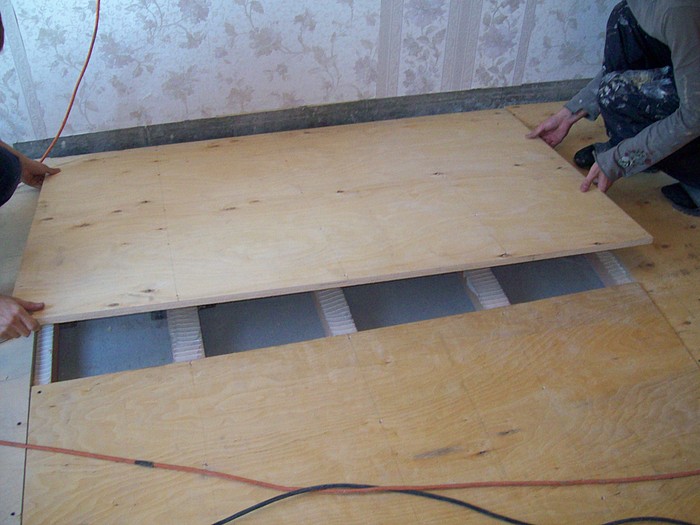
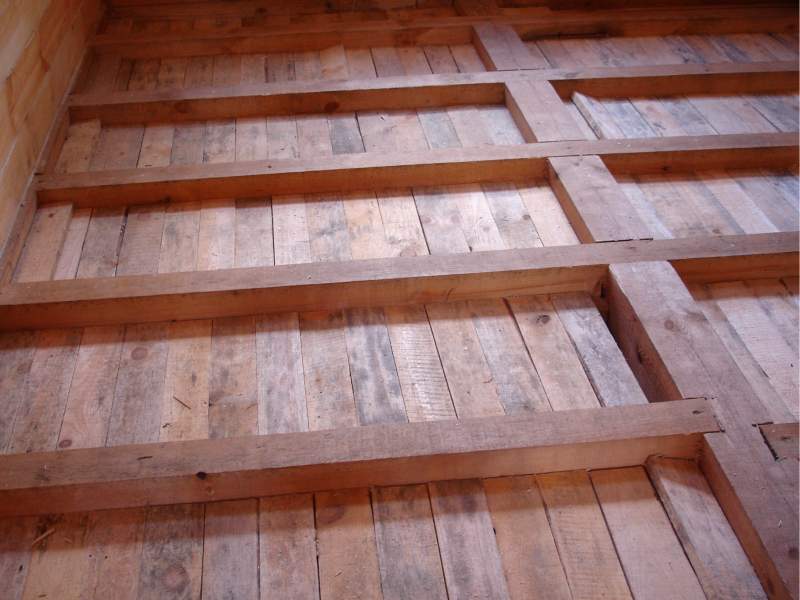
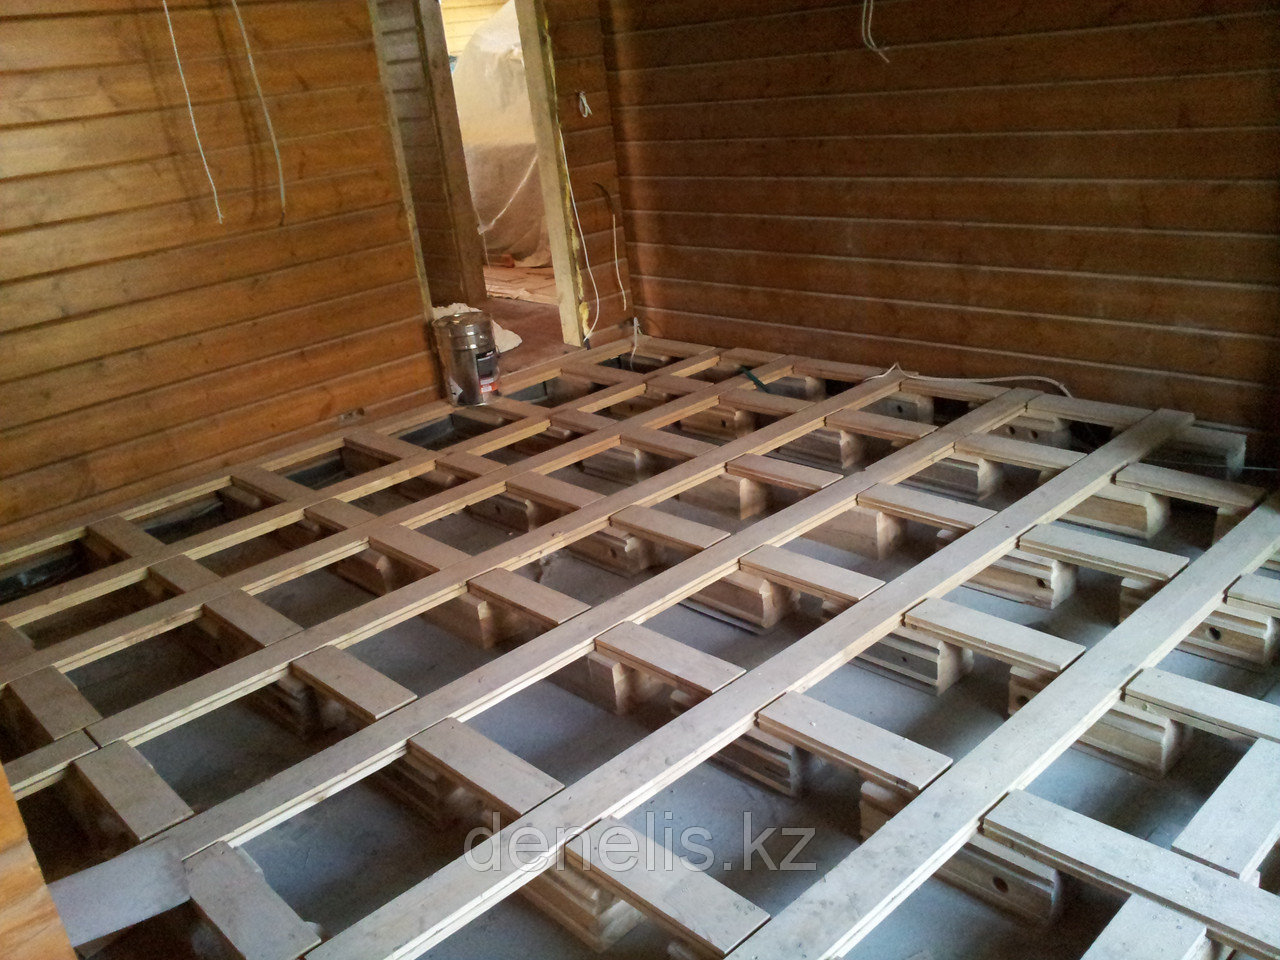
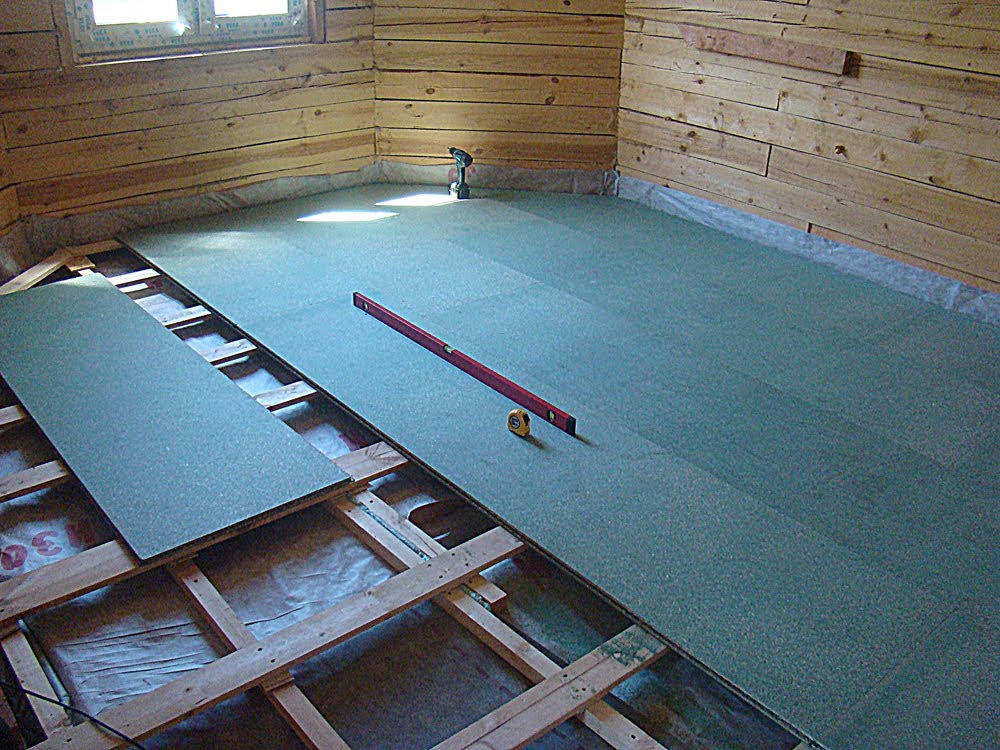
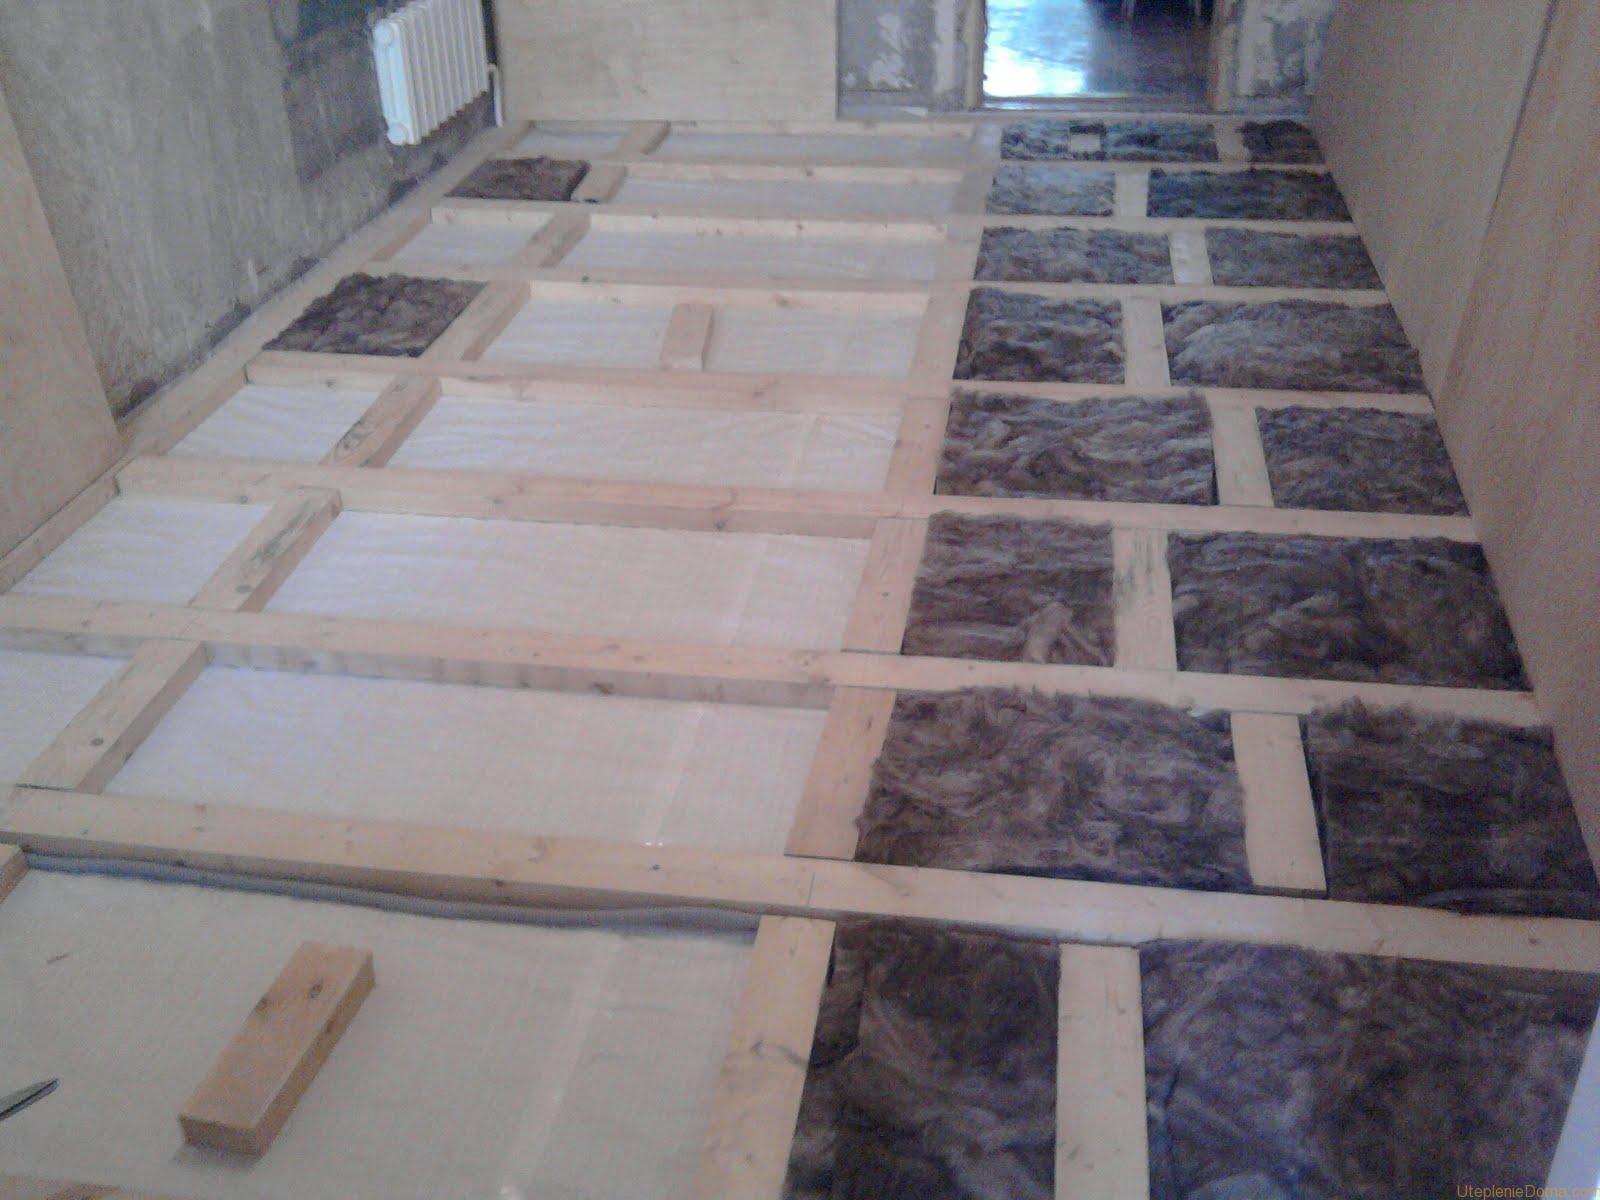
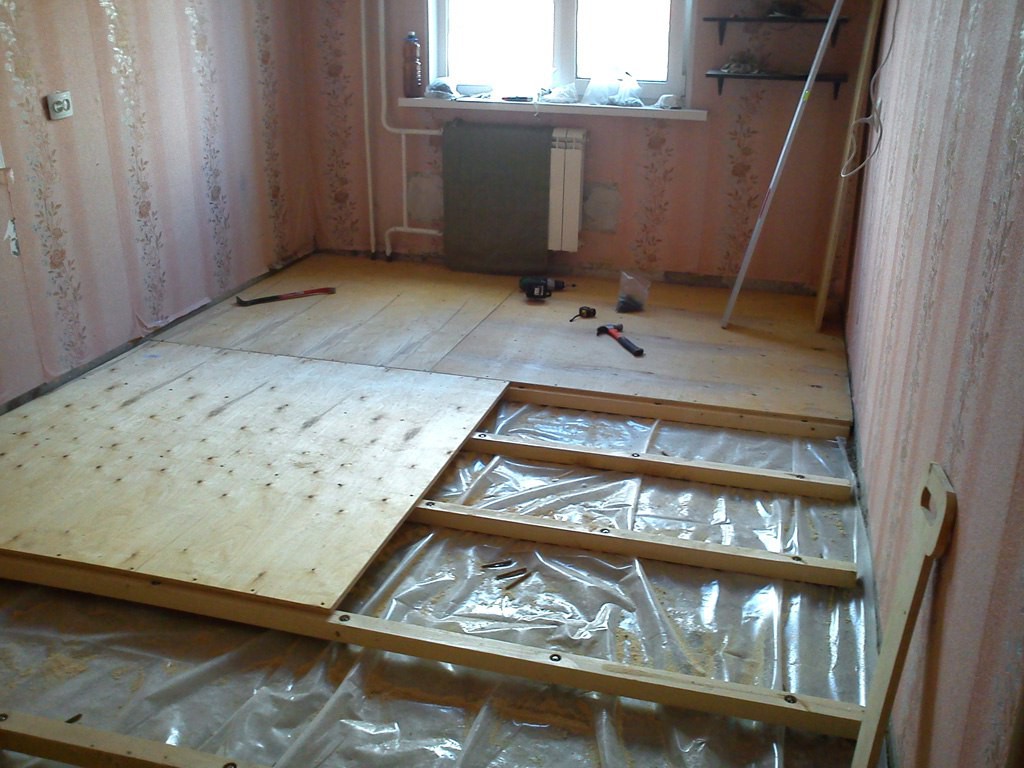
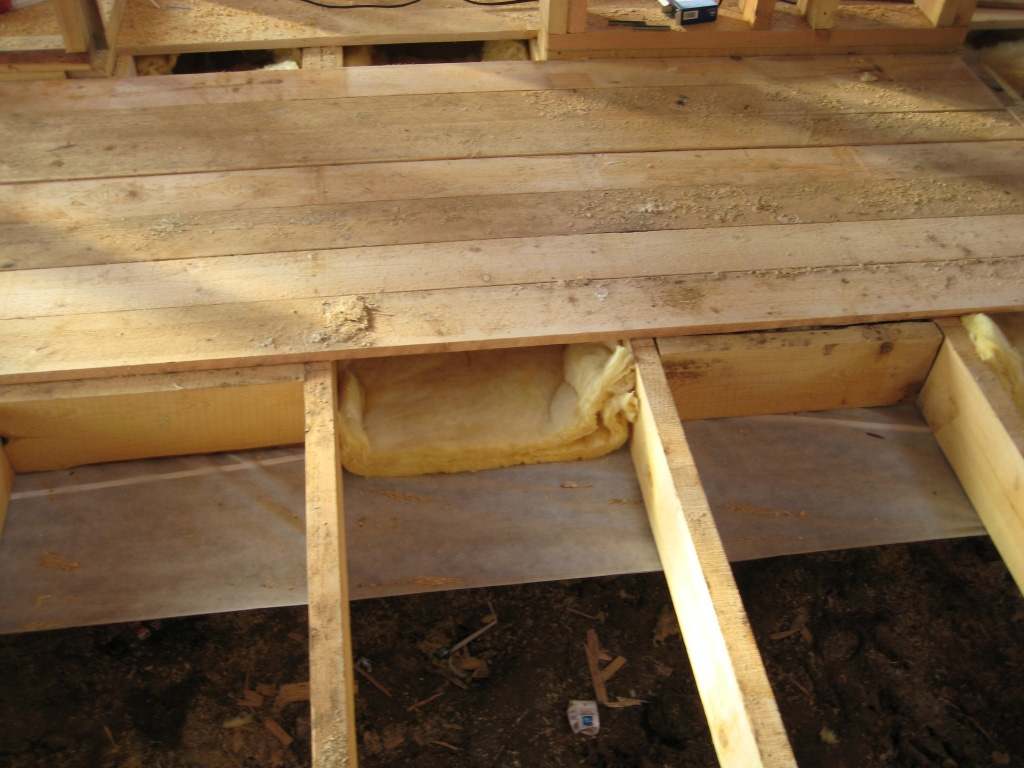
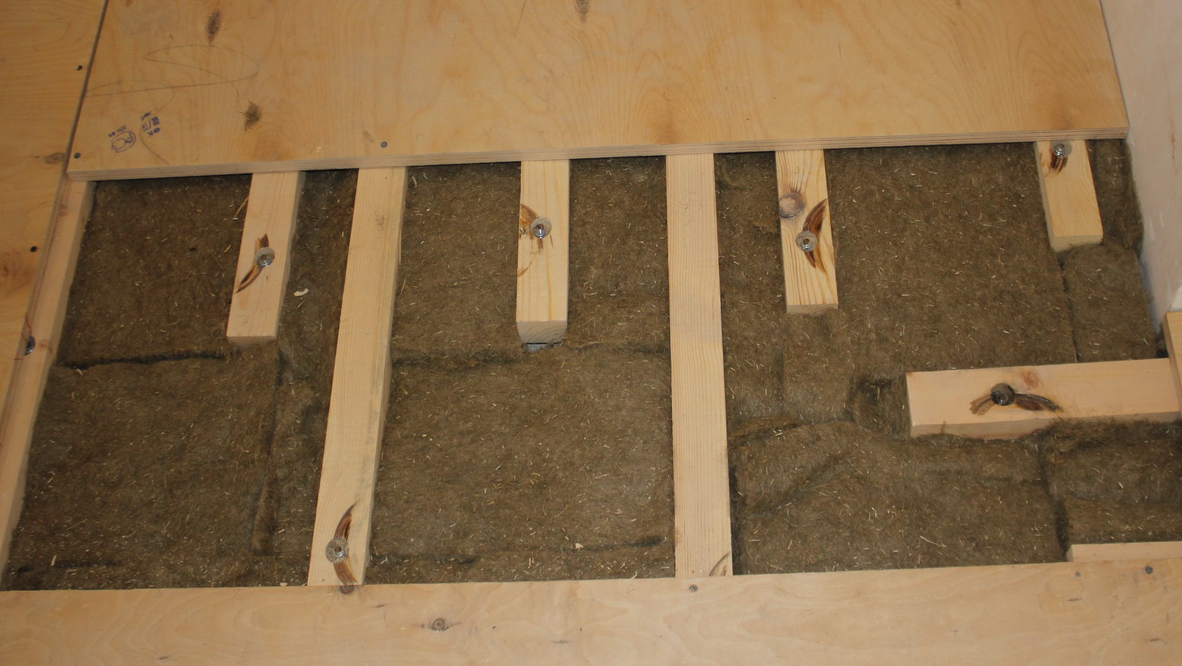
The next stage of installation is the device of the subfloor. To do this, along with the lower edge of the lag, a cranial bar is fastened on both sides, onto which a rough floor of unedged board is then laid. It is necessary to lay a layer of wind-proof membrane on it in order to prevent the insulation from getting wet. The membrane overlaps with the obligatory gluing of the seams.

Further, a membrane of the required thickness is laid on the membrane between the lags (depending on the climatic conditions of the region). As a heater it is better to use mineral wool. Insulation plates are inserted so that there is no gap anywhere. After laying the insulation above it, there should be a distance of at least 2 cm to ensure its ventilation.
Above the lag is spread a layer of waterproofing material. The strips are laid overlapping, the seams are glued with a special tape. Further, a layer of waterproofing strengthened with bars or slats, which are packed on the logs. For these purposes, you can also use brackets.
If it is intended to lay a special floorboard with a ventilation chute,there is no need to use slats or bars.
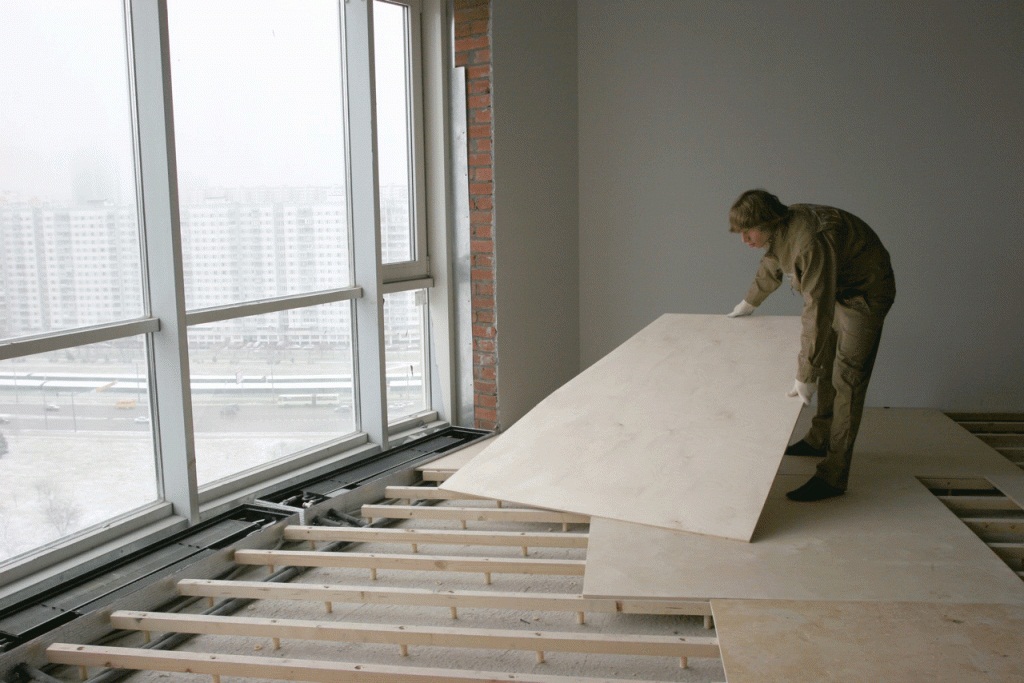
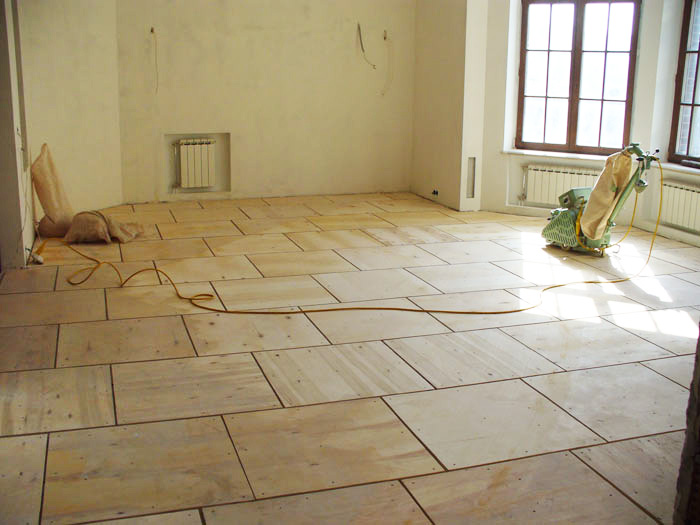
Finishing the floor can also be made of grooved solid wood or plywood. The main thing is that the material should provide an even basis for the installation of a finishing floor covering.

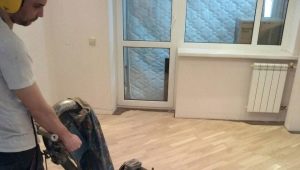
How to do it yourself?
The technology of flooring on logs with a ventilated subfloor is quite simple. And to arrange such a floor with its own forces is quite capable of an amateur working in the hands of an unsophisticated in construction business. The main thing is to be patient, to study the theory and correctly calculate the amount of materials.
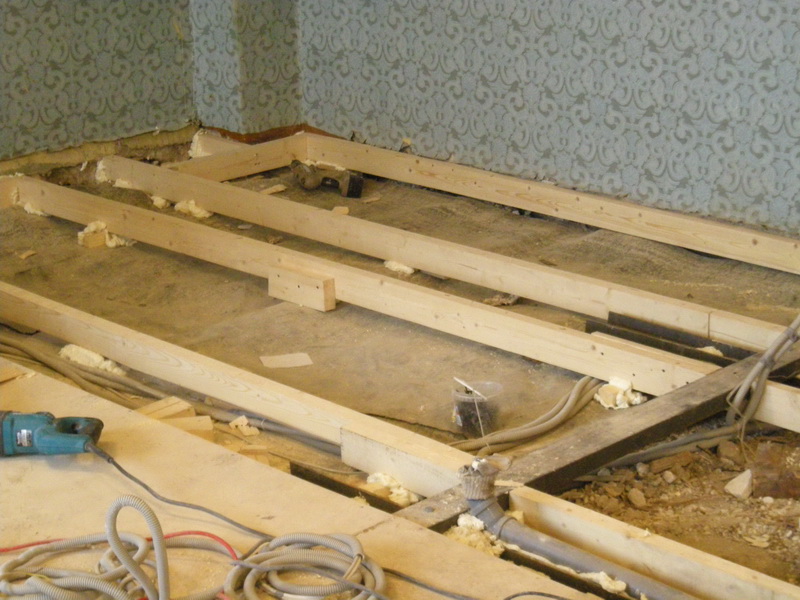
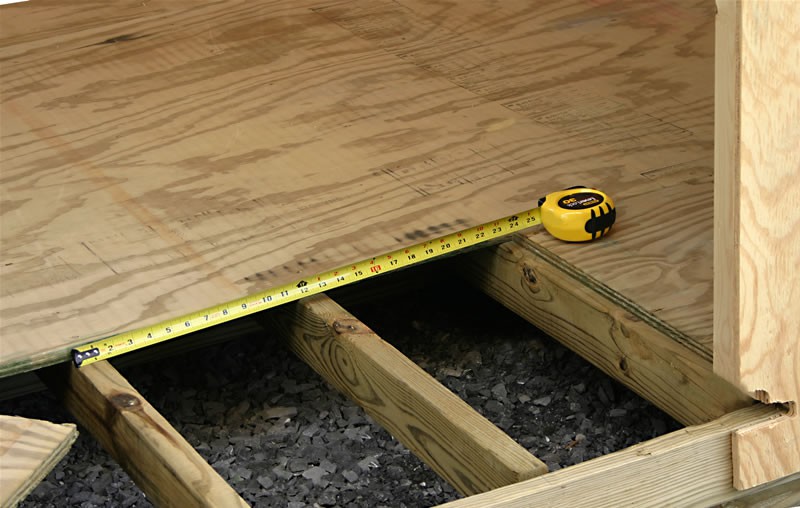
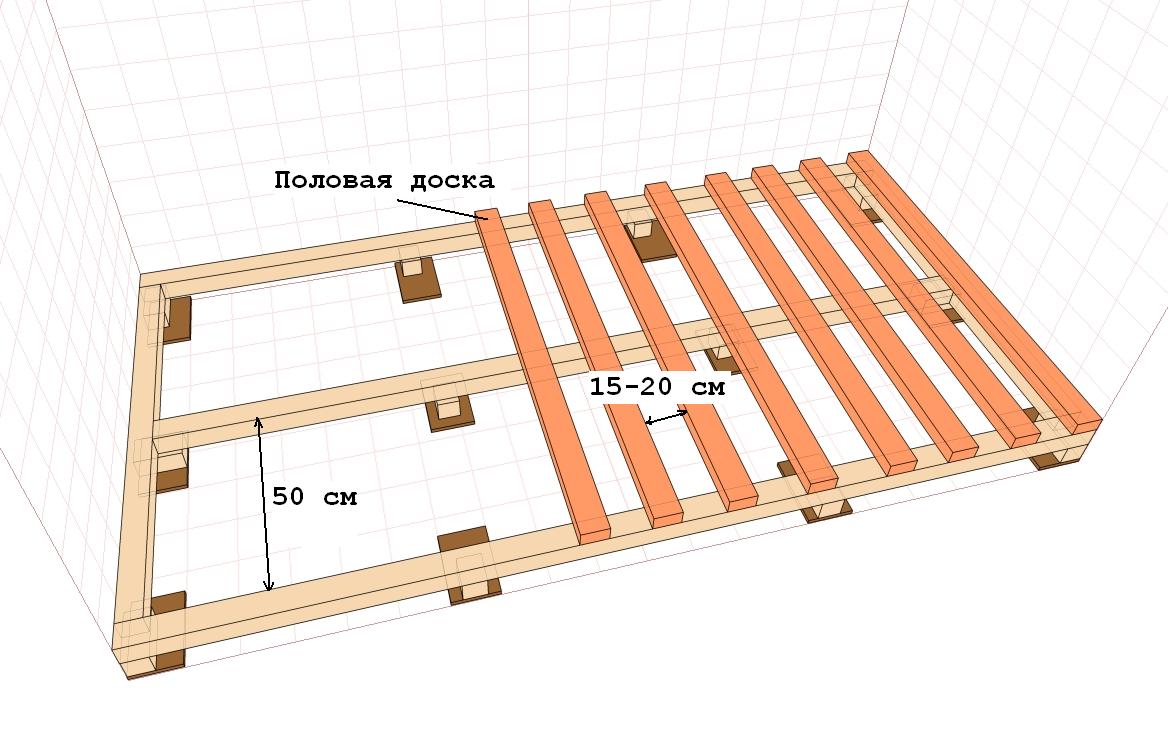
First you need to accurately measure the size of the room and calculate the number of necessary lags.
So, for example, if the length of a room is 10 m and it is supposed to lay the floor with a 30 mm thick board, then the distance between the lags should be no more than 0.5 m. A simple calculation gives us the value of the amount of lag - 20 pieces. It should be noted that the distance from the wall to the lag should be no more than 0.3 m, and this means that the amount of lag will have to be increased by one.
Next, you should purchase materials and stock up on the tool. The overall technology of the installation lag is about the same for different types of bases, the difference concerns only the features of the cake, depending on whether you need to perform floor heating or not.

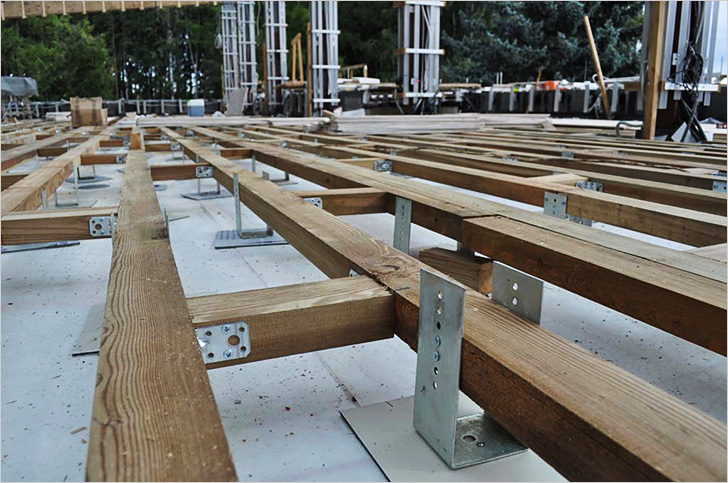
Lags begin to mount from the wall. For fixing the log to the beams use special corners, which can be purchased at the hardware store. For their fastening screws are used.
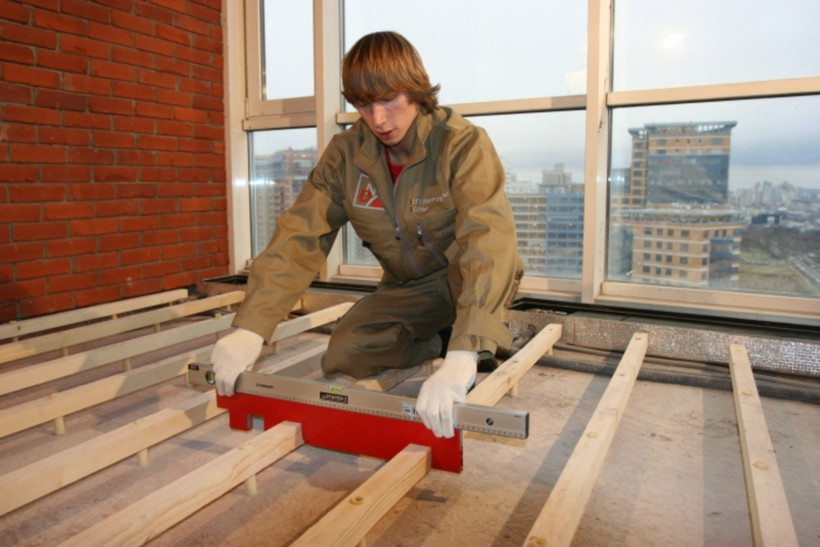
Considering the thickness of the floor boards, a mark is made on the wall, and the end of the log is set and fixed on it. The same operation must be repeated at the other end, controlling the position of the beam level. Installing lags near the walls, you should not immediately fix them completely. Finally, they can be pulled down when the lag level is exactly set. After fixing the extreme bars go to the intermediate.
Aligning intermediate lags can help tightening the cord between the wall lags. If the floors are warmed, it is better if the distance between the lags will match the size of insulation. After installing the subfloor under the heater, you need to remember to install a vapor barrier, and waterproofing above it.
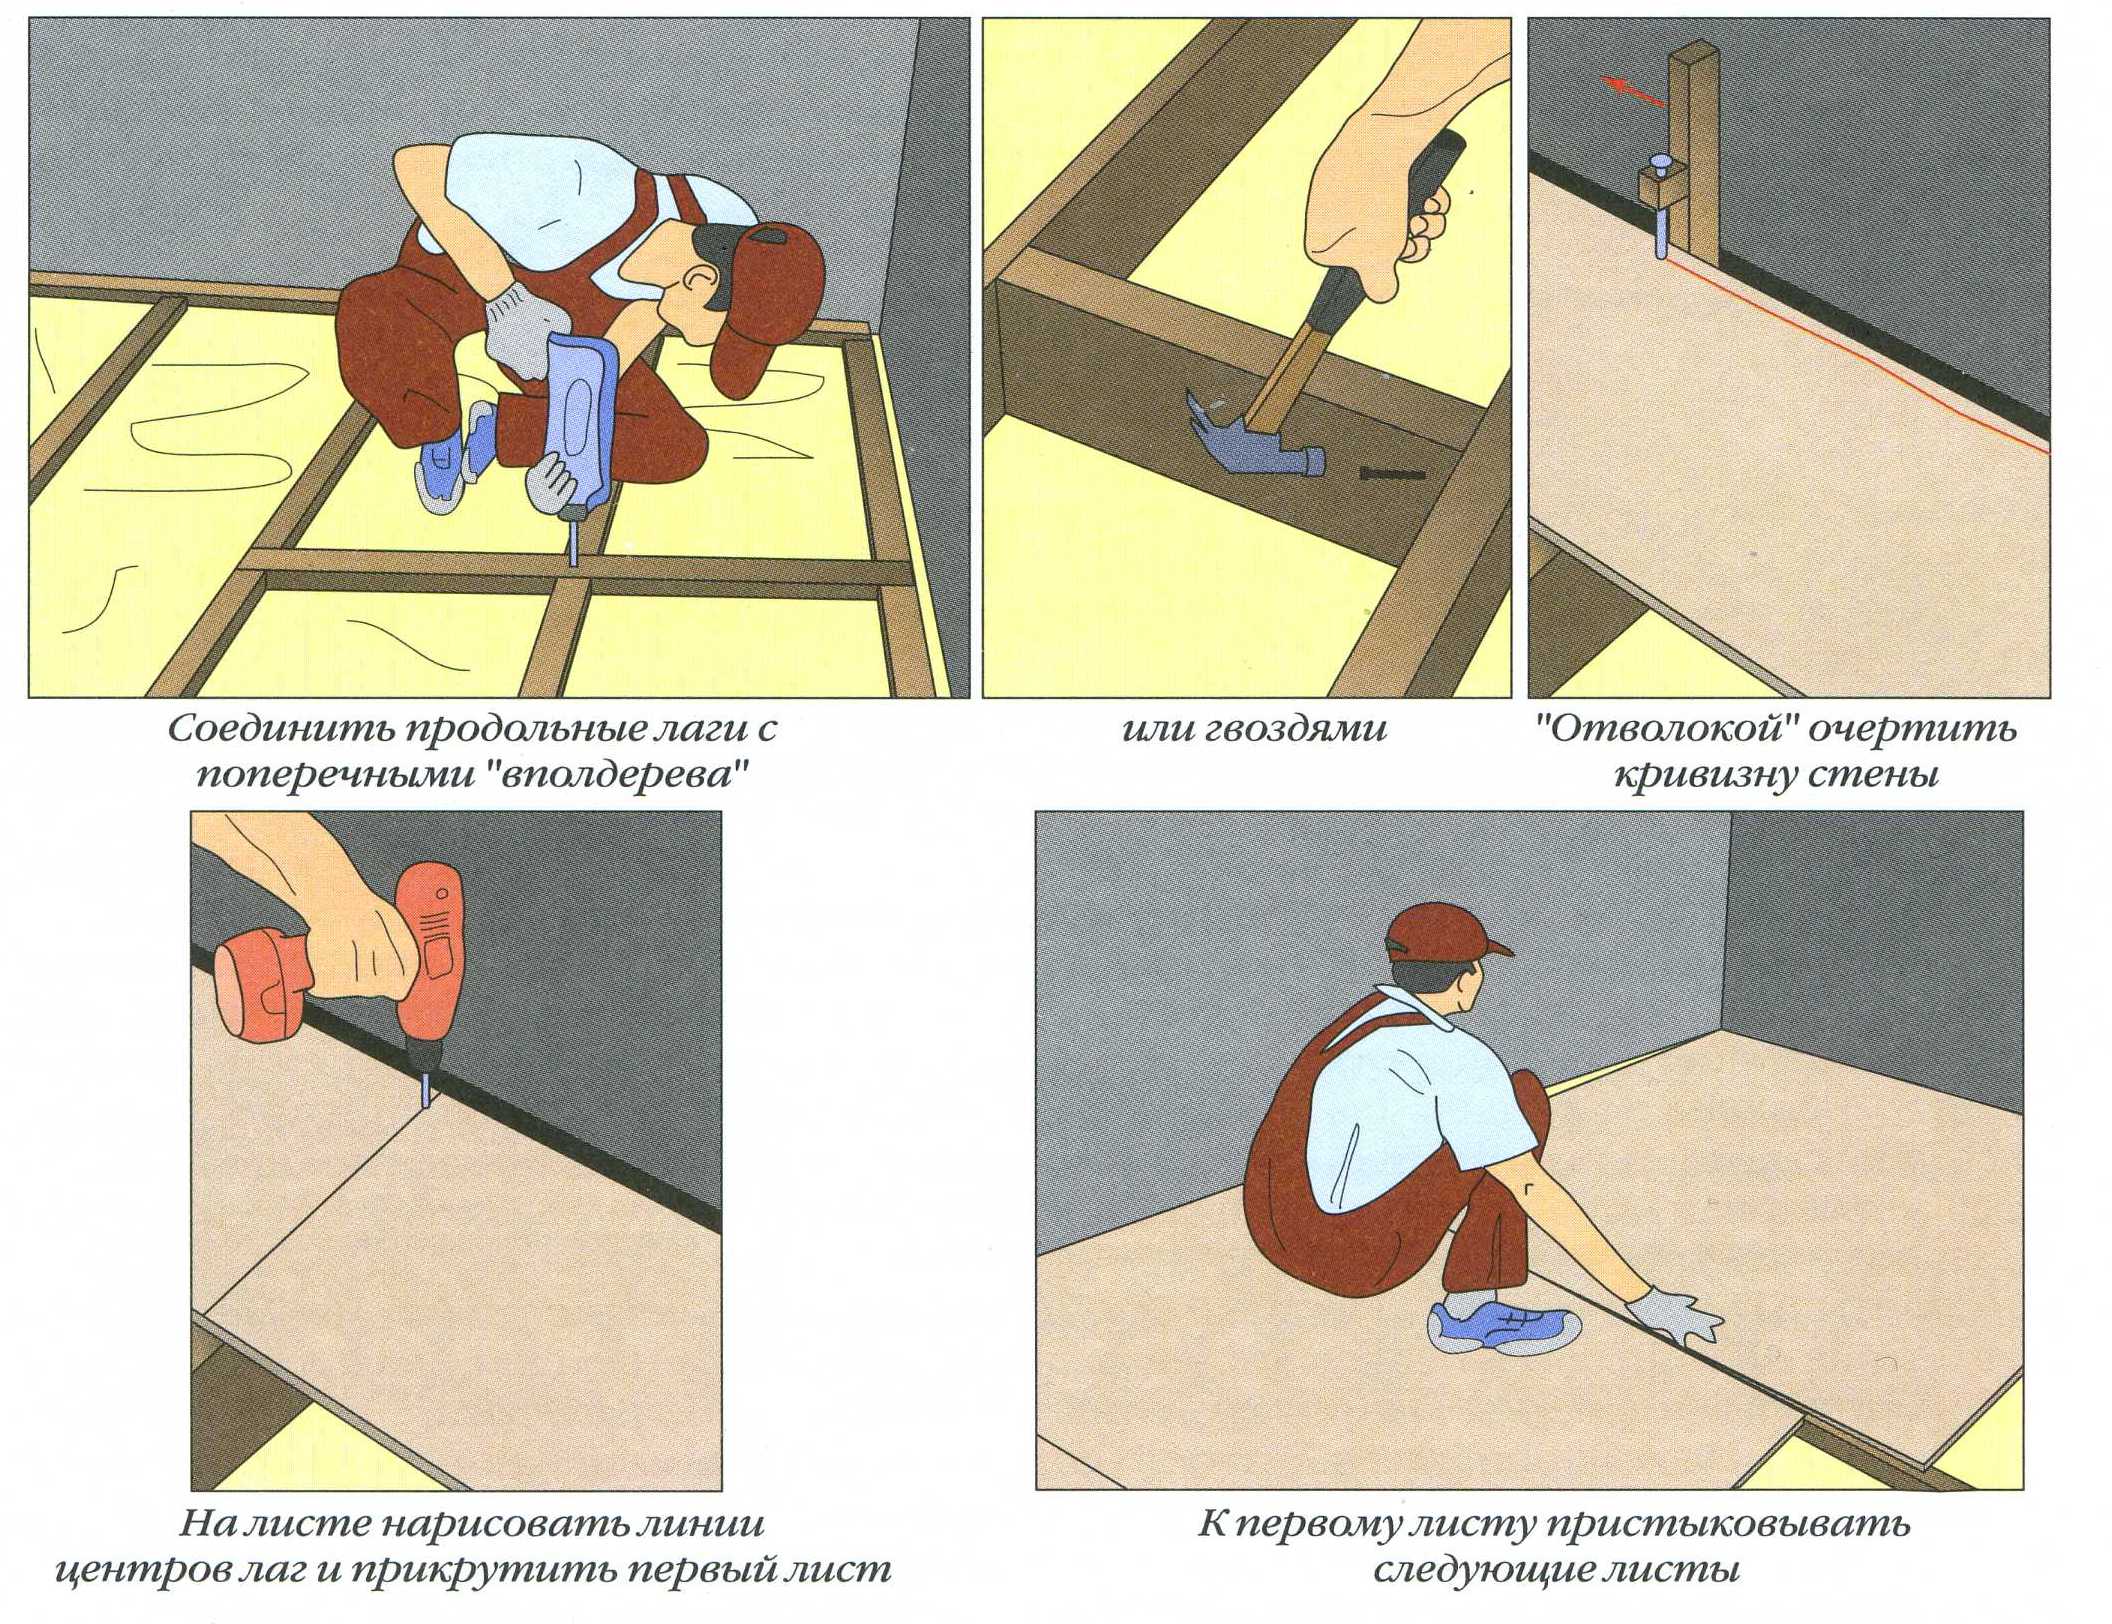
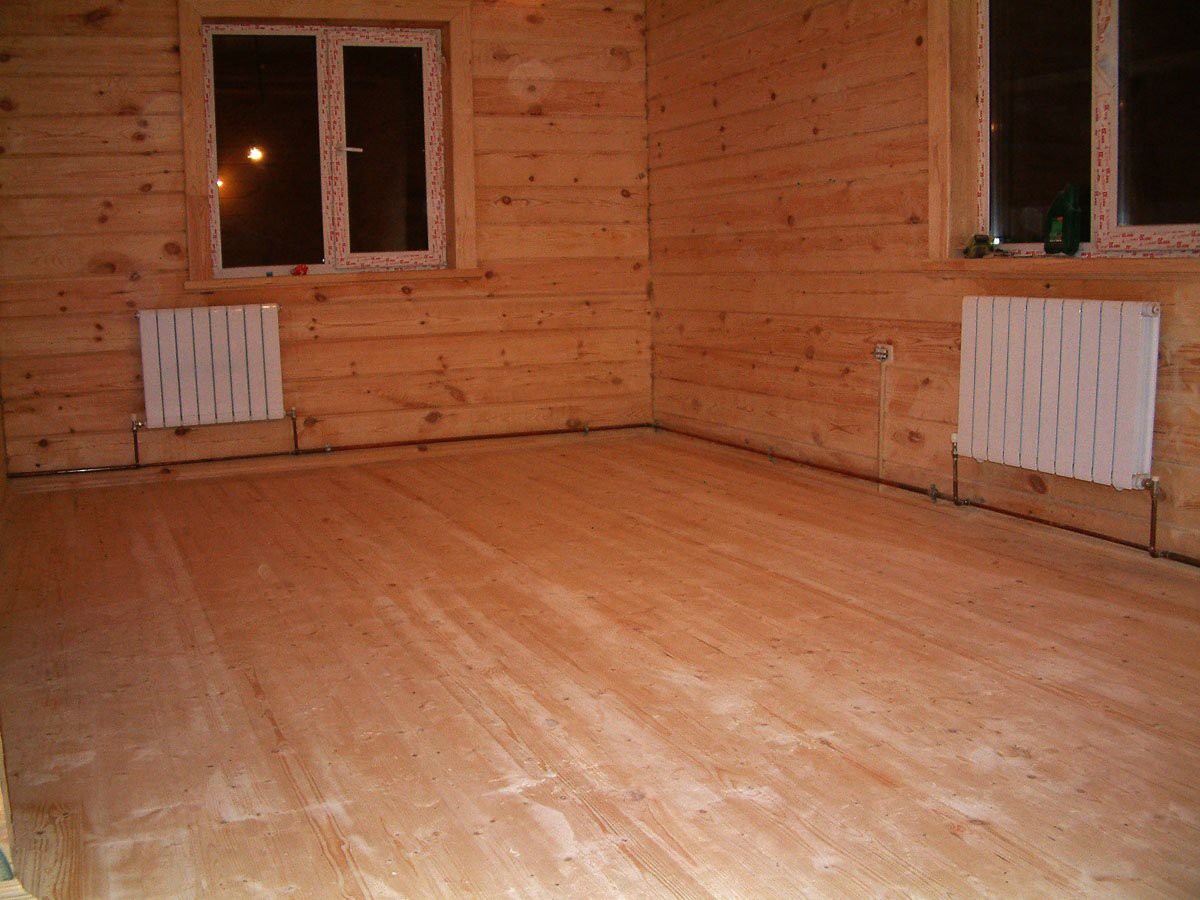
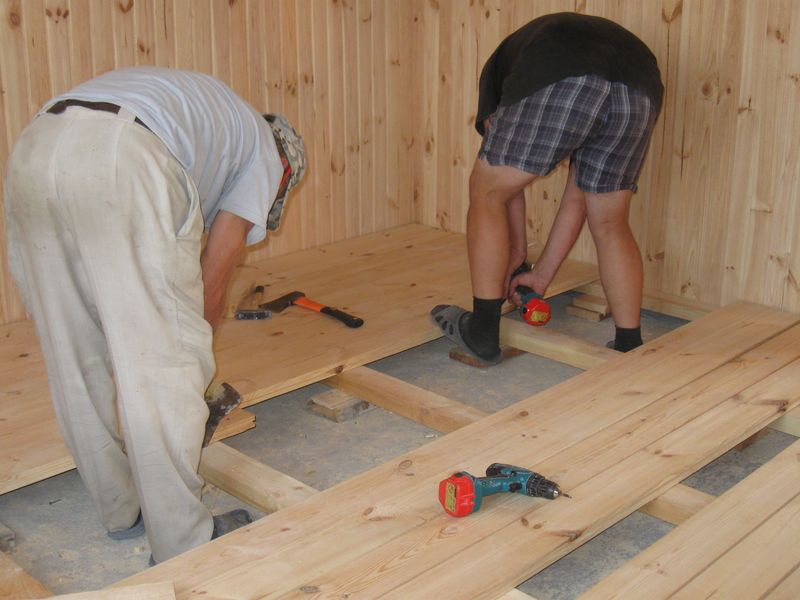
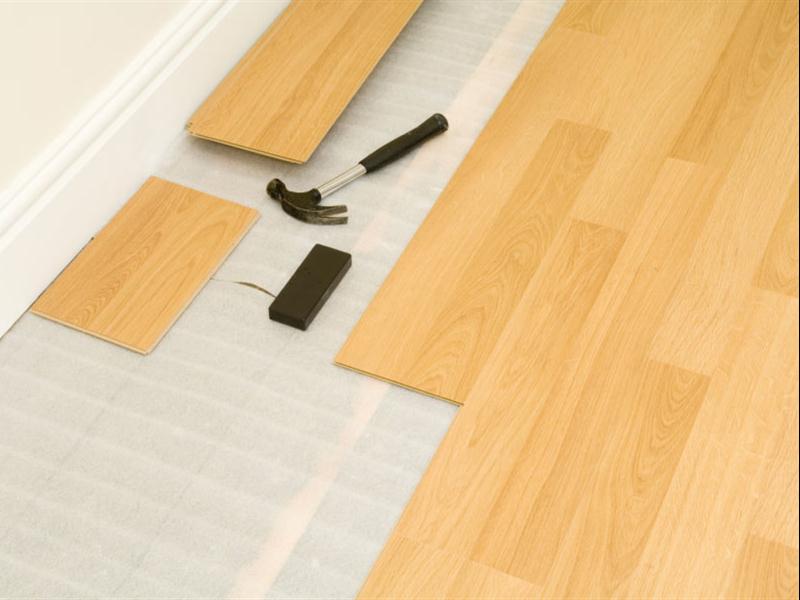
Then proceed to the installation of the finished floor. The best flooring option is a rabbit board. Such a floor can be used immediately as a topcoat if it is treated accordingly.
Before laying the board, it is necessary to adapt it to the microclimate of the room where it will play the role of a clean floor for three days. After that, you can start working with it. Laying the board, it is necessary to leave a ventilation gap of 10–15 mm wide between it and the walls, which will also help to level floor deformations during seasonal swelling of wood.

Finishing floor is laid perpendicular to the direction of laying the rough base. The first row has a spike in the direction of the wall and fix it with screws so that the baseboard later closes them near the wall. The following rows are inserted into the groove of the previous row and secured with screws.
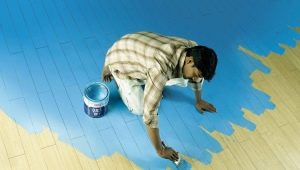
If the wooden floor is to be used as a finishing floor, it is first cycled, then the first lacquer layer is applied and polished. Then you need to rally and putty all the cracks with a special composition for wood. Now the floor can be painted or varnished or waxed.
Warming
Warming the floor, arranged by lags, it is possible to carry out various heaters: sawdust, expanded clay, mineral wool:
- The main advantages of mineral wool are good sound and thermal insulation properties, non-inflammability, resistance to flame and chemicals.
- Expanded polystyrene - the most common insulation due to a good set of performance characteristics. The material practically does not conduct heat, vapor-tight, has a long service life.
- Penoplex - a material made from extruded polystyrene foam, does not conduct heat, which means it retains it well, is not subject to rotting and mold formation.
What material to choose for thermal insulation of floor structures is up to the owner of the house, depending on the requirements that he makes to him, such as the foundation of the floor and financial possibilities.
Professional Tips
To properly mount the base for the floor on the logs, It is very useful to get acquainted with the opinions and advice of professionals in the construction business:
- Section log for lag should be chosen based on its width and length. A section is a rectangle with a width that is a multiple of one and a half and a length that is a multiple of two. In that case, if the logs are supposed to be mounted on the wooden beams of the ceiling, the beam section is selected based on the step with which you plan to install it. Here there is a direct dependence of the cross section on the distance between the bars.With increasing distance increases the thickness of the lag.
- When choosing a timber, you should not forget to take into account the presence of at least 2-centimeter ventilation gap, that is, you need to keep in mind that when laying insulation between the lower part of the finished floor and the upper layer of insulation, there should be free space for evaporation of the condensate. Otherwise, the moisture will begin to be absorbed into the insulation (especially if it is hygroscopic), which will lead to the loss of its operational properties. And when laying timber on a subgrade, it is necessary to take into account the height of the reel attached to the cranial bar

- The dimensions of the bars for the device lag is better to choose a little more than necessary.
- If the whole timber for the device of the lag of the desired size cannot be found, you can connect two boards with the necessary section. Then the lags will be set to them on the edge.
- To save money when laying the floor on the ground, it is possible to reduce the span of the lag by setting up the posts for supporting the beam with a smaller section. It is better to make supports from burnt bricks and install them at a distance of 1.2 m from each other. It is possible to use silicate bricks, but, if only the probability of raising the groundwater is minimal.
- When the beams are located at a sufficient distance from each other, lags can be laid in two layers - perpendicular to each other.
- In order to achieve a fairly smooth base during the installation of the log, they are not placed on top of the ceiling beams, but are attached to their sides. Thus, the need for leveling the height of the lag by lining under them disappears.
- Some time ago, the fastening of the log was carried out with the help of long nails. But progress does not stand still, and for these purposes special fasteners of different types have been developed, which demonstrate a greater degree of reliability than nails. Fasteners for the beams can be in the form of a corner or the letter "P". These are quite convenient fastenings, which are fixed to the timber with the help of screws, and to the base - with the help of dowels. In this case, the fastener enters the timber at a depth of 3-5 cm.

All the detailed information on how to properly do the laying of wooden floor on the logs, you will see in the video below.