Features of installation of a heat-insulated floor
Heat is one of the criteria for home comfort. This is especially true of the winter period, when there is a question about the heating system. Traditional heat carriers have an alternative and this is a warm floor. It is worth talking about whether it is necessary to install it in the house, what are its pros and cons and what is the installation instruction.
Features: advantages and disadvantages
Before you set the floor, you need to pay attention to its advantages and inconveniences that it can create.
The advantages are as follows:
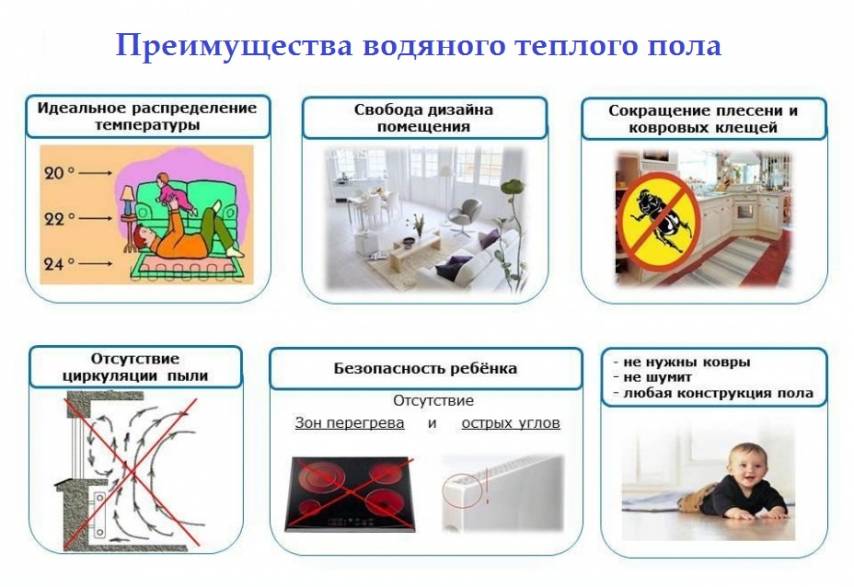
- Heated floor saves a lot of space, which means it gives the freedom of creativity in the implementation of unusual design ideas.
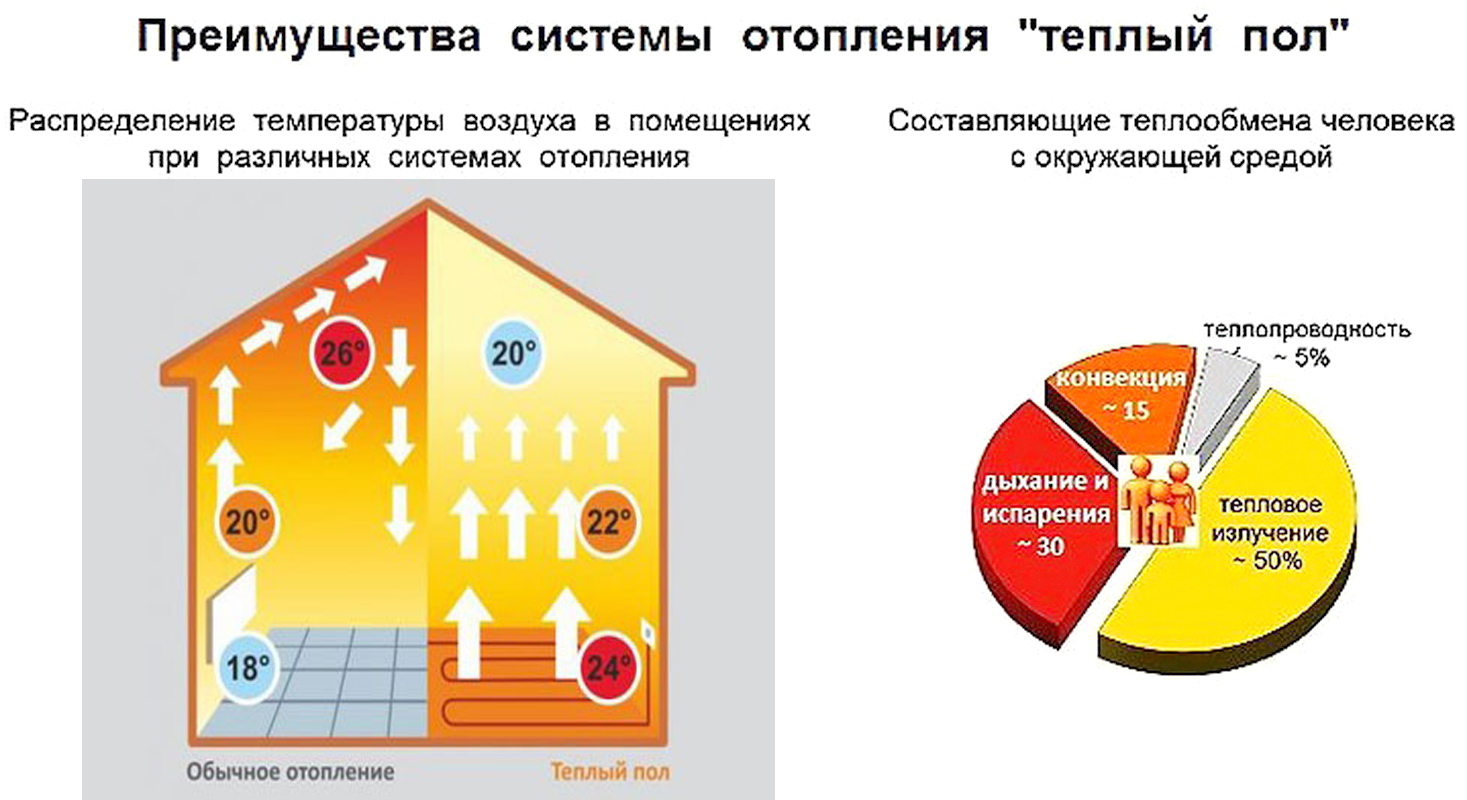
- Drafts are excluded. The floor evenly spreads heat throughout the house, which means that even asthmatics and allergy sufferers will feel comfortable.
- The floor provides the air with the right level of humidity.
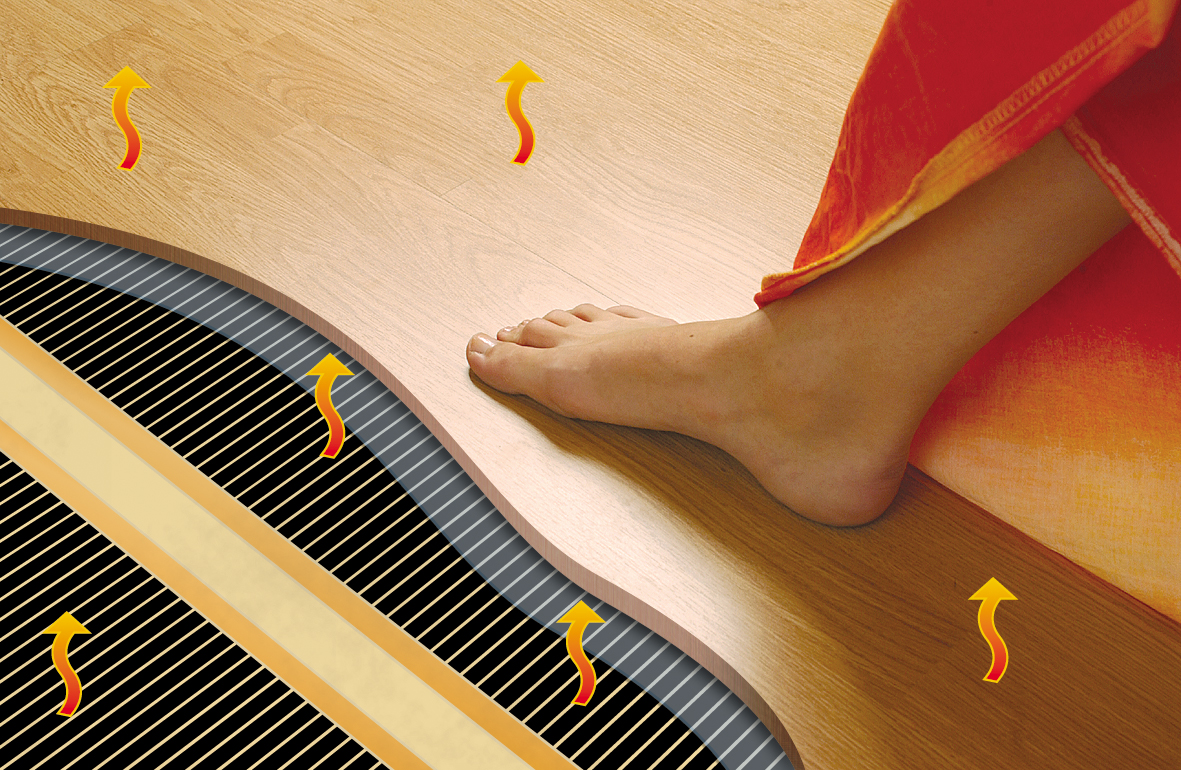
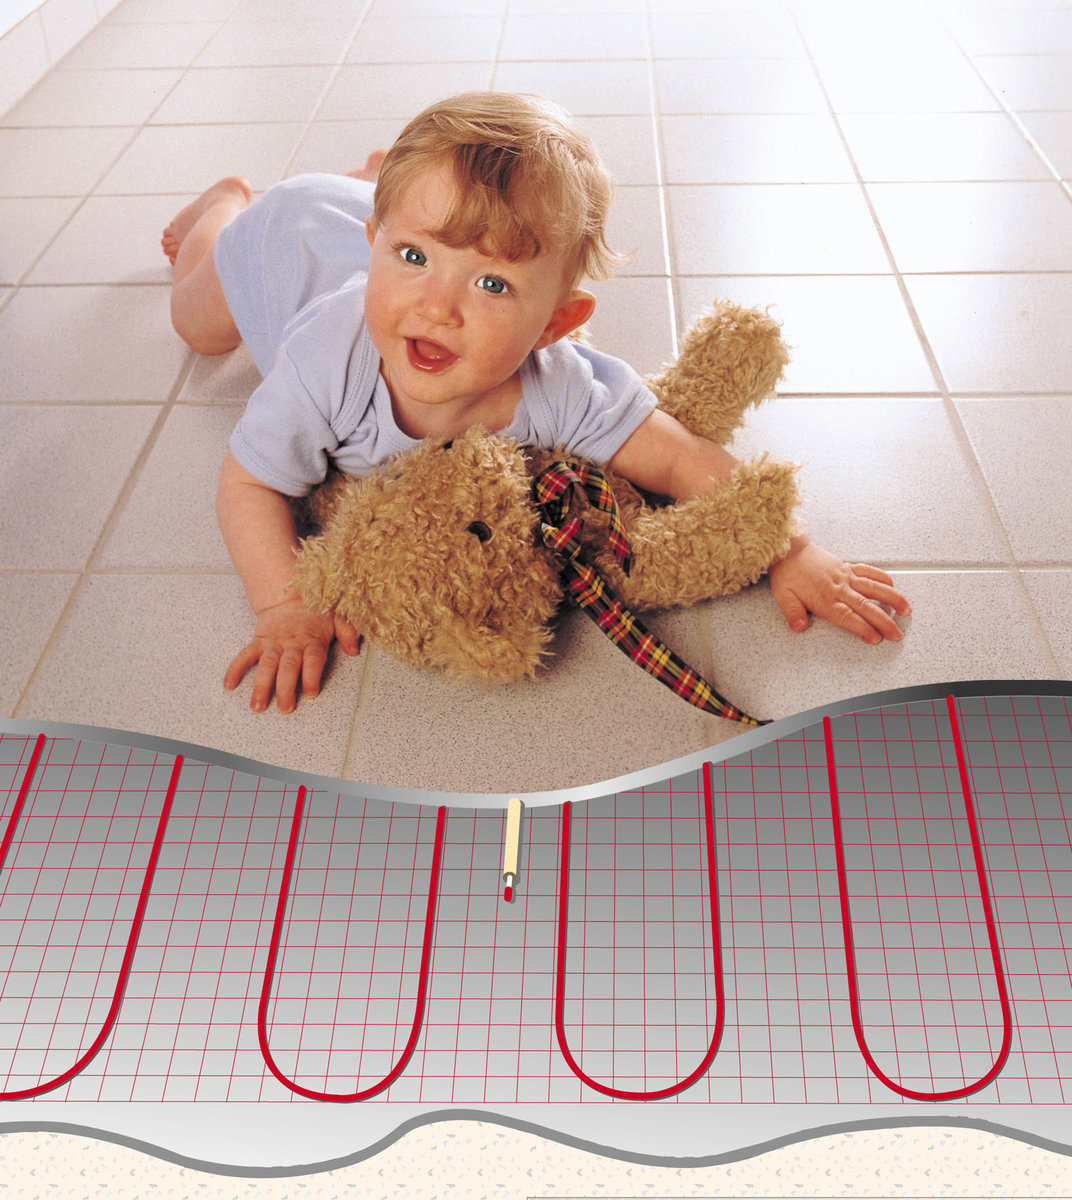
- Underfloor heating is good for health because it transfers heat through radiation, rather than heating the air.
- The heat-insulated floor is more effective than radiators as heats the room quicker.This sample is especially relevant for owners of private houses.
- Heating systems are carefully hidden from the eyes and do not harm the overall aesthetic appearance of the room.
For comfort you have to pay. The disadvantages of a warm floor are:
- Floor covering must be selected with caution. The wooden floor is prone to destruction due to temperature exposure.
- Certain types of wood can reduce heat efficiency to zero.
- When installing an electric floor will increase the cost of electricity. Basically consumes 110-150 watts per square meter. Although the heating temperature is saved, if the owners are not at home. With the right approach, you can save about 40% of energy. Recommended to use infrared floors, which are reduced to 50%.
- Electrical networks in some buildings do not always withstand the load when heating a house.
- After installing an electrical sample, electromagnetic radiation rises. It is believed that this adversely affects human health. But this has not yet been proven by science. The creators of the infrared floor claim that the floor of the film has no electromagnetic radiation.
- In the event of an unexpected or planned power outage, a warm floor is useless.
- Installation of a water heated floor requires a lot of time and effort.
- Significant cash costs are required.
- Not all warm floors are reliable. Water floor is less efficient than an electrical sample.
Types and characteristics
The warm floor is divided into two types, but they have a unifying factor: the floor surface has installed heat conductors that do not interfere with the overlap like slabs. And each of them can adjust the temperature. And the types of floor heating are as follows:
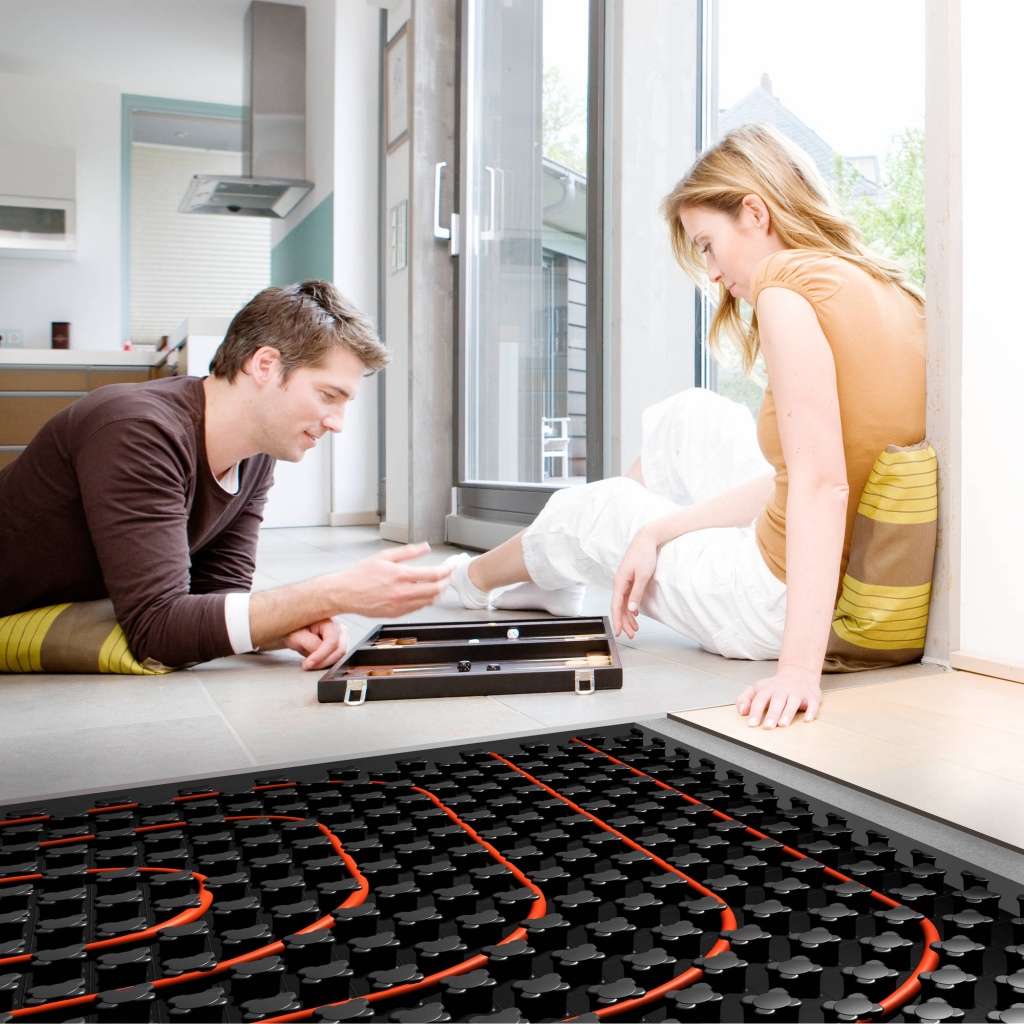
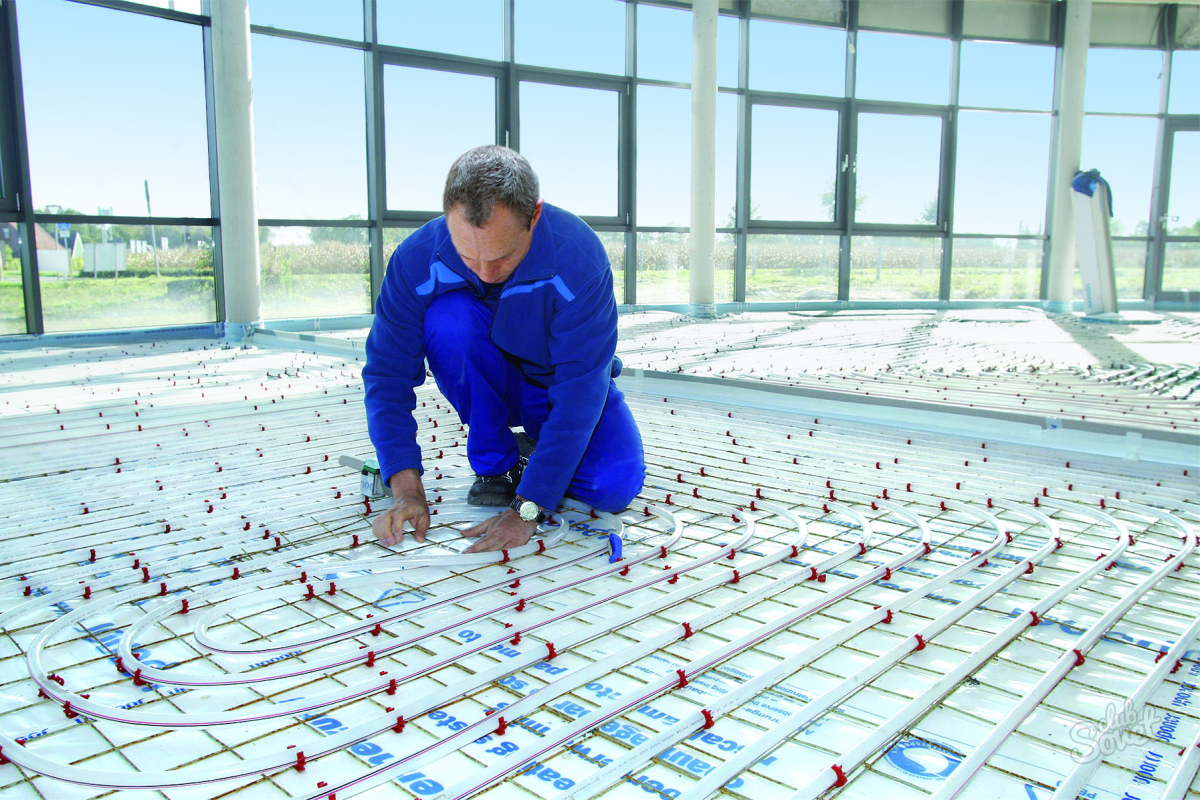
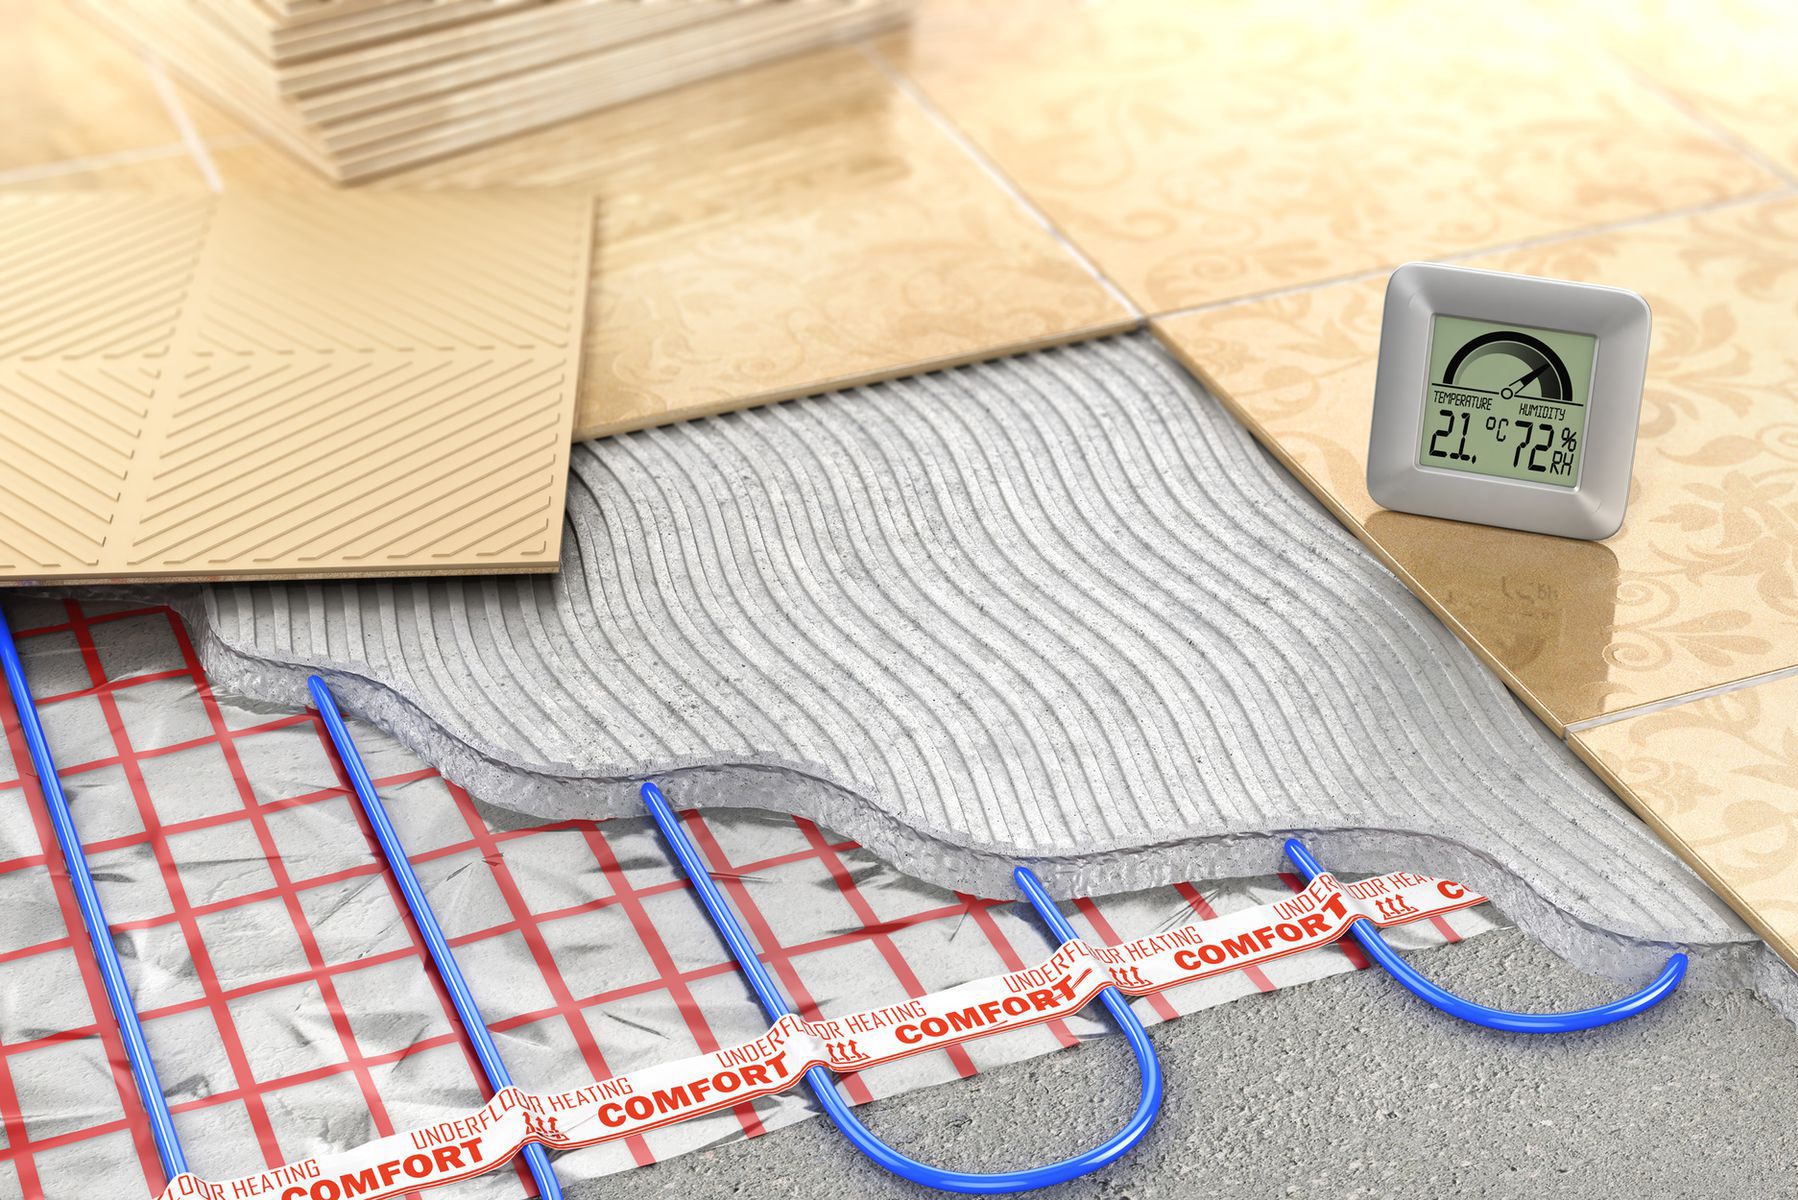
- Electric - cables are used as heat sources (flat conductors on the film are possible). The floor is heated by electric current, which passes through the above mentioned conductors.
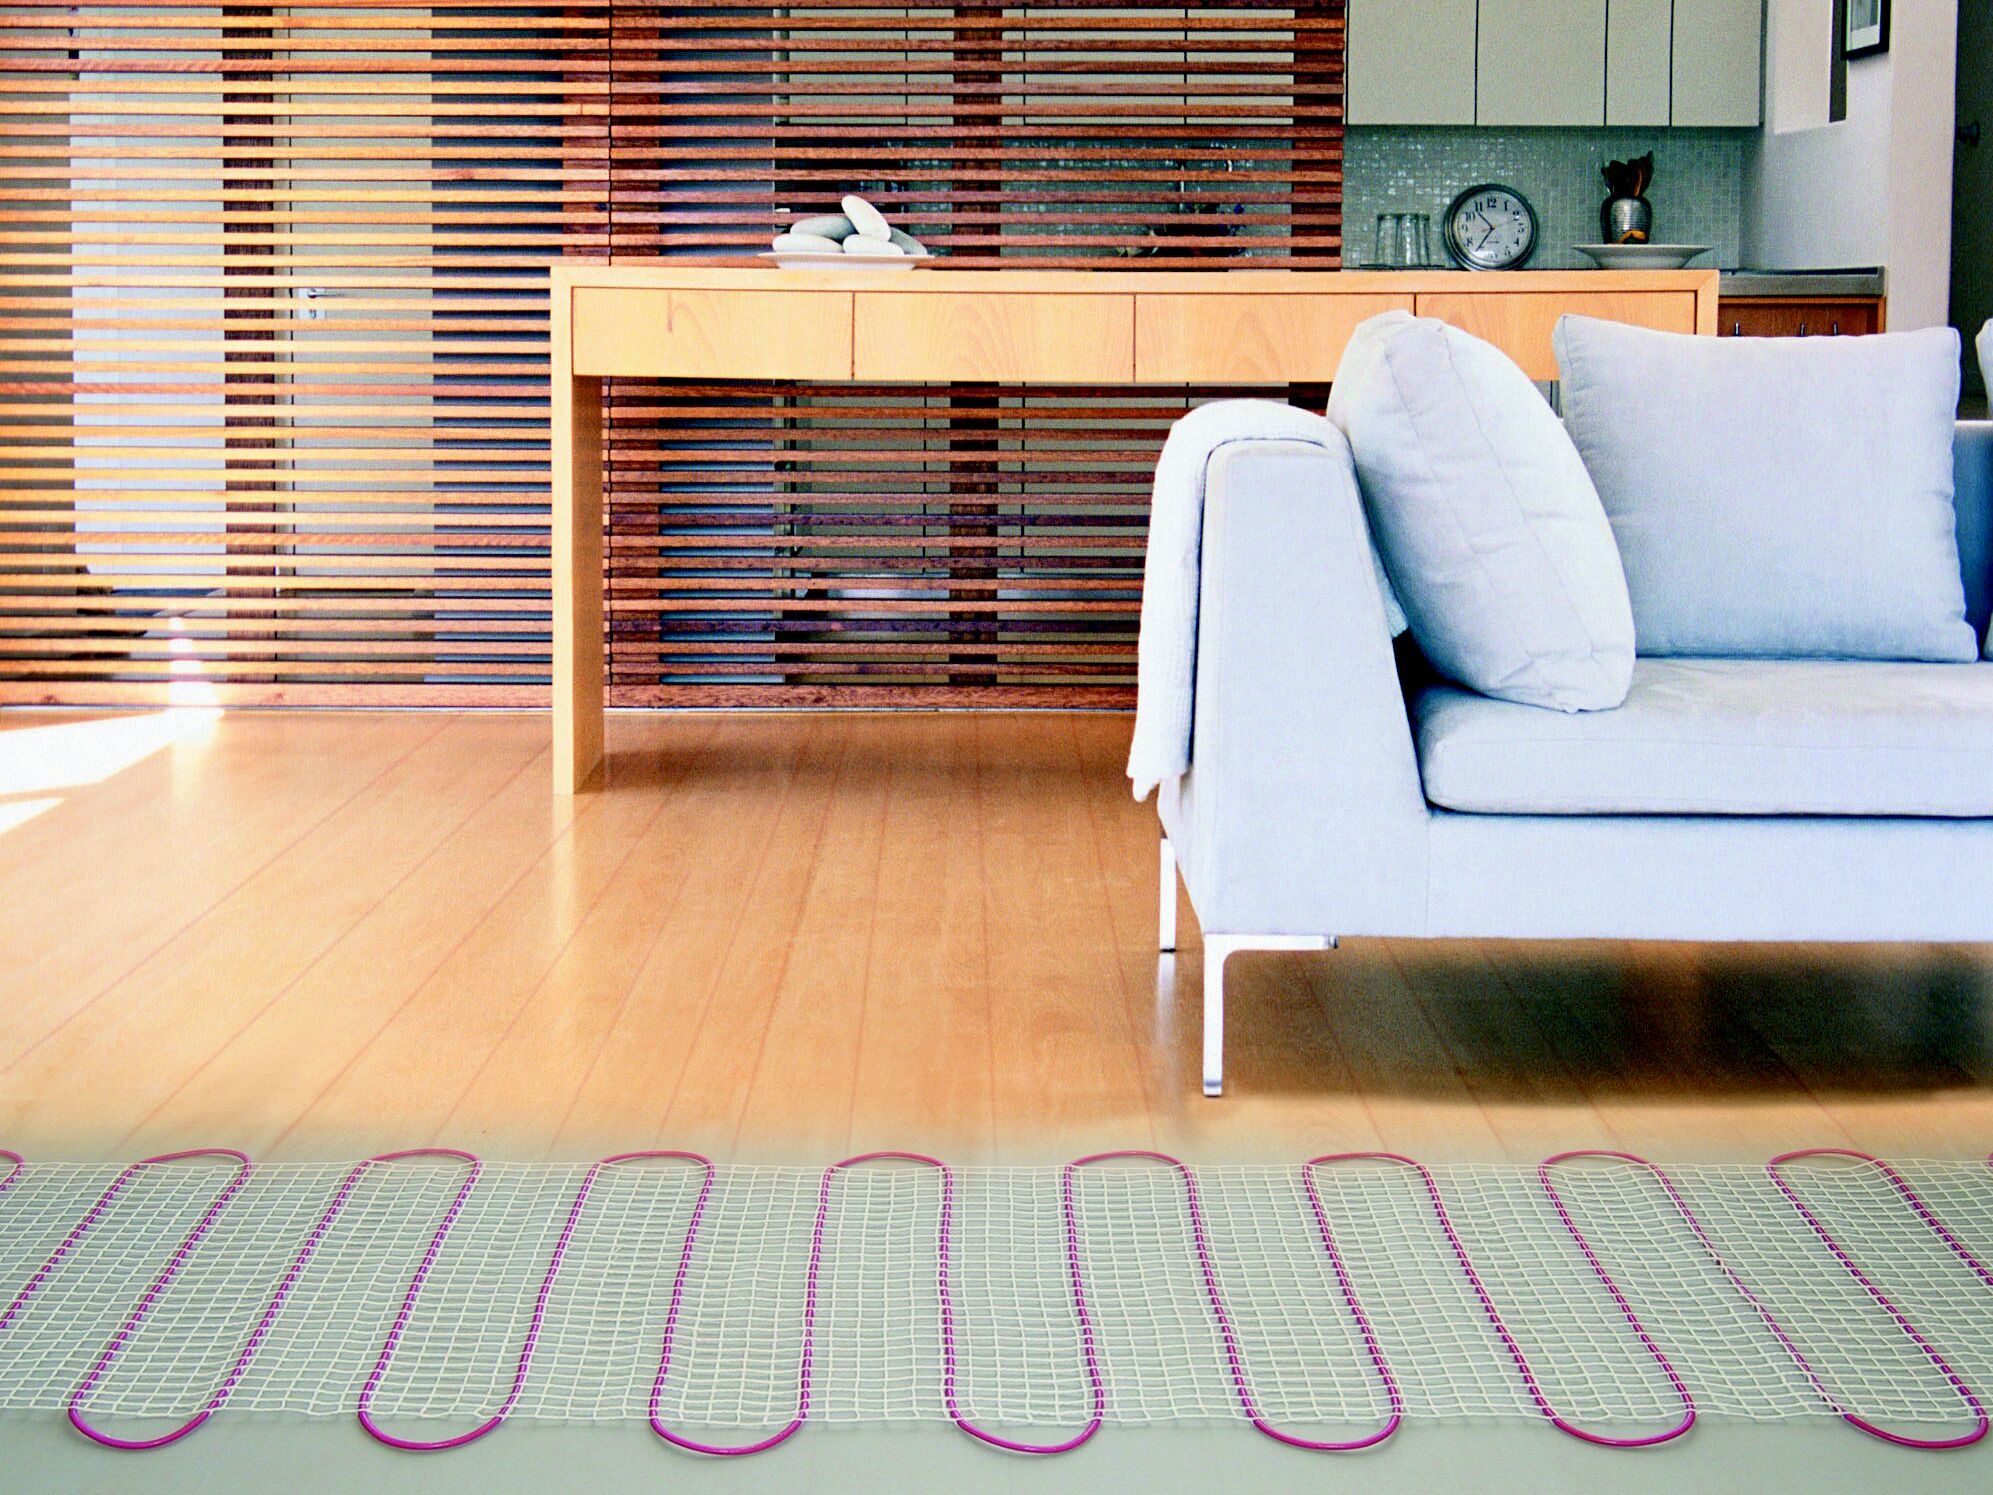
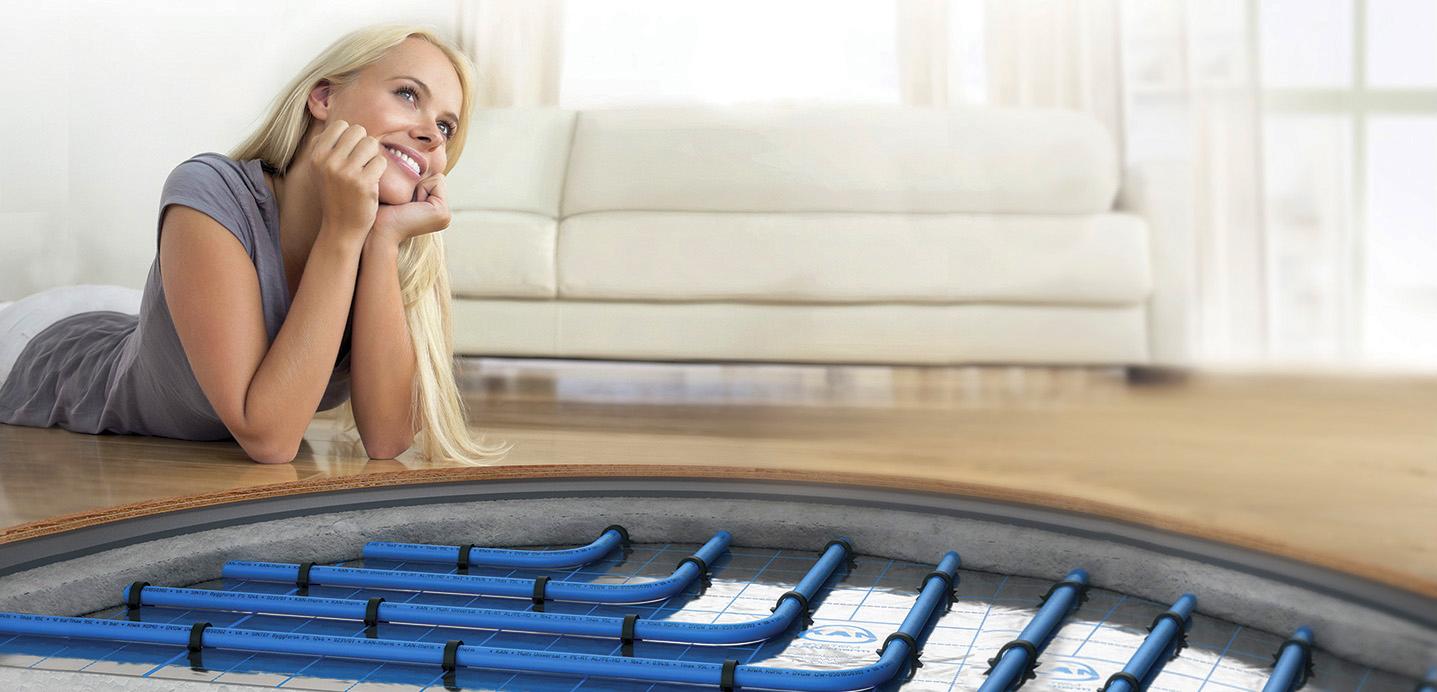
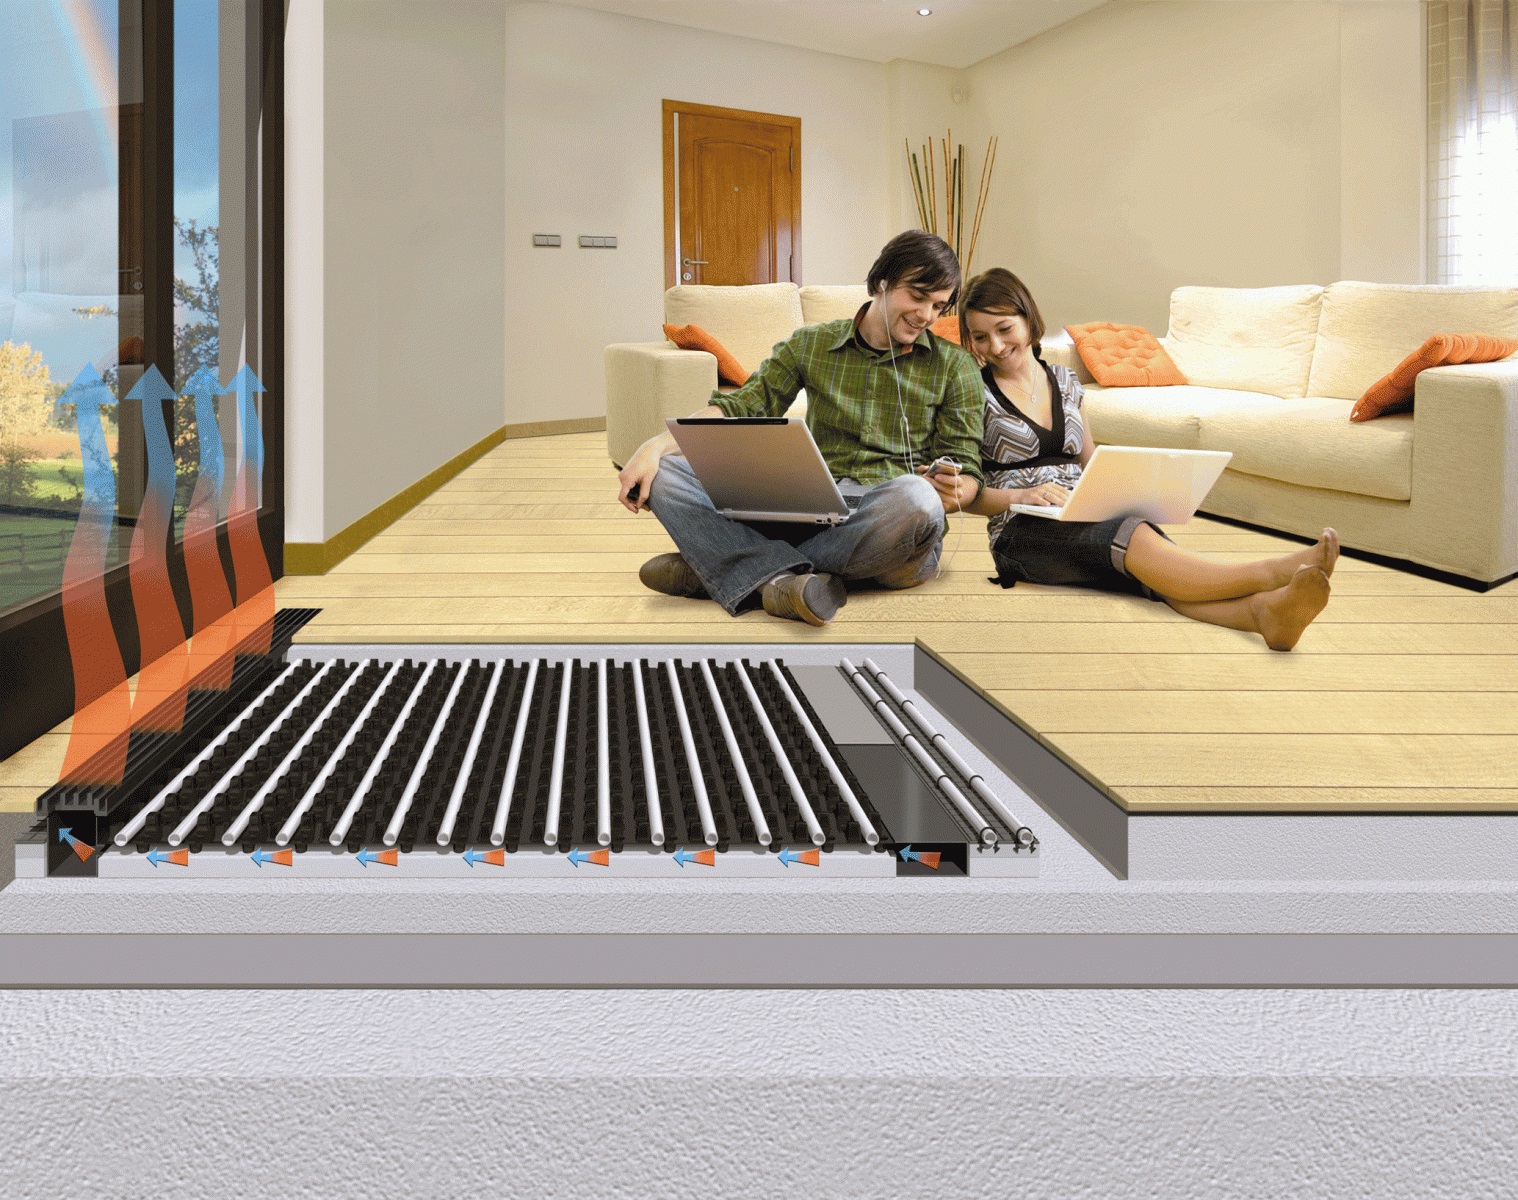
- Water - heat is provided by pipes heated with hot water. It is a huge battery installed in the floor. This floor is in great demand, especially in private homes, because it uses its own water heating system. And also the water floor is cheaper than cable (electric) and does not have electromagnetic radiation.
Also often used system "warm floor". It is relevant at a time when the weather is warm and it is meaningless to turn on the heating completely.In private homes, heating can be activated independently, with a minimum mode.
But in homes with central heating needed "warm floor".

Installation rooms
Warm floors of different types can be installed anywhere. The apartment can be laid both electric and water floor. The reason is this: the city will find all the necessary resources for comfort.
There are nuances on which water and electric floors should be mounted in certain places:
- In a private house is better to lay water floor, because outside the city should not particularly rely on electricity.
- The frame house will be provided with the most natural level of humidity and uniform air temperature if the building has a water floor. If the electricity is turned off under unforeseen circumstances, the house will remain unheated.
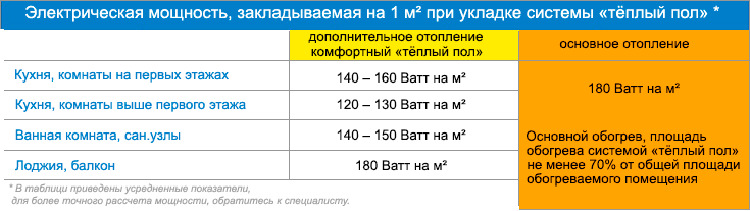
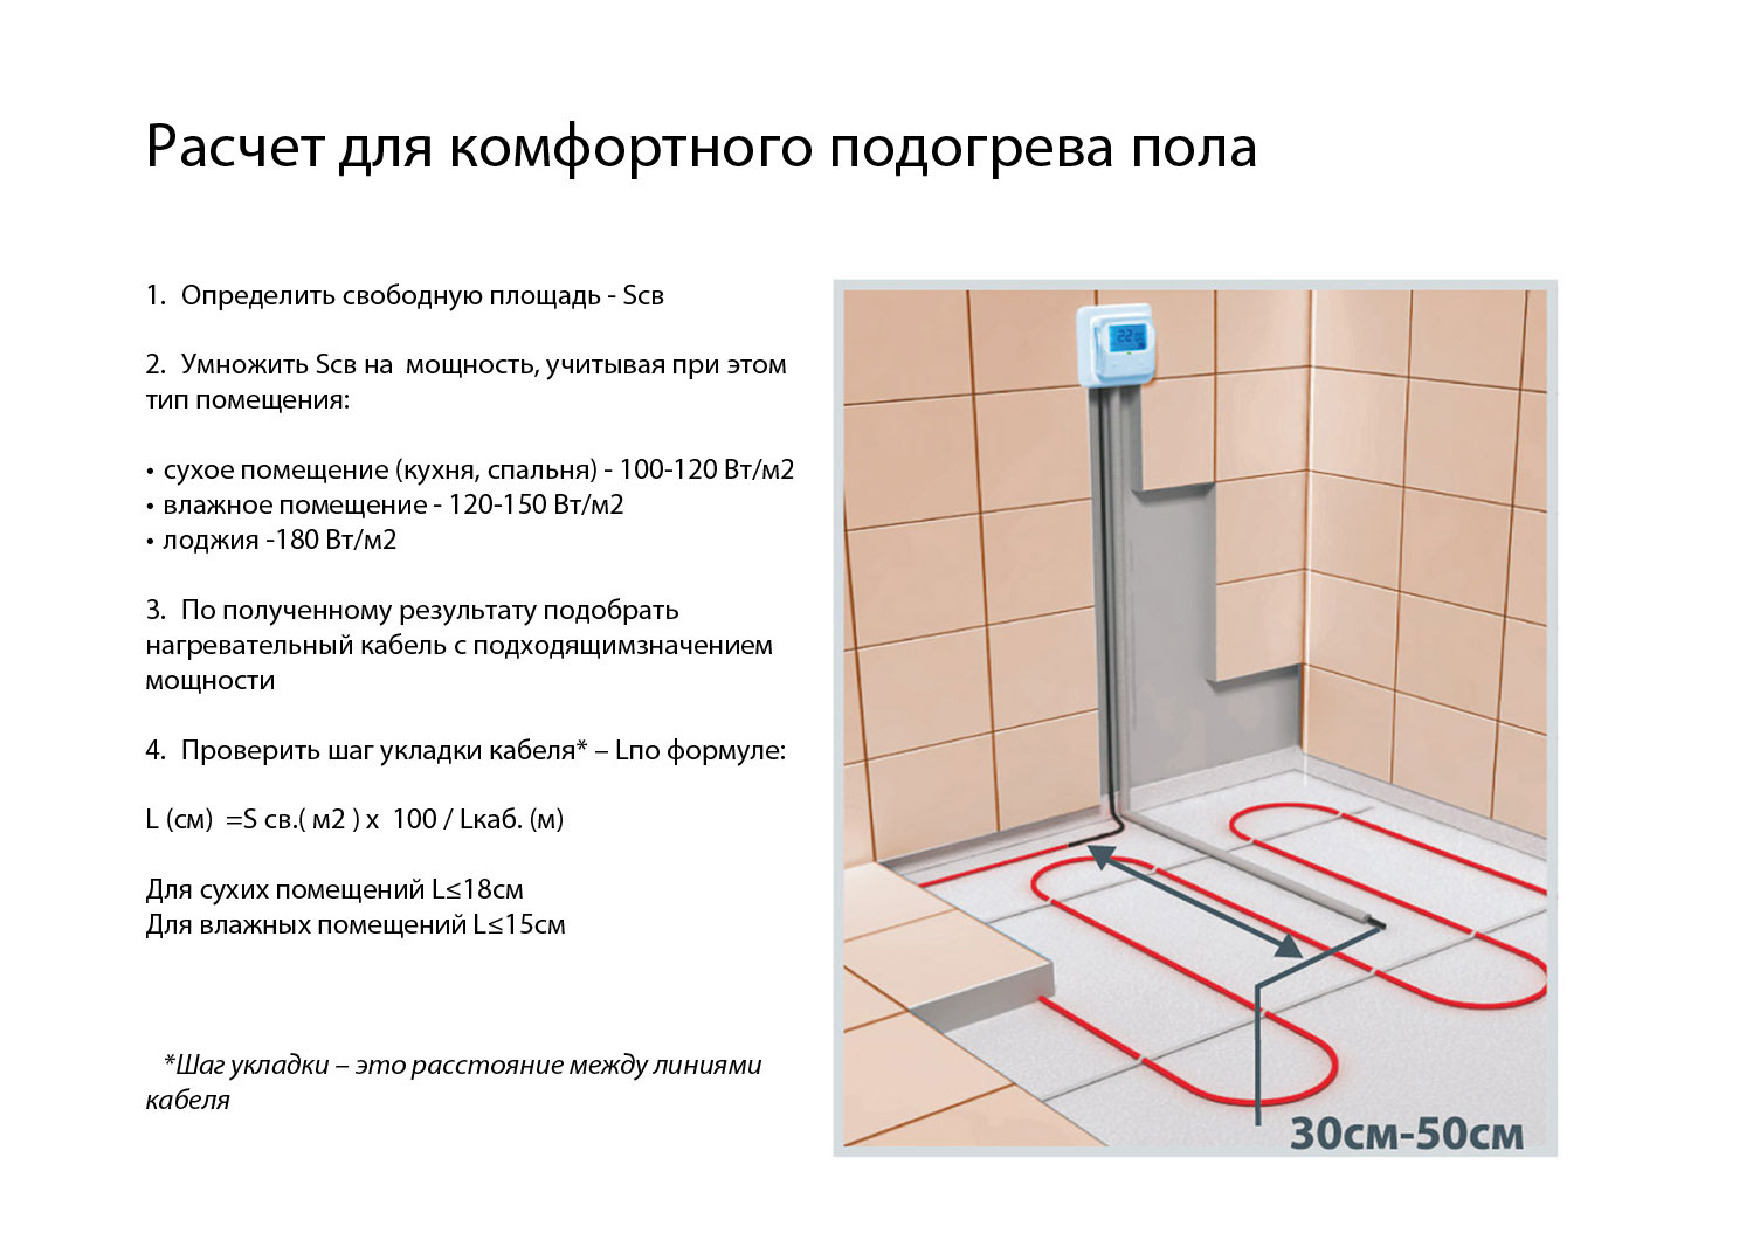
- The key factor that affects the comfort in the house - is the power of warm floors. She, in turn, depends on the type of room. For warming dry rooms, optimal power is 100-120 W per square meter, 150 W for wet rooms, 180 W for loggias.
But if the floor is the only source of heat, the numbers may increase.

To make it easier for the owner to navigate in the selection of the floor, he should familiarize himself with the table, where the necessary thermal calculations are given.
Materials and tools
Before you start the installation, you need to prepare all the necessary tools to avoid incidents.
For installation will need:
- floor heating system;
- fasteners;
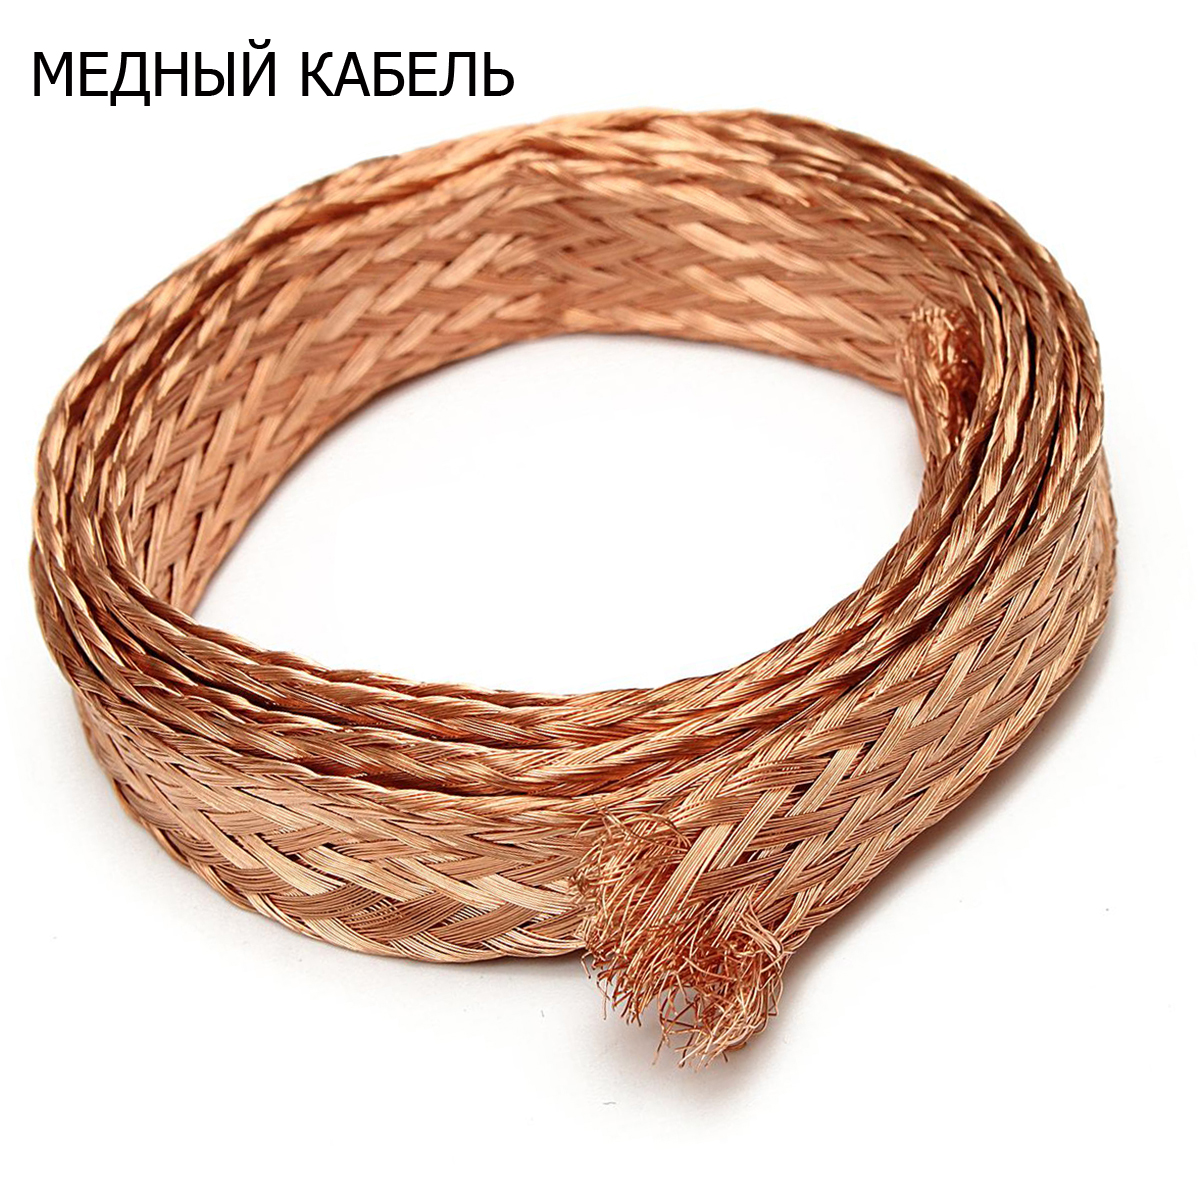
- copper cable for grounding;
- wires for connection;
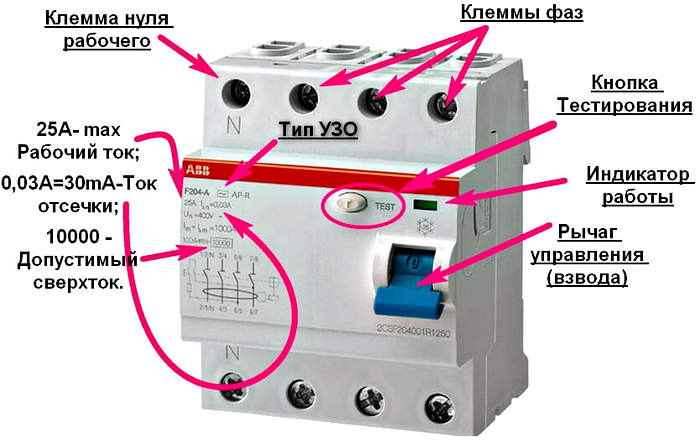
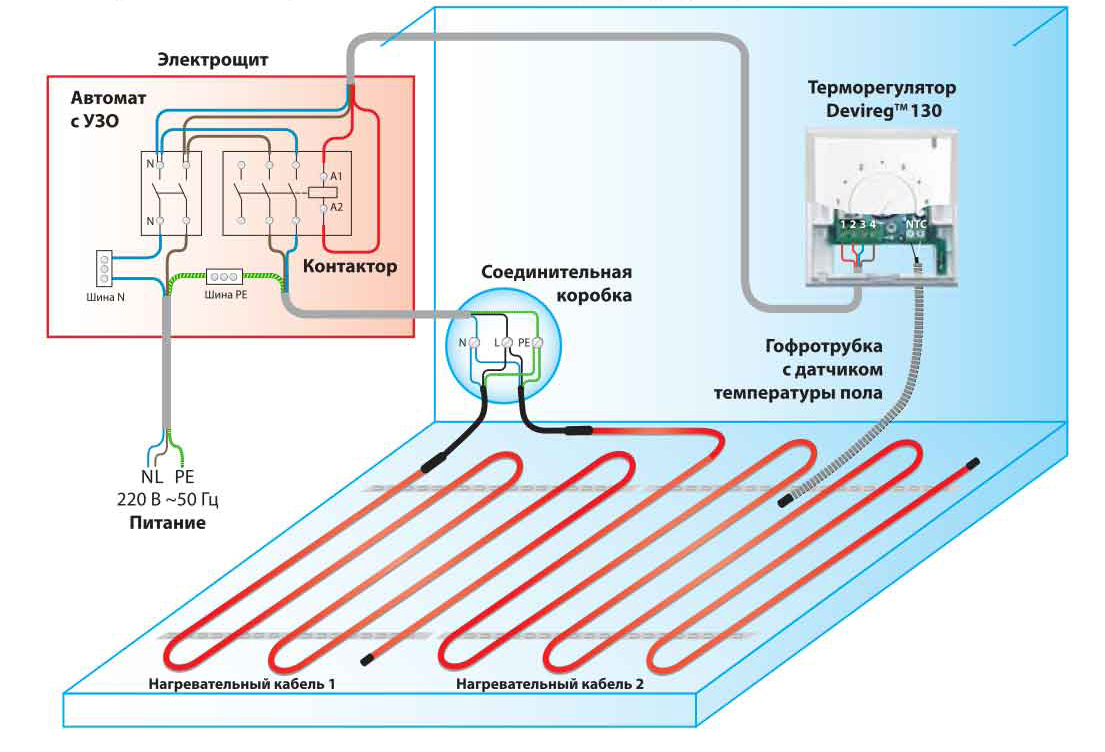
- UZO protection system;
- regulator;
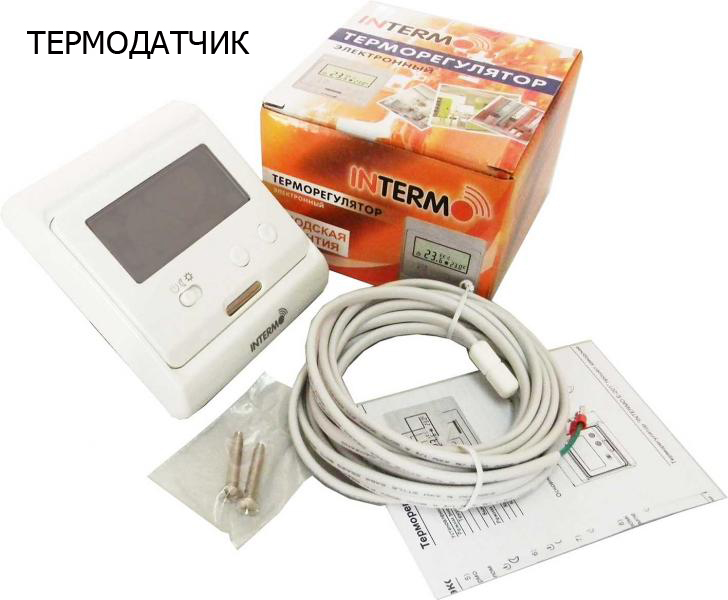
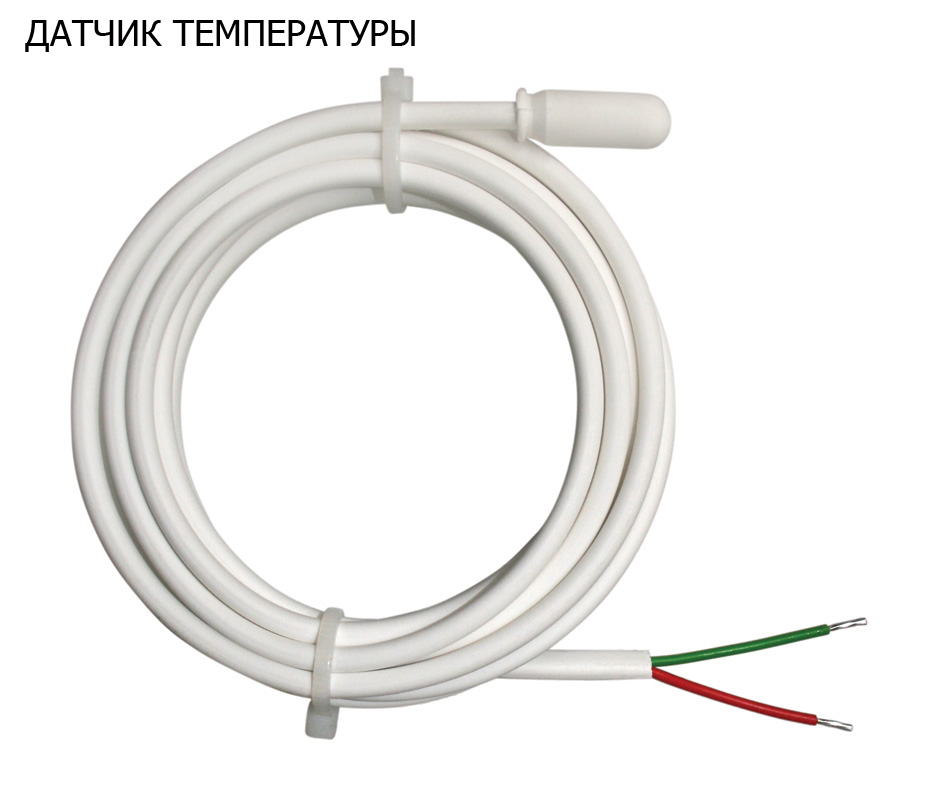
- thermal sensor;
- glue;
- mounting tape;
- temperature sensor;
- pump.
The defining principle in the selection of materials is the calculation of the heat loss of the room. You must select a specific wire laying step and the desired length for the entire space. For film systems, calculations are easier: you need to select as many elements as you need to cover the entire area. It is necessary to take into account the wire connecting the heated floor and the regulator from the meter to the system elements from the regulator. In no case can not connect the electric floor to the outlet.
You must ensure that the electrical input can withstand the load. Otherwise, it will have to change and pick up the necessary automatic fuses.
How to do it yourself?
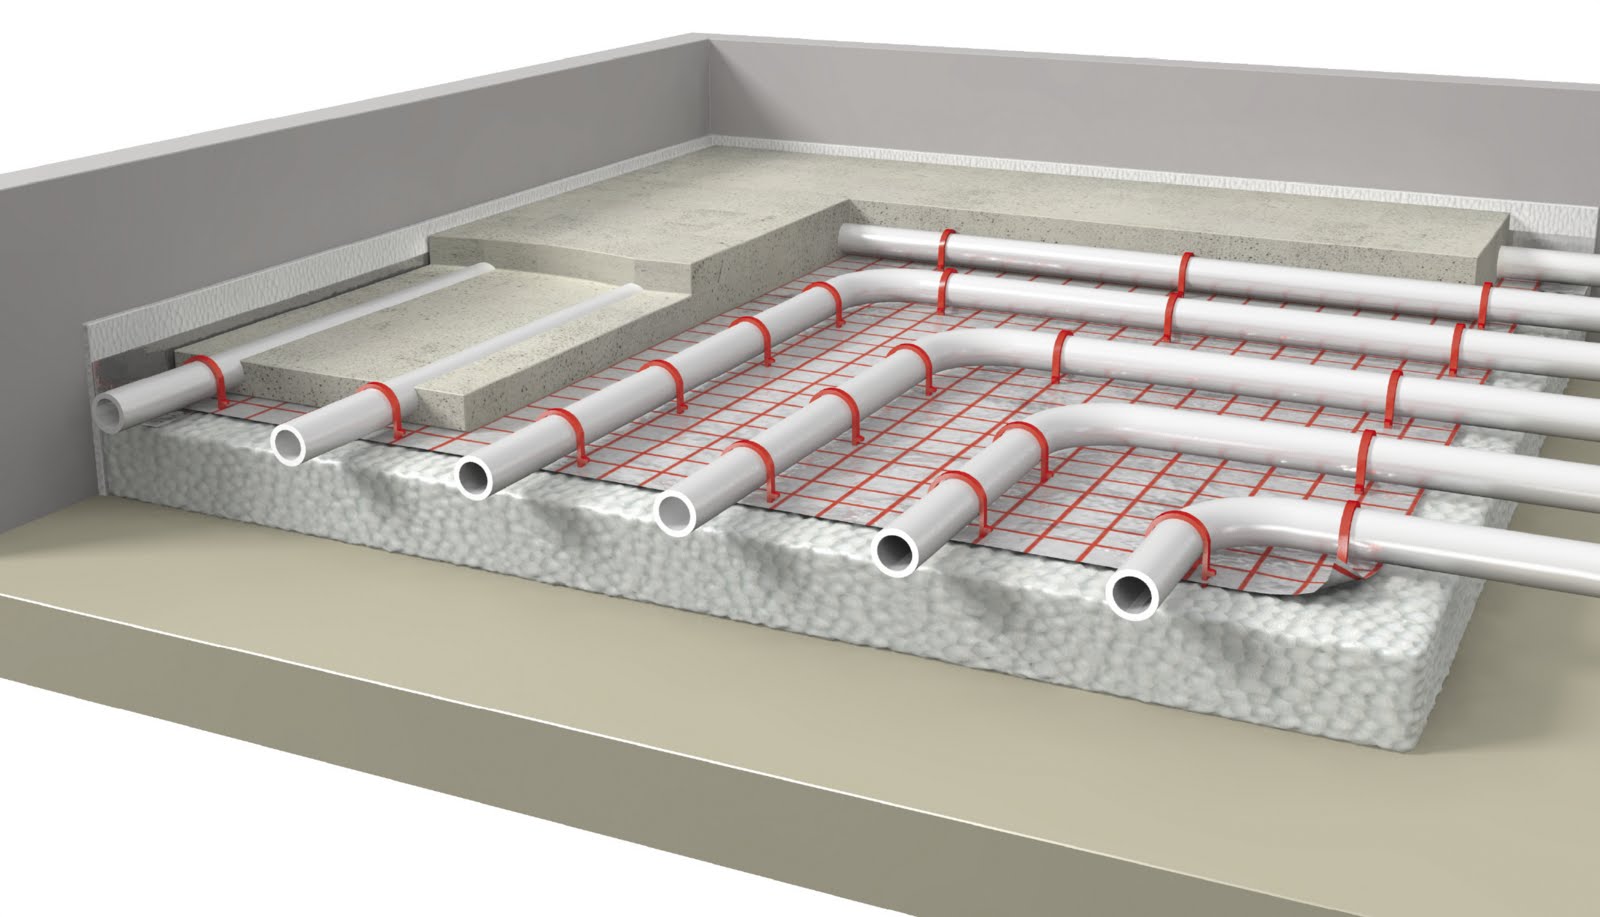
If the owner of the house wants to do the installation himself from “A” to “Z”, he will have a lot of work. It will be about installing a water floor, since it is most optimal in private homes. First you need to prepare the floor itself for installation.
The procedure is as follows:
- It is necessary to eliminate the floor covering, if any. With the help of cement mortar need to fill the cracks. Also fit a small layer of clean coarse sand. You need to make sure that the floor has no distortions. For this you will need a construction level.
Otherwise, areas with coolant stagnation will appear, and, therefore, the rooms will not be able to heat up properly.

- It should be mounted tape from the damper along the perimeter and at the contour of the junction. The tape itself is any width. It may be adhesive layer, and may be absent. The width of the tape must be greater than the calculated height of the concrete screed. You need to choose a mount, depending on what the wall finish. The tape with an adhesive layer is easily attached to flat walls, and it is worth attaching the dowel-nails to rough surfaces.
The tape is needed because it ensures the reliability of the screed during heating or cooling the floor.
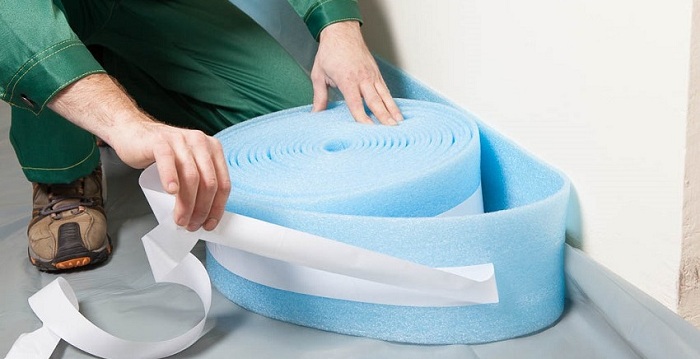
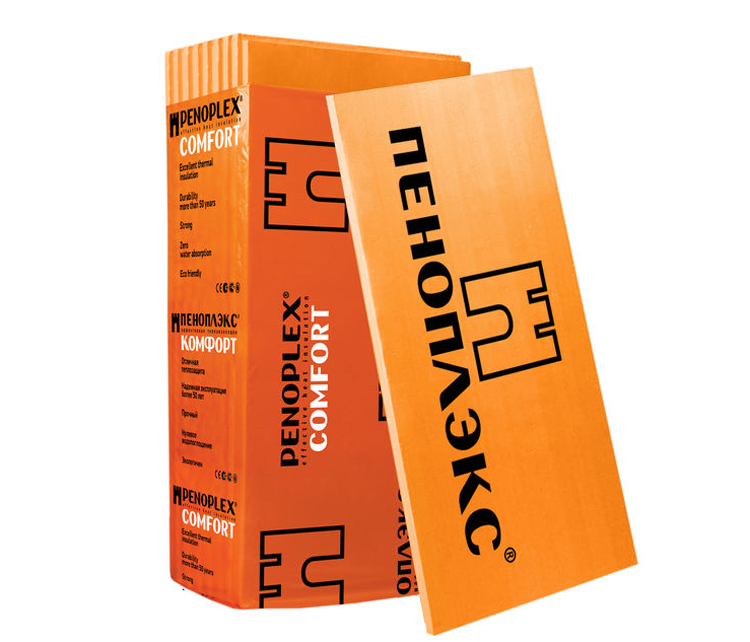
- Then you need to do the laying of reliable thermal insulation.She can be polystyrene in the form of plates, and maybe foamed polyethylene in rolls coated with foil. Plates must be laid, avoiding the cracks. Actions with rolled materials are done exactly the same, but you still need metallized adhesive tape, which can connect the joints.
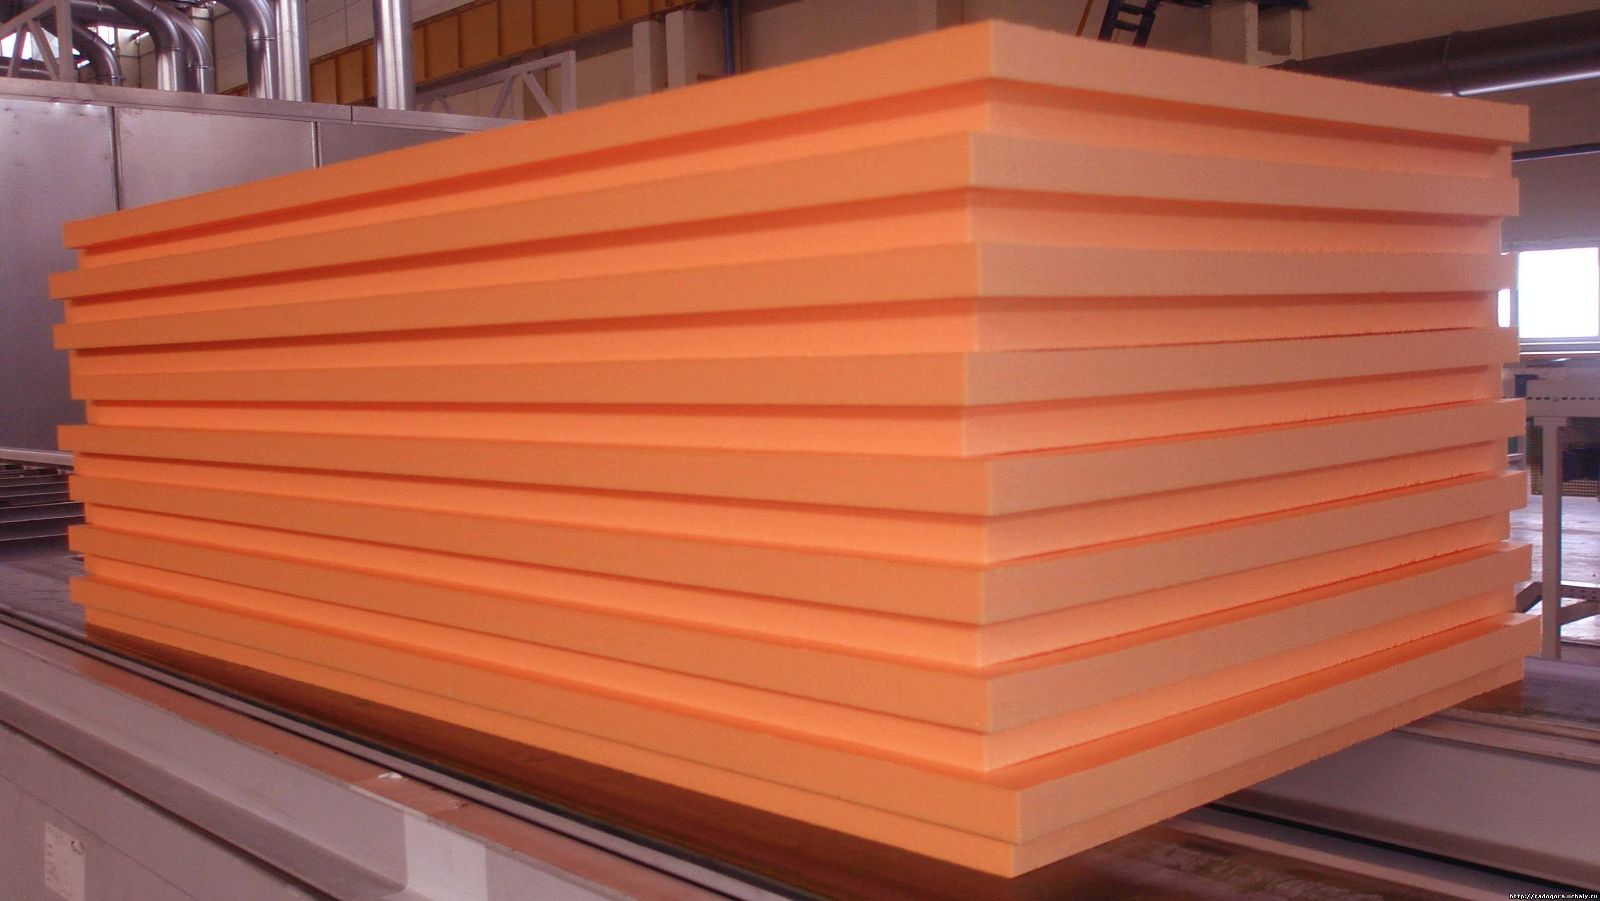
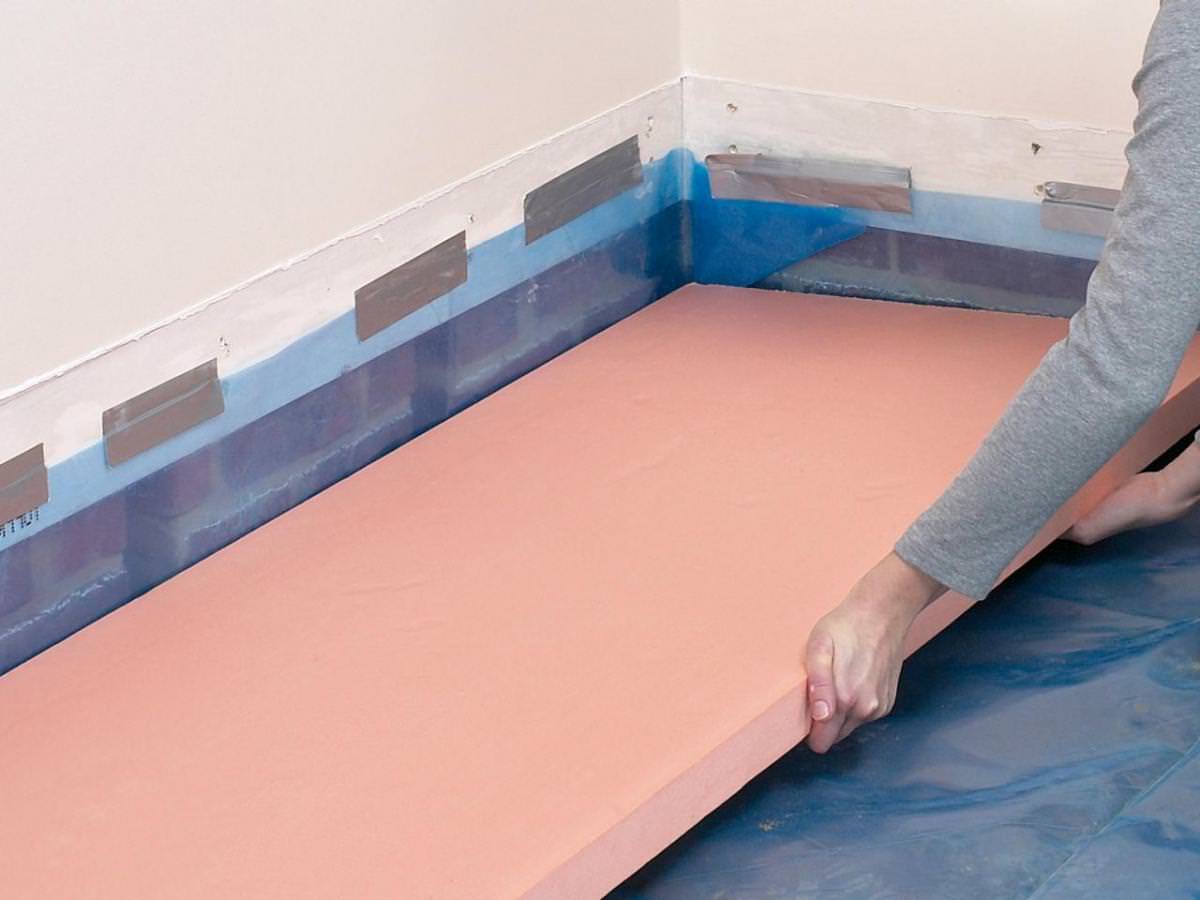
Polyethylene is more often used in low spaces because it is difficult to use thicker insulation there. Insulation itself must be covered with a film of polyethylene, whose thickness is about 200 microns - this will provide favorable conditions for drying the concrete and preserving its reliability.

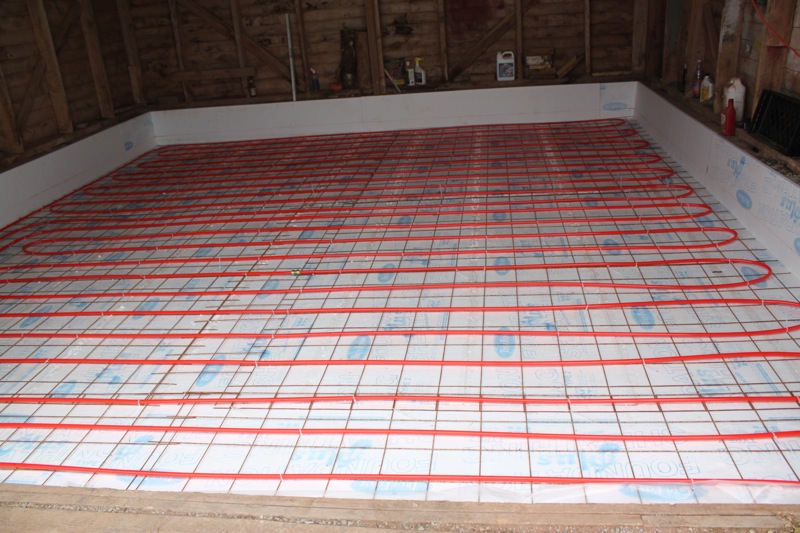
- It is necessary to put reinforcement on the floor. It can be a grid with 10-centimeter cells or a grid of 6-8 mm rods attached in the areas of intersection with a wire.
A grid is placed on the plastic guides, which will create a space between the base and the reinforcement.

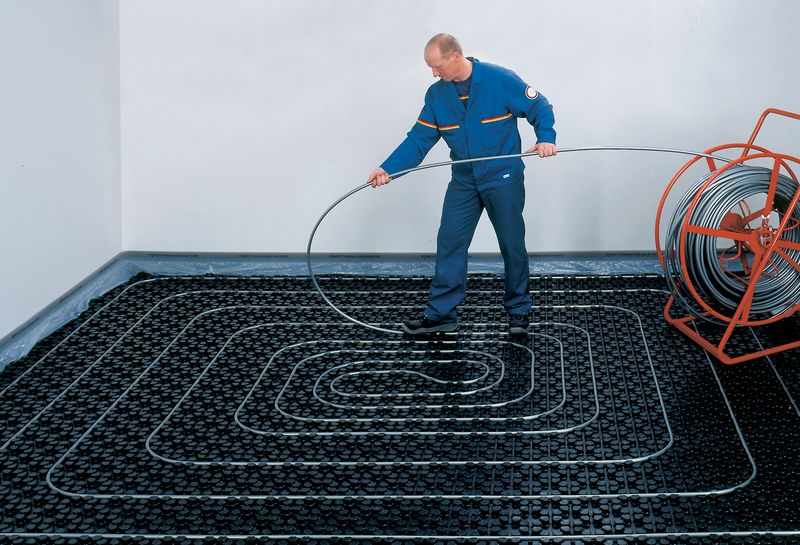
- Polystyrene plates with bosses will help to lay the water circuit, they do not need to mount guide pipes. During the laying of polystyrene need to use pipes made of metal instead of polyethylene.
The fitting is done after the water circuit has been installed.
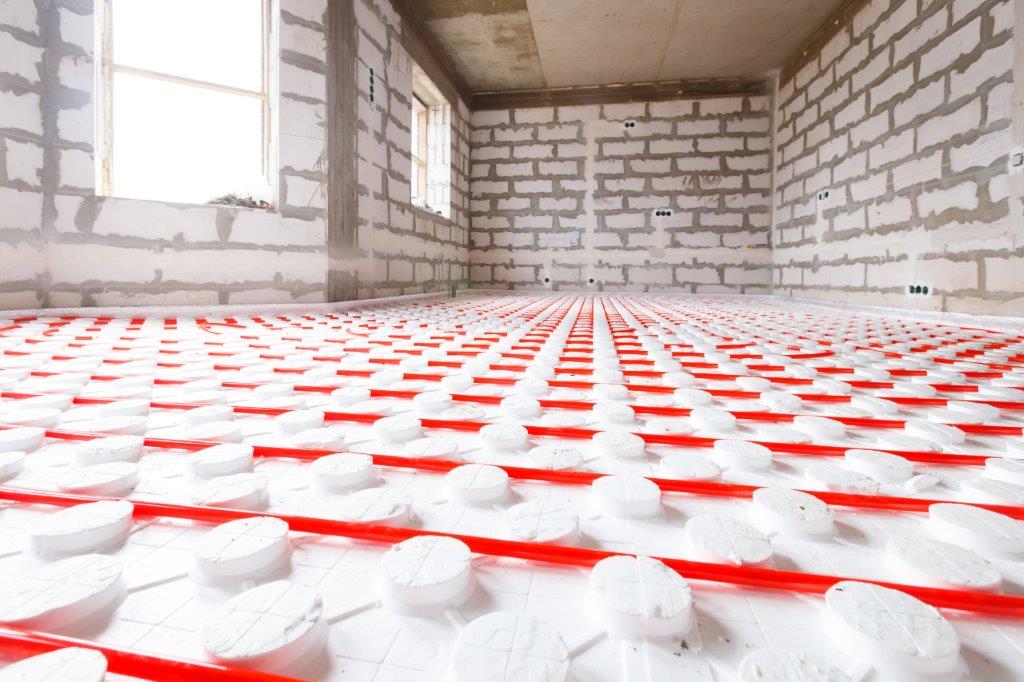
- The diameter of the tubes is usually from 16 to 20 mm. It is undesirable to use tubes of the big sizes as water expenses will increase.
- Uniform distance from the wall ranges from 75 to 115 cm.
- Pipe laying should be level and neat. This will contribute to a pre-planned route of the pipe through the floor.
- To avoid leaks, the bends of the pipe must be free of joints.
Pipes are laid in such schemes as:
- snake;
- double snake;
- spiral with offset center;
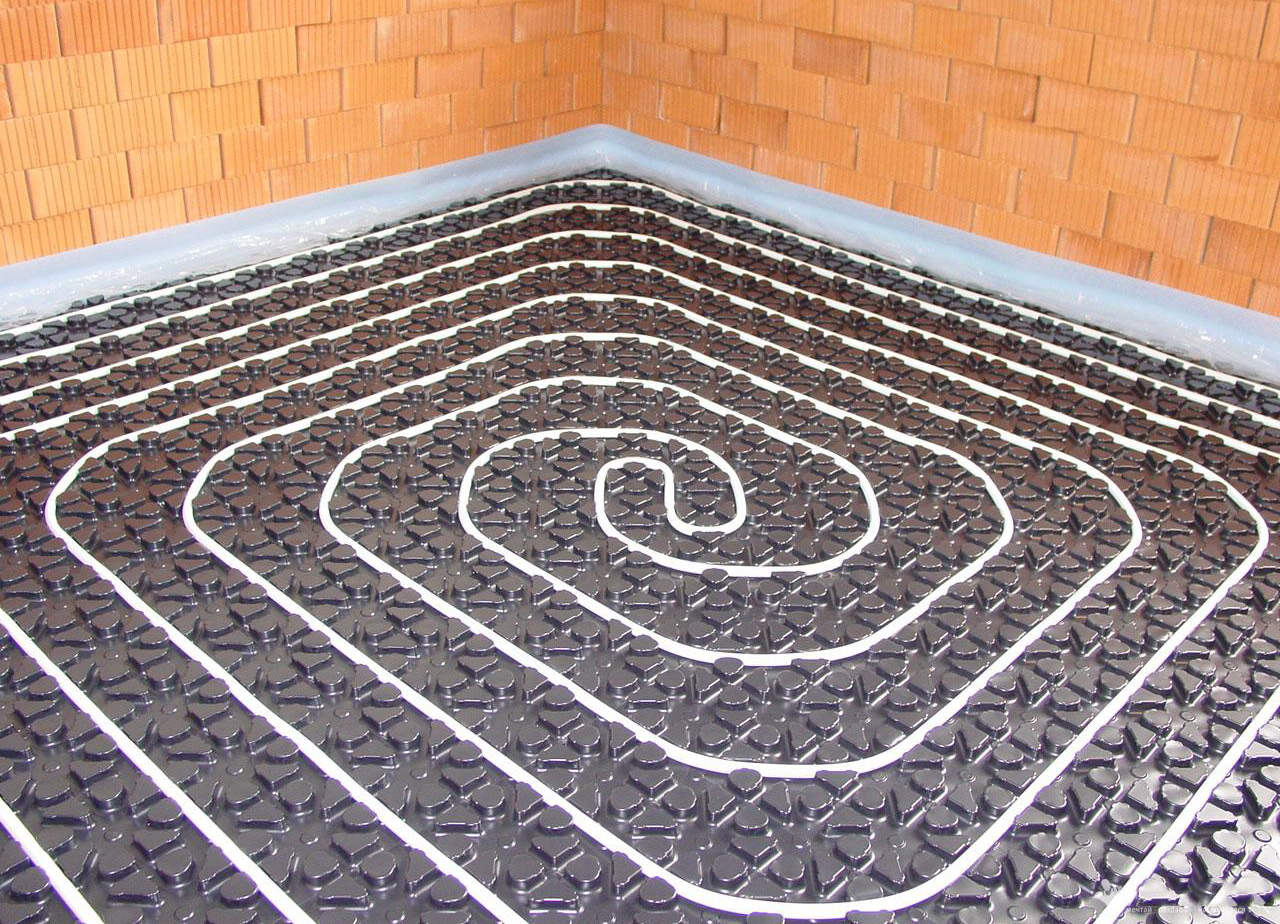
- simple spiral ("snail").
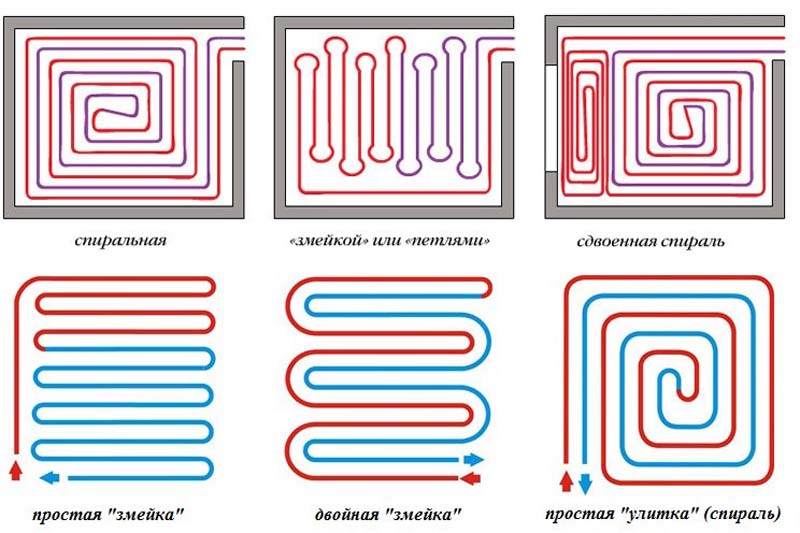
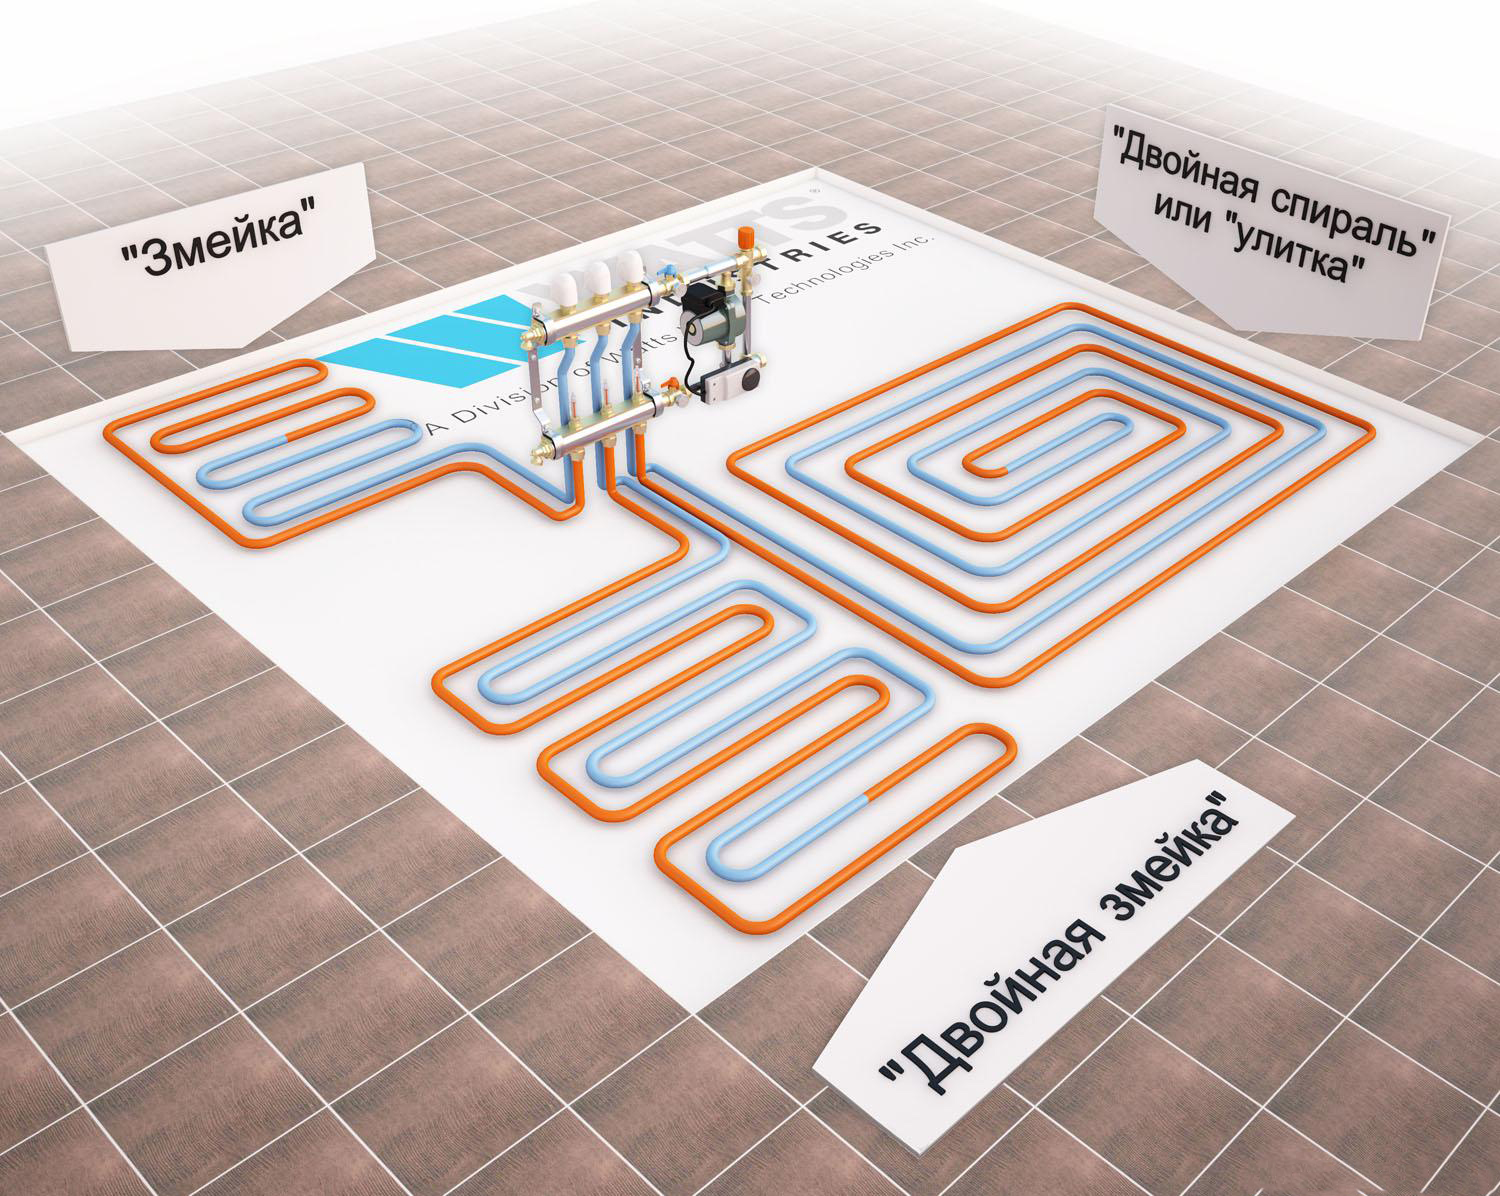
It is recommended to use laying "snail", because its contour has the minimum number of angles. Water pipes are placed with a distance of 15 cm, for the southern regions will fit 30 cm.
Water circuit pipes must be no larger than the trunk pipes in diameter in order for pressure to become acceptable.
Before proceeding with the installation, you must first draw a plan. Pipe laying begins at the distribution point. The work is recommended to perform with an assistant. One worker is busy laying the pipes while the partner ties the pipes to the fixture using plastic clamps.Alternatively, pipes can be fastened between bosses.
Then you need to bring the edge of the pipe to the distribution point and fix it where the floor and wall meet. For this you need metal sleeves. Connecting fittings connects the contour of the warm floor to the distribution point. After that, the system is filled with air or water.
It is necessary to ensure that the pipes are safe and sound.
The screed fills better when filled with air system. For screed used concrete with mark 200, filled with fine grain. Concrete is poured onto the foundation, then plank lighthouses are placed. The floor is smoothed using the rule. The screed must be high enough so that the pipes and fittings can be covered by 5-6 cm.
If the screed is thicker, dedication will worsen. And if the screed is thinner, the pipes will be damaged. Using a sieve, you can coat the surface of the screed with cement, for greater reliability.
The drying of the screed will last for about a month, after which you can install and load a decorative covering, for example, a tile.
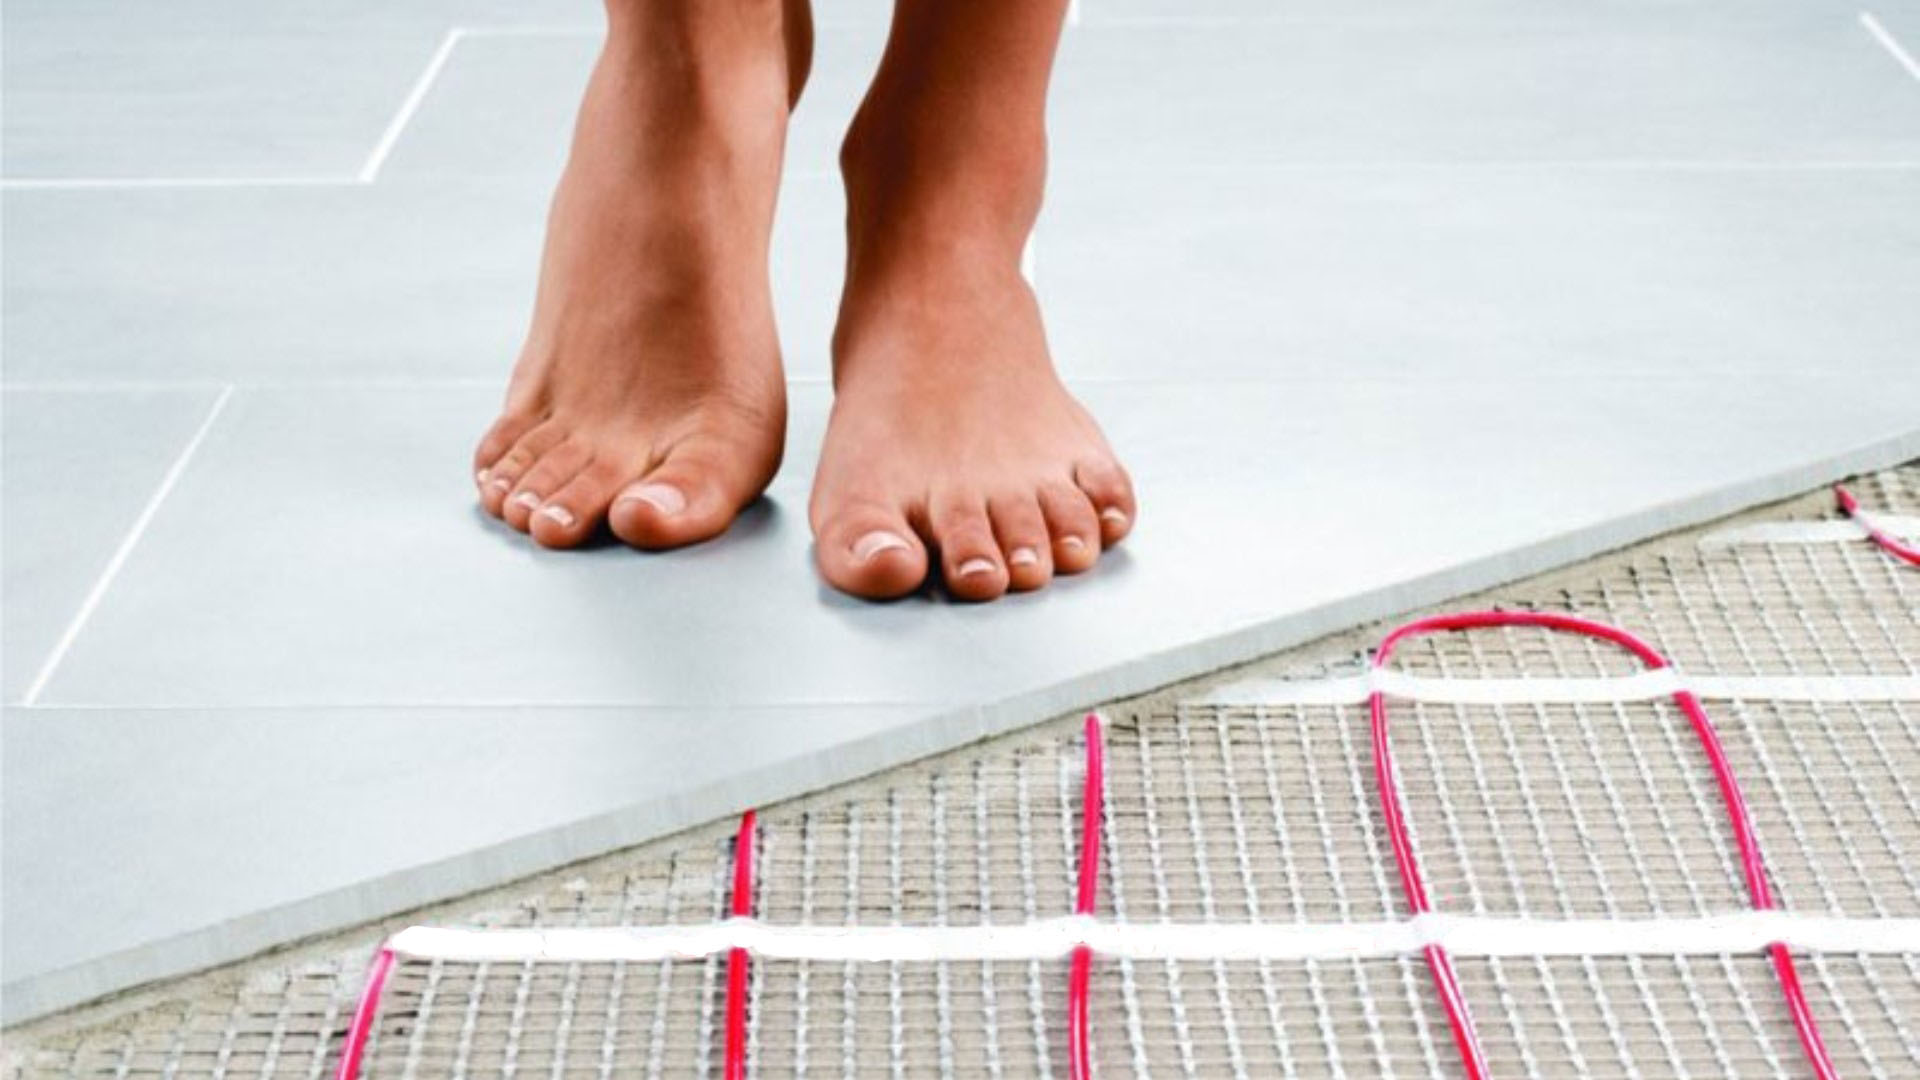
Porcelain tiles - the best option for facing the surface on a warm floor.It can be laid on a warm water floor after the concrete screed hardens. But if leakage occurs, it will be very difficult to repair it locally.
Ceramic granite can be veneered and electric underfloor heating. But if the heating breaks, you will have to dismantle the lining.
If the owner of the house wants centralized heating, he needs to coordinate this with the organization that supplies the heat carrier.
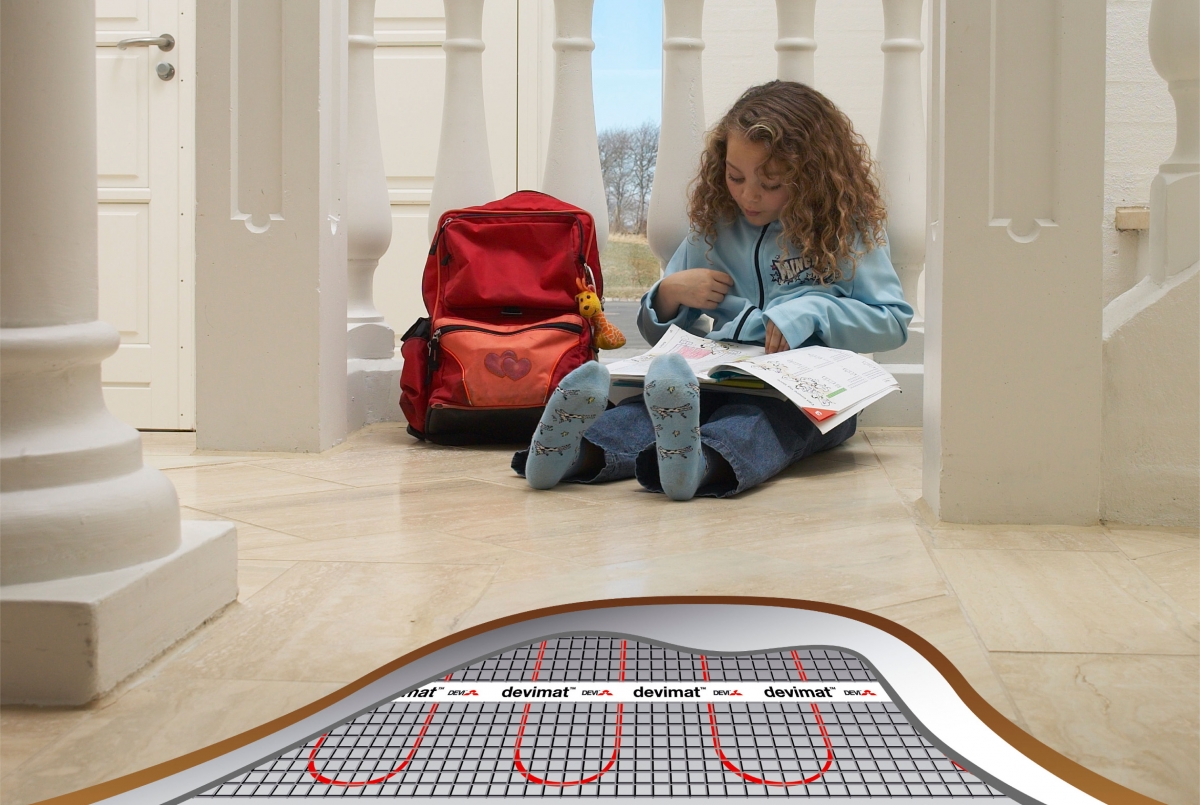
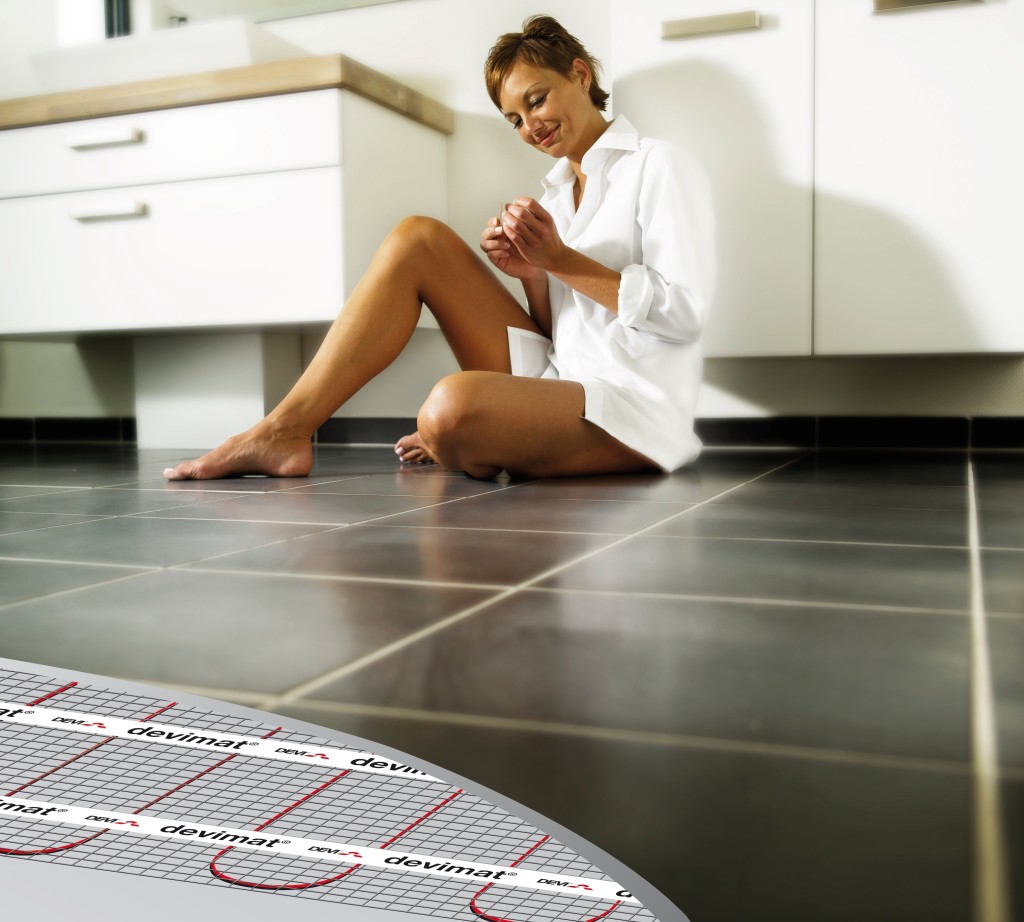
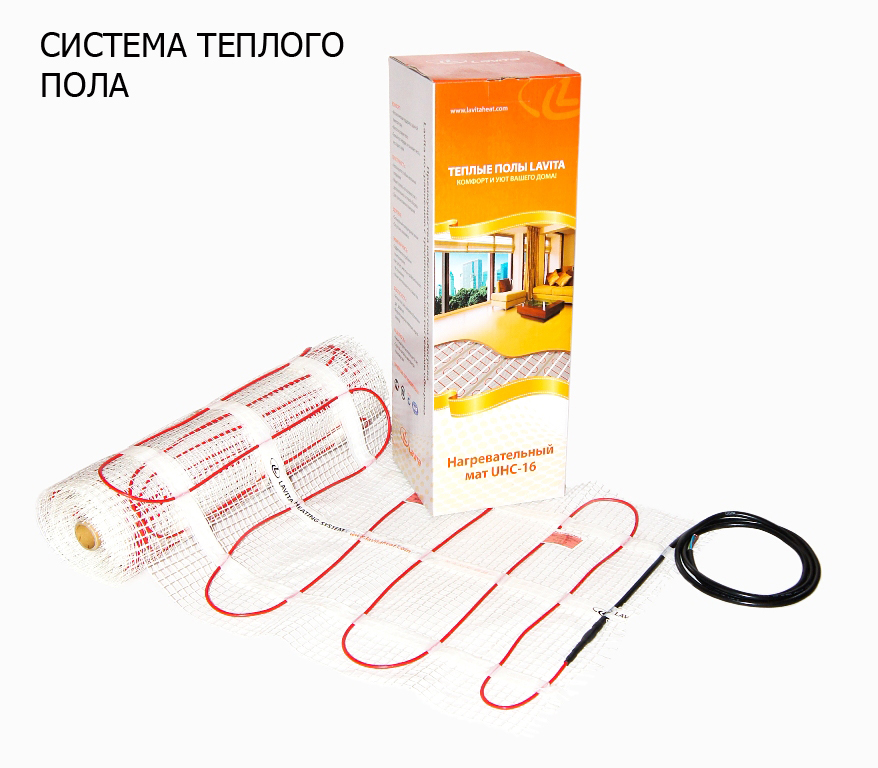
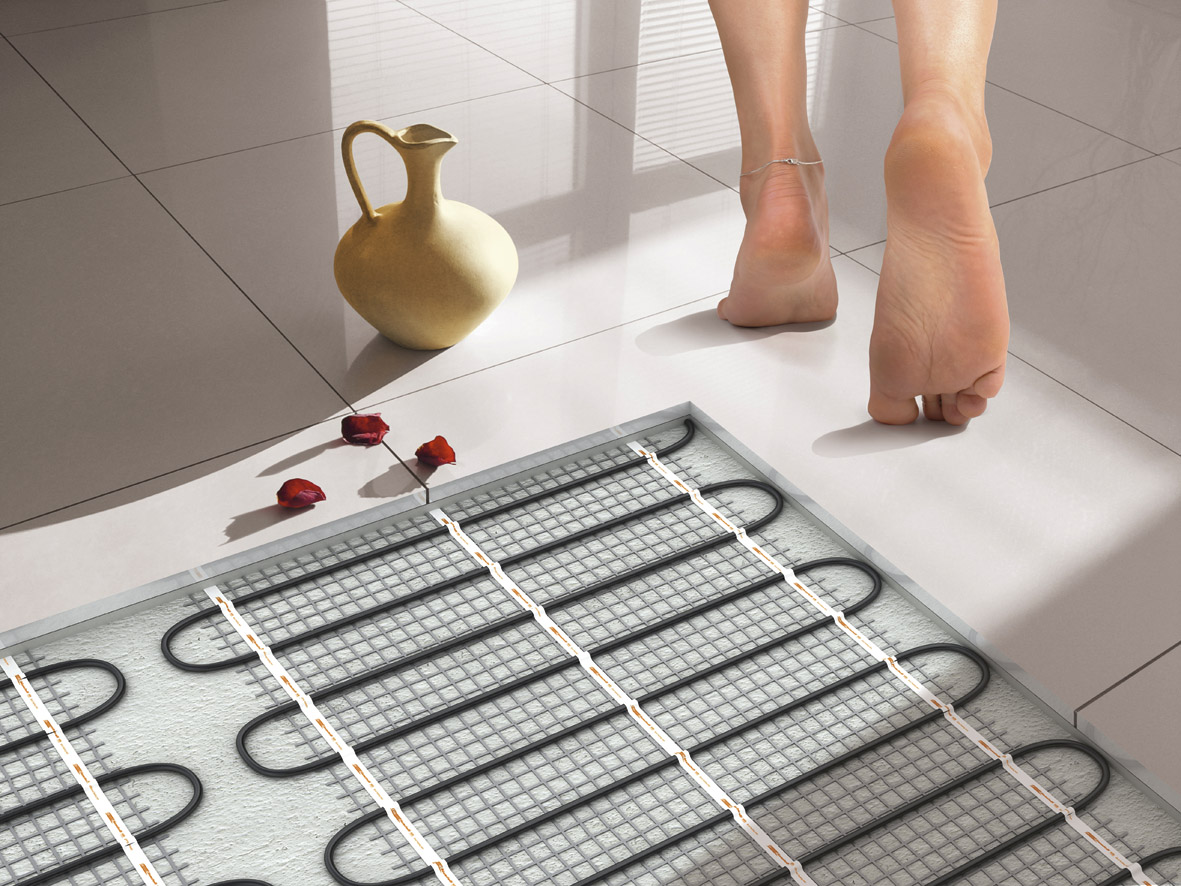
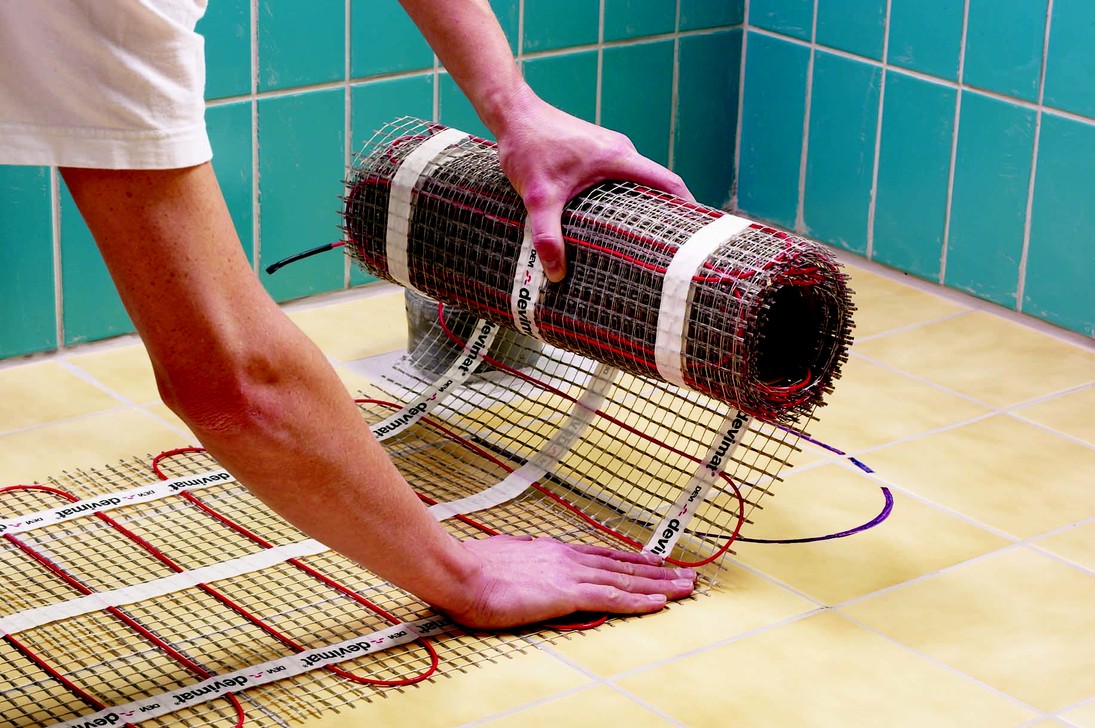
Two systems are in the greatest demand for porcelain stoneware: infrared floors and heating mats. Porcelain tiles cover the drywall in the case of an infrared option, and in the second case - put on top of the mats.
Installation of electric floor is generally the same as the installation of water. The difference is that a cable is laid in the concrete screed, and an additional layer of foil creeps above the insulation.
Note: if the owner of the house wants to install a warm floor on the veranda or loggia, you need to prepare a more dense layer for insulation. To do this, you need mineral wool or polystyrene foam with a thickness of 10 cm.
Heating can also be spread on the wooden floor, but in this case the water system has its own characteristics:
- The location of the pipeline with a circulating coolant is on the surface of a lag or plank floor in specially formed channels.
- Heat distribution plates accumulate and transfer heat to the channels. These elements have a recess in which the pipes of the heating circuit are laid.
- The same plates increase the rigidity of the apparatus, as a result of which the substrate will not be needed during installation.
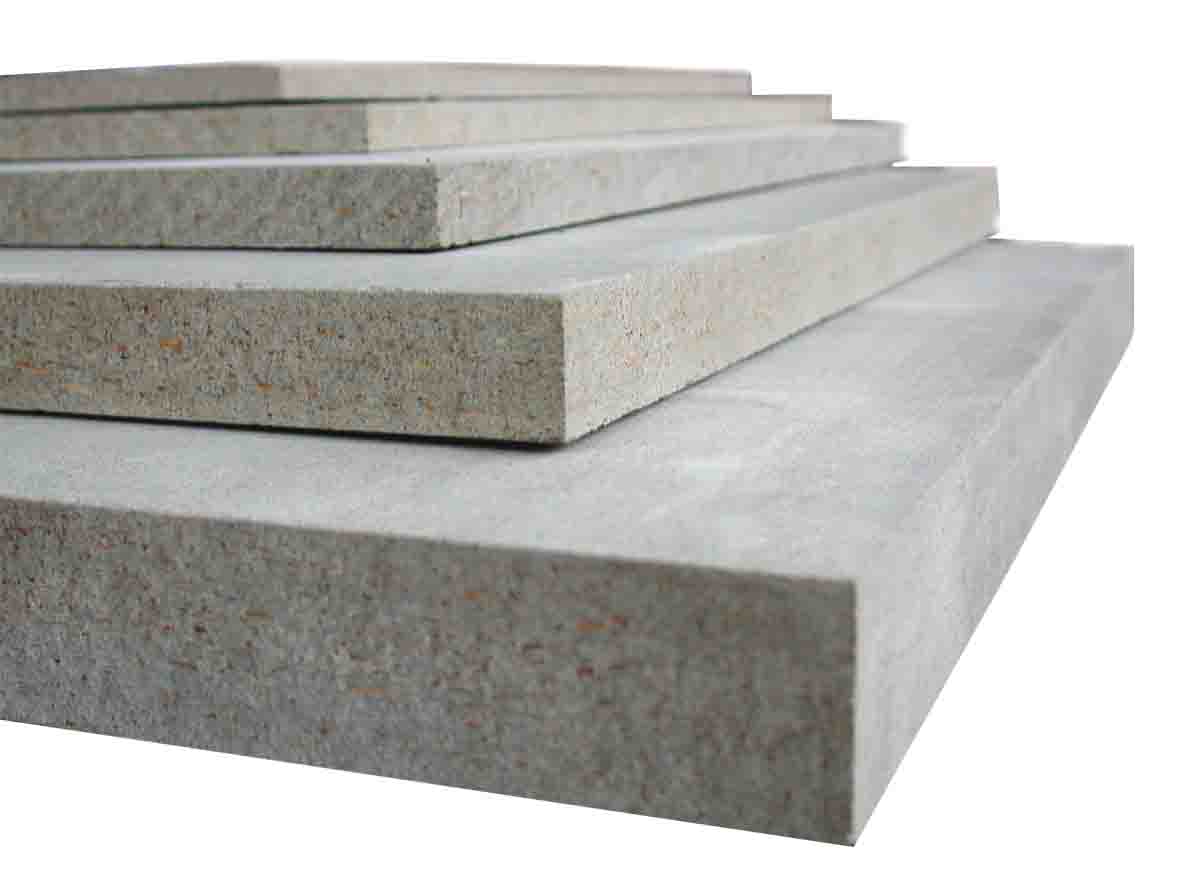
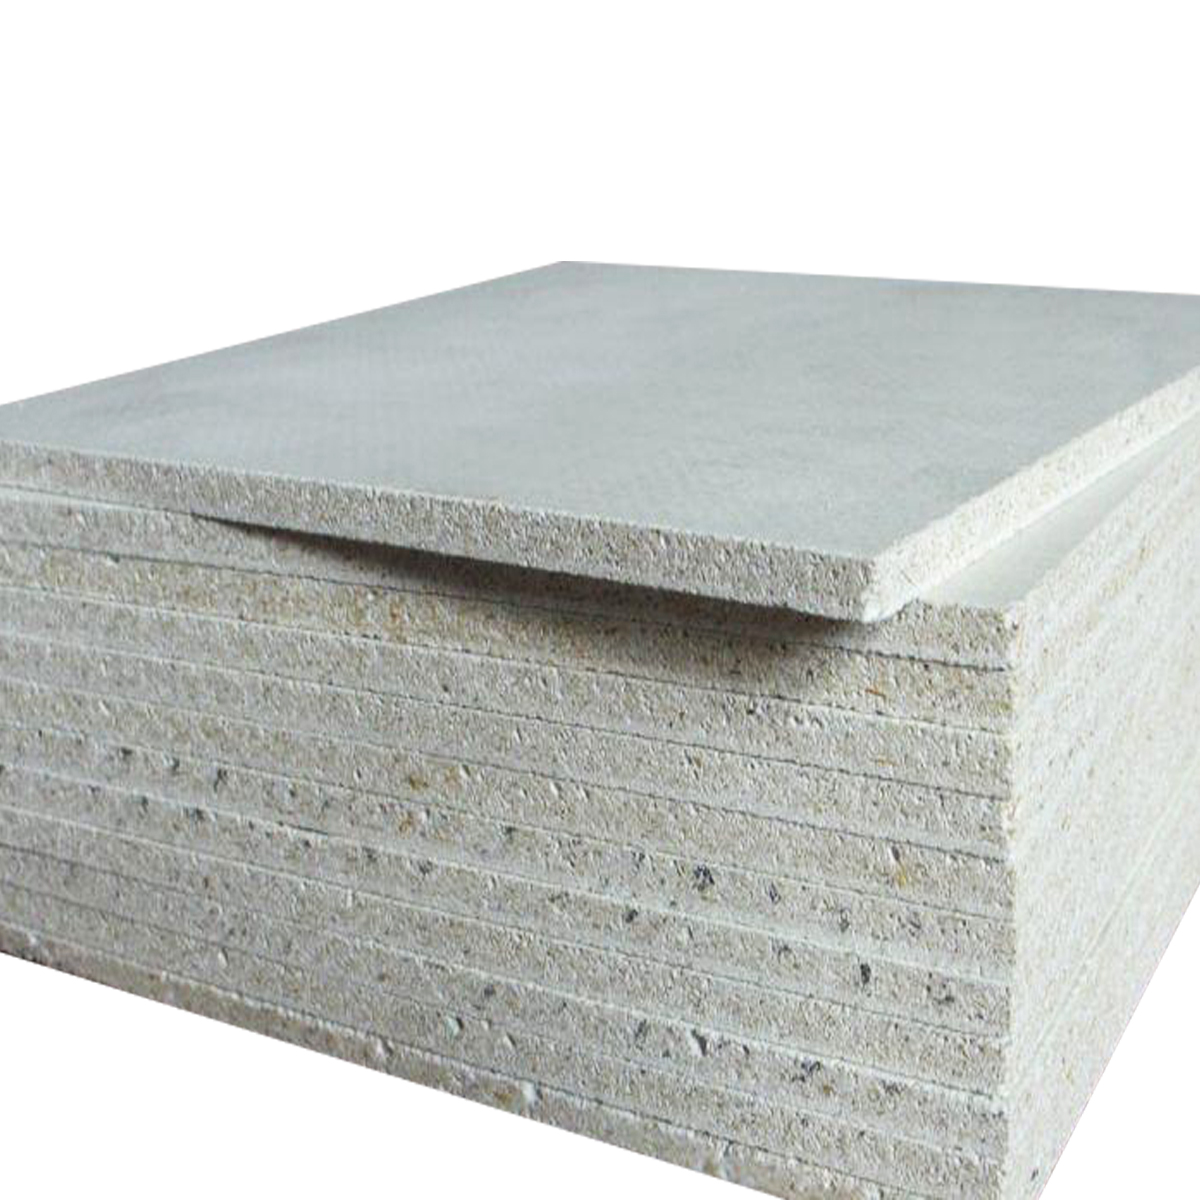
- If you need to finish the floor with linoleum or ceramic tile, cement-bonded or gypsum-fiber boards with small insulating indicators will be useful.

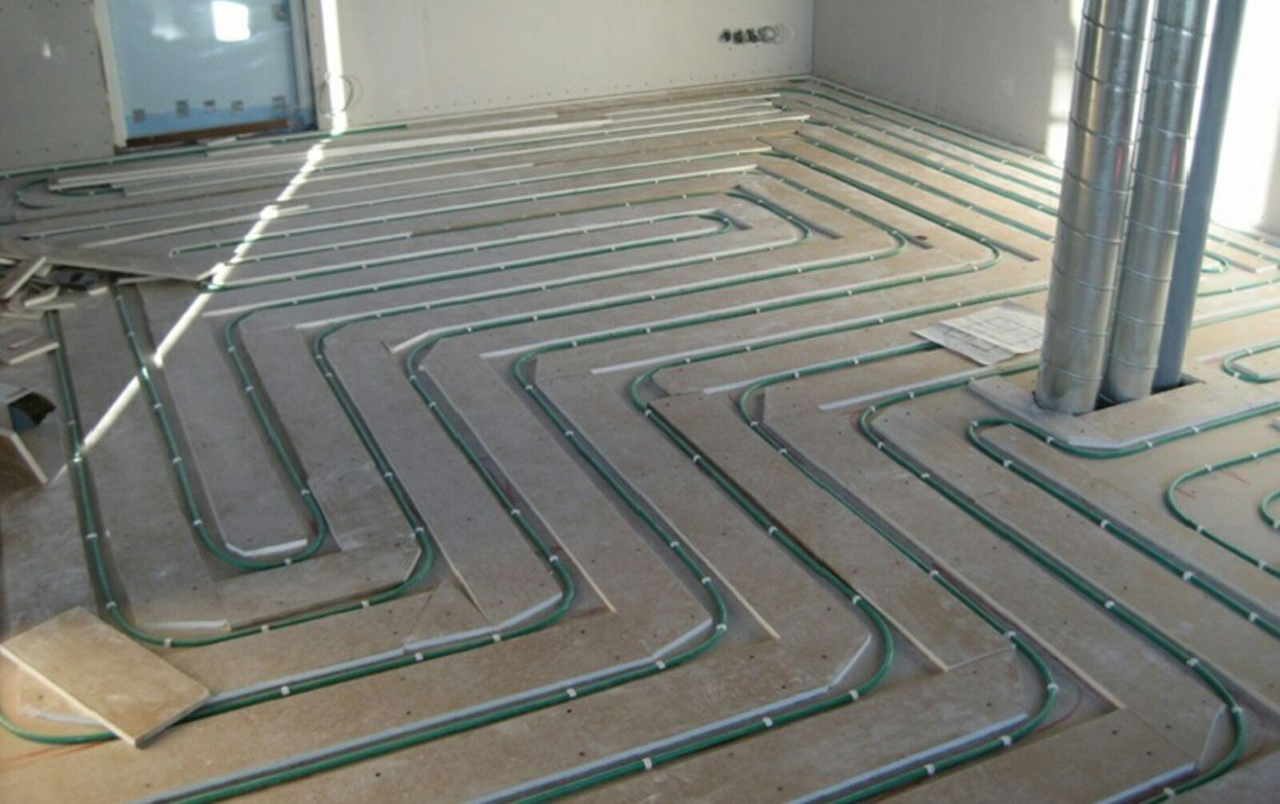
In addition to traditional methods, there is a Finnish technology installation of a heated floor. It facilitates the design and avoids a monolithic fill.
The installation principle remains the same, but the amount of materials has increased:
- Gypsum fibrous sheet - strong, reliable for bending, moisture resistant sheets are sometimes required;
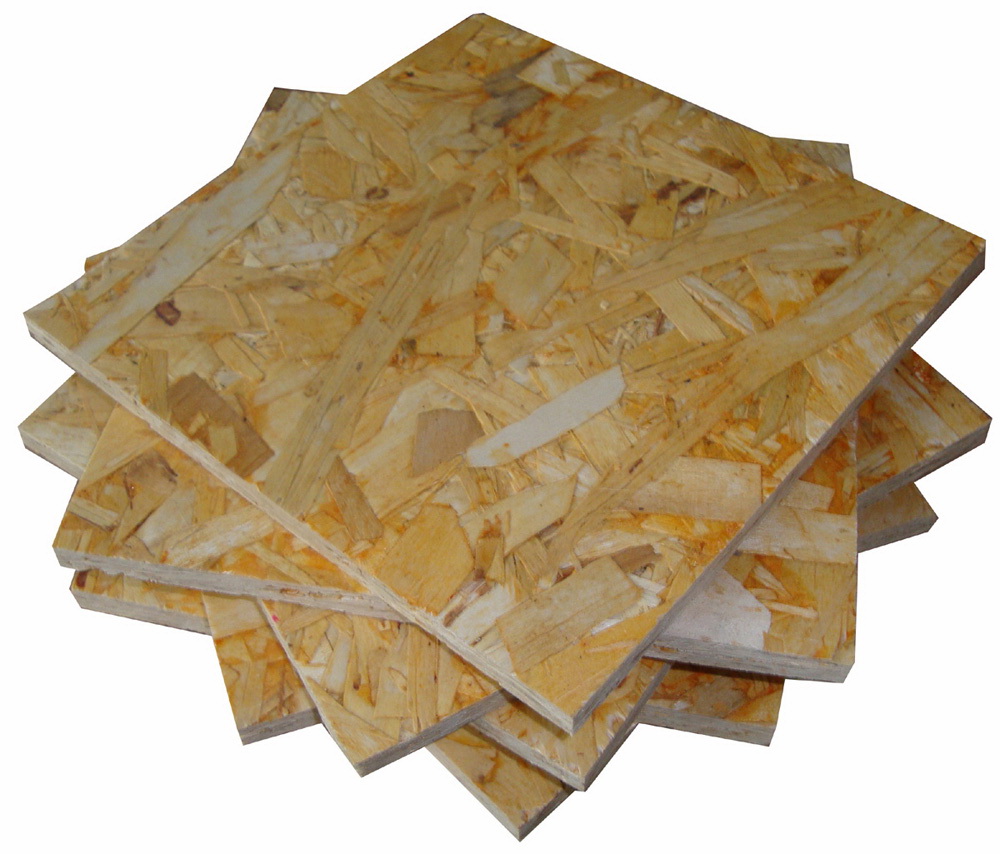
- Chipboard, OSB - this material has less heat output than the previous version; you can purchase full floor kits on a dry screed from these sheets, but they are expensive;
- Cement-bonded chipboard;
- EPPS - pipes are installed in a heater, and gaps are filled with glue; foil increases heat transfer.
Sheets on a plaster base are the best option according to several criteria: the optimal price, simple division into segments, environmental friendliness.
Installation according to the Finnish technology is as follows:
- Vapor barrier passes between the lags, it is superimposed insulation and another layer of vapor barrier, which will strengthen the wood and insulation.
- Gypsum sheets are attached to logs, the space between them should not exceed 60 cm.
- On the formed surface the route of the future installation of pipe contours is drawn. It is necessary to carefully repeat all the bends and turns in the drawing.
- Sheets should be cut into strips and attached to the foundation of the structure using self-tapping screws. The distance between the sheets should be greater than the diameter of the floor heating pipes.
- In extreme cases, you can make two rows of strips, then the height of the structure will be greater than the diameter of the pipe.
- Aluminum foil should cover the floor surface so that it falls into the recesses for pipe installation.
- Following the drawing, the contours of the pipes are laid between the sawed sheets. They are fixed with screws and plastic tape.
- The remaining voids can be filled with glue for the plates or a mixture of plaster.
- The resulting structure is covered with gypsum-fiber sheets. They are the foundation for the finishing flooring.
Note to the Finnish technology: the length of the purchased pipe depends on the area of the room, the characteristics of the heat source, its costs and the power of the apparatus that heats the coolant.
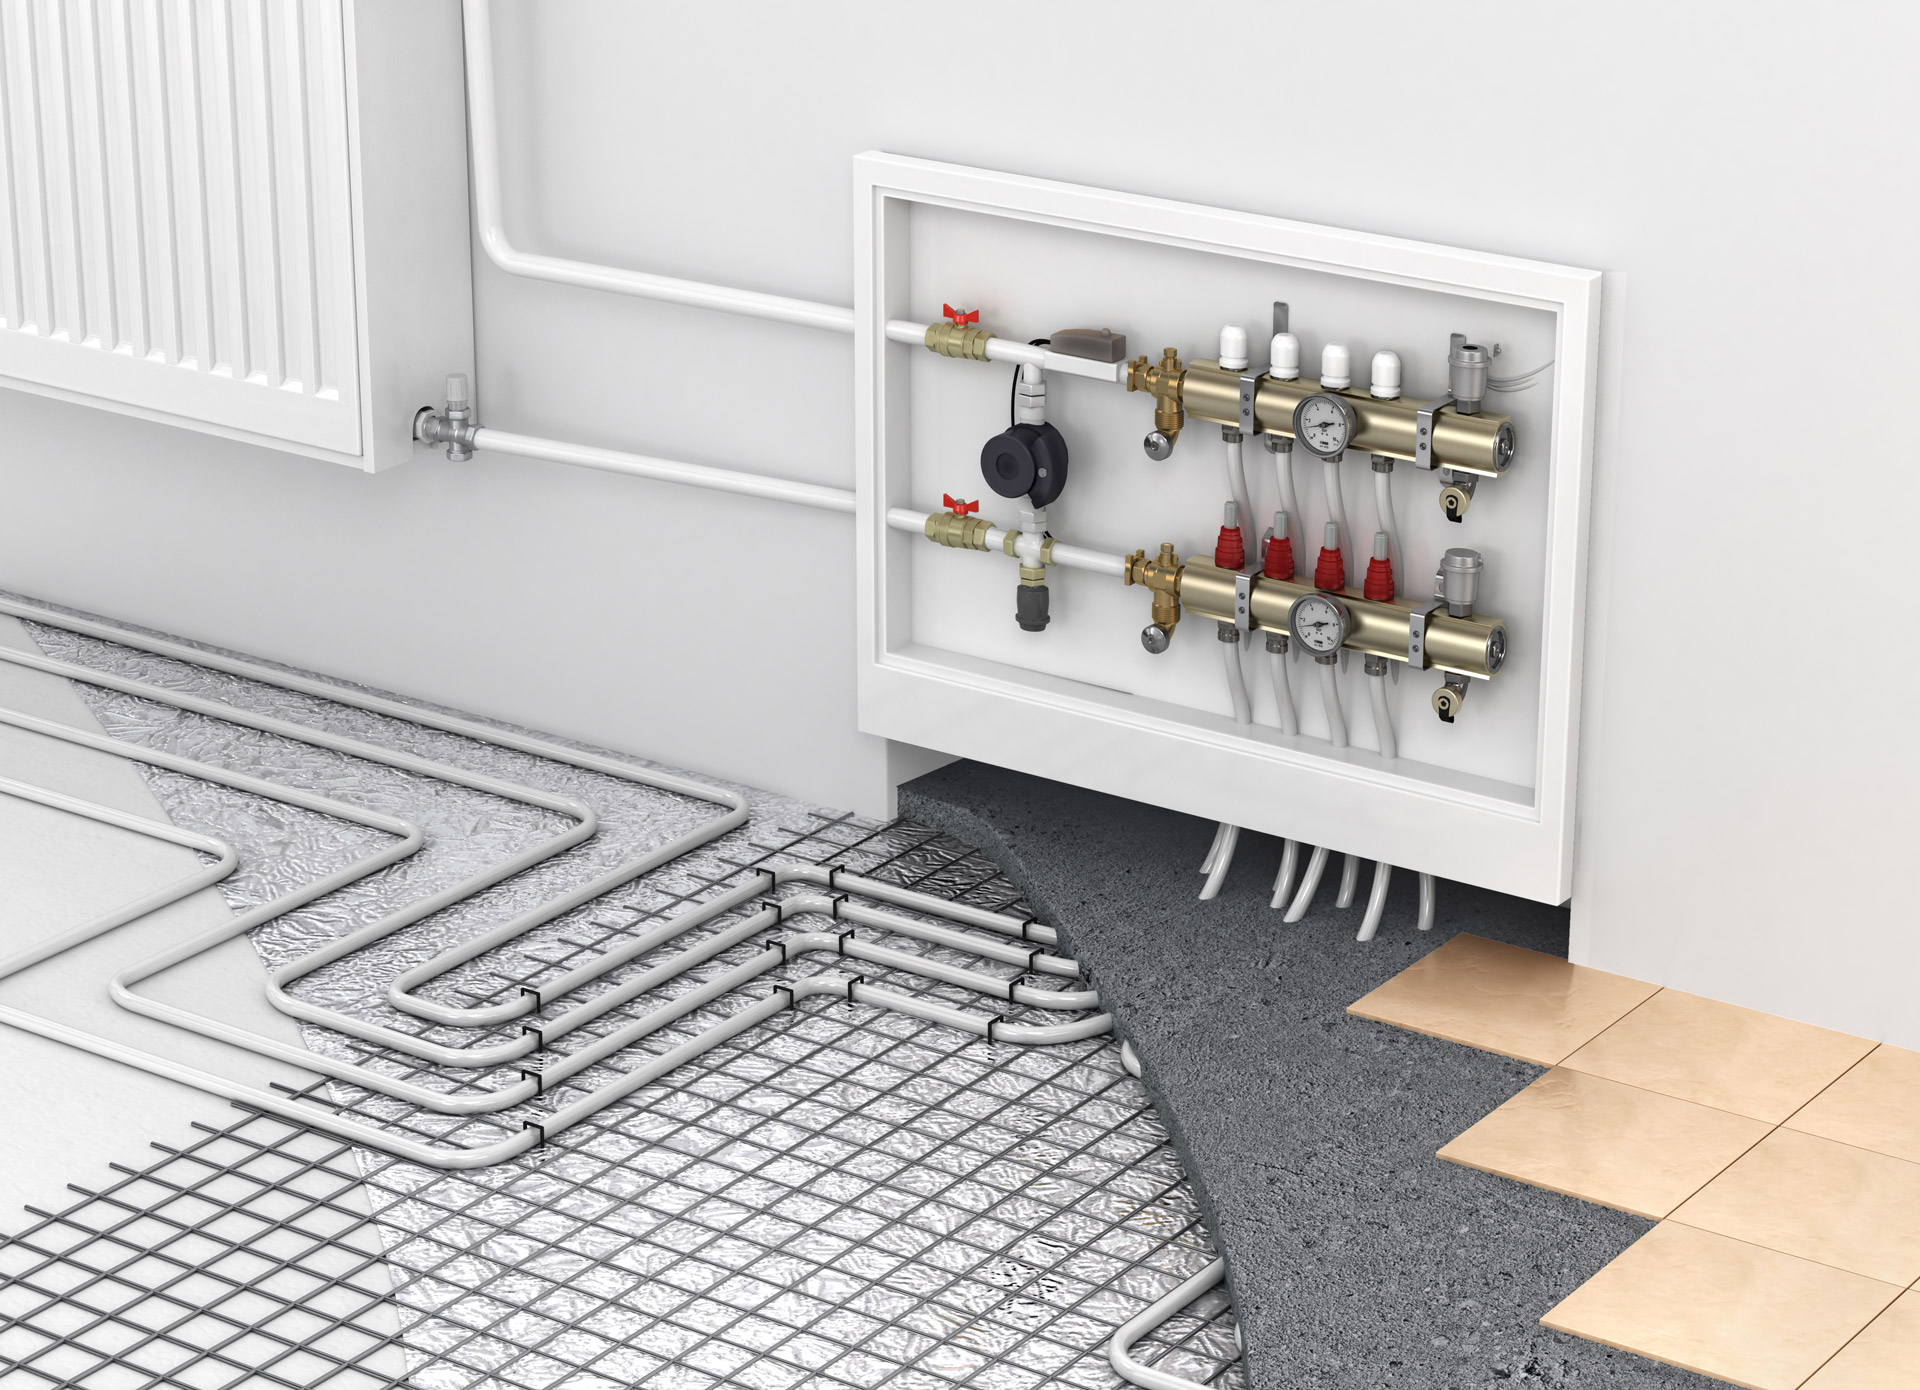
Knot mix or mixing node is needed when the owner of the house finally decided to heat the premises with the help of floors. The following section will tell you how to install the heating system.
Step-by-step instruction
Laying pipes under the screed is not the whole process of installation. A separate task is to connect the device. The boiler is a key element in the heating system. But for the boiler to function, you need to carefully consider the installation of the distribution node.
It can be made of the following materials:
- Brass - expensive material has a long service life and the ability to withstand high pressure. Suitable for all kinds of pipes.
- Copper - the material is able to withstand more pressure than the aforementioned brass, up to 30 bar.This material is ideal for a working fluid like oil.
- Stainless steel is the best option, as this material is relatively affordable.
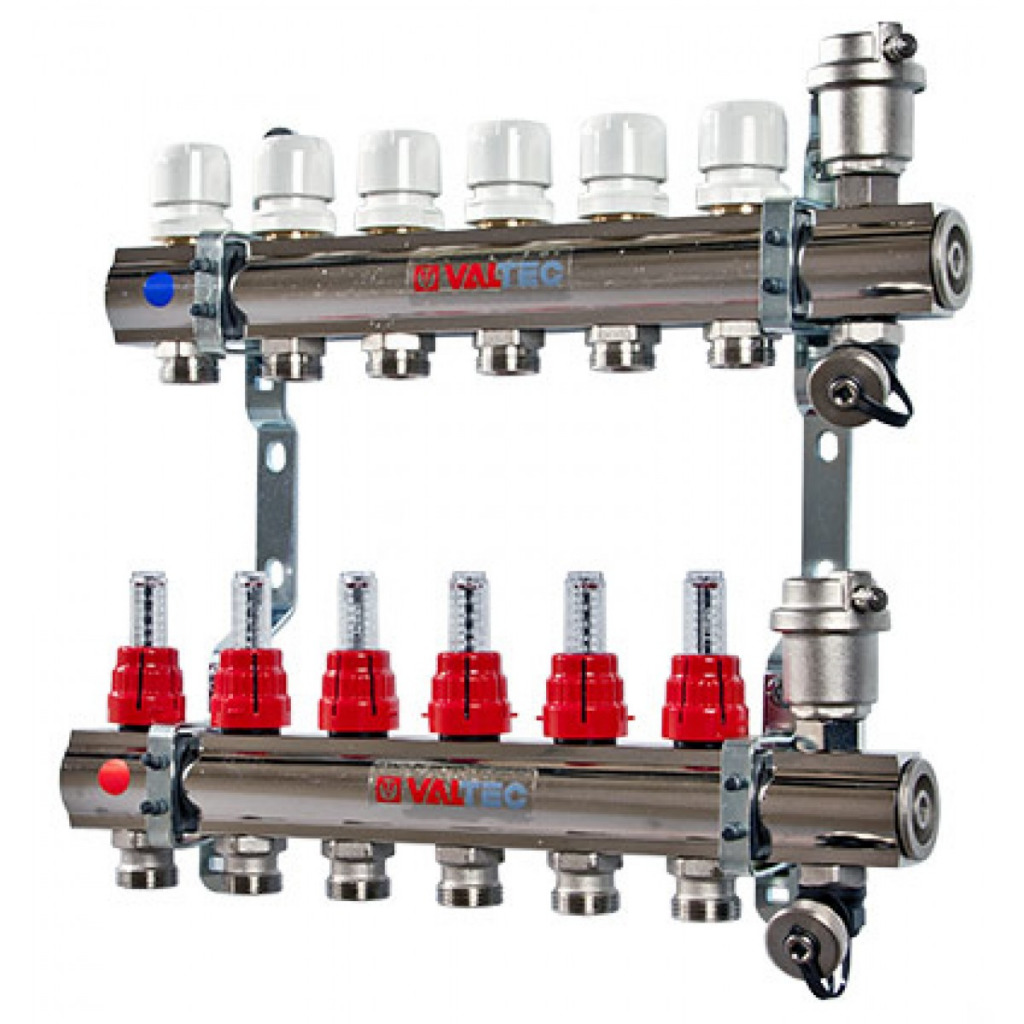
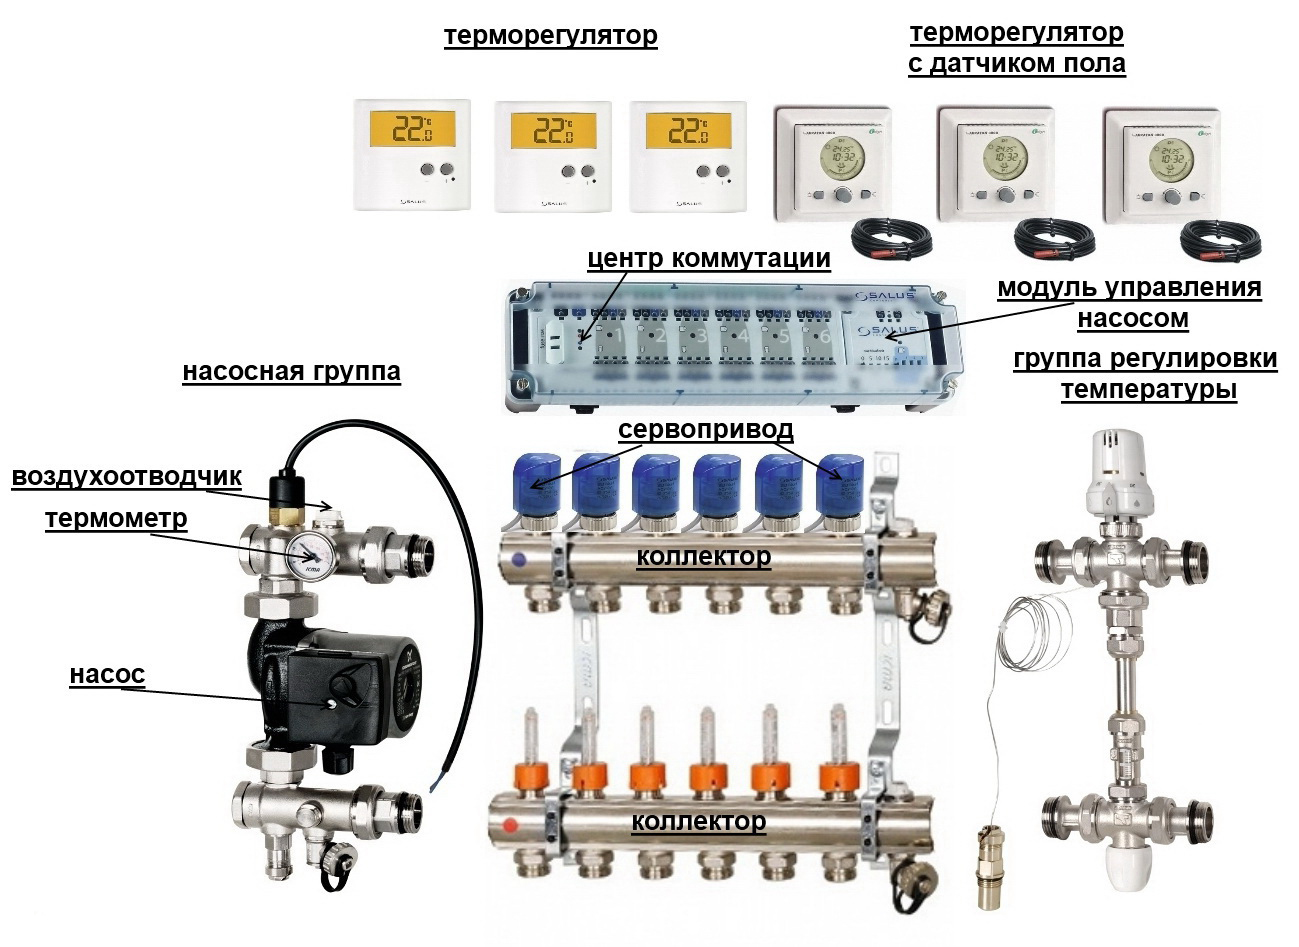
As an additional element for the collector, a comb, an air vent and a drain valve are necessary, since they do not allow air to accumulate.
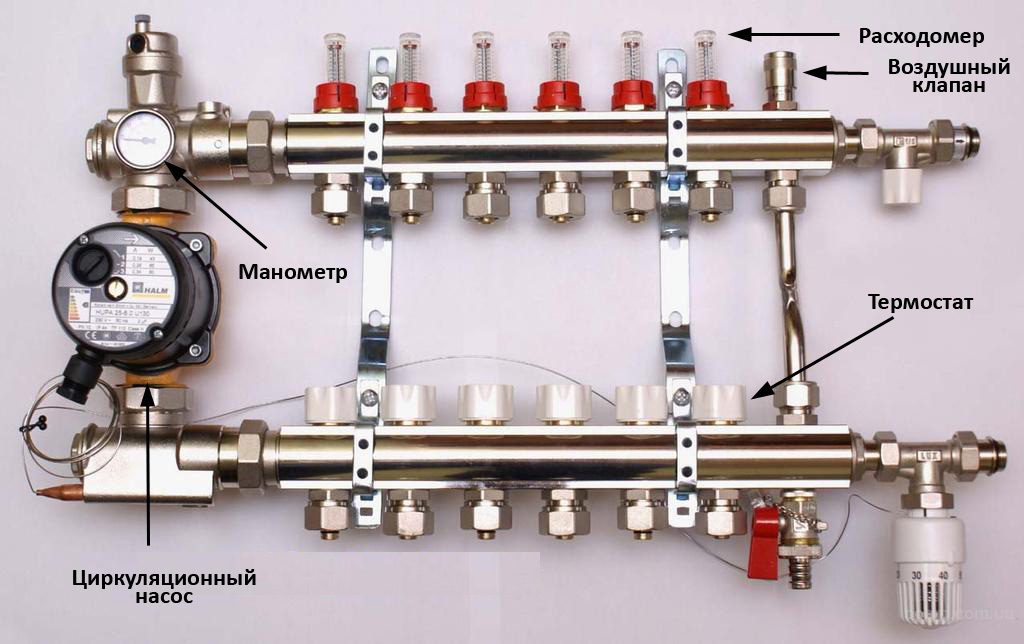
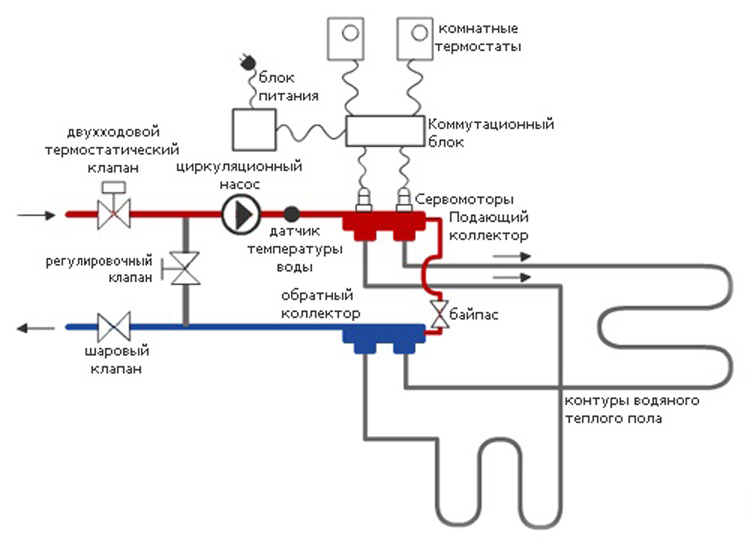
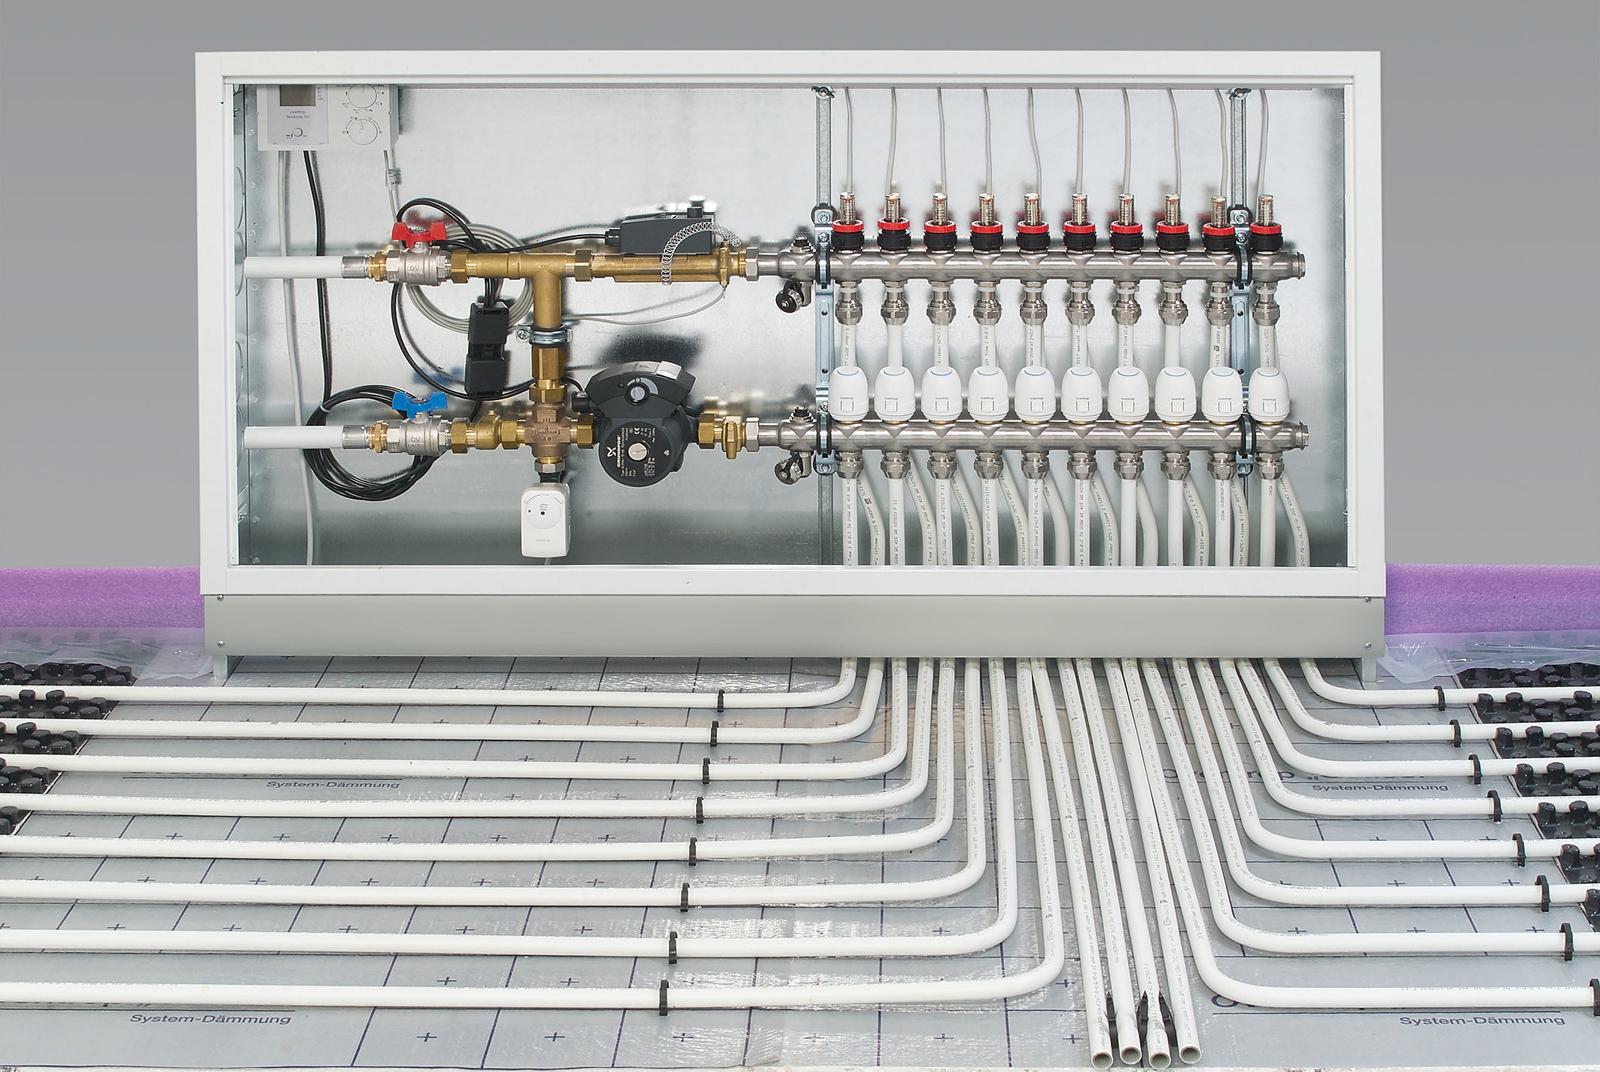
Collector cabinet should be located in a specially designated place. Heaters must be at equal distances from it. A cabinet, a box are mounted, supply pipes (hot water from the boiler) and return pipes (cooled water, which heated the floor) are supplied to the collector. They are mounted valve using fittings.
Then you need to connect a manifold, which consists of a pair of combs, a drain valve, an air vent, a valve, and thermal sensors. The servos responsible for closing and opening the valves of the distribution manifold are connected to the thermostatic valve of the manifold or to a separate valve.
The distribution node must be assembled independently and hidden in the niches. After the supply and return pipes are installed, they are attached to the collector component. In this metal element, the outlet is closed with a plug, and an air vent is mounted at the top.Then you need to bring the pipe contours of the floor and attached to the collector system with fittings.
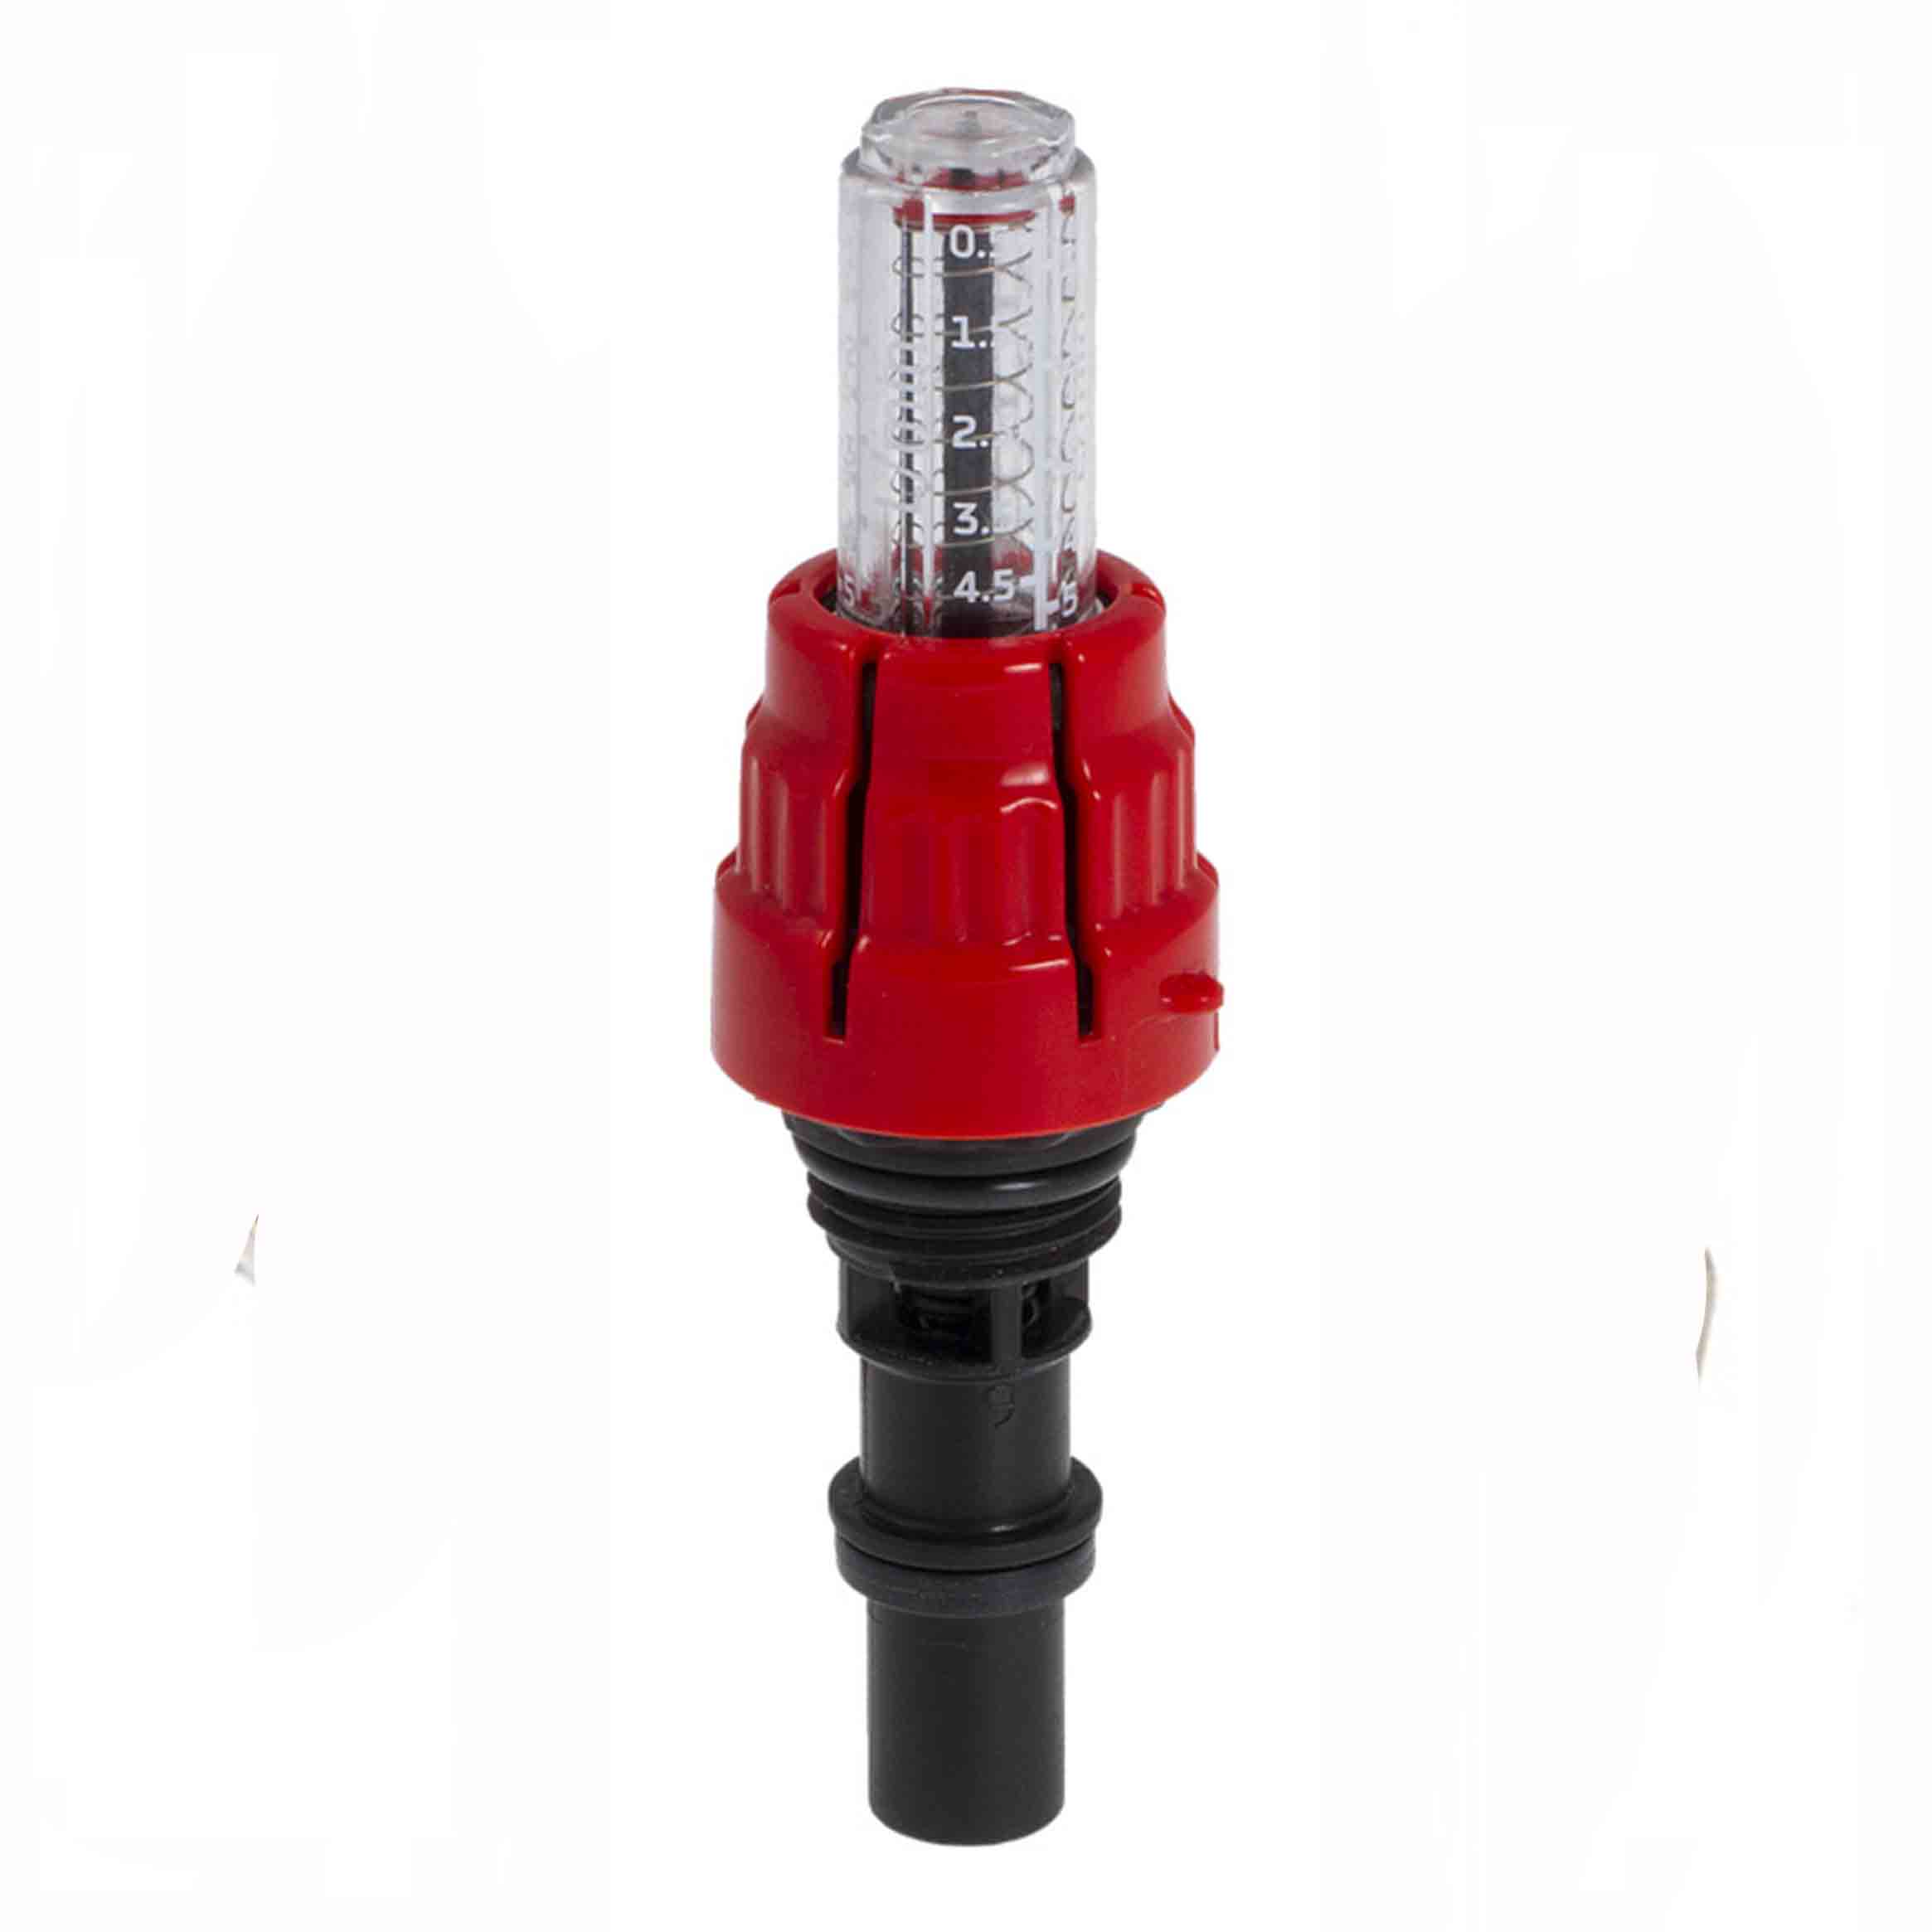
Installation and adjustment of the sensor provide independent temperature control. Do not forget about such an element as a flow meter that controls the waste of water.
The flow meter is mounted vertically, and then actions are performed in the following order:
- The flow meter should be connected to the return manifold process input.
- It is necessary to open the pressure gauge, turning the flask to the left.
- Need to eliminate the factory ring.
- Then rotate the housing ring to the right to the desired level of pressure. Thus, the flow rate of the energy carrier is balanced. Scale float will show the required value.
- The ring is closed with an overlay. Otherwise, the machine will be damaged. This is especially true of those situations where the water floor assembly is not fixed in the closet or in the recess.
- Next is a test of the health of the device.
How to use?
Electric floor heating
Each type of floor is differently arranged. It will be useful to learn about some of the intricacies of its operation.
The electric floor has several types of regulators, through which you can control the heat consumption:
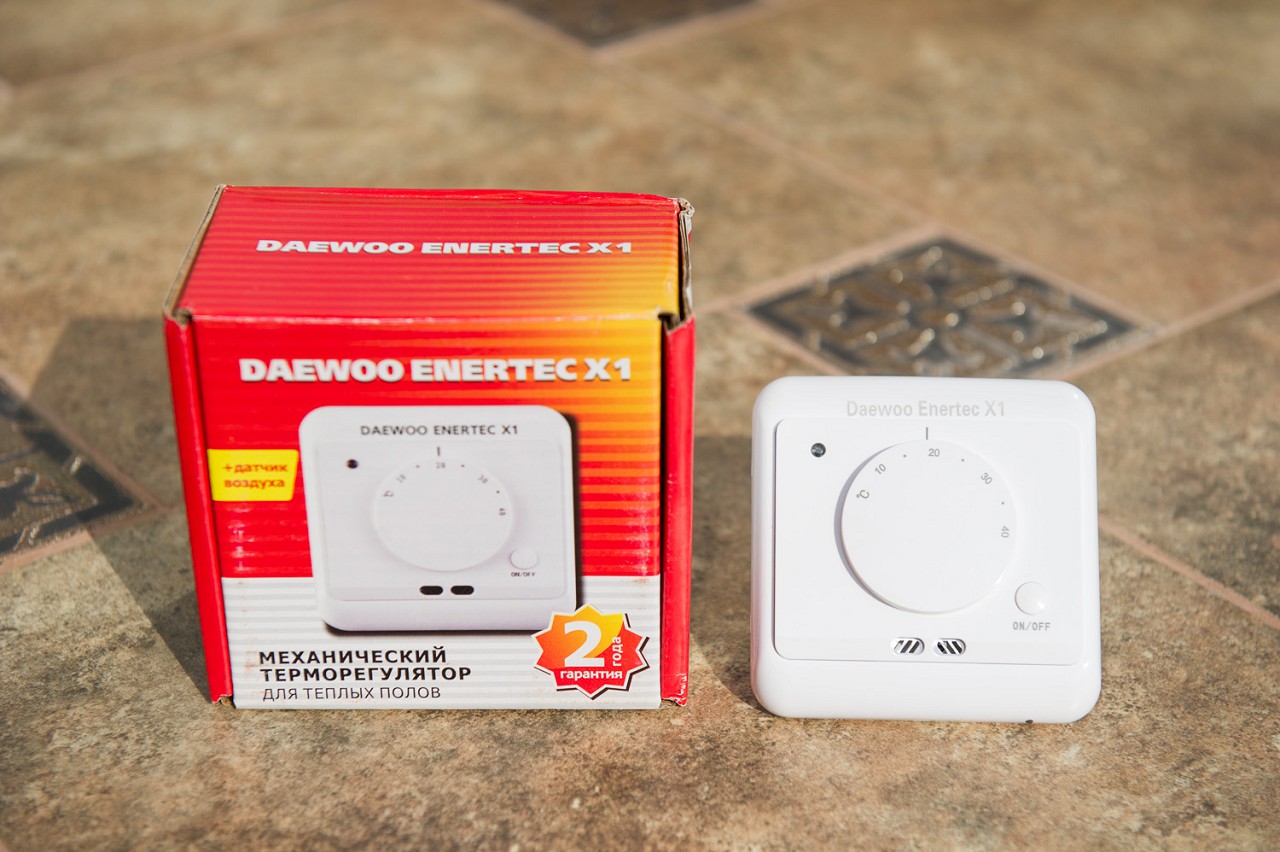
- Electronic-mechanical regulator - it is easiest to control: it has a poor set of functions (controlling the heating and turning off the floor), is controlled when using the wheel on the controller, the price is small, this device breaks down infrequently and is easily repaired.
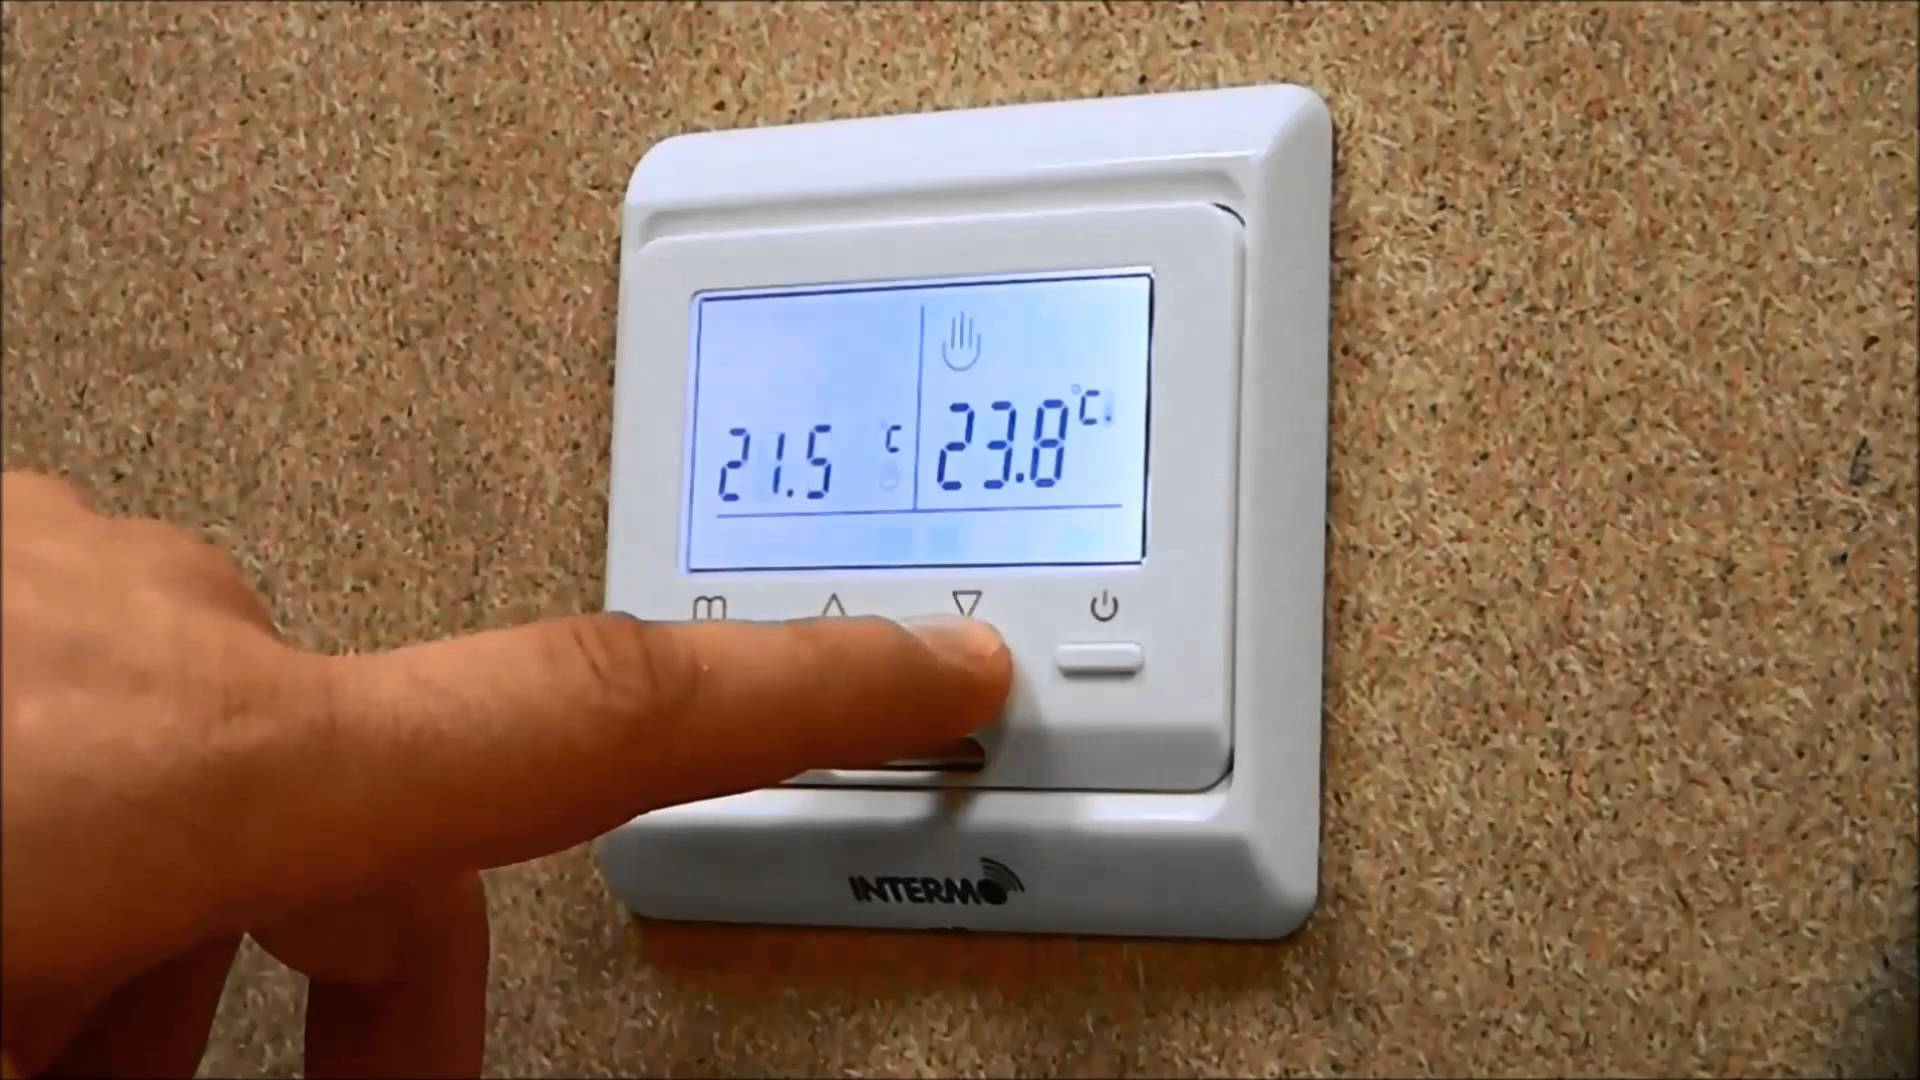
- Digital control panel - similar to the previous sample, only controlled by buttons or sensor. The device is equipped with electrical sensors that mark the temperature of the air and the floor in the apartment.
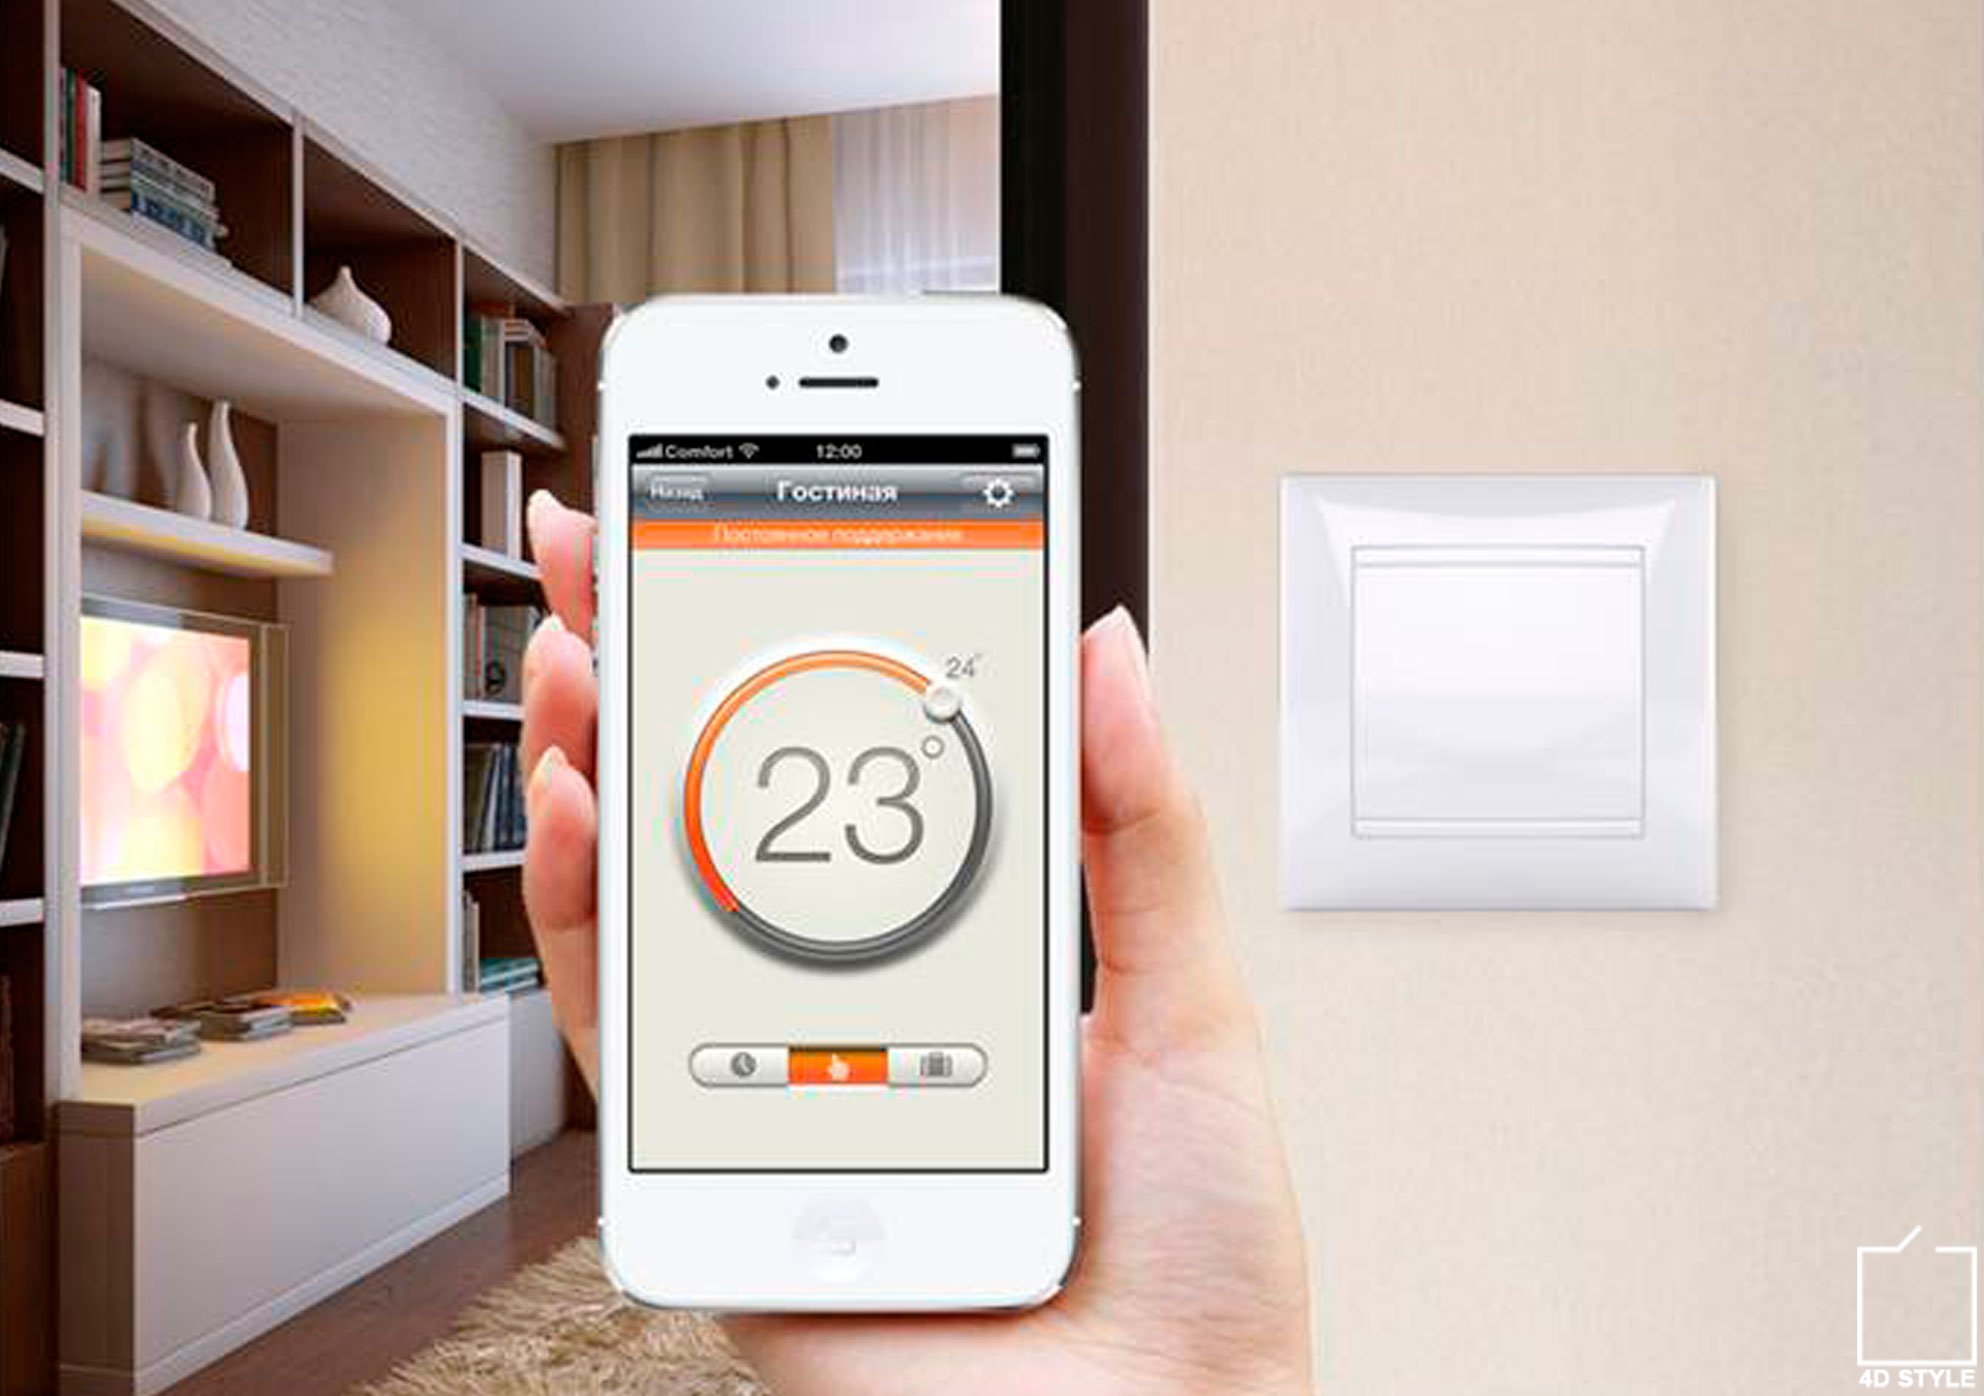
- Programmable thermostat - equipped with several sensors for temperature measurement; they transmit information to a controller that maintains the temperature in separate rooms. Some regulators are controlled even through the Internet.
When controlling the electrical floor, you need to make sure that the power of the floor and the sensor match each other. There are situations when you have to purchase several sensors for one room.
It’s one thing to tune and another thing to install a regulator. You will need to damage the wall in order to mount a controller in it.Alternatively, you can install a box with a thermostat. The main thing to remember: do not install the controller in wet rooms. Most often in everyday life they use control units with little functionality. But you can buy a programmer with which you can control the floor from a distance.
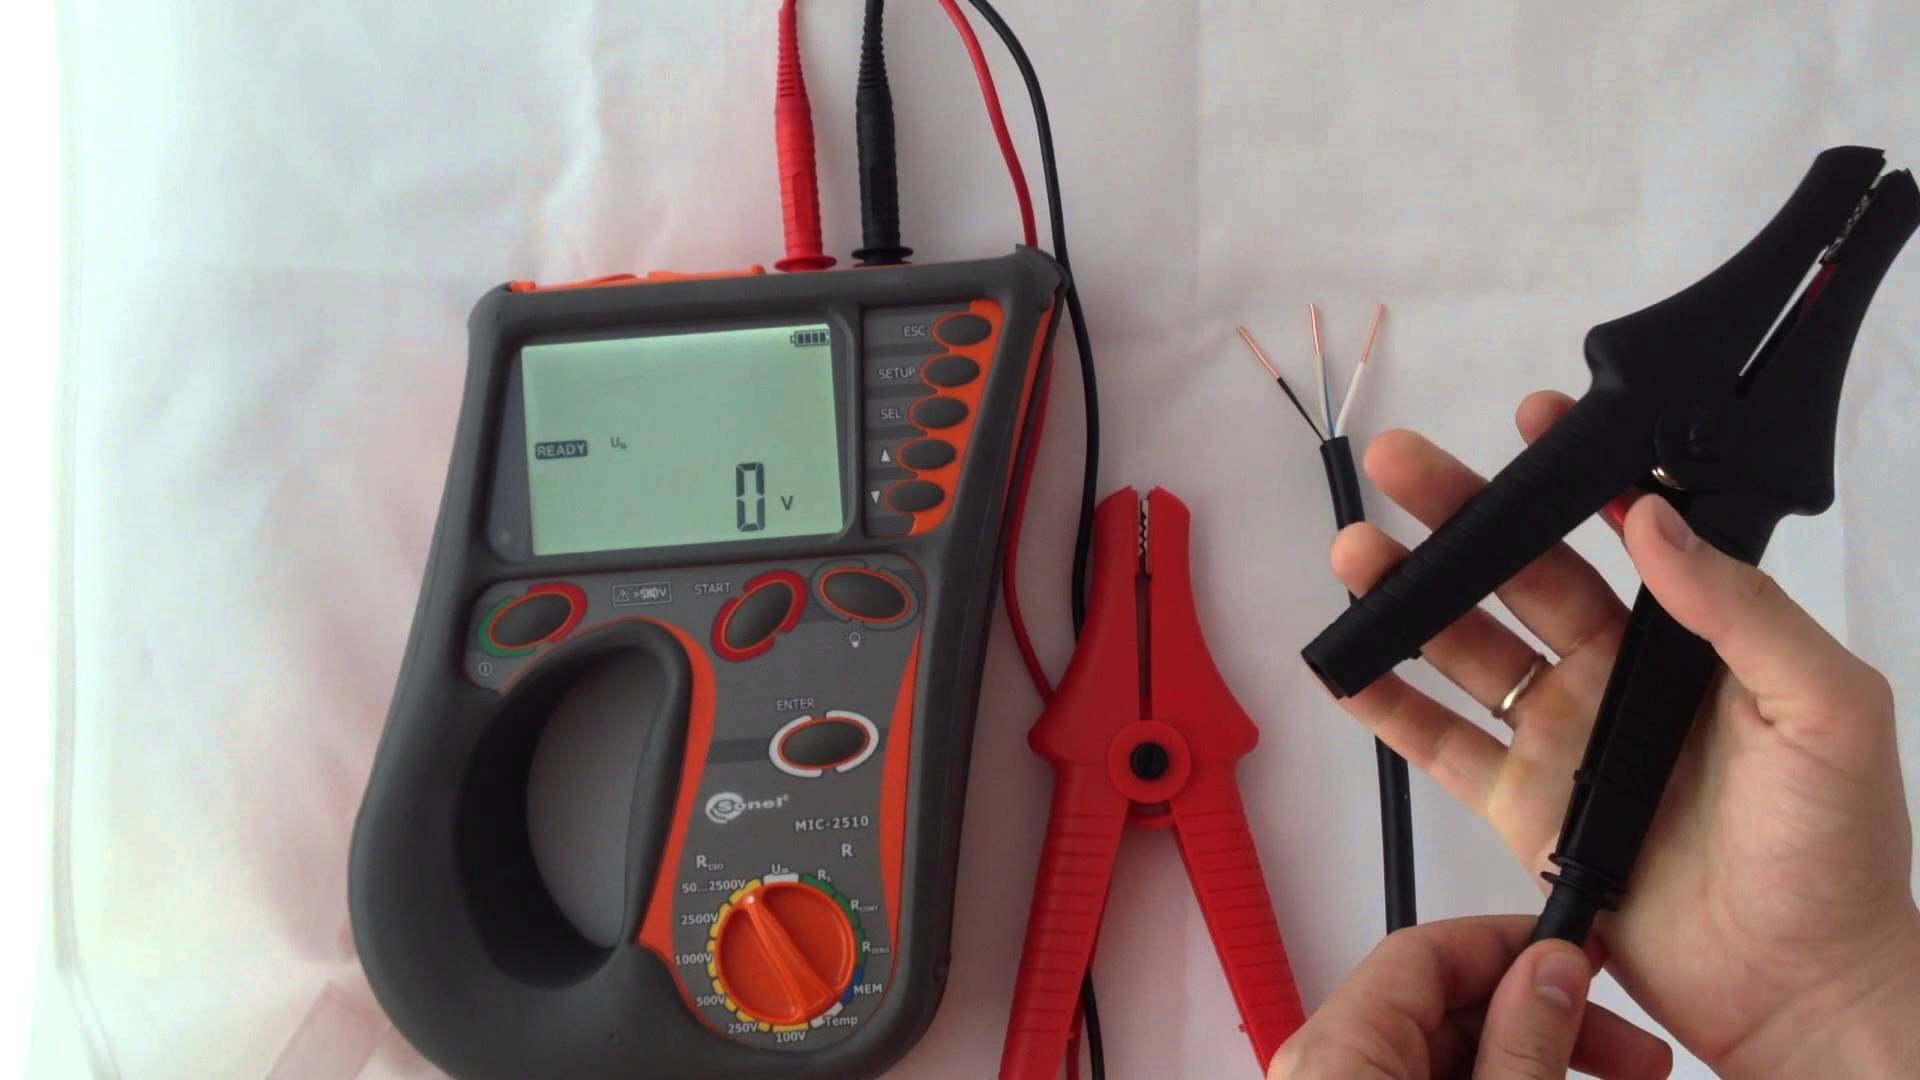
Sometimes the control unit may malfunction and you have to use a tester. It is necessary to apply current to the receiving terminal and mark it on the second terminal, which shares energy with the heating element. In those cases where there is no current, the device must be returned to a specialist for repair.
Sometimes the temperature sensor is not functioning properly. It is checked with a multimeter that measures the resistance of the sensor.
If the parameters do not meet the standards (5-45 kΩ), the sensors must be changed.
Water floor heating
Pay attention to some nuances associated with the operation of the water floor:
- The design should be activated in the first cold days. Heating of rooms can last for a long time, because first the floor warms up, the walls behind it, then the air. And only then the temperature stabilizes with certain indicators.
- The temperature of the circulating fluid should rise slowly if the flooring is laminate or wood. Thanks to this floor will retain durability.
- If necessary, the water floor can warm a whole year. On hot days, it makes sense to use heating branches under a ceramic plate that keeps the cold at any time of the year.
If not to pay due attention to arrangement of a heat-insulated floor, mistakes will be made which will be shown in the future:
- The floor surface will not evenly distribute heat.
- The cost of materials will be in vain, since some of them will be unnecessary, and some even will be missed.
- Furniture, walls and underground will warm up, although this should not be.
- Excess water and cement cause cracks in the floor. In some situations, cracks can be eliminated by priming the surface several times. But it is best to consult a specialist.
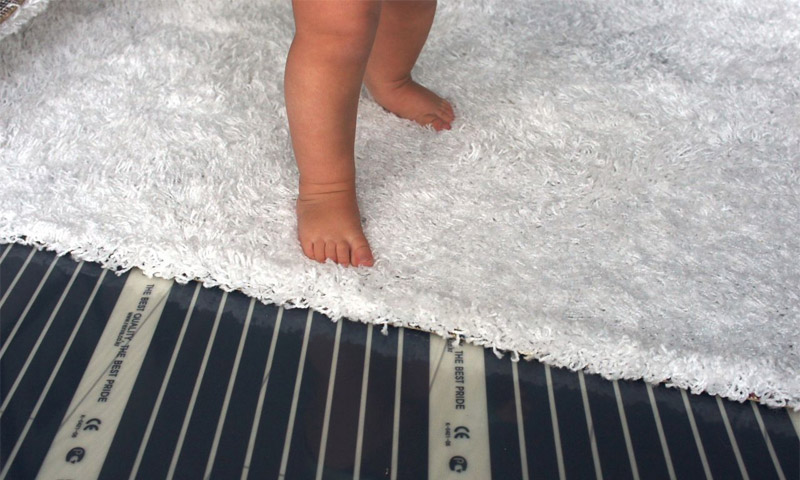
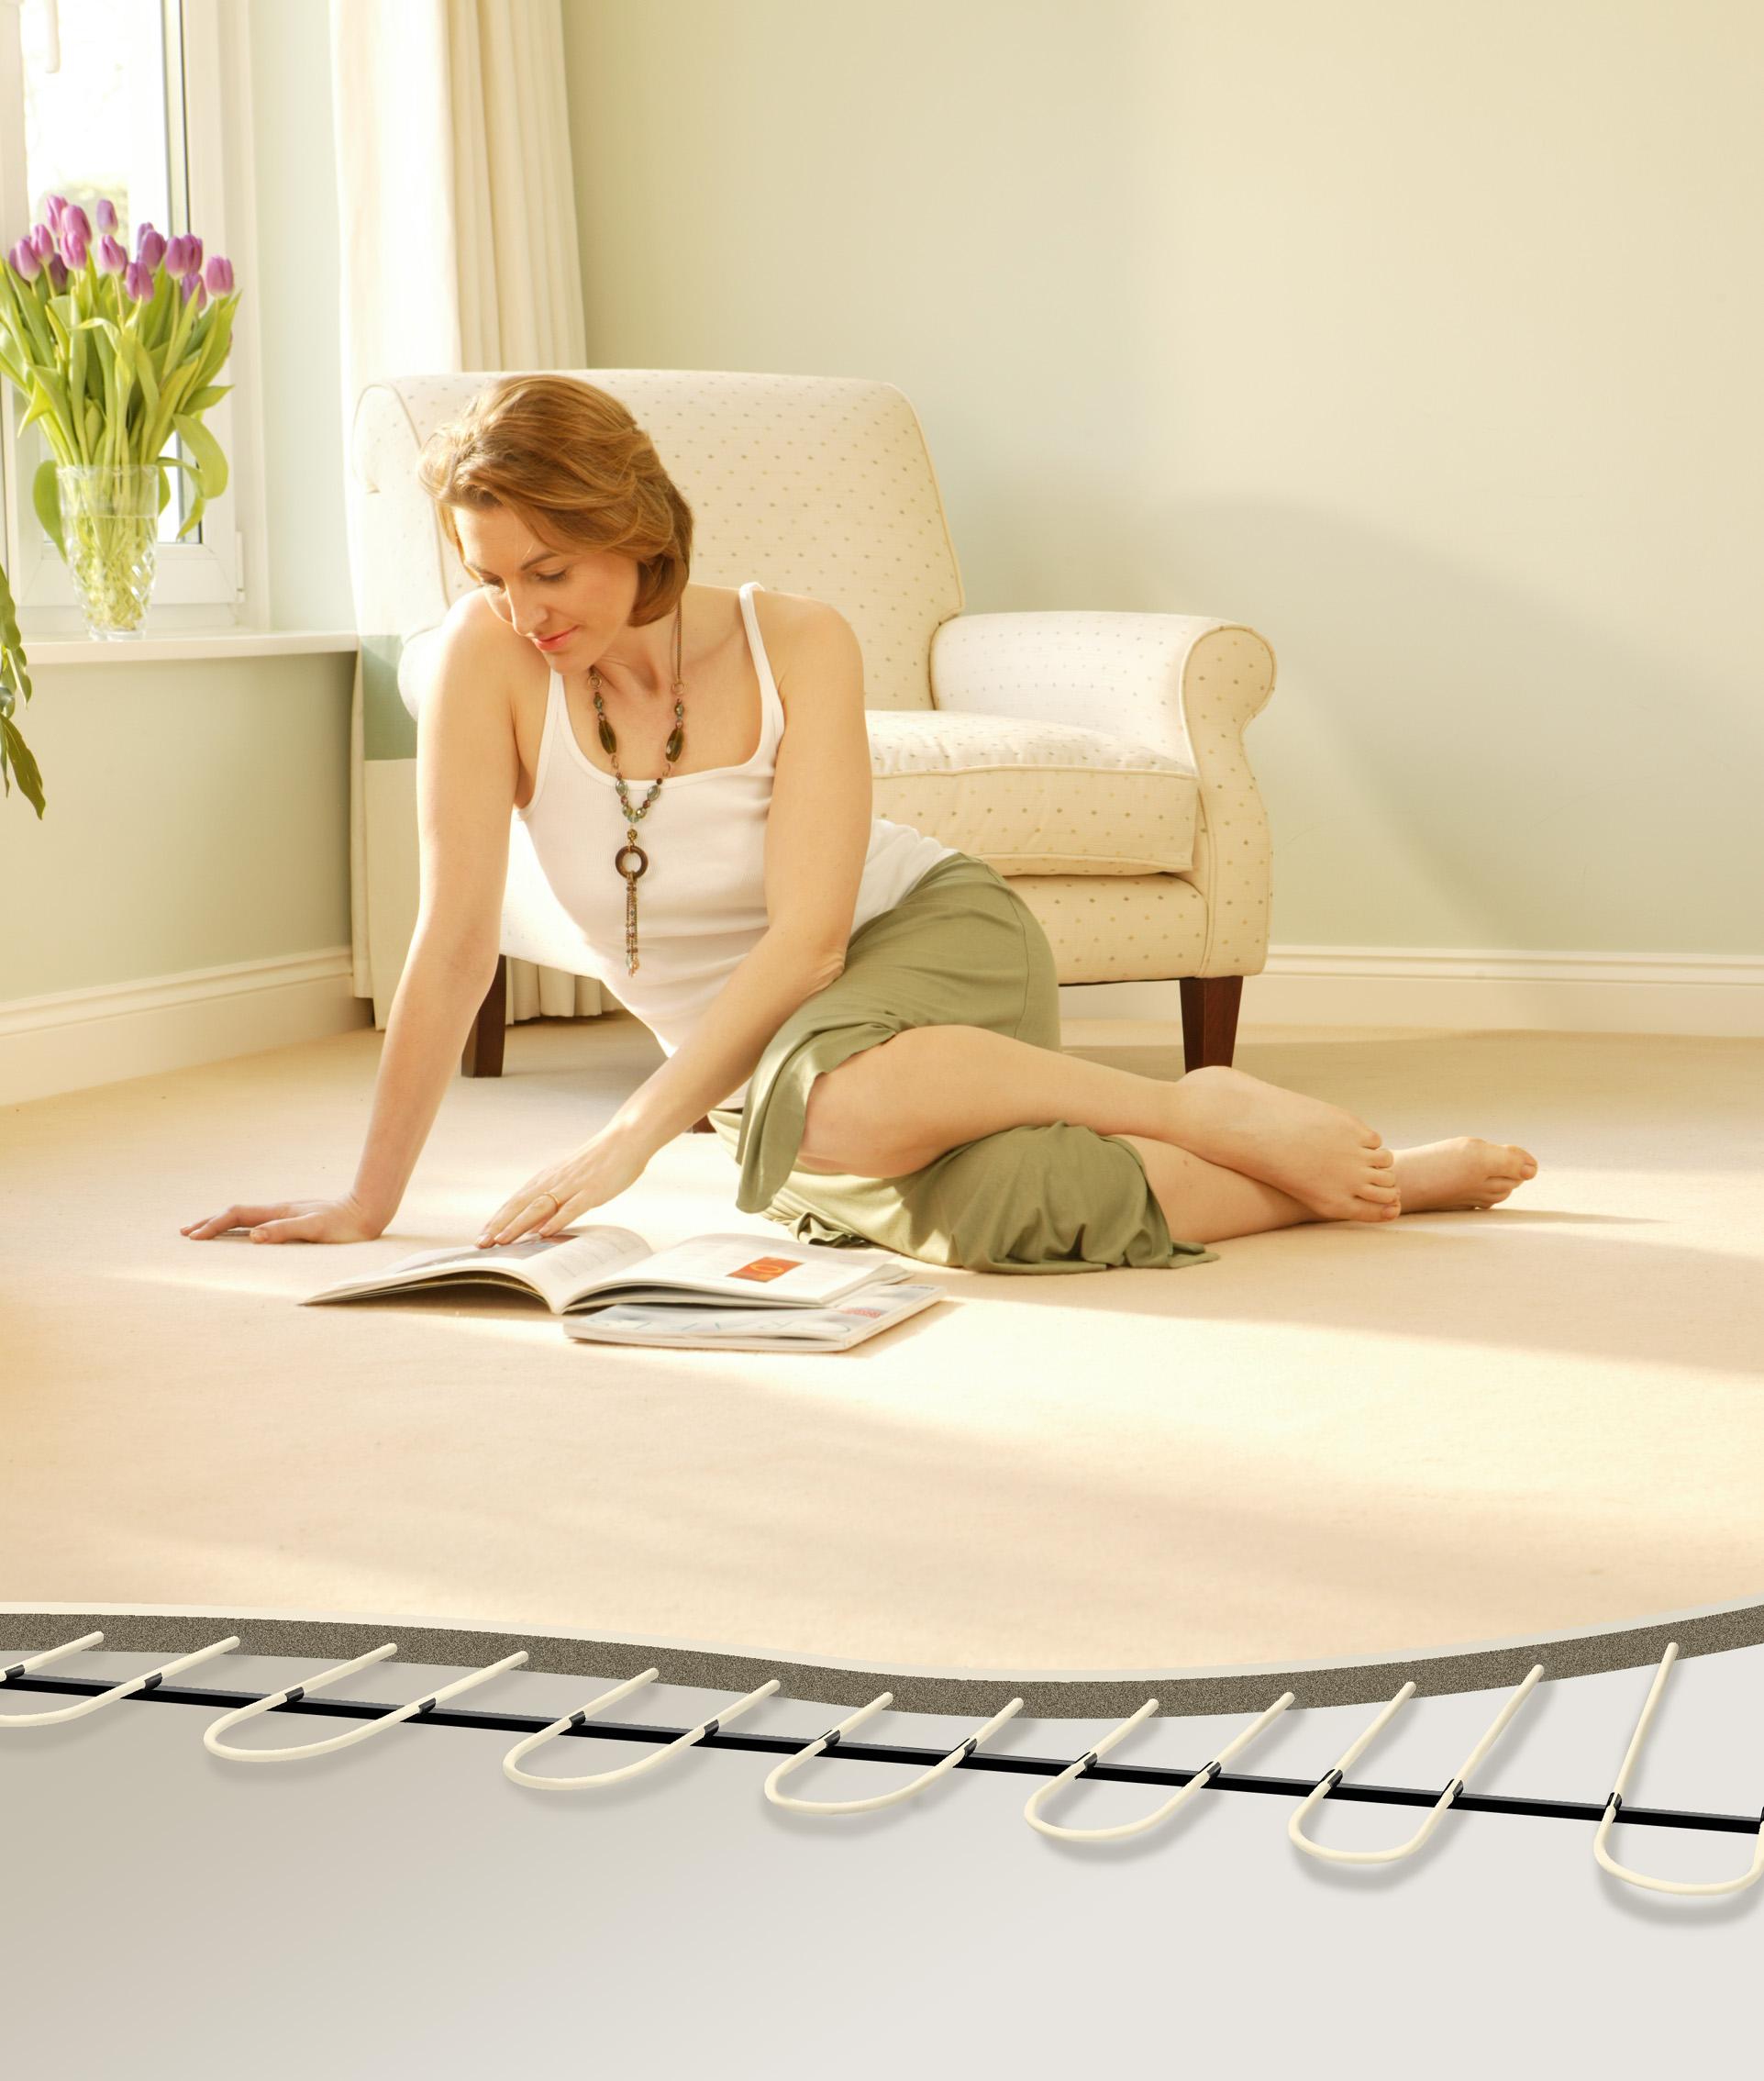
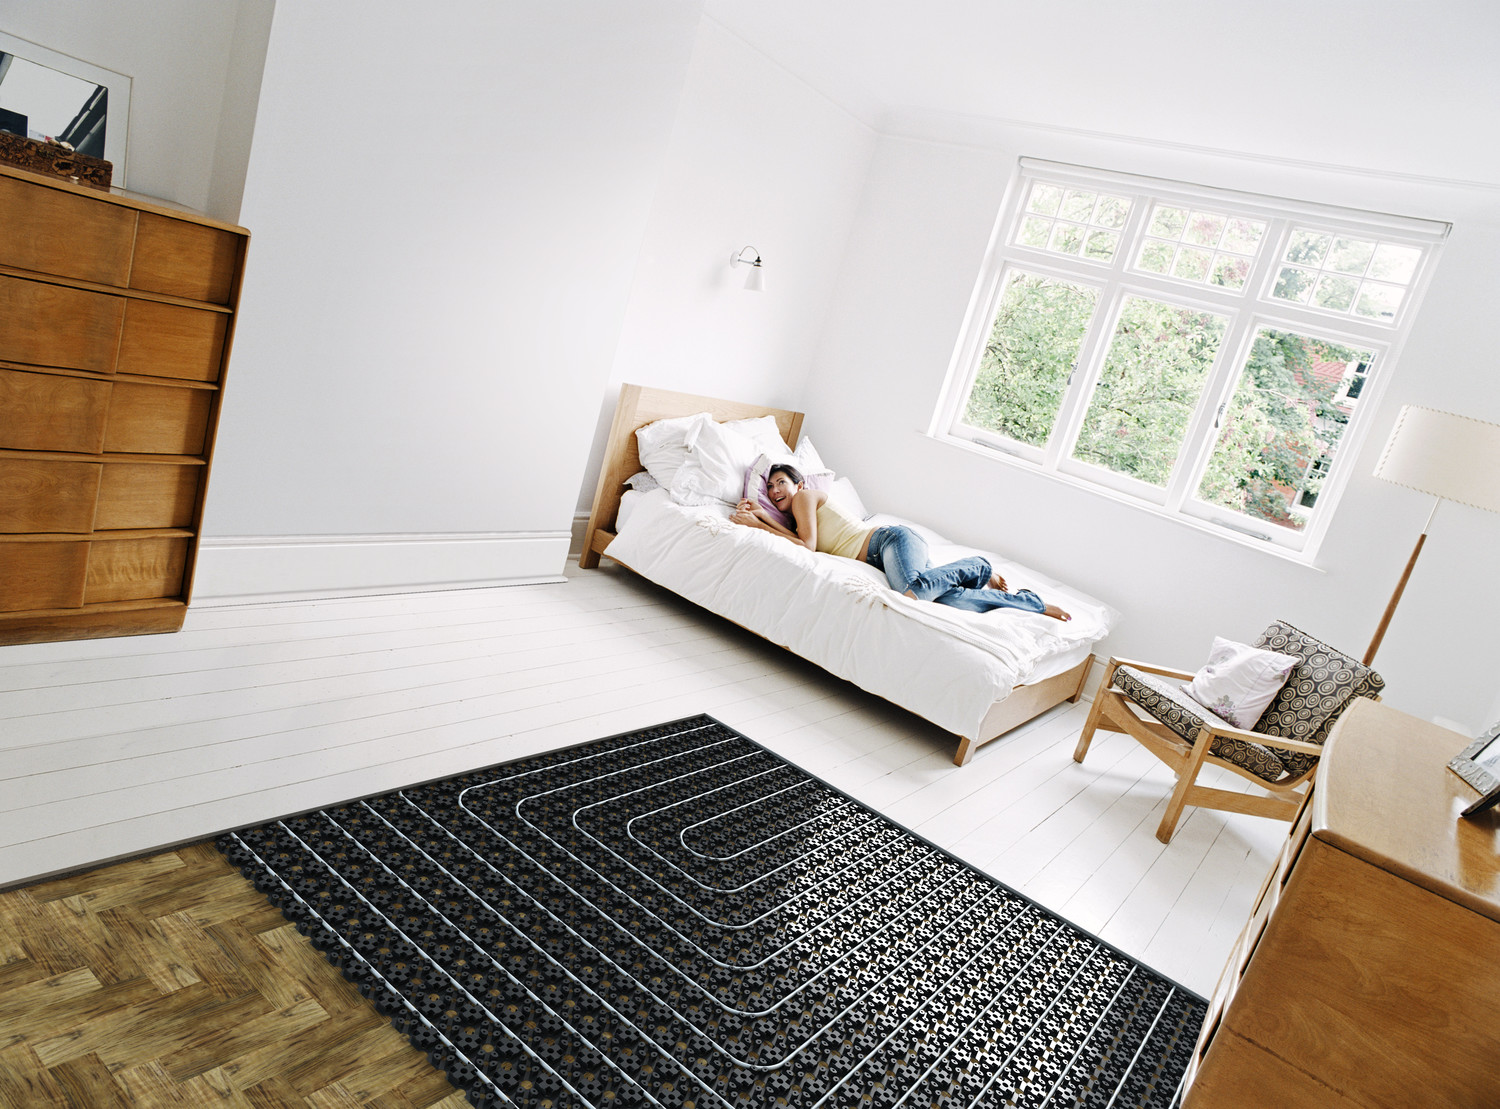
Separate advice for those who want to install a warm floor with such a coating as carpet: if the buyer lives at the dacha - heating mats will be useful for him, water floor for residents of a private house, infrared samples for apartment cloisters.


For more detailed instructions on how to install underfloor heating, see the following video.
Successful examples and options
As an illustrative illustration, examples of warm (mostly water) floors are given in several variations:
- In the country;
- On the loggia;
- Under the carpet;
- Infrared pattern.