Features of floor insulation in a wooden house
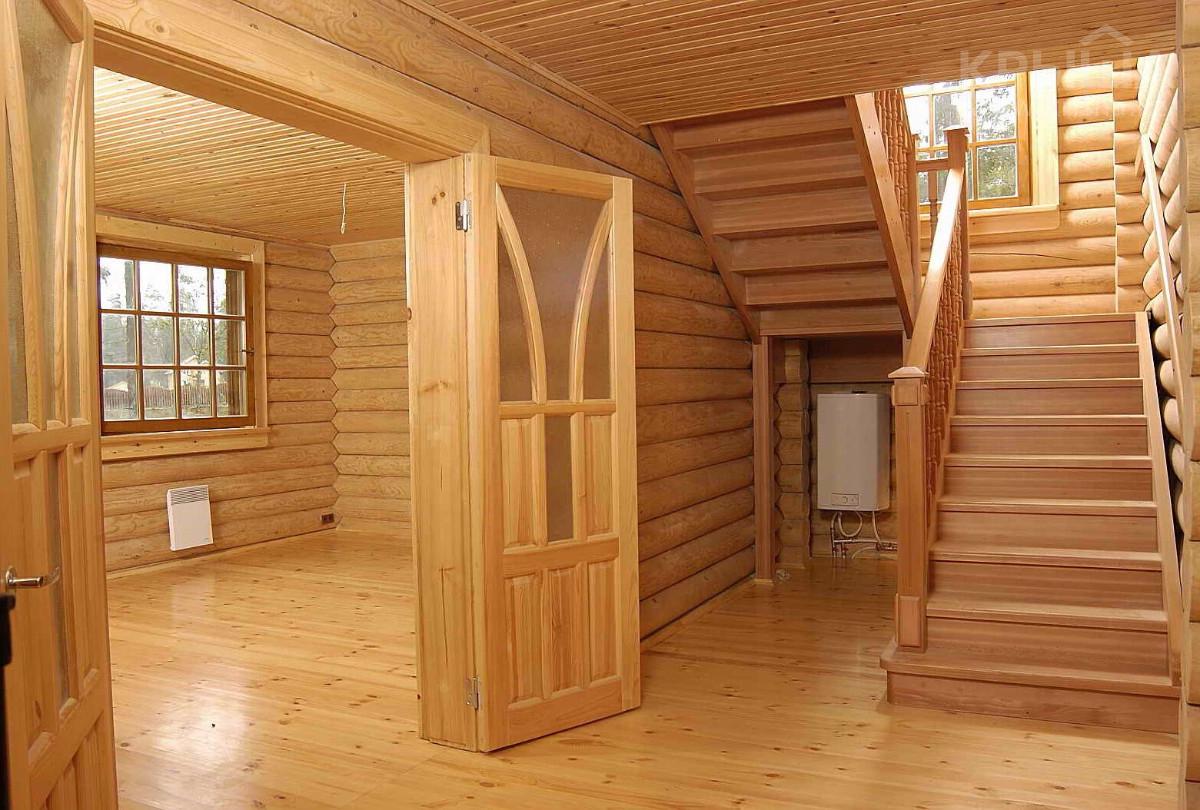
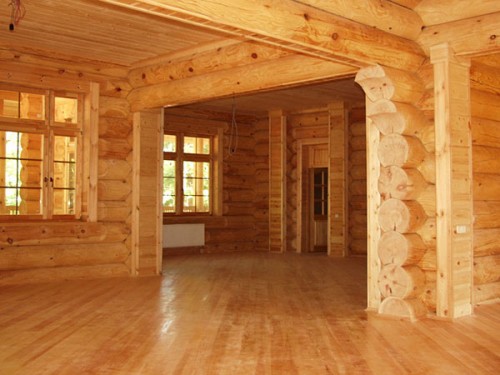
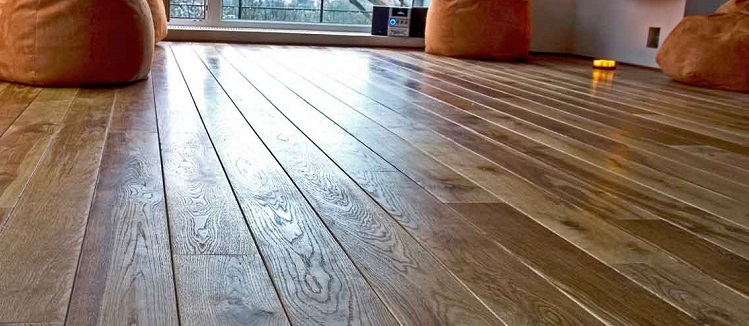
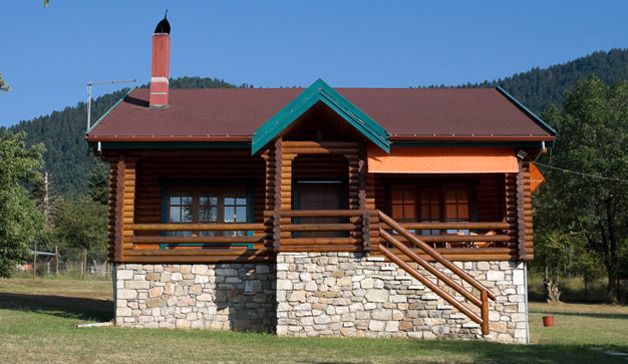
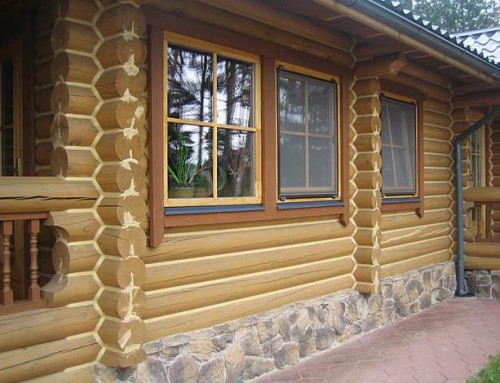
At present, the eco-friendly low-rise construction of houses made of wood materials is becoming increasingly popular. Traditional log cabins from rounded logs, cottages from timber and even houses erected from lightweight materials, their owners try to sheathe with board or clapboard. These same considerations for creating a microclimate closer to the nature in a home are also guided by the choice of material for floors, giving preference to wood as a lighter, but rather durable material.
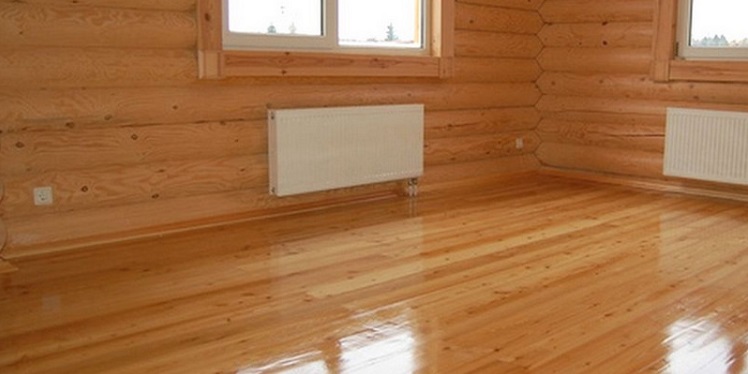
Due to its natural origin, wood has a rather low thermal conductivity, but in the Russian climate it still needs additional thermal insulation.
Options
There is a fairly large selection of fillers for insulation of floor decks, floor and ceiling.An inexperienced builder finds it difficult to understand the properties of a heater, objectively assess their advantages and disadvantages, and make the right choice.
The thing is that different heat-insulating materials are more applicable for some operating conditions and less suitable for others. Warming of such specific rooms as the attic, underground, porch requires a special approach, so it is worthwhile to study all the properties of materials in order to produce an insulation device as efficiently as possible.
The following factors influence the choice of thermal insulation material:
- Humidity. Permanent dampness in the room (basements with open ground or insufficient waterproofing of the foundation, bathrooms, winter gardens or home greenhouses) or the likelihood of increased humidity in it (balconies, rooms for drying clothes, bathrooms or steam rooms);
- Purpose of the room. Some types of materials in their composition contain certain resins or glue, for security reasons, not suitable for bedrooms or children's rooms.
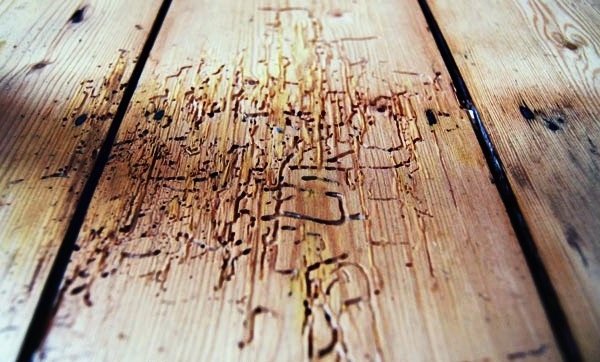
- The likelihood of damage by rodents or insects, resistance to fungal damage.Some of the materials are to the taste of rodents, while others act on them scaring.
- Lower and upper temperature limits. Some heat insulators are unstable to severe frosts, while others lose their properties or are completely deformed and become unusable with significant heating.
It should be borne in mind that the heat insulating material should “work in both directions” - not only protect the home from low temperatures in winter, but also maintain a comfortable environment for humans and pets in the summer heat.
Not least, the choice of insulation and the method of performing insulation also affects the overall condition of the house:
- the age of the building - in the old house one method is required, in the newly built another one;
- Foundation construction method - on bored or screw piles, on reinforced concrete blocks or on light foundations of small depth;
- The height of the building and the area of the work - whether the floor is being insulated for the 1st or 2nd floor.
Below
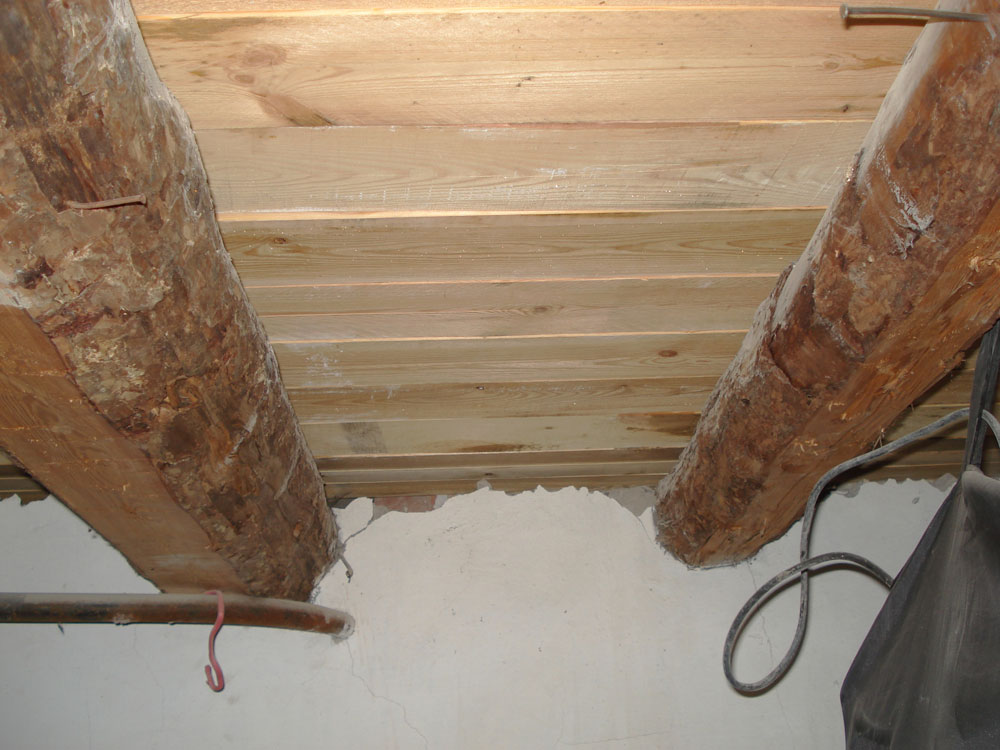
In most cases, wooden houses are built with a high base, that is, the height of the subfloor allows you to perform insulation from below.The only exception may be the southern regions where private houses are being built on stable soils using the low-rise construction technology on piles of small depth. But even there, in most cases, they try to keep the traditional construction of houses with a high base.
Otherwise, if the subfloor is not high enough, to insulate the floor of the first floor you will need to remove the floorboard to lag or another supporting structure.
Thus, it is possible to insulate the bottom with a sufficiently high subfield for the first floor or floor insulation for the second floor, which, respectively, is the ceiling for the first floor.
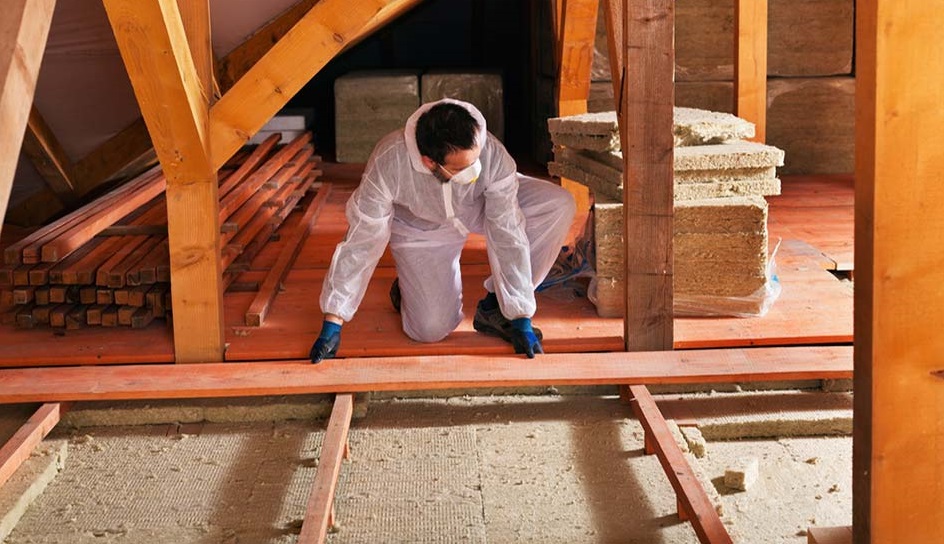
The implementation of thermal insulation works in the subfield is not much more difficult than the same work when we warm the floor of the second floor, but it has a number of features. Before you begin work, you need to prepare a place and ensure yourself both minimal comfort and the necessary level of security.
Most likely, there are no windows in the basement, so the first thing to do is to take care of sufficient lighting. If there are no fixed lights, waterproof, portable light sources on a flexible cord of sufficient length should be used.
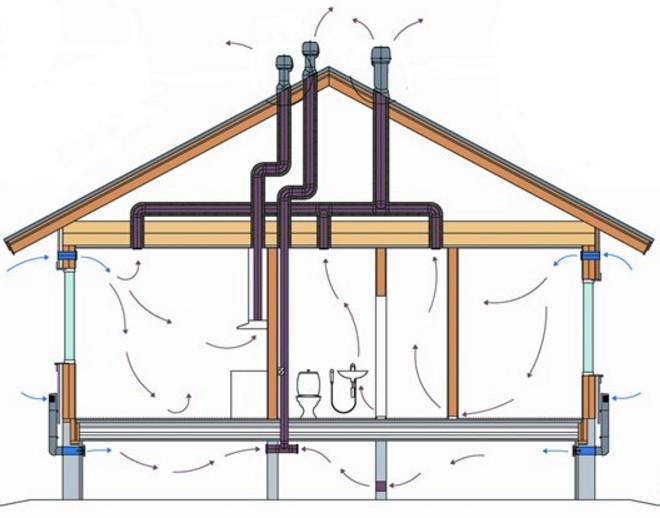
For the same reason, there is extremely poor natural ventilation in the underground space, and sometimes it is completely absent. Unfortunately, many builders do not take this factor into account, which has a very negative effect on labor productivity. Exhaled carbon dioxide is heavier than other gases that are part of atmospheric air, and therefore tends to the bottom.
And since the underground is the lowest point, carbon dioxide accumulates here, disrupts the worker's full breathing, causes increased fatigue, drowsiness, and in severe cases fainting. therefore It is very important to ensure adequate ventilation from inside the house or from the street.
Of course, for the duration of the work in the basement, it is necessary to remove all things, products and other objects stored there that hinder the unimpeded movement of the repairman.
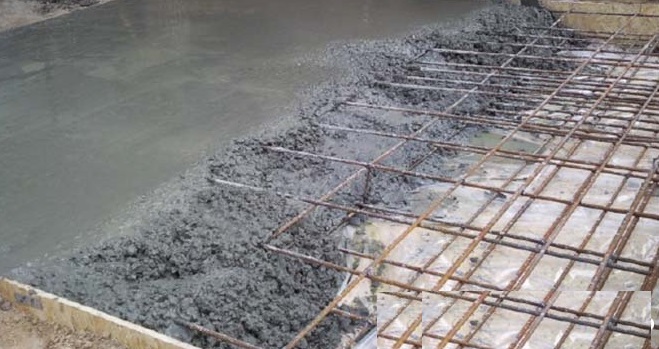
If in a subfield open ground, if possible, it should be leveled and compacted. In the best case, if the budget allows - to fill concrete with a minimum of 10 cm height with reinforcement, thereby significantly reducing the humidity in the underground space. This will significantly extend the service life of both the bearing elements of the basement and the wooden structures of the floor.
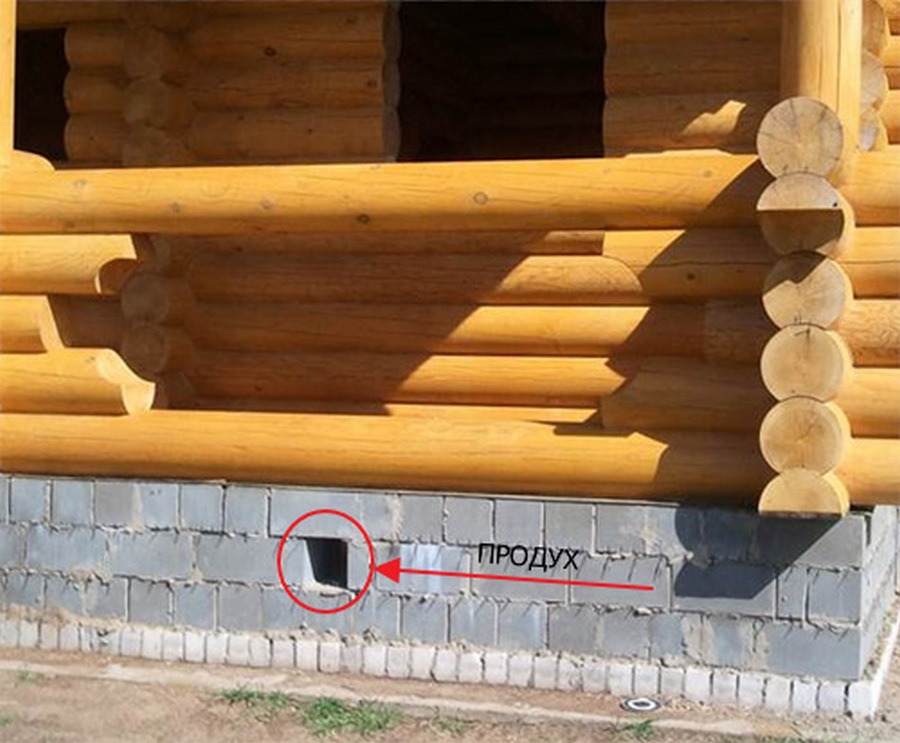
In the absence of natural passive ventilation, the subfloor is not superfluous to make small (about 10 * 10 cm) ventilation slots in the external walls. This will improve the microclimate in the cellar, additionally prevent an increase in humidity and, as a result, will allow the mold structure to avoid damage to wooden structures.
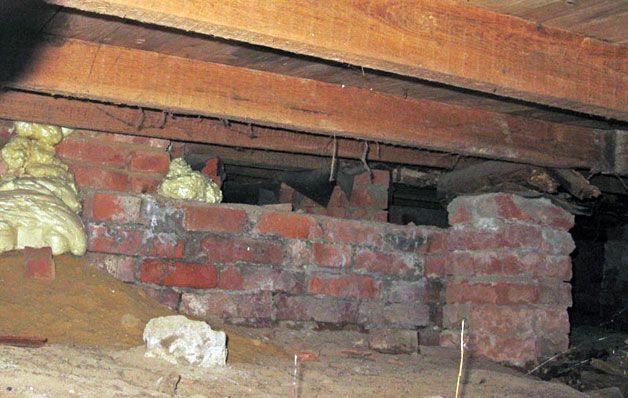
Having completed the preparatory work, you first need to check the condition of the bearing elements - beams, log, support columns.
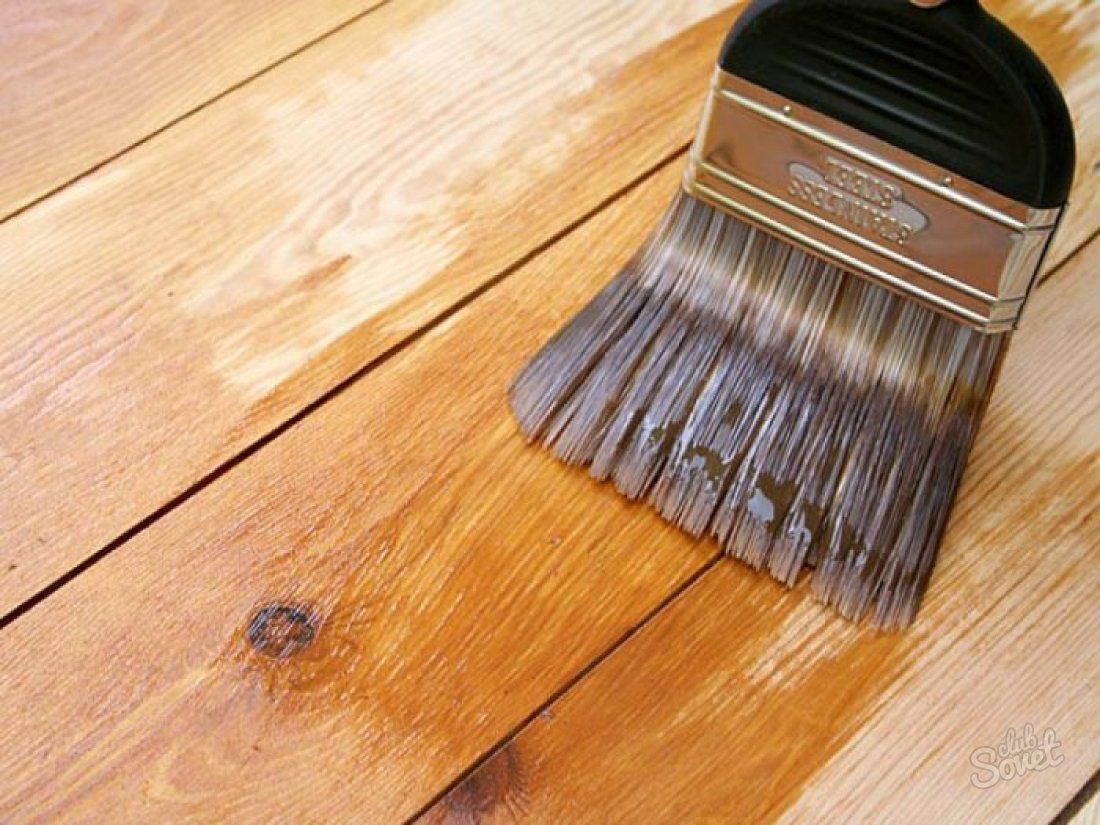
Having identified areas of damage with a mold, carefully clean the surface with a spatula, sandpaper (popularly called "sandpaper"), and then twice soak it with antiseptic solutions. Then all available wooden elements should be saturated with fire and bioprotective compounds and dried thoroughly.
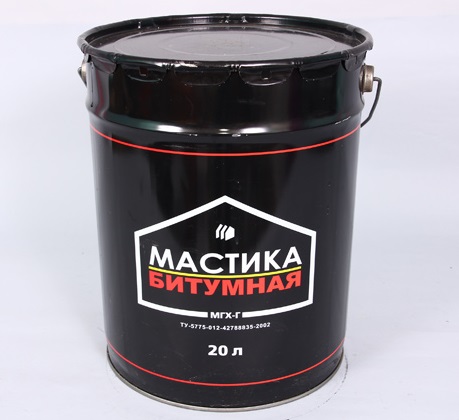
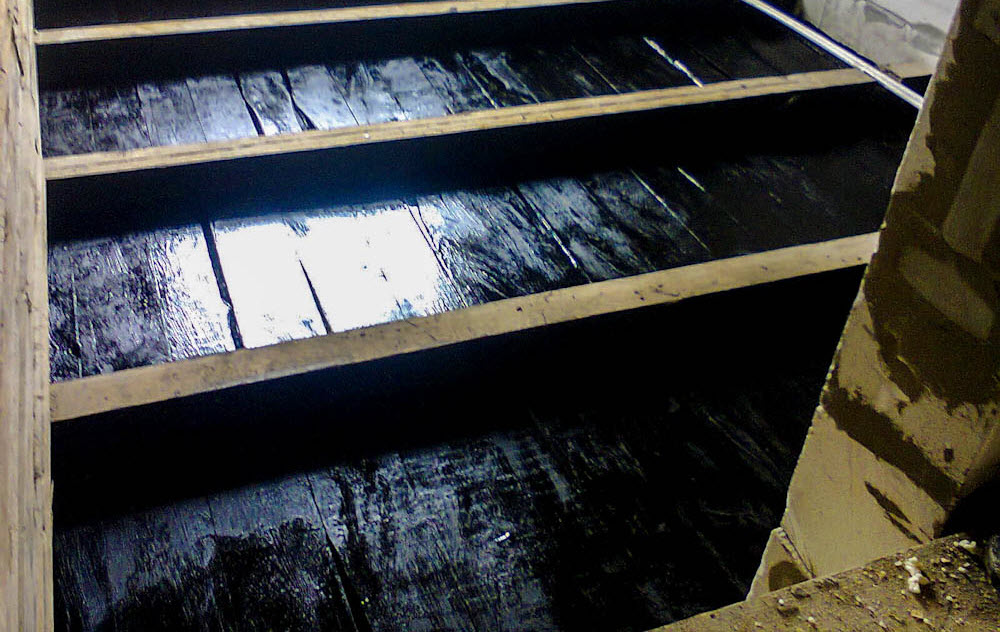
If the foundation and the basement were erected using concrete or a brick (block), these areas need to be treated with bitumen mastic to protect it from moisture. If work is performed on days of high atmospheric humidity, it may be necessary to dry them further using heating equipment.
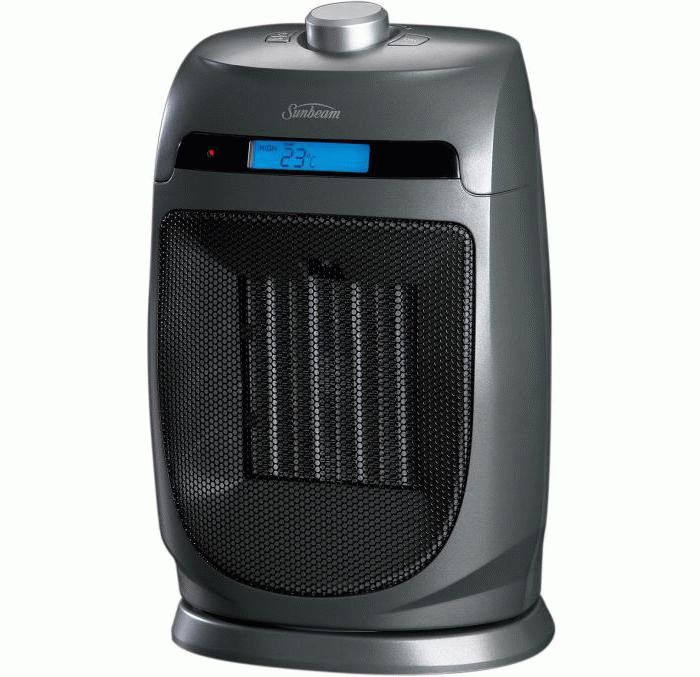
In some cases, a conventional domestic fan heater will suffice, but for large spaces of a subfield a building heat gun may be required. In no case Do not use a gas or gasoline / diesel heat gun, it is permissible to use only electric, and that should not be left unattended for security reasons.
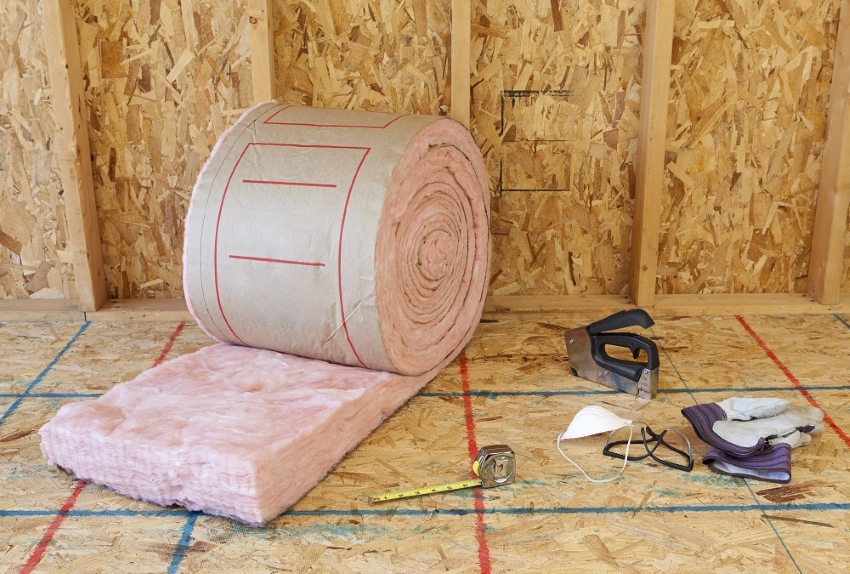
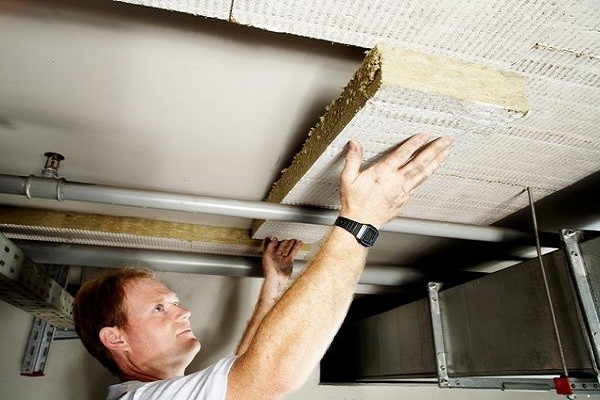
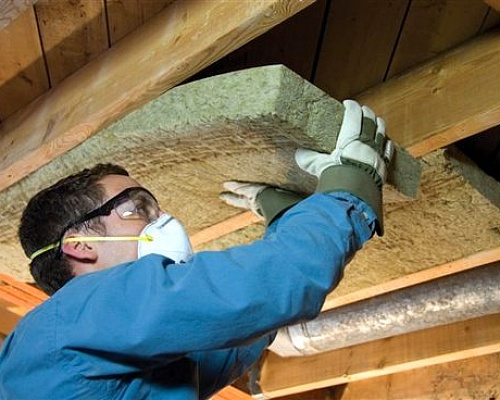
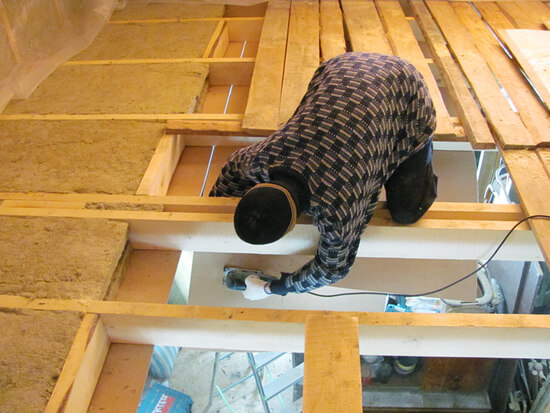
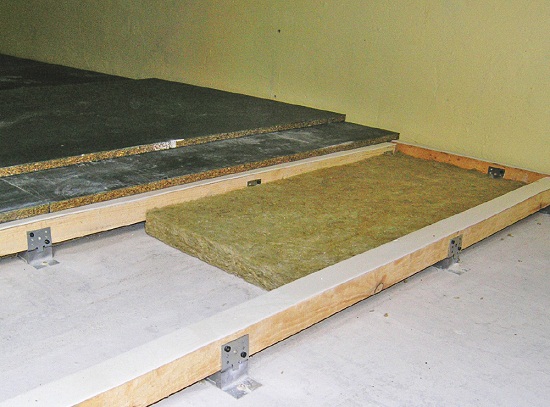
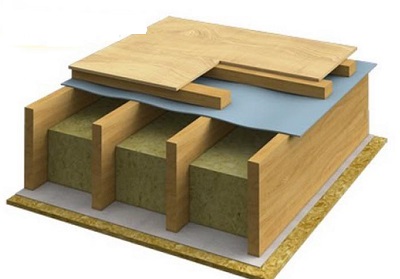
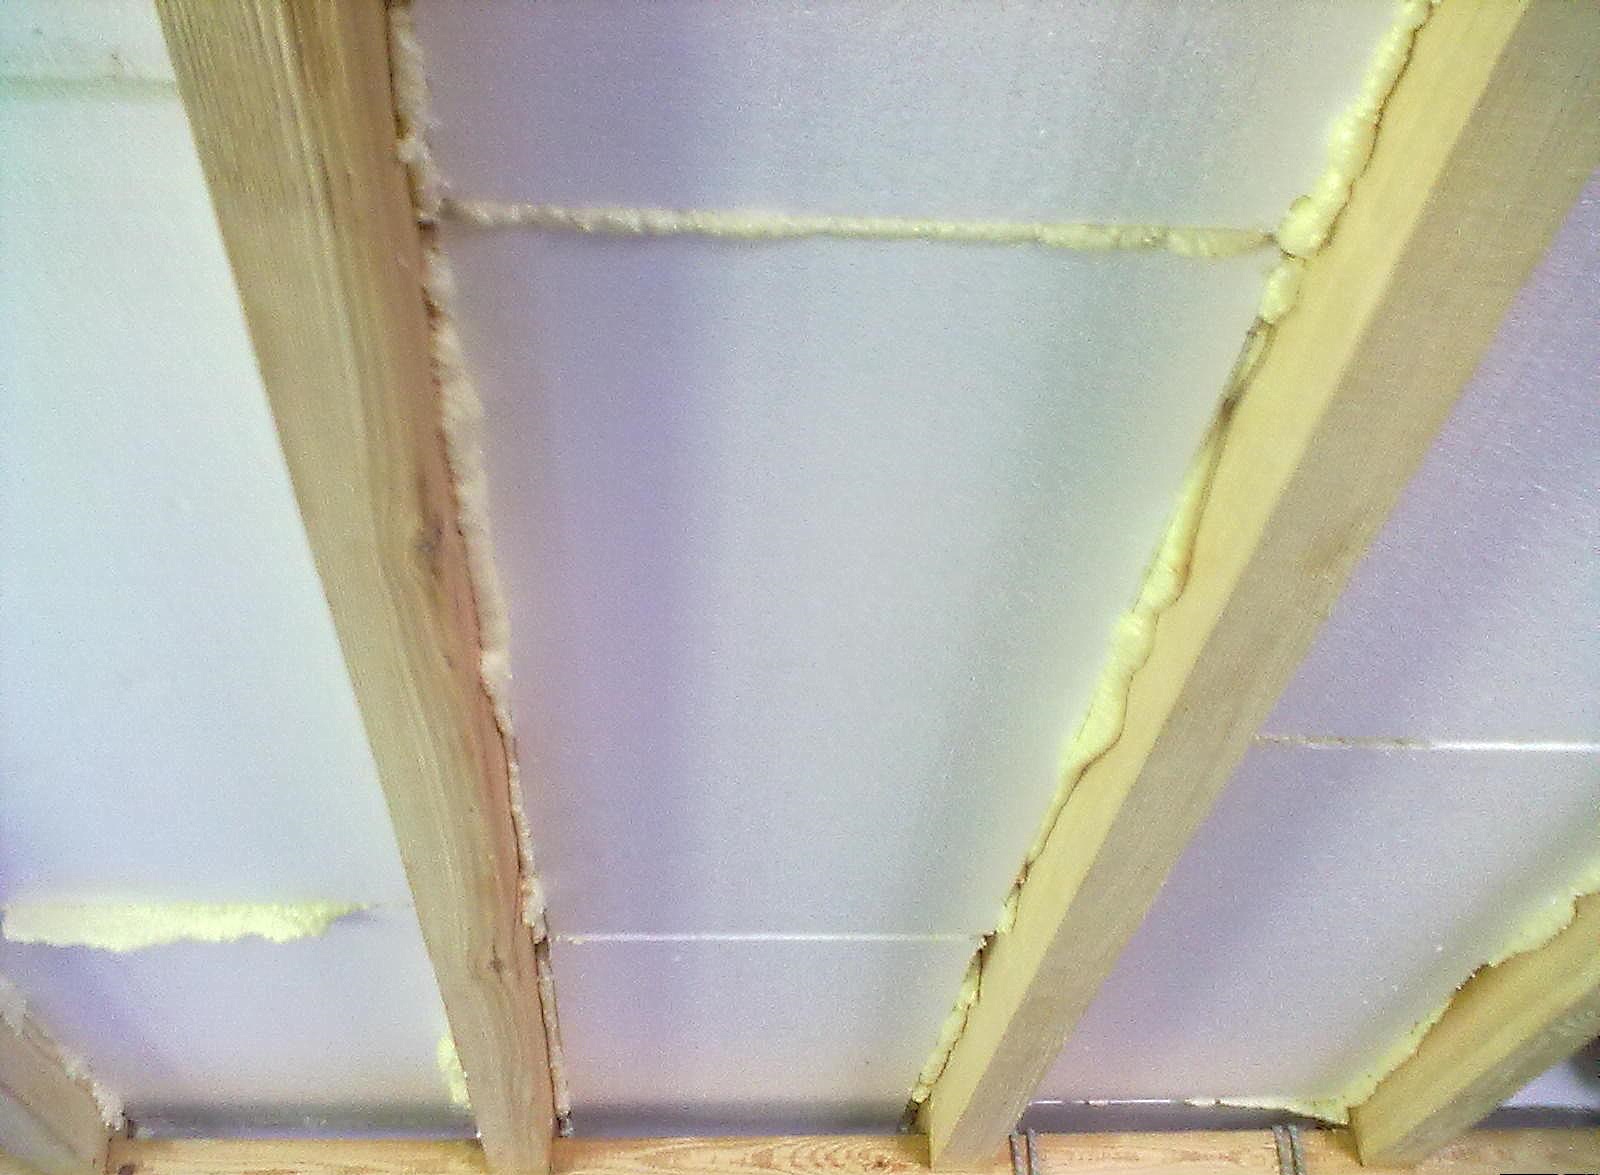
For insulation from below, it is rather inconvenient to perform work with thermally insulating materials such as mineral wool or izolon. And, all the more, bulk materials such as sawdust, expanded clay and the like are not suitable for this purpose. Therefore, preference should be given to insulation in sheets - foam, foam, and so on.
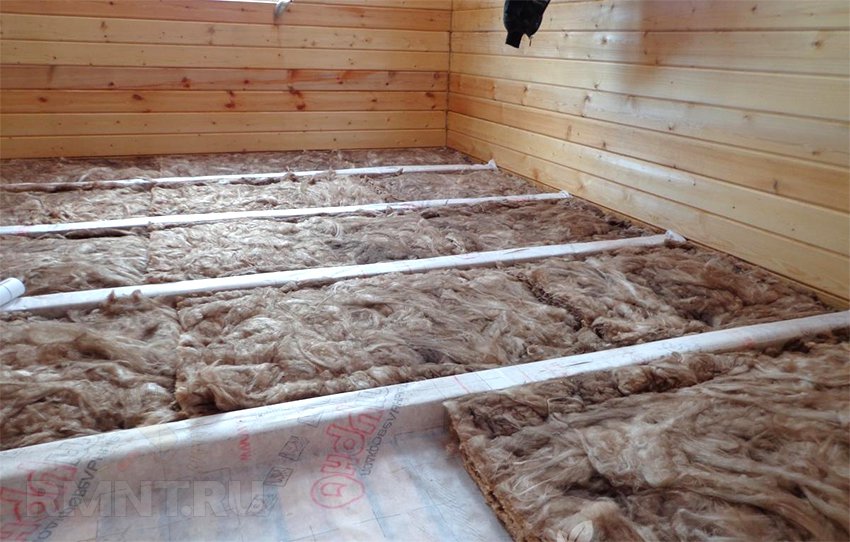
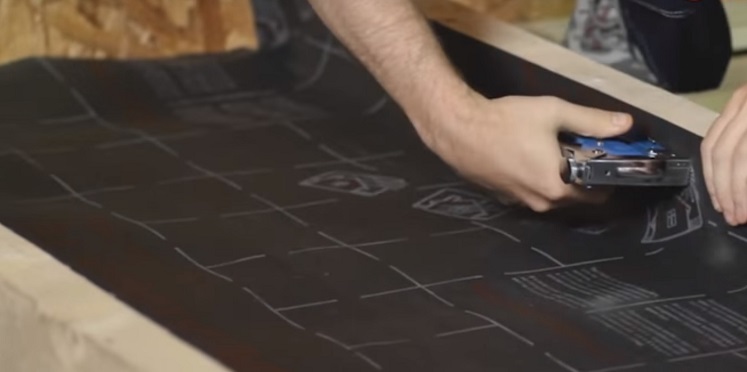
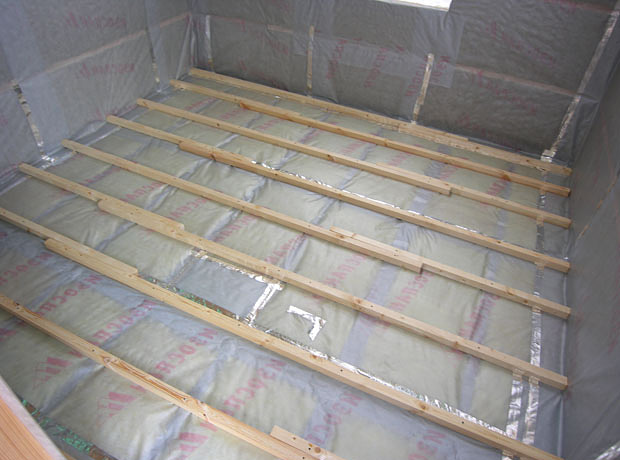
First of all, it is necessary to fix the vapor-insulating material, in most cases it is a plastic film. For the conditions of the subfield, it is preferable to choose a film with a thickness of 350 microns, if possible even more dense.
It must be fixed, observing full adherence by the construction stapler on logs (beams) taking into account all irregularities, bends and height differences, in places of sagging additionally fix on the floor boards.Fragments of the film must be laid with an overlap of one to another at least 10 cm, fasten the edges with a wide adhesive tape. Filling on walls and vertical structures - not less than 25 cm.
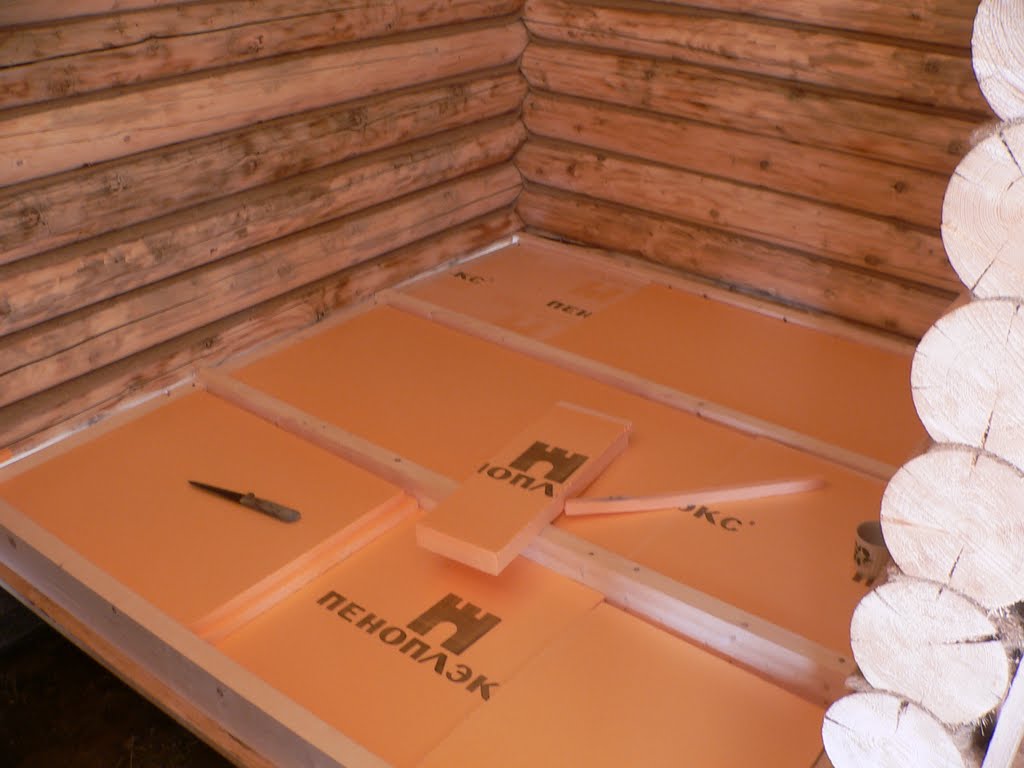
After that, you need to start installing the insulating material in the intervals between the lags. If possible, the heat insulator fragments should be cut so that there is no unnecessary gaps between them and the lags, and the insulation itself does not fall out. If necessary, if the fragment does not stick to the edges with lags, it can be temporarily fixed with screws, and the gap between its edges and lags can be filled with mounting foam.
It should be remembered that the metal screw has a very high thermal conductivity, therefore, after the construction foam hardens, all of them must be removed.
Also, after laying the insulating material over the entire surface of the slab, all inevitable gaps must be filled with assembly foam, and after it hardens, cut off any protruding surpluses.
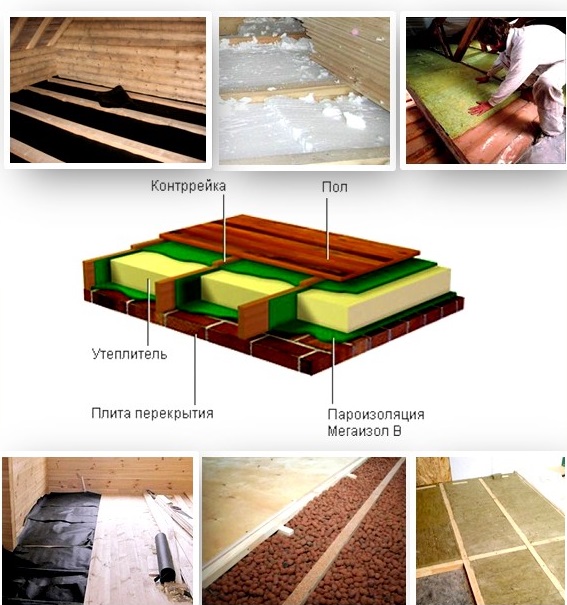
After that, to ensure a more reliable retention of the heat insulating material, it is necessary to fix it from the bottom with a light hem. The most economical option is fiberboard sheets, but low-grade plywood, edged boards and a range of other materials are also suitable. You should not use gypsum plasterboard (plasterboard sheet) because of its high hygroscopicity and fragility.
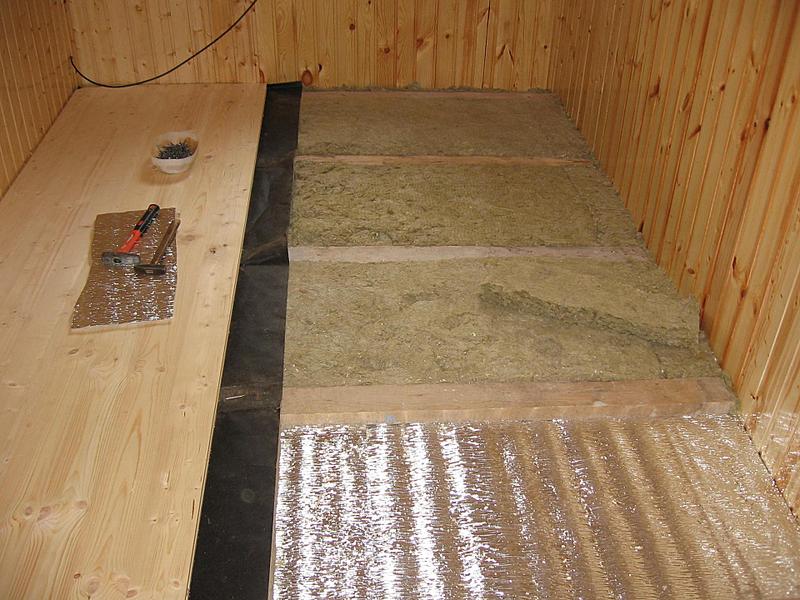
After completing the binder, you should fix another layer of vapor and waterproofing. You can apply and plastic film. In this case, it is permissible to use izolon, folgoizol and other composite materials.
Above
In this case, there are two options for insulation, radically different from one another:
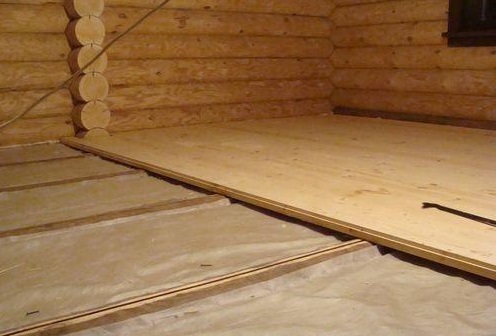
- Without dismantling the flooring. Lags are laid on the old floor, between them - insulation and a new floor covering is put on top.
- With dismantling. In this case, the boards are marked, dismantled and removed from the room where they are being repaired. Insulation is mounted between the existing lags, then the floor boards are installed back.
In the first case, the level of the floor rises - depending on the technology used, to a height of 10 to 25, and in some cases by 30 cm. This method is more cost-effective and reduces the useful volume of the room. But if the budget allows and the ceilings are high enough, this option can significantly reduce the time to complete the work.
In the second case, the height of the floor remains at the same level, but the builder will need more work and time.
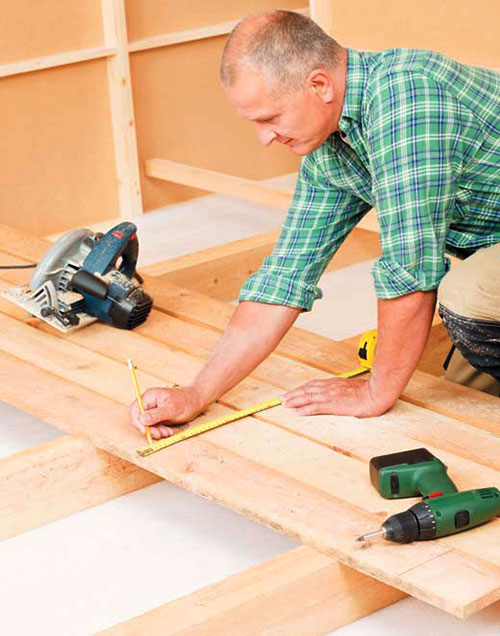
Whichever option is chosen, before starting all the work, it is necessary to take out all the furniture from the premises, free the floor from carpet or other covering, remove the plinth.
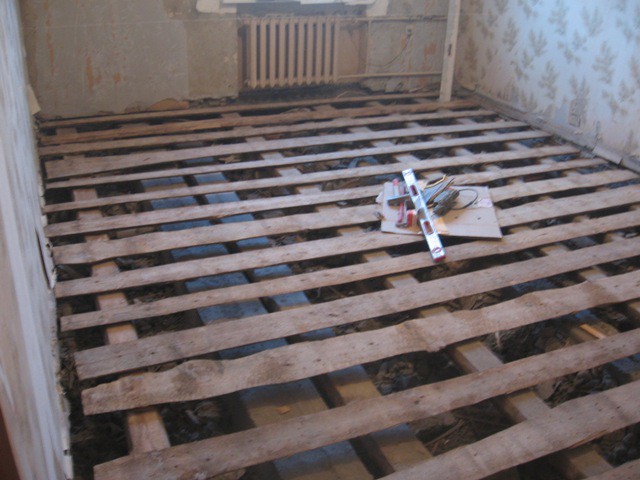
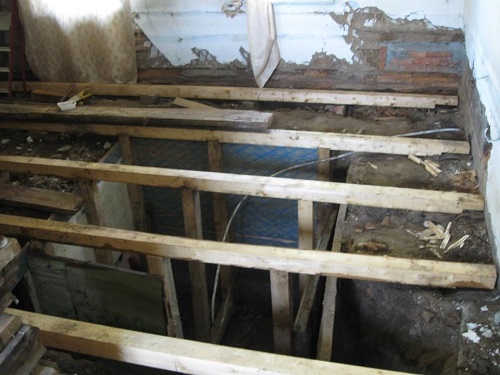
First you need to check the condition of the floor boards. Elements damaged by rotting or affected by mold should be replaced, and unstable should be fixed. On old boards, you need to apply soil, antiseptic impregnation and dry, if necessary, use for this additional sources of heat.
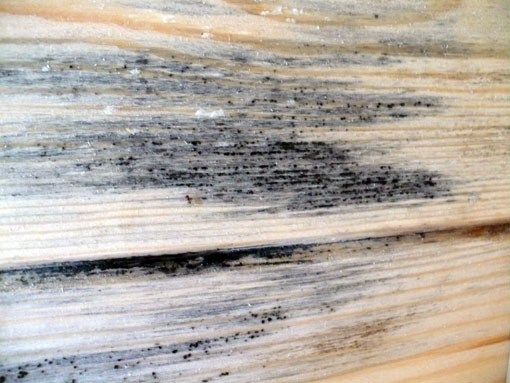
As with the inspection of the underground space, the areas affected by the fungus, but having retained their strength, need to be cleaned up to healthy wood and saturated with antiseptics.
Experienced builders recommend for this purpose to use a composition that is practical and completely safe for humans and domestic animals, but is so unloved by rodents and wood-boring insects. cool solution of common table salt. To prepare it, add salt to the hot water until it stops stirring.
The areas of the board, previously cleaned from mold damage, are thickly poured with hot saline outside.Found cracks between the boards or cracks in them need to be filled with building foam, on top level with putty on an oil or acrylic base. After drying, lay the waterproofing material - plastic film or penofol, glue the joints with a wide adhesive tape.
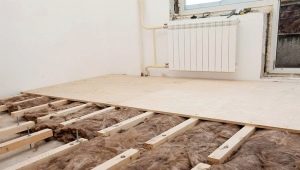
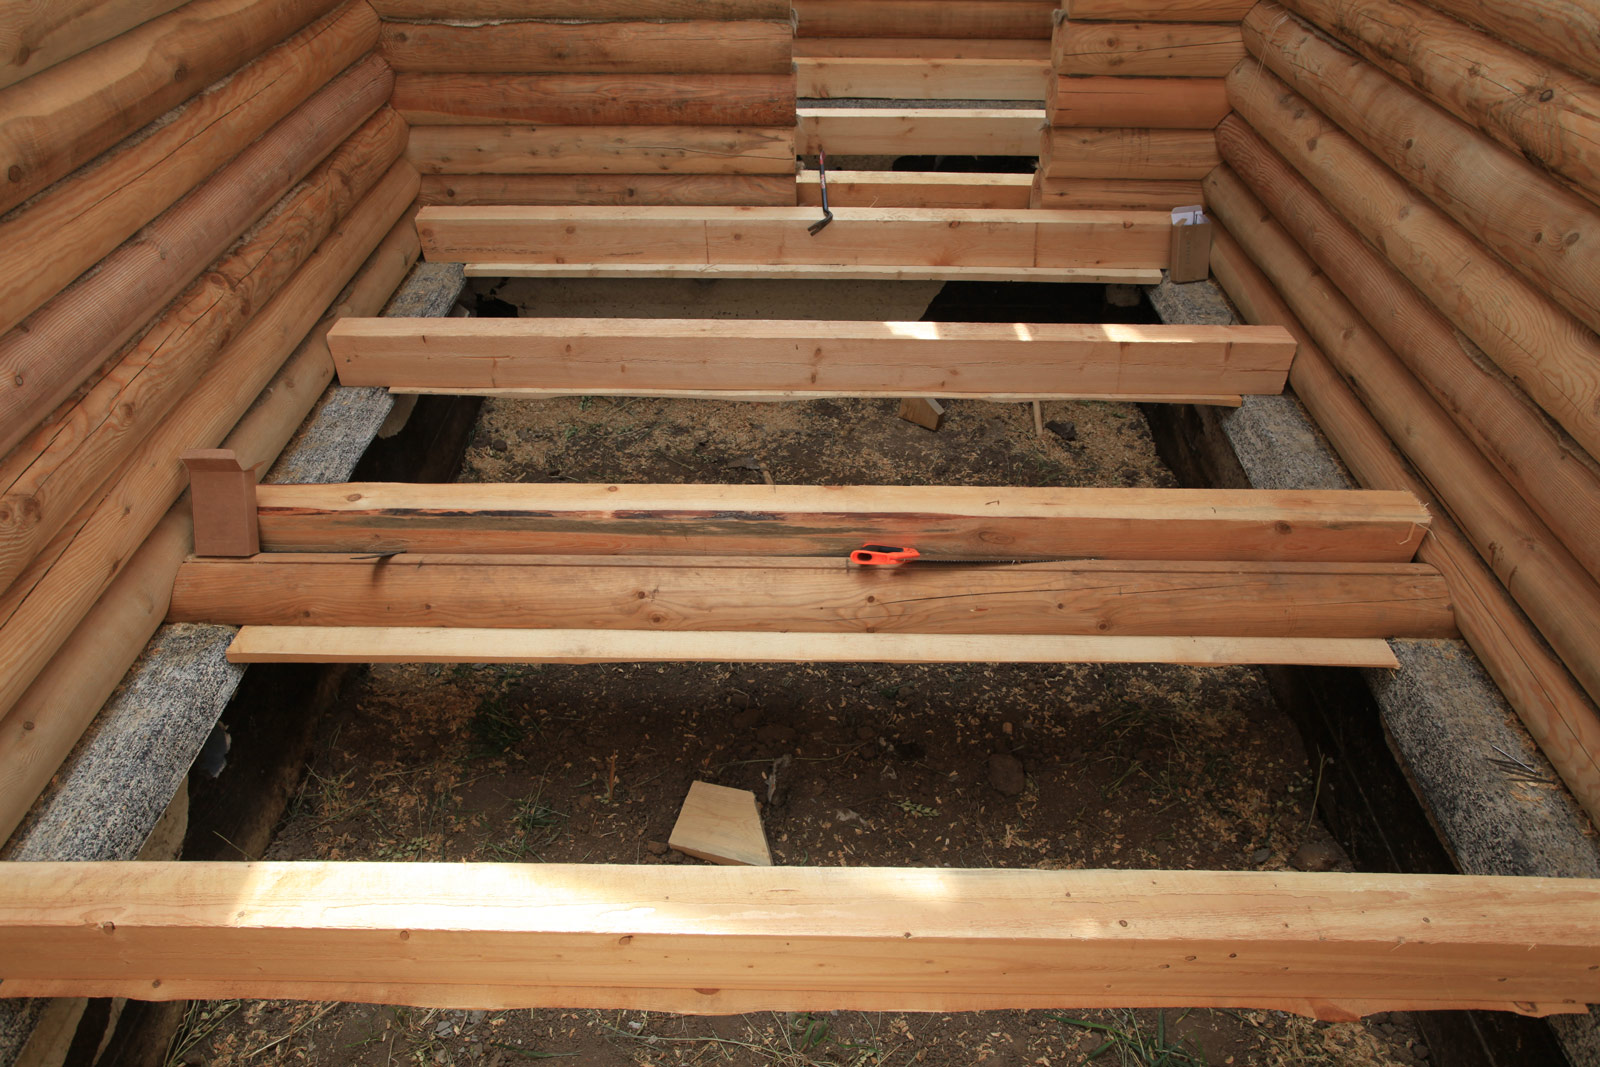
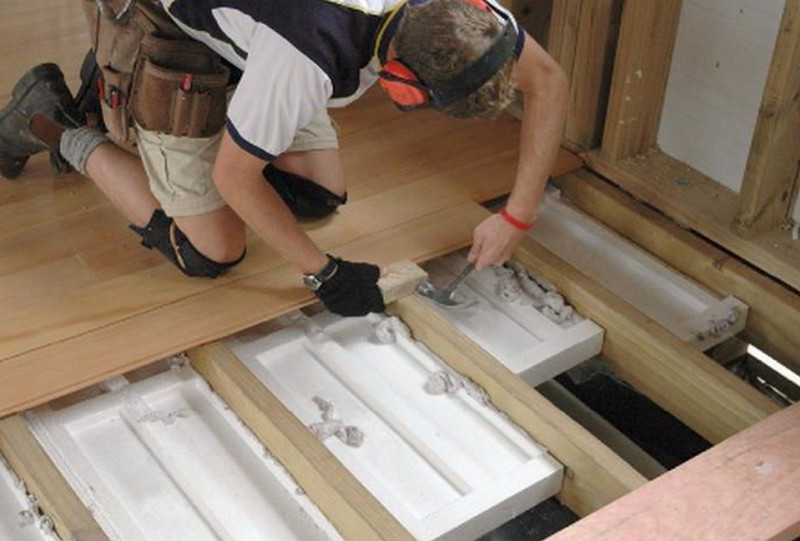
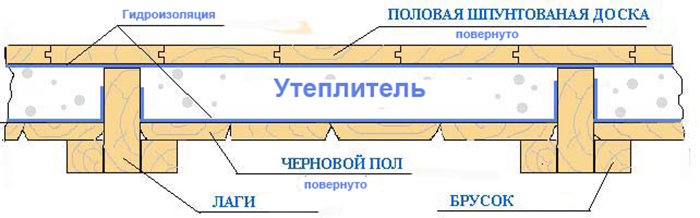
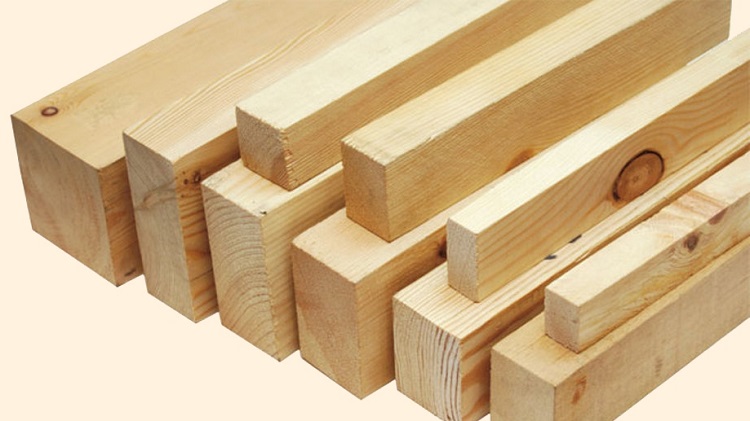
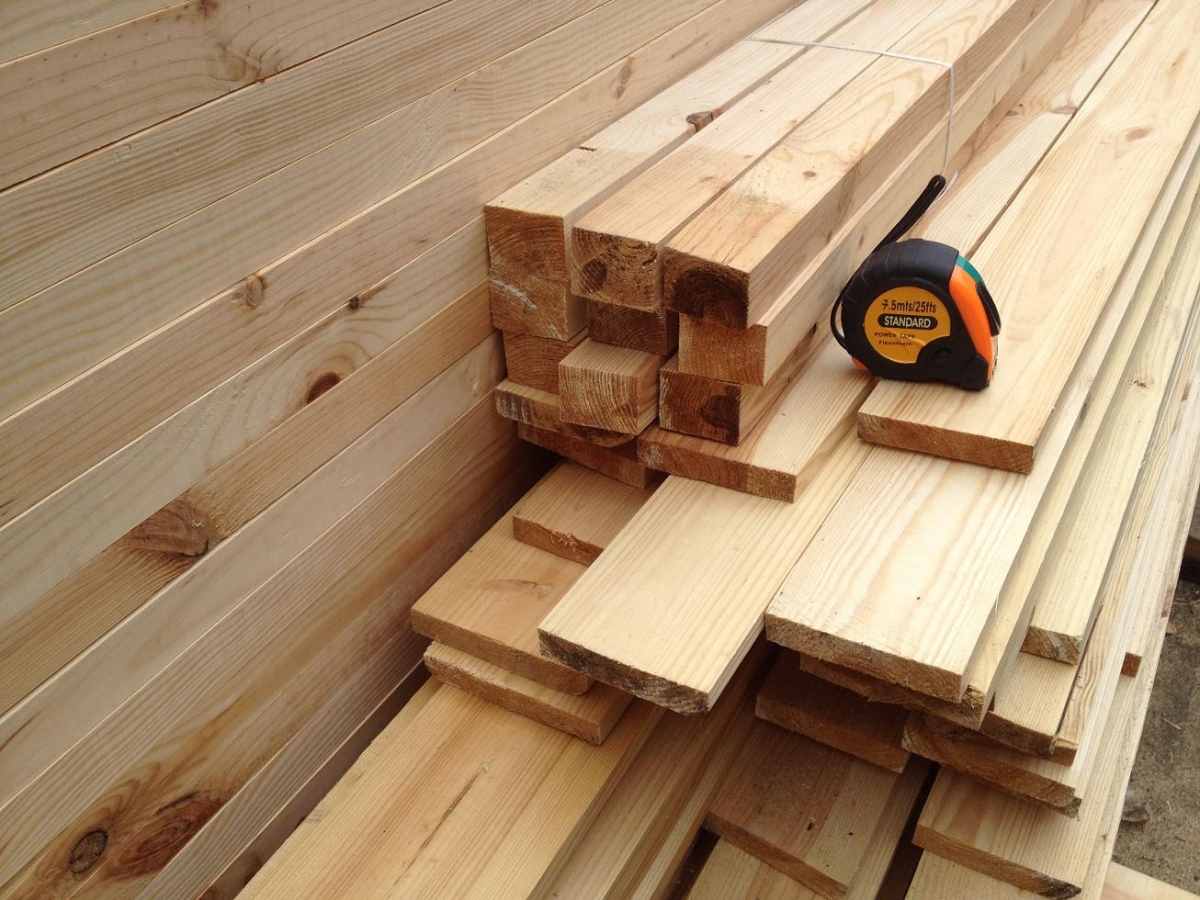
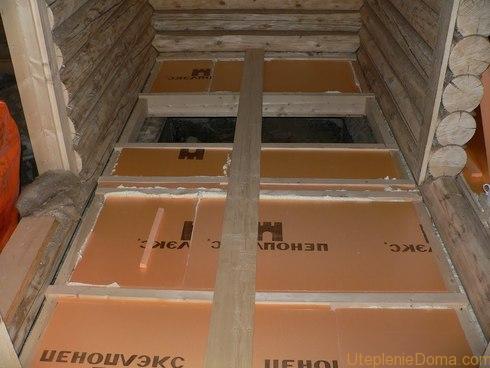
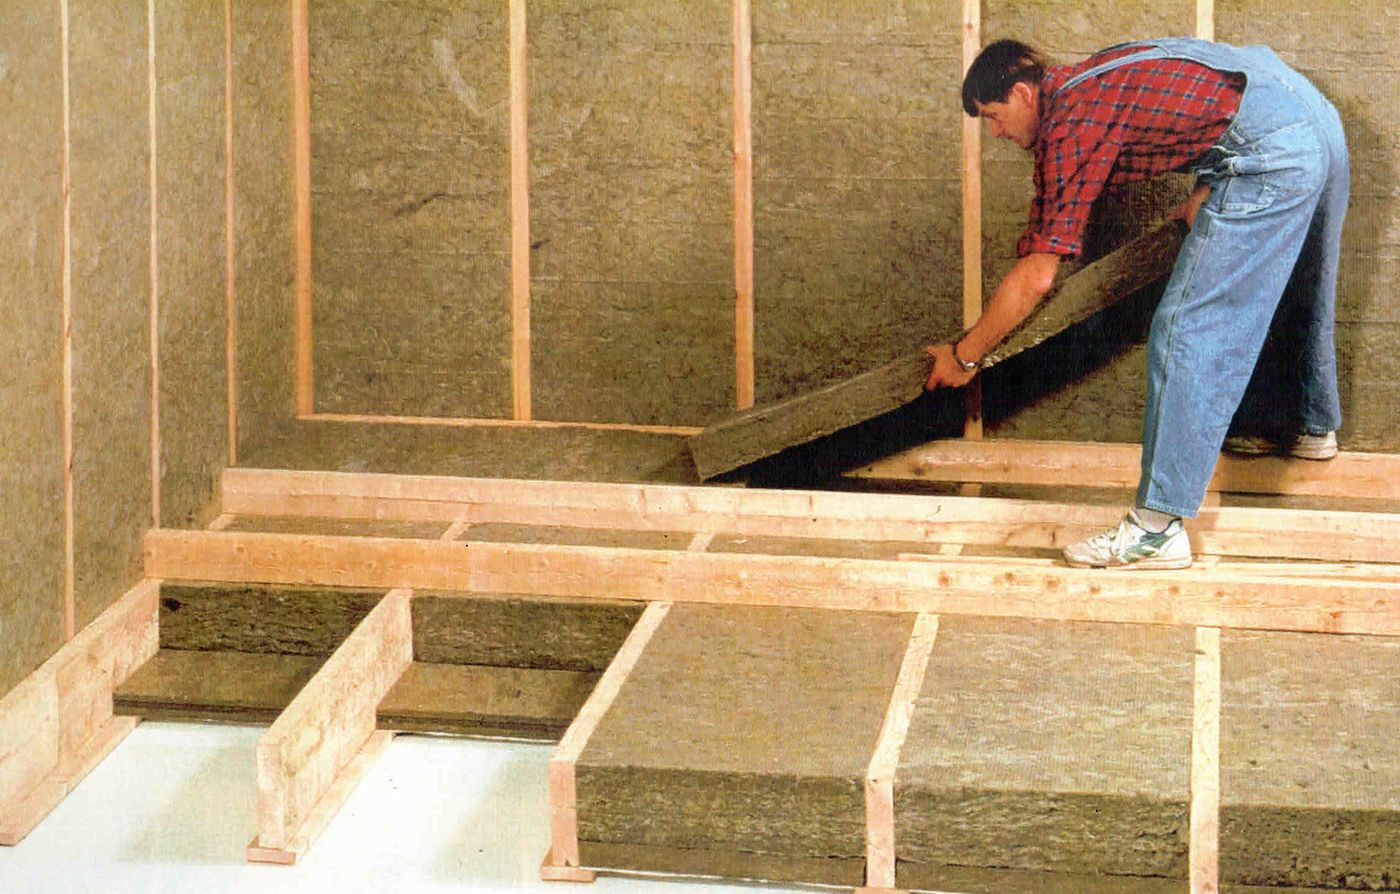
After that lags are laid. You should choose a timber from coniferous wood, the minimum cross section of which is 50 * 50mm. However, if the flooring of the lower floor is being insulated and reinforced insulation is required, then, accordingly, a larger section beam is required.
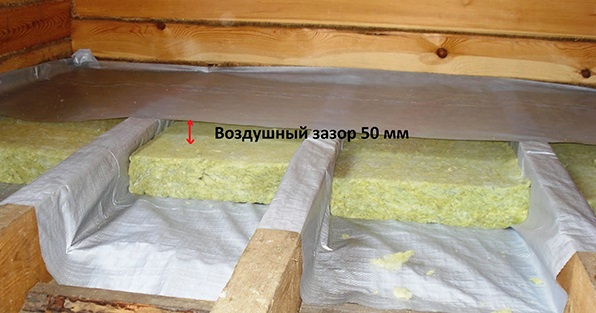
The preferred dried timber with no visible deformations (without bends on any of the axes), chips and other damage. It is important to bear in mind that between the insulation and the top board there should be a gap of 1 - 2 cm for natural air microcirculation and humidity compensationtherefore, the height of the material for the lag must be calculated with a margin.
As a frame, in addition to the beam, it is permissible to use a cut board with a thickness of 50 mm of appropriate width, mounted on the edge (the wider side will be located vertically) - in this case, more rigid mounting of boards to the floor is required.You may need metal corners with a shelf length not less than half the width of the board: for example, if a board with a section of 50 * 120 mm is chosen for installation on an edge, then the shelf length of the metal corner must be at least 60 mm. The installation angle is no more than 1 meter.
It is strongly not recommended to use unedged materials, as in the wane (remnants of bark) on wood, larvae or even adult woodcutting insects can persist, and unfortunately, it is not always possible to eliminate them using bioprotective impregnations.
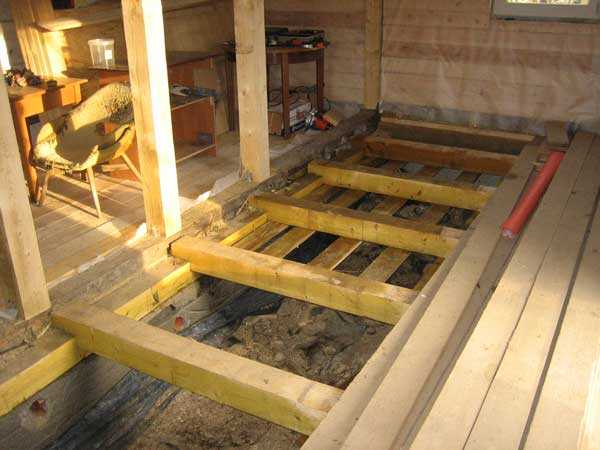
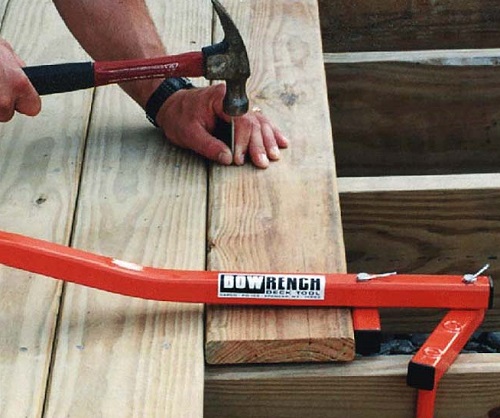
It is necessary to start laying from the highest section selected by the construction level. The layout of the lag is quite simple. The step must be kept constant - from 50 to 60 cm. It is necessary to observe horizontal position, as far as possible, if necessary, placing hard inserts resistant to moisture and fungus from below. The logs are fastened to the floor with screws in increments of 100-120 cm.
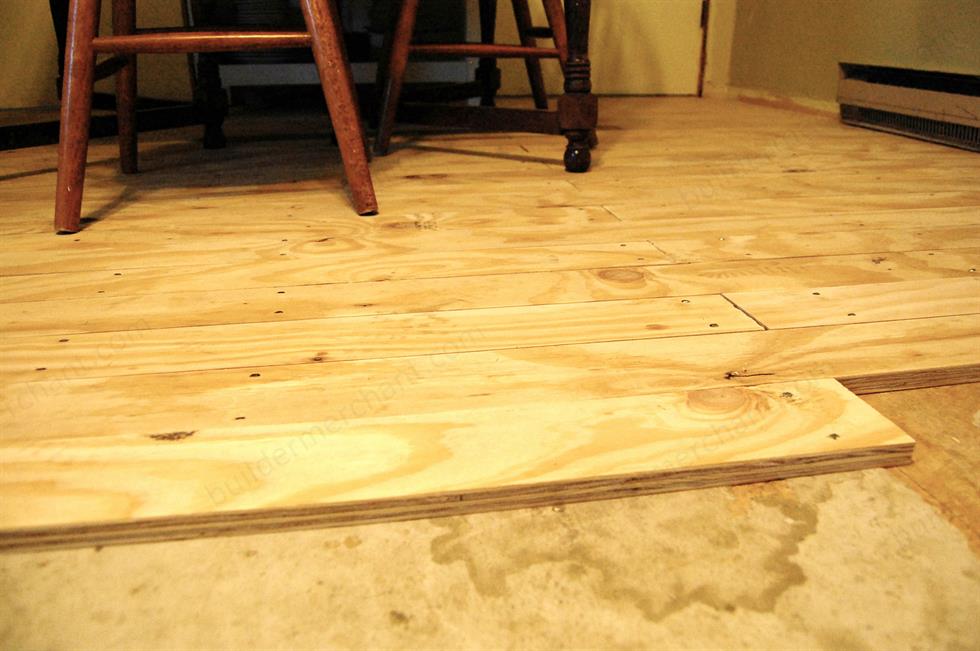
In the space between the lags fit insulating material. At warming from above the choice is not limited to sheet heater any more. In this case, it is possible to put on the floor not boards, but plywood of sufficient thickness, then the floor will last even a little longer.

The algorithm works with their own hands
Warming from above with dismantling of floor boards implies that floor boards are checked, their condition is satisfactory and they do not need to be replaced.
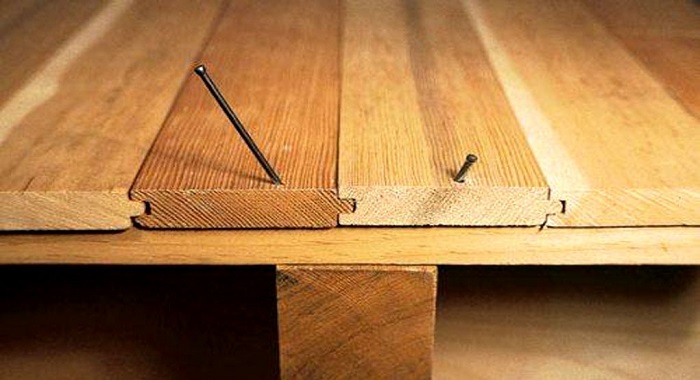
Before starting the dismantling of the board, it is necessary to mark them with an indication of their order and orientation, as in the case of using tongue-and-groove boards or with a spike-groove attachment, an error in orientation will disturb their mutual fixation. The indication of the top side will be the surface on which the marking is applied.
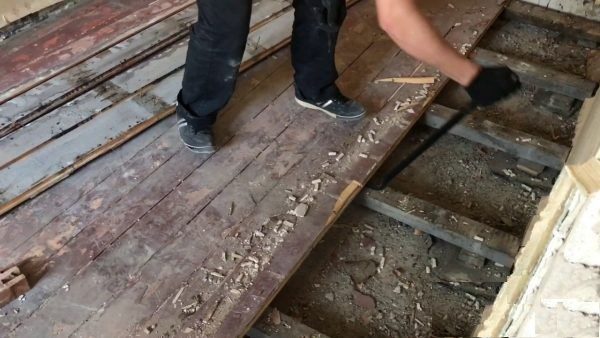
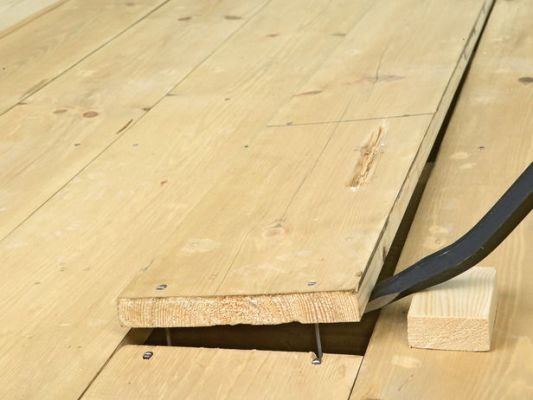
Dismantling need to produce with utmost care, without damage to the material. If the boards are screwed with screws, all of them need to unscrew and only then lift one by one, starting from the edge of the room.
Some difficulty in finding points of attachment with self-tapping screws can create an old paint, if the floor was painted. This will help simple way - the use of a magnet, perhaps from the old speaker (column). Although today a more powerful neodymium magnet is relatively inexpensive. With its help, the cap of the screw is found, the paint is torn off with a spatula and the screw is unscrewed.
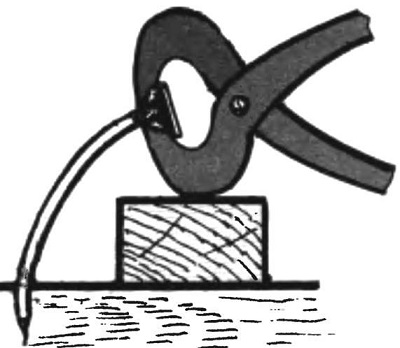
Dismantling is slightly different if the boards are nailed. In no case should you try to remove the nails with pliers or a nail puller; this will only damage the board.Heads of nails are also easily located by a magnet, these places are marked with a marker.
The builders of the “old school” used an ax to dismantle the boards: they gently wedge it between the lag and the board, without damaging either one or the other, and lifting the edge of the board with a slight shake.
You can use a pry bar or a nail tip with a flat tip. There is no need to try to lift the entire board at once, having wedged it with an ax in only one place, from which the wood can split.
You should raise the board at each attachment point to a small height, then walk along the board again, repeating this operation. When the edge is already noticeably raised, substitute an additional support for the tool and raise the entire board. Wherein It is important to ensure that the tongue or spike of the board is not damaged.
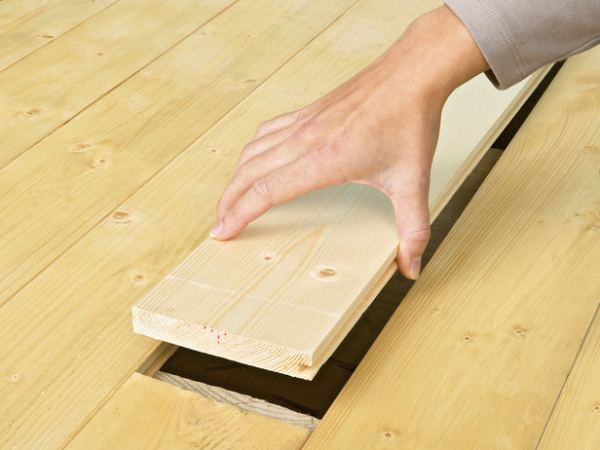
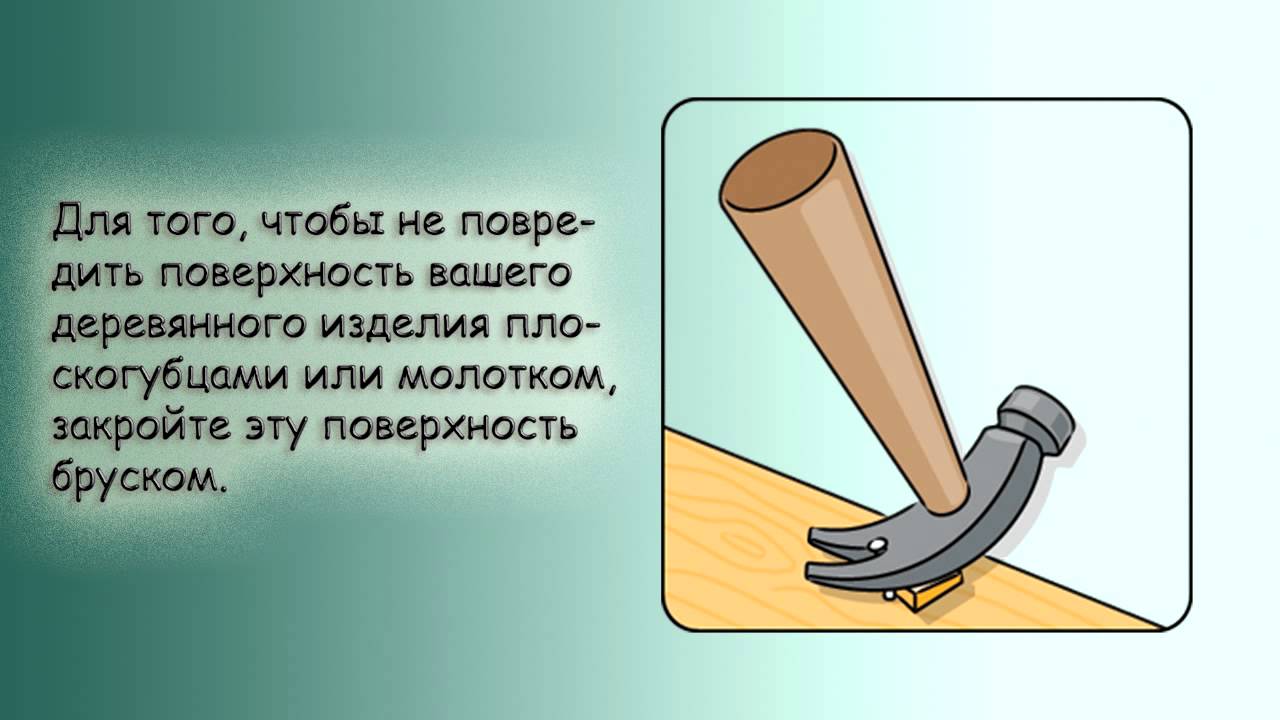
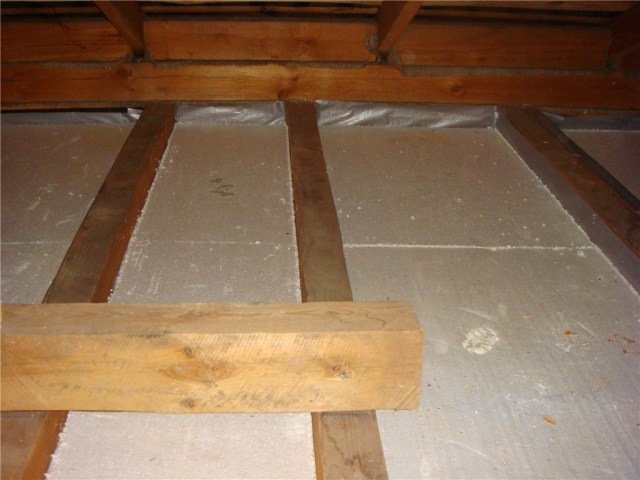
Old nails need to be knocked out with a hammer on the side of the point, and when the nail head rises above the board, remove it with forceps or pliers. After removing the boards, the builder opens the lags and, if their condition is satisfactory, lays the plastic film using a construction stapler, fastens the joints with adhesive tape and mounts the heat insulating material.
In both cases, with open lags, they should be soaked with fire and bioprotective substances and dried thoroughly before laying the insulation.
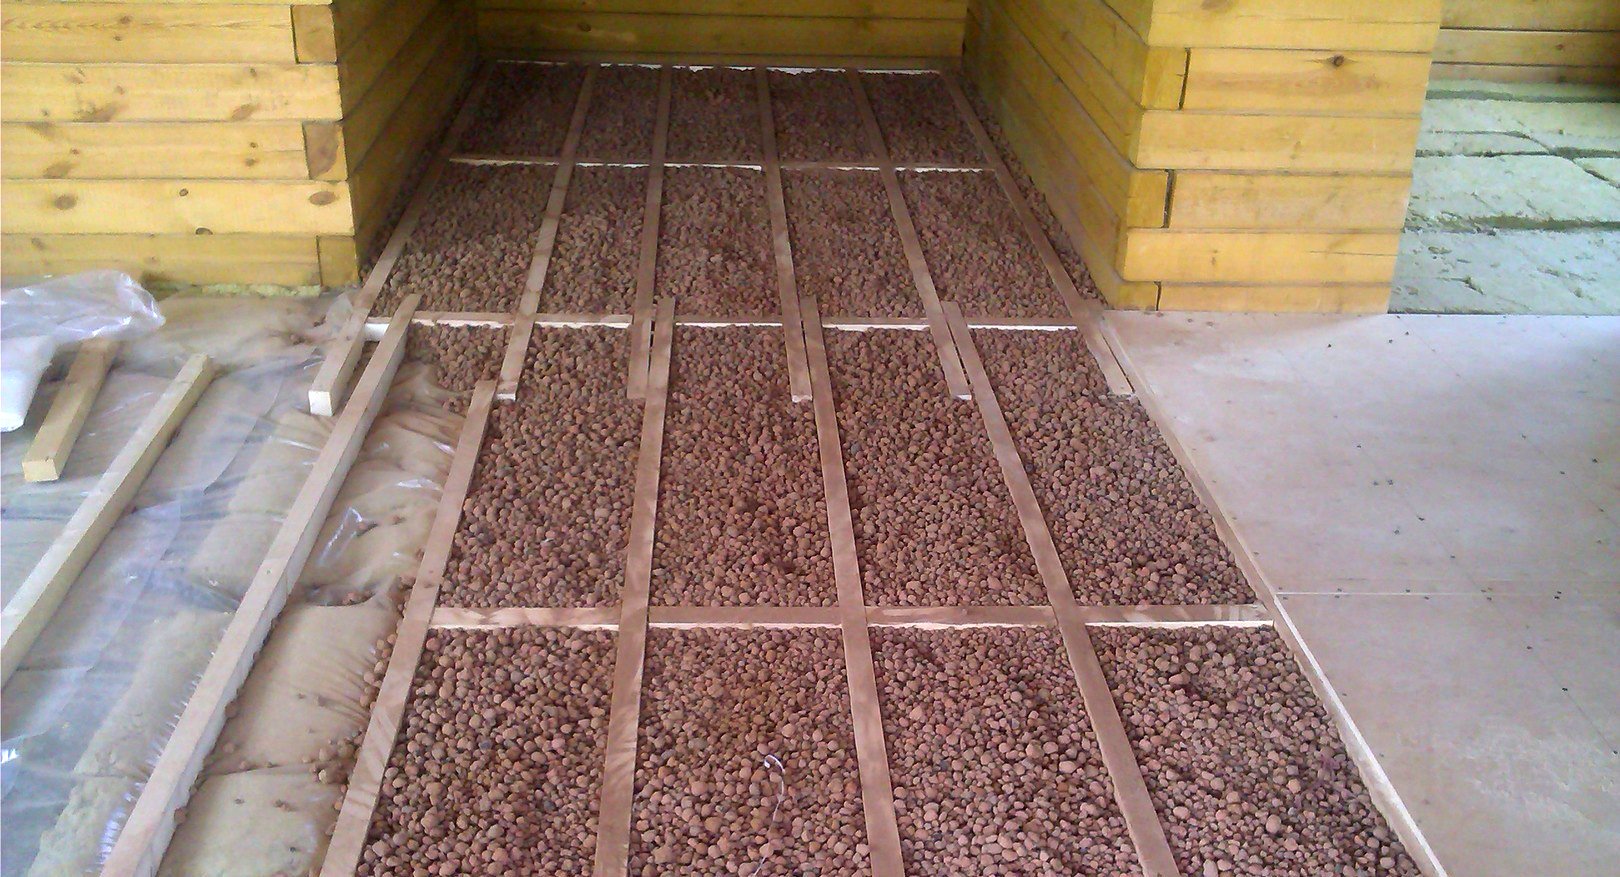
If bulk material is used - whether it is sawdust, wood concrete granules, expanded clay or any other, you must carefully level the layer of insulating material, avoiding laying too loose or, on the contrary, excessive compaction, fill all irregularities and cracks. In the case of the use of roll materials, you should try to cut in accordance with the geometry of the space between the lags, avoid ruptures and crushing, do not leave voids.
It should be remembered that many rolled heat insulating materials lose their properties when wet, and from a heat insulator they turn into heat conductors. When working with sheet material, you should try to cut as accurately as possible, avoid bending the sheets, fill the gaps and voids with mounting foam.

At the end of the laying of the heat insulator, regardless of how hygroscopic the material is, you should lay the polyethylene or other moisture-insulating film again, and after that you should mount the boards.
Materials for thermal insulation
The modern market offers a fairly wide choice of materials for thermal insulation, and it is difficult for an inexperienced home craftsman to choose the most suitable insulation for wood flooring.
In addition to the price, each type of material has its advantages, and some - and obvious disadvantages:
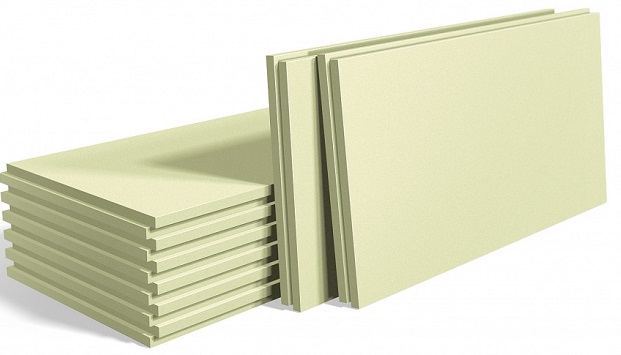
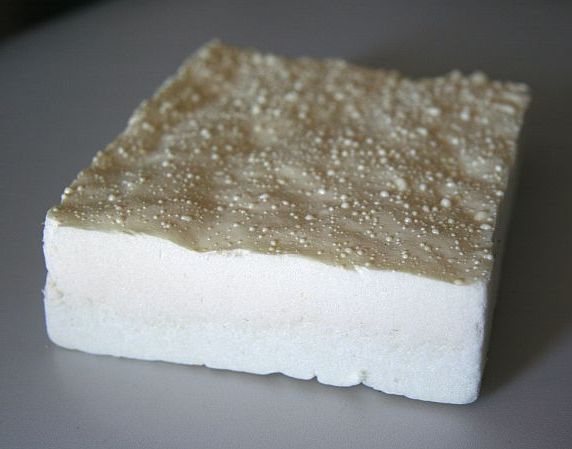
- Penoplex. Sheet insulation, produced in a fairly wide range of thickness. Rather strong and at the same time easily processed material with high heat insulating characteristics, resistant to moisture and mechanical stress. For ease of installation available in sheet piling. Afraid of high temperatures and organic solvents. It is not attractive for rodents and insects.
- Styrofoam. Unlike older brother - penoplex, it is softer, less resistant to moisture, it can crumble when cutting. In this case, it has a much lower density and, as a result, a somewhat greater insulating capacity. Unlike penoplex and EPPS, it does not contain styrenes, that is, it is somewhat safer when used in living rooms.
- EPPS - extruded polystyrene foam.In fact, this is the same penoplex, but with a few differences in production technology. According to the characteristics it is not inferior and does not exceed.
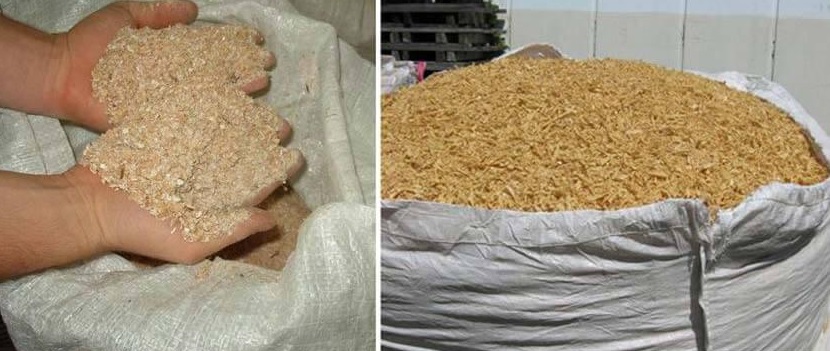
- Sawdust. This bulk material is very cheap, in some cases even free, as it is actually a waste of production. One of the most environmentally friendly and safe materials for humans and pets. It should be remembered that the sawdust in its pure form can not be laid, otherwise the invasion of rodents and insects can not be avoided. Sawdust must be mixed with cement or clay, while adding fire retardant, antiseptic and antifungal solutions. Sawdust is intolerant to dampness and without proper processing and moisture insulation is easily susceptible to rotting and mold damage. Over time, they coalesce, losing insulating qualities.
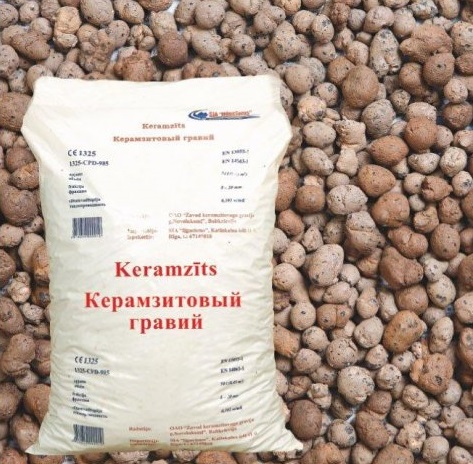
- Expanded clay. Lightweight porous bulk material of baked clay, which is why it is absolutely harmless. Resistant to high temperatures. In expanded clay not closed pores, which is why it is hygroscopic and needs high-quality waterproofing.
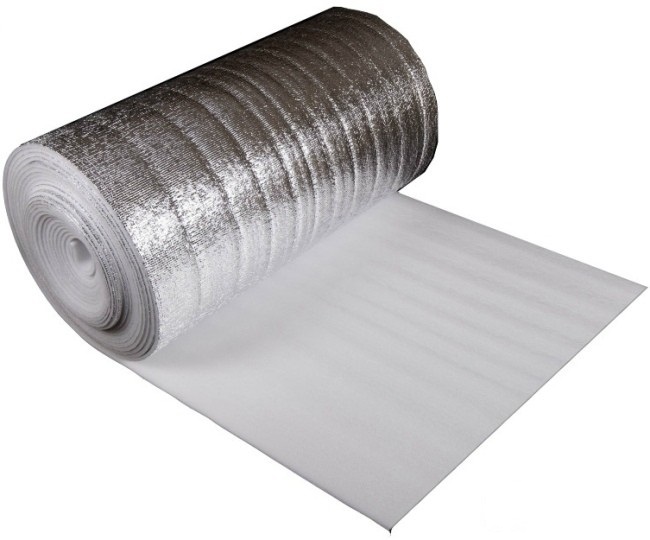
- Penofol. It is a foamed polyethylene coated with aluminum foil on one side (less often on both sides).It has high moisture resistance, according to the heat-insulating characteristics it is noticeably inferior to foam plastic. Very sensitive to even insignificant heat. It is not damaged by fungus, is not subject to rotting. When using, one feature should be taken into account - the foil side should be facing the warm room.
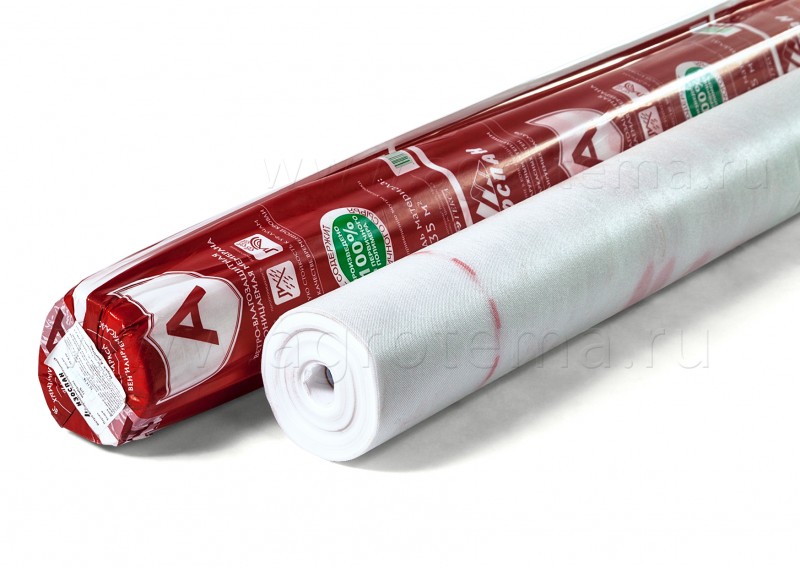
- Izospan. Quality material for steam and waterproofing. Used as protection against moisture, it allows wooden structures to "breathe", that is, it does not interfere with air exchange with the environment. Flammable Resistant to fungal infection.
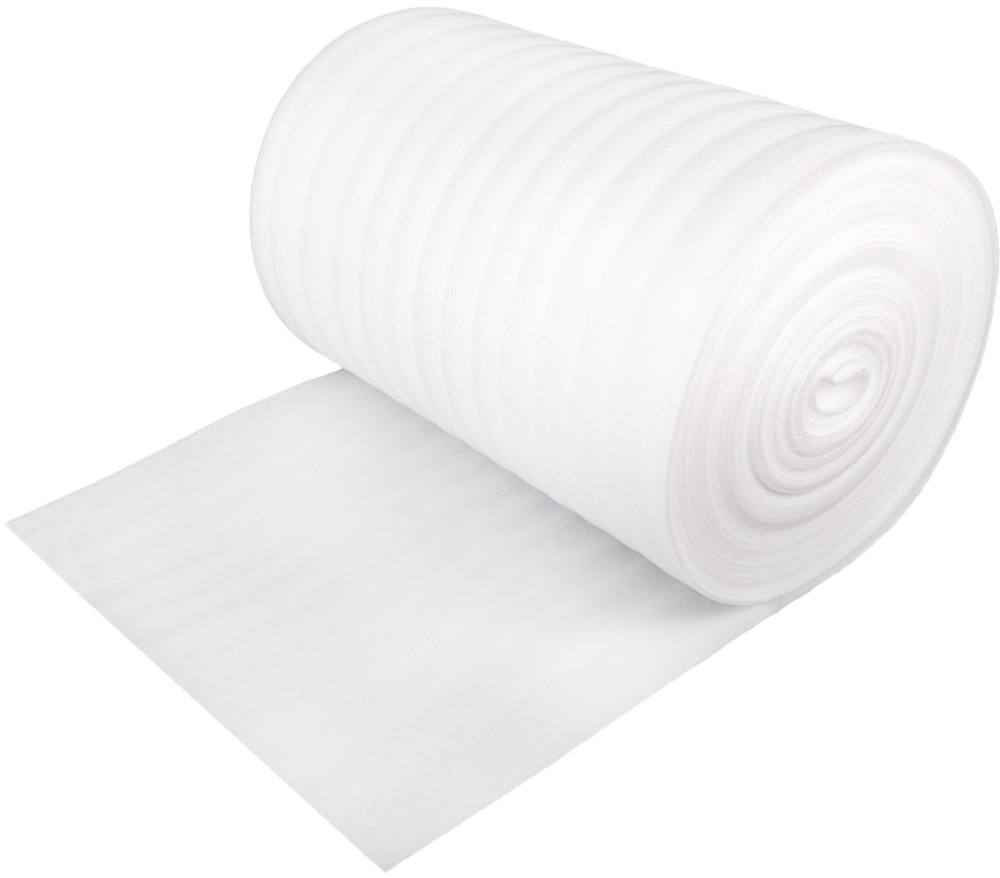
- Izolon. Foamed polyethylene without foiling. Due to the peculiarities of the production, it is not produced with a thickness of more than 7 mm, therefore it has no practical application as a heat insulator. At the same time it is a quality waterproofing material with some noise insulating properties. Sensitive to high temperatures, resistant to fungi, not damaged by rodents or insects.
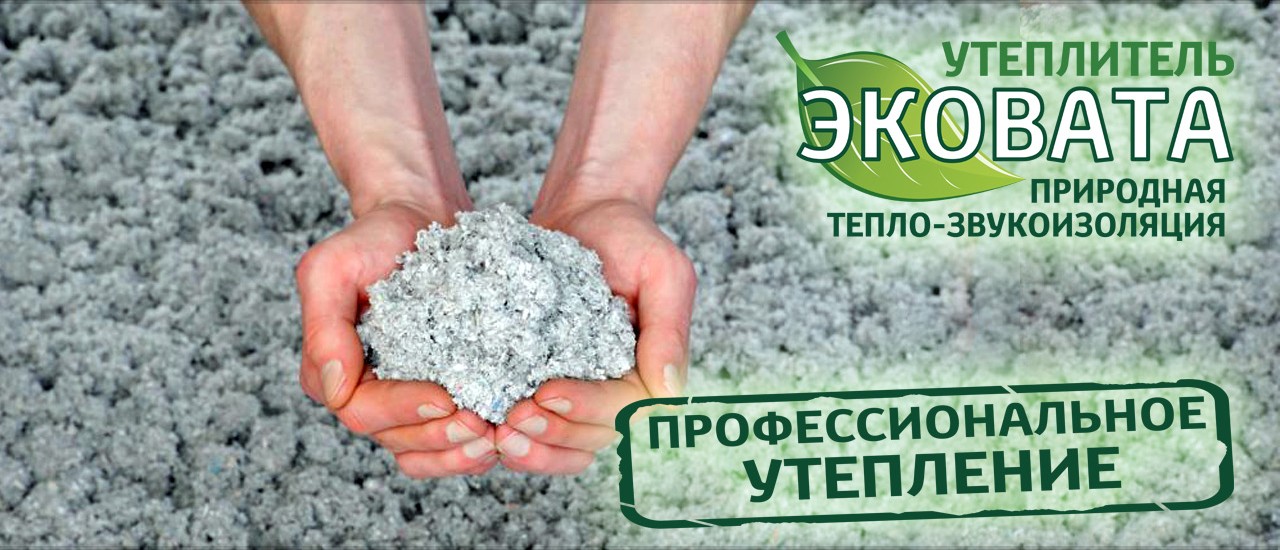
- Ecowool Cellulose based extrusion material. Rarely used in private housing, as for the application requires specialized equipment and trained personnel.Unfortunately, it is not uncommon for a contractor to reduce the cost of production that violates the formulation of the initial composition, as a result of which this material with high thermal insulation characteristics begins to evaporate toxic substances into the environment over time.
- Polyurethane foam, as well as cellulose ecowool, for application requires specialized equipment. The composition does not apply harmful substances. During curing, it forms closed pores, which excludes any evaporation of substances into the environment. On the part of the contractor is not subject to violation of the formulation. Frost-and heat-resistant, not susceptible to rotting, molding, fungal damage. It has high noise and thermal insulation characteristics.
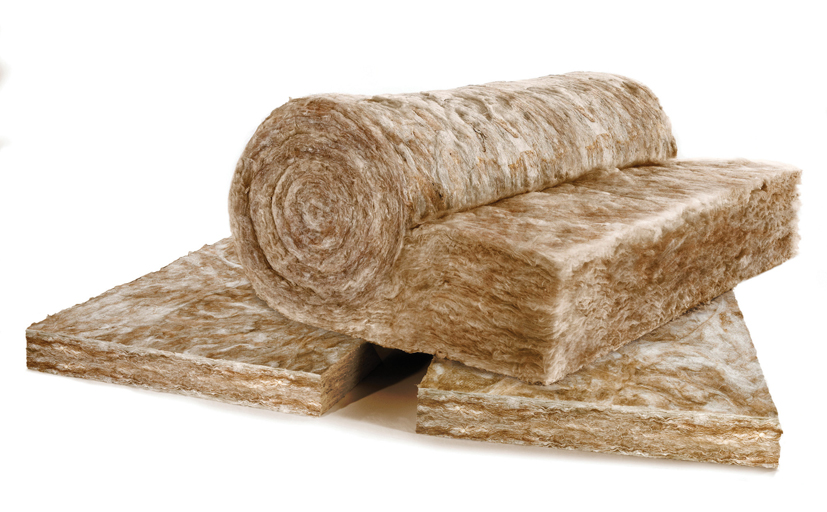
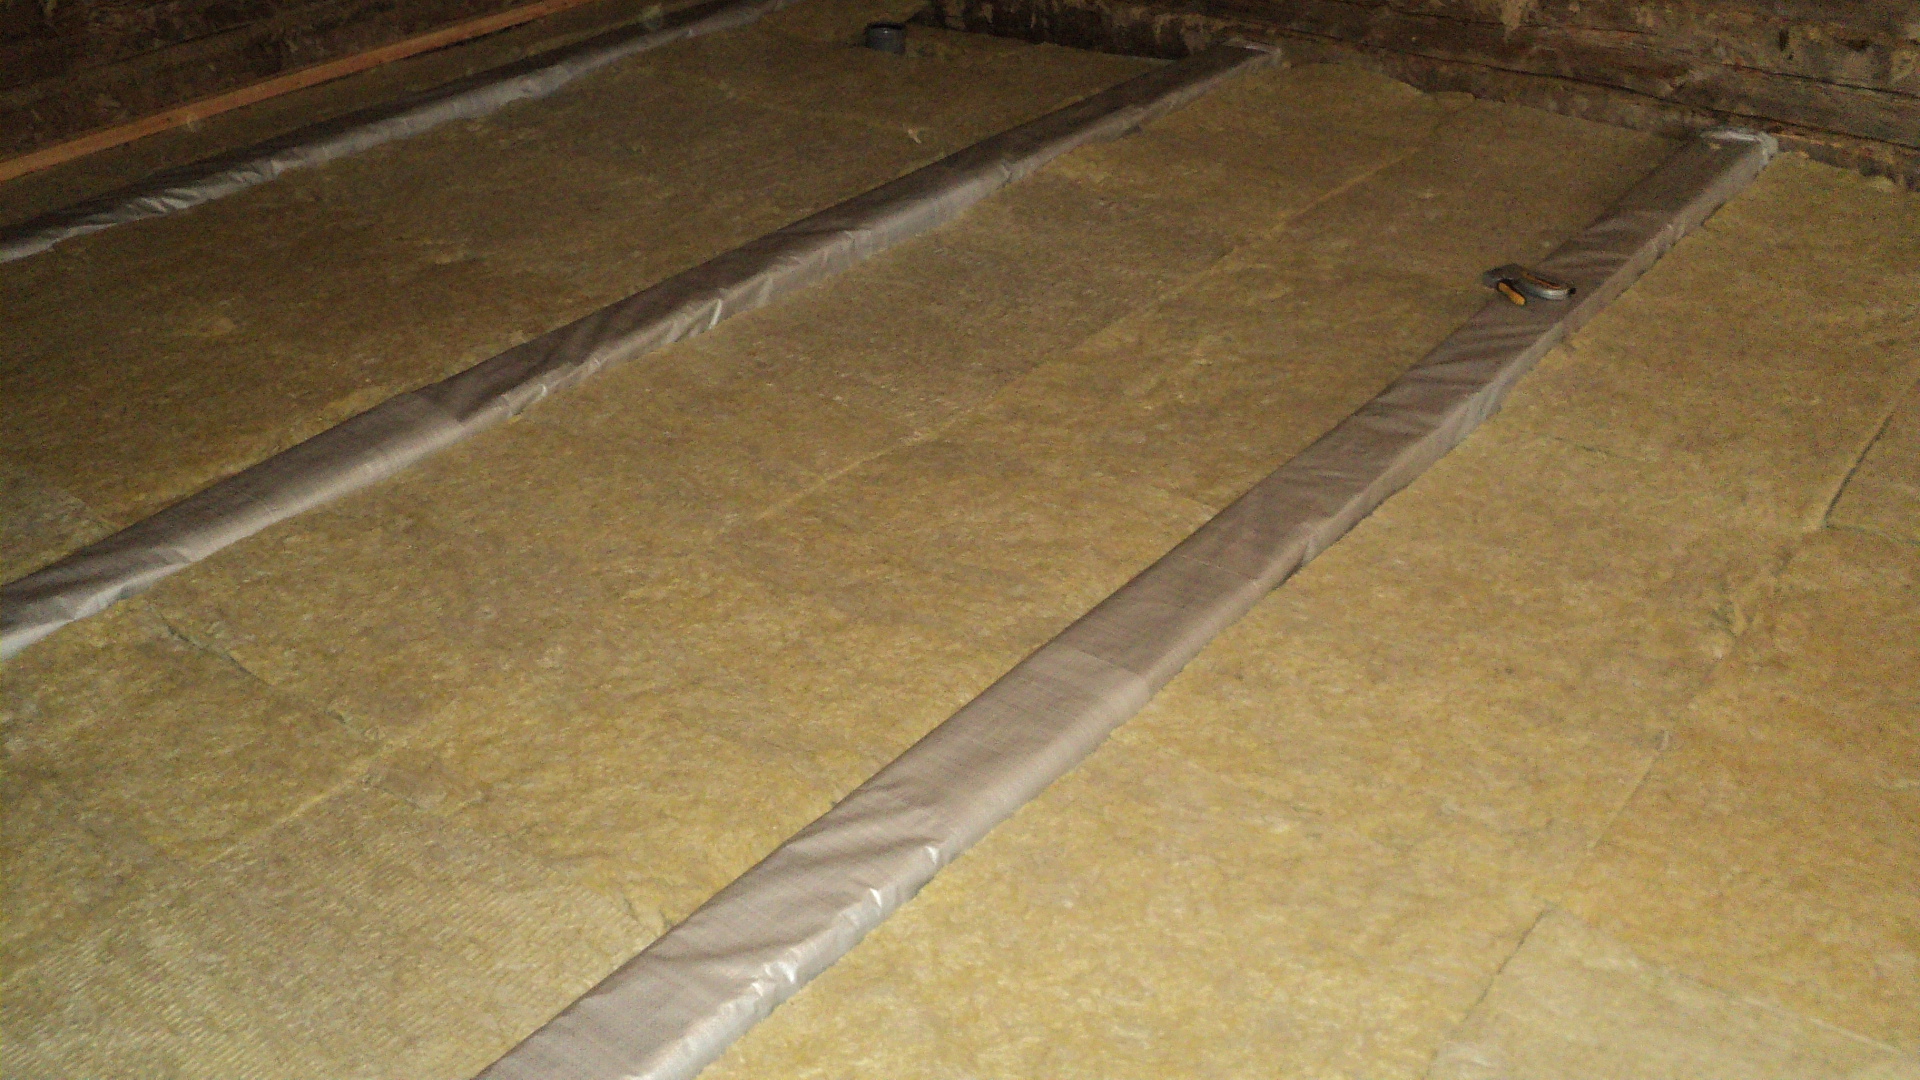
- Mineral wool. One of the most undemanding and easy-to-use insulating materials. It is afraid of moisture, but after drying restores its properties. Due to filling with mineral powder, it excludes damage by rodents or insects, and the absence of organic fillers prevents rotting or mold damage. Easily crushed material, therefore, requires careful handling.
Choosing an insulating material, it is necessary to familiarize yourself with the instructions for use attached to it. This document describes the characteristics in detail: thermal conductivity, permissible temperature range, humidity, and so on.
Typical errors
In some cases, builders, relying on the moisture resistance of the material declared by the manufacturer, neglect additional waterproofing. With rapid temperature changes in an environment of high humidity, condensate may form, as with the direct flow of water from a room through a gap in the floor. When freezing, water causes cracking or rupture of the pores in the material, which dramatically reduces the insulating quality.
When warming the ground floor of a foam floor, the material is sometimes left open. The fact is that mice often gnaw at precisely foam plastic, taking away its crumb and “warming” its holes in it. This approach helps to preserve the vapor barrier layer and, if necessary, to update the sheets of heat insulator without any problems.
It happens, the builder will save on the scotch and leaves the overlap of the plastic film loose. Moisture contained in the air penetrates the mineral wool through the edges of the film and it becomes damp. therefore It is important to monitor employee compliance with technology.
Examples of successful designs
Consider the following:
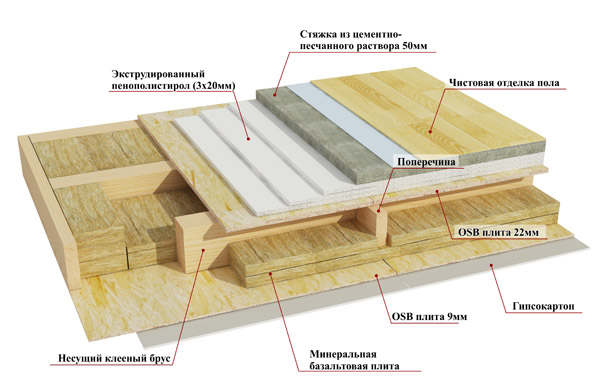
- The classic "cake" at warming from above with the use of a tie under the finishing floor.
- The assembly of the lag "in a run-up", filling with expanded clay over the film, covered with plywood.
- High-quality filling with construction foam of gaps between lags and sheets.
- Laying slabs in the space between the beams on top of a layer of izospan.
- The use of wide boards, mounted on the edge.
- Double-sided waterproofing mineral wool.
In the next video you will find a video tutorial on how to warm the floors in a wooden house.