Repair of the floor in the apartment: the phased creation of their own hands
The floor in the apartment is the basis, on which the whole space of the dwelling “stands out”. And if it is of poor quality, then everything around will be the same. Therefore, high-quality repair of the floor in the apartment is so important. Perform it under the force of a person who is faced with repair and construction works. The process of transforming sex, especially capital, is quite laborious, energy and financially costly. But the result is worth it.
Process features
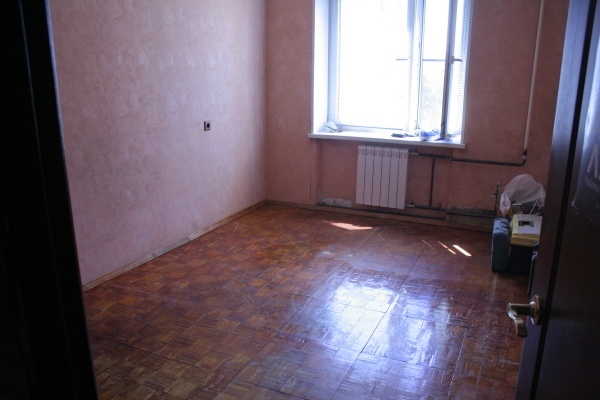
In many apartments, the floors leave much to be desired, especially in the "Khrushchev", in old panel buildings or wooden houses. They creak, and the decorative coating itself does not fulfill its design and practical functions. And if the apartment owners have already decided on large-scale work (and there is a lot of work to be done), then you need to take into account some peculiarities of dismantling and laying the new floor.
Repair of the floor can be minor and consist only in the elimination of minor defects., for example, squeaking, by strengthening wooden structures with screws or adding wedges between boards. It is also possible to simply perepilaniya top flooring. But if the house is old, then the problems that are hidden under the finish can be very significant, and simple primitive measures are not enough. It is necessary to completely raise the old flooring and act.
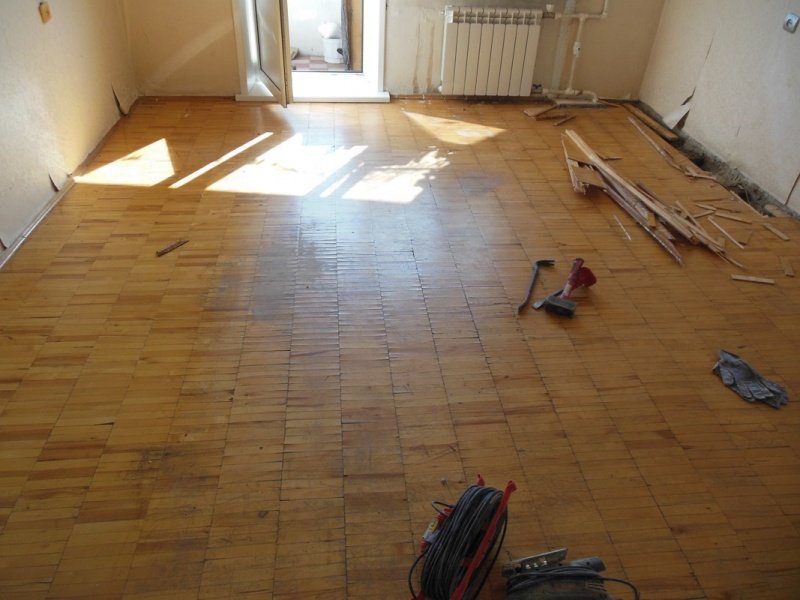
But the very first step in repairing the floor with your own hands will be the complete liberation of space from things and furniture.

Then try to protect the rest of the premises from dirt, debris and dust. It will be necessary to hang a damp cloth or oilcloth on the doorway, put a soft roller between the aisles. If the floor is changed throughout the apartment, then such precautions will not be needed.

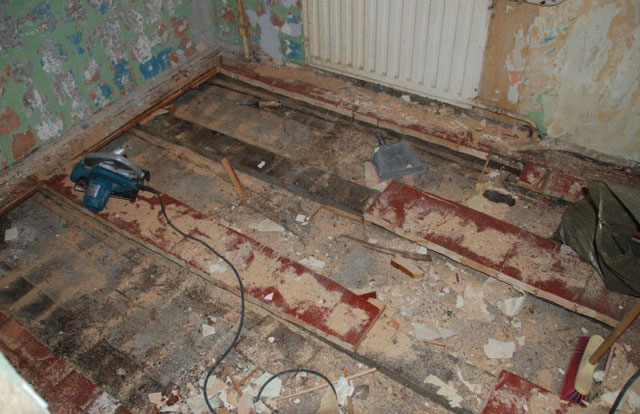
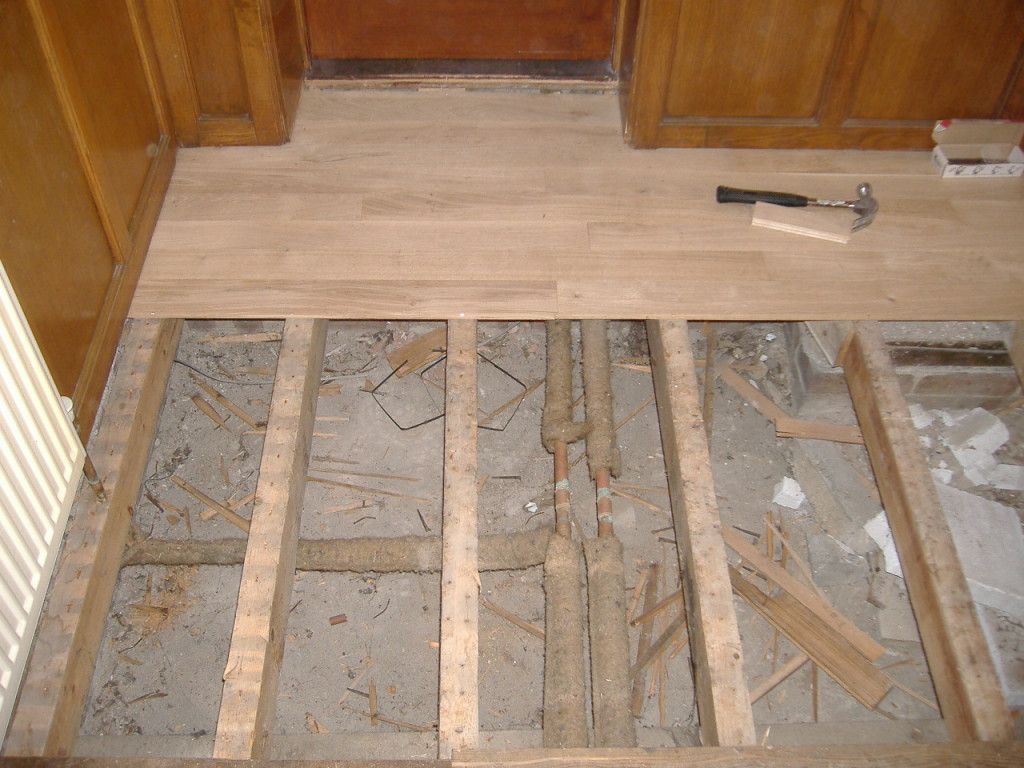
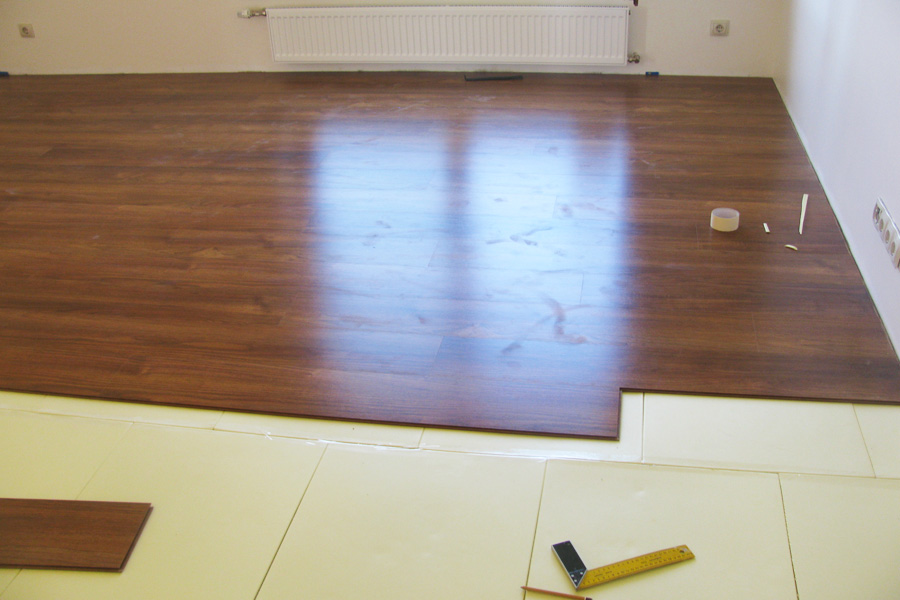
The skirting boards are carefully separated from the walls, especially if they are planned to be used in the future. After that, you can raise the old flooring. When the top layer of the floor is removed, it will be possible to know what to do. After all, there are plenty of options: maybe the old lags in the wooden house are rotten, and maybe there are cracks and defects in the screed.In addition, thanks to the repair, you can raise or slightly lower the level of the room, replace the heat and sound insulation. The main thing here is not to panic, but to do all the work in stages.

If the base of the floor is strong, there are no defects in it - the screed is still as smooth, the lags are not loose and are not destroyed before the eyes, there are no crumbs of cement and holes in concrete, You can do purely cosmetic repairs:
- Simply override the base with a new floor covering or remove the old and put in a new one.
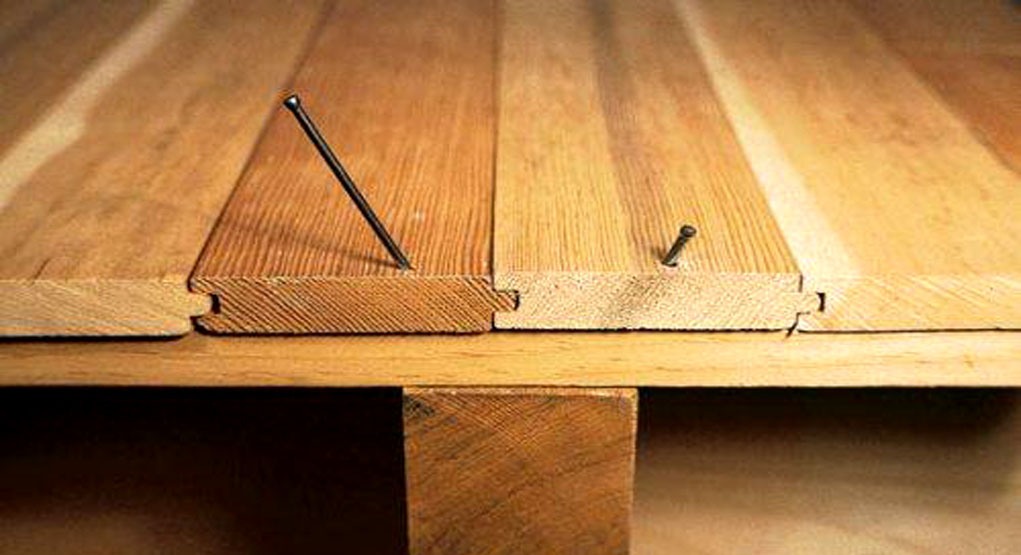
- Remove squeaks in wooden floors with screws (or long nails). Determine the place where the sound comes from, and drive in nails. This will strengthen the floor structure for a while.
- You can eliminate the creaking of the floorboards with talc or graphite powder. You need to fall asleep between the boards.
- If there are gaps in the boards, then wedges can be inserted between them (plastic or just small chips).
- Make a kind of grout, for example, with glue and sawdust remaining after scraping or grinding. Instead of sawdust, you can also use small pieces of newspaper and putty this mixture defects. It is possible to process gaps with sealant for seams.
- If bubbles form on the linoleum or it begins to move away, then it is possible to introduce glue into the defect site using a syringe, put the weight in to influence it for a while.
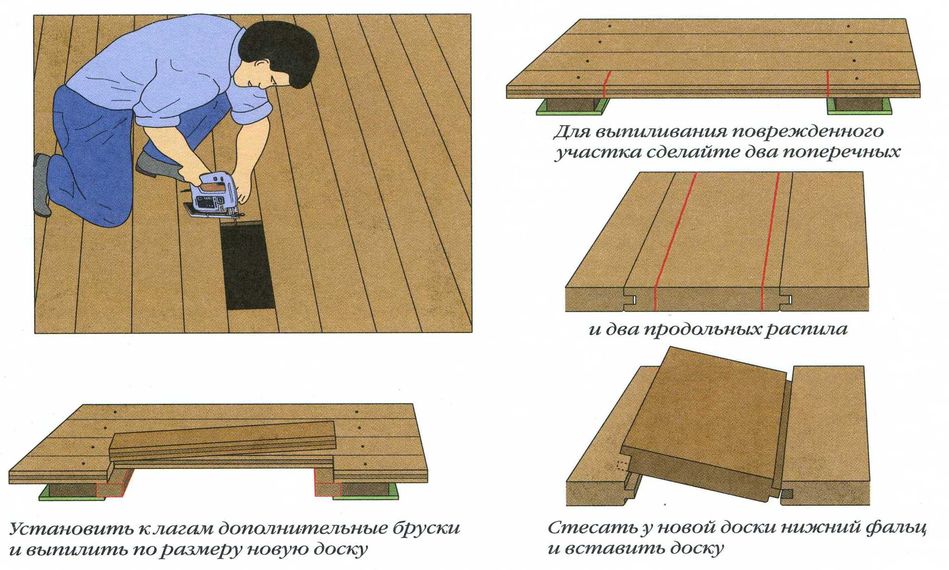
- If there is damage on the top surface (linoleum, carpet, parquet, laminate), then you can make a small patch by removing the bad fragment and change it to a new one.
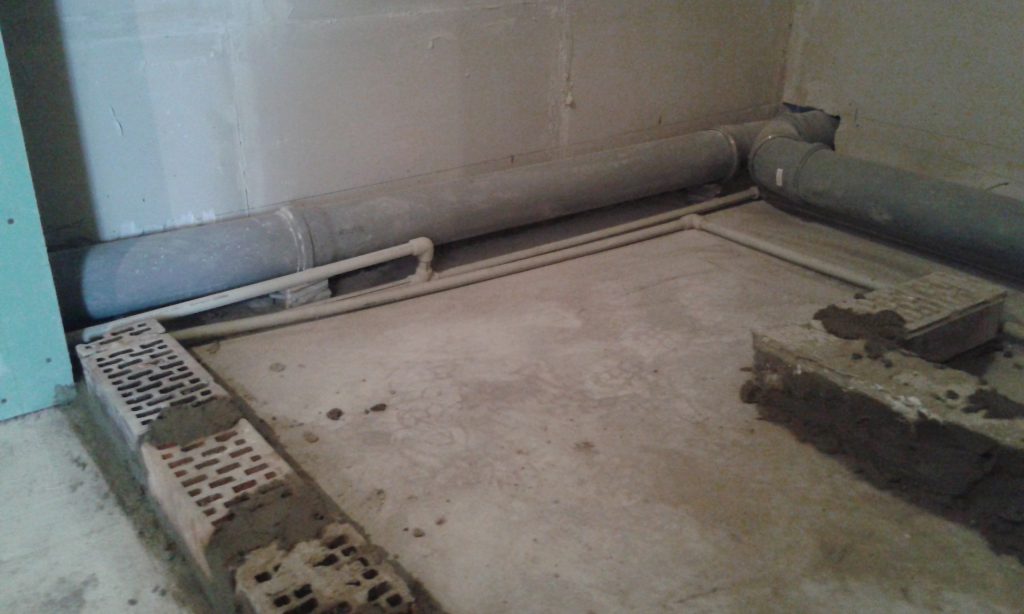
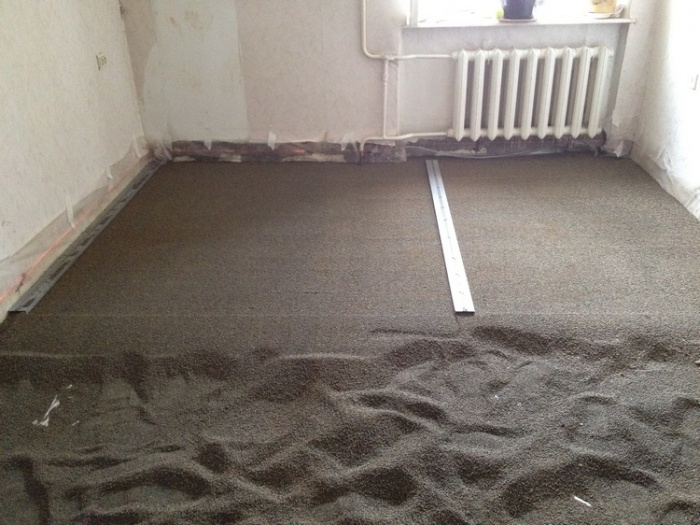
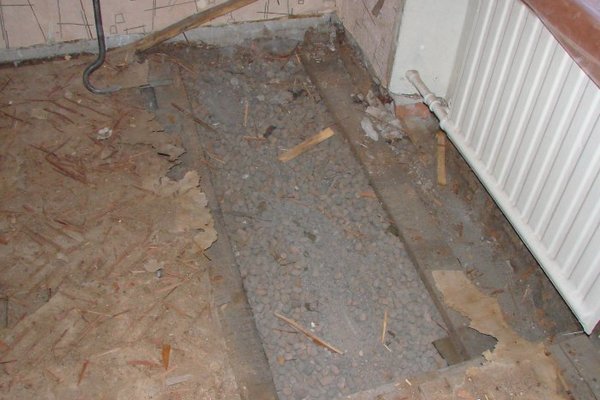
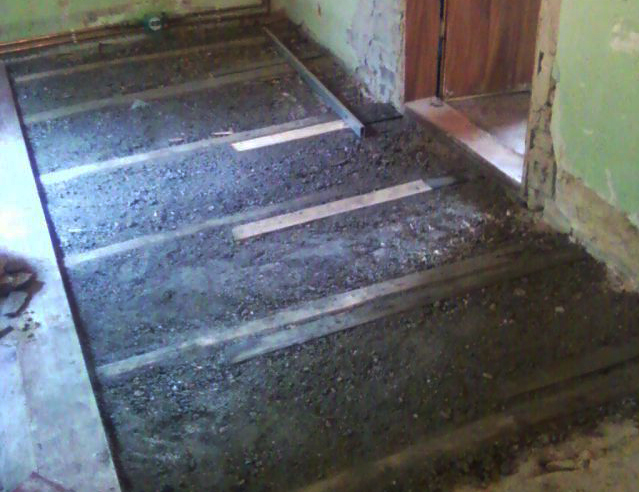
The floors in typical Soviet buildings and wooden houses, of course, differ from each other., as well as house building technology. Conventionally, the floors that need to be restored can be divided into two types: with a concrete base, which can also include layers with expanded clay insulation, poured over with a screed, and wooden ones on logs, which, in turn, can be covered on top with a plank base or laid with chipboard, OSB.
In their structure, concrete floors resemble a “pie”, where the floor is on top, below is a screed layer, including draft, there may also be an expanded clay layer that takes on the functions of heat and sound insulation, and, directly, the floor plate itself . If the screed is damaged, then it can produce a sandy rustle, deflection.Repair minor damage can be through the use of special repair compounds for screed.
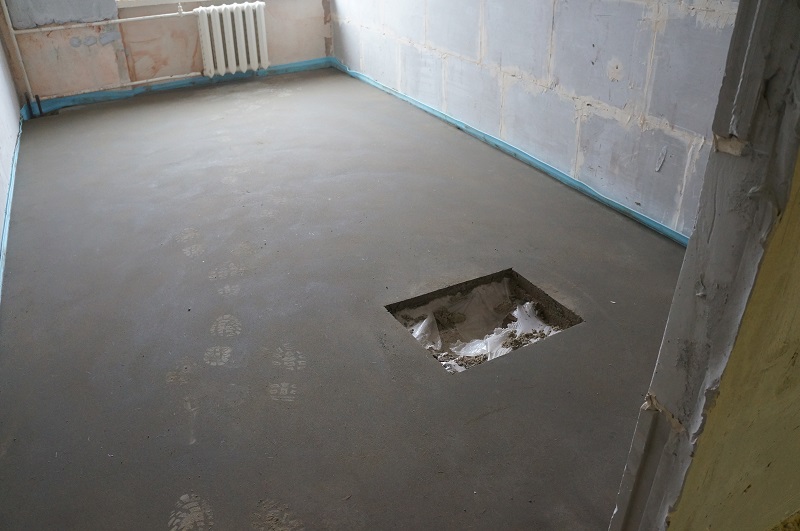
In case of damage to the concrete base, it is also necessary to patch it with a cement mixture, and then cover it with a tie.
By pre-cleaning the damage or removing the old layer of the screed completely (in case the “patches” do not save the situation), repair can be done in one of the following ways:
- Pour all the specially created cement mixture. This is a classic and proven method of restoration. He has only one minus - the need for careful leveling, leveling up with the help of beacons and a long wait for the mixture to dry (up to a month).
- Use instead of the cement-concrete mixture of special dry formulations intended for these purposes. They just need to be diluted with water in the proportions indicated by the package. Such mixtures can significantly save waiting time, but do not obviate the need for rigorous level construction.
- The use of the so-called self-leveling self-leveling floor as a screed eliminates the long wait for drying and the need to build a level.However, these compounds have a fairly high price.
- There is also the so-called dry screed. The composition is applied to the waterproofing layer, leveled and laid, for example, GVL.
When the screed layer is laid and dry, you can proceed to further work - to put the finish coating or to build on it the construction of a log. It will allow you to make the floor warmer in the future, because you can put additional sound, hydro and thermal insulation between the bars of the base. And besides, the floor on the logs "breathes", there is a certain air circulation in it.
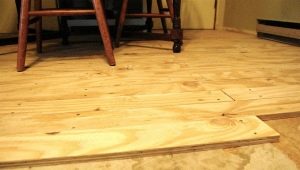
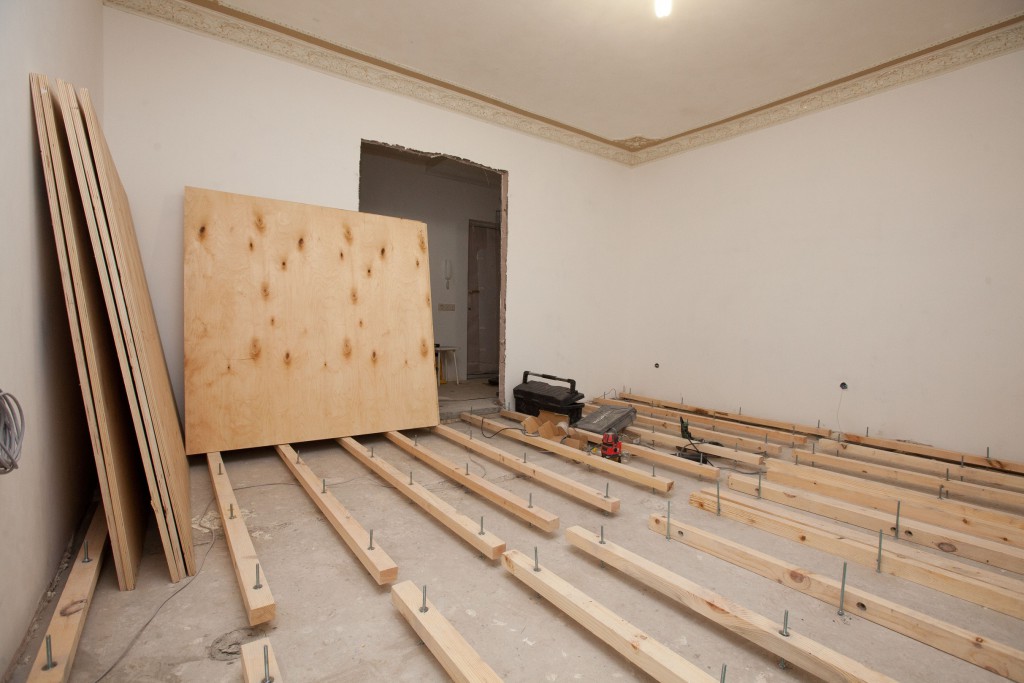
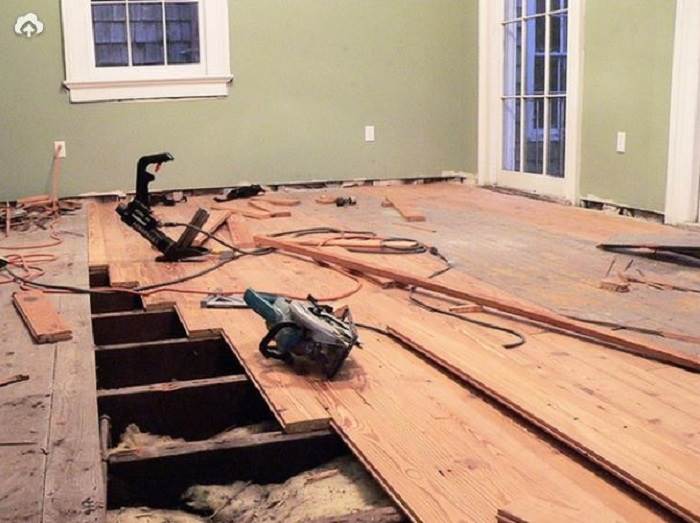
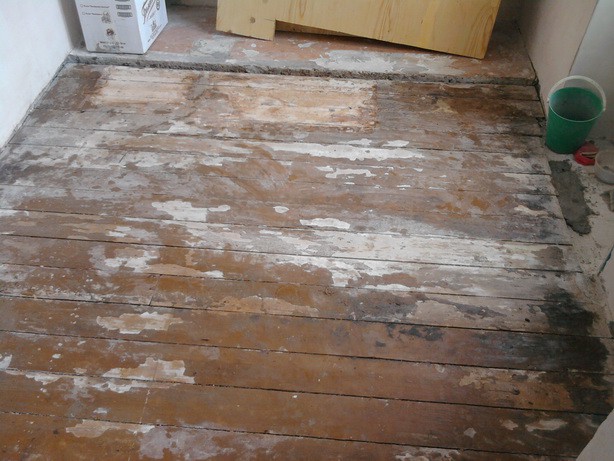
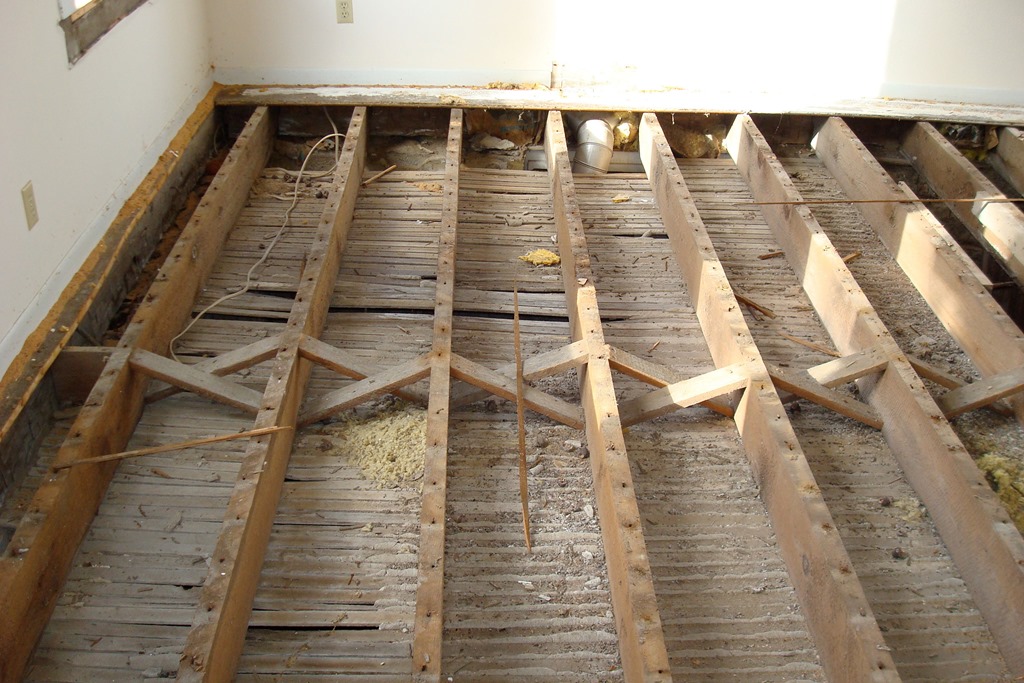
Repair of the lagged wooden floor is also carried out with the removal of the old coating (if it is laid on top of boards or plywood). If boards are laid, they should be removed as carefully as possible, simultaneously sorting them into suitable and unsuitable for reuse. Suitable material will need to be further processed.
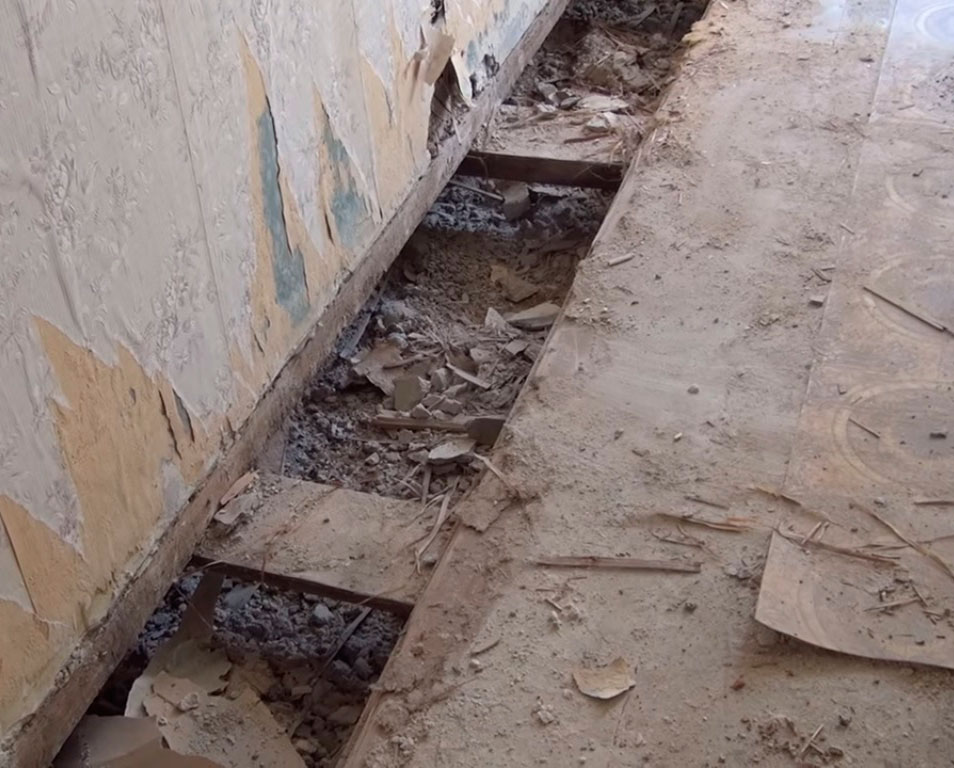
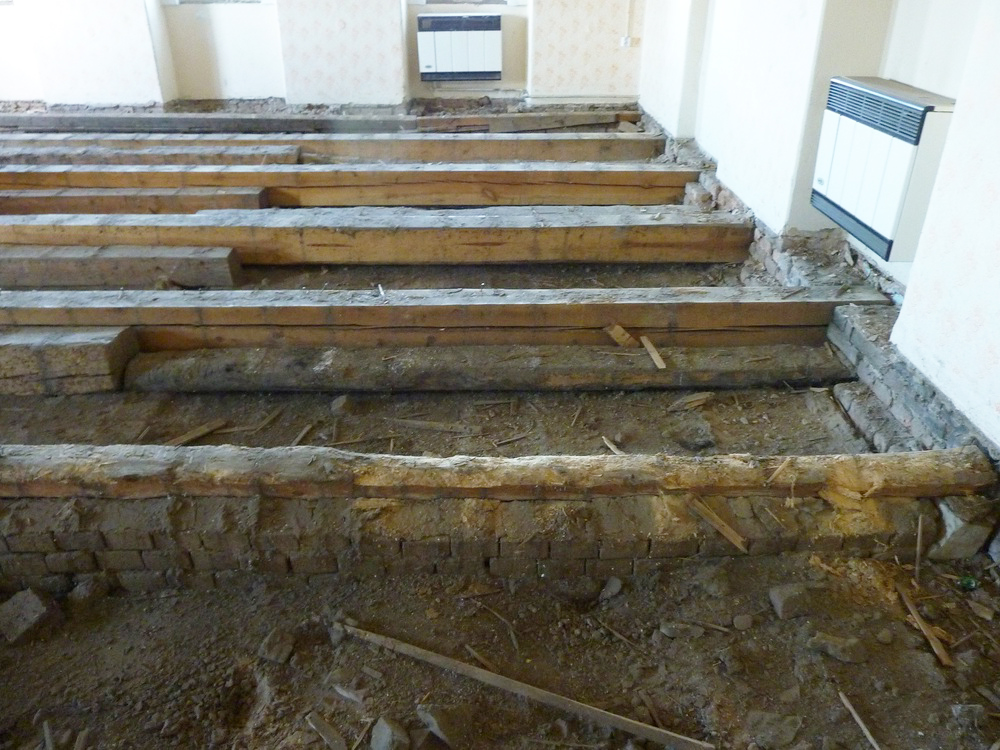
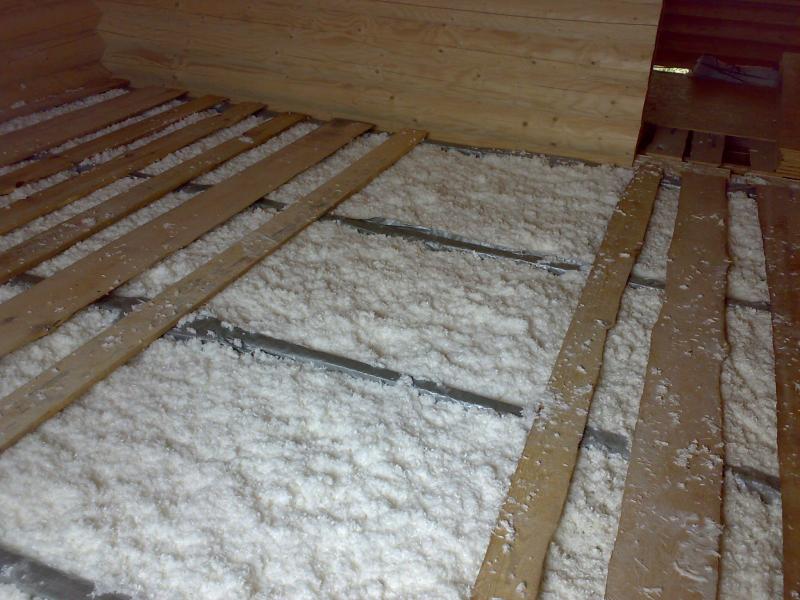
When parsing a wooden floor also inspect the logs, transverse wooden parallel bars. They could also be damaged over time, therefore, they must also be replaced. The layer of insulation and sound insulation is also subject to replacement. Most likely, he has already served his time.After you need to check the logs for the level, it is possible, and it is necessary to raise somewhere, and somewhere to add additional bars for greater stability and to avoid further bending of the floor. Then you can put the boards back or cover the room with layers of chipboard, gypsum board or OSB. Using the latter allows you to achieve a good level without unnecessary differences.
Which is better?
After a major restoration of the subfloor, you can rewrite or change the finishing floor covering. You can do it yourself. The main thing is to observe the sequence at all stages and wait for the compositions to completely freeze (if used), especially if the apartment is on the first floor, where the basement is close enough. When in rooms of this type there is a need to change the floor, then you definitely need to consider and implement waterproofing.
If the apartment is higher, you need to be extremely careful with the lags, as they can be load-bearing elements, and their damage can damage the walls and the entire structure of the house.
When repairs affect the concrete floor, there may be "consequences" from the neighbors below.Then it is necessary to repair not only the floor, but also the ceiling.
When the restoration work is over, you can begin to install the flooring.
Conditionally finishing material can be divided into:
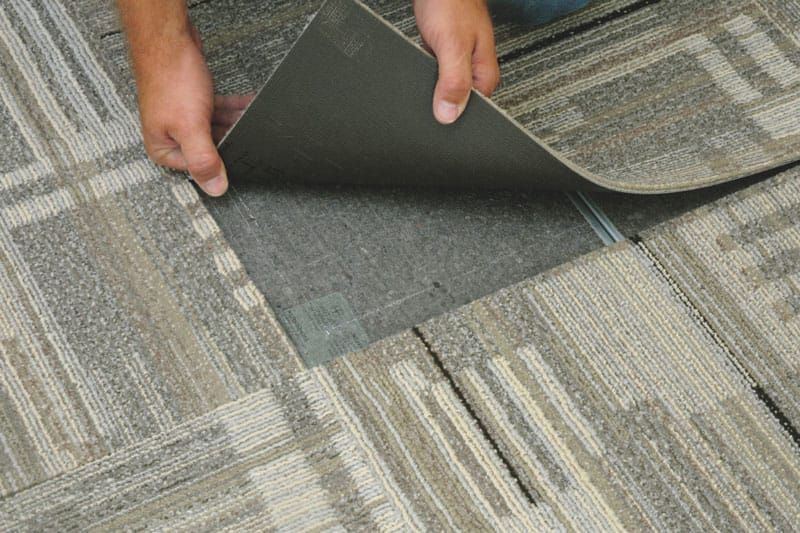
- Rolled coverings - linoleum, carpet;
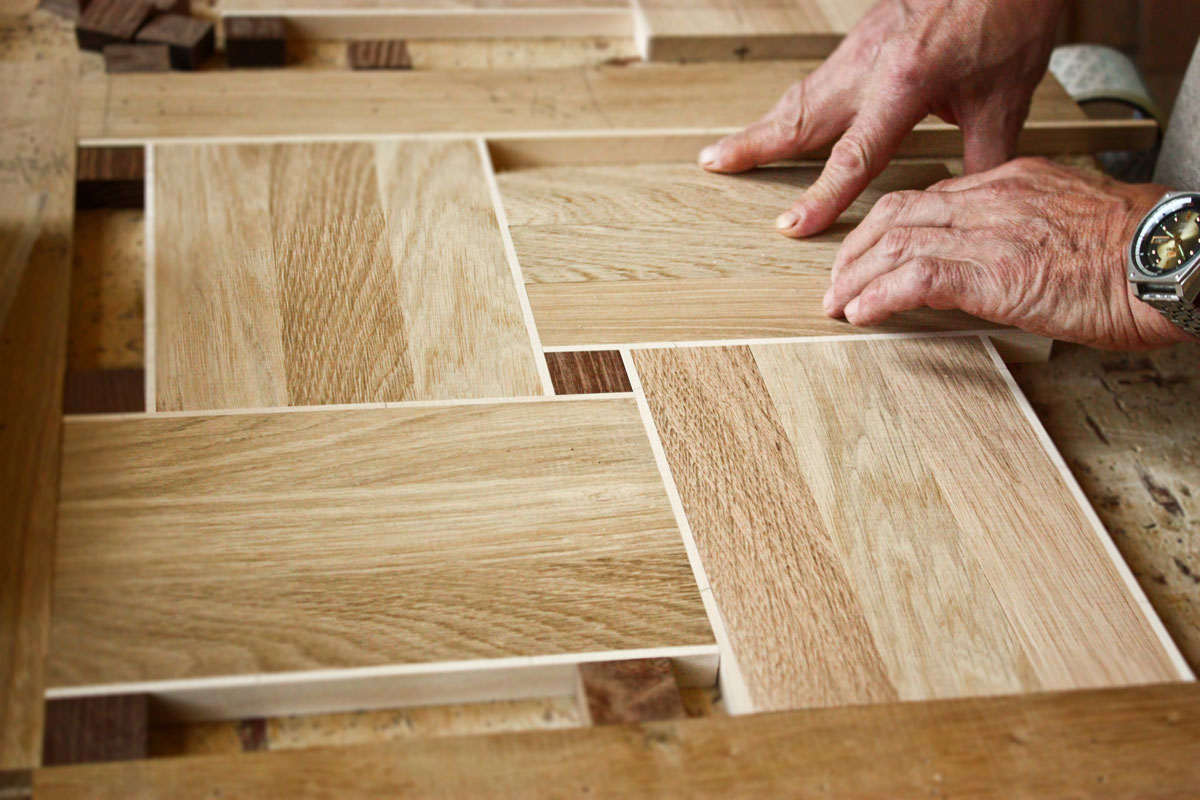
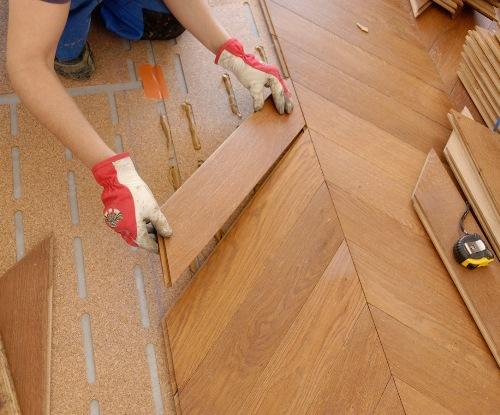
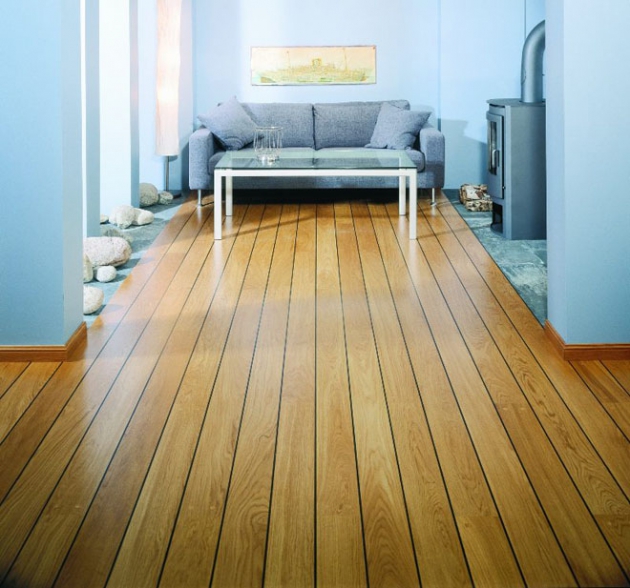
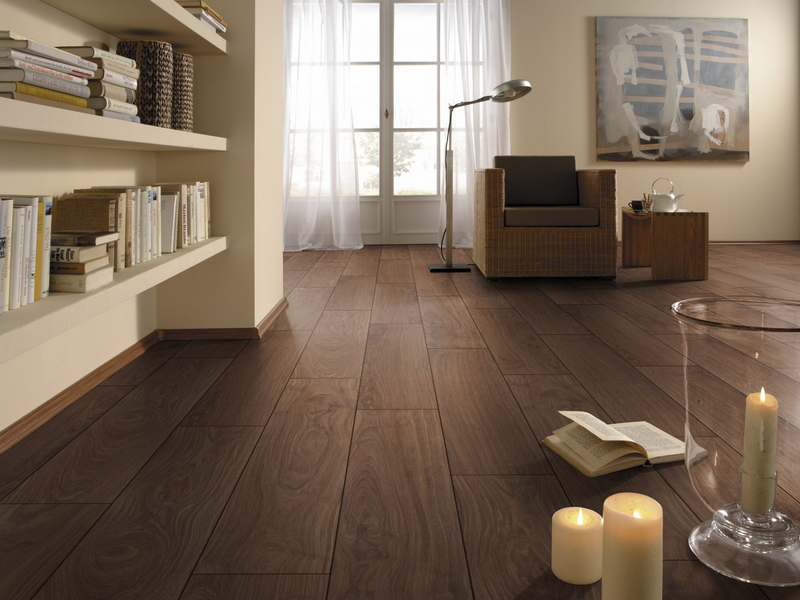
- Boardwalk and lamellar - parquet, board, laminate;
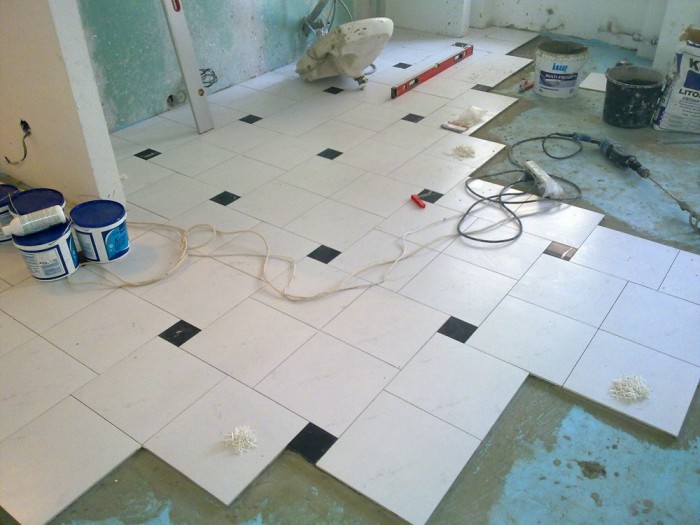
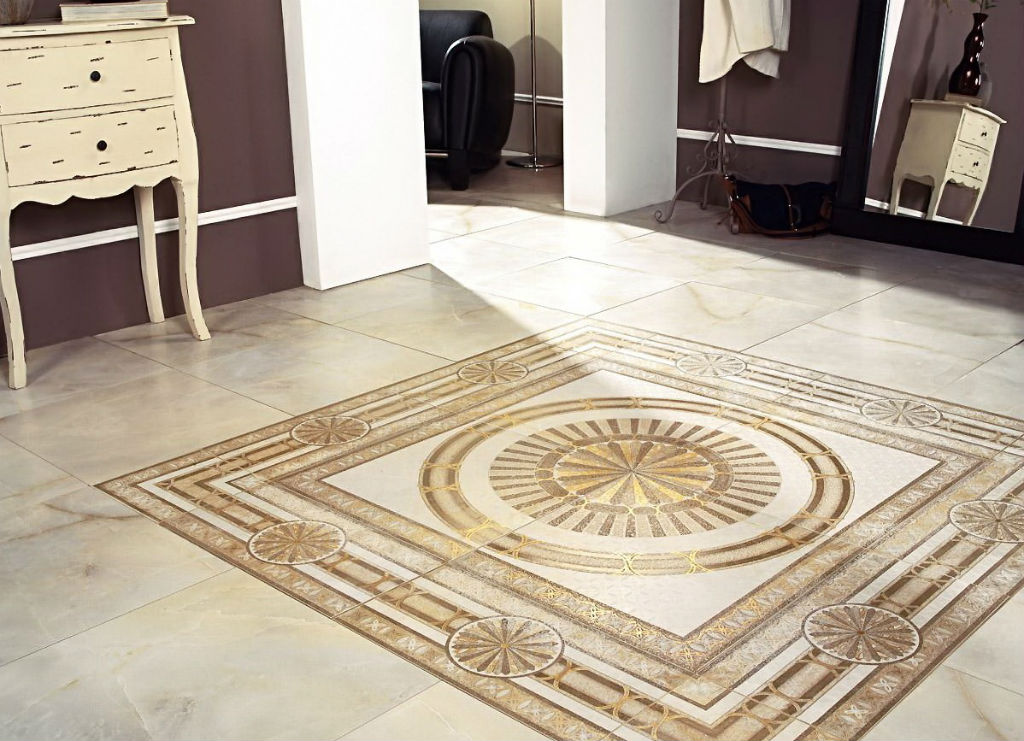
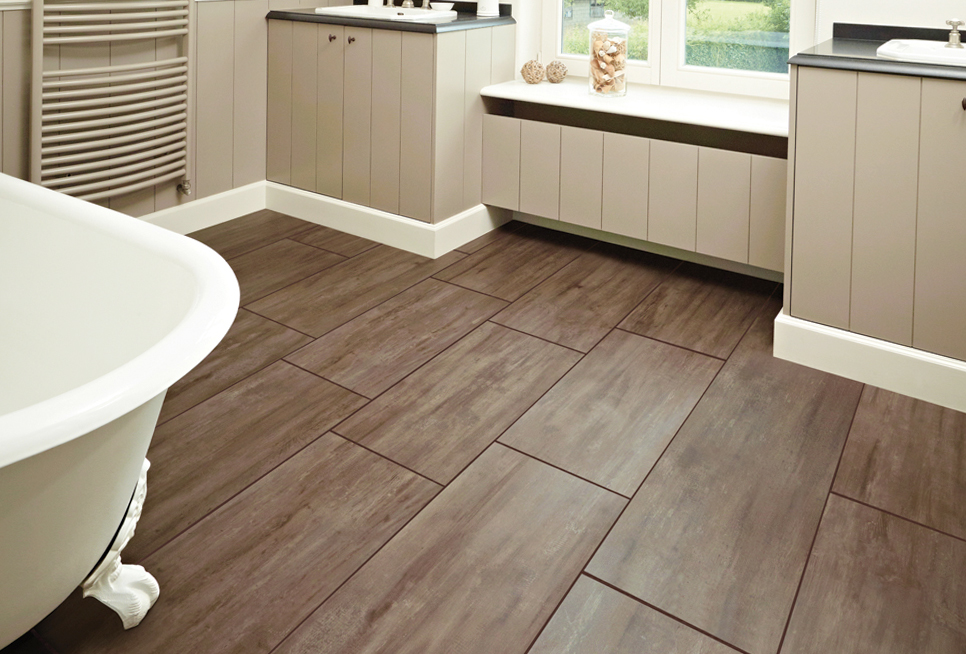
- Ceramic - tile, stone.

Each of the coatings has its advantages and disadvantages that must be considered, in addition to taste preferences and financial capabilities.
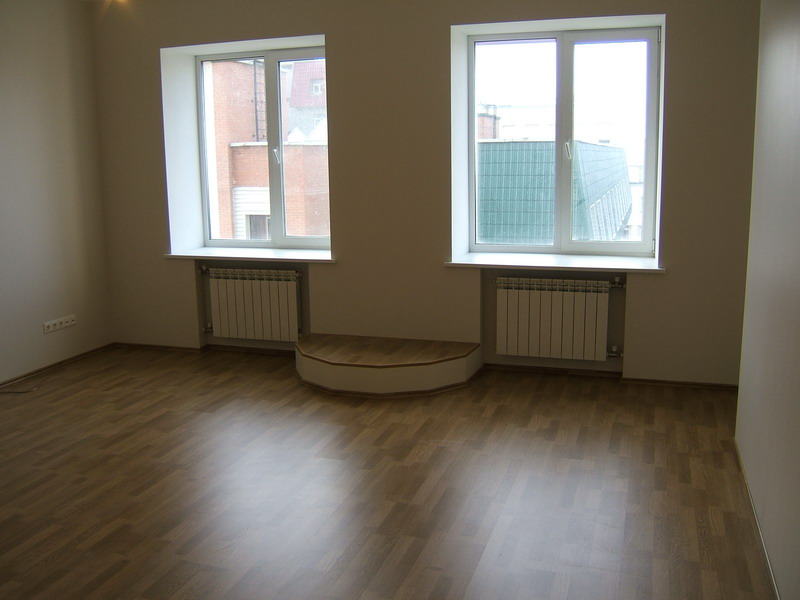
Linoleum, especially its warmed versions, is quite an economical and practical material. It is easy to install, has excellent wear resistance. However, it is not entirely environmentally friendly.
Carpet - warm and soft, but completely impractical. Over time, it becomes very difficult to clean, the fibers wear out, the color, even black, burns out.
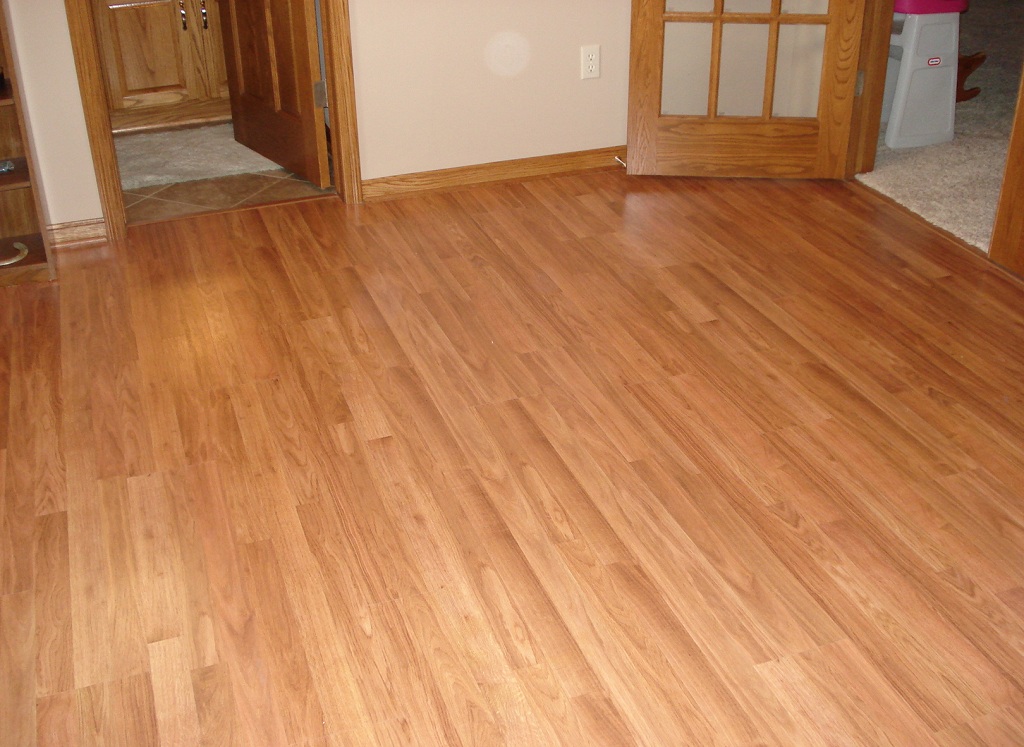

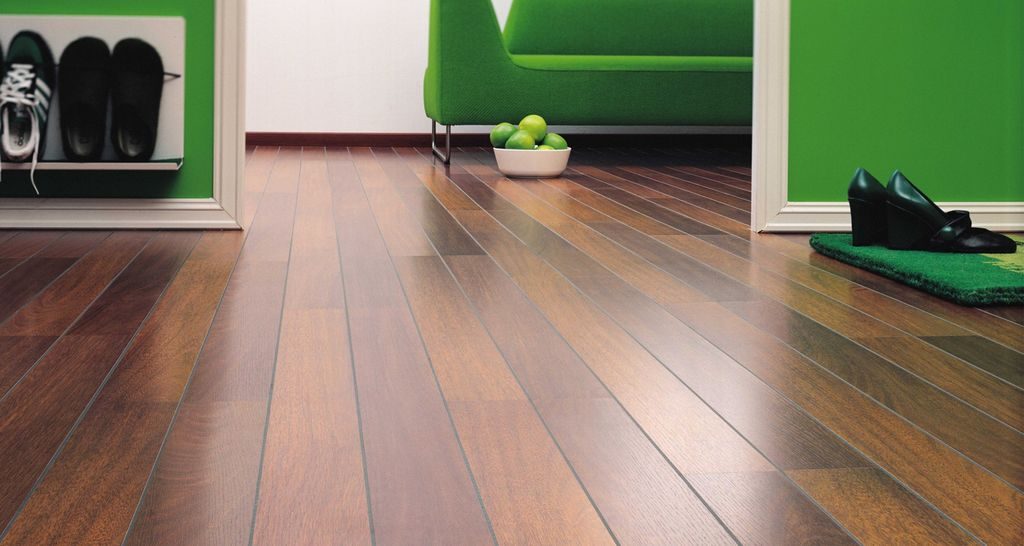
Parquet is expensive and afraid of water, but very attractive. Laminate perfectly imitates boards or stone, but is not particularly "friendly" with water. In this matter it is necessary to carefully study its characteristics.
Pottery will not be erased and will not lose its appearance, but it is very cold. Vinyl tile - a kind of hybrid of linoleum and laminate, but can scare away its price.
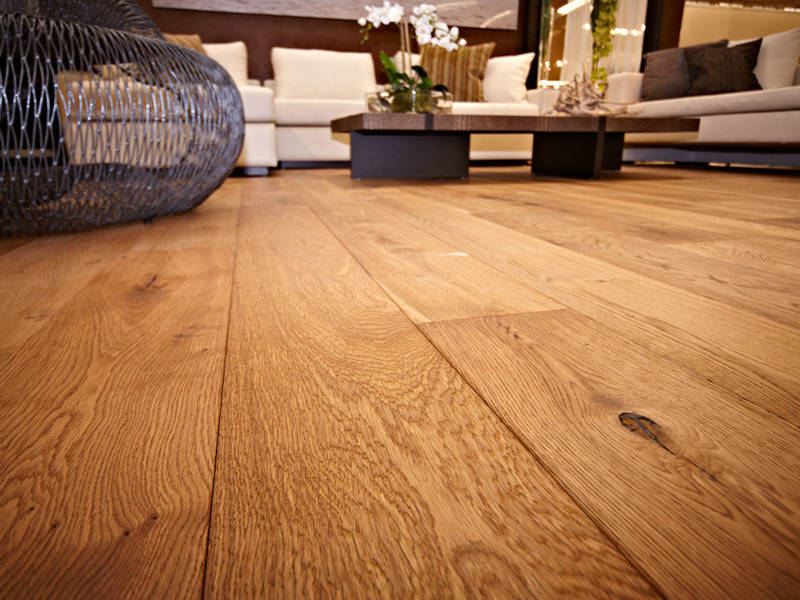
Boards - the most environmentally friendly and warm material that requires mandatory processing, otherwise water, rot and insects will do their job and spoil the coating.
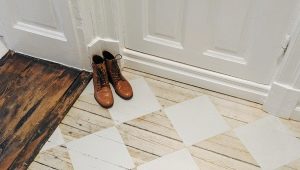
In general, each material has something to boast. And because some enterprising owners go to the tricky reception - they combine several types of flooring in the room. For example, in the hallway at the entrance area tile is laid, and in living rooms - linoleum or laminate.
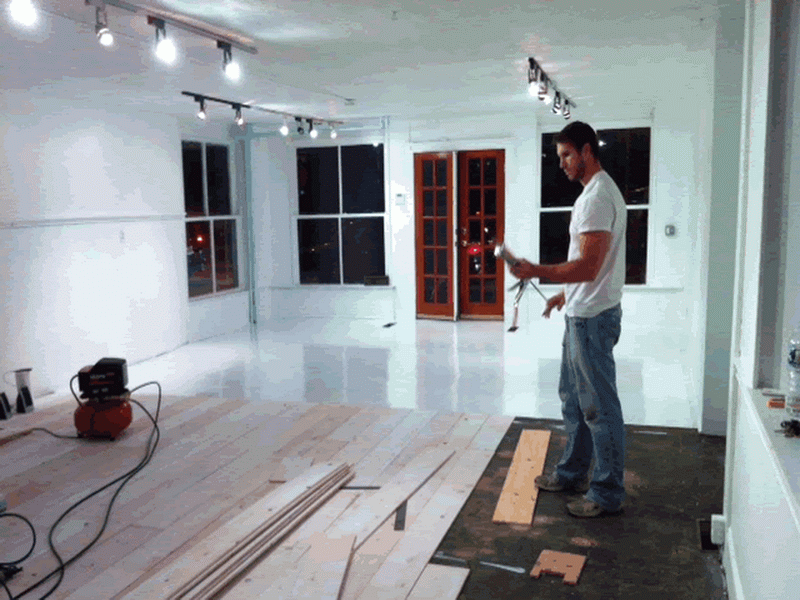
Technology works
Independent floor repair is carried out in stages, especially if it is capital. Often the preliminary stage is the complete liberation of the room from things and people who will only interfere.
There is an option when the floor is overwritten., but the furniture remains in place, it moves from one end of the room to the other. But such a repair will not affect the deep layers of the subfloor and will only be external. When overhaul is still necessary free space. And only then you can proceed to the stage of dismantling the old flooring.

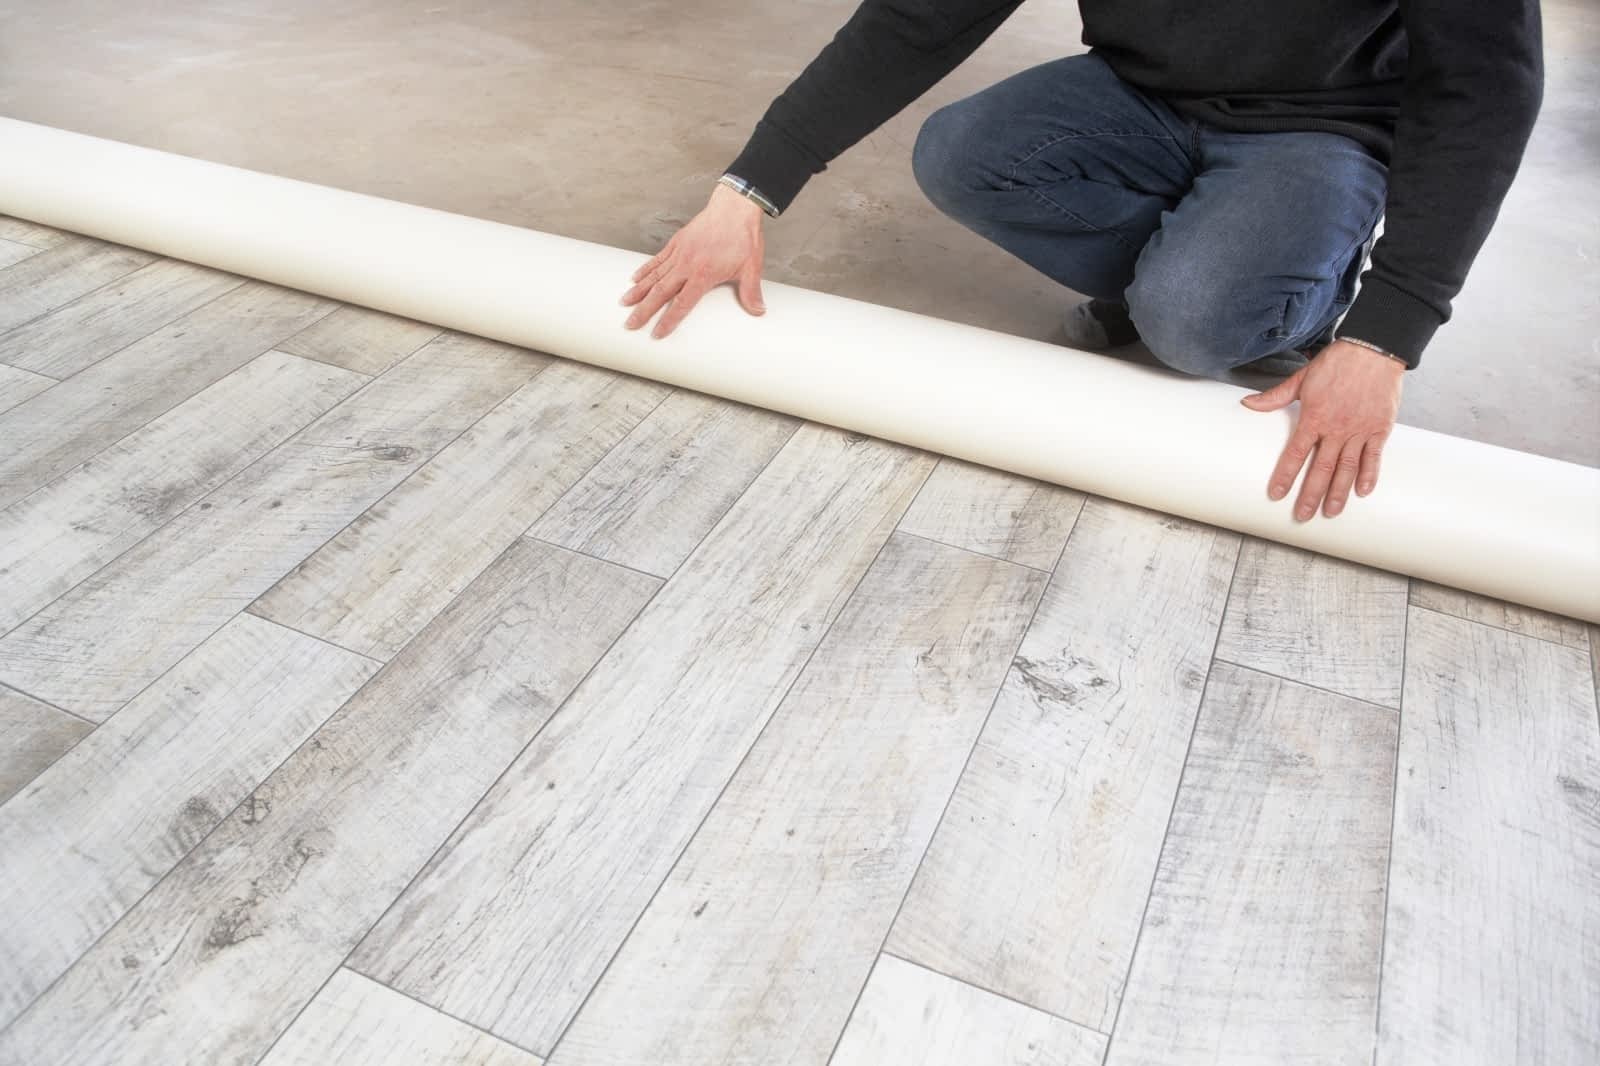
Removing the old cover
For convenience, rolled materials such as linoleum are usually cut into small strips and thenrolled into rolls and taken out of the room. If the linoleum was planted on glue, then remove it is not so easy. Its fragments may remain on the screed. You can remove them with a spatula and a building dryer that will separate them from the base. You can also try to remove sticking pieces of glue using floor cleaning solution. Or you can try to carefully “hollow out” the elements with special tools. Unfortunately, with this approach, the screed will suffer.

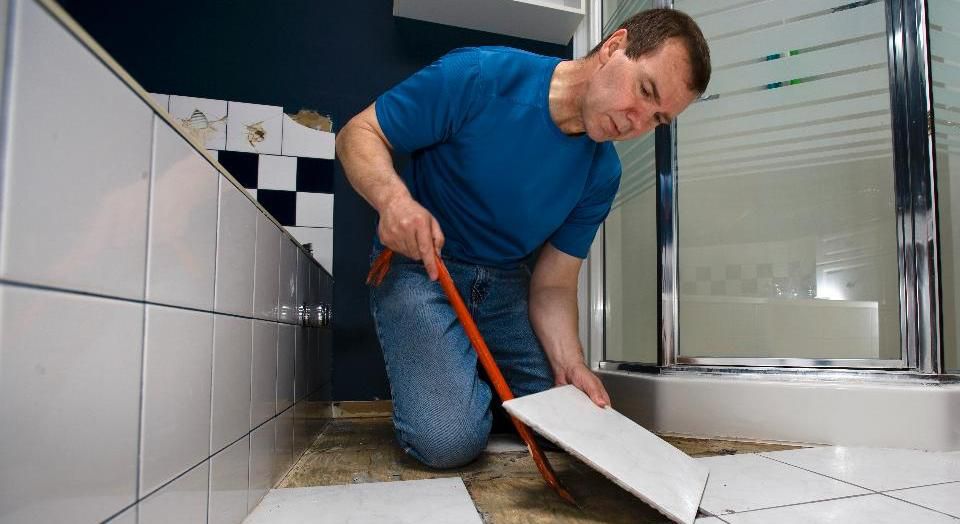
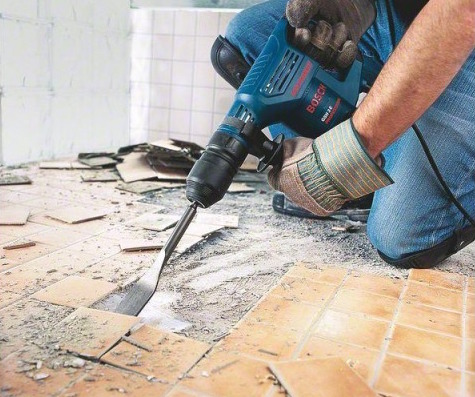
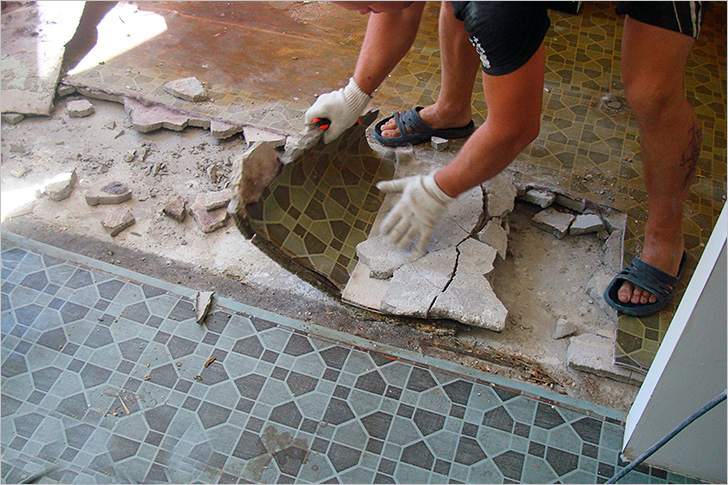
To remove the tile, you will need a chisel and a hammer or a perforator with a special nozzle - a chisel-blade. Each tile will be removed one by one.
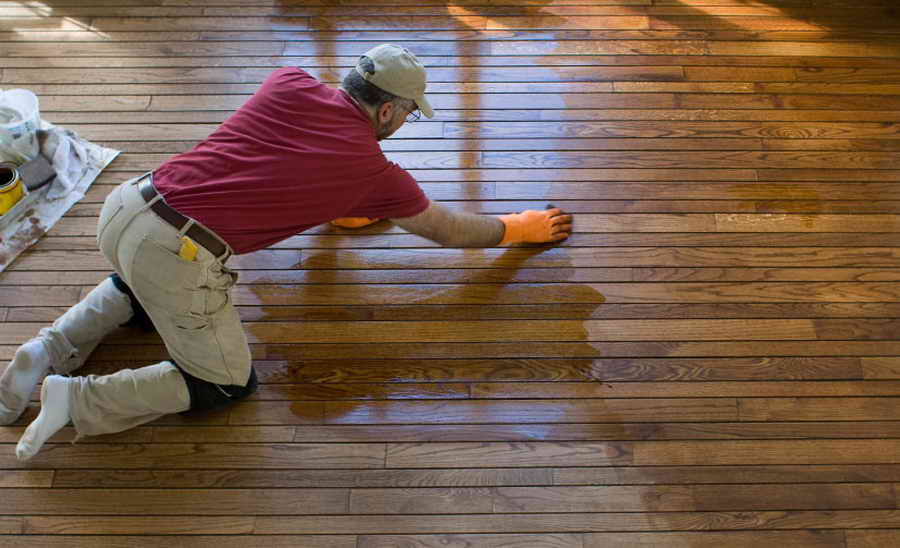
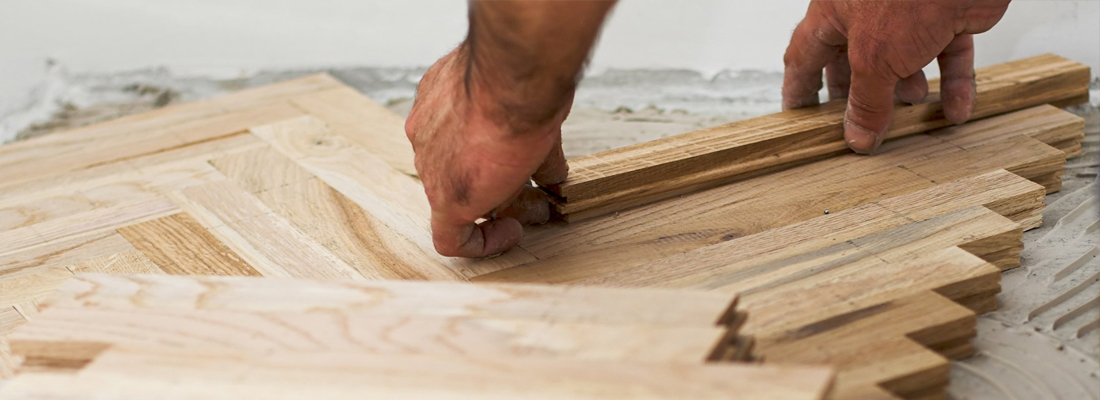
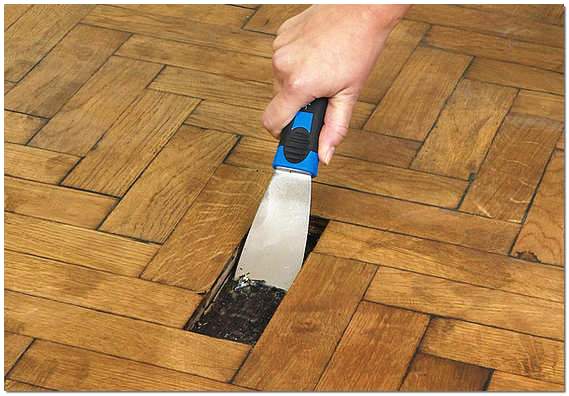
To remove a parquet that will not be reused, especially if it was attached to bitumen or mastic, use the same scraper and chisel, a building dryer. If the parquet is not glued and its quality is suitable for reuse, then its boards are carefully removed and removed.
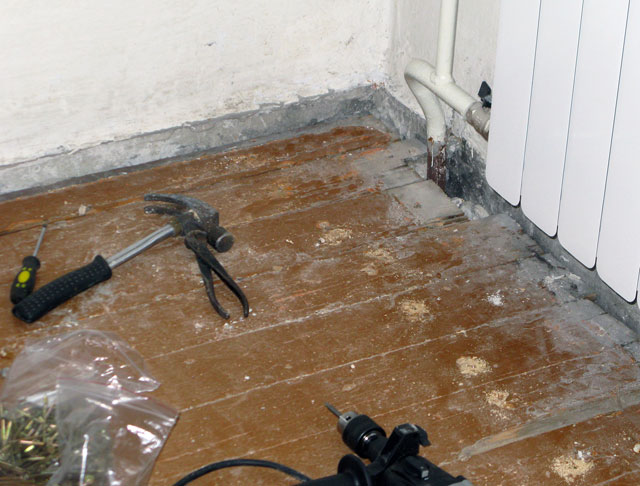
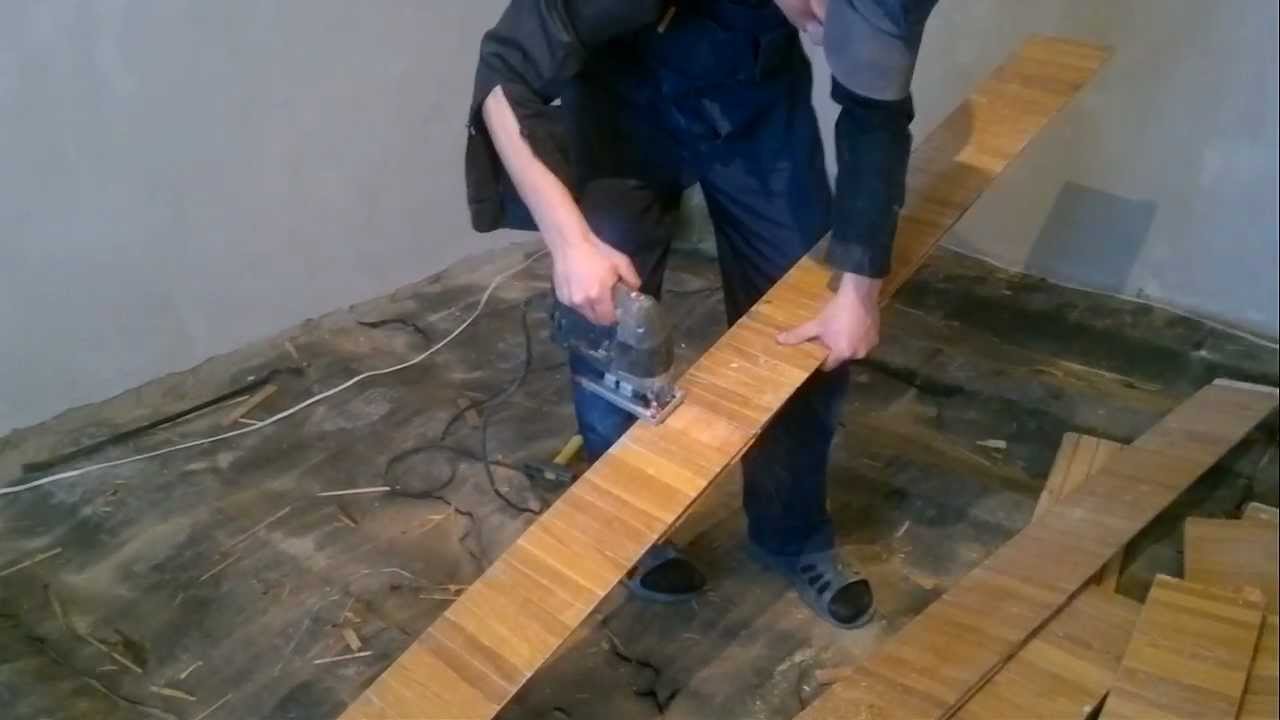
When dismantling boards or laminate, the main thing is to remove the first element. Then the rest of the details will give in well. When removing the boards, you will need a nail puller, a hammer, pliers, and, possibly, scrap.If the mount for the old cover screw, then it is logical to use a screwdriver. To remove the first board, you will need to pry it with a crowbar or a nail puller, then remove it.
Regardless of what material was laid, after its dismantling you will need to make a thorough cleaning of construction debris and dust. These actions will be a transitional step to the next stage of repair.
Surface preparation
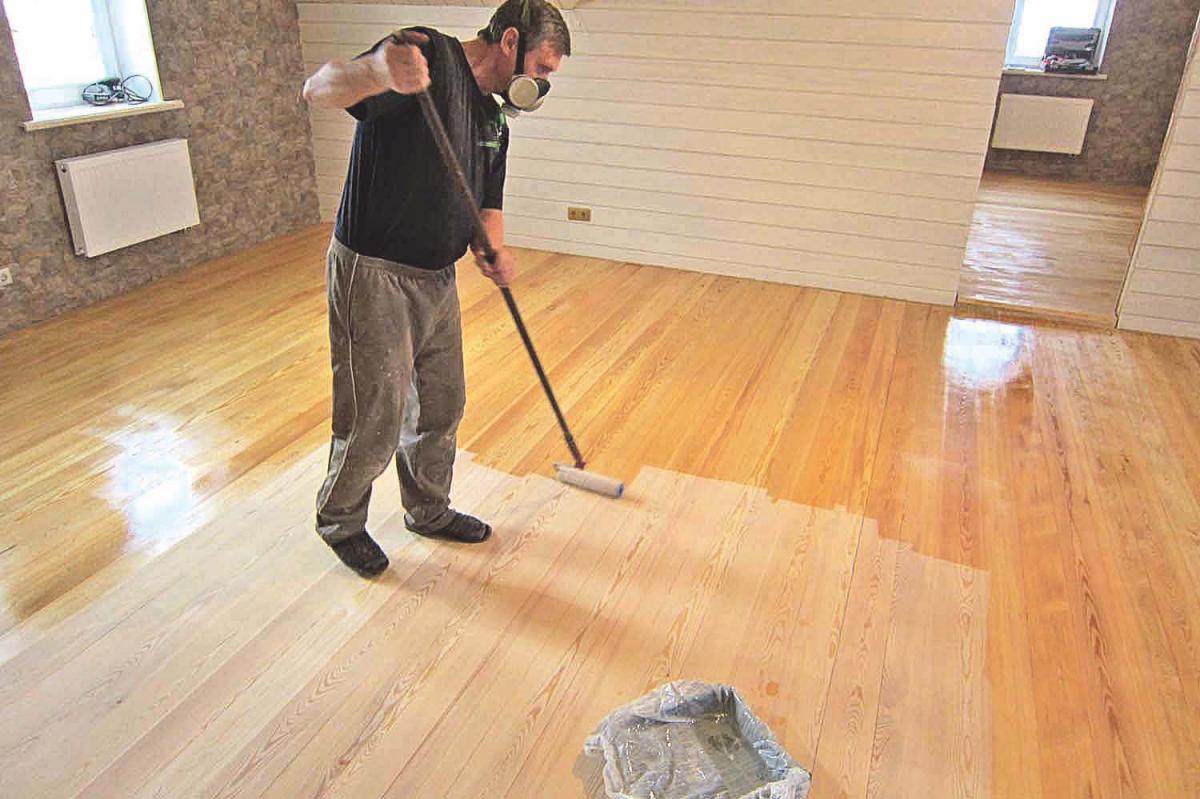
For further work, the draft floor is inspected for visible defects. The screed is tested for cracks. They expand to 1.5 cm, so that you can then putty. The coating knocks on the presence of cavities and, if they are found, the old screed breaks to expose and release these voids. Naturally, after such actions, all the garbage is cleaned with a construction vacuum cleaner. The surface is treated with a primer for concrete (preferably several times), holes and holes are patched, cracks are puttied.
After the base has dried, you can proceed to laying the screed, or, if necessary, take care of additional thermal insulation or erect a structure from a log.
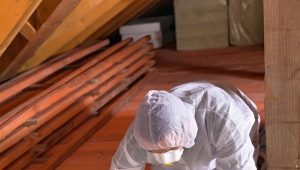
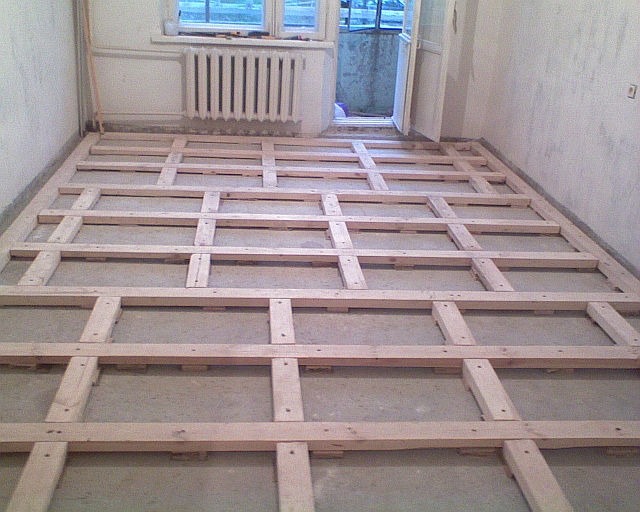
In the case of a wooden floor, the distance between the beams is checked.It must correspond to a step of 60 cm. Otherwise the floor will be curved and will fall. All elements of the structure are examined. Each lag is checked under pressure, and there should be no rattling, squeaks and deflections. Good wooden bars are treated with special solutions for mold and mildew, insects and moisture changes. Bad lags are removed and replaced with new ones, which are also treated with protective compounds.
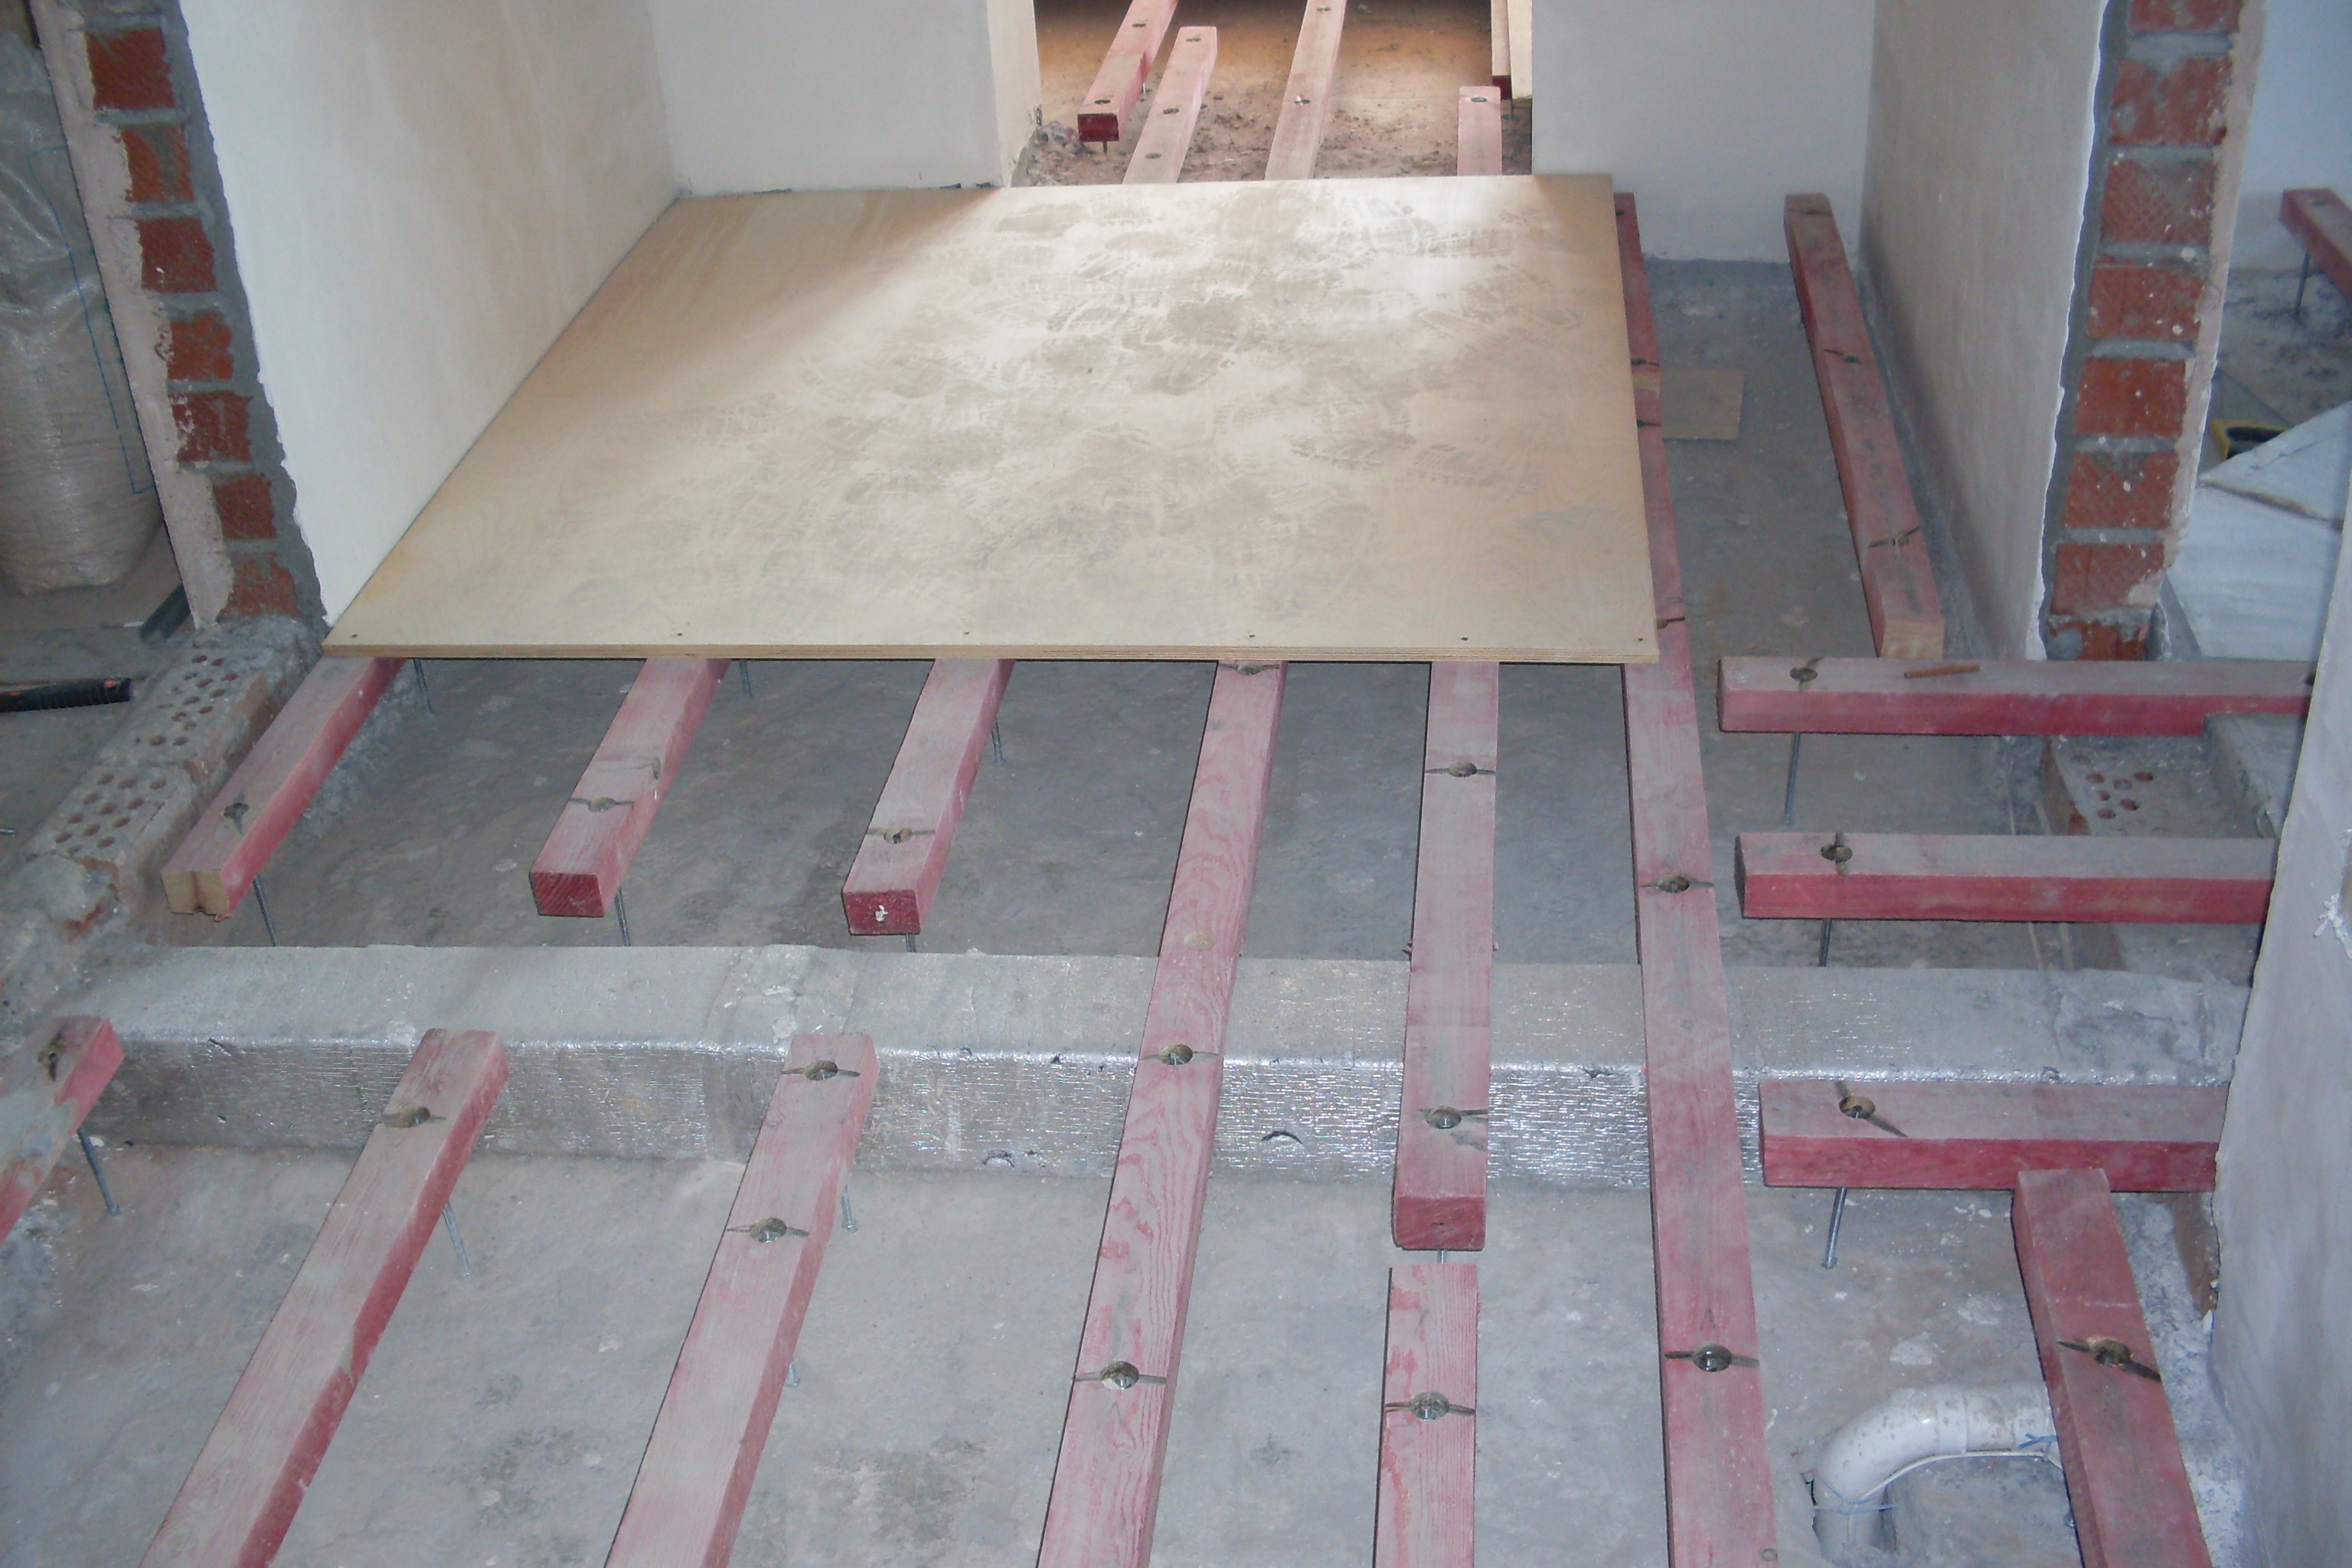
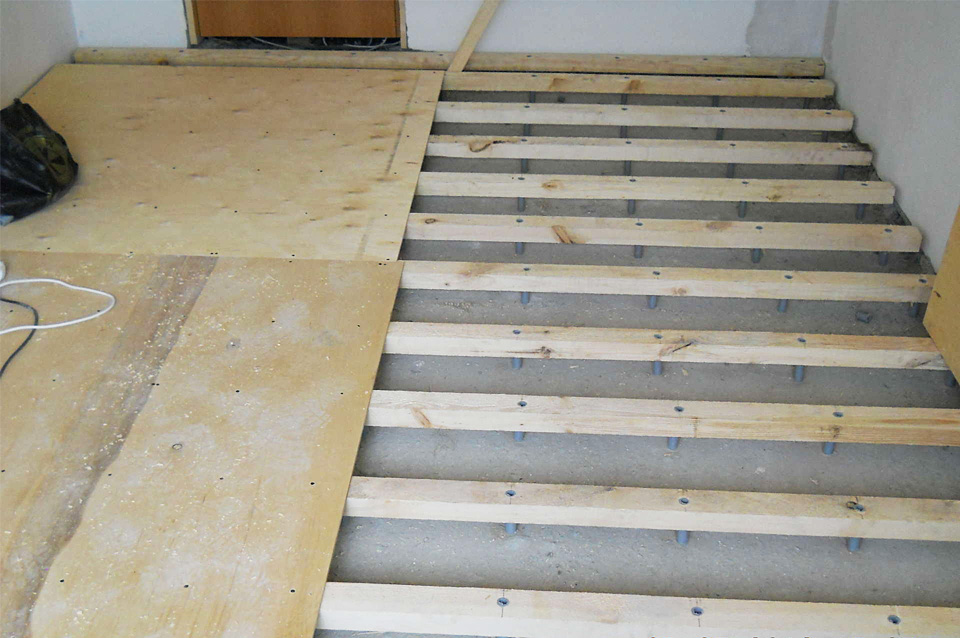
If the floor is swinging, then a new level is rebuilt for it with the help of lighthouses. The bent bars are raised with polymeric wedges or by putting pieces of plywood, wood, or with special adjustable bolts — the so-called adjustable floor system.
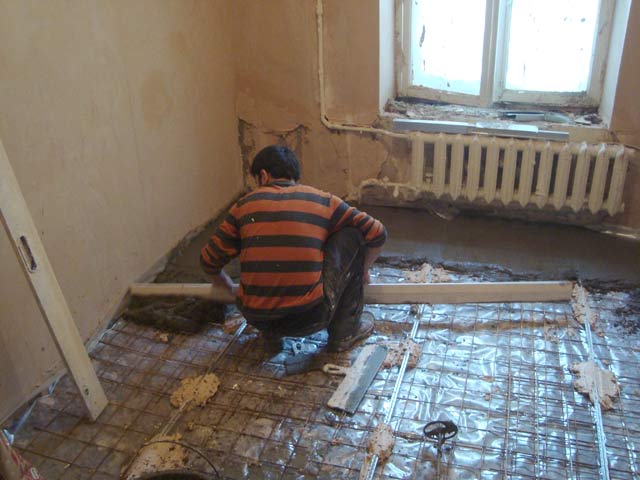
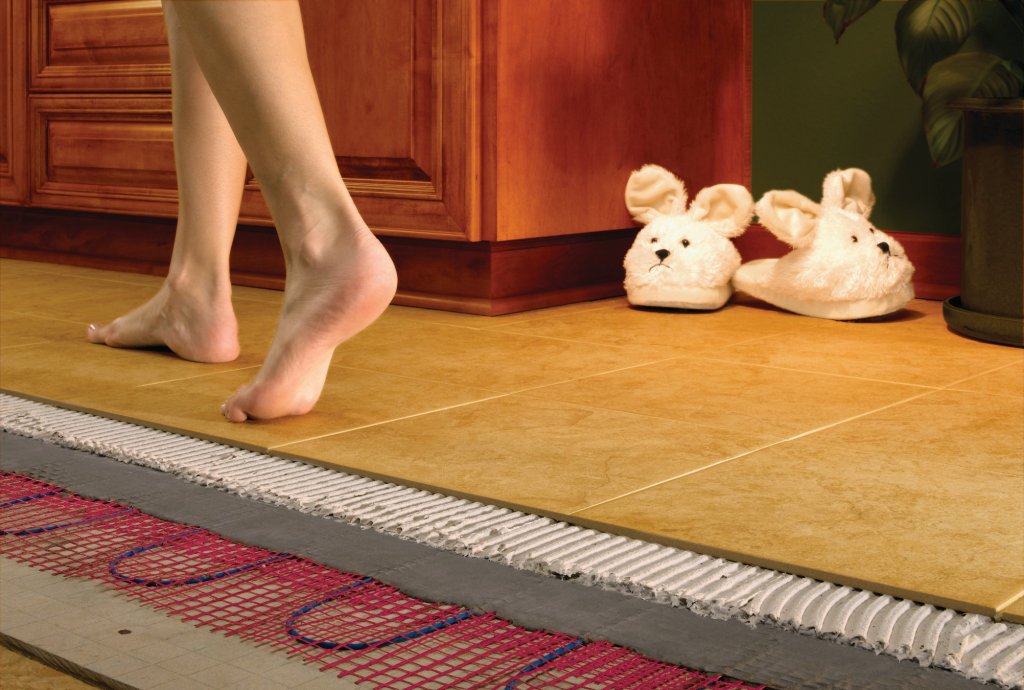
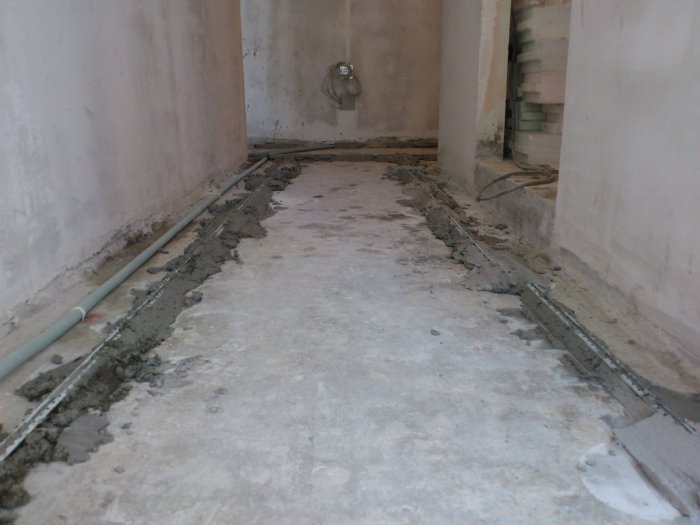
Layers of insulation and sound insulation are removed and replaced with new materials. This may be expanded clay, mineral wool, or some other. Also at this stage, waterproofing is installed. It is simply necessary if the floors on the first floor, in the toilet or bathroom change.
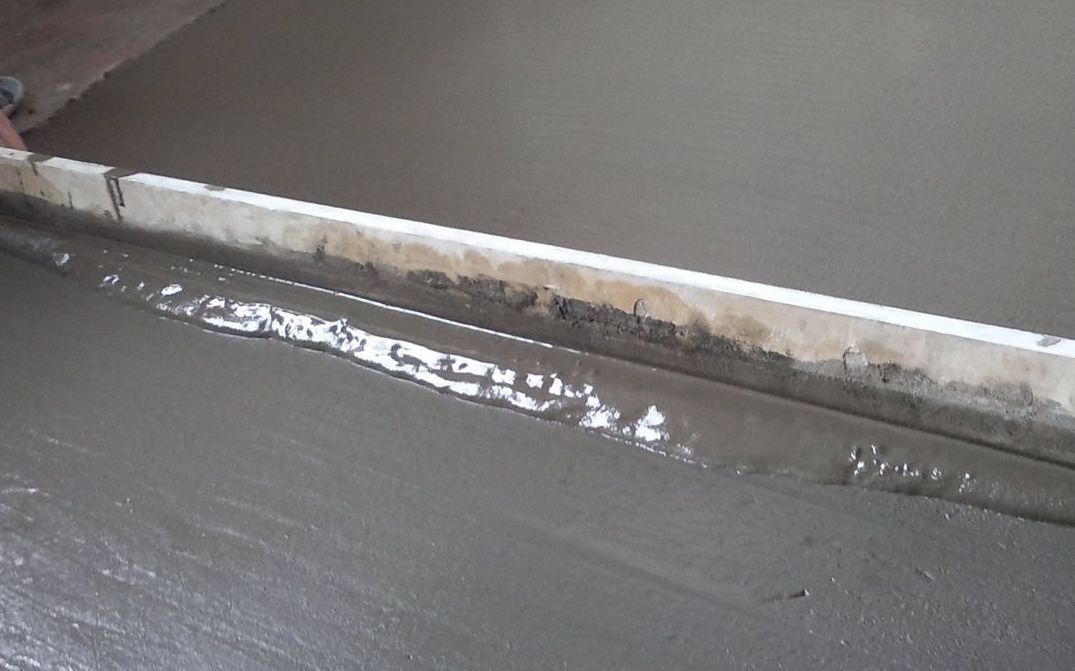
Screed
Theoretically, the coupler can be made on any floor, including the lag. High-quality alteration of a floor is impossible without a seal and construction of a coupler.It is thanks to her that you can remove level transitions, even imperceptible to the eye. She will also take on some of the vibrations that occur from time to time.
There are several ways to create a screed:
- based on cement-sand compositions, where cement, sand and water are commonly used;
- there are also ready-to-work compounds that just need to be properly diluted with water;
- bulk floor;
- dry screed - a mixture that does not require the addition of liquids.
Each type of coating has its advantages and disadvantages. But to say that some way of laying screed best, it is impossible. In some cases, several types of ties can be used and combined. For example, when the area of a room is too large, a dry screed can shrink, and then a floor system is indispensable.
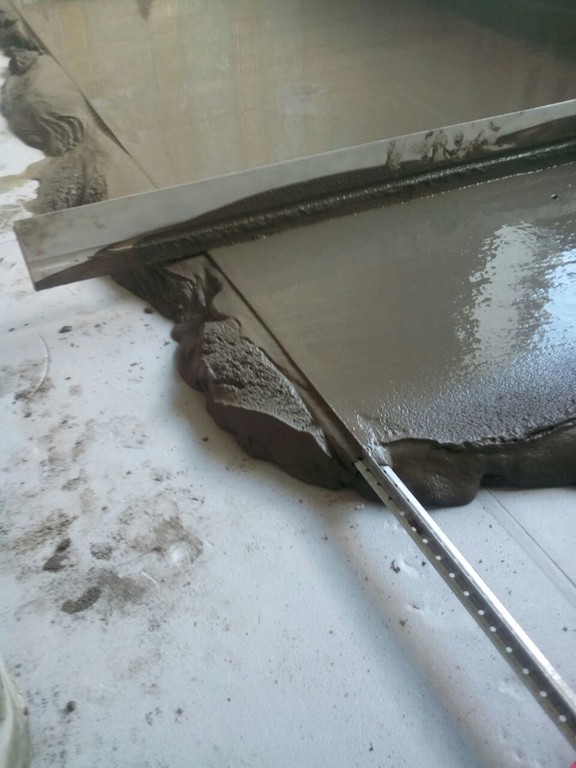
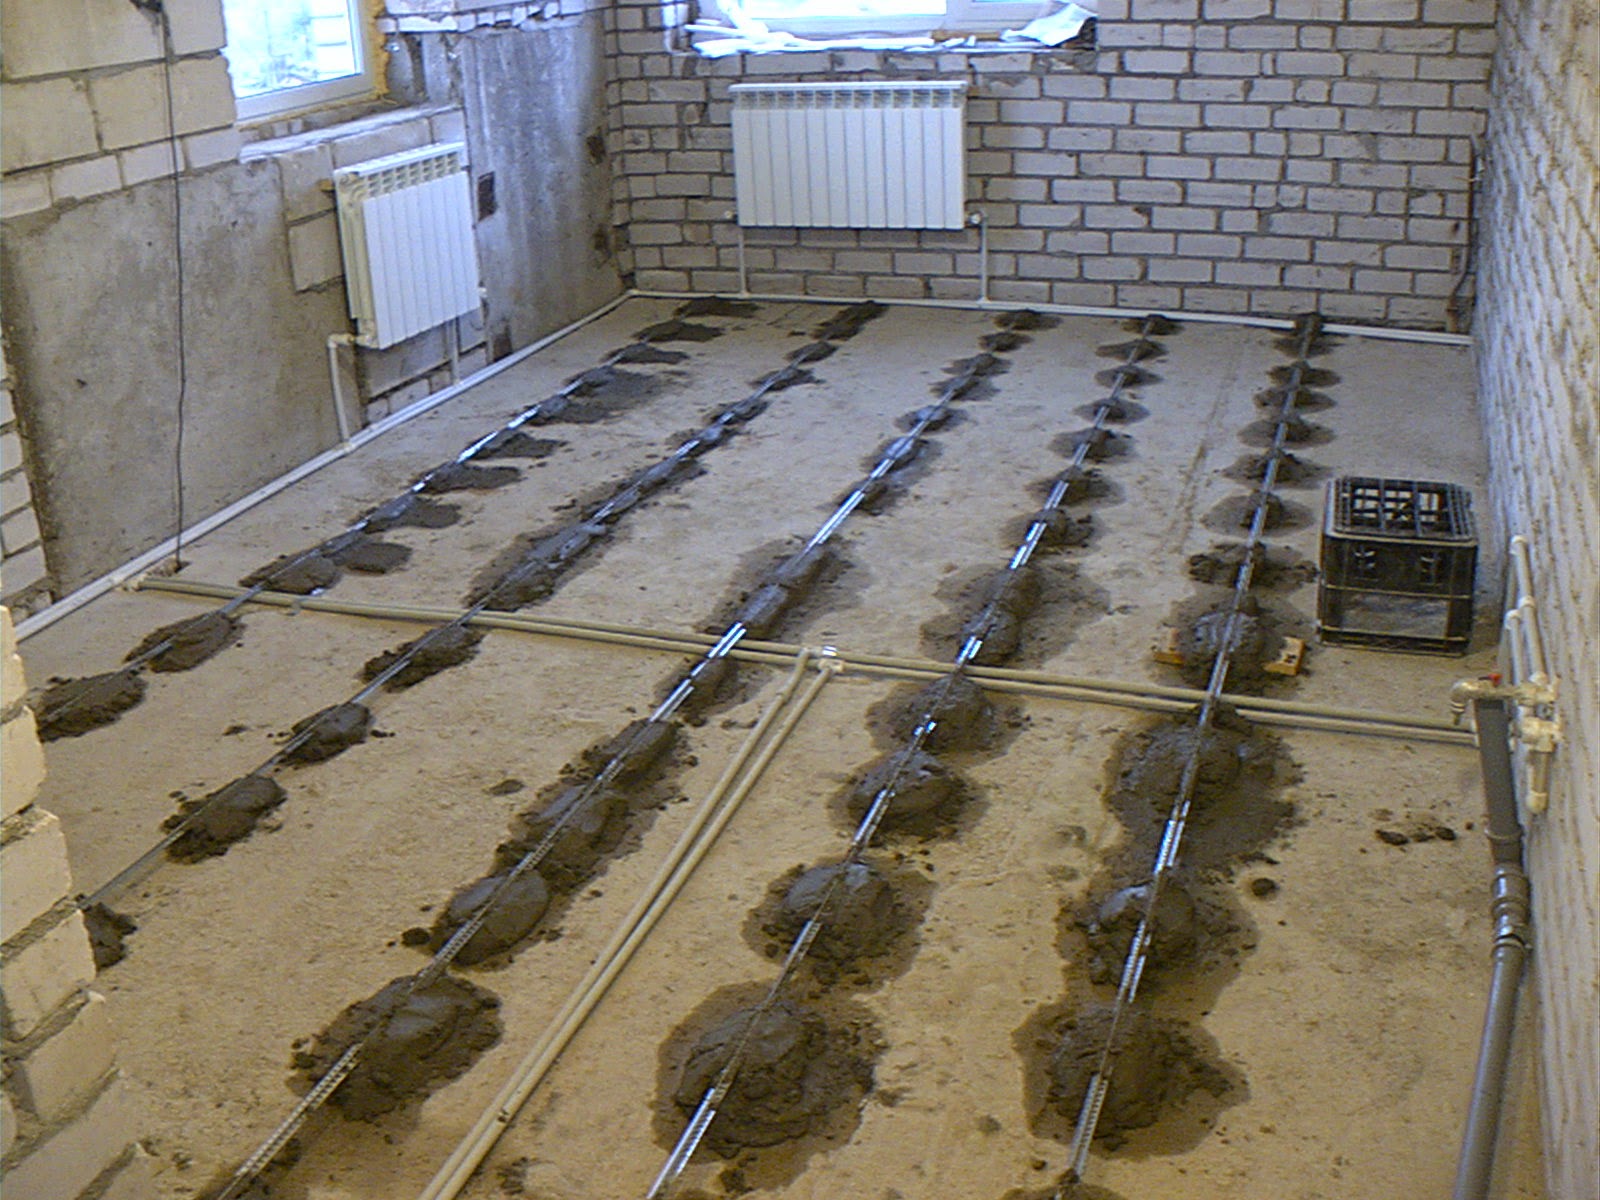
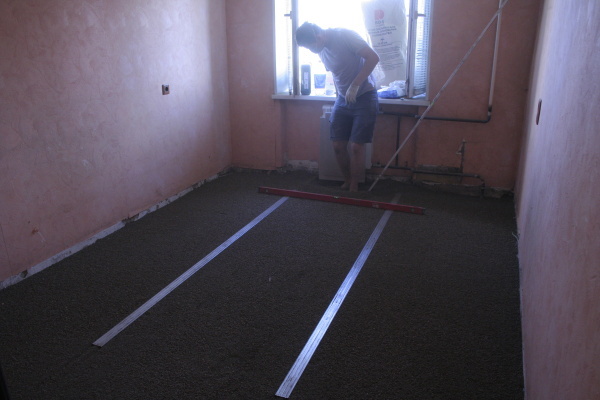
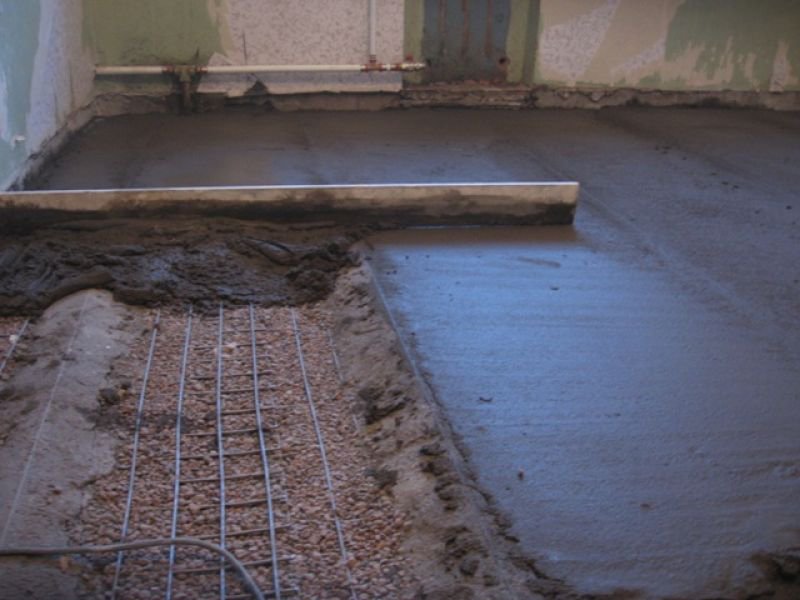
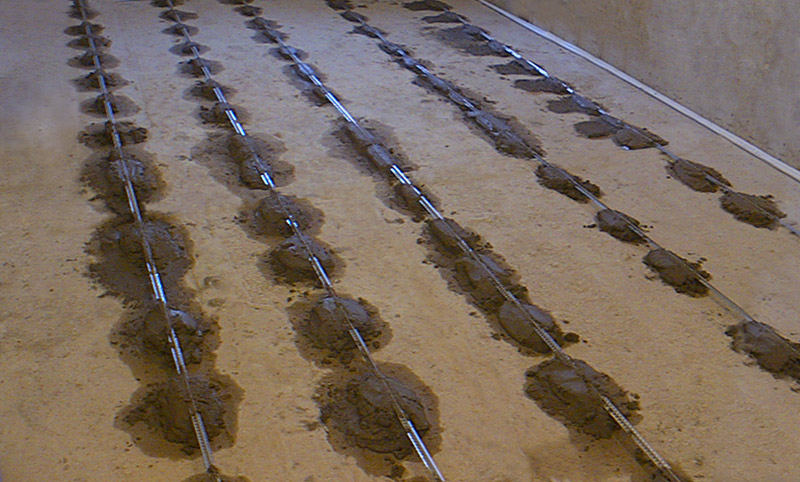
The first step will be building a new level with the help of lighthouses. The technology of making screed based on cement mixtures has been known for a long time. It is usually made at the place of work in the following proportions: 3 parts of sand to one part of cement. When using ready-made mixtures, you must strictly follow the instructions, adding exactly as much water as indicated on the package.Also, according to the information on the package, it will be possible to calculate the mixture consumption rate.
Bulk floor incorporates self-leveling mixture. This type of screed is perfect for bases where there are small drops.
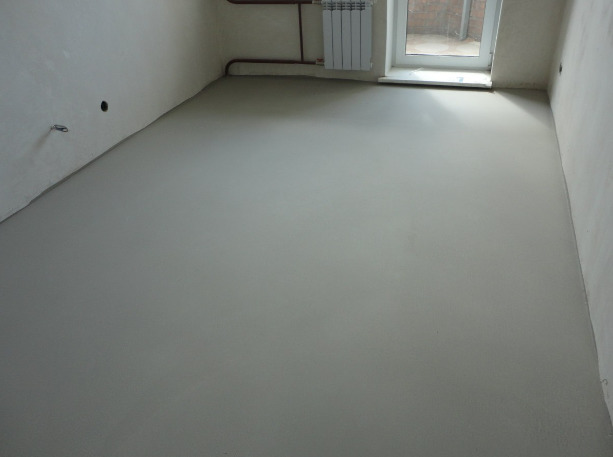
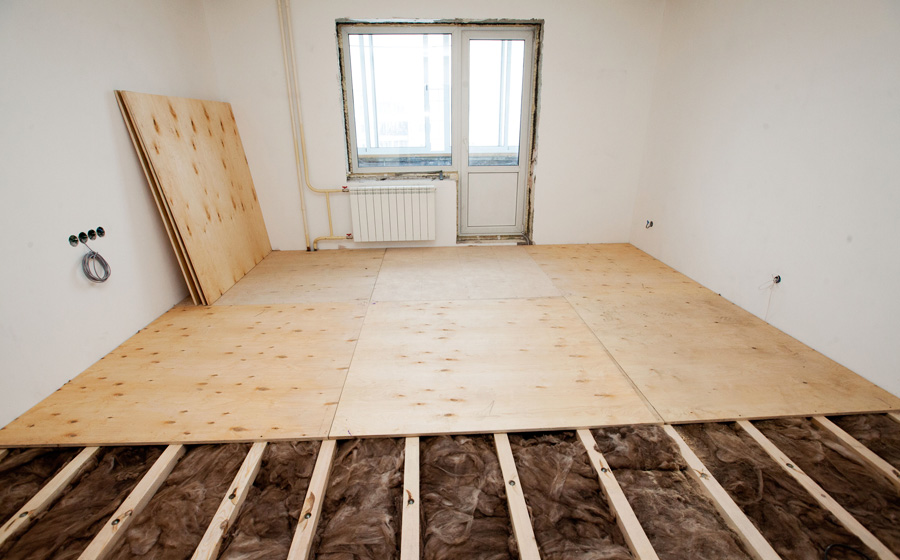
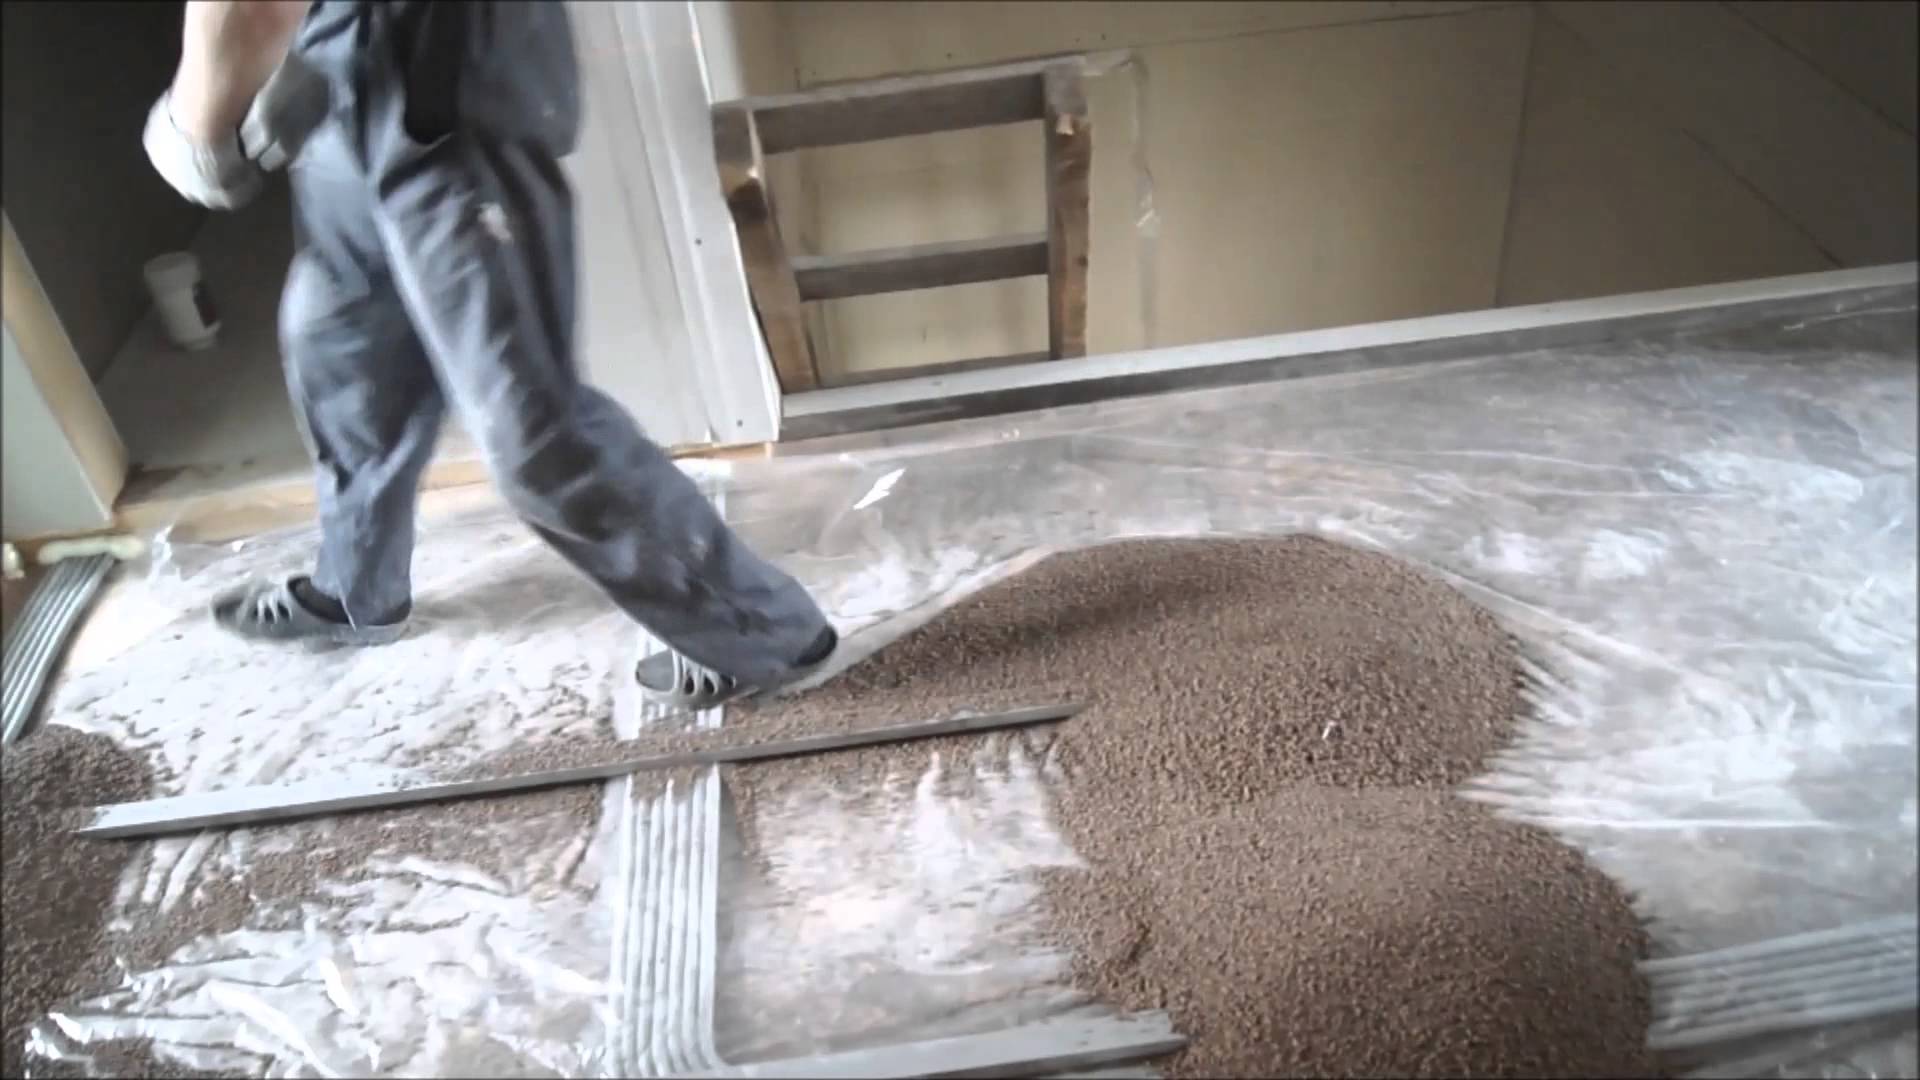
Dry screed does without water, but not without GFL or plywood sheets, fiberboard. The laying scheme for such a screed can be described as follows: a polyethylene film is laid on the base, then beacons are mounted on it to determine the level, the expanded clay composition is applied to the floor, leveled, and sheets are stacked on top. You can additionally fasten the sheets with self-tapping screws, then the seams are puttied and rubbed. The floor is ready for the final installation of the floor covering and further placement of furniture and things.
In addition, it is possible to lay sheets of plywood or OSB directly and onto the system from a log without using any bracing compositions.

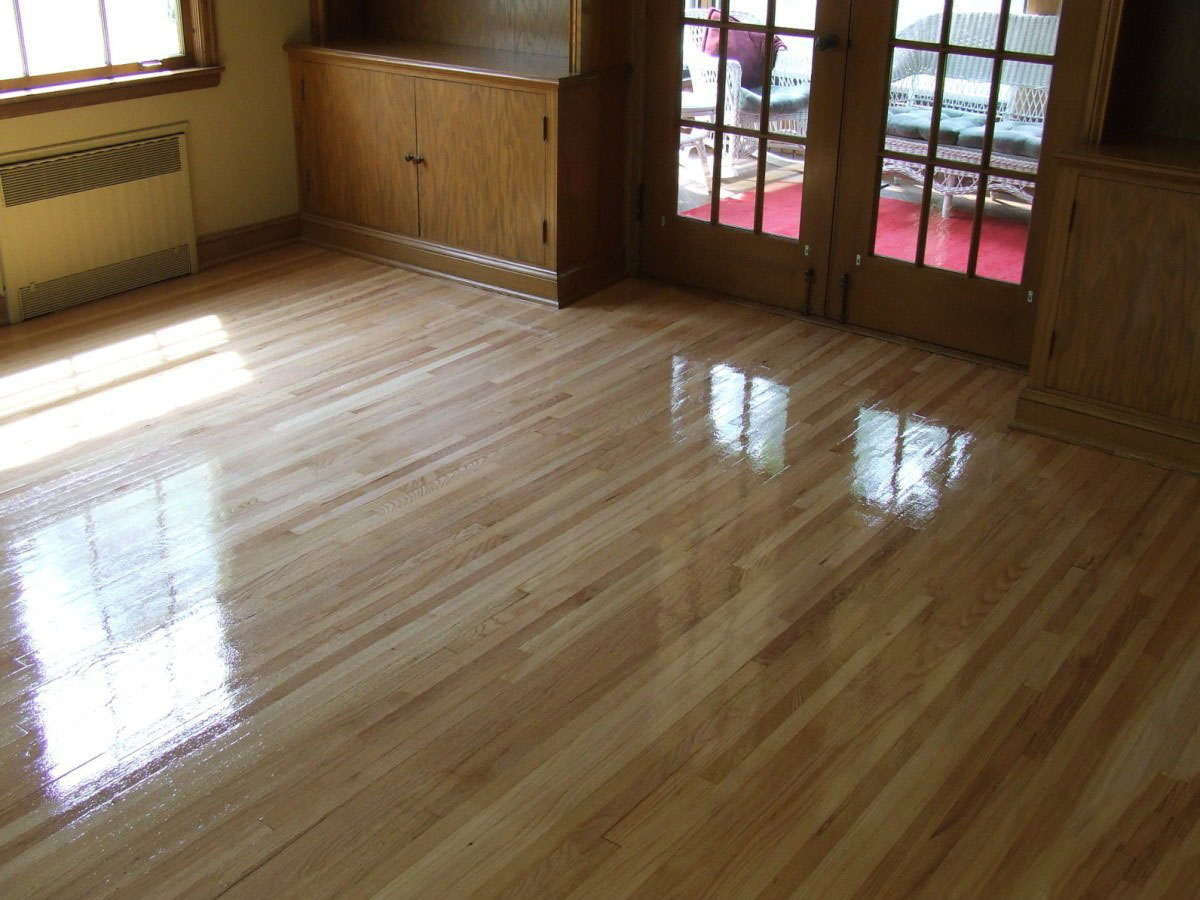
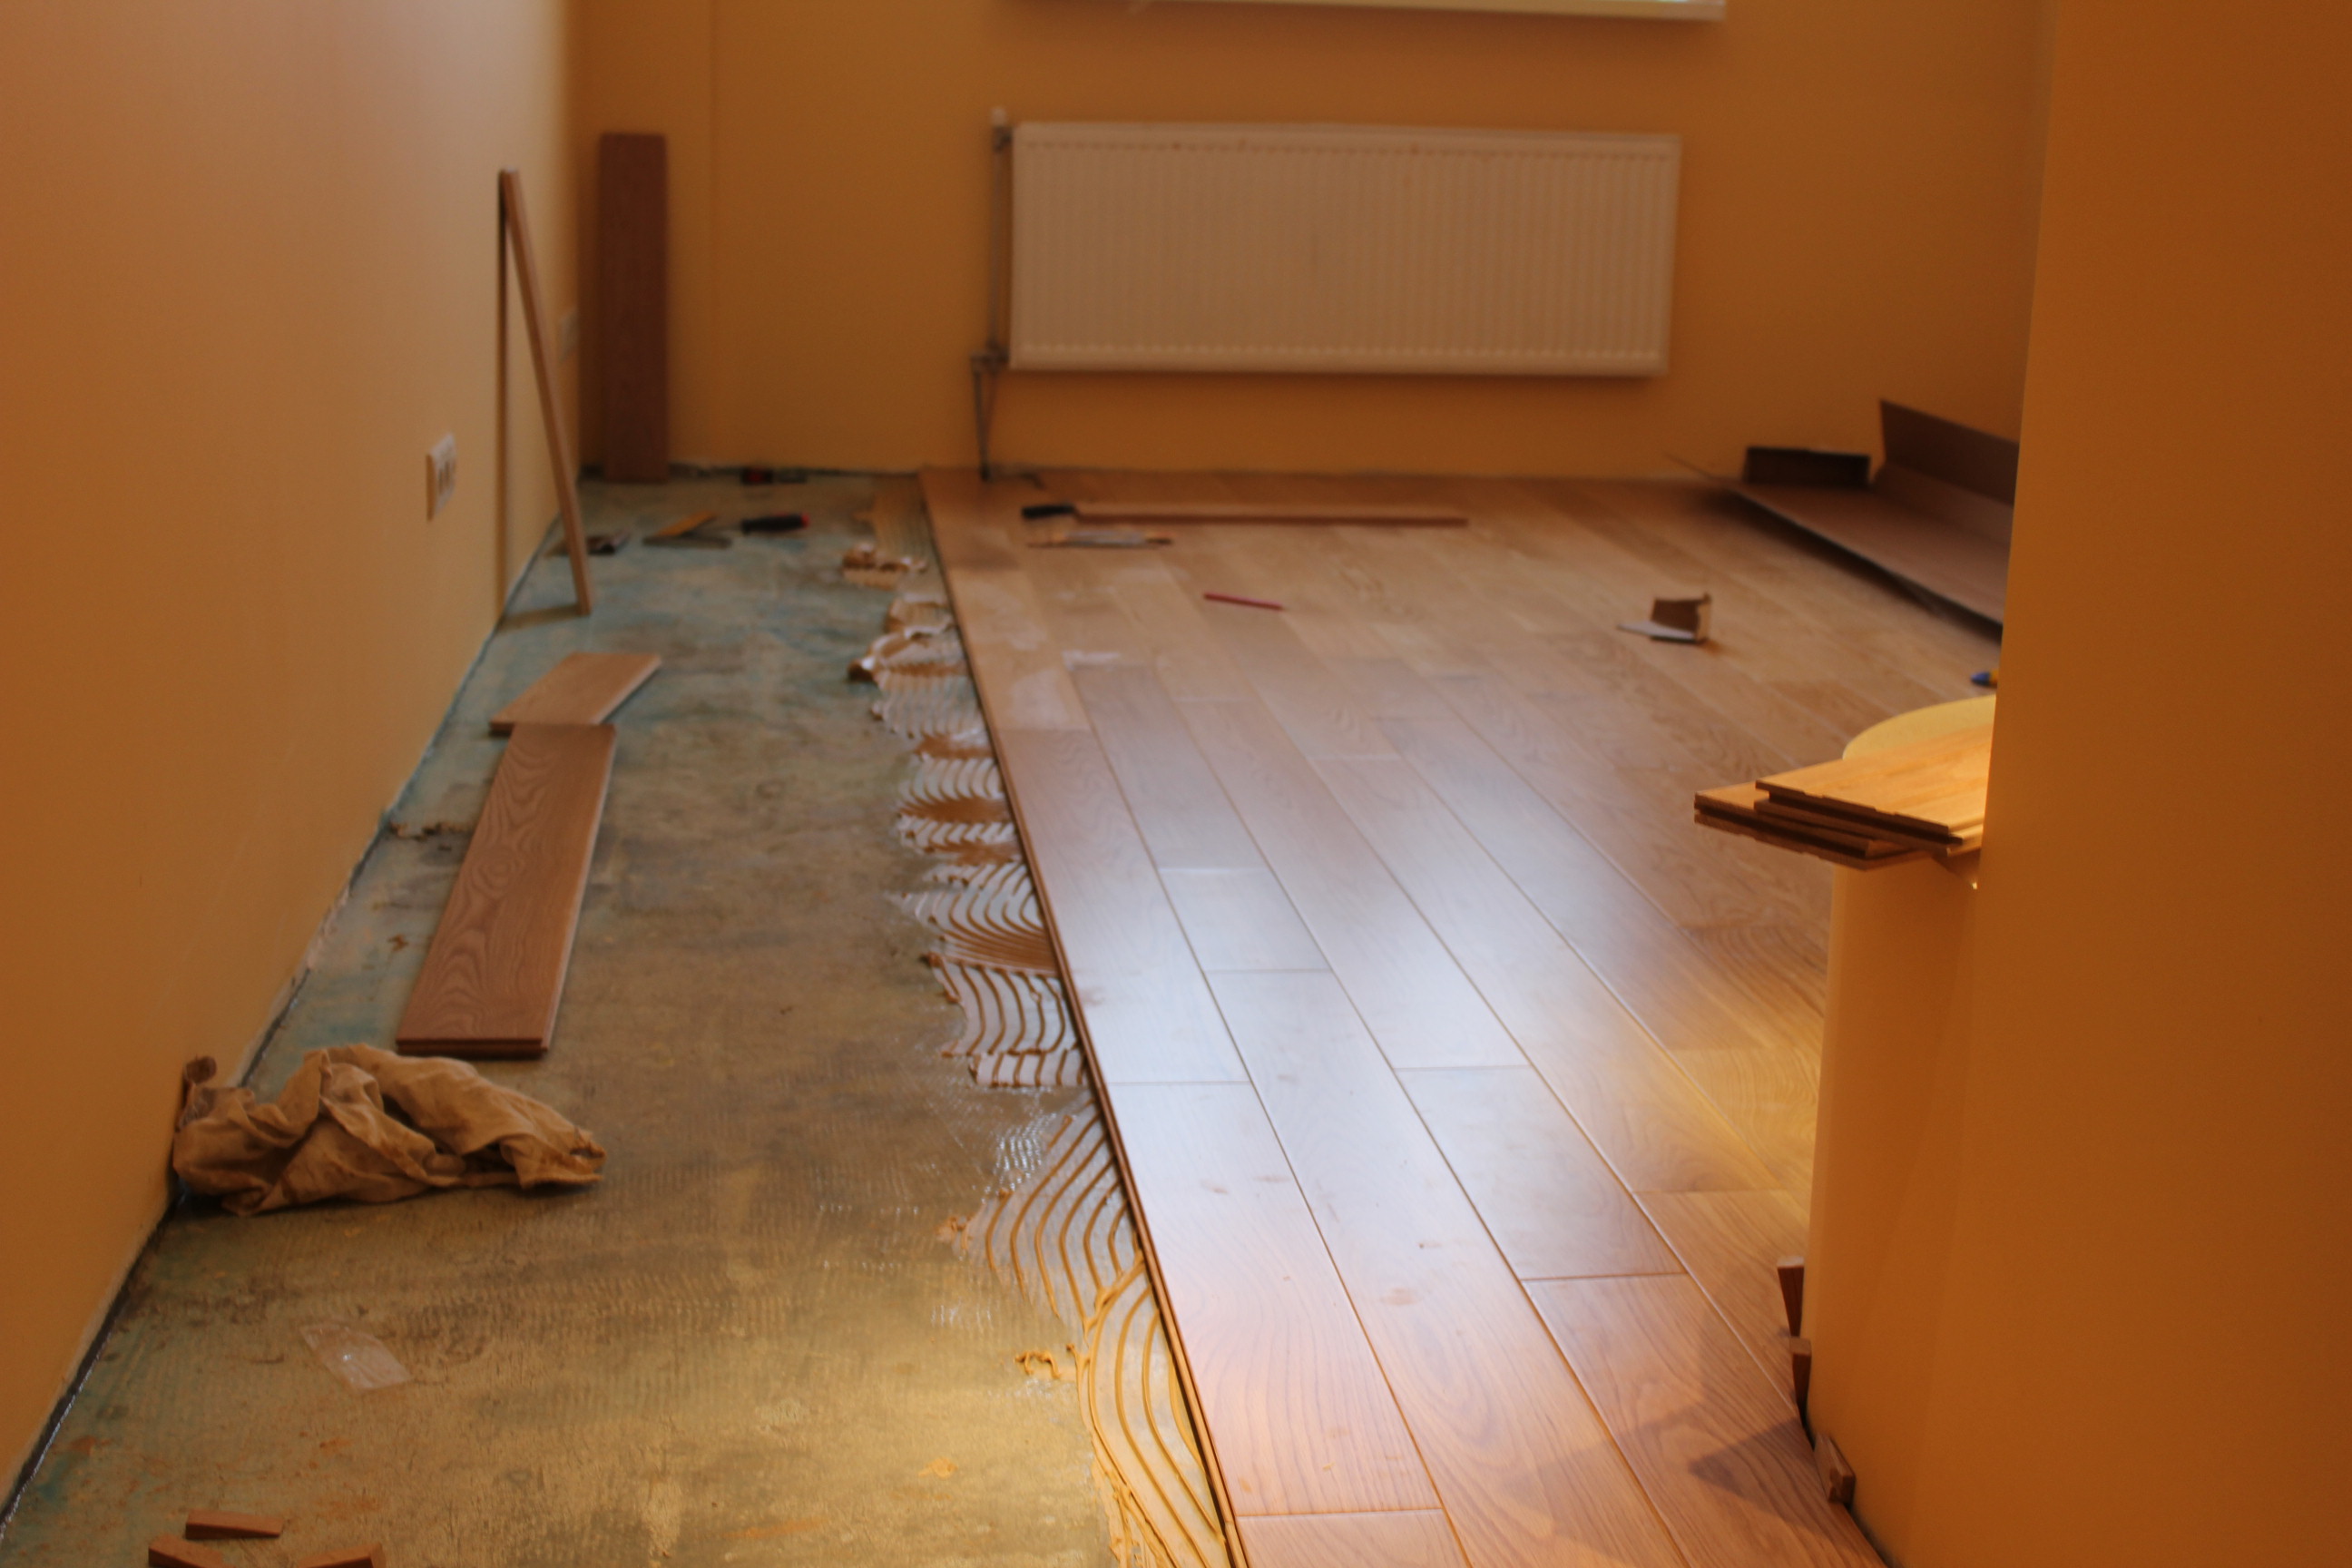
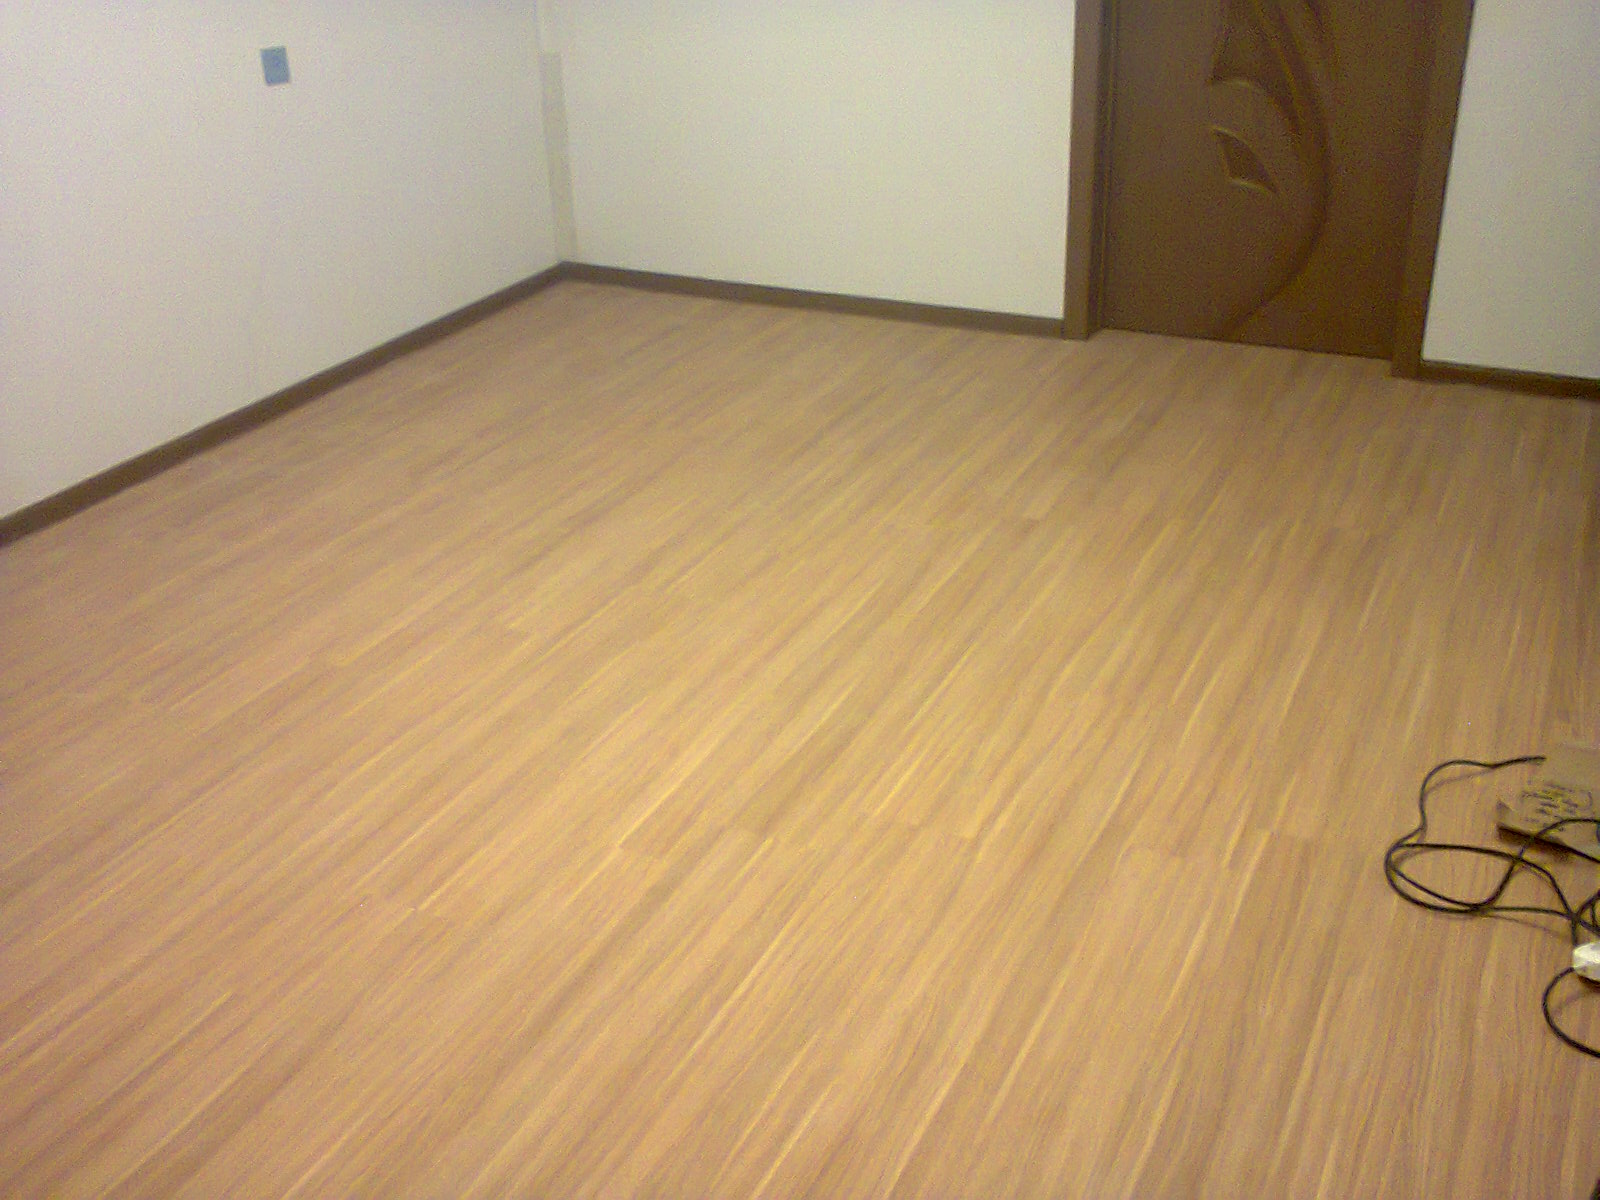
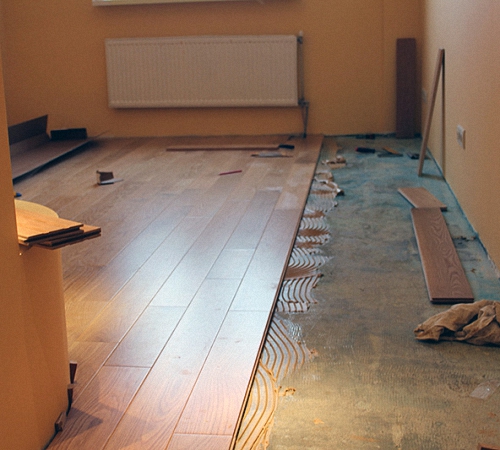
Installation of a new coating
The final step in the repair will be laying the finishing floor covering. The most popular and economical today are linoleum and laminate. But the construction market does not limit buyers, and if there is money, opportunity and desire, then it is quite possible to purchase vinyl tiles,floorboard or something ceramic.

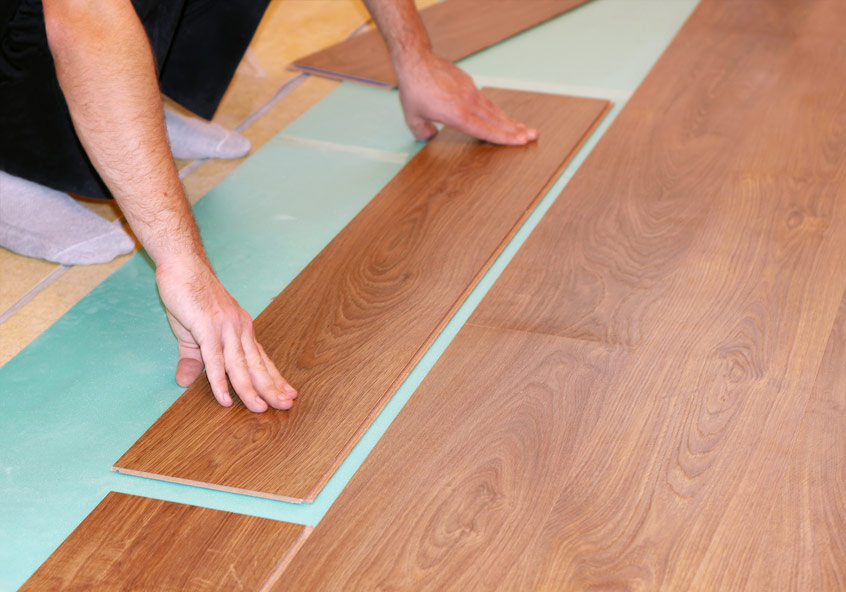
For laying some types of cover, a perfectly level floor is needed. These materials include laminate flooring. Linoleum, carpet, vinyl - not so critical to its level. Tile is well suited for rooms with high humidity or high traffic.
Expert advice
Often the repair of floors is carried out only superficially, making it a cosmetic option. But if the house is old, it has long been over 10, 20 years, then these measures become only temporary. Thus, only major repairs are delayed. But taking and redoing the floor once, it can be achieved that this issue will be resolved for decades to come.
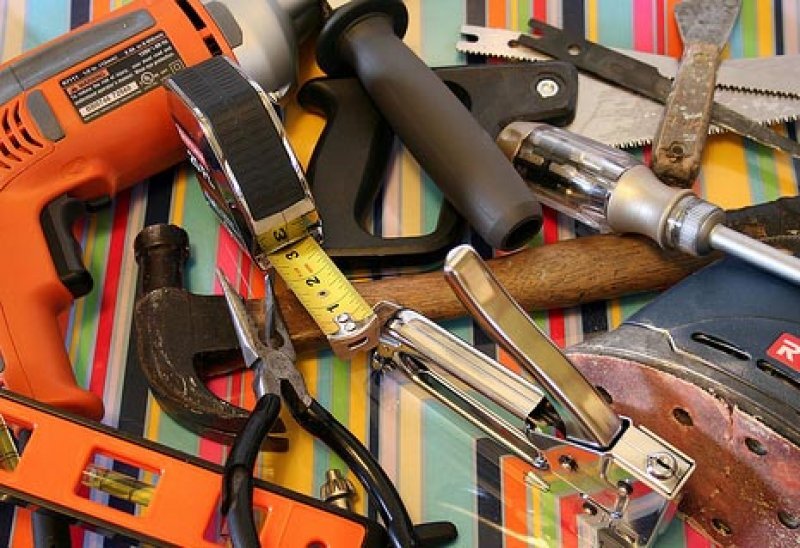
Repair - troublesome and very expensive. For many jobs, you may need special expensive tools, such as a concrete mixer. A simple man in the street does not have a complete set of highly professional tools. Yes, he is not needed.
Having bought the tool and using it once, it may no longer be needed and will not work out the entire amount spent on it. It is much more economical to rent tools.

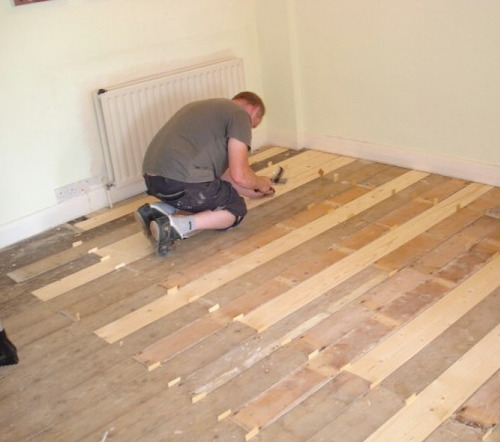
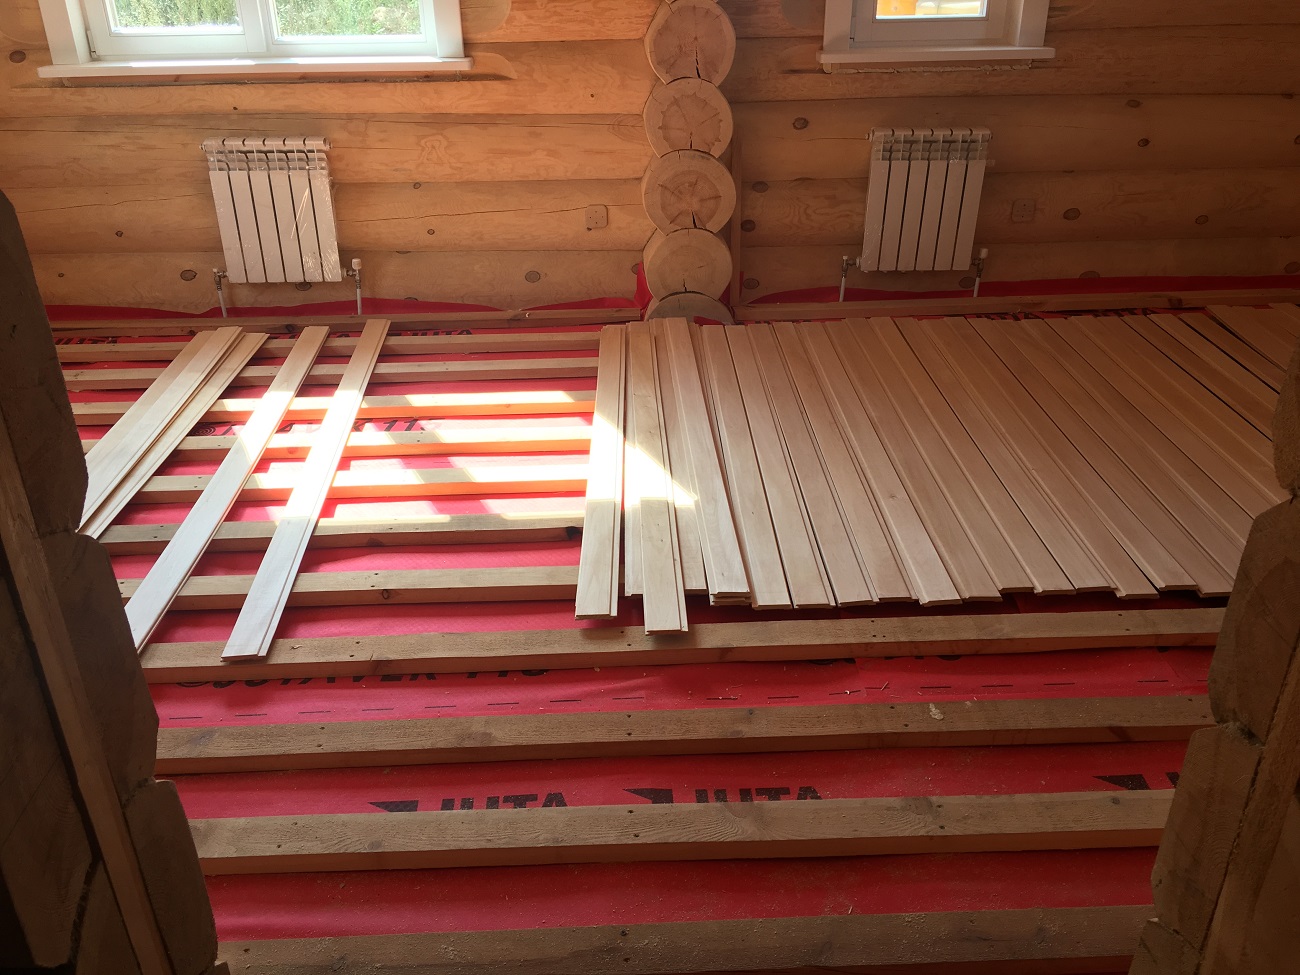
When repairing the concrete layer on the first floor, you must first make a waterproofing. If the mineral wool is taken as a heater, then it should be covered with waterproofing. In the case when the state of the lag is beautiful, you can lay a new flooring on them from boards, sheets of plywood, gypsum fiber board or OSB.
When mounting sheets on logs, it is necessary that they are attached to at least three supports. Their joints should be located in the middle of the lag. The gap between walls and sheets must be at least 5 mm.
If the surface of the old screed is flat, then you can put sheet material (GVL, OSB, plywood) as a “dry” screed. In case you do not use waterproofing and apply a concrete solution, moisten the working surface with water so that the composition will get better.

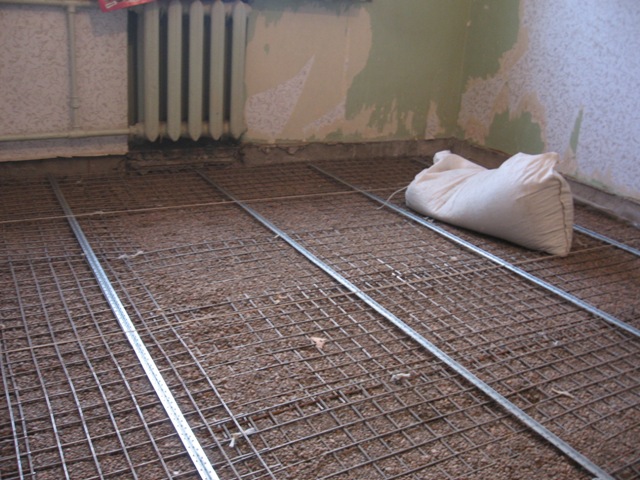
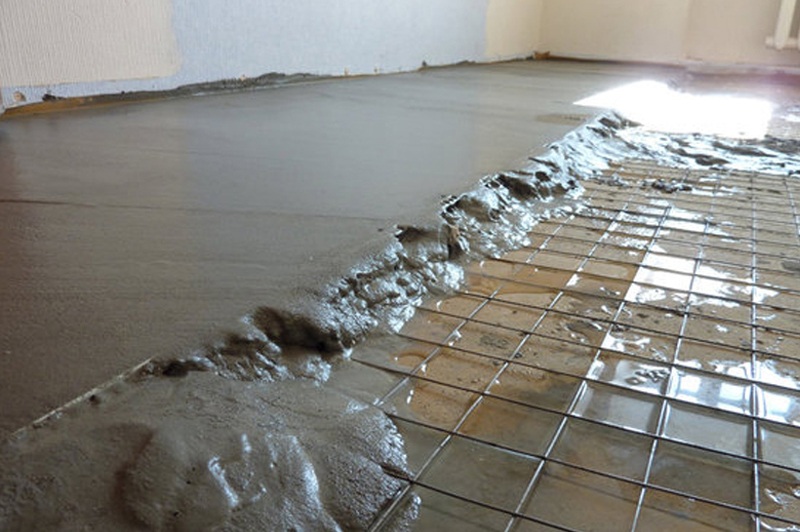
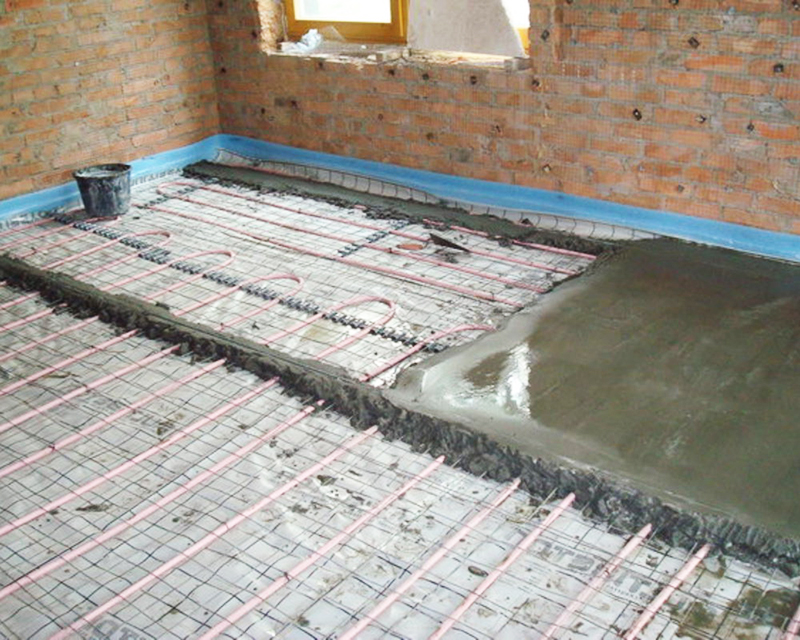
When using cement casting to give greater structural strength, you can additionally carry out reinforcement by laying a special construction grid.
You will learn more information about how to make a quality repair of the floor in the apartment from the video below.