How to level the floor under the laminate?
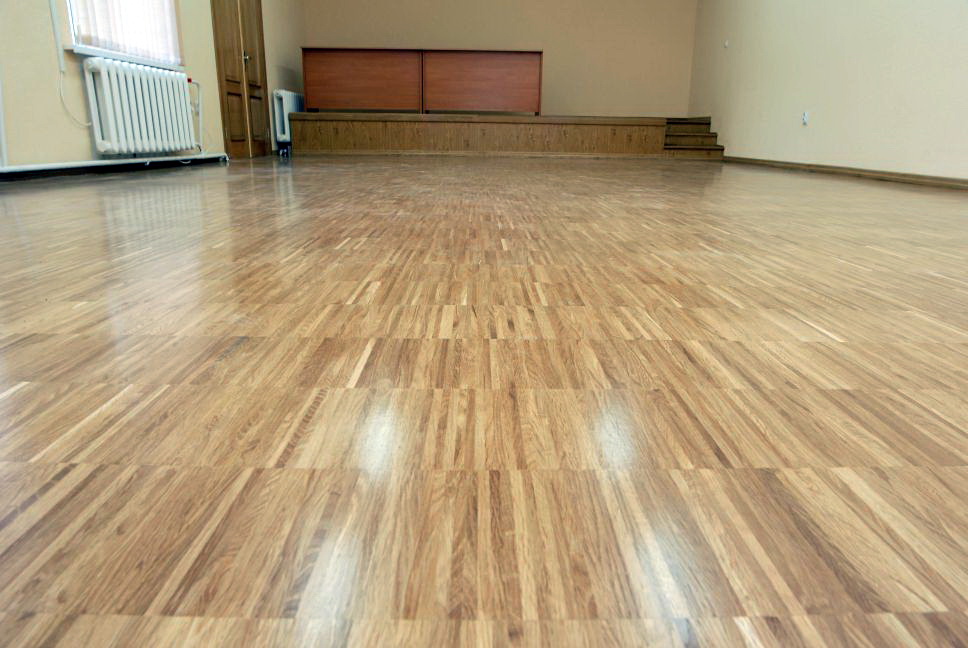
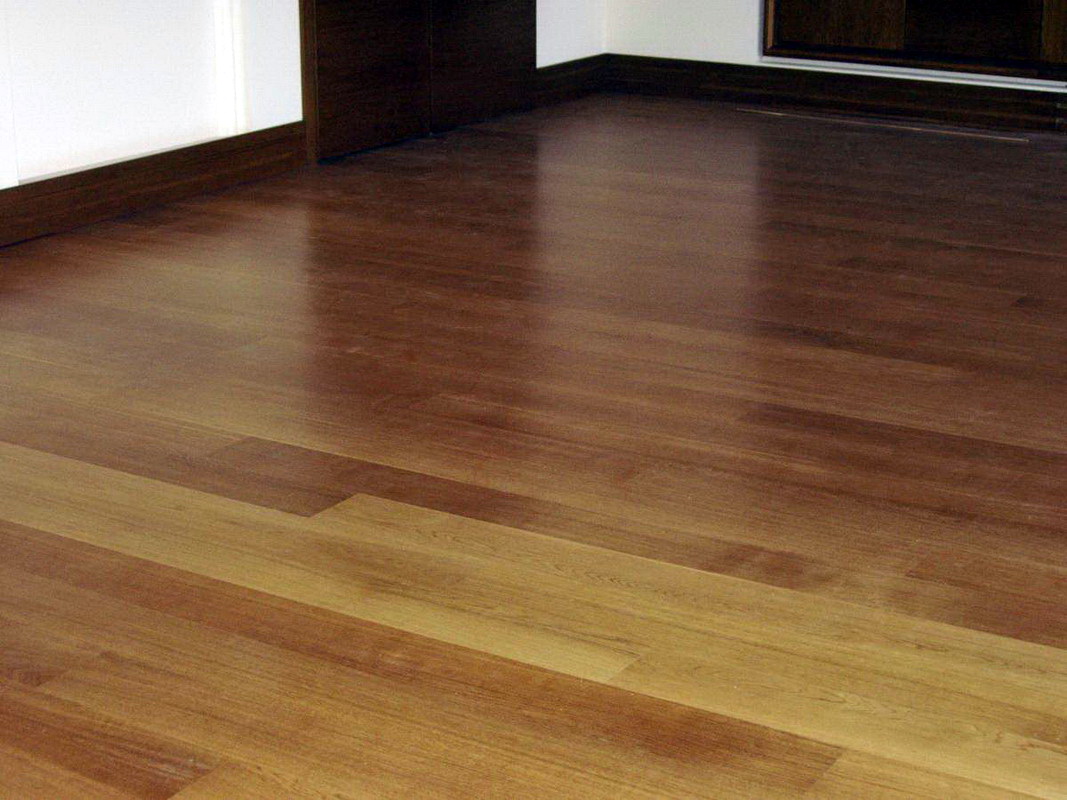
She prefers to laminate floors more and more often. This material is unpretentious in operation, does not require much effort during installation. In addition, it is aesthetic and suitable for residential apartments and private homes, and for office space. Coverage is acquired for a lot of money, but it will be a pity to spend them if the floor creaks under your feet, and even worse - pops. The reason for these troubles - the uneven styling. Leveling the floor under the laminate can be done with your own hands.
Why do it?
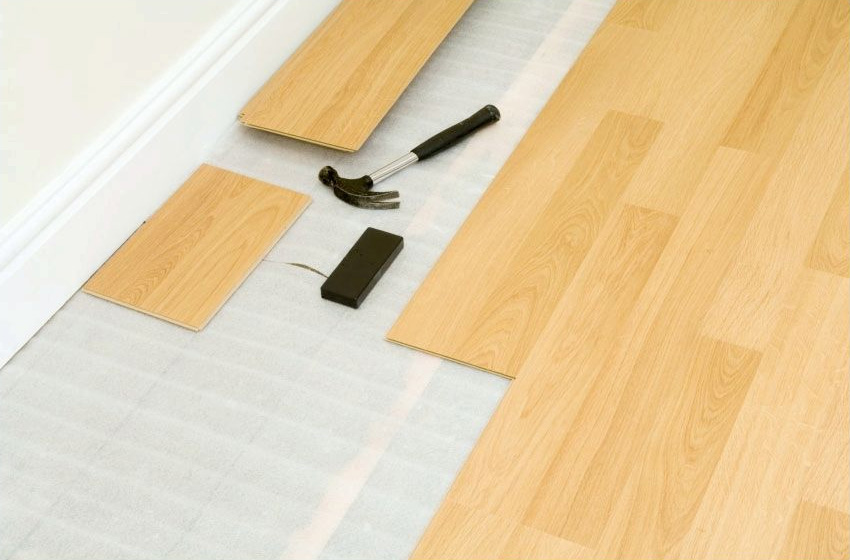
Laminate is made on the basis of fibreboard and is a layered plate, which is assembled into a common floor surface with fixed locks. The plates are very rigid, so the underlying or supporting layer under the laminate should be smooth, otherwise the material is subjected to stress and, accordingly, cracking.
The locks connecting the laminate plates, in this case, will also quickly wear out, the seams may diverge. Therefore, the floor on which the floor will be mounted must be prepared and trimmed. At the norm the curvature of the carrier layer should be 2 mm per 1 meter running over all parts of the room.
The alignment of the laminate plates is carried out by the floating method, that is, they are not fixed on the base and the substrate, so when the floor is folded into a single layer, a deformation seam remains along the perimeter of the room along the walls. This explains horizontal positioning - one of the important requirements when laying this coating.. On an uneven surface or with a slope, the floor will slowly move to a lower part of the room, the plates will no longer deform temperature, as they will rest against one edge of the room under a slope, and will begin to collapse.
A very important circumstance is base dryness. Laminate does not like moisture, exfoliates and becomes useless if water is spilled. Therefore, when choosing the method of arranging the foundation for the subsequent installation of a floor finishing covering, these requirements should be taken into account.
Now there are high-quality plates already covered with various compositions that protect against moisture and even locks between laminate plates have a thin layer of hermetic glue, but under the laid covering it is still necessary to create conditions that exclude any moisture content of the structure. The floor will delight you for many years.

Types and characteristics of the base
Alignment under the laminate is performed on one of the following bases:
- Concrete floors or cement-sand screeds;
- Floor slabs in private houses or apartments;
- Wooden floors on the logs.

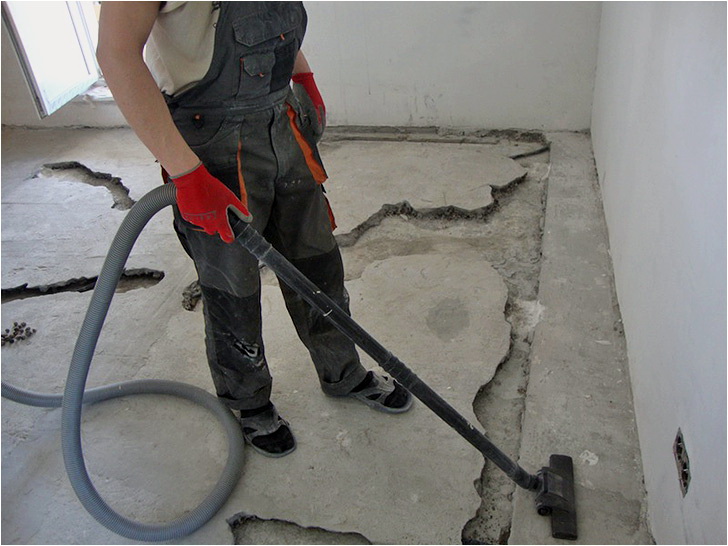
Methods of preparation of screeds and slab floors, as a rule, are similar and have the same conditions. For all required to conduct preparatory work. Concrete bases must be cleaned of dirt, to dismantle the old screed and the old finishing coating, if it was. Removed damaged wooden floors, damaged tiles, screed. If the floor of the boards with mold, you should also completely dismantle this draft floor. Plywood sheets or chipboard installed on wooden logs should be checked for the presence of wet areas, stratified edges.

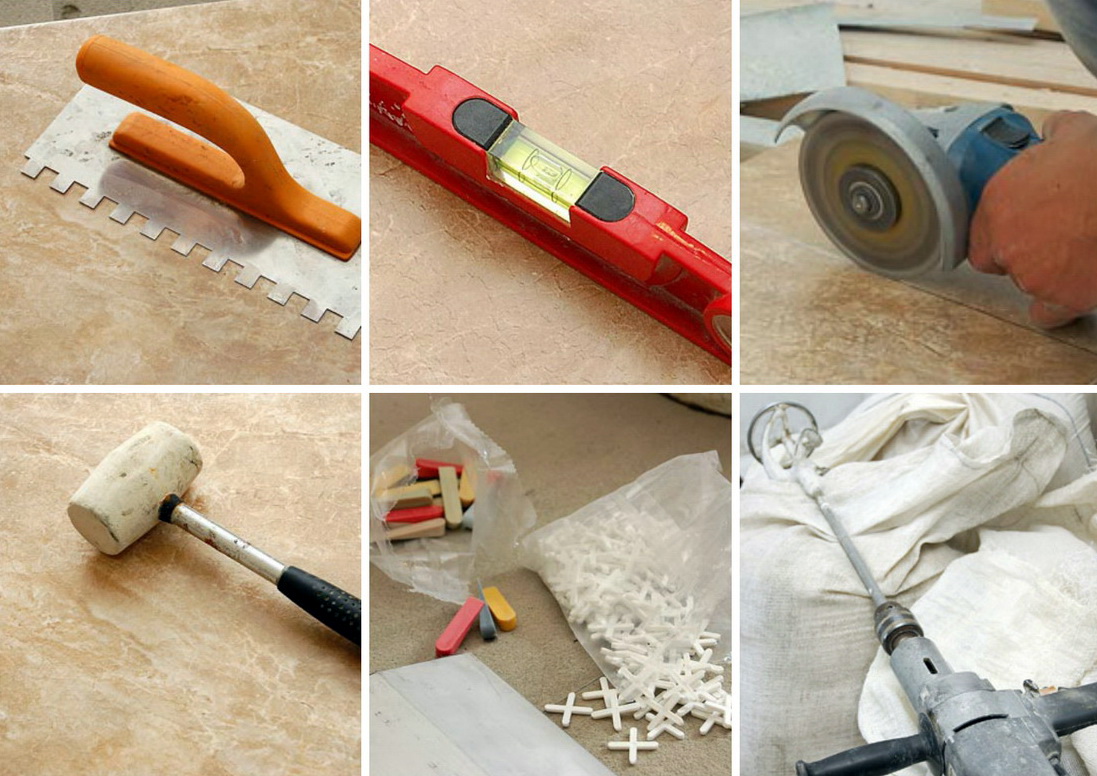
Required tools:
- Grinding or scraper machine, respirator and headphones for work with the scraper machine;
- Roller or brush. These tools are used to apply a primer to a concrete base and an antiseptic to a wooden one;
- Roulette;
- Building level;
- Drill with a special nozzle for mixing mortars or construction mixer;
- Screwdriver, screws, PVA glue, construction gloves;
- Beacons - building slats to help level the floors.
What is the best level?
For alignment of concrete bases using screeds from cement-sand mortars with various components. They are suitable for the first layer, as they cover the main large cracks and irregularities. But for the floor on which the laminate will be laid directly, another layer of mortar is needed, thinner for evenness and smoothness. Next should be laid substrate, which provides insulation. These floors are quite heavy, create a certain load on the floor. It should be taken into account in advance, assessing the possibility and feasibility of the device of this floor in each specific house or apartment.
Self-leveling compounds or, in other words, self-leveling floors are often used to level concrete floors.When pouring the mixture, the coating becomes ideally even, all small cracks are eliminated and the errors of the previous layer are aligned. Only suitable for very smooth substrates.
Also used claydite - a material often used and light. The weight load on the floor from it is minimal. It has many positive properties: it maintains sound insulation, does not burn, is environmentally friendly, does not enter into chemical reactions with the materials used in flooring. The coating with claydite retains heat for a long time, is very durable, is not afraid of damp and is relatively inexpensive. Preparation for laying the finished floor is carried out very quickly in time, as the material is dry.
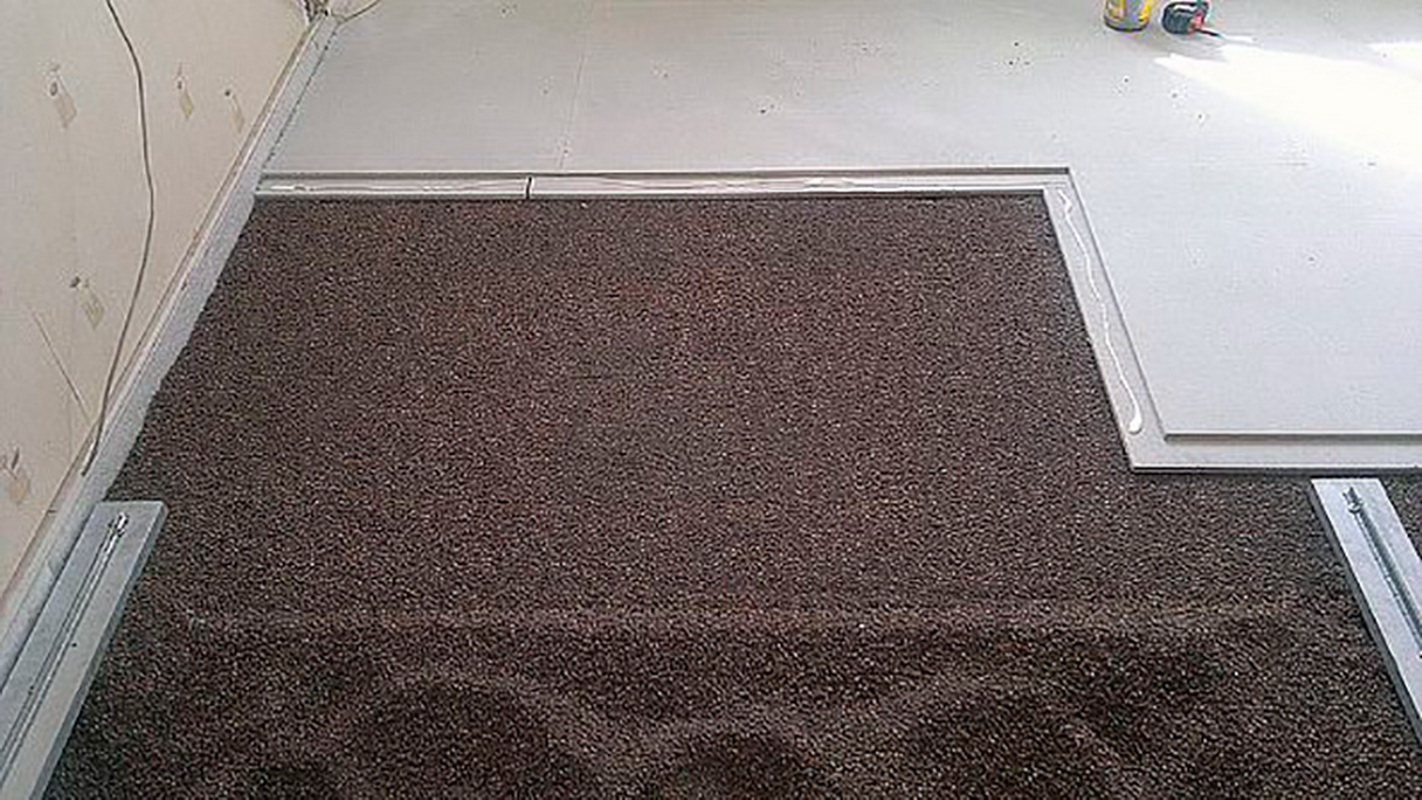
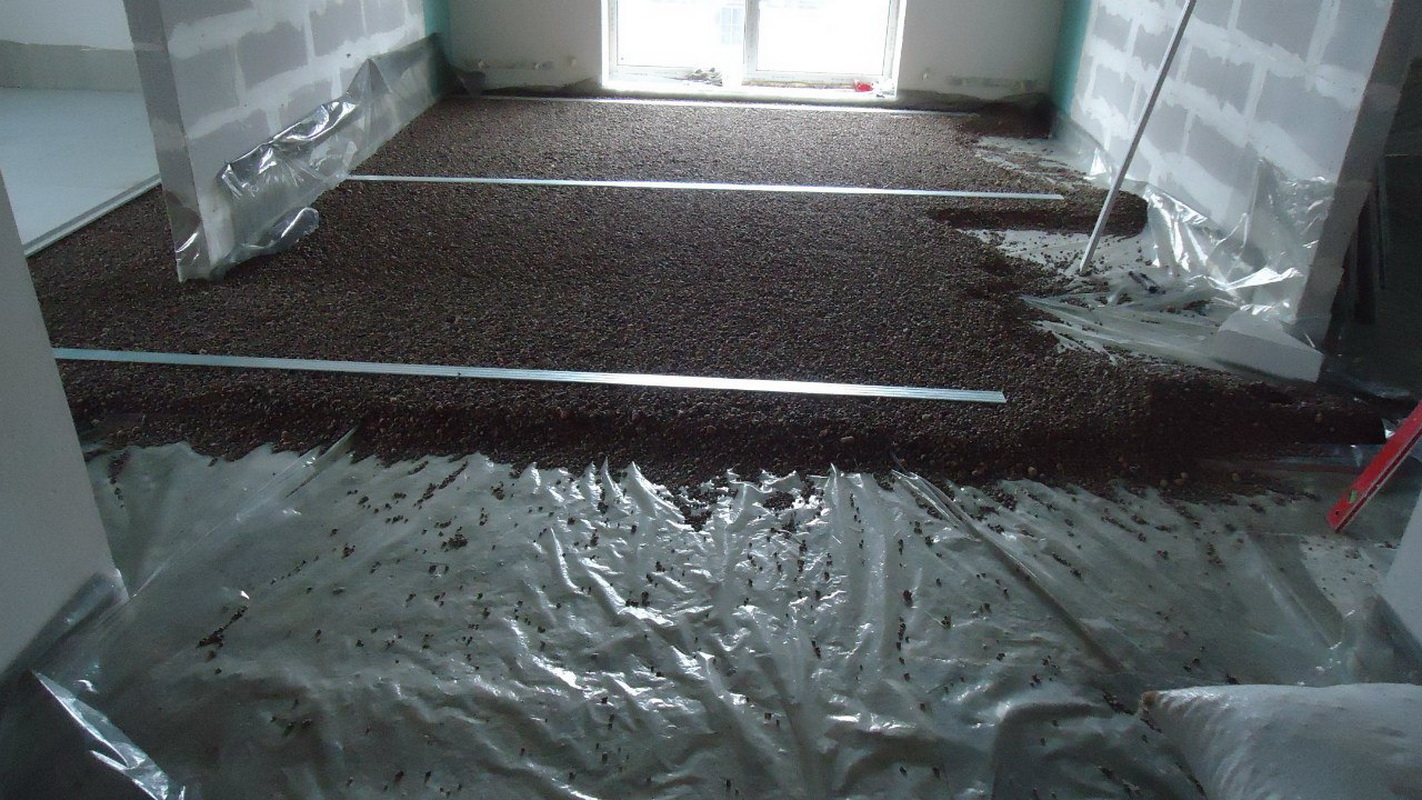
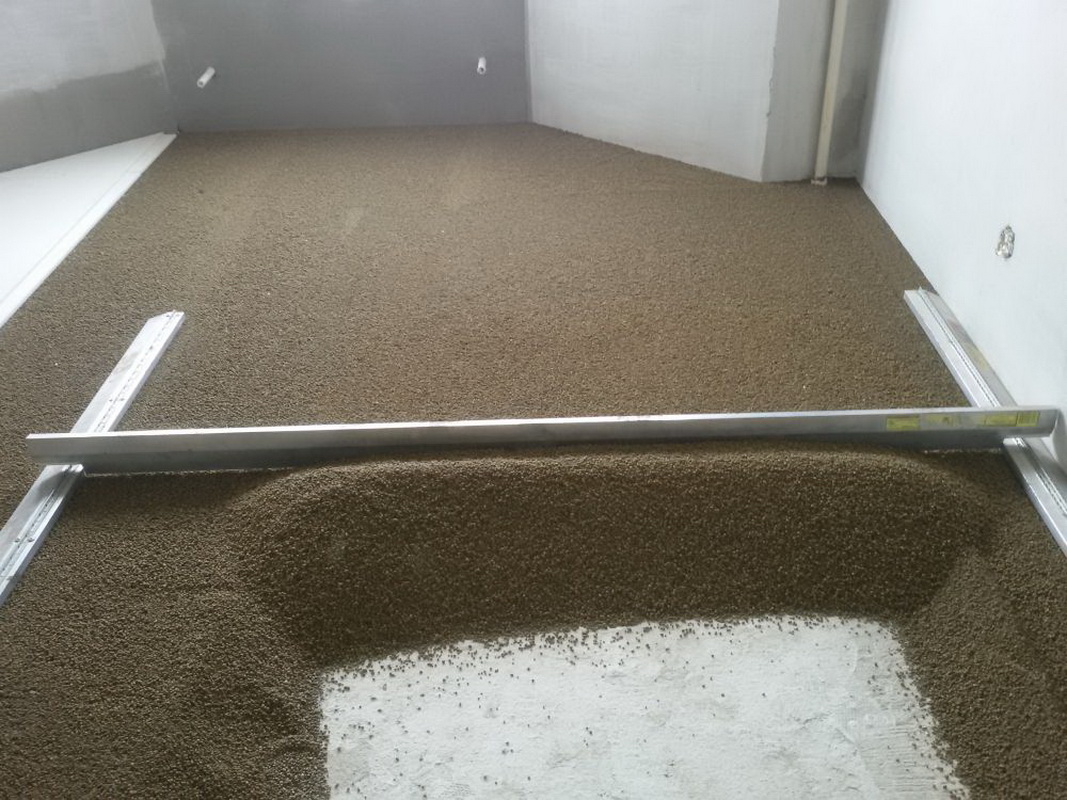
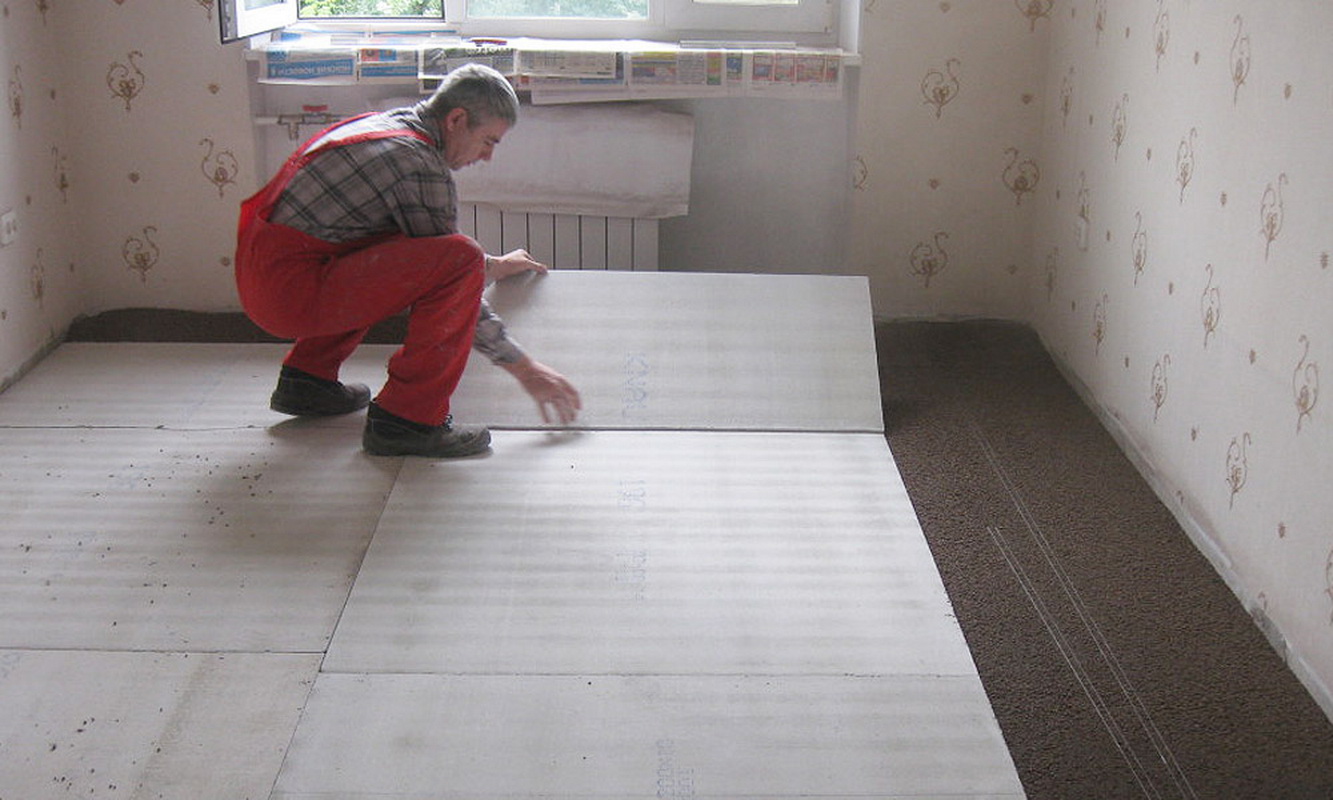
There are more ways to dry leveling grounds. For example, the installation of wooden boards with a measured pitch and laying on top of plywood, chipboard or OSB, as well as a screed according to the Knauf technology with dry solutions. In the second case, between the installed metal guides, filling is made with fine fraction clayite and then leveled with stacked gypsum-fiber plates (GVL). The surface is reinforced, insulated, soundproofed. The only negative is that the GVL plates are waterproof., and it is necessary to cover them with a waterproof primer or use a special water-repellent.
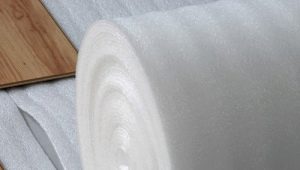
When the irregularities are not more than 4 mm, when the minimum alignment is necessary and the laminate can not be simply laid on the ground, and more complex installation of structures to carry out inconvenient and expensive, use the substrate. They are of several types: polyethylene, cork, cork bitumen, chipboard coatings, polyurethane foam, polypropylene, izolon, foil.
Often use the substrate and on the already smoothed floors to better preserve the back side of the laminate plates. The most inexpensive option is, of course, polyethylene foam.
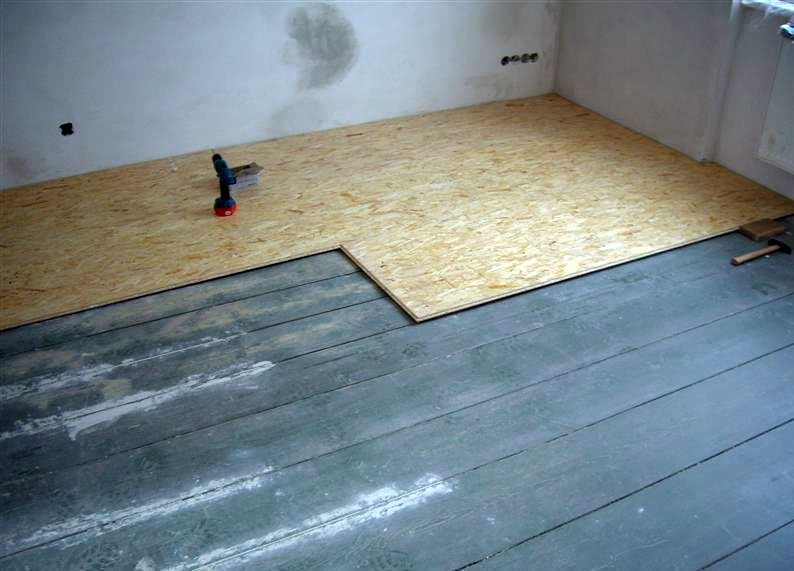
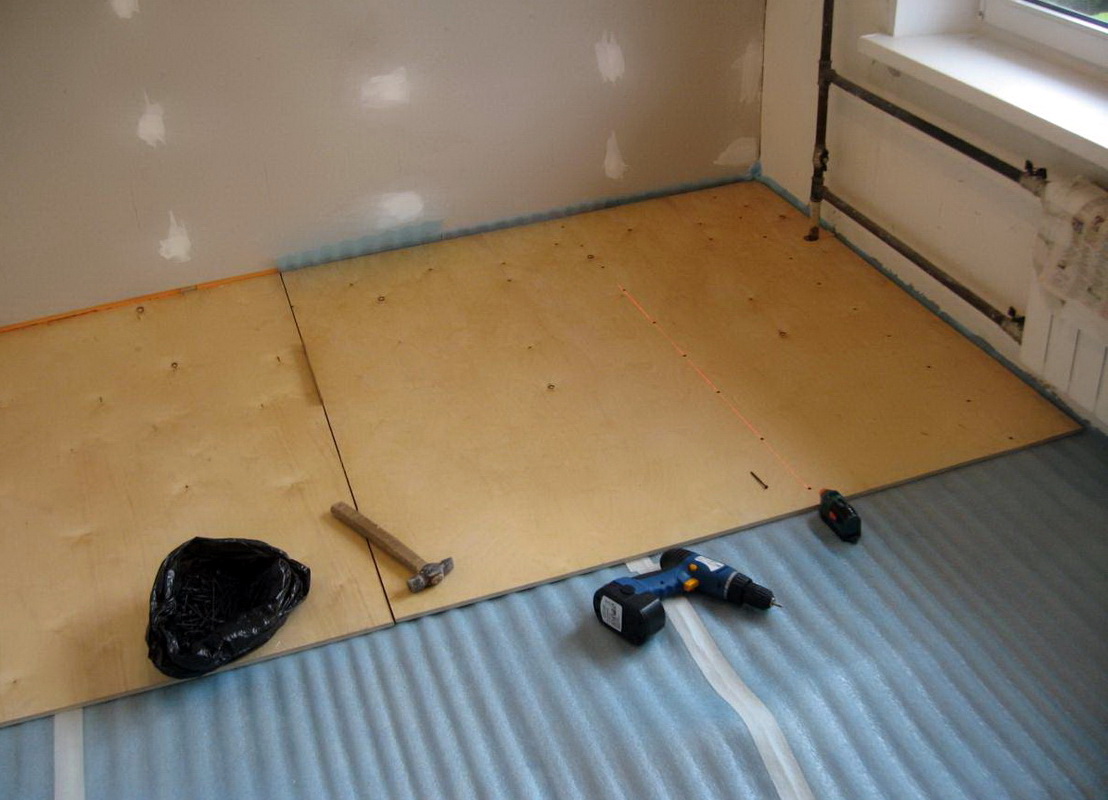
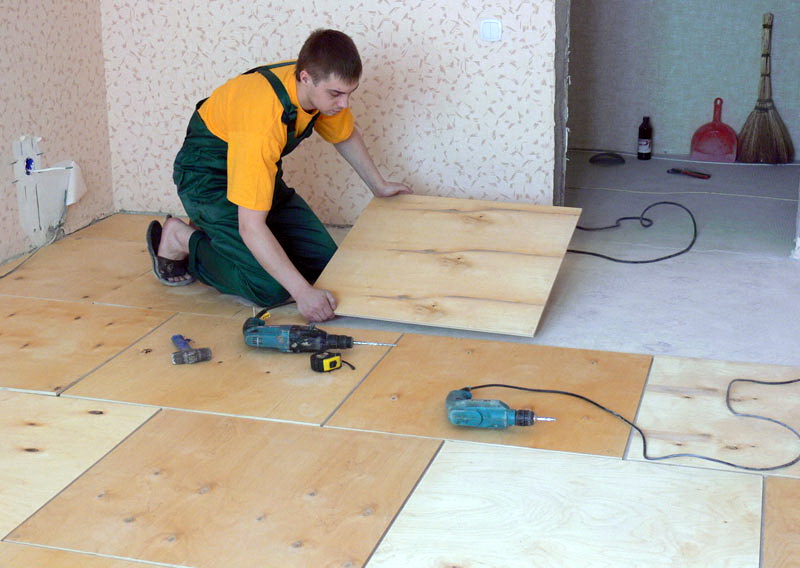
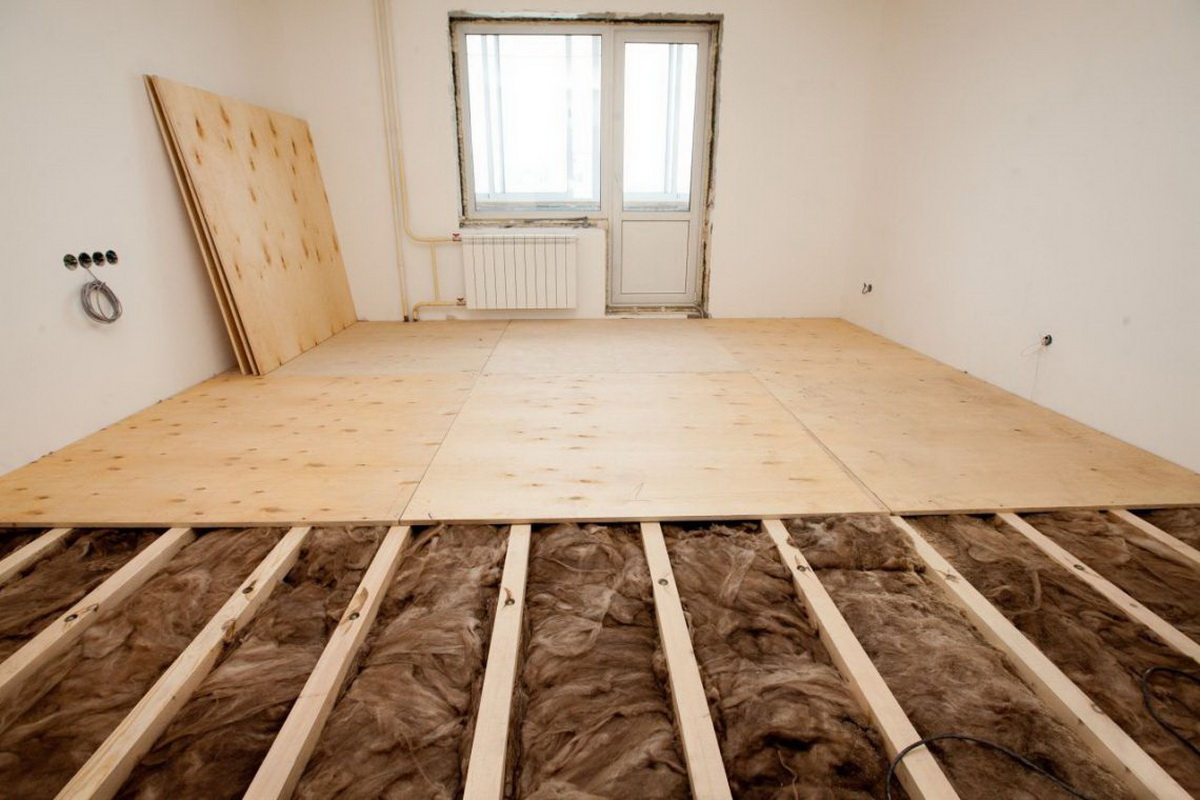
Wood floors to cook under the laminate - a more difficult task and more expensive. According to the new wooden logs, the floor is leveled with plywood sheets, OSB or chipboard. The thickness of plywood sheets recommended for laminate - 12 mm. But if the old wooden floor is still durable, not wet and suitable for subsequent installation, then you can carry out a partial restoration and save a lot.
There are two ways to do this:
- Scraping or grinding by machine and by hand. Scraping can be performed when there are no serious irregularities on the boards. The second method is alignment using stacking of the same plywood, chipboard or OSB.
- Putting putty. Suitable for wooden floors. Irregularities should be shallow, putty is applied in several layers. Each layer requires drying, so it takes a lot of time for such repairs.
After laying the laminate is recommended to apply mastic. It will be an additional protective layer, as well as emphasize an aesthetic and complete appearance.
Main ways
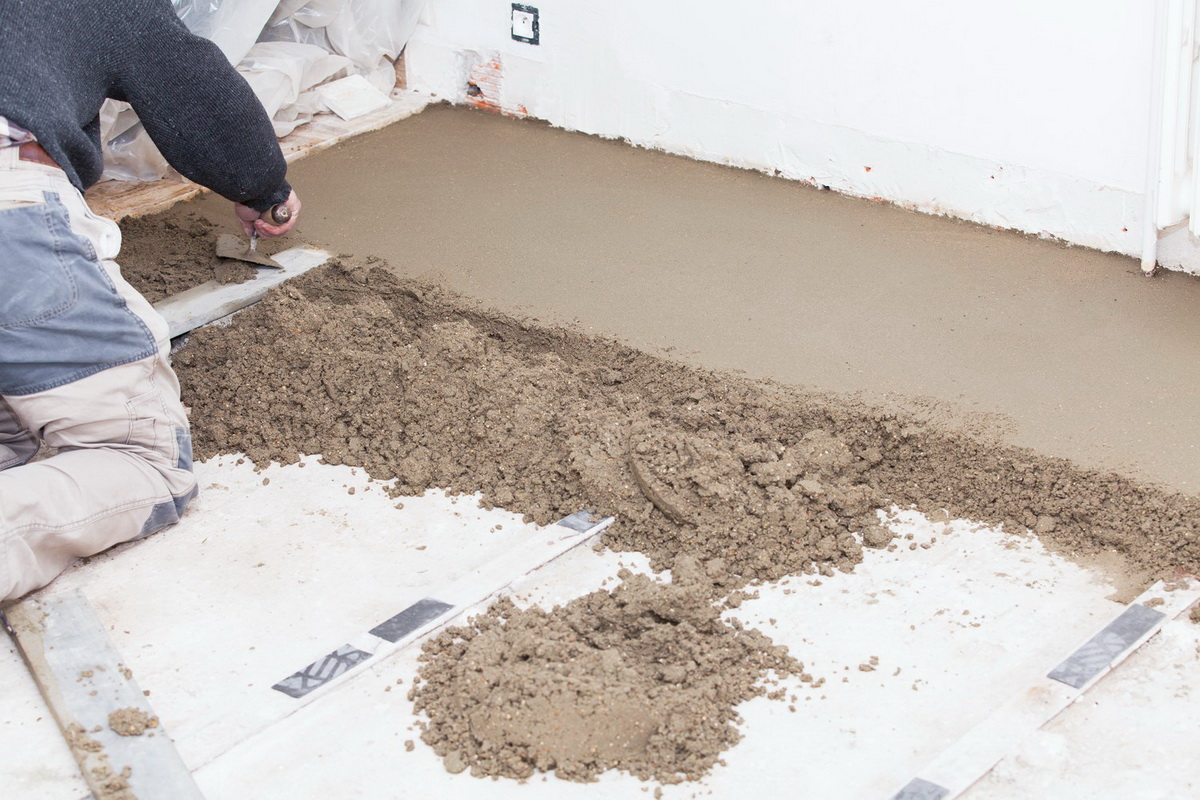
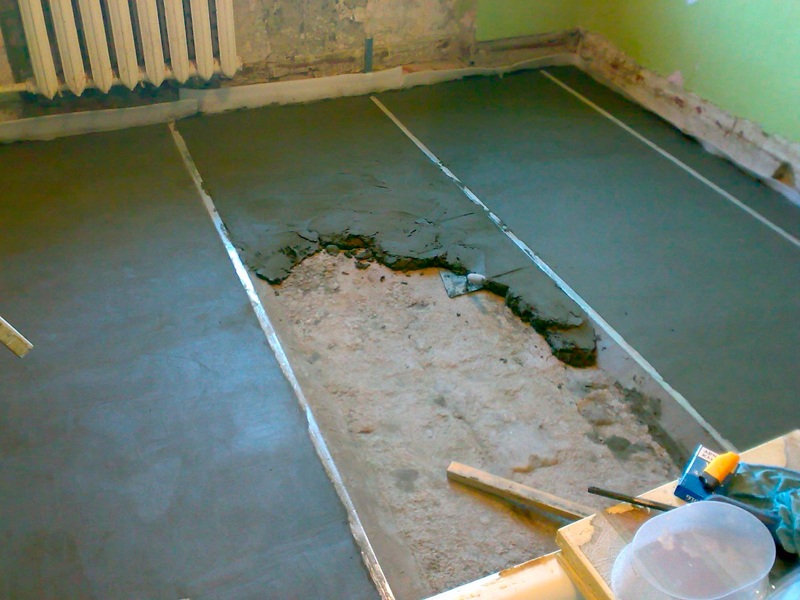
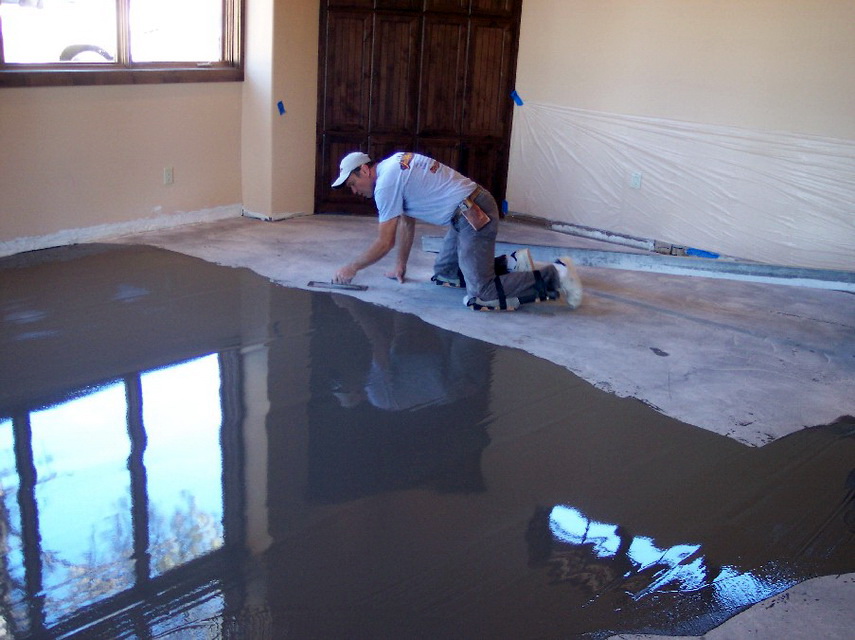
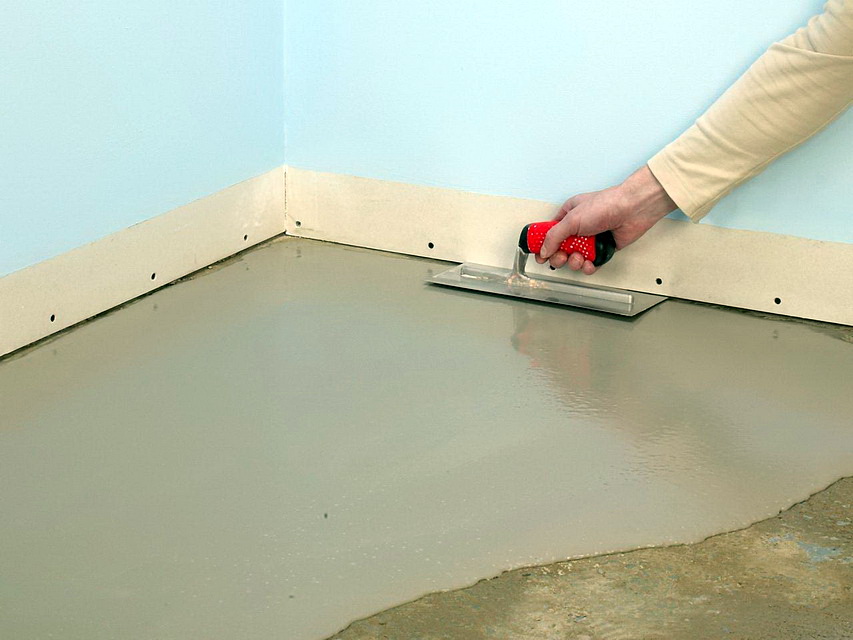
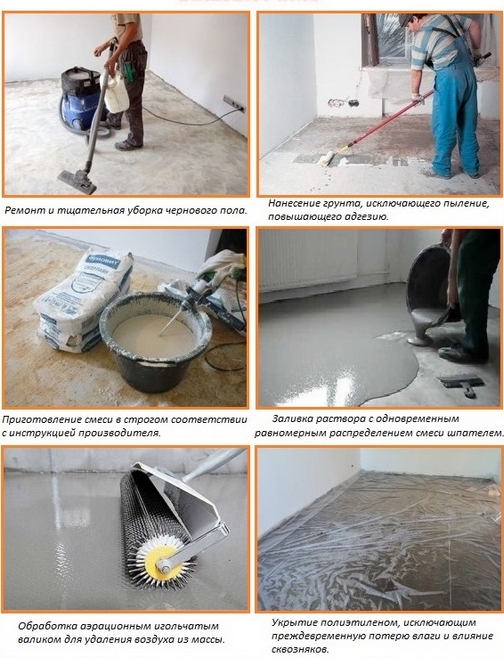
In preparing the concrete floor, work is carried out in two stages. First, with the help of a screed (cement-sand mortar), deep irregularities are removed, and then self-leveling mixture is applied, giving a smoother, cleaner surface. The algorithm will be as follows:
- In the apartment or in a private house, all remnants of the previous coating, debris and paint stains are removed from the concrete base.
- Deep cracks are filled with a cement-based mixture.
- The entire area of the floor in the room is treated with a primer mixture.
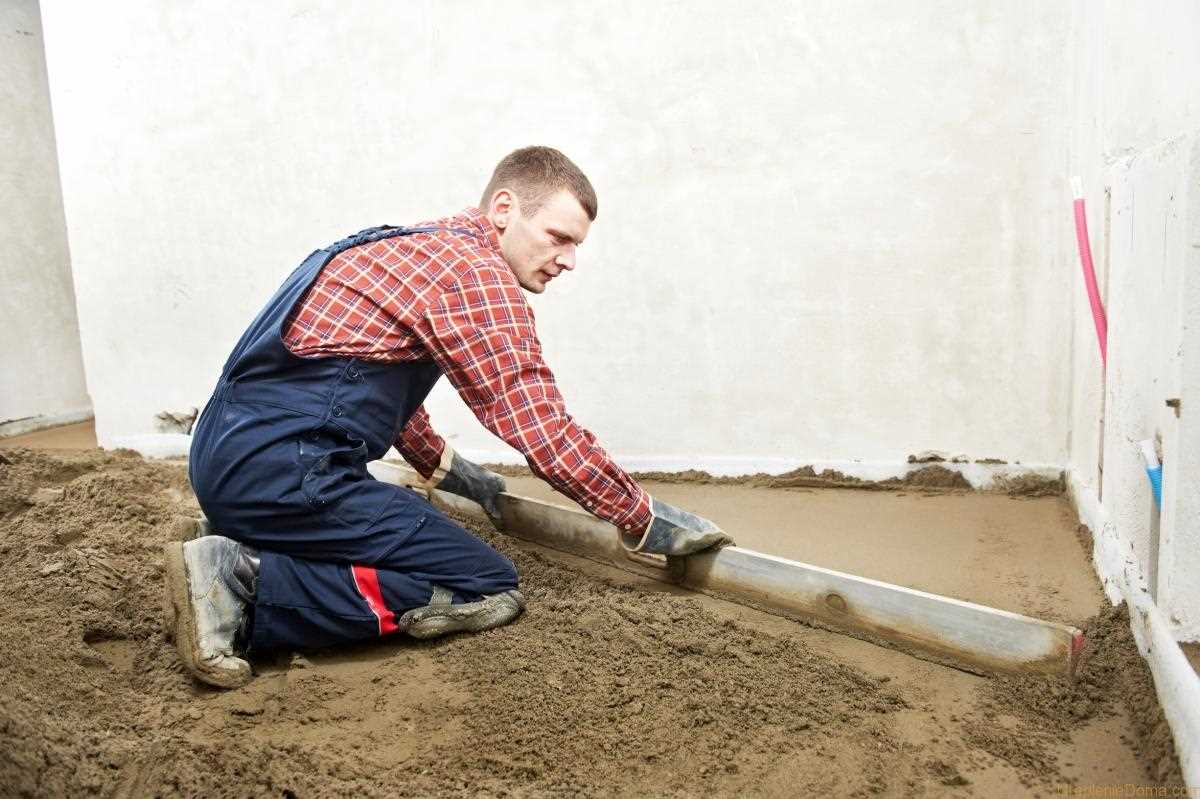
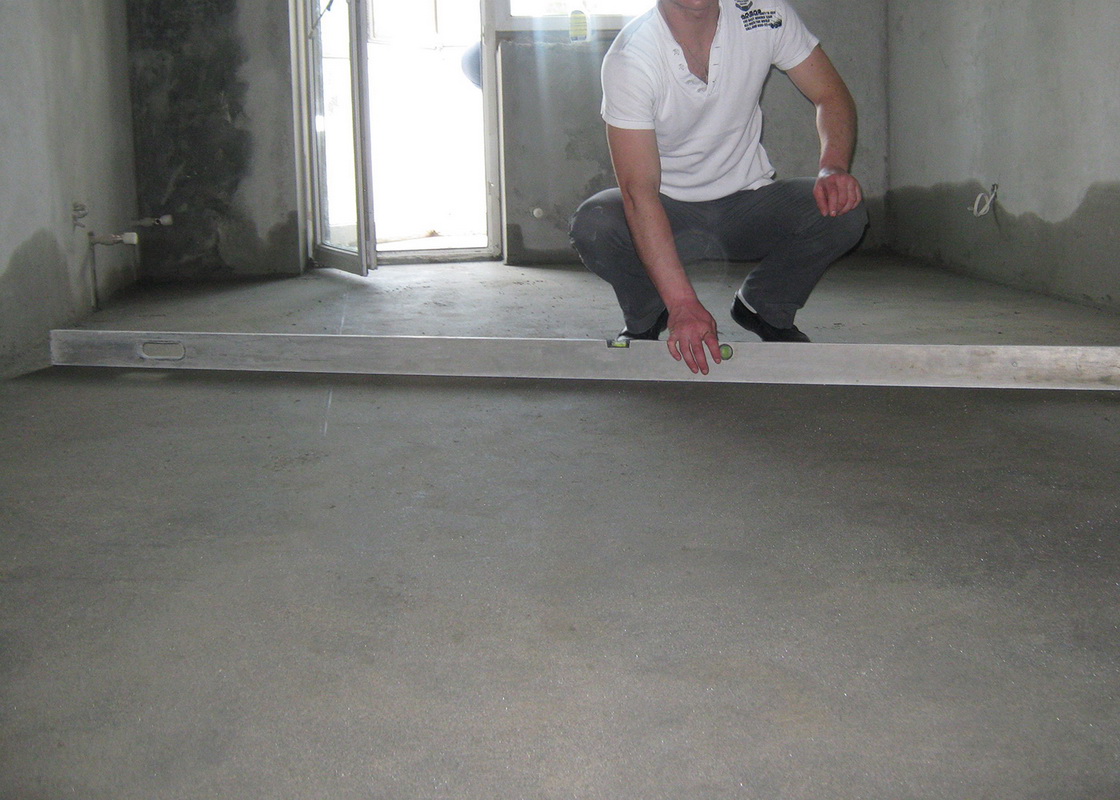
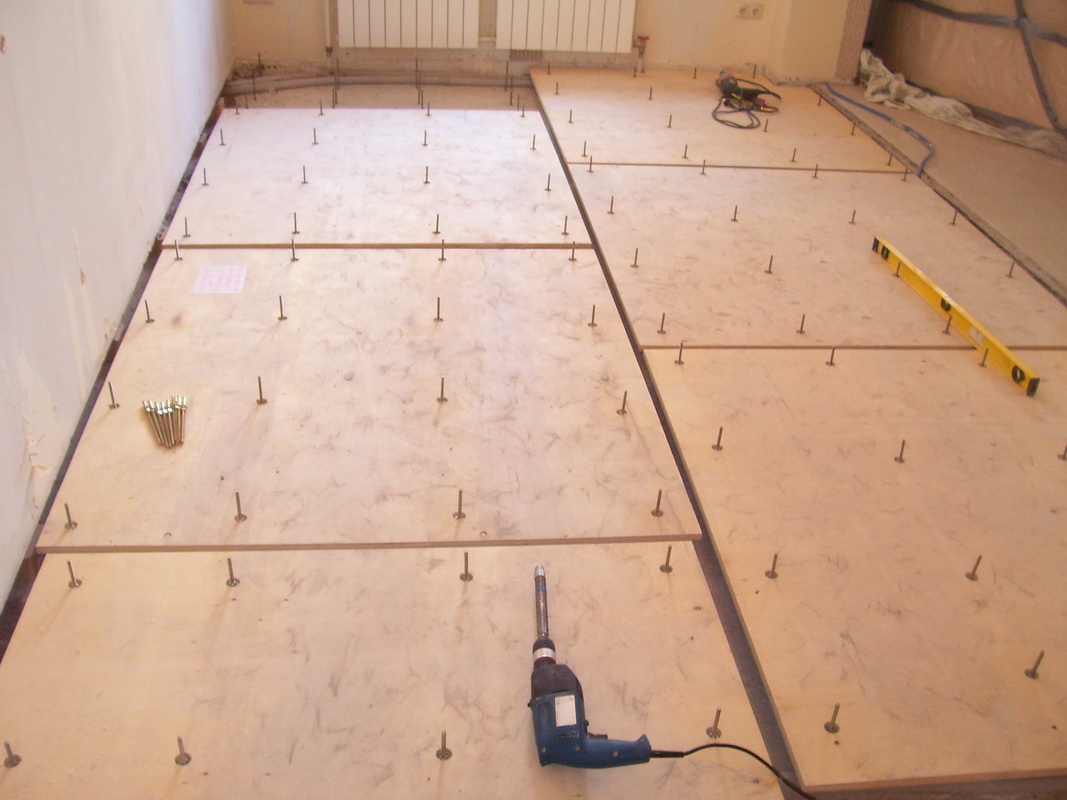
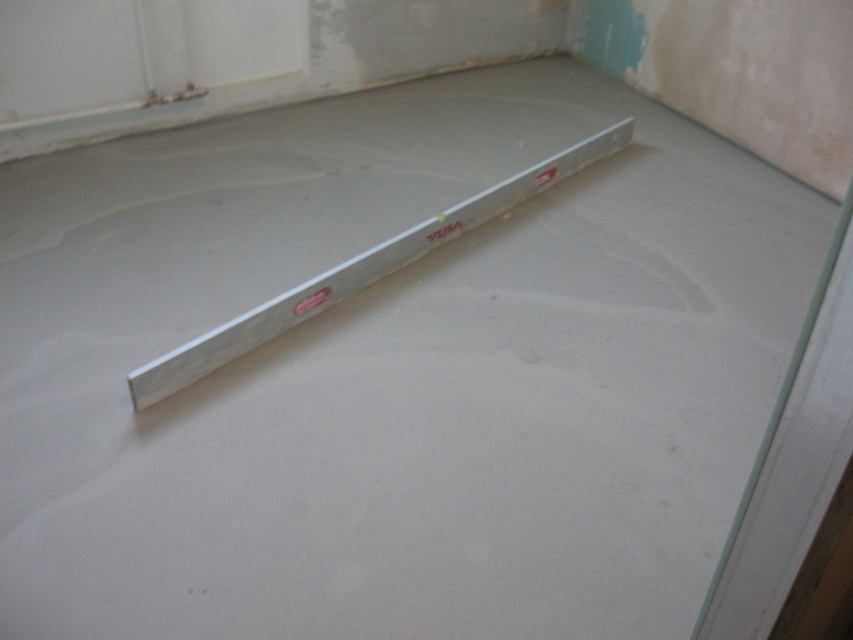
- With the help of the construction level, rack beacons are installed and strengthened with mortar.
- A mortar is being prepared for a screed based on 75% sand, 25% cement M400.
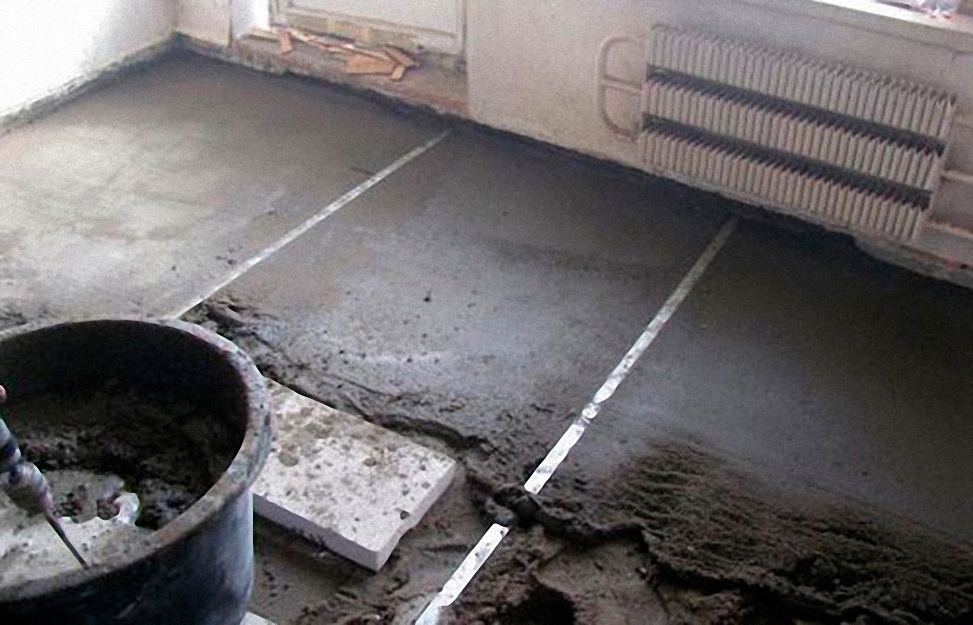
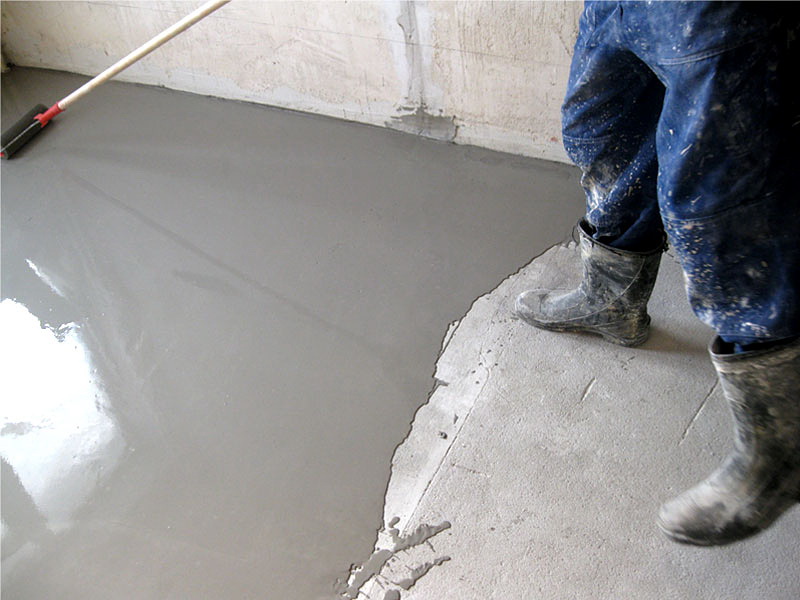
- Carefully mixed mixture spreads on the floor, spreading to the marks of lighthouses. The thickness of the concrete layer in the thinnest place should be more than 7 mm.
- After hardening of the first layer, it is desirable to carry out additional priming.
- Let the floor dry. When the mortar sets, the lighthouses must be removed, and the voids beneath them must be filled with mortar and allowed to dry again.
- Cover all plastic wrap, which will retain moisture in the layer. Draft application can be considered complete. It is necessary to wait for the complete solidification of the layer before proceeding to the next stage.
- When preparing a self-leveling mixture, you should follow the instructions exactly and knead it with a special nozzle on a drill or a construction mixer. You should pay attention to the shelf life of the product, as it is limited.
- Concrete floor is filled with a mixture.
- After three days, the floor will be ready for laying laminate. For better preservation of the panels, you can lay the substrate.
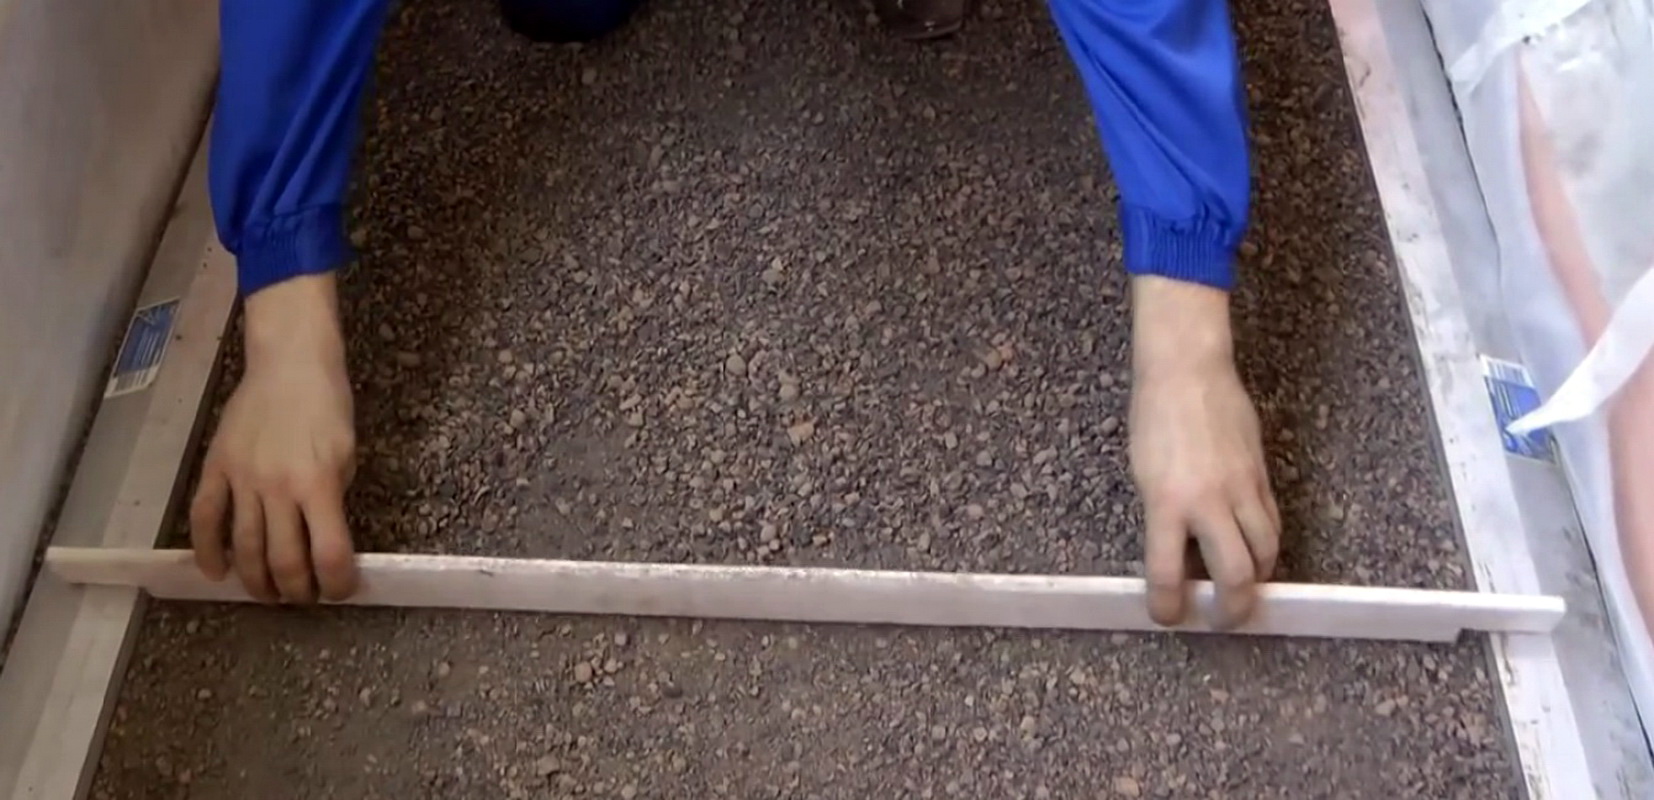
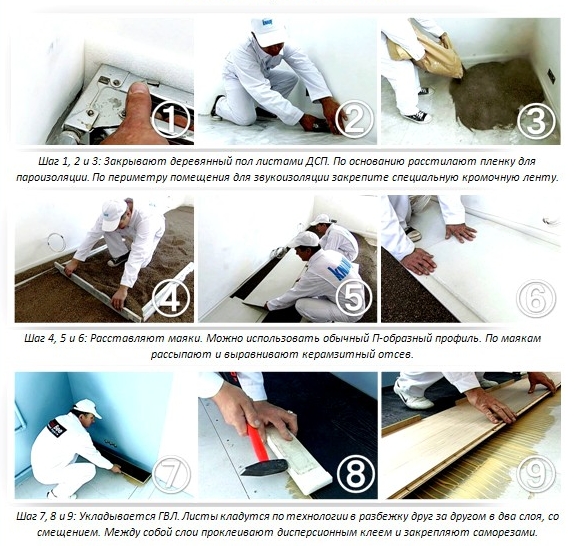
Expanded clay is often preferred for a variety of positive properties. The sequence of preparation:
- The surface of the floor is covered with a film that runs on the walls for 10-15 mm. The film is a waterproofing layer.
- Then, along the perimeter of the room, an edge band is applied; it indicates the height of the layer covered.
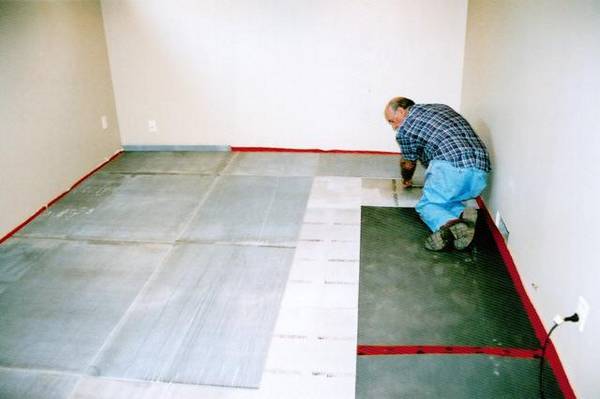
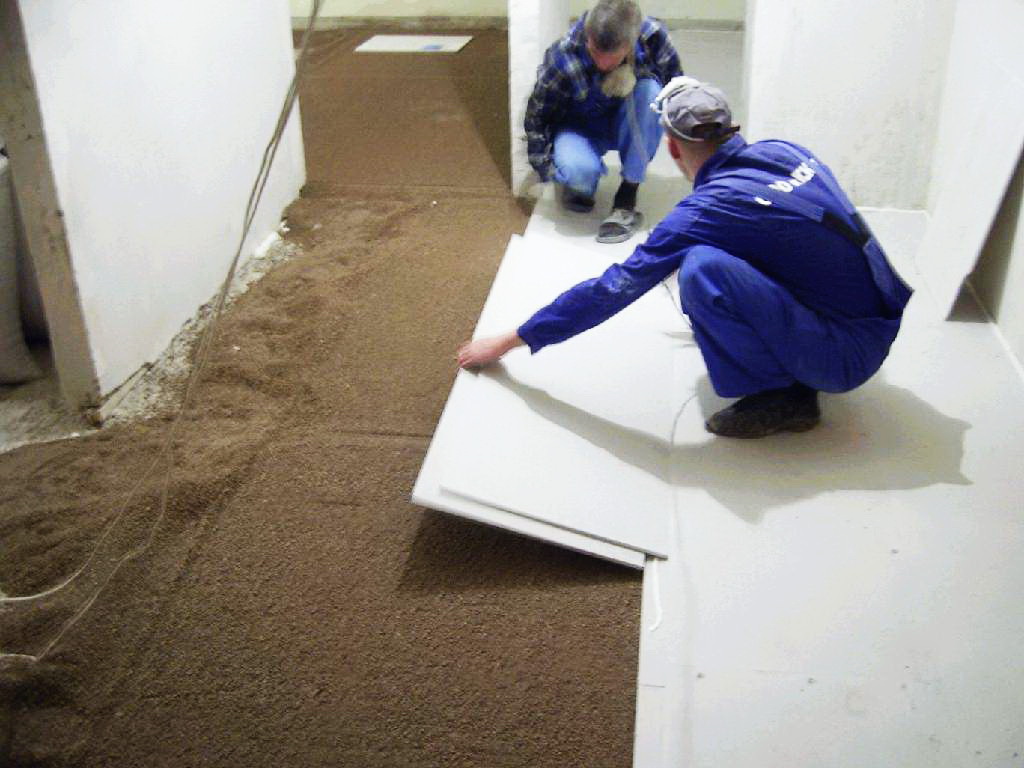
- GVL or plywood sheets are laid on the smoothed expanded clay, fastening each other with self-tapping screws and special glue. Sheets are laid out in a checkerboard pattern.
- After laying the plates, any substrate creeps in, and laminate panels are assembled on it.
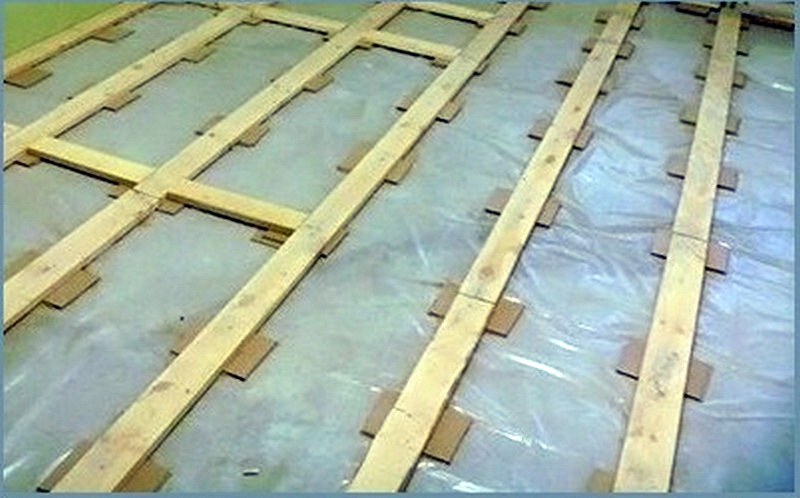
Leveling the wooden floor under the laminate:
- The degree of humidity in the room where the floor is laid should be consistent with the humidity of the plywood sheets. It is necessary to wet them before laying and leave to dry in this room. Sheets must be used no more than 50 mm thick.
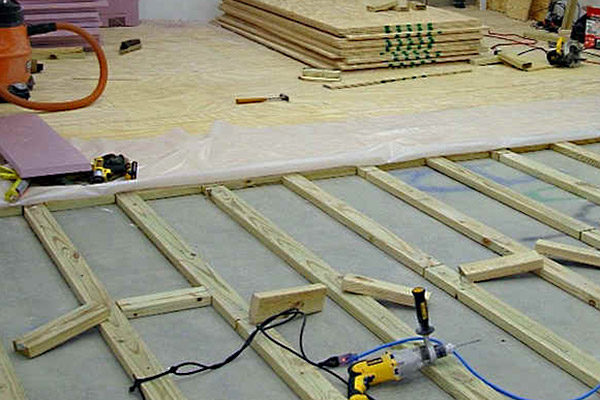
- Lags are installed with a thickness of at least 3 mm and fixed with glue or screws.
- Plywood should be cut into squares with smooth edges and lay on the logs, joining the edges. It is necessary to stack the sheets in a staggered manner and not to allow the joining of four sheets at once. It is necessary to leave gaps of a few millimeters between the squares in order to maintain the temperature balance of the floor.
- Cut the required holes.
- Secure screws with invisible heads.
- It is necessary to provide a double layer of material around the walls, so the GVL or plywood layers near the walls are stacked with a trimmed fold.
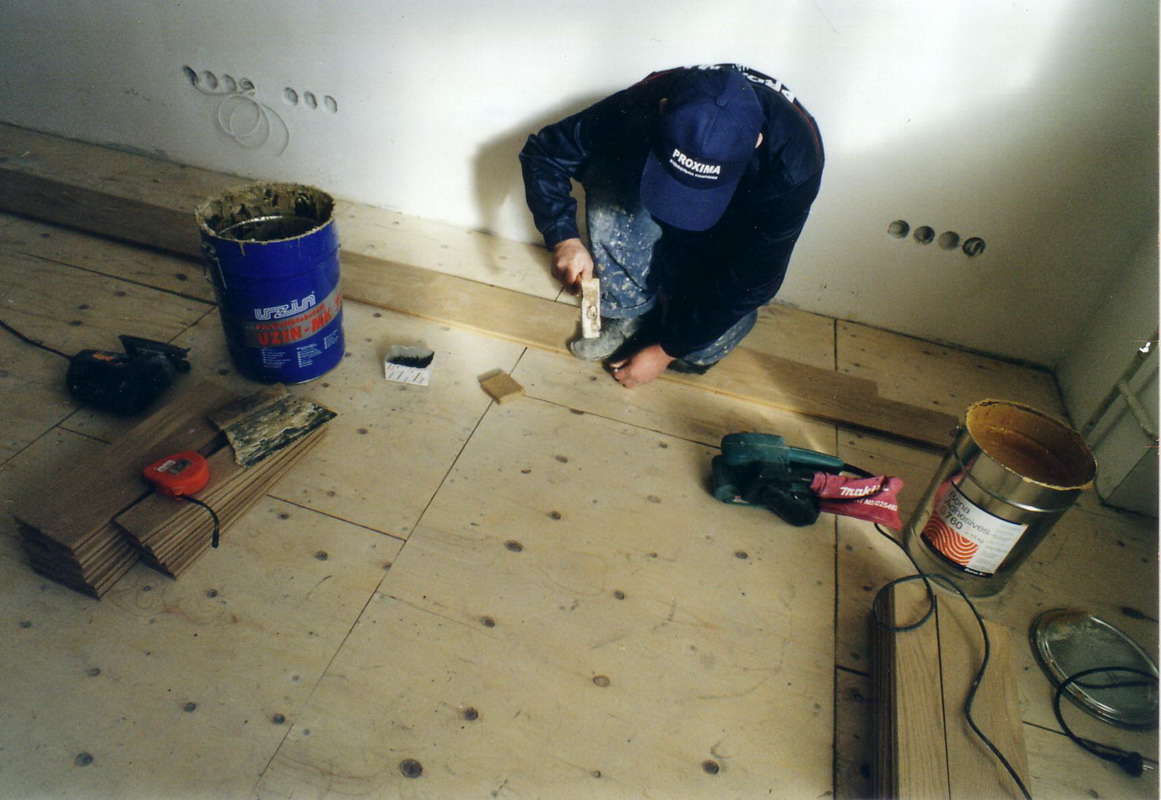
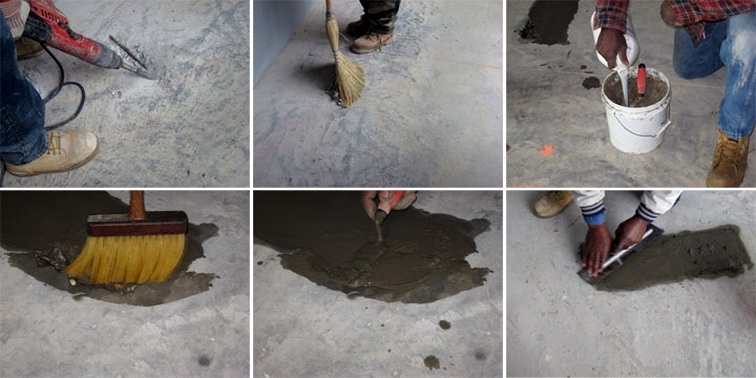
Putty - an inexpensive way to level the floors under the laminate. Having mixed wood sawdust and a mixture of putty based on PVA glue, it is possible to cover a space with large footage, having spent very little time. This is done as follows:
- To carry out the preparatory work, clearing the floor from dirt and dust. Dry sawdust for the preparation of the mixture must be made wet so that they do not dry out quickly and rapidly, as they will take moisture from the putty.
- Next on the floor you need to fill the beacons of wooden slats or sheets GVL.
- The space between them is filled with a solution of PVA, putty and sawdust. Multiple layers can be applied if it is required to fill and align grooves and cracks. Each layer must be set to dry. The thickness of each layer should be 20 mm maximum. Filling a new layer must necessarily begin only after the previous one is completely dry.
- In the process of work, you should constantly check the horizontal position of the surface to be filled with a building level.
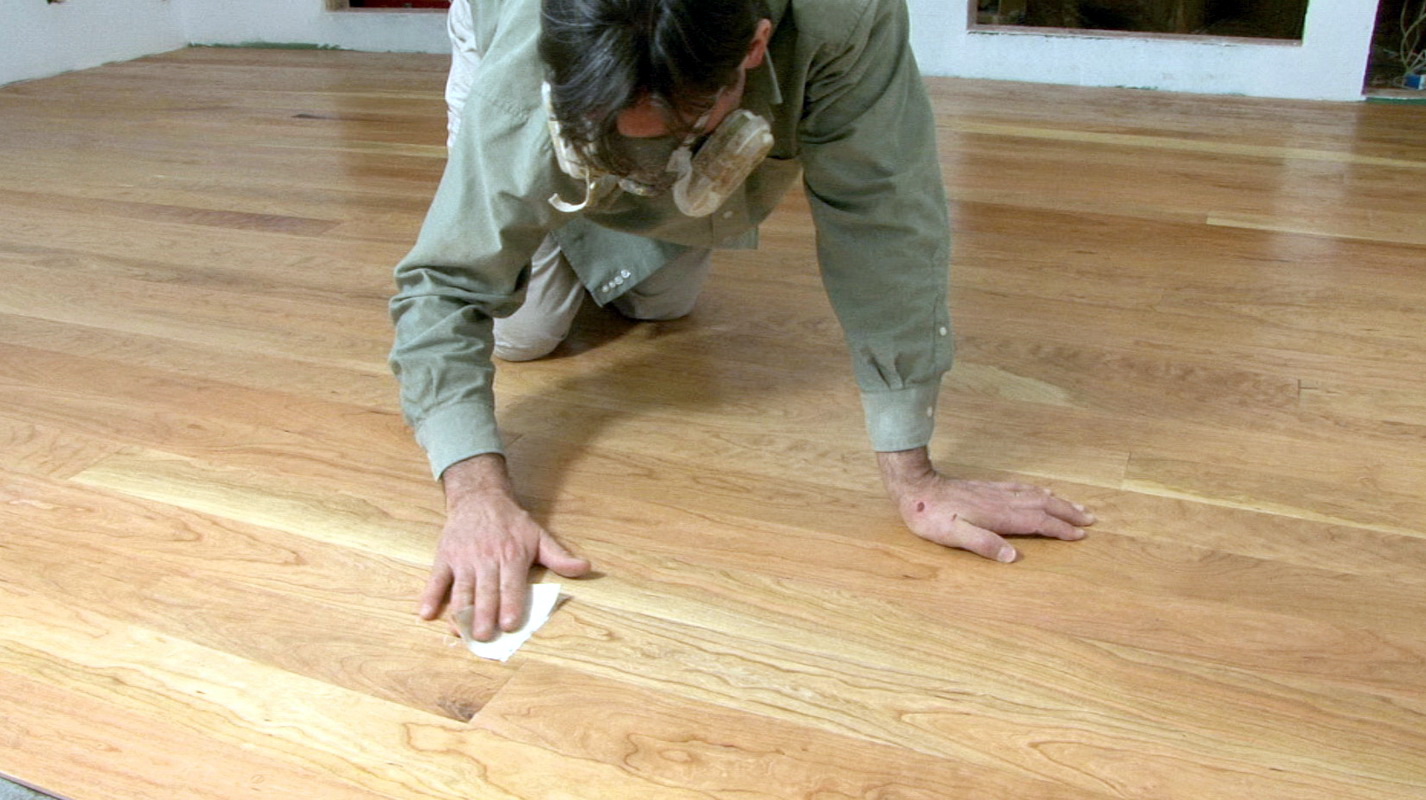
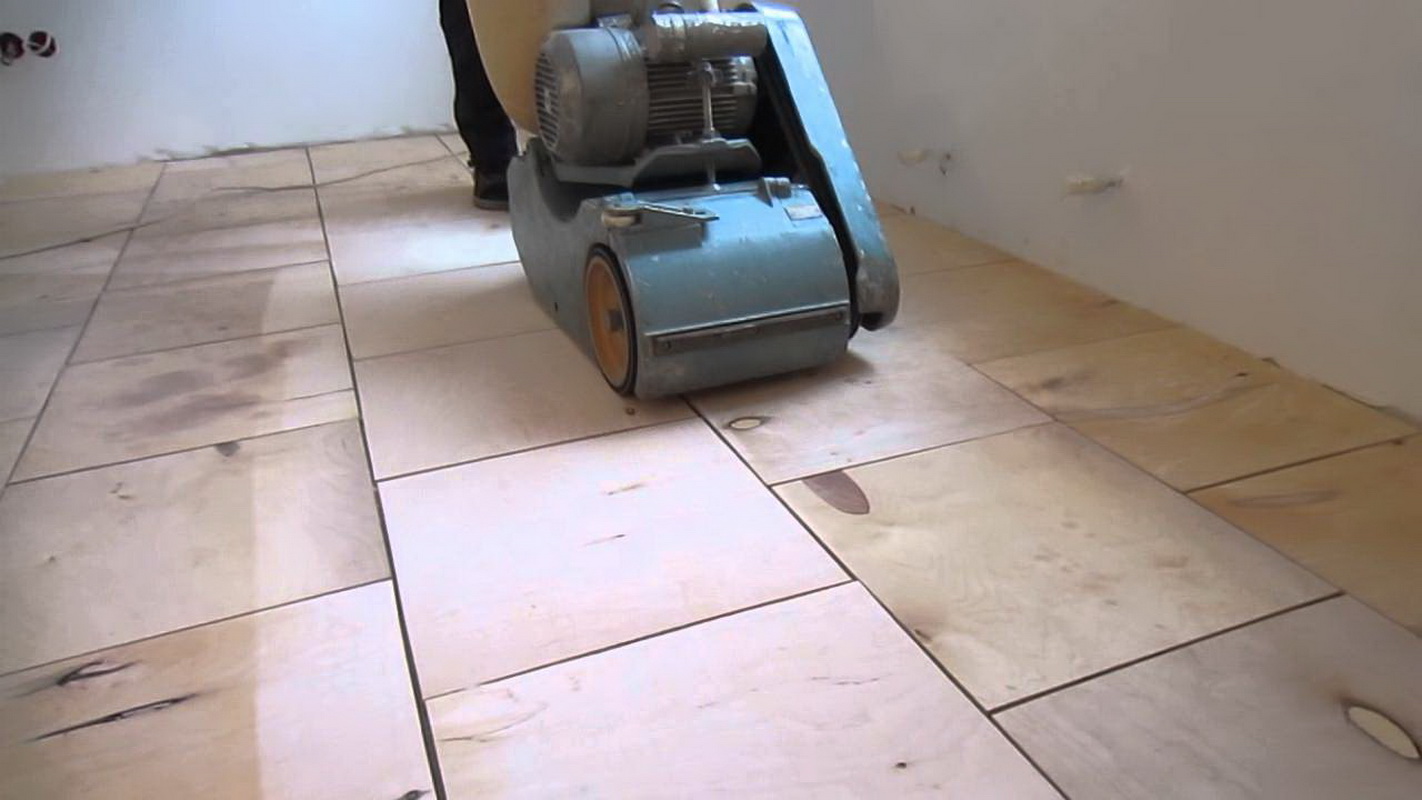
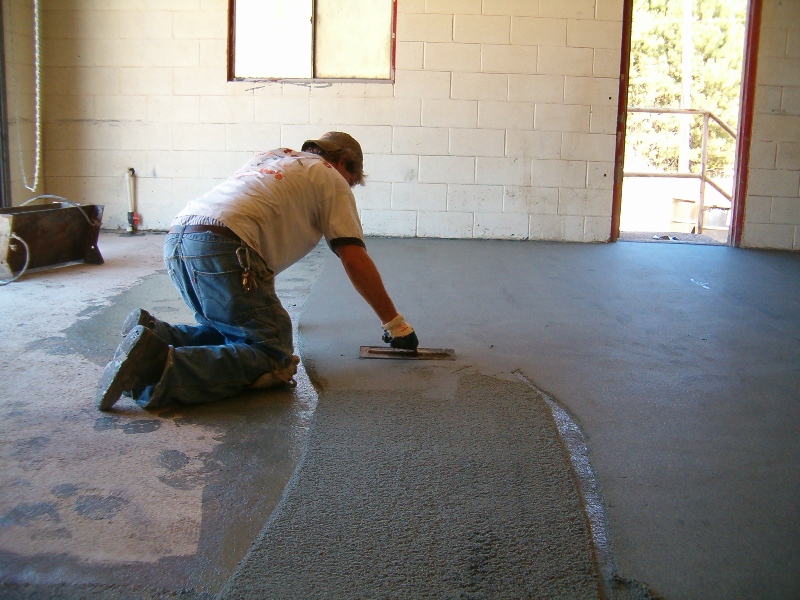
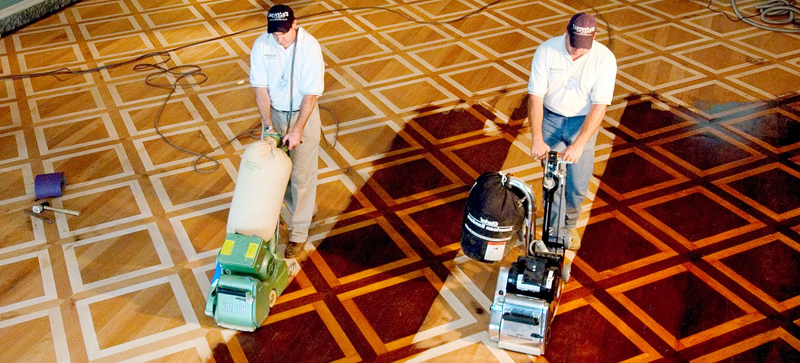
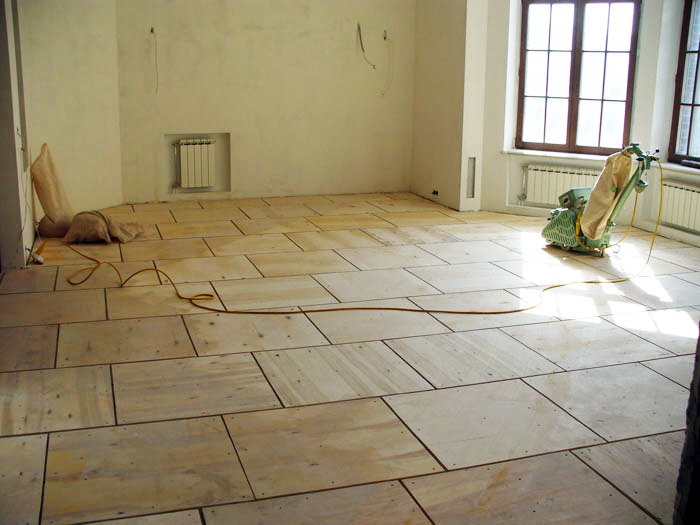
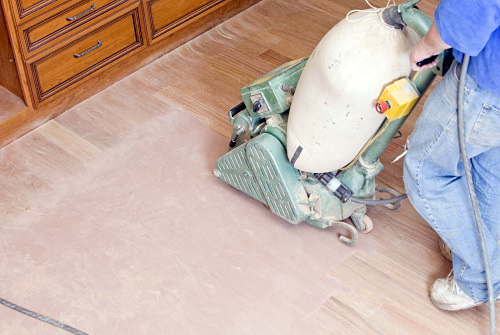
Scraping is an easy way to level the boardwalk.The whole process is carried out using a tsilevalnogo machine, and some places that are difficult to access, you will need to handle a manual cycler. When the floor is reasonably satisfactory, when the boards are not seriously damaged, they resort to this leveling option. The cycle machine will not be able to exclude too obvious relief of the floor, but it will even out minor irregularities:
- The room where the work will be carried out must be empty.
- The floor is checked for defects. Cracks and chips are puttied, as well as various voids between the boards. You can lay their sawdust. Replace broken boards if necessary. Check that there are no protruding nails and staples. You can remove the aged peeling paint with a wire brush. Next, the floor pass abrasive machine and thoroughly washed with water or pure alcohol. Give the tree time to dry.

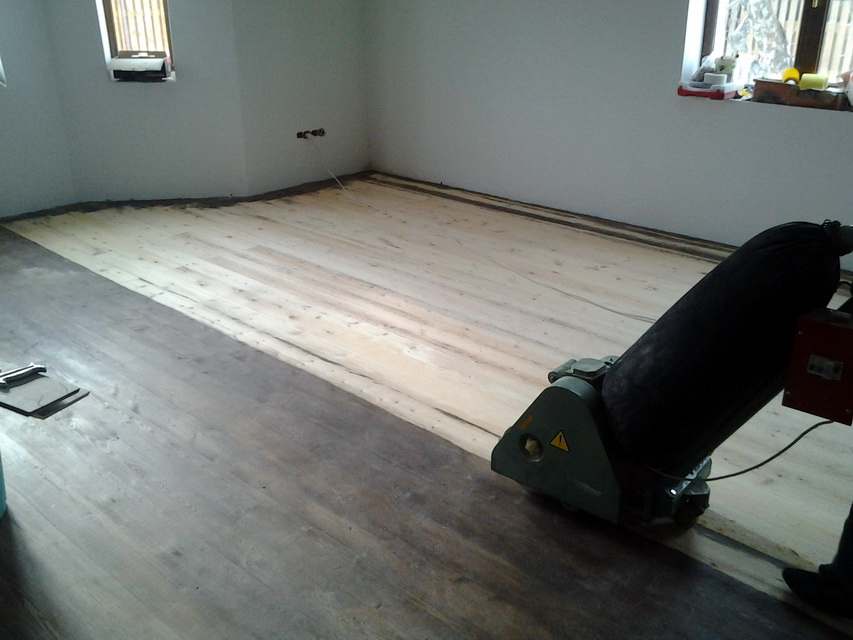
- In the cycling machine, the belts with emery paper are tucked in (the grit size of the paper is reduced with each new layer).
- Begin the process from corner to corner of the room with a snake. The next strip should overlap with the previous one. Finishing to do the work, you should walk with a cycling machine, moving parallel to the plank floor.
- It is important to remember to change the sandpaper and clean it when working with a scraper.
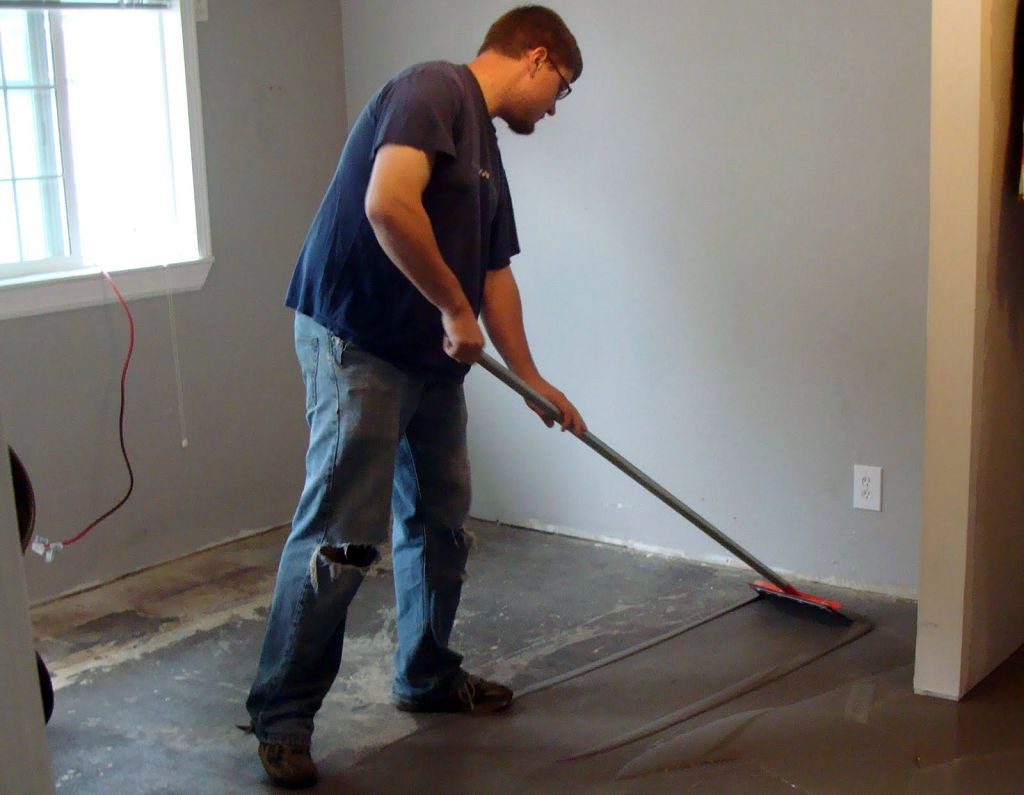
- At the end of the floor, it is necessary to sweep the floor or thoroughly vacuum and then wipe it with white spirit.
- To save the back side of the laminate, you can lay any substrate.
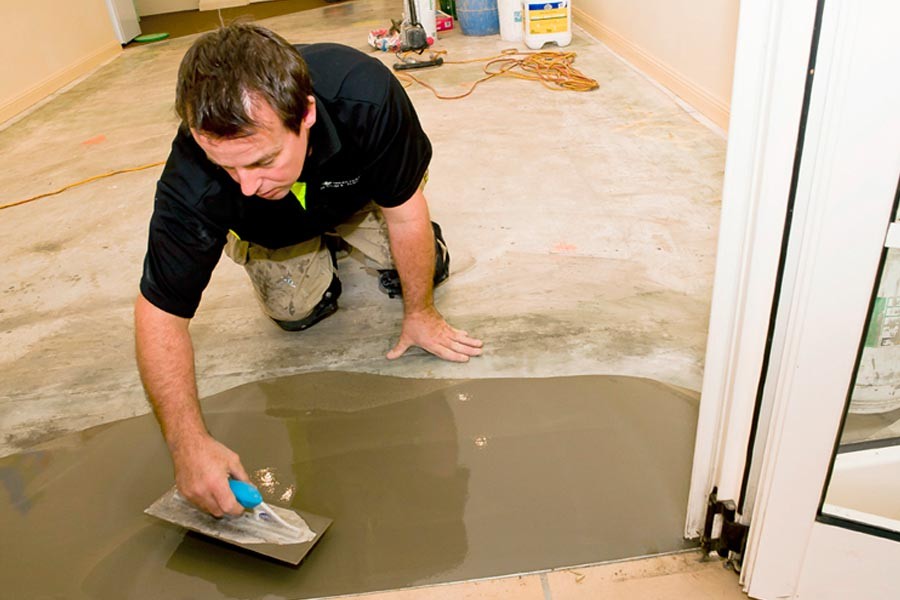
How to fill?
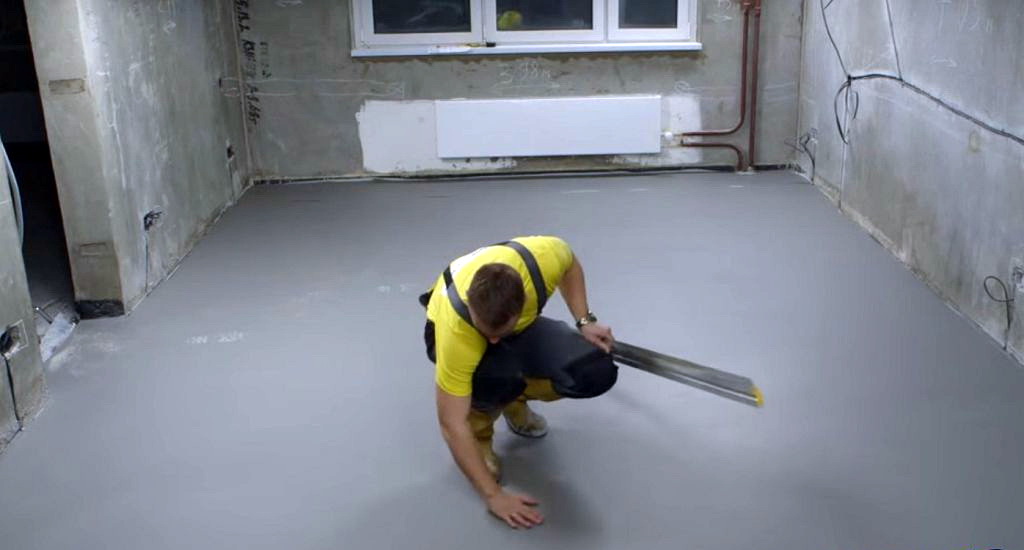
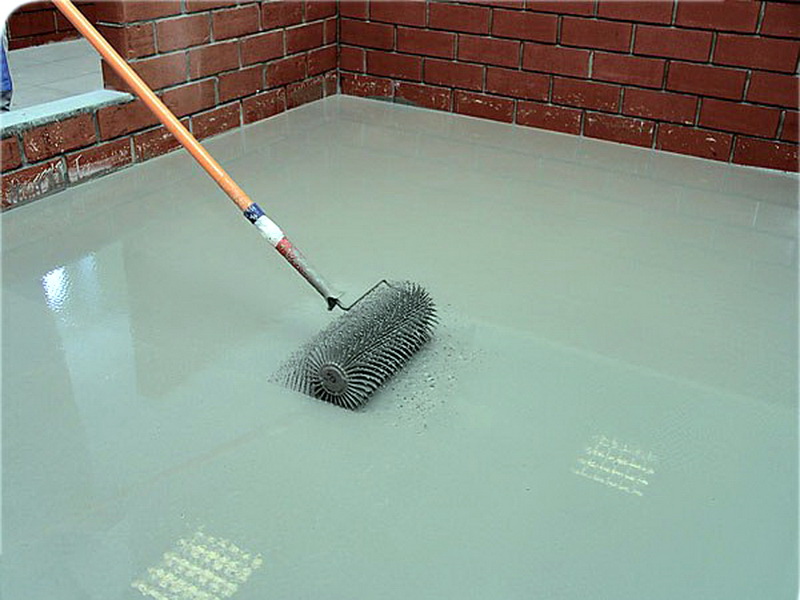
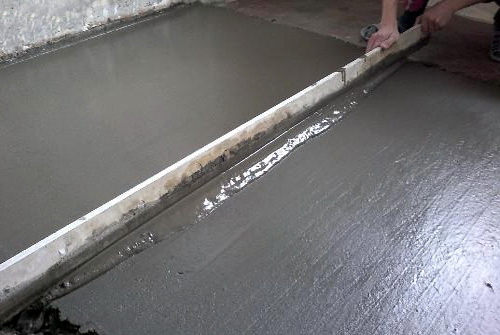
Consider the leveling screed self-leveling compounds. These compounds are often called self-leveling self-leveling floors, seamless polymer floors. It must be remembered that dry self-leveling masses are poured into water, but not vice versa. Use for mixing a special nozzle on a drill or construction mixer. The consistency is kneaded until all the lumps disappear. Next, proceed to the installation.
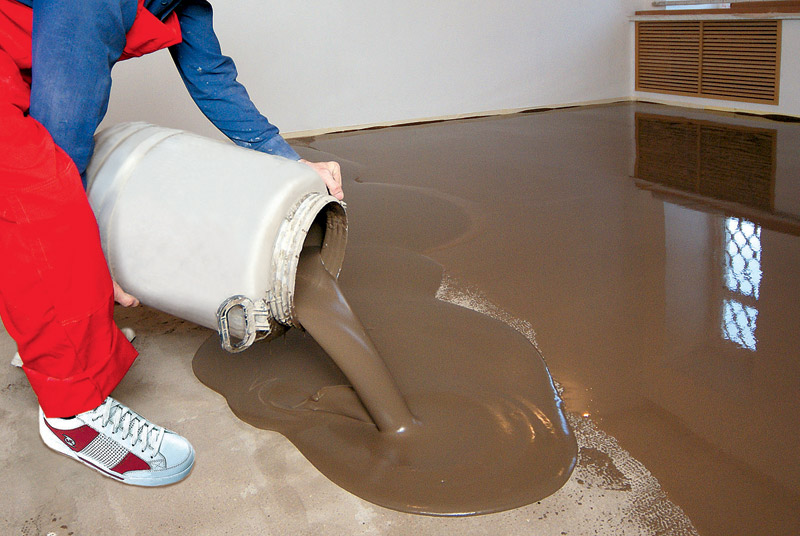
In the case when the area of a room or even the whole apartment is very large, it is necessary to divide it into sections. At the same time they are poured in one period of time - starting work in the morning, do not transfer to another day. Begin pouring from a high base. For faster spreading, spatulas are used and help them distribute the solution over the surface of the base.
The solidity of the pouring of each section must be ensured by the high speed of work, it must not be allowed to dry out of the sections.When filling a new part, the joints should be made with a spatula and smoothly joined to the previous one. So that no air bubbles remain in the solution, should go with a toothed roller or brush.
There is the option of pouring tile adhesive under the laminate. It is expedient if, for example, after the last layer of the subfloor has dried out, cracks have appeared or the areas between the lighthouses have dried unevenly. This happens if the preparation of the composition was performed with violations, incorrectly installed lighthouses or the screed was poorly leveled. Also a layer of tile adhesive can raise the floor level. Cement-sand screed or self-leveling mixture have a minimum thickness of 4-5 cm, and filling them with a small layer, they can crack and peel off. therefore leveling with glue in this situation is the best option.
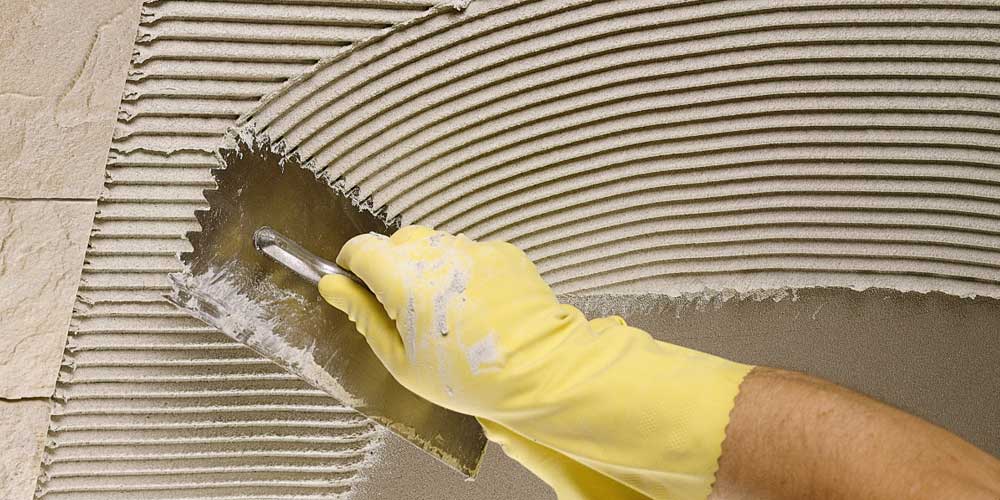
To prevent flaking of the tile adhesive, it is necessary to thoroughly clean the surface of the pouring from the smallest particles of dust and dirt. Next, you need to prime the substrate for better adhesion and allow to dry for as long as indicated in the packing instructions. Then it is necessary to knead the glue solution, following the manufacturer's instructions.For leveling with tile glue it is necessary to use a wedge up to 3 meters long. The solution must be poured in parts or completely, distributing it to the lighthouses with a wedge horizontally.
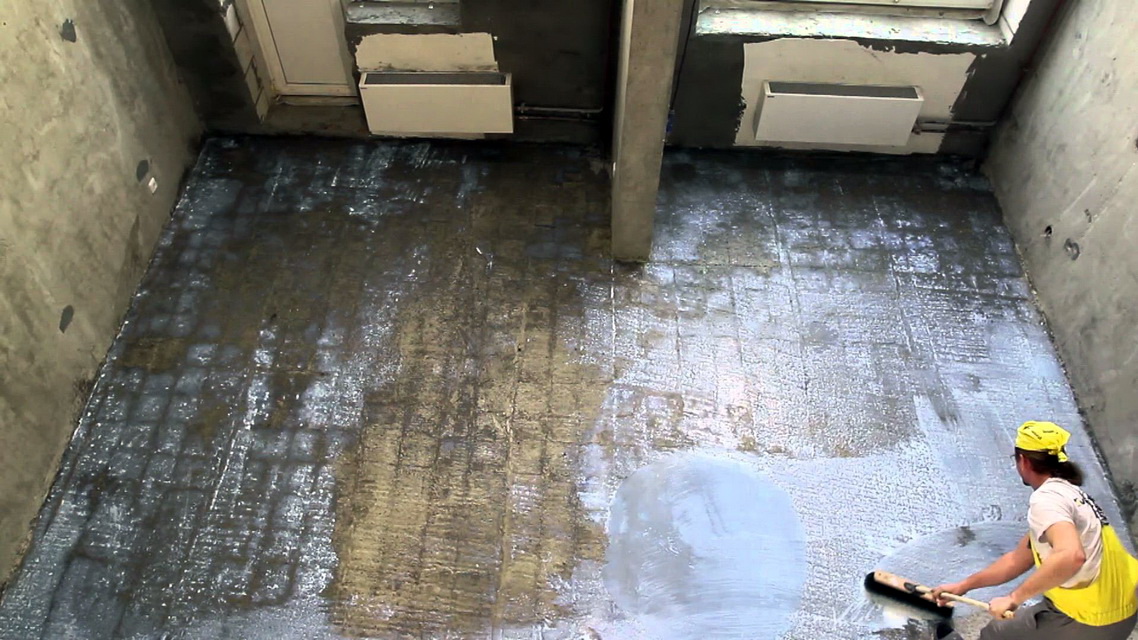
The primer helps the materials to “clutch” with each other, that is, it has high adhesion, which allows us to make the construction strong. The absorption of the concrete solution is reduced due to priming compositions, thereby preventing its cracking.
Warming
We have already said about some types of insulation, but we will try to classify them and understand the principle of proper installation in the floor under the laminate. When constructing wooden floors in established lags, it is possible to choose insulation of appropriate thickness and lay it between them. For example, foam, expanded clay or min. cotton wool. Warming in the form of plates must be fixed. Next, on top of the insulation should be laid plastic wrap, which will create a vapor barrier. For a smoother surface, install chipboard, OSB or plywood sheets, then laminate panels.
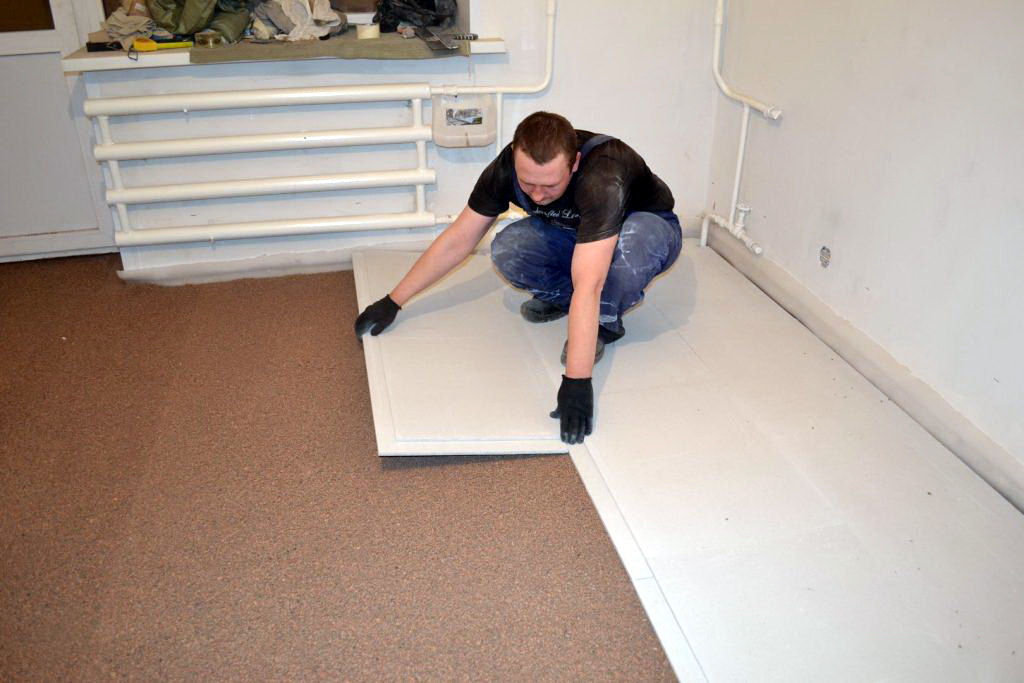
Concrete floors under the laminate can also be arranged with weatherization. If alignment is necessary, you should thinkwhat height should be a layer of insulation. With the new casting of the screed, a fraction of expanded clay is added to it or the slabs of mines are placed under the screed. cotton wool, foam plastic. Self-leveling compounds should be used in the case when there is absolutely no space for insulation and it can be no more than 1 cm. GVL sheets, polyurethane foam, polyurethane foam, and isolon can be put on a concrete surface with a smooth surface. The thickness should be no more than 2 cm. It is also possible to lay the membrane with thermal insulation.
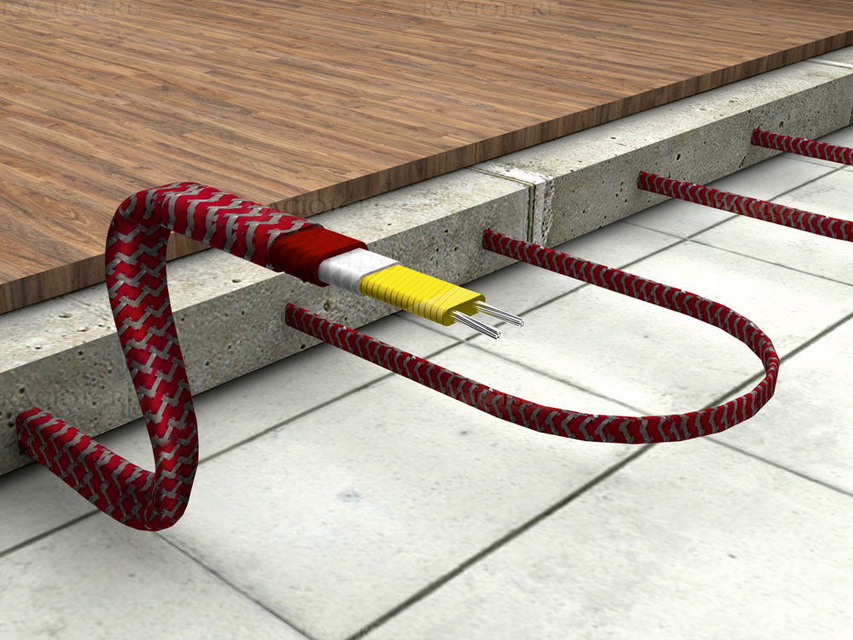
When installing a water floor, metal-plastic pipes are laid directly into the tie with a snake over the entire area of the room. Between the pipe and the laminate panels, the height should be no more than 3 cm in order for the heating to be felt.
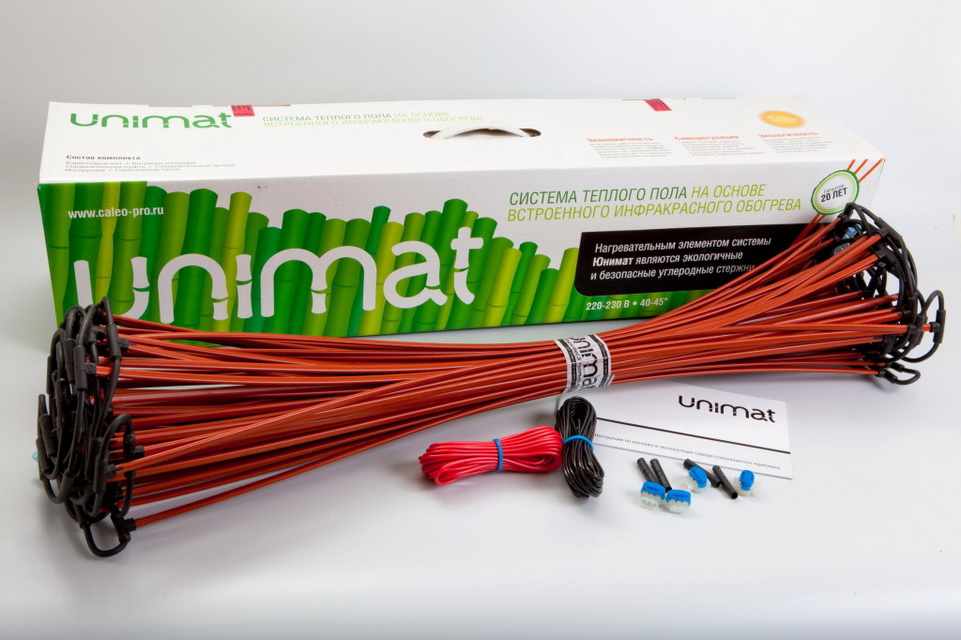
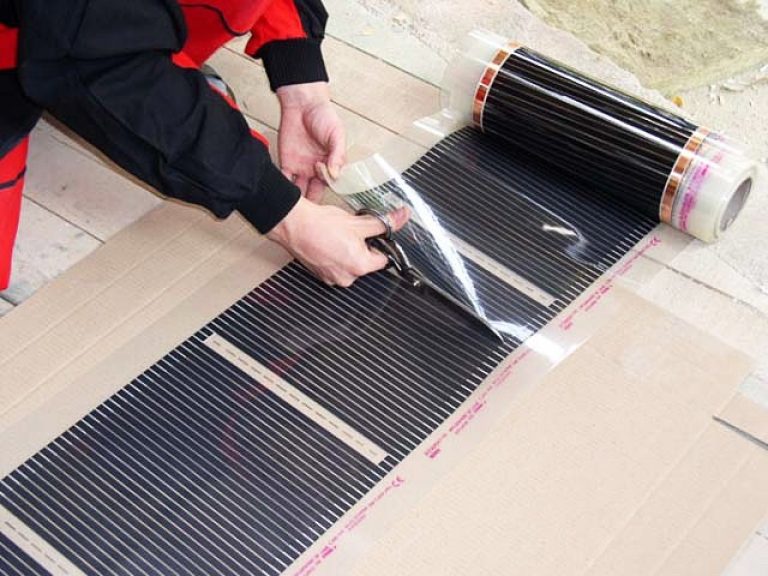
Electric floor can be of three types: cable (placed in a sand-cement screed), infrared film, rod mats. It requires less space than water, is regulated more precisely by temperature.
Successful examples and options
A few examples of surface leveling for floor covering. An example of wooden flooring by machine. Alignment of plywood sheets on wooden lags, floor insulation.The correct scheme for laying plywood on logs in a staggered manner with gaps between the sheets.
Leveling the base of the first layer of the screed on the beacons. Phased fill self-leveling mixture. Step-by-step technology of dry screed made of expanded clay for leveling the floor for laying laminate. Laying polyethylene substrate under the laminate.
From the foregoing, we can conclude that it is imperative to carry out work on leveling the floor before laying the laminate. The service life of the floor will depend on the quality of their own work and the right materials.
How to level a floor under a laminate, look in the following video.