How to make a frame of the profile for drywall?
Uneven overlap in our time will not surprise anyone. Such grounds are difficult to finish, and they do not look aesthetically pleasing.
To solve the problem of uneven coatings help sheets of drywall. In some cases, they are simply put on glue, but most often the plasterboard panels are required to be installed on a frame construction from a profile.
Special features
Drywall is a very popular and common material that is most often used in repair and construction works. Not only various structures are made from it (arches, niches, furniture), but they also use this material to level various bases.
Thus, it is not possible to finish walls with overfalls and prominent sections due to these defects.To solve such a problem, various materials are used, for example, OSB sheets, chipboard panels or plasterboard canvases. The latest options are used most often..
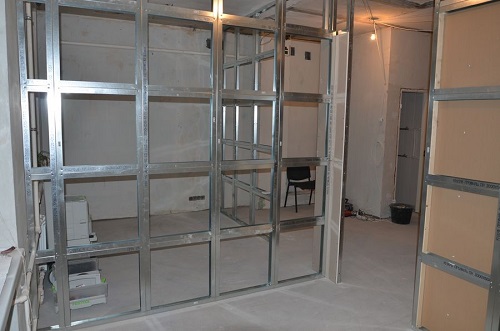
It is not always possible to put drywall on glue, thereby leveling the base. Much more often you have to construct a profile frame, on which in the future and will be attached GCR.
The main feature of this design is that it takes a certain amount of free space. This nuance should be considered if you plan to align the floor in the house. For this reason in very small rooms it is not always possible to equip the frame of the profile.
However, the use of the profile is a priority in installing drywall.
Such designs have many positive qualities:
- First of all, it should be noted that the profile frames are characterized by an ideal geometry. When using a bar, the material often has to be sorted out, due to which a considerable part of it is sent to waste due to kinks. There are no such problems with specialized elements.
- Metal frameworks always remain constant, regardless of the level of humidity or temperature.Wooden parts cannot boast of such properties - in conditions of high humidity the wood swells, and when dried it undergoes deformation.
Any changes to the lathing can cause damage to and cracking of the drywall, so metal foundations are best suited for it.
- Profile bases are durable. The same bar can not boast for a long time. Over time, various damage, destructive fungi and mold can appear on the tree. After 10-15 years, the frame of the timber will lose its former reliability and strength, which is not the case with metal structures.
- It is permissible to install the metal frame practically in any premises, since it is not afraid of temperature drops and other external factors.
- Today, the shops sell a lot of quality fasteners that allow the most tightly and securely fasten the structure on the ground.
- It is quite possible to assemble such a structure with your own hands. Of course, you need to follow clear instructions in order not to make any mistakes, but every master will be able to cope with this.
- With the use of profile cages, ideally even, neat and stable bases are obtained.
- To construct a frame from a profile, it is not necessary to use special expensive tools.
- Profile frame will not cost the master expensive.
- Even if the profile was damaged, it is very easy to restore it.
- Before installing such a structure, it is not necessary to scrupulously prepare the walls.
- Metal profile is not afraid of fire. It does not ignite and does not support burning, like wooden structures.
Profile frames for drywall are not perfect. They have some drawbacks:
- despite the fact that metal profiles are relatively inexpensive, they are still more expensive than wooden parts;
- due to a small number of threads, fasteners may accidentally fall out of the guides, which will adversely affect the stability of the structure;
- metal sheathing can corrode;
- Some frame structures are quite complex, so not every home artist can cope with them on their own.
To make the frame really reliable and durable, you need to buy high-quality materials that do not have defects and damage.Subject to all rules and regulations, the result will be a smooth and tidy surface, which is easy to finish.
Types of designs
The choice of its basis directly depends on where the framework will be installed. For example, one frame is used to assemble a box into a bathroom, and another is used to level the walls or ceiling.
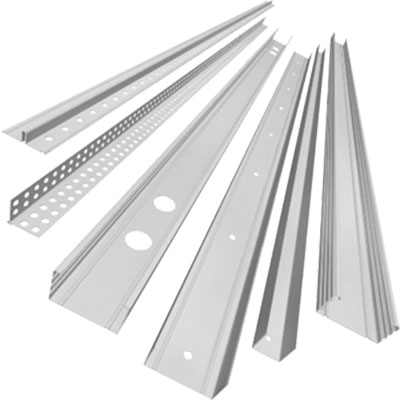
To date, there are several types of profile with certain conventions:
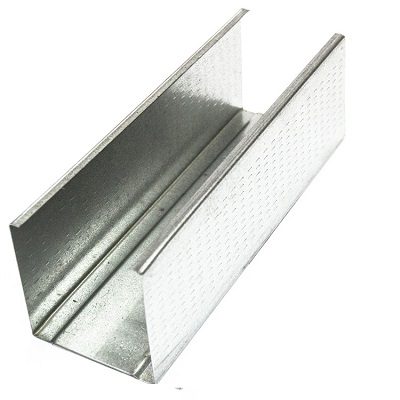
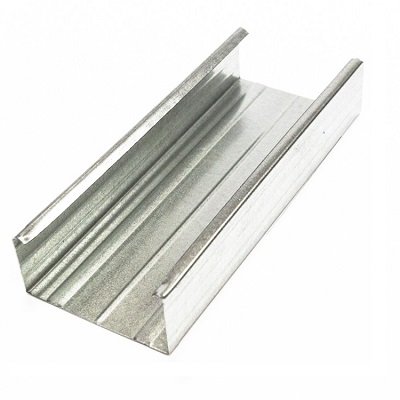
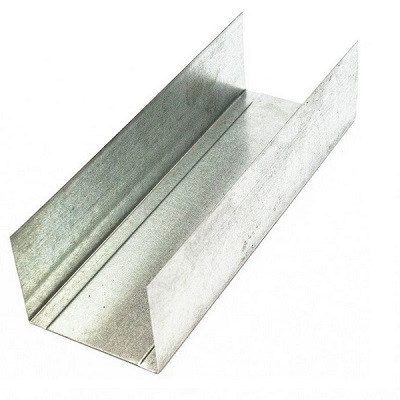
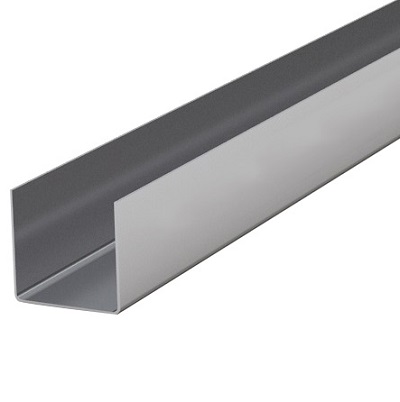
- PS. This profile is rack. It has a U-shaped structure with longitudinal grooves. It is used as vertical racks.
- PP. This profile is a ceiling. It has 3 longitudinal grooves. Plasterboard plates are attached to this material.
- Mon. This is a profile guide, which serves as a frame for the walls. The same element is used in the construction of partitions. The PN profile is fixed both on the floor and on the ceiling, forming as a result a peculiar frame for the future construction.
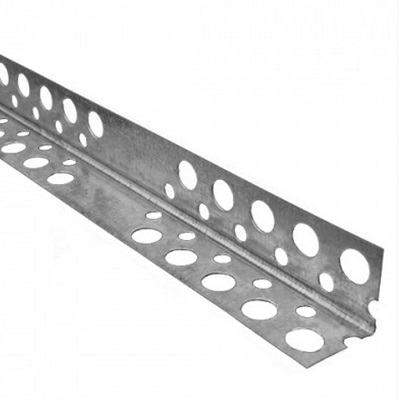
- PU. This is the name of the angular profile, which is designed to fix the corners. PU is external and internal.
- PNP. This is a ceiling guide profile.It is addressed when designing a suspension base. These profiles are attached to the walls and direct the ceiling profile.
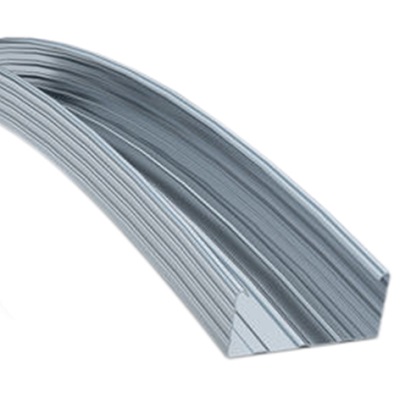
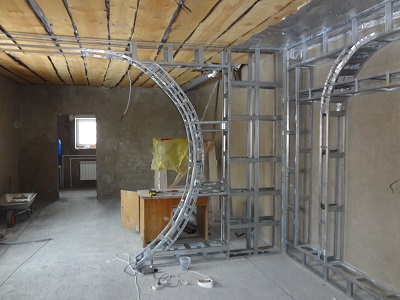
- PA. This profile is arched. It is used to design arched openings. In addition, this type of profile is perfect for arranging complex suspended structures of irregular shape.
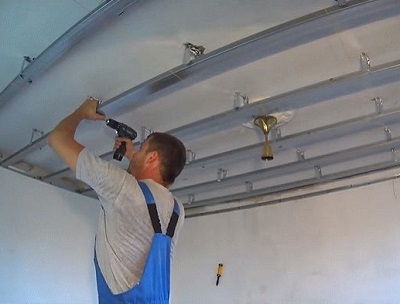
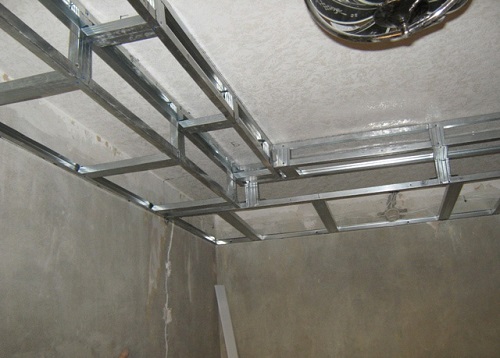
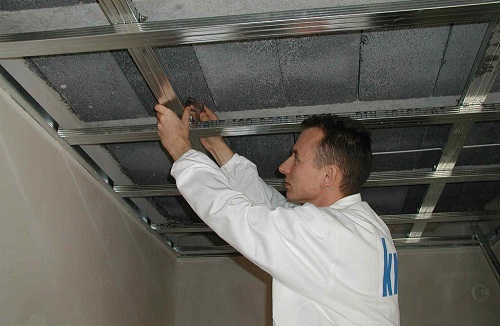
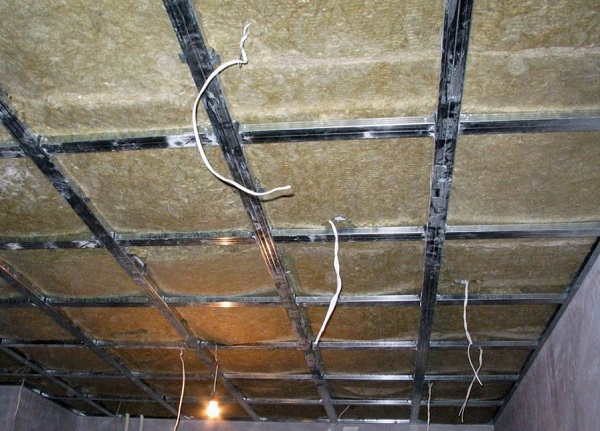
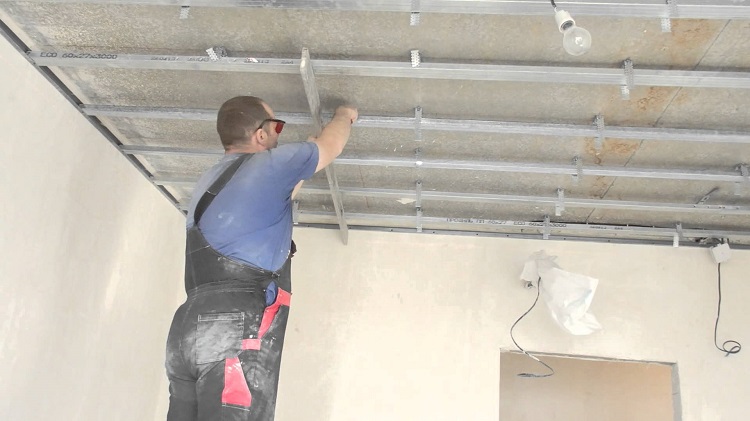
Frameworks are used for plastering not only the walls, but also the ceiling. Ceiling designs are different. The most simple and uncomplicated are single-level frames, which serve as the basis for multi-level ceilings.
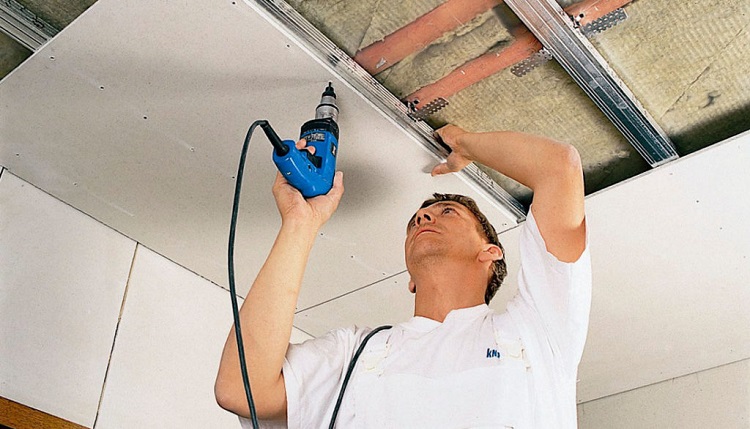
Creating one-tier frames is easy and simple. The main condition that you need to comply with - fasten the frame parts to the base as securely as possible. The final stage in this case will be the sheathing of the batten with drywall.
When installing a single-level design it is extremely important to use high-quality measuring instruments. It is equally important to adhere to the right horizon, as well as to take care of electrical wiring and other communications on the ceiling in advance.
Leave additional space under the light (10-15 cm will be enough).If you follow this rule, it will be easier to install lighting devices.

The main advantages of single-level ceiling frames are:
- preservation of the attractive appearance of the finished surface, despite any changes in the foundation or its shrinkage;
- the height of the ceiling in the room from this design does not change much, which is especially important for compact areas;
- similar designs perfectly hide various defects and irregularities of the ceiling;
- for a single-level frame, sheathed with plasterboard, it turns out to hide the wiring;
- With the help of such facing it is possible to protect a dwelling from the noise coming from the neighboring apartments.
If you are a supporter of more original design ideas, then you will like the multi-level design. These frames are installed on concrete slabs. Then the next level is set for each layer.
Frames for such ceilings are more complex. They are recommended to be made only by experienced craftsmen.. A beginner runs the risk of not coping with such work. Multi-level frames allow you to create beautiful ceiling structures made of plasterboard.
Such details not only decorate the interior, but can also act as an element of room zoning.
Scope of application
Profile frames are used quite often. Such structures are distinguished by reliability and durability, so they are chosen by both beginners and experienced craftsmen when repairing a house.
Consider in what areas today used frames from the profile for drywall. Such bases are used for:
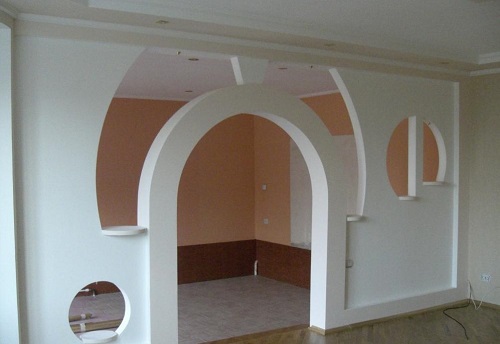
- the construction of arches;
- reinforcement of existing structures;
- sound insulation of the room (insulation can be both internal and external);
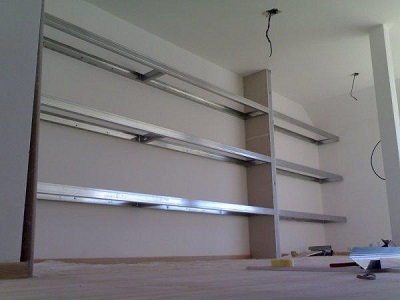
- the construction of shelves and niches of different sizes;
- false ceiling installation;
- installation of the box;
- facing uneven walls or floors with damage;
- the construction of the partition;
- arrangement of door and window openings.
In all of these cases, the profile frame is used, on which sheets of drywall are further stitched.
After all the work is completed, these structures can be finished - painted, pasted over with wallpaper or covered with plaster mixture.
Important nuances
When designing a robust frame made from a metal profile, it is very important to consider the following nuances:
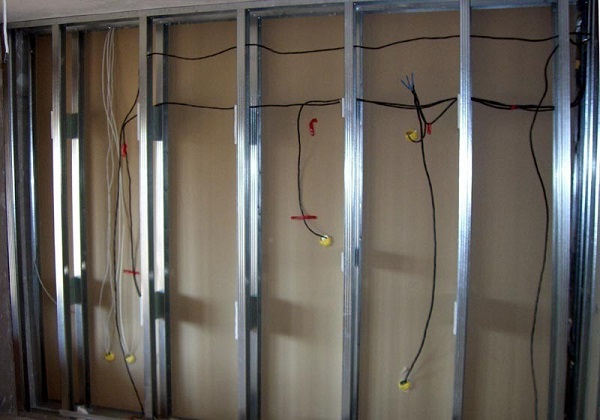
- Before proceeding to the plasterboard cladding, it is important to conduct the wiring of the electrical cable and all plumbing pipes.
- The frame should be as reliable and strong. In addition, it must be tough to handle various loads without problems.
- Plasterboard plates must be installed in a checkerboard pattern.
- All sheets coming after the starting parts, you need to connect in the center of the metal profile.
- Before laying GKL-sheets need to securely fasten the entire frame on the screws. Pay special attention to the corners.
- To make the construction as strong as possible, you should set the angle and also sheathe it with plasterboard canvases, it is recommended to withstand a step of 30 cm in this area.
- For the assembly of the frame it is necessary to use only high quality and reliable materials.
- When making the markings of the ceiling and walls, it is necessary to take into account one important condition: all the joints between the plasterboard sheets should be located directly on the profile.
If we take into account all the listed nuances in the manufacture of the basis for drywall, then the frame will be strong, reliable and durable.
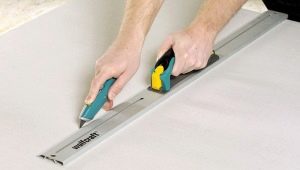
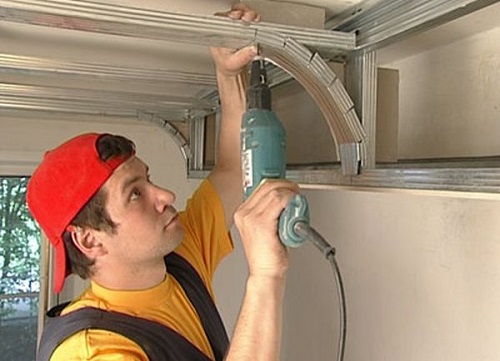
Instruments
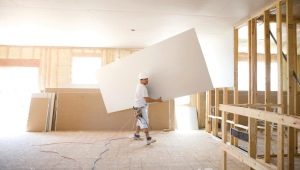
The frame construction for the installation of sheets of drywall can be made by hand. To do this, you need to stock up with all the necessary tools and accessories.
These include:
- hammer;
- ruler;
- roulette;
- dowel;
- perforator;
- pencil;


- plumb with a load;
- screwdriver;
- self-tapping screws;
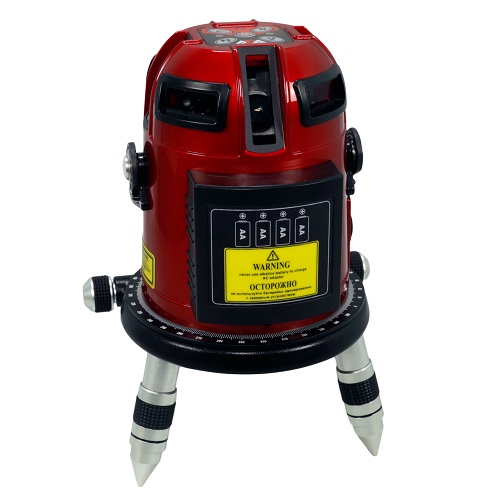
- bubble or laser level;


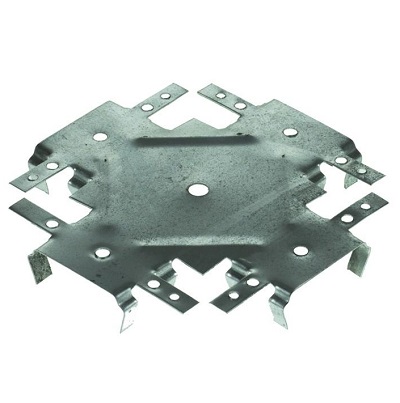
- cross and straight connectors;
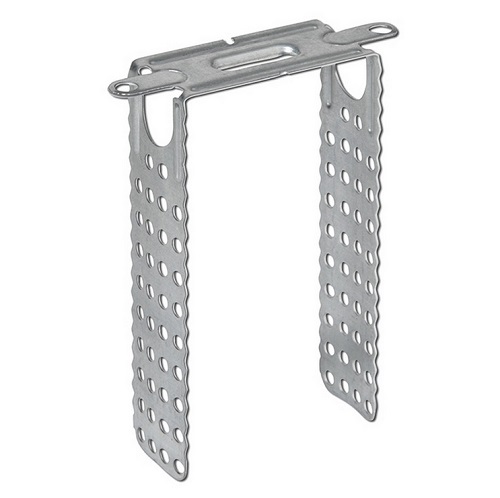
- suspensions;
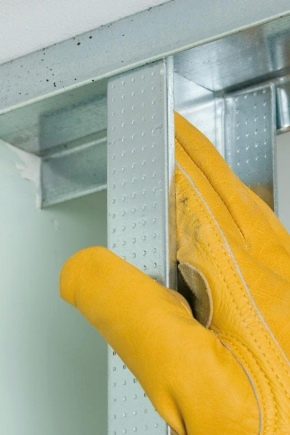
- metal profiles.
For work it is recommended to purchase only high-quality and reliable tools. With the use of such devices work will be much easier.
As for the metal profiles, here it is very important to buy copies without damage and creases. Be sure to carefully inspect these parts before paying - it will be very difficult to work with deformed guides, and the result may upset you.
Subtleties of installation
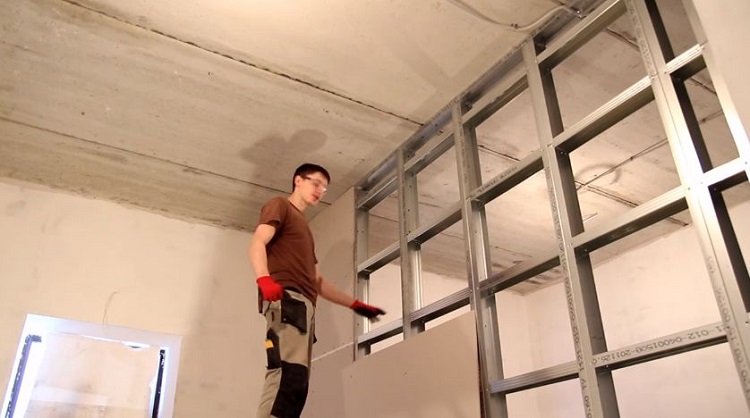
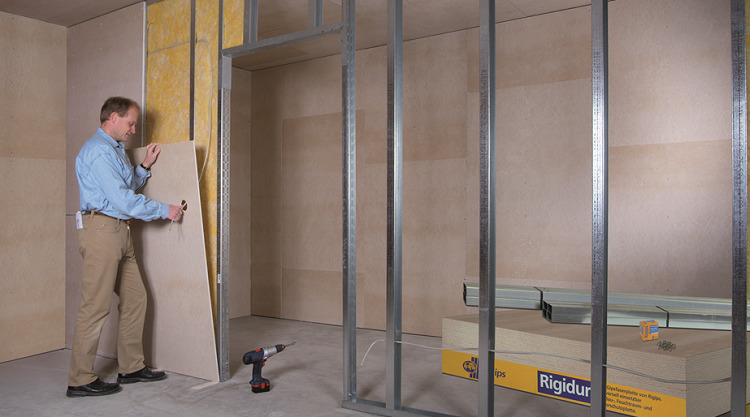
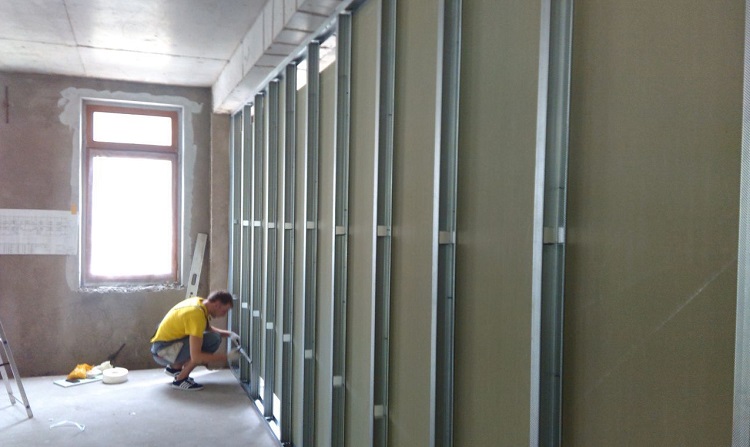
If you stocked up with all the necessary materials and tools, then you can proceed to the direct construction of the frame of the profile.
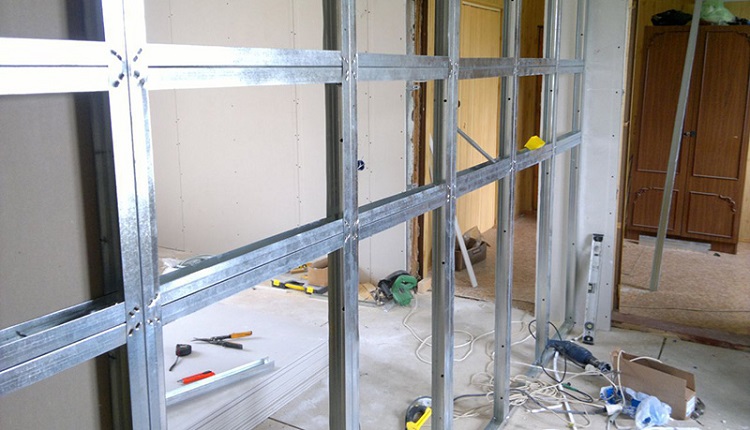
Consider the step-by-step instructions for the installation of profile frames on the example of the arrangement of the partition:
- We must assume that the partition must have sufficient rigidity. This is especially important if the frame structure does not rest on two main walls.
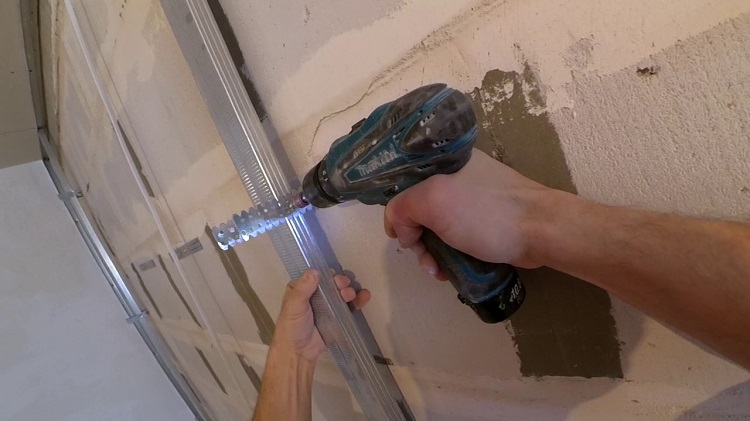
- Work should begin with mounting guides. To do this, use a dowel with a screw and stick to a step of 40-50 cm.
- Next you need to install vertical racks. They are fastened to each other with special horizontal ties.
- Racks are fastened face to one of the wall floors.

- In the end, it turns out that both sides of the partition will have an edge, which is necessary for the installation of drywall cloths.
- If you want to insulate the structure or close the communication in it, then you need to select profiles of appropriate sizes.
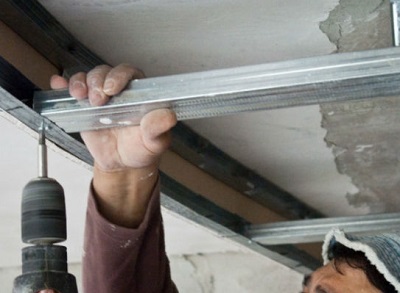
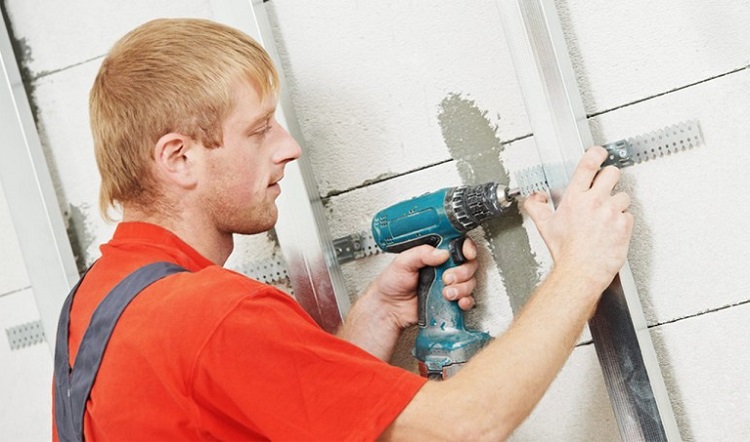
- All components of the frame construction are fixed with metal screws.
- In the side parts you need to install a wooden bar of suitable dimensions in order to make the construction more robust and reliable.
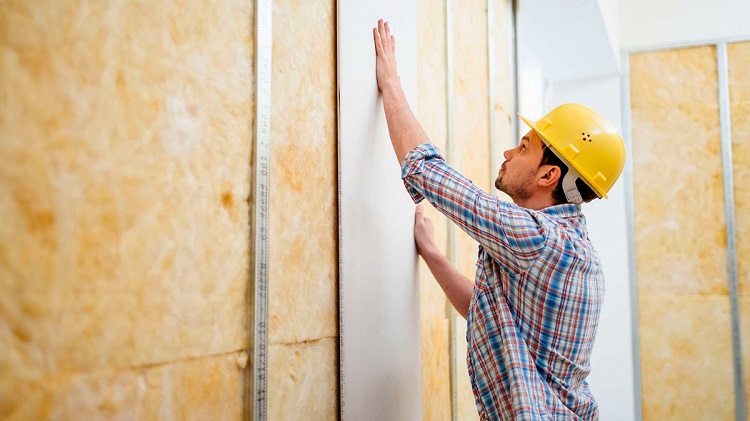
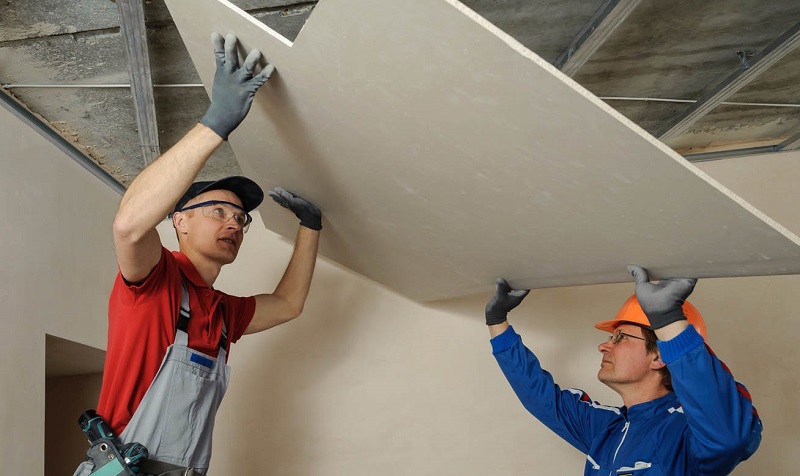
After that, you can proceed to the stacking of GKL-sheets.
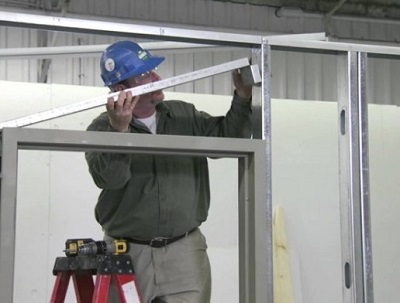
If you are constructing a frame in the doorway, then you should follow other instructions:
- First you need to assemble the door frame with a pre-installed door leaf.
- Insert the wedges of fiberboard or hardboard to get the necessary gaps.
- Next you need to set the rack adjacent to the doorway. They need to be fixed in a vertical position and additionally strengthened with a block of wood.
- Then you need to apply mounting foam and fix the box with screws.
This method of constructing the frame is considered to be quite complicated, but it is best suited for those cases where the opening was not originally provided.
When arranging the light window, you need to consider the following nuances:
- you must first install 2 horizontal jumpers: one - on top, and the second - on the bottom;
- vertical racks are recommended to add wooden mortgages.

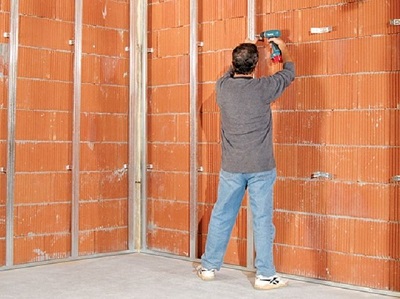
The easiest is the construction of a frame on the walls. Let us consider in detail how to correctly mount this structure on this basis:
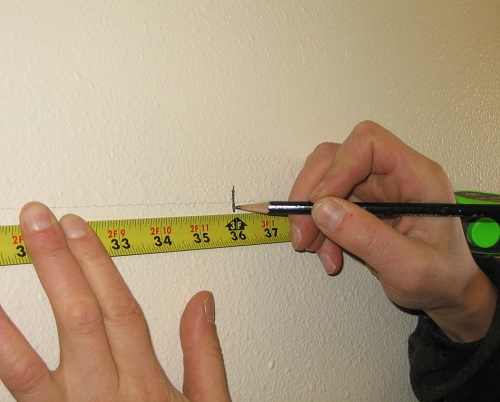
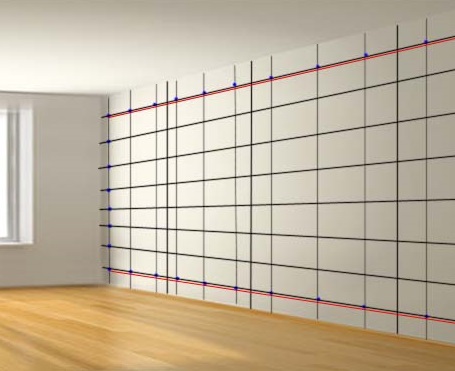
- First you need to apply the markup. It is desirable that the profile is located as close as possible to the wall. However, this rule is no longer valid if you plan to insulate the structure.
- The markup must start from the floor, and then transfer the necessary data to the ceiling.
- After that, you can go to the marks on the side slabs and the main surface.
- Do not forget that the pillar profile step should be from 50 to 55-60 cm.
- Next you need to do the reaming under fasteners. At this stage, you can immediately install the U-shaped brackets.
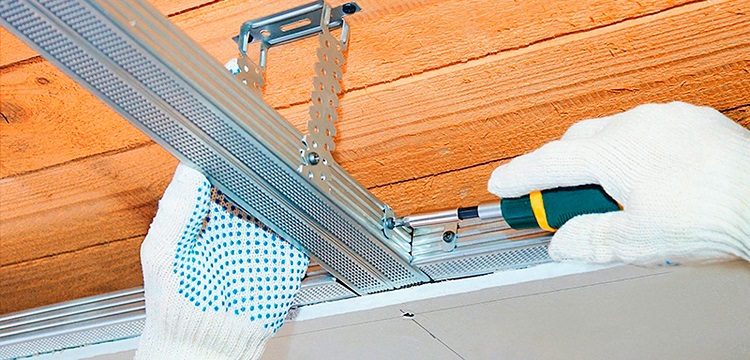
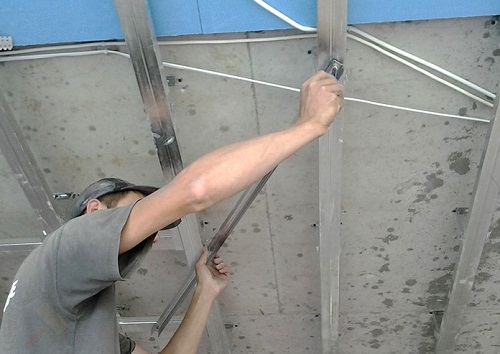
- After that, all components of the batten should be secured. First, a guide profile (PN) is put in order to obtain a closed-type structure into which rack profiles (SP) will be inserted.
- Use metal screws to fasten the profiles to each other (from above and below).
- Rack mount parts must be attached to hangers.
Suspensions are often outside the profile. The protruding elements need to be bent inward, so that there is no interference to the installation of drywall sheets.
If you want to make the frame more rigid, you need to use horizontal ties. They can be made from the metal profile itself, which must be cut in accordance with the required dimensional parameters. However, you should leave a small margin. Special attention should be paid to the fastening of these parts.
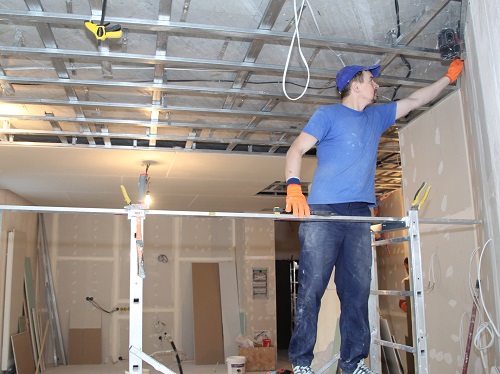
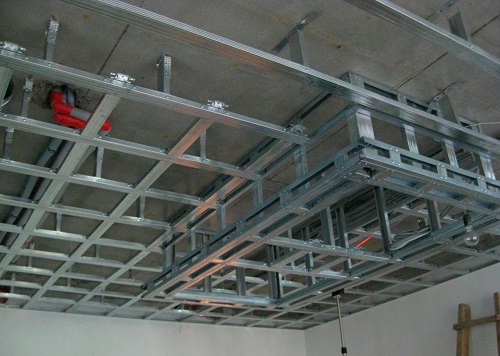
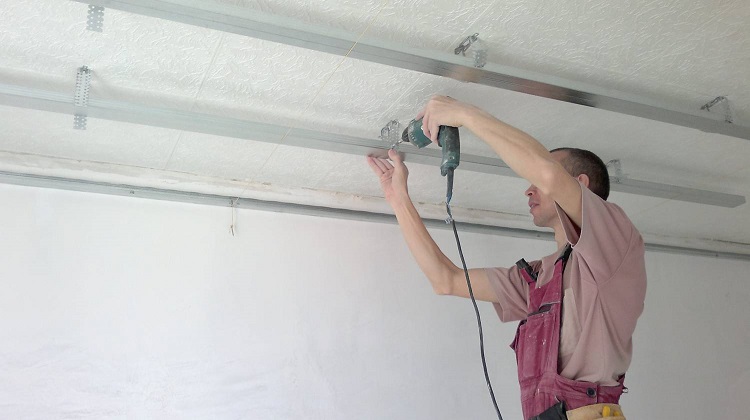
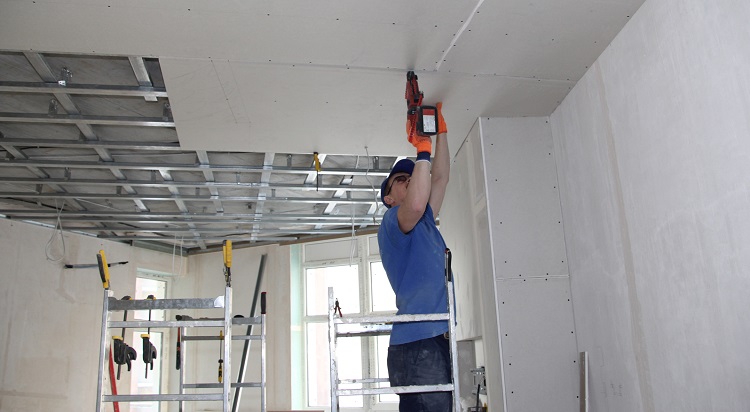
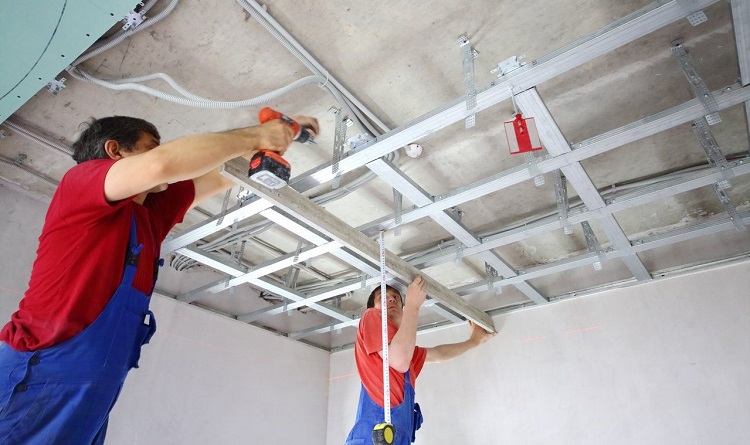
As mentioned above, drywall often sheathes the ceiling, creating a single-tier and multi-tier structures.For their manufacture is also necessary to make the frame of the profile.
His device must be made as follows:
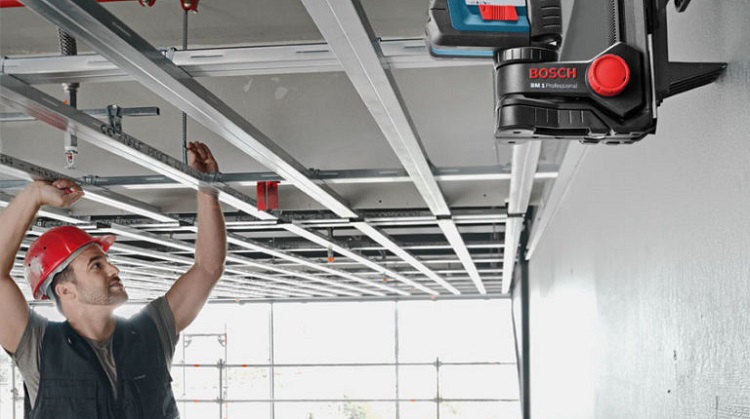
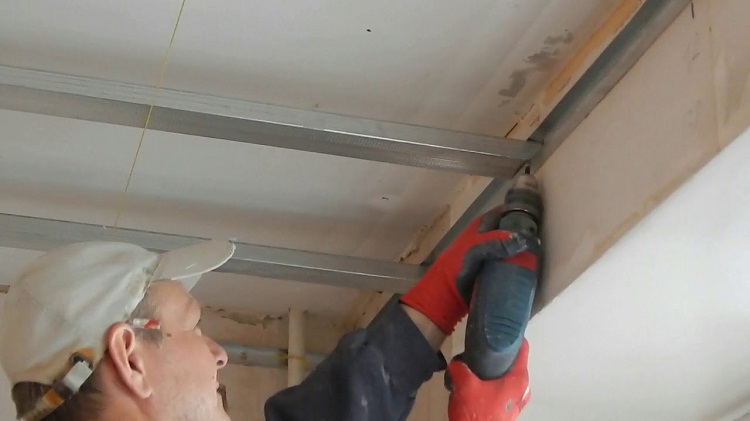
- First, it is necessary to perform the calculation and mark the ceiling at the attachment points of the suspensions on the ceiling. At the same time, it is necessary to maintain the distance to the walls and the next element at 120 cm.
- Thus, a fastener line is created for the main profile parts.
- There must be a distance of 50 cm between the carrier rails.
- The carrier profile, which is closer to the wall, should be set 10 cm from the ceiling, and the next one - 40 cm from it.
- Suspensions should be fixed to the ceiling with a smooth side. Apply a sealant tape to these parts in advance. Leave a distance between them of 1 m, and between the rows - 120 cm.
- Next you need to firmly secure the ceiling profile. If its length is not enough, then you have to independently increase (that is, lengthen) this part with an extension cord.
- Next, you need to install guides between the carrier profiles. One edge of the profile does not need to be fixed at all, and the other is placed in the "crab". In this case, the marking of the location of these parts is applied to the wall in order to then properly hem drywall.

As you can see, assembling a drywall mounting frame is not as difficult as it may seem. The main thing is to work without haste, and also to connect all the necessary parts together most reliably.
If it seemed to you that you will not be able to cope with such work yourself, it is better to turn to experienced craftsmen who will construct a profile construction in a short time.
Tips and tricks
- Installation of the frame and drywall is preferably performed in conjunction with an assistant. In addition, it is recommended to use sheets with a side of no more than 90 cm.
- When purchasing profiles for frame construction, it is necessary to pay special attention to their purpose. For example, for the design of the walls can not be used guides intended for the ceiling (and vice versa).
- When assembling and installing the frame, the grinder cannot be used, since the torque of this tool is very high, and the galvanized profiles are not very thick. Because of this, the material being cut off heats up very quickly and deforms.
- Before proceeding to the installation of a metal profile frame, you should complete all the work related to communications that you plan to “hide” in the future for drywall.Draw all the wires in advance, mount the sockets and other necessary parts.
As for the wiring under the lamp, it is better to leave it with a small margin so that it is more convenient to connect the device.
- In the process of marking on the walls or ceiling, one important condition must be taken into account: all joints between gypsum plasterboards should be on the profile.
- After mounting the metal frame, an annoying rattling sound may appear. In order not to face such a problem, it is necessary to glue a sealing tape between the surface and the guides.
- Particular attention should be paid to partitions in which the arrangement of the doorway is planned. In this case, the lower guide must be cut, and additional vertical posts should be installed.
- Separately measure the length of each element of the structure, since the structure of the rooms in modern apartments is rarely perfectly correct. When measuring, reduce the distance between the floors by 2-3 cm.
Partition frames do not need to be attached to the walls, so the cells in them should be small. Experts advise to form them from squares with a side of 40 cm.In this way, you can achieve optimum structural rigidity.
- To calculate the pitch of the frame, you need to rely on the dimensional parameters of the sheet of drywall. Each part must be securely mounted on 3 rack or ceiling profiles.
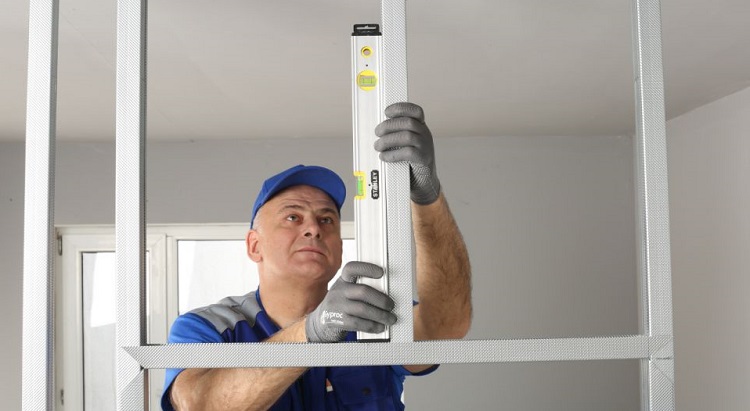
- When you construct a frame on the walls or ceiling, it is especially important to ensure that the corners between all the structural elements are perfectly straight. For this you can use the square.
- Attach the profiles to each other and fix them on the base / suspensions using screws with press washers.
- The connection of all necessary parts of the frame should be made as reliable and strong as possible. Thus you will make the design as strong as possible.
- When finishing the steps of stairs, a special angular profile with sliding is used. This element has an anti-slip surface, thus it ensures the safety of the structure as a whole.
- Profiles allowed to dock with a small overlap. In this way, gaps on the base can be avoided.
- Always clearly adhere to the framework design technique. If we neglect one or other stages in the work,As a result, the construction may turn out to be incorrect and will not last for so long.
- Always install ceiling structures on hangers. Their smooth side should be pointing down. It is in this case that it serves as the basis to which the GCR will be installed.
- In no case should a multi-level ceiling be left without suspensions. This design can lead to cracks over the entire surface of the ceiling.
- Always attach drywall sheets with the right side. For example, if you incorrectly install moisture-proof canvases, this may adversely affect the properties of the finished coating.
Beautiful examples
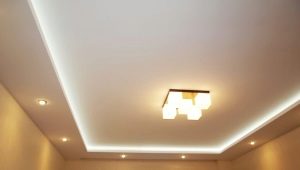
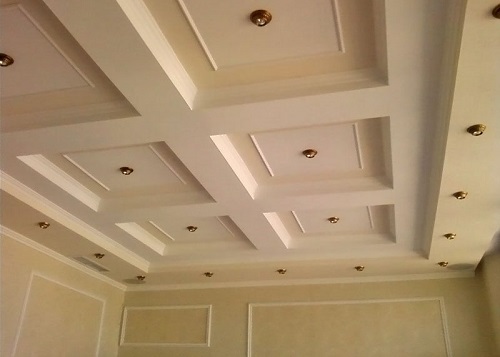
From drywall, hemmed to a frame basis, it turns out very spectacular elements that adorn the interior. For example, it could be a multi-level ceiling with multiple square-shaped grooves. Such a finish will look expensive and aristocratic, especially if you make it white, cream or beige.
From the frame structure with gypsum plasterboard you get very attractive and original partitions. These elements may have end-to-end “windows” of figure shape.
Often they place small shelves of plaster.
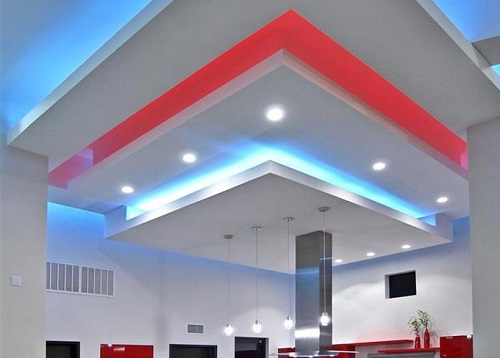
Multilevel ceilings with LED lighting look especially bright and impressive. If you want to bring a zest to the interior, it is possible to place ribbons of different colors on each level and reinforce them with spotlights. However, it should be borne in mind that such designs look organic only in large areas with high ceilings.
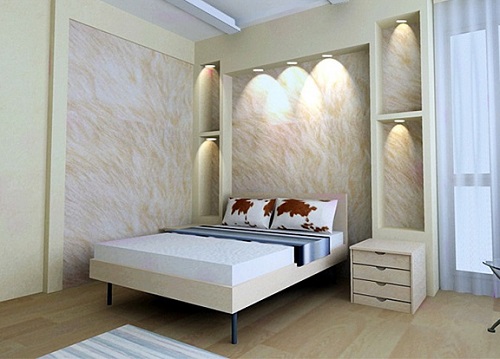
Made from plasterboard, hemmed to a metal frame, You can build a very beautiful niche and place it above the headboard. Recesses in this design should be equipped with recessed lights.
Note that for the bedroom too motley and bright niche will not work. Stick to more neutral and soothing shades.
See how to make a plasterboard ceiling in the video below.