How to make a box of drywall?
Practically in every major overhaul, and sometimes even in cosmetic, a situation arises in which it is necessary to hide some kind of communications or other devices “into the wall”. Often this applies to bathrooms, kitchens and corridors.
It is mainly about pipes, but sometimes it is necessary to hide the structural features of a building, for example, beams or columns. Most often, this problem arises on the secondary housing market in model homes that were built without regard to aesthetic beauty or special amenities.
Appointment and placement
In order to improve the room and avoid visual or other inconvenience, there is a very simple way to solve the problem: sew it into a plasterboard case.But it is not necessary to dwell on drywall: there are plastic panels, chipboard, and other materials to solve such situations, but the peculiarity of such materials is that they are well suited for something more specific. But drywall is a universal means to solve this kind of problems.
From its advantages, it can be emphasized that it is better suited for processing and performing non-standard tasks arising during repairs.
When choosing further finishing materials drywall is more versatile, because it allows you to use almost all types of finishes.
You can put in a drywall box:
- Luke;
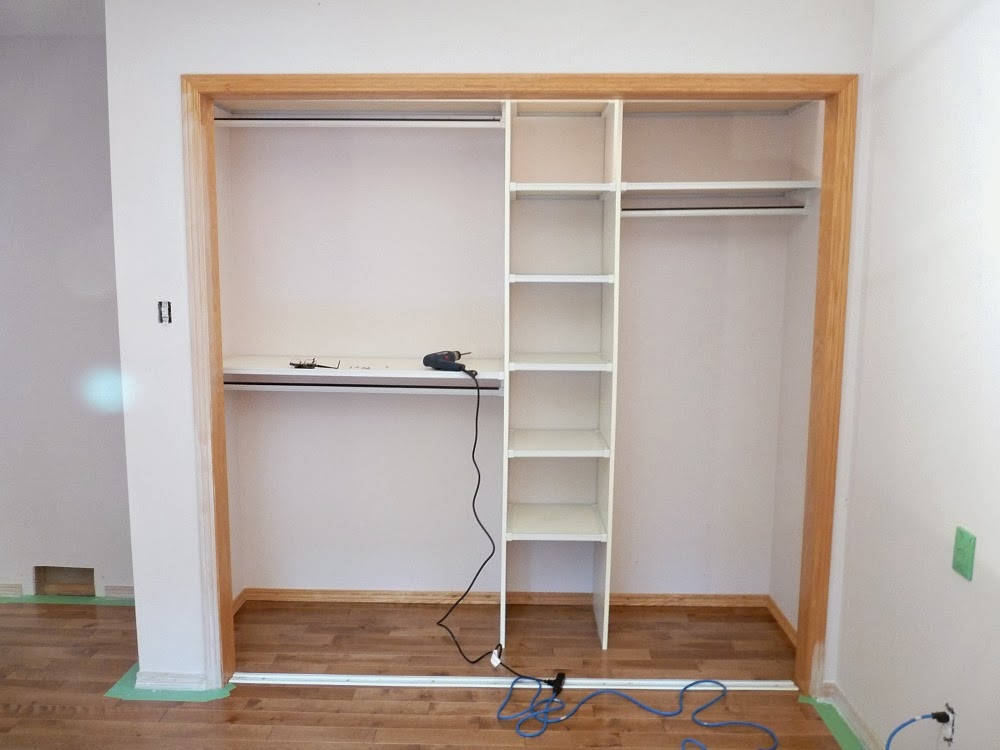
- closet;
- television;
- shell;
- curtains under the eaves at the top;
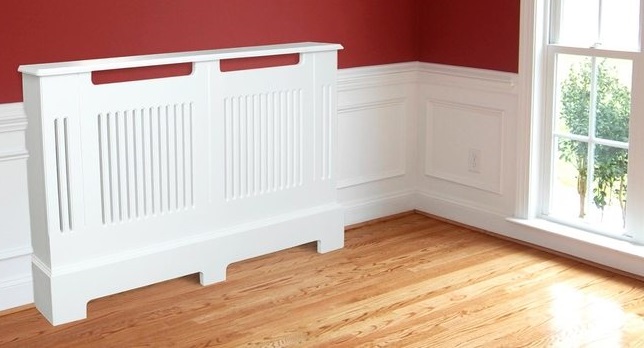
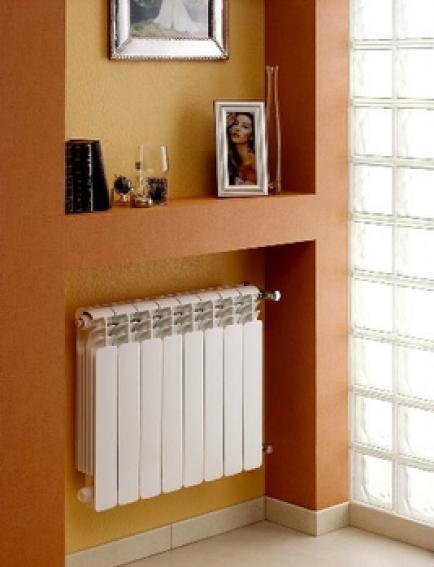
- radiators;
- LED backlight;
- installations and so on.
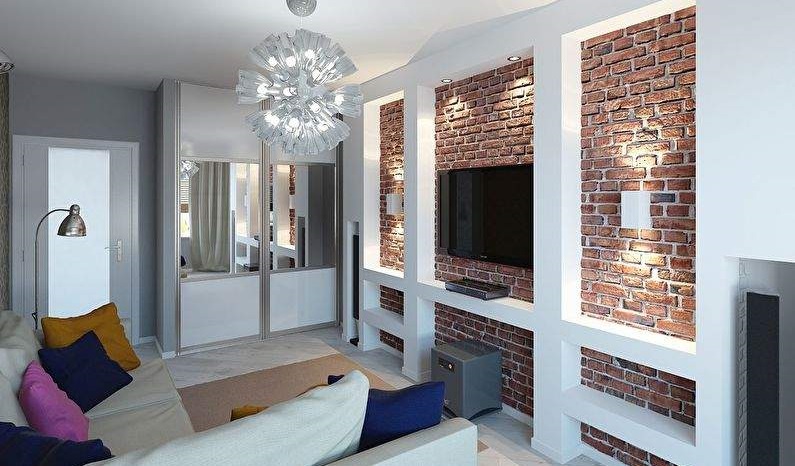
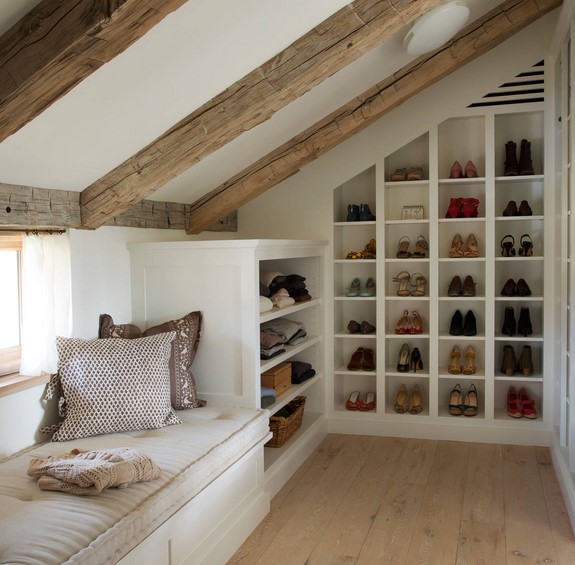
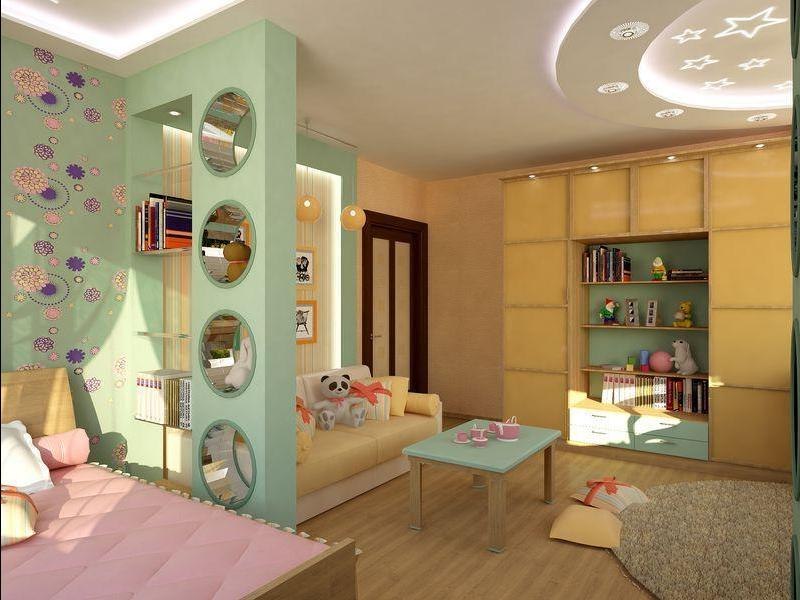
You can make such a design both in the bedroom, in the living room, and in any other room in the house.
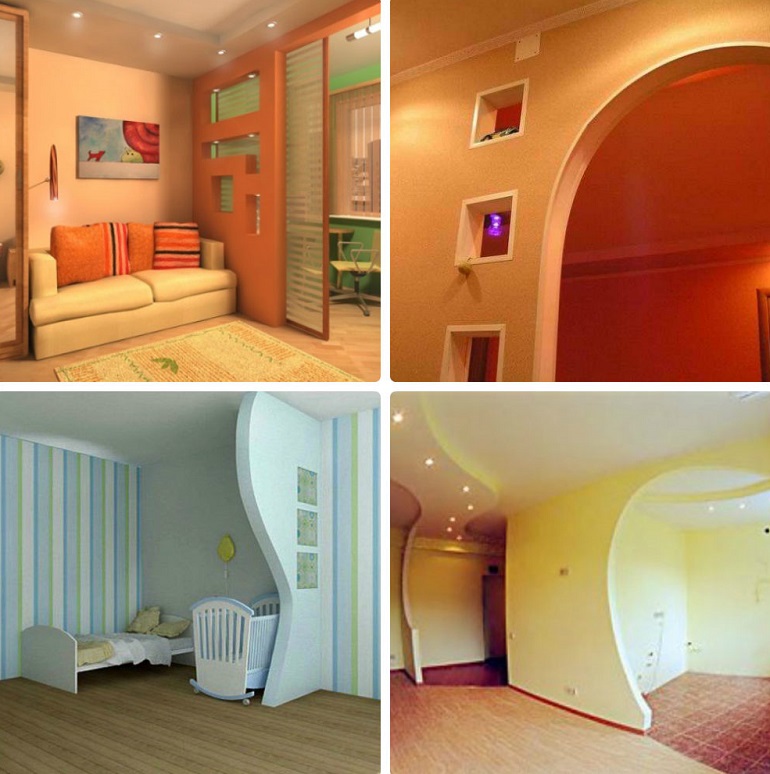
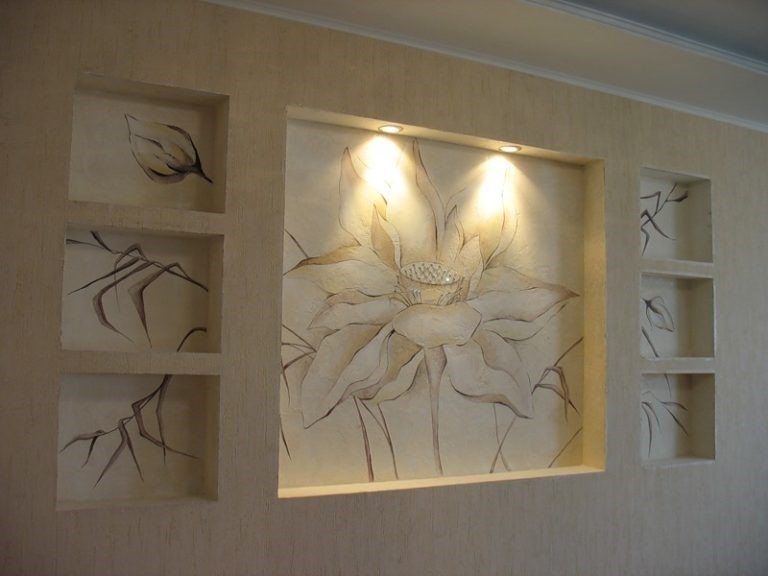
Forms
Forms can be absolutely any that your imagination will allow you, but the most common are regular geometric shapes, of which the most popular is rectangular. But there are also options with a round shape, but the circle is made not only with the help of drywall, but also when finishing this blank.
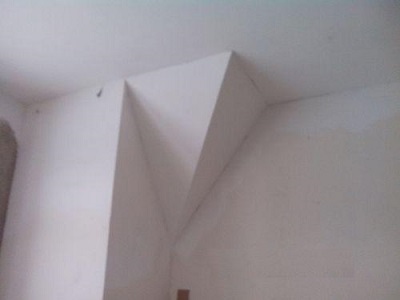
Triangular shapes are almost never used., but it is quite possible to realize them - everything depends on skill and imagination. Still corner and oblique box are popular today.
Kinds
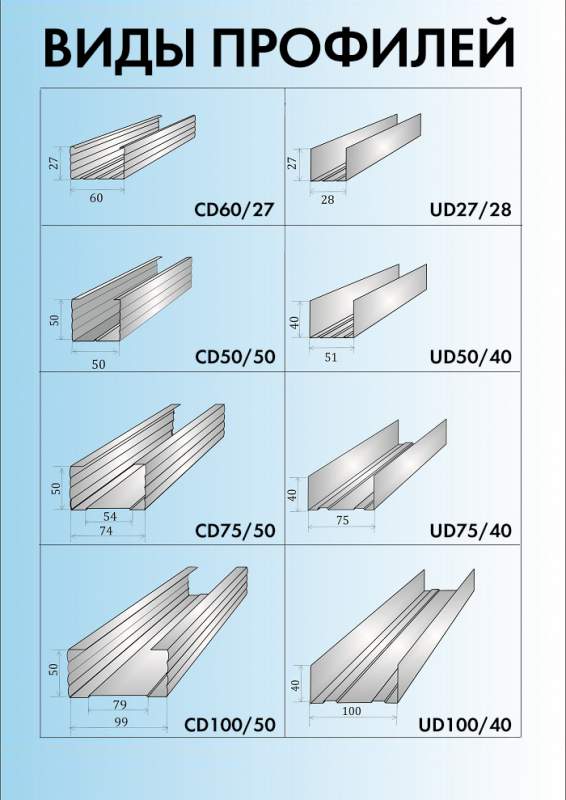
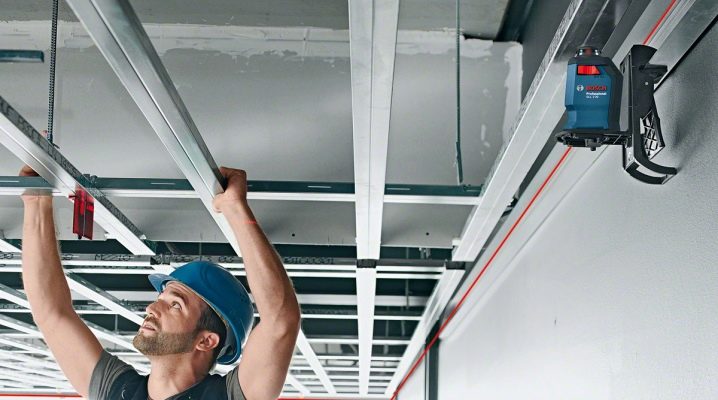
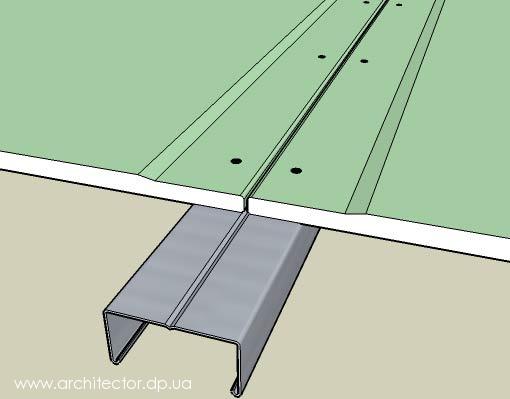
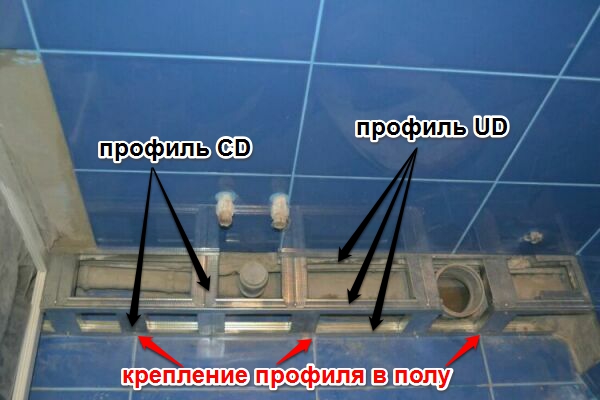
An important element of the implementation of the box from drywall is the profile on which it is mounted. The profile, as well as any other material, is issued in various standard sizes. Sometimes it turns out that the profile seems to be of one size does not converge, one slightly shorter than the other (in width). In order not to get into such a situation, profiles for plasterboard should be taken from the same batch and from one manufacturer. The main standard sizes of profiles and their functional purpose, where UD is the guide profile, and CD is the main profile.
- UD 27/28, CD 60/27 - profiles are common for all types of premises, but not for suspended ceilings. They are used in rooms whose length does not exceed 5 meters.

- UD 50/40 and CD 50/50 - profiles for boxes of floor and for wall structures, which allow mechanical and physical stress. And also used on multi-level ceilings, in rooms with a length of more than 5 meters. Sometimes used for decorative boxes.
- UD 50/40 and CD 75/50 - approximately the same as the previous size, but allows the installation of stretch ceilings (in rooms with a length of not more than 5 meters), but is not recommended for floor boxes.
- UD 75/40 and CD 75/50, UD 100/40 and CD 100/50 - everything listed above, but with a length of rooms more than 8 meters, is suitable for verandas and terraces.

What is needed for manufacturing?
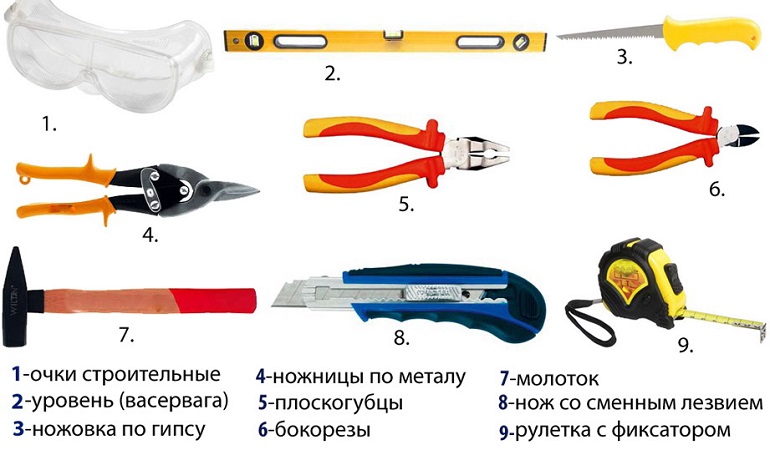
To install a drywall box will require a certain set of tools, without which a quality repair will not work:
- roulette;
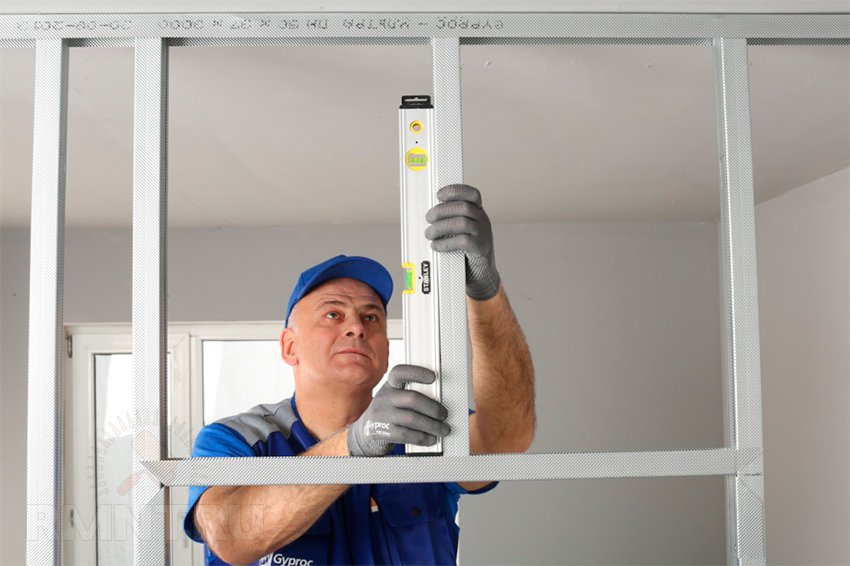
- level - at least 1 meter, preferably with a horizontal and vertical level, if there is a diagonal one, some tasks can be simplified;
- perforator with a drill for concrete;
- screwdriver with screws;
- Phillips screwdriver;
- paint knife;
- hammer;
- pencil.
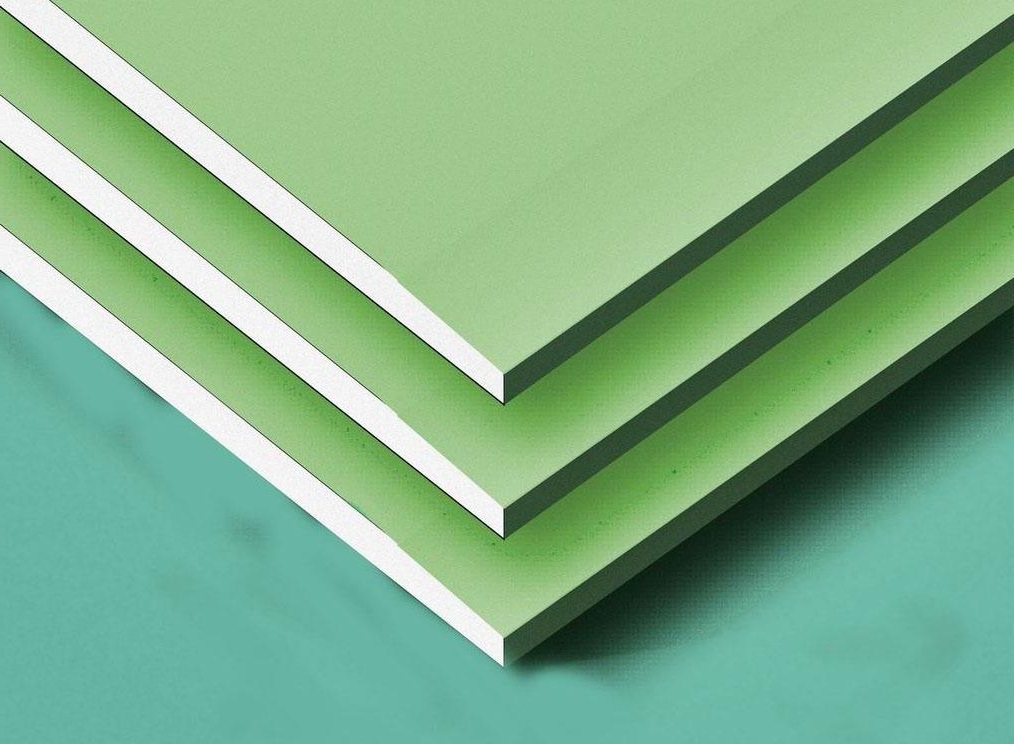
Sheet drywall is also necessary, because it is a key element in the formation of the box. Depending on the purpose, it is worth taking drywall sheets: waterproof for plumbing premises, fire resistant if special equipment is sewn up, which is flammable.
In addition to it, more profiles are needed: guide and main. They will be attached to the box itself, they act as a frame. Sometimes used as a profile of wooden bars, but these profiles do not pass any criticism: wood with a high humidity begins to loosen, and defects in the box may appear, and you can not mention the fact that the wood is burning.
Even if you spend additional funds on wood impregnation with fire-fighting chemicals and moisture-resistant chemicals, it turns out that the price of such a frame will exceed the price of the metal, and an order of magnitude. Regarding environmental friendliness: the board impregnated with chemicals is several times less environmentally friendly than the metal counterpart.
How to do it yourself?
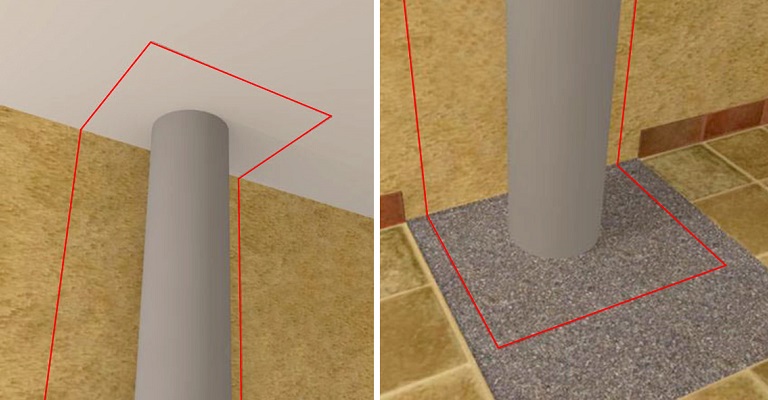
It is necessary to begin installation with the preparation of adjacent surfaces. The wall, ceiling and floor (depending on the place of junction) must be cleared to the ground, otherwise the plane will have to be straightened for a very long and expensive time. Begin installation with measurements and drawing on the surface of the required size.
It is important to remember that the distance between the pipe and the nearest boundary of the profile should be 3-5 cm on all sides. If the box is made under the tile, it is better to measure the width of the tile and make the box equal to this size to avoid trimming.
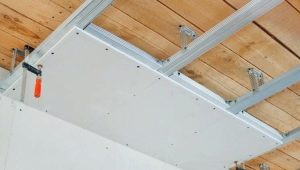
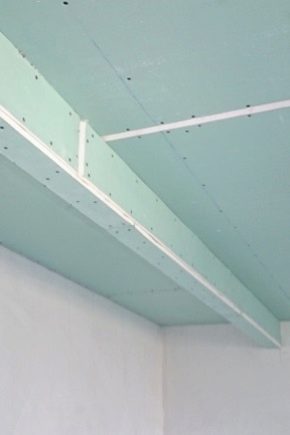
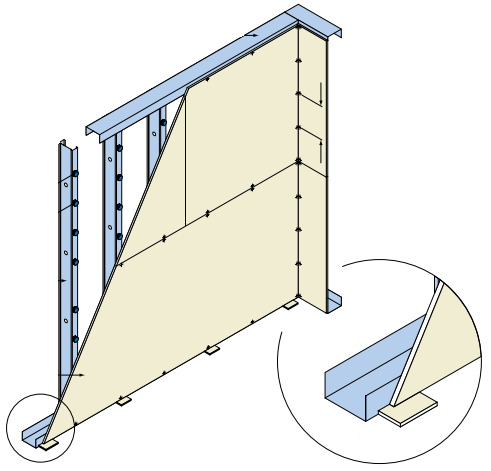
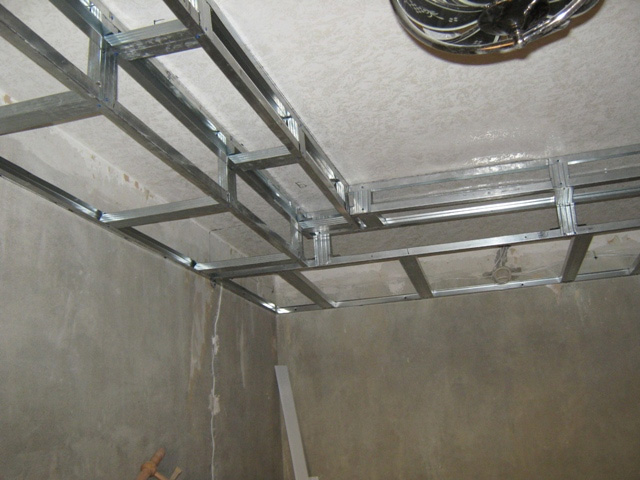
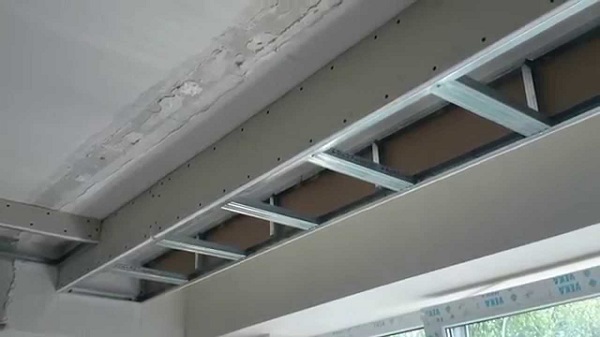
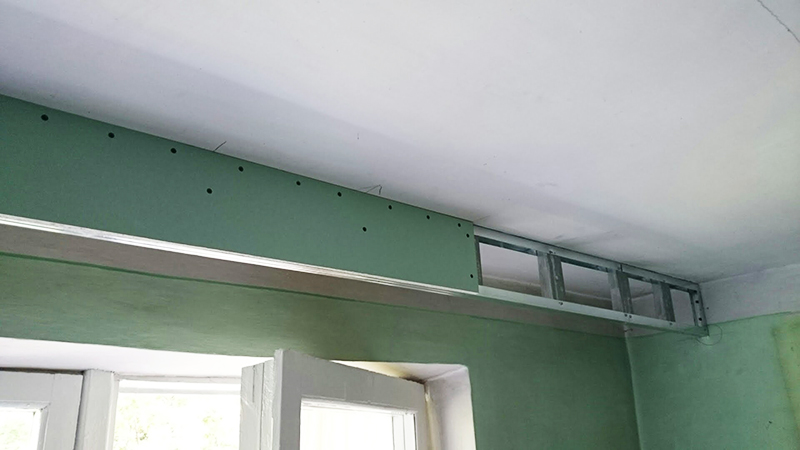
After that, a guide profile is cut in and applied to the necessary areas. When the profile is ready, it is screwed to the surfaces on the dowels. It is best to fasten a horizontal profile levelso that the design is smooth and sturdy.As soon as the guides are ready, the corners are made of the same profile (if the construction ends not in the wall or floor).
If the length of the box is more than 1.5 meters, it is necessary to make jumpers from the guide profile to harden the structure. After that, the main profile is cut. Depending on the length and width of the structure, it can go both along and across the structure, but the step must be at least half a meter. All this is attached to metal screws.

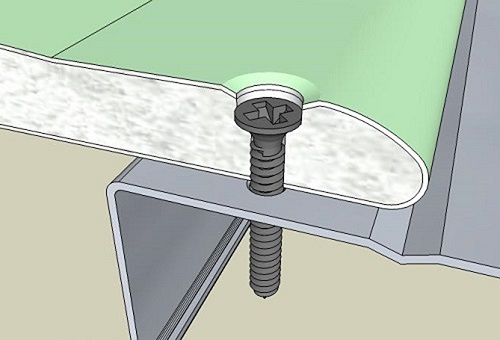
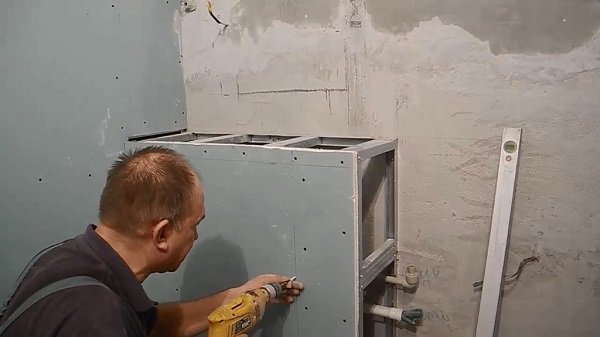
The next step is the installation of the drywall sheets themselves. For this, precise measurements of the required surface are made, and the sheets are cut out with a painting knife. An incision is made at the level or along the marked line (depending on the strength of the hands and the eye) about half of the sheet, after which a sheet is carefully knocked out on the reverse side, that is, it breaks down the incision. It is important to remember that the sheets should not protrude beyond the edges of the frame, the sides are meant. But the front face sheet is cut last to the edges of the already mounted box.
Sheets are fastened in steps of 25 - 30 cm to the main guide profile. It is also better to look at how the sheet is pressed to the profile so that there are no sags and other things.After mounting the side sheets, it is necessary to mount the front sheet on the same principle, but it is only desirable to look at the already mounted ones so that the screws do not touch each other.
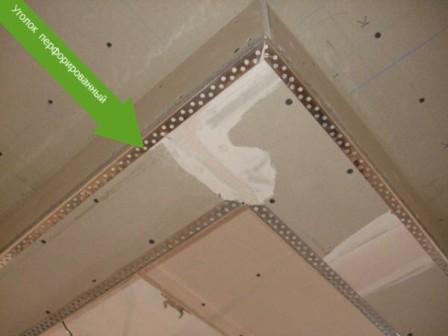
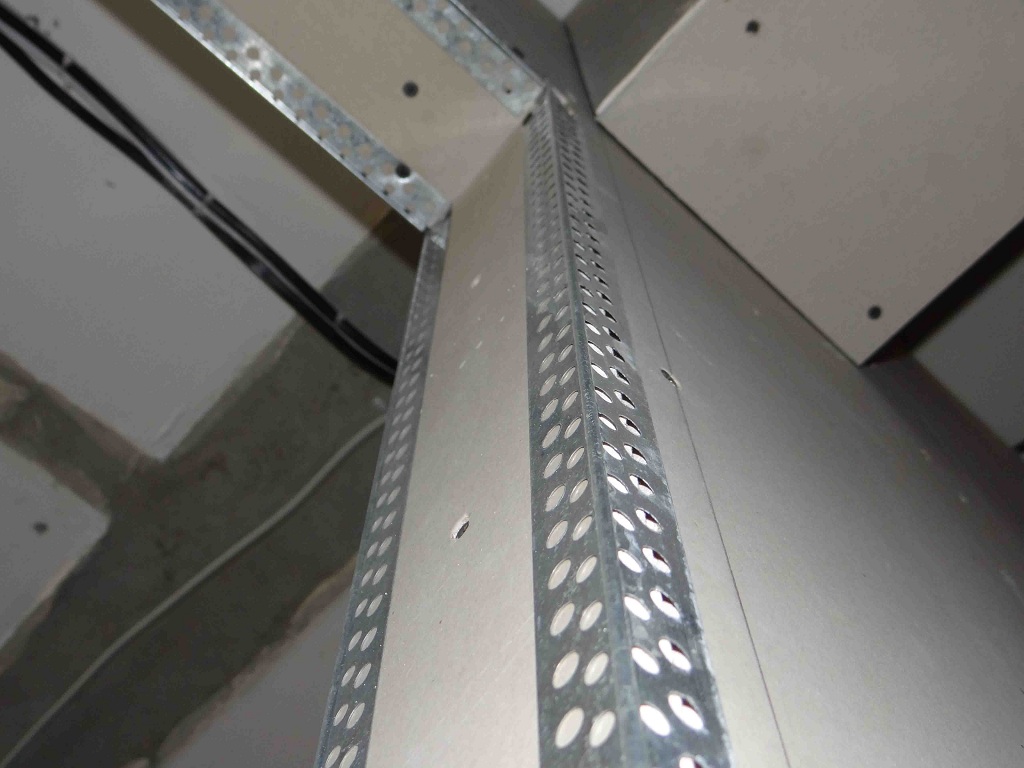
After completing the installation of sheets, you can, if necessary, sharpen sandpaper, erasing irregularities. After bringing the corners into a normal form, you need to glue perforated ceilings on the plaster glue (at least on the starting plaster)., then leave them to dry for a day. But it is also possible to miss the mark of the screws for the convenience of applying the next layer. In cases where a tile is put, and not a wall is putty, the corners are not needed, the tile is laid according to the usual scenario. After completion of the preparatory work box ready for finishing work.
But there are a few points that must be considered when constructing the box, for technical reasons.
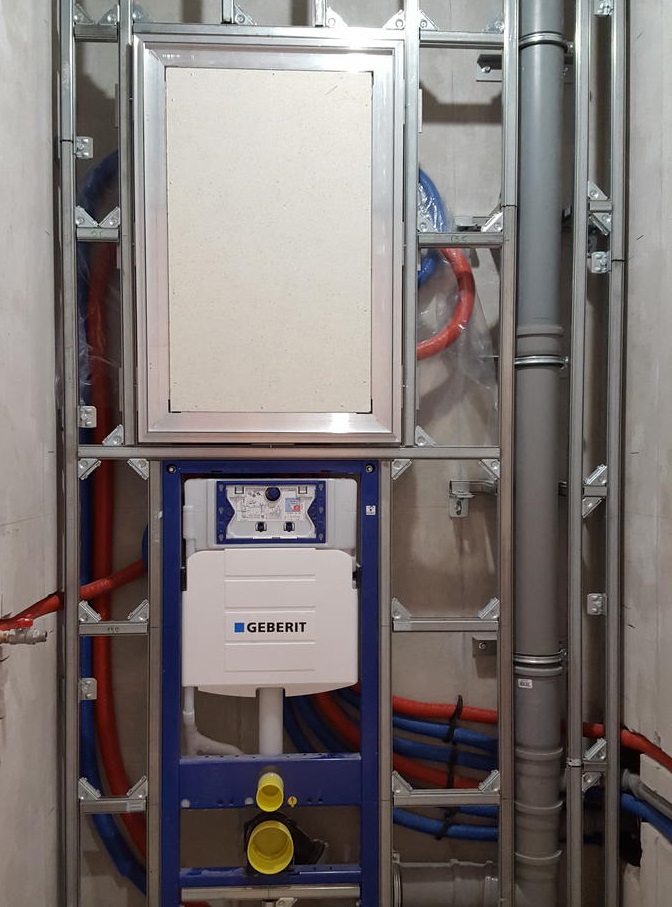
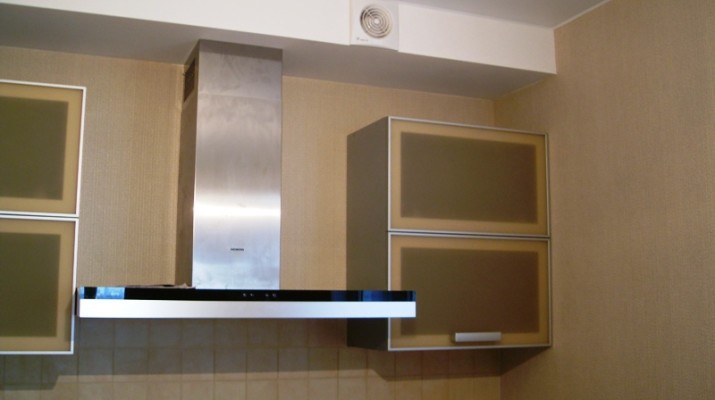
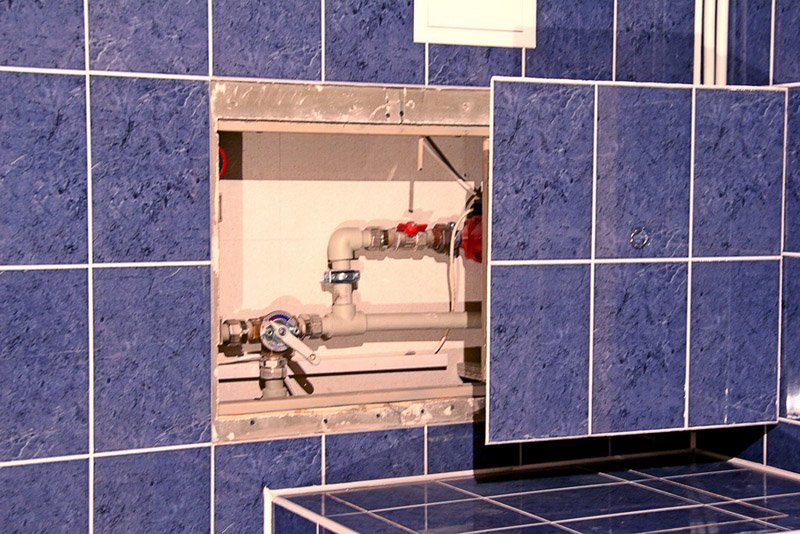
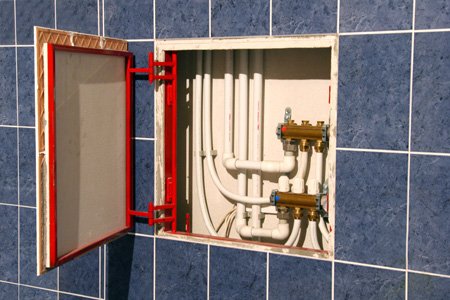
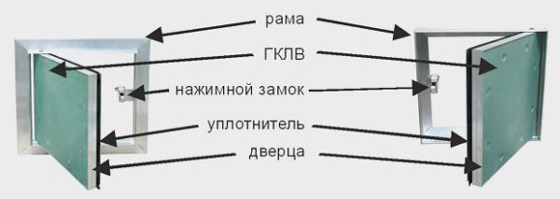
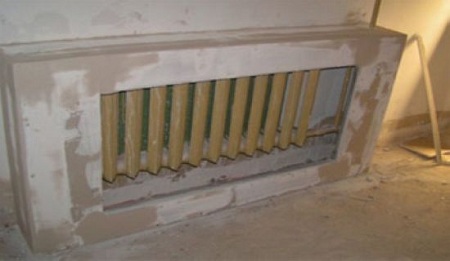
You can not sew up the pipe riser or sewer drain, leaving no connector under the window for revision. And also it is impossible to close the counters of water and gas without a special window, and the hood should be hidden only if the whole surface has a special removable door, and the sheet itself has a degree of fire resistance not lower than the required one.
If you decide to assemble the device from the GK yourself, then you will need step by step instructions. The box can be with a diode backlight, which is easy to install. There should also be ventilation and waterproofing.
Features of boxes
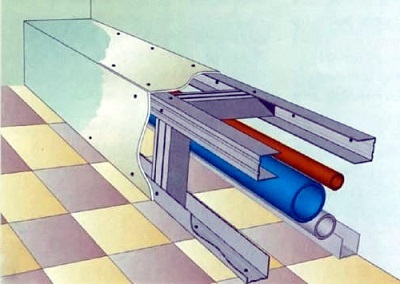
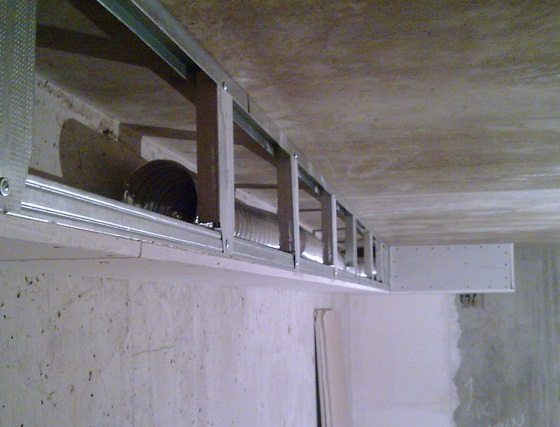
The box is actually a simple construction, consisting of profiles and sheets of drywall. But it is necessary to remember about the communications that this structure covers, therefore during installation it is necessary to remember both the aesthetic beauty of the structure and the practical application of the structure.
Installation of sewer duct box
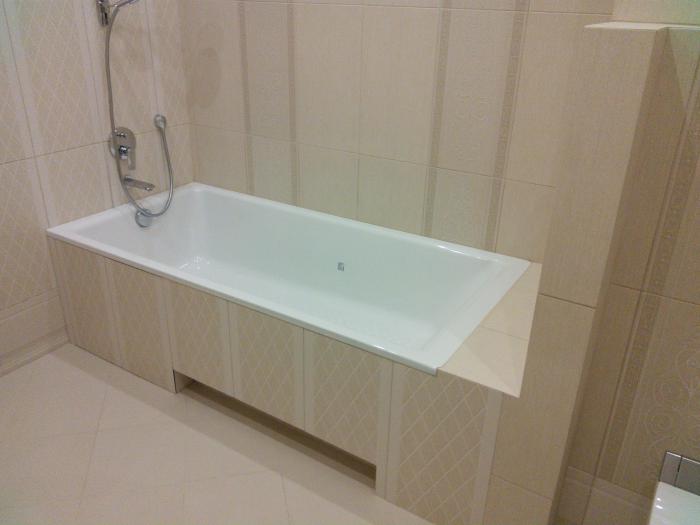
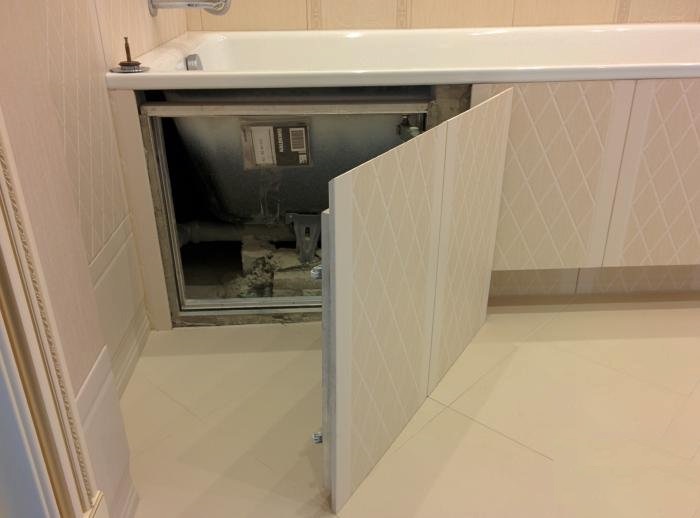
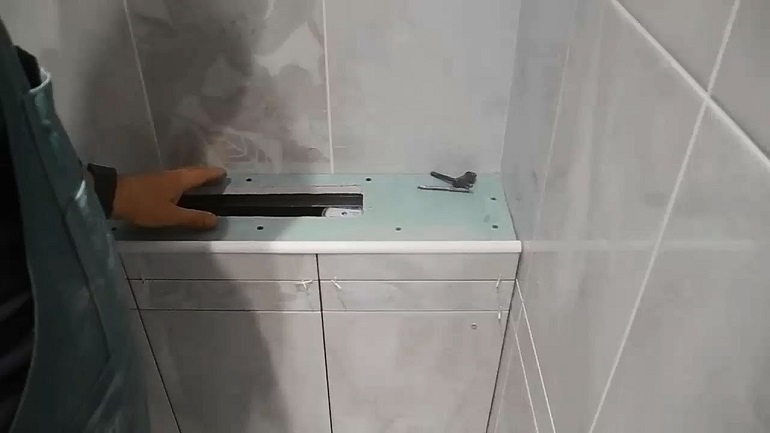
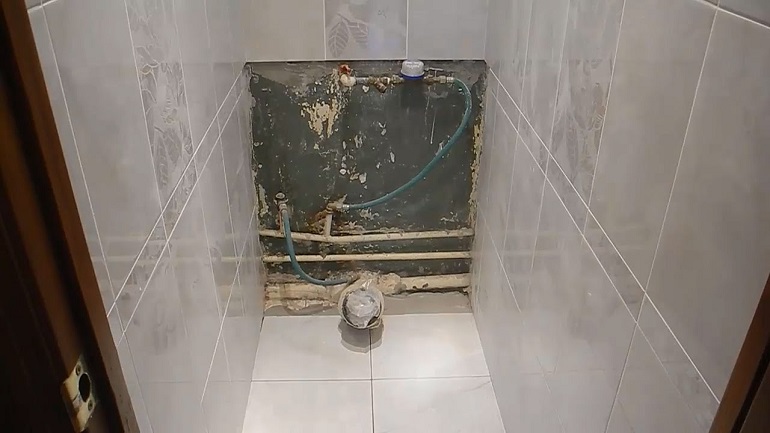
All sewers have a special hole - revision. This hole is used to clean and check congestion in the riser. This place must not be completely sewn, it is necessary to leave a hole under the dormer window. The size of this window should be one and a half to two times the diameter of the revision and have a special door.
Such dimensions are due to inconvenience when performing plumbing work and it is likely that during emergency repairs plumber accidentally breaks the box. Special doors are sold in almost any store and in different sizes.
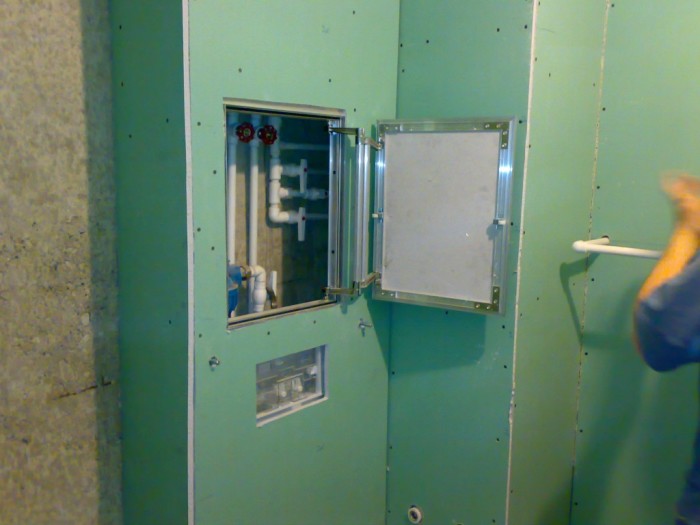
Before making a special hole in the box, you must already have ready-made options (or know the size by heart) in order not to make a hole that is too large. And also when installing the box on the sewer riser, it is worth looking at other openings that may be needed in the repair of the riser itself and provide them with the appropriate windows.
It is worth remembering that the audit should always be located on the front side with a view of the entrance (exit). This is a must, and without it, you can easily tear down a part of the box to gain access to the audit.
Water mains
The principle of installation of the box is the same. Also required are holes for windows, but already at the places of fastening of water meters, on all valves (usually they are located in one or two places), on gearboxes and check valves. It is advisable to sign the appointment of a valve or gearbox from the inside.so that in case of a critical or emergency situation you are not taken down part of the box, trying to understand what this or that pipe is heading for.
With a large fork in the road, it would be best to provide each window with a door with a pipe-plan through it.
Maybe this action will seem strange to you, but when repairing a plumbing worker will tell you a lot of thanks and do his job much faster. The main thing is efficiency in accessing the necessary valves and main channels, the location is not so important, even if the door with the valve looks to the opposite corner from the entrance.
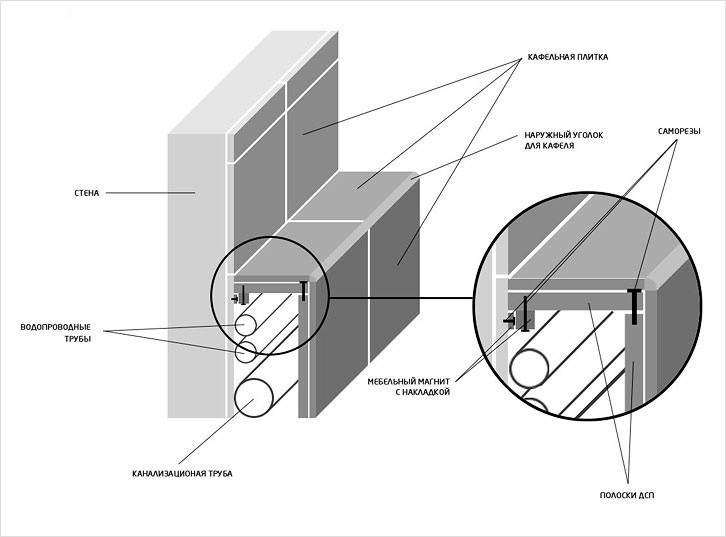
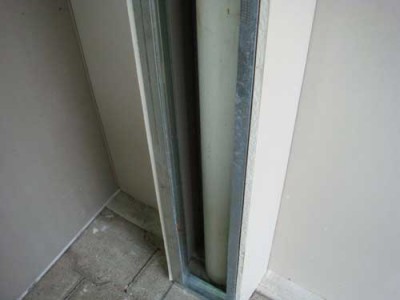
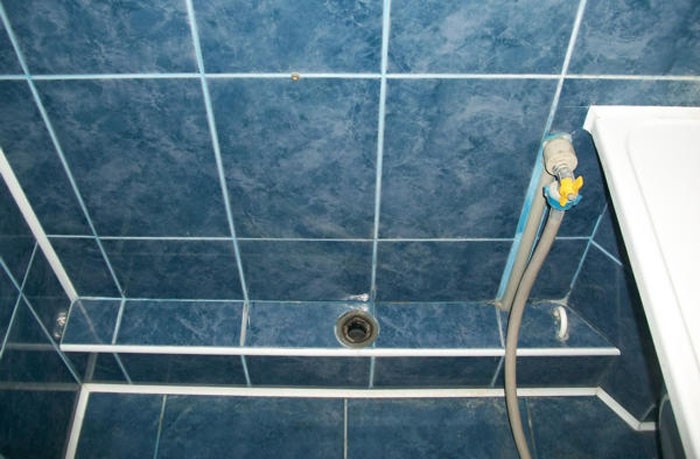
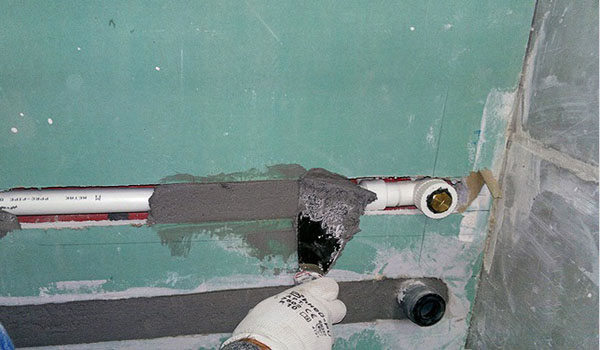
When removing pipes outside the box, holes are made whose diameter is larger than the diameter of the pipe itself. Empty space in drywall, as a rule, is filled with foam or ordinary masking tape.. This is due to the fact that there is a different weather condition or technical condition of the pipes: it is common for metal and any other materials used to play on the temperature - they increase and decrease.
Of course, this is less true of plastic pipes or pipes of metal-plastic, but there is a mechanical effect or human factor. For example, someone accidentally hit the pipe and it with the help of vibrations destroyed part or all of the box from drywall. Therefore, in order to avoid such situations make holes larger in diameter than the pipe itself. But also, if you do not want to separately buy doors to the windows, then you can also make a window out of plasterboard, but then you will need a handle and door hinges (small ones).
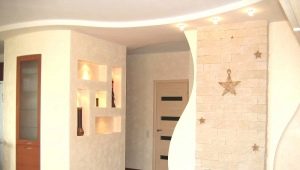
Decoration and decor
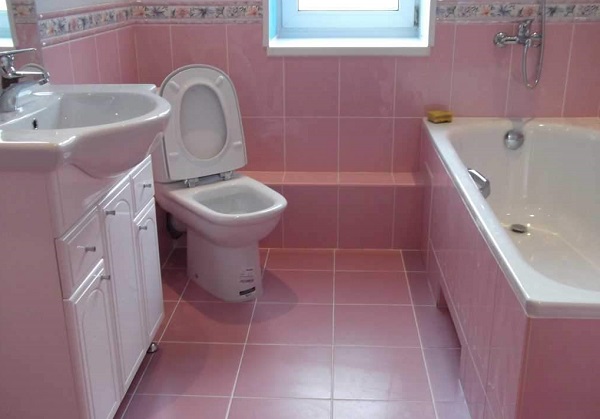
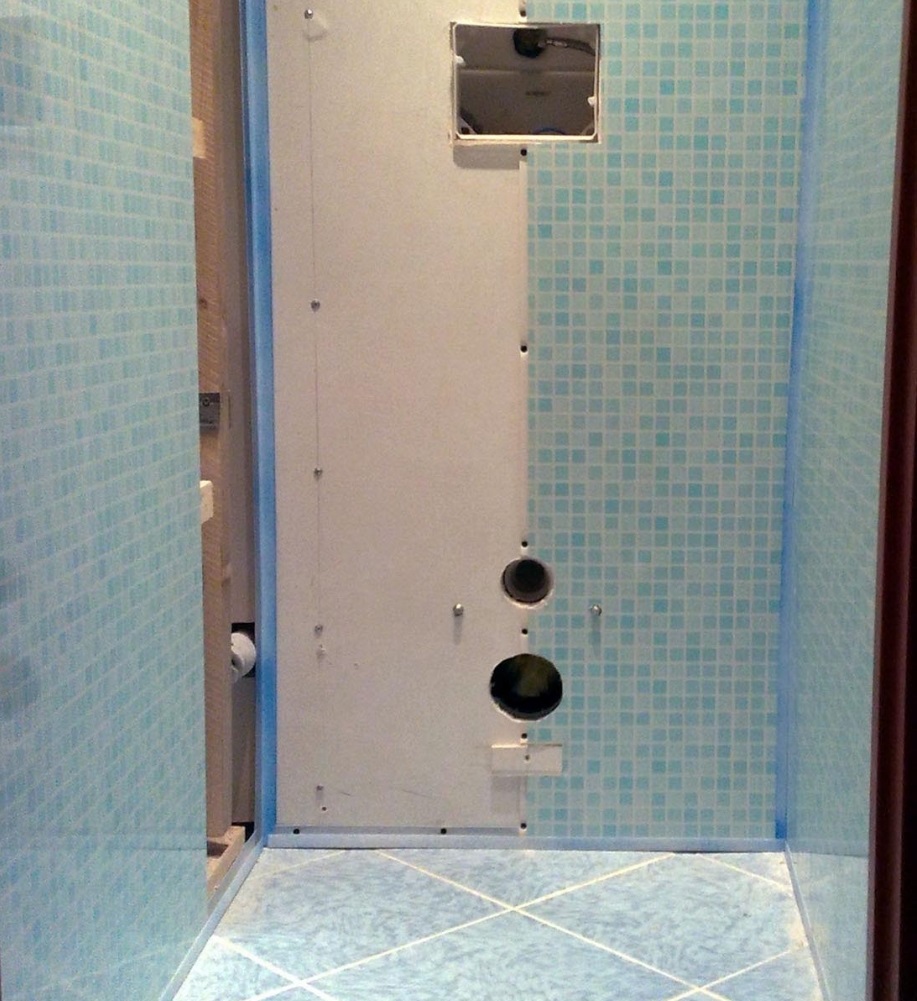
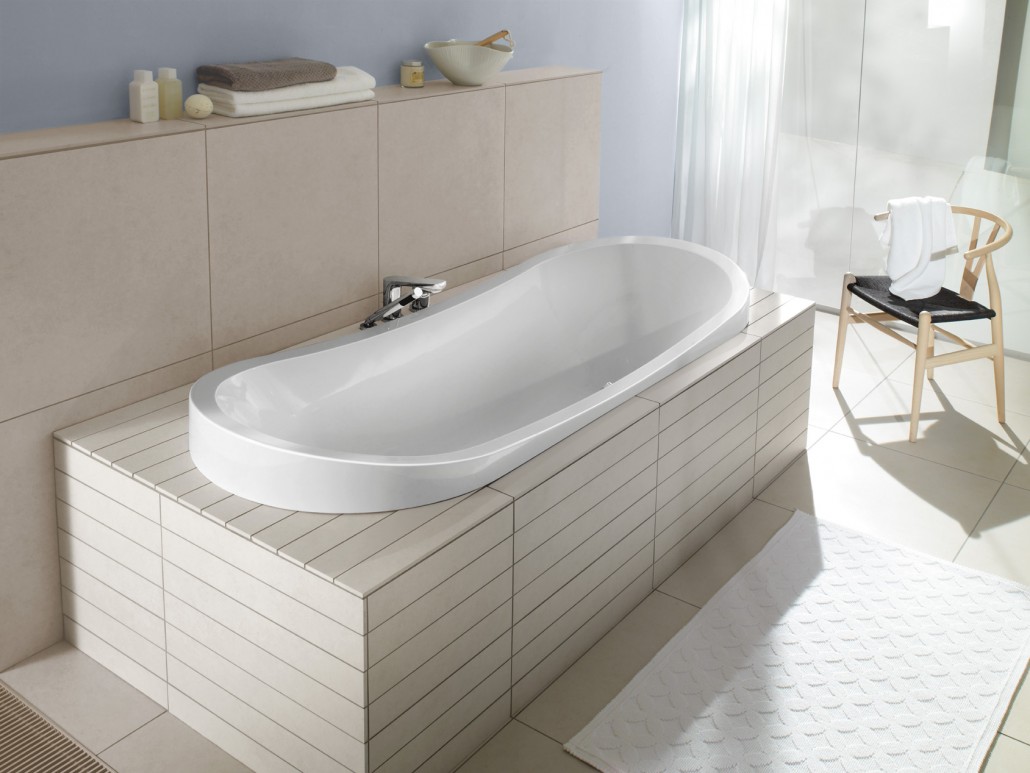
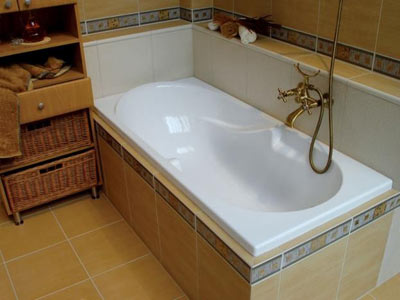
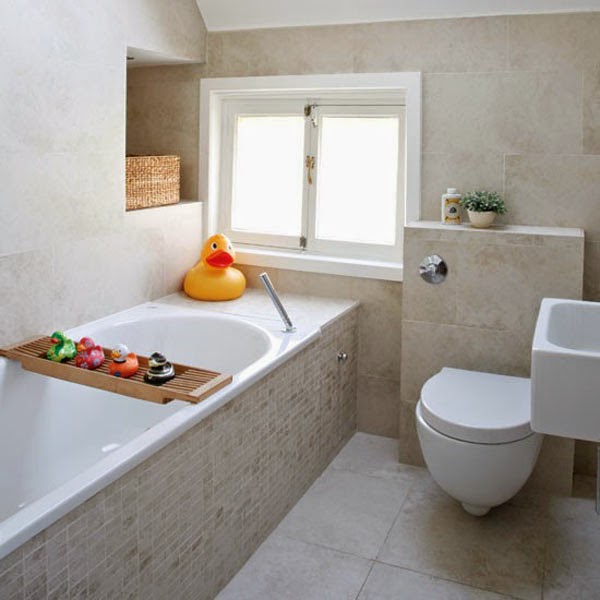
As a finishing material, practically the whole range of possibilities of modern interior decoration can be used, but often tile is the most popular way to finish the plasterboard box in the bathroom and toiletwith the exception of the ceiling.
Since the box is flat and keeps the plane, laying tile will be a quick way to repair the room. And laying mosaic tiles, tiles with cutting at 45 degrees (produces the effect of a monolithic wall) is also suitable.
In cases when the box is intended for puttying, then a corner is glued and the level along with the plane is drawn through it. Usually putty all in 2 layers - starting and finishing. It is not necessary to even level the box - the sheets of drywall, by definition, are even. But the perforator for a couple of mm raises the level, giving extra space for decoration.
After puttying the box, it is necessary to process it with additional finishing materials, such as paint or wallpaper. For painting putty skins and leveled, as they say, perfect. Then paint is applied in several layers.
Before painting, regardless of whether the putty was applied or not, a drywall box should be primed to avoid excessive and premature wear of finishing materials.

Regarding the choice of paint for the box: depends on the placement of the box. Waterproof paint for bathrooms, in the cheapest form - it is an old kind oil paint, there is a little more expensive - nitro paint (dries quickly), but in these cases you should not even up to the limit - this paint forgives the painter's mistakes, because it can close the necessary amount from the first time.
As for the water-based paint - it is not waterproof and can be washed off, and the gypsum is afraid of water, because this paint is used outdoors with moisture.
There are also acrylic paints, which are the most expensive, but at the same time moisture-proof, there are non-standard and pleasant colors that can diversify your room. Do not forget that is painted from edge to edge. You can not paint over half of the necessary, and continue in a day - there will be unpleasant overlaps, which will be very difficult to fix. And also the roller does not change during painting until the necessary space has been painted.described earlier.
Each roller has a different structure, and this can also negatively affect the structure and quality of painting. It is usually painted in three layers: horizontally (from the window), vertically, horizontally (towards the window). Thus, the layers are homogeneous, monotonous and without unnecessary flows.
In the case of wallpaper, the plane is skinned and leveled to make the surface without pits and notches, as well as without hillocks, after which the wallpaper is glued. After performing certain actions mounted skirting
In this video, we will talk about how to make a box of plasterboard for pipes in the toilet.