Subtleties of mounting drywall
Today, drywall is one of the most sought-after materials that are intended for the construction and creation of interior decoration of commercial as well as residential premises.
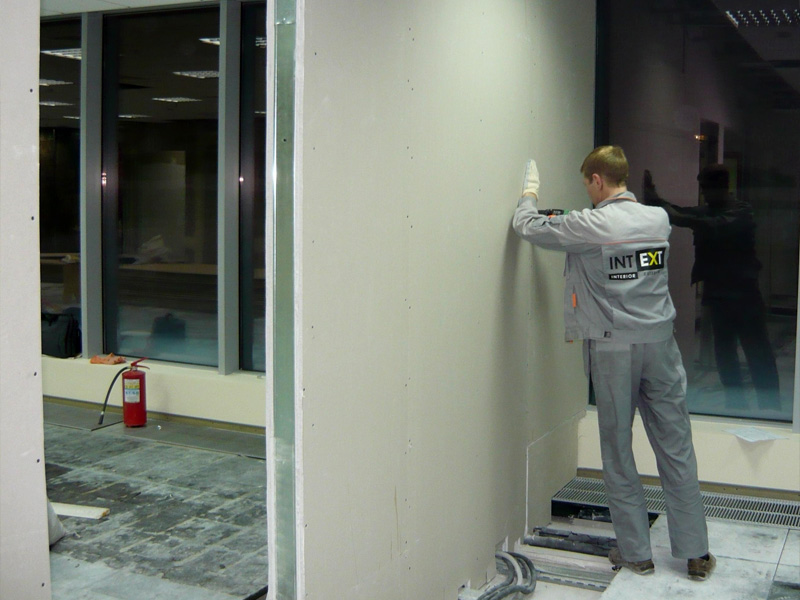
At the same time, many people do not know how to properly install drywall on walls. It is for this reason that attention should be paid to this, as well as the subtleties of this process, in order to know how to make it as efficient as possible and to obtain a qualitative result.
Special features
Drywall sheets are familiar even to people who have not previously engaged in construction and have not made repairs.
Today this material is used in various areas of construction and repair work:
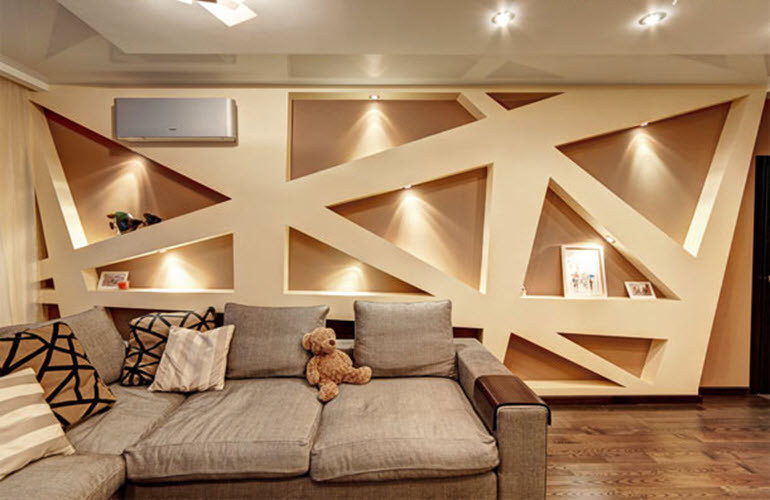
- in decorative furnish;
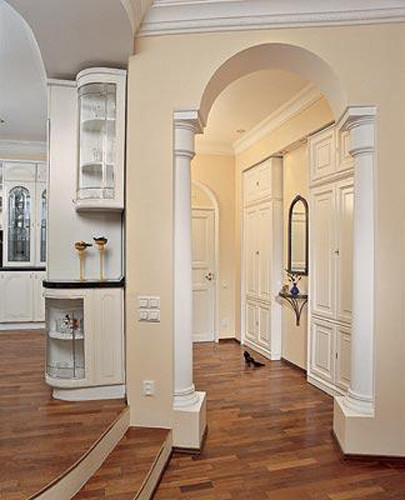
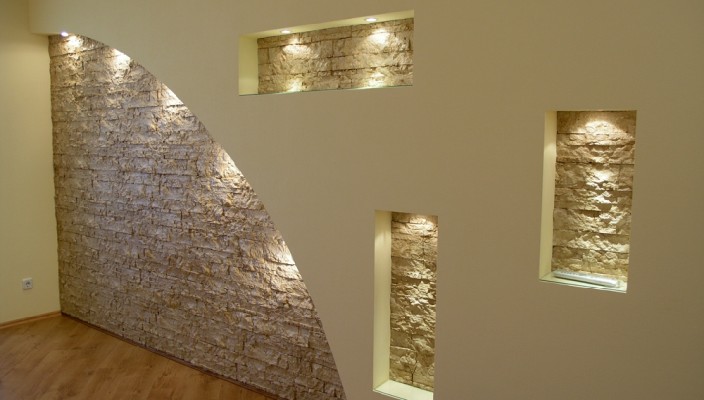
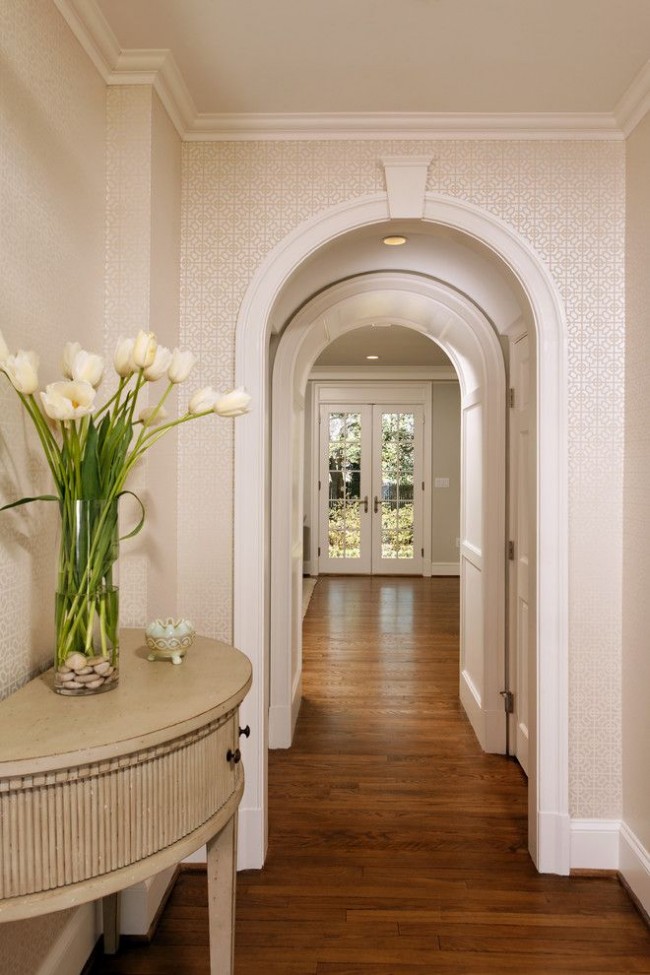
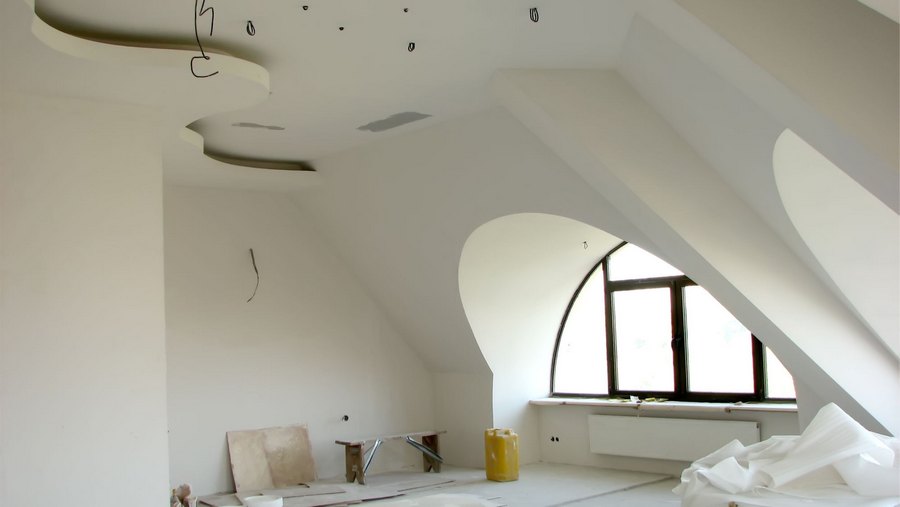
- when creating arches;
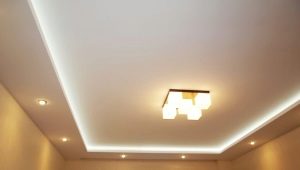
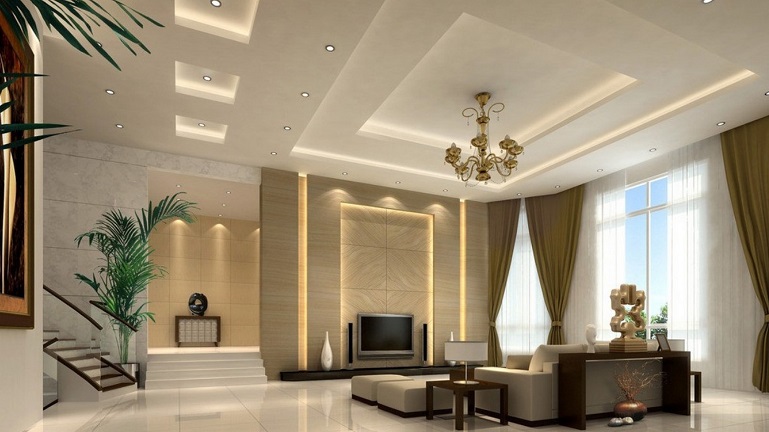
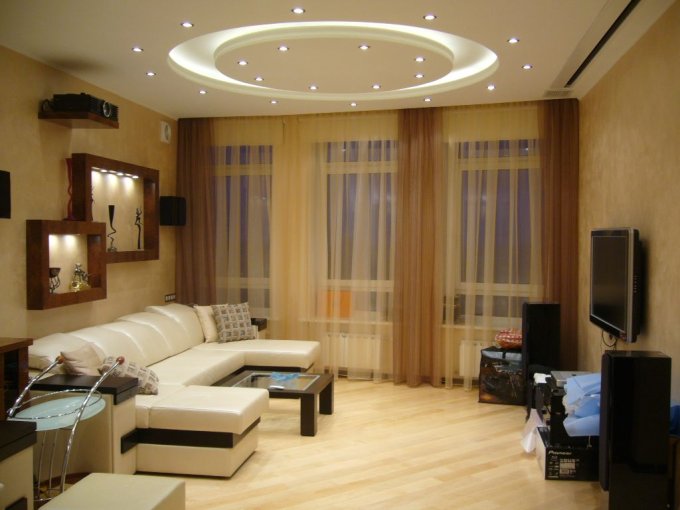
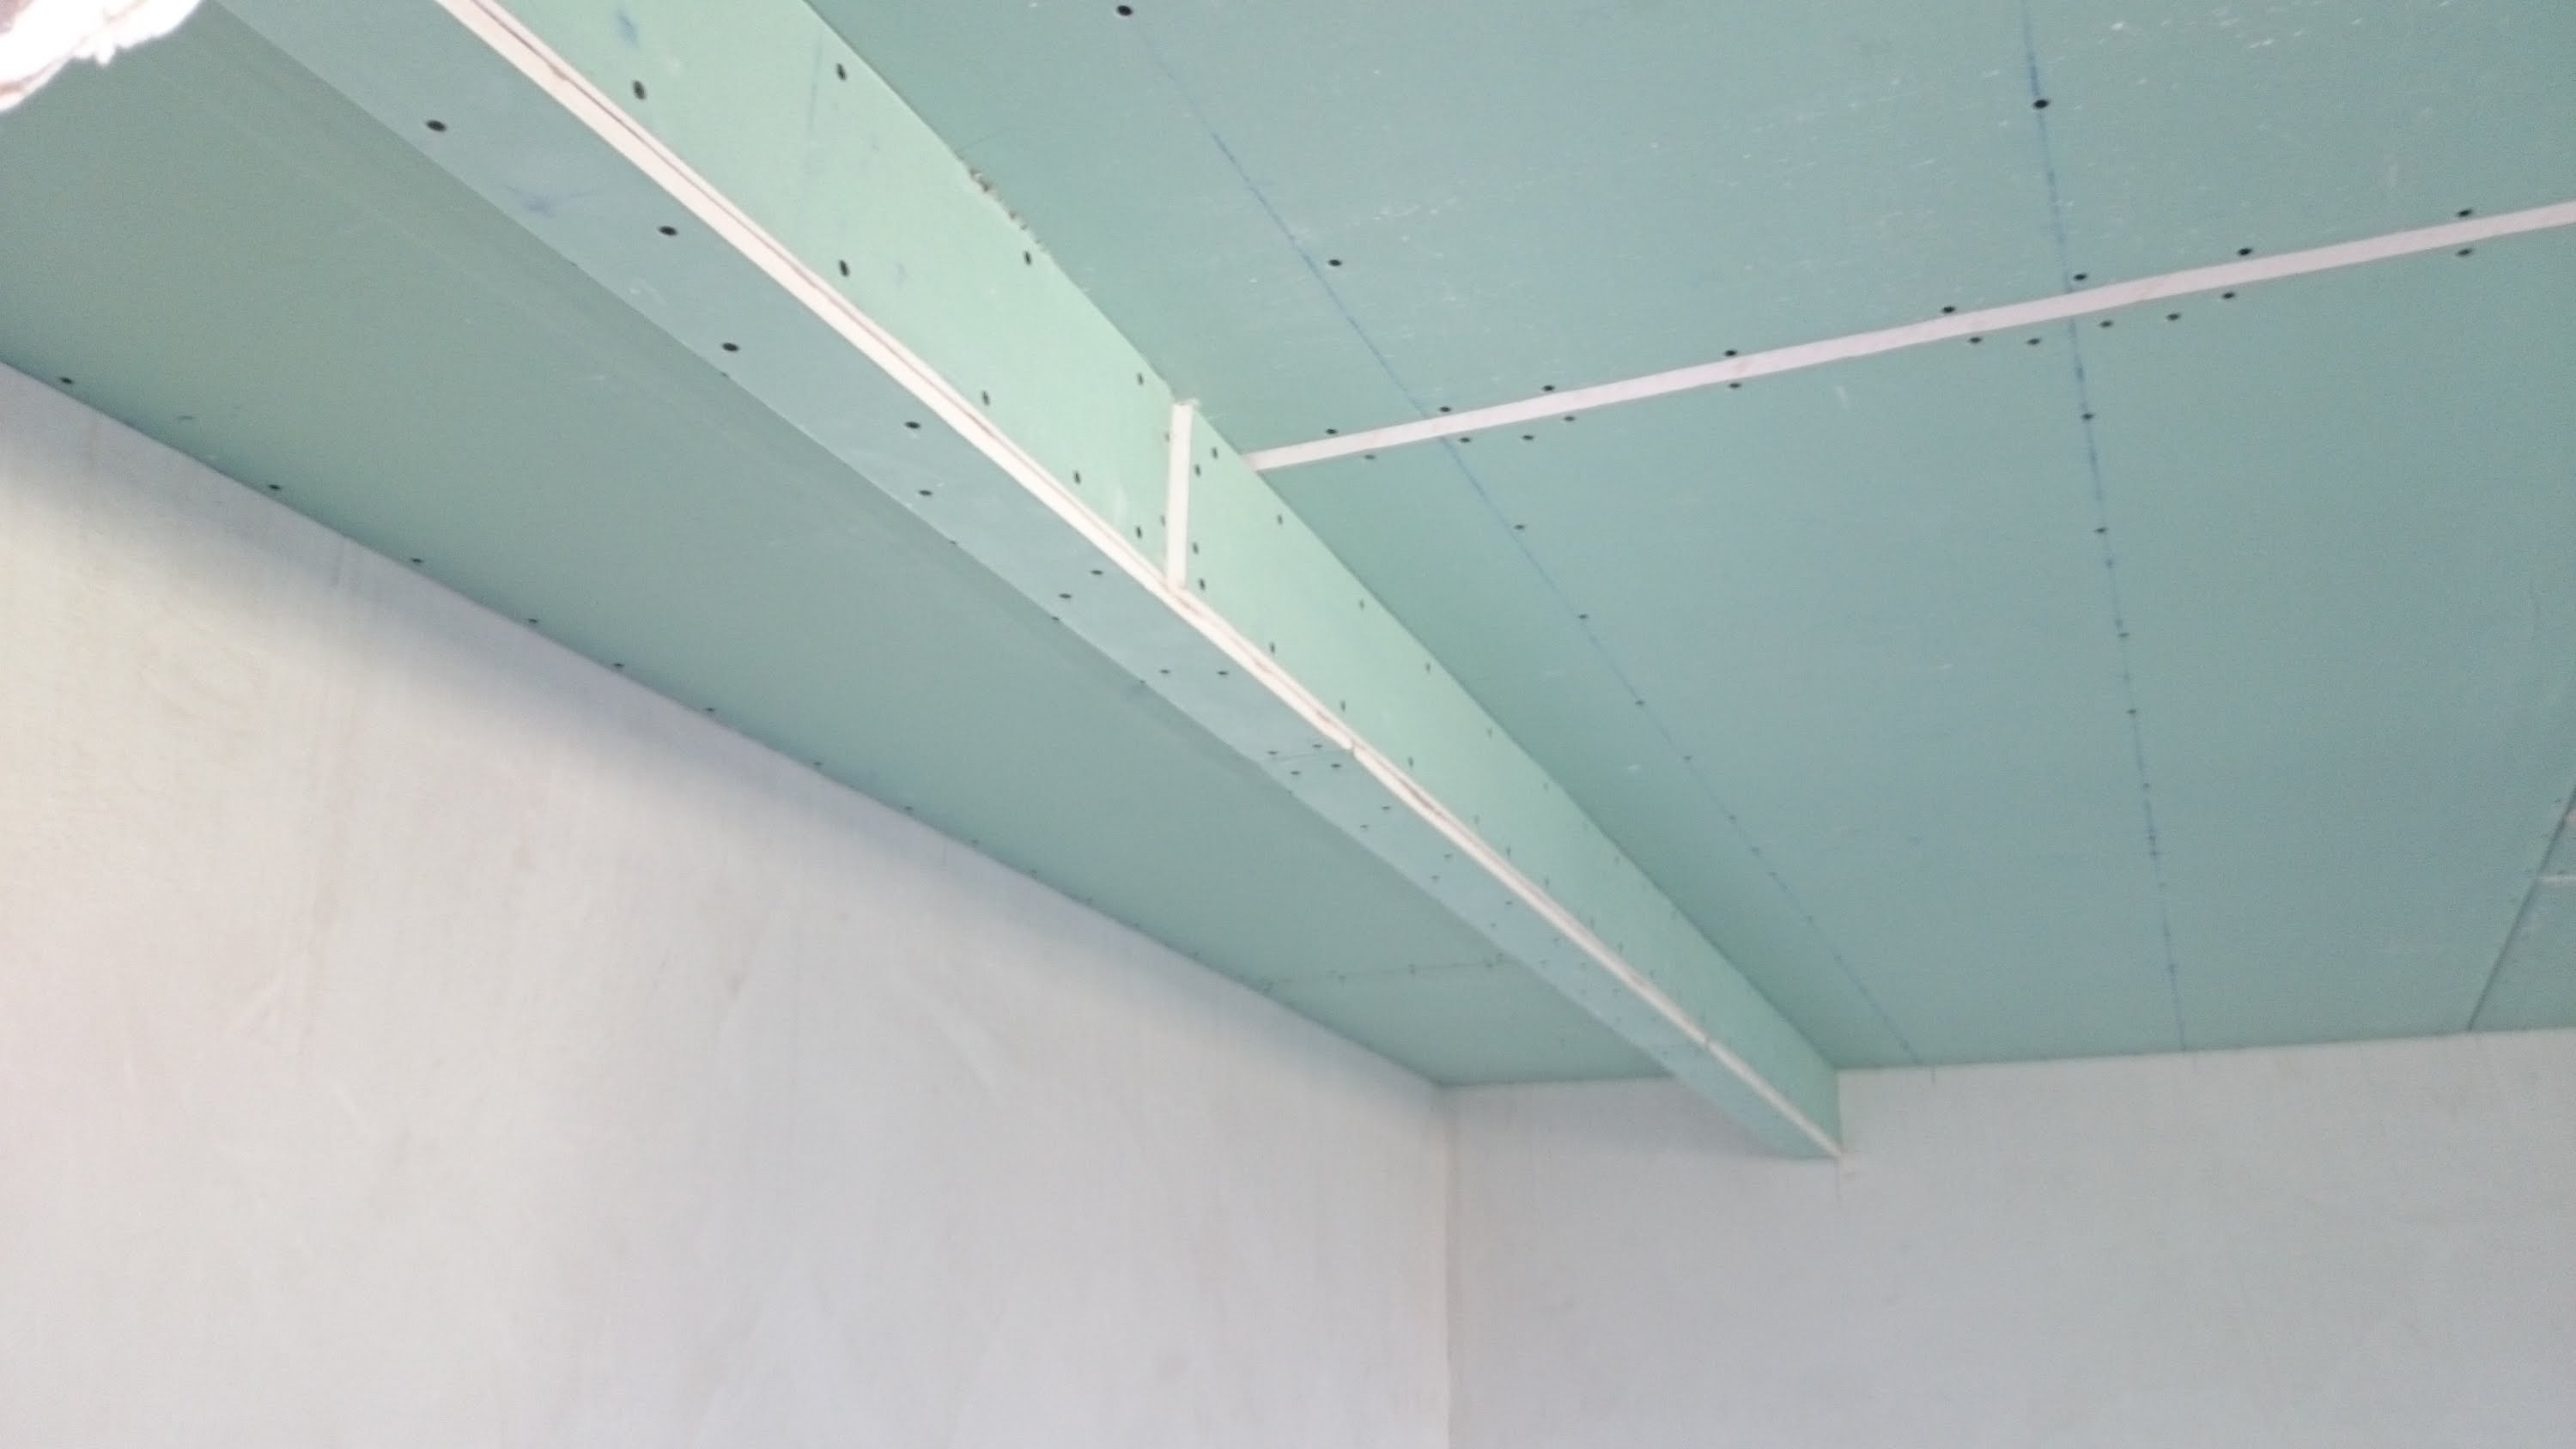
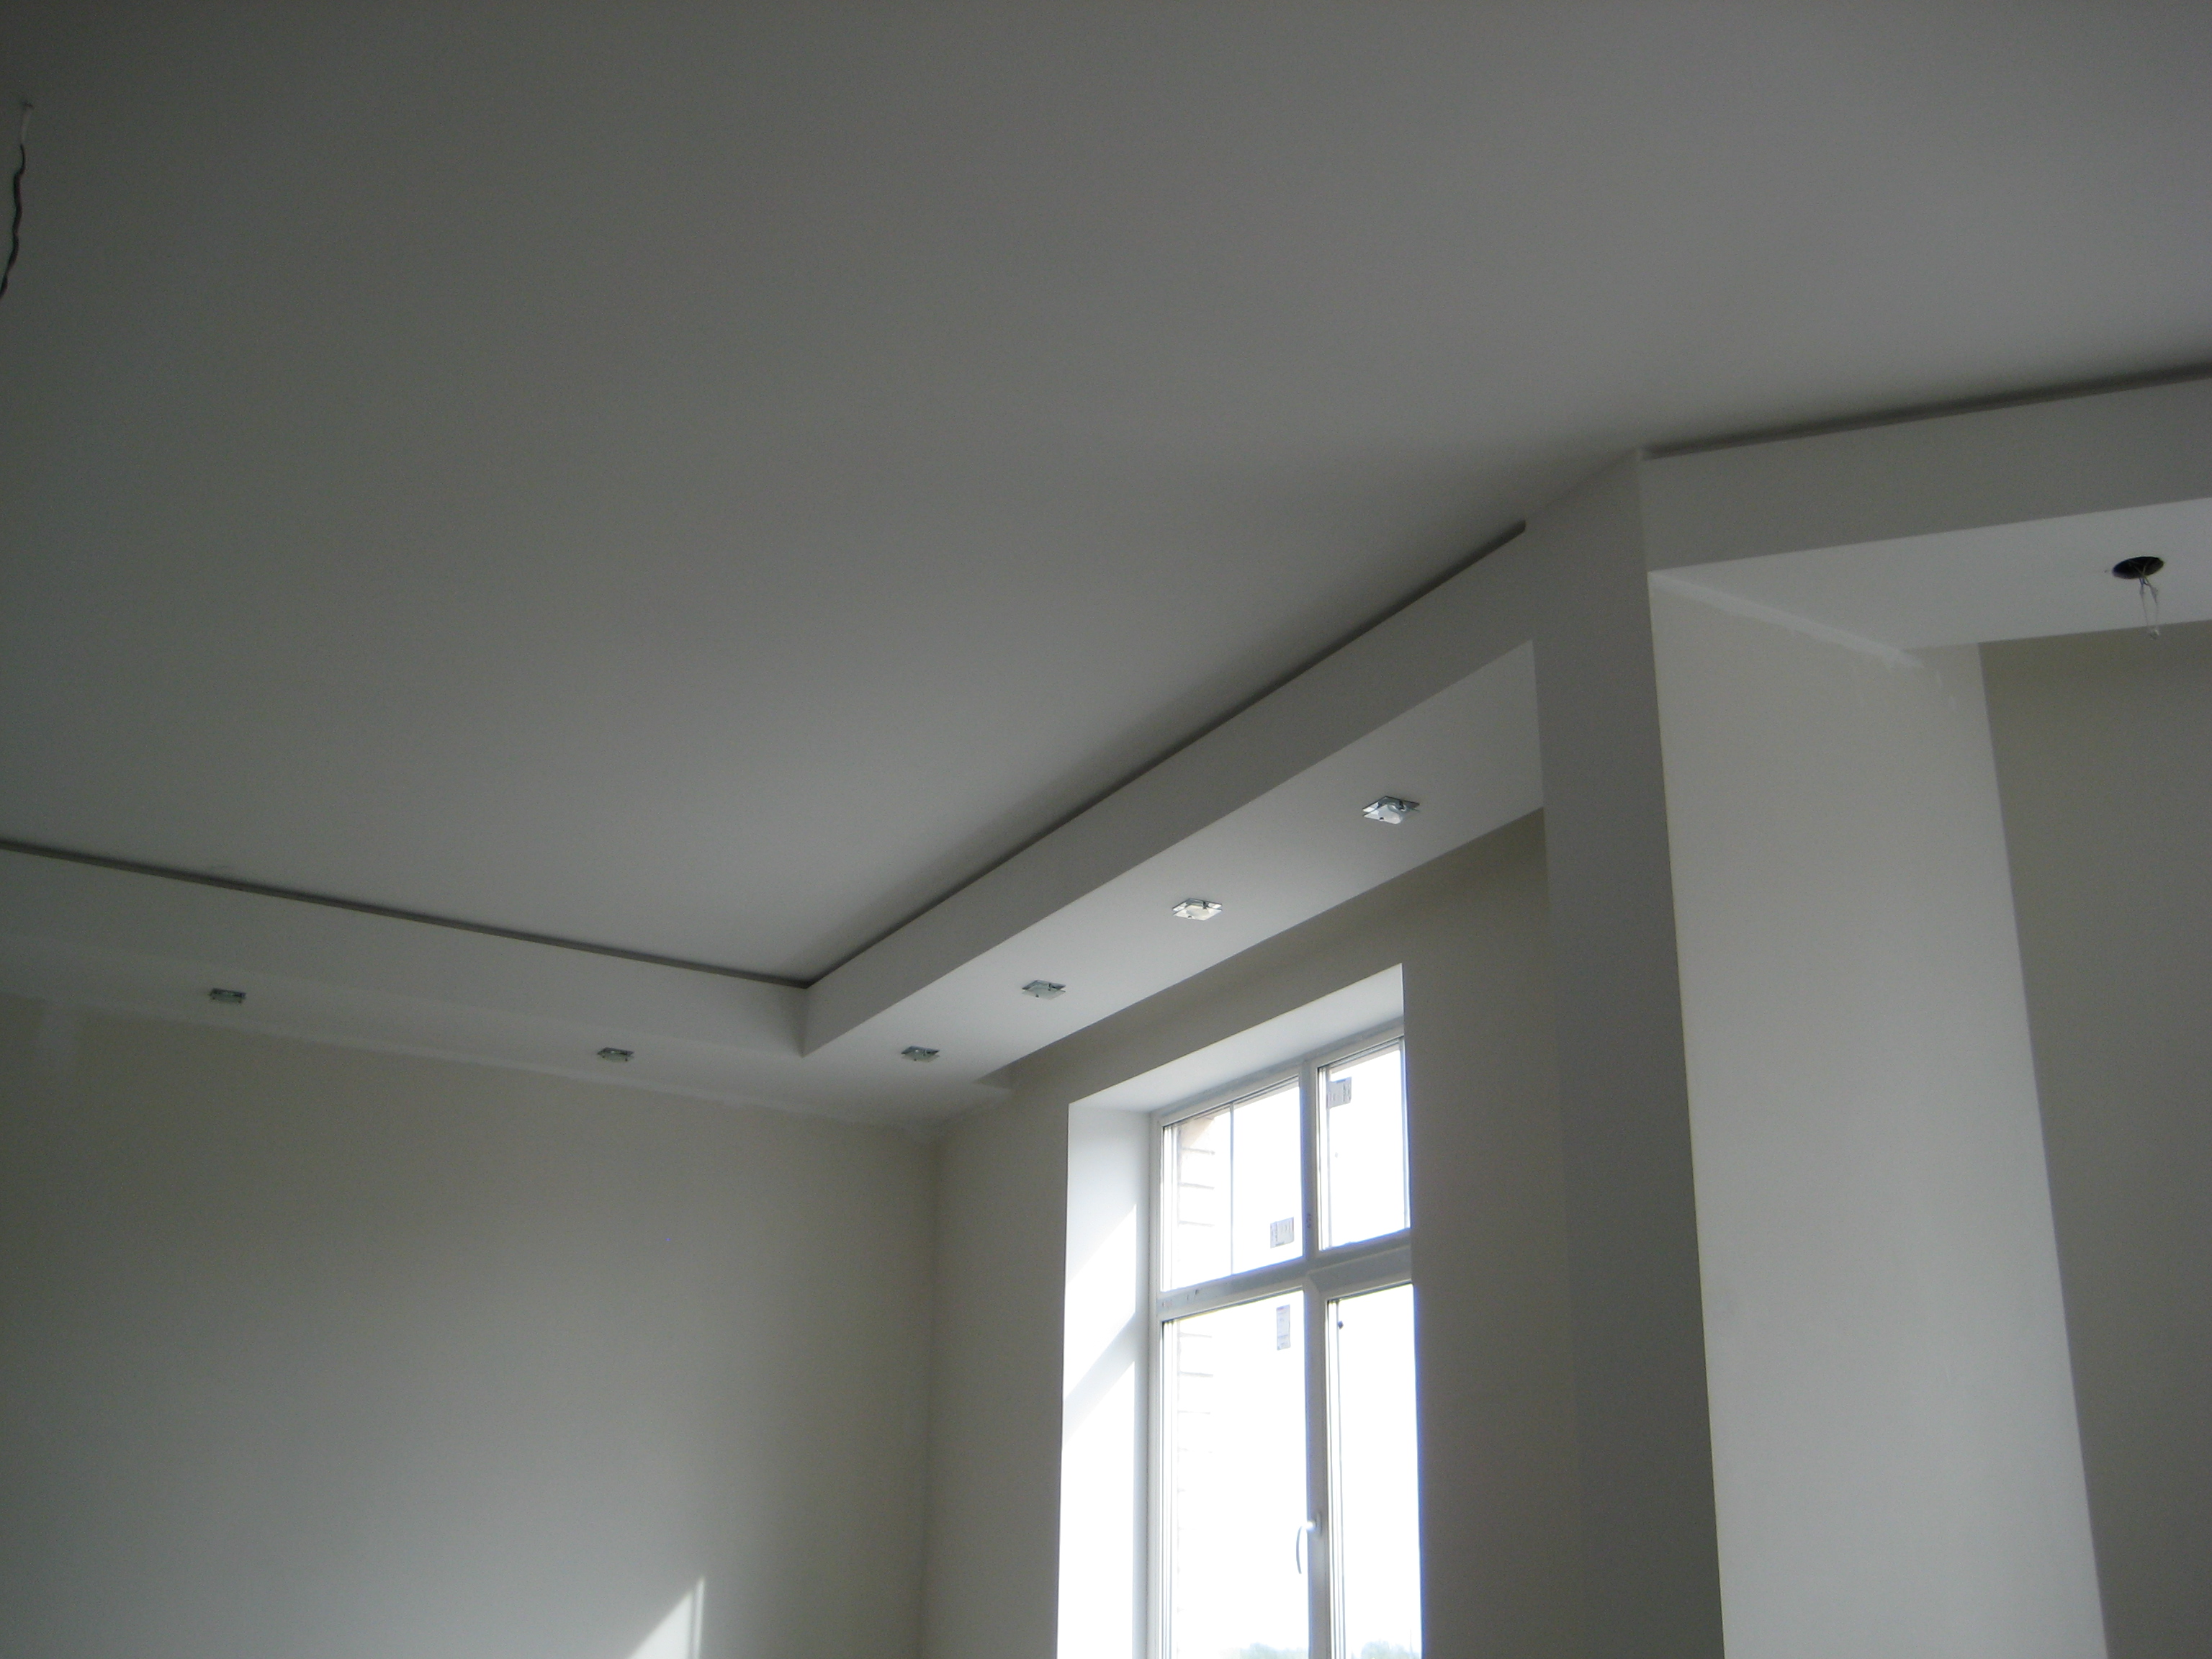
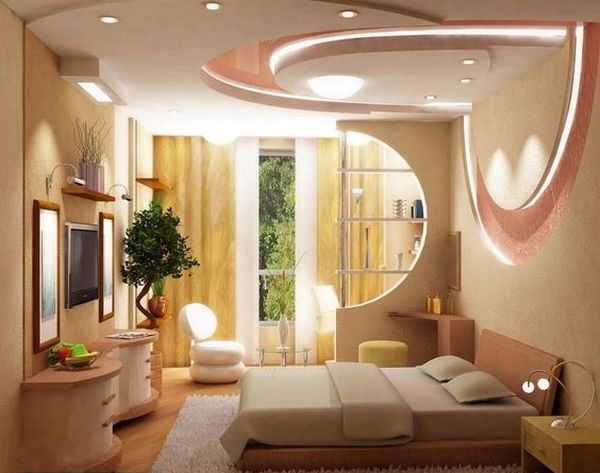
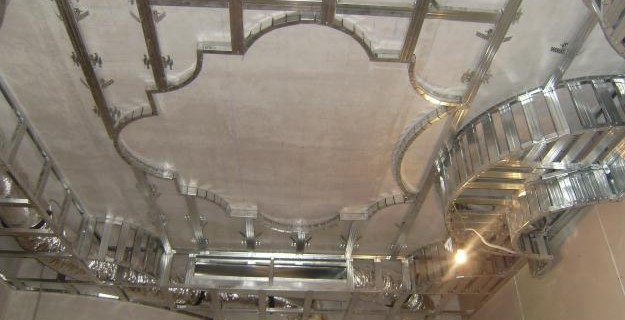
- when creating multi-level ceilings;
- when aligning ceilings and walls;
- at registration of facades;
- to create built-in cabinets and niches;
- when carrying out repairs in areas where there is high humidity.

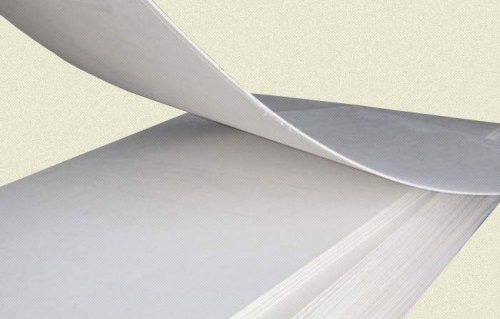
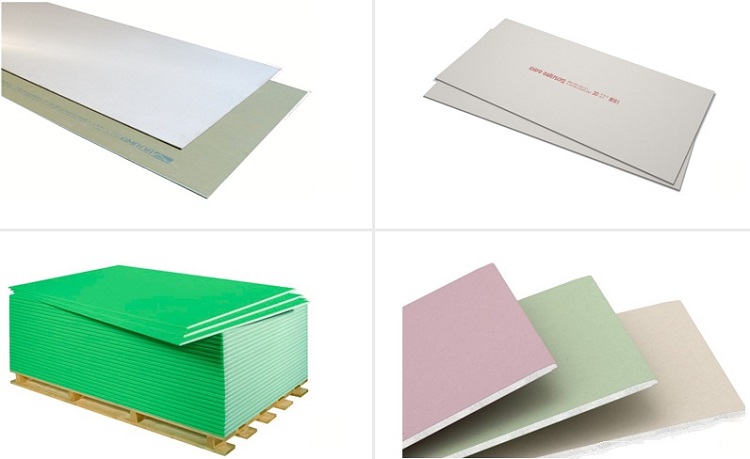
Anyway, today it is difficult to find some kind of finish that can not be done with the help of drywall sheets. It is for this reason that manufacturers are constantly increasing the range, offering customers more and more unusual and interesting options. The classic version of this material is a sheet formed using the pressing method.
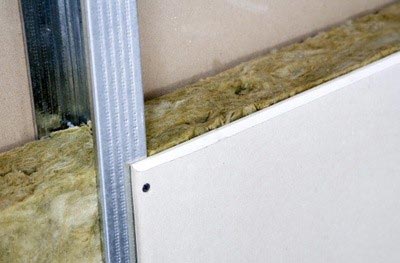
It has a core made of plaster as well as cladding layers made of cardboard. As a rule, before the plasterboard wall covering begins, it is necessary to find the desired look.
It is usually classified by purpose. And it is this that is the determining factor of its thickness, as well as the modification of the material. The main advantage of drywall sheets is versatility.
Moreover, drywall does not crumble after some time, and if it is operated correctly, then it will not cause any irregularities or cracks in it for a long time.Drywall allows you to realize any kind of idea, even an extravagant designer.
No less important argument is that material is suitable for carrying out various cables, wires, and also laying of pipes in constructional emptiness. Even if we talk about plumbing plumbing or the rooms where there is high humidity, then you can use drywall sheets with moisture-resistant properties. In addition, the material is environmentally friendly, because neither cardboard nor gypsum does not emit any substances harmful or hazardous to humans in the process of exploitation.
Kinds
Like any material, drywall has different types and types:
- ceiling;
- wall;
- moisture resistant;
- arched;
- front;
- fire resistant;
- vinyl coated;
- with insulation.
Now let's talk about each type in more detail.
Wall option has a thickness of 12.5 millimeters and a white and gray color. Apply this look when there is a need to realize any construction ideas on installation of partitions or walls or to repair. Or if you need to implement some design solutions.
Wall plasterboard is also widely used to create shelves and niches, as well as for the design of suspended ceilings.
Ceiling view drywall has a smaller thickness - only nine and a half millimeters, which makes it possible to significantly simplify the design, which is mounted. By name it is clear that this material is used for cladding the ceiling and when you need to make some multi-level solutions.
The flexibility of this type is extremely high due to the smaller thickness. For this reason, it is extremely in demand, if you want to create some kind of curvilinear structure. For example, the arch.

Arched Drywall is the thinnest of all types of this material. Its thickness is only 6.5 millimeters. It is needed to create all sorts of structures with a curvature of different radius.
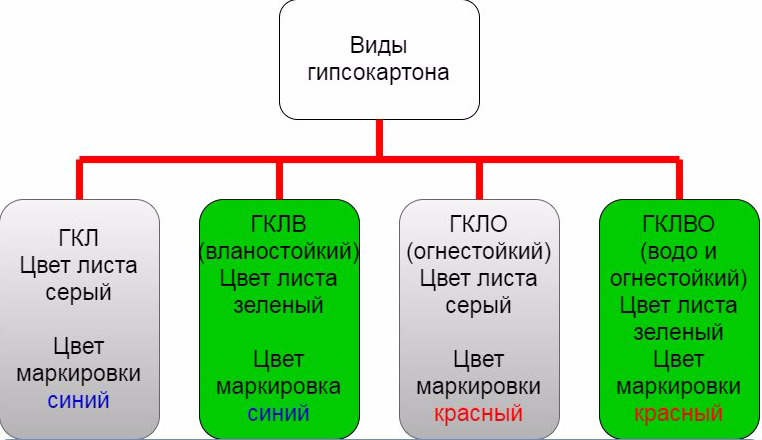
If talk about moisture proof cardboardthen it is marked with GKLV and painted sheets are green on the outside. Inside, it looks just like regular drywall. Its main difference from other types will be that it practically does not absorb water, which makes it possible to use the material when finishing toilets, bathrooms and other rooms in which high humidity is observed.
The red colored surface has fire resistant or fire resistant Drywall, which is labeled with gklo. Its difference lies in the fact that it has a reinforced structure inside, which significantly increases the characteristics of this material in the matter of susceptibility to fire and high temperatures.
Facade drywall on both sides covered with fiberglass. It can be recognized by the bright yellow color of the surface. It has a standard thickness of 12.5 millimeters.
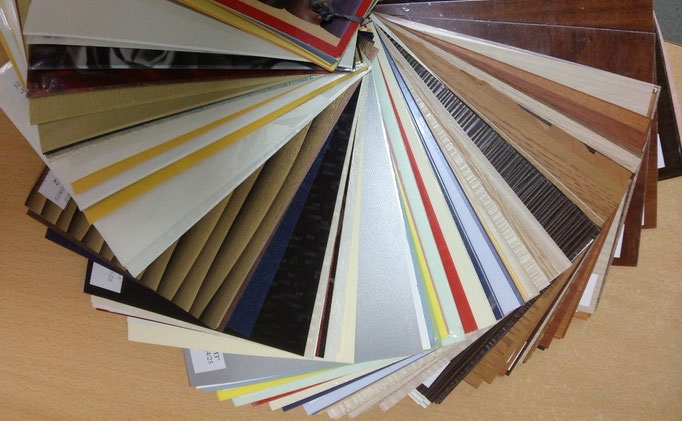
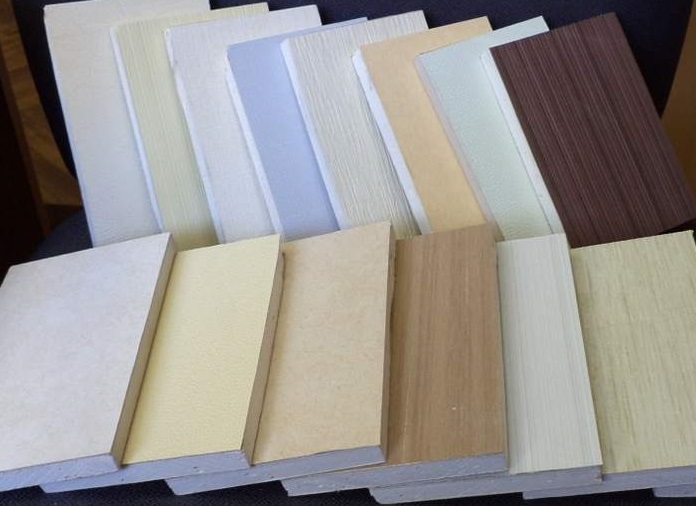
Vinyl Drywall - one of the new products that manufacturers have created with the aim of improving the versatility of drywall as such. In this case, one side of a drywall sheet has a vinyl decorated coating.
Any installer will appreciate the simplicity of working with this material, since it also comes with universal profiles, as well as various connecting elements that fit different colors. This allows the installation of walls with ready-made color solutions.
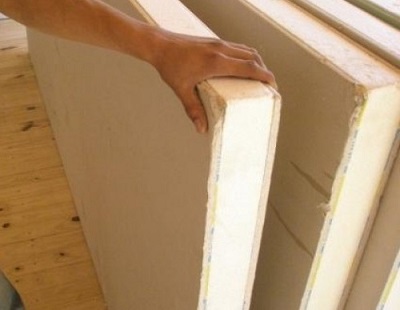
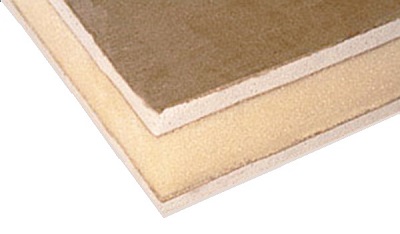
And the last view, which wants to stop attention - drywall with insulation. It represents another modification of the material. In this case, a block of expanded polystyrene is attached to the standard sheet by means of the adhesive method.The insulation layer can be up to 60 millimeters thick, which makes it possible to create walls with excellent insulation parameters.
If we talk about the size of drywall sheets, then they were standard for a long time. But now on the market you can easily find options with a width of 60 centimeters and a length of two and a half meters.
Edge Types
Before working in a house or apartment, it is important to choose the right type of gypsum board that may have different types of edges. This is important because certain types of edges make it possible to seal the seams without any protrusions.
There are such types of drywall by type of edge:
- straight;
- refined;
- semicircular from the front;
- semicircular and thinned from the front;
- rounded.
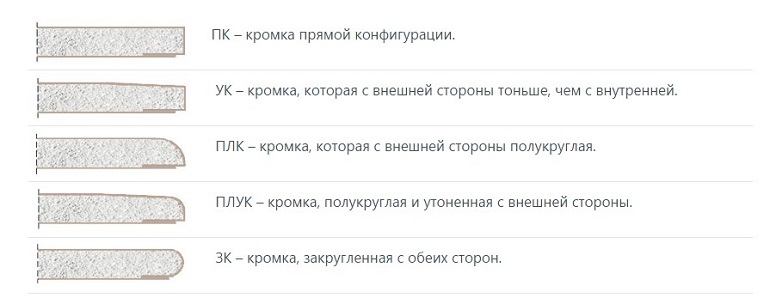
Now let's talk about them in more detail. The first type is designated PC or SK. With such an edge, it is not necessary to seal the seams.
The second type is designated AK or UK. In such a drywall, walls are additionally reinforced with a special tape, after which they are puttied.
The third type is designated PLC or HRK. In this case, the joints are only puttied.
The fourth type is designated HRAK or PLUK. In this case, as in the case of a thinned edge, the drywall joints are additionally reinforced with special tapes, and then puttied.
And the latter type is labeled ZK or RK. In this embodiment, the drywall joints will only be putty.
The most commonly used in the decoration of the premises are sheets with types of edges PLUK or UK, as they provide an opportunity to seal the seams without protrusions.

Types of construction
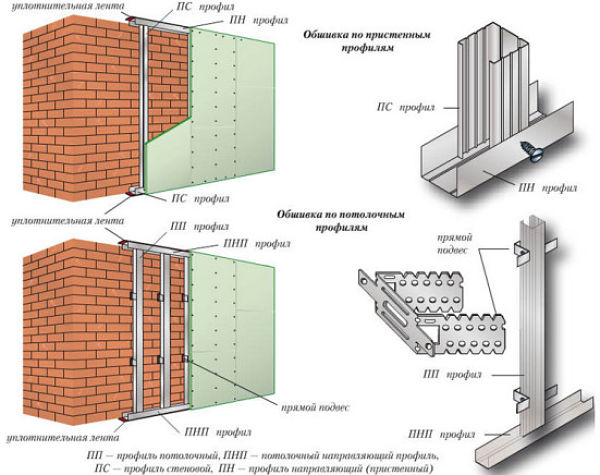
Now, a little need to pay attention to such a moment as structures or profiles for creating a rigid frame, since without this it is simply not possible to make a high-quality installation. There are many of them, which sometimes even a good specialist can be stumped.
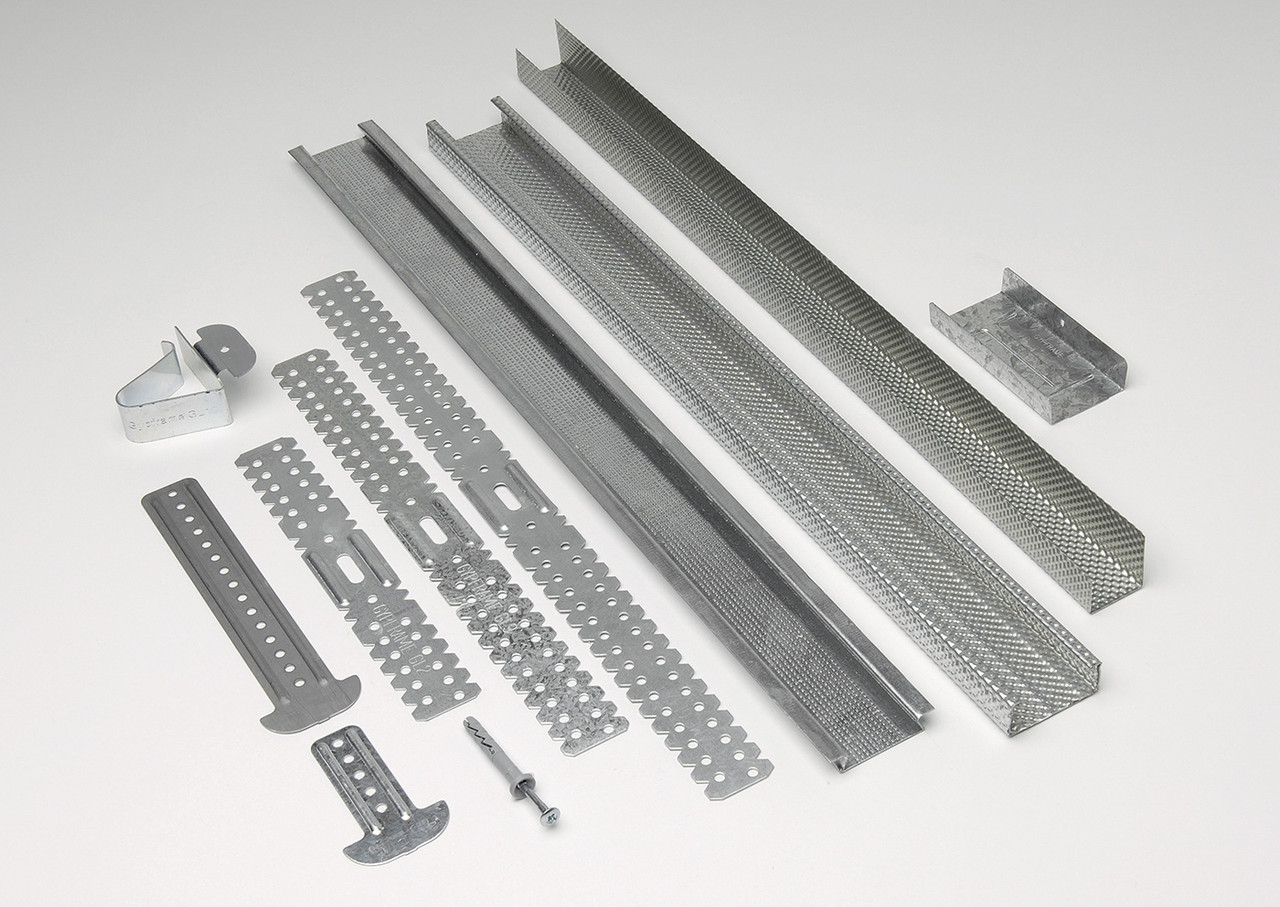
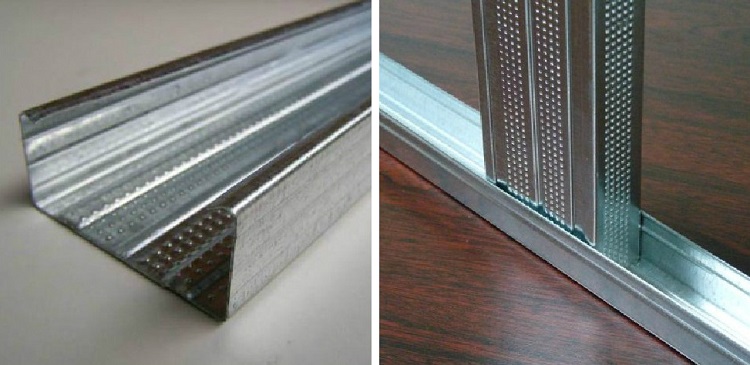
If we talk about the basic structures, then there are only six types:
- Guides for frame assembly. They come in two kinds of mon or uw. Their depth is 4 centimeters, width - 5, 7.5 or 10 centimeters, depending on how thick the wall is. The name tells us that this product guide is a kind of rail, the basis for fixing ceiling and rack-mounted guide profiles, which will be installed later.
- Ceiling guides. They are of two types - UD and PNP.They have the same functions and are necessary for installing the base of the ceilings for plasterboard. This type is indispensable for the installation of suspended multi-level ceilings.
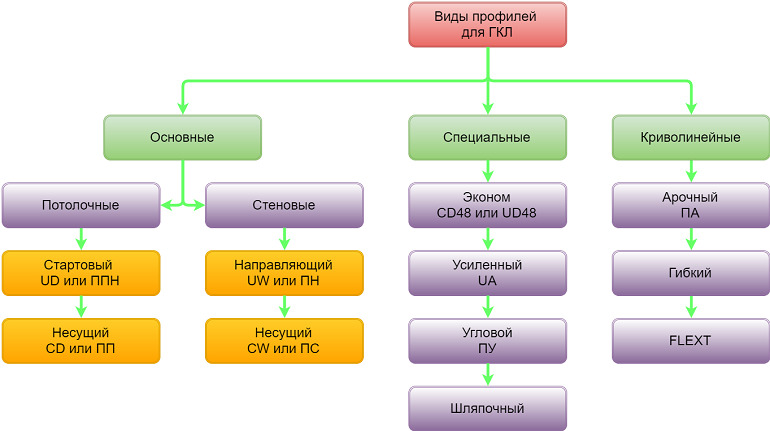
- Ceiling. They are either PP or CD. They are attached to the ceiling with anchor clamps or direct suspensions. The ceiling frame is formed from this type of rails.
- Rack-mount. They can be either PS or CW and are used to install the basis of plasterboard partitions, or the walls. As a rule, they are fixed directly into the guide profile.
- Mayachkovye designed to align the wall level. Such a design can be called a rail, on which the rule follows. It is quite convenient to use it during plastering walls.
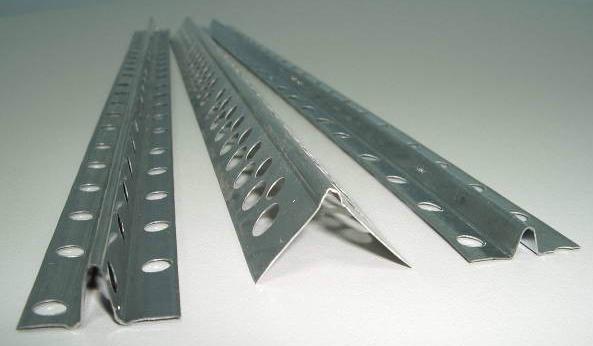
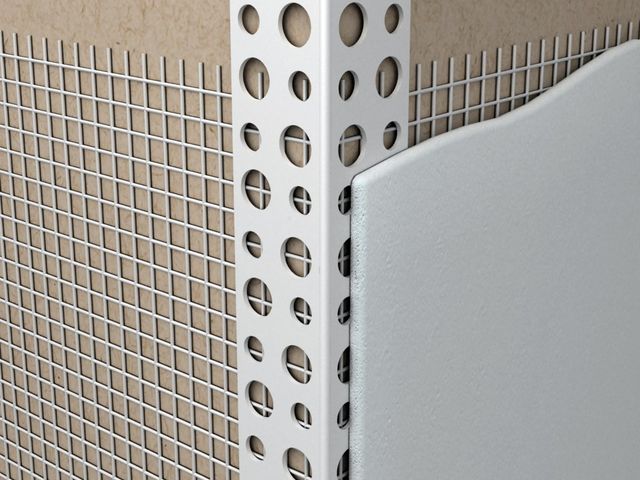
- Corner designs intend for strengthening of corners and alignment.
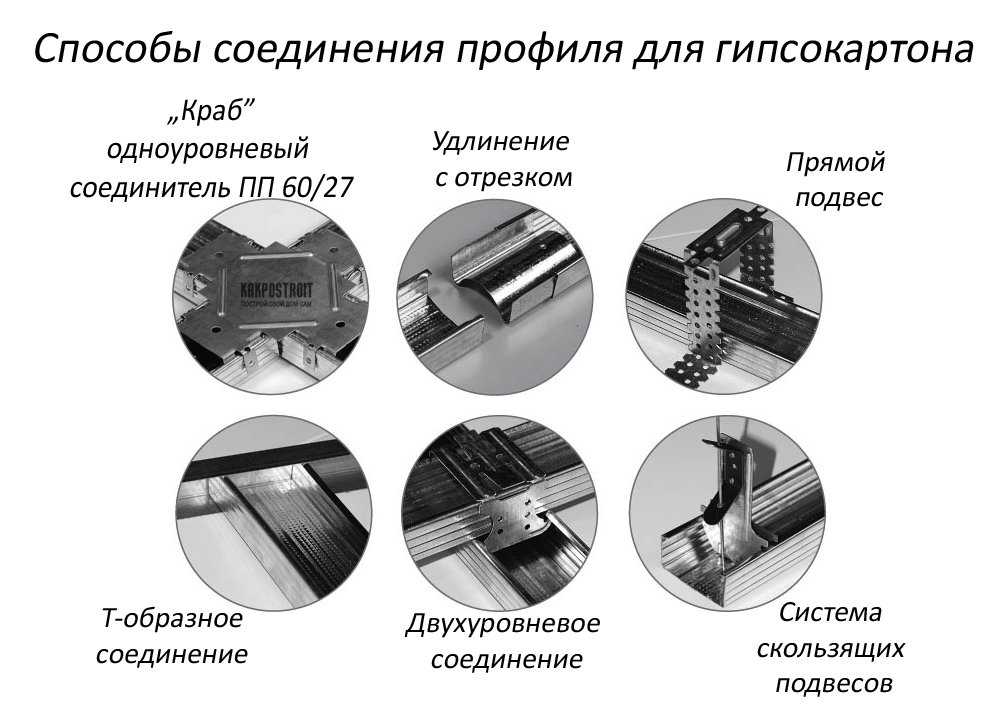
It should also be noted that for fixing different types of profiles can be used connectors-crabs, extension cords for different combinations of pieces of metal, direct suspensions, anchor clamps, two-level connectors. And to create various designs from profiles, usually use pincers, a cutter, a bending tool, nippers, a peeling plane, and so on.
Application area
Drywall sheets are commonly used for:
- ceiling finishes;
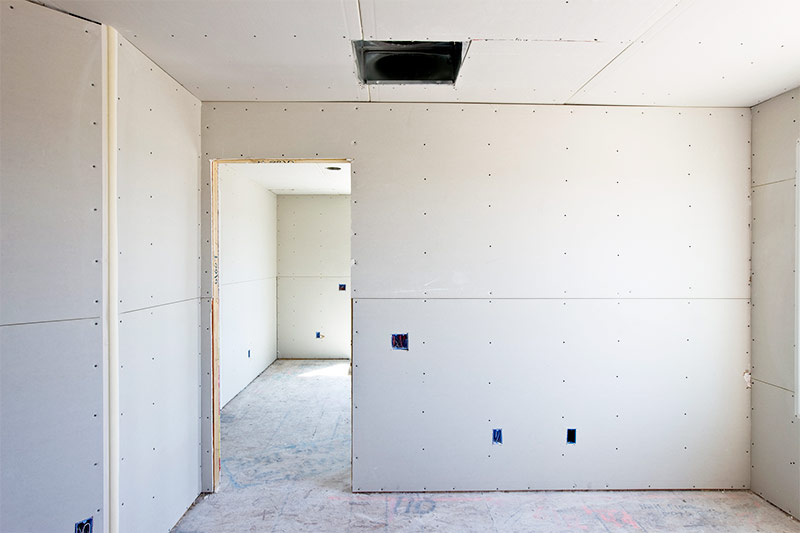
- wall leveling;
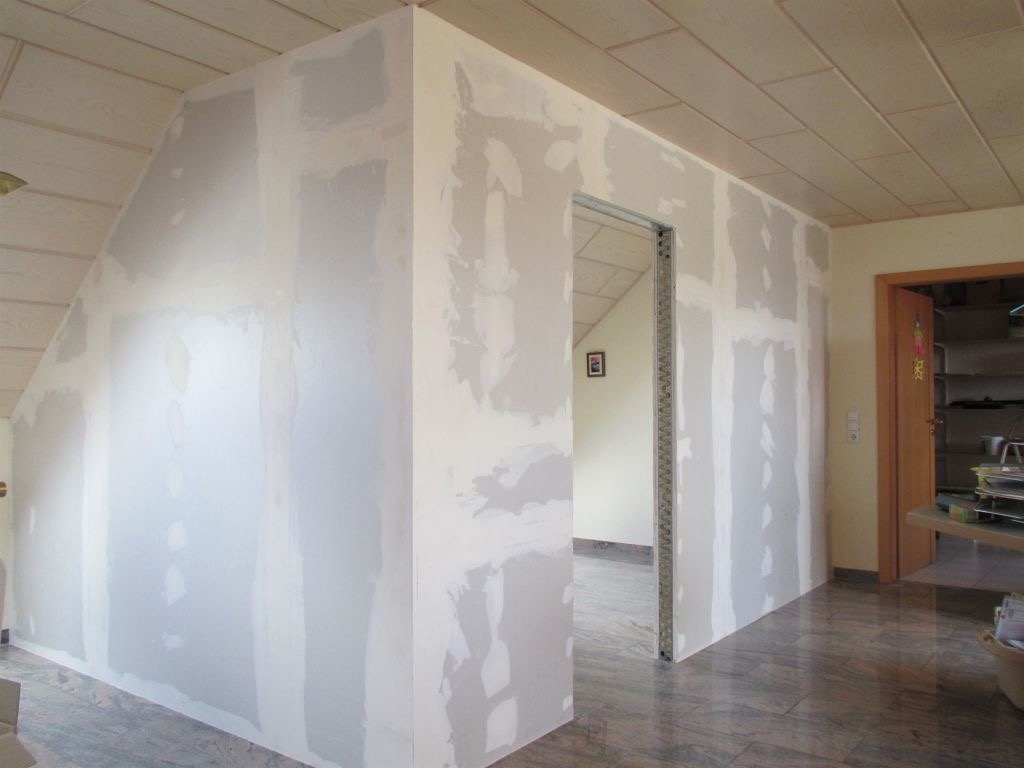
- the construction of partitions;
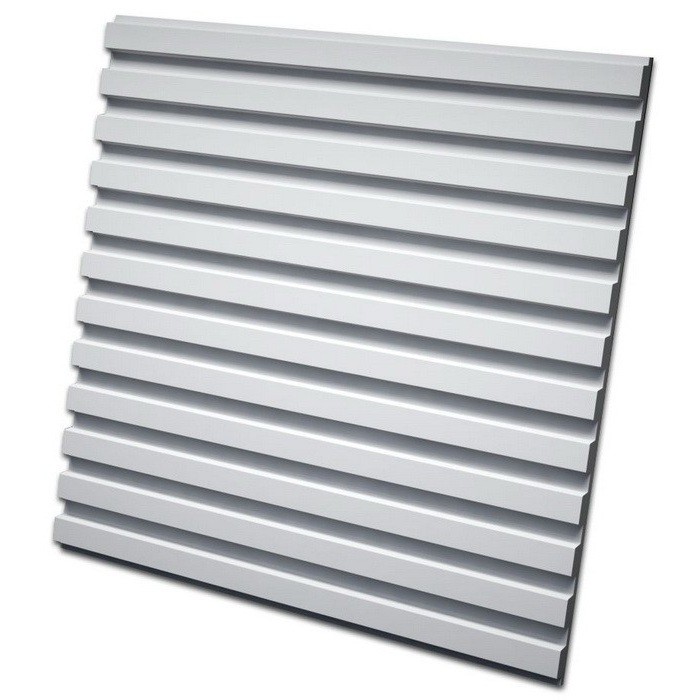
- creating relief;
- repair of existing structures;
- filling openings and cavities;
- creation of architectural compositions of various types - columns, arches, shelves, plinths.
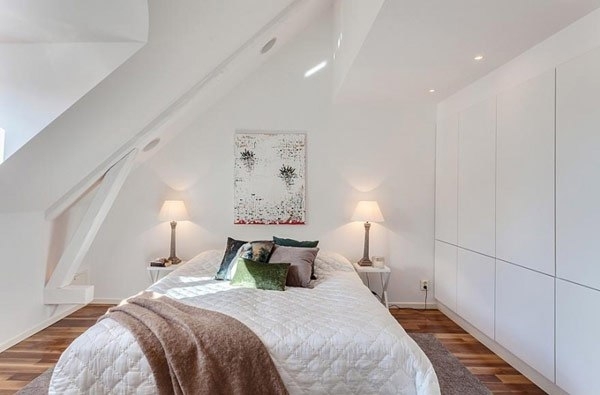
That is, the interior decoration made by gypsum plasterboard is an excellent solution. It can also be used in the attic or attic. For finishing the attic can be used and moisture-resistant drywall. It is also used to finish the bathroom, bathroom or kitchen.. Fire resistant types are used to create communication shafts and ducts.
In the case of the latter, it will be possible to easily lay various electrical or telephone cables, dust removal or heating systems, as well as plumbing systems. Besides, drywall is often used when laying precast floors.
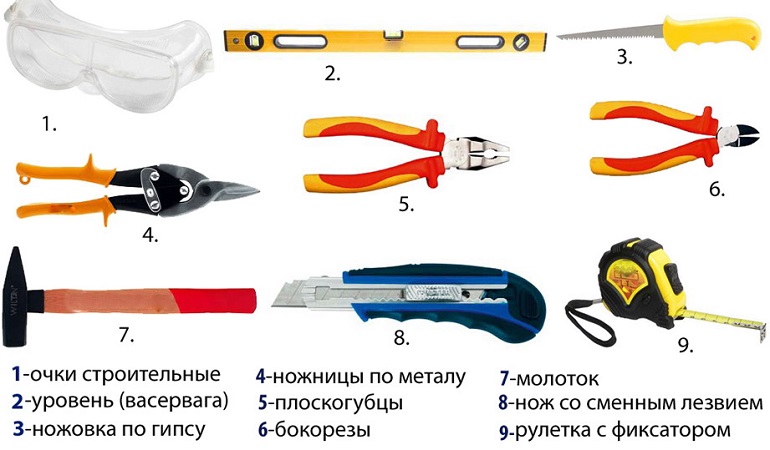
Instruments
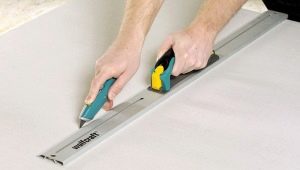
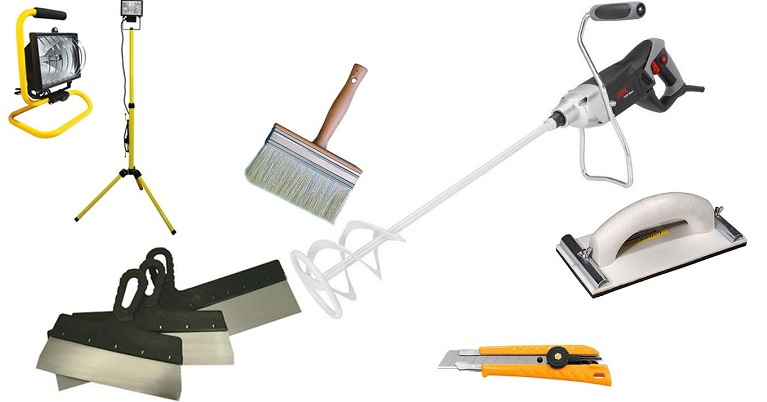
Drywall does not have any special mechanical properties and it can be quite easily processed with a simple tool. In order to cut the sheets into pieces, we need a saw or a hacksaw for wood.To create long straight cuts when cutting, you should have a circular saw at hand. If you need to make some complicated elements or parts by marking, you can use the jigsaw. The construction knife will be necessary for trimming the edges of the parts after cutting.
For measurements when cutting and marking will need a tape measure. Construction plumb will be necessary to control the position of the sheet in space during installation. Will also need a carpentry level. Drill holes for fasteners can be using a conventional electric drill.
To install fasteners during fixing of drywall parts, as well as to assemble a frame of metal profiles, you will need a screwdriver.
It is necessary to have on hand and a set of spatulas. And the set should be both narrow, medium, wide, rubber and angular metal spatula. To apply the primer, we need a foam roller and a paint brush. In addition, to stir the dry mixture will need to attach the drill and the capacity for stirring.
And it does not hurt to have on hand sandpaper. This is the main tool for working with drywall.With it, you can make the alignment, primer, as well as decorative walls of plasterboard.
If we talk about materials, then we will need:
- primer;
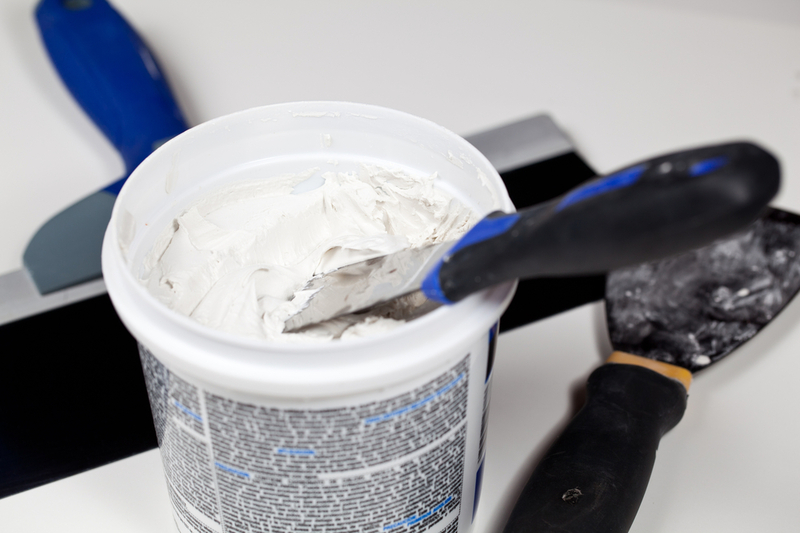
- acrylic based putty;
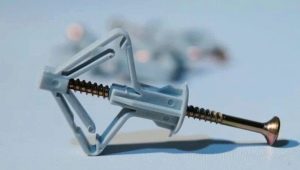
- fasteners for drywall;
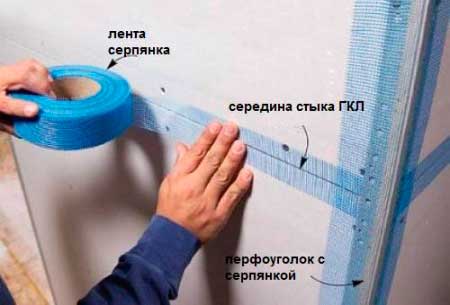
- fiberglass serpyanka tape;
- insulation for laying;
- themselves sheets of drywall of various sizes.
Now let's say a little more about each material. Primer will need to strengthen the surface of the walls. Putty will be needed for the repair, as well as the preparation of the surface of gypsum boards for the application of the main leveling layer. Self-tapping screws of special shape can be used as fasteners. Insulation will be needed for plasterboard sheets and to prepare the surface of the material plates for the application of the main leveling layer.
And various sheets of drywall will be needed for:
- the formation of spatial forms of parts;
- for ceilings;
- for wall cladding;
- for laying the flooring with a dry screed.
How to calculate the required amount of material?
The calculation of the required number of drywall sheets and other materials should be based on the fact that you know the net area of all the walls of the room.In order to calculate the net area of each individual wall, it must first be multiplied by the length and height. By the same method, it is possible to calculate the area of door and window openings on this wall, if any. Now from this area it is necessary to take away the resulting area of window and door openings, which will allow to get a clean wall area. In general, as you can see, everything is simple.
When calculating the amount of materials, it is necessary to keep in mind that in most cases the width of any gypsum board is 1.2 meters, but the standard length can be different - 2 meters, 2.5, 2.7 or 3 meters.

In addition, one should take into account the fact that in the process of work there always remain some kind of trimming, and part of the material becomes unsuitable. It is for this reason that when purchasing drywall and components for its installation, you should buy everything with a small margin.
Wall markings
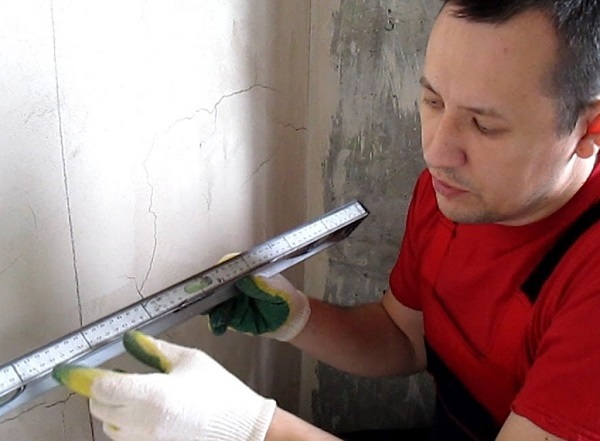
The process of marking walls requires a lot of attention and certain skills, as well as the use of the right tools. An indispensable thing when conducting this process is the laser level. But, naturally, to buy such expensive equipment in order to lay the drywall on the wall once is not the best solution.
For this reason, most often the markup is done using the usual level, as well as some additional components. If you can mark up using a laser level in just a few tens of minutes, then with our method it will be a little longer.

When we measured the required distance for carrying out various communications and laying insulation, a plumb line is fixed on the ceiling, closer to the corner. And at the point where it comes into contact with the floor, a note is made. Best of all, if in this place will even be screwed screw.
And this procedure must be repeated with the other three corners. After that, in order to facilitate the marking process, it is necessary to stretch a regular thread between horizontal dots. When the lines to the floor and ceiling are moved, the threads can be removed. Now you can proceed directly to the installation of the profile.
When making markup, it should be remembered that the wider the indentation from the base of the wall is, the more space will be “eaten”. The profile will be installed along this line, and the putty, the final coating, and also the plasterboard sheets will increase the thickness by another 1.5-2 centimeters. But in the case of a plasterboard wall, the minimum indent should still not be less than four centimeters.. By the way, it should also be noted that the drawing must be applied in such a way so that after several careless movements it is not erased and there is no need to redo all the work again.
Frame
Before you start working with the frame, you must completely free the room from the furniture and remove the old coating from the wall. If it is planned that there will be hidden electrical wiring, heating pipes or other communications behind the drywall, then this must be done in advance.
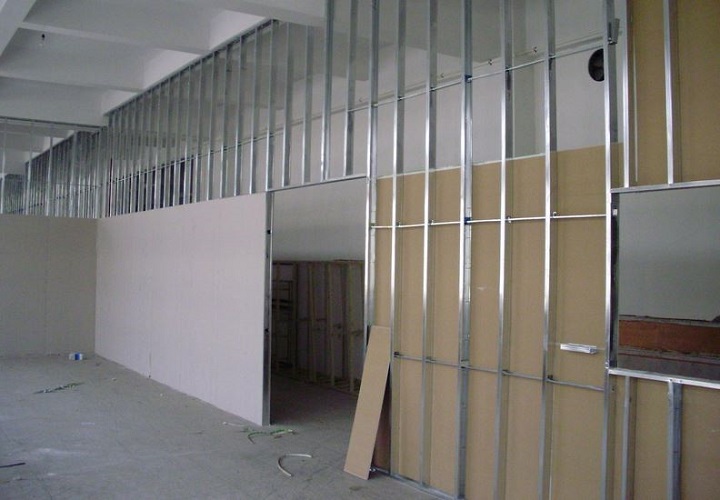
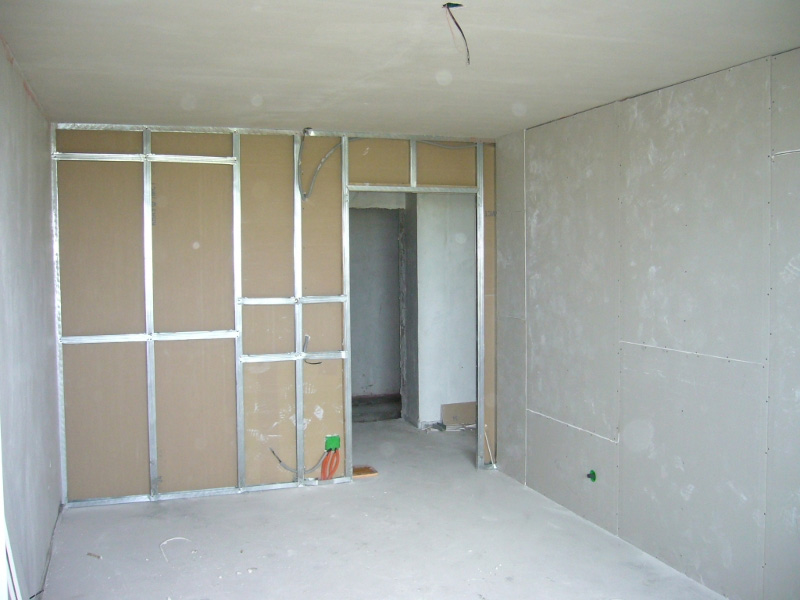
That is, until you mount the supporting frame on the wall. After the surface of the walls has been prepared, First of all, it is necessary to correctly install the upper and lower guide profiles. in room. And to be more precise, along its entire perimeter.
To do this, first, the U-shaped profile should be laid on the floor and carried out its fastening using self-tapping screws parallel to the wall along a building cord that was previously tensioned. Now you need to fix the top profile of the same shape in the same way to the ceiling.
And we must pay attention to the plumb line, which was lowered to the longitudinal centerline line of the profile from above, to pass clearly through the same line located on the lower profile.
This will enable the installation of the plasterboard wall to be made directly to the wall. Then the top rack profiles can be fastened to the walls.
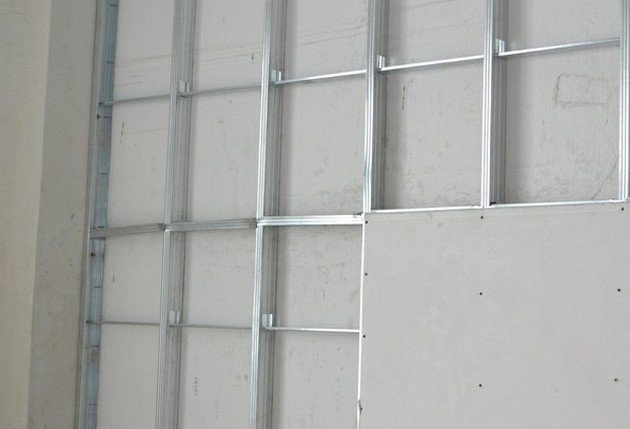
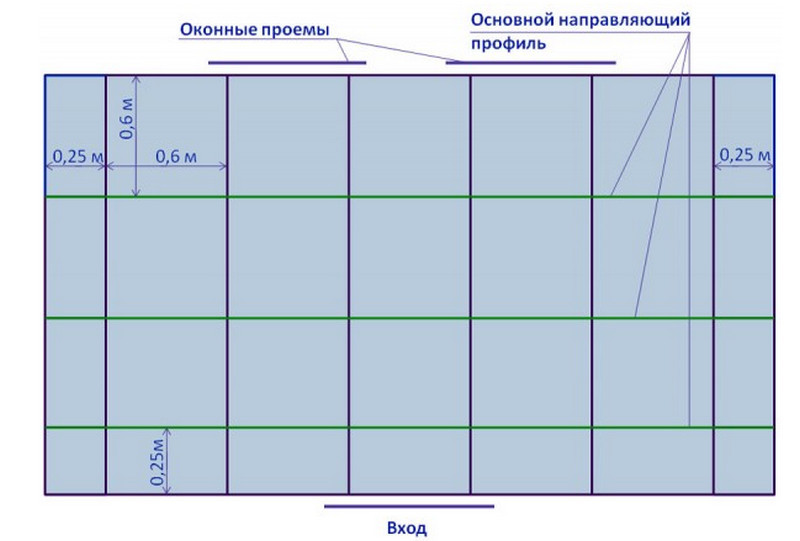
If the main walls do not have any strong curvature, and the horizontal profiles were fixed on a large slope from the wall, then special U-shaped distance brackets will be required to fix the rack-mount vertical profiles. In order to do this, from one of the corners around the perimeter of the room on the walls from floor to ceiling should draw vertical straight lines every 60 centimeters. Now in each corner on each such line it is necessary to fix several brackets.
In this case, you should be guided by the fact that the distance from the bottom bracket to the floor, and from the top to the ceiling should be 50 centimeters. In the same time the distance between two adjacent should be in the range from 80 to 100 centimeters. Now you need to take a rack profile and cut it into a certain number of identical parts. Over the entire length, they should be equal to the height of the room from the level of the floor to the ceiling. In the same way we fasten the rack profile at the top.
Each piece should be mounted vertically between the holders in the shape of a letter P. The lower and upper ends should be inserted inside the corresponding profiles and fastened to the sides of the walls with self-tapping screws. Now it must be installed vertically. For this it should be level and attached to the paws on the sides of each bracket using two screws.
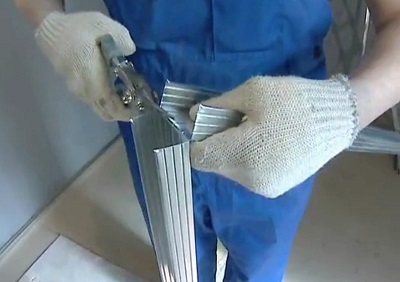
If the legs will be a little, then you can cut them with scissors for metal or grinder. Now, in the same way, you should install a wall-mount profile along the perimeter of each window or door opening. Having carried out the installation of all vertical racks, it is necessary to tie them together with transverse horizontal bridges from the same profile.
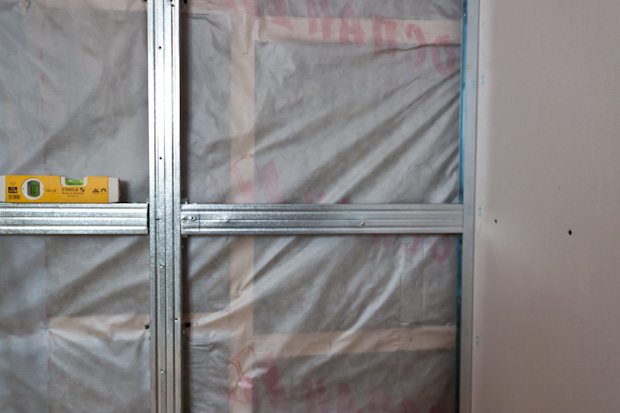

By the way, to facilitate the installation of jumpers, you can use special connectors, crabs, which will enable you to join two profiles of the same type in the same plane at a right angle.As mentioned above, when installing horizontal jumpers, one should proceed from the fact that the distance between their axes should be within 60-80 centimeters.
Subtleties of installation
If we talk about installation as such, then due to certain difficulties, not everyone wants to deal with it. The fact is that the need to install metal profiles with their own hands scares even some of the pros with a large number of stages, as well as the complexity of the work. Despite the fact that this type of fastener is considered the best option, there are other technological solutions.
There are only 4 ways to plaster walls with plasterboard:
- with metal profile;
- on a rack basis;
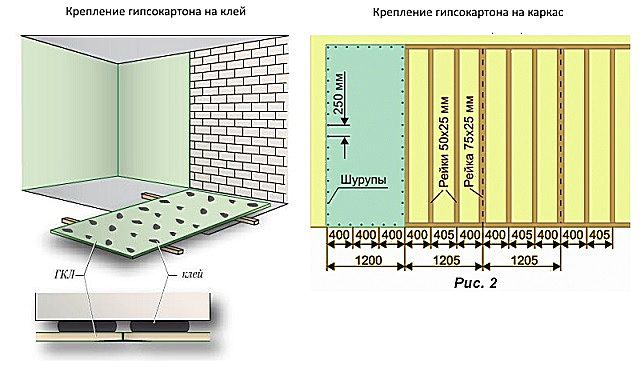
- adhesive method;
- using a plaster frame.
Now let's talk about each method in a little more detail and try to consider the subtleties of each of them.
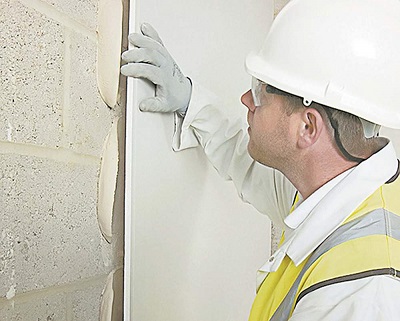
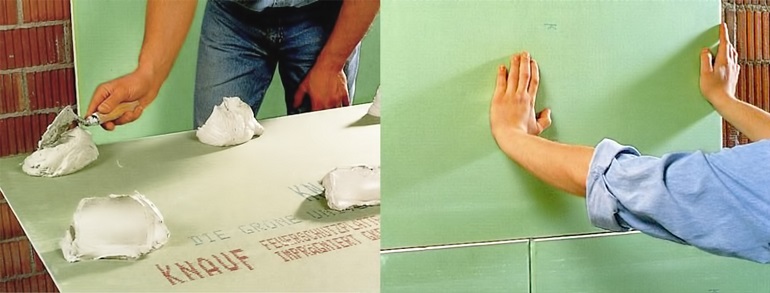
Adhesive
Using this option can be made to finish the walls, which have a virtually flat surface.
This method is good with the following points:
- the speed of work increases significantly;
- ease of installation, when compared with other similar methods;
- the strength of the walls to various physical influences increases significantly;
- free space consumption will be minimal.

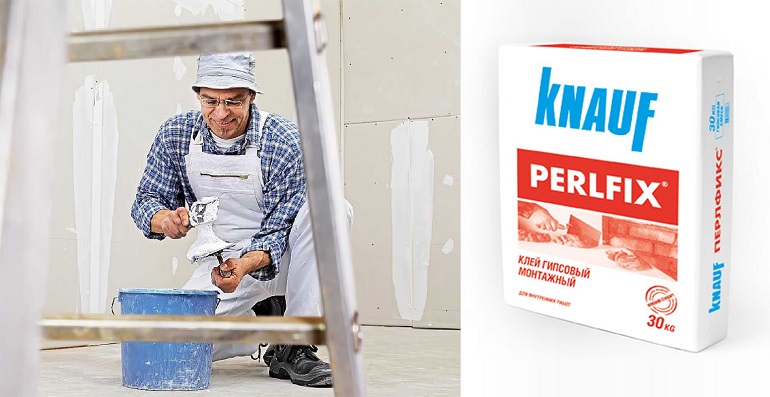
It is possible to fix the drywall in this way with the help of glue, mastic or some other construction mix that has high adhesive properties.
It is best to use for this:
- Ceresit CM11;
- silicone;
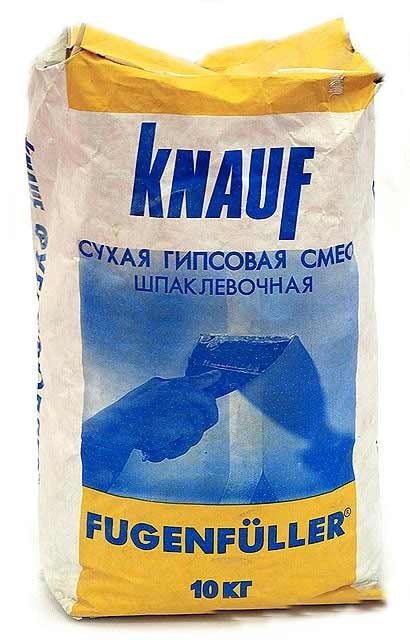
- fugenfüller;
- perflix


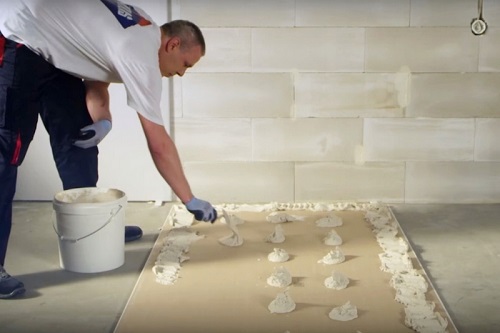
In this case, the sheets of drywall set in a checkerboard pattern. For this reason, the sequence of work should be as follows:
- the implementation of the marking of the walls with the designation of the edges and the middle of each sheet;
- carrying out primer walls;
- preparation of drywall sheets, i.e. their trimming;
- glue preparation;
- putting glue on the wall;
- gluing drywall.
It should be clarified that after carrying out the primer, it is necessary to withstand the necessary time for complete drying of the composition - usually from noon to one day. It should also be remembered that adhesive solutions should be consumed as quickly as possible, as the glue is diluted immediately before the moment when work begins. And because it must be used in full.
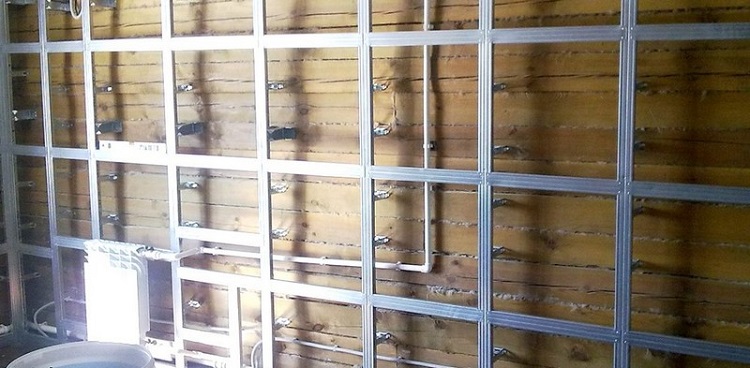
Installation on a wooden or plaster frame
The basis of gypsum is quite convenient for attaching sheets of material, if there is only a small drop in the wall plane. The frame is made of drywall pieces 6-8 centimeters wide.
Gypsum slats are mounted on walls using a screw or glue joint. And already on this basis, you can mount sheets of the selected material. In the same way, the installation of plasterboard sheets on a wooden base.
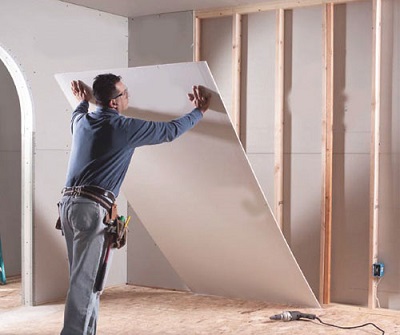
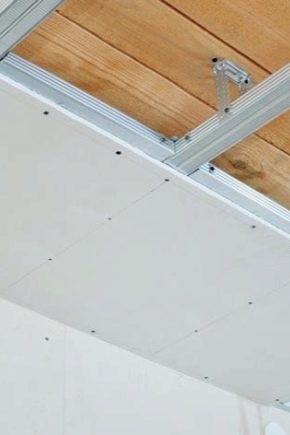
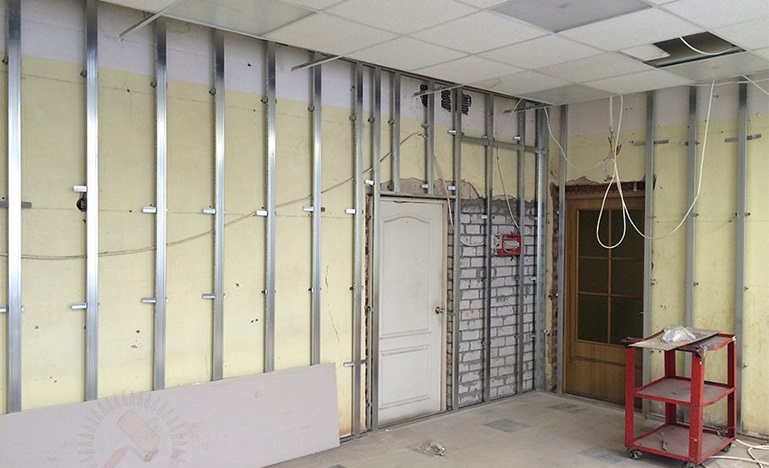
Installation of drywall on profiles
This type of installation of sheets of drywall gives the masters the opportunity to implement almost any idea of the client during the interior design.
Also, the frame method allows making false walls in some convenient place and use for this additional layers of insulation. That is, in this case, additional insulation, sound insulation, as well as insulation can be made, if there is a need for it. Fixing drywall sheets is possible with a metal profile.
As a rule, one of the four options listed below is used for this:
- rack-mount;
- ceiling;
- guide;
- ceiling guide.
The first type has the shape of the letter "C" and is used when creating partitions, as well as when lining should be made.The second type has the shape of the letter "P" and is necessary for the formation of partitions and during the finishing of the walls. The third type is a great solution when creating a framed ceiling. And the last option will be a good solution for installation work with ceiling frames, as well as a vertical profile of the walls.
In order to sheathe the walls with drywall in this way, you should follow a certain sequence. The first step is to mark the walls.. Although we have previously described the main points of this stage, it would not be superfluous to say about them again.
That is, we first mark the indentation from the working wall to the outer level of the gypsum plasterboard. This is usually about 20 centimeters - the best distance to level the surface, distributing and removing wiring and creating insulation for it. This indent should be marked around the perimeter.
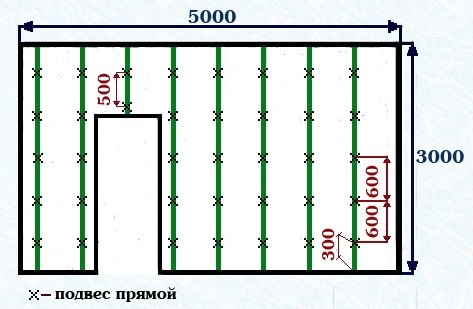
Now the marking of the wall itself is done, when in steps of 60 centimeters verticals are drawn on it and marks are made for suspensions in increments of 50 centimeters in a checkerboard pattern.
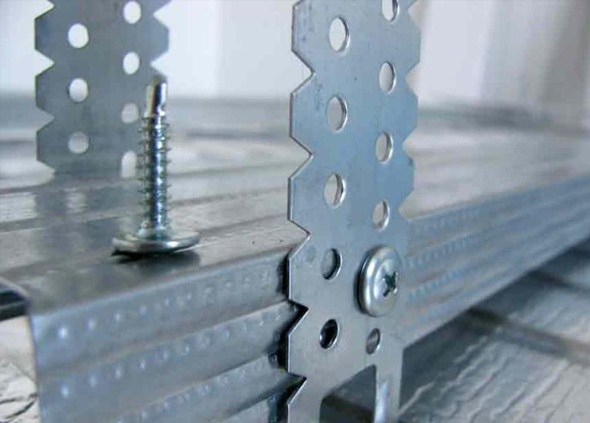
The second stage - the installation of the profile. At this stage, the technology in question involves the installation of a starting profile around the perimeter of the working wall, after which suspensions are installed in various places.In the future, suspensions will be installed in the previously planned locations. After a time they will need to fasten the guide profile.
All profiles and various auxiliary elements can be screwed with screws or dowels.
By the way, professionals also advise at this stage to use dihtung for sound insulation of structural noise. Installing it is easy - you can glue it onto the surface of the supporting profiles.
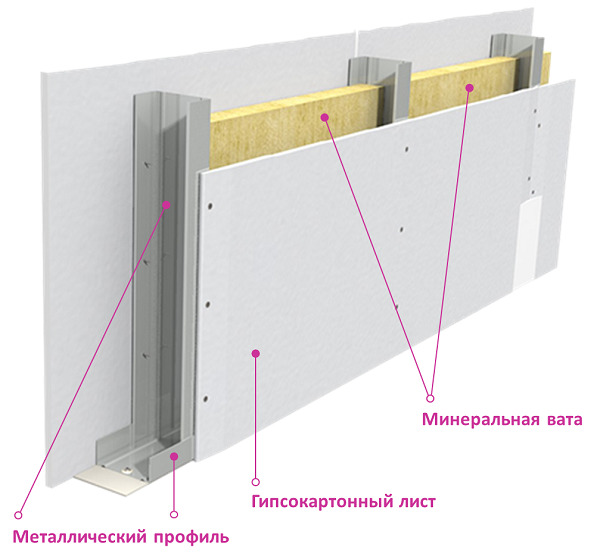
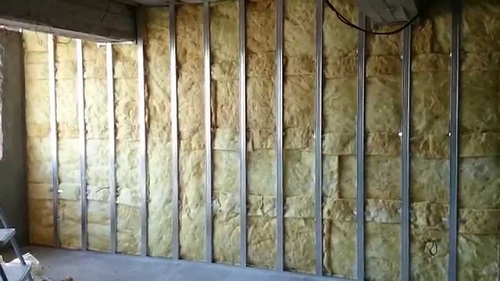
The third stage - working with the insulating layer. If there is a need to work with insulation, then for direct fixing of GCR from the inside, the space between the profiles is filled with blocks of insulating material - mineral wool plates or foam.
The next stage - preparation of sheets. According to the rules, drywall sheets are cut into blocks according to the markup. If necessary, then they make holes for sockets or switches, using a hacksaw or jigsaw.
Fifth stage is a direct installation of drywall. That is, we can already sheathe the walls. By the way, you can do this if you install the sheets using metal screws to the profile. The pitch should be no more than 25 centimeters.Best of all, if the screw is like going into the surface of the sheet one to two millimeters.
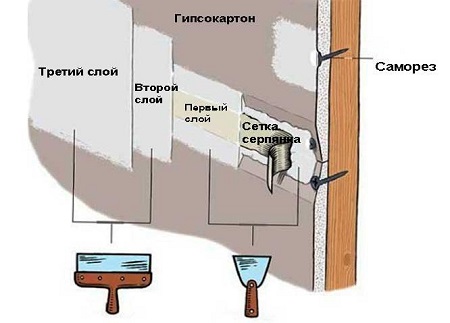
When working is important stacking the sheets of drywall. It is also necessary to monitor the location of the seams.
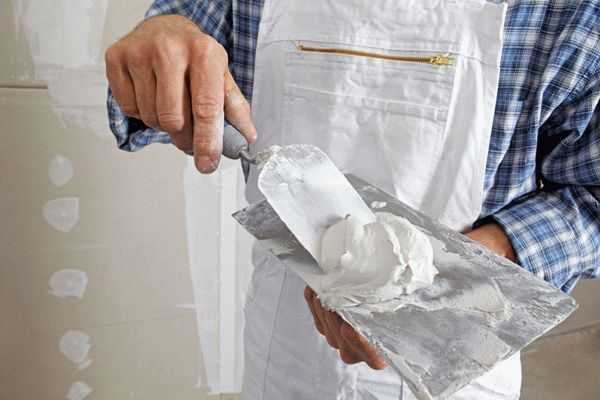
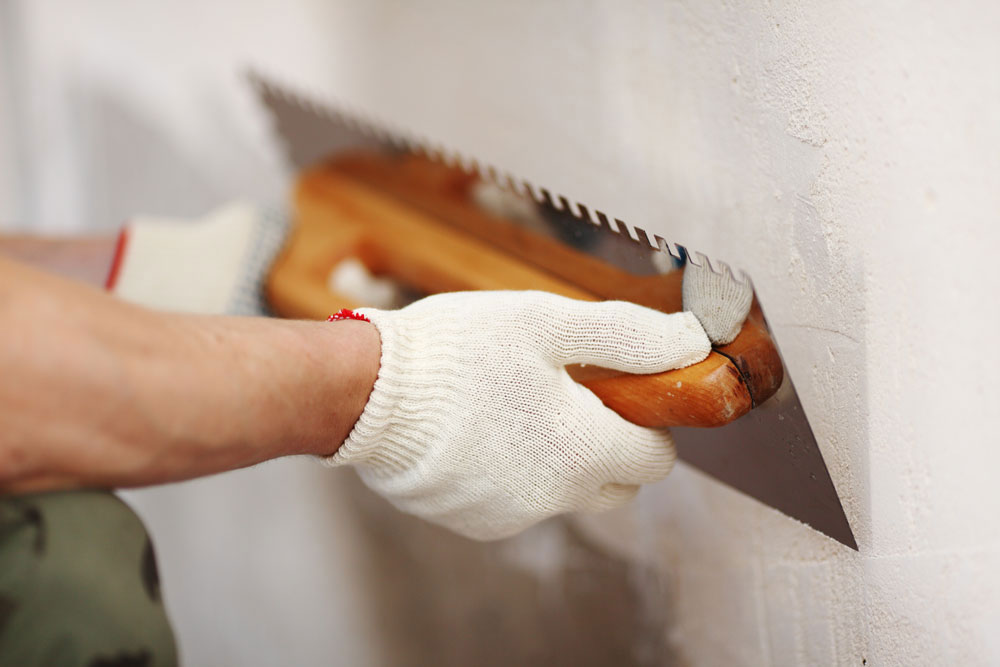
The sixth stage will be putty. This type of work is required when installing drywall. It allows you to completely close the joints, and also allows the reinforcing mesh and protective corners to fit snugly. Installation of the specified elements is obligatory on external corners. And you can install them on internal ones at will.
If the putty of works was of high quality, then on the wall should not be visible traces of fastening or reinforcing elements.
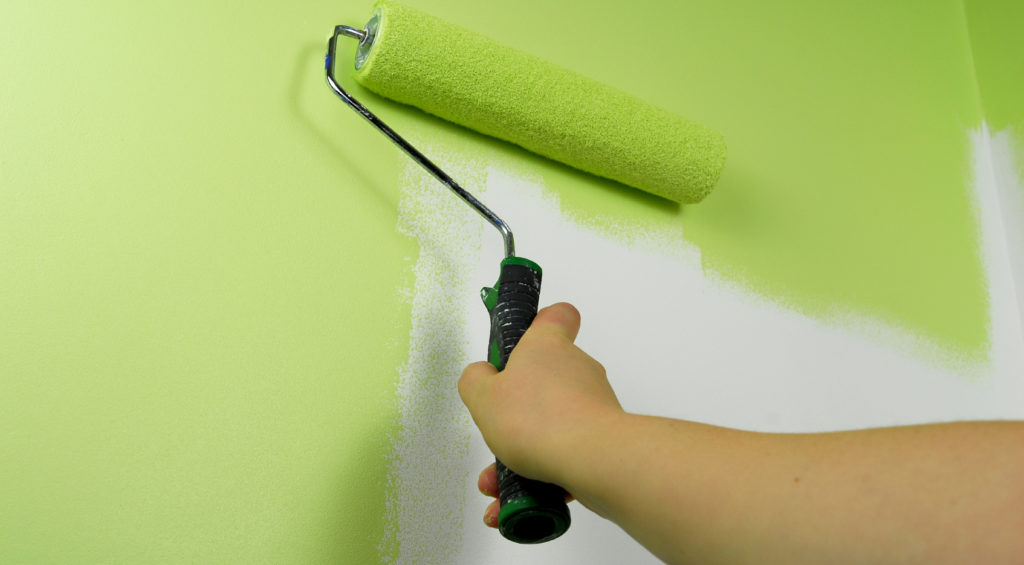
The seventh stage will be finishing works. At this stage, you can do such a repair. That is, you can glue the wallpaper, paint the walls and do any other actions that fall under this expression.
Tips and tricks
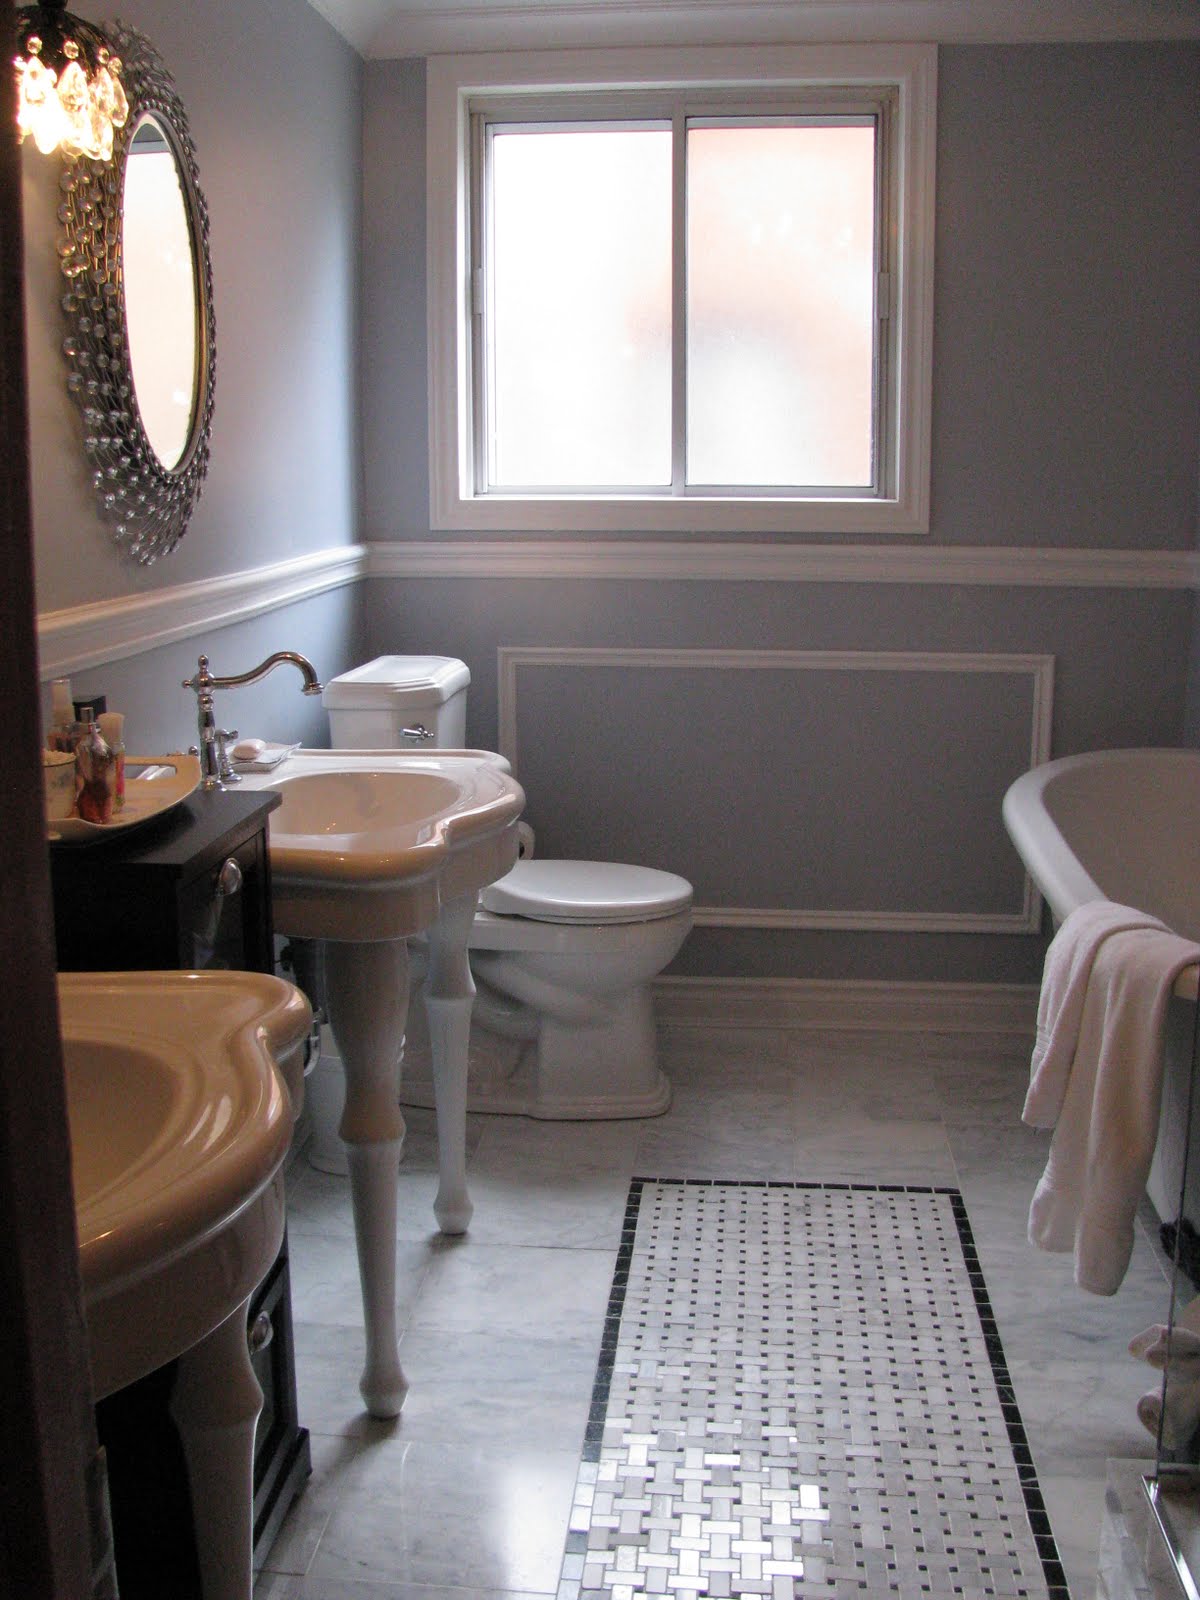
To decorate the walls in different rooms of apartments or private houses, you can use any type of drywall. At the same time, it would be best to use regular drywall, as its price will be less. When repairs are made in a room where the level of humidity is high, it is best not to save money and to buy moisture-resistant drywall immediately.It not only does not collapse under the action of moisture, but also its surface better resists the appearance of the fungus.
If you need to finish the walls of some boiler room, it would be better to use fireproof plasterboard. This material can also be used to design stoves and fireplaces, if you install a non-combustible insulation between them. This insulation is more intended for industrial use, but it can be applied when finishing a private house.
For example, it is well suited for facing a smoke channel or a furnace door in a bath in a cold dressing room. At the same time, if necessary, it will be easy to dismantle it.
To install drywall on the supporting frame will need to be prepared. To be more precise, it will be necessary to purchase a profile of two types of metal coated with zinc, docking crabs, straight distance brackets, self-tapping screws for metal with a hat on the supporting frame.
Horizontal profiles with a cross section of 28 by 27 millimeters are installed one below, at the level of the finished floor, and the second - under the ceiling itself. The total length in this case should be equal to the double perimeter of the room.
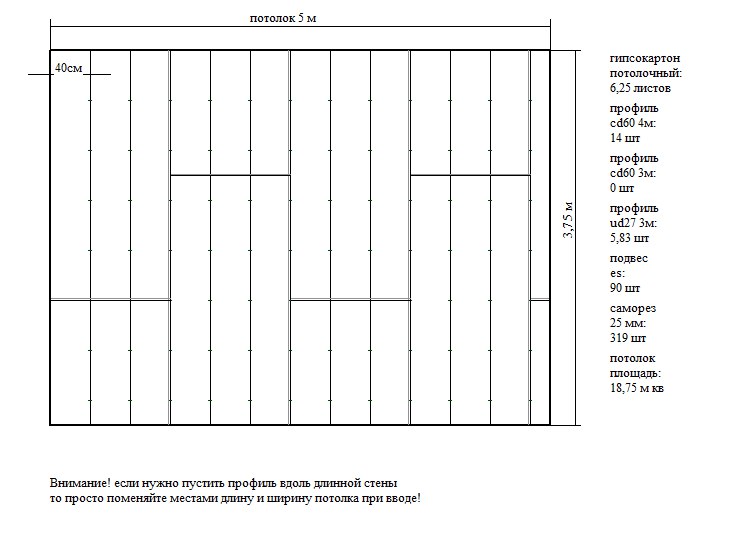
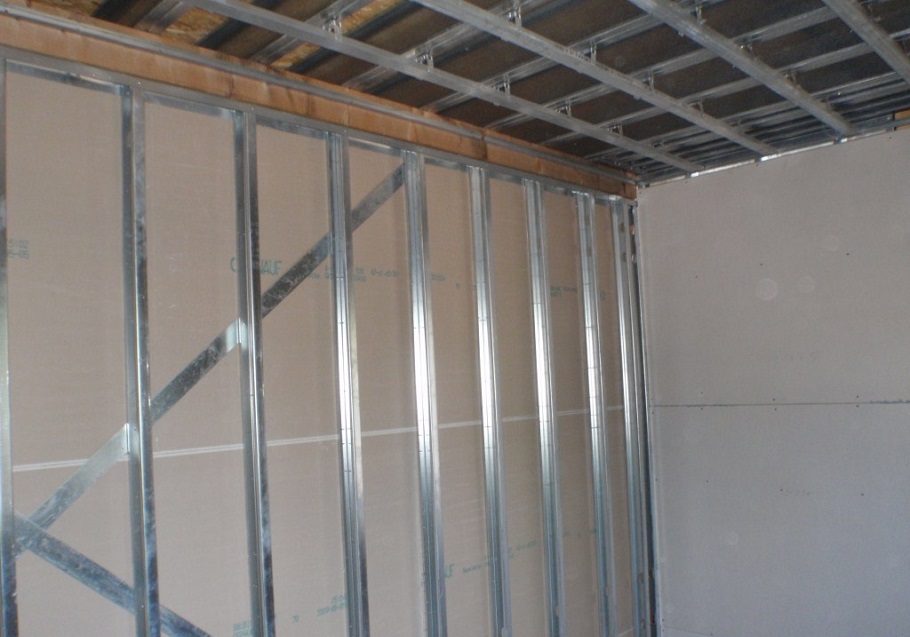
If we talk about a rack profile with a section of 27 by 60 millimeters, then it is mounted vertically from the ceiling to the floor over the entire area of the wall with a step of 60 centimeters. In order to find out how much such a profile is needed in meters for one wall, it is necessary to divide its entire length by 0.4 and multiply it by the height of the room.
To find out how much distance brackets you need, you should not forget that 4-5 brackets are required to fasten each rack profile. It’s impossible to know exactly how many self-tapping screws will be needed, but most experts say that it is better to have on hand from 300 to 500 self-tapping screws.
If you have plans to stitch the walls according to the so-called frameless technology, then you will need to buy a special construction adhesive to work with gypsum plasterboard. To understand what will be its consumption per square meter, you just need to read the information on the packaging. The final important tip is that standard thickness of drywall sheets can vary and be 6, 9.5 or 12.5 millimeters.
The thinnest sheets of drywall lend itself well to bending in an arc. It is for this reason that they are used for the manufacture of various figured details of the interior.
Sheets with a thickness of 9.5 millimeters have a relatively small mass, and therefore are used when sewing ceilings. If we are talking about finishing the walls, then it would be best to use sheets with a thickness of 12.5 millimeters, since a lot of weight is not critical for them and they have the maximum strength among all types of drywall.
If to sum up, it should be said that to make the installation of drywall with your own hands is not an easy task, but rather doable. In order for this process to really be as accurately and precisely accomplished, it is required from the very beginning to understand what you are doing and why. It is also necessary to have all the necessary tools and materials before the work, so that later you don’t have to suspend work because of some small things. But in general, do-it-yourself drywall installation is a task that everyone can manage.
In the next video you are waiting for the secrets of the installation of drywall.