Installation of two-level plasterboard ceilings with lighting

Two-level plasterboard ceilings play a special role in the modern interior. They not only give the room a beautiful look, hide the irregularities of the coatings, but also allow you to originally zone the rooms. Such designs are easy to install and are ideal for any style of interior. In addition, the design of two-story ceilings can be created independently, choosing for this interesting and unusual ideas.
Special features
Two-level plasterboard ceiling is a fashionable design that can be complemented by lighting and combined with various finishing materials. Thanks to the right color combination, two-tiered ceilings can visually change the space, making it wider or narrower.
The main advantages of these structures include the following:
- huge choice of design;
- affordable price;
- quick installation;
- masking of construction defects on the ceiling.
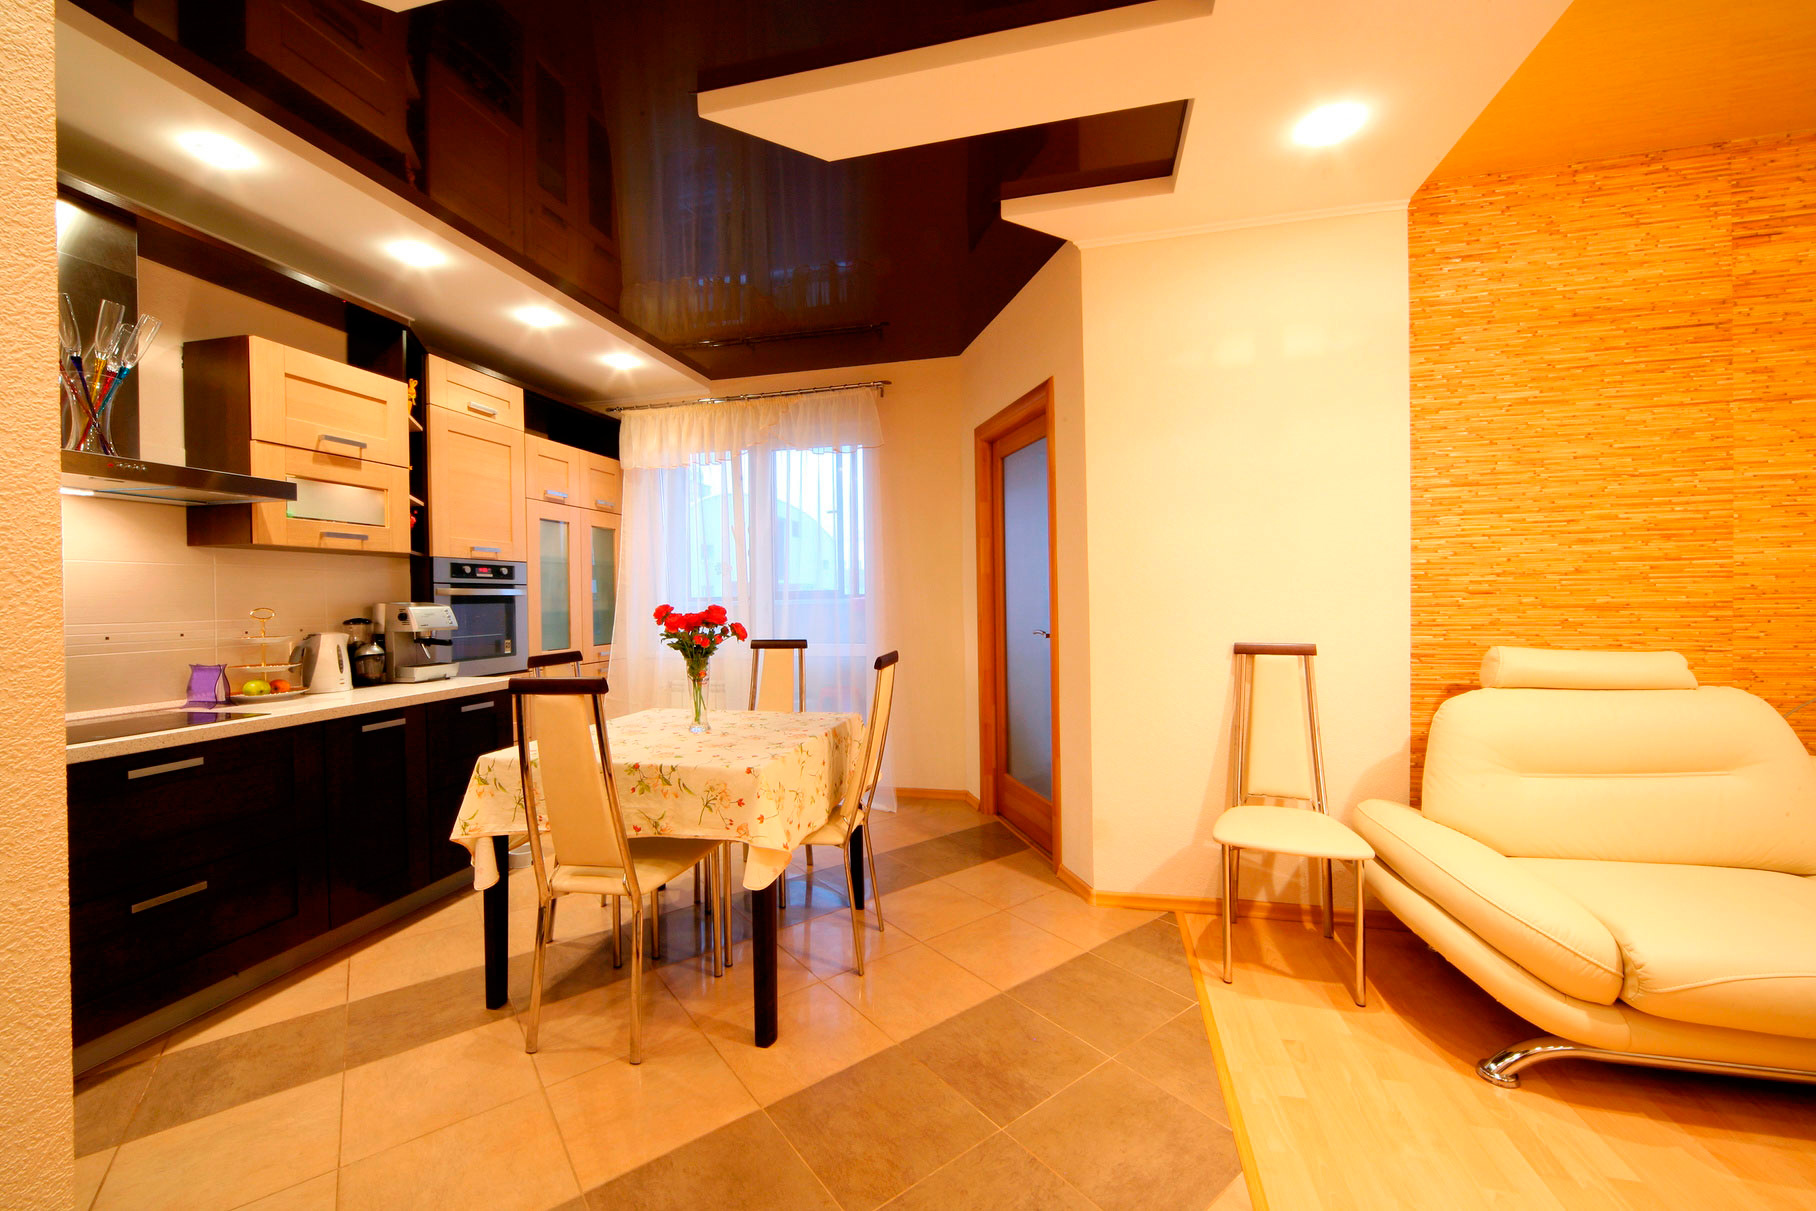
The suspended ceiling can be installed not only in large but also in small rooms, placing the main level of the structure at a distance of 3-7 cm from the slab. The complexity of the forms and colors of the ceiling should depend on the functional purpose of the rooms. For example, for a kitchen, it is recommended to choose light shades and combine them with color inserts. In this way, it will be possible to separate the dining room from the cooking zone in an original way. In this case, it is better to place spotlights above the working area, and a chandelier can be hung above the dining area.
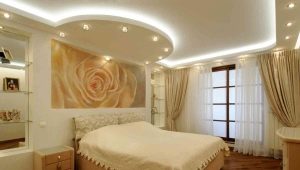
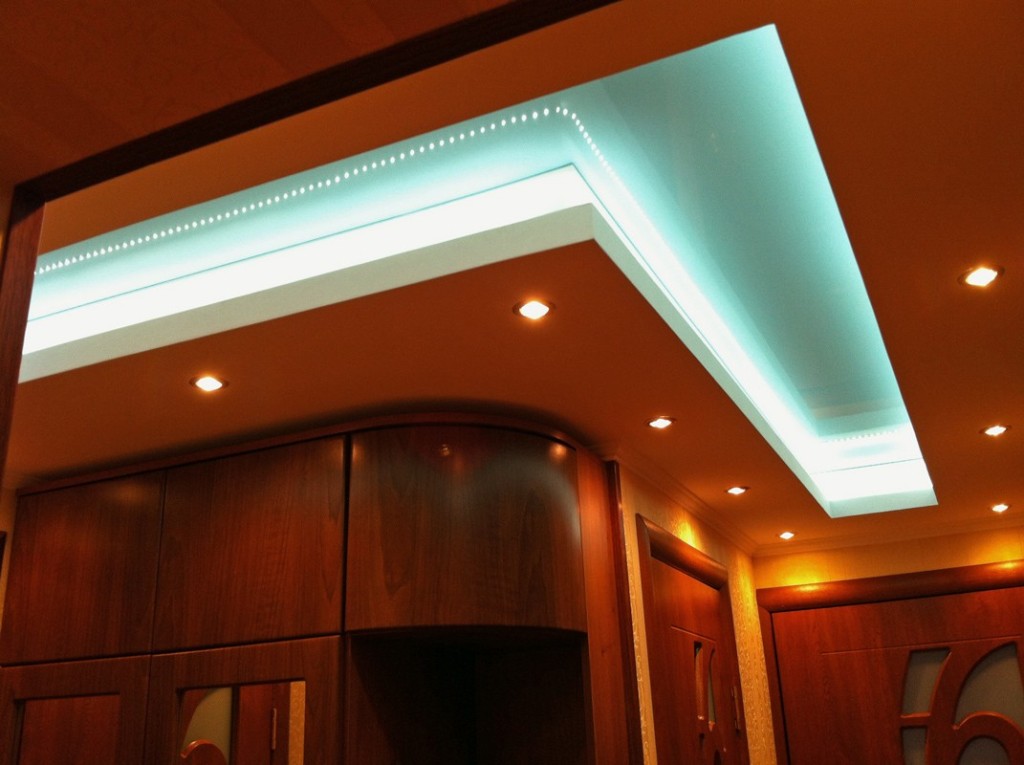
As for the hall and the bedroom, then it is best to make the classic version of the ceiling in them and decorate it around the perimeter with a diode ribbon. An unusual solution would be the decoration of such a design imitation of the starry sky. For children's rooms, you can choose simple two-level ceilings or supplement them with complex geometric shapes.
Beautifully in the children's look and designs with photo print and painting.
The main feature of bunk ceilings is that their installation requires prior construction of the design scheme, the creation of which takes into account some factors.
- The height of the room. Typically, the suspension system takes 10 cm of ceiling height. To save space, you can make the second tier smooth.
- Humidity level If there is high humidity in the room, then drywall sheets should be treated with special mixtures. This is especially true of the kitchen and bathroom ceilings.
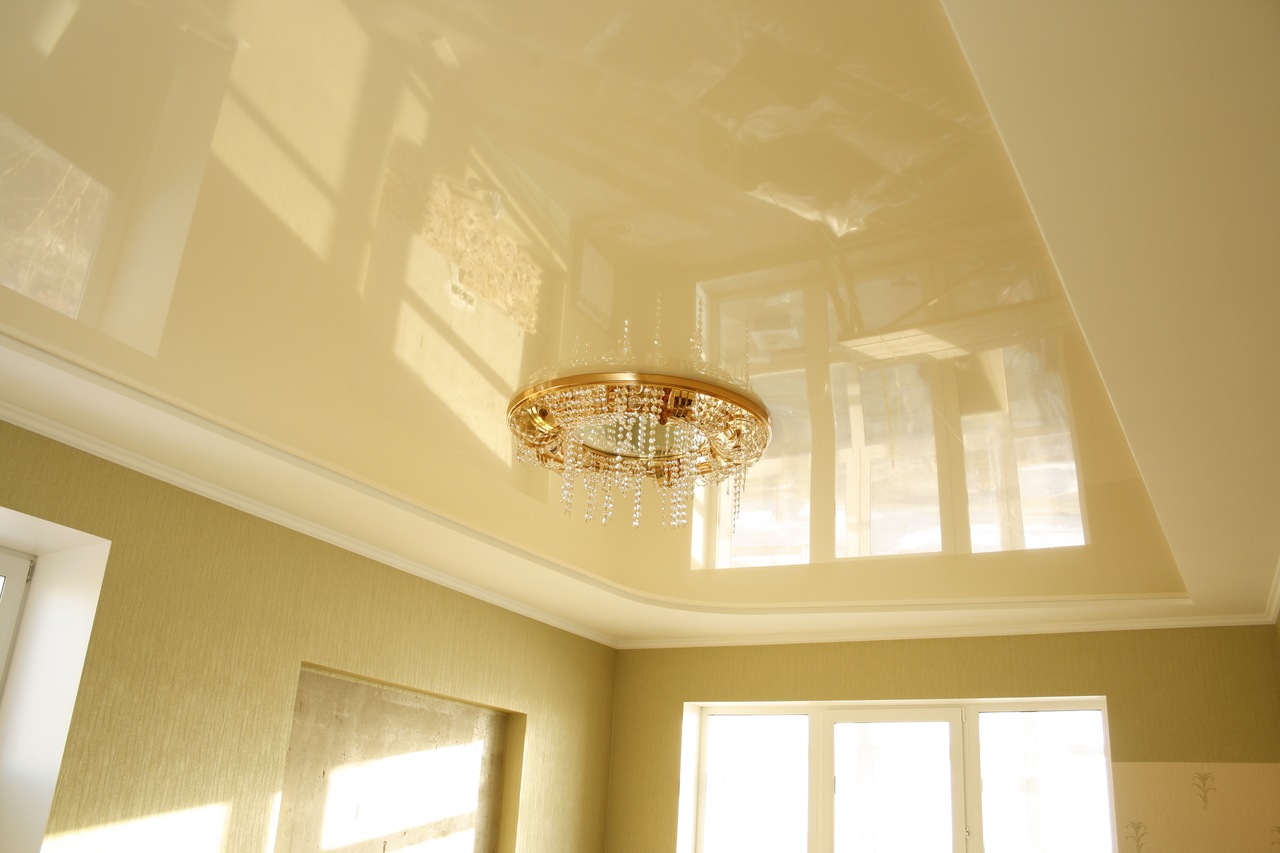
- Lighting. The location of luminaires and lamps must be considered before the start of installation work. Thanks to the light sources, you can achieve a beautiful effect in the interior.
- Form of construction. Ceiling with a double configuration should be in harmony with the general appearance of the room. In some rooms he may have straight lines, and in others he will be surprised by unusual patterns and figures.
Ceiling preparation
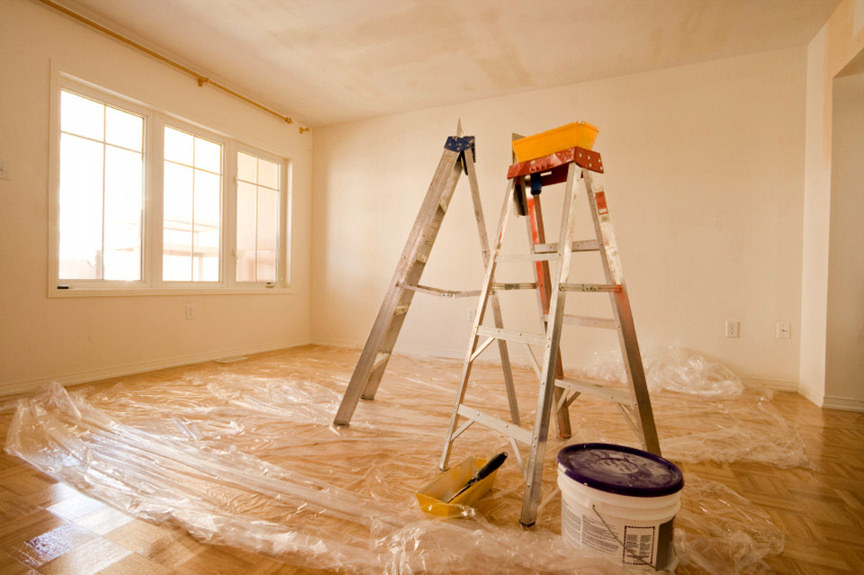
Installation of any decorative design provides for the preparation of the base, are no exception, and two-level gypsum ceilings. First you need to set the required level of humidity in the room and warm it up well. Since ordinary drywall is “afraid” of dampness, it is recommended to purchase sheets that have been specially treated for rooms with high humidity. You can also cover the material with a protective primer.

Then an assessment is made of the state of the tile surface. If the coating has significant irregularities greater than 5 cm, they must be corrected.
In addition, you should check the structure of the plaster, it should keep well and not crumble. If the old coating peels off, it is applied to the mounting grid and finish finishing plaster. The plaster, which cannot be restored, is dismantled. After this, the ceiling surface is thoroughly cleaned, primed and dried. It is advisable to use a deep penetration primer.
In order to save money, you can not perform the alignment. Construction details permissible to attach to the ceiling after cleaning it from the old plaster.
Charting and starting work
A two-level plasterboard ceiling is considered a worthy decoration of any interior, but in order for it to harmonize with the design of the room and fit its size, you need to make an exact scheme of the design. To do this, make a drawing on a sheet of paper. It indicates the location of levels, lighting and all communications.Independently, you can make a project of any complexity.
After the scheme is ready, and all the details of the installation are thought out, it is worthwhile to proceed to the immediate execution of works. As a rule, at the initial stage they are determined by the way in which the ceiling will be fixed. Many craftsmen first prepare the first level of construction, install it, and only then assemble the second tier. If the second level has complex forms, then first of all it is installed, and then the main layer is fixed.
The next step will be the layout of the room. It is important to correctly determine the height of the room. This should be done with the help of special tools, and not “by eye”. Initially, the center point is determined, then diagonals are drawn from it along the entire perimeter. Then choose the two shortest walls and draw another additional line. In case there are inaccuracies in the markings, they must be eliminated, otherwise the structure will be installed unevenly, and the appearance of the whole finish will be damaged.
When the markings are applied, you can make a strip along the center of the ceiling that will connect the main points of the walls and create a straight line along the entire room. A similar procedure is carried out with long walls.Next, you need to adjust the dimensions of the structure specified in the scheme to the lines drawn. To simplify installation, it is recommended to make a grid consisting of small squares with a side of 60 cm along the entire perimeter of the ceiling. A laser projector will help to make room marking easier. To do this, it is placed in the center of the room and make the appropriate drawings.
This tool will save you from tedious calculations and help you instantly calculate inaccuracies.
Installation
Installation of a two-level ceiling with drywall begins with lighting only after careful preparation of the base and selection of the necessary tools. It is also necessary to calculate the amount of drywall to eliminate unnecessary financial costs. As a rule, the number of sheets depends on the size of the room and its design.
For the work will need the following materials.
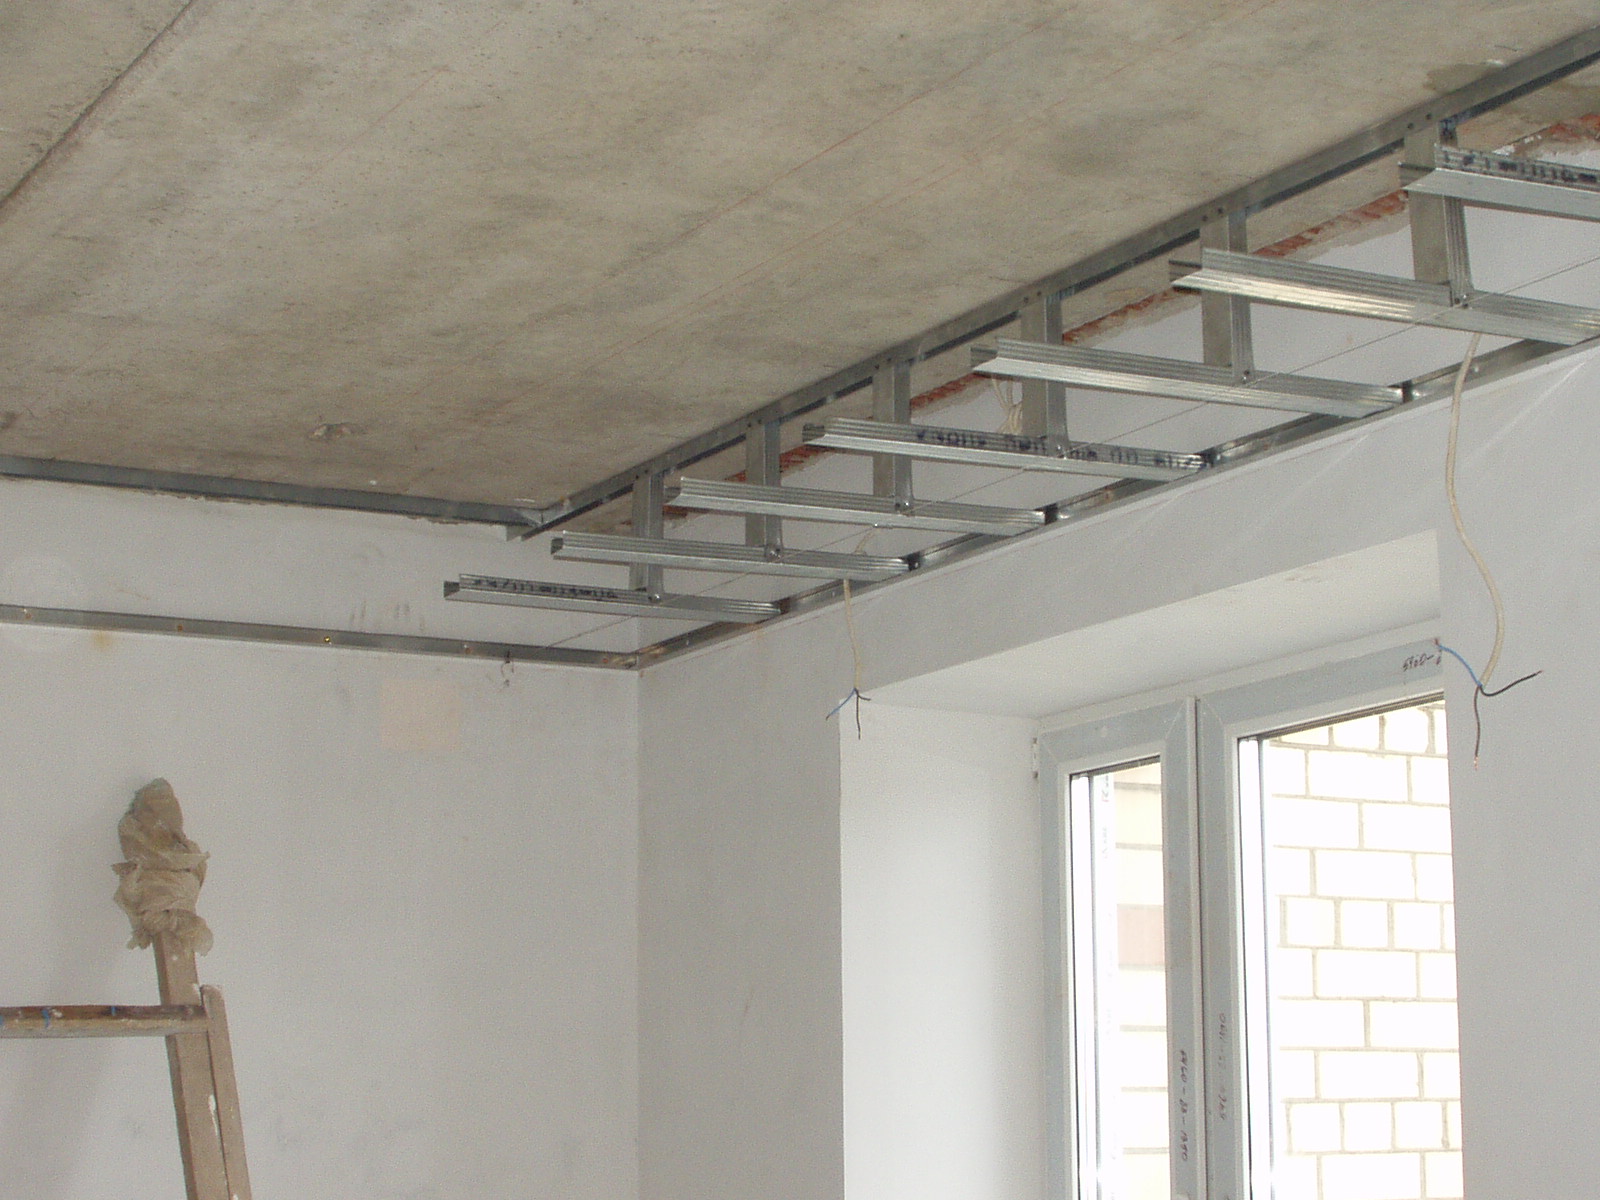
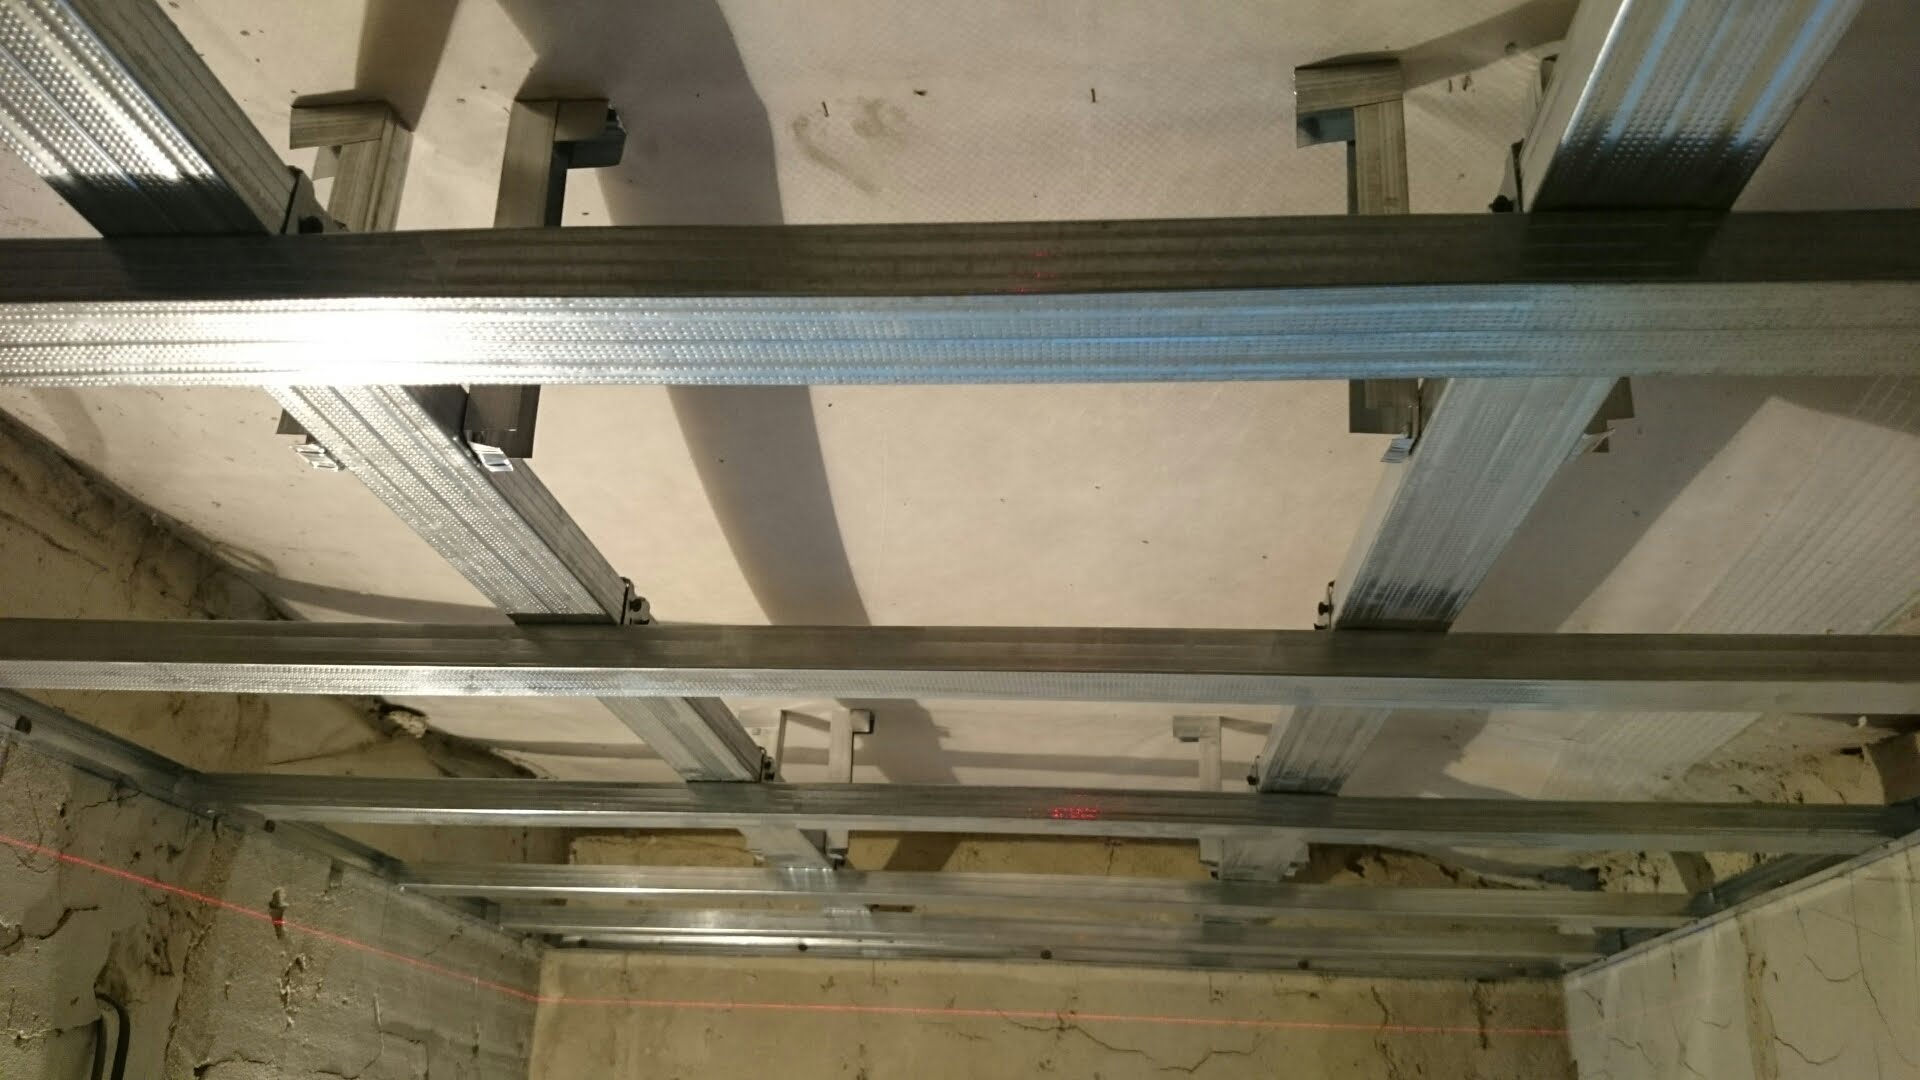
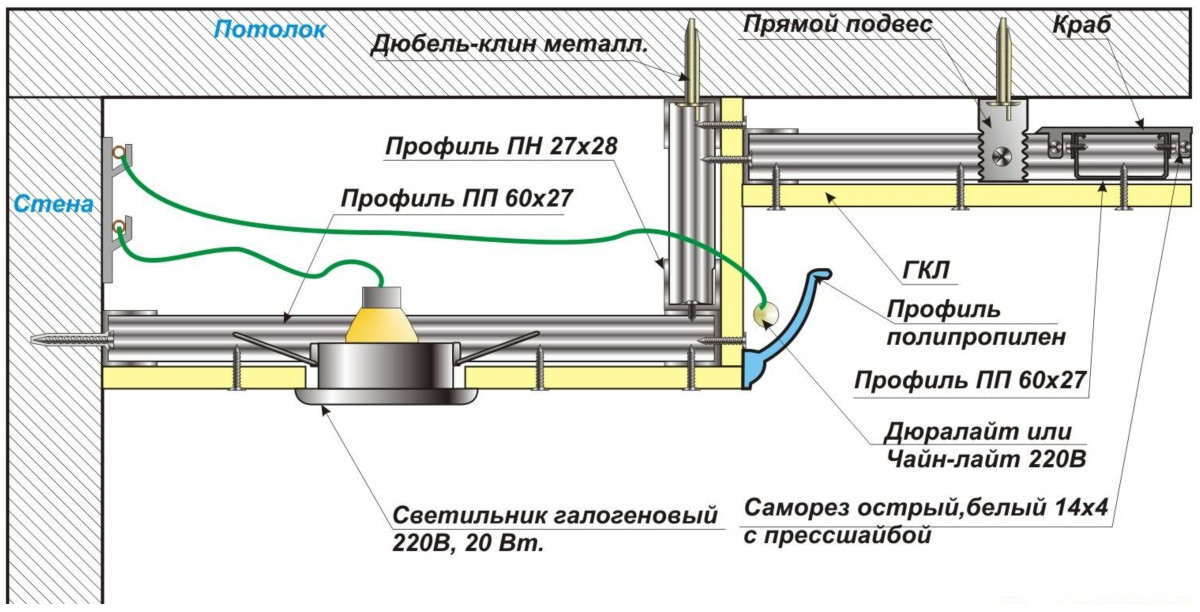
- Guide profile. For the ceiling, U-profiles are used with dimensions of 27 by 28 cm.
- Longitudinal profile, it is also called C-profile. For a bunk construction, you need to select products with parameters 60 by 27 cm.
- Clamps. They are used for fastening the frame.
- Suspensions.
- Screws and press washers.It is recommended to choose products with dimensions of 3.5 by 9 or 3.5 by 11 mm.
- Anchor dowels.
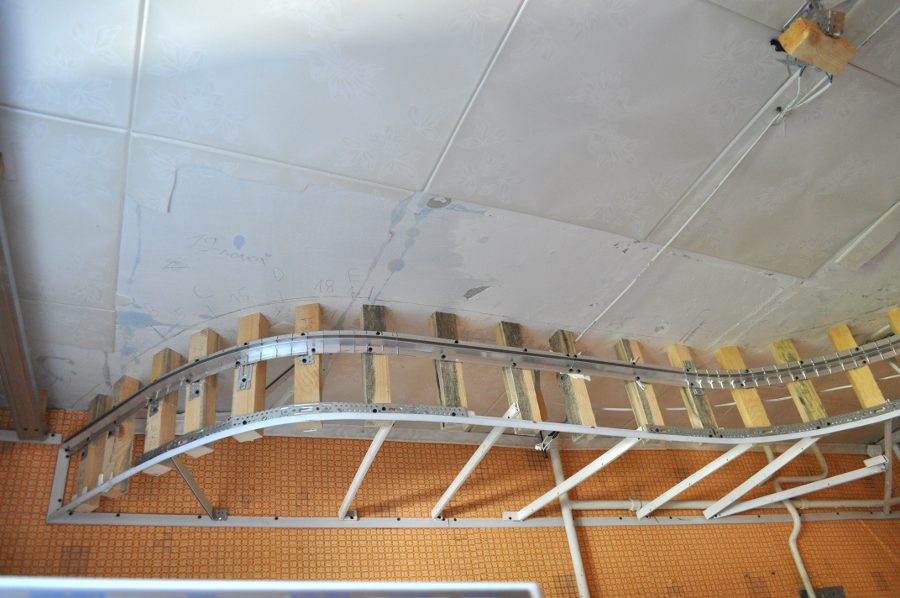
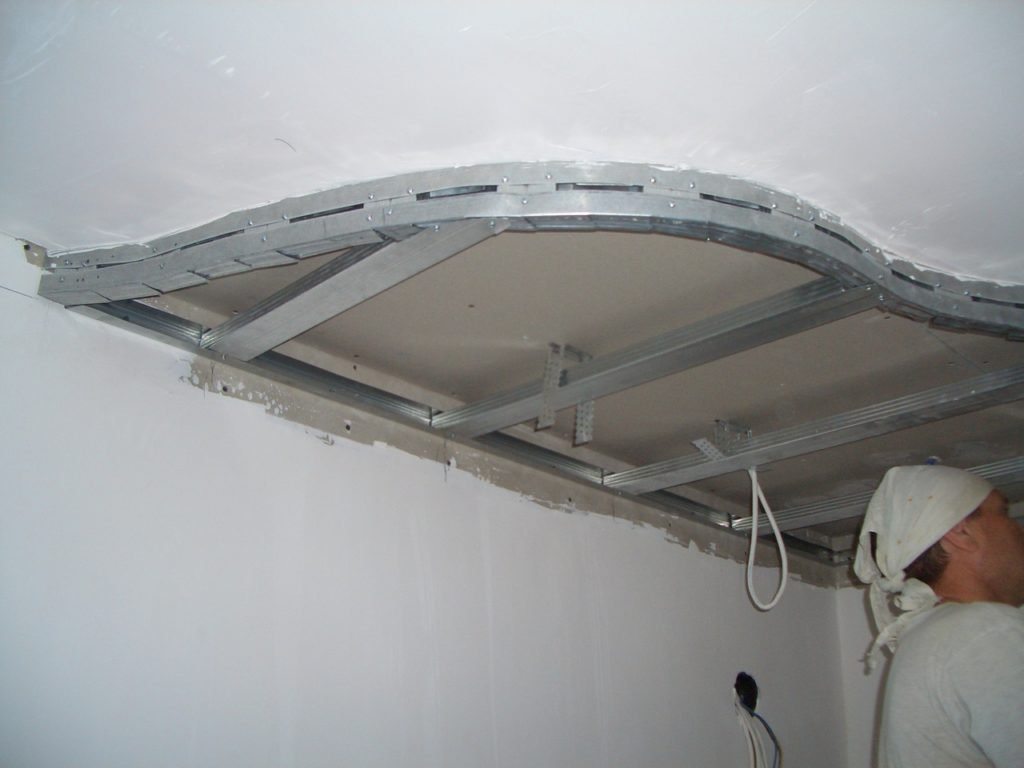
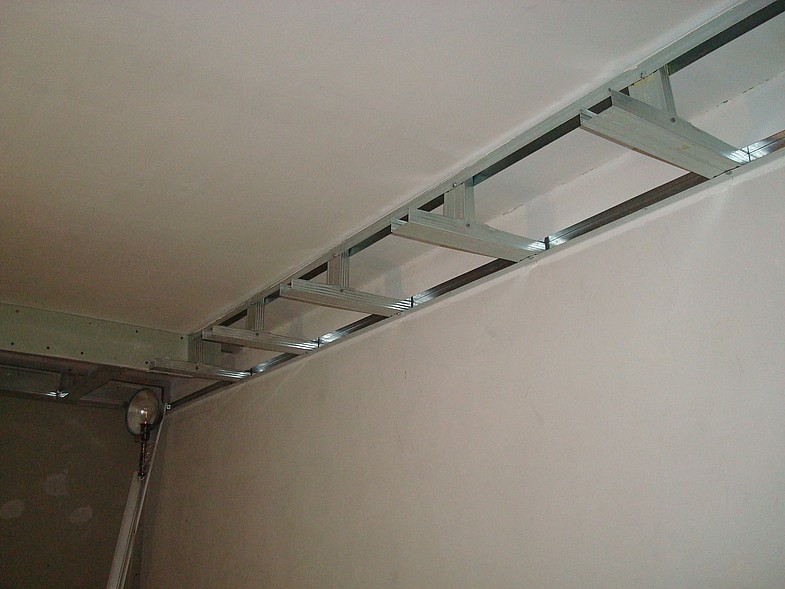
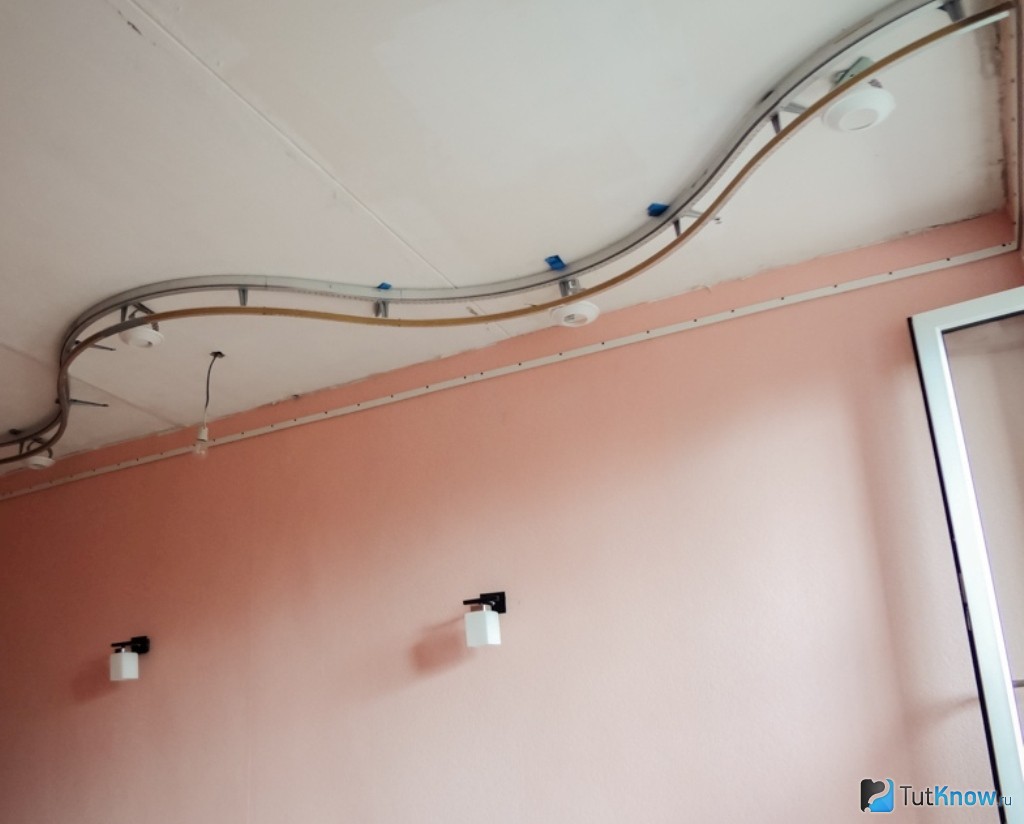
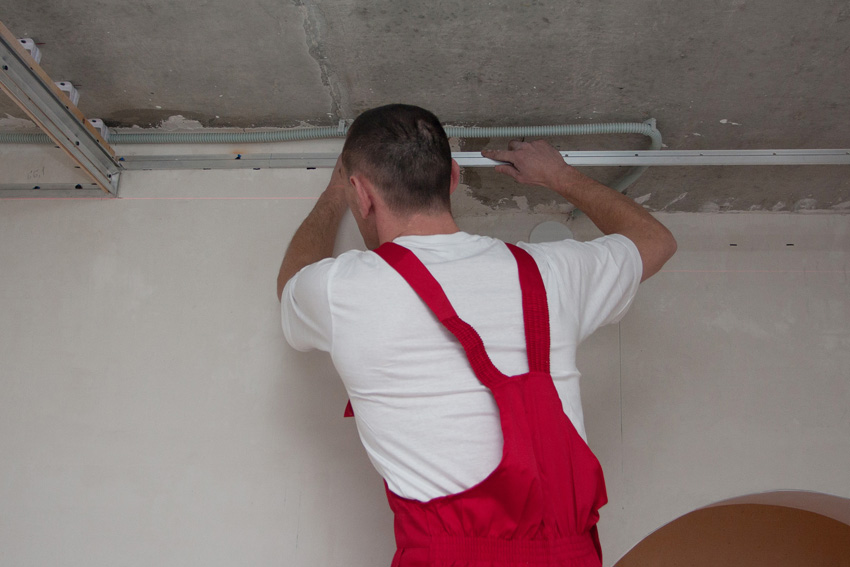
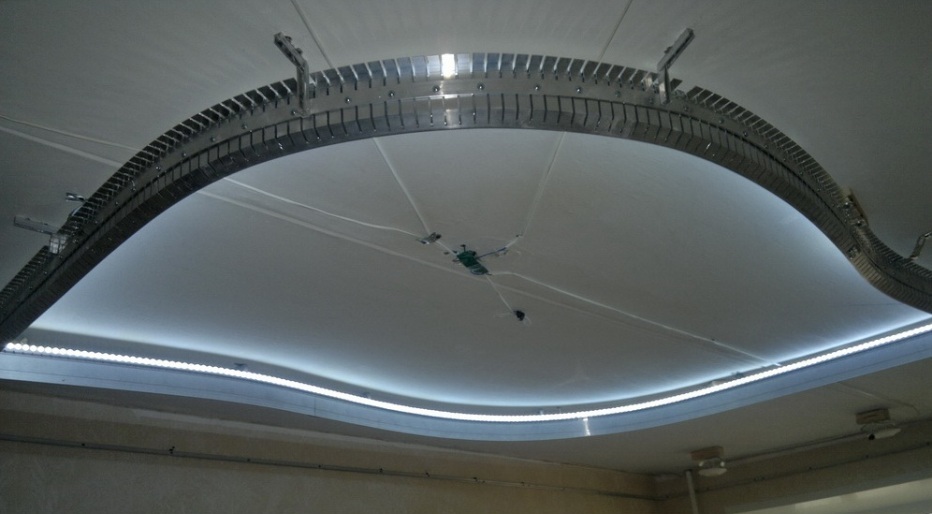
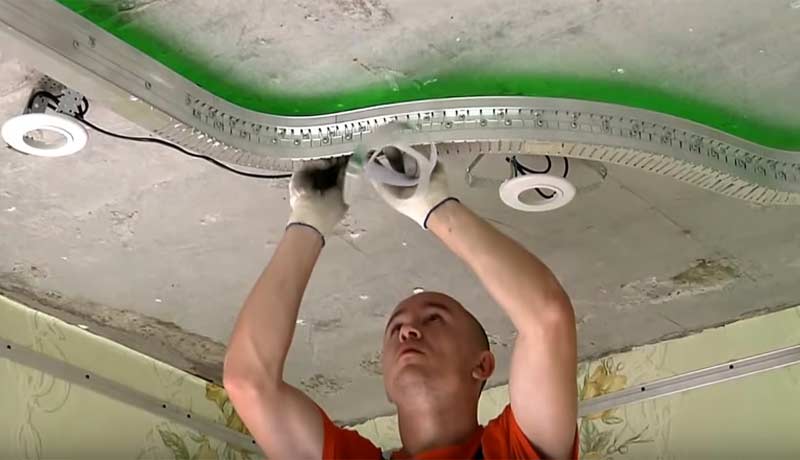
Installation should be carried out strictly according to the drawn up diagrams and drawings. First, guide profiles are attached. In case they need to give a curved shape, on two or three walls of the profile make cuts and form the desired look. To obtain a convex shape, the profiles are notched V-shaped.
Under the guiding profiles should be placed ready-made markup, which will allow evenly fix the longitudinal details of the structure. The distance between the axes should not exceed 40 cm. The axes are located along perpendicular marking lines. They are attached suspensions, which are used for mounting the second tier.
Between suspensions a 60 cm step is taken.
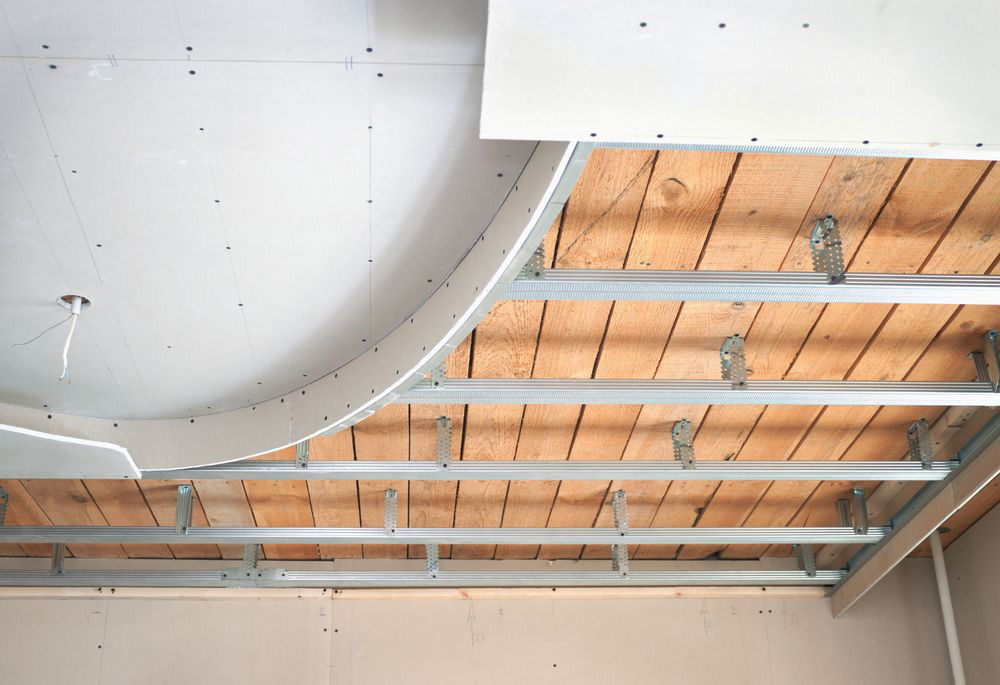
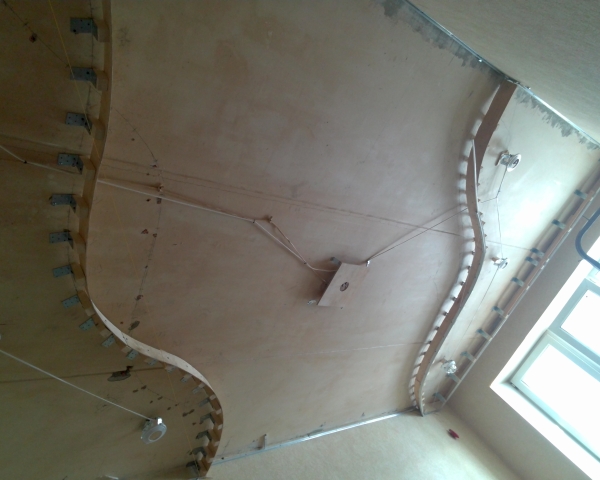
After the skeleton of the first level is fixed, you can first see the “draft” pattern and the shape of the future ceiling. The next step will be the installation of the second tier. To do this, take a longitudinal profile, from it cut into small pieces of 10 cm in size and attach them to the base. The number of such profiles depends on the depth of the ceiling.
Each cut profile is fixed with screws to the axis, according to the design scheme. Then you can proceed to the fastening of drywall, given the location of communications and fixtures. In two-level ceilings electrical wiring is located in the depth of the ceiling, so it is not noticeable and does not spoil the view of the scenery. First, the horizontal surface of the ceiling is sheathed, and then patterns and geometric shapes are formed.
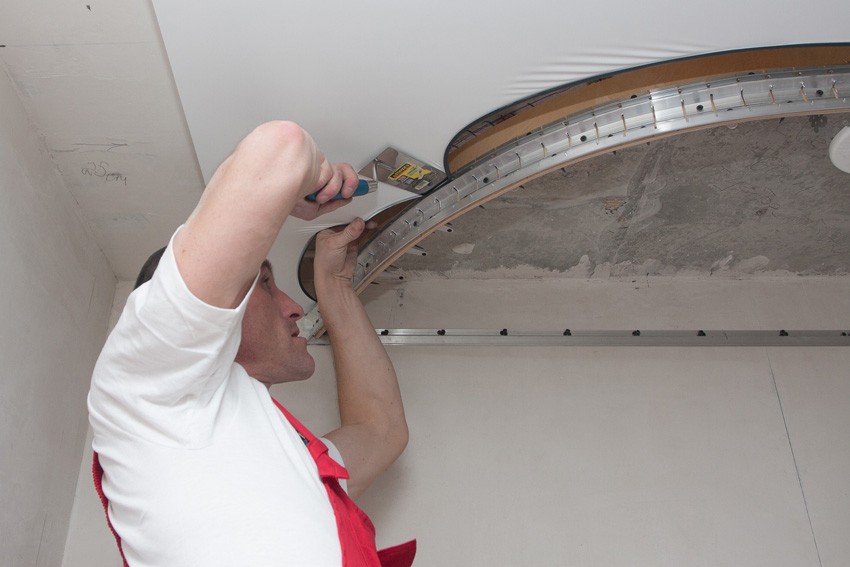

Figured details cut out on cardboard patterns and form their curved shapes. To do this, prepare the desired item, roll it with a needle roller and sprinkle with water until drops appear on the surface. The drywall part should soak for an hour, after which any bend can be easily formed from it.
After completing the main decoration, it is necessary to beautifully draw the gap between the frame and the wall. To do this, cut out square stripes and fasten them to the base with screws along the entire contour. The result is a textured and even second tier. Before closing the second level of the ceiling, it is necessary to make holes for the wiring and lights. When all layers are fixed and communications are established, it remains only to level the surface.To do this, take a reinforced mesh, put it on sheets of drywall and putty.
As the finishing of the ceiling can be painted or wallpaper paste.
Ideas for installation
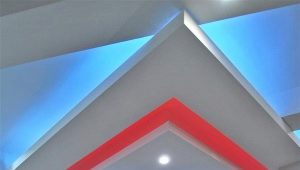
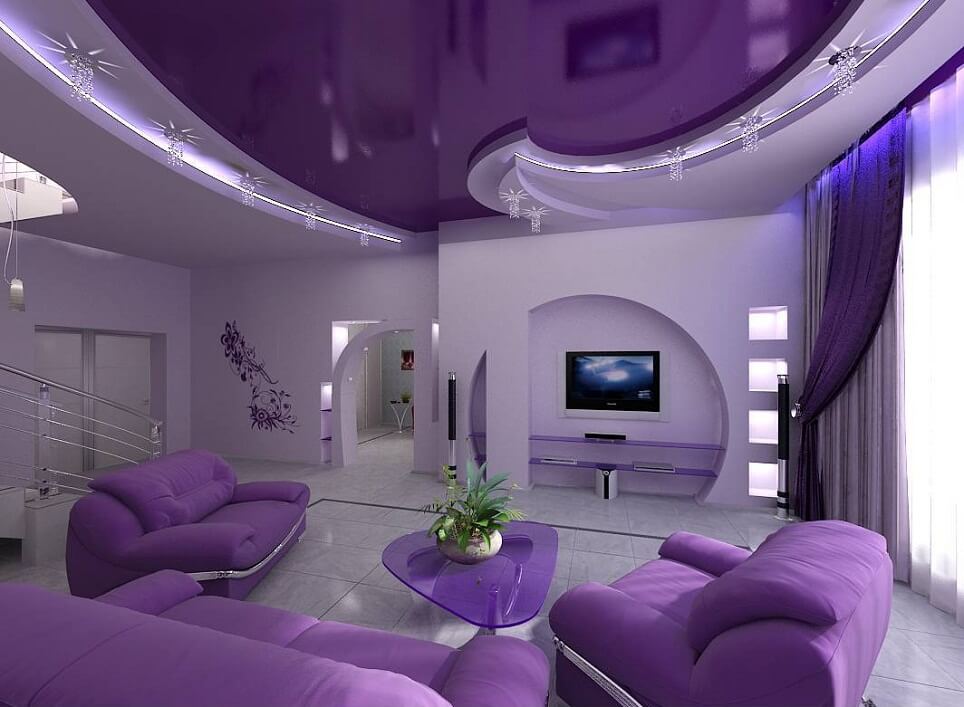
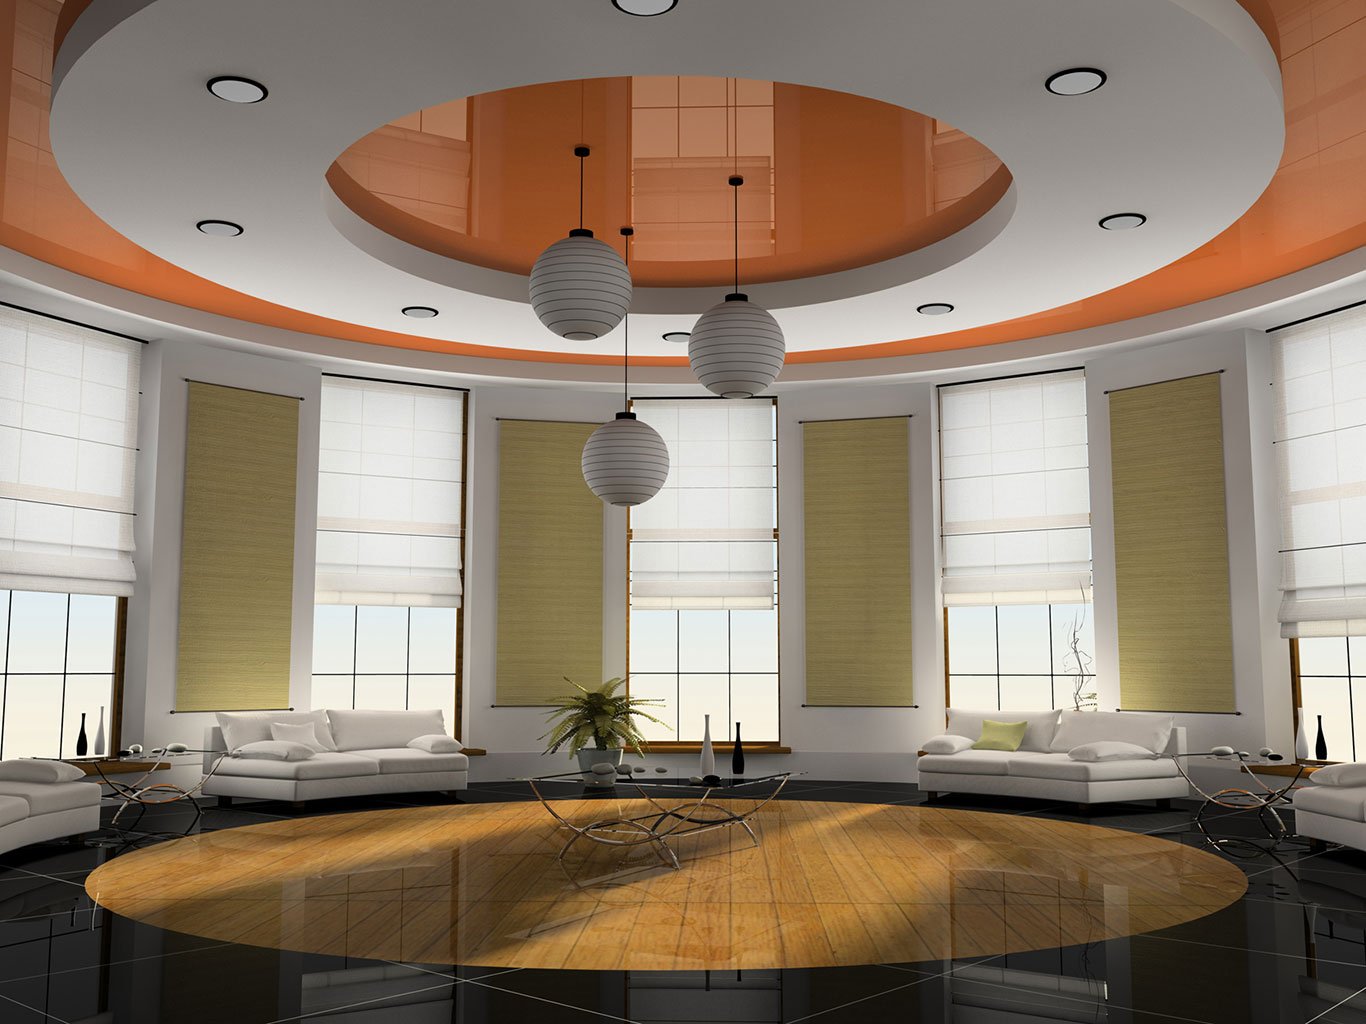
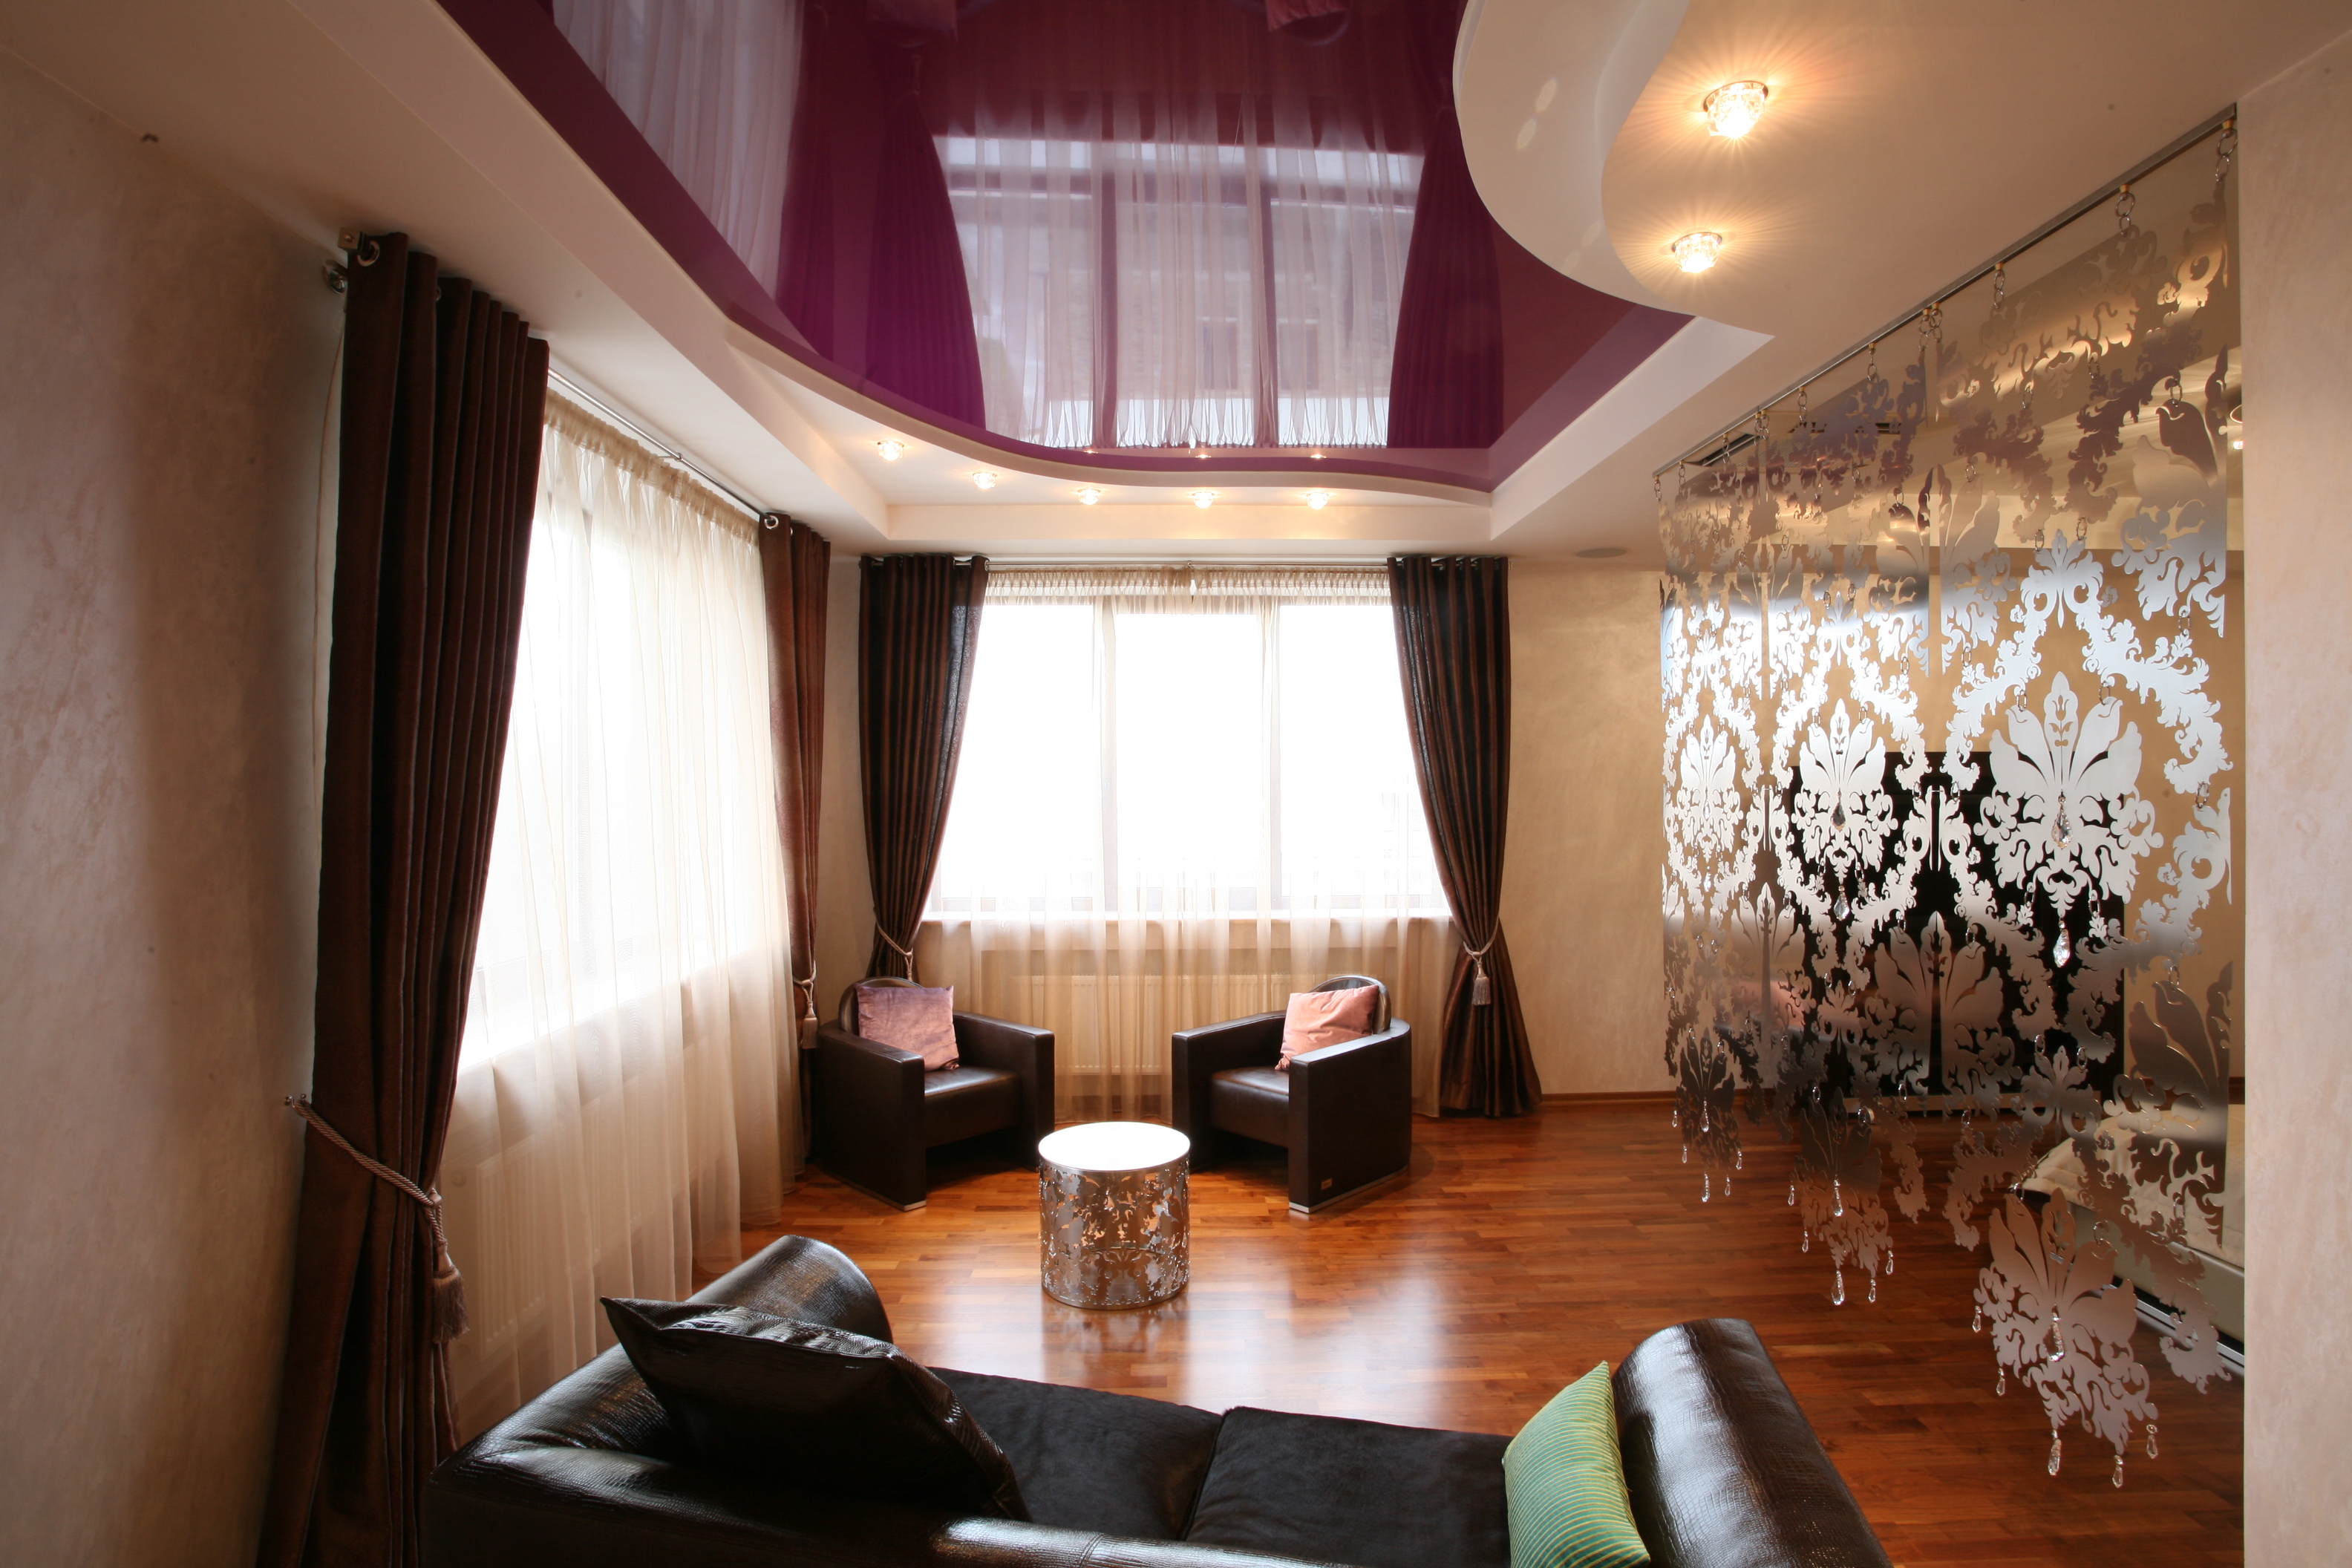
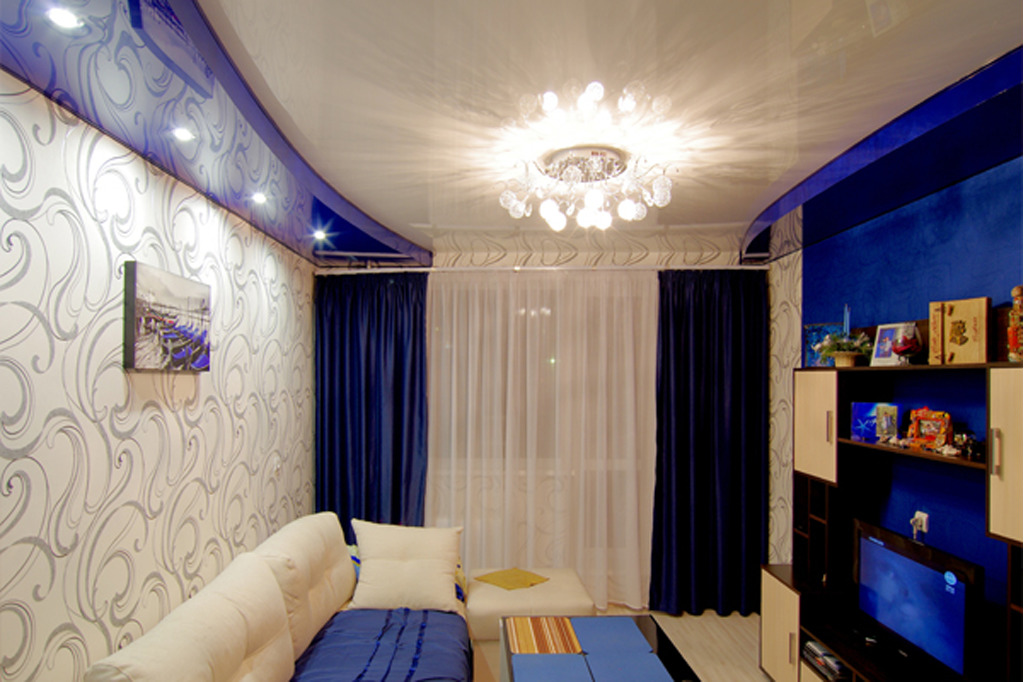
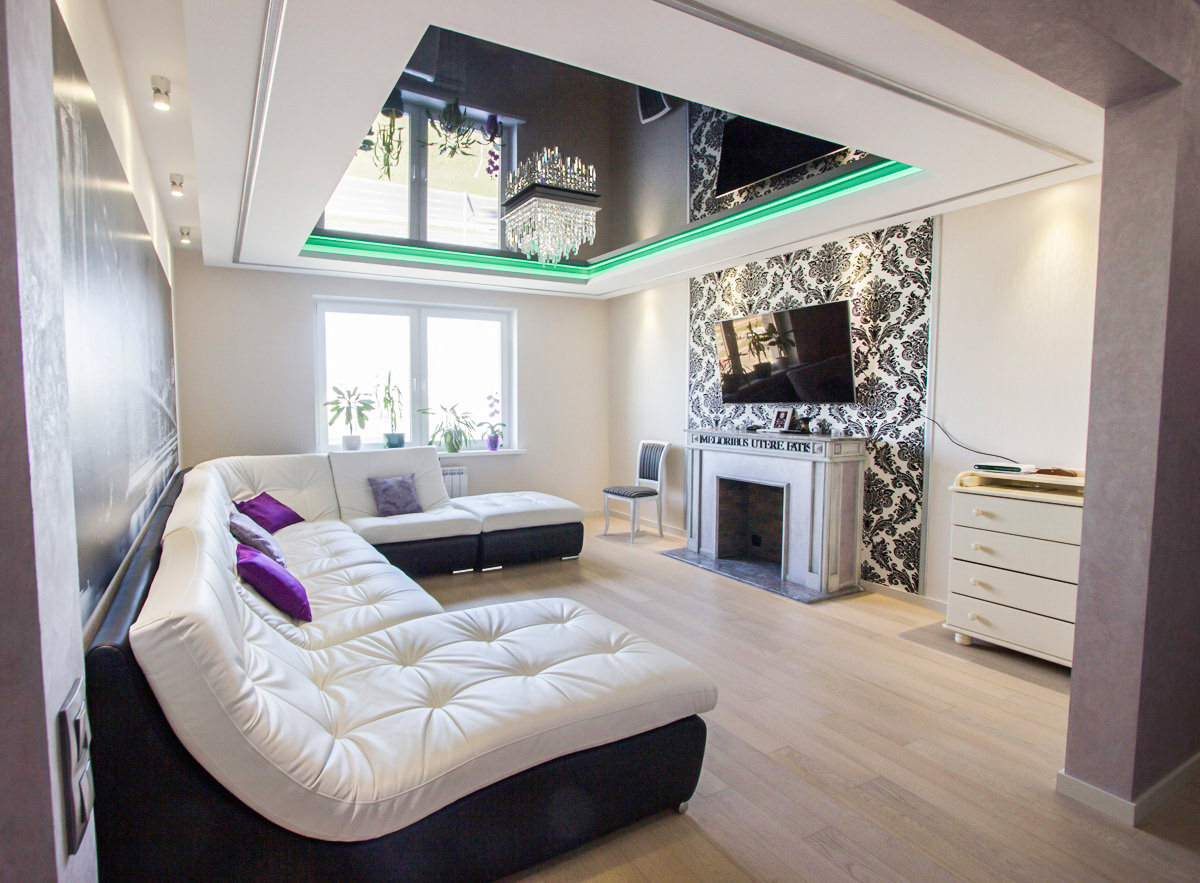
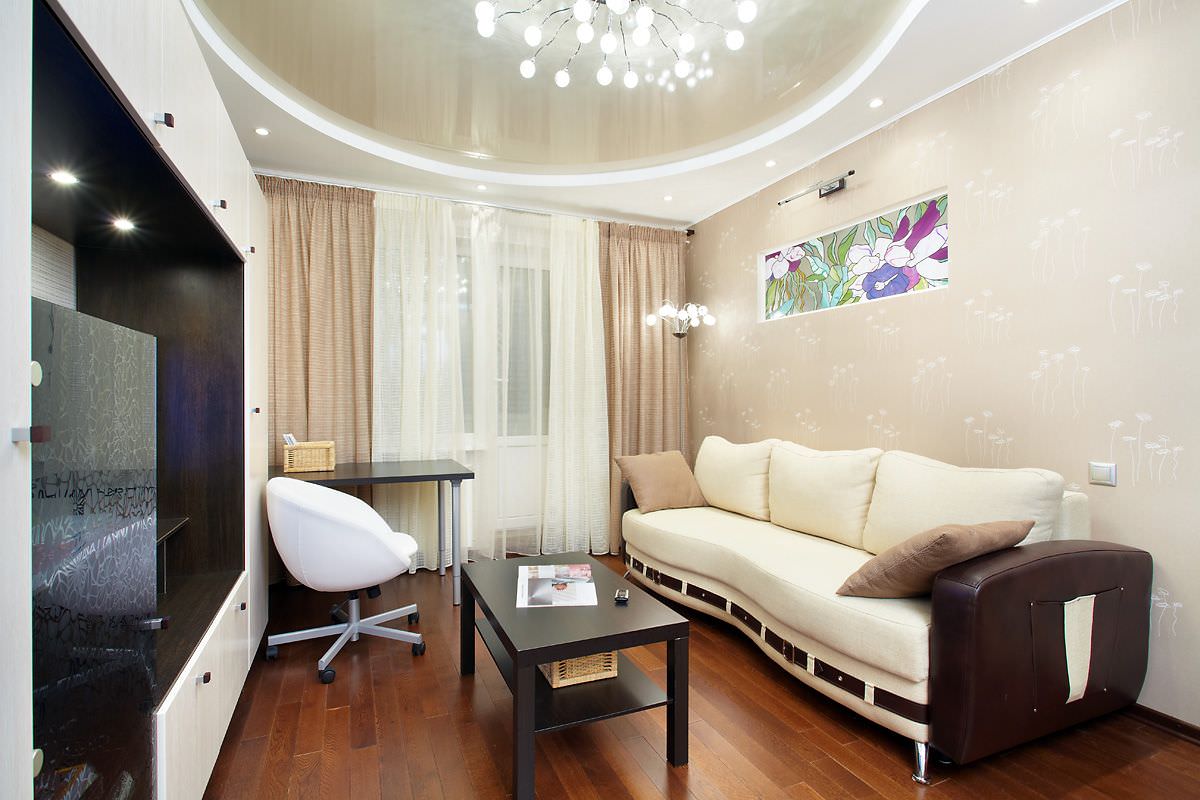
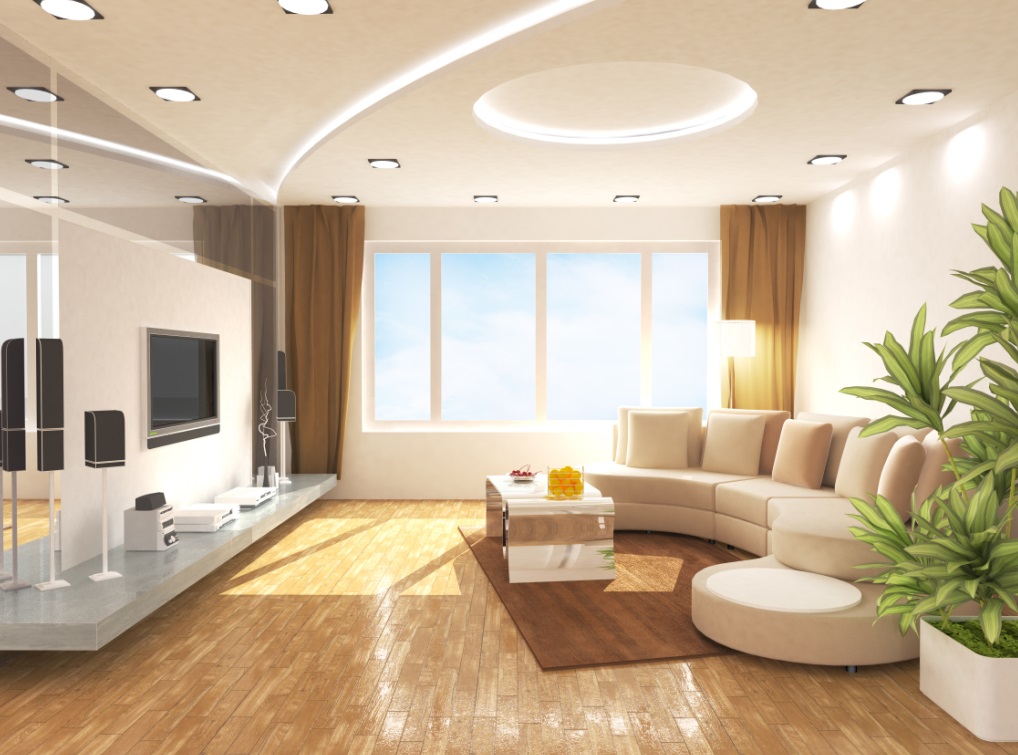
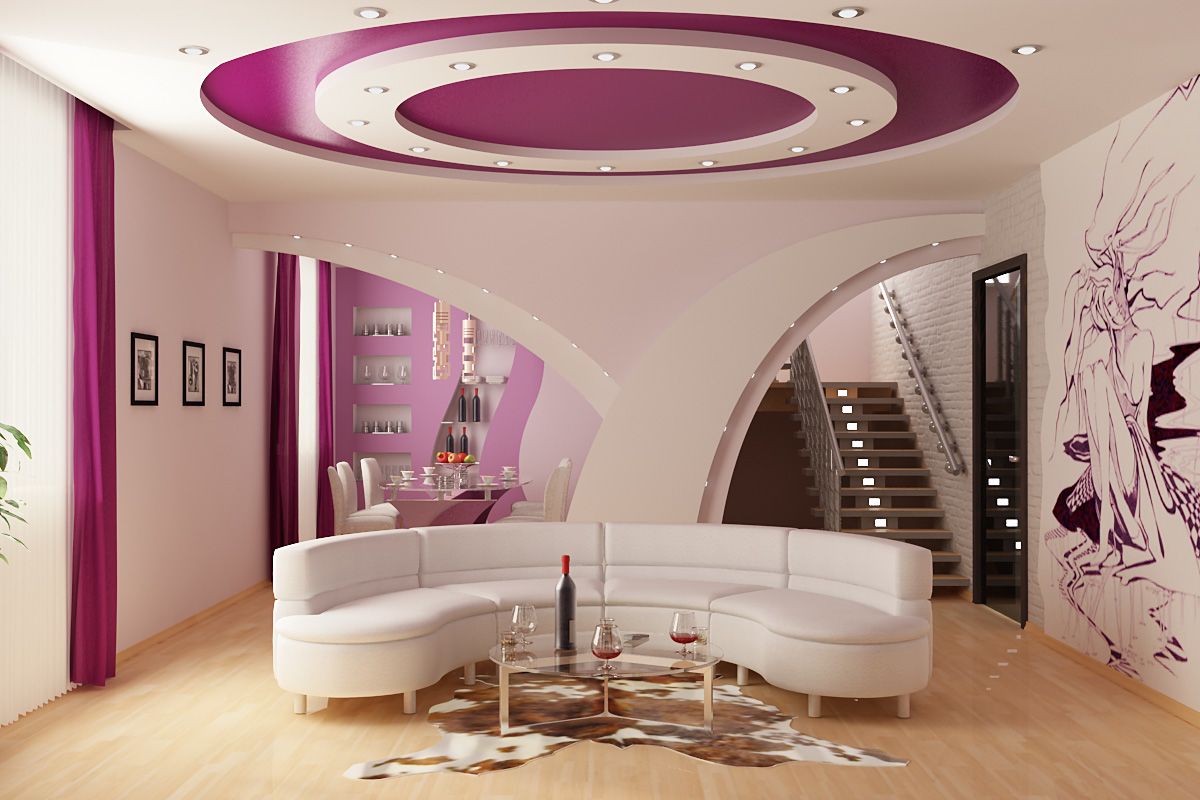
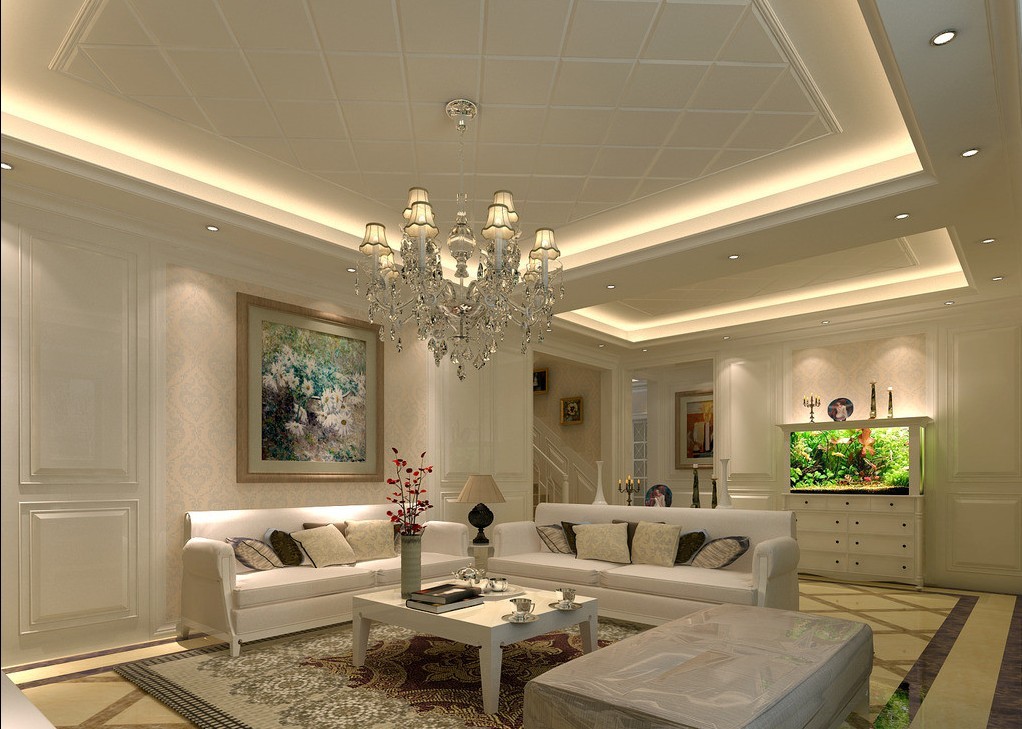
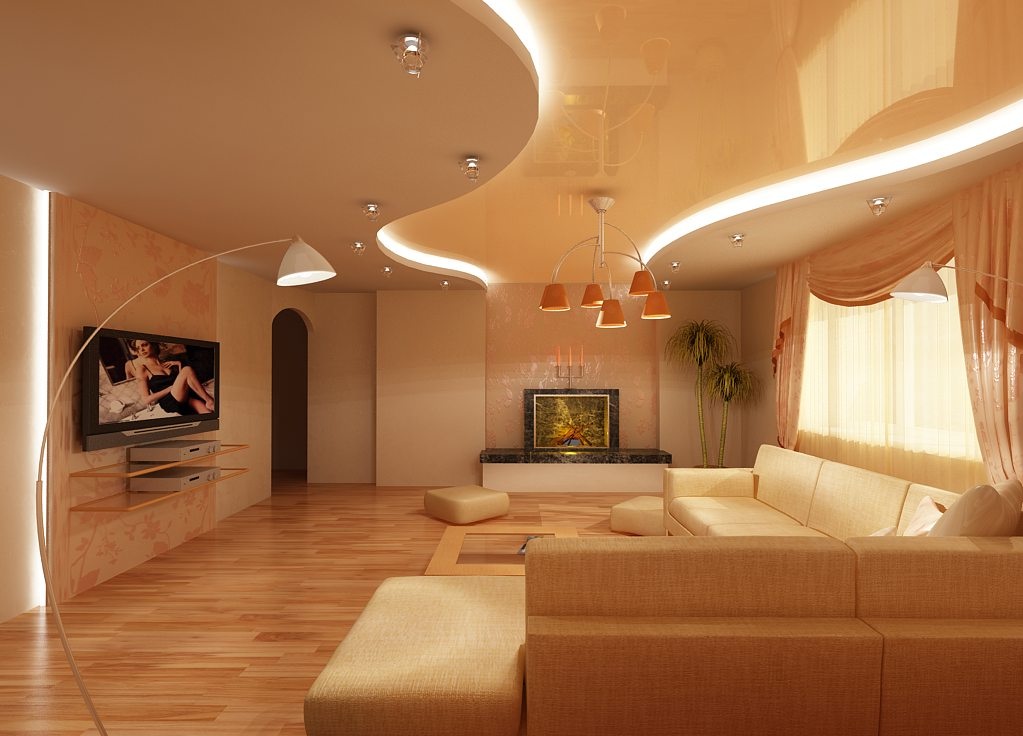
Two-level ceilings of plasterboard with illumination offer great opportunities for design decoration. They can be installed in any room, but bunk structures in the living room deserve special attention. Properly chosen form of the ceiling and good lighting will make this room beautiful and stylish.
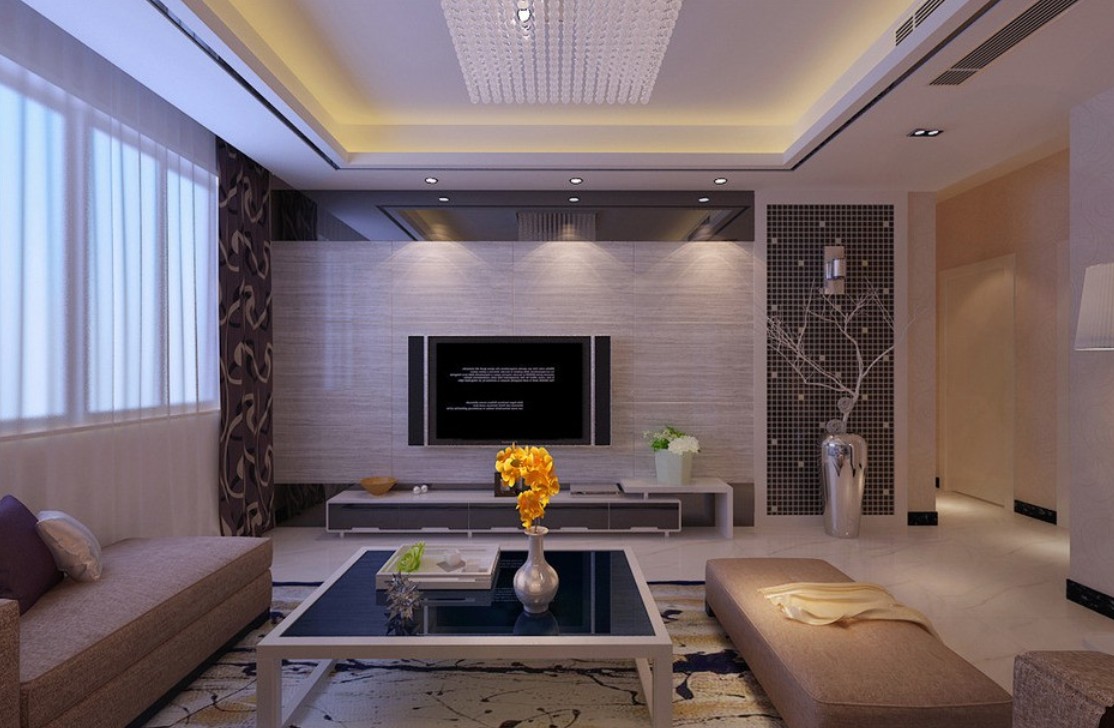
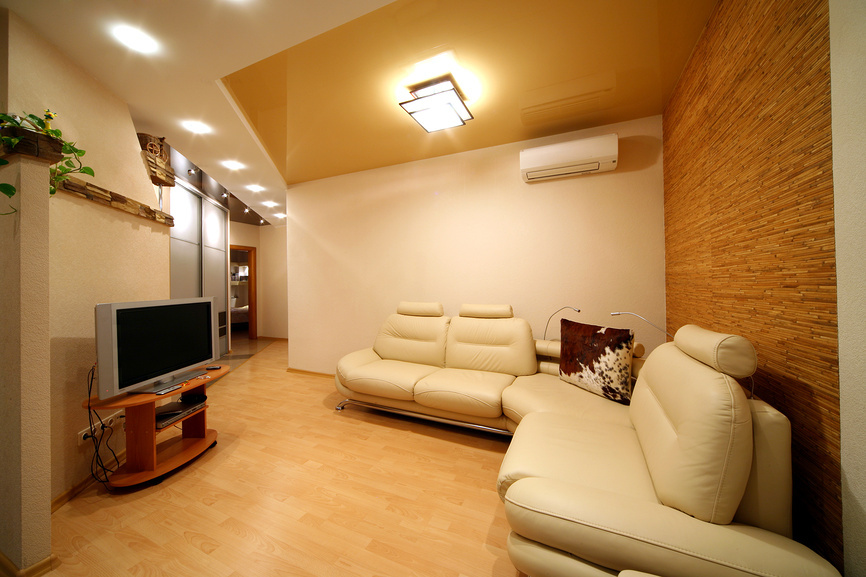
As a rule, complex systems with various shapes and races look originally in living rooms. By combining several sources of light at the same time, you can visually expand the room and emphasize the rest of the design details.
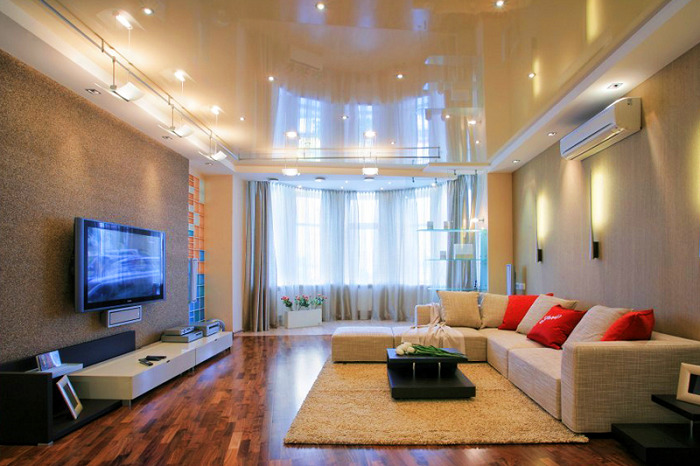
In living rooms it is better to install ceilings of light shades and decorate them with wavy lines. Thus, the room will create a feeling of comfort and coziness.
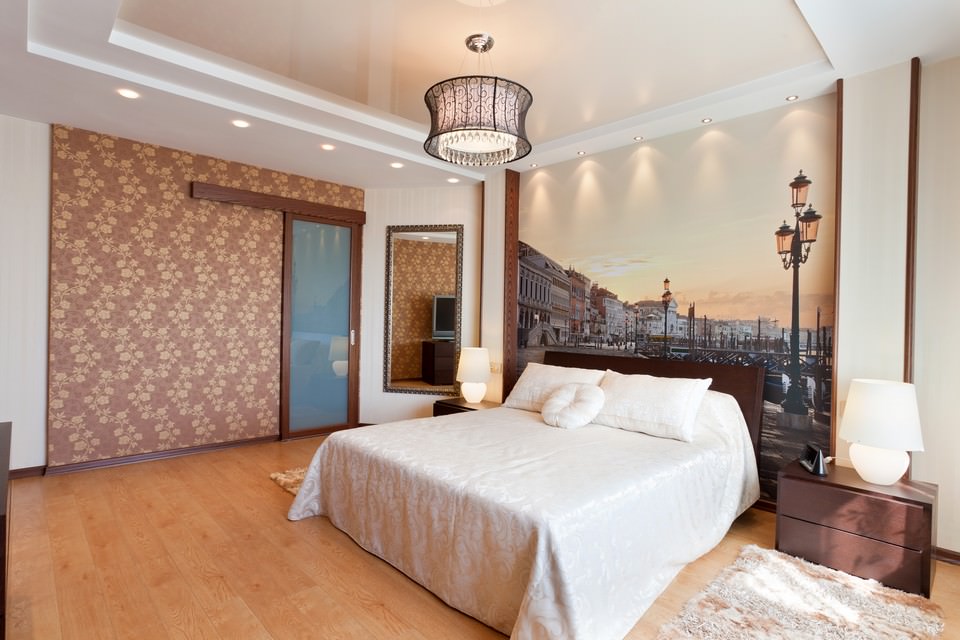
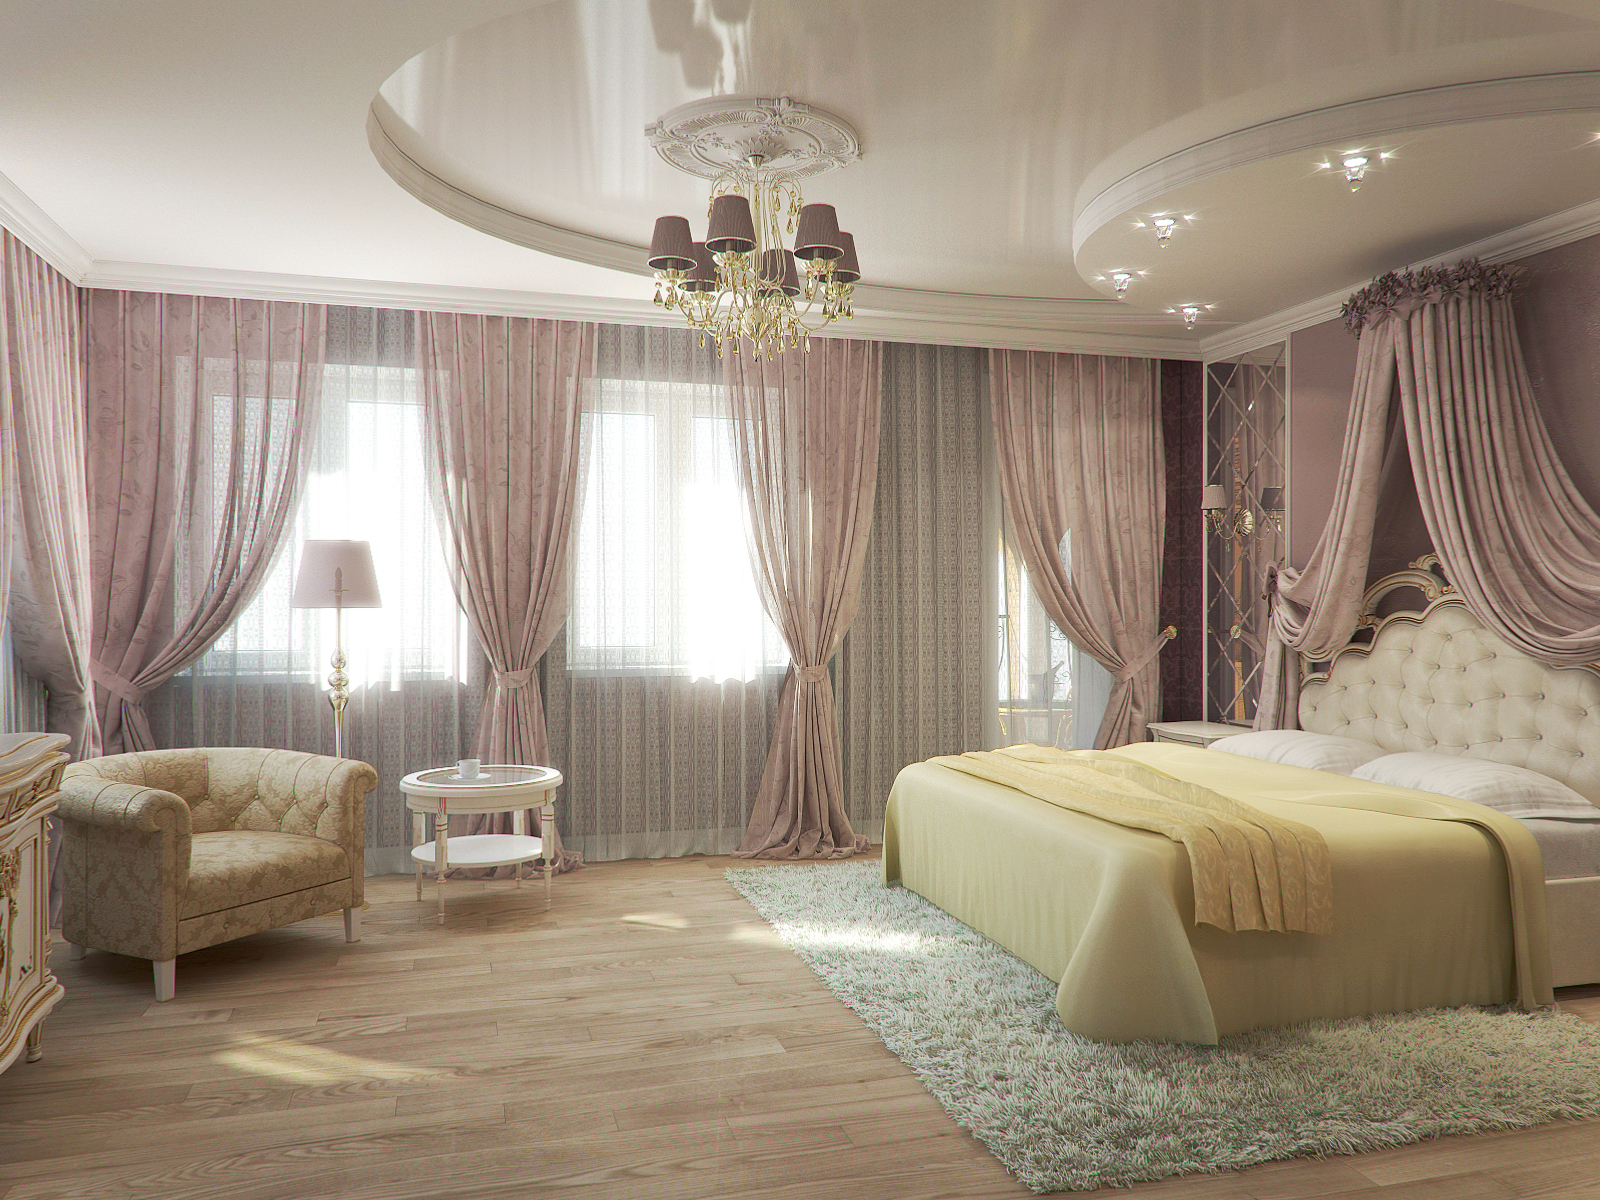
The bedroom is considered a seating area, so its interior must be appropriate. Ceilings in the bedroom are recommended to make the correct form and to avoid the presence in the design of sharp corners.Visually raise the height of the ceiling by using bunk structures of a concave shape.
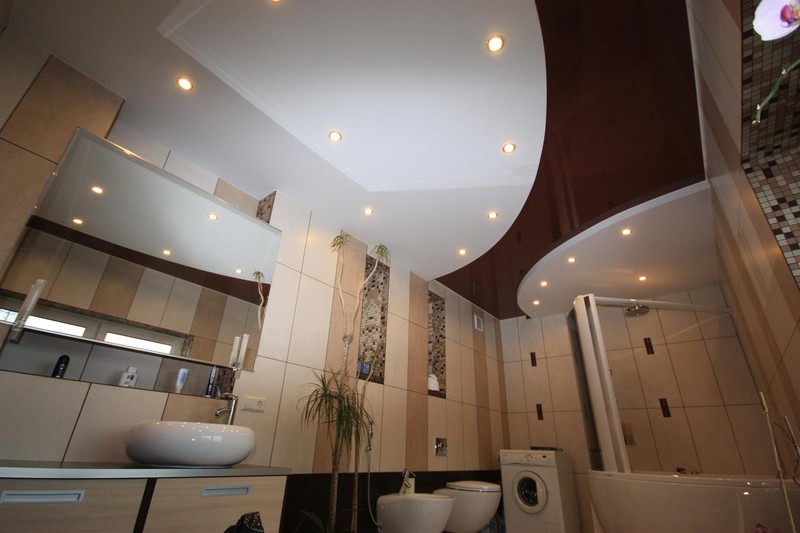
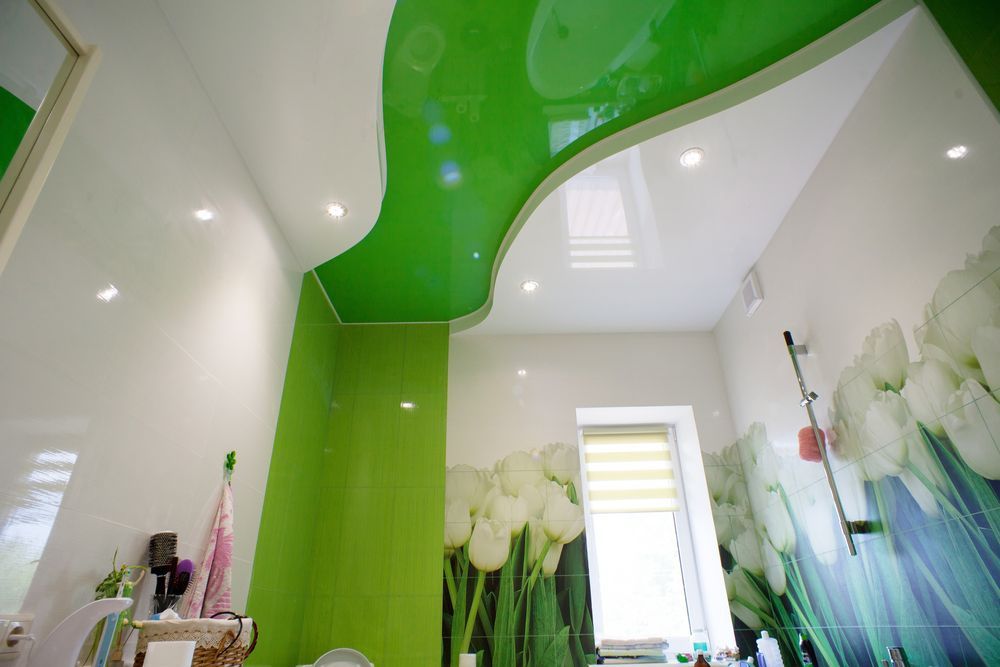
As for the bathroom, it is characterized by high humidity, therefore, when installing drywall ceilings, you need to choose moisture-resistant materials. In this room you can place classic systems or decorate the second tier with geometric figures. To prevent the room from turning dark, the two-level ceiling should be supplemented with good lighting, using both spotlights and LED strips.
Similarly done the design of the ceiling and in the corridor. As a rule, in apartments this room is small, therefore all elements of decorative furnish, including design of ceilings, should be light and simple. Complex geometric shapes can visually reduce space and make it narrow. Therefore, for the corridors it is best to choose a suspension system with smooth and smooth lines.
You will learn more about the intricacies of installing two-level ceilings with lighting from the following video.