How to make a two-level ceiling with drywall with lights?
Gone whitened ceilings with crooked corners and yellow stains against the walls are gone.
The era of two-level gypsum ceilings has begun, offering to solve interior tasks in an apartment in different ways. This is one of the most popular options due to its appearance and humane cost, as well as ease of installation.
Design features
The device of a two-level ceiling made of plasterboard allows you to apply a variety of design solutions and achieve the necessary interior effects due to its features. This gives a lot of advantages when working with drywall and often tilts the scale in his direction when choosing between drywall and stretch ceiling.
Its advantages:
- perfect alignment of walls without large-scale construction works;
- freedom of expression - you can pick up absolutely any pattern and shape of the ceiling;
- environmental friendliness;
- no dirt during installation;
- strength and functionality;
- universality;

- Thanks to this design, you can successfully hide the ventilation, communication and lighting systems;
- the speed of the work - you can keep within one day;
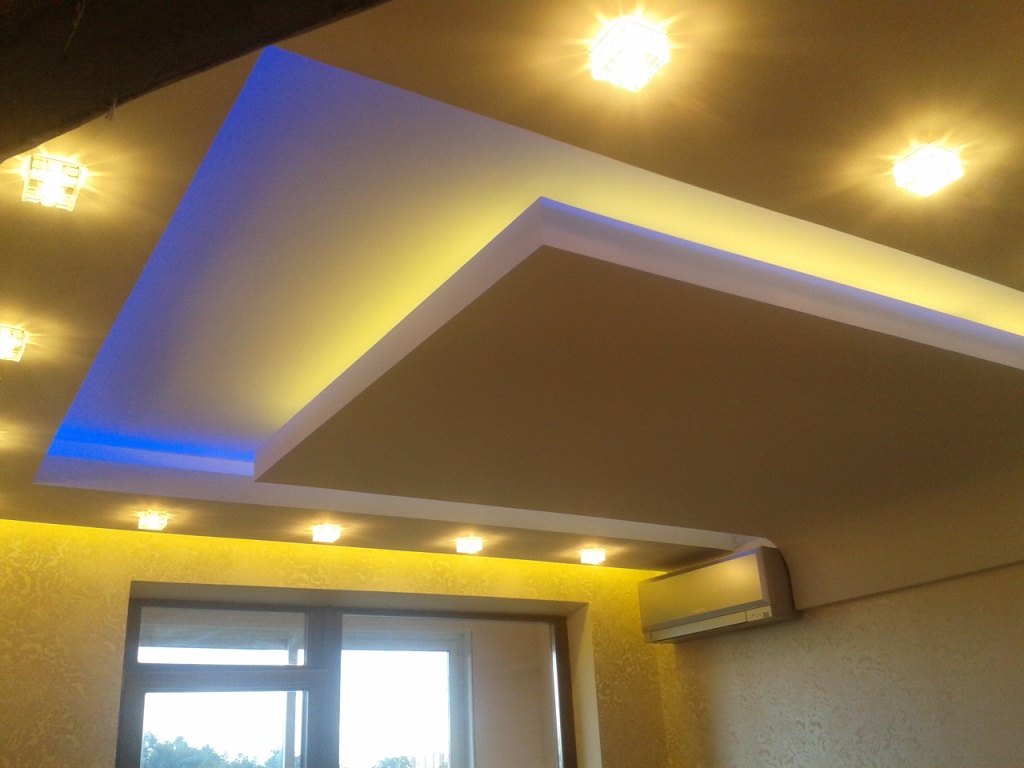
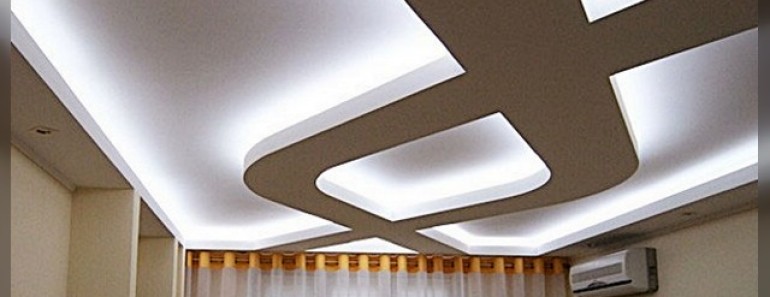
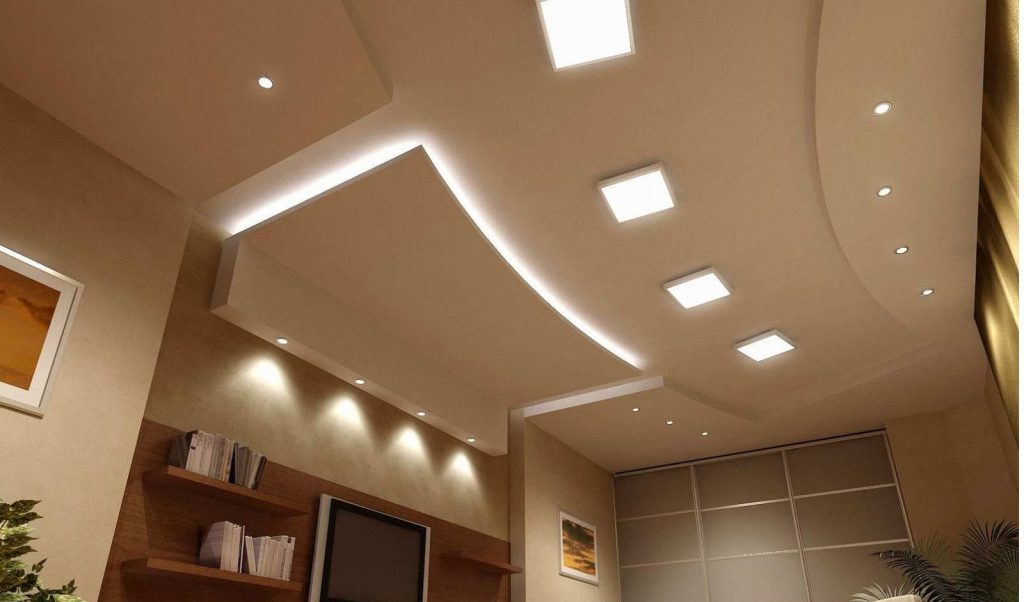
- the ability to select lighting zones - you can organize a point light in the necessary places;
- the possibility of visual separation of the room into different areas;
- can visually increase the height of the room;
- simplicity in installation and installation with which even the nonprofessional can cope.
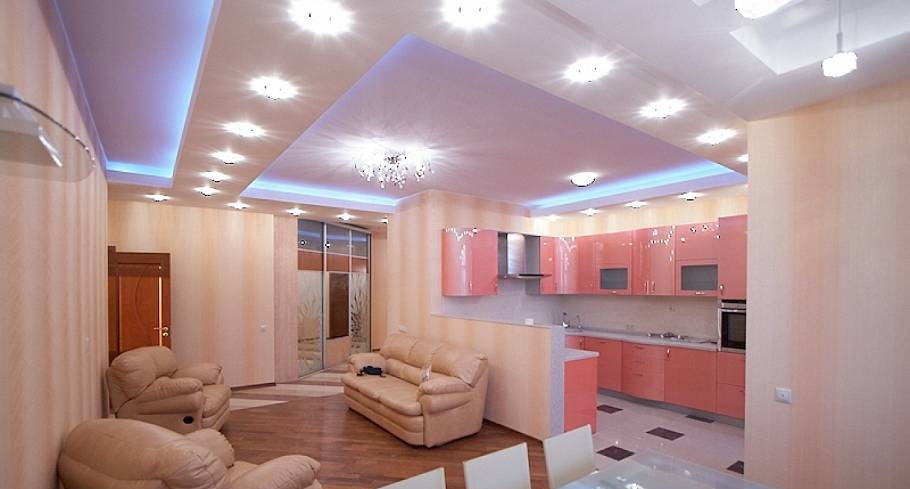
Usually, double suspended ceiling is used in the repair of an apartment for zoning rooms - this is a very convenient way to thematically separate one part of a room from another, especially if they have different purposes: for example, the dining room is separated from the kitchen area, and the living room is from the hallway. Such unobtrusive separation allows you to do without the construction of additional partitions or the installation of screens, which means it helps to save and use space rationally.
However, these ceilings have their significant drawbacks. Normal drywall is afraid of water, so it is unacceptable floods from the neighbors above. Repairs will consist of replacing sheets and repainting, or only from repainting and a new putty for the ceiling. In addition, visually increasing the space, in fact, he takes it away.

There are several ceiling options for the design of living rooms:
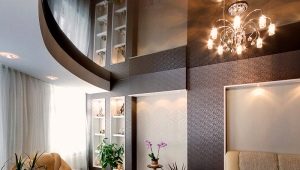
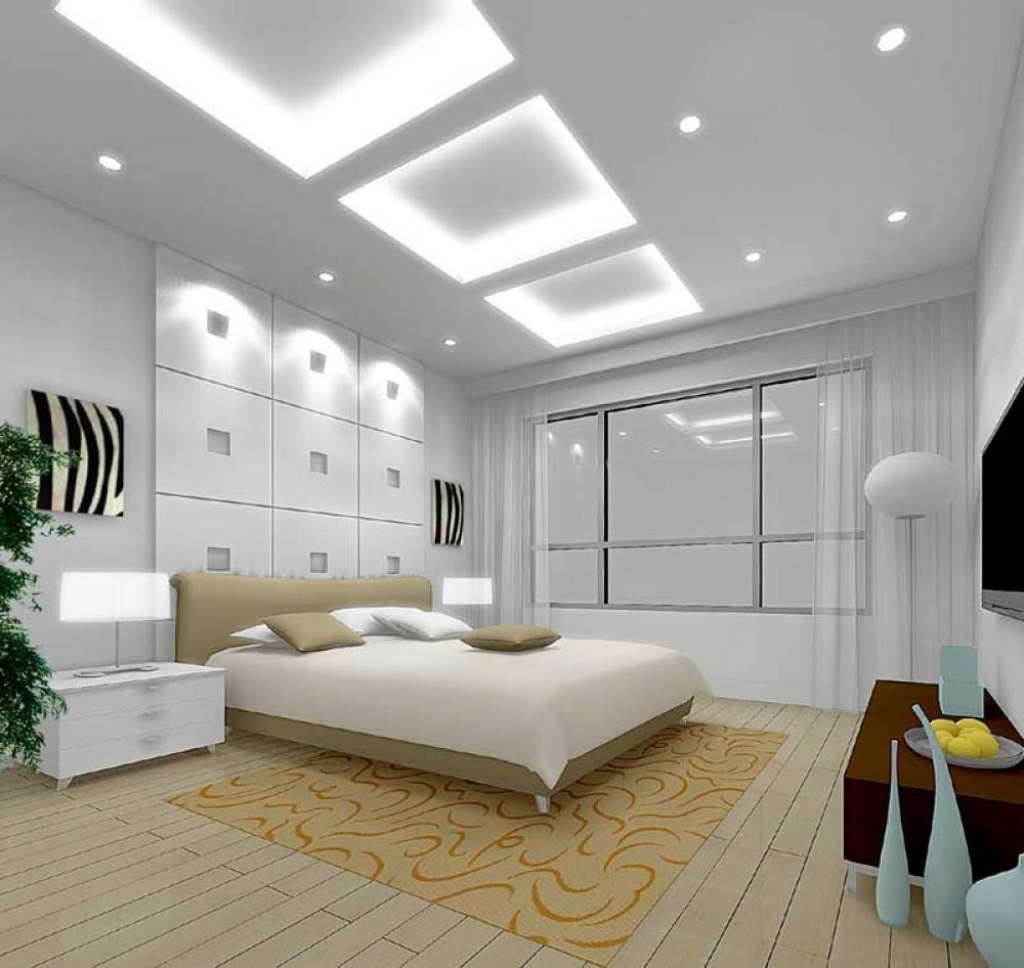
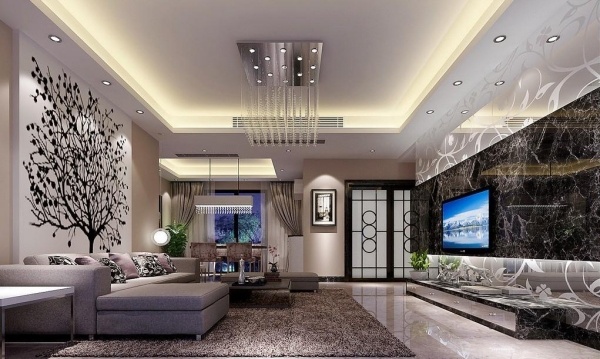
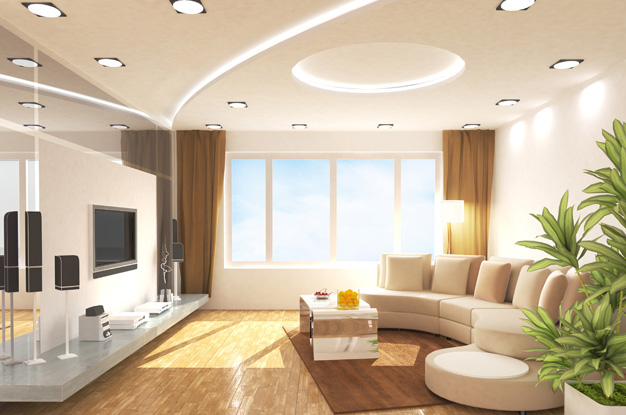
- Framework. Rounding the room around the perimeter. It is possible to mount a backlight and place a spot light. At the same time there is a lot of space in the center of the room, so you can add a chandelier that is suitable for the style.
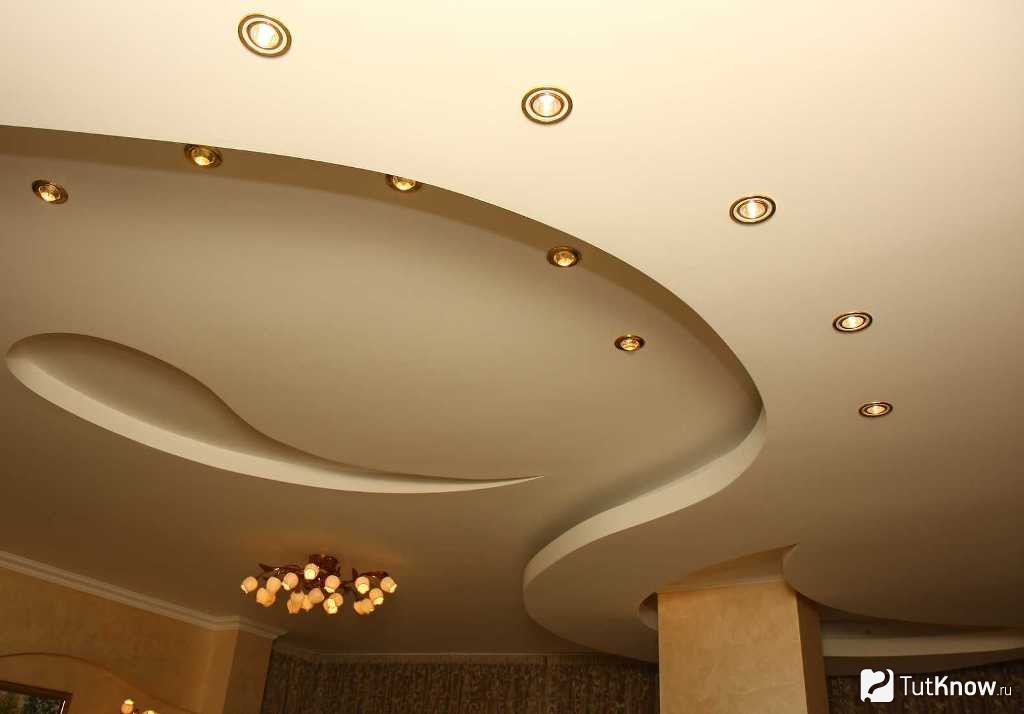
- Diagonal. It is a diagonal line running from corner to corner. Can be straight or curved - this is a matter of taste. The base of the ceiling is smooth, the second level is only above the part of the room. It divides the premises into unequal zones, helps to beat the premises and generally looks original.
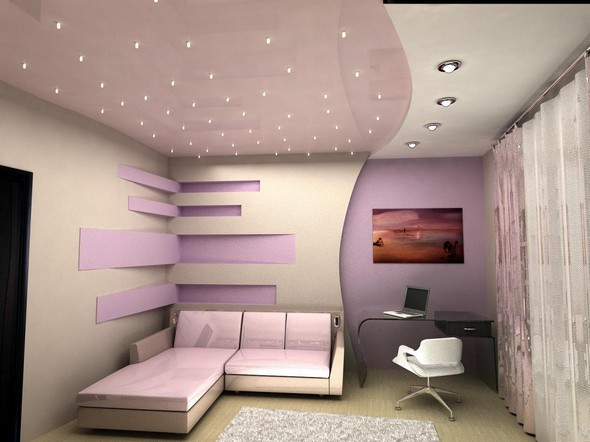
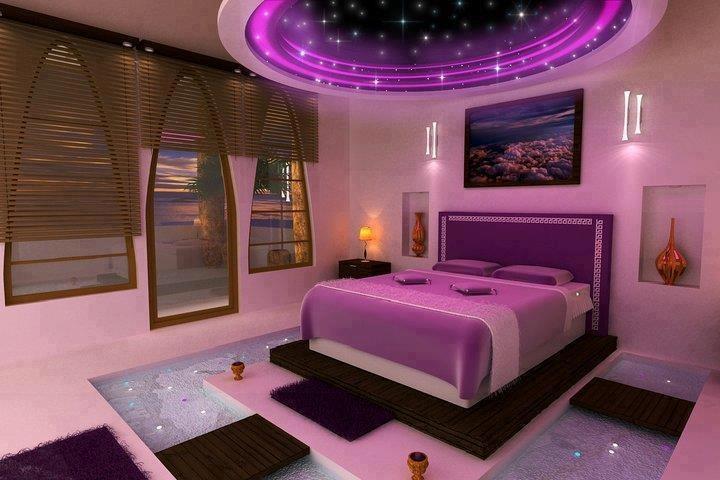
- Zonal. Helps to highlight a specific area of the room, usually quite small. It is often used in bedrooms to separate the sleeping area from the work area (if the bedroom is combined with the study).
These are not all existing options.If desired, the design can be complicated by adding more elements to it.
Unusual shapes, patterns and patterns are used to highlight the individuality of the room and the taste of the owners:
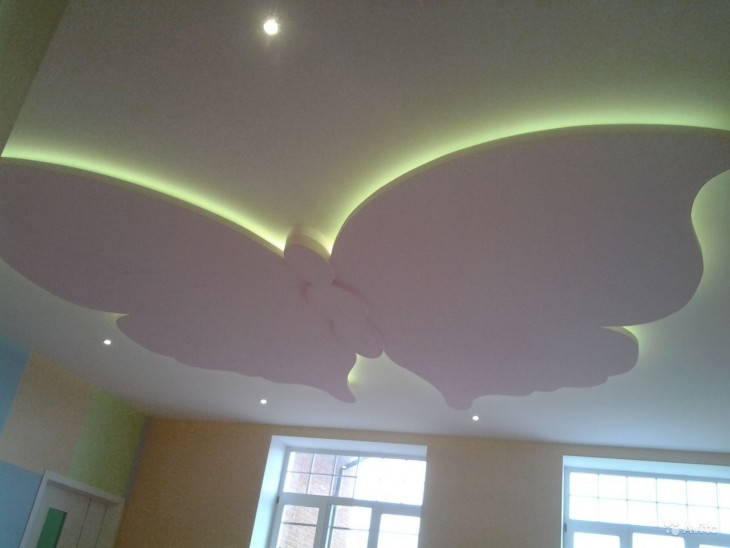
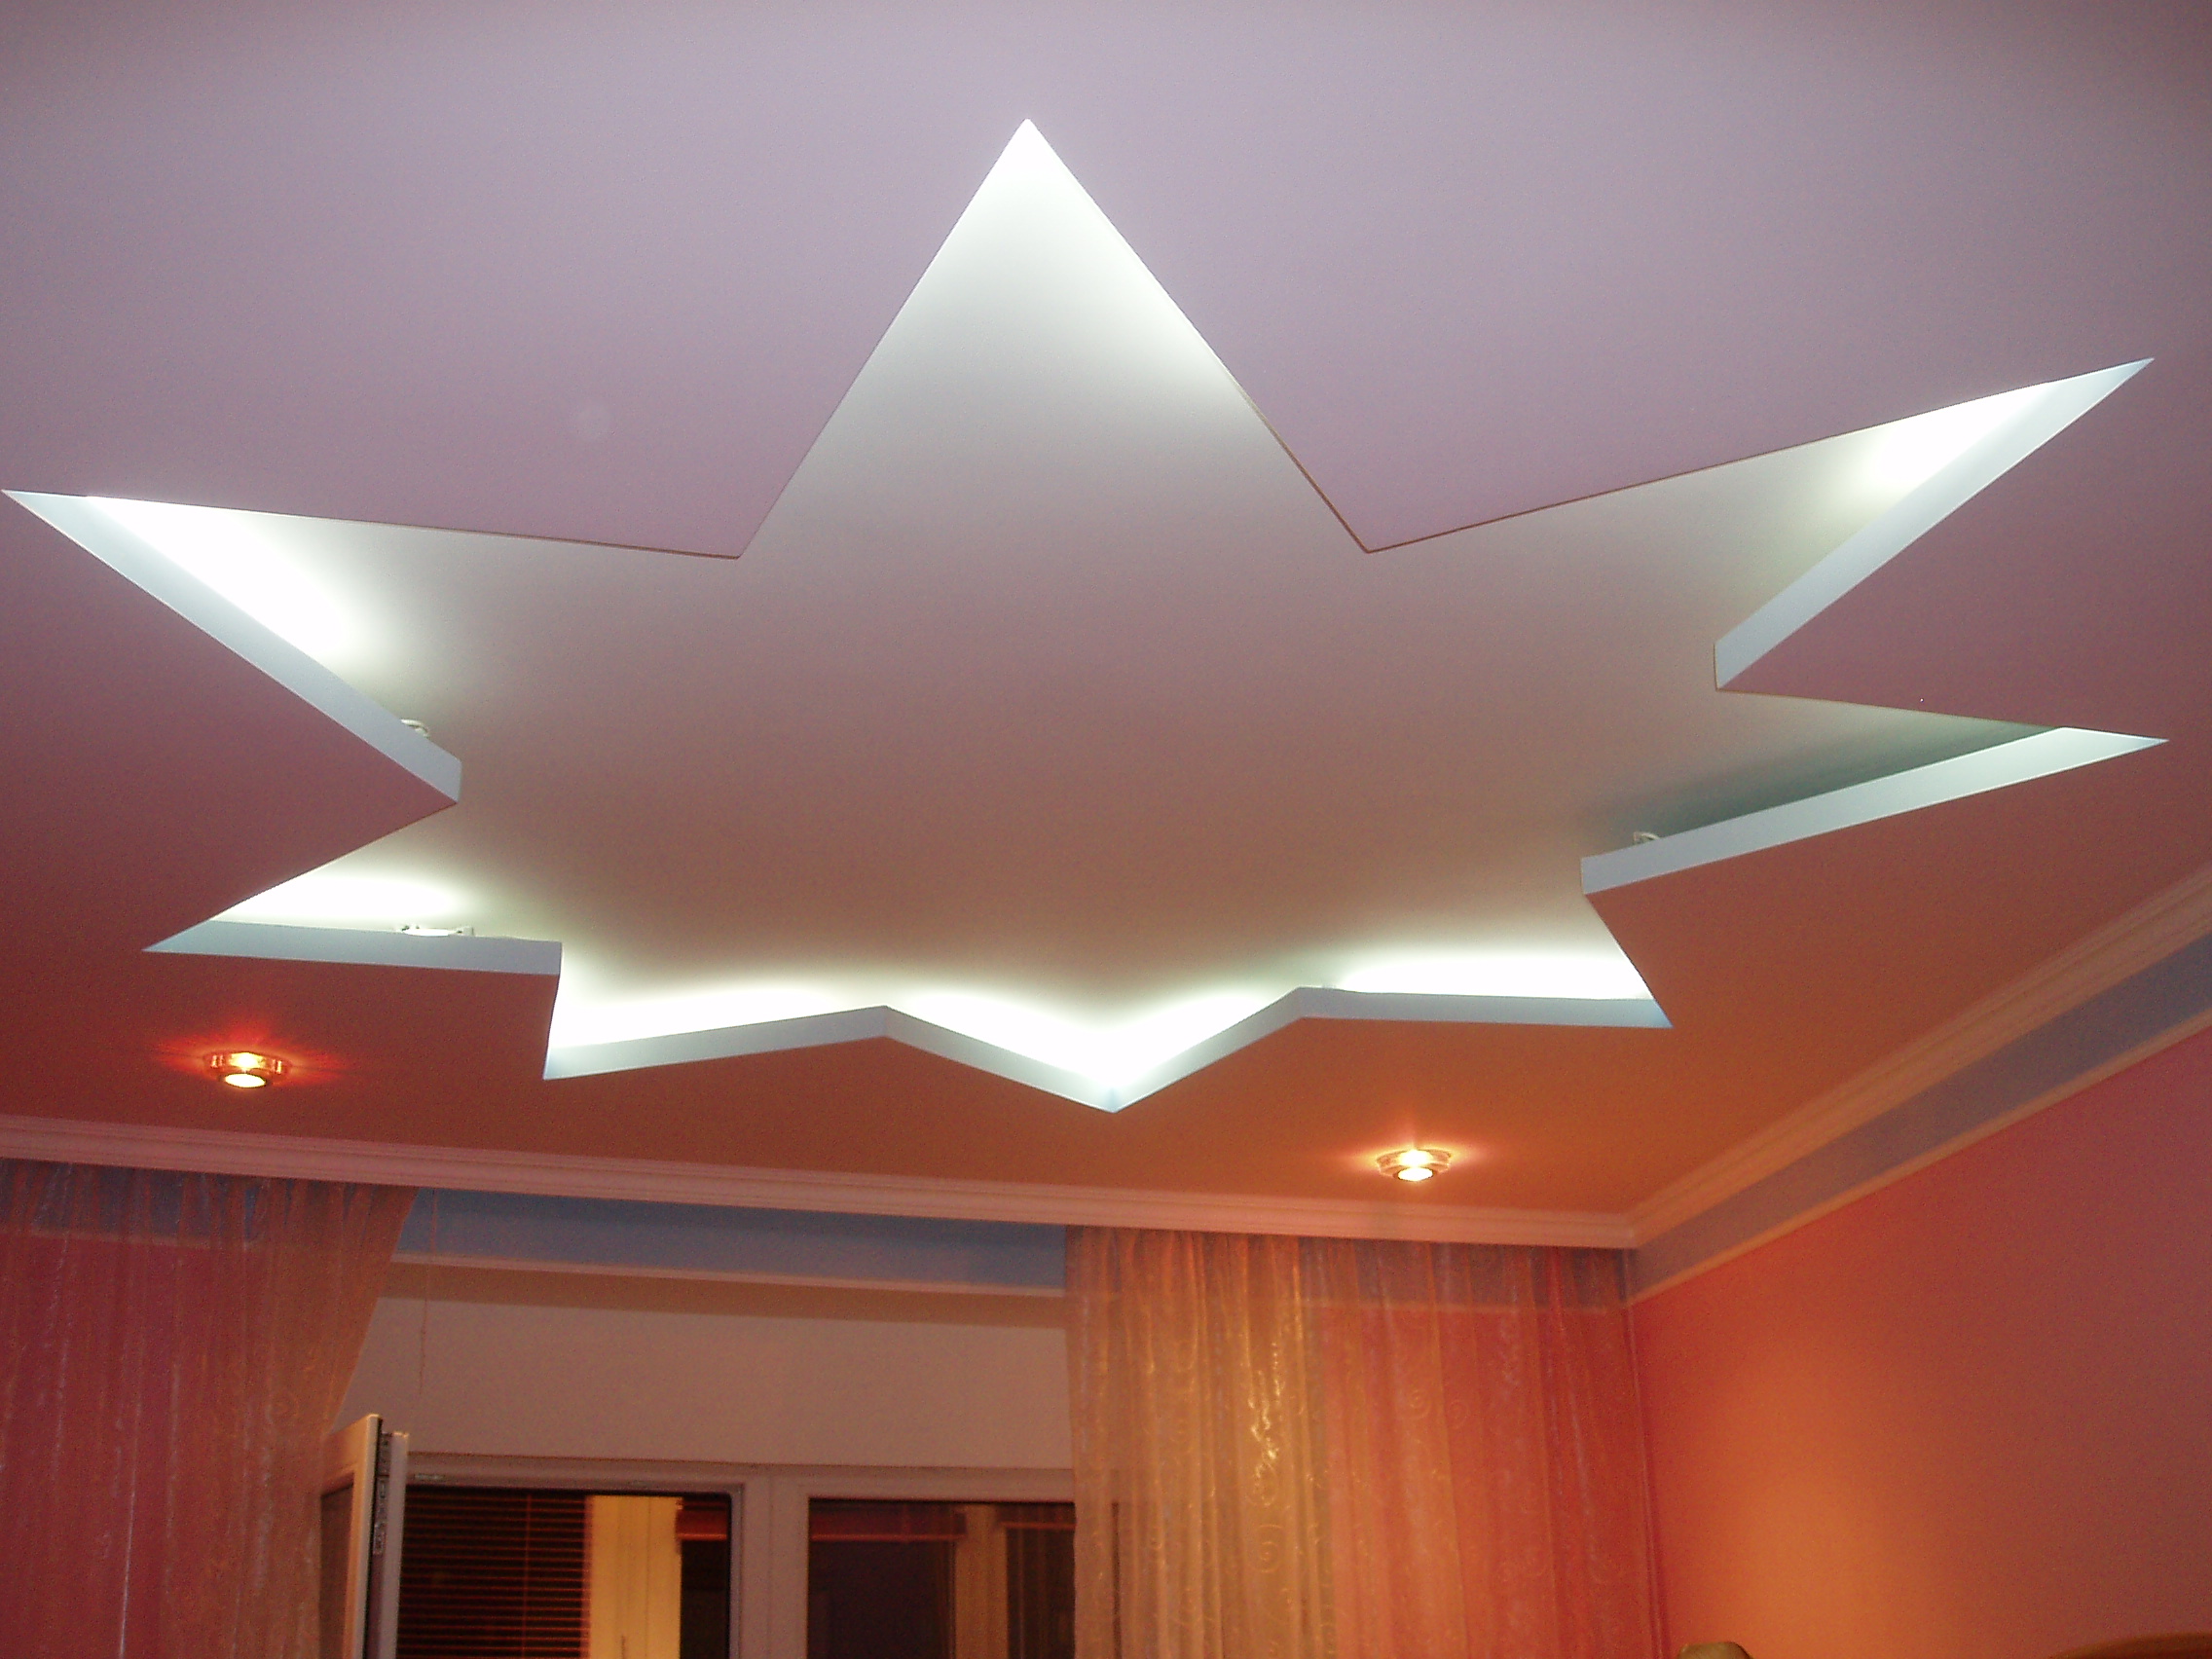
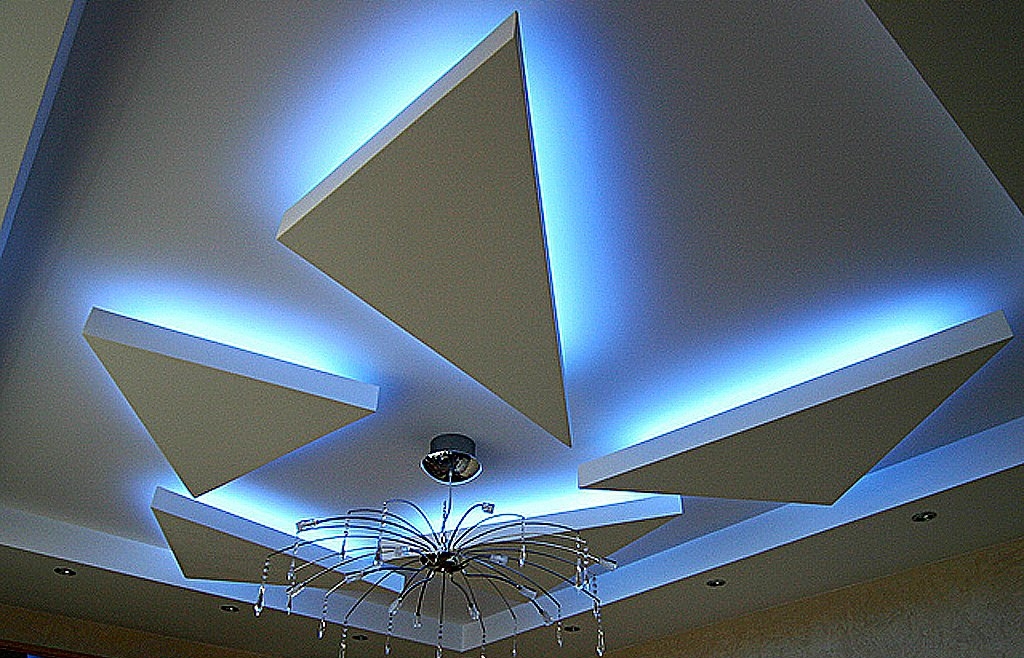
- Figured. On the base in the form of a single-level ceiling, the structure is fastened in an unusual form: it can be a geometric figure, a plant element, an animal motif - for all the will of the owner. As a rule, such an element is placed in the center of the room, and in order to further beat and attract the attention of the guests, they frame it with a backlight. You can use colored LED lamps.
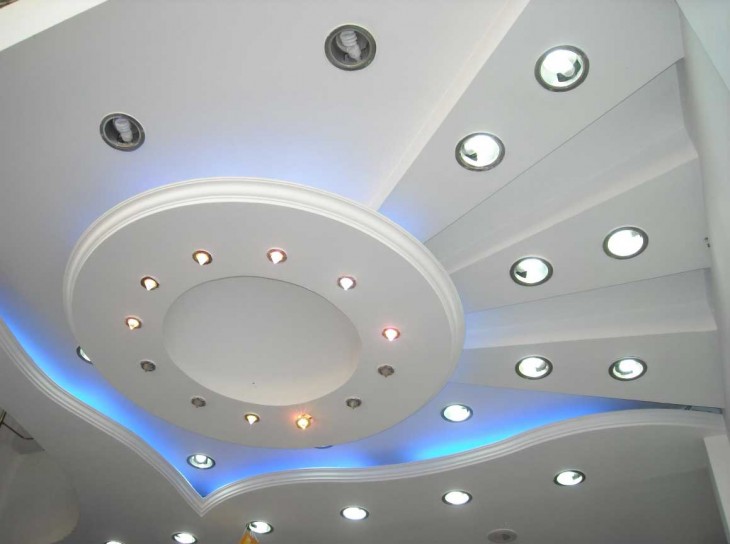
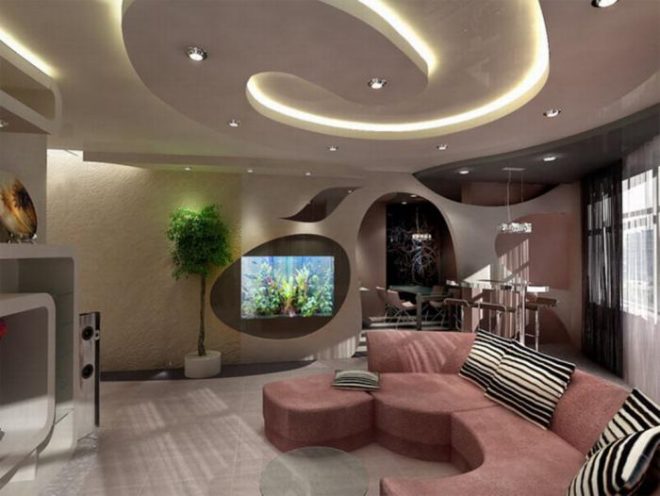
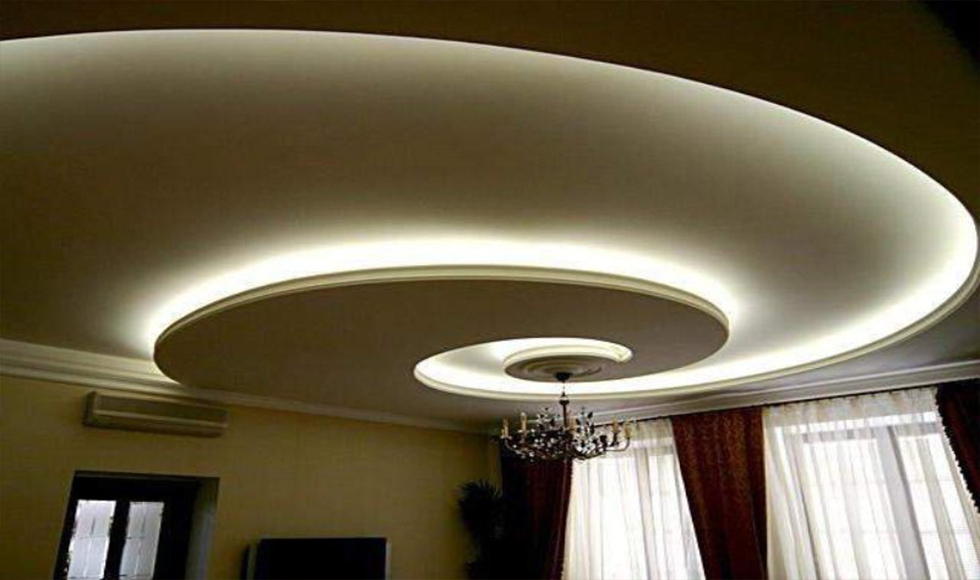
- Abstract. A variety of designs are used: from spiral-shaped to completely unseen forms, which can be arranged chaotically on the ceiling. The composition is complemented by different methods of illumination and its colors. Such a ceiling solution can be considered the most unusual and unique.
- Soaring. Plasterboard elements attached to the base on the metal pins and fitting sleeves. So they look like hovering, suspended in the air. Good light will only emphasize such an attractive effect.
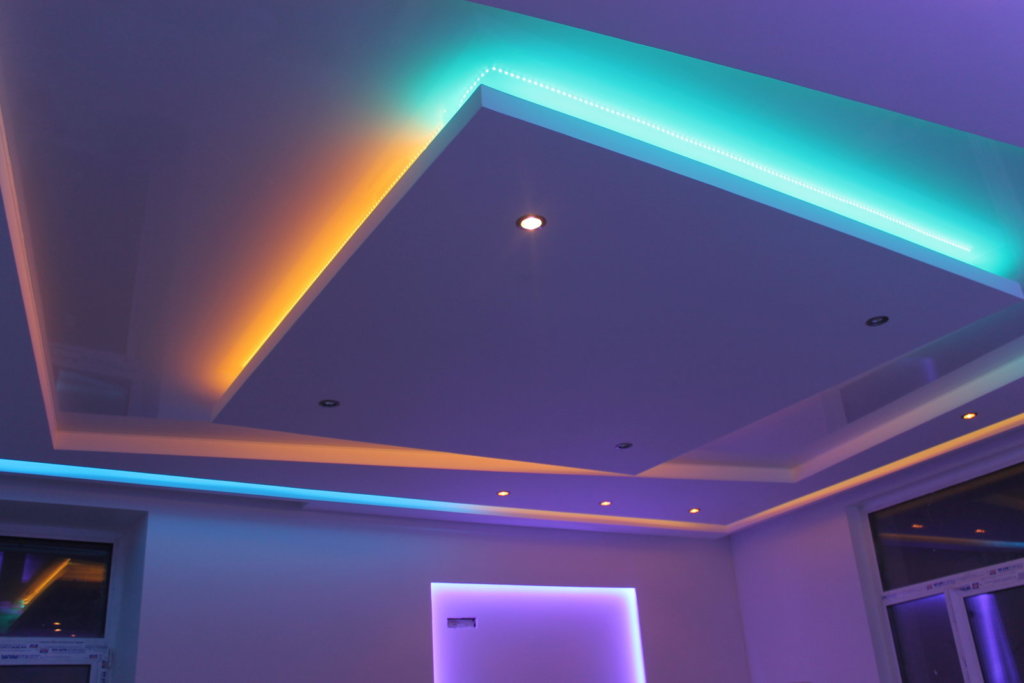
In the installation of a two-tier ceiling there is an important point: the lower level is always less than the first.Usually they make a zoned lighting system in it, adding more light where it is needed most according to the design of a room or apartment.
Materials and tools
To install a two-level ceiling, you need to prepare all the necessary materials and tools. Their choice must be approached with all the responsibility, because the quality of the final result depends on the quality of the materials, and hence the durability and reliability of the ceiling.
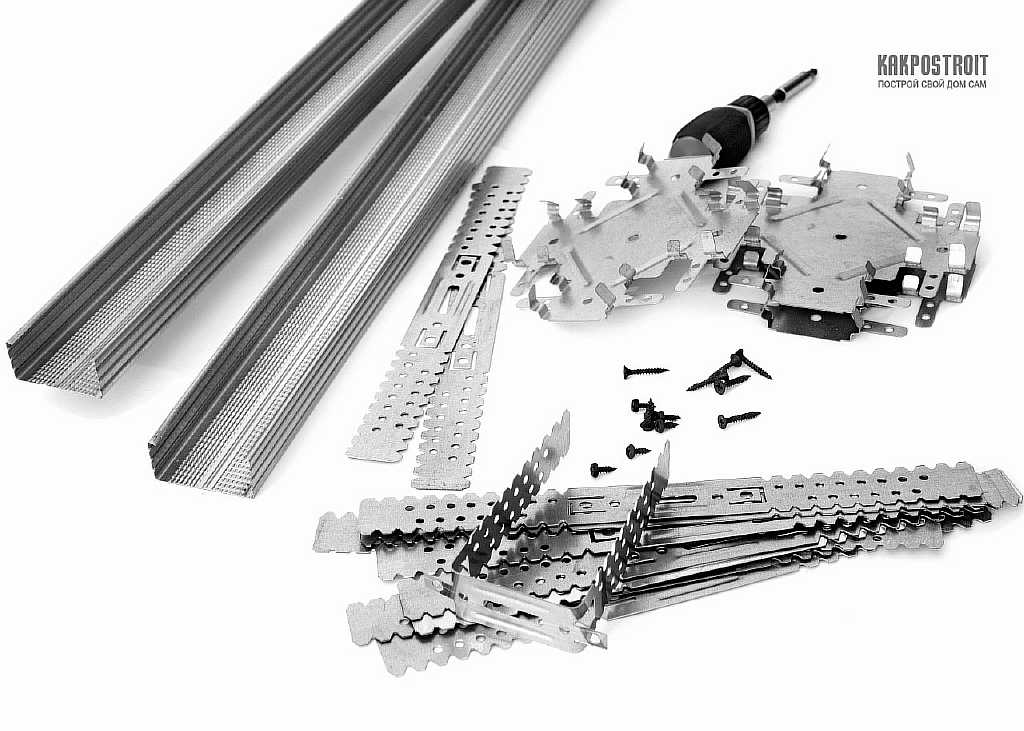
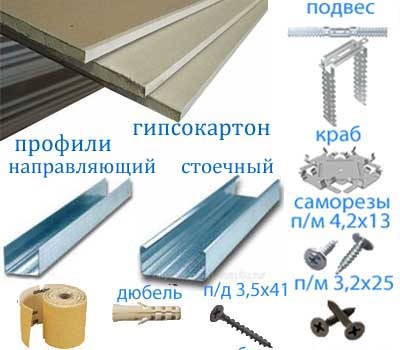
First you need to familiarize yourself with the design of the coating. It includes:
- metal profile (guide UD and ceiling CD);
- fastener elements (screws, screws);
- “Crab” - connectors;
- straight or springy suspensions;
- metal dowel wedges;
- sound-proof materials (if such a goal is set);
- self-tapping screws;
- finishing materials: primer, putty and more;
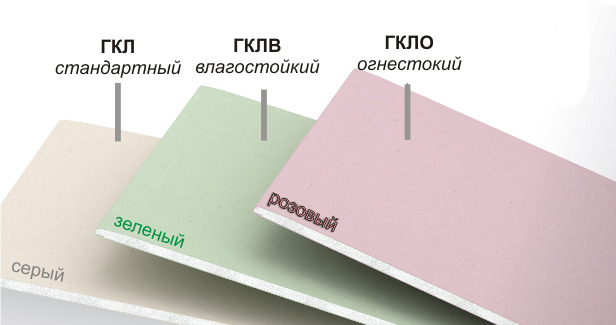
- GCR.
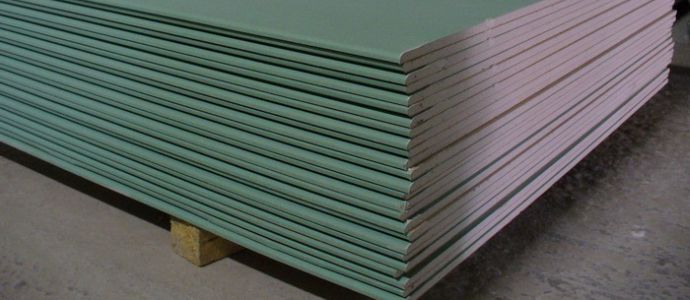
Also when choosing materials it is worth considering that for rooms with different purposes need a drywall with different properties. So, for the arrangement of rooms, hallway or kitchen, simple building plasterboard will be suitable, and for bathrooms - moisture resistant.
Especially when choosing to pay attention to the size of the room.It is better to take a little more material (about 10-15% more than necessary), because it is this amount that will be used for pruning and waste.
When buying frames, special vigilance should be shown when evaluating products for defects, kinks and bends.
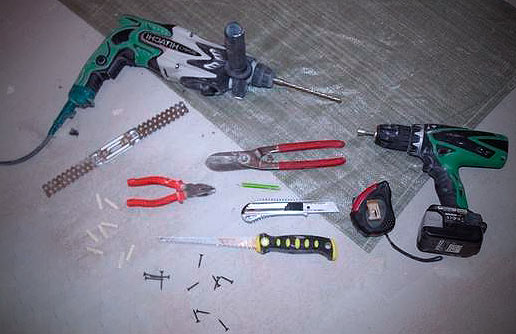
For self-installation, you must have the following tools:
- square or T-square;
- roulette;
- pencil;
- construction knife;
- screwdriver;
- perforator;
- building level;

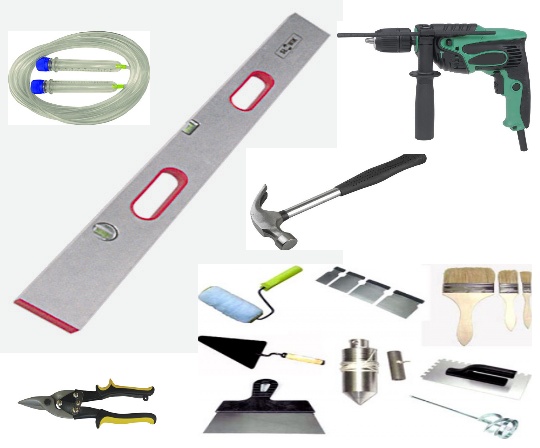
- spatulas, brushes and other devices for painting and finishing works;
- plummet;
- scissors for metal;
- ladder;
- gloves and goggles for protection.
Installation: step by step instructions
Assembling a plasterboard ceiling with lighting with your own hands only seems like an impossible task. If you follow the technology correctly, then the whole process - from the preparatory stage and frame assembly to the final finishing works, will seem like a new interesting experience and will not bring any inconvenience and problems.
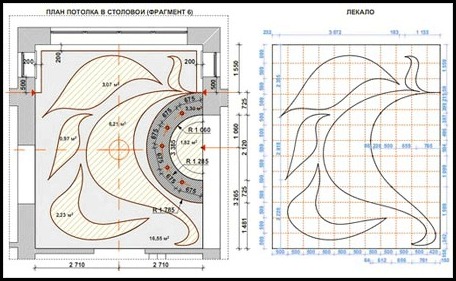
Installation of gypsum ceilings requires a draftin which all profiles will be displayed, their location and mounting. When developing it, it is better to seek help from specialists - they will be able to advise and give valuable advice on the entire process of installing ceilings.However, you can do the project yourself, if you take into account all the tips and responsibly approach the issue.
The project should be treated with the utmost care: the manufacture of such ceilings requires accuracy in measuring the dimensions and the ratio of all sides. If everything is done correctly, the ceiling will be smooth and reliable.
In addition, on the basis of the compiled project, calculations are made on the amount of material used, and here it is very undesirable to make mistakes.
Considering all the previous points, we get the following sequence of actions in the manufacture of two-level ceilings:
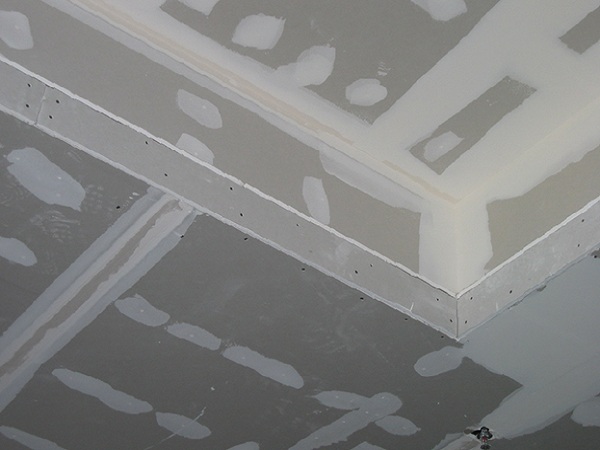
- surface preparation;
- markup;
- installation of the frame of the first level;
- installation of the frame of the second level;
- finish

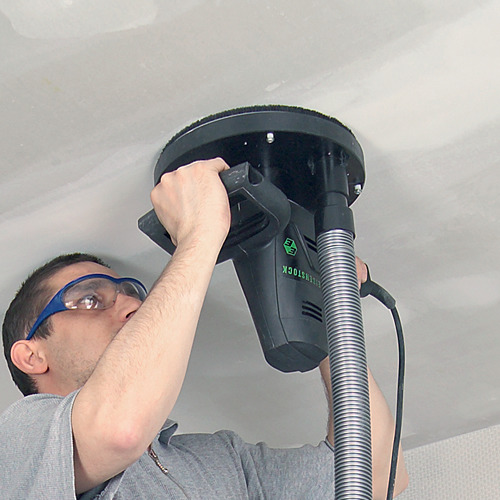
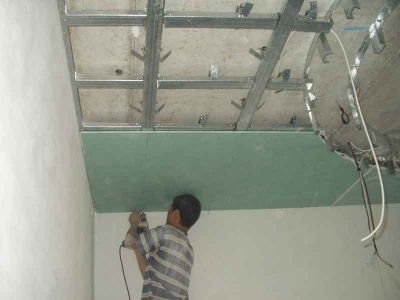
Ceiling area must be thoroughly cleaned and leveled, primed, if necessary.. Primer is needed to reduce the likelihood of dust on the surface of the plasterboard ceiling from the inside.
You can even clean the ceiling with a vacuum cleaner - this is the most accessible and simple, but at the same time, an effective way to collect dust particles and dirt so that the material does not get clogged. Especially this action is worth making to residents of middle floors who have neighbors on top.
Universal linseed oil may be used as a primer.It must be applied in several layers after the leveling plaster has hardened, otherwise the primer is absorbed into the fresh composition and it will not be possible to achieve the desired result.
Before you start drawing up the frame, you need to make his scheme. In order to get all the necessary data for the markup, you need to perform the following steps:
- measure the height of the room at the corners;
- find the “lowest” angle (with the smallest height).
It is this angle that will become the starting point of the markup, because only in this way will the whole structure be flat horizontally.
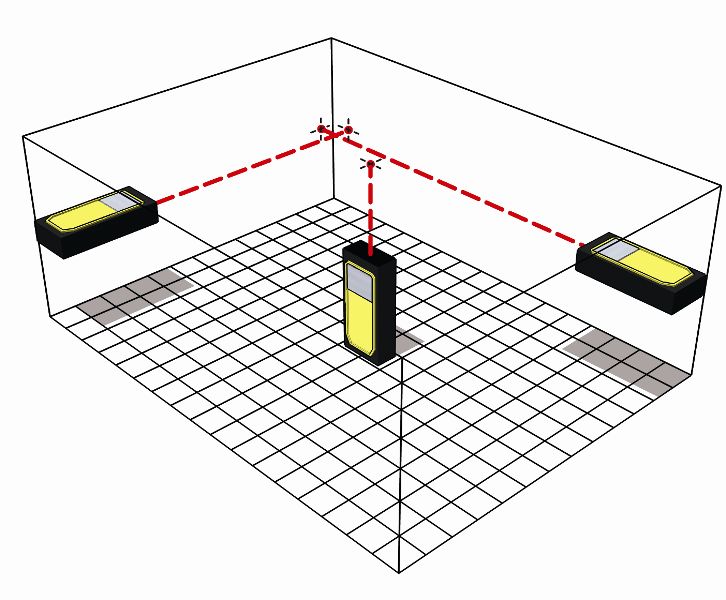
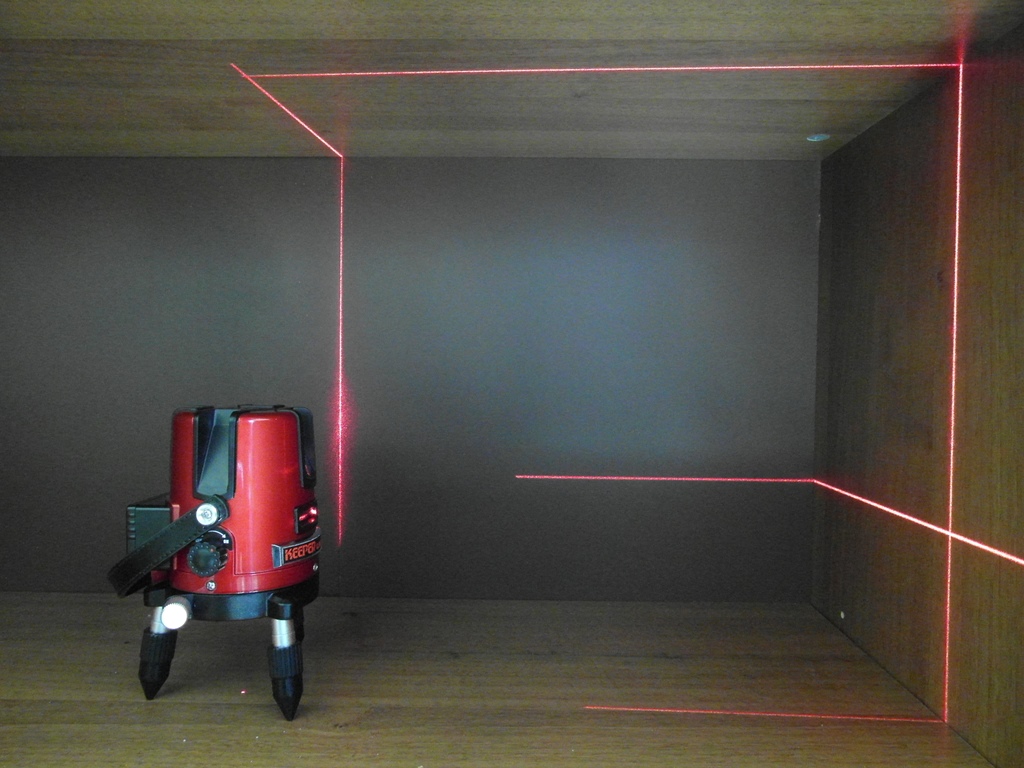
The next step will be marking. It is necessary to mark on the walls a flat line for the profiles according to the drawings. We put dots on the ceiling so that the suspension comes out even. Do not do a lot of extra lines and points on the walls and ceiling - it will be confused. It is very convenient to use a laser level.
It is important that:
- the perimeter accurately correlated with the horizon;
- the lines on which the guides will lie are correct;
- the location of the hangers was noted;
- proportions were correctly and accurately transferred to the walls and ceiling.
However, it also happens that not only the corners, but also the length of the walls and sides of the ceiling are different in the room. Then the main task becomes horizontal adjustment.After that, you need to leave a clear pattern on the ceiling and align the rest of the structure along the edge. This will help visually smooth the curvature of the sides and give the ceiling the desired look.
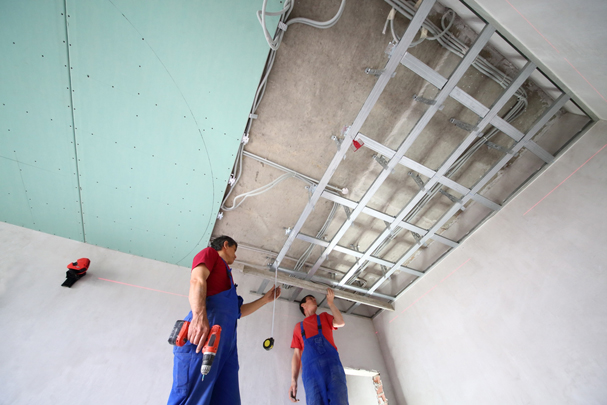
The next step is to mount the guide profile along the walls of the room in accordance with the marking. The mount should go strictly along the line, otherwise the ceiling and the whole structure will be curved.
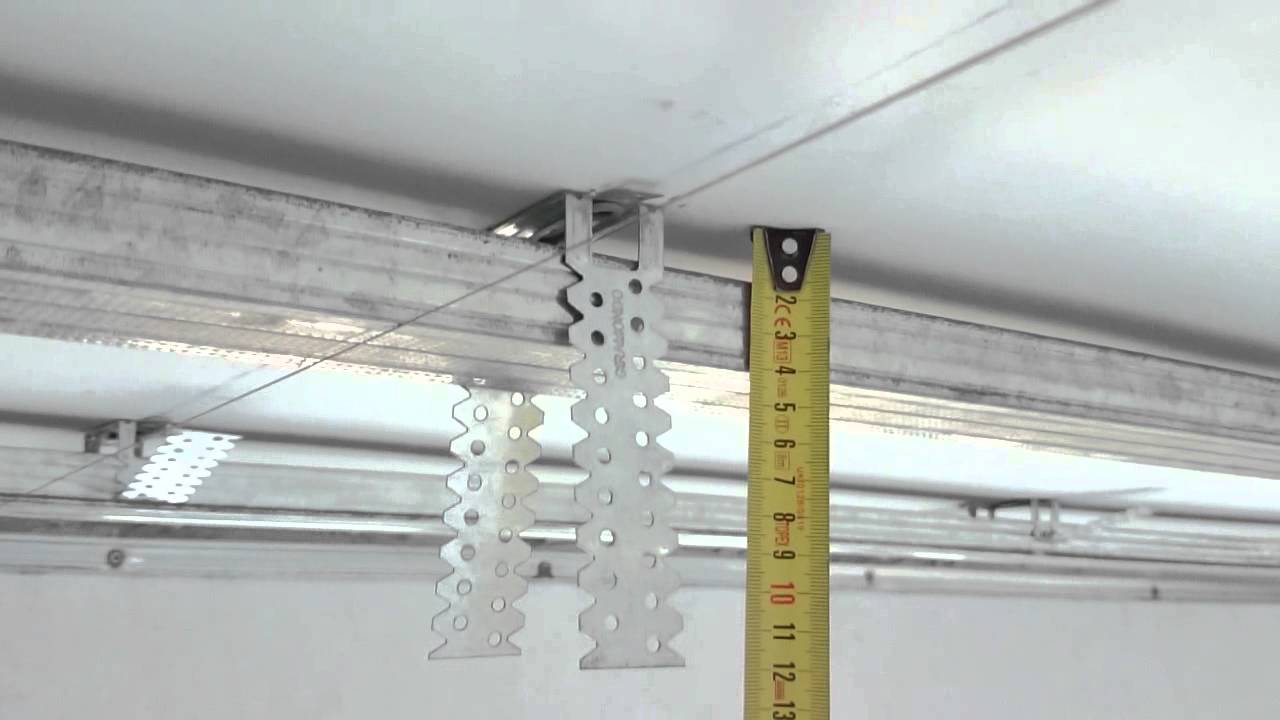
Holes for fasteners are drilled with self-tapping screws, the length of which should be sufficient to support the weight of the entire profile. Suspensions are also mounted on screws, although not necessarily: depending on the type of suspensions, the fastener itself also changes.
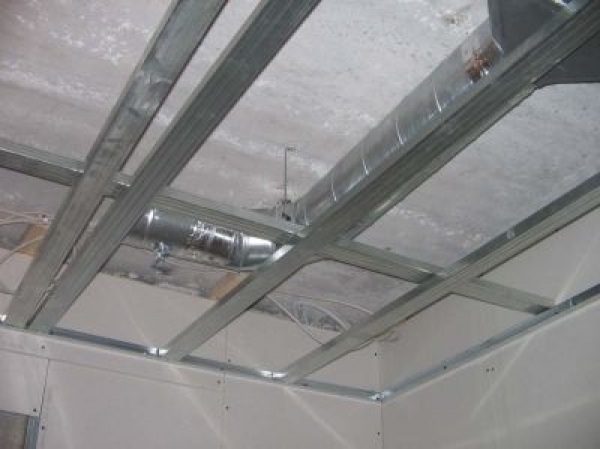
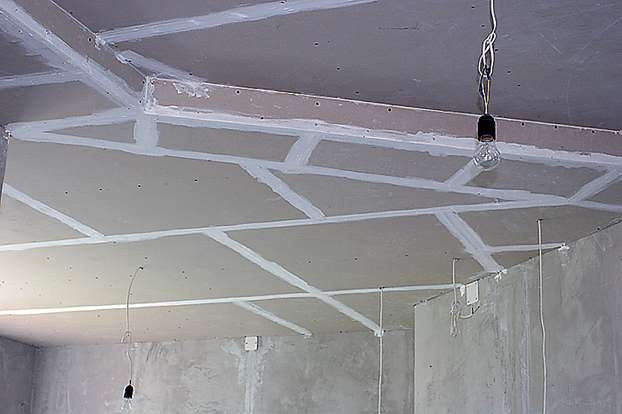
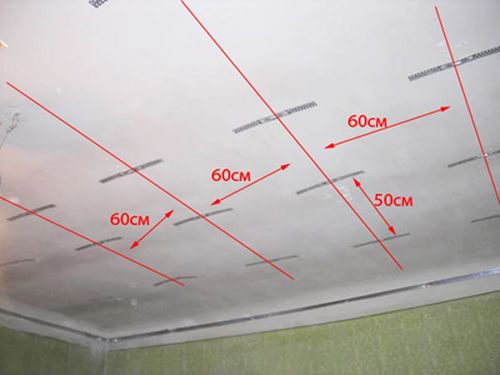
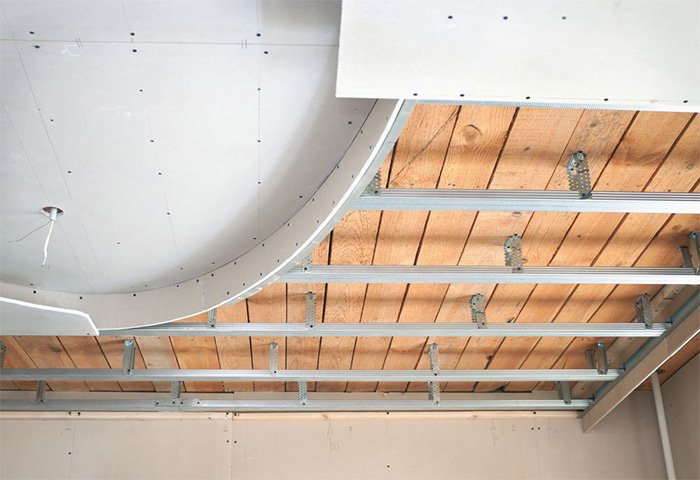
The next step is to build the frame. The transverse bands are attached to the longitudinal, fastened with "crabs", i.e. clamps - they provide an even perpendicular arrangement of profiles relative to each other. After installation is complete, the structure should be checked for stability, reliability and rigidity.
If required, the gypsum board can be trimmed with a hacksaw to the desired dimensions, and after that it can be fixed to the profile.
In order to give the desired shape the desired shape, the material must be moistened with water.Then the sheets become soft, pliable and can easily change their shape. To simplify the work, the surface is treated with a metal needle roller - this way the material will be faster soaked and it will be easier to bend it into the desired shape.
It should be borne in mind that when creating a two-level ceiling to the first tier do not attach sheets of drywall in those places where the second tier will be located. All that is needed is to leave a margin of 10-15 cm so that the frame is not noticeable.
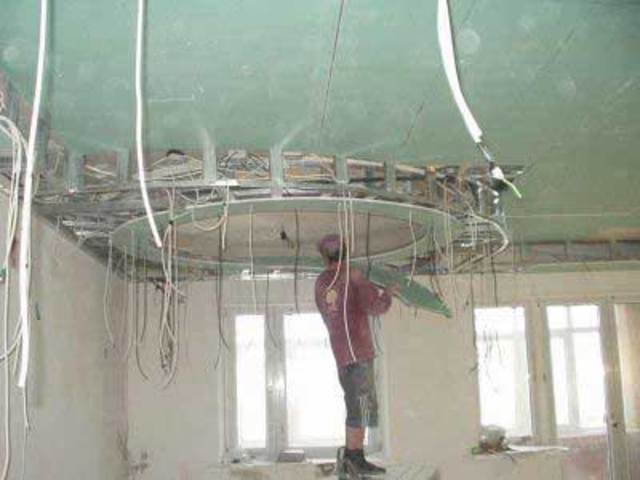
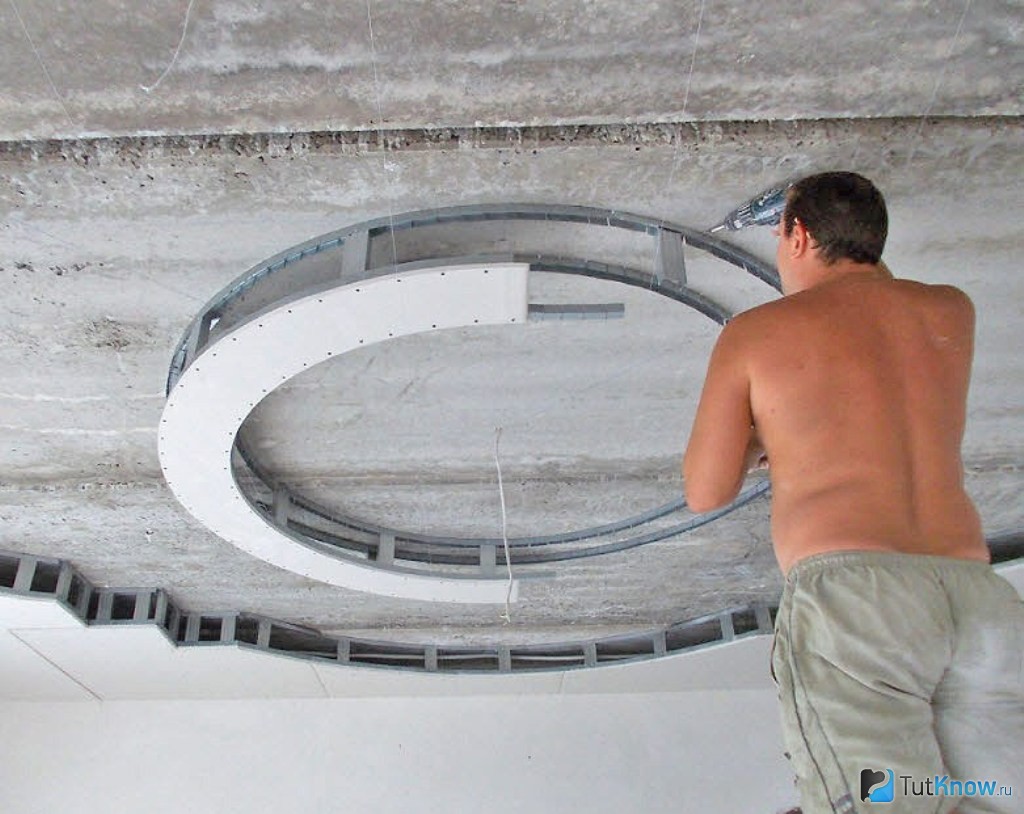
With the installation of the frame of the second level begins small difficulties. It takes more care and caution not to damage the upper level and carefully do the second.
First of all, on the finished and sheathed surface of the first level and marks are left on the walls for the construction of the second level. The marks are left only where the second level will pass directly - if it is located along the entire perimeter of the room, then the marks are made on all sides.
The guide profile for the second level is attached along the line on the walls and along the border of the lower level, from the inside. Pieces of the main profile are cut to a length slightly lower from the profile to the mark located on the wall. On the pieces of the profile leave space for mounting profile.
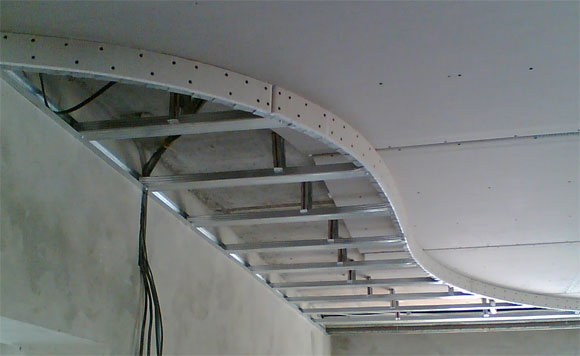
To guide the profile attached pieces of the guide. A guide profile is set to a pre-positioned place for attachment. Its sharp edge should face the wall.
In order to insert and fix the main profile into the guide elements, it is cut into pieces of suitable length. If the length of the pieces is more than half a meter, additional fastening in the form of suspensions is required.
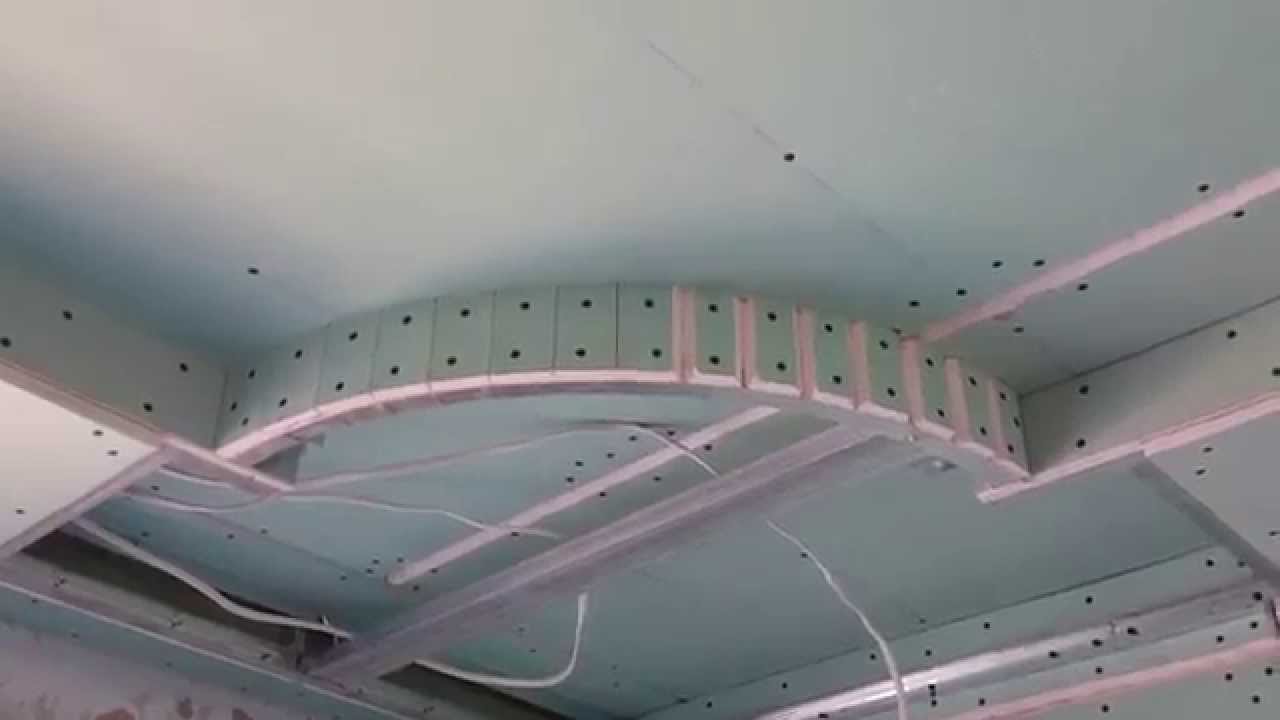
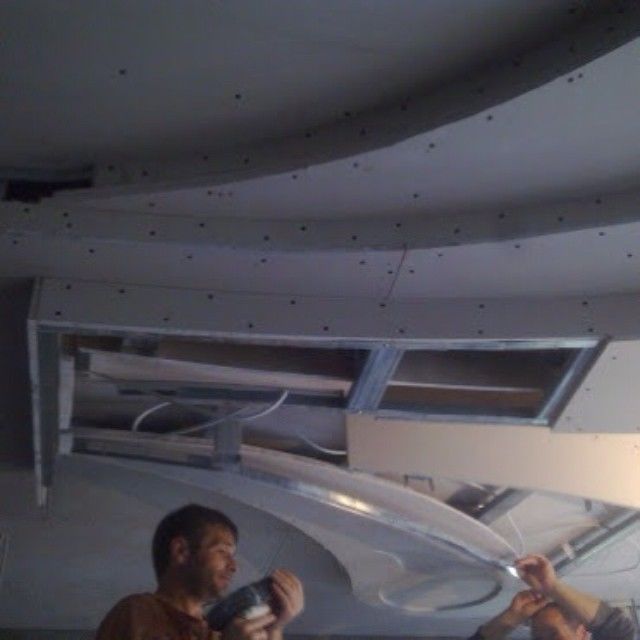
After that, drywall sheets are fixed to the supporting profile of the frame. You need to start fixing from the corner, and at the same time the sheets should not be joined. It can not do without screws and a screwdriver. Since the weight of one sheet of drywall is about 20-30 kg, it is worthwhile to think in advance about an assistant and a stable and strong stepladder.
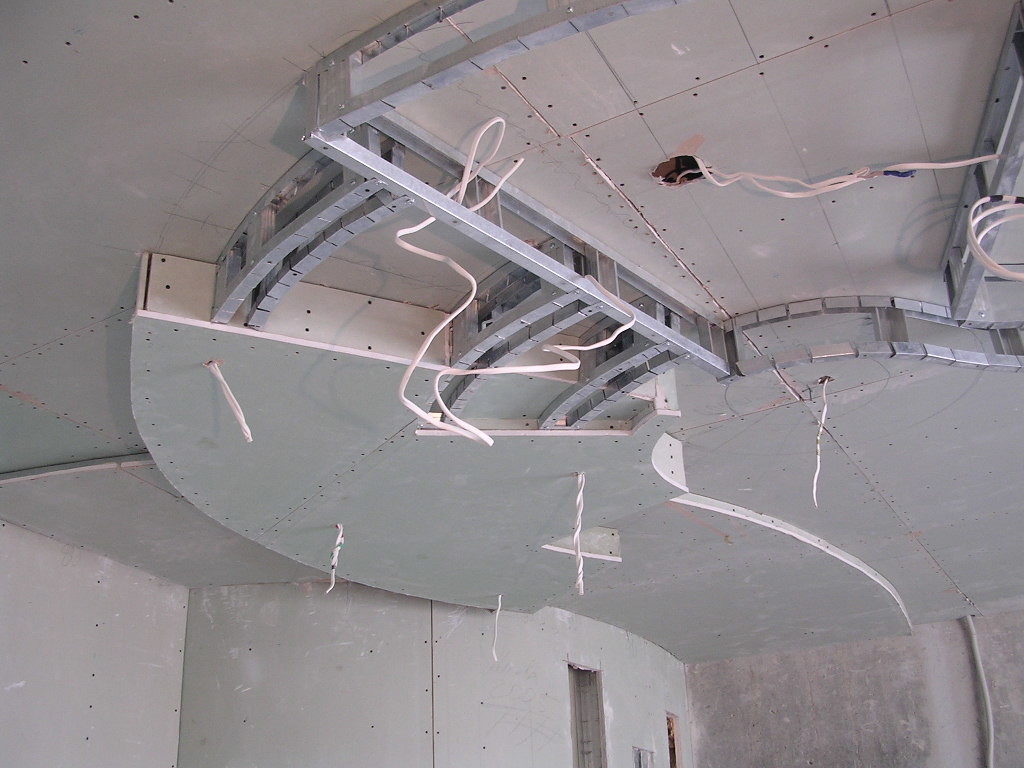
The second level of the ceiling is sheathed similarly to the first. The seams are sealed last, and then you can begin to finish the ceiling.
but before completing the work, holes are being cut in drywall and cables and wires for communications are held (communication lines, speakers, if their presence is provided for in the drawing and plan), a lighting system is installed. All wires must be in the corrugation - to protect against cuts during pulling and for fire safety purposes. It is better not to attach power cables to the frame profiles - better to the ceiling. It will be very difficult to do this later.
Holes for spot lighting are made with a drill. The light bulbs themselves will be held by their own clips.
When all the elements are fixed, the cables are laid, and the lighting and other communications are ready, there comes the stage of finishing the ceiling and bringing its appearance to the necessary owner.

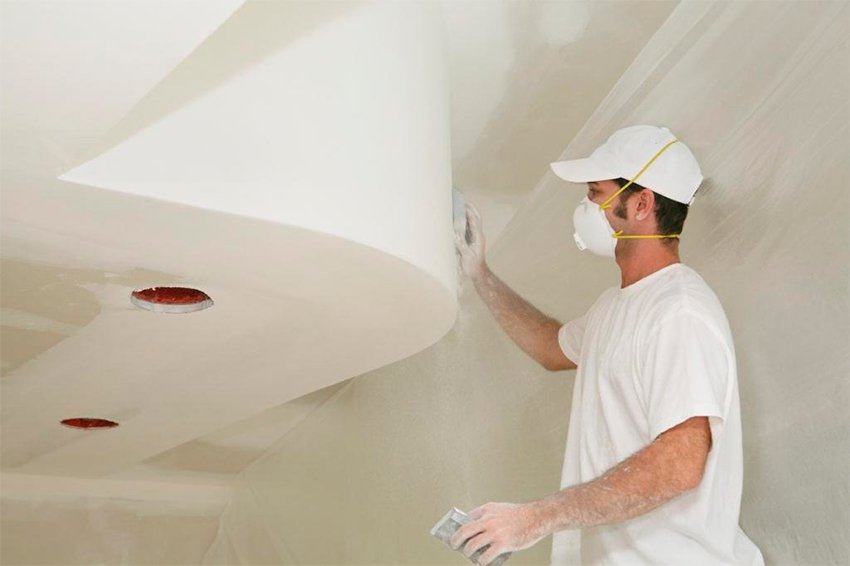
Finishing and design can be entrusted to specialists, but you can do it yourself. Here, as in the other stages, there is nothing difficult: just follow the instructions.
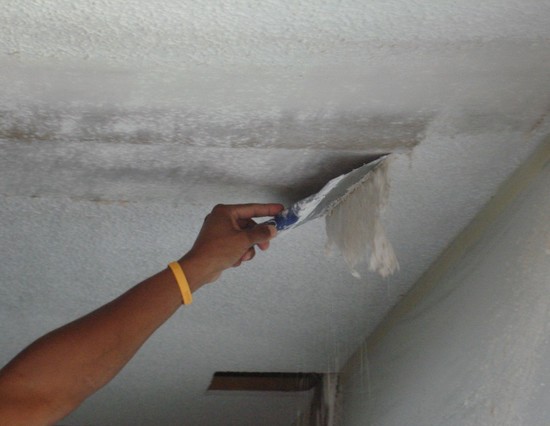
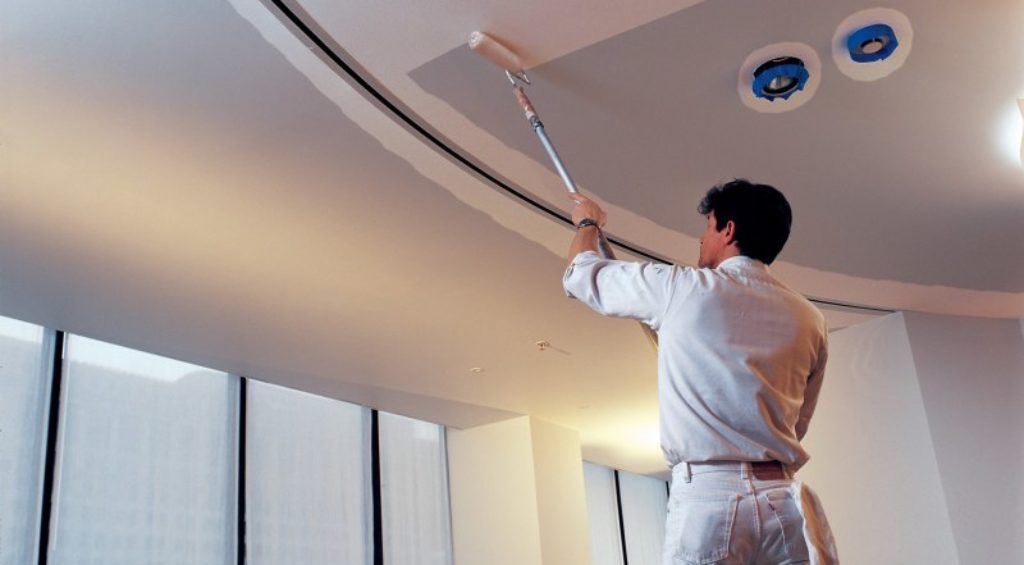
Firstly, need to get rid of joints. They need to be patched with a putty or special mesh and leveled. so that they are not visibleotherwise they will spoil the overall look, standing out under the paint. After all the joints are removed, the surface is processed with emery paper, which allows you to make invisible border transition. Then put another, final layer of putty, diluted with water. It is good to carry out this procedure with a paint roller - so the layer will be more even.
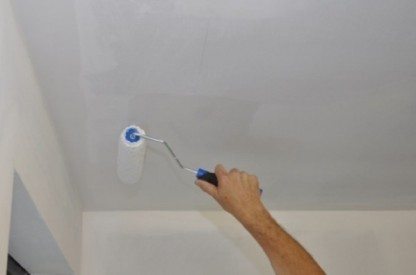
After the putty has dried, the surface is treated with a primer and coated with paint for ceilings or other finishing materials. However, if the choice fell on the paint, then you have to fill the entire surface so that ugly stains could not be seen. Also when finishing a two-tier ceiling it is worth remembering about angular and flat tapes for reinforcing seams. They are covered with a special perforated tape.
You can leave the ceiling just white, diversifying it with one light and LED lamps, or you can go ahead and pay attention to non-standard and unique color solutions:
- If you make the ceiling in the tone of the walls or one or two tones lighter, then visually the room will become more spacious and bright.
- The dark two-level design “steals” the height of the room a bit, but it evens out its proportions. A good option for high ceilings with curved walls.
- If a part of the plasterboard construction is finished with gloss, it will create the effect of additional light and visually expand the room and add air to the interior.
- If the windows do not come out on the sunny side and the lack of light is a significant problem, you should pay attention to the trim of the ceiling with bright, warm, summer flowers.Peach, soft pink, orange and yellow shades will play the role of an artificial sun and will always be comfortable in the room.
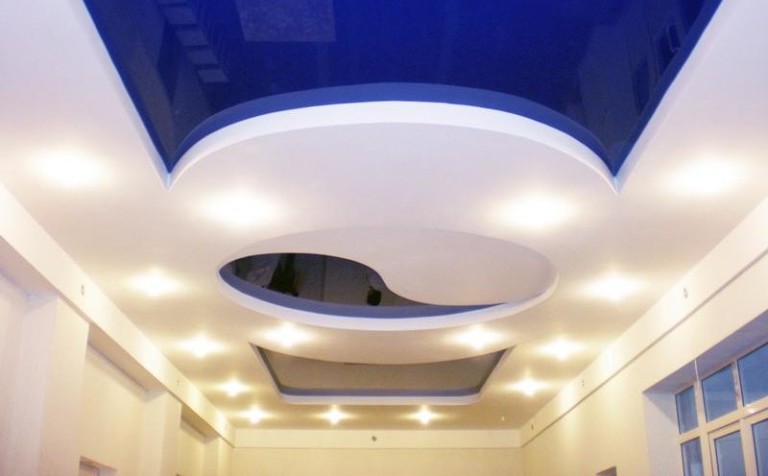
- In the rooms, the windows in which are located in the southern direction, cool shades will look great. A good option for lovers of blue, gray and greenish shades in the interior.
The final touch will be the installation of a plinth around the perimeter of the entire ceiling.
The design and variety of patterns on a plasterboard suspended ceiling depends only on the imagination and taste of the designer or owners.
Useful recommendations
For beginners, to simplify the task of mounting, it is better to plot all the lines in the drawing. It will be easier to work with them, because it will be possible to do without drawing on paper and not be distracted by it every five minutes of the process.
Before starting the calculations, it is worthwhile to give “for testing” a finished project to a professional. It will help to make the necessary changes or suggest the best solution.
It is better to stop using incandescent bulbs. - they may burn materials. In return it is worth using halogen lamps.
During the painting, it is better to apply the first layer in one direction, and the second - perpendicular to the first one.. The paint applied in this way does not leave stains and lays down with a dense qualitative layer.
In order not to cut your hands on the edges of the metal profiles when working with them, you should wear protective gloves. Screws in drywall need to be screwed at a distance of 15 cm from each other - so fasteners and fixation will be more reliable.
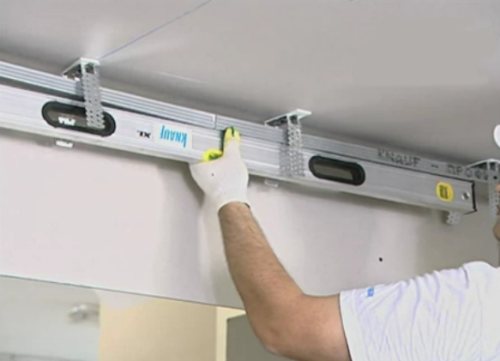
Jumpers must be strictly at the same level, in order to check this, you should measure them with a level tool. Be sure to use the level when installing the structure. It will help to avoid the appearance of dangerous defects. If a slight bending of a gypsum plasterboard is assumed, then this is easy to do without additional machinations. However, if the curvature is significant, it is better to prepare in advance for this process and learn the subtleties and details.
The two-tier ceiling made of plasterboard helps to solve a lot of aesthetic and design tasks, correct room flaws, such as curvature of walls or the ceiling, makes it possible to evenly distribute the lighting throughout the room, making it high-quality and harmless to the eyes.

It is necessary to remember all the features of working with drywall and take into account its advantages and disadvantages.
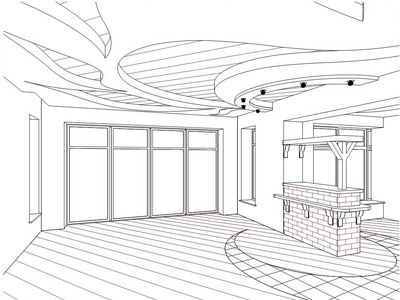
Successful examples and options
Here are some ideas of finished two-level ceilings that can inspire you to create a new unique design in your apartment or room.
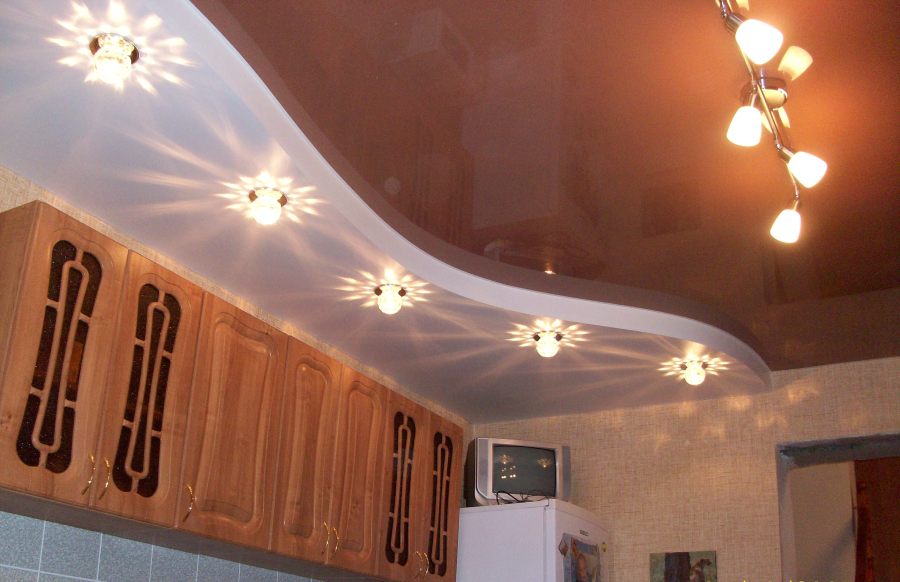
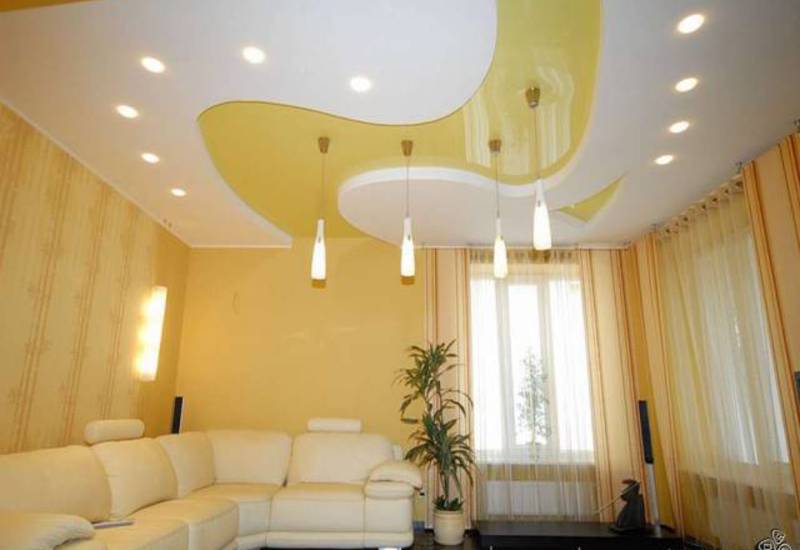
Bright orange design with waves.

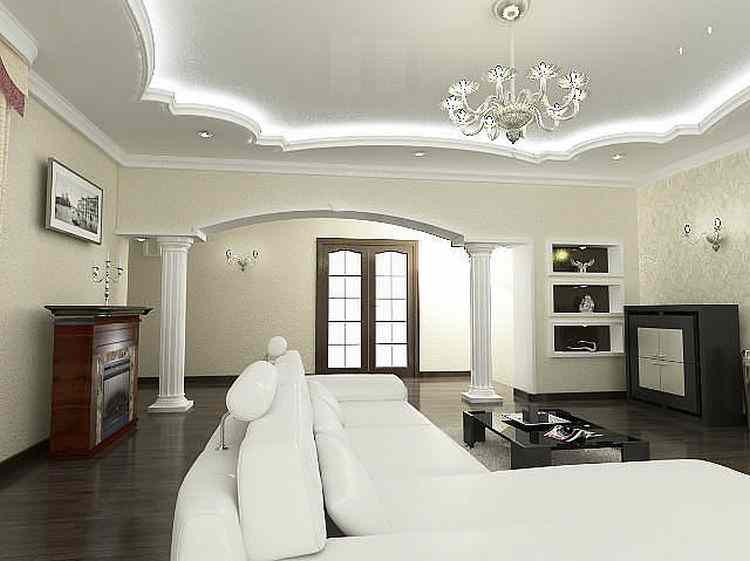
The classic option.
Figured.
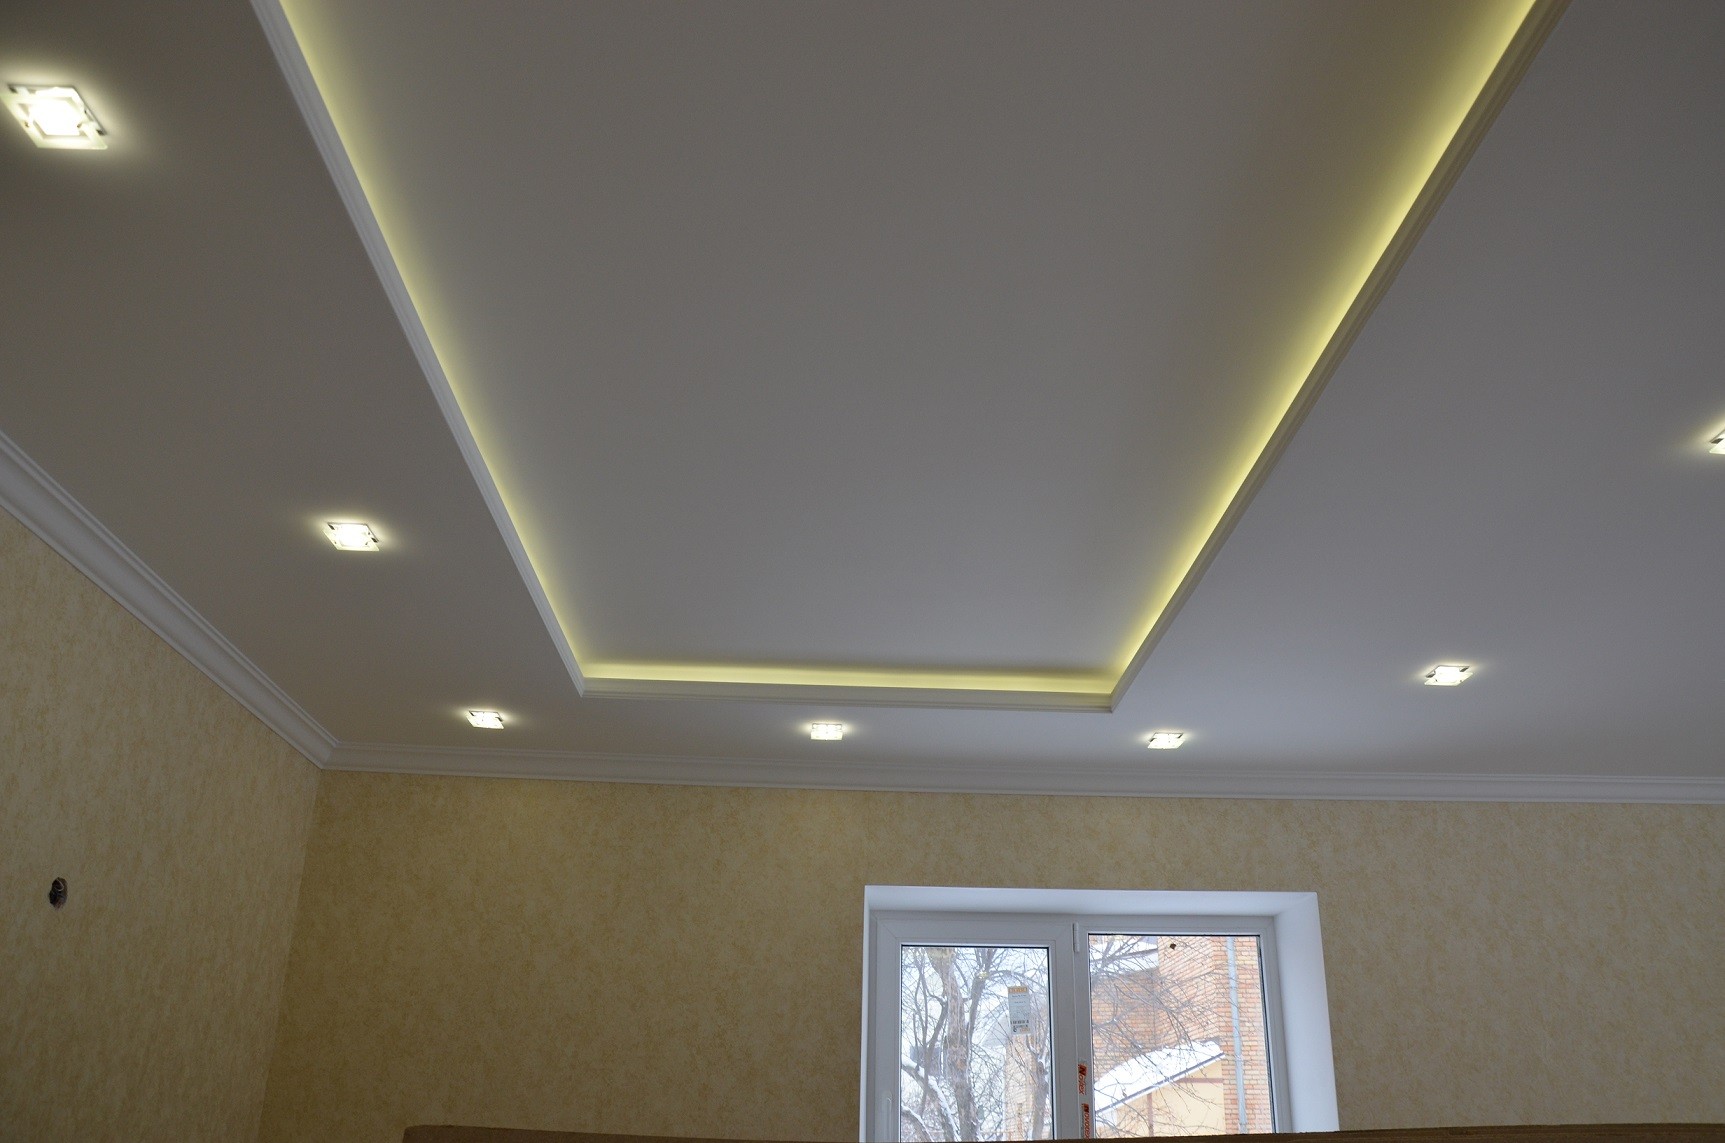
With LEDs.

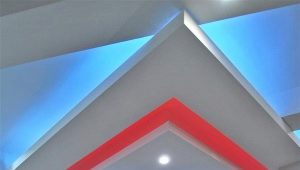
For lovers of geometry.
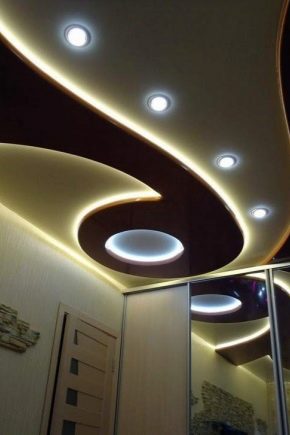
Two-level ceiling with an abstract “curl”.
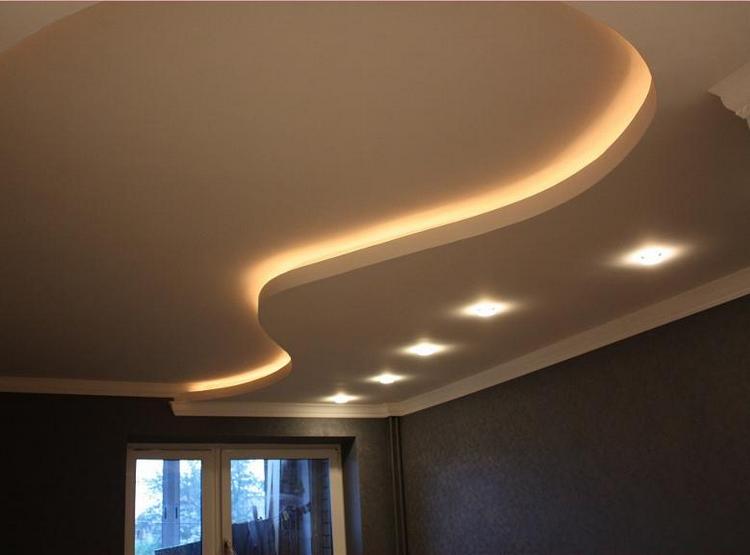
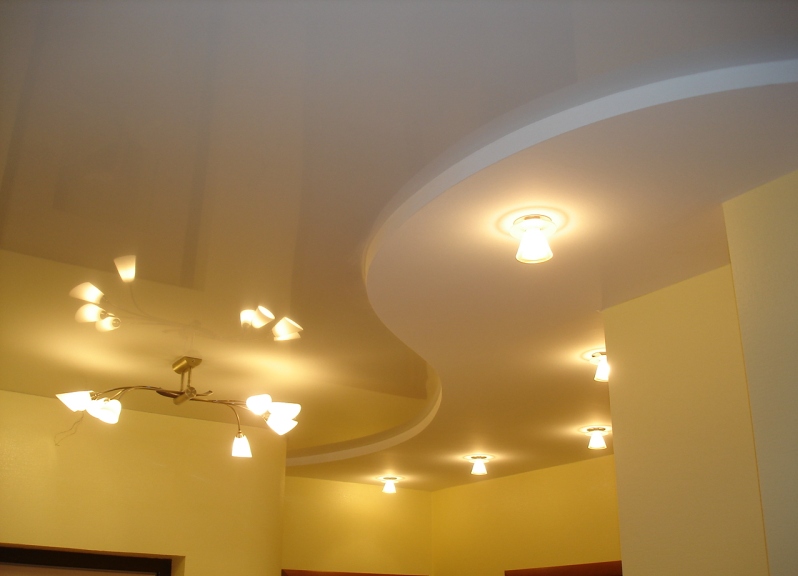
Unusual lines.
Zoning example.
On the two-level plasterboard ceiling with hidden lighting, see the following video.