Two-level plasterboard ceilings: design features
When a simple and even ceiling in one line does not allow to embody the whole idea as clearly and competently as possible, they naturally begin to use multi-tiered structures. But these solutions are much more complicated and can in no way be reduced to the simple addition of a single surface. Only by deeply examining the problem and understanding the features of the products, you can avoid the occurrence of difficulties and omissions at work.

Advantages and disadvantages
First you need to find out what the two-tier ceiling is in general, how it differs from a single-layer ceiling, and why it is necessary to use it in certain cases. The formation of structures from drywall is considered one of the most difficult design operations, but it is this that allows to achieve impressive success.
The advantages of GCR are well known even to novice builders:
- minimum level of fire risks;
- suitability for leveling the base and for giving it a volumetric shape;
- the ability to prepare complex intricate shapes and create holes without the slightest scratches and chips;
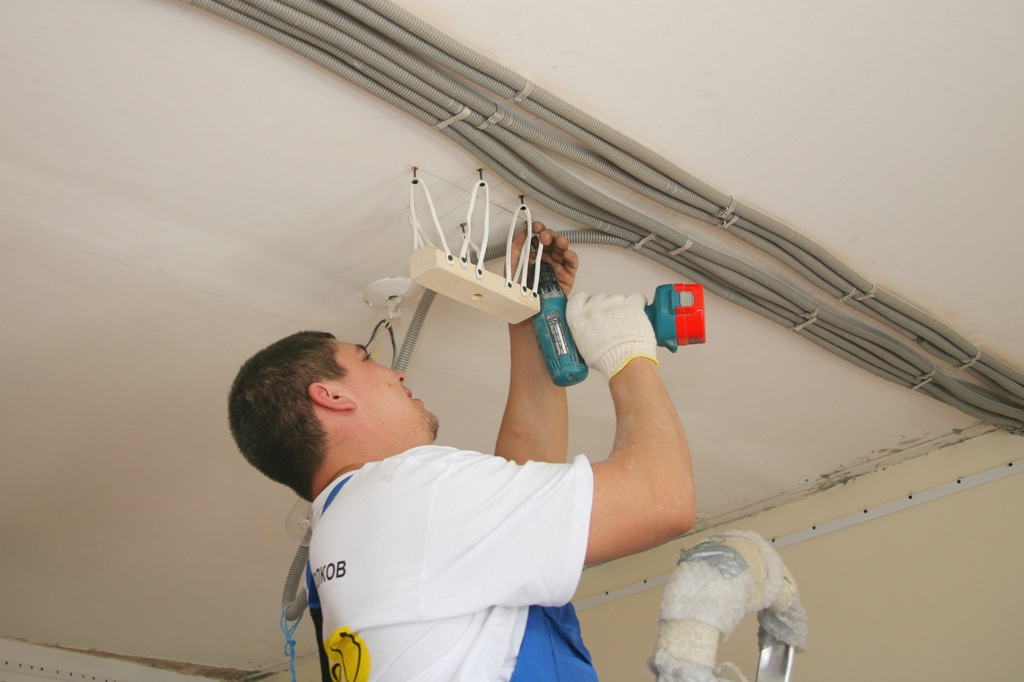
- in the frame is not difficult to hide the wiring;
- if you later need to replace this hidden wiring, it will be simple and easy.

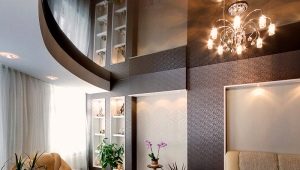
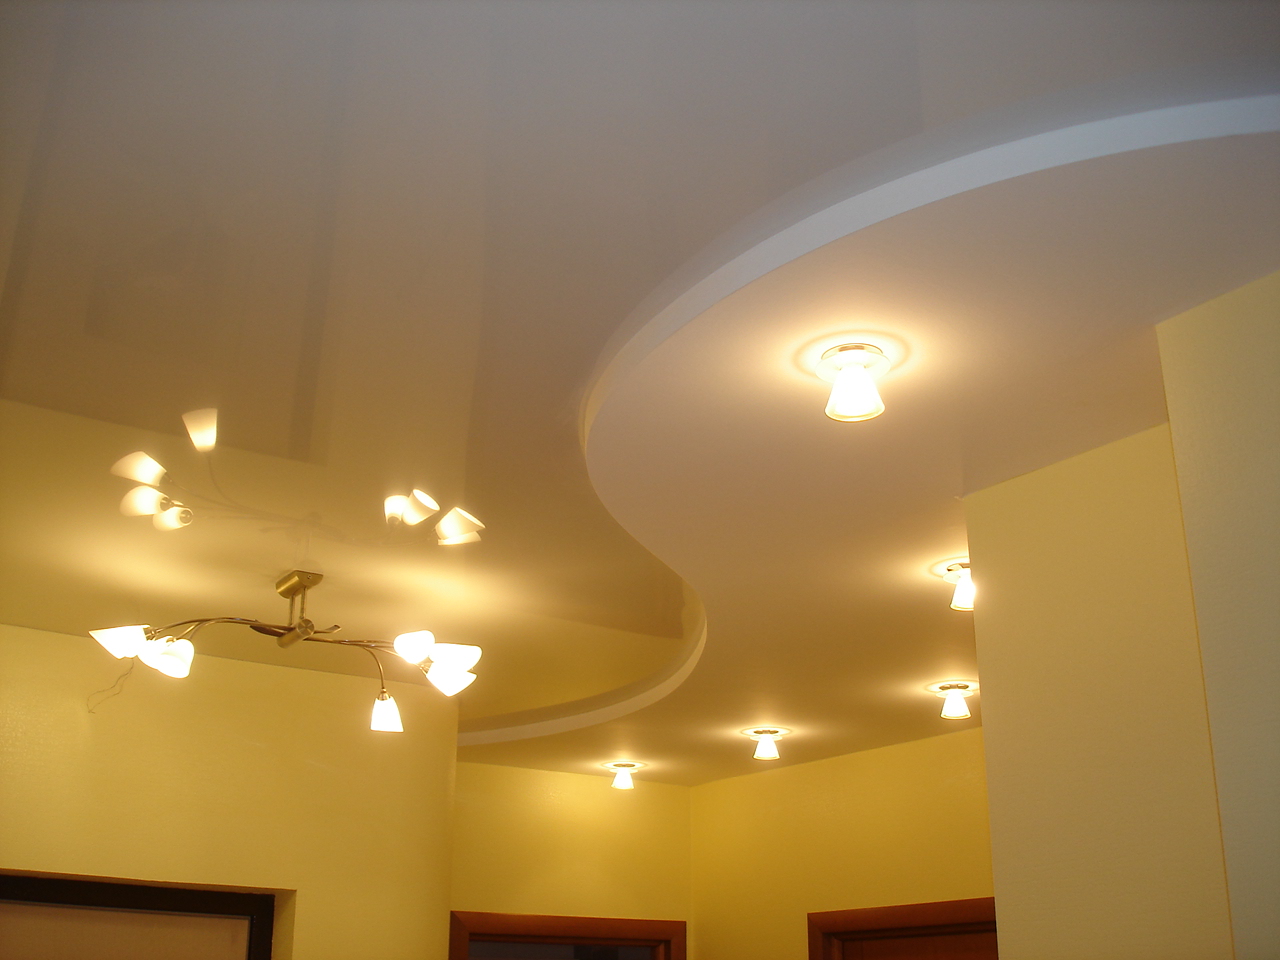
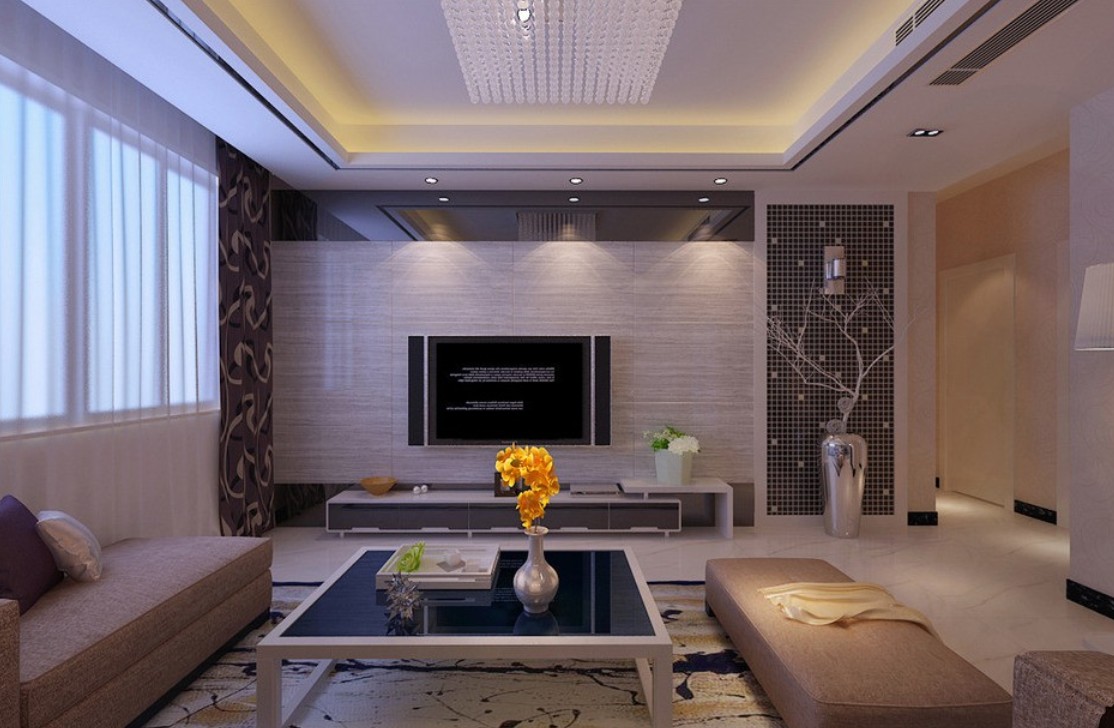
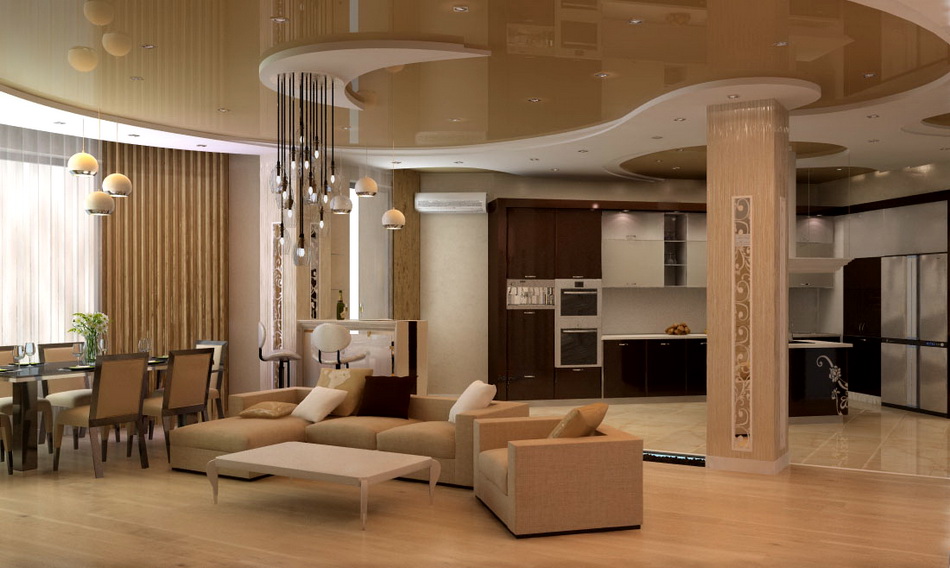
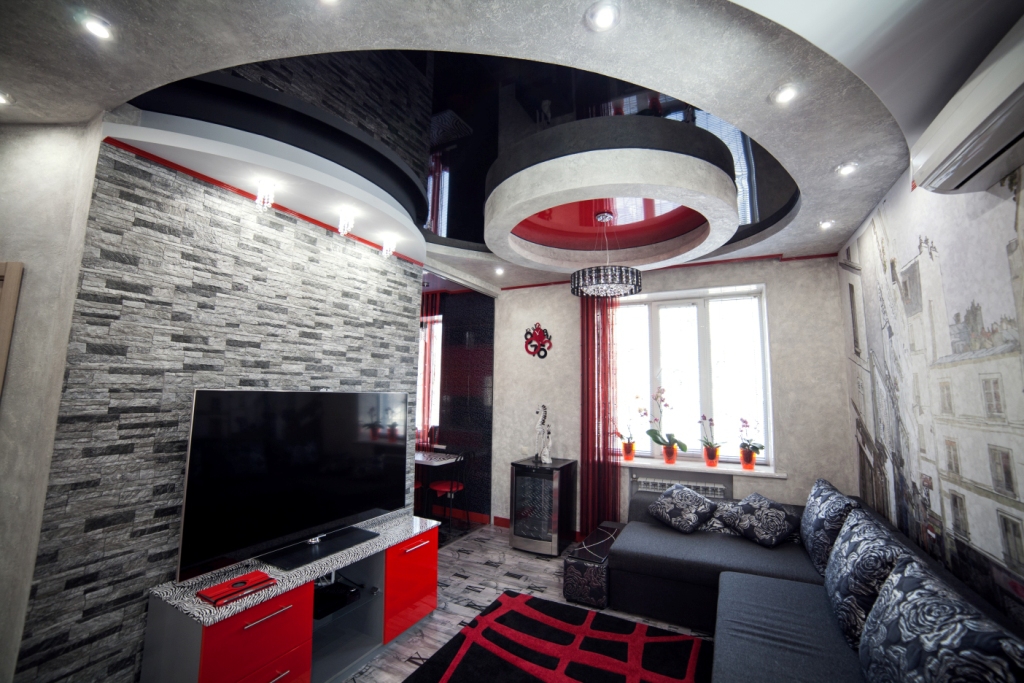
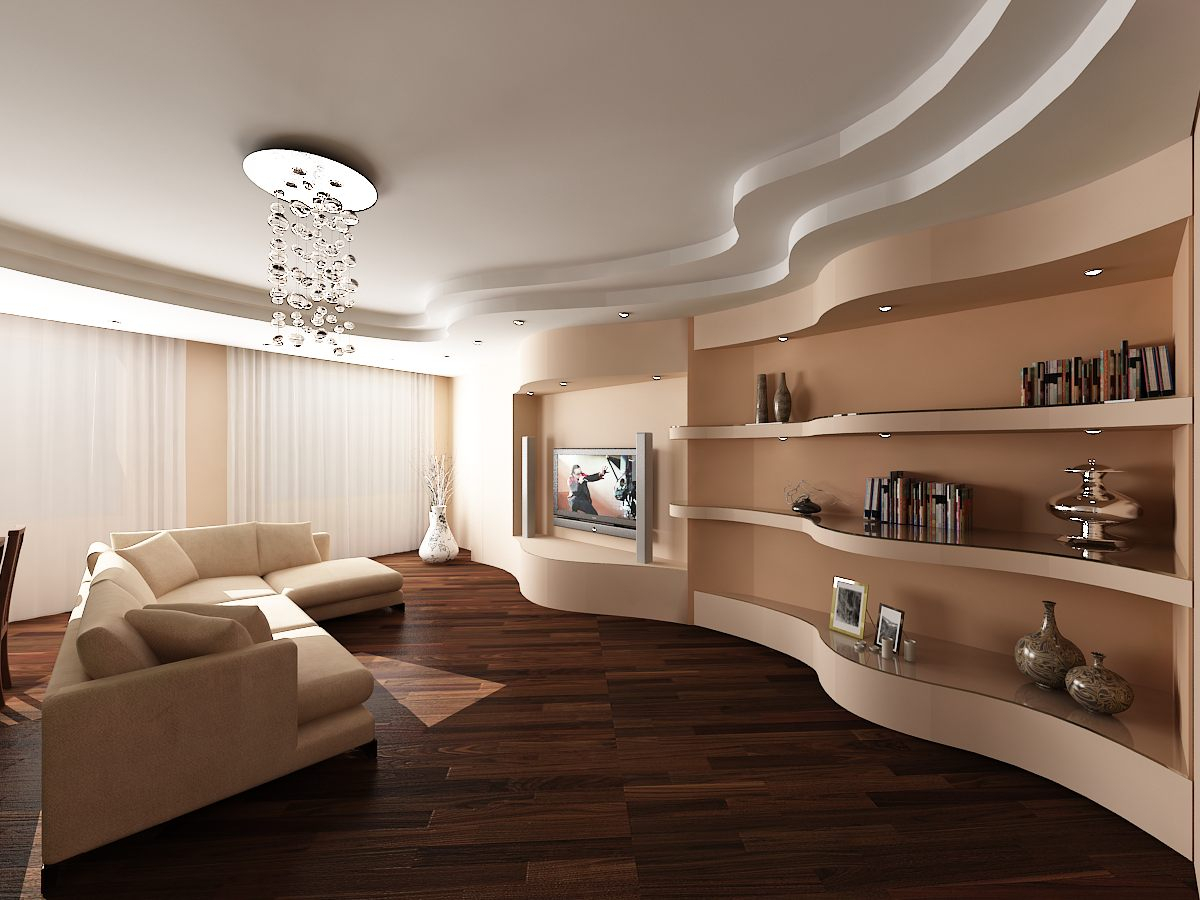
A double plasterboard ceiling, especially in combination with expressive lighting, will look much better than a single version.
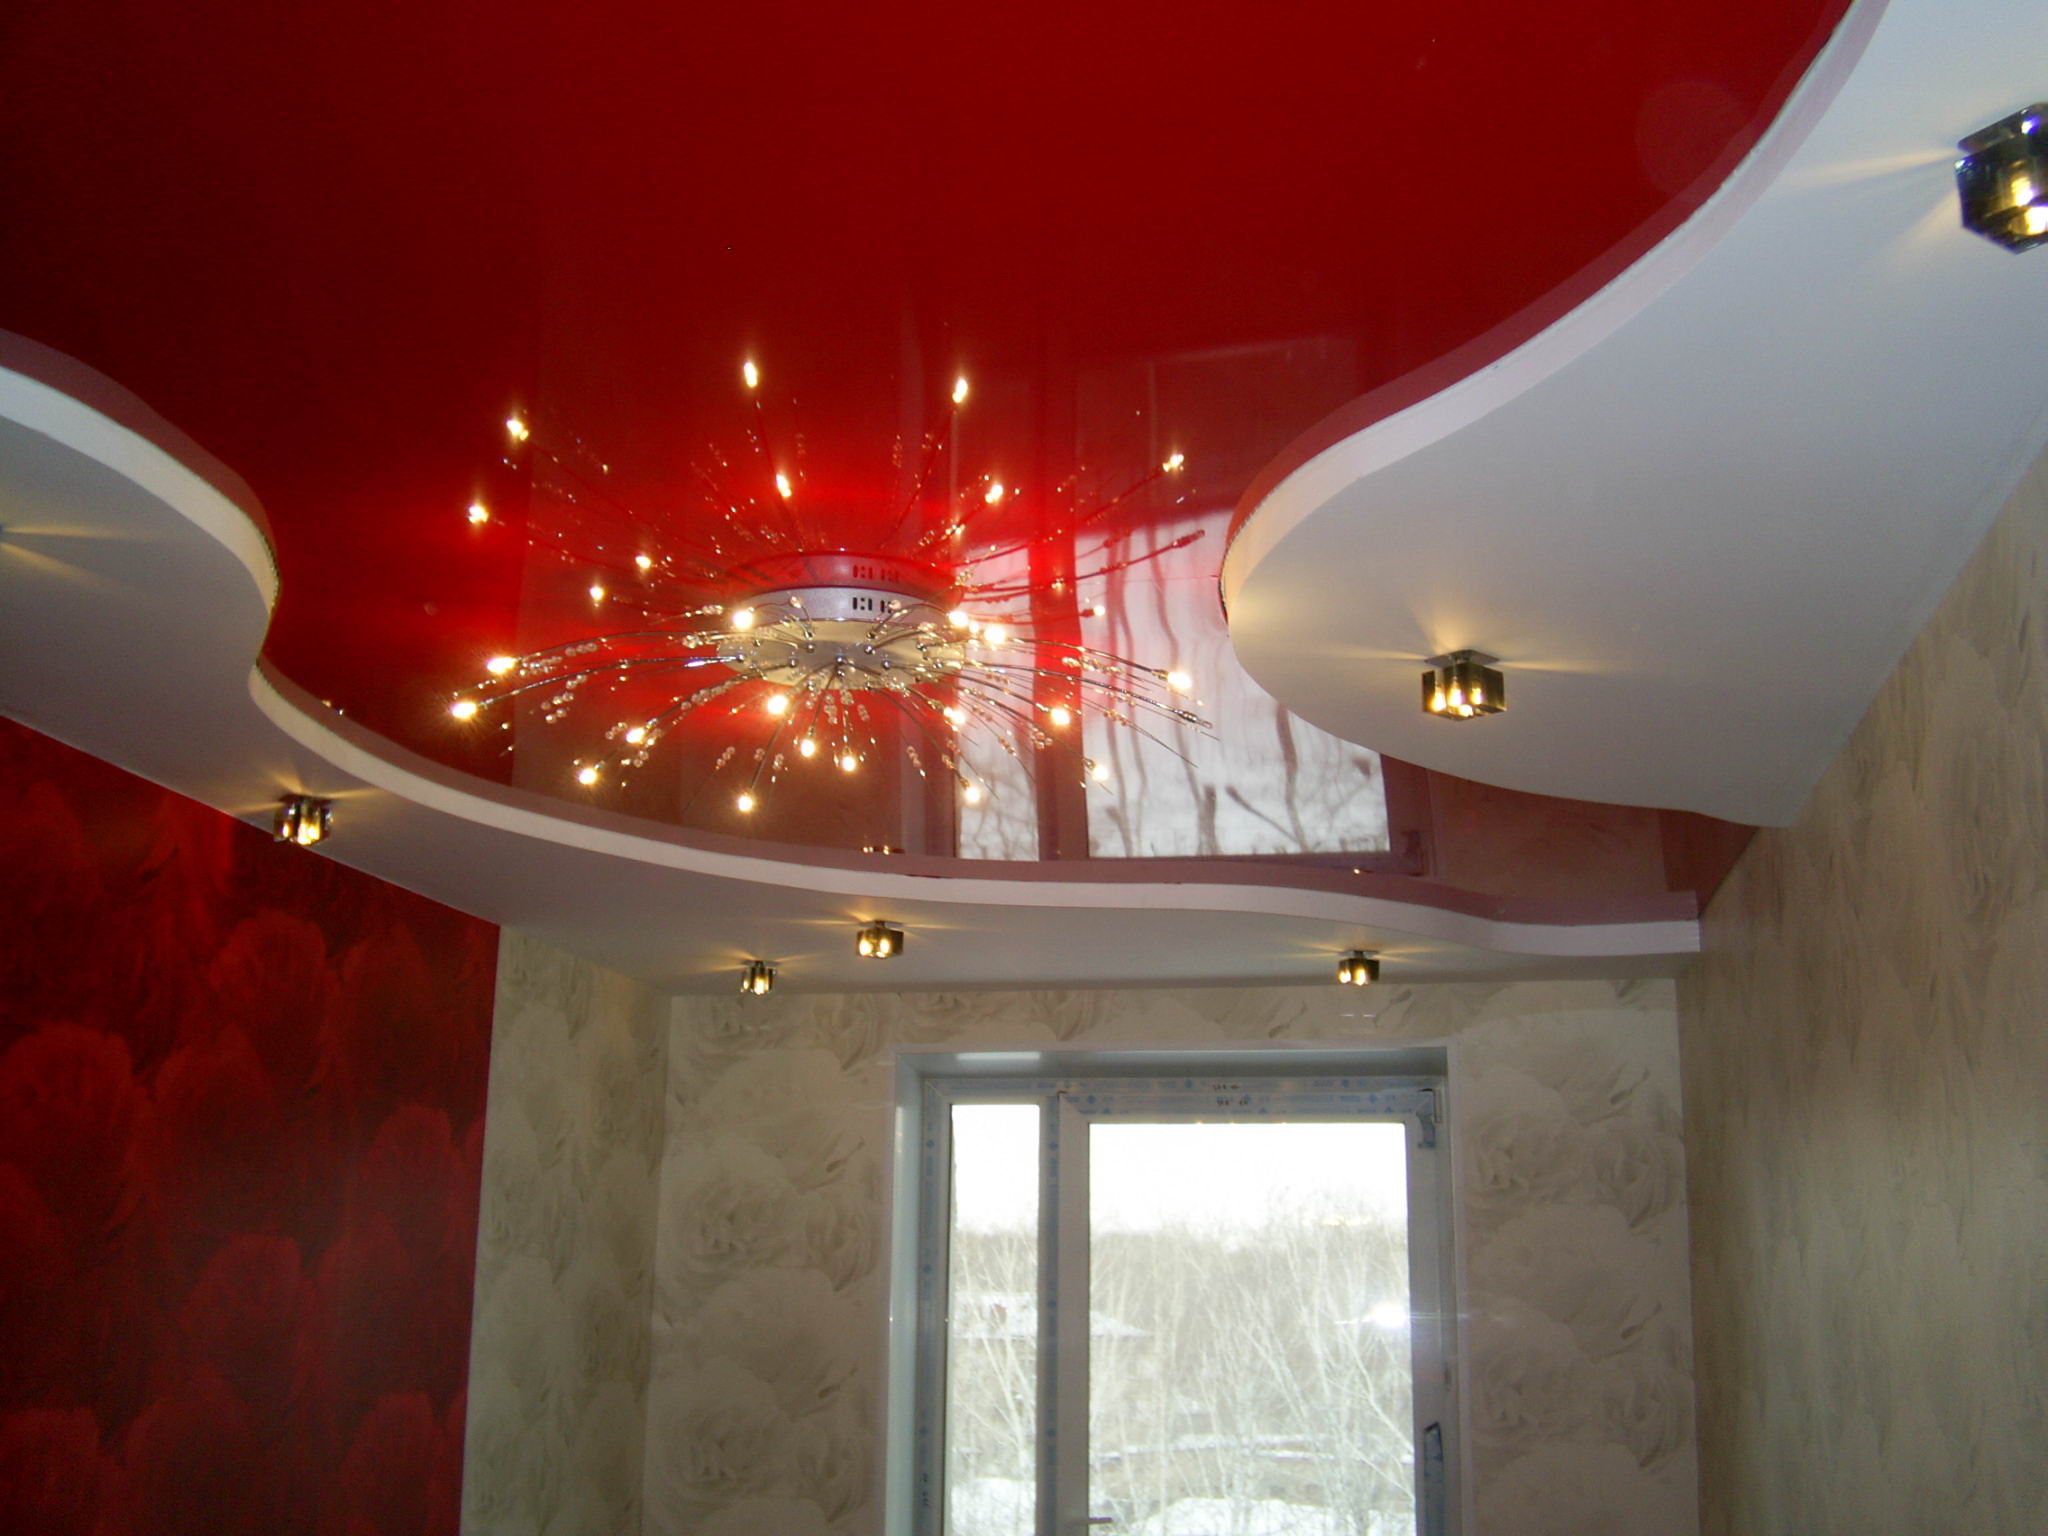
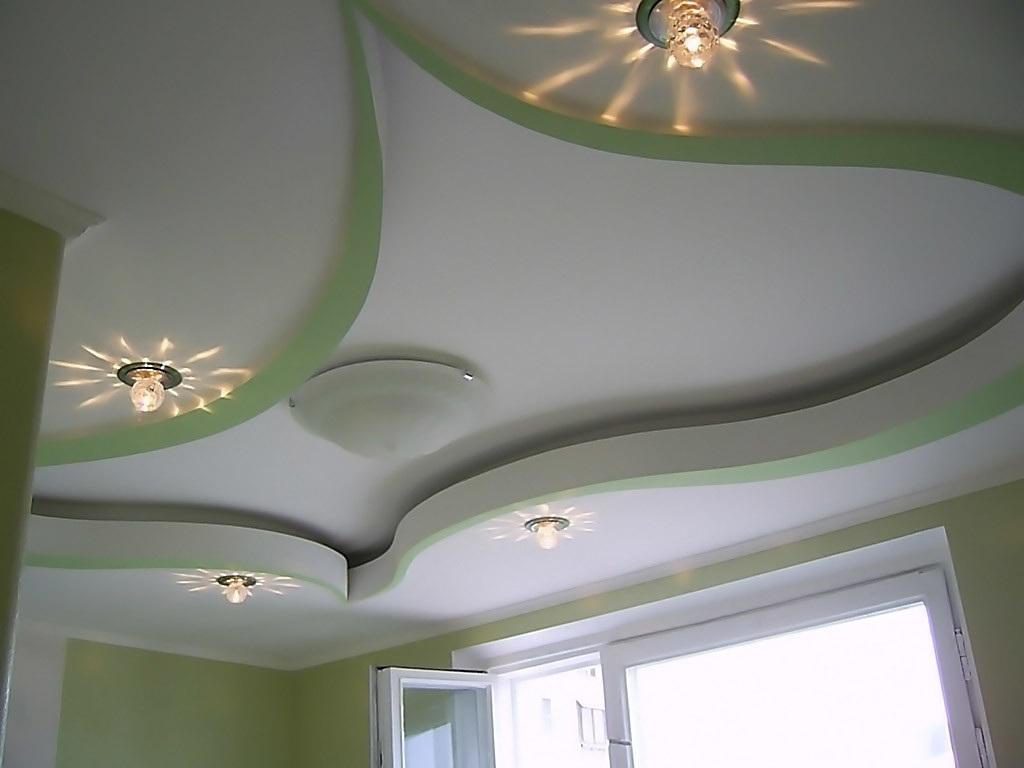
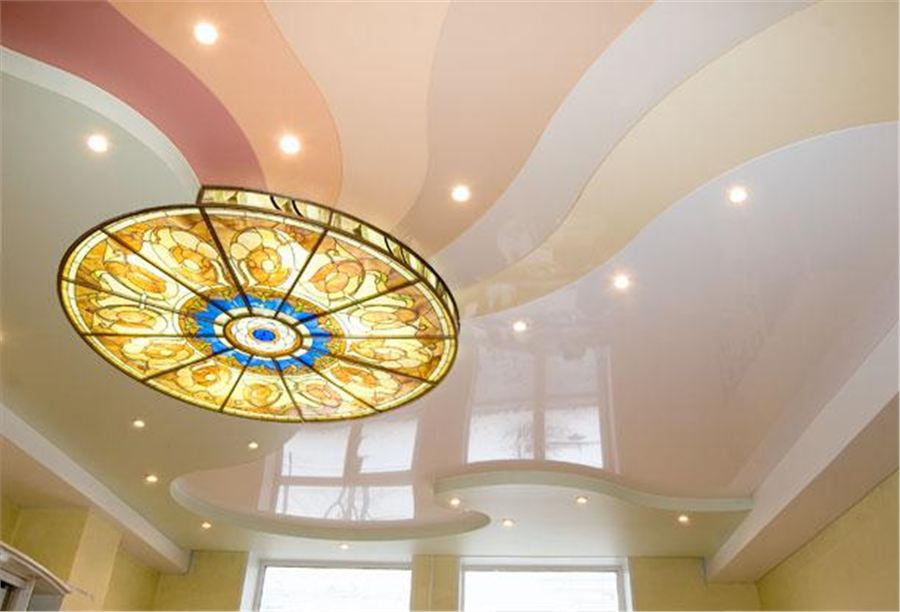
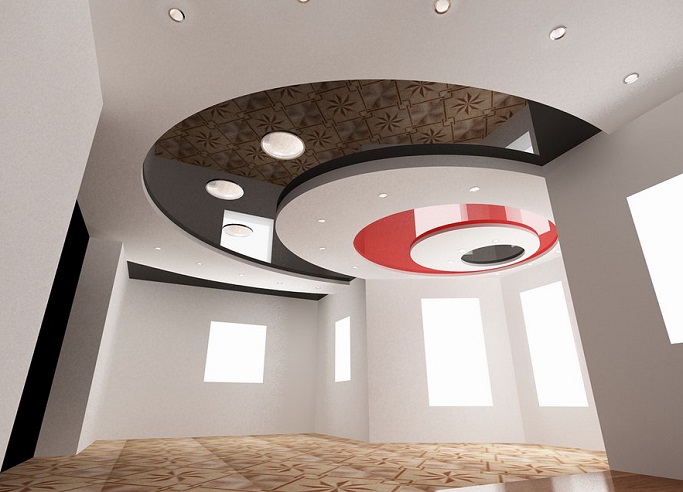
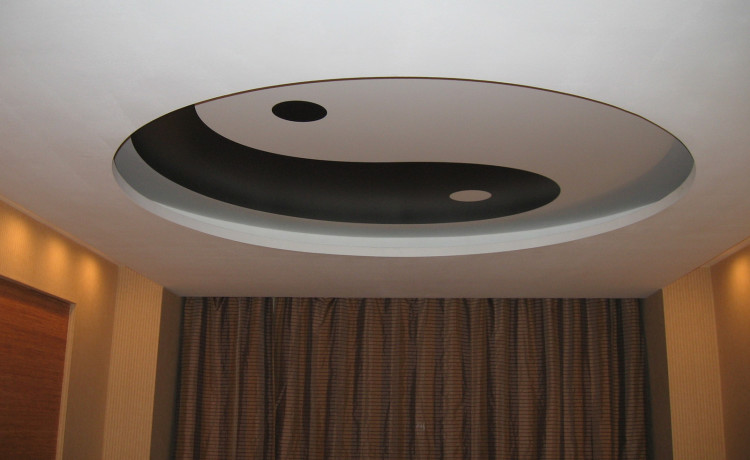
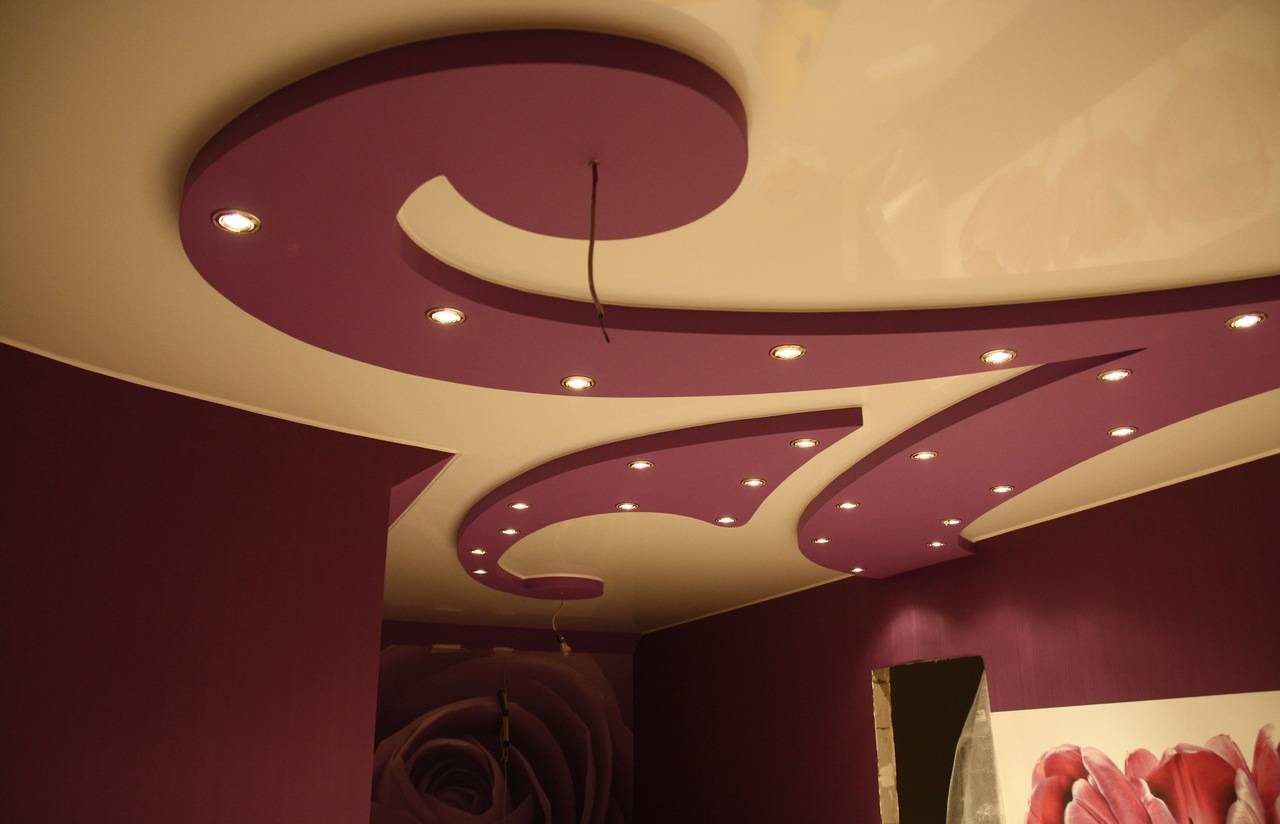
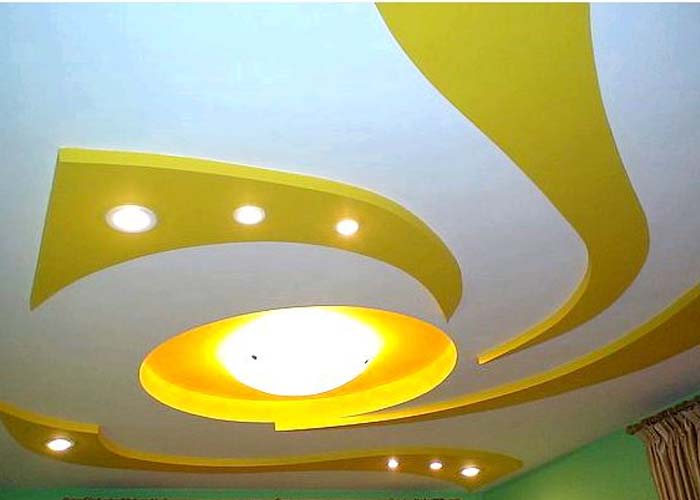
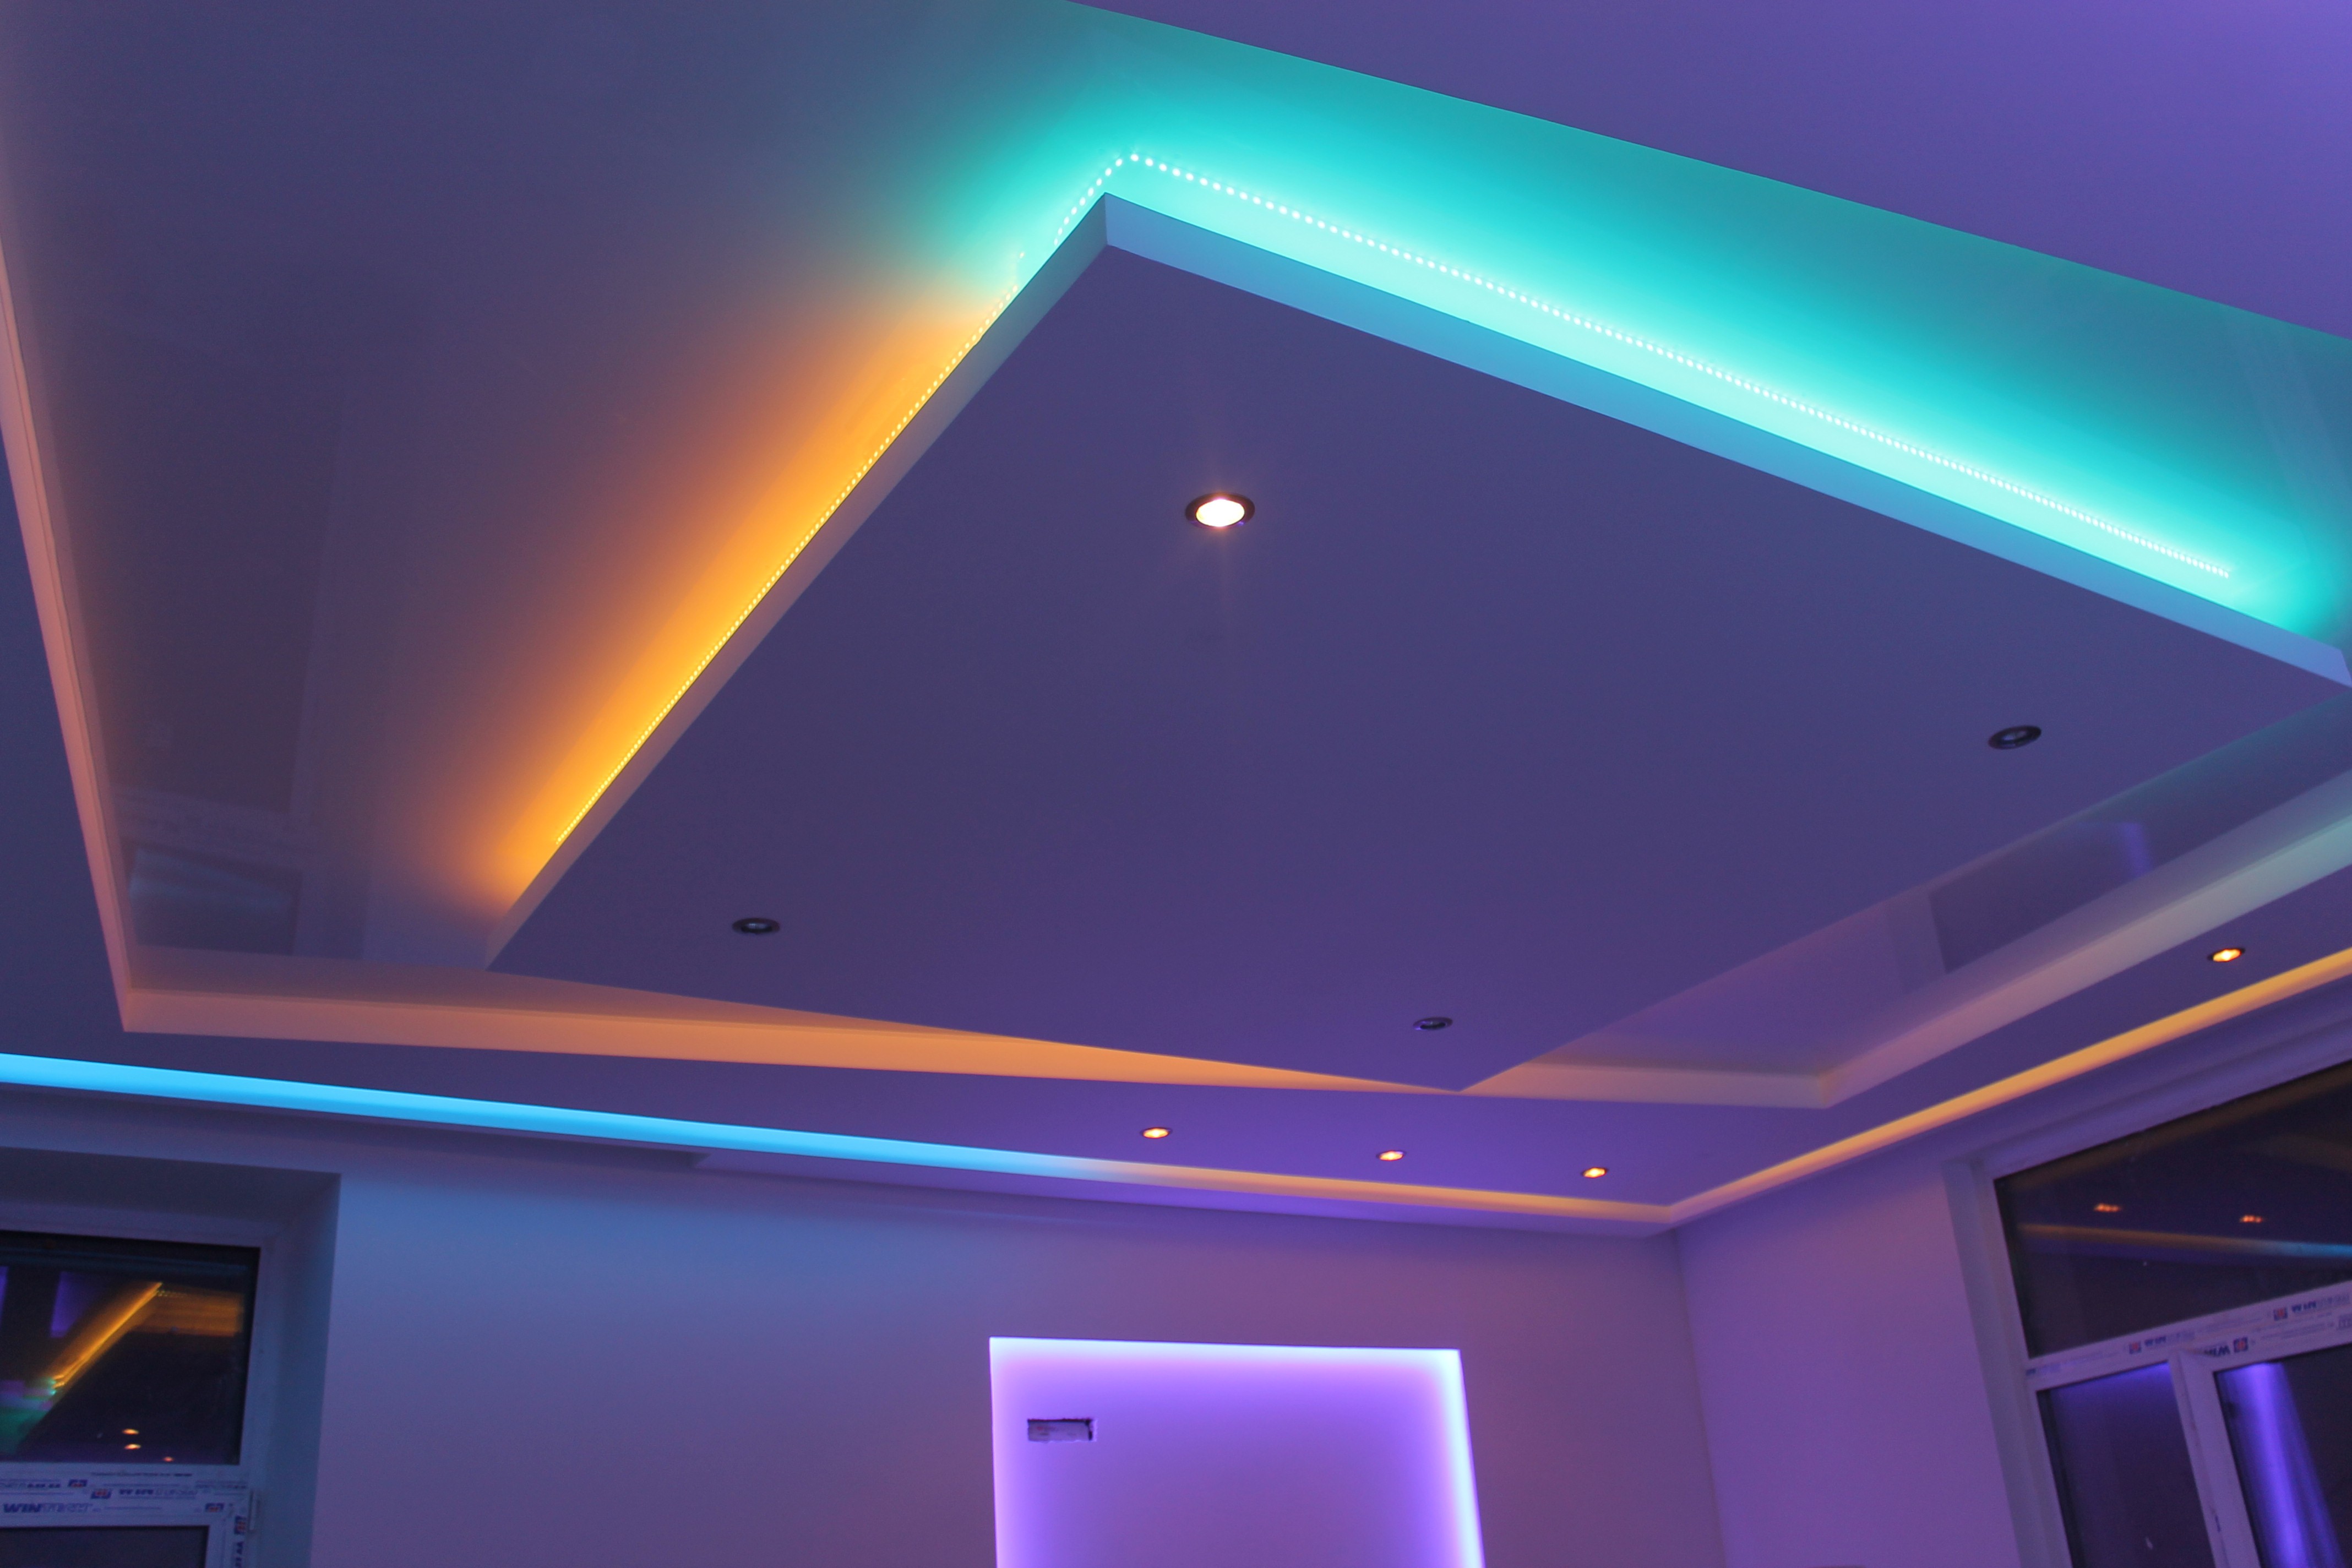
There are a number of attractive design solutions. - This is a wavy surface, and zigzag curves, and three-dimensional wallpaper. It’s impossible to list all possible options, especially since their number is constantly increasing due to the efforts of engineers and designers. In addition to decorate the ceiling space will help LEDs with colored luminescence, crystal chandeliers, small mirrors. Fantastic plots will appeal to children and romantic-minded people.
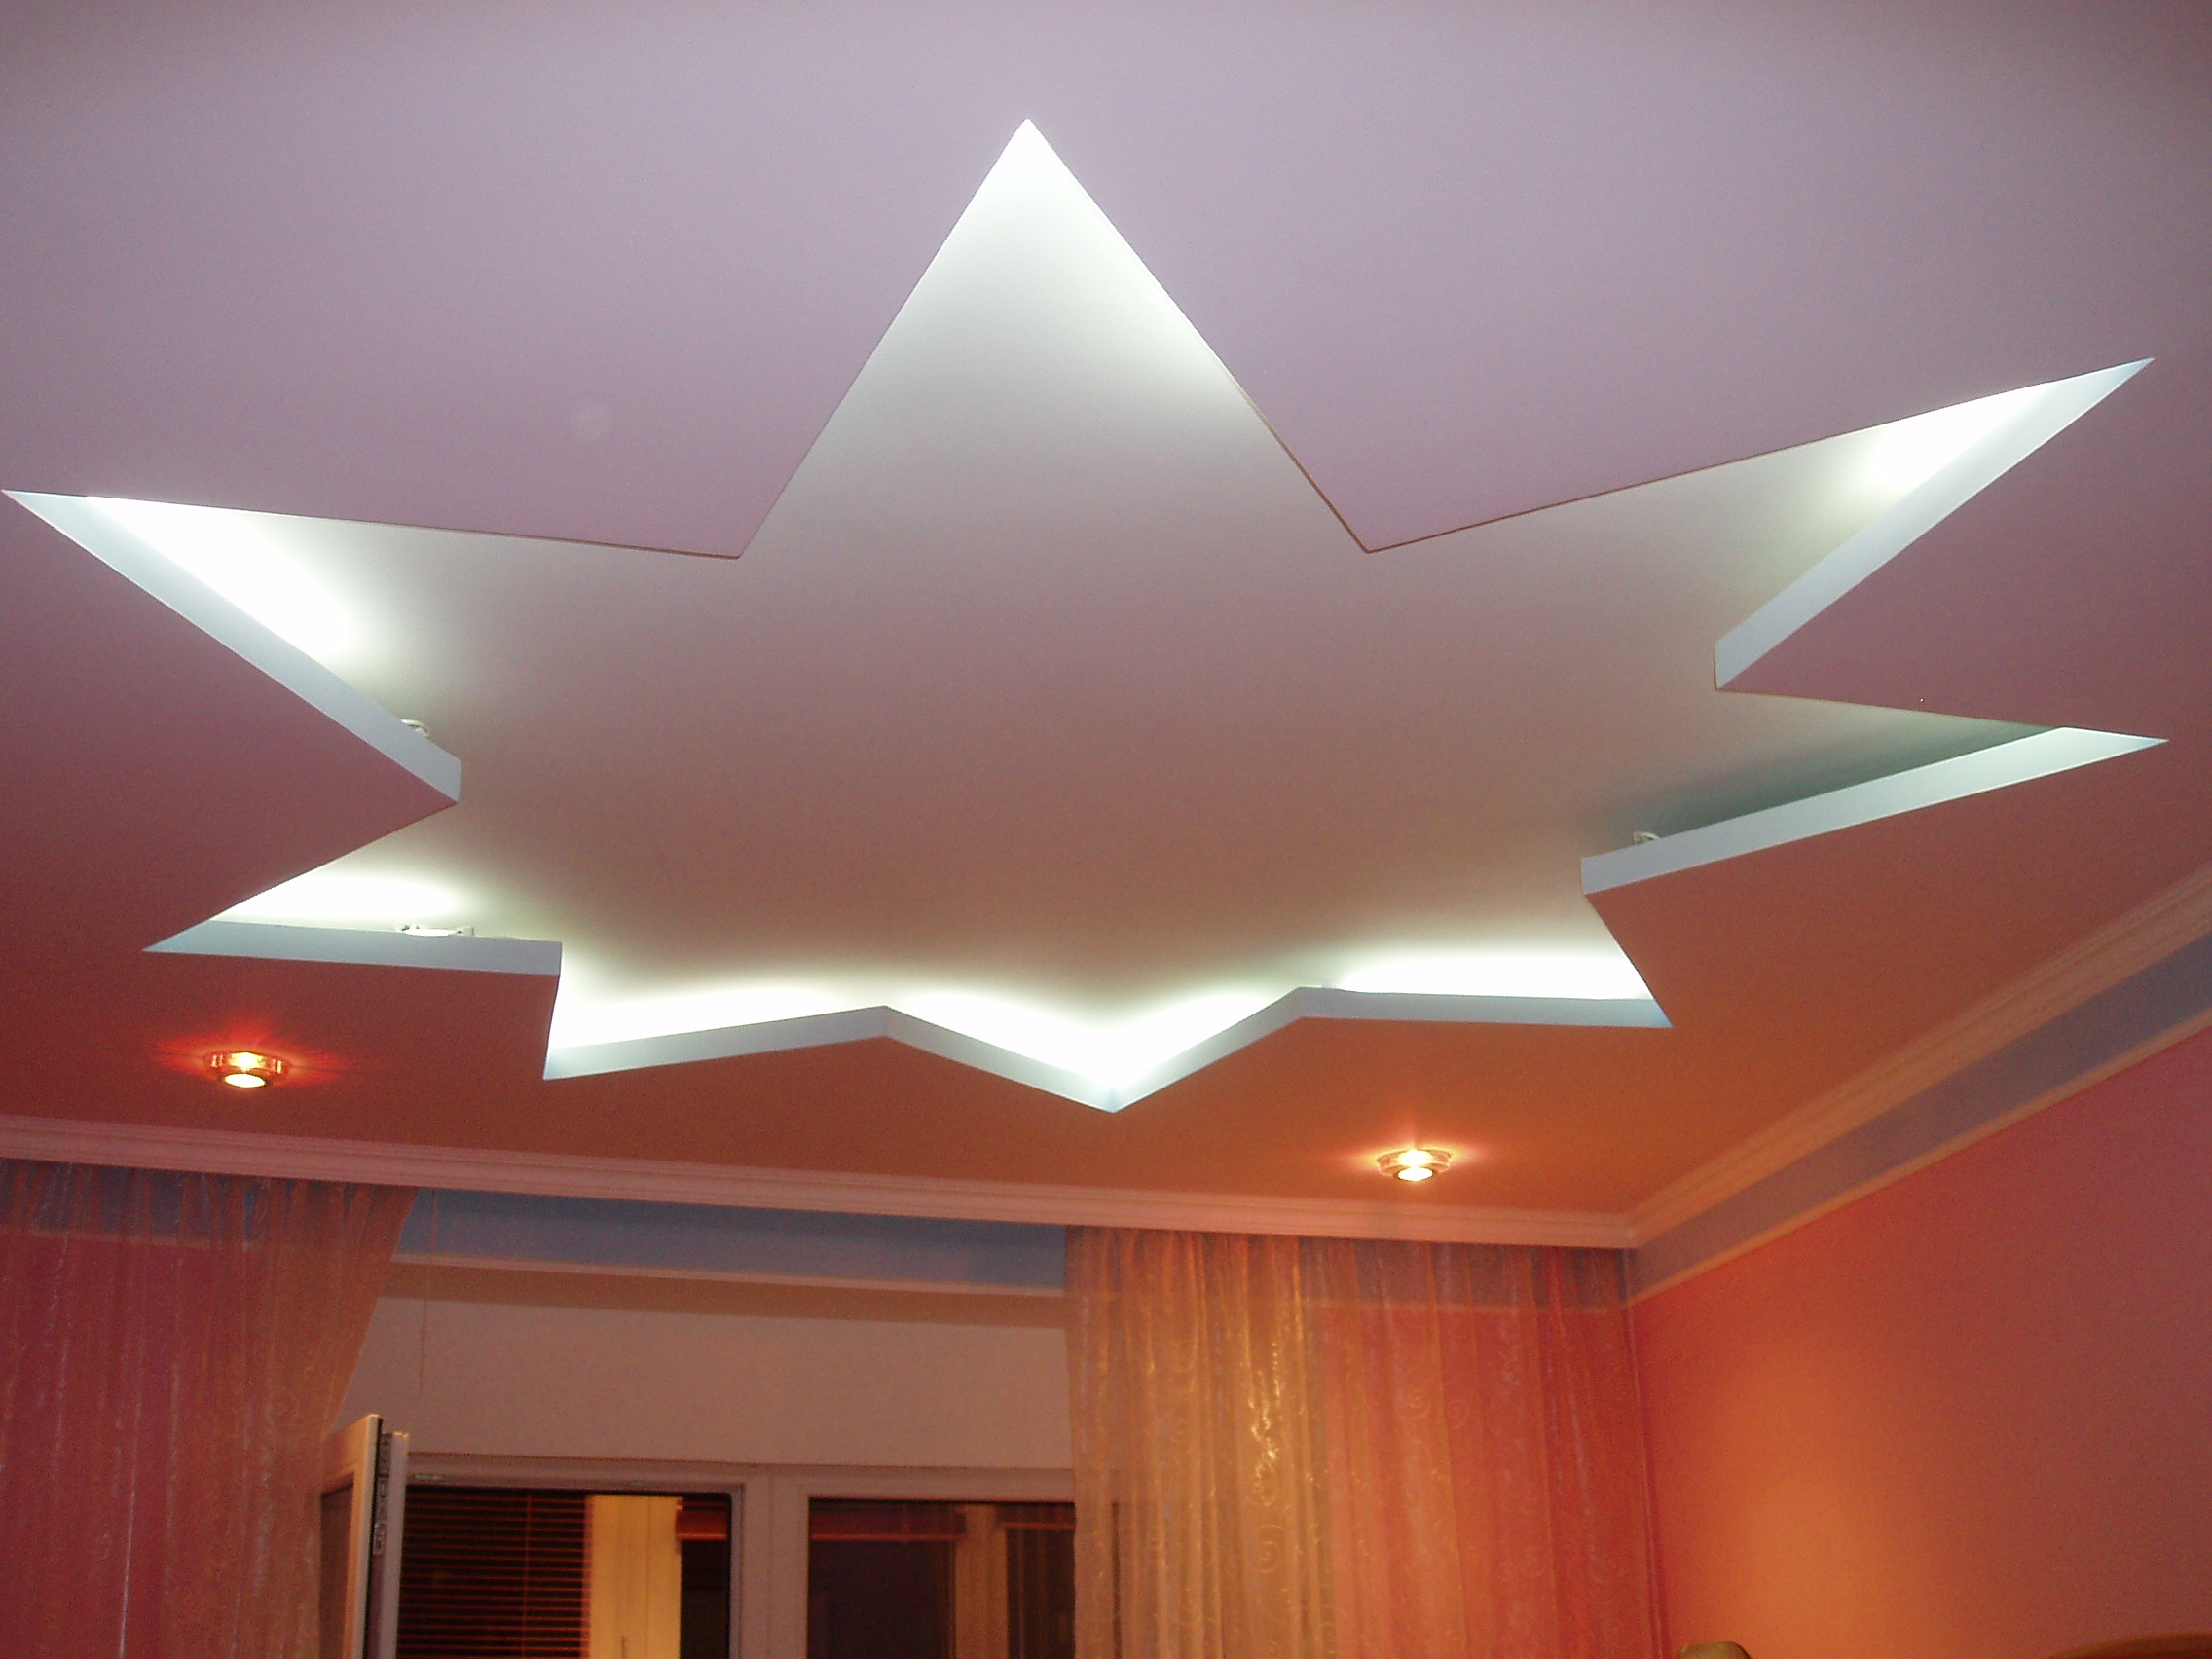

But it is important to understand that competent preparation of non-standard elements is a rather complicated thing.Only an attractive end result is worth the effort.
Types of designs
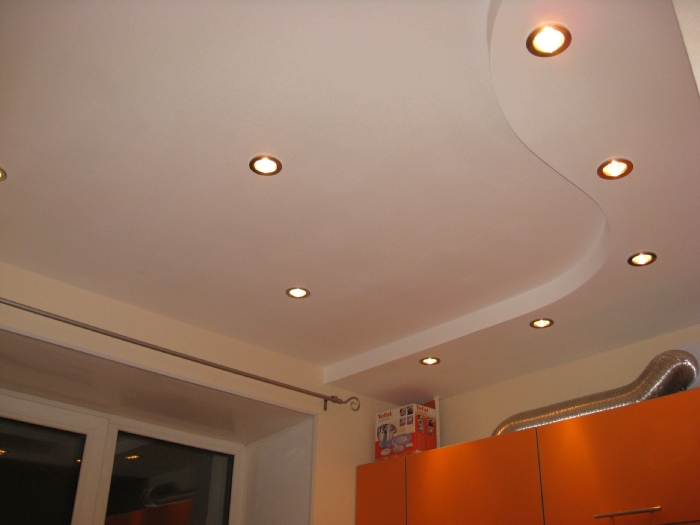
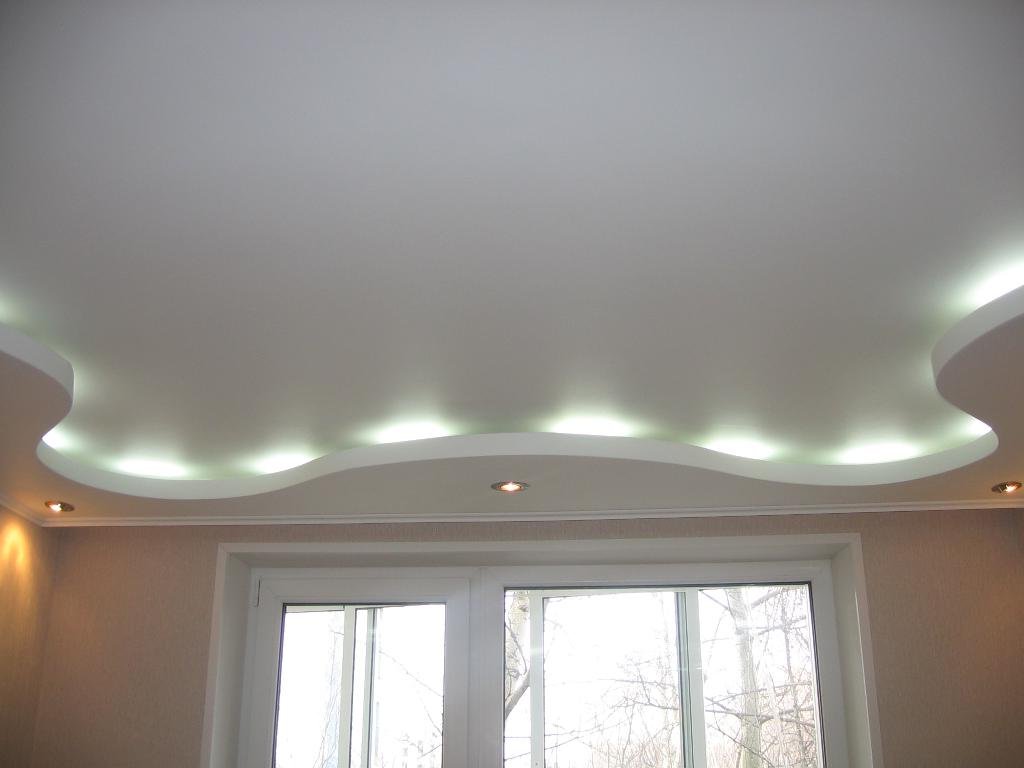
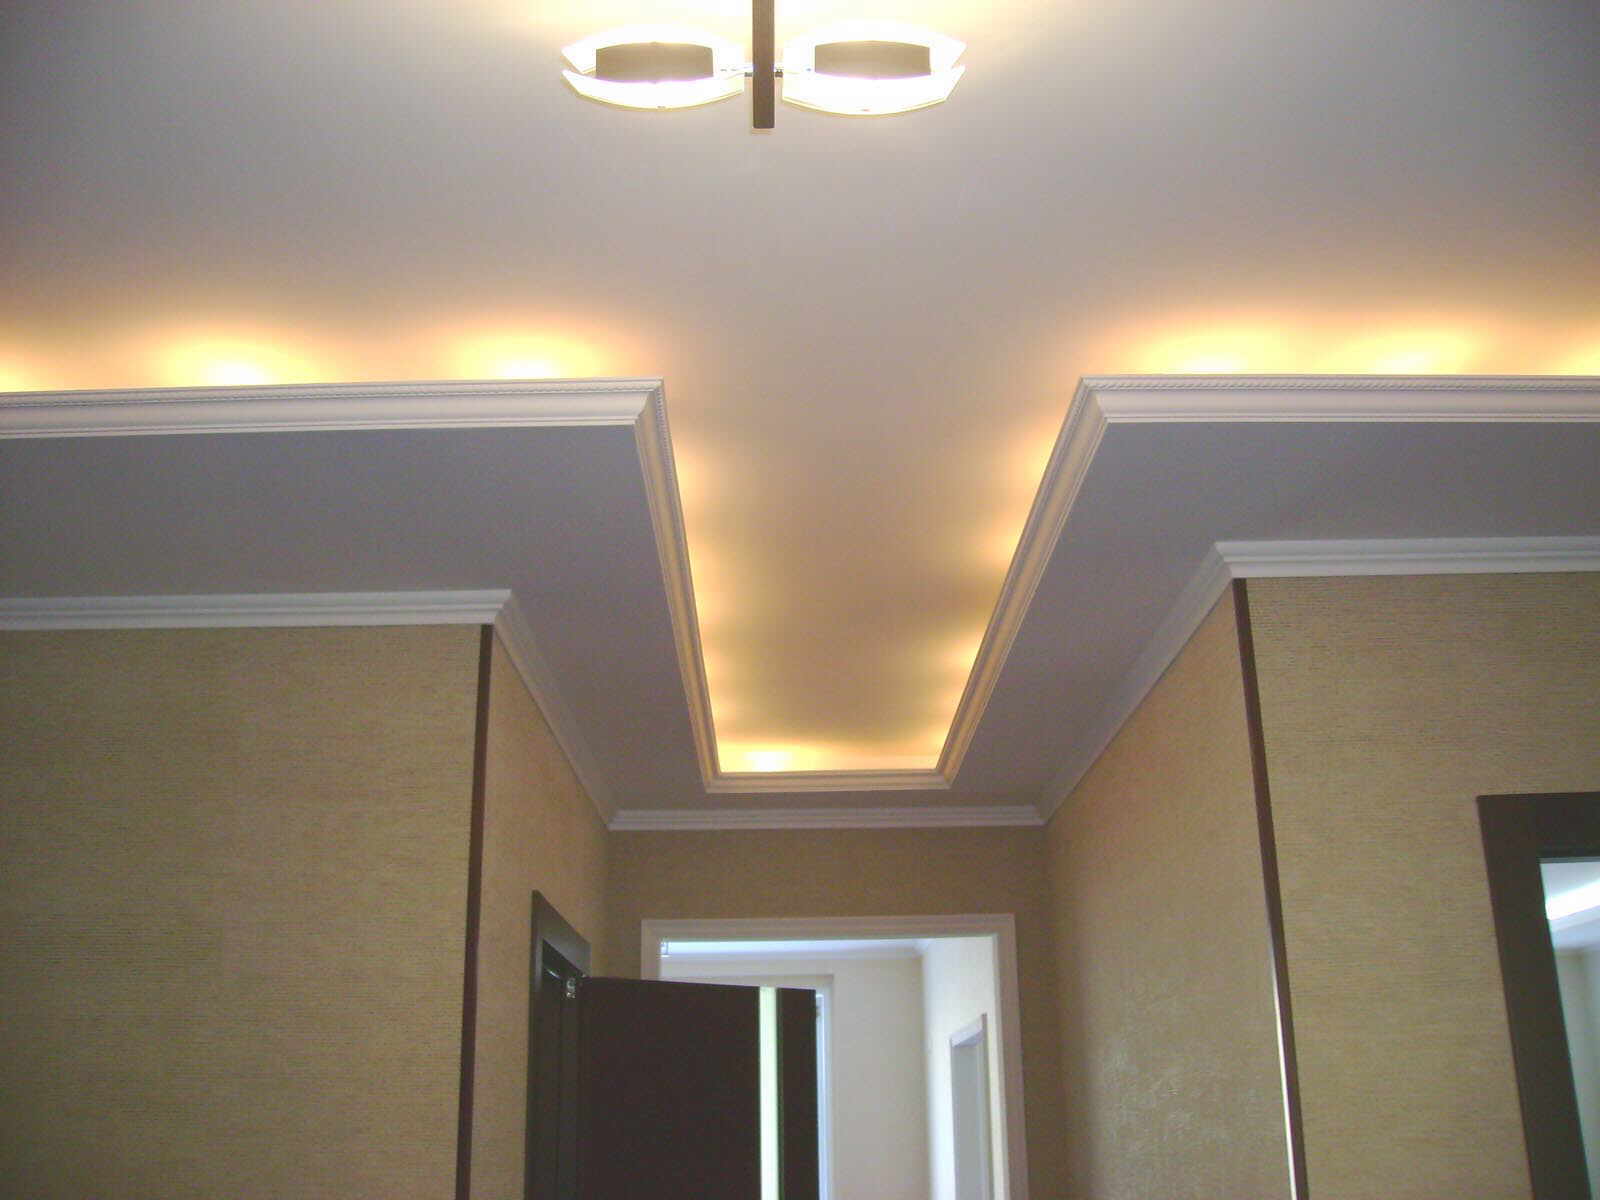
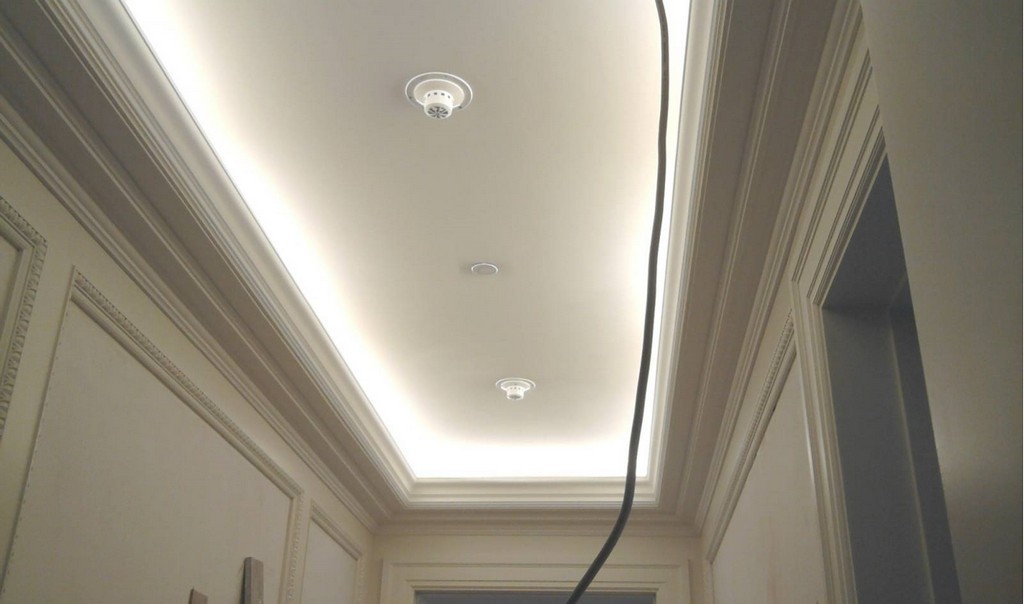
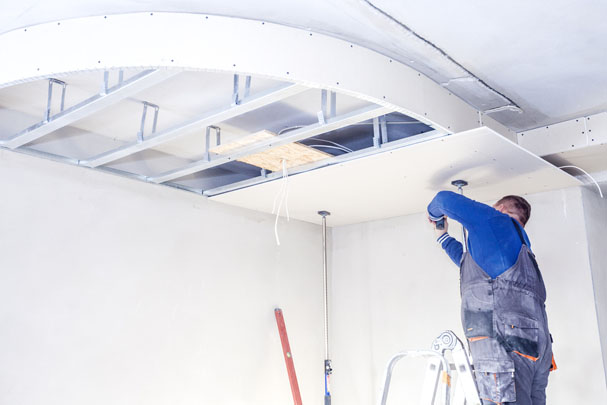
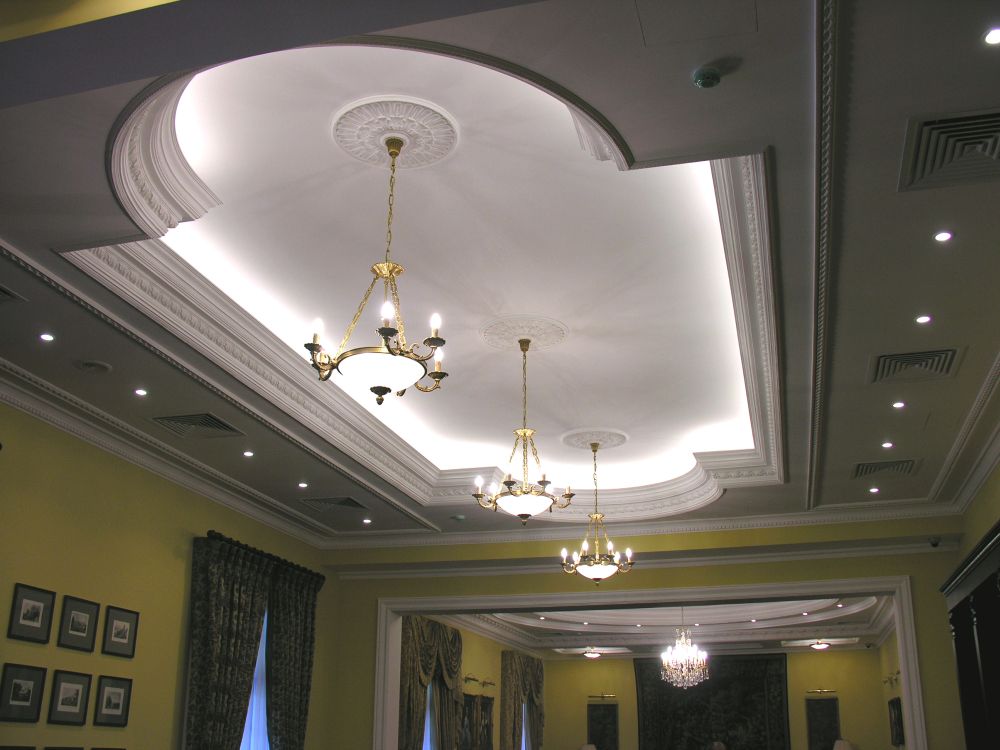
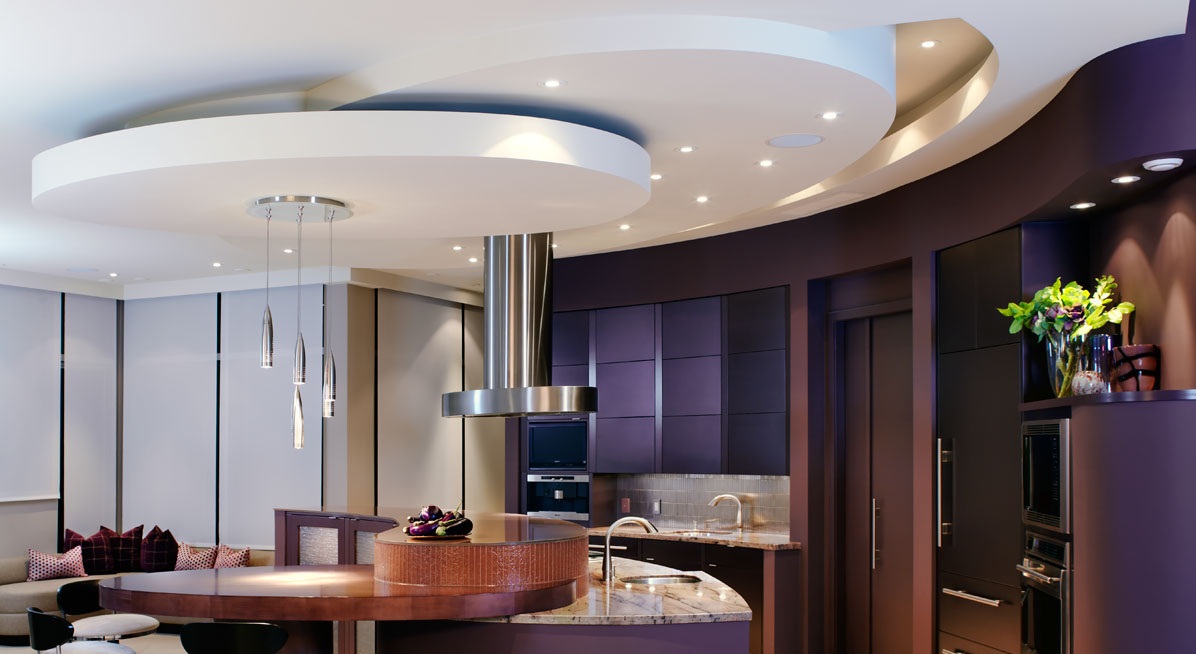
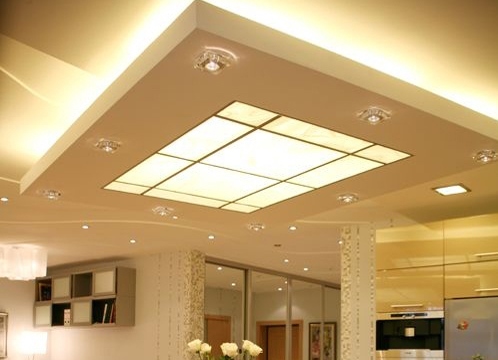
Two-level suspended ceiling can have a lower level of various geometric shapes. Since the inner layer is less ventilated, it is necessary to use a moisture-resistant material. A curb around the perimeter of the wall should be applied over the plastered surface. The difference between the tiered levels can also be expressed in the arrangement of the drywall islands, which facilitate the upper distribution of zones in space. In this scheme, the second level is occupied by recessed lights or light strips.
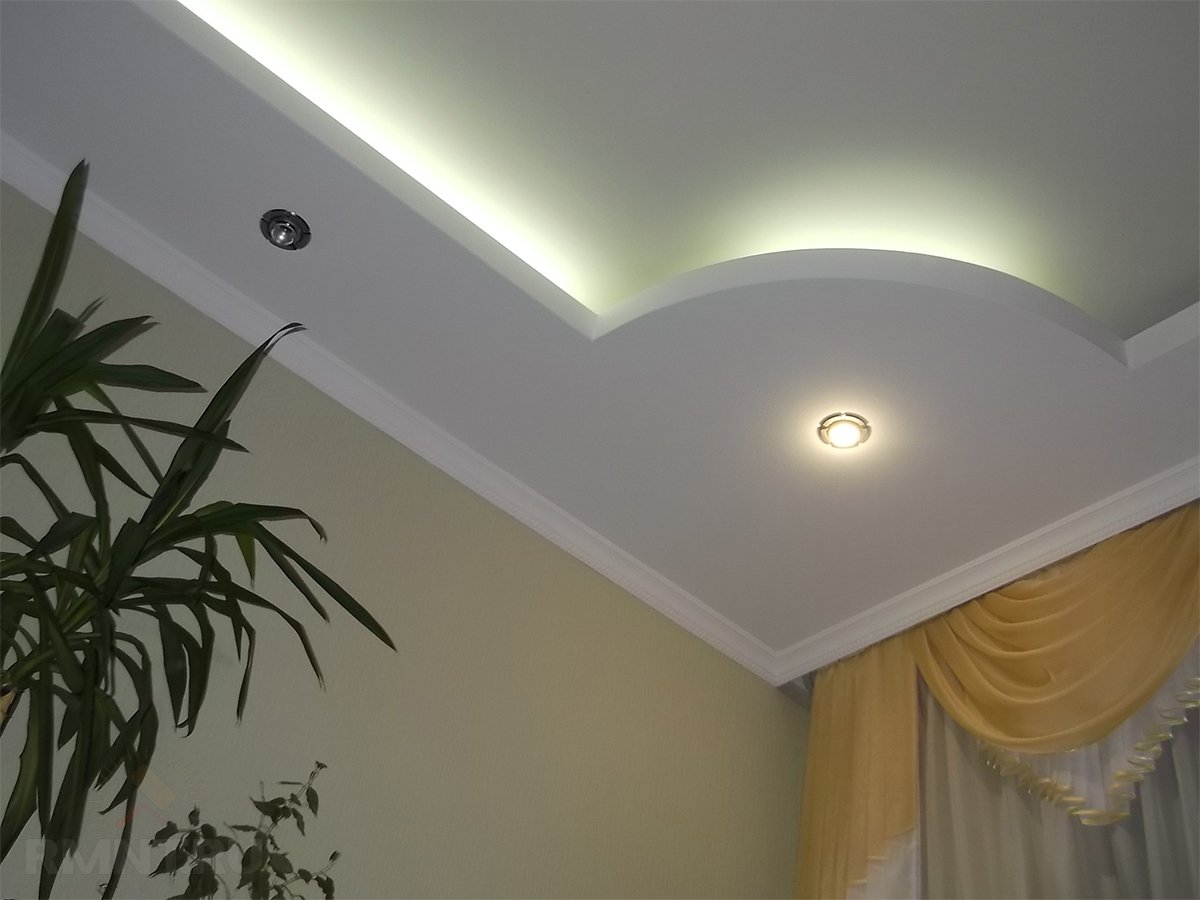
If you refuse the eaves for lighting, you need to mount a special profile on the walls, held by nails. This element forms the second horizontal layer. Identical profiles are placed on the ceiling, holding it with anchor wedges that define the configuration (it will not always be a rectangle). The use of illuminated eaves implies placing an LED strip with a self-adhesive layer inside. The eaves is a special shelf that extends beyond the planes of the second levels,in fact, this is an extension of the horizontal profile by 50-100 mm.
The advantages of using the surface of a draft ceiling as the first level are:
simplicity of work;
material savings;
minimum height absorption;
increased reliability of fastening directly to the main structures.
But there are difficulties - sometimes you need to remove all the plaster to the very foundation, and this is very difficult. To conduct the wiring, you will need to shtrob ceiling, and often the walls. High-quality application of plaster and putty is much more difficult than placing an initially smooth plasterboard, and there will be much more penetration of extraneous sounds. That is why the majority of builders and customers prefer structures, both levels of which are represented by the gypsum board. Then all the deformations of the base can be safely ignored, anyway, the front surface will look amazingly smooth.
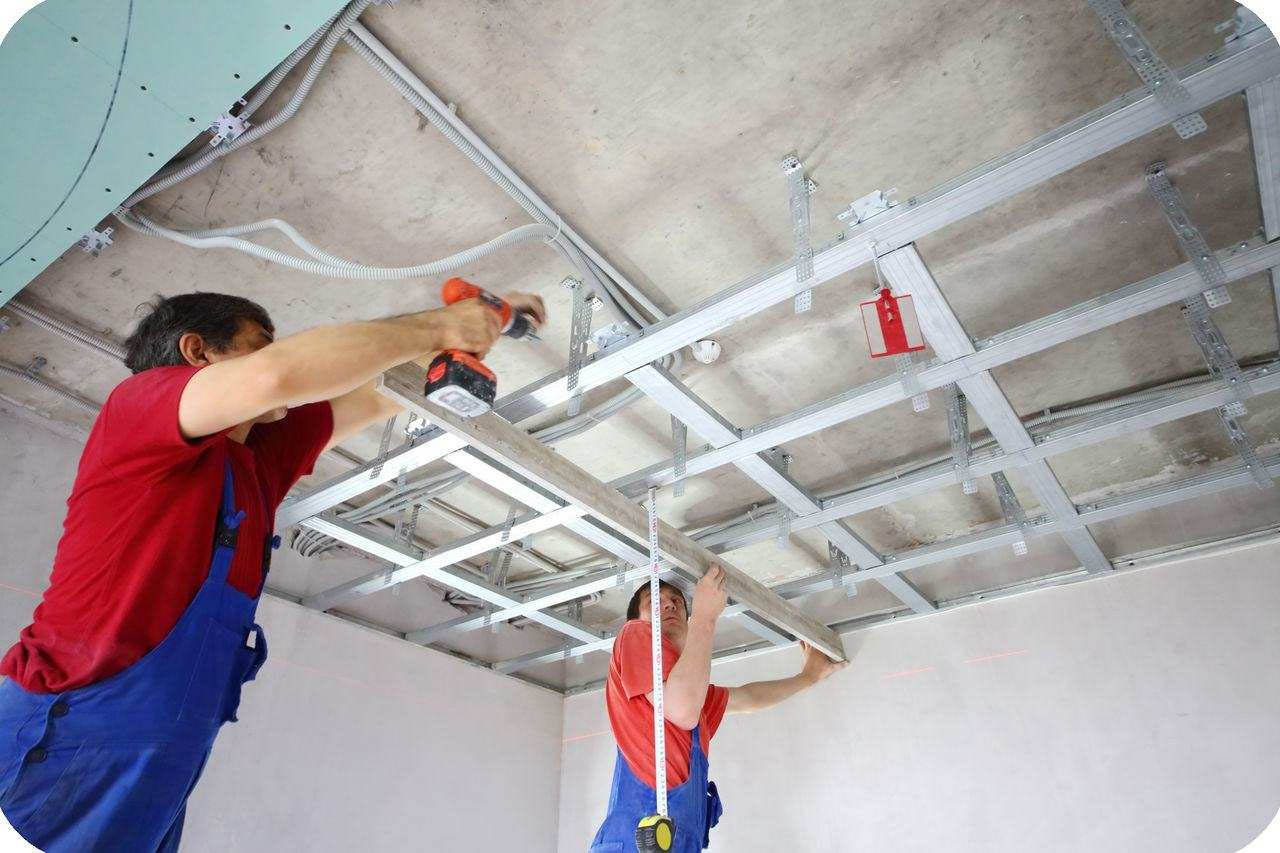
The second level can be fixed to the first, then the frame of the original tier is mounted first of all. Guides make 5 cm below the most "down to earth" point base. Thanks to this step, it is possible to lower the room by only 5.9 cm.Profiles of the second level join the primary. To equip the cornice or not, decide the owners of the house.
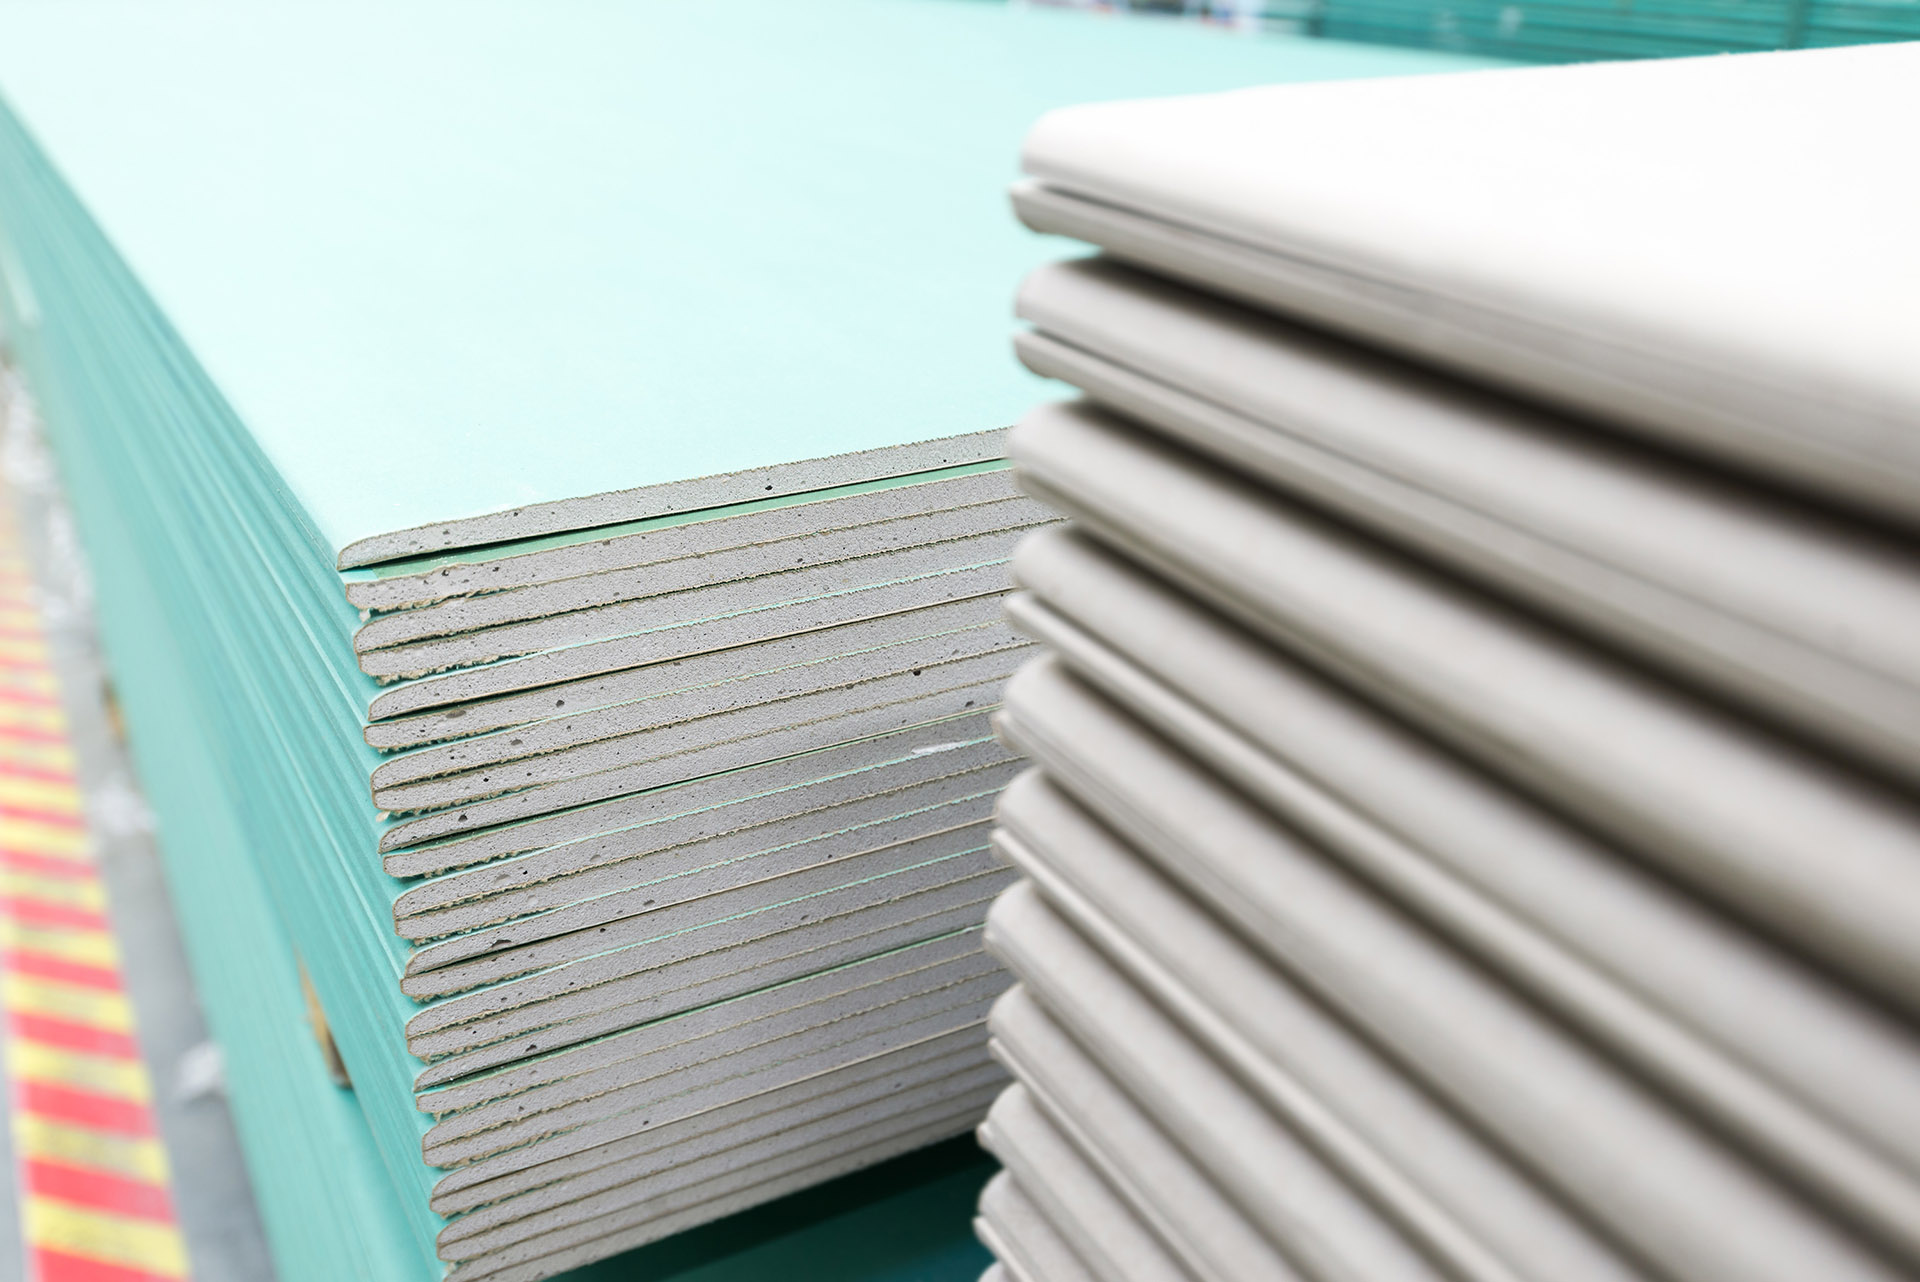
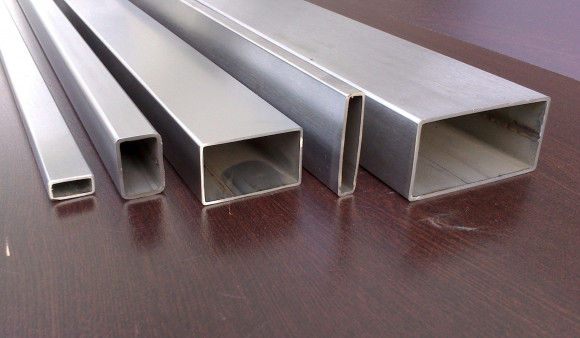
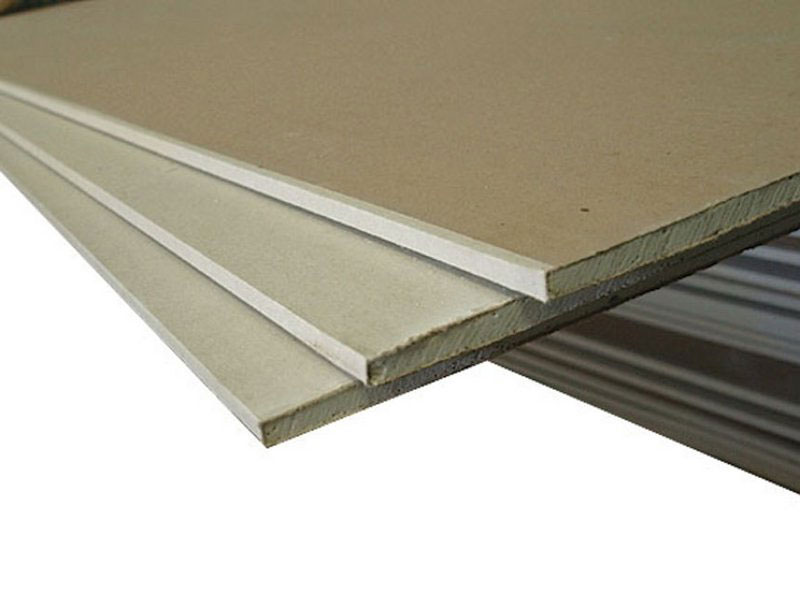
Regardless of what type of structure will be created, you will need:
metal profiles;
gypsum plasterboard;
screws and other fasteners;
scissors for working with metal;
screwdriver;
ladder.

At the last moment you should pay special attention, because special ladders are much more practical and safer than any tables and other improvised support devices. To make the profile curved, it is covered with notches, so it will be easier to get a fold. You should mark the initial tier using a hydraulic level, and strictly at a height of 0.1 m from the draft ceiling.
The choice of fasteners is dictated by the material in which they must enter. The key CD profile is fixed in 600 mm increments, unless there is no reason to change this distance. But the suspensions should not be spread further than 0.5 m. The ends of the mounted suspensions need to be bent to get a shape like the letter P. The electrical wiring is placed in a corrugated plastic pipe. It also relies to fasten thoroughly with clips.
Where the first and second tiers are connected, it is not necessary to fix the plasterboard sheets; leave only allowances of 100-150 mm to mask the unsightly frame. Before starting work, it is necessary to chamfer, that is, to cut the edges of the sheets at the corners. Then at the subsequent finishing it will be easier to process the gap with drywall. Strengthen the material, starting from the corner, the sheets do not join too tightly, a gap of 0.2 cm around the perimeter is quite acceptable. To properly fix the screws, you need to make a gap of 200 mm between them, keeping the center and outer edges of the gypsum board.
To make it easier to make the individual drywall fragments curved, it is desirable to slightly moisten them. Moisture impregnation is simplified by pre-punching cardboard with needle-like steel rollers.
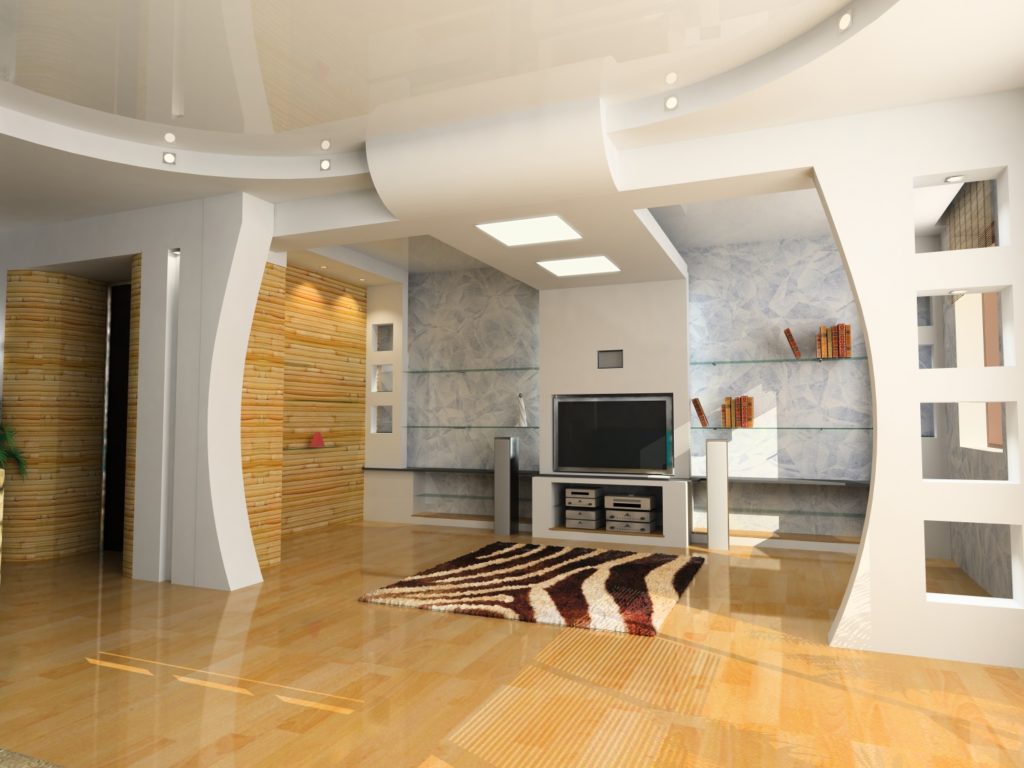
Forms and sizes
Constructions that have two tiers add volume to the room or change its appearance, add refinement to the interior. With the help of sharp differences in height, smooth areas you can achieve an extraordinary appearance.

Bunk plasterboard blocks need to be done only in rooms at least 250 cm tall. If you break this rule, the room will become uncomfortable in appearance.
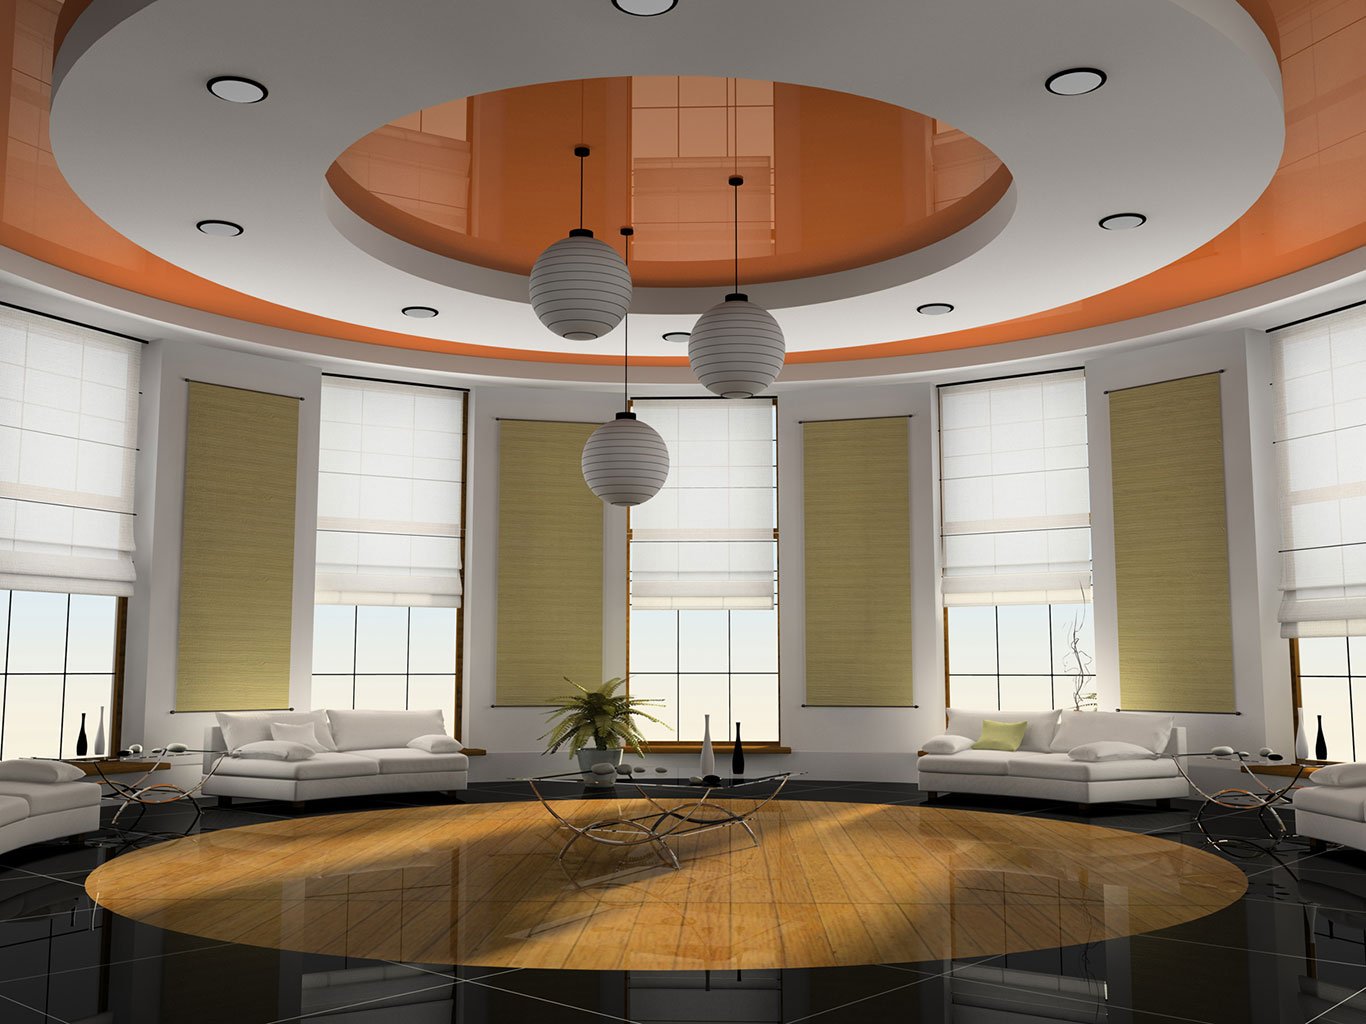
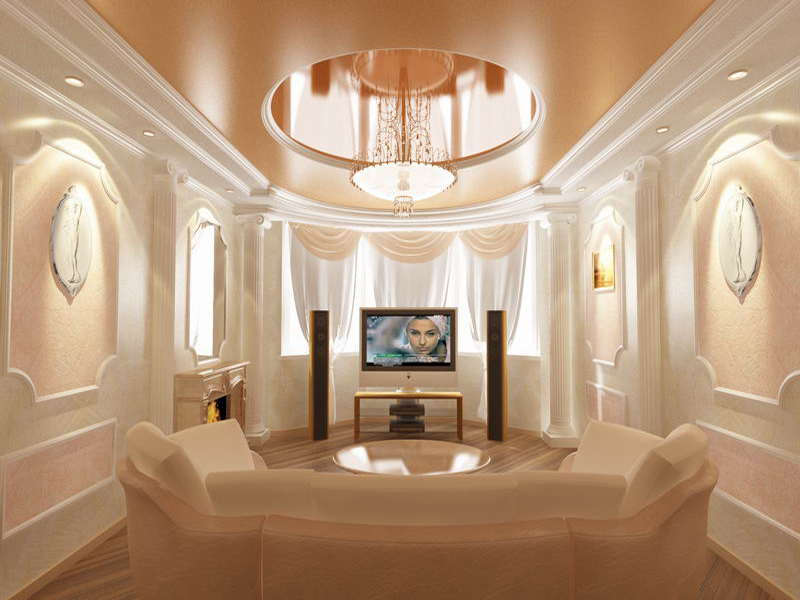
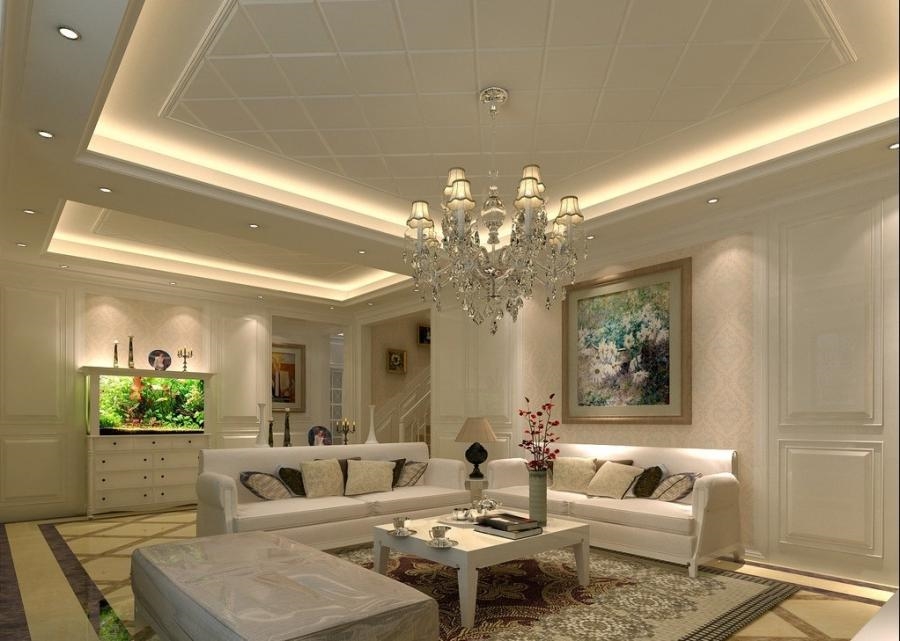
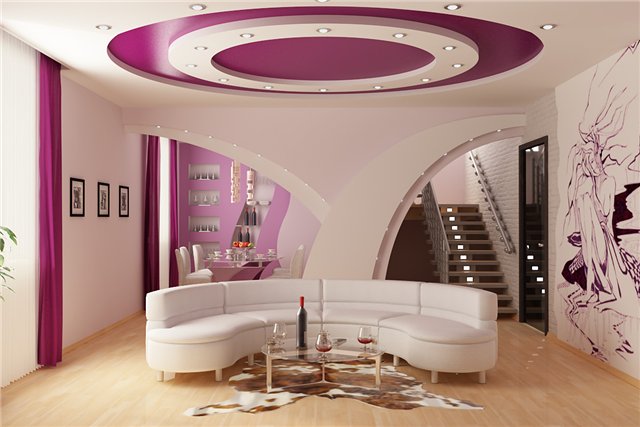
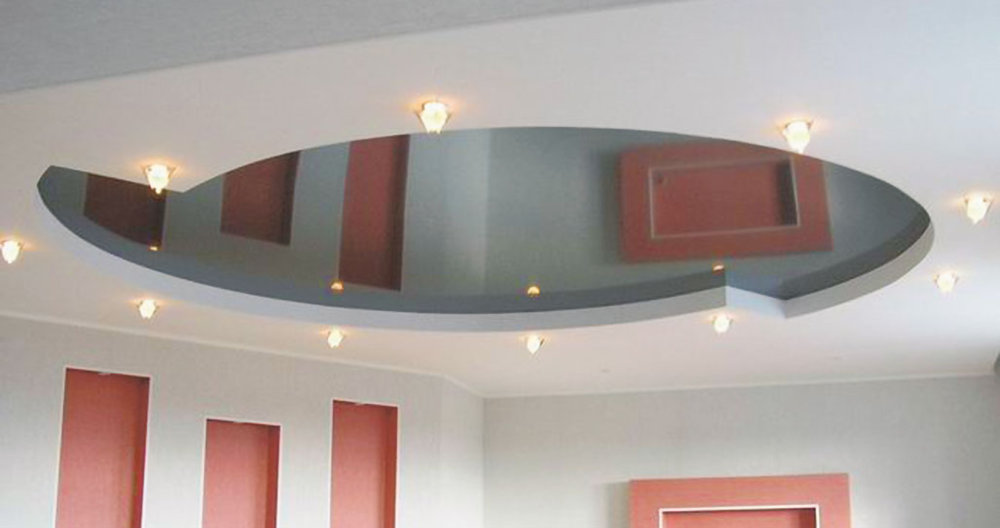
The round type will help to distinguish visually the central part of the space (corresponding, for example, to the dining table placed below). The rectangular format allows the correction of unnecessarily narrow rooms.
The size of the construction is directly dependent on how large sheets are used. With a slight (no more than 120 mm) gap between the draft ceiling and the gypsum plasterboard, direct suspensions can be used. In the case of multi-level structures of large thickness, it is advisable to use spring mounts with built-in clips. The second level is usually mounted indented 50 cm from the wall. When calculating the profiles going to the first level, it is necessary to take into account those that will hold the lower structure; Suspension requirements are calculated according to the same scheme as for single-level ceilings.
Colors and design
Stylistic options for two-level gypsum ceilings are very diverse.
With the help of symmetrical arches, stucco and arched structures interiors are designed in the spirit of:
Victorian style;
mild provence;
graceful classics.
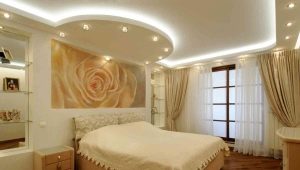
In the loft and country setting is recommended to use beams.The classical type of a two-level ceiling is ideally compatible with light coloring, accurate geometry. Chandeliers of attractive shapes are used as lighting devices. But much better for this solution is suitable high-tech, because it allows you to apply a strict rectangular shape. Highlights of the ultramodern interior can help lamps made of metal, painted with blue or purple paint.
Two-level constructions can be made in the antique keywhen bright tones are used for curved, fancy elements. When there is a desire to paint the upper part of the room in complex tones, you need to choose a modern style in which corners and sophisticated forms are unacceptable. This is because either the color or the geometric configuration of the ceiling can be complex, but not both. In a modern setting, photo printing is permissible.
The radical version of modernity implies scrupulous study of the smallest details. There is also a surface-lightened format, when only the “spirit” of the style and its color canons are reproduced, and otherwise the designers and builders have a completely free choice.It will be very good to introduce vegetative motifs into the situation; this decision best of all corresponds to modernist approaches.

The techno format is not just strict lines, but also lamps made in “cosmic” motifs. But lovers of exotic and variegated better to focus on the ethnic format of the ceiling.
Japanese style is externally laconic and very strict, but that is why it embodies a deep semantic set. Coloring should be natural and, moreover, not too elaborate, because natural tones are best suited. The spectrum of brown and yellow tones is almost the best solution in most cases, most accurately embodies the ideals of the Land of the Rising Sun.
The minimalistic environment always includes not just light colors, but also the active use of the game of semitones. Among all possible paints, preference is given to white. Shades of shiny metal or glass are best suited to this style. It is unacceptable to draw up a minimalist ceiling in more than one color, it will immediately undermine all decoration canons.
If you have the slightest difficulty in choosing the right option, you should seek help from a professional designer.Alterations and new repairs or the need to live in a room that does not take into account the basic canons of style and design - things are very unpleasant. Compared to them, the additional costs of attracting professionals are fully justified.
Experts know how to take into account the smallest details and flawlessly embody even the most general and seemingly not very specific wishes of clients. It is recommended to make narrow ceilings glossy or mirror, then the problem of space distortion is solved especially effectively.
Whatever strength is chosen, it is important to note that there should be no discrepancy in design between the ceiling structure and the rest of the room.
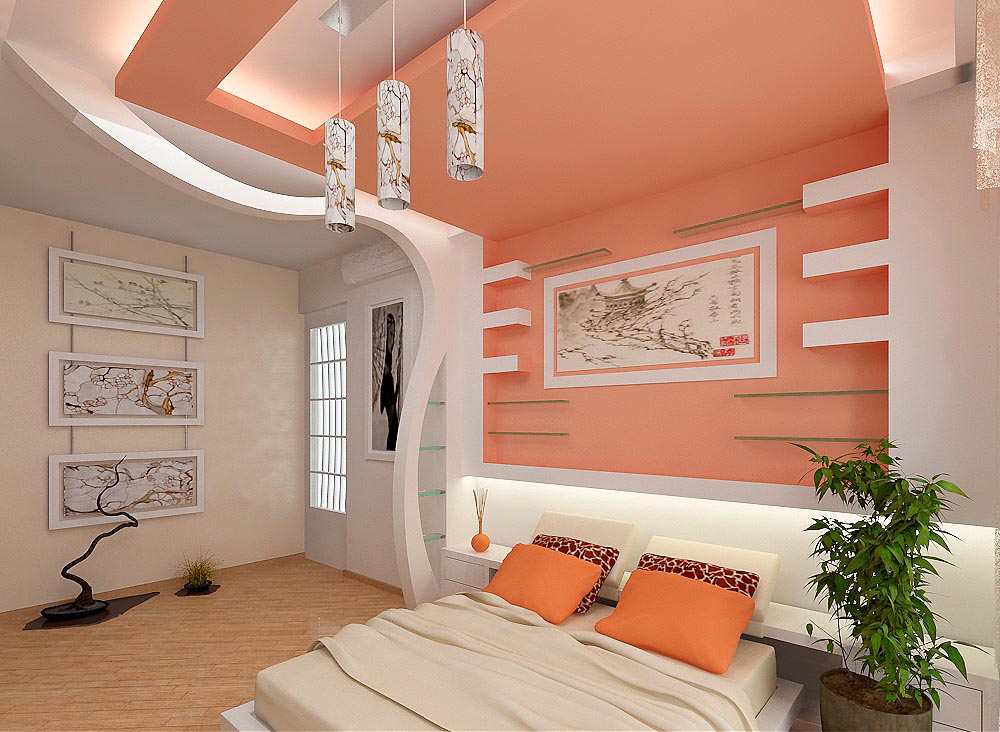
Coloring is no less important than geometry or light level. Choosing the wrong color, you can break the whole concept, and vice versa, accurate and competent decisions can work wonders. When the ceiling matches the tonality of the walls or slightly lighter than them, the space is filled with light and spaciousness. Thick dark colors will help to get rid of excessively large, visually pressing height.
In many rooms, daylight is not very bright (because they are facing west,northwest or shaded outside).
Then it is advisable to use the ceilings of warm rich colors:
peach;
pink;
yellow.
The opposite case (with windows facing south) requires the use of blue, green or gray colors. If you wish, you can combine a neutral colored baseline and an expressive second.
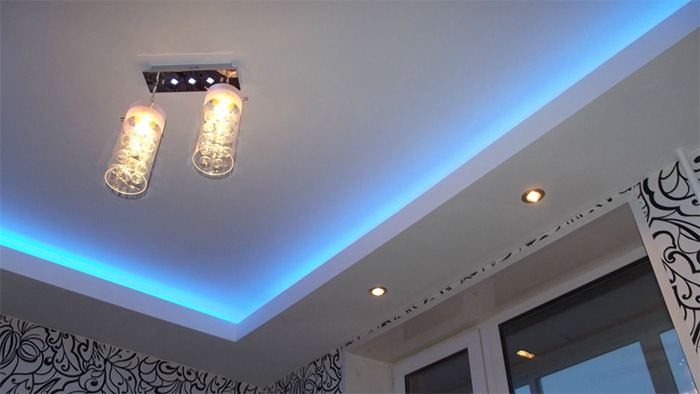
Lighting
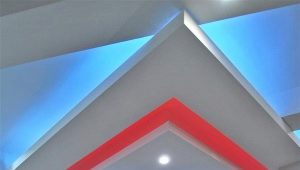
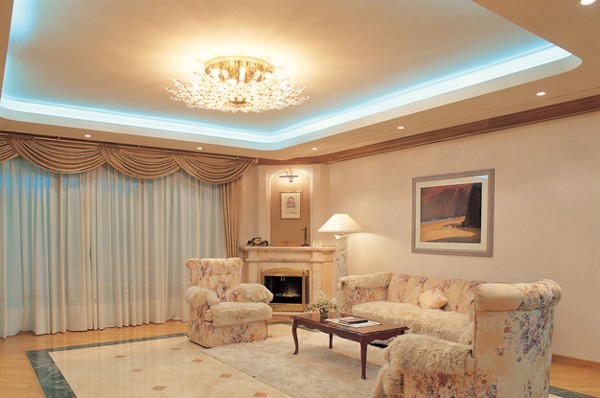
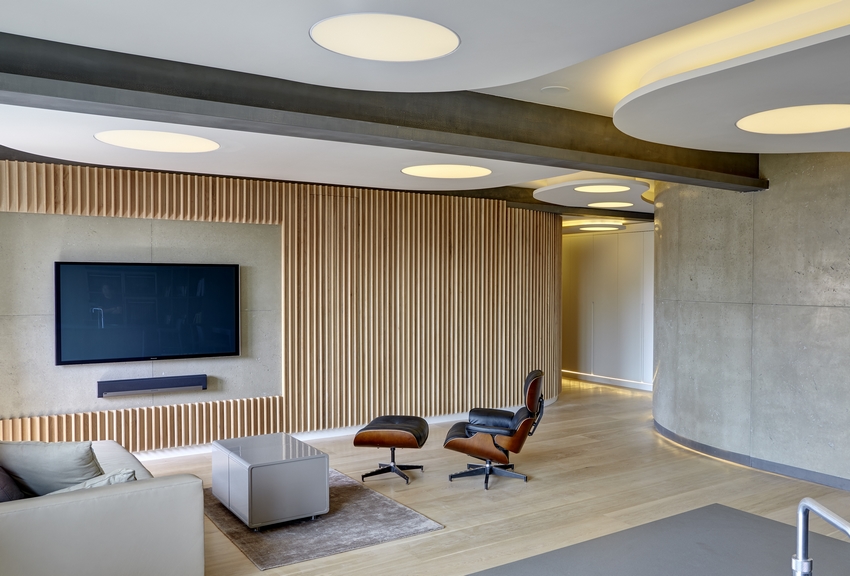
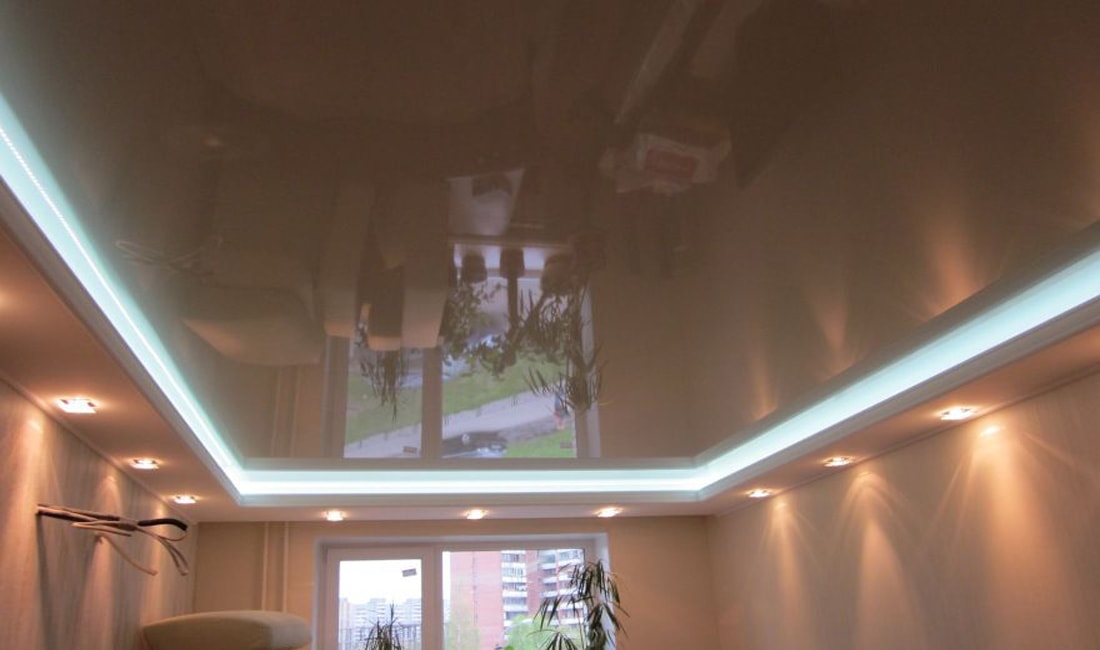
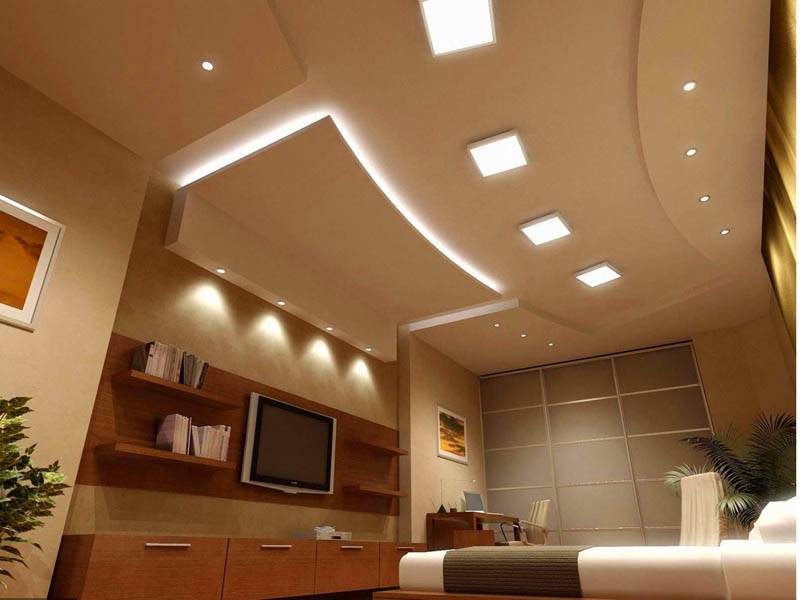
Lighting for a two-level ceiling is very important. Almost always they use LED light sources. Their attractiveness is due to a soft and uniform glow, the ability to increase the visual depth of the ceilings and create the feeling of “floating in the air” in the observer. By varying the light power and the color of the lamps, it is possible to create a truly unique lighting that you will not find anywhere else. You can increase the brightness due to the introduction of lamps or floor lamps. The location of the built-in lighting means is supposed to make the light uniform throughout the room.

To illuminate a two-level ceiling, you need to use LEDs for either 12 or 24 V - it is very important not to confuse these figures with each other, because according to external characteristics they can be very similar.It is important to distinguish between moisture-proof and moisture-proof structures: the former are suitable for periodic contact with humidified air, the latter are able to transfer the action of splashes and water droplets. For neon lights, you need to apply a voltage of 100 V, set them in 5-meter increments.
Tips for choosing
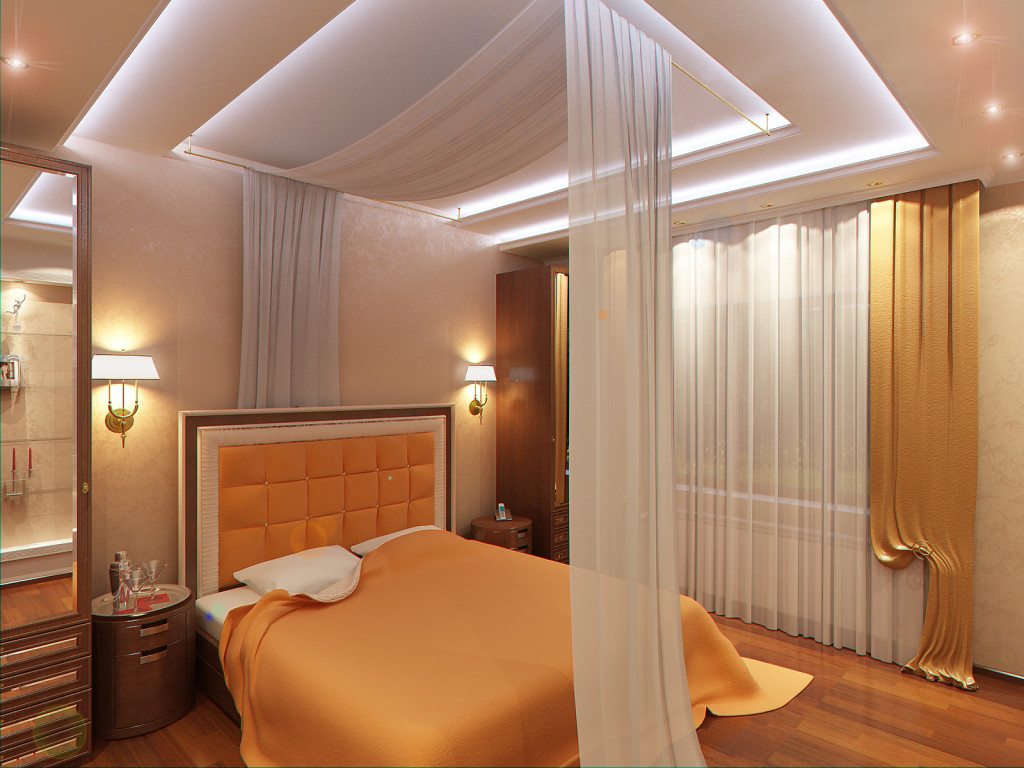
For bedrooms it is recommended to use designs with a smooth geometry, painted in pastel colors. The glow should be soft and not too pushy. Pictures of the starry sky, soaring clouds and other peaceful scenes are suitable for the room where you need to relax and rest. Dim lights with the effect of flickering or a pattern given by fluorescent light sources help to increase the romance of the situation. It is better to refuse registration with the help of neon ribbons, this solution is better suited for the corridor and the hallway.

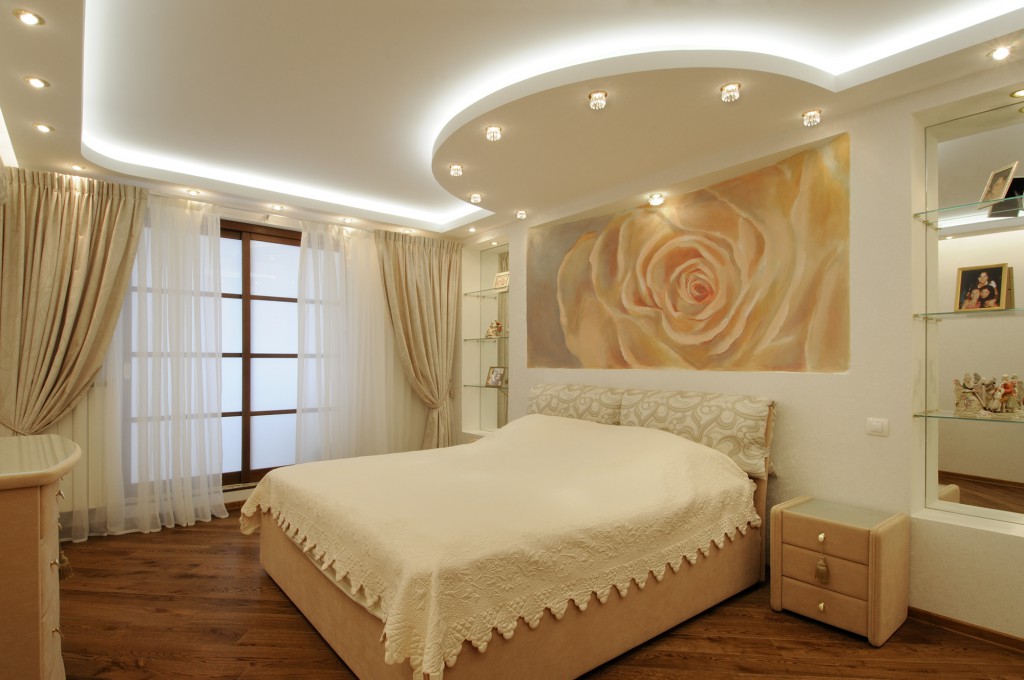
It is unacceptable to hang heavy and bulky chandeliers and constructions of a different kind over the beds; this is not only ugly, but it can be dangerous. Sharp contrast or excessive gloominess should be avoided.
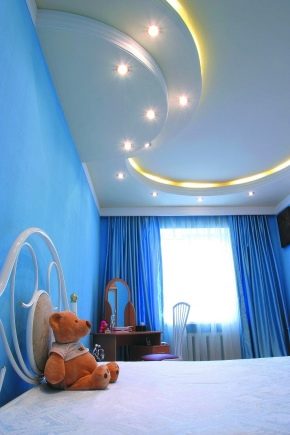
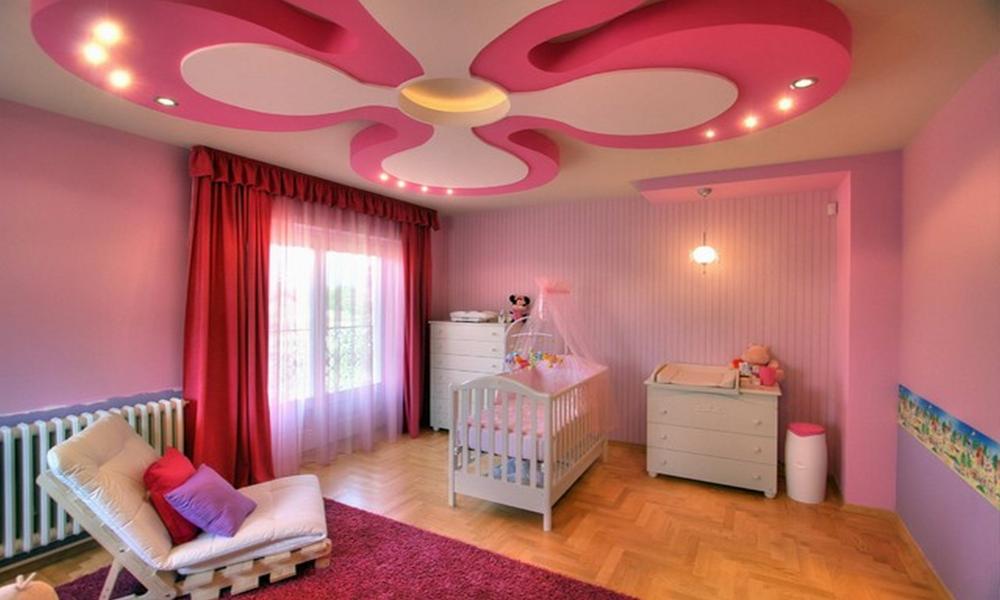
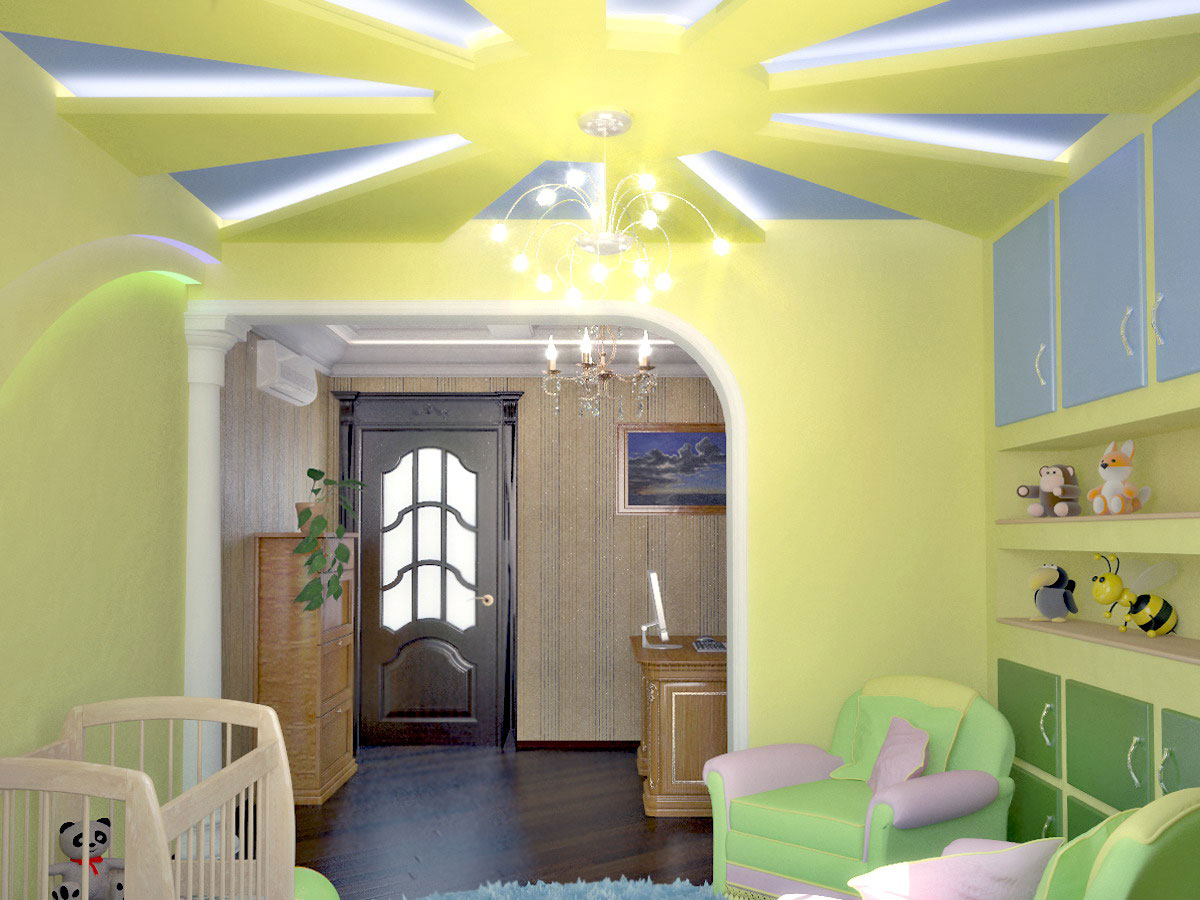
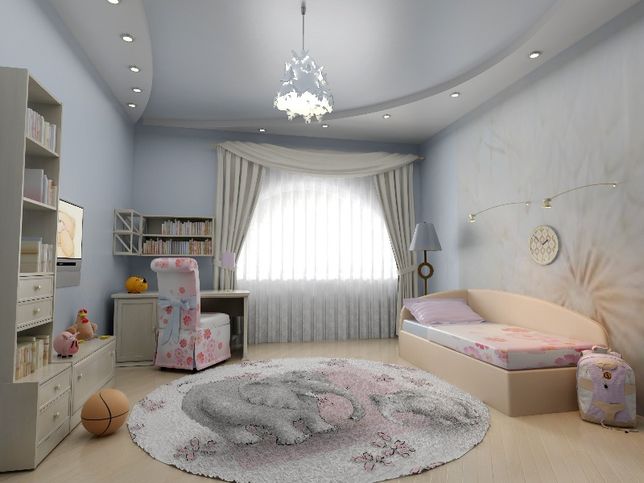
The ceiling in the nursery has its own characteristics. There you can not visually overload the room - the smaller and lower it is, the calmer the design should be.Adults can safely transfer the appearance of massive figures painted in different tones, but such things are often perceived by children as a kind of threat. The only justified use of large parts is the distribution and underlining of zones. Soft spring shades are perfect, the light should be milky or slightly yellow.
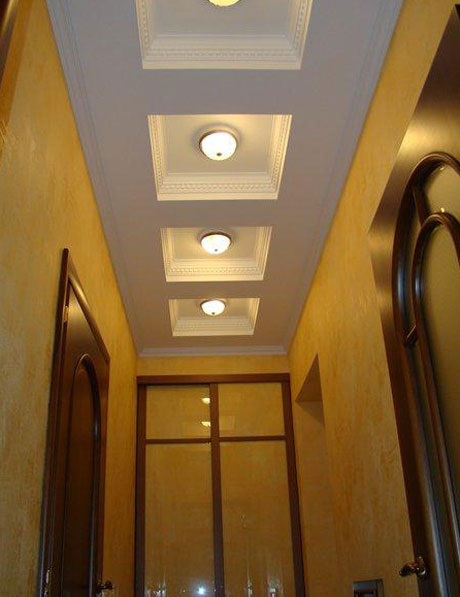
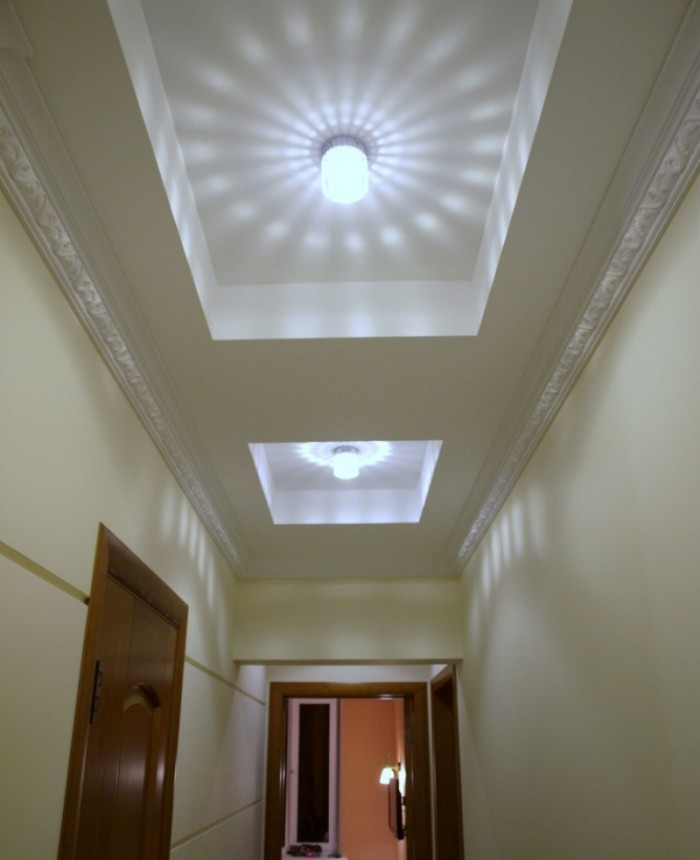
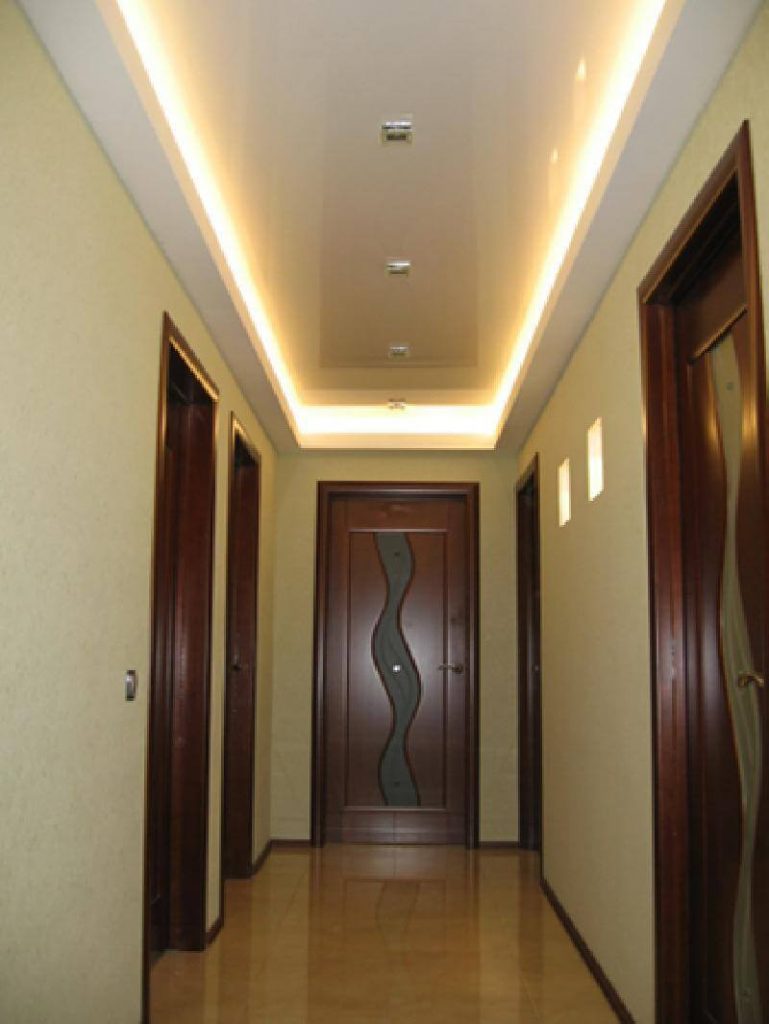
Returning to the corridors and hallways, it should be emphasized that they are best manifested monochrome ceilings of bright colors, continuously highlighted around the perimeter. Such solutions help to get rid of the excess gloom and heaviness of these rooms, almost always remote from the main windows in the house. Sources of light - most often point or tape. To increase the attractiveness of the finish helps choice of arches, arches.

Beautiful examples in the interior
You can still describe some subtleties of creating a two-level drywall ceiling and techniques used in this process. But it will be much more interesting to disassemble a few examples that demonstrate the capabilities of modern design.

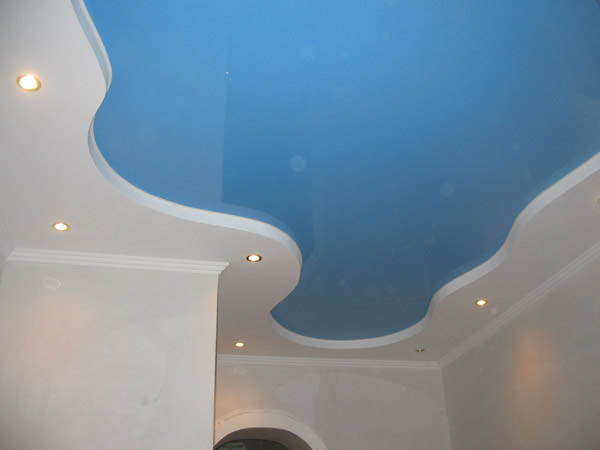
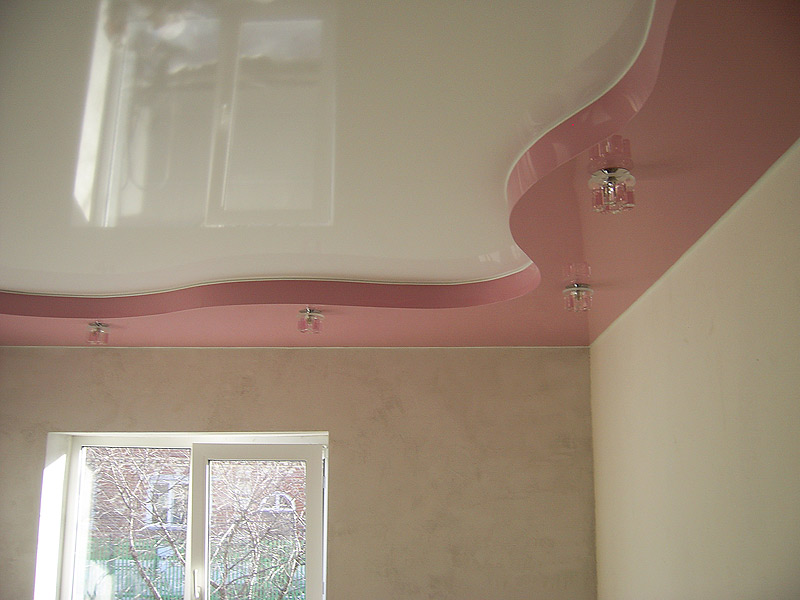
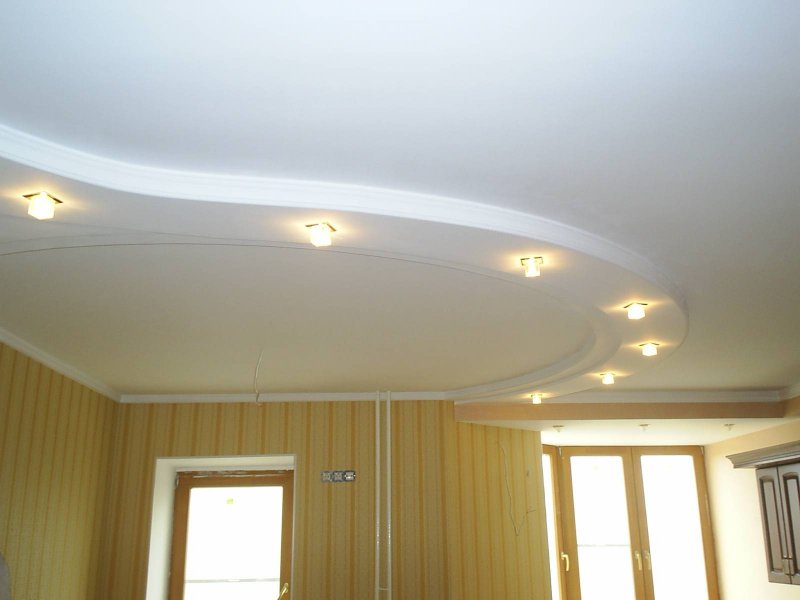
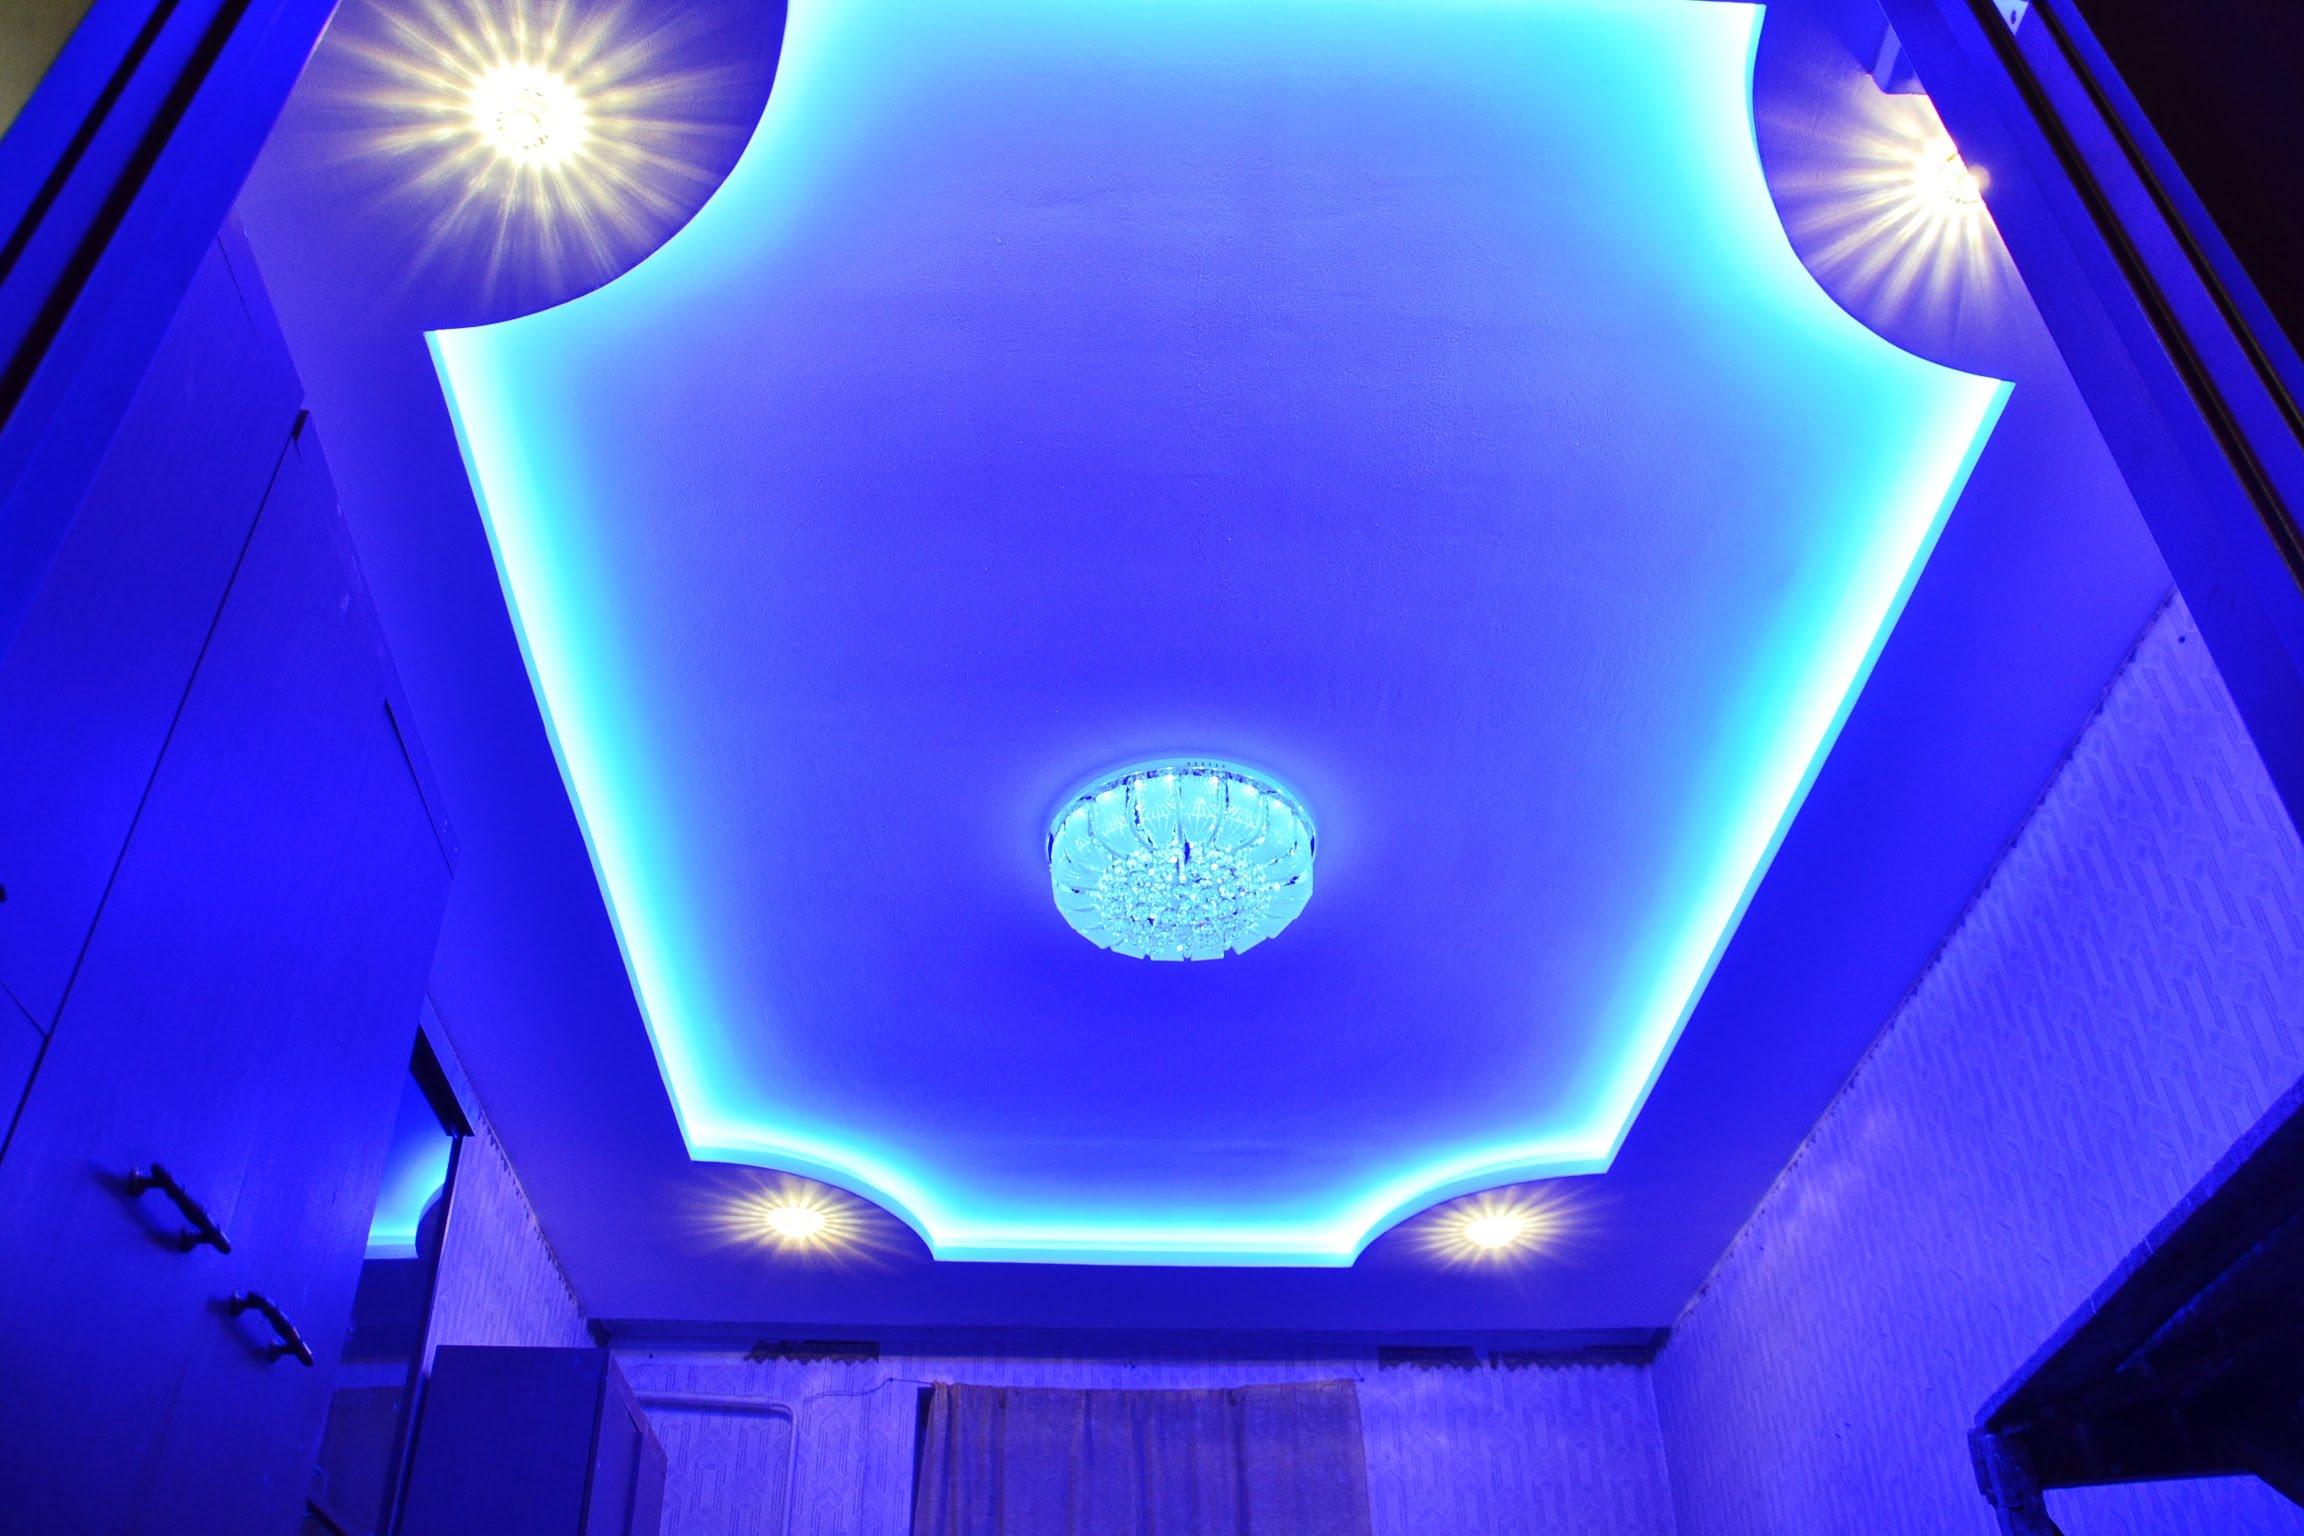
A blue ceiling with a central luminaire and lighting around the perimeter may look charming and unusual.To emphasize the specificity and attractiveness of such a decision, to connect it with the rest of the room, it is desirable to finish the walls in the same range. A simple white ceiling can be varied with an arc-shaped strip raised above the main plane. It is desirable to integrate light sources into it. Not badly similar design reception is combined with the light walls covered with wall-paper in a vertical strip.
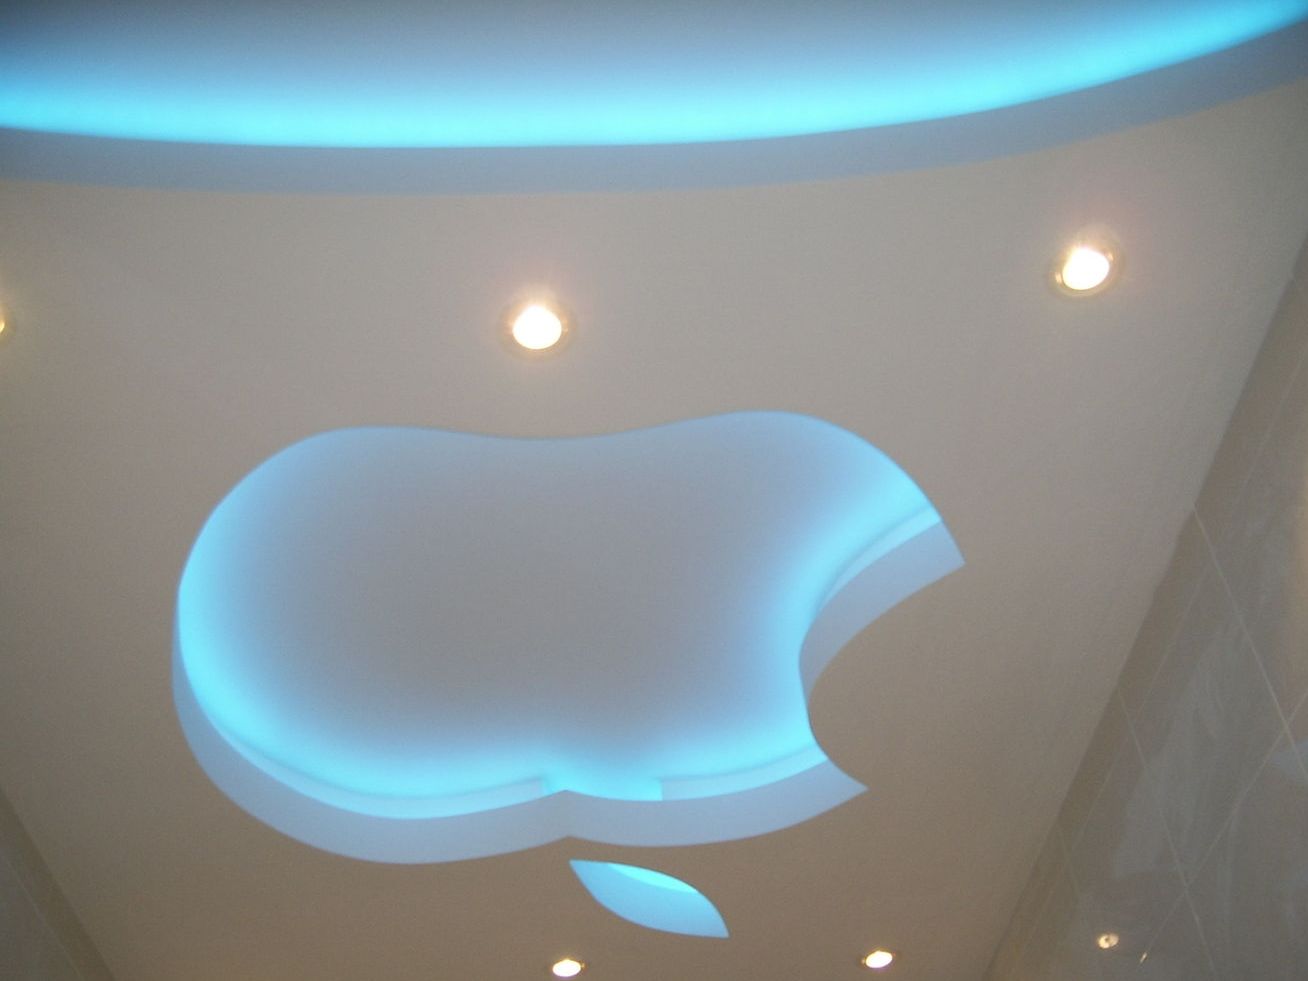
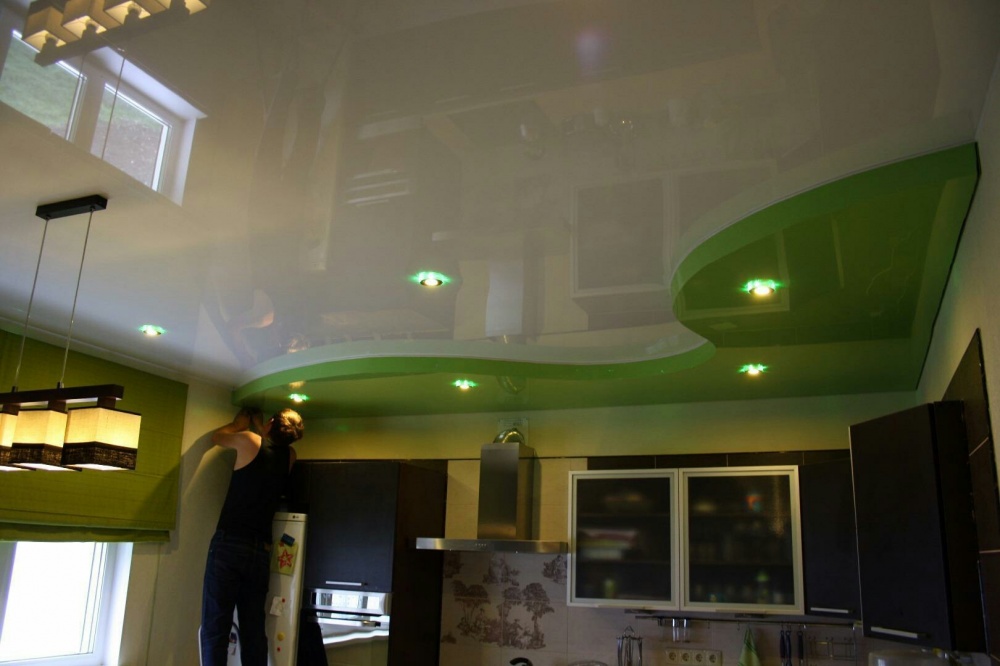
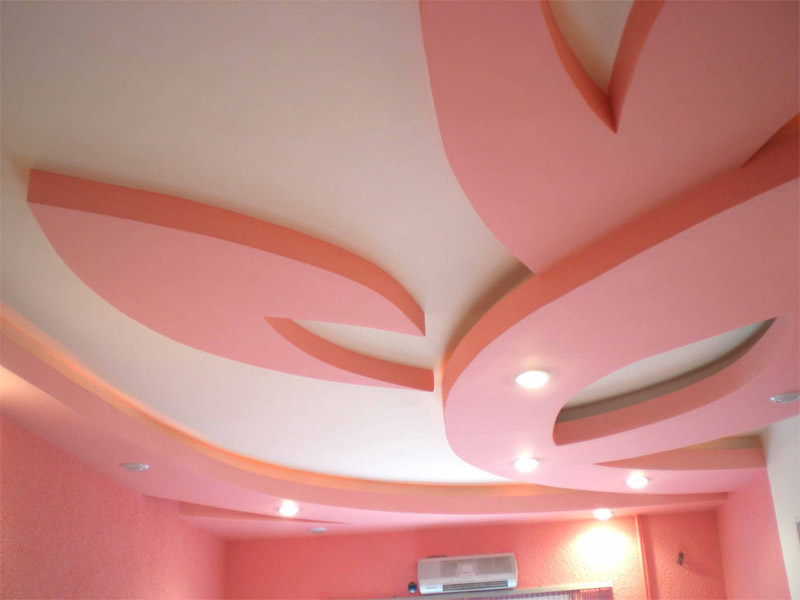
It is not at all necessary that the decorative elements be inseparable: pink-colored “petals” separated from each other on an ordinary white base will also look extraordinarily beautiful and elegant. In the opinion of some designers, glossy ceilings are best complemented by a sinuous colored construction in one of the corners protruding above the plane. The photo shows an example of such a design using green.
In the next video, see how to gradually make a two-level ceiling of drywall.