Features mounting the ceiling of plasterboard with lighting
Drywall is today used for various types of work, it is especially widespread in the covering of the planes. In addition to covering the walls it is used to create various designs. From it you can make the ceiling with your own hands, using various lighting effects. This material has its advantages and disadvantages.
Consider the features of the installation of the ceiling of drywall with lighting.
Special features
Drywall is a heat-resistant building material, which is well suited for creating a smooth surface, the formation of bulk forms. This material is easy to process, including cutting any contour, drilling holes.
Depending on the desired shape, single-level, two-level and multi-level ceilings of ordinary and figured type are made of it.At single-level ceilings, the main advantage is simplicity and reliability.

Basically, this option is used for small rooms, except for the bathroom and kitchen, where high humidity can destroy the material. In the absence of moisture, a plasterboard ceiling can last for decades, therefore, such constructions today adorn different rooms of a modern person’s dwelling.
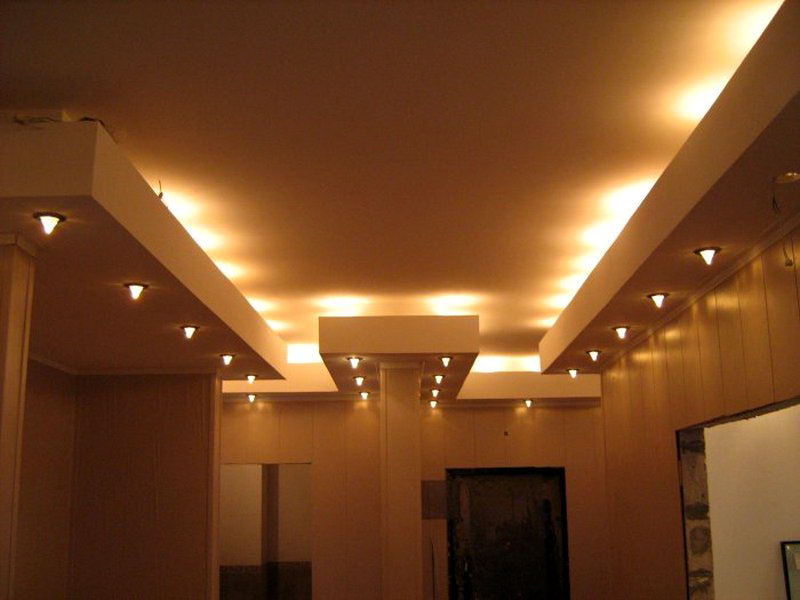
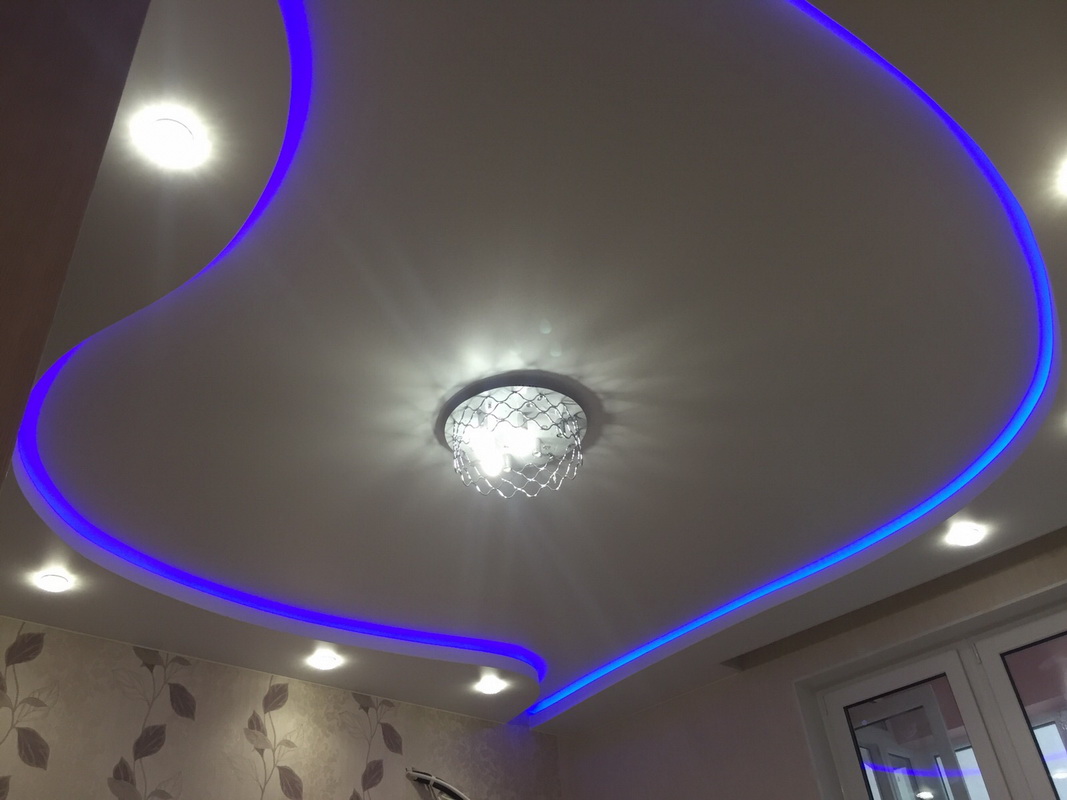
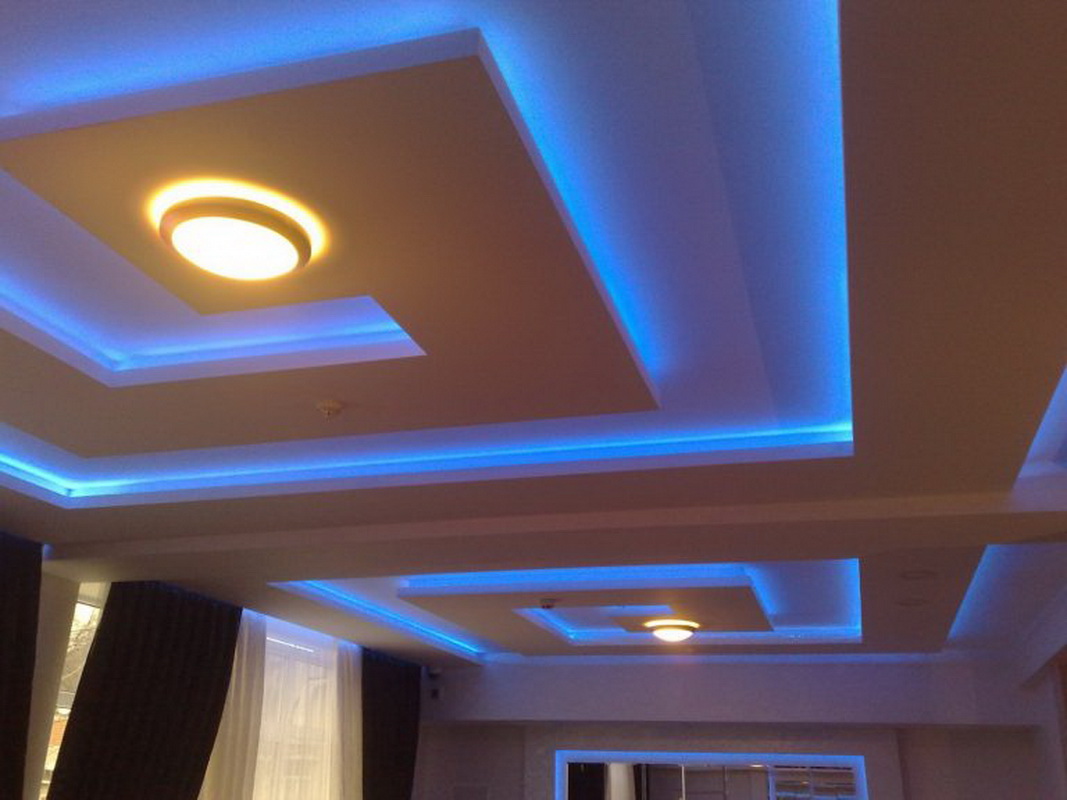
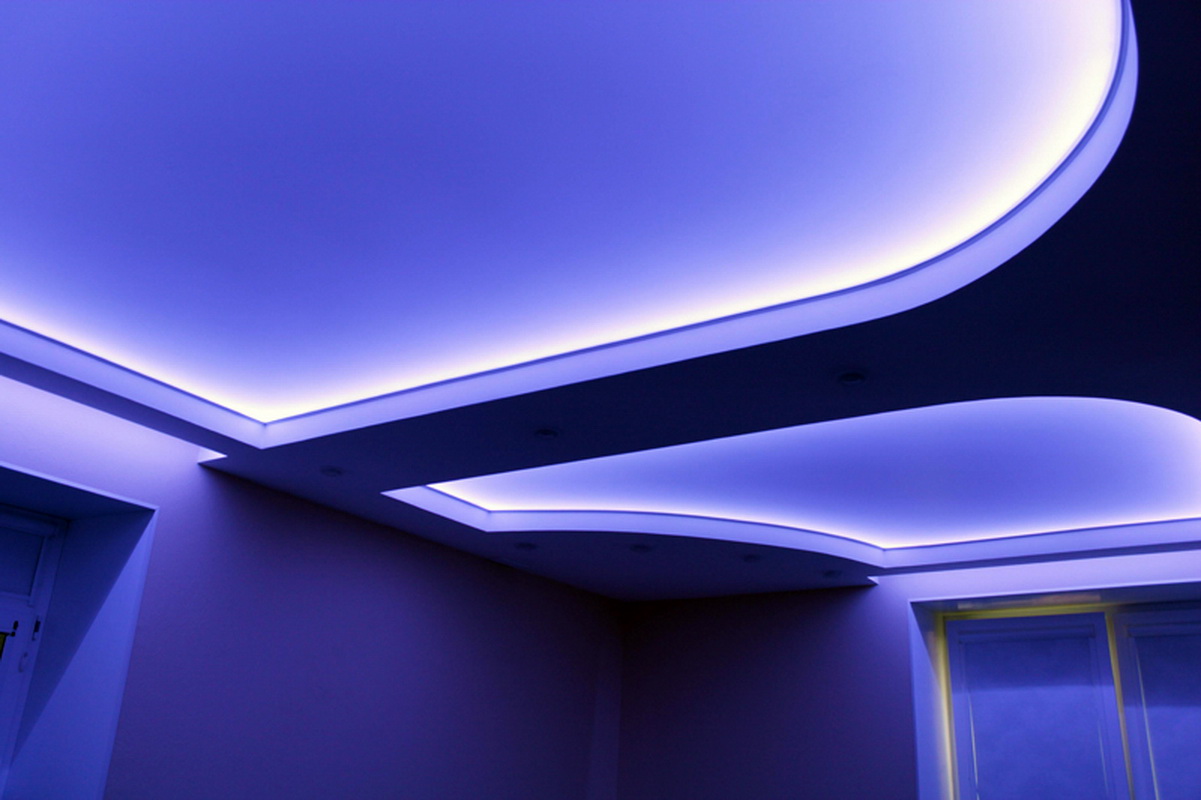
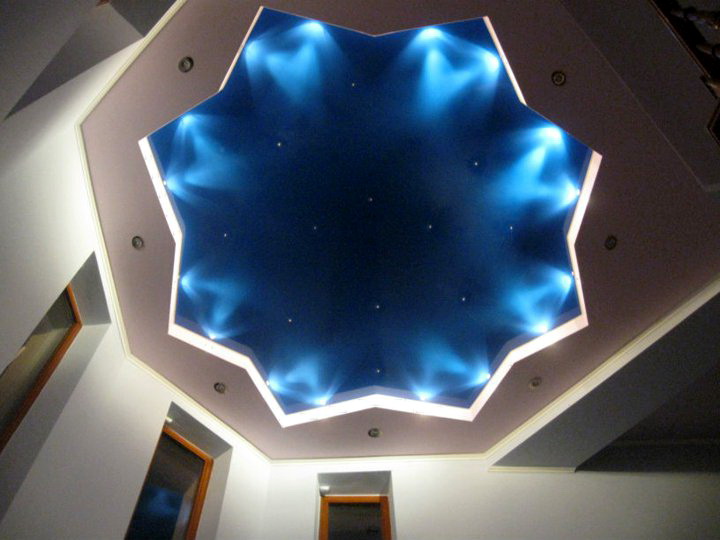
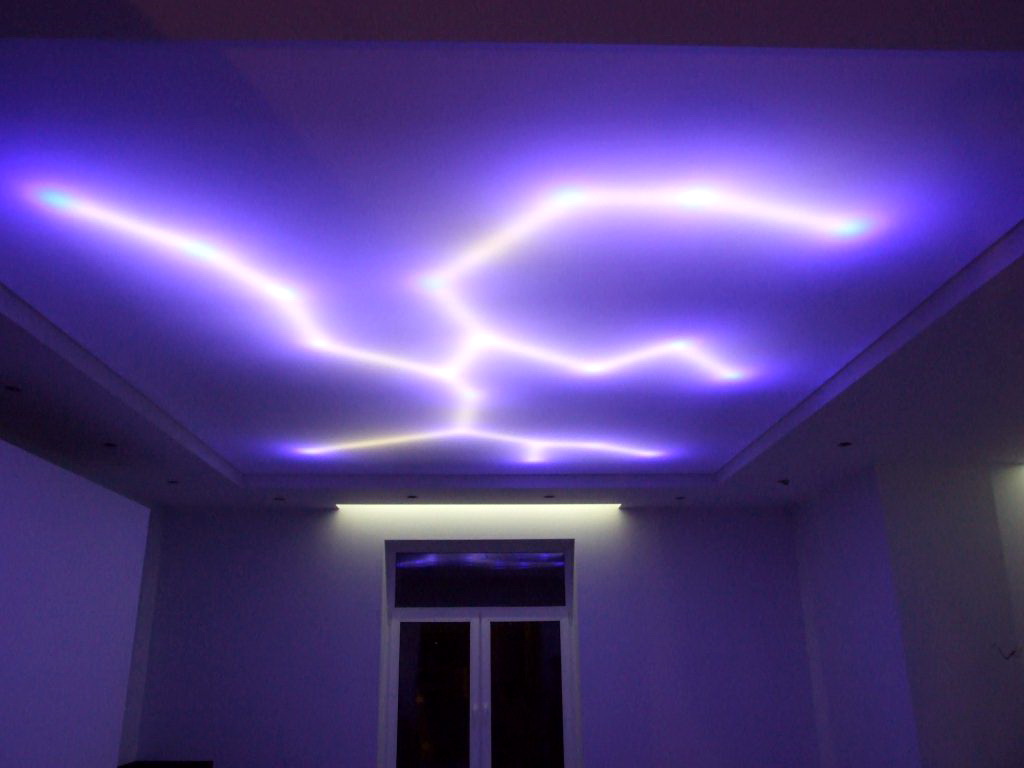
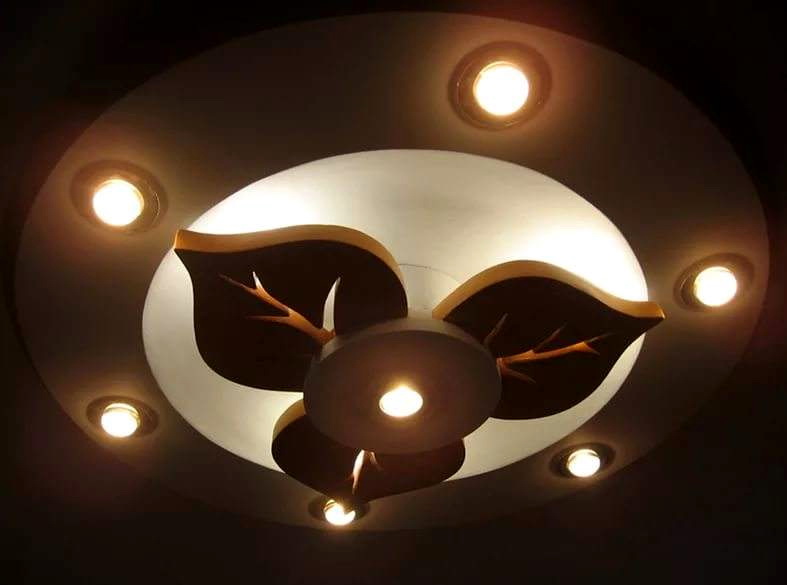
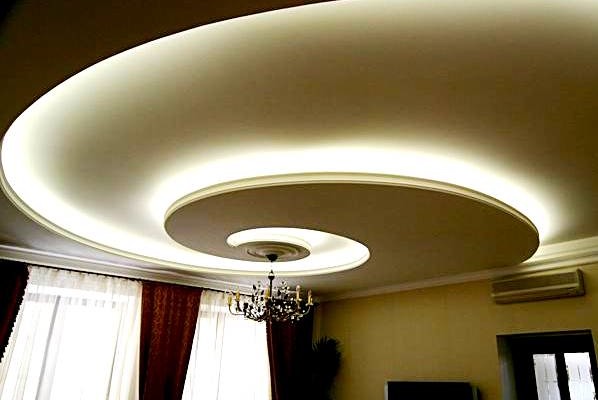
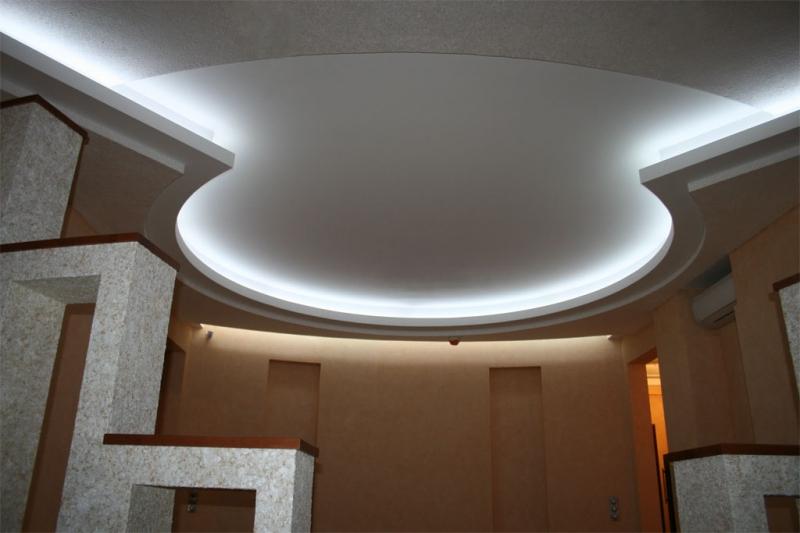
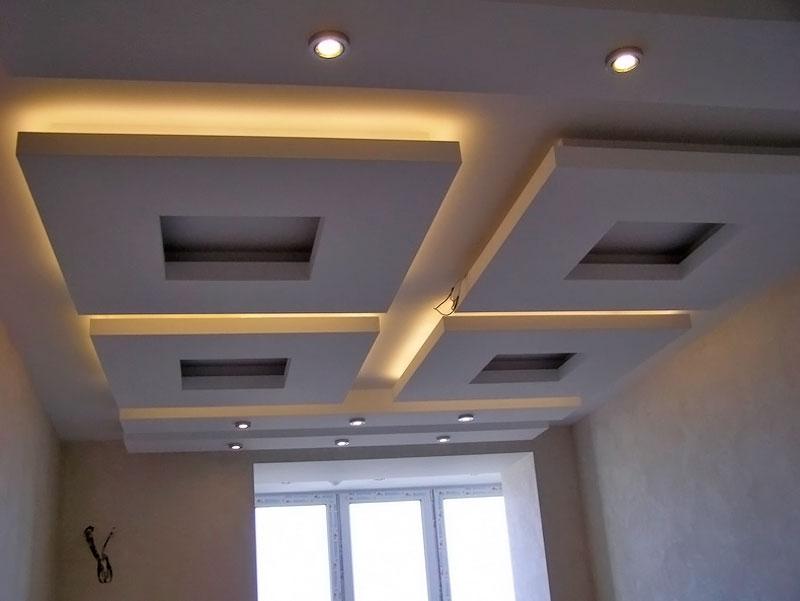
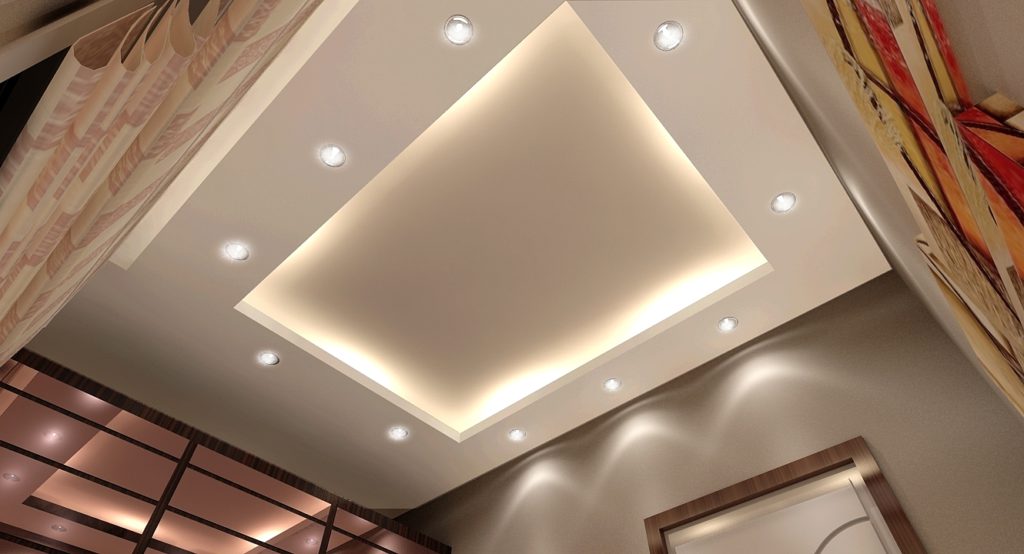
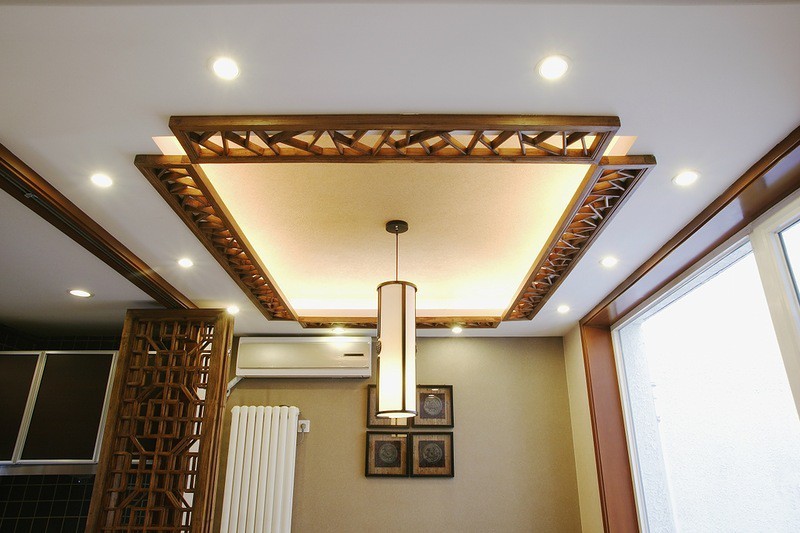
With the addition of bright backlighting, multi-level designs look chic and volume. The complex elements of a wide variety of forms, decoration, and various inserts are a small part of designer imagination. To achieve a great effect in the design of structures contribute to lighting. Figured ceilings are mounted using non-standard elements in the form of flowers, butterflies, curls, clouds, stars.

Backlight types
Illumination of plasterboard ceilings is of two types.
Consider the features of each.
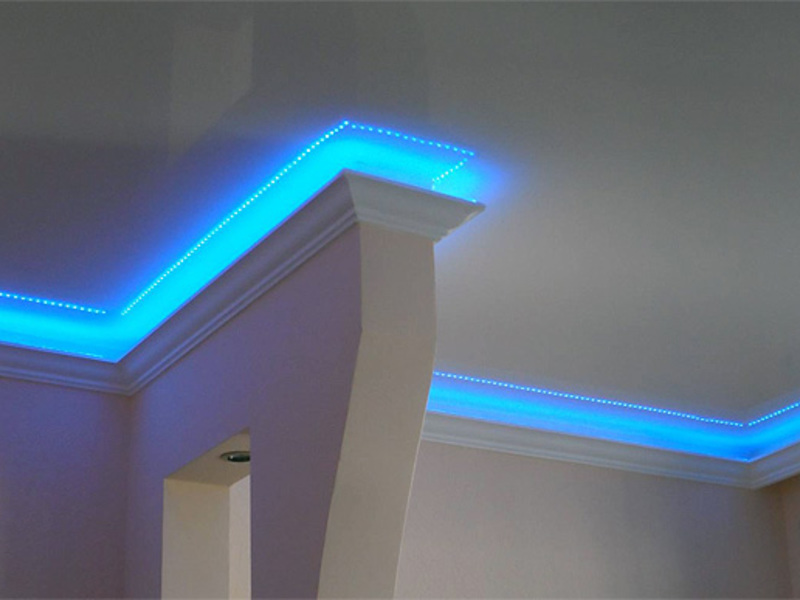
Open light
These lamps are inserted into the holes prepared for them in the ceiling cladding. Sometimes they are simply hung from the ceiling. Most often, this type of lighting is used in single-level constructions..
It is necessary to take into account the weight of pendant lighting: lights weighing more than 10 kg can not stand and spoil the whole trim.

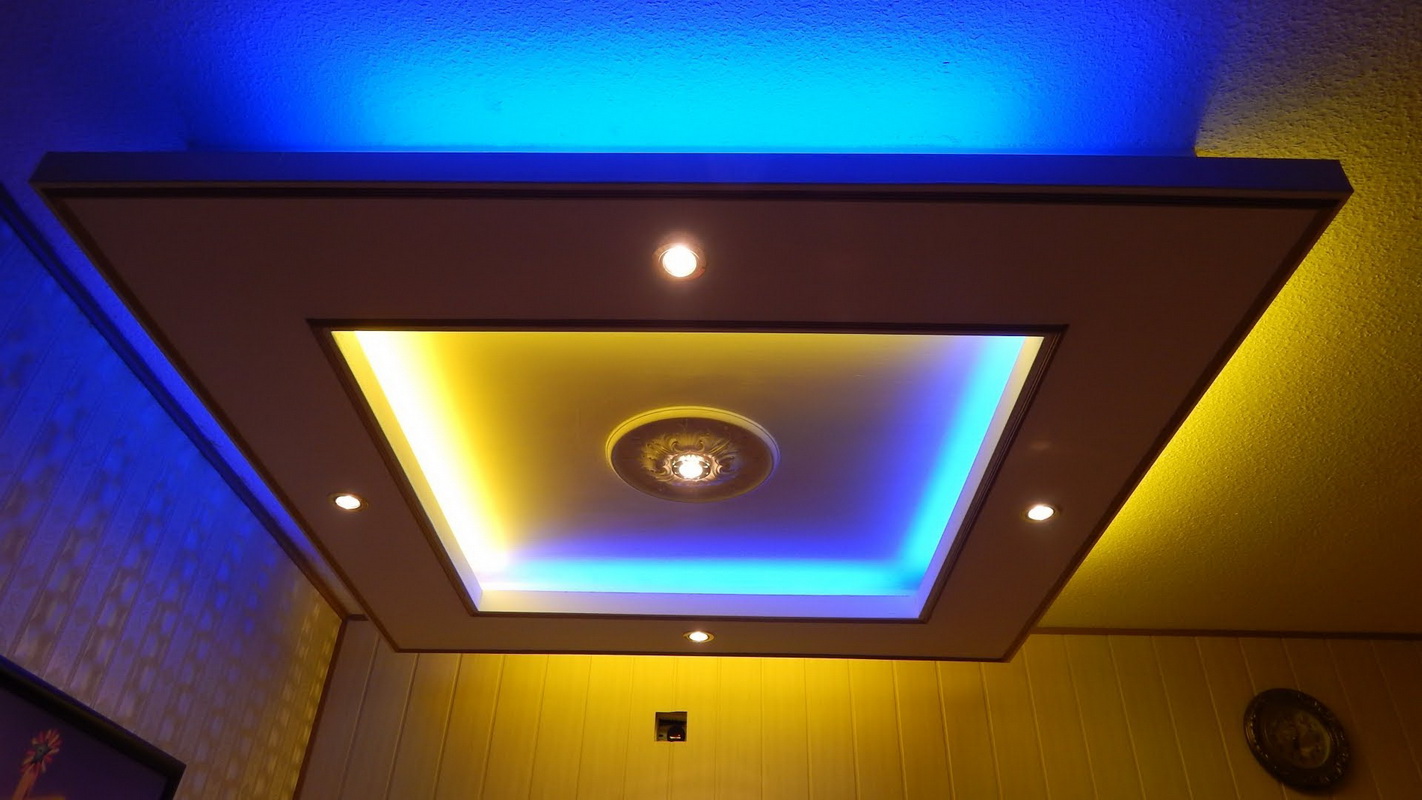
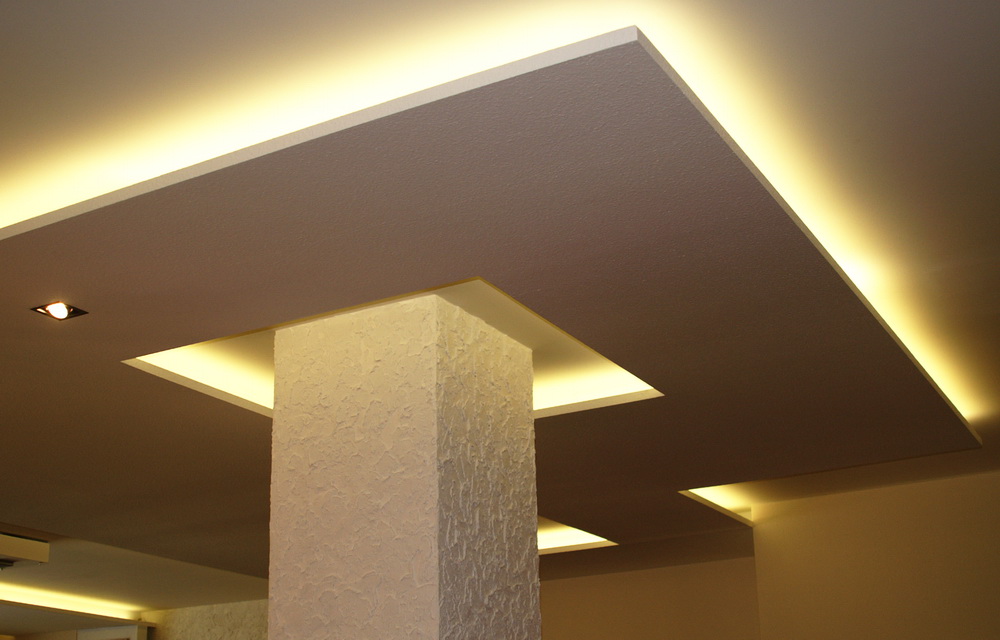
Hidden
To make a ceiling with a closed lighting, you need to well calculate the layout of the lamps. Such systems are made when installing multi-level ceilings.. Lighting devices are built into specially made niches. To create a cozy atmosphere and original atmosphere in the rooms the stream of light is directed not directly into the room, but to the ceiling planereflecting light into a common space.
Style and design
The design of gypsum ceilings is often complex. At the same time, this is an interesting task in the process of repairing the premises. When solving it, attention should be paid to the functional purpose of the room, furniture furnishings, and general decoration. This will help to rationally divide the space into zones, save from visual errors and negative perception of the room. You can get confused in a variety of design options through the backlight.
It is necessary to carefully consider the design, if you want to end up with a bright and updated interior. A single-level ceiling can be made to your taste (for example, paint with enamel, glue wallpaper on top). It is advisable to use light colors, dark shades will visually reduce the space.
Tiered structures in the classic interior are used in public halls, exhibition galleries and other establishments. Intricate reliefs will decorate children's rooms, spacious rooms, bedrooms.
You can perform a ceiling covering in the form of a wave. Also suitable pictures or, for example, a standard circle. Figured design will amaze with its unique refinement of children and adults.
The color combination of the ceiling with the colors of the walls, the decor will be great, patterns in the same style look good. You can design your home by equipping the ceiling with lighting. Lamps will add more light and comfort.
Necessary tools and accessories
For the installation of such structures do not need complex tools, it does not need special knowledge and skills.
To equip the ceiling with lighting should be prepared:
- set of screwdrivers;
- drill;
- knife;
- pliers.

For installation of the ceiling itself, you need a little more fixtures. These include:
- screwdriver;
- self-tapping screws;
- hacksaw;
- scissors for metal;
- building level;
- roulette;
- pencil.

In addition, it is desirable to have a design scheme and plasterboard material, as well as light bulbs and profiles.
How to do?
Having decided on the choice of design, option of lighting, color performance of a future design, it is possible to make installation.
The list of jobs is usual:
- marking, making the frame;
- sheathing material;
- installation of lamps.
Consider the main points:
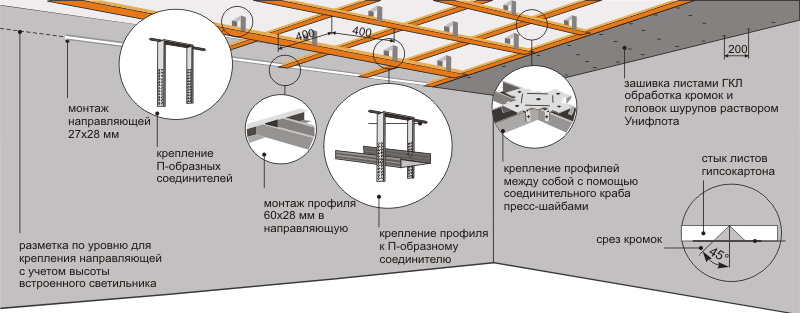
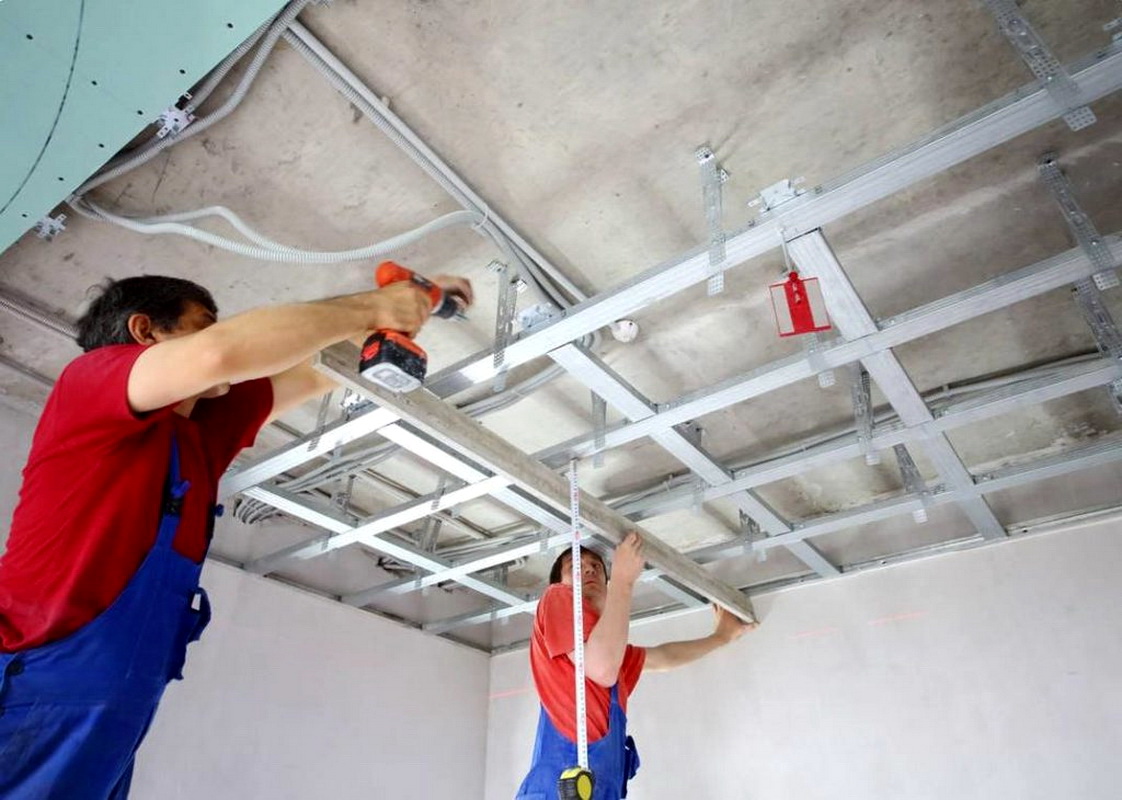
- It is necessary to measure the required distance from the ceiling and draw a horizontal marking along the perimeter of the entire room. The size of the gap between the ceiling and the marking line depends on how high the walls allow it (preferably about half a meter). To do this, use a tape measure, a level and a pencil.
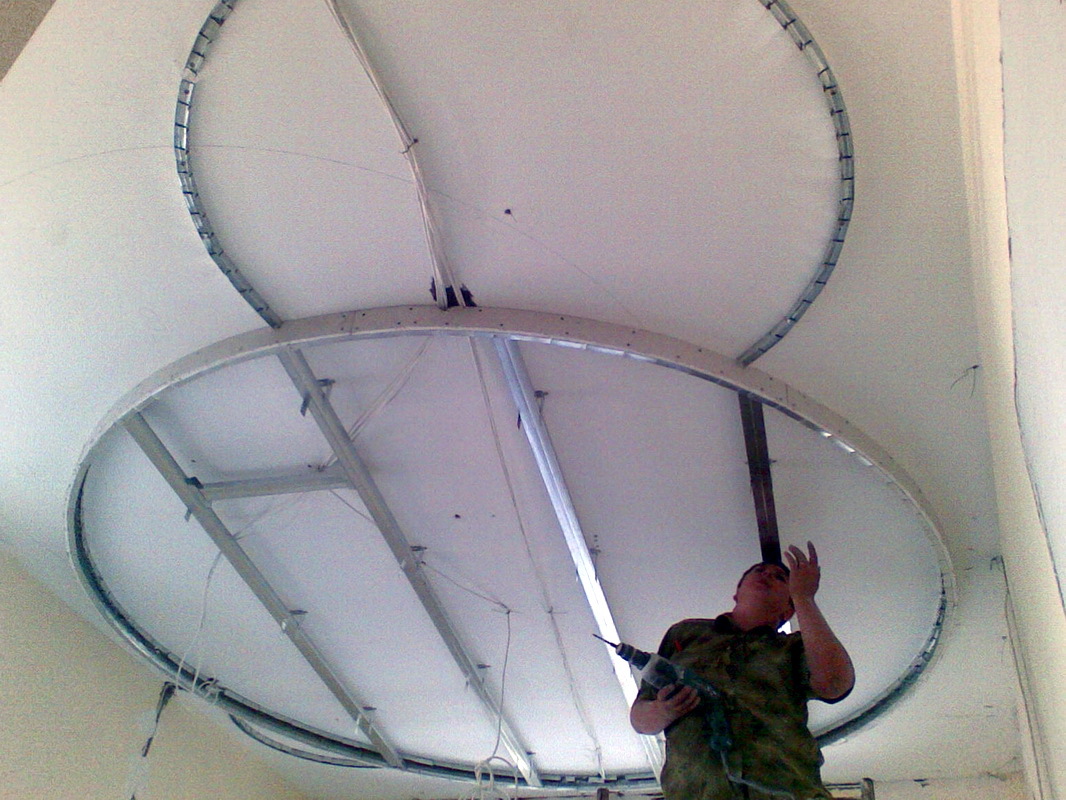
- Along the marking it is necessary to fix the profile to the wall surface. It is necessary to insert the main parts into the profile and attach it to the ceiling with special hangers. Profile elements should be inserted with a gap of approximately 400 mm.
- To strengthen the structure with the help of crab connectors between the main parts, you need to add profile jumpers.
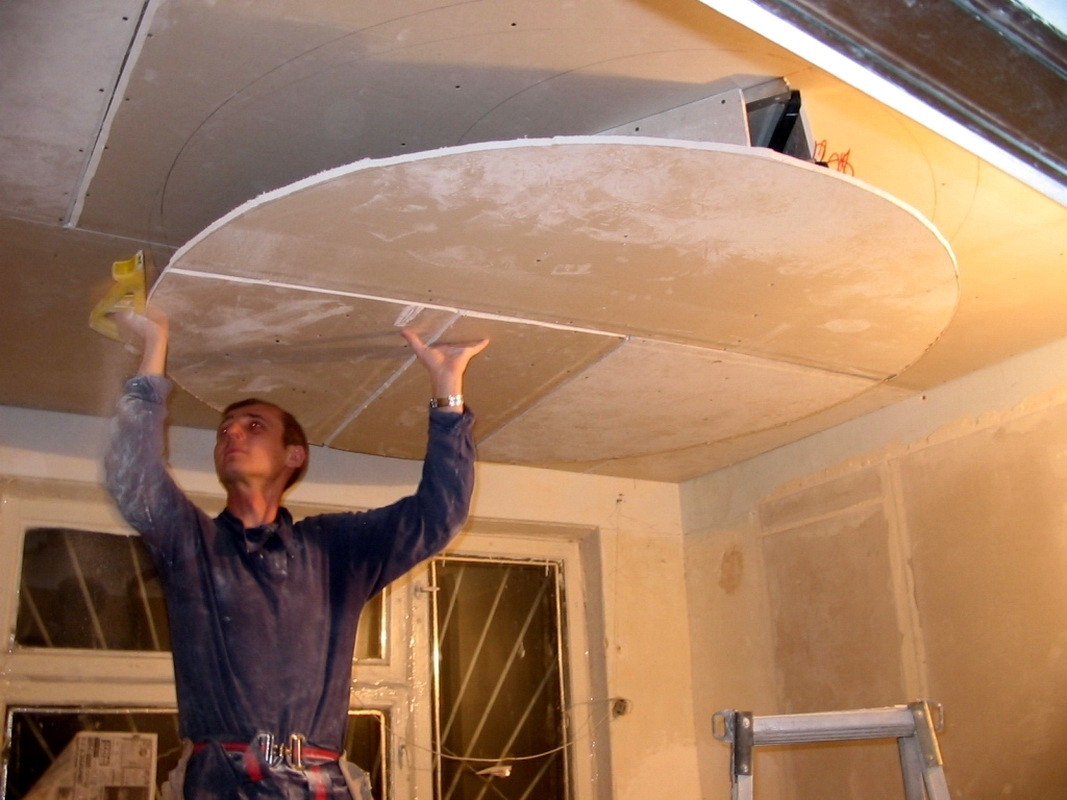
- Then the frame gently sheathe sheets of drywall with screws.Cutting drywall is better with a sharp construction knife. The cut side of the sheets should be treated with a special plane and sanded with emery paper, removing minor flaws. As a result, you should get a full-fledged basis for translating the conceived design into reality.
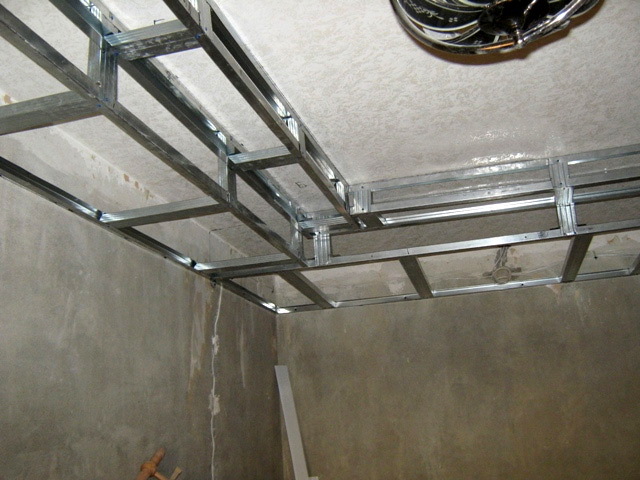
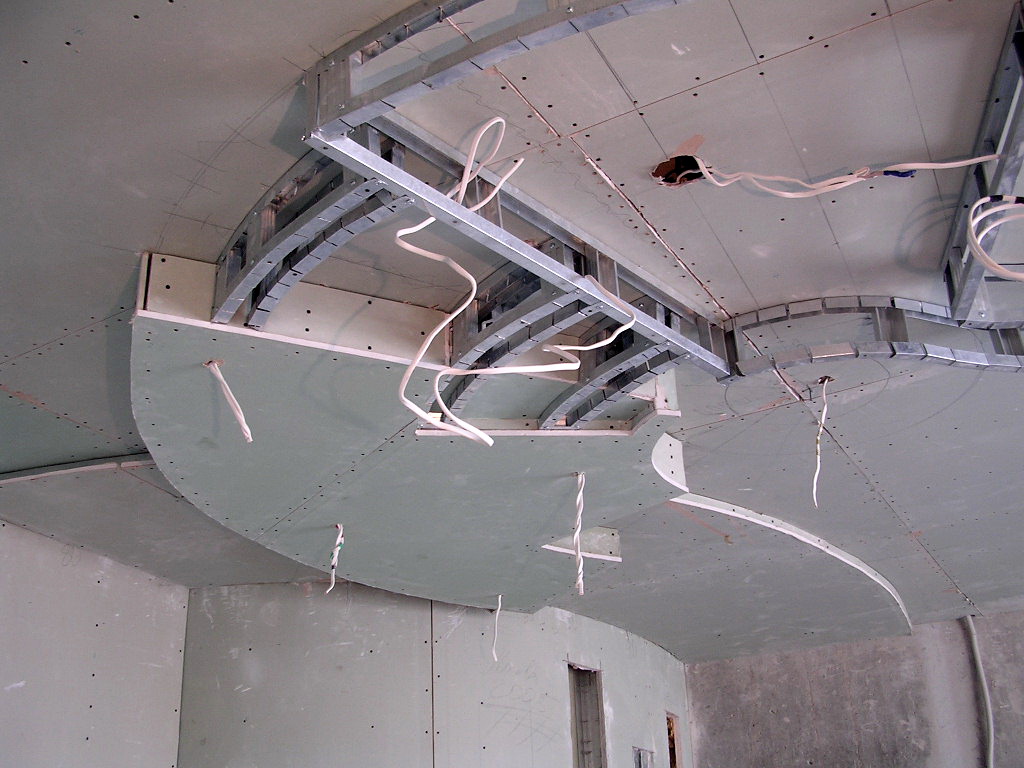
If the project involves a multi-tiered structure, then you need to start creating a niche:
- It is necessary to draw a contour of the upcoming level on the main tier of the ceiling.
- Departing the thickness of the gypsum from the contour, you need to attach to the ceiling profile.
- After that, it is necessary to cut profile elements the size of the height of the second tier. Then they need to be screwed with screws to the main profile (they will be used as suspensions).
- At the bottom of the suspensions you need to attach another profile.
- The resulting frame must be supplemented with jumpers, combining them into one design.
- After that, should be withdrawn in the right places wires.
- Then it is necessary to sheathe the frame and the sides of the tier with drywall.
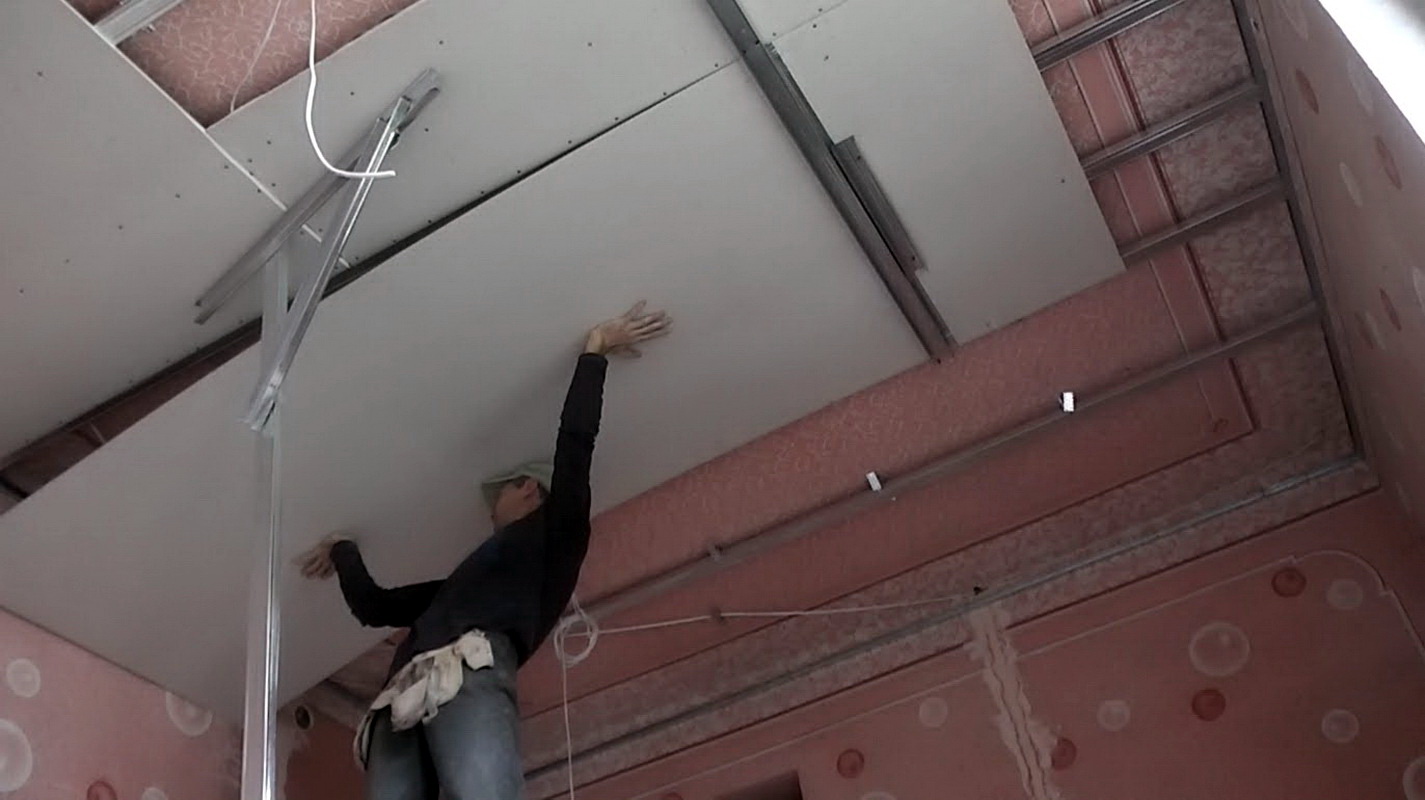
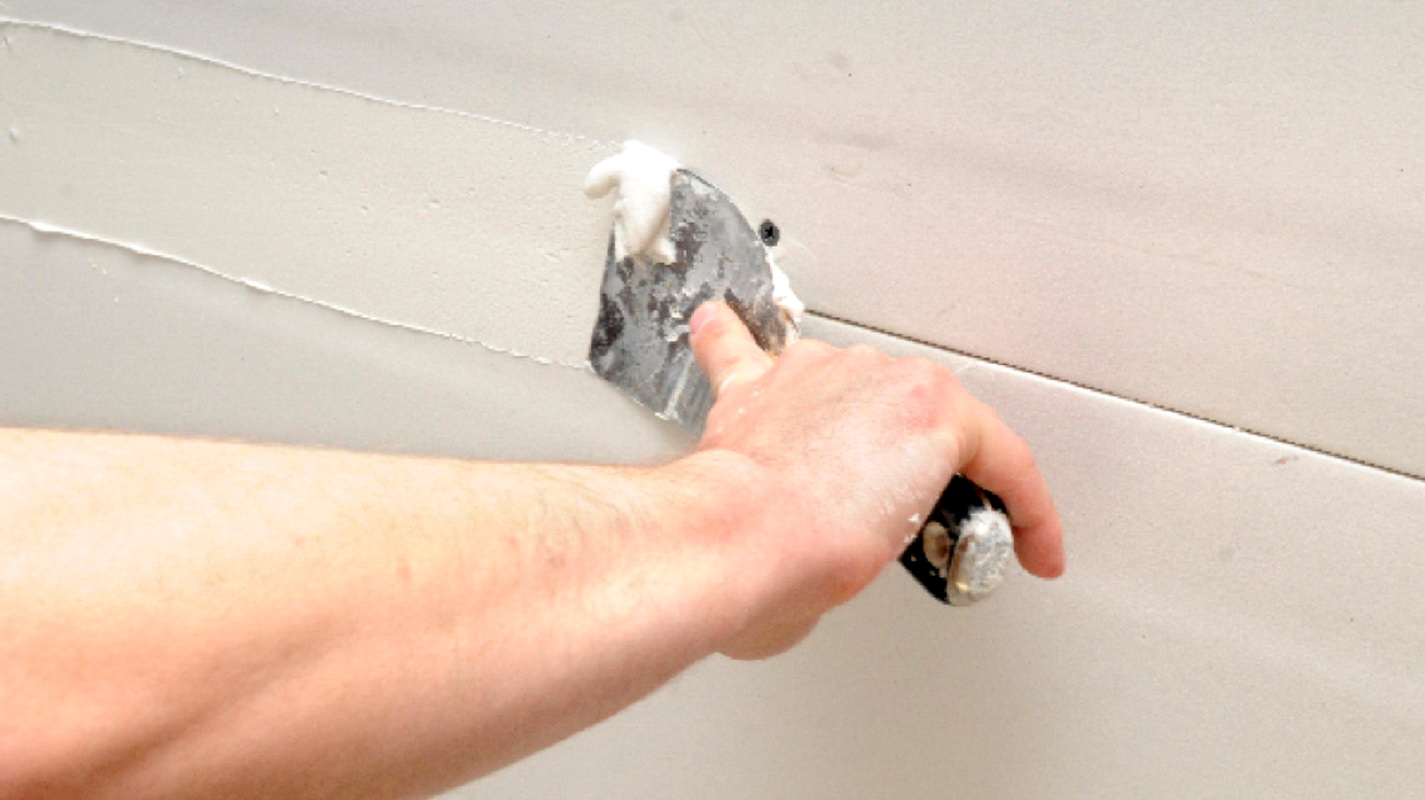
In the final stage, it will remain to putty the seams of the cladding material, remove the caps of the screws and mask the flaws that have formed.After puttying, you need to sand the entire surface in the necessary places, giving the base evenness.
You can make the finish in any acceptable way.
In order to repeat the contour of the tier with a profile, it is necessary to construct it with pieces of a certain size, the same applies to the plasterboard elements of the level board.
In the bedroom
The most comfortable room, designed to relax and unwind body and soul - bedroom. She must be comfortable, while corresponding to fashion trends.
A big role in the design of such a place is the appearance of the ceiling. Quite attractive looks square version of the design.
Single deck
This option is the easiest, it can be done beautifully by adding lighting effects. But on such a ceiling, the possibilities are limited, it is not always possible to realize everything desired. Therefore, such designs are often simple.
Two tiers
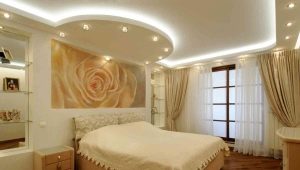
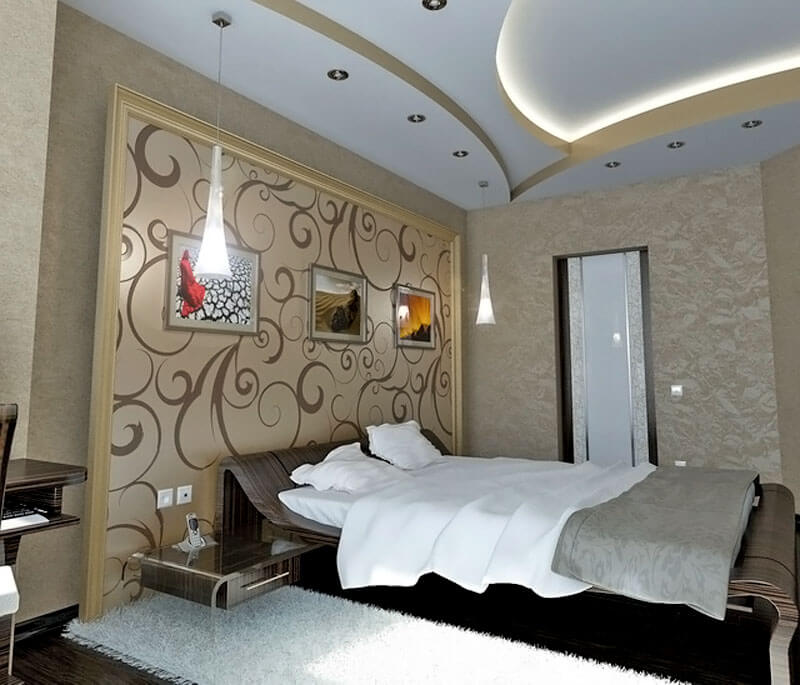
These designs will give the bedroom a visual volume and completely change the look of the whole room. Two-level plasterboard ceilings, made professionally, will create a comfortable, unique atmosphere.
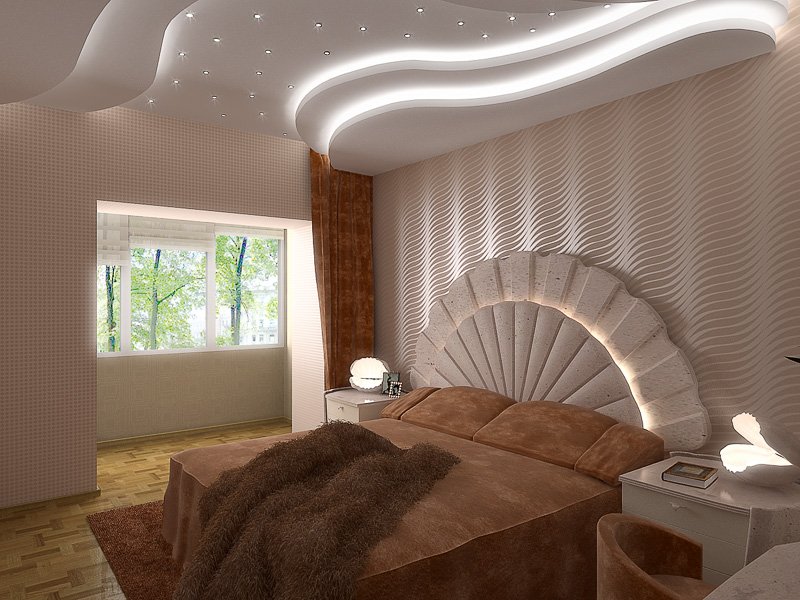
Layered
These systems are the most difficult to manufacture, such devices will give the bedroom a stately chic, add luxuryThey imply the use of various decorative forms (for example, arches, moldings) in the decoration.
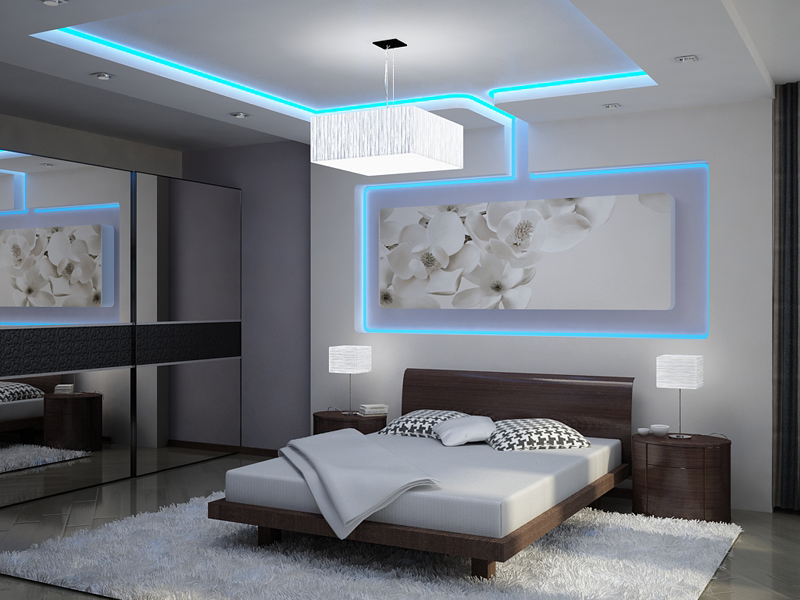
With the help of multi-level ceilings and lighting You can successfully divide the bedroom into separate functional areas, highlighting the area of the bed. The formation of different levels can visually beat the flaws of the ceiling, make it higher or lower.
A variety of lighting options makes it possible to make multi-level ceilings luxurious and elegant. That is why they have become today the key design elements of drywall constructions. The design of the ceiling for the bedroom is better to use rounded and lax forms: they will bring peace and tenderness in the setting.
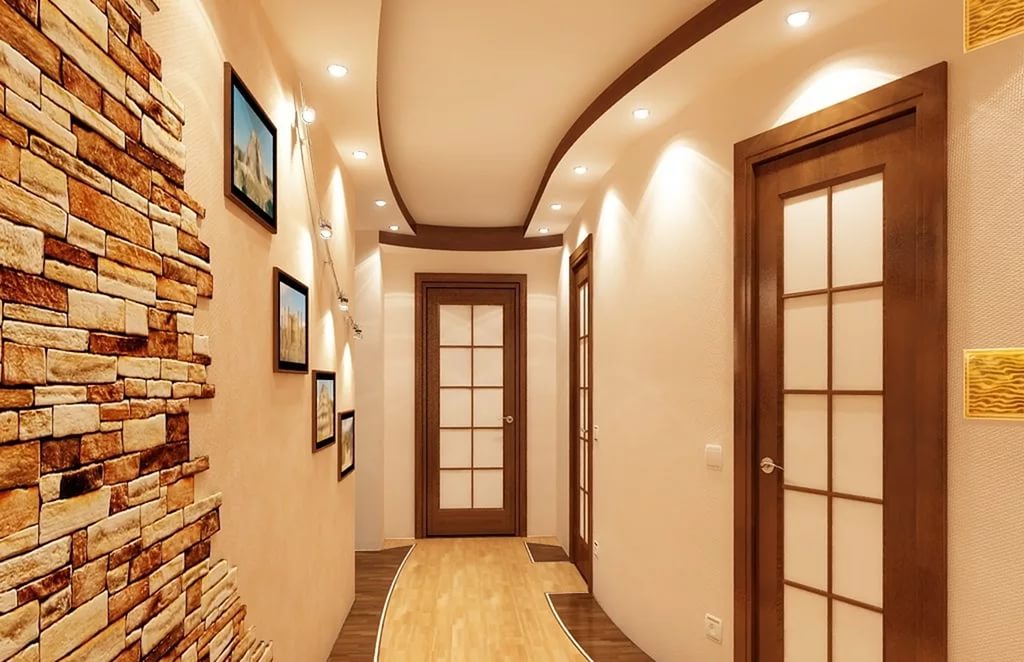
In the hall
Hallway - the look of each house. Her appearance should make a favorable impression. Furnishings and decoration should be combined with each other as much as possible. Well, if they are made in the general style. The ceiling needs to be done in the same design.
The ceiling of plasterboard with light, of course, does not make a huge room out of a microscopic hallway,but if you calculate the design correctly, you can create a visual sense of space, which is present in large rooms.
Many designers recommend ceilings with distinct geometric features for such corridors..
Niches of the correct forms, located in the center, visually expand the space of the room. If the hallway is narrow and additionally long, it is better to make geometrical niches in several places.
In the spacious hallway you can give free rein to fantasies. There is an opportunity for experimentation and improvisation. There will be various versions of the ceiling leaf to the place, since the area gives everything to create a masterpiece of any complexity and shape. Due to the quick installation and the ability to implement the most daring ideas, such ceiling surfaces have achieved recognition of design masters.
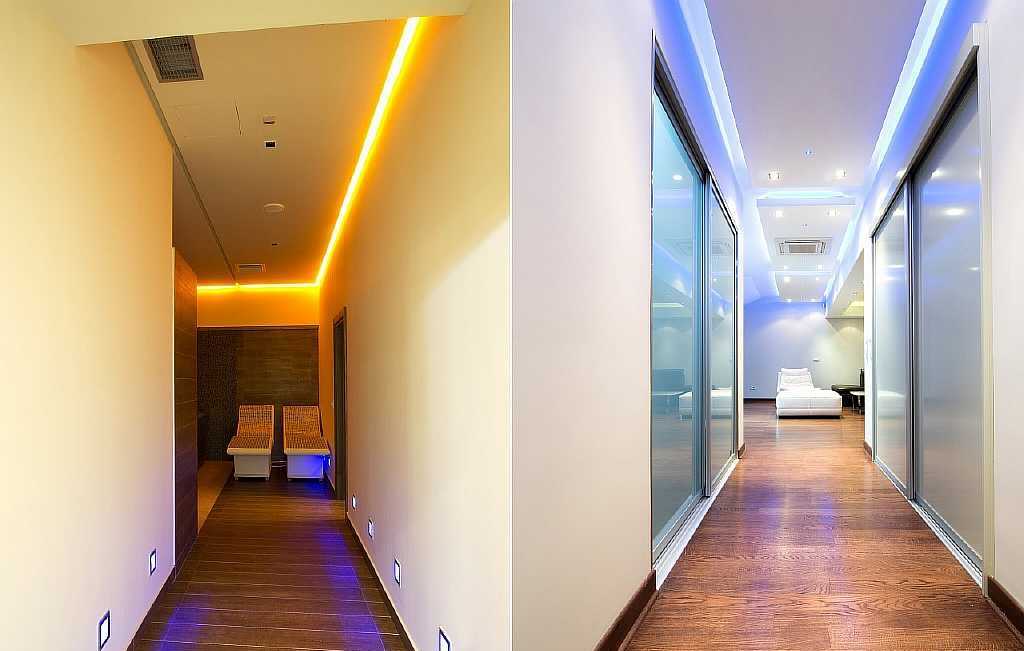
In the hallway looks great soaring split-level ceiling with a side. It must be supplemented with a diode tape.. All these tricks are capable of creating a real masterpiece even from the smallest and craziest hallway.
Tips and tricks
Although it is easy and simple to work with drywall, there are some useful tips for creating harmony in design.
We note the main criteria:
Room height
This is the main parameter, it can significantly affect the design capabilities. With low ceilings, the slightest loss of space can adversely affect the interior as a whole.. There are ready-made versions of multi-storey structures suitable for low rooms.
A variety of drywall constructions can make it possible to make a beautiful ceiling even in low spaces.
Lighting
If the room is poorly penetrated by natural light, you need to focus on the lighting and the choice of ceiling options. Additional backlight with adjustable light level will add the desired lighting.
The simple design of the white plasterboard ceiling will make the room visually lighter.
Color solution
Color - the main detail of comfort. It psychologically affects the person. Consider its effects on humans.
Red
Aggressive color is suitable for non-residential premises or as separate elements of decoration. If you want to use a bright, rather catchy shade, it is better to use its soft shades.

Yellow
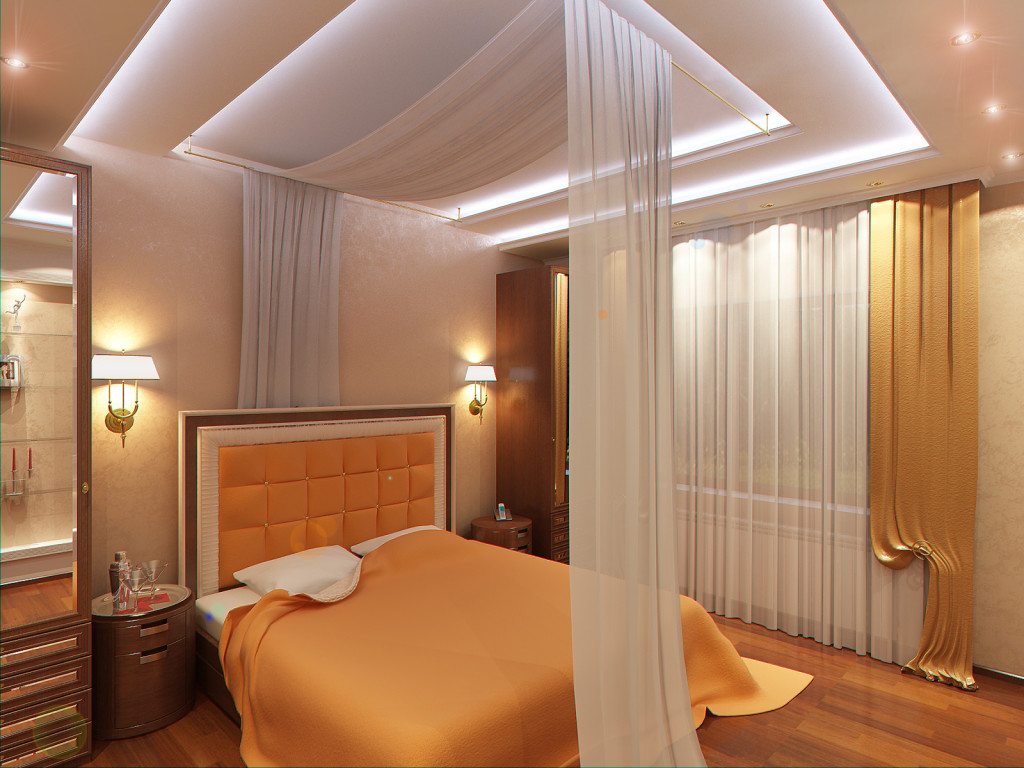
Good for bedroom.Warm and cozy color relieves fatigue. It is advisable to use it in multi-level ceilings with the addition of an orange shade or dark variations of the primary color.
Green
For ceilings, rooms use herbal, light and gentle tones. Ideally, the floral theme of the interior will look. The life-affirming coloring will give a charge of cheerfulness in any weather and time of day.
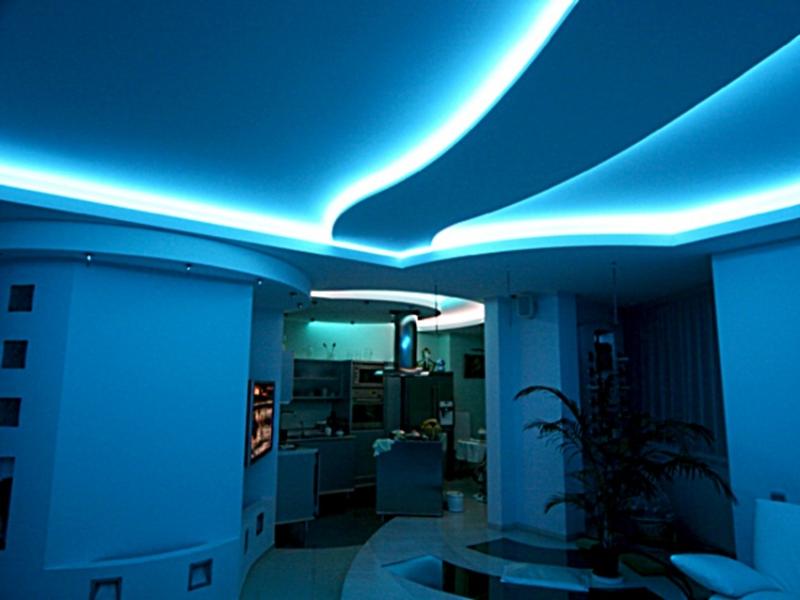
Blue
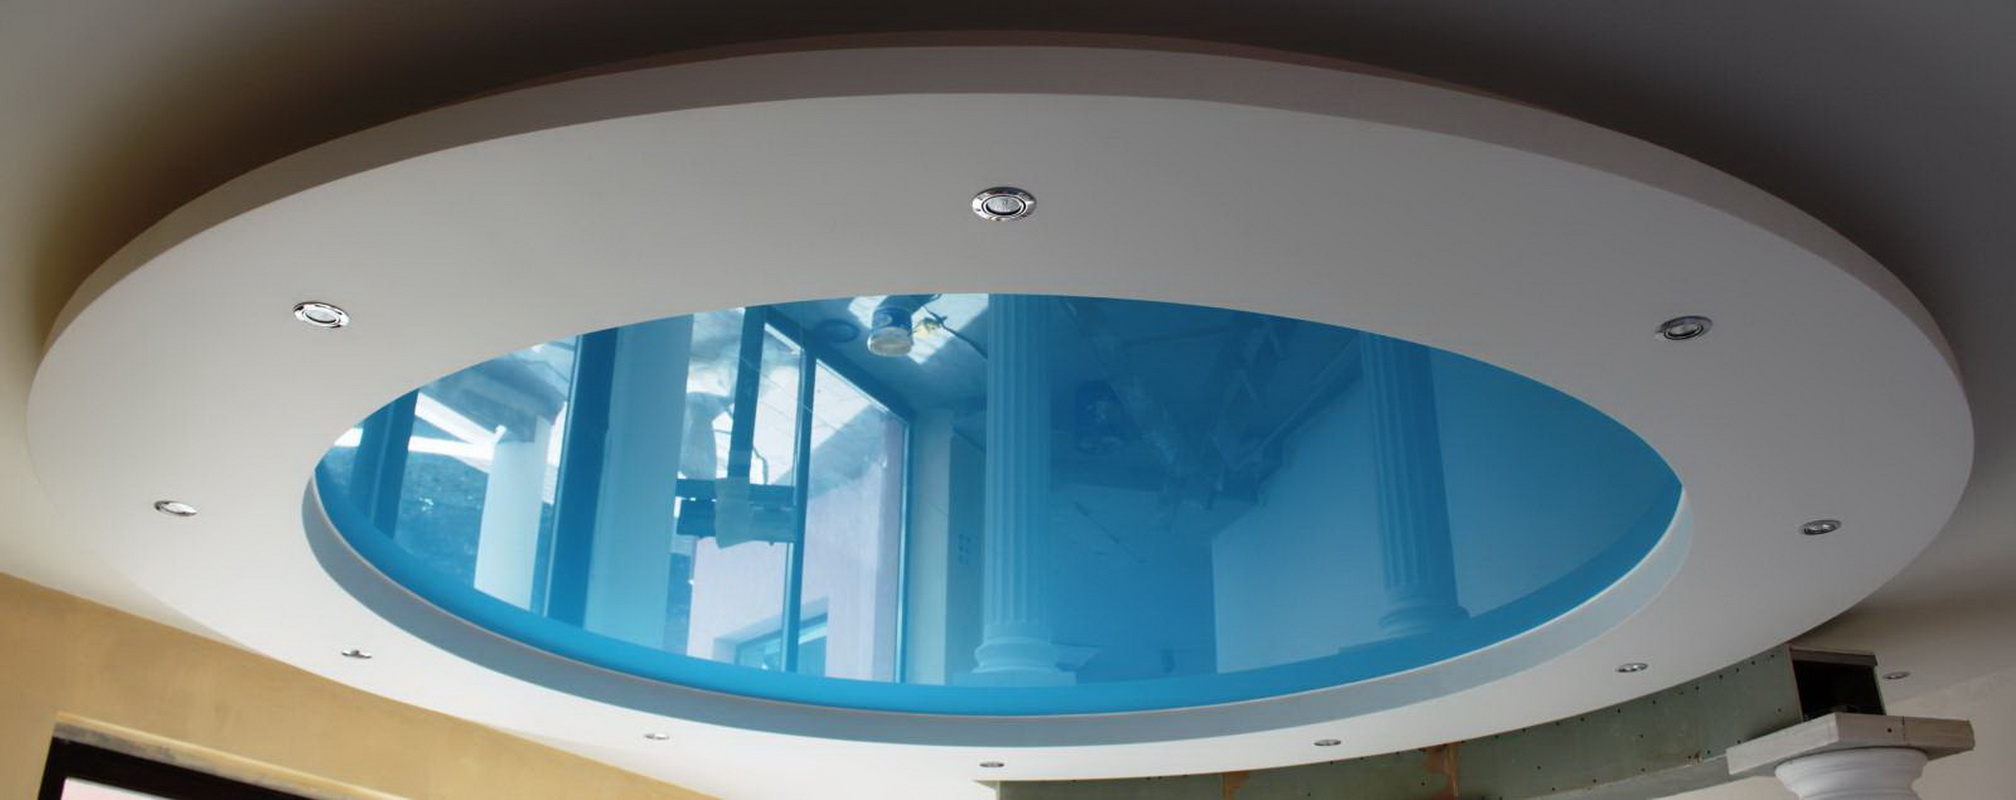
The perfect color scheme. If the room is low, this color will greatly expand the space, give it lightness. It is successfully used in various ceilings and adorns the single-level, three-level version. Well suited for an oval ceiling.
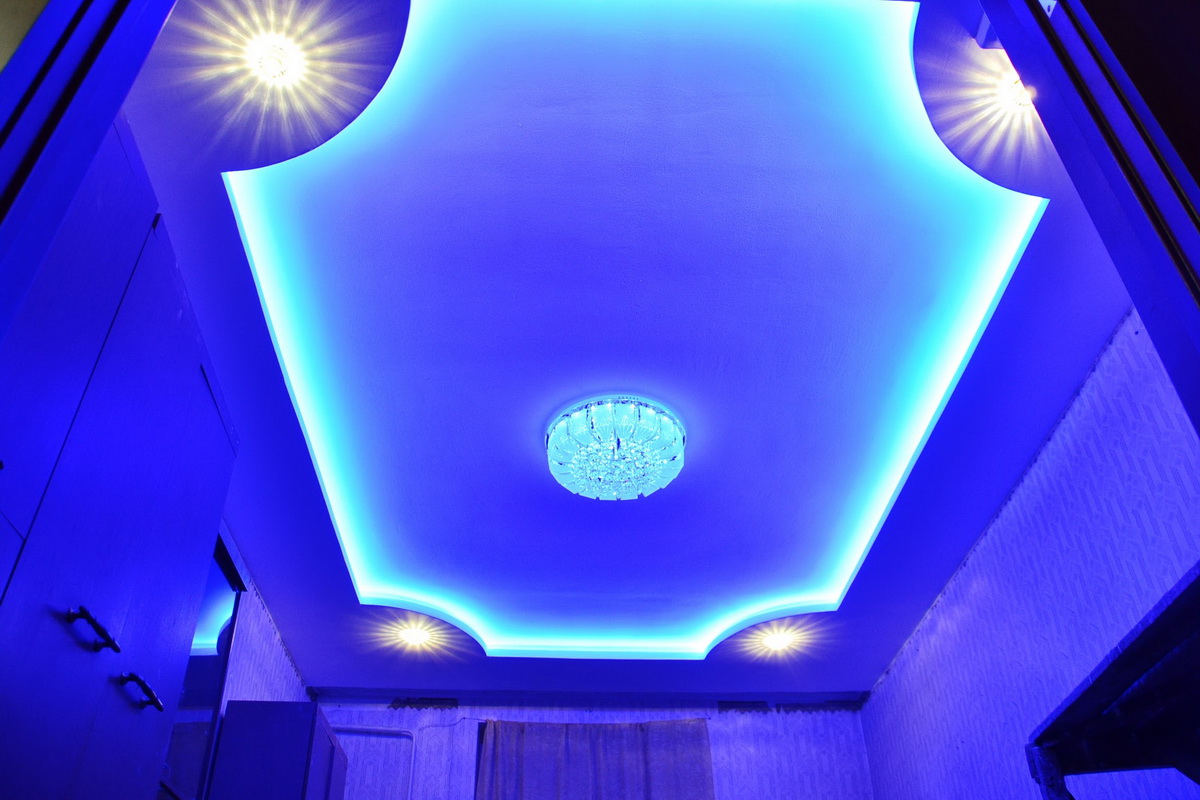
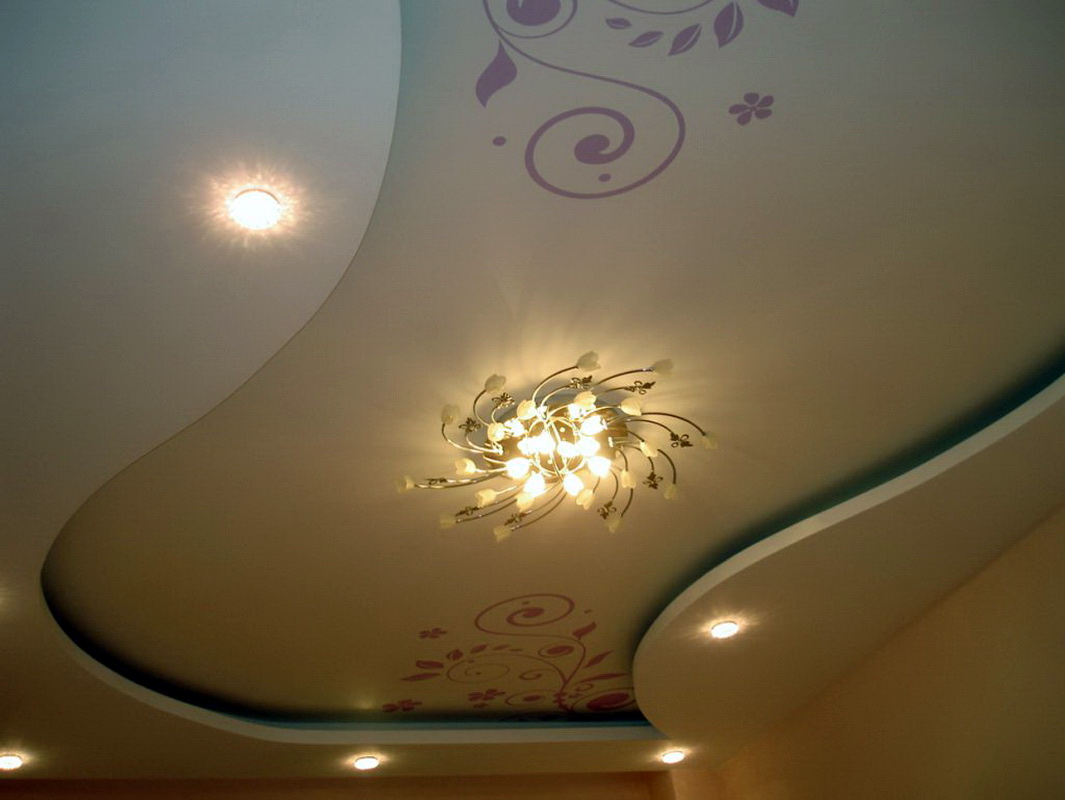
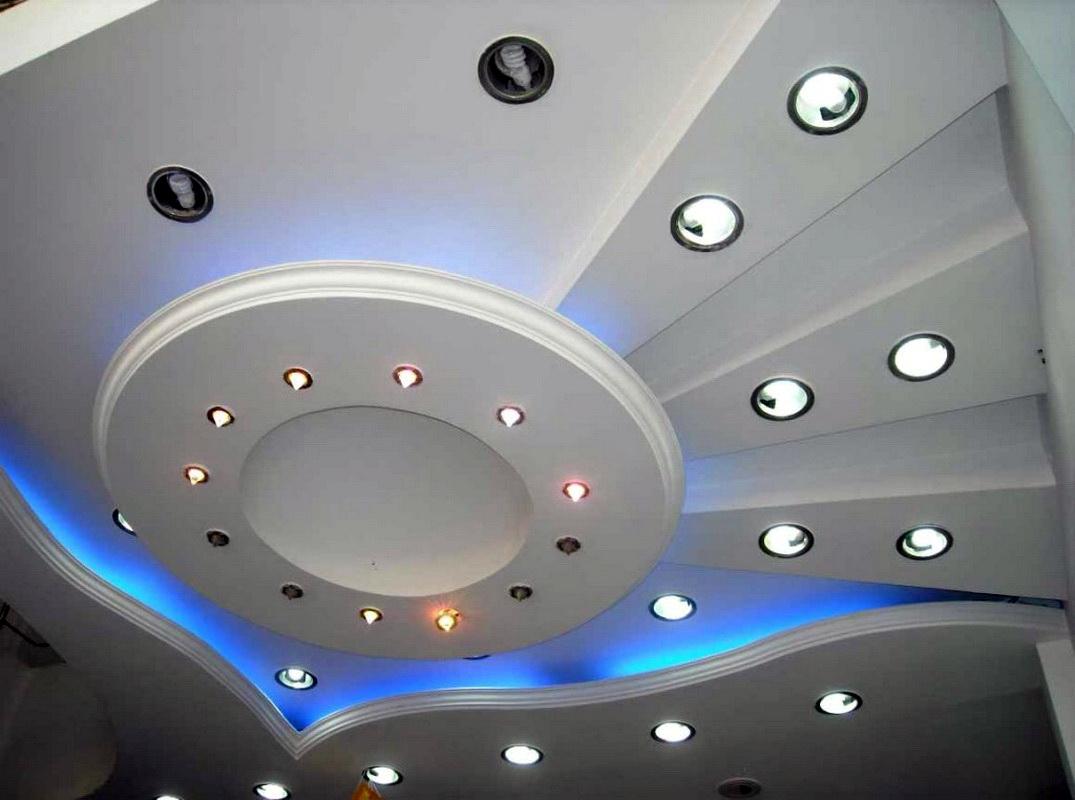
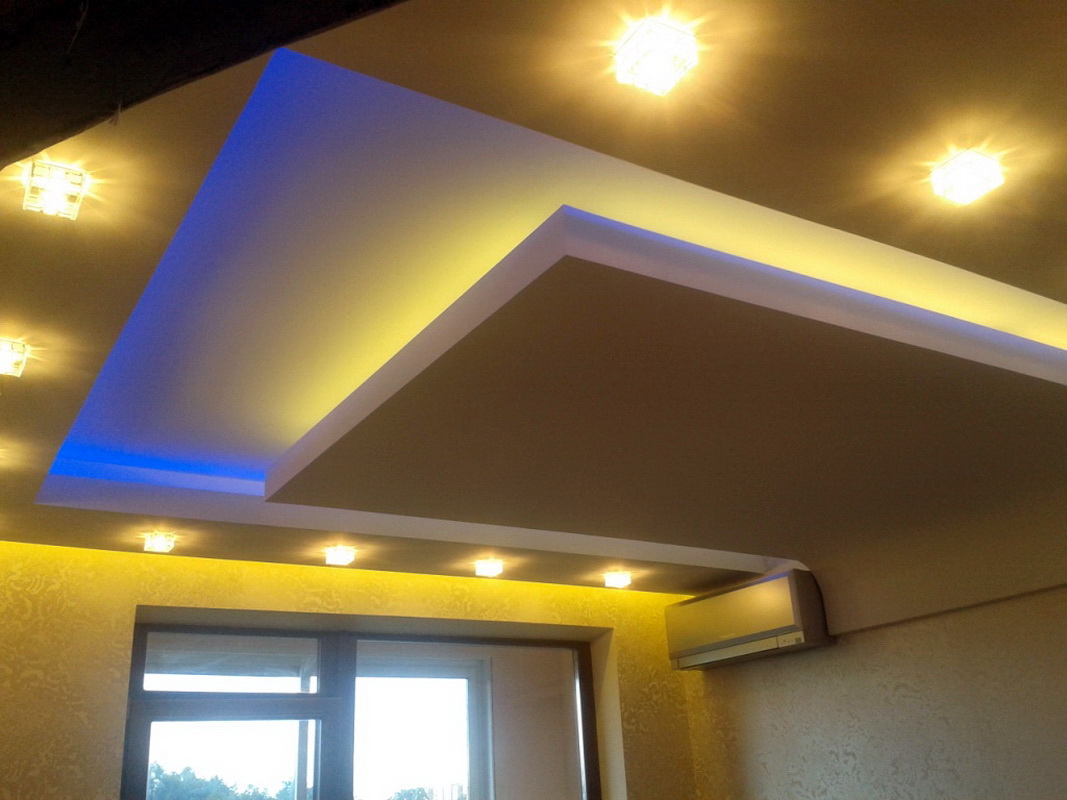
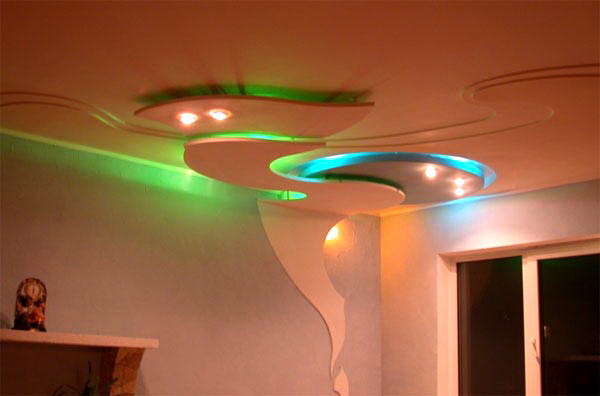
Successful examples and options
Ceiling designs of plasterboard sheets using a variety of illumination.
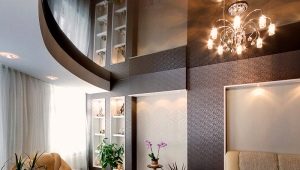
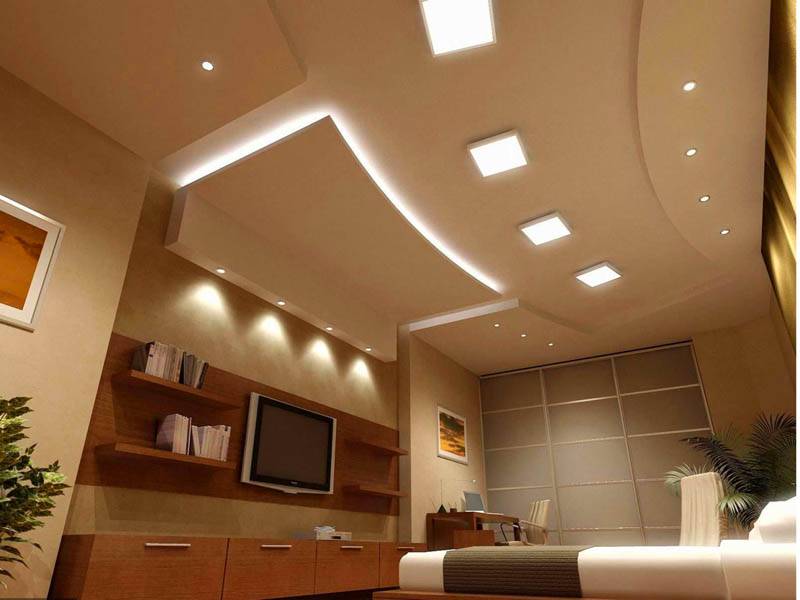
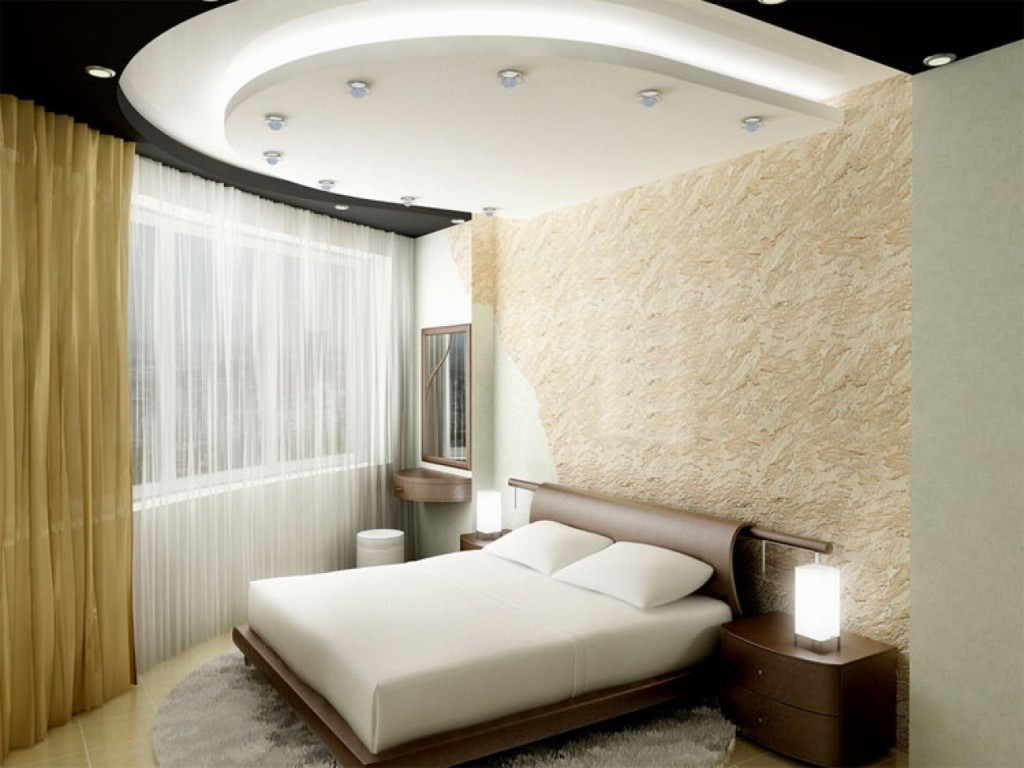
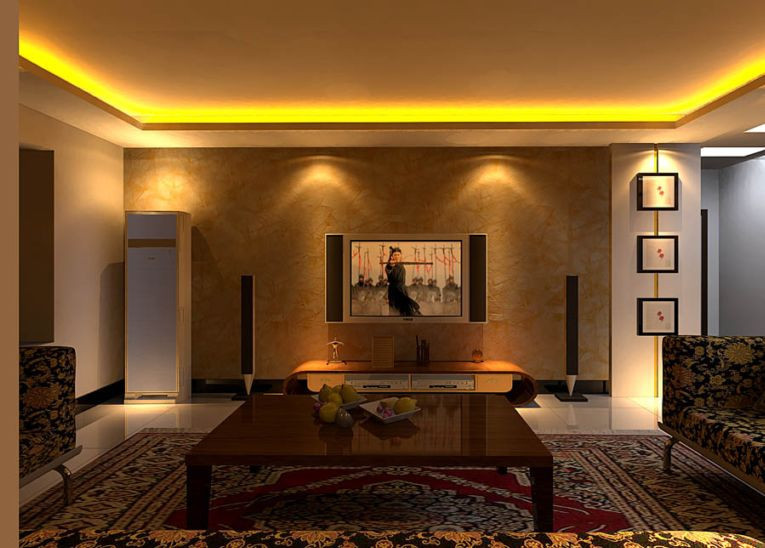
- Suspended ceiling using drywall boxes and multiple light sources. In the center is a chandelier, there is a spot lighting and LED strip. You can use this option without a chandelier, if the room has enough natural light. From the bottom there should be a shelf in the same color.
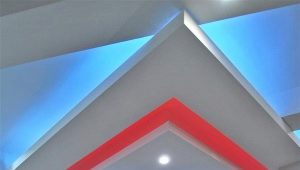
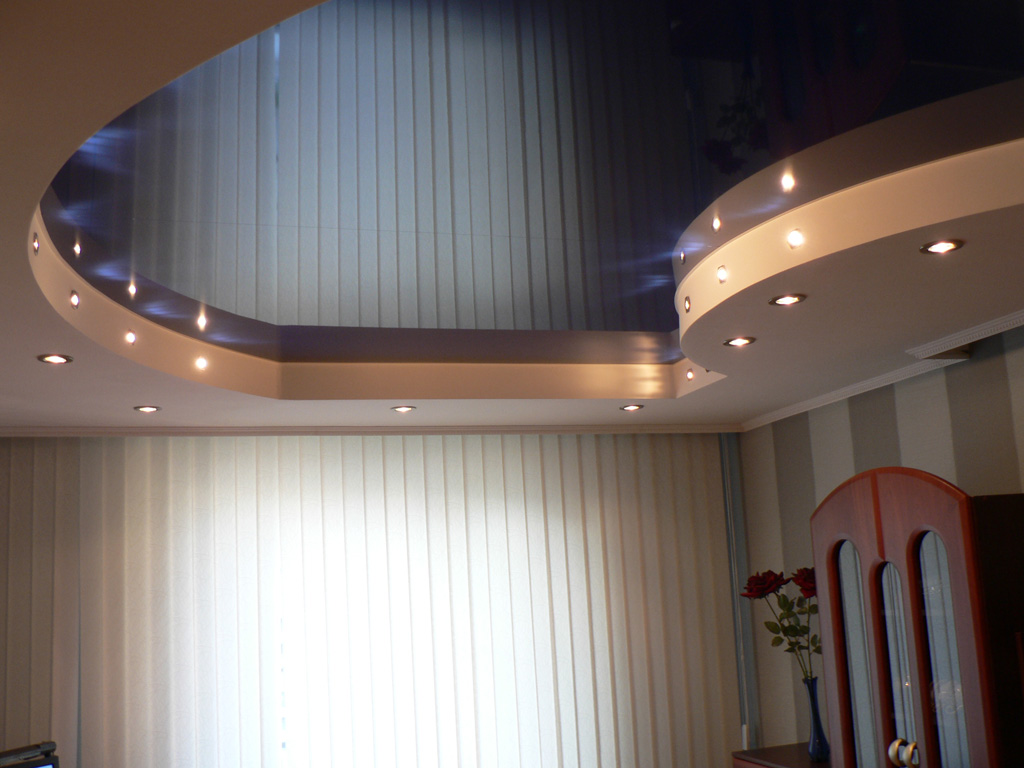
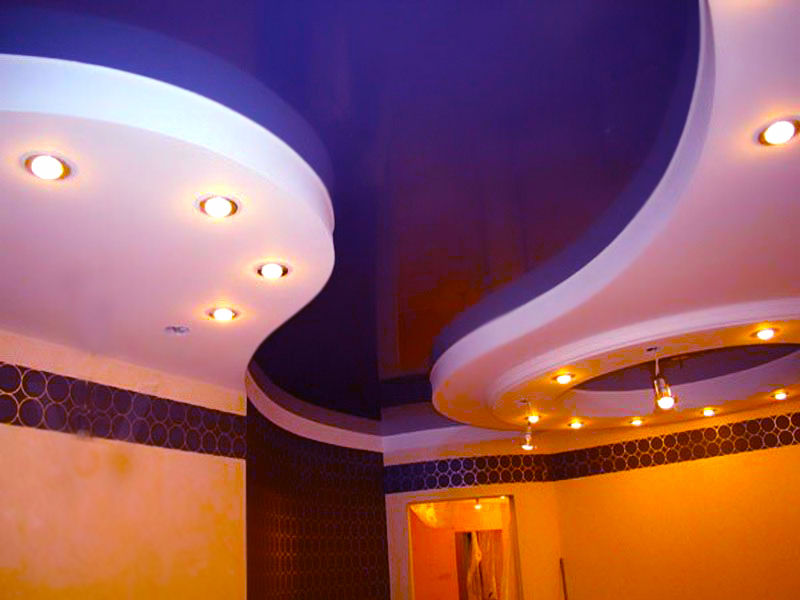
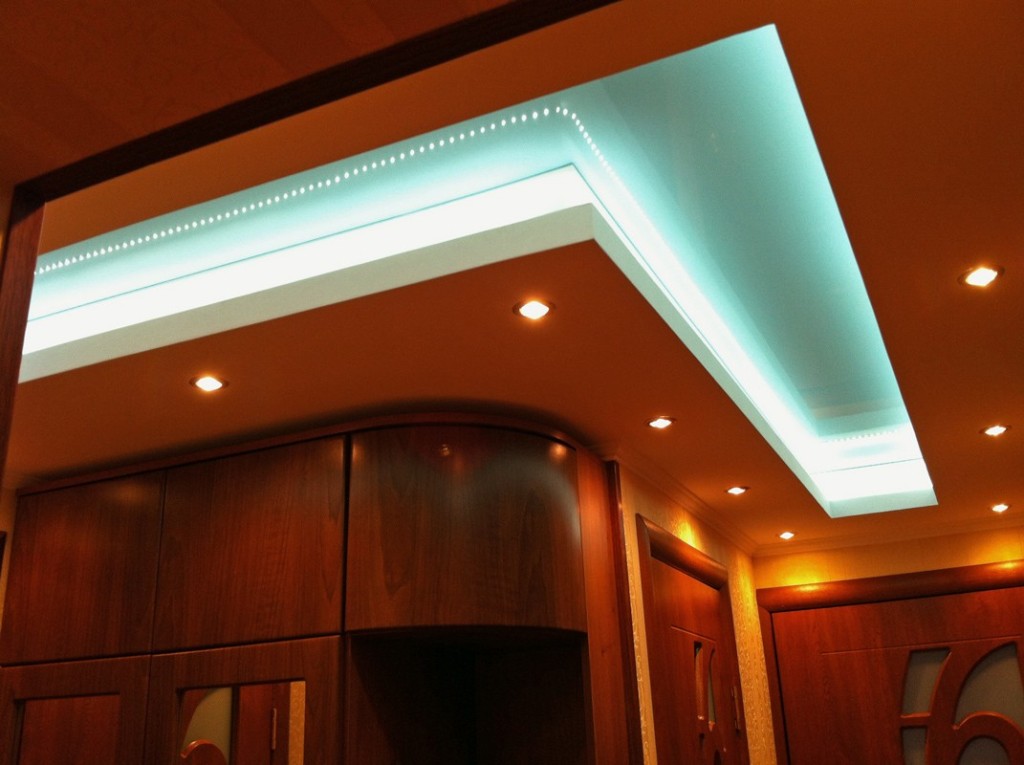
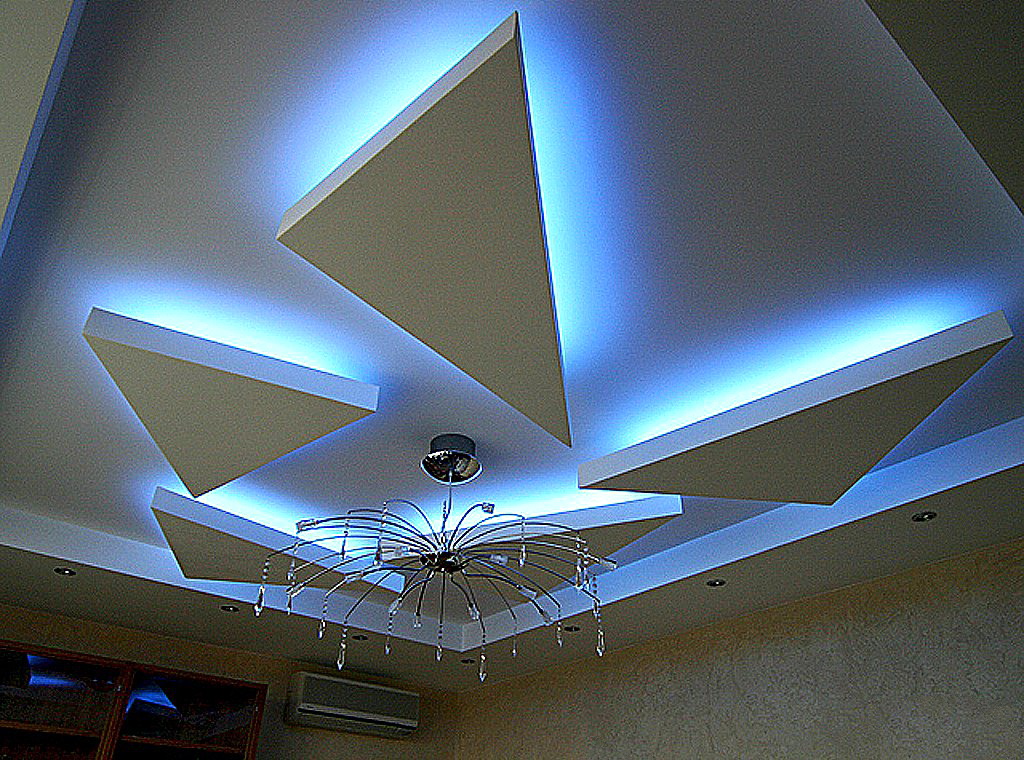
- Multi-level design with hidden LED and open point light. A spectacular way to design rooms for any purpose.
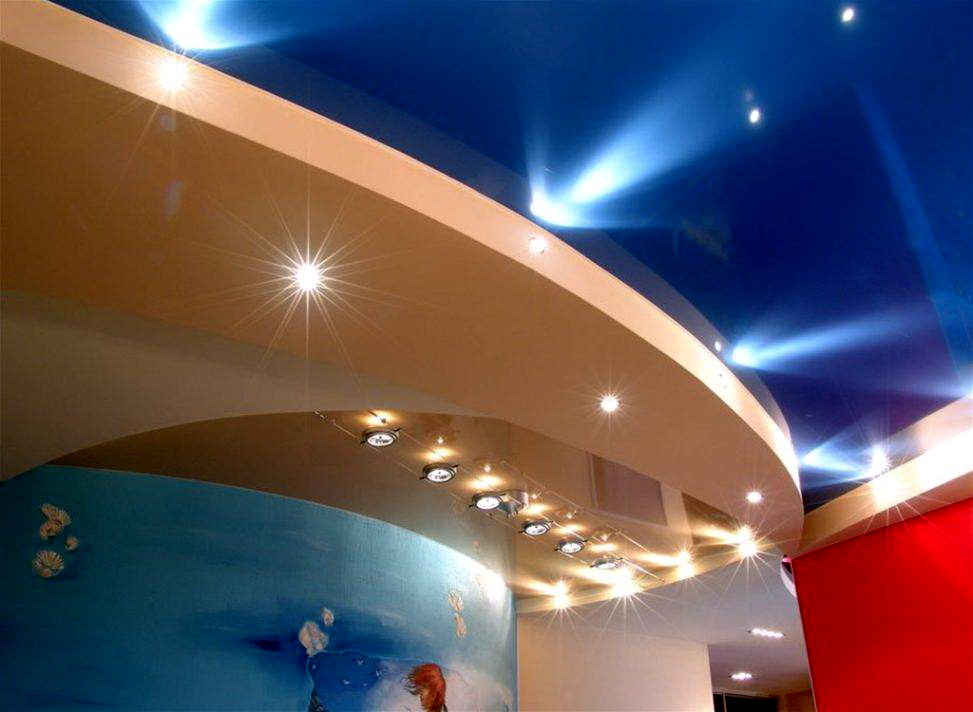
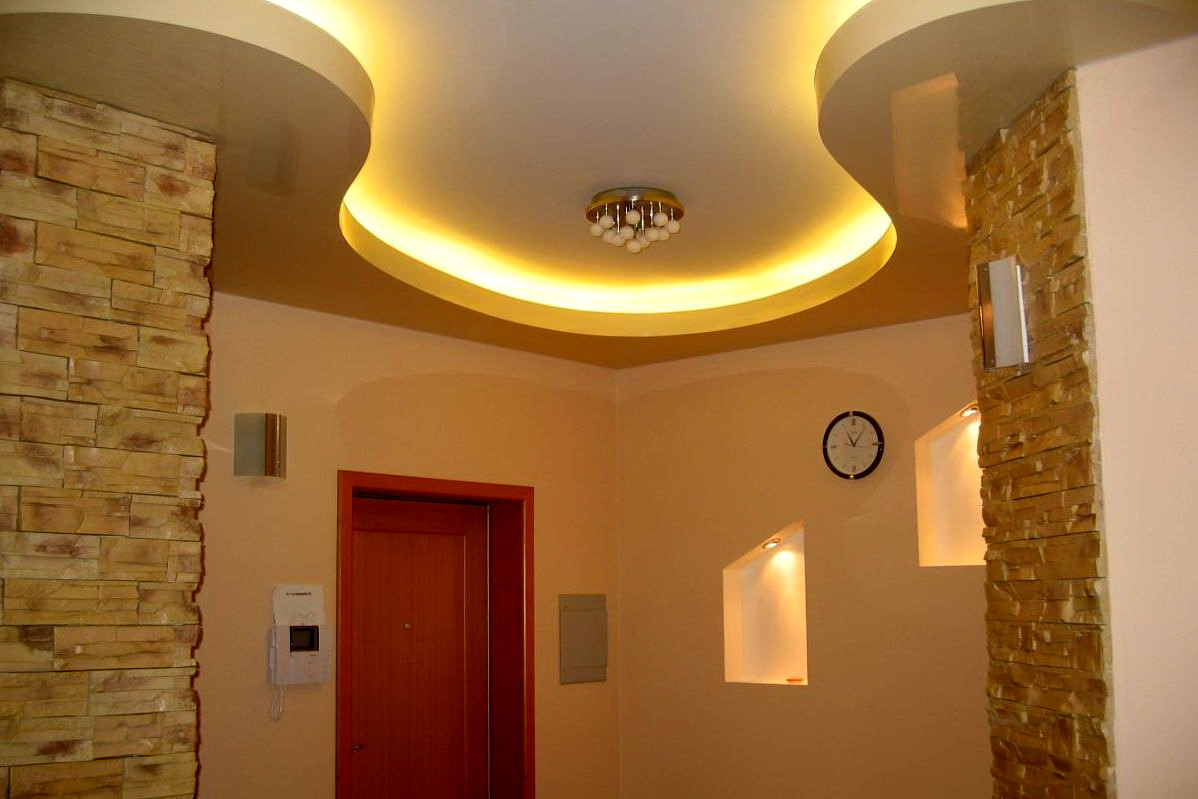
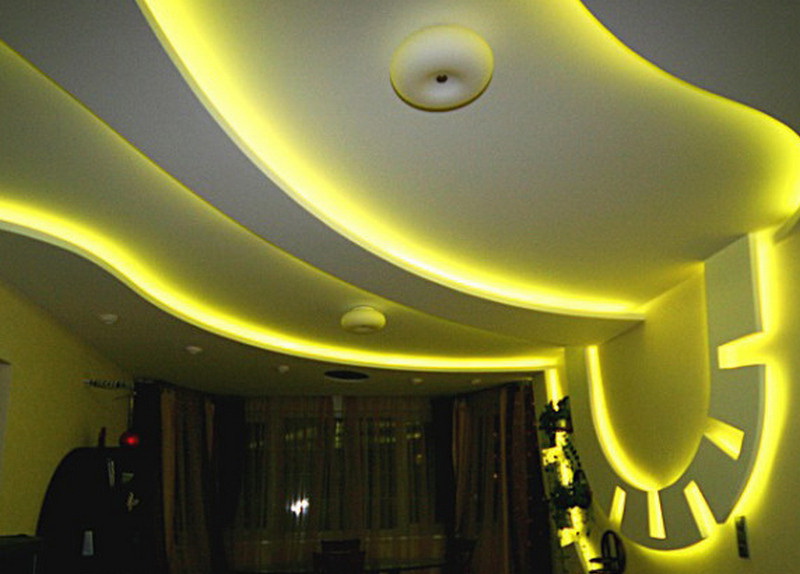
- Partial transition of the plasterboard ceiling to the walls of the room. Illumination of different colors adds uniqueness and originality to the design.

On the features of the installation of the ceiling of plasterboard with lighting will learn from the following video.