Step-by-step instructions for installing self-leveling floor

Bulk floor is in special demand among modern buyers. Mounting it does not require any special skills. Step-by-step instructions for installing self-leveling floor proves it clearly.
Special features
In appearance, self-leveling floors are somewhat similar to linoleum. If you touch them, they are rather like ceramic tiles with an increased level of smoothness.
This flooring has no gaps, seams, it belongs to the category of monolithic. Bulk floors of various shades are on sale: one-color, multi-colored with drawings and without.
The thickness of this flooring can also be different - from one to seven millimeters.
The main advantages of this floor:
- Simplicity and versatility of application. Bulk floor consists of 70% self-leveling mixture.It can be mounted under a concrete screed, and you can also on a wooden base. A self-leveling floor will look perfect anyway.
- High level of resistance to shock and any mechanical damage. This plus allows you to mount the self-leveling floor in the apartment, in a private house or even in the office. It can be laid in any room: in the bathroom, toilet, living room or even in the kitchen.
- High level of wear resistance of the upper abrasive layer. This advantage allows you to fill the floor once and for many years enjoy its impeccable appearance and brightness of colors.
- Fireproof. All floor coverings of this type sold today have a high level of fire safety. When it occurs, the floor does not burn, but very slowly begins to glow, thus avoiding the rapid spread of fire.
- Immunity to aggressive chemical compounds and complete safety for health and nature make it possible to flood this floor in catering establishments, in children's institutions and hospitals.
- Maintainability. It is possible to eliminate small defects, using special repair structures.Large flaws can be blocked by other coatings, for example, tile or linoleum can be put on top of a self-leveling floor covering.
- Long service life. On average, the warranty period is 10 years. With proper care, professional installation and carrying out timely repair work, this period increases to 15-20 years.
This cover has some disadvantages:
- High price.
- Low level of vapor protection.
- The need for additional sound insulation.
- Low thermal conductivity.
- Long installation.
- The need to use special tools.
The advantages of the self-leveling floor is still more than the disadvantages.
Therefore, the demand for such a floor is only growing.
Types and characteristics
Self-leveling flooring is divided into several types, depending on its composition:
- Polyurethane used most often in the private sector. It is characterized by ease of installation, long service life and attractive appearance. This coating is characterized by increased resistance to shock, moisture, steam, abrasion. Suitable for installation in warehouses and industrial premises.The polymer floor has a high level of hygiene and safety. The downside is the high consumption of funds and the need for detailed floor preparation.
- Methyl methacrylate designed to create flooring at production facilities: in the automotive industry, pharmaceuticals, in warehouses of various types. Differs in high resistance to ultra-violet radiation, does not react to sharp and fast temperature drops, has the increased crash-worthiness. The downside is considered to have a strong peculiar odor during operation and rapid solidification of the mixture.
- Epoxy coating It gained the greatest popularity in the production of chemical aggressive reagents. Differs in the increased durability, resistance to attrition and immunity to various chemicals. Can be used in the private sector. The disadvantage of this floor is considered a low level of its elasticity.
- Cement acrylic coating Originally created for objects related to the food industry. It is characterized by a high level of hygiene and safety, good wear resistance and long service life.Now actively used in the private sector. The only disadvantage of such a self-leveling floor is labor-intensive installation.
Depending on the appearance of self-leveling floors can be:
- Monochrome. The hue is chosen by the buyer and can be absolutely anything, sometimes you can find a transparent floor. The surface itself is matte or glossy. This type is suitable for both domestic and private use.
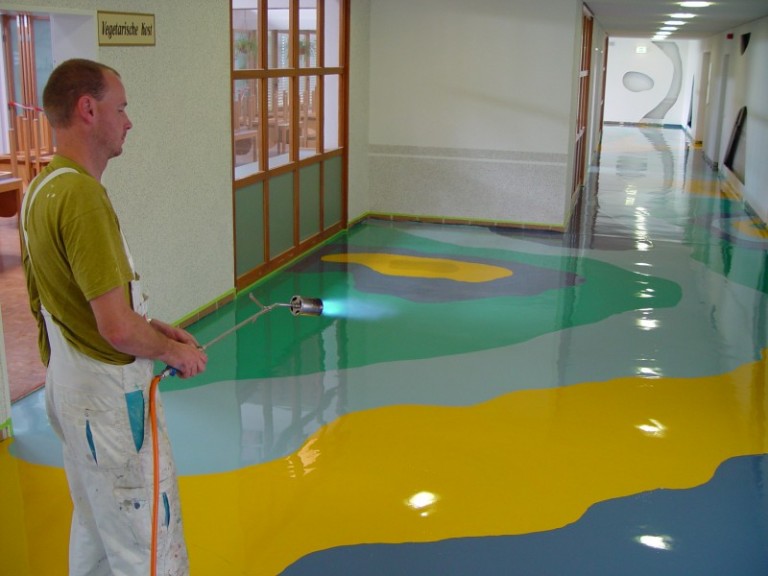
- Multicolored. Here it is assumed that the base of the floor has one shade, and the pattern on it is painted in a different color. The flooring of this type always looks unusual and attractive. Self-priming colored flooring is usually mounted at home.
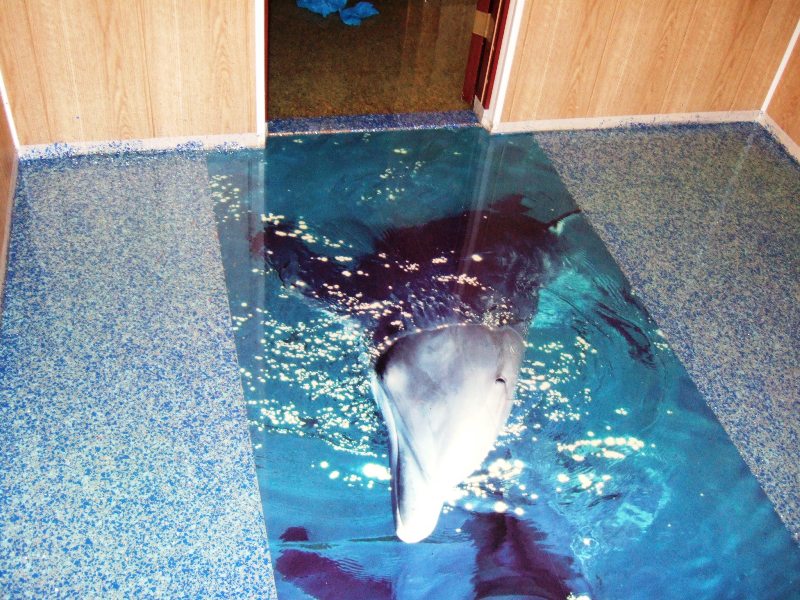
- 3D filler covers - This is one of the new products. In them, the drawing is created in a special way, thanks to which a three-dimensional image is recreated. Such a decorative floor creates the illusion of complete immersion. It can be created both with use of a photo printing, and without it.
To mount any kind of this flooring is possible only using special devices and tools.


Composition and materials
Materials of manufacture of each type of self-leveling coating are different.The main component and gives the name of a particular species.
As the main components of the mixture emit:
- Cement, aggregate of high strength and polyacrylate copolymer. This is the main composition of the cement-acrylic floor.
- Epoxy coatings are based on liquid epoxy resins and special hardeners.
- Methyl methacrylate quick-hardening floor is made on the basis of methyl and acrylic resins.
- The main components of the polyurethane flooring are polystyrene foam, hardeners and synthetic resins.
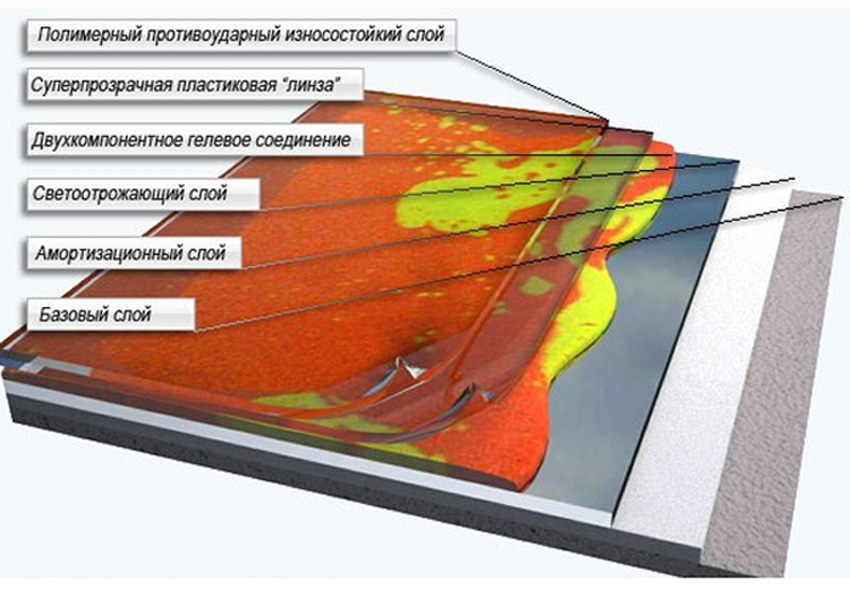
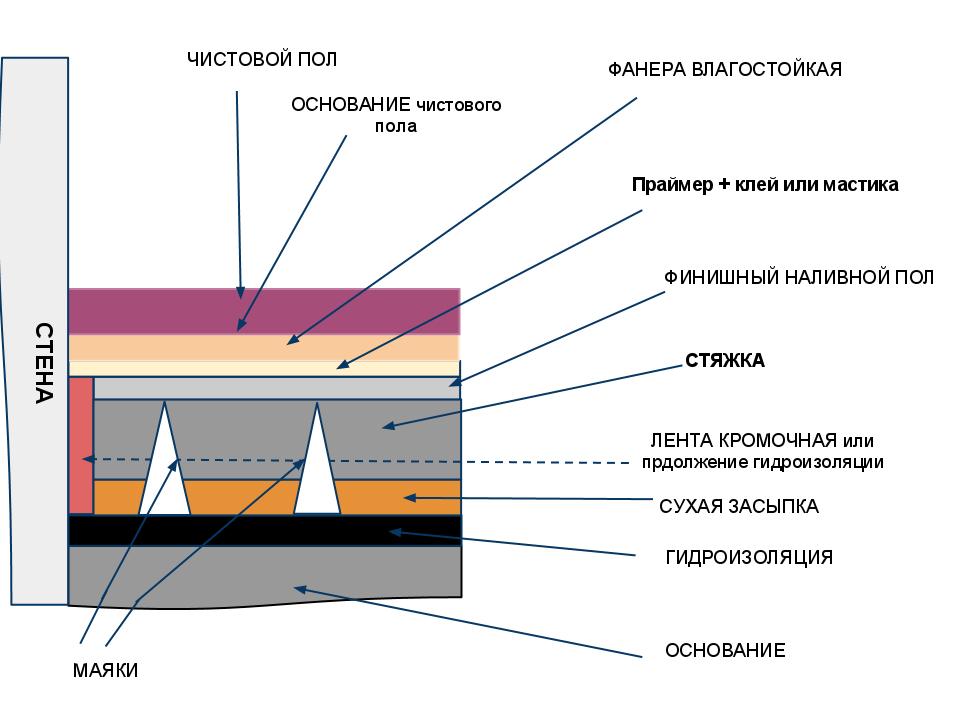
Self-leveling floor consists of several layers. Therefore, it makes sense to consider the composition of each layer, and not just the top coating.
Be sure to perform the primary concrete pour the working surface. For this purpose, ready-made cement mixtures are used. They are composed of sand, cement, bitumen mastic or bitumen and additives based on polymers, such as penlex.
It is sometimes wiser to use gypsum screeds, rather than cement dry mixes. They are made on the basis of gypsum, and as additional ingredients are mineral fillers, expanded clay in crumb.
Depending on the manufacturer, the composition of the self-leveling floors may also include marble, ceramic granite, tar, screenings or fractional crushed stone, plywood in small quantities.
How to do?
It is possible to make a self-leveling floor in your house with your own hands.
It is necessary to begin work with the preparation of tools:
- large spatula;
- special kraskoosty for the passage on the newly flooded floor;
- tanks for the preparation of mixtures.
- construction mixer or drill with a suitable nozzle;
- level;
- rakla;
- roller with large needles.
These tools will be required directly to fill the floor. Preliminary work may require the use of other things depending on the type of floor.
Now you need to prepare the very basis for further work. If it is wooden, then you should remove the baseboard, replace rotten boards, free the entire surface from paint. In the end, it is necessary to eliminate all the gaps and thoroughly degrease the surface with a special solution.
If the foundation is concrete, the procedure will be as follows:
- dismantling the remnants of the old coating;
- remove debris, dirt and dust.
- Measurement of the moisture level of concrete.The best is considered an indicator of 4%.
- Elimination of any irregularities grinding machine.
- Measuring the level of the floor, as well as checking its durability device Dean.
If the old base is a ceramic tile, then it is necessary to check its reliability of fastening. Any chips and cracks should be removed, and tiles that are too damaged should be replaced with a new one. The final stage is the degreasing of the working surface.
Now you need to carefully align the base. For this, a primary primer is performed. After it, large irregularities and cracks disappear, and the base itself becomes less dusty. In order to do the job correctly, you must first install beacons. This is done so that during priming the entire surface of the base is leveled evenly.
If the substrate is too porous and has rather large flaws, it may be necessary to re-primer. It is performed only after the previous level is completely dry.
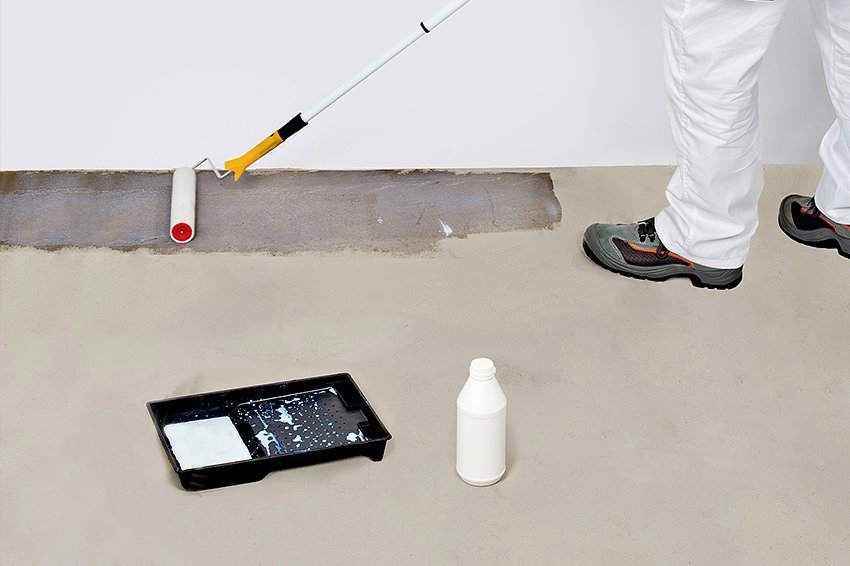
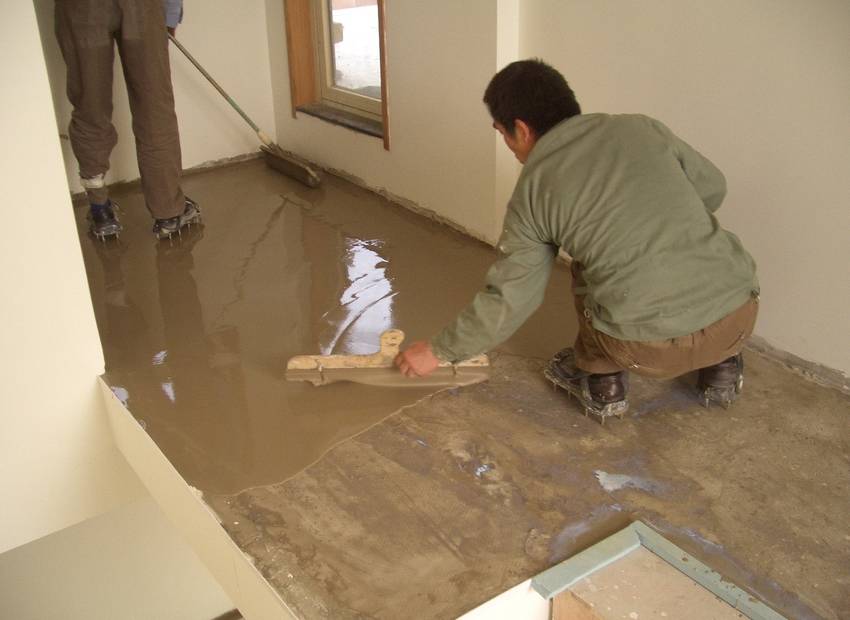
It is necessary to carry out the priming of the surface with a special wide roller followed by leveling with a spatula. It is even better to give preference to self-leveling compounds.It is better to use with them not ordinary beacons, but rappers and squeegees. Diluting self-leveling mixtures is strictly according to the instructions, as each manufacturer will have its own recommendations on this.
Sanding the base, made after the primer, will ensure perfect smoothness of the floor, and therefore, achieve a more dense adhesion of the self-leveling floor with the base.
Fill technology
Self-leveling floors of this type must be filled in stages:
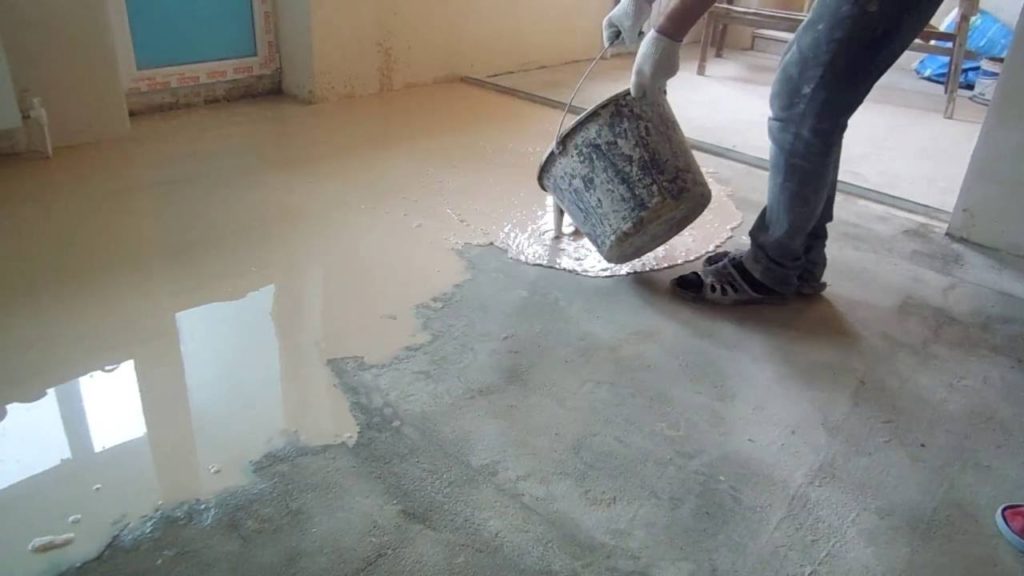
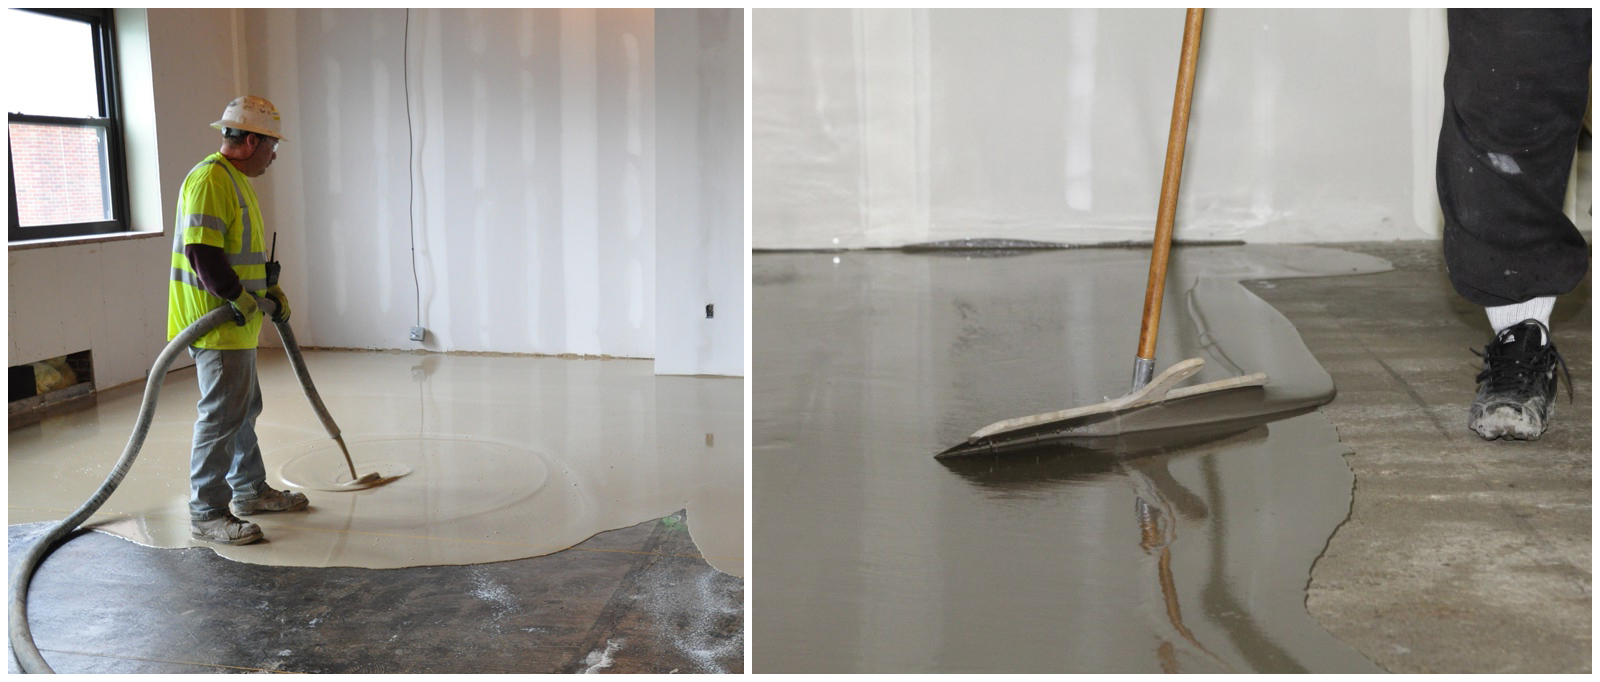
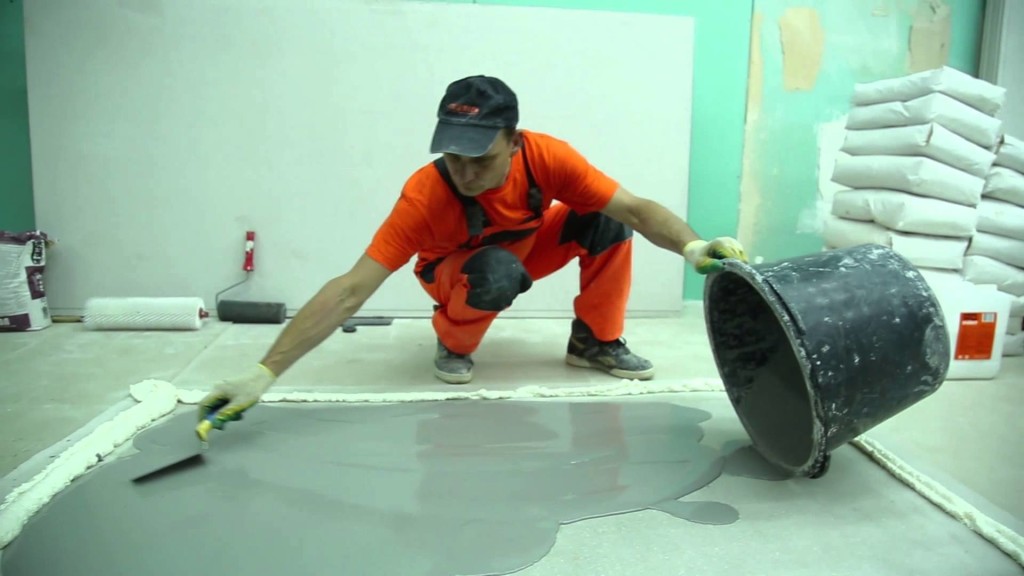
- Preparation of the mixture. To do this, put the dry mixture into the container, then pour it with water in accordance with the manufacturer's recommendations and mix it thoroughly with a mixer or a drill. It is important to pour as much water as indicated by the manufacturer. With more of it, the floor will be too fragile and faded, and with a smaller volume it will harden too quickly and may subsequently burst.
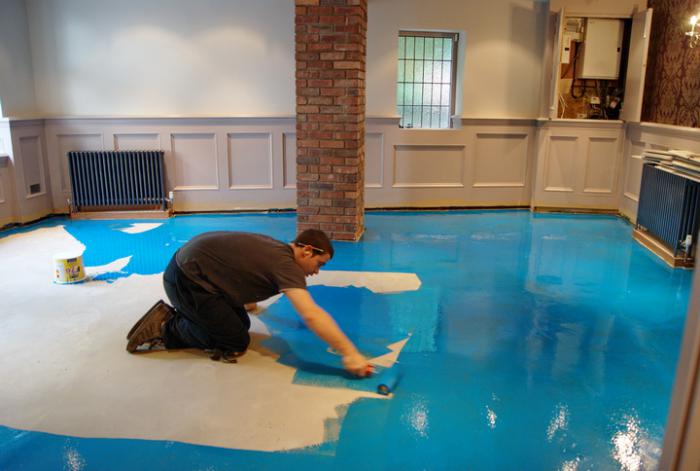
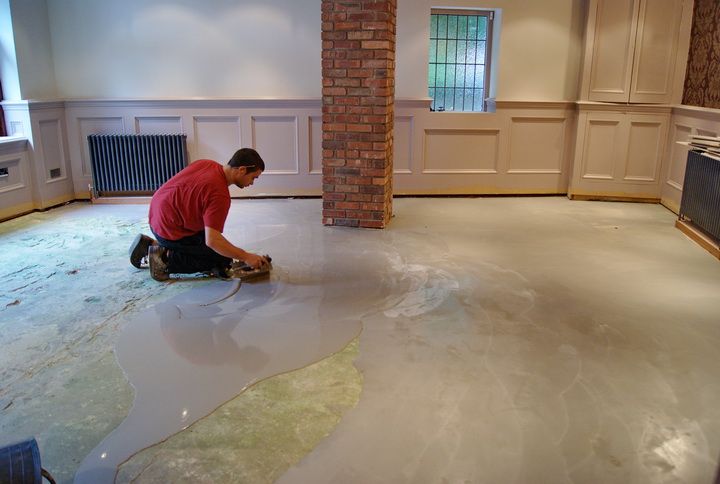
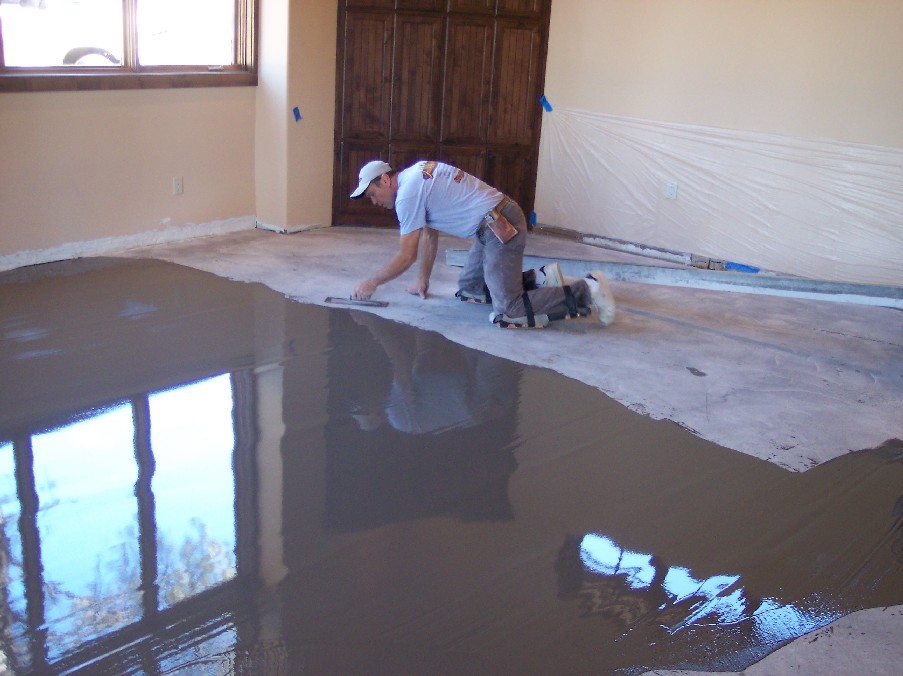
- As soon as the first portion of the mixture is ready, it is necessary to pour it in the corner of the room farthest from the entrance. While it will spread independently, it is necessary to prepare the second portion, which is poured next to the first.
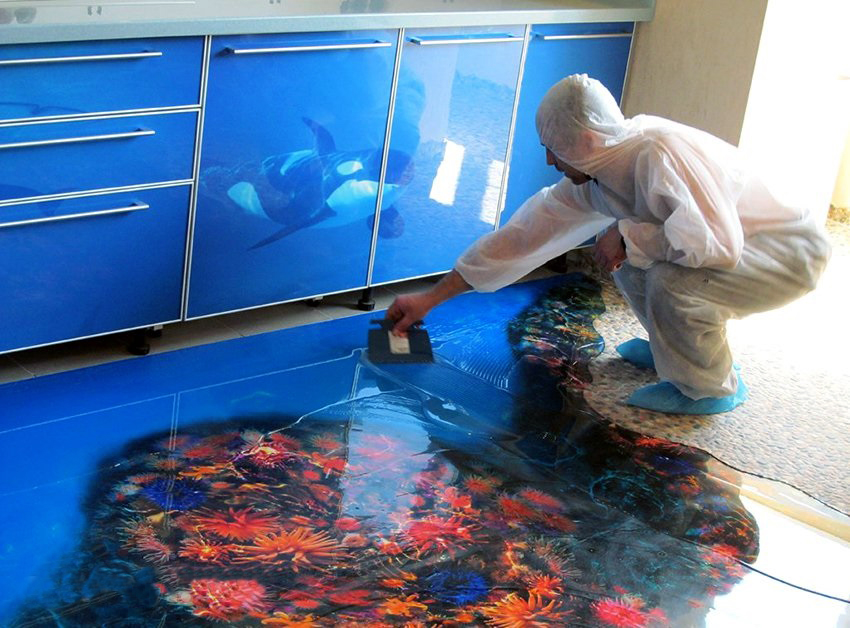
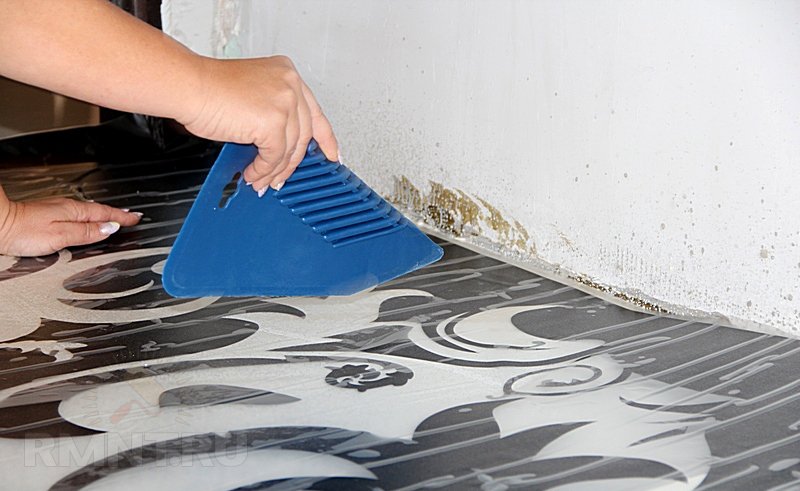
- After that, the mixture must be leveled with a wide spatula and with the help of a squeegee, adjust the thickness of the self-leveling floor.
- The repeated smoothing of the self-leveling mixture and the adjustment of the thickness of its layer should now be carried out after pouring out each new portion until the entire floor has been filled.
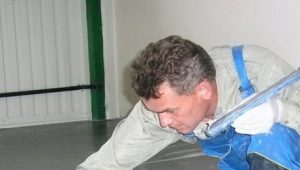
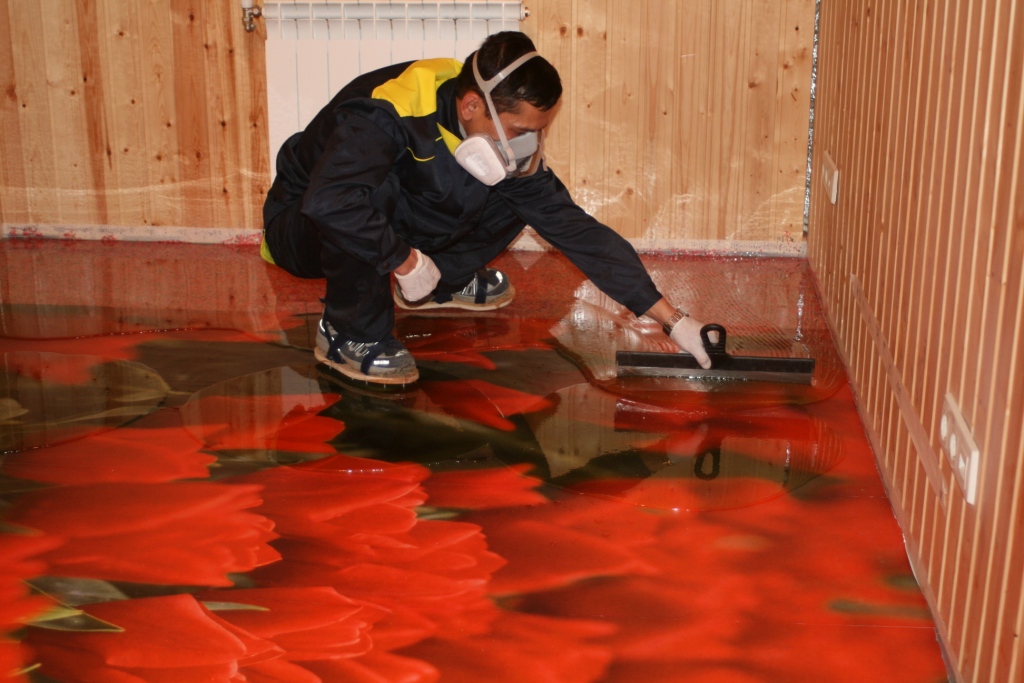
- Finally, a needle roller must be walked over the entire surface of the flooded floor. So you can remove air bubbles and debris from its surface. During this stage of work, you should use special shoes - kraskostyami.
- When the entire room is filled, the surface of the self-leveling floor is covered with plastic wrap and left to dry for at least a day.
- After this period, if necessary, you can re-fill the floor with a mixture, if you want to apply it in two layers or pour the final coating.
The further procedure will depend on what kind of finishing coating will be used: single-colored or multi-colored, with or without a pattern. In any case, it is necessary to grind the surface and degrease it thoroughly. Then from the farthest corner from the entrance begins to fill the final coating. Such work should be done as quickly as possible. It is best to use self-leveling self-leveling floors.
If a final coating with a 3D pattern is used, the procedure will be as follows:
- Freeing flooring from dust, debris and dirt particles.
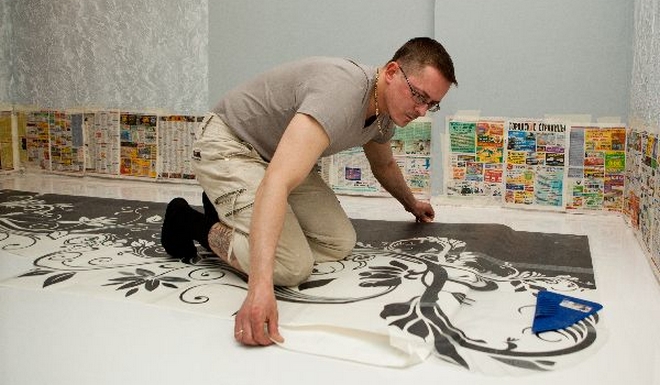
- Gently fold the fabric on the floor surface.
- Cutting off unnecessary parts.
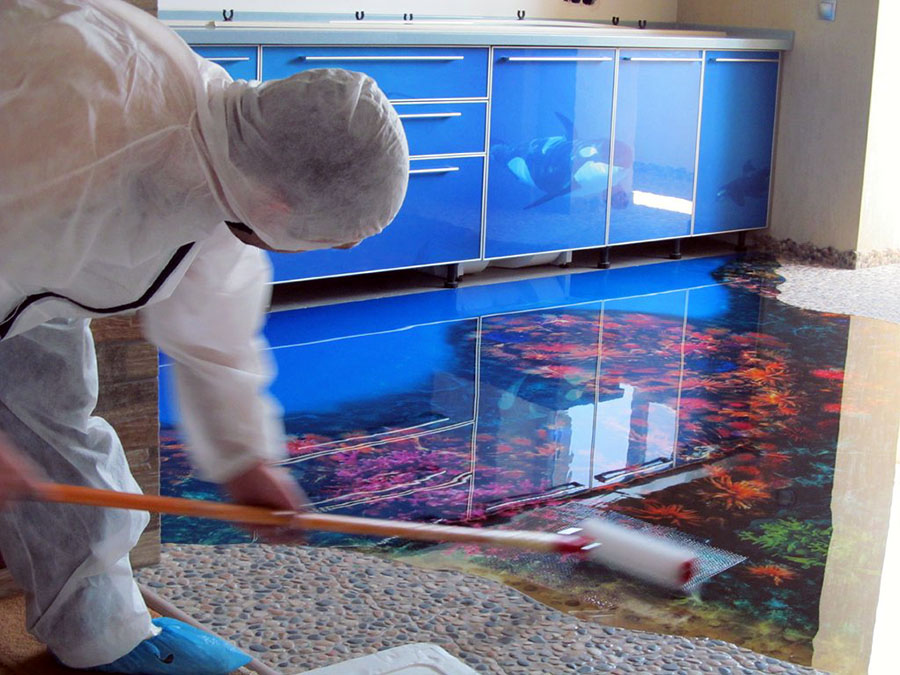
- Treatment of the flooring with a special varnish.
- Fastening fabric to lacquer. After this, it is necessary to allow the construction to be fastened for an hour.
- Dilute the final coating according to the instructions and apply it around the perimeter of the room to the center.
There is nothing difficult in installation of a bulk floor.
Such work requires quite a lot of attention, time and perseverance, but the result obtained in the course of its performance covers all costs.
Maintenance and repair
Proper operation and care of self-leveling floors will help to preserve their appearance and aesthetic appeal for a long time.
Proper operation includes:
- Compliance with the manufacturer's recommendations at the place of filling the floor. That is, if the mixture is intended for domestic use, it can not be applied to production facilities.
- Proper care of the flooring. Remember to regularly wash the floor and use only suitable cleaning products.
- Implementation of timely redecoration.After some time, small defects may still appear. If they are not eliminated in time, the problem will only get worse.
- It is imperative to agree to the service provided by the specialists during the warranty period.
- When heavy furniture is installed on such floors, felt should be placed under their legs so that there are no dents left.
- You can not drag on such a coating any heavy objects.
Daily care for self-leveling floors is to wash them with warm water. If heavily soiled, you can use detergents that do not contain fluorine and ammonia. Once every 2-3 months after washing the floor is rubbed with mastic.
The frequency of its use depends on the patency of people.

But even the correct and comprehensive care of the floor can not protect against the need for its minor repairs:
- Hillocks or bumps on the surface can be masked with acrylic chips. Their use allows you to additionally decorate the floor.
- Often there are bubbles on the surface. Eliminate them is more difficult, but still possible. If they were formed on the surface of the newly filled floor, then it is necessary to walk carefully over the entire area of the floor with a needle roller.If bubbles are formed on the already frozen surface, all work will have to be redone, repairs will not give the desired result.
- If the floor covering is white in some places, the situation can be remedied by re-grinding the damaged areas and re-treating them with polymer.
- Incorrect or partial sealing of the seams of the base can lead to flaking of the self-leveling floor. You can fix the situation like this: you need to lift the topcoat, re-clean the base, treat it with a primer, and then glue the polymer layer with mastic.
- Sometimes small holes may appear on the surface. You can get rid of them, using the usual putty. After it hardens, the damaged area is covered with a very thin layer of polymer.
Each defect has its own reason for the appearance, which lies in the gross errors in the performance of work.
Typical errors in the work and manufacturing
The knowledge of the most typical mistakes at installation of a bulk floor and its production will allow to avoid their repetition further.
Insufficient attention to the preparatory stage, namely, ignoring the measurement of the moisture of the base is an error that 80% of those who fill the floor on their own make.As a result, the bulk mixture is poorly distributed, quickly peels off from the base and cracks. It is imperative to measure the moisture level of the base, especially if it is concrete. The indicator should not exceed 4%.
Non-compliance of the proportions of the components in the preparation of the liquid mixture. Often the water is poured more in order to save the dry component more economically. As a result, the floor is brittle, the polymer coating quickly wears out and crumbles, and holes and whitish spots appear on its surface. It is very important to follow all recommendations of the manufacturer for the preparation of mixtures.
Failure to maintain the floor drying time. This also applies to priming works, and installation of the self-leveling floor. Trying to reduce the time of work, they end up with poor-quality, unreliable and short-lived floor.
Ignoring the use of squeegee when pouring floor. When working with self-leveling compounds, many people find it unnecessary to use this tool, and this is a big mistake. No modern mixture of this type can perfectly align itself. The result of ignoring the squeegee becomes a floor with dents and different heights.
By avoiding these mistakes in the installation of the self-leveling floor, you can protect yourself from further problems associated with its repair and maintenance.
Reviews
It would not be superfluous to get feedback on the self-assembly of the self-leveling floor, and in general about this floor covering. If we speak directly about pouring such floors with our own hands, then people note that the process is sufficiently laborious and has a long time to complete it. Most of them note that it is the concentration and the lack of haste that are the key to self-production of high-quality self-leveling coating.
Reviews regarding self-leveling floors in general are mostly positive. The owners of this flooring mark its novelty, creativity, high safety. For many, it is important to create a unique design with it.
Long service life and the preservation of the ideal appearance are also noted as the main advantages.
Beautiful examples in the interior
Confirmation reviews are the following photos. They clearly show how beautiful and modern flooring can change the design of a room for the better.
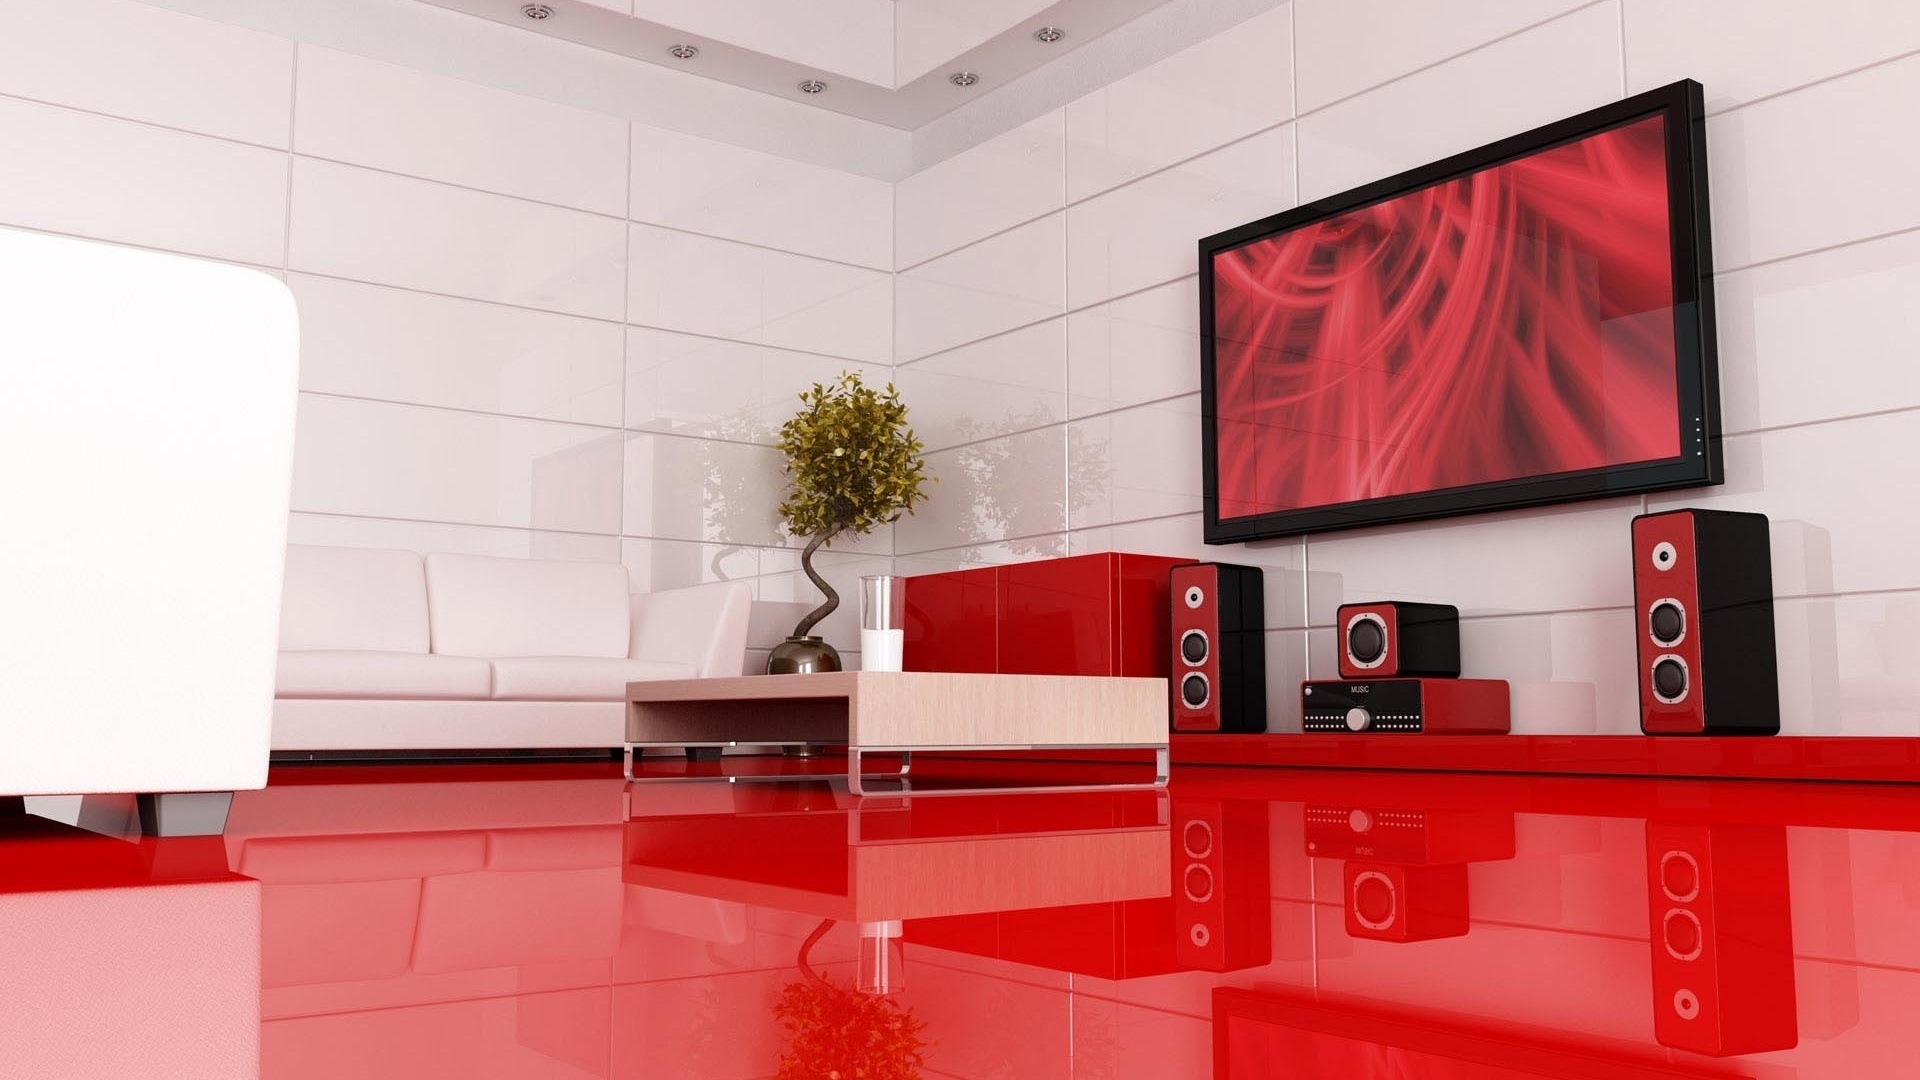
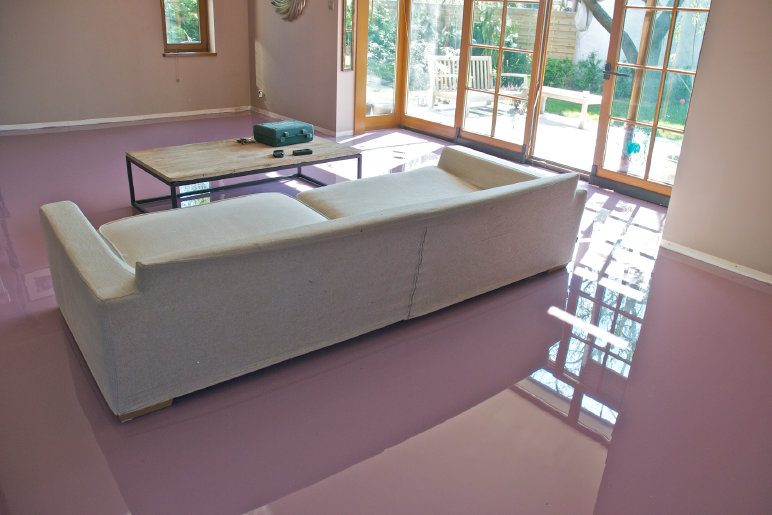
- Bright, glossy, self-leveling floor saturated pink color immediately attracts attention. He makes it clear that this is a room for creative and creative people. Such a floor design is ideal for a dance studio or beauty salon.

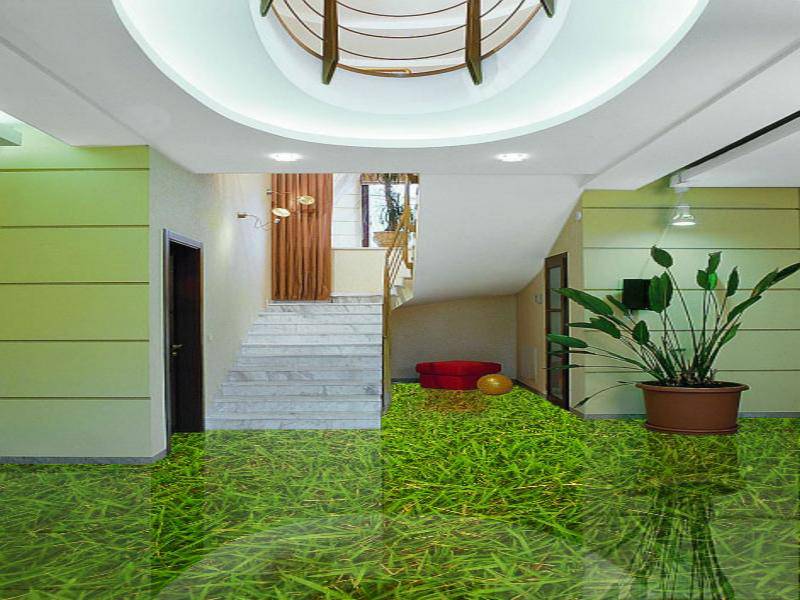
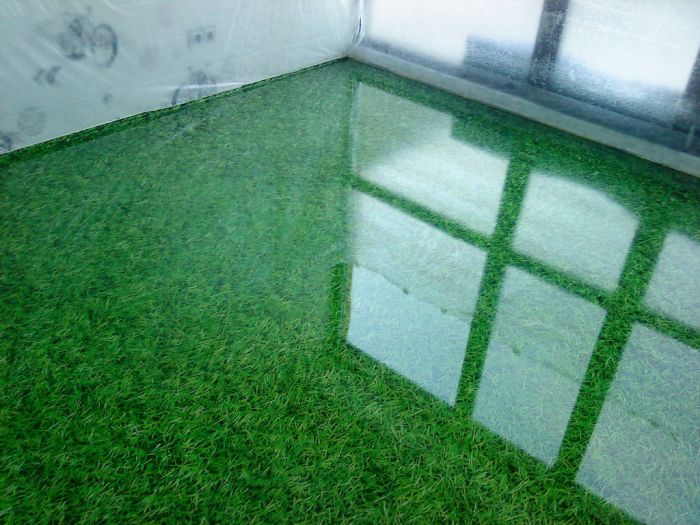
- Bulk glossy floor with imitation grass. It has a bright green color and attracts attention. Makes the room itself more alive and immediately uplifting. On cold winter evenings, just such a floor will allow for a moment to plunge into the warm spring.
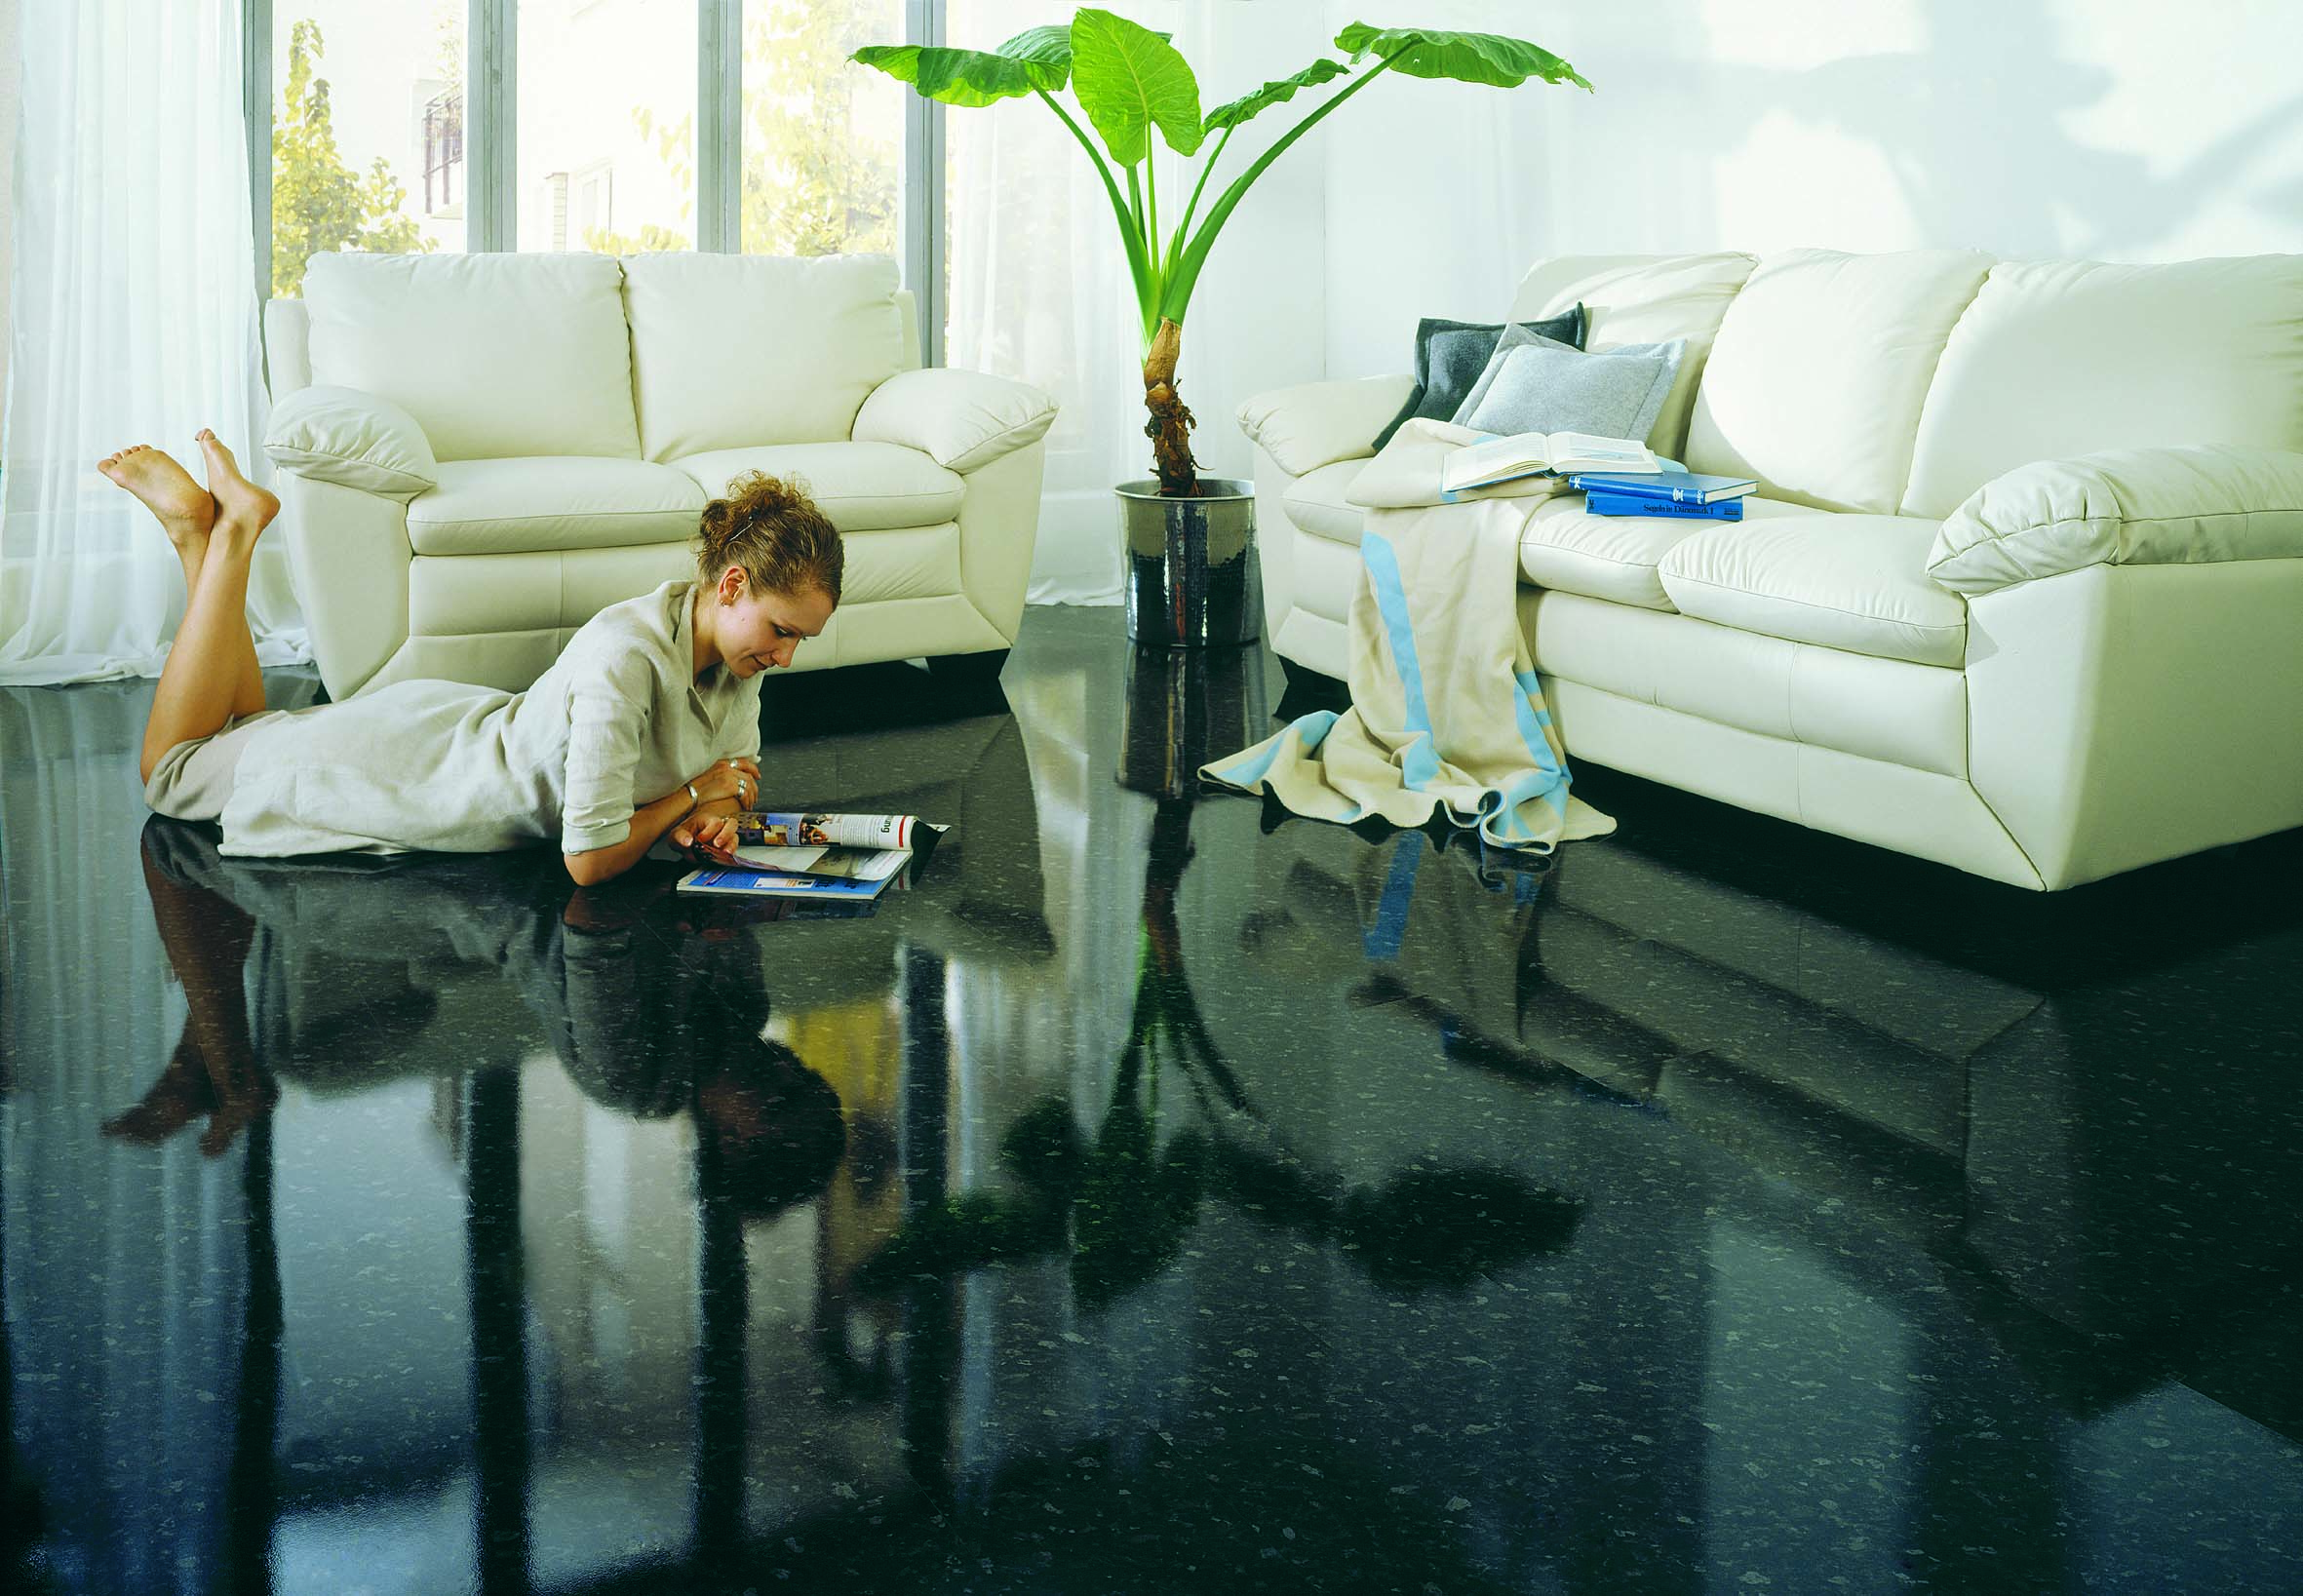
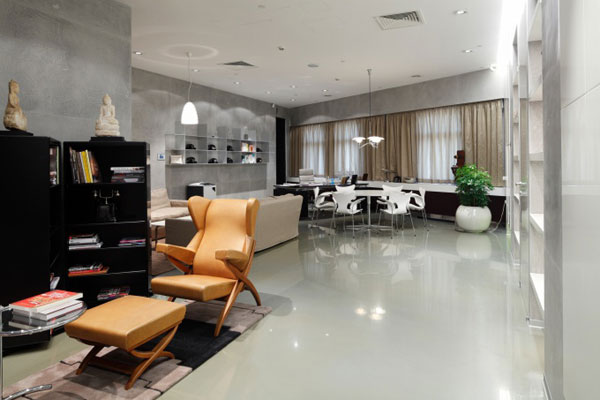
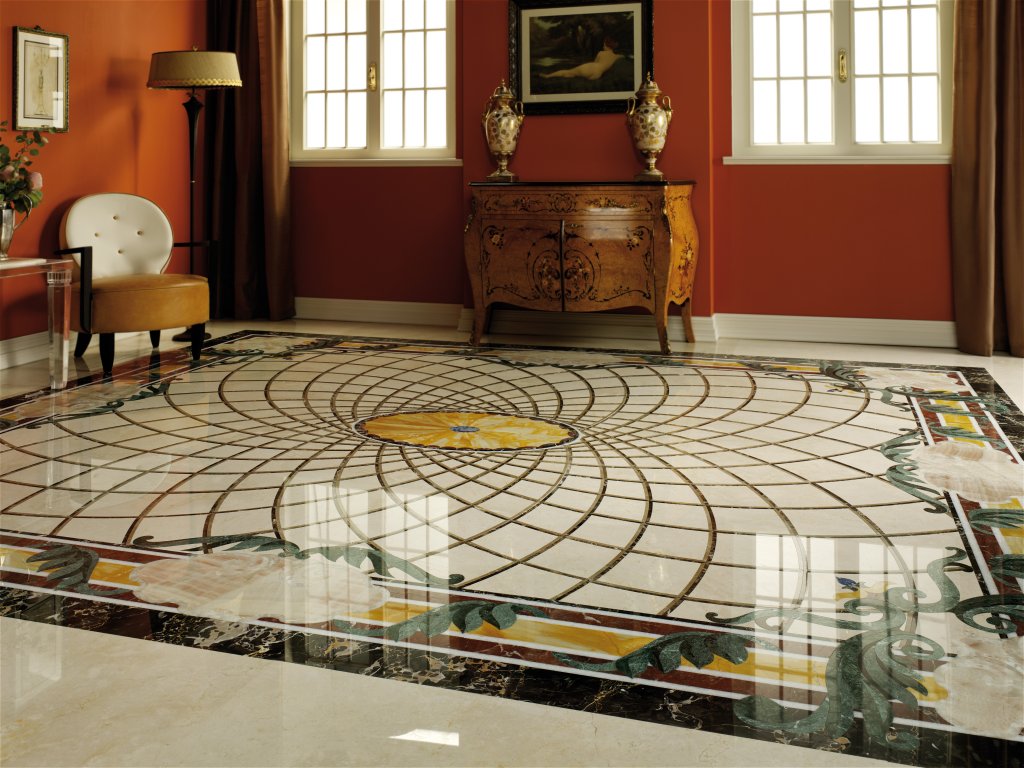
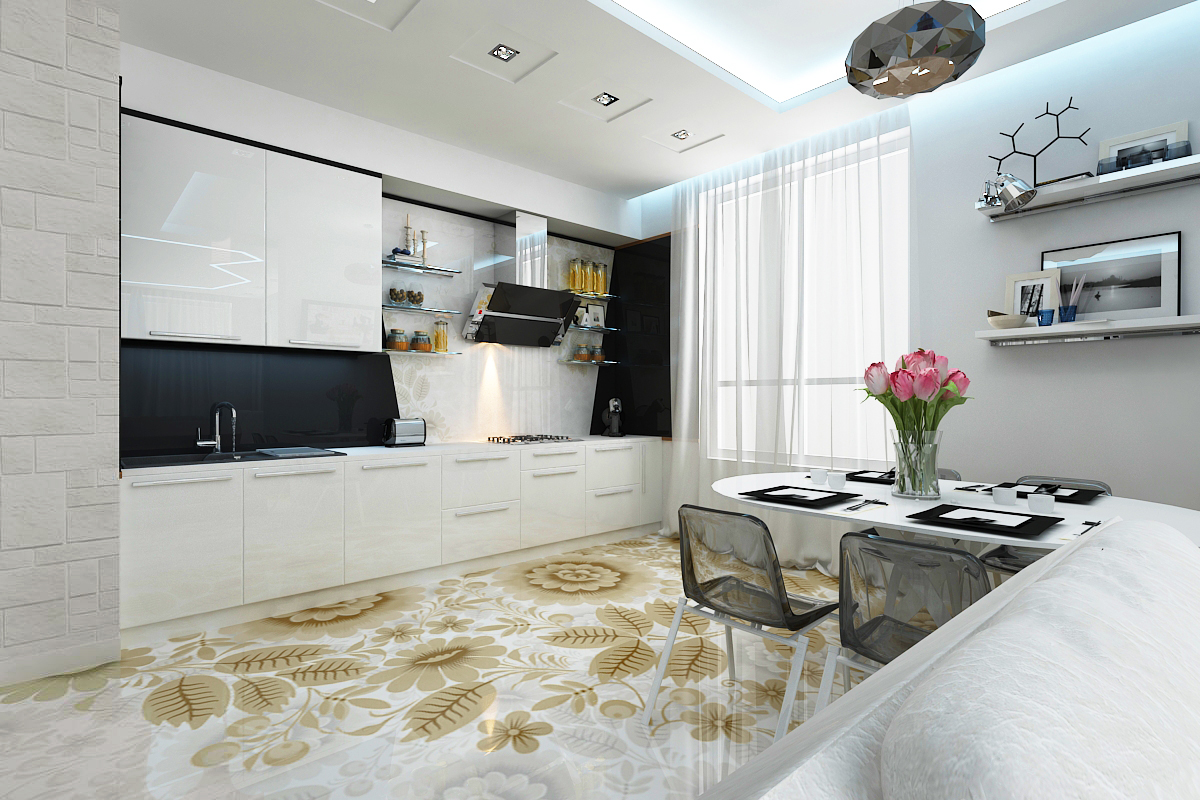
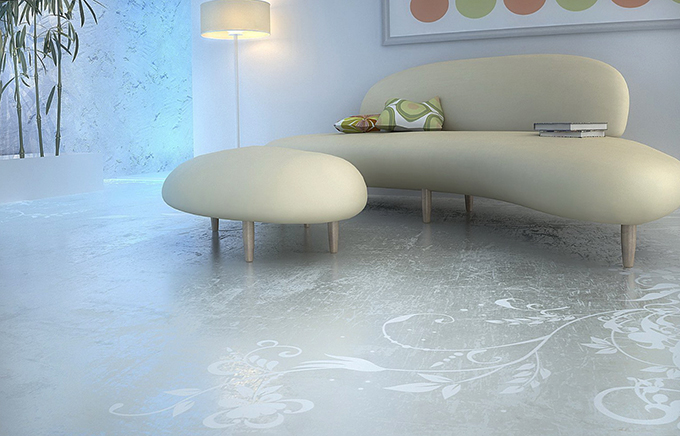
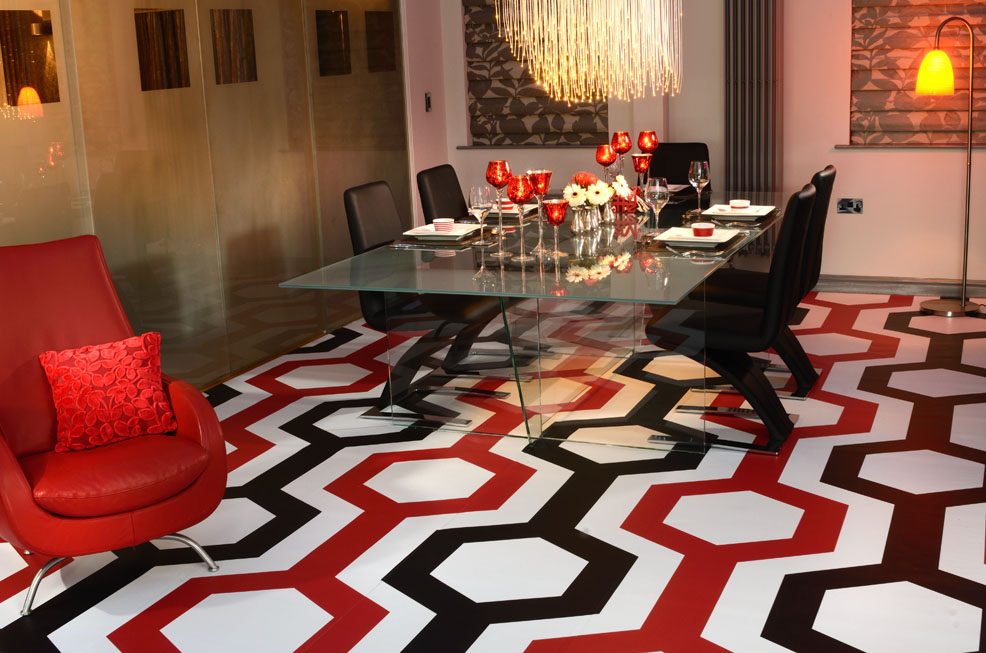
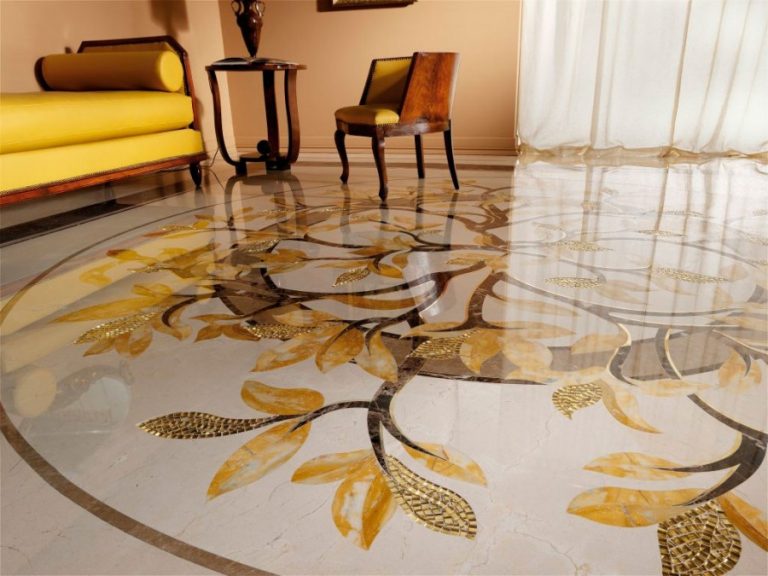
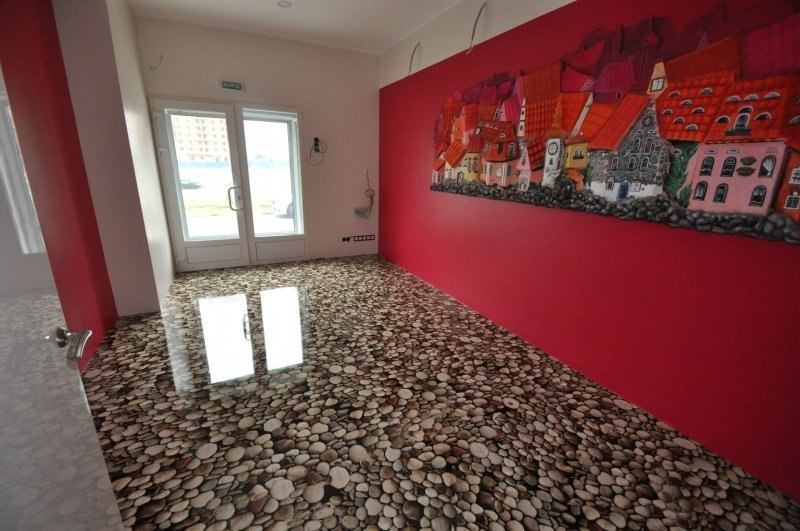
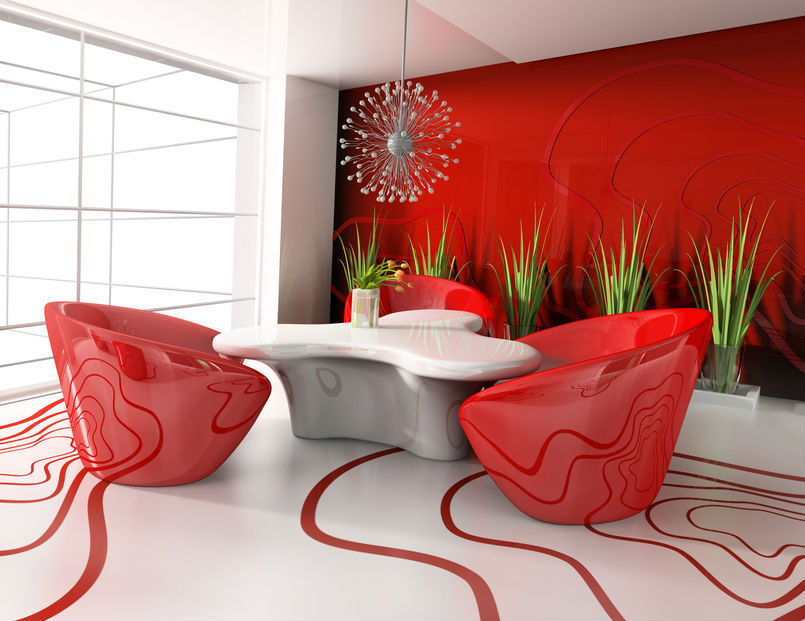
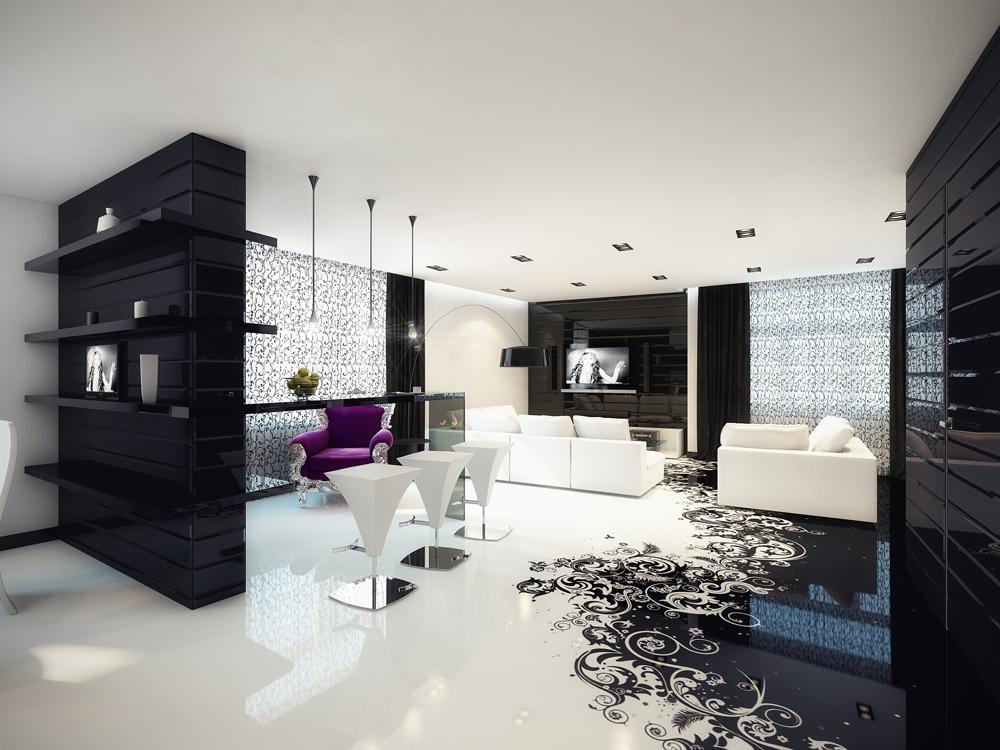
- The highlight of this glossy flooring is an unusual pattern from one edge. Such a liquid coating looks restrained and stylish and testifies to the good taste of its owner.
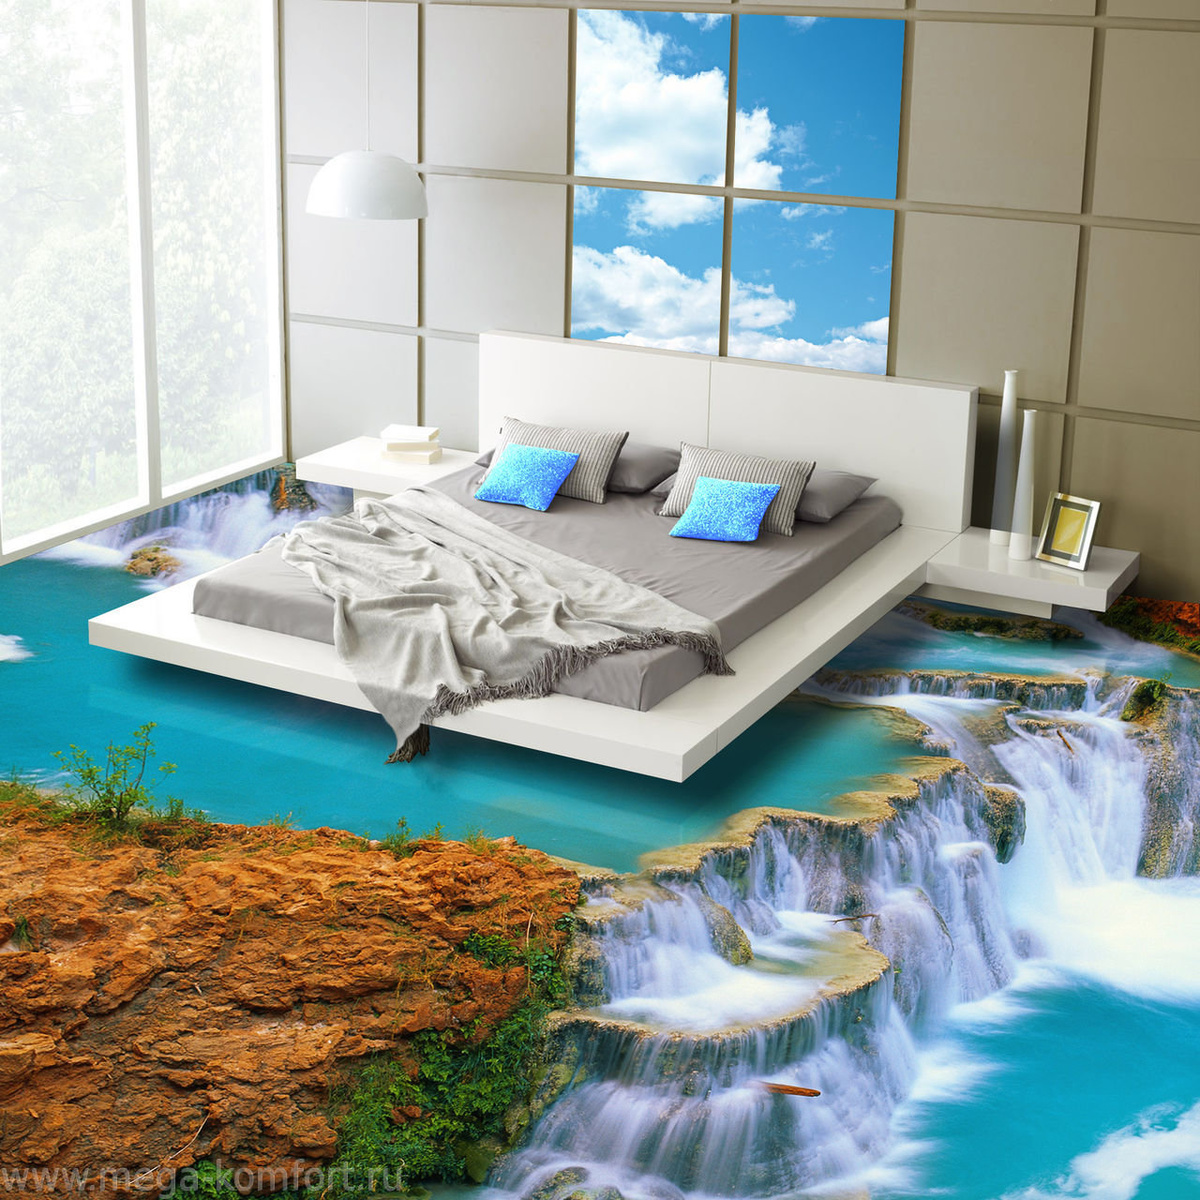
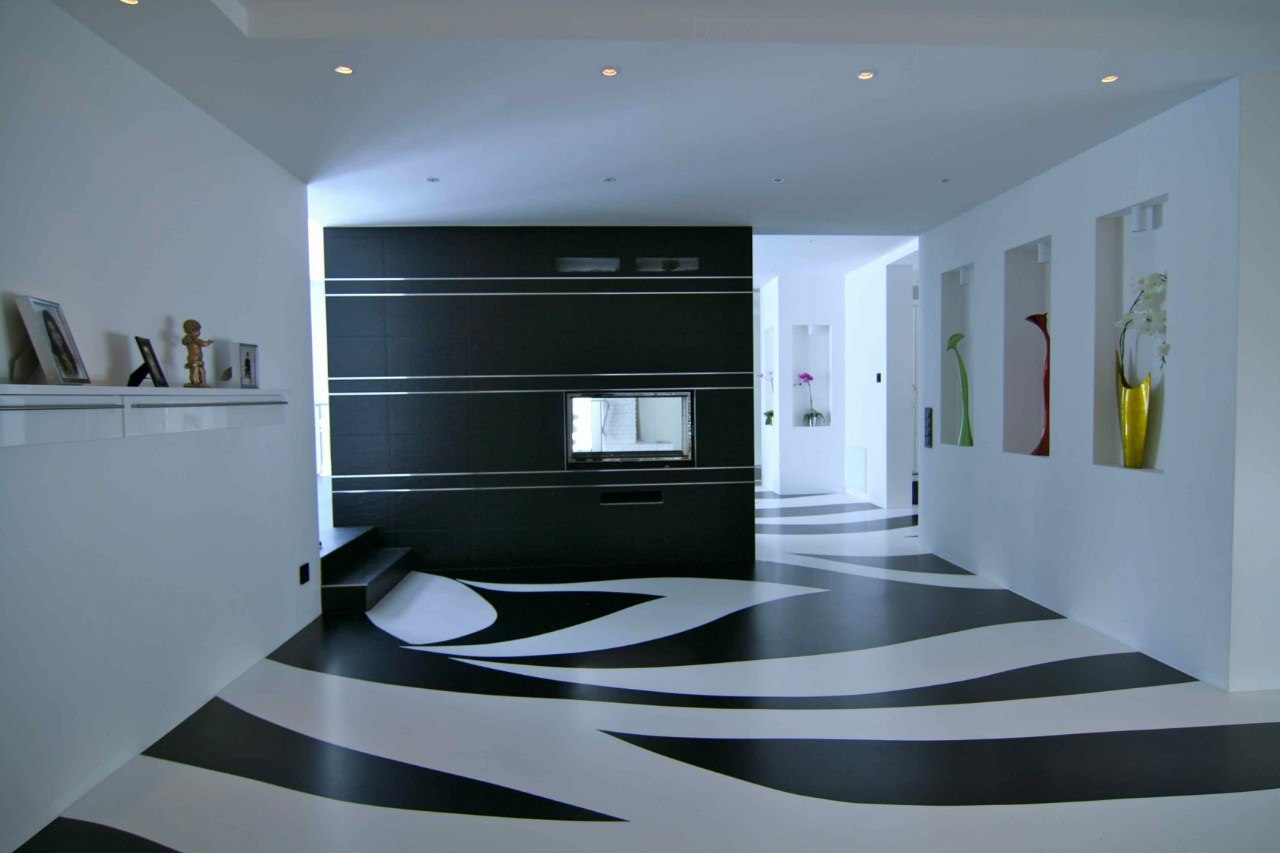
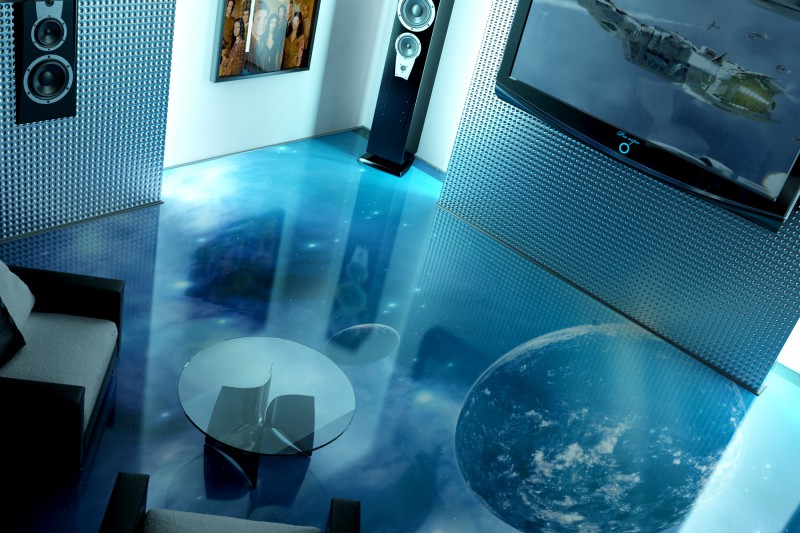
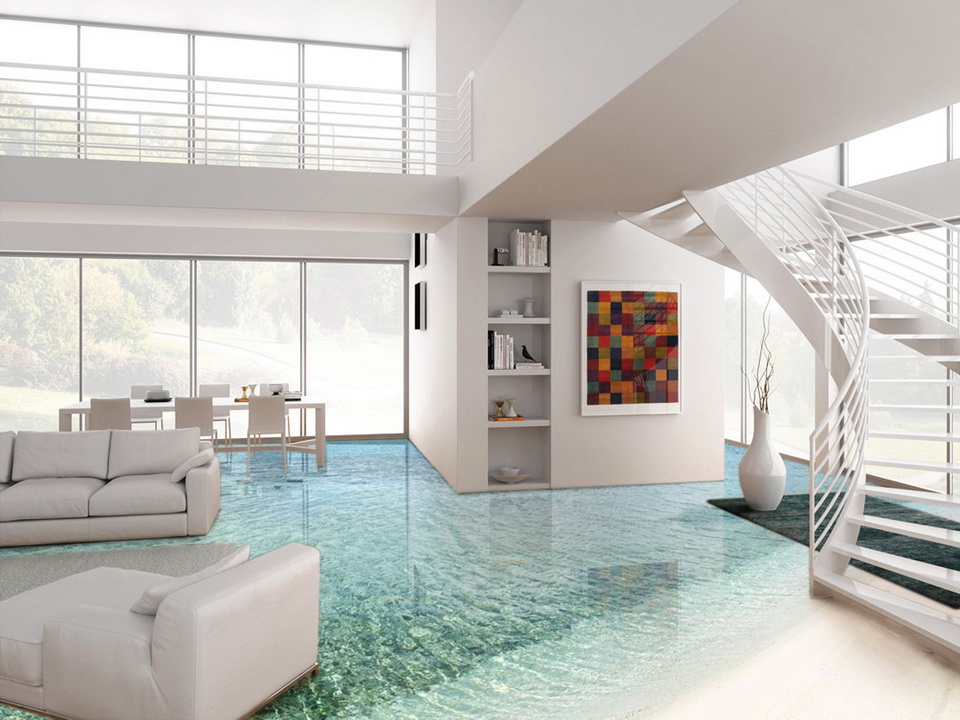
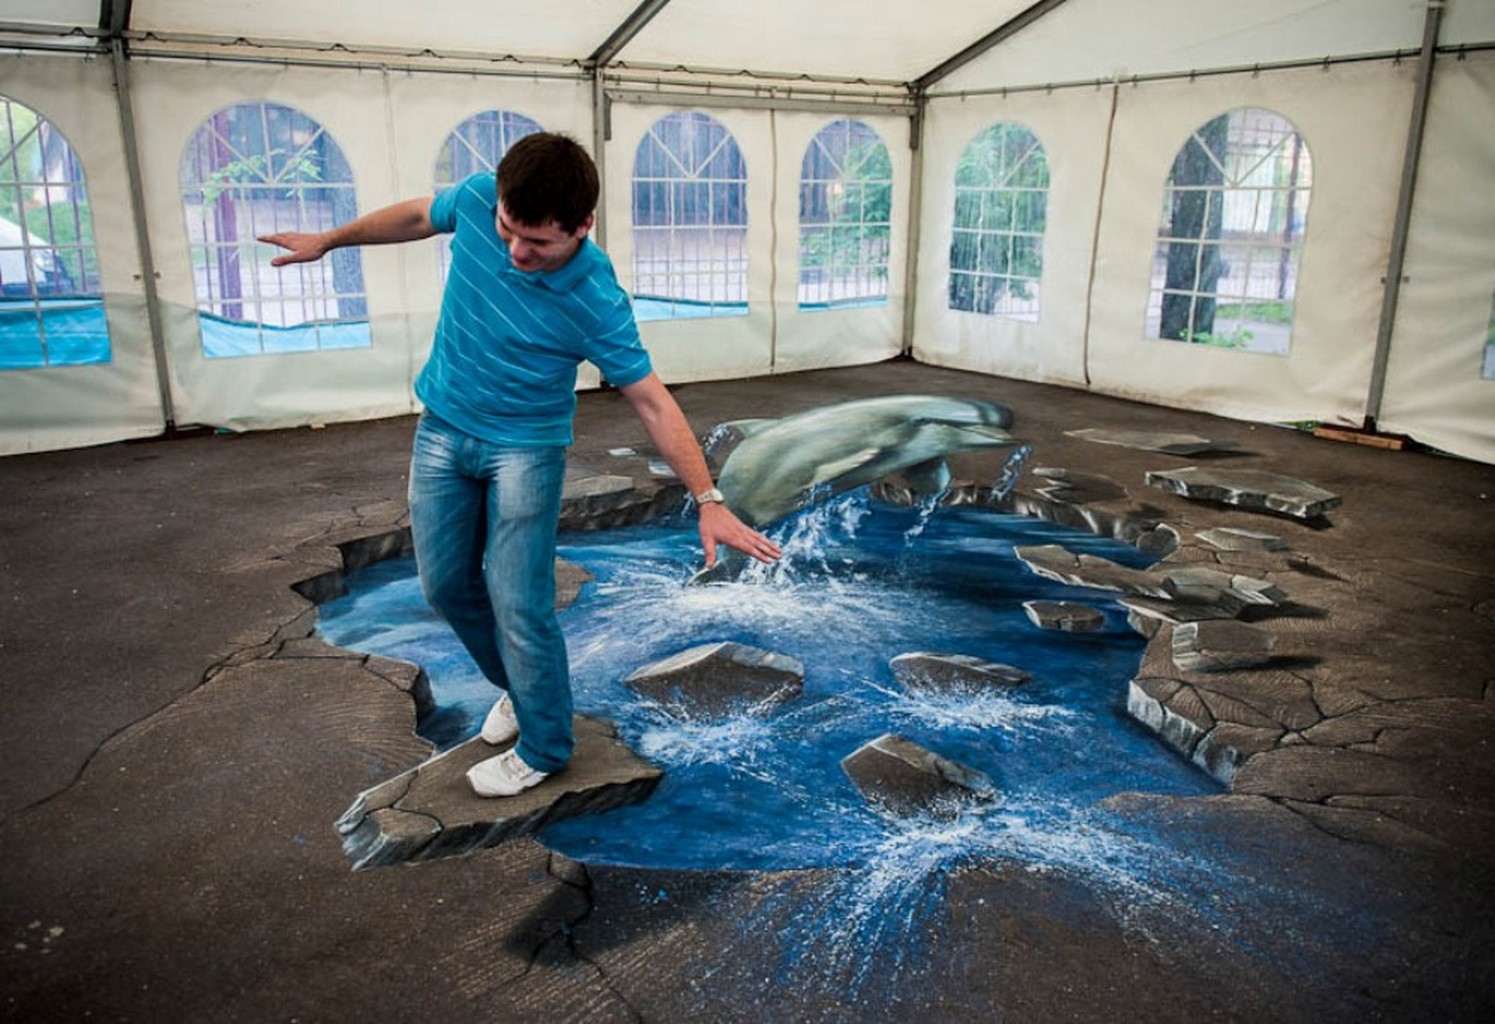
- 3D floors, as in this image, are the most popular. They seem to allow you to destroy the boundaries of consciousness. This flooring looks very modern, unusual and beautiful. Choosing this design option, you should take into account that it is the self-leveling floor that will be the highlight of the interior.
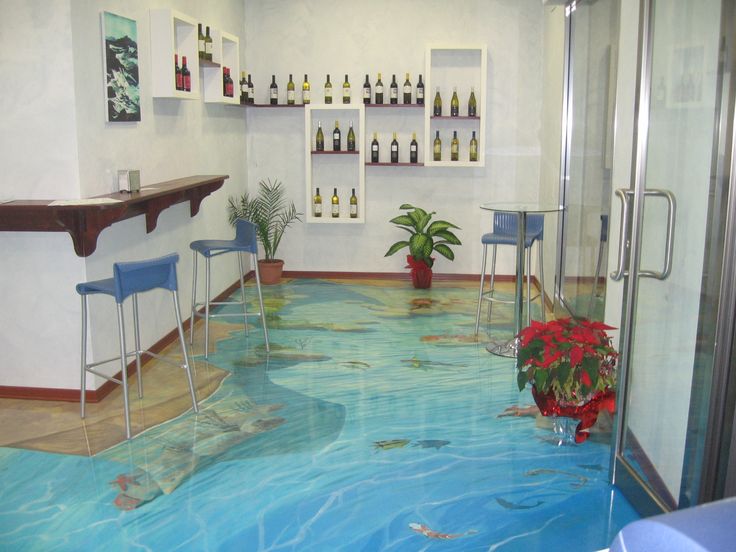
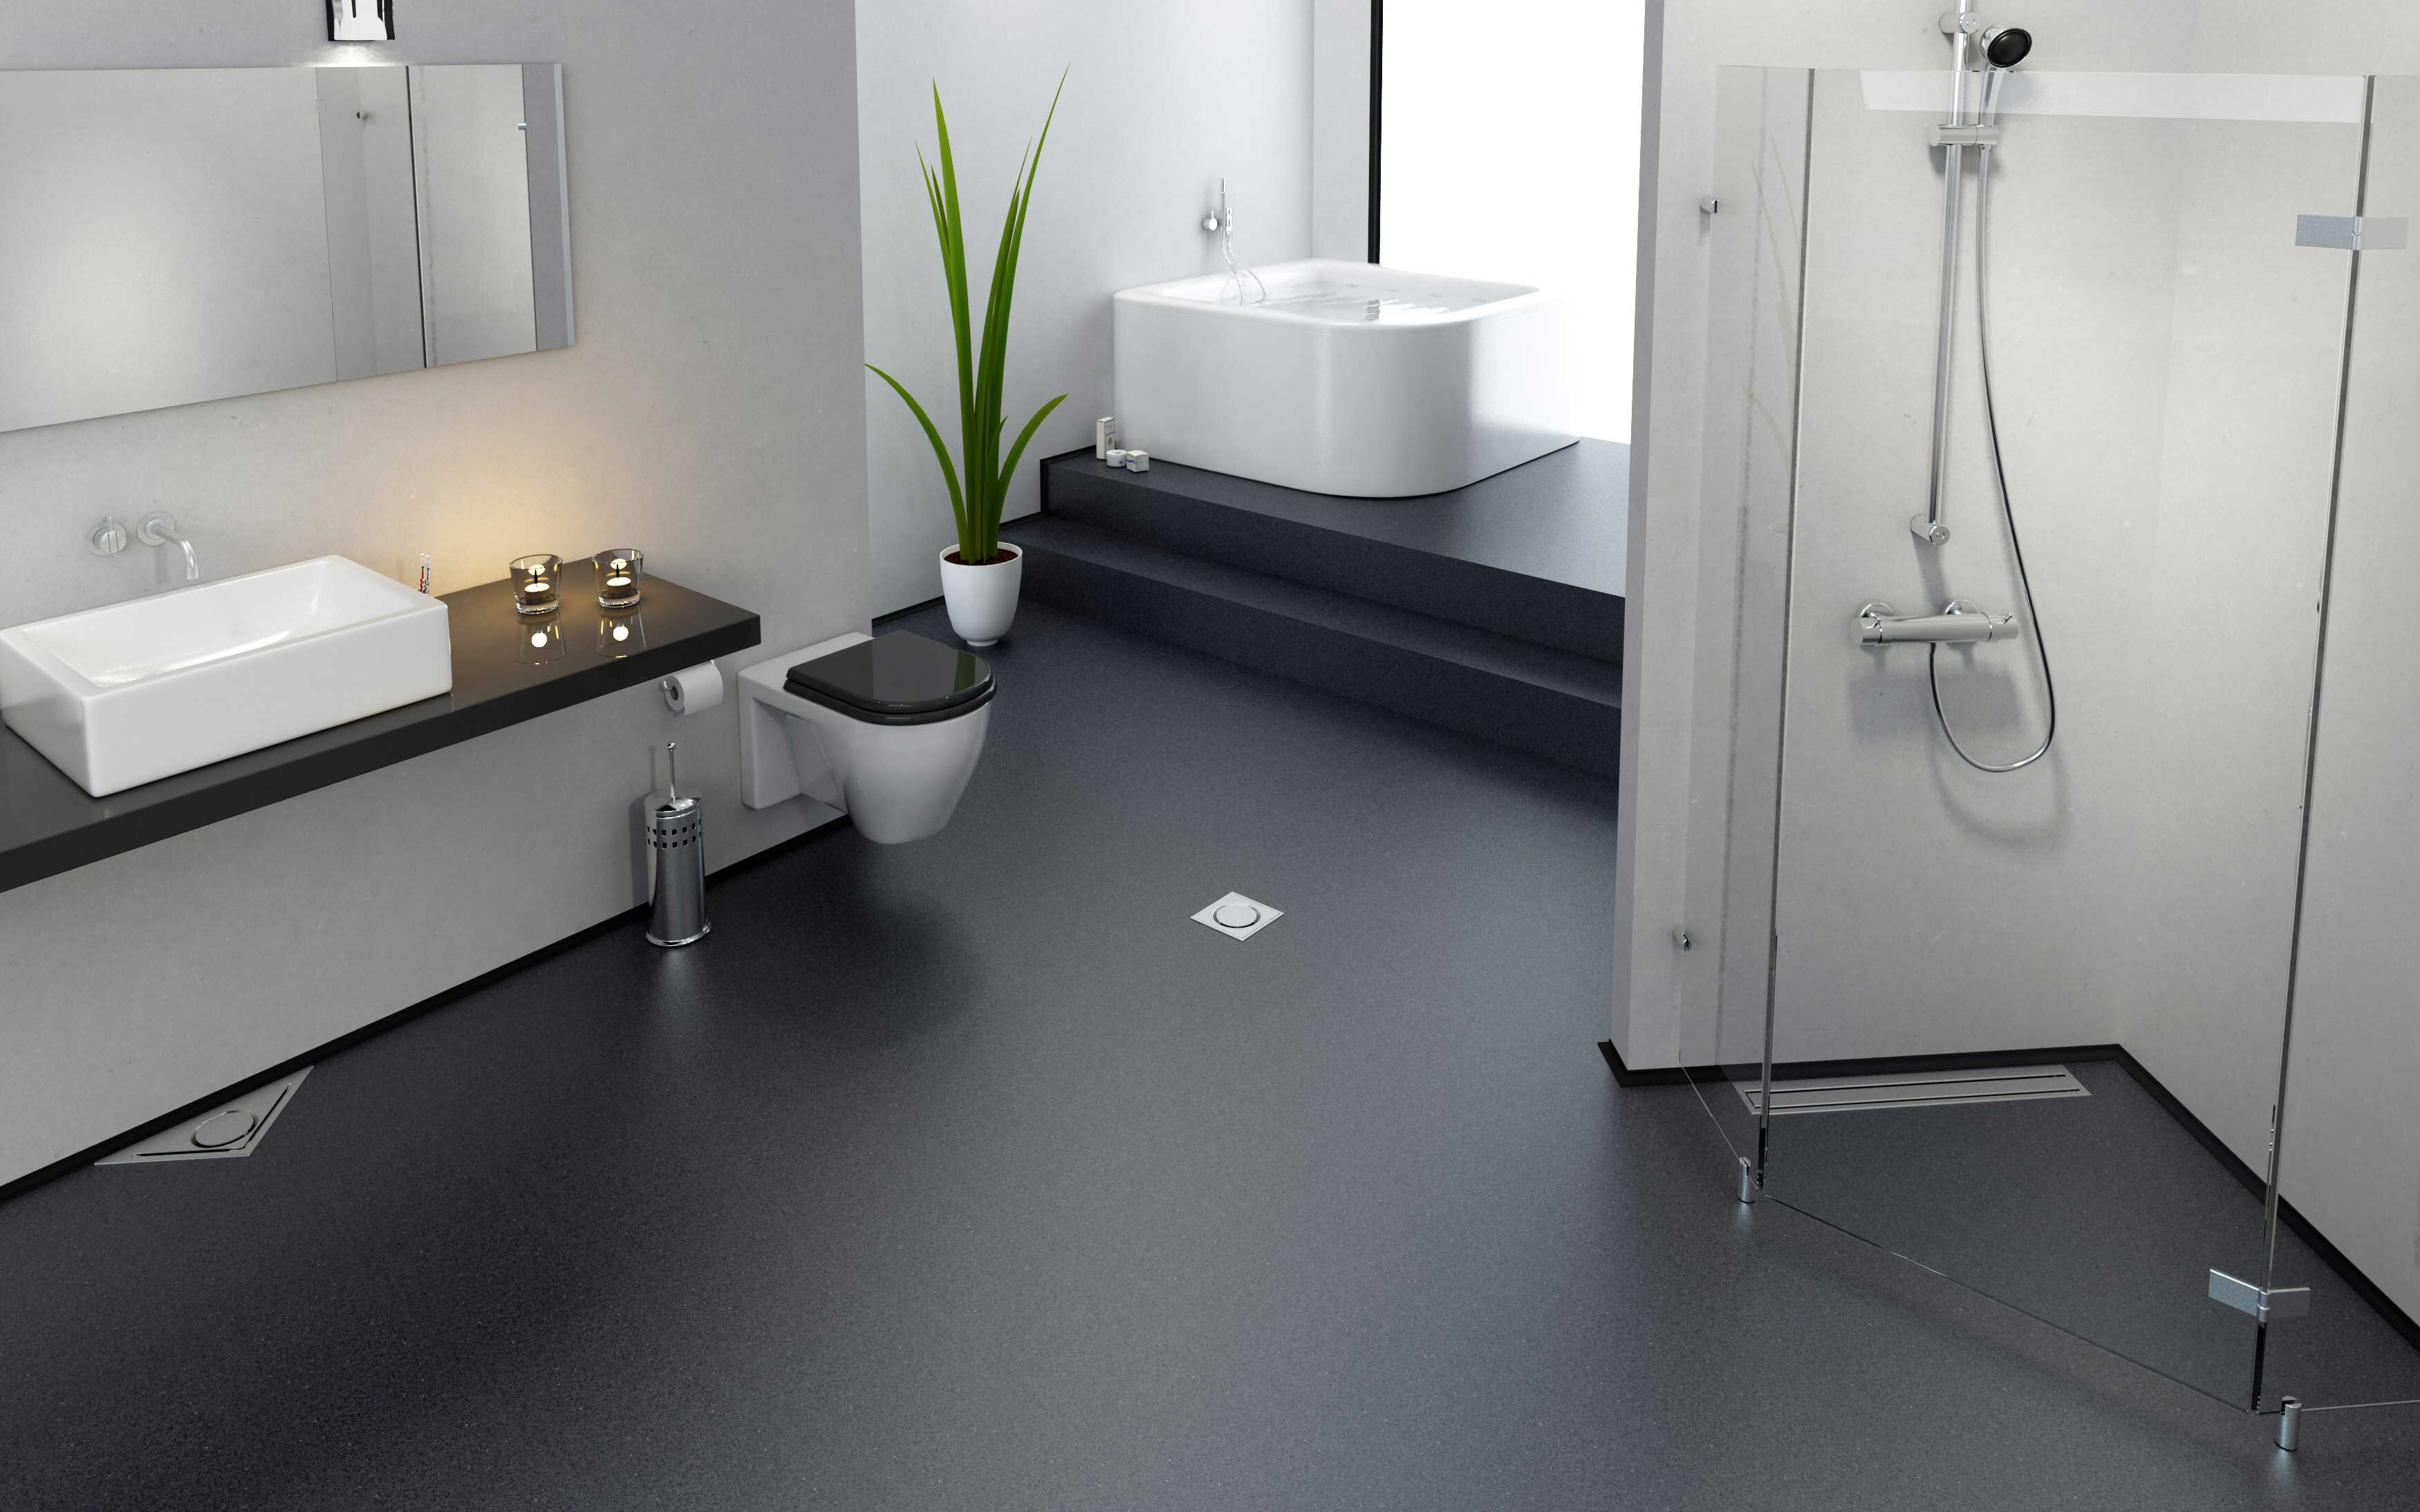
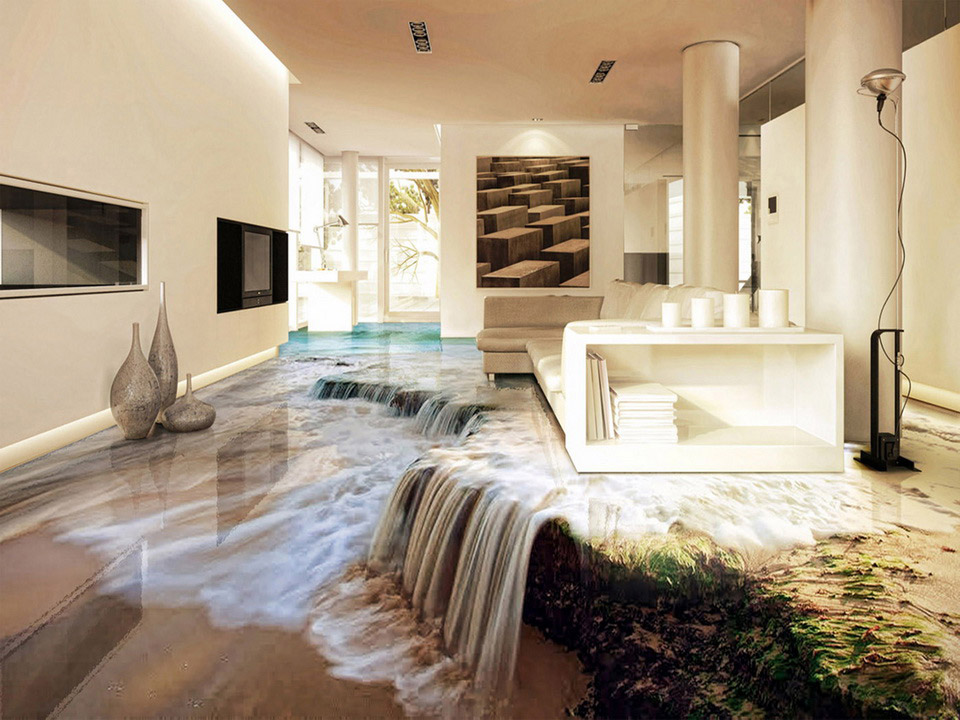
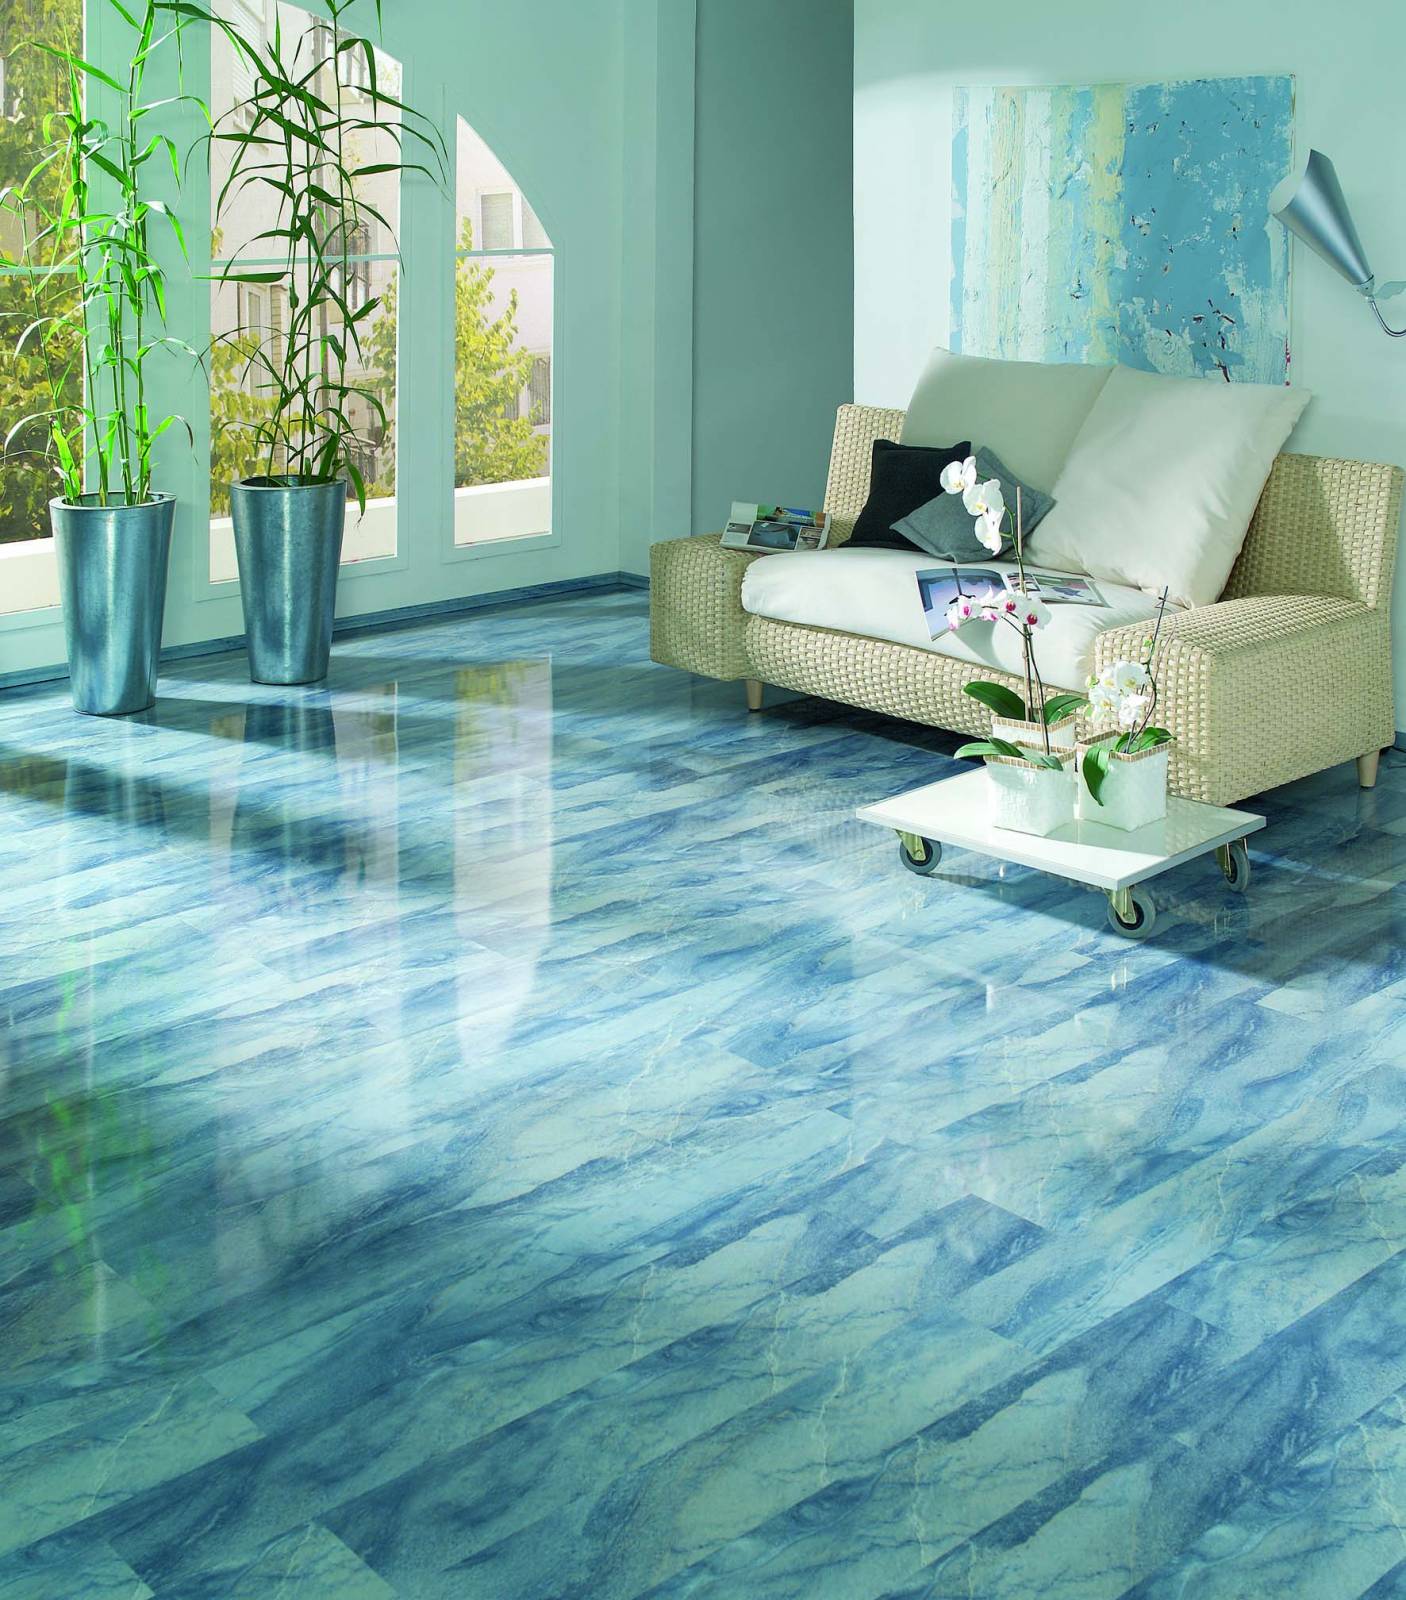
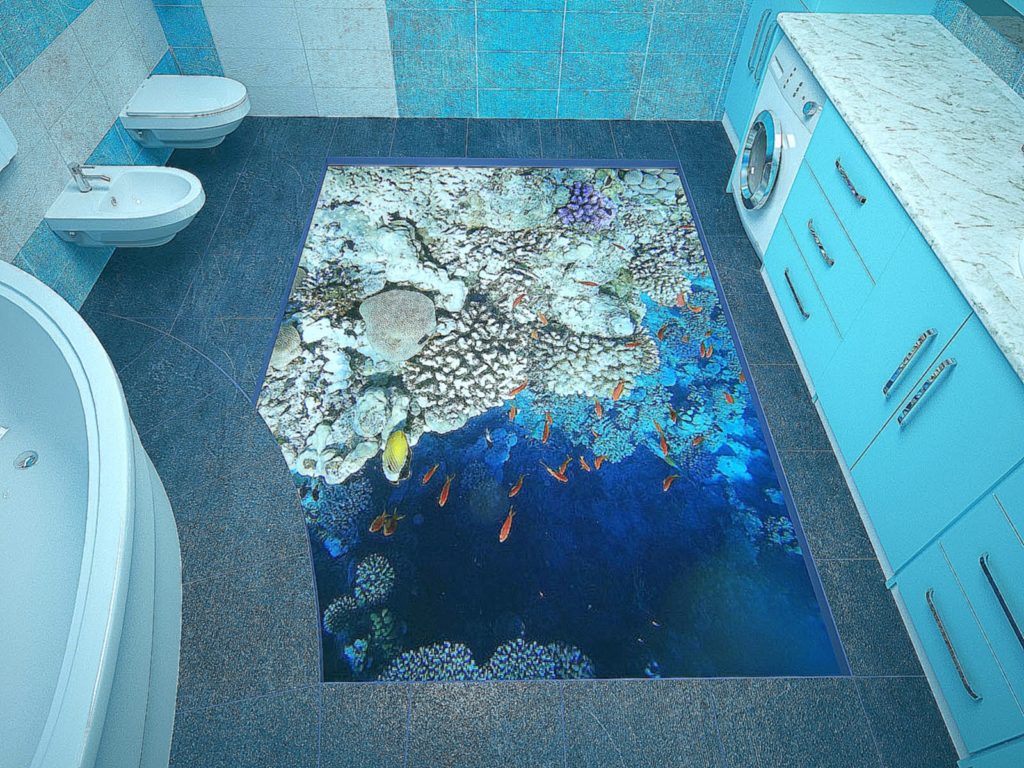
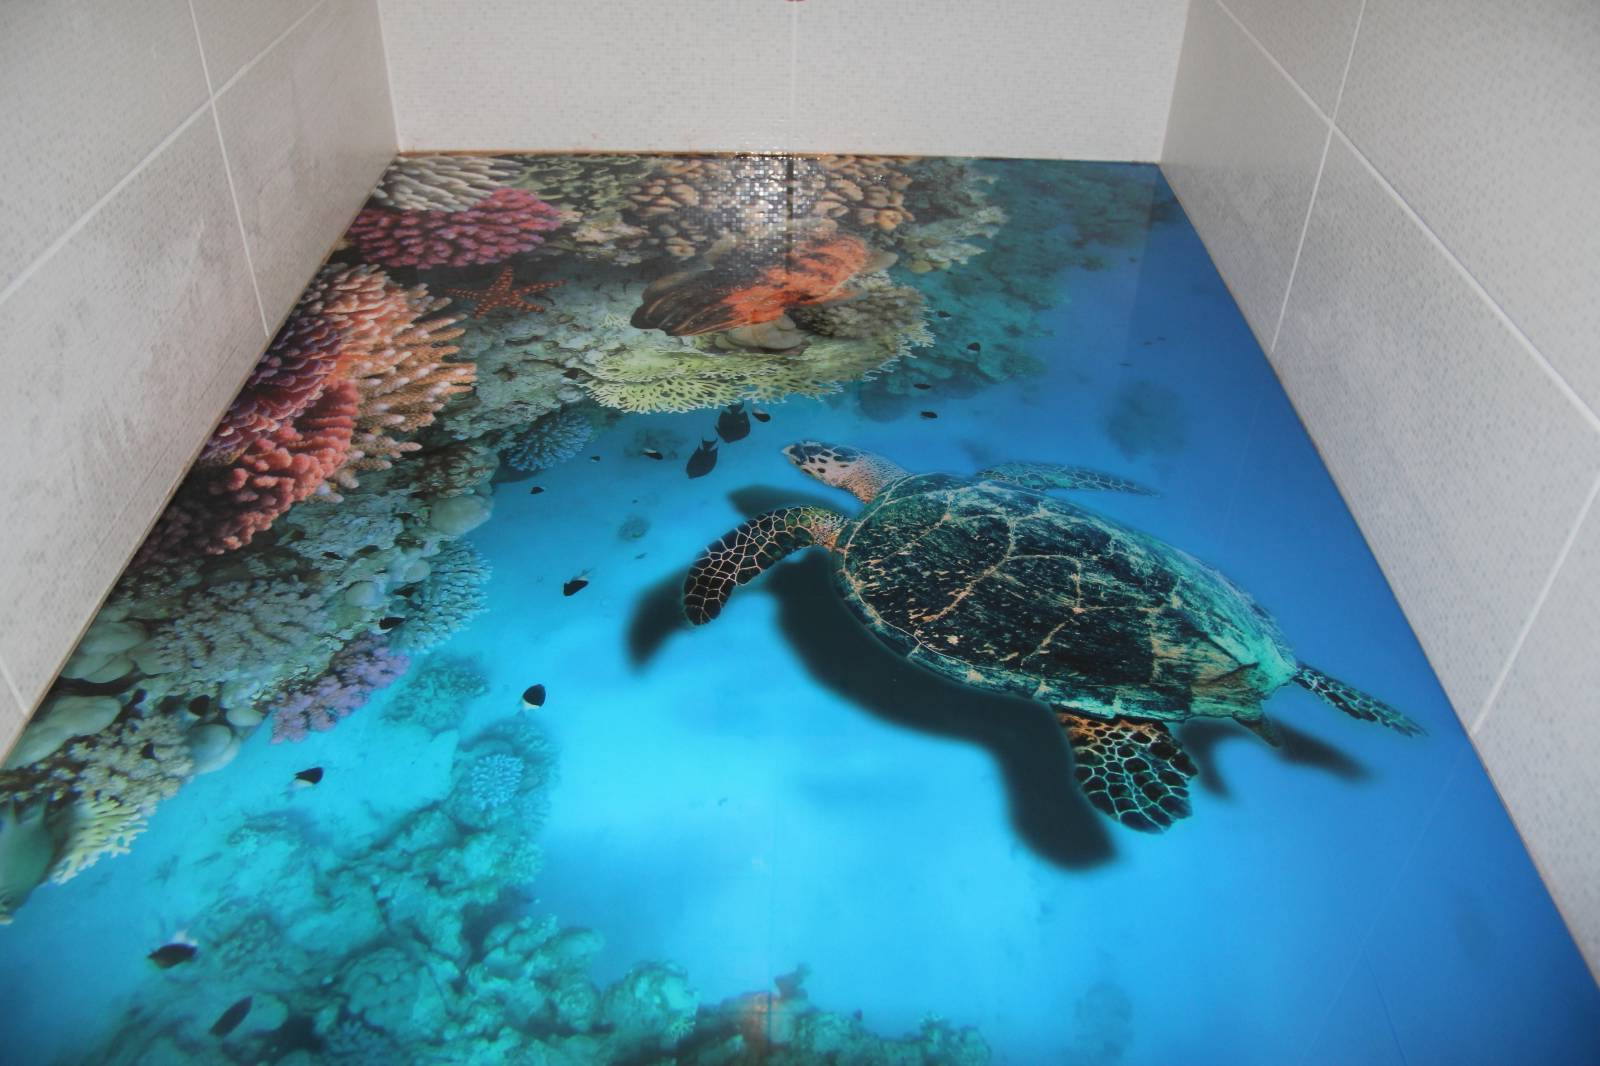
- Another great example of a 3D floor design. Finding yourself in a room with such a floor, imagine yourself on the ocean.This flooring option is ideal for a bathroom.
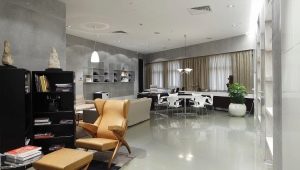
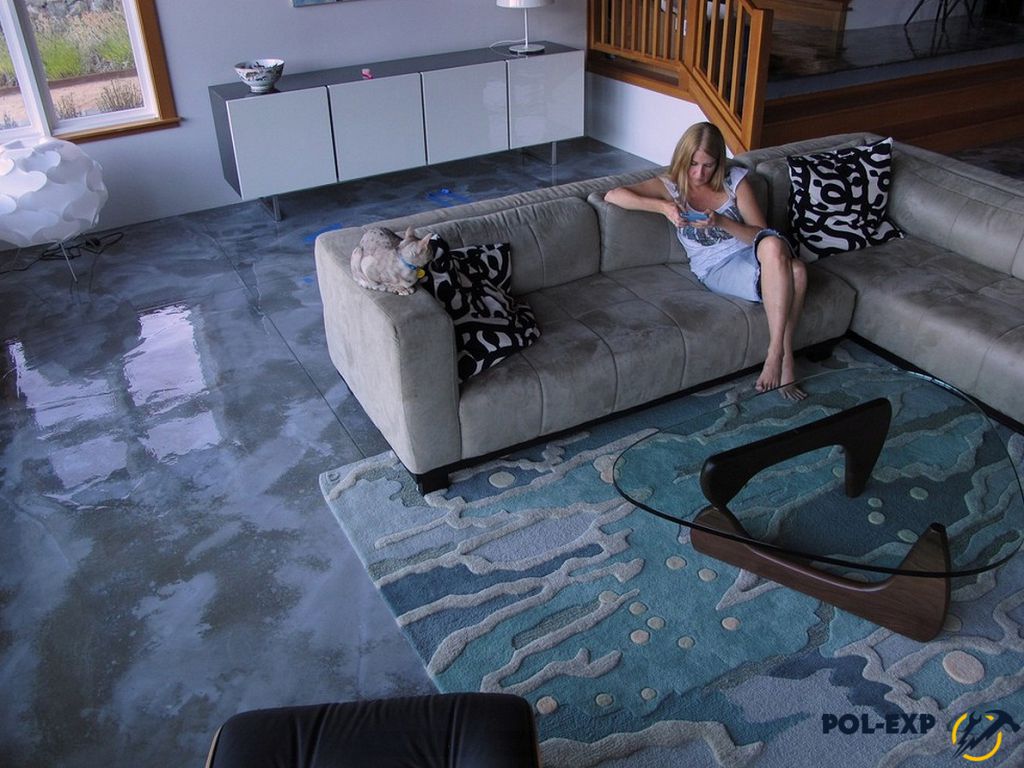
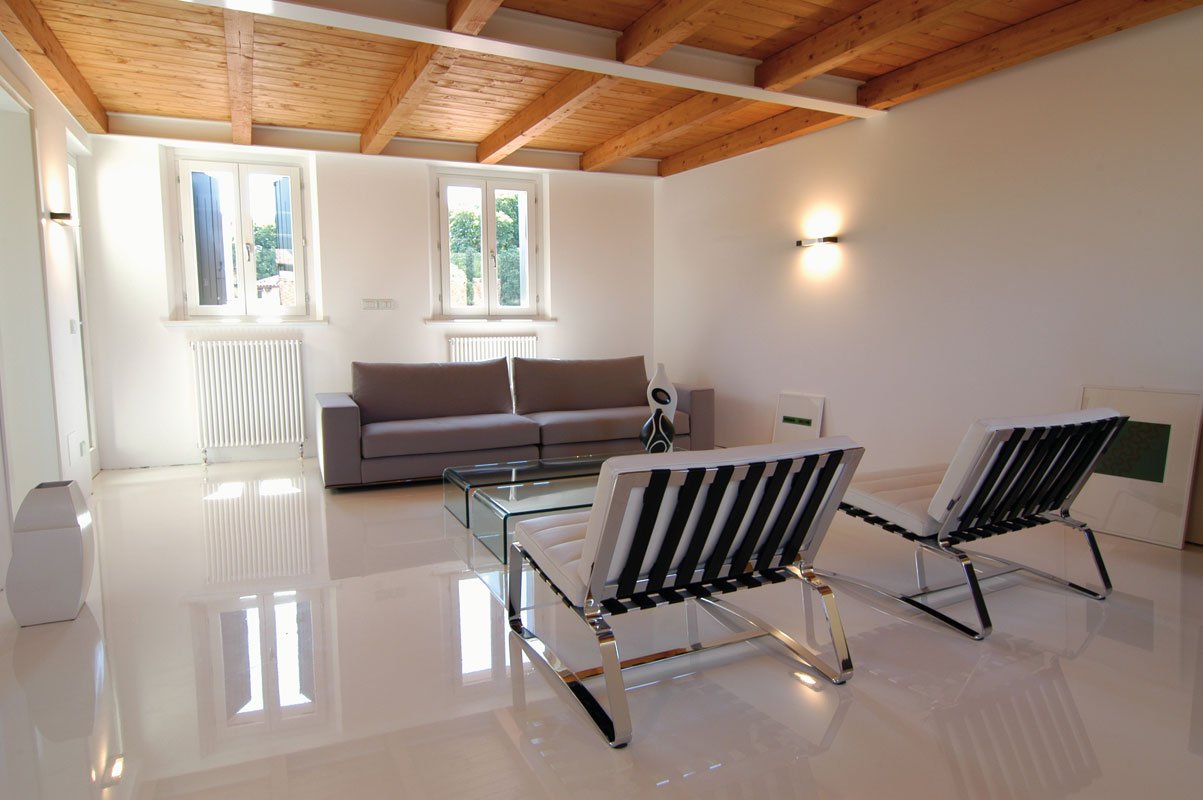
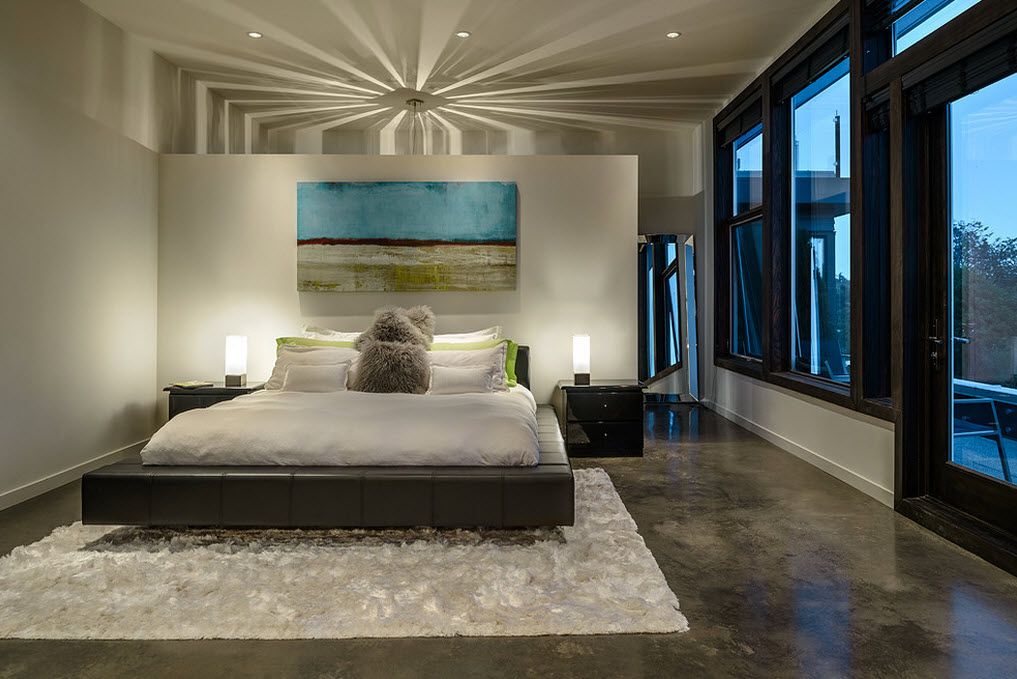
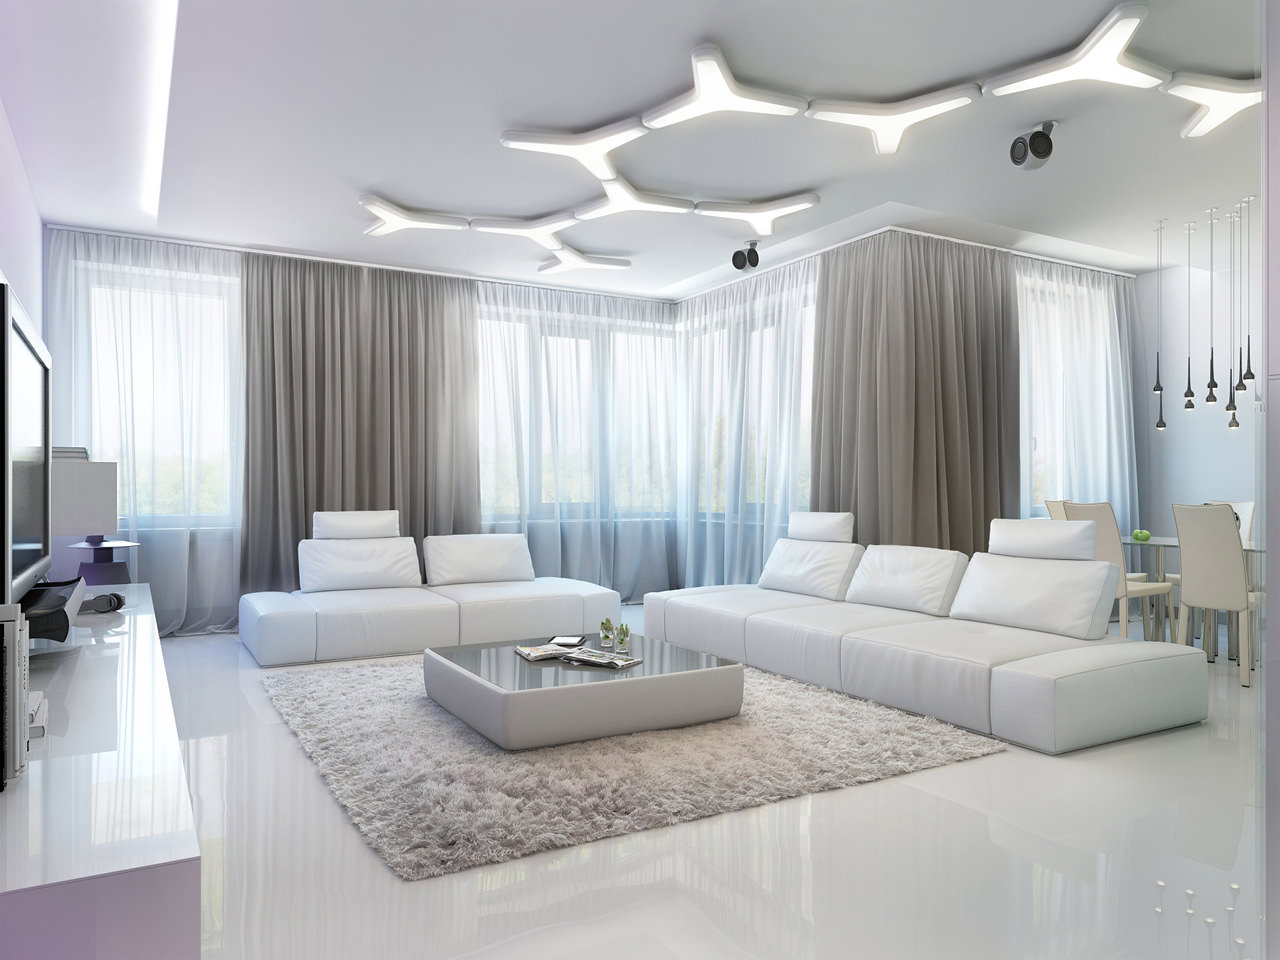
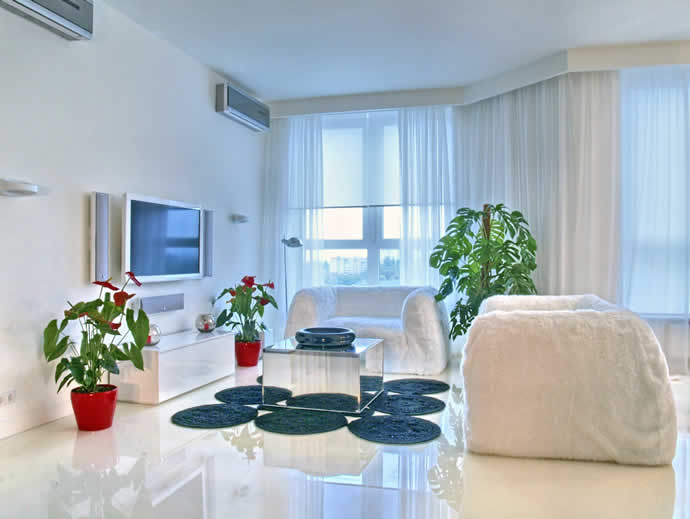
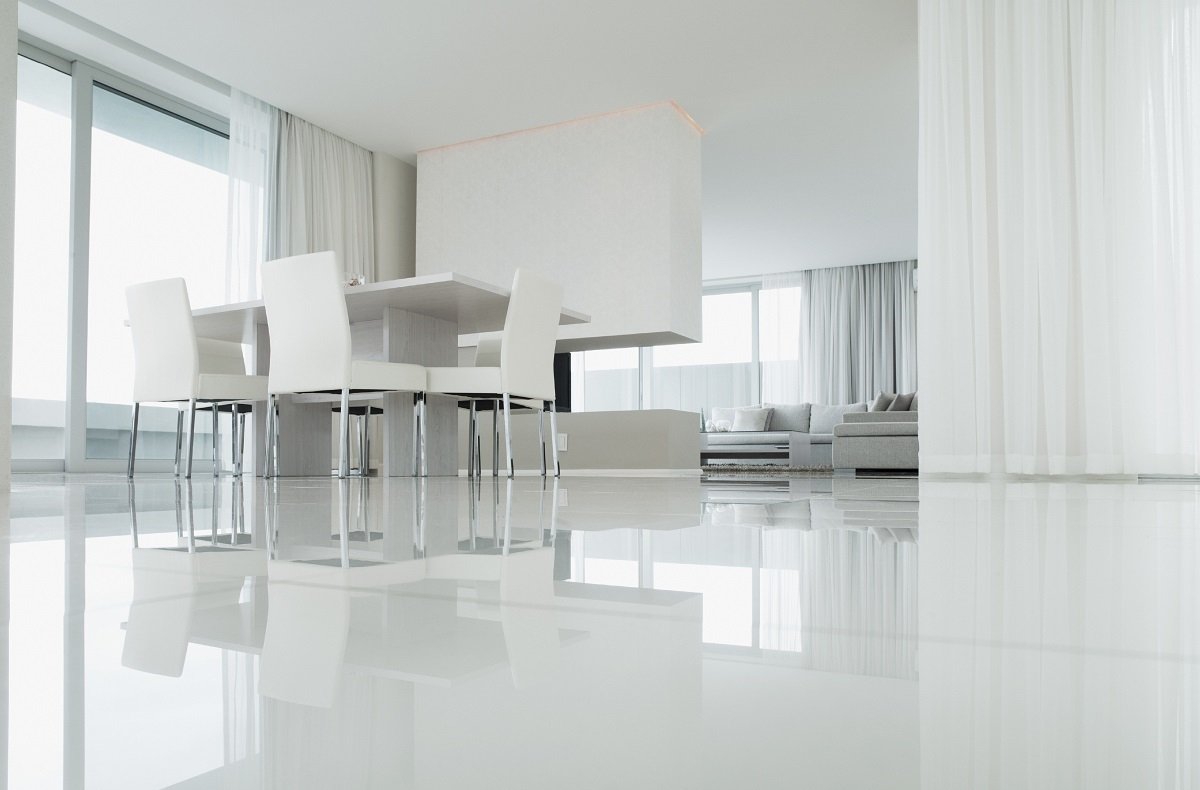
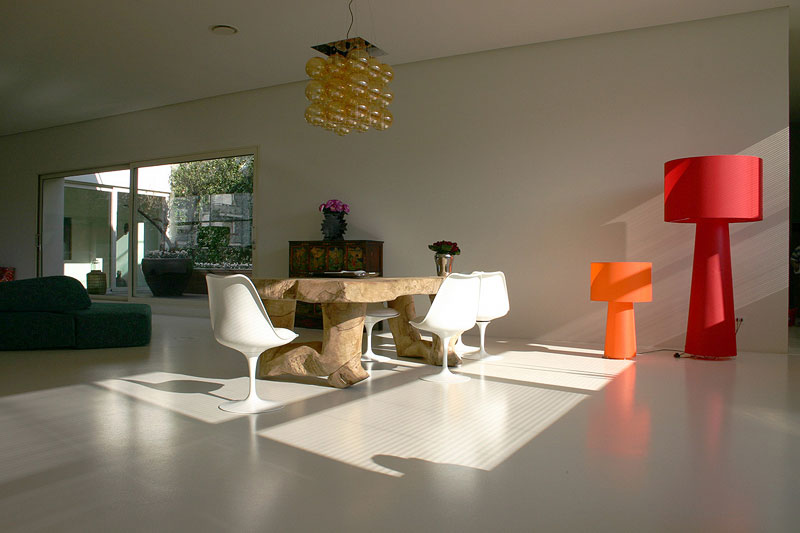
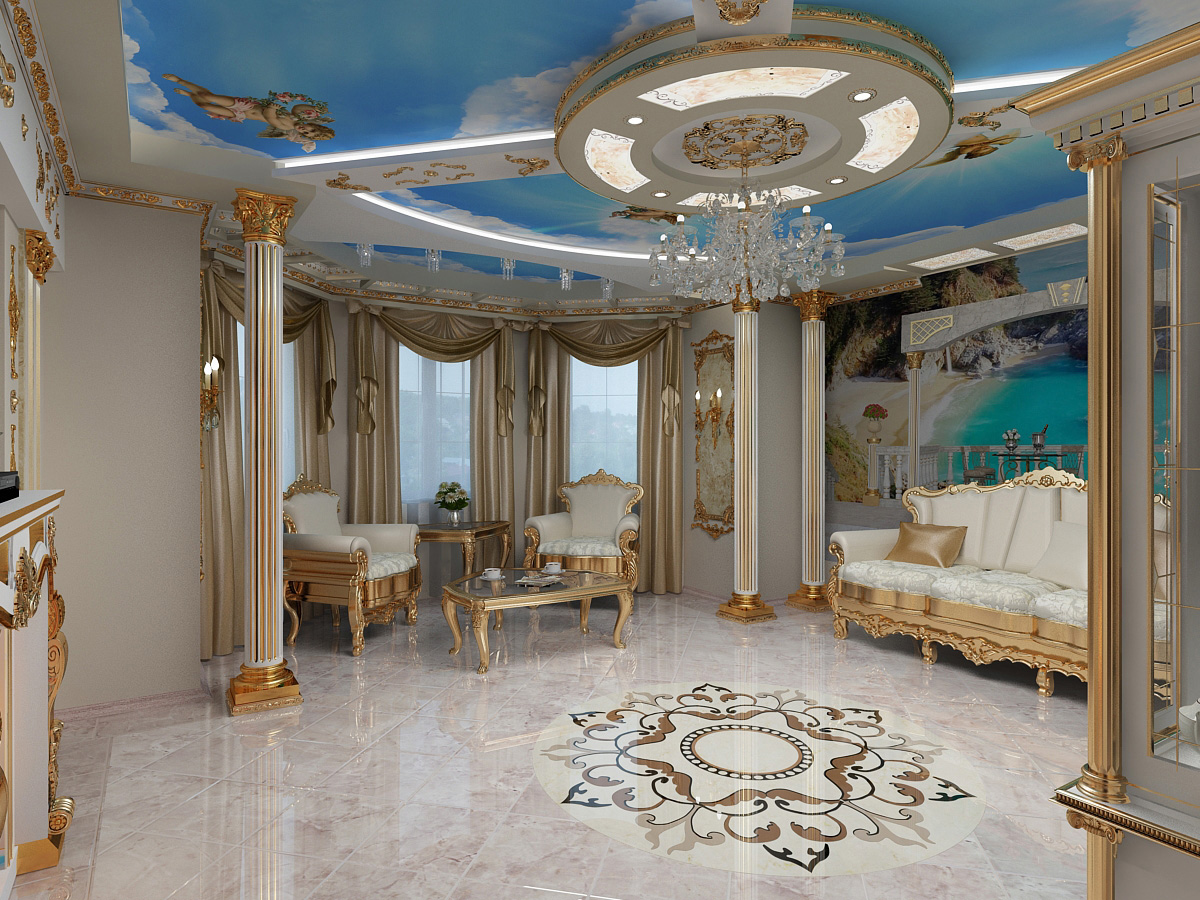
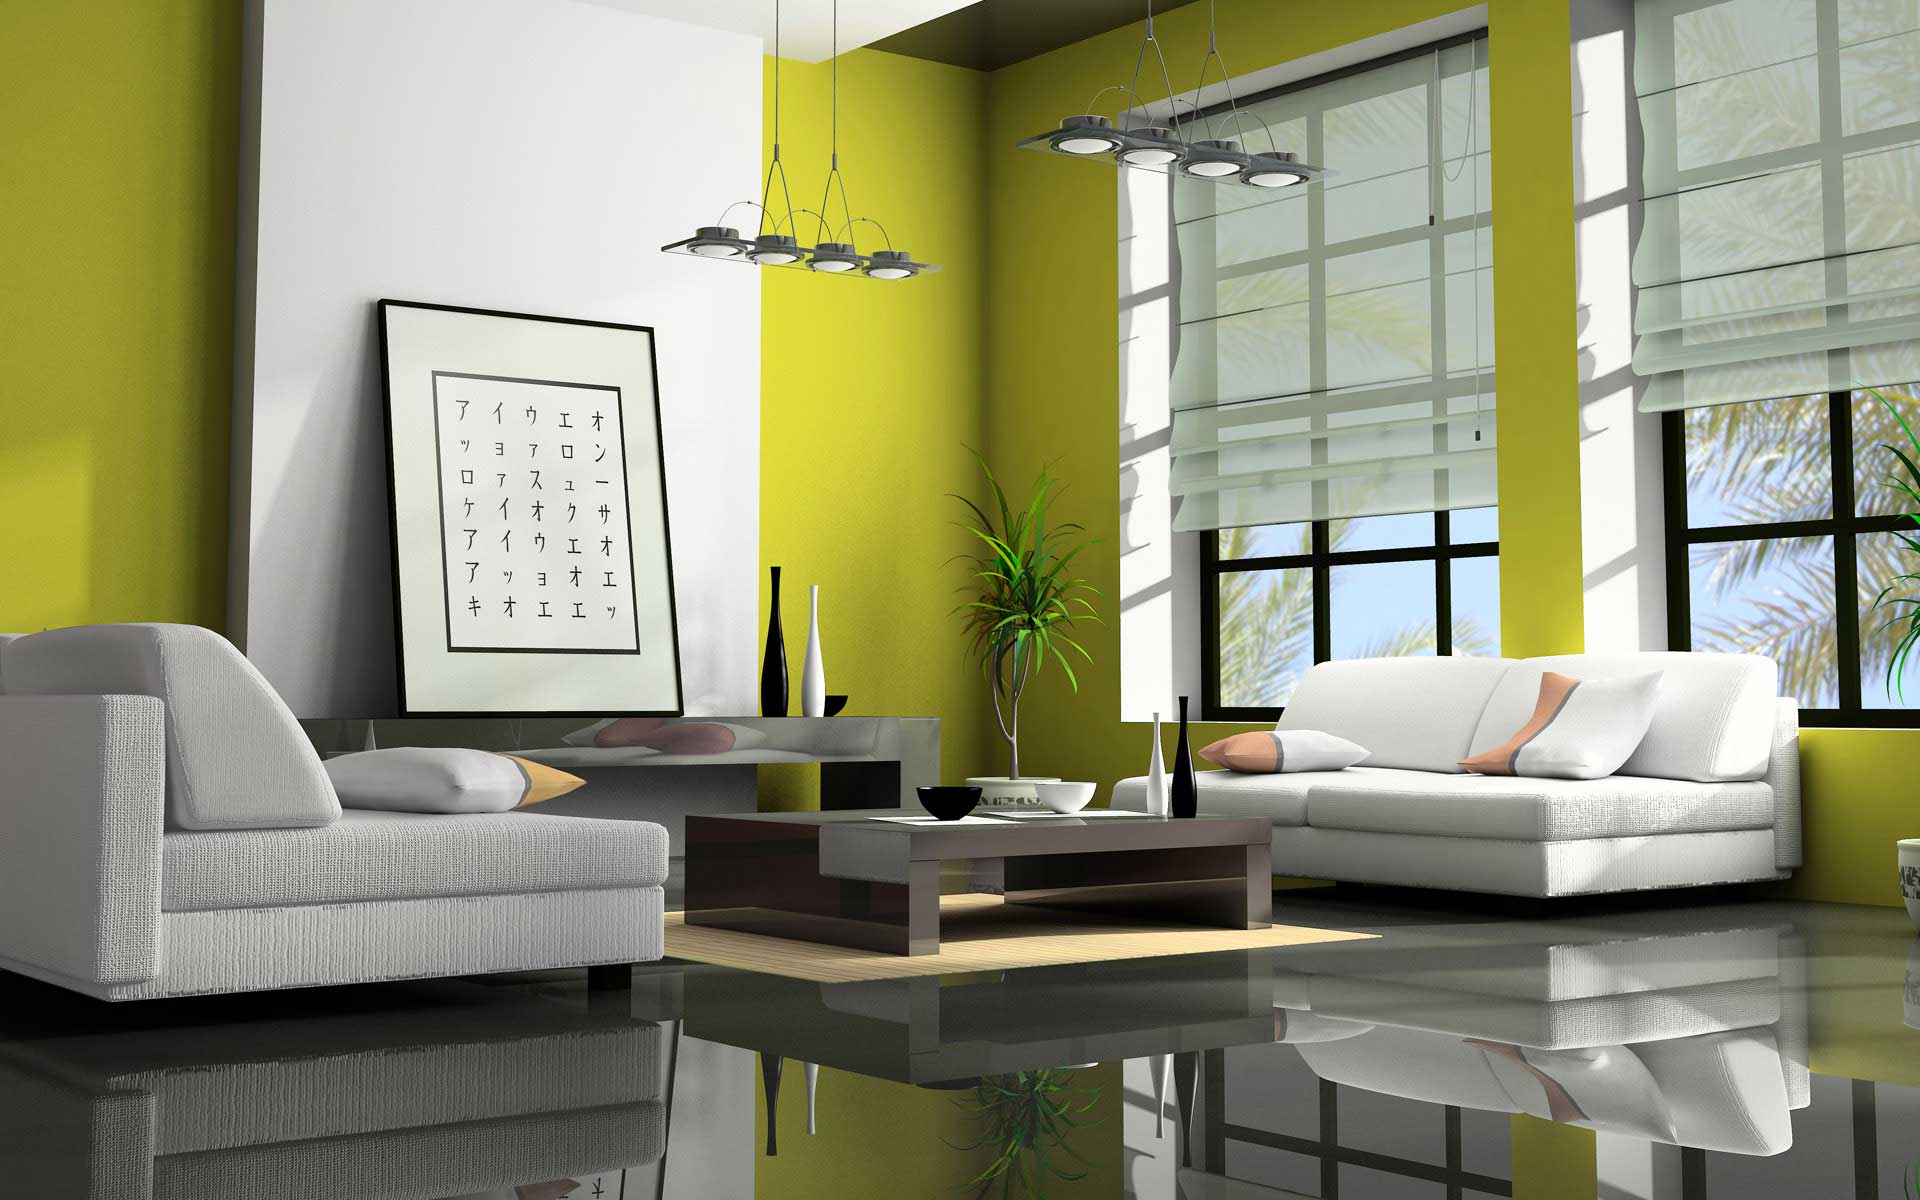
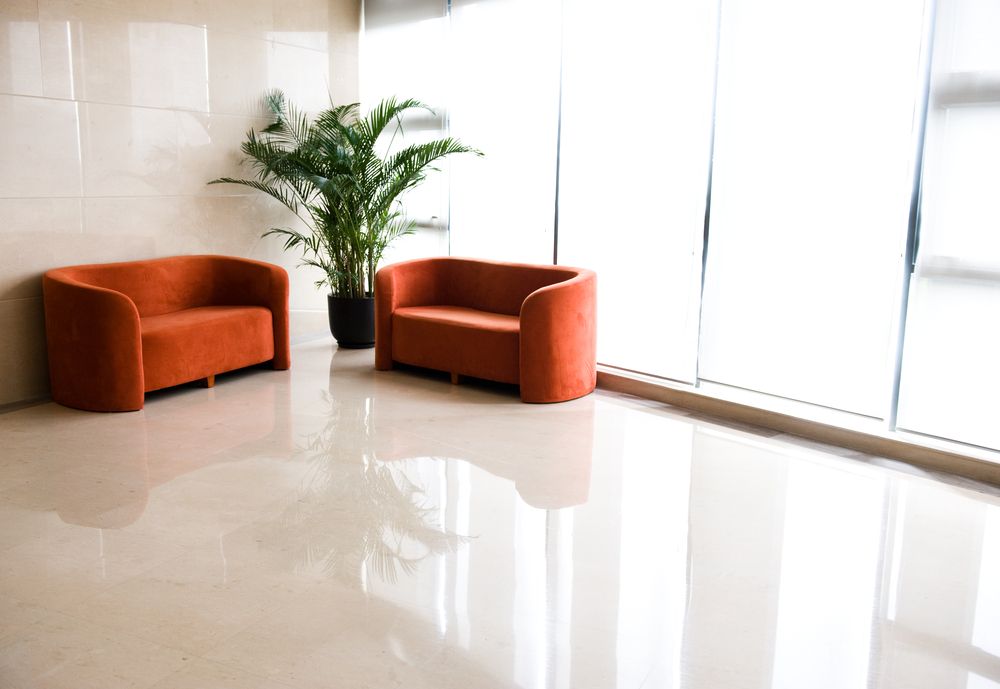
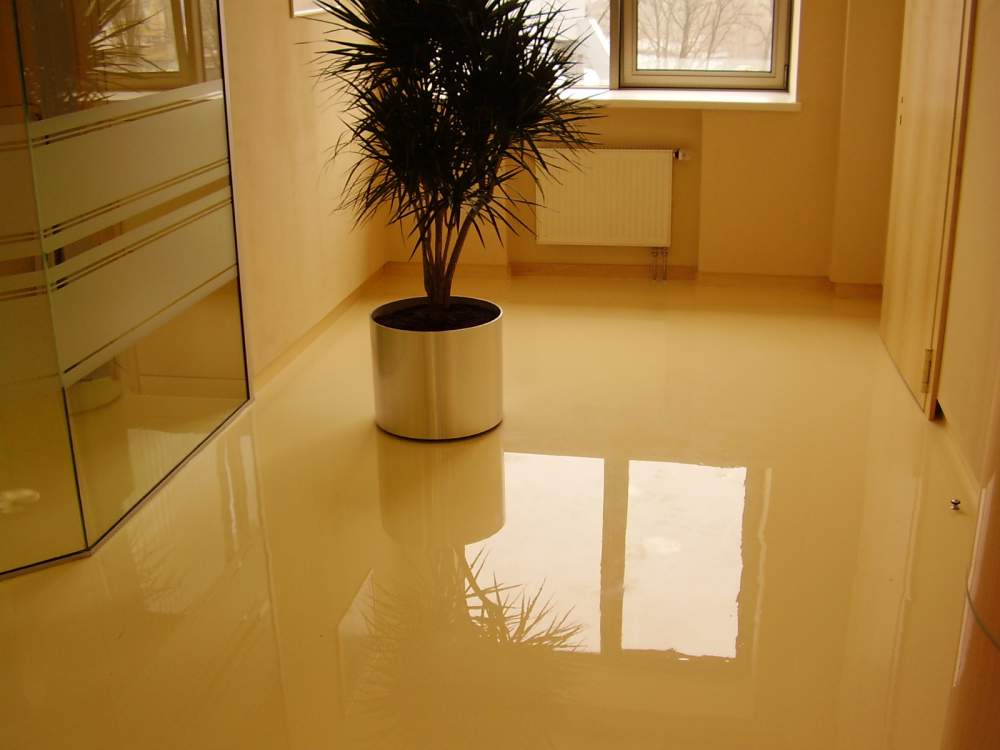
- An ideal example of how a self-leveling floor decorates a room without standing out from the general color spectrum of a room. Natural calm color, thanks to the glossy texture, expands the boundaries of the room.

Self-leveling floors - this is room for imagination. With their help, you can transform completely any room even in a private house, even at a production facility. And most importantly, pouring them yourself is not so difficult.
You will learn more about how to do a self-leveling floor with your own hands in the following video.