DIY floor screed: recommendations for beginners
There are many reasons why you need to do floor screed indoors. This process is quite complex and requires special skills, especially in cases where the screed is performed on large areas. But in relatively small spaces, such as an apartment or a private house, you can do all the work yourself.
It is enough to accurately comply with the technology, having previously studied the detailed recommendations for beginners.
Special features
The main purpose of the screed is to make the concrete base under the flooring as smooth as possible. This is done both for aesthetic and practical reasons: on a flat surface, the furniture will not stagger, and decorative floors will last much longer and will not be deformed.
Screed is required in the following cases:
-
On the soil in a private house, garage and other rooms;
-
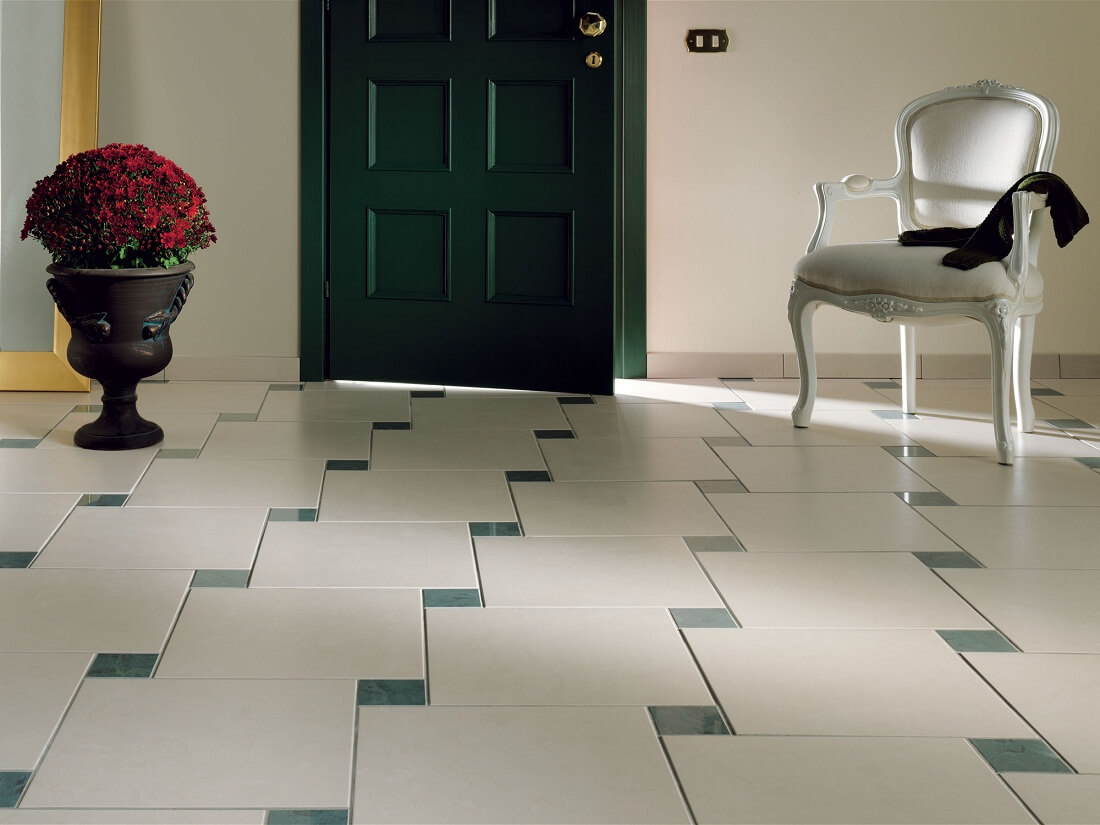
Under the parquet, laminate, linoleum and other modern coatings on the technology of laying requiring an absolutely flat surface of the base layer;
-
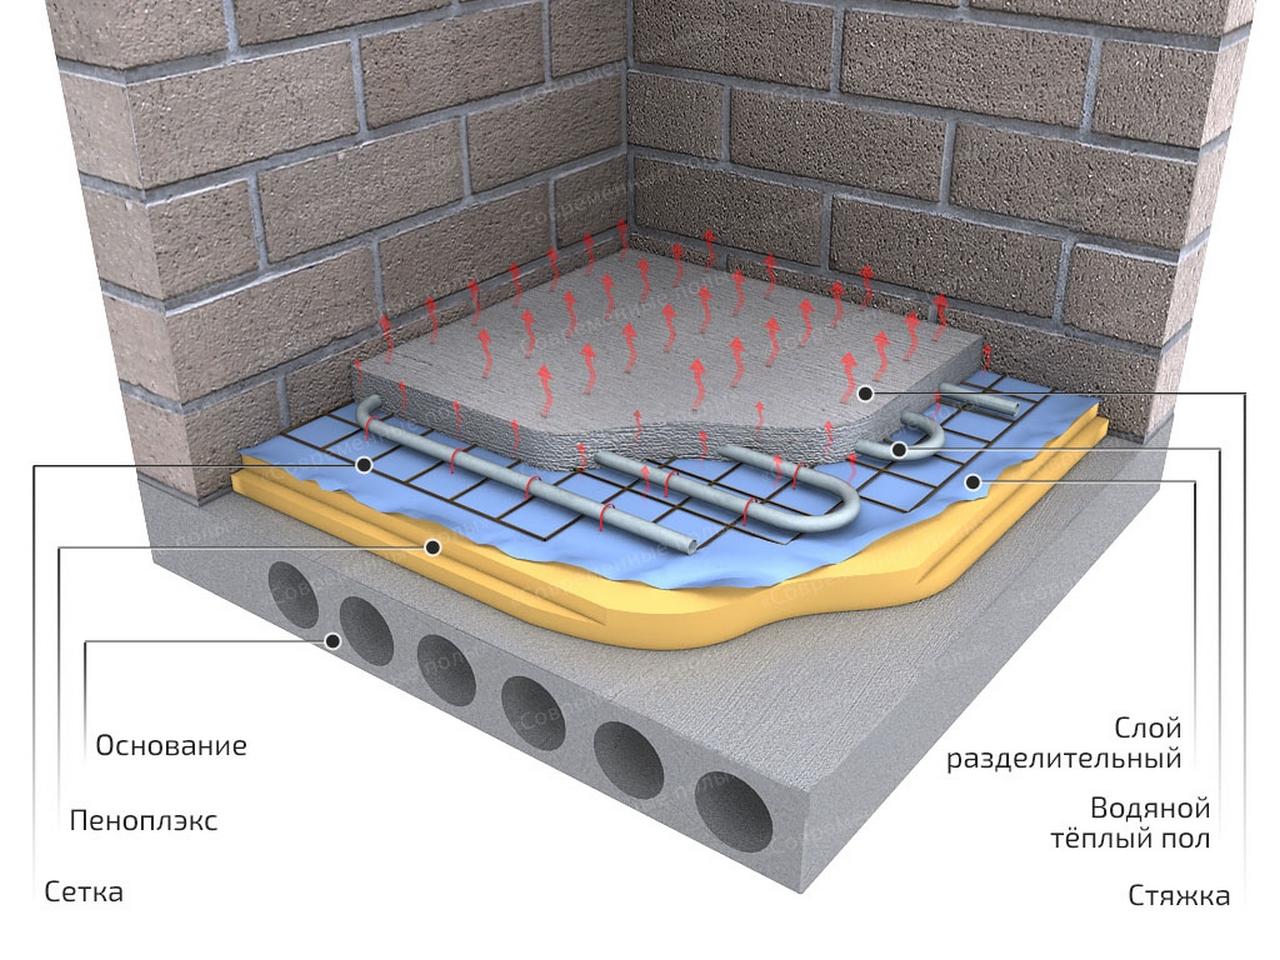
When indoors you need to make a waterproofing or thermal insulation of the floor, including when installing a system of warm water or electric floors.
Features of the technology of laying and selection of materials depend on many factors. It is necessary to take into account such characteristics of the room as the condition of the old pavement, the height of the ceilings, the floor and the presence of the basement room. Based on these data, the required thickness of the screed is calculated and the necessary materials are selected.

Time-tested budget options - cement-sand or concrete mixes, are laid on the ground in a private house and garage. They can also be used in an apartment on the ground floor.
For apartments on the second floor and above, it is better to fill the floor with more expensive, but light self-leveling mixtures or dry screeds.
According to the method of laying there are three types of screed:
-
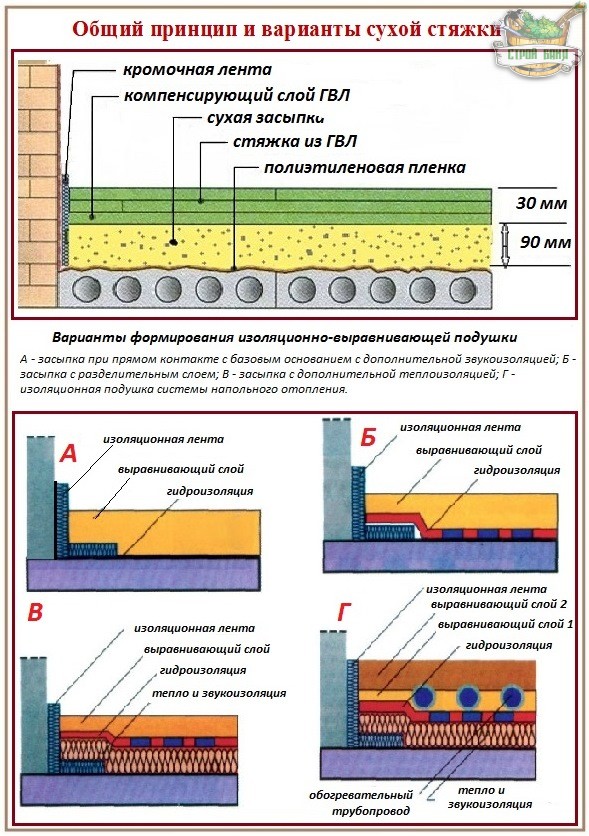
Dry or composite screed. This is a construction made of durable building boards of drywall or plywood, covered with a waterproofing compound.Plate thickness is 15-30 mm. Laying is done on a layer of dry polystyrene or expanded clay with overlapping sheets at each other so that the joints are completely closed. Combined method - the easiest and does not require drying before finishing. Possible only in rooms with low humidity. In cases where the coating is not sufficiently smooth, it is poured with a liquid self-leveling mixture.
-
Semi-dry screed is a concrete or cement-sand mixture with a minimum amount of water. For the device of such a floor requires considerable experience and a lot of special devices, so this method is mainly used by professionals.

Depending on the method of laying the coupler can be made both single-layer and multi-layered. The multi-layer screed is made of a rough concrete and smooth finishing layer. The draft layer serves to correct major defects in the floor and impart the required rigidity to the structure. Its thickness must be at least 2 cm. The finishing layer, the thickness of which is from 3 to 15 mm, is necessary for the surface to become perfectly flat and smooth.
There are also three ways to tie on the nature of adhesion with the base:
-
Tied or solid screed. In this case, direct adhesion of the material to the base coat occurs. It is important to ensure good adhesion and uniformity of the screed.
This method can be applied only on a dry basis, not lower than the second floor of the building.
-
Screed on separating layer. As such a layer can be waterproofing materials, in rare cases, oiled paper. Layers of the base and screed are obtained independent of each other. According to the laying technology, the minimum layer is 30 mm, reinforcement may be required.
-
Floating screed performed on materials intended for thermal, hydro and noise insulation with wall allowances of about 15 cm. Thus, the concrete layer and the floor itself are not connected to the base. The minimum layer thickness is 5 cm, reinforcement is required. It fits on the first floors of residential and utility rooms on a concrete and soil base.
Characteristics of flooring
The choice of floor decorative coatings on the modern market is quite wide and is limited only by the owner’s imagination and the operational characteristics of the room. Under any of the coatings floor screed must be done correctly.And since the requirements for materials and evenness are different, it is necessary to carefully select the leveling compound.
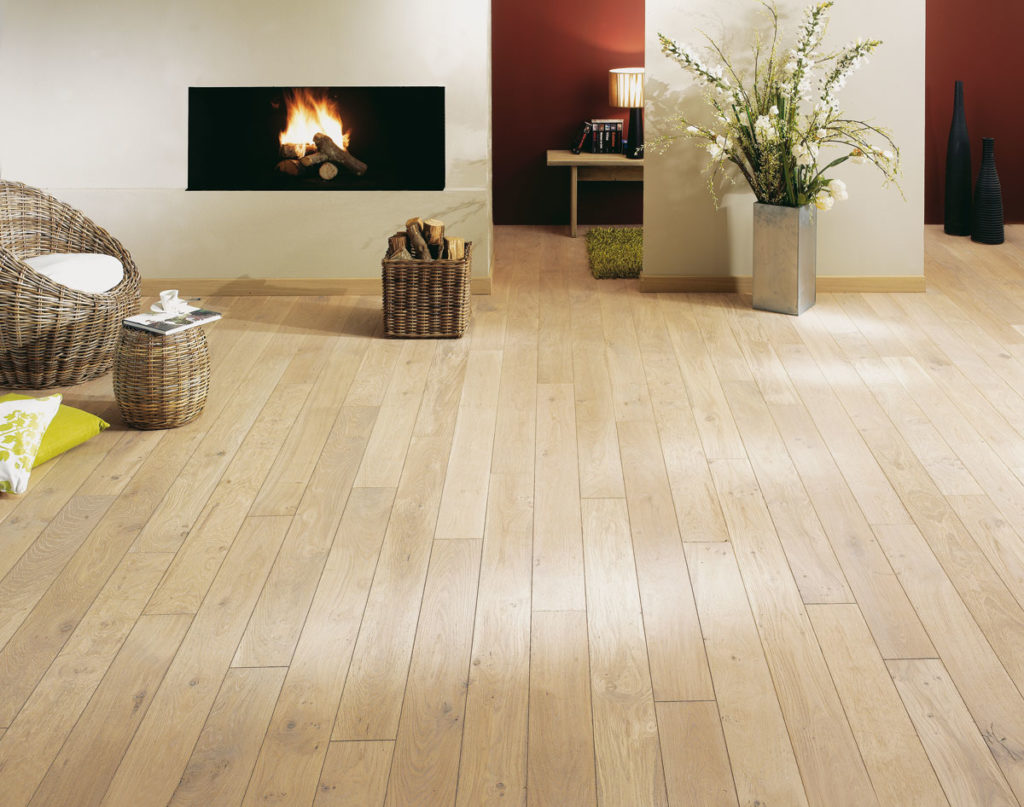

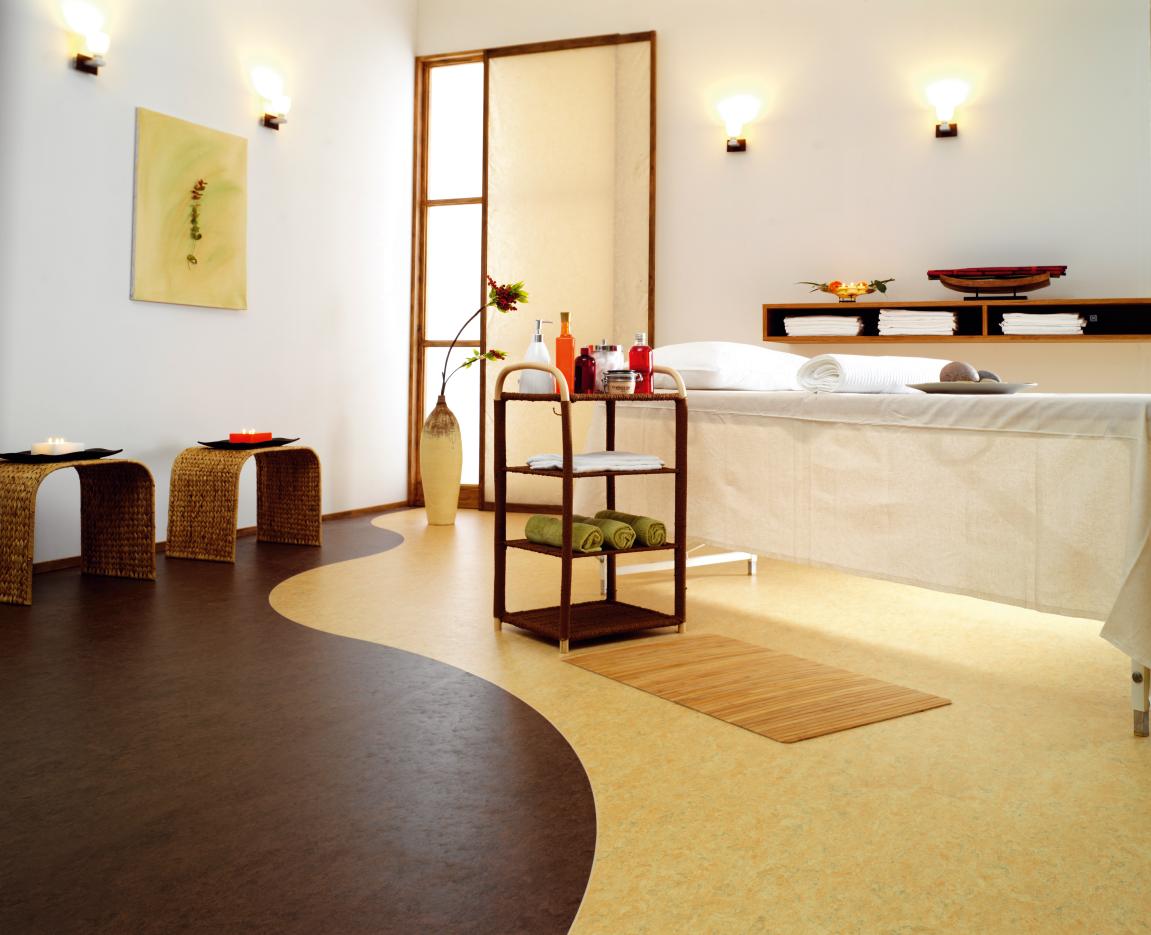
So, for laying parquet, laminate and self-leveling polymer floors need a perfectly smooth and horizontally smooth surface. For the device of this screed using self-leveling liquid mixture. At the same time for a polymeric bulk floor self-leveling mixture should be based on the same polymers.
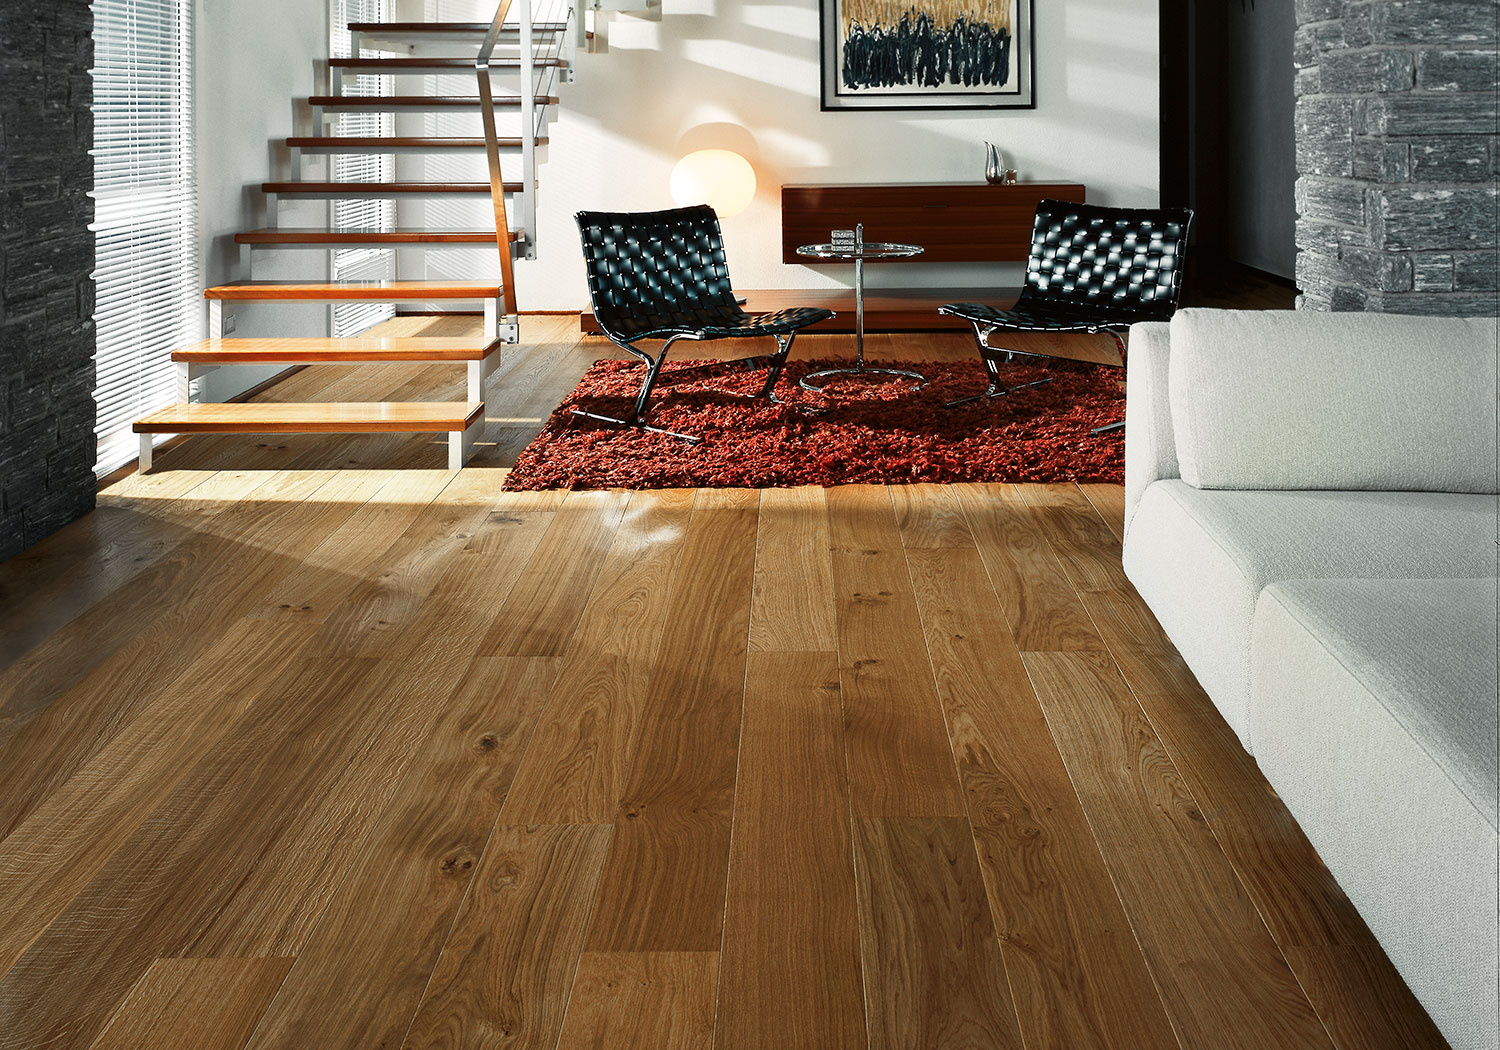
For laying linoleum, carpet or tile in the bathroom it will be enough to have a smooth concrete or cement-sand screed.
In new buildings, a floor screed may not be necessary, but, unfortunately, this is not always the case. Well, if the apartment is purchased with a rough finish, then you can make a minimum screed and proceed to further repair. Worse, when the apartment is made turnkey, and the quality of the finished coating leaves much to be desired. Then it must be redone, completely dismantling the poor quality layer.
In a private house, to save money, you can make a concrete or cement-sand screed. It is obligatory to make a concrete base on a multi-layer cushion of gravel, crushed stone, expanded clay and waterproofing materials on earthen soil. Lightweight mixes may be needed only on the second and third floors.
The device floors can be carried out on almost any surface, you only need to choose the right composition. The exception is wooden flooring. On such surfaces, the finished coating can quickly become deformed and crack, and the tree itself can rot under it. Of course, there are special mixes, but they can be quite expensive. Therefore, if there is a possibility of dismantling to the concrete base or to the ground, then it is better to do that.

If you remove the wooden floor is not possible, then it must be very carefully prepared. To do this, it is necessary to replace all rotted and damaged elements, ottsiklevat surface of the tree and cover it with a special primer.
It is recommended to use a gypsum-based screed, but it is not suitable for rooms with high humidity.
Where to begin?
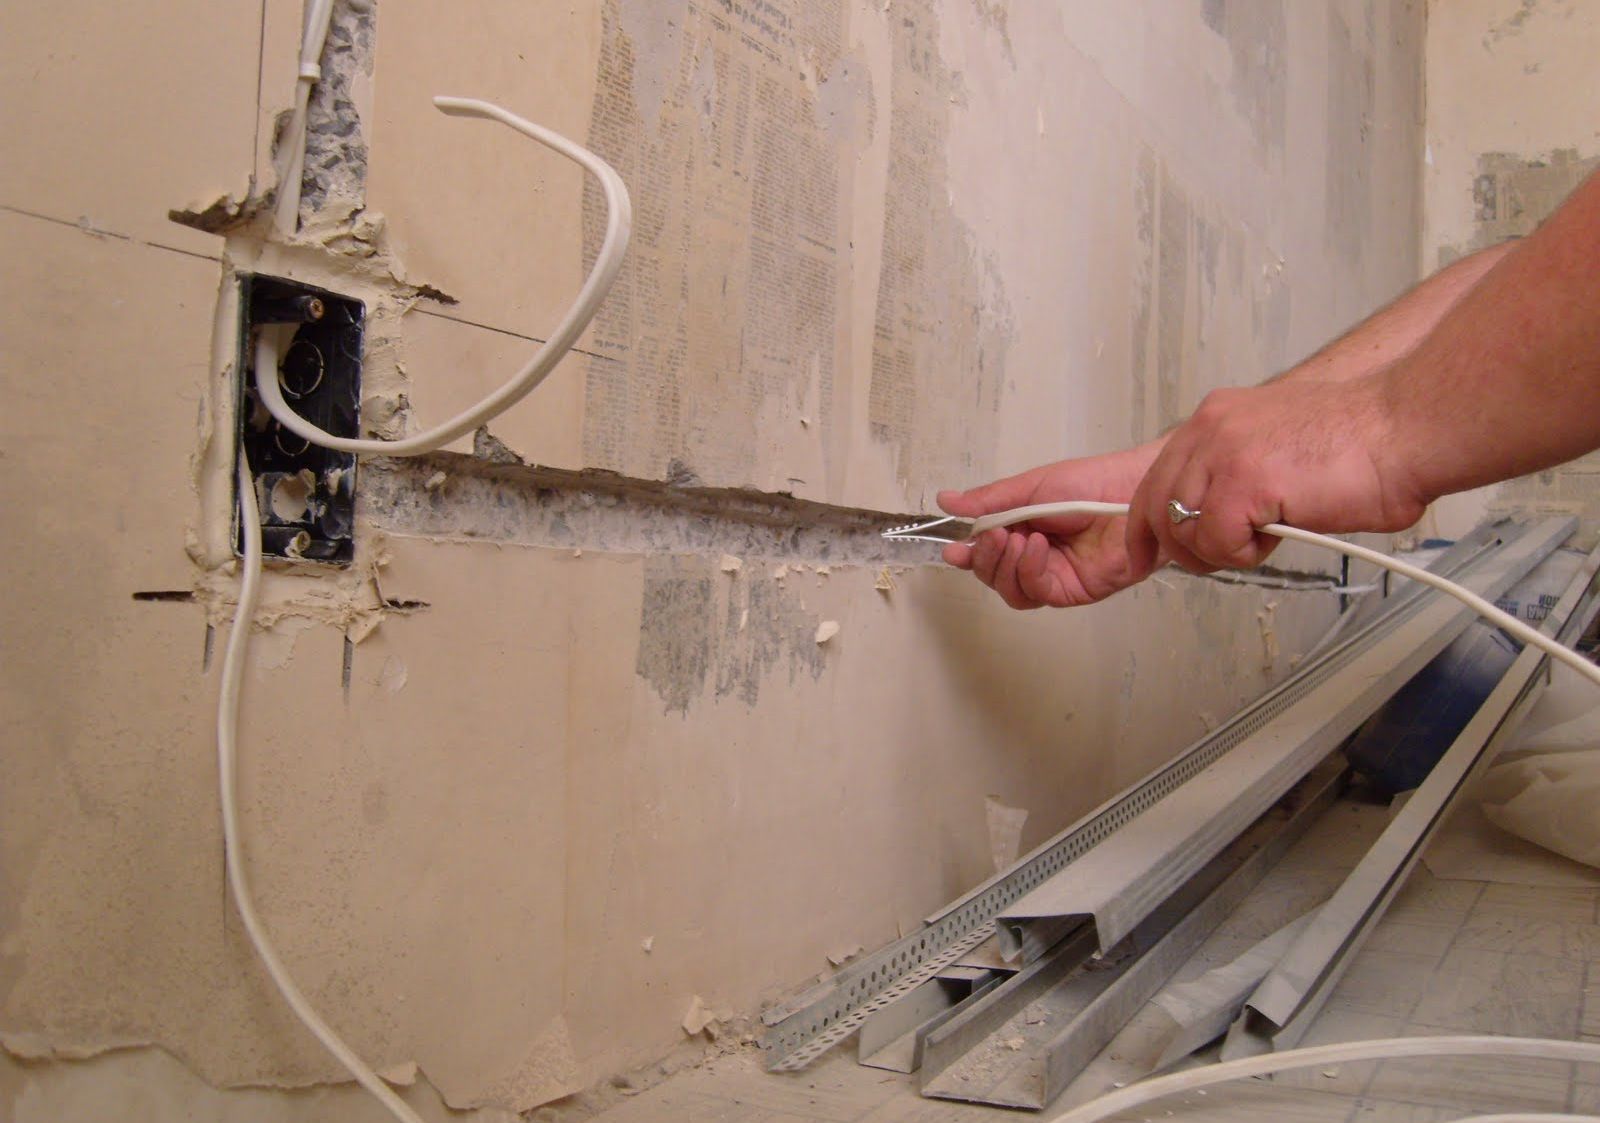
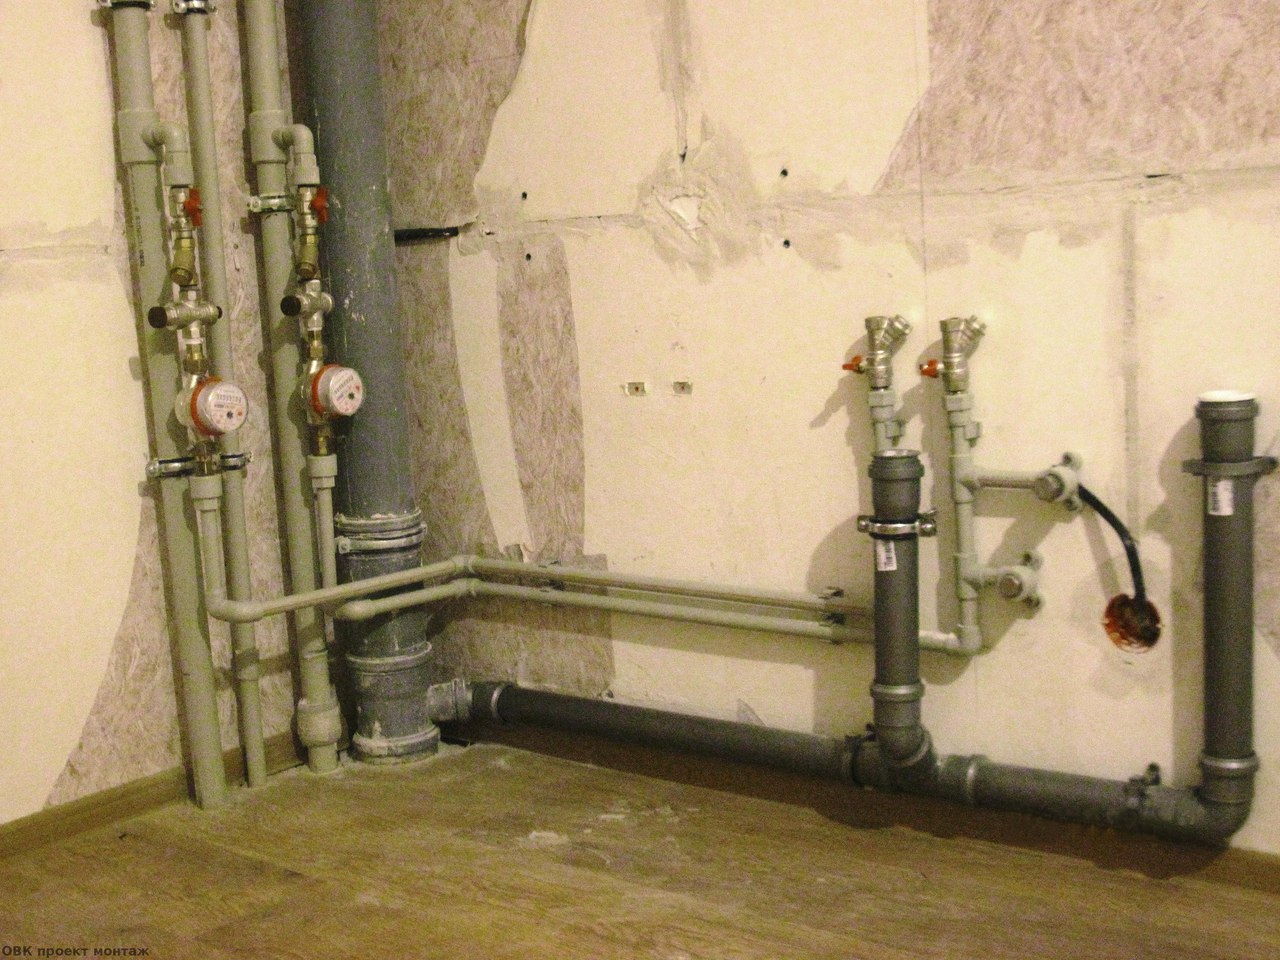
To perform work in a short time, preparation of the premises, materials and tools. All communications are laid, such as electrical wiring, water supply, sewage and heating, and repairs are being made to the entire room. There are also requirements for the microclimate of the room: air temperature - in the range of 5-25 ° C, humidity - 60%, without sudden drops. The absence of drafts is important and direct sunlight is not allowed.
The most difficult is the preparation of a soil base. First of all, you need to remove the top layer of soil, the thickness of which can reach 40 cm. In cases where the distance from the soil to the leveling mark of the screed is more than 35-40 cm, pour a layer of sand of the desired thickness. After that, the entire surface is carefully tamped using a special vibrating machine or a heavy log with a length of 1 meter. The surface is considered sufficiently rammed, if it does not leave traces of shoes.
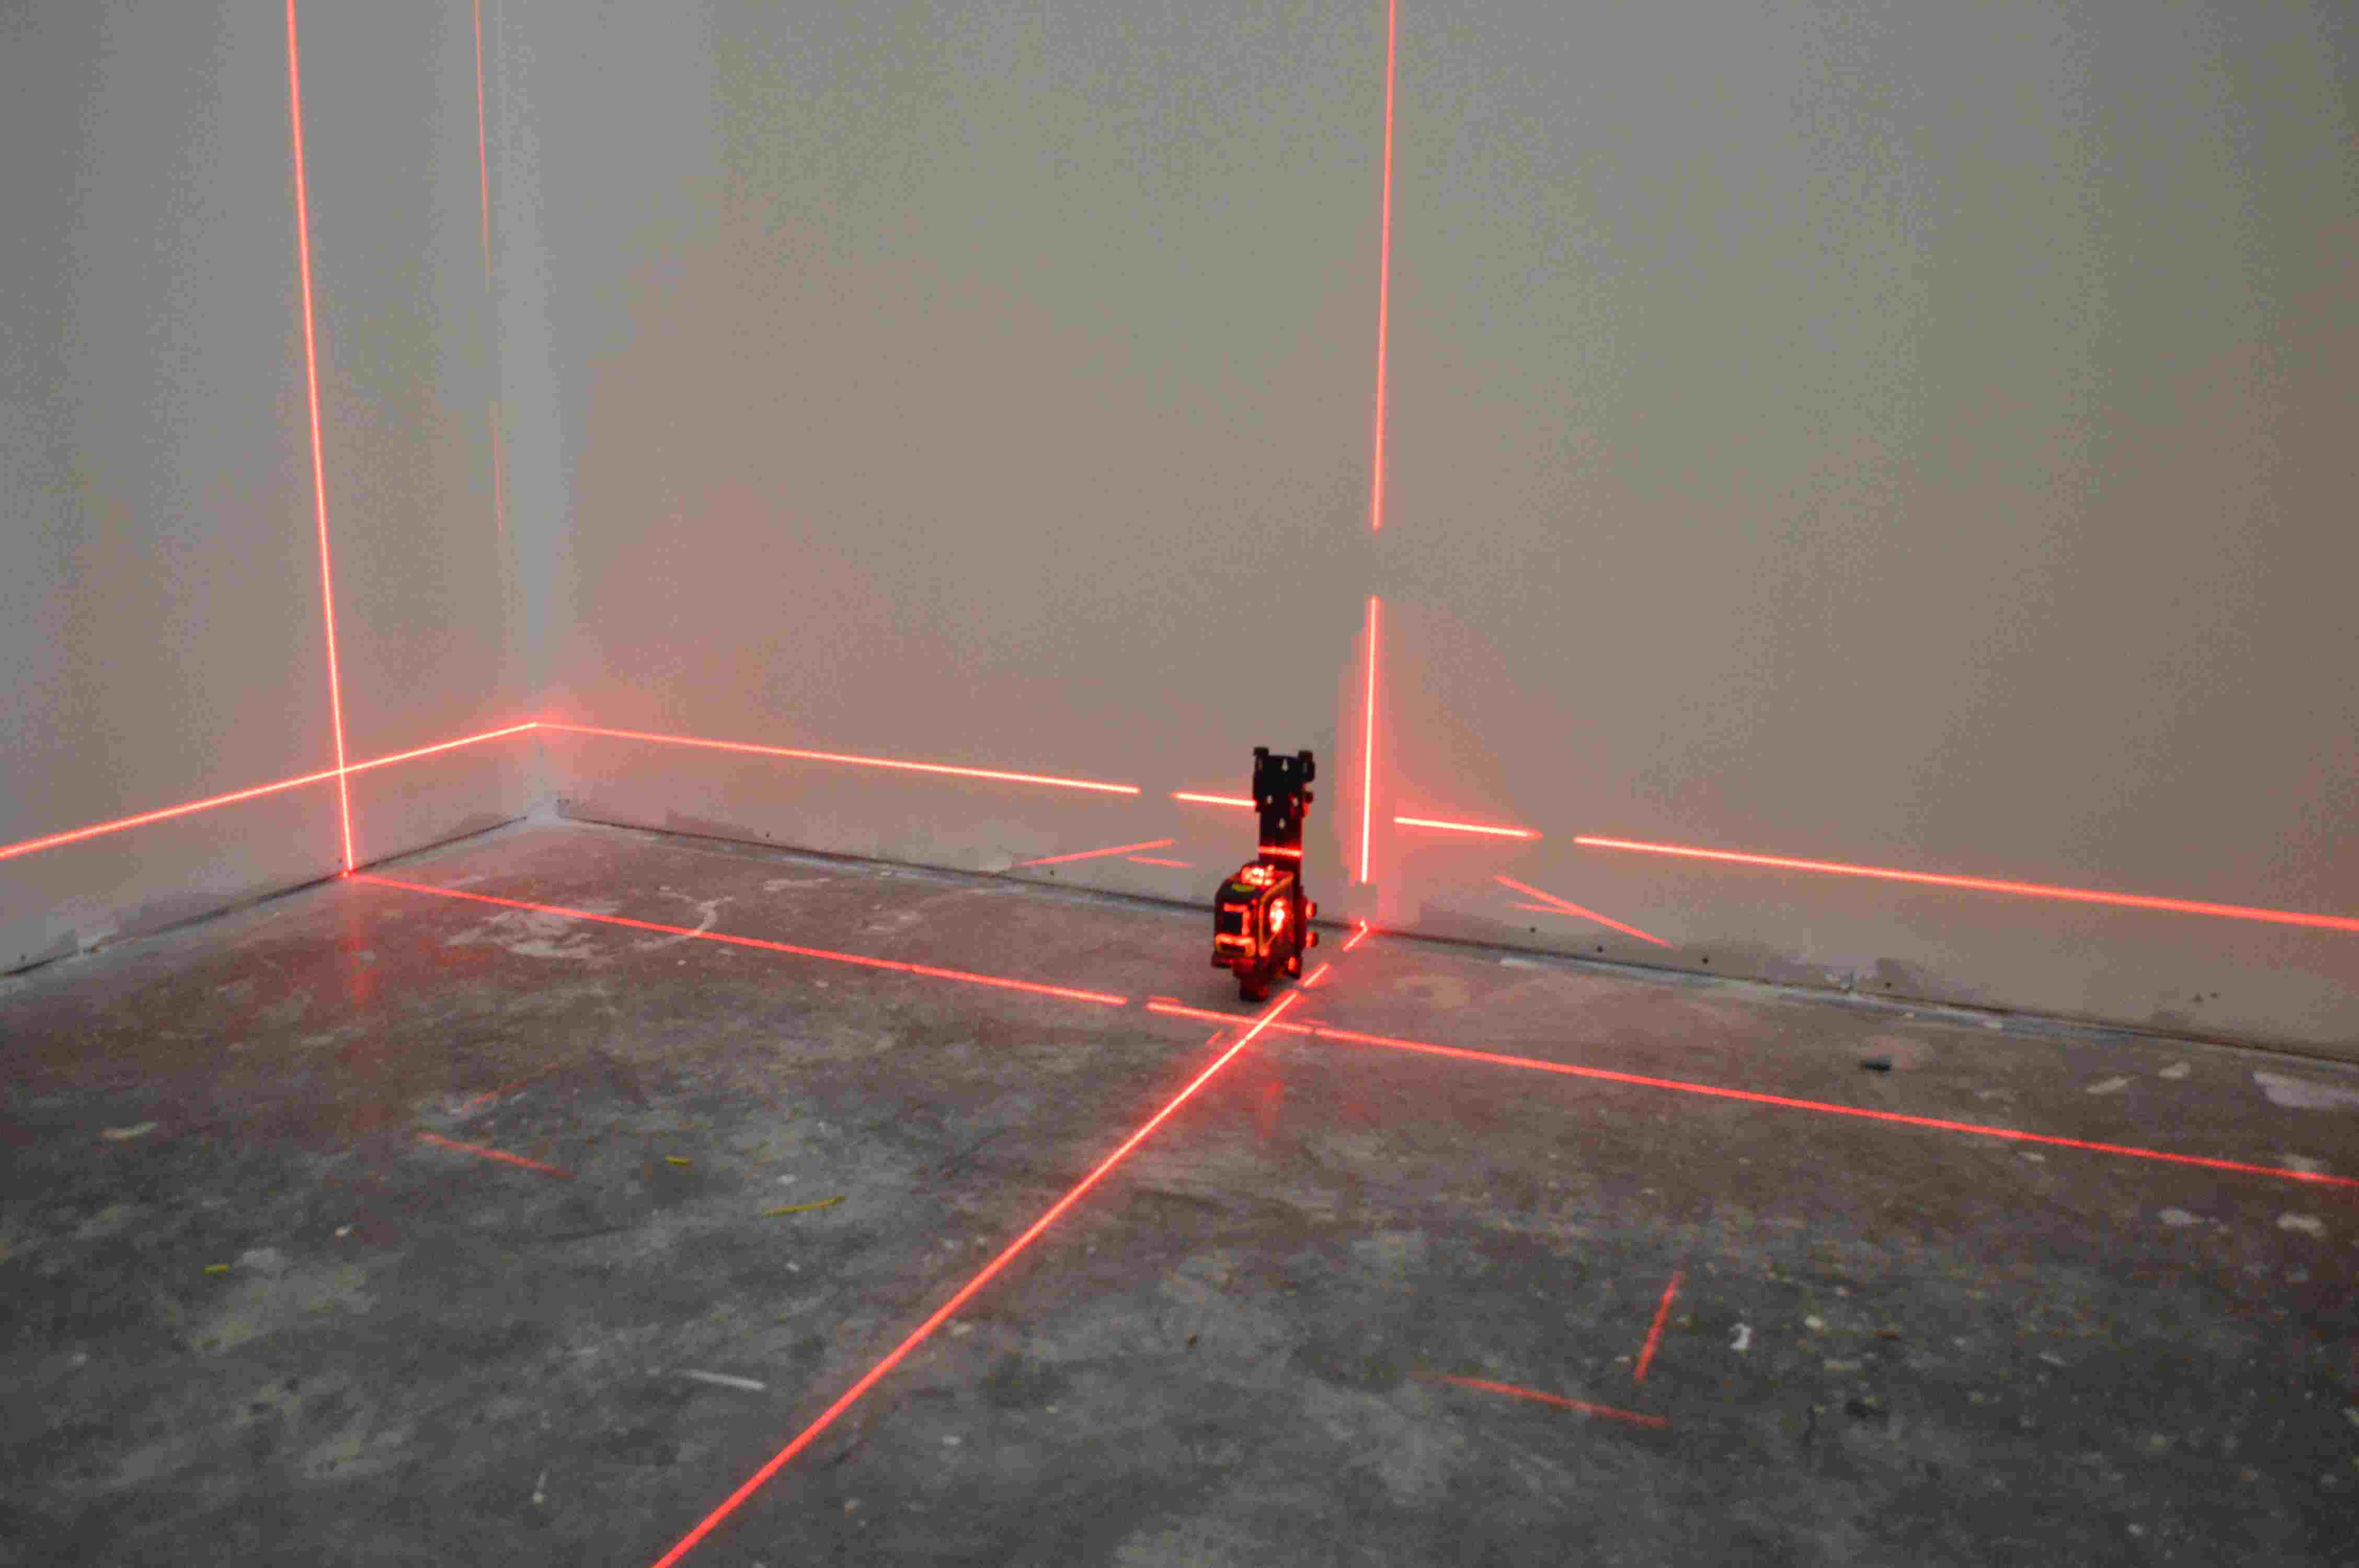
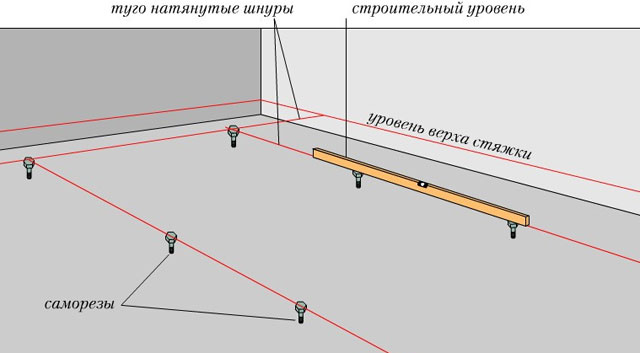
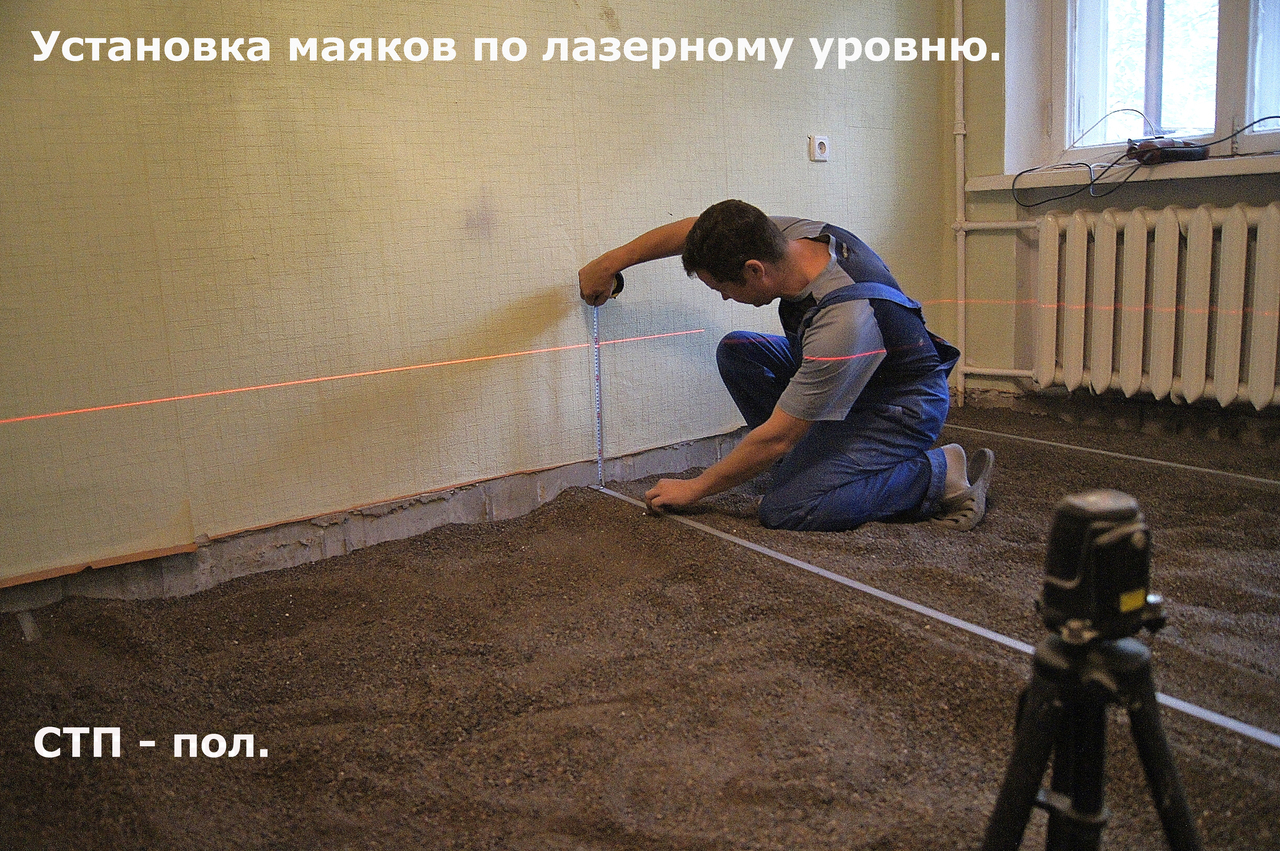
To calculate the materials that will be needed for the device screed on a concrete base, is determined by the highest point of the floor. This is a mark necessary to ensure that the finished coating is smooth. It is usually in one of the corners or one of the walls. It is determined as follows:
-
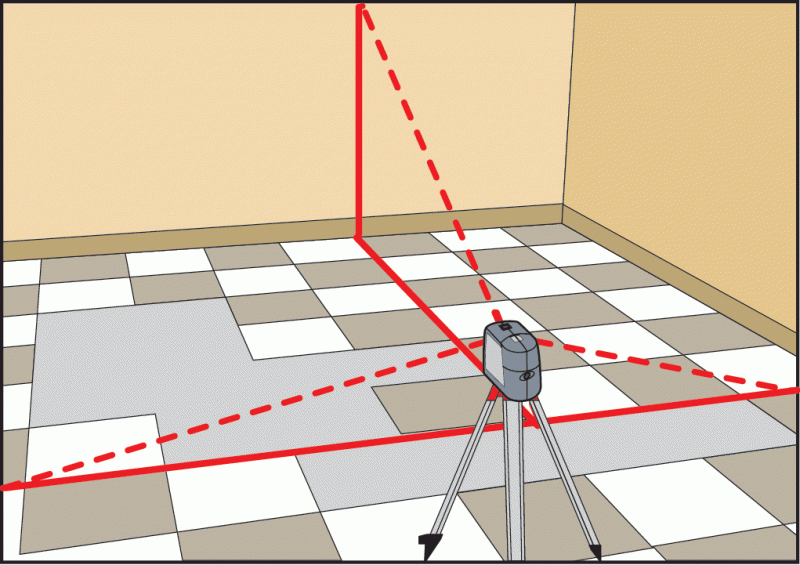
From the threshold of the room vertically along the wall you need to measure 1 meter and make a mark with a pencil. Using a building or laser level on the wall, draw a flat horizontal line;
-
Using a tape measure to make measurements from the line to the floor for every 10-15 cm.The point, the distance to which will be the smallest, is the highest point of the floor;
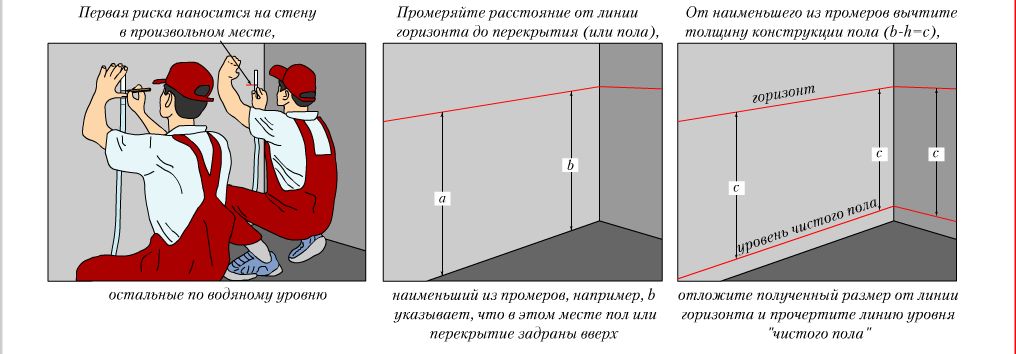
-
The received measurements should be marked on the rail as less as the floor will rise;
-
Using the same batten, mark the highest point of the floor around the perimeter of the walls and draw a control line on them. The wall should be cleaned of plaster 0.2-0.3 cm above the marks made.
Also, to calculate the height of the screed, it should be taken into account that there should be no floor level drops at the joints of different rooms after laying the floor covering. The exception is the bathroom and toilet, where the level should be lower to avoid leakage of water supply and sewage pipes in case of unforeseen accidents, and some design solutions. This takes into account the thickness of the coatings, and the difference is compensated by the levels of the screed.
Materials
Depending on the characteristics of the room and the selected flooring, you can choose one or more possible options for floor screed compounds, which may need additional materials:
-
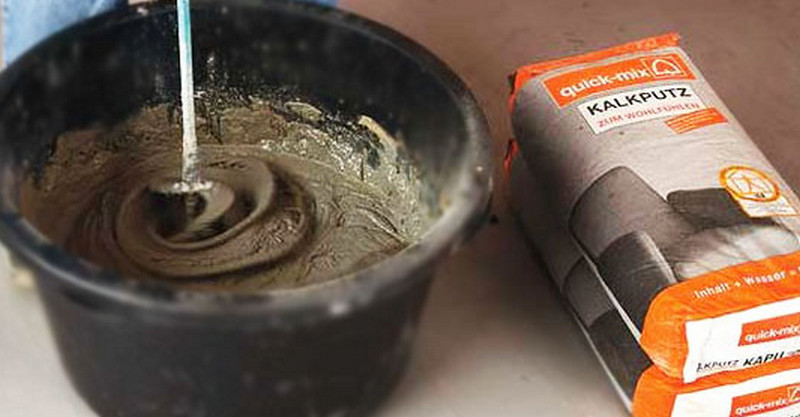
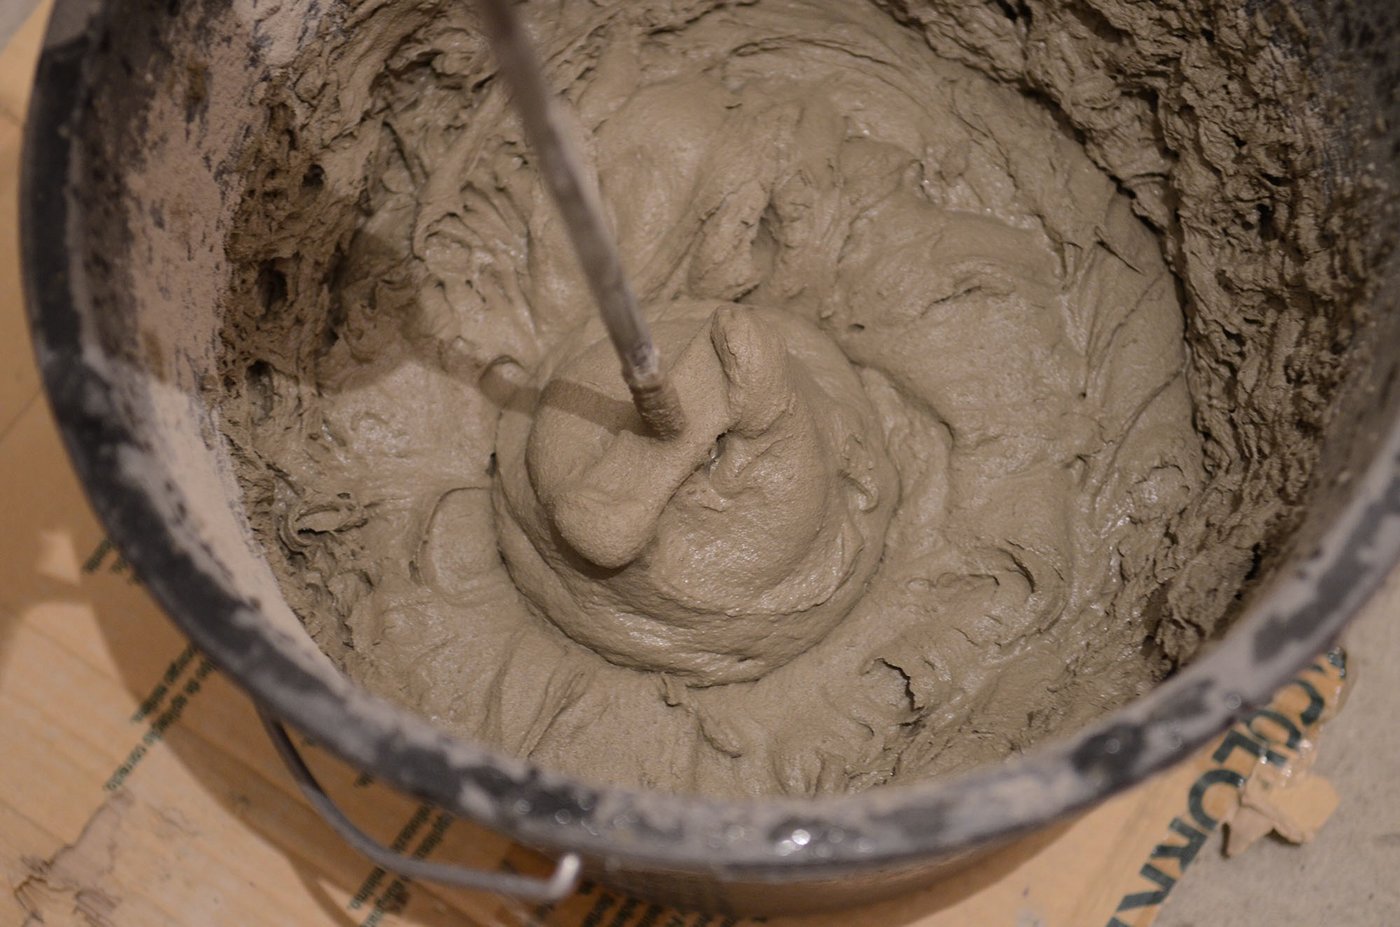
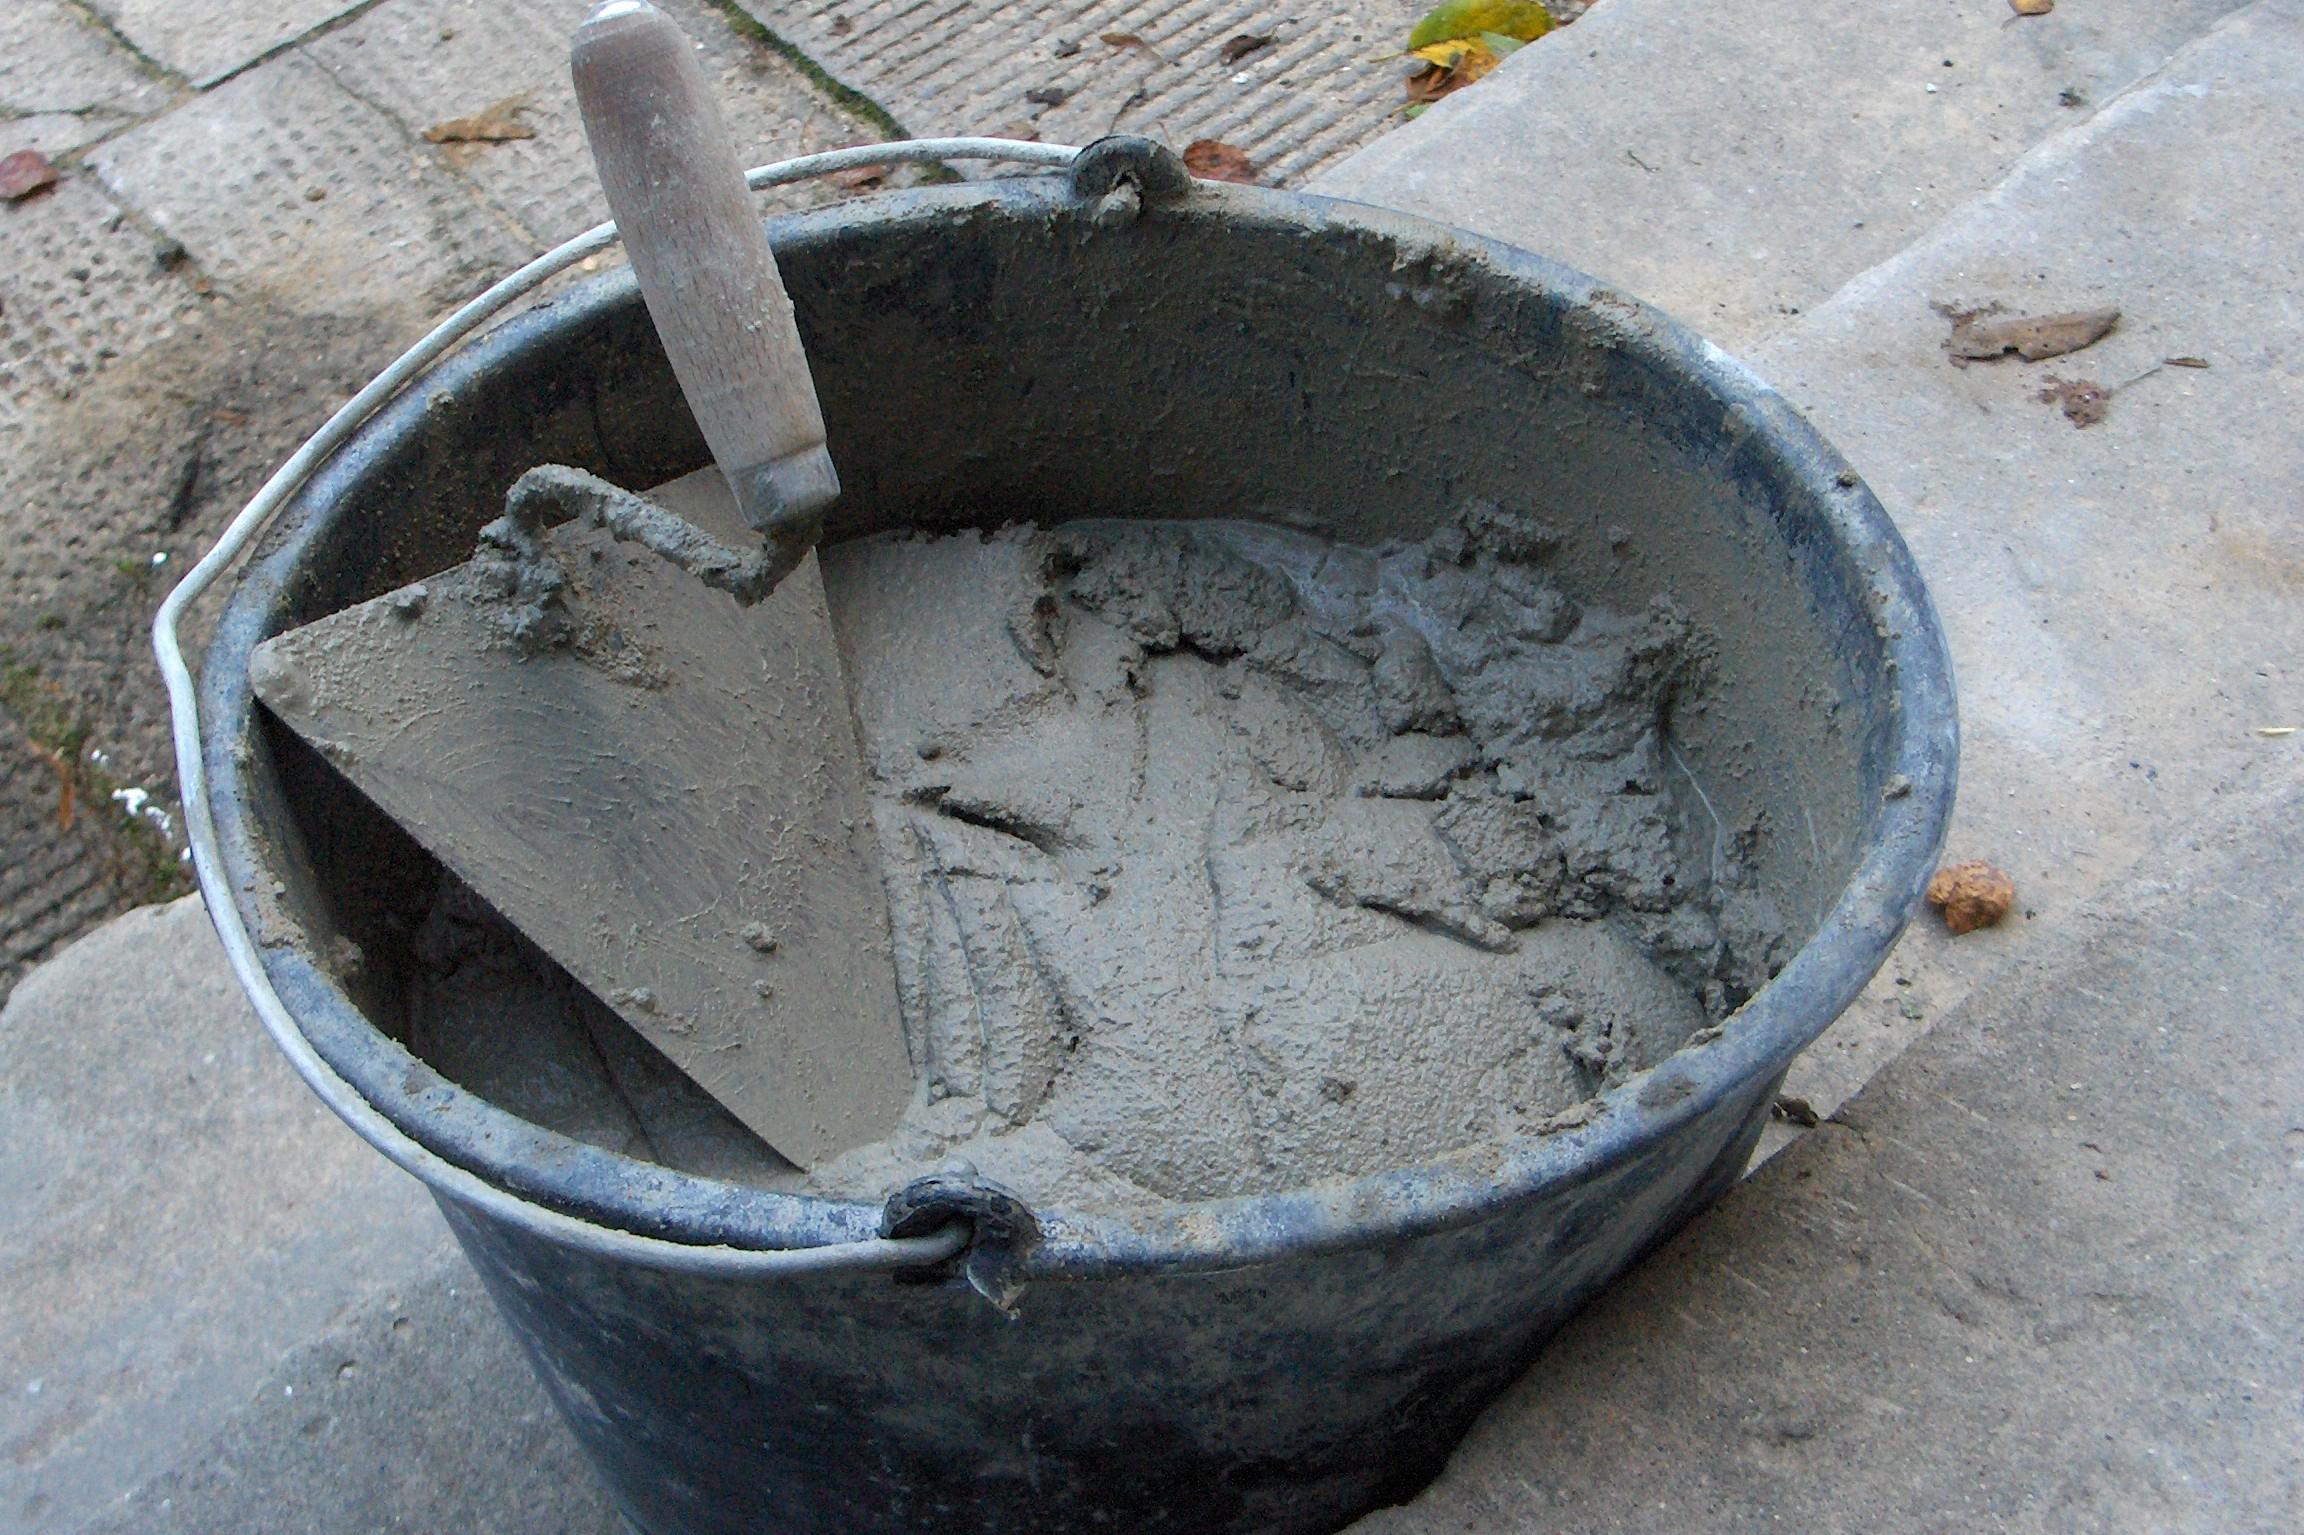
Concrete screed: Cement grade M400 is used, with large loads on the floor - M500. Depending on the fillers, there are several recipes for preparing the mixture.The most common is 3 parts of sand to 1 part of cement, 2 liters of water are added to 10 kg of the mixture. With the use of large inclusions, such as crushed stone, expanded clay or gravel - 1 part of cement, 4 parts of large filler, 2 parts of sand, 0.4 parts of water. For strength, polypropylene fiber is added to these mixtures at the rate of 50 g per 100 kg of mixture. Plasticizers are used for plasticity, the required number of which is indicated in the instructions.
The minimum layer of such a screed - 4-5 cm, it is recommended to lay a reinforcing mesh or structure made of reinforcement. Drying speed is about one month.
-
Cement-sand screedA: 1 part cement, 4 parts perlite, 2 parts sand, 13 parts water. Preparation of the mixture is done in several stages, the sequence of which must be strictly followed. You may also need to change the amount of water to achieve the desired consistency. You can add plasticizers. A layer of such a floor is made from 2 cm, reinforcement is recommended to be done only with a layer of 4 cm or more. Dries within 3-7 days.

-
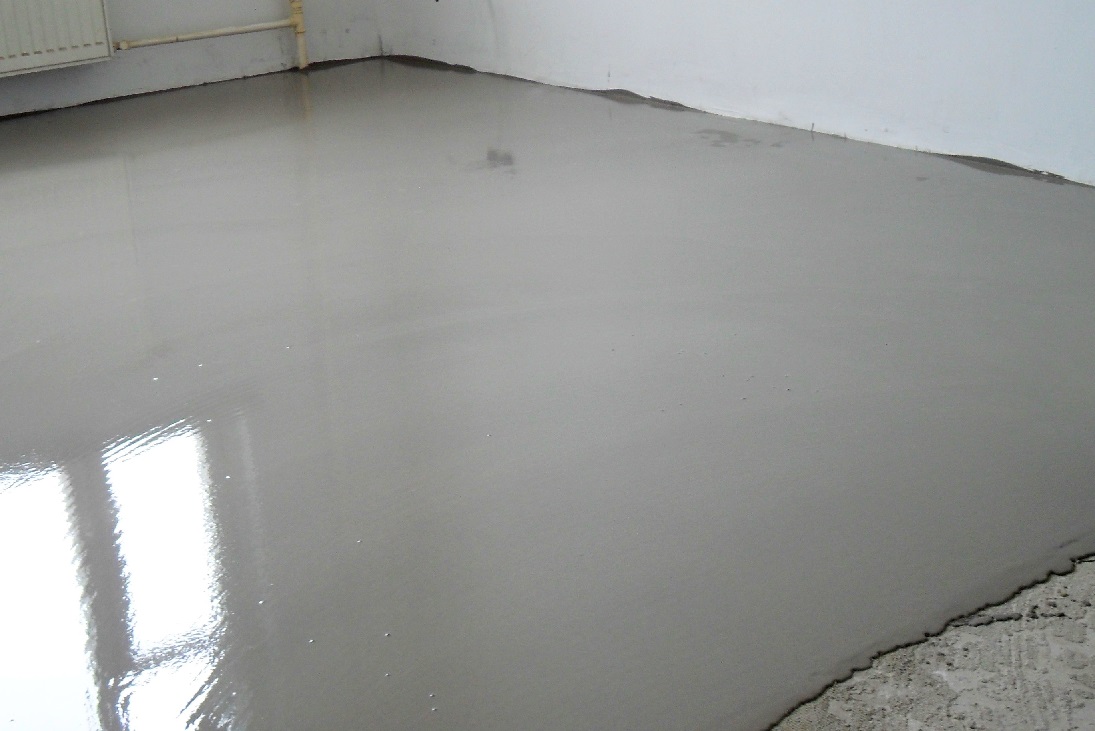
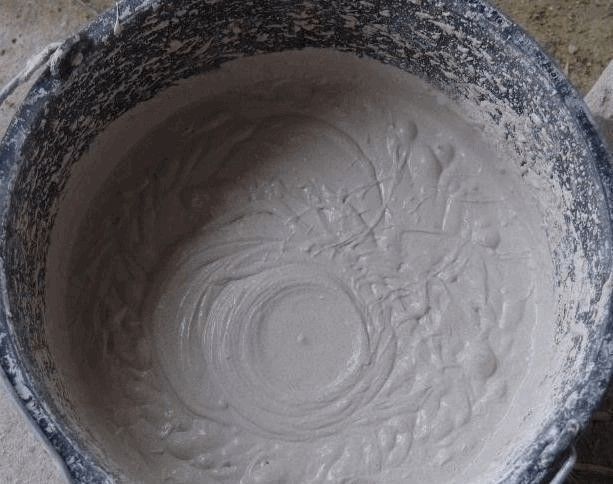
Self-leveling compounds sold already in finished form and diluted with the necessary amount of water specified in the instructions. There are mixtures based on cement, gypsum, or a combination thereof, as well as using polymers.It is forbidden to use a gypsum-based tie in rooms with high humidity, since in case of wetting, gypsum acquires the consistency of sticky dough. The thickness of the mixtures can be from 0.3 to 30 cm, which is indicated in the manufacturer’s instructions, but taking into account their high cost, it is advisable to make a layer up to 3 cm. At the same time, the thickness of the draft layer is 5-25 mm, and for a finishing surface 1-2 is enough mm Drying time - from 10 hours to 3 days, depending on the composition.
-
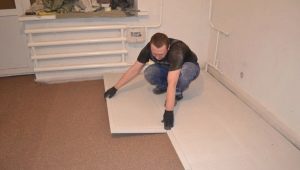
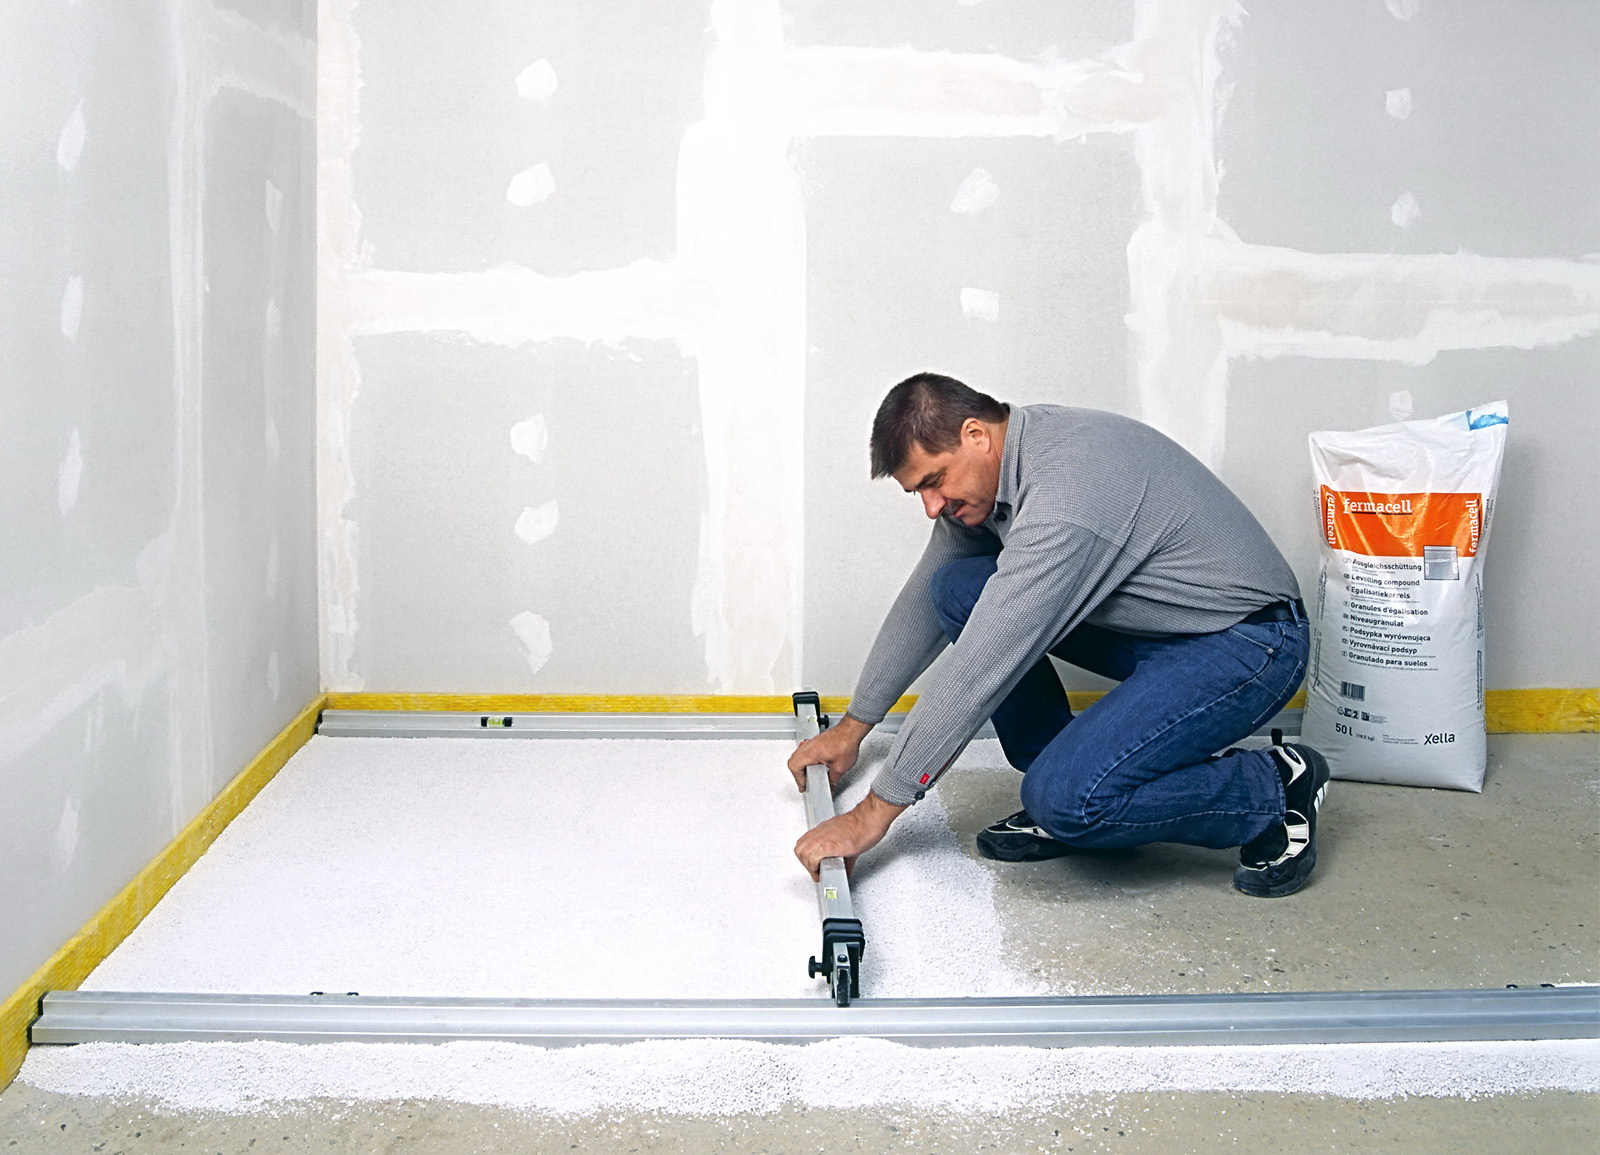
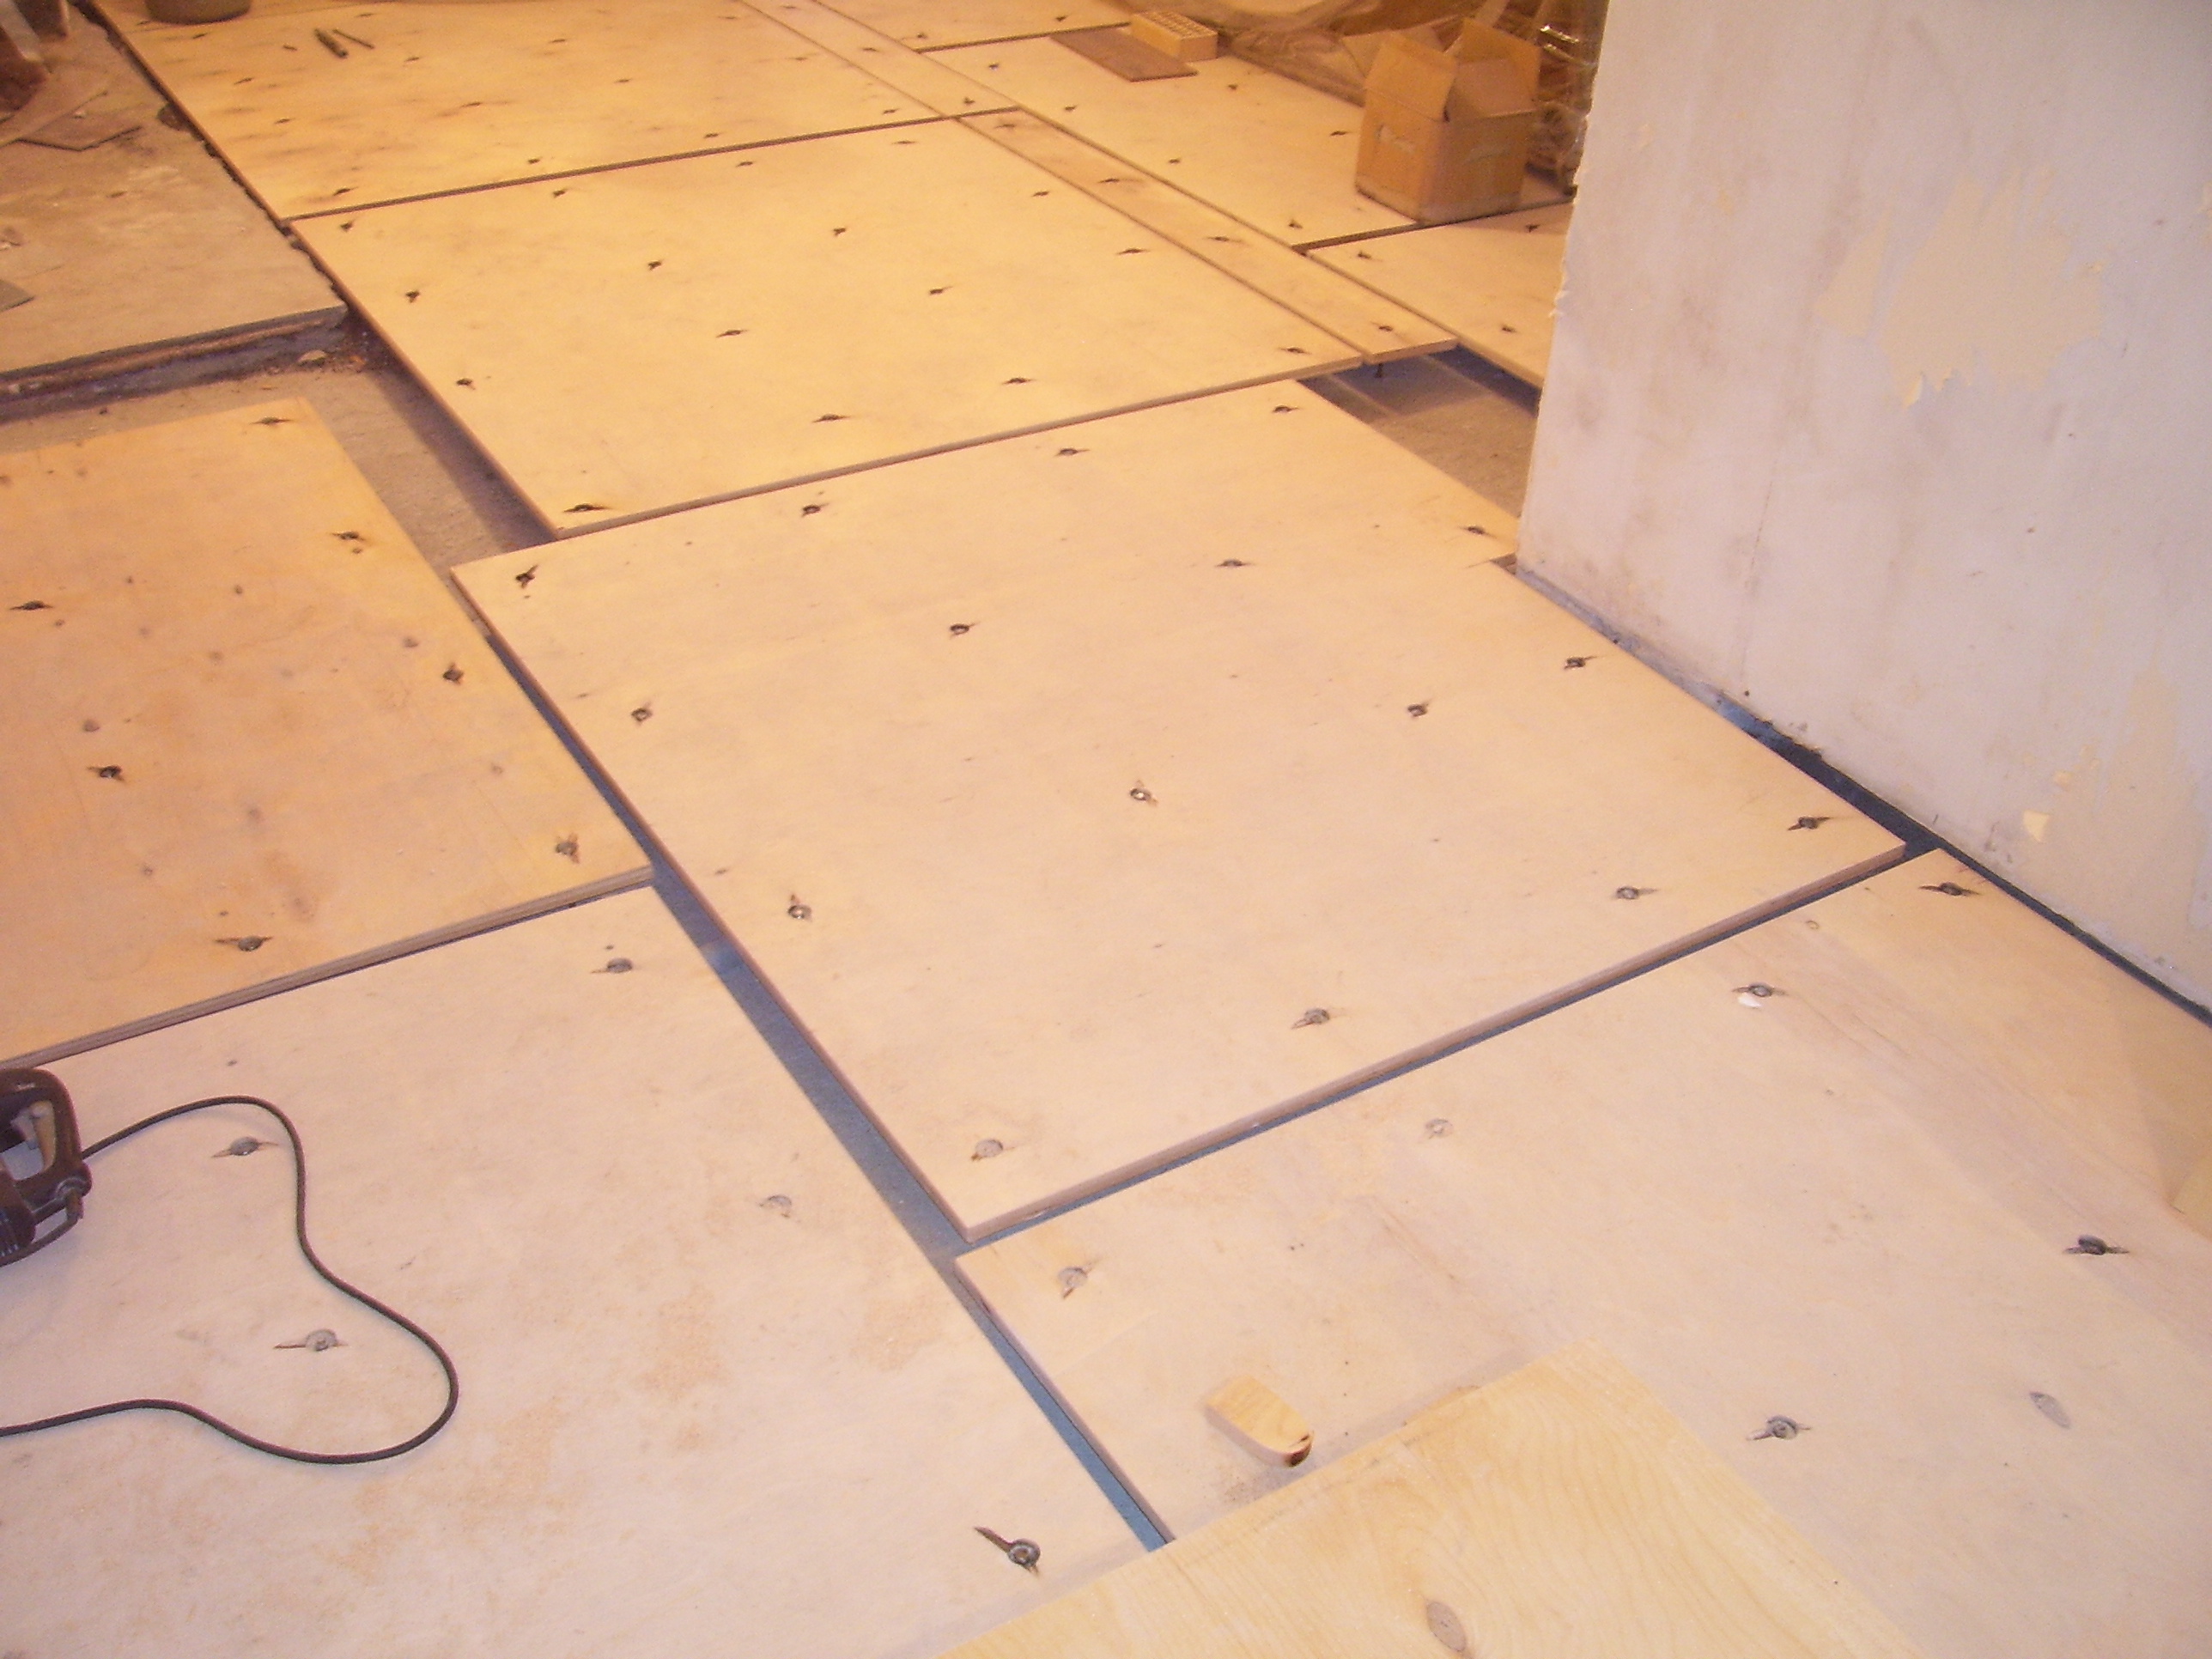
Dry screed - These are large sheets of drywall or plywood, which are laid on a layer of bulk materials, such as polystyrene or expanded clay. Further work on such a screed can be started immediately after its installation.
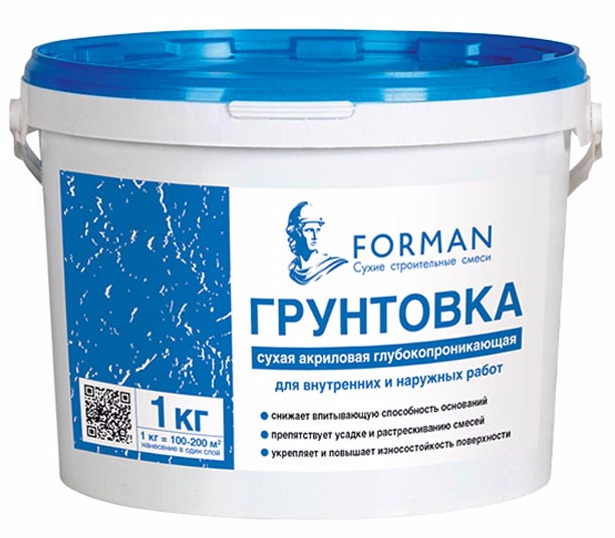
When working with any type of screed will need primer and putty. For concrete and cement-sand screed, a universal primer or concrete contact is suitable. Suitable types of primers for self-leveling floors are indicated on the packaging of mixtures.
Putty must be selected on the resin or glue base.
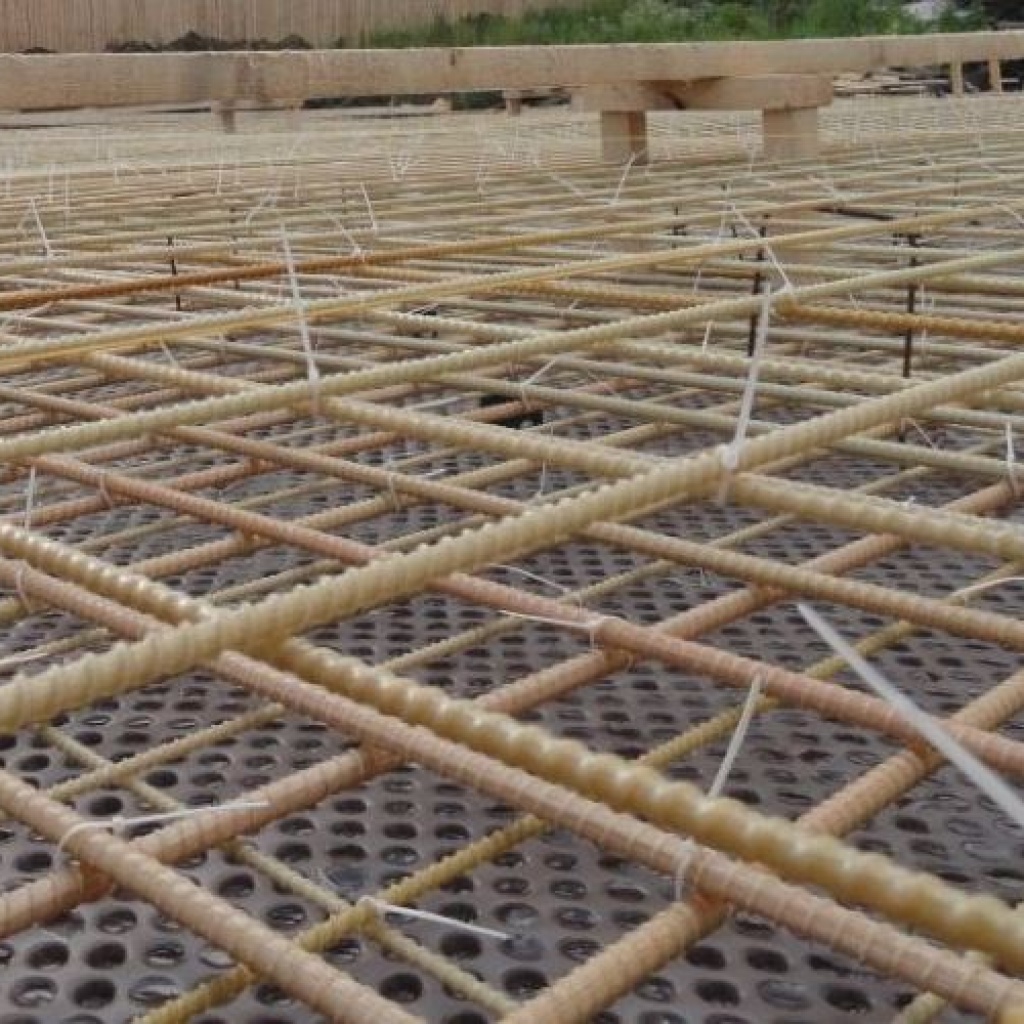
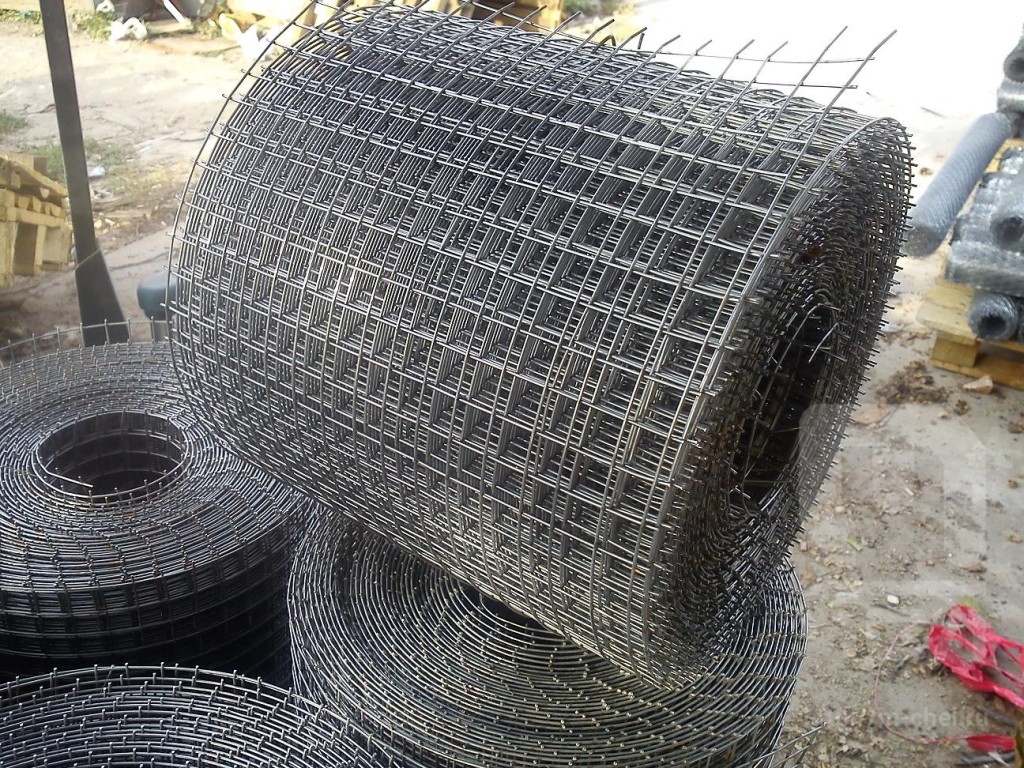
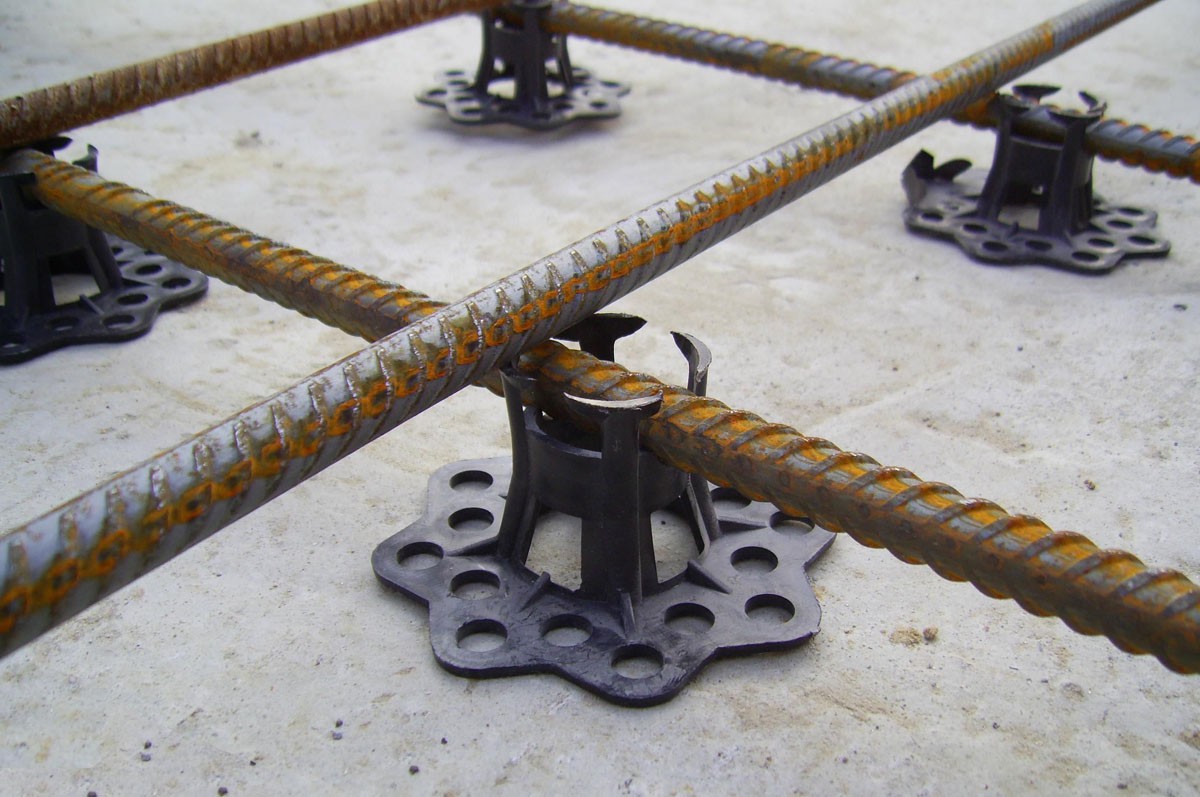
You will also need foam to fill large gaps near the heating pipes. For laying the reinforcing layer the easiest way to use a special fine-mesh mesh of wire or plastic.For floors with increased load, a steel welded mesh or construction of reinforcement is needed, which is welded at the work site. To fix the reinforcing structure, you need to prepare special supports, which can be made of plastic, wire or metal. On 1 square. m you need from 3 to 5 units of such clamps.

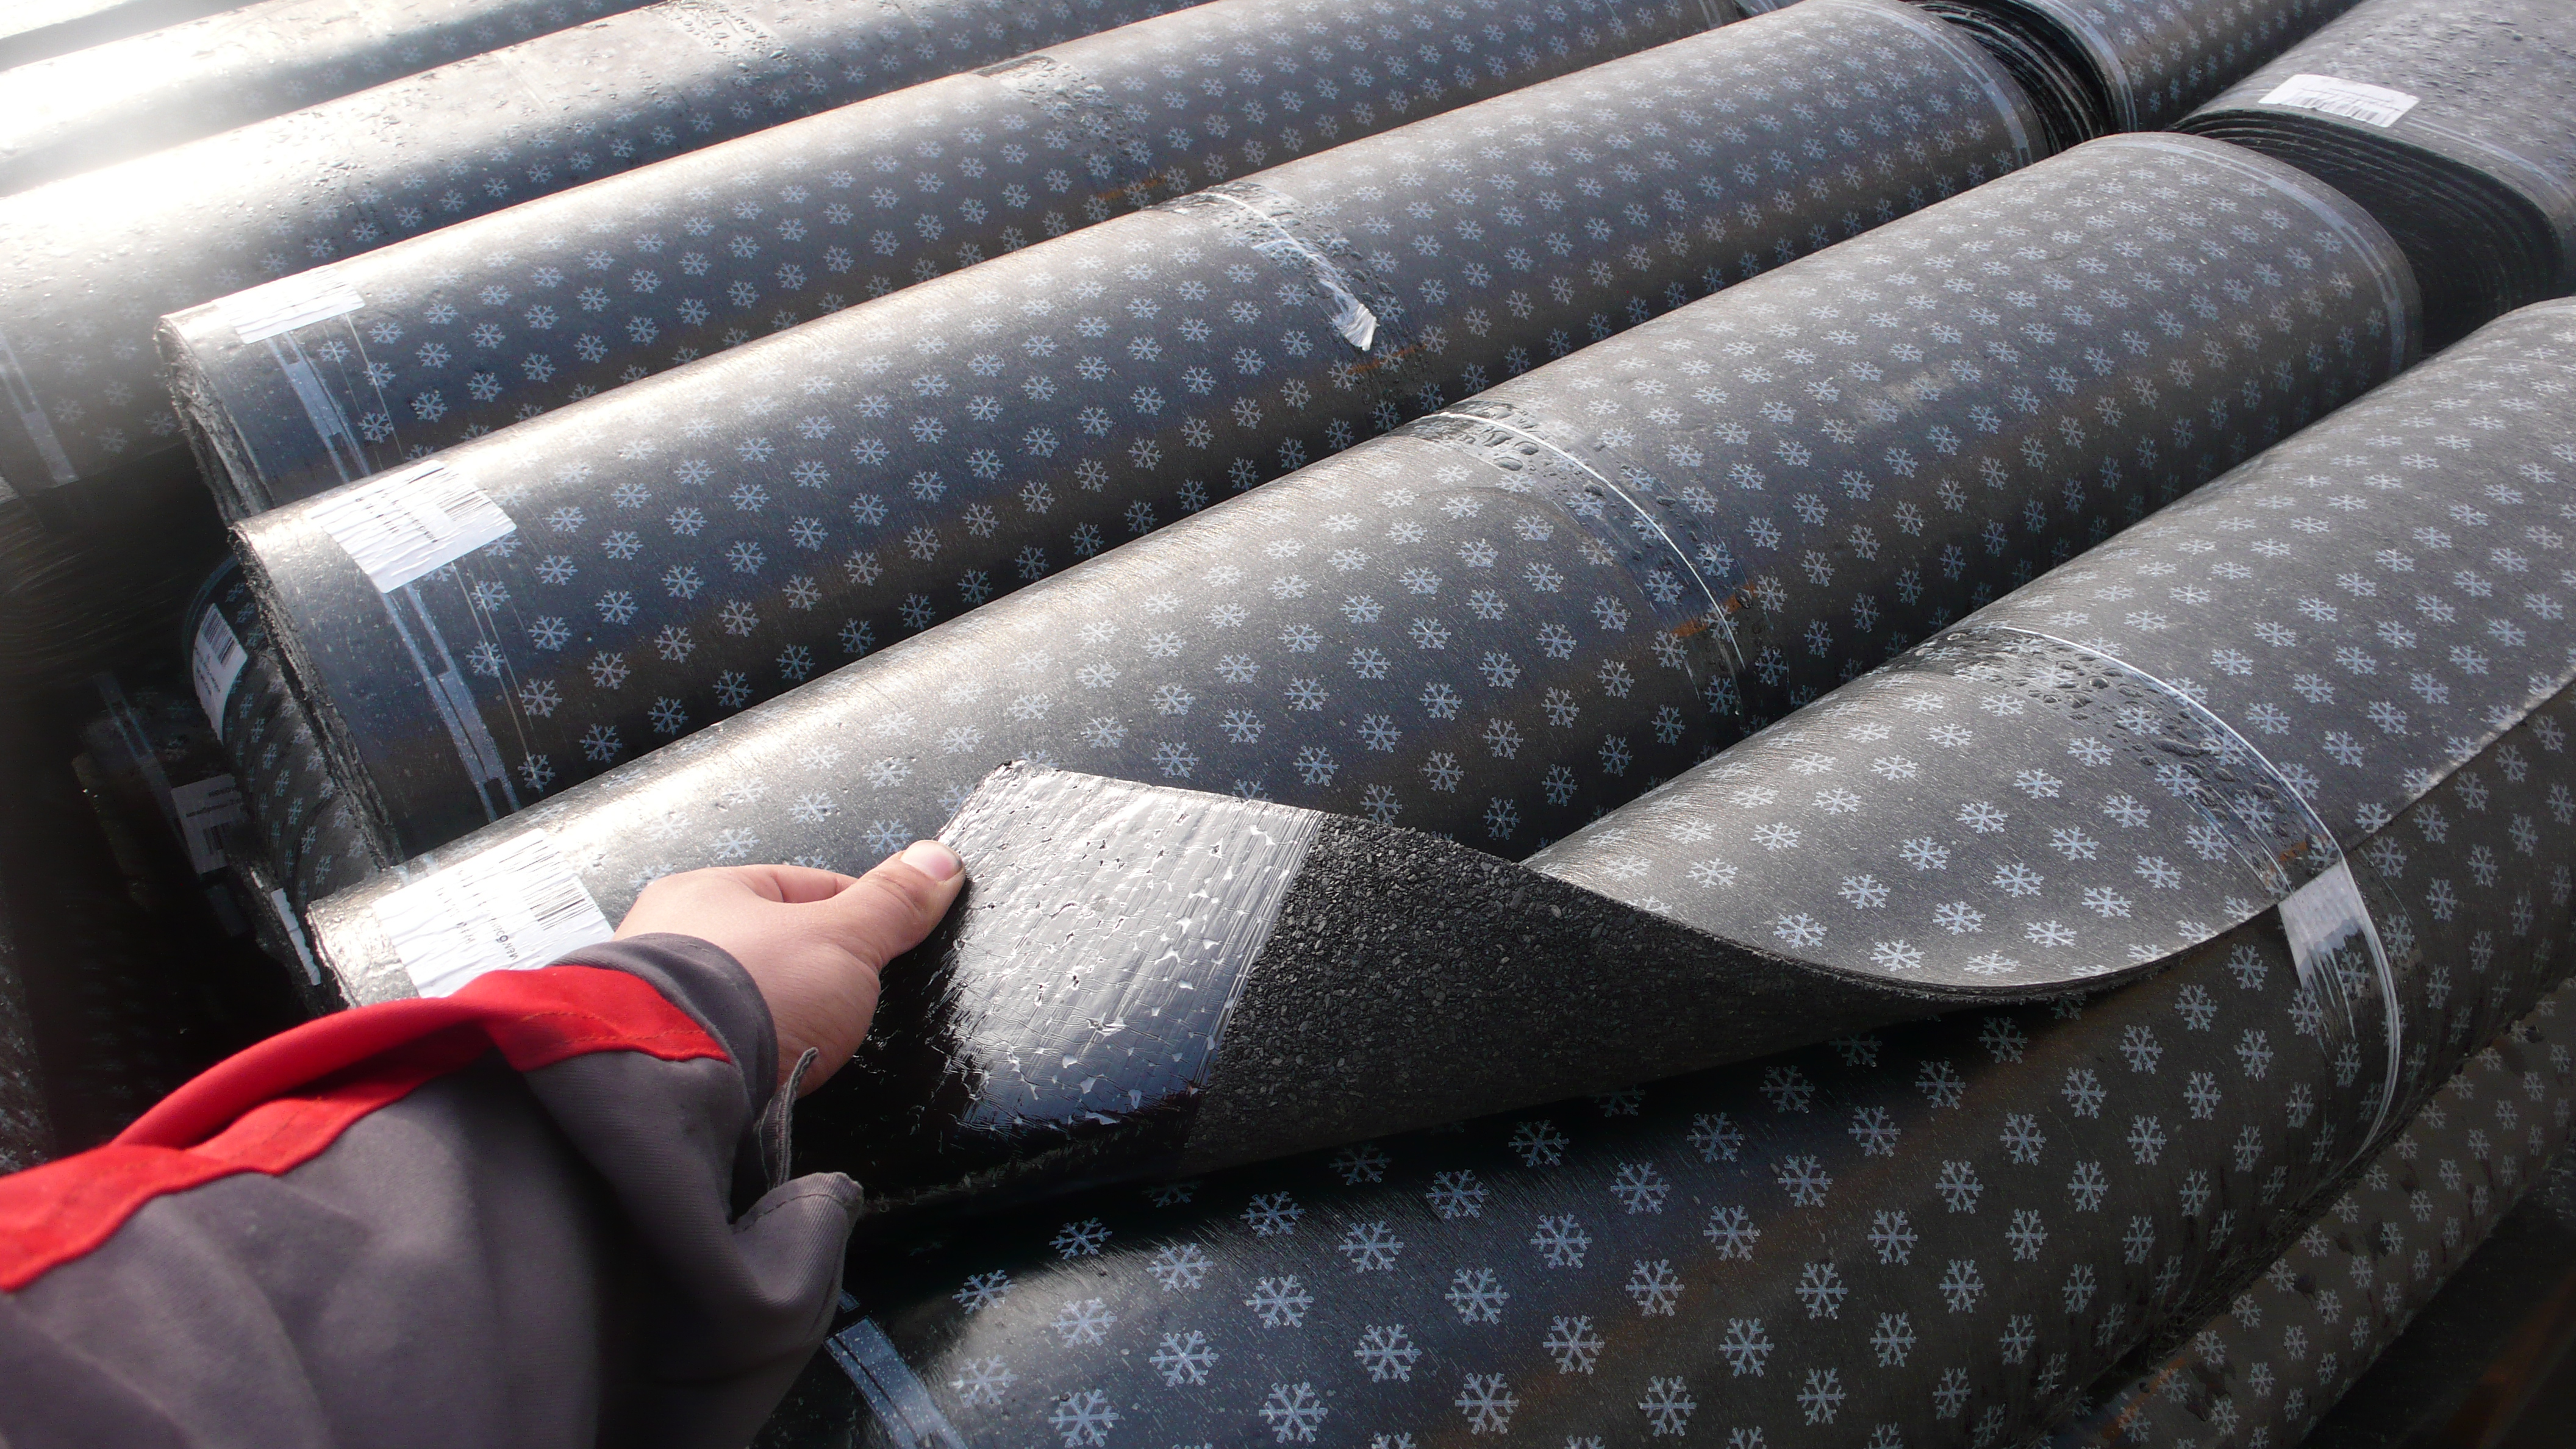
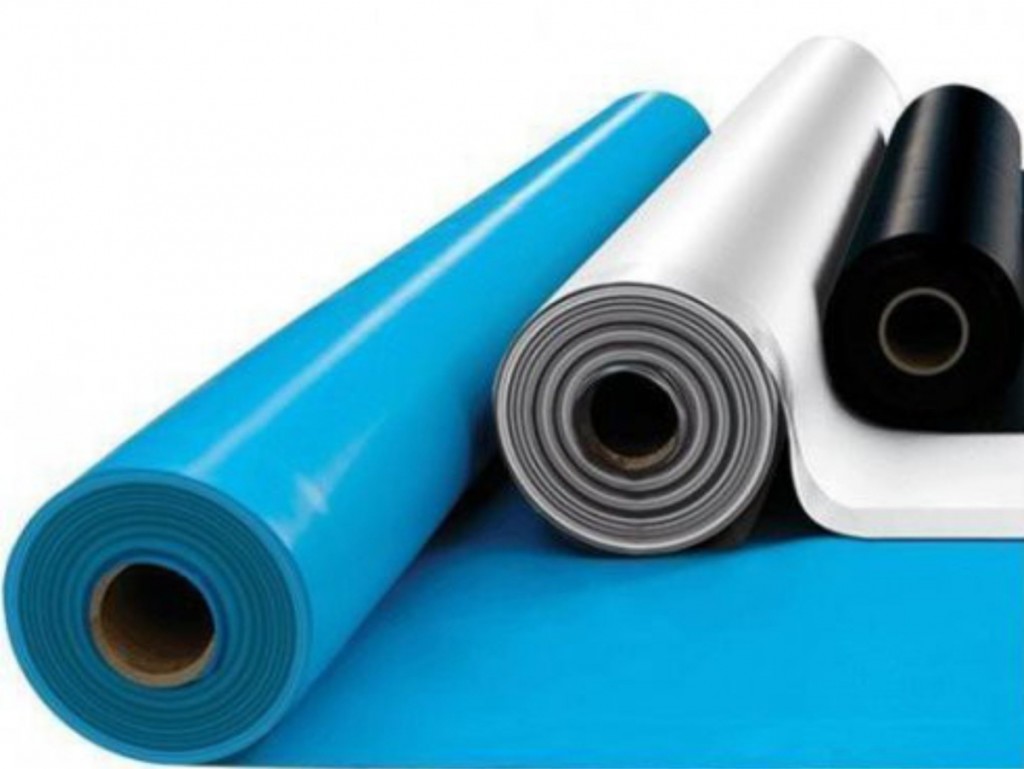
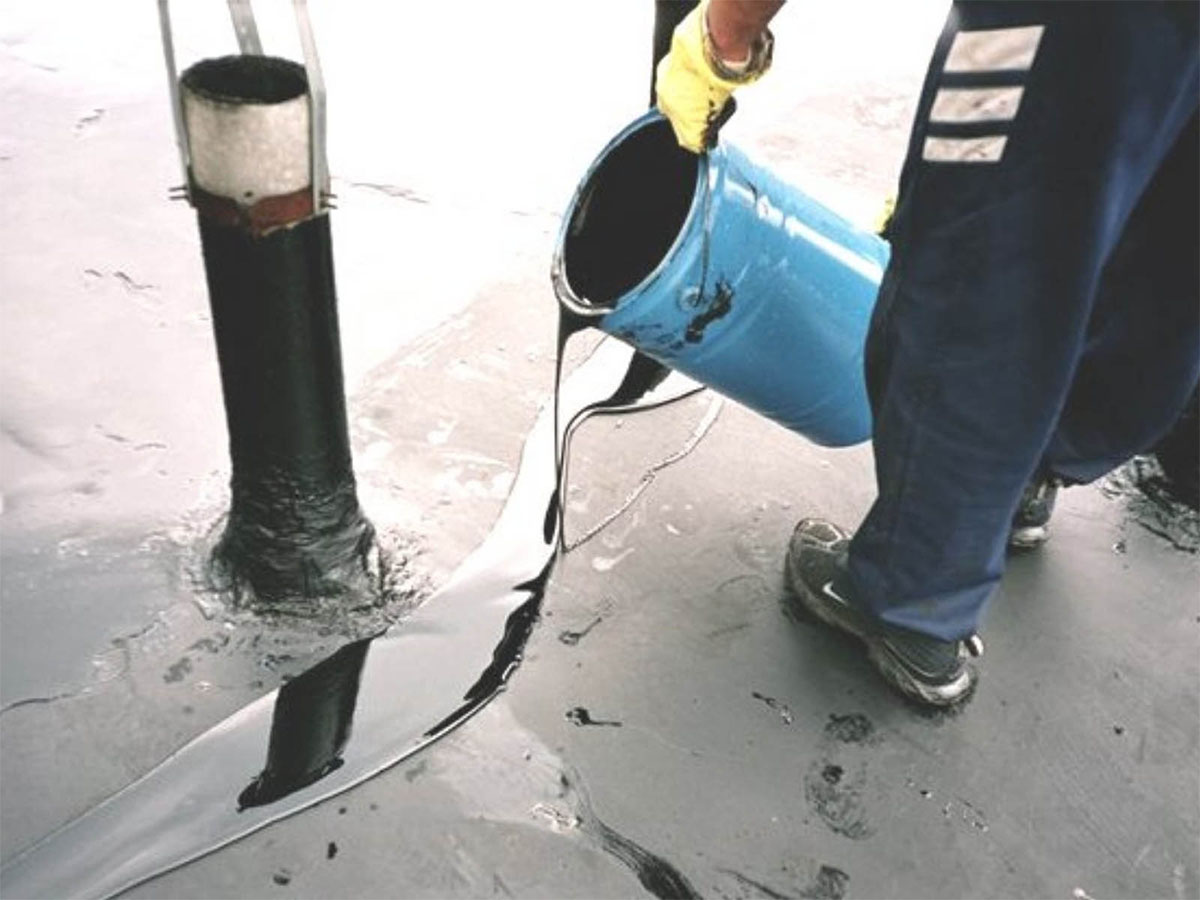
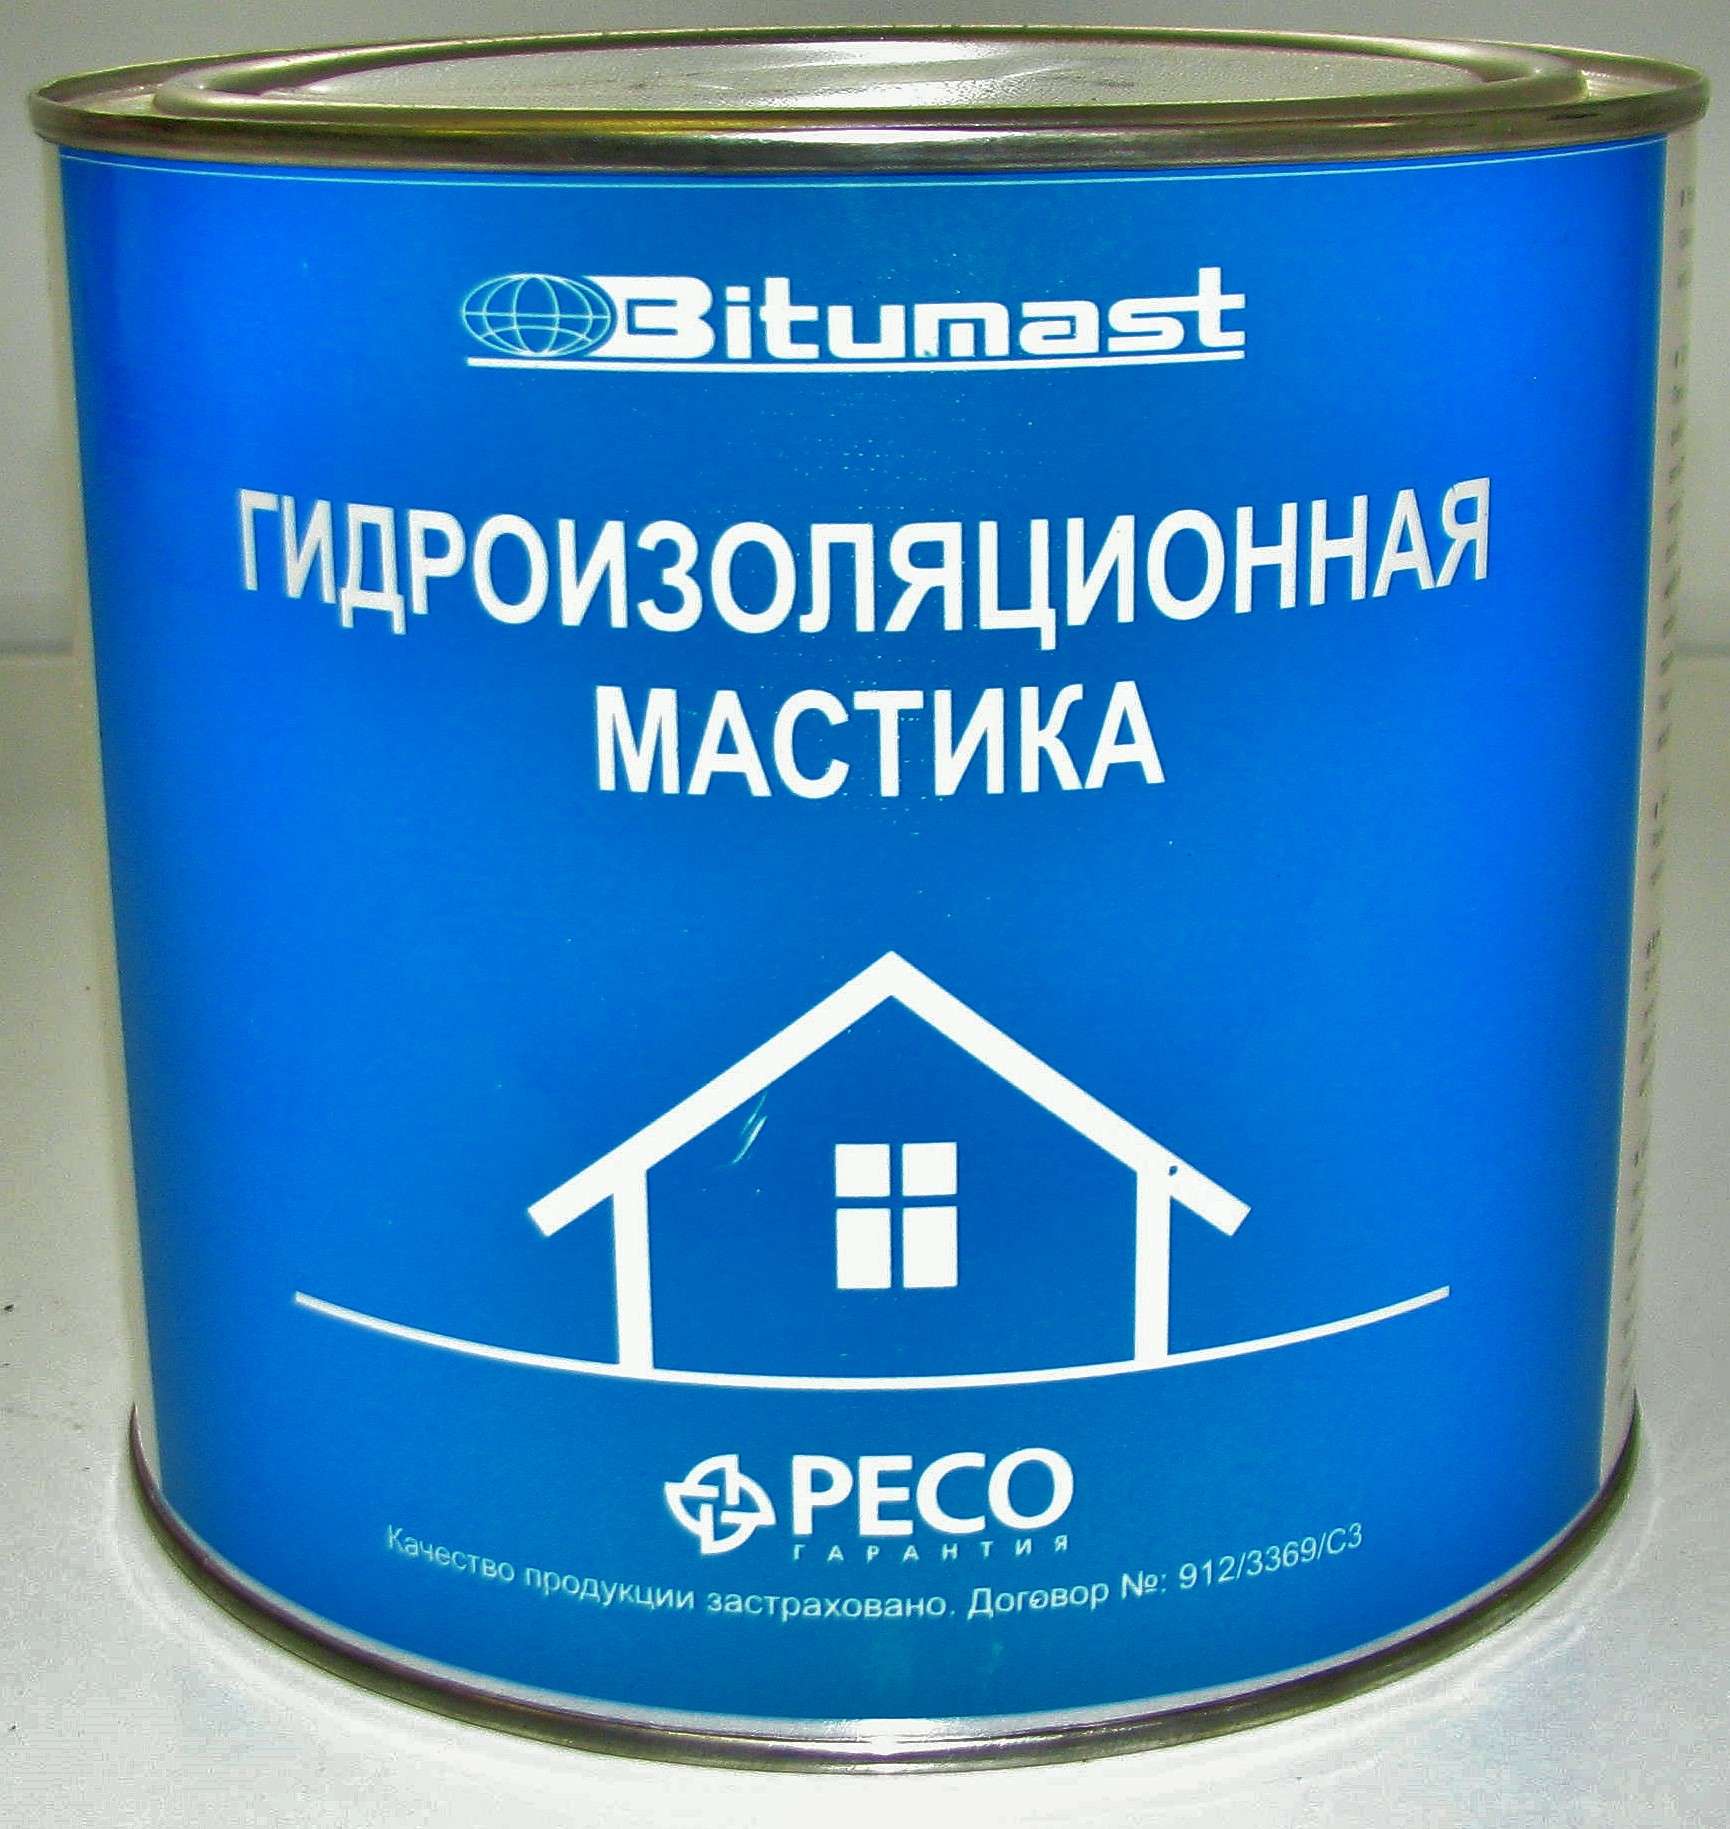
In cases where it is necessary to lay a layer of waterproofing materials, the choice is limited to the condition of the base and the chosen method of screed. According to the composition, there are 4 types of waterproofing:
-
Polymer;
-
Bituminous;
-
Bitumen-polymer;
-
Mineral

There are also differences in the method of laying material:
-
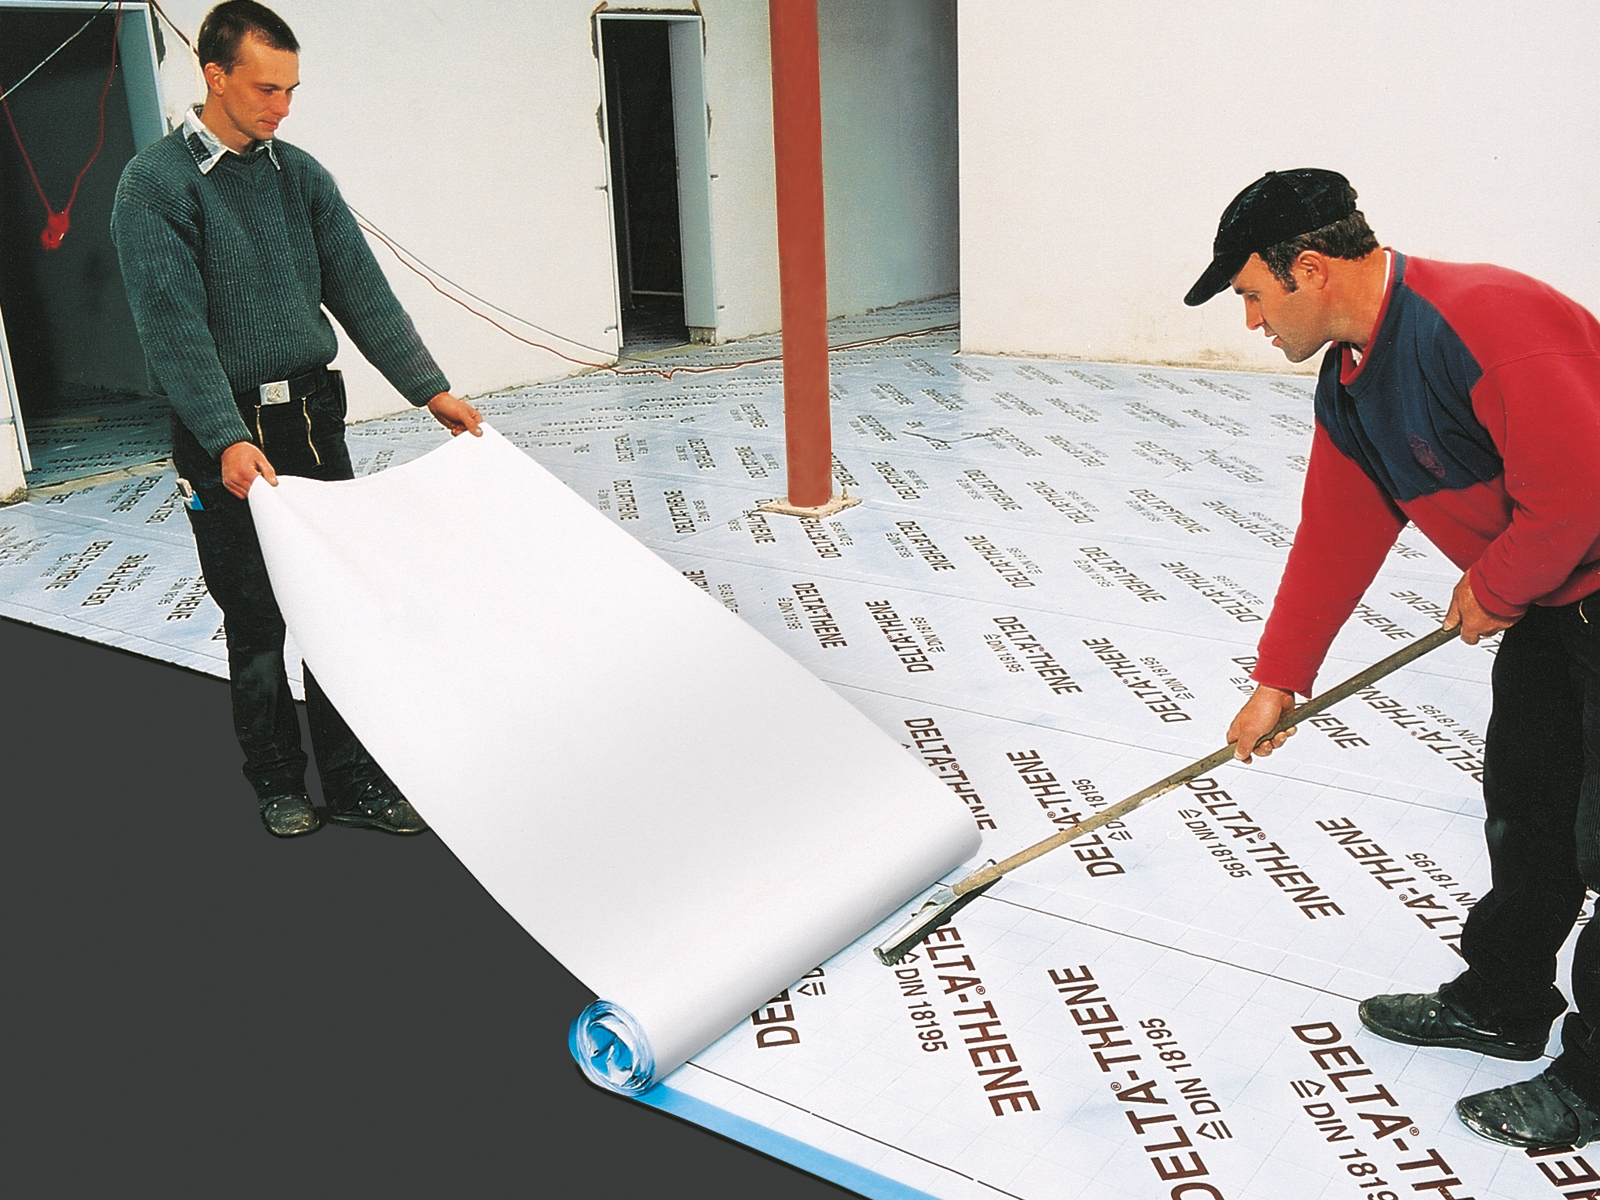
Roll or film. This is the most popular method of waterproofing using plastic film or roofing material. Modern types of polymeric multilayer membranes are also distinguished by insulating qualities. Such materials are used for laying on the ground and on the first floors of apartment buildings. Self-leveling compounds and cement-sand screed with a thickness of less than 2 cm on this type of waterproofing are not used due to poor adhesion and the risk of deformation of the surface;
- Liquid. These are special compositions that differ in varying degrees of viscosity and are water-repellent;
-
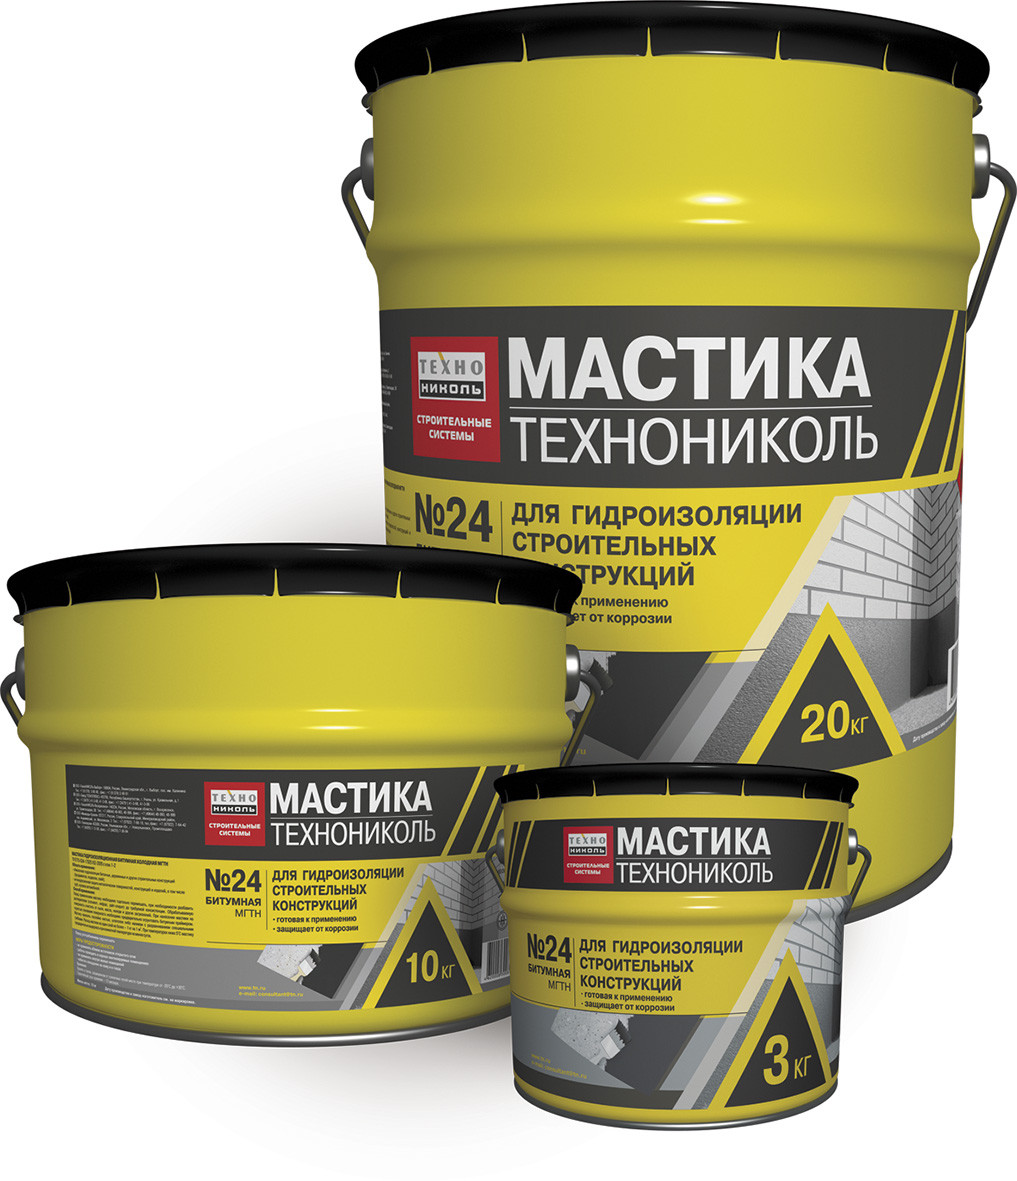
Mastics and powder. The latter are friable compositions based on plasticizers and various binders that are diluted with water according to the instructions immediately before use.
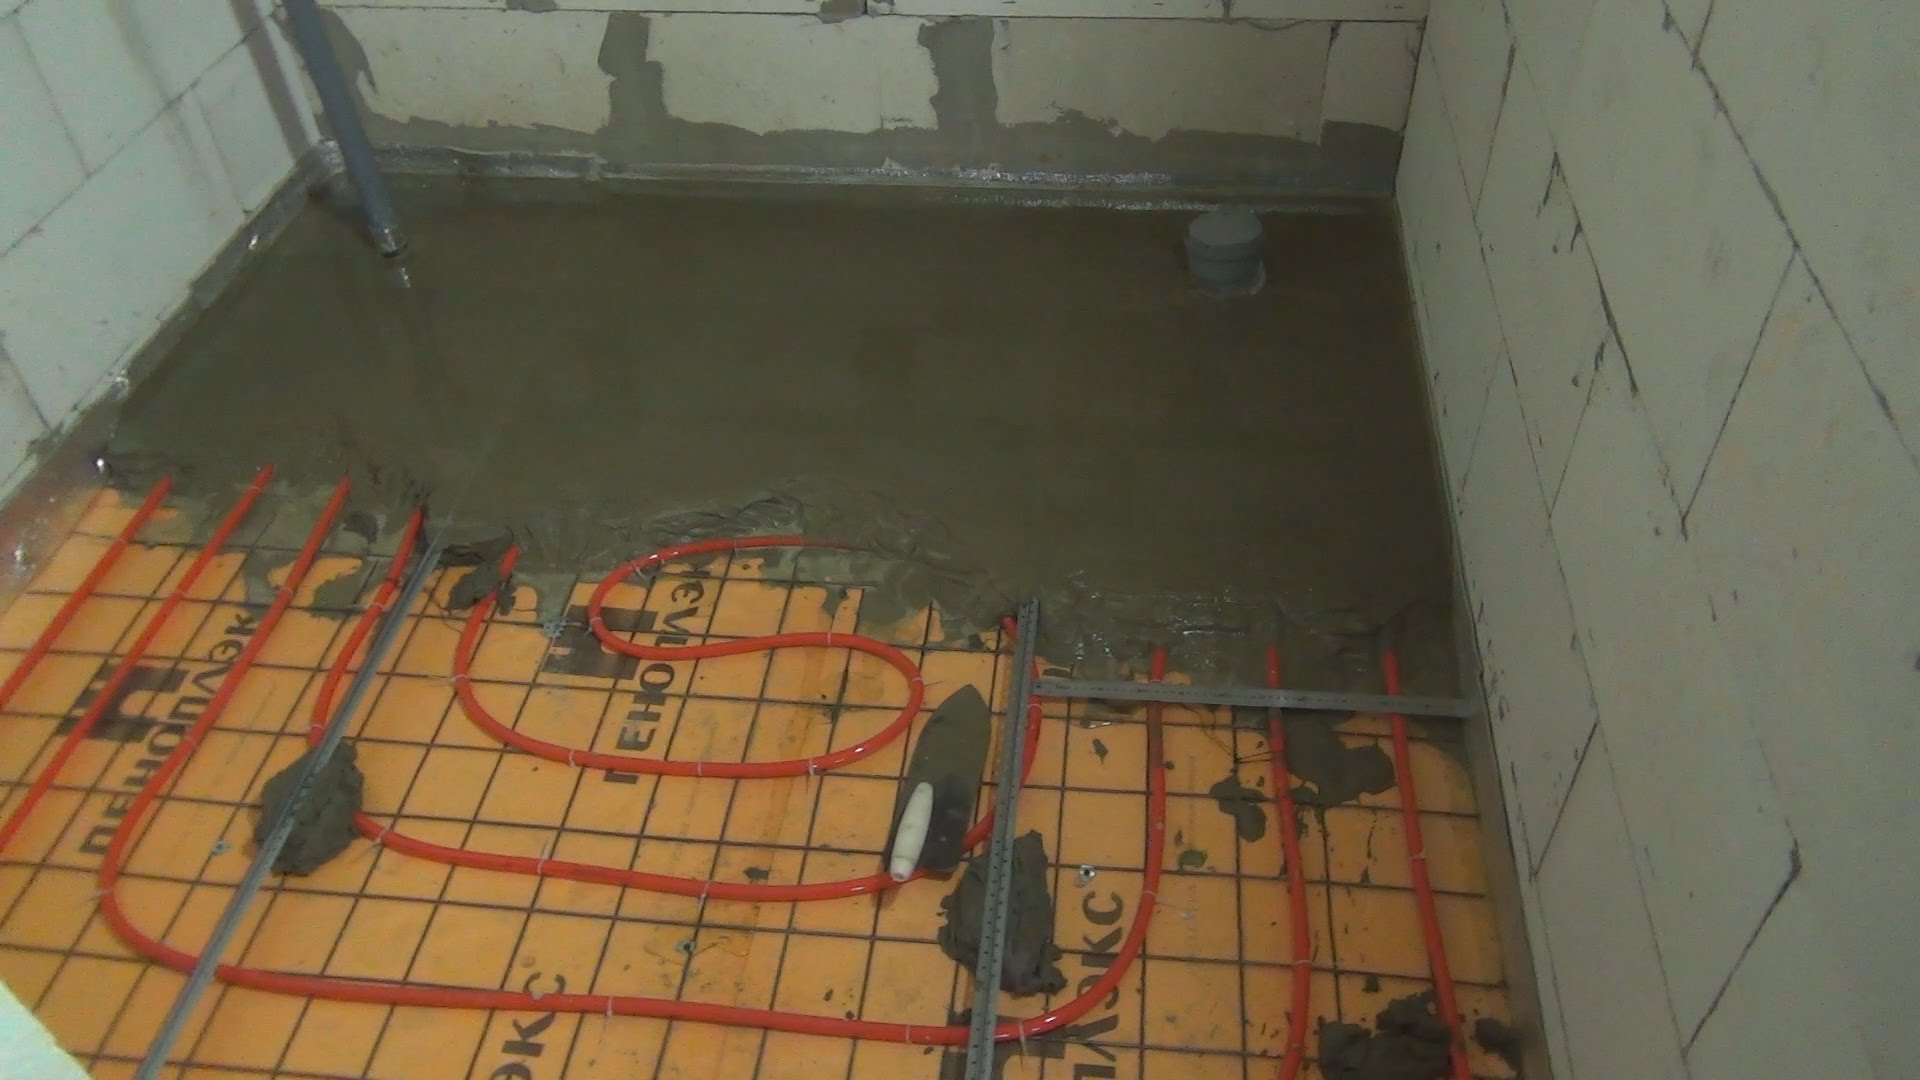
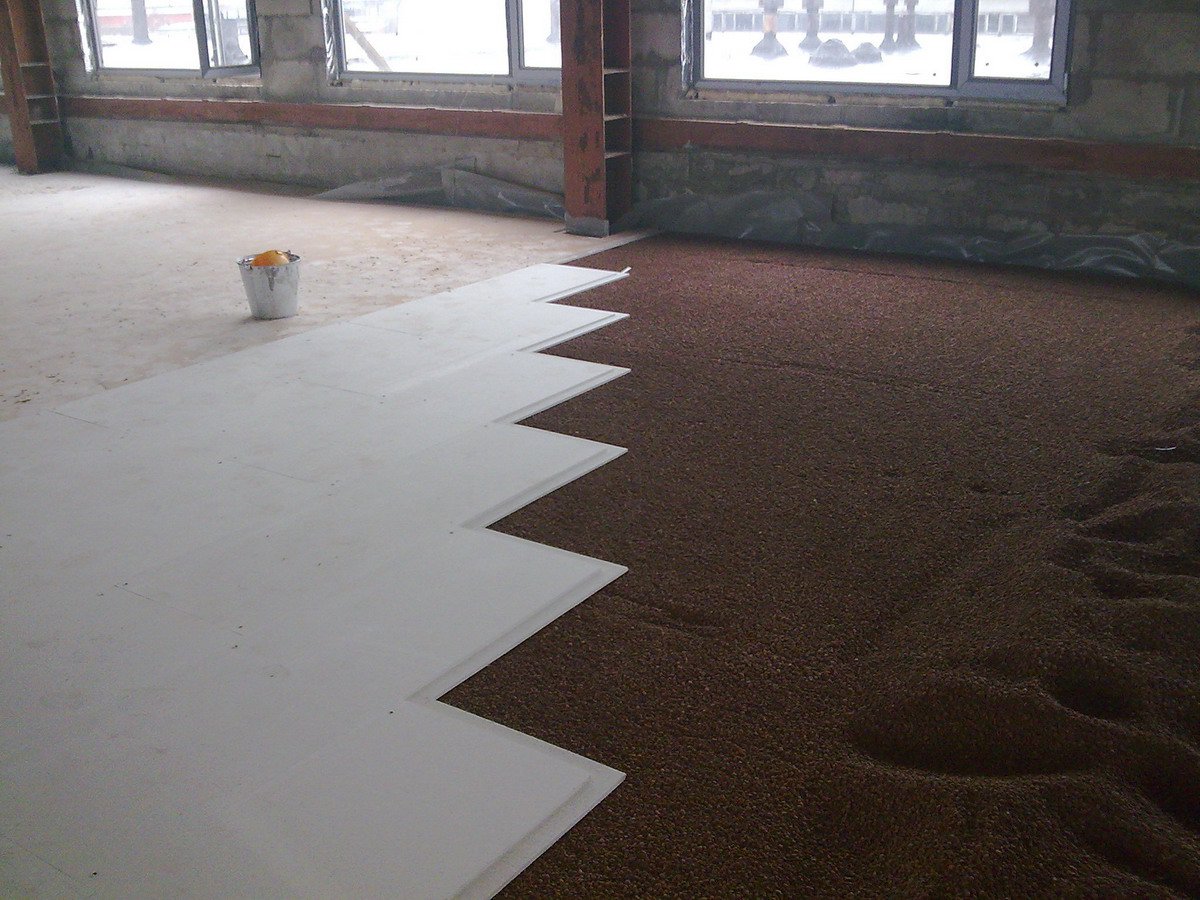
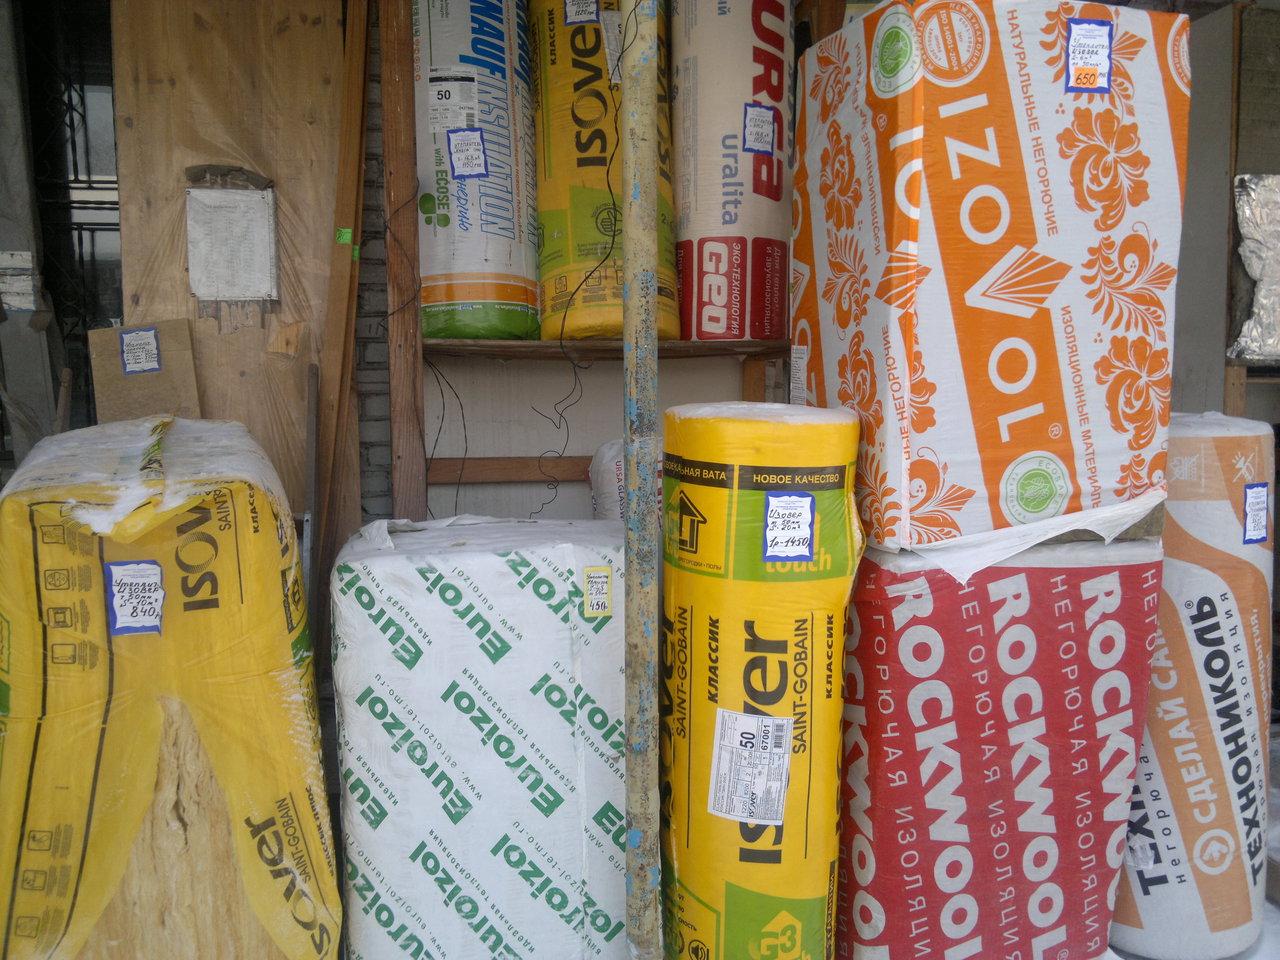
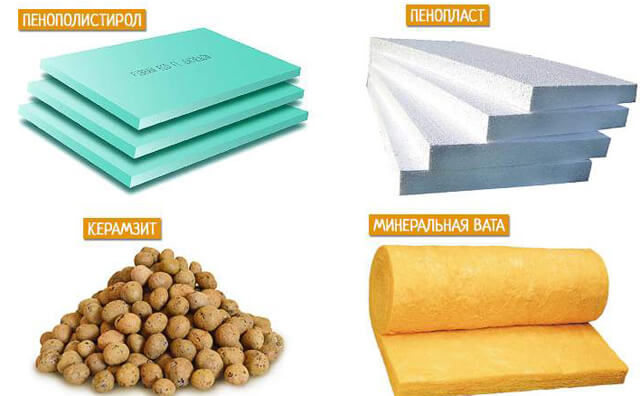
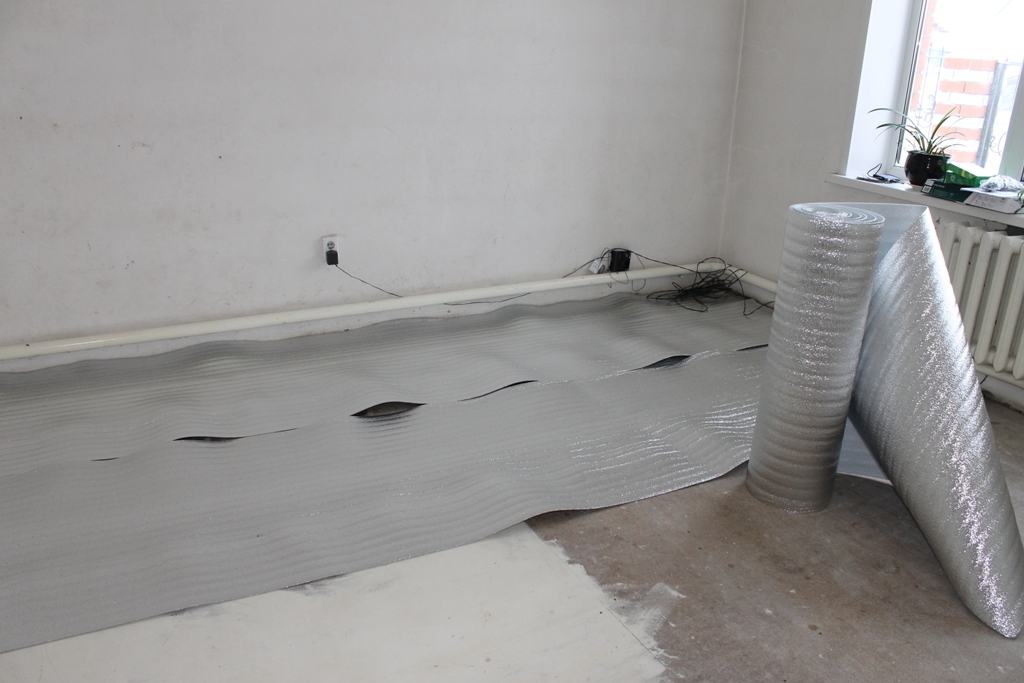
In some cases, materials with a heat insulating effect are laid over a layer of waterproofing. This is a mandatory procedure for the device screed on the ground and for the construction of floor heating systems. You can choose from the usual bulk materials such as perlite, expanded clay, gravel coating or coarse sand. Some prefer insulation in the form of plates, which can be made of mineral wool, polyurethane foam or extruded polystyrene foam - penoplex.
Instruments
The list of necessary tools depends on the chosen method of the device. and some other factors:
-
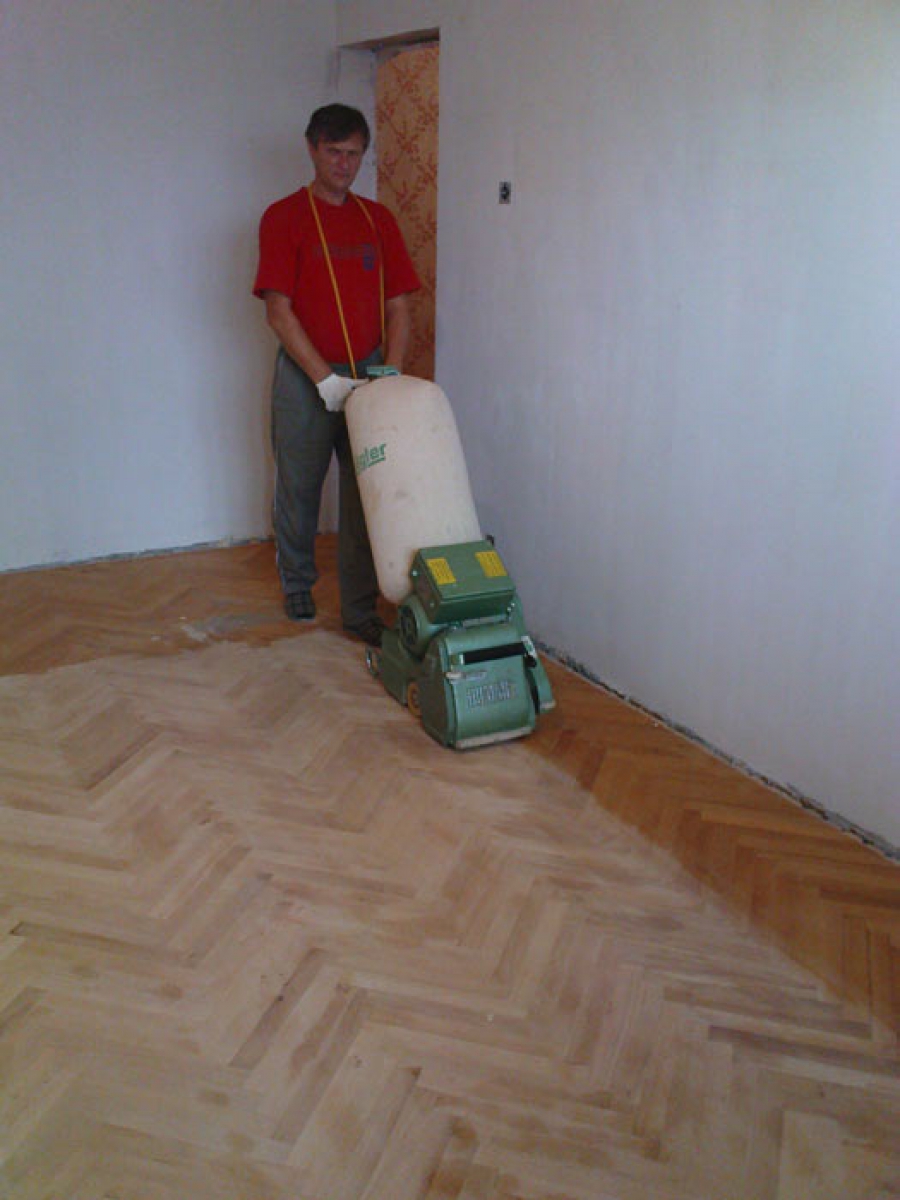
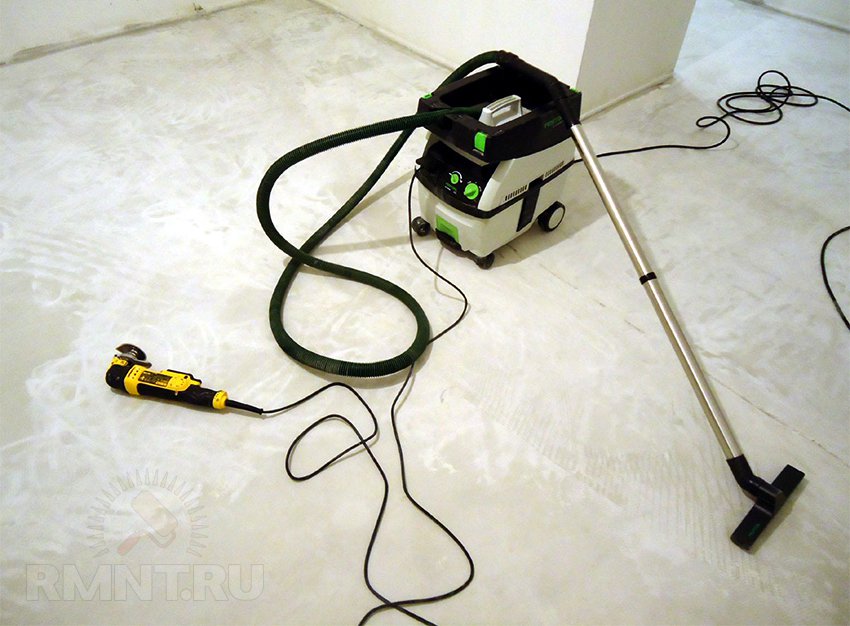
Sander. It will be necessary for processing of the concrete basis before work. If the area of the room is small, at this stage you can use a metal brush instead.A concrete screed must be processed with a grinding machine after full curing.
-
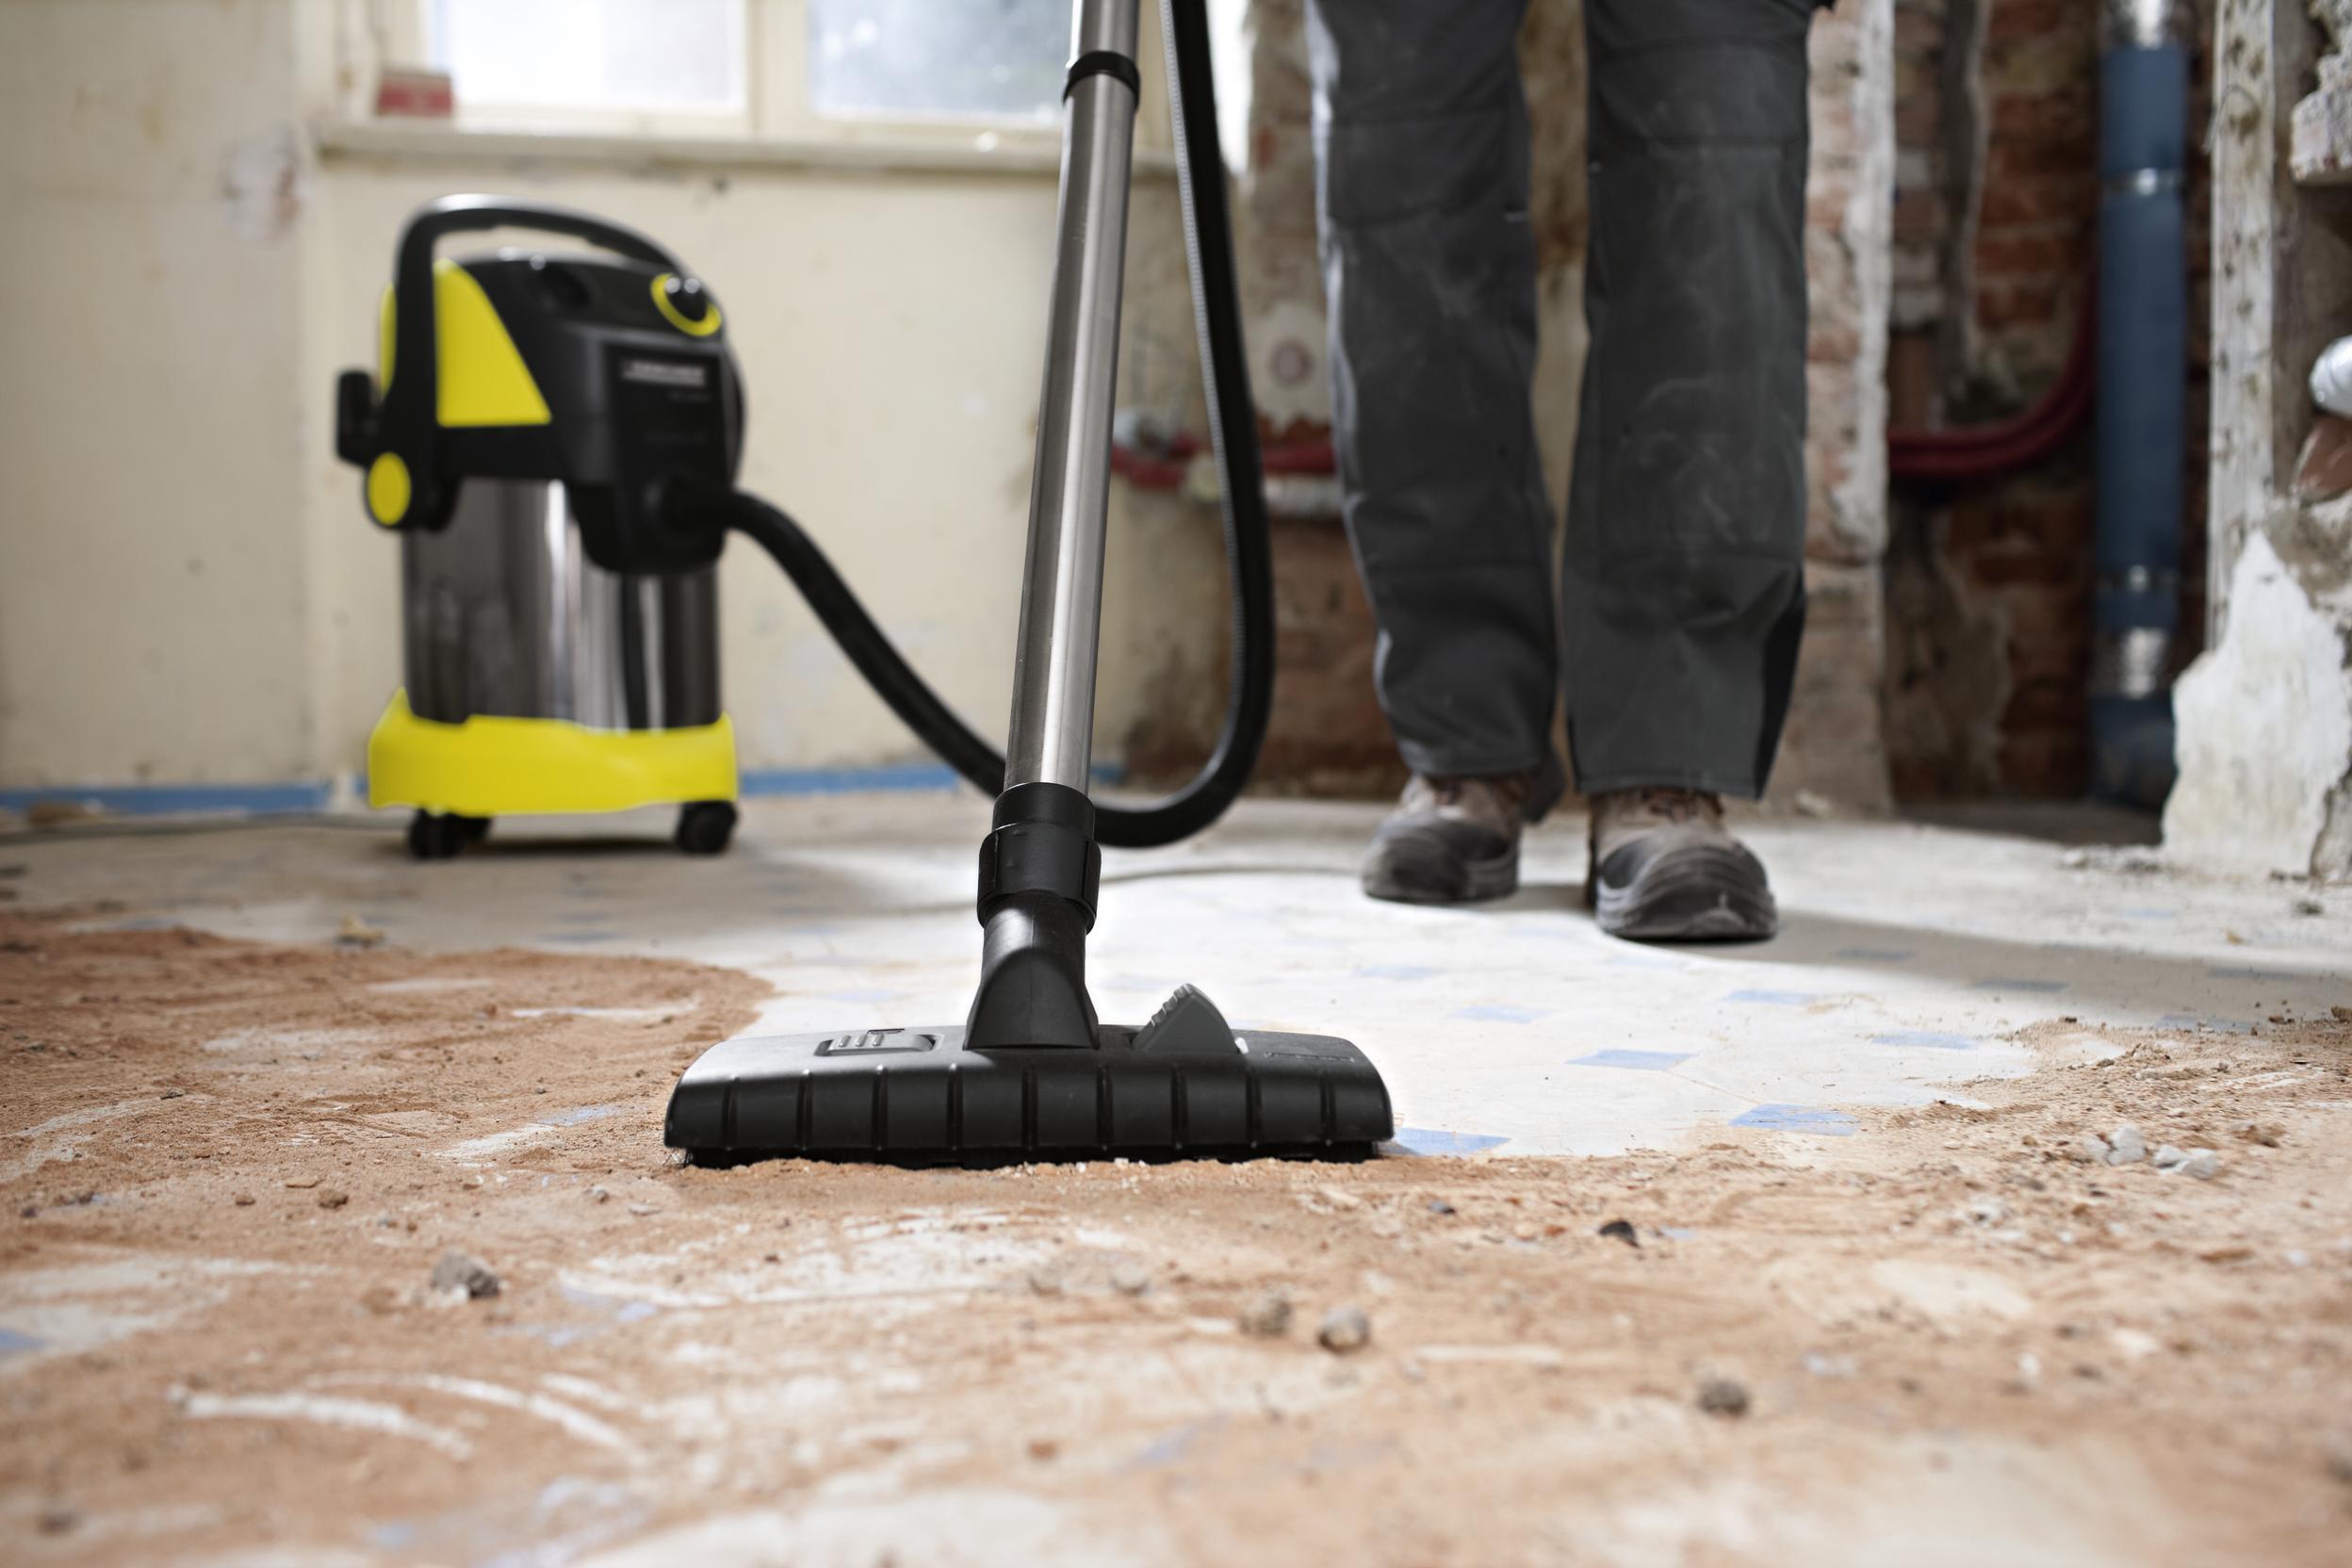
Industrial or powerful household a vacuum cleaner.

-
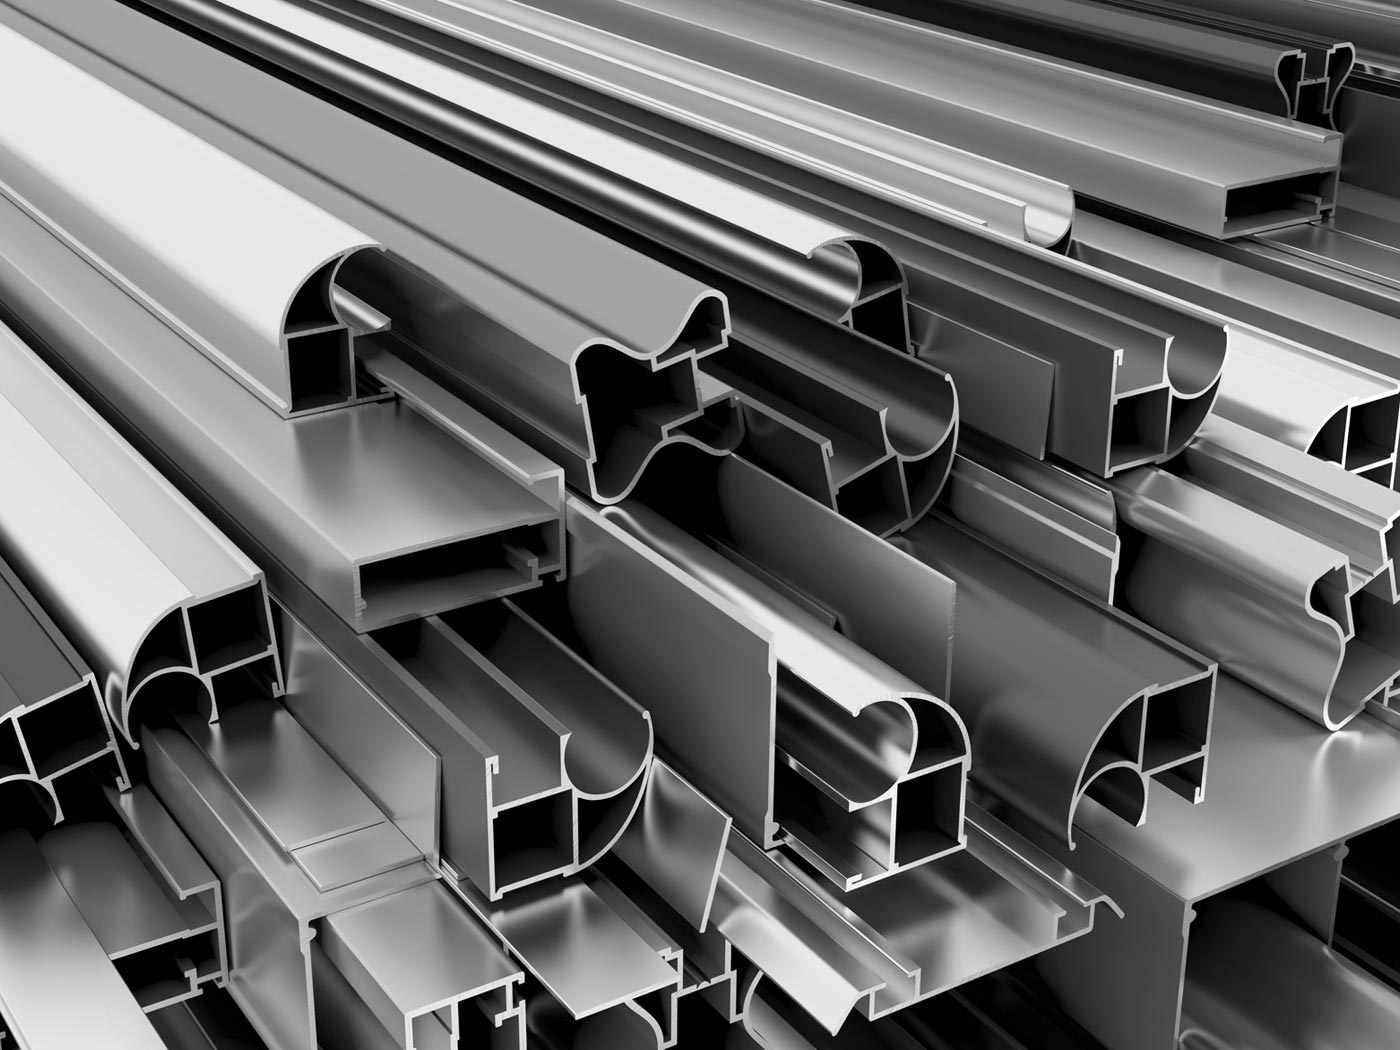
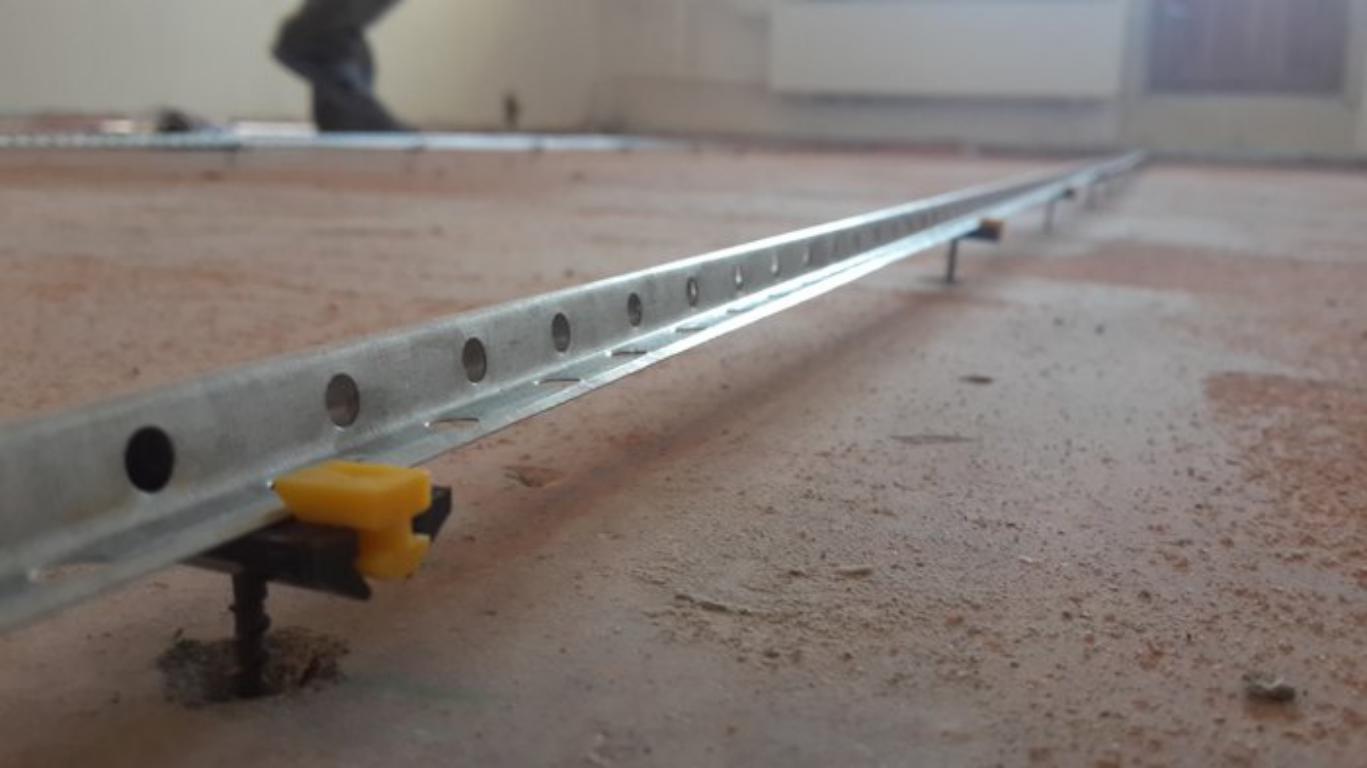
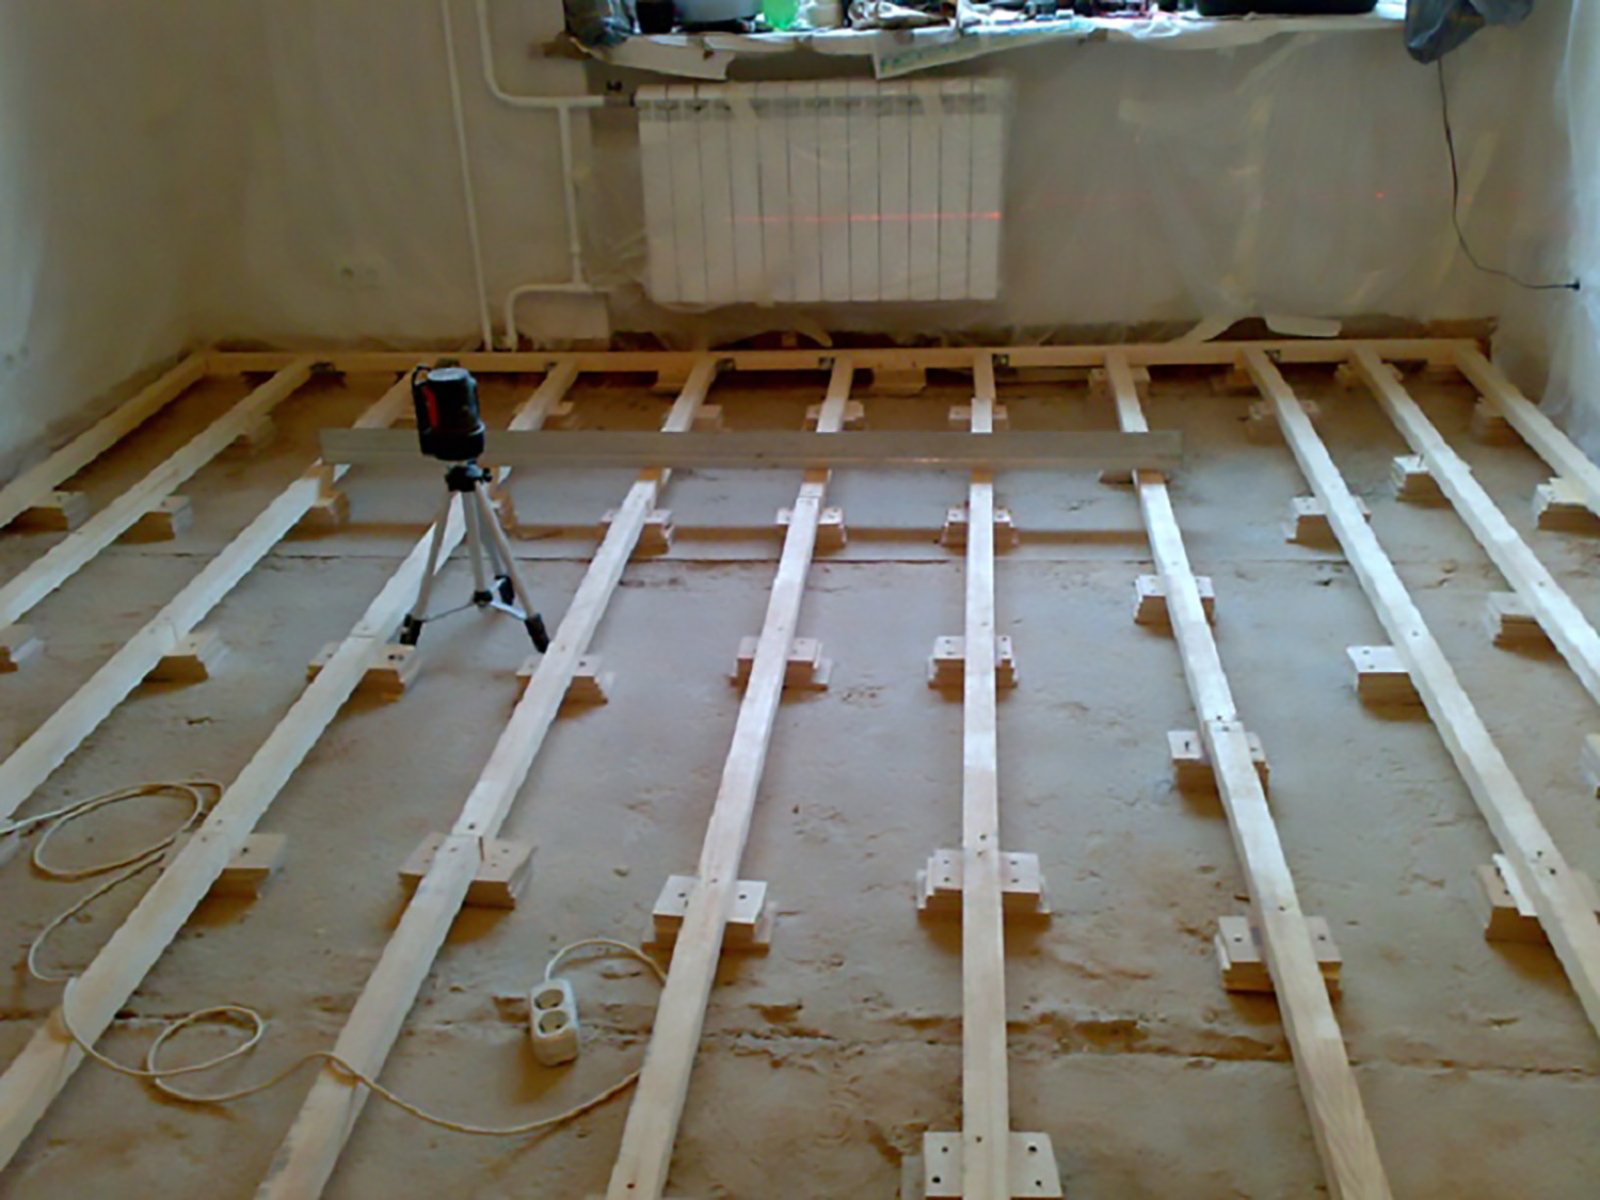
Lighthouses It is possible to use a T-shaped aluminum profile, round or rectangular pipes made of steel in a diameter of up to 70 mm, wooden slats, dowel-nails. It should be borne in mind that the pipes and slats are removed from the partially frozen solution. If the screed is performed by self-leveling mixtures, the beacons may not be needed, or special reference beacons are used.
-
Building level. Bubble construction level is required without fail, the recommended length is from 2 m. For more convenience, you can additionally use a laser level, with its help it is much easier to install beacons.

-
Roulette. Minimum length - 8 meters.
-
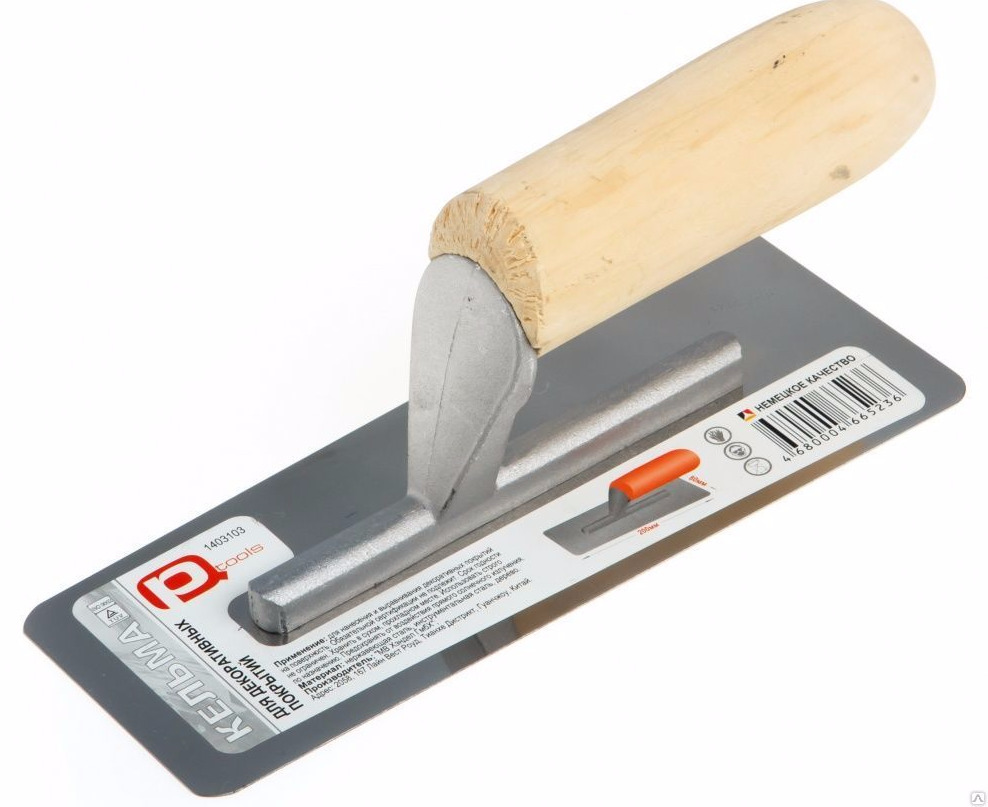
Spatulas, trowel.
-
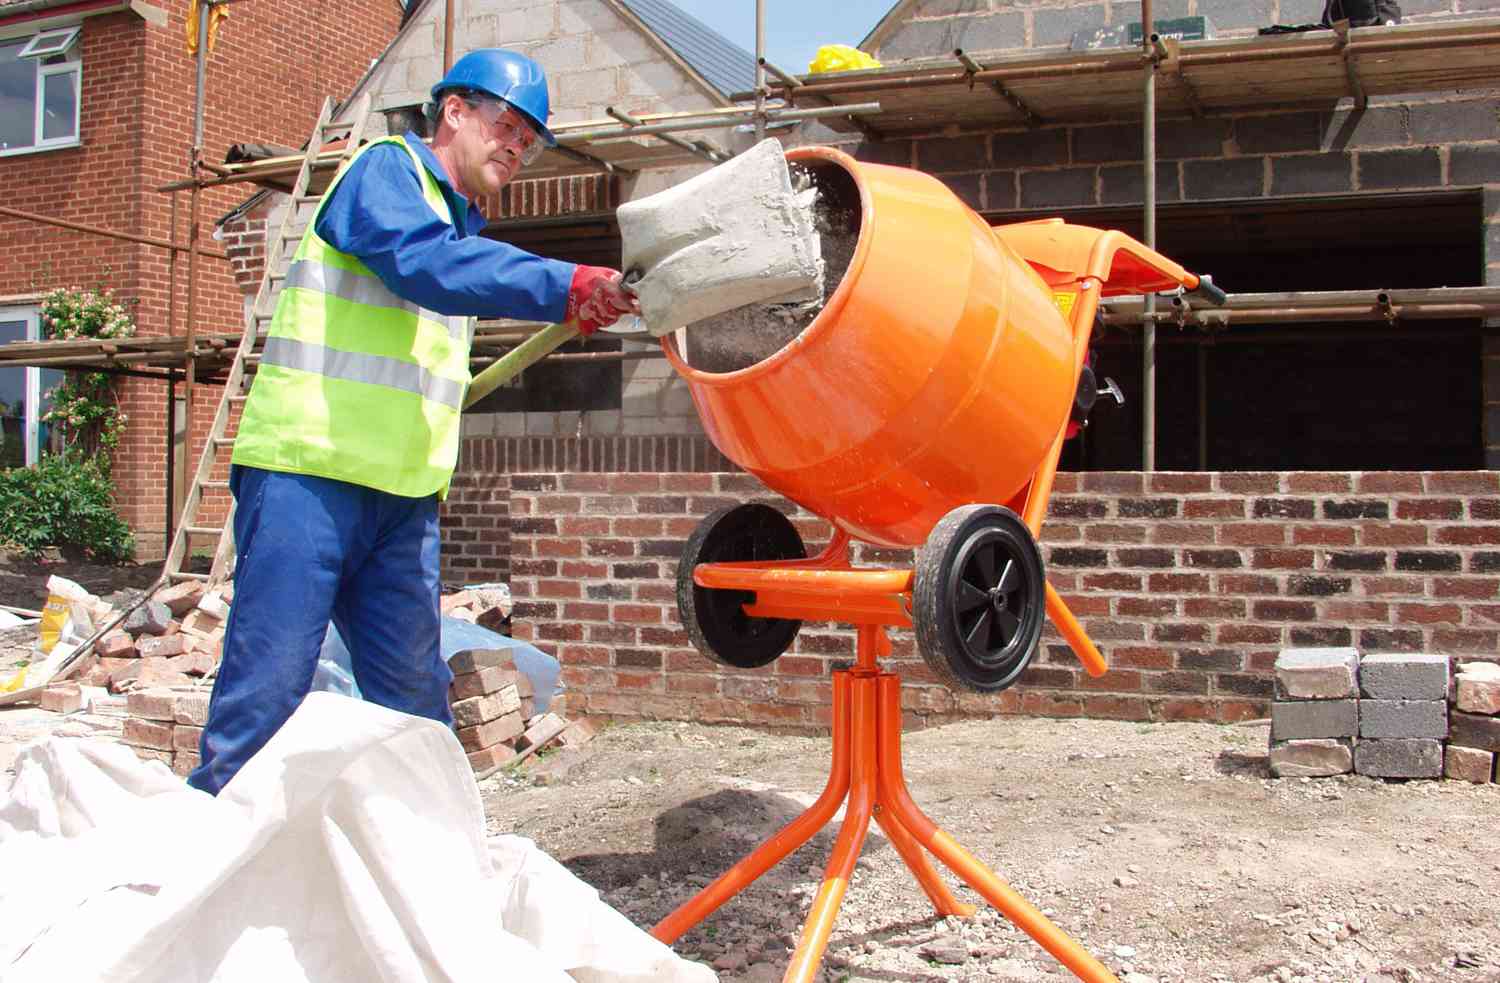
Rule and construction mixer or drill with nozzle-mixer. The latter is needed for mixing the components of the mixtures. For a concrete screed, it will be more convenient to use a concrete mixer.


-
Rollers and brushes for the application of primer and waterproofing compounds.
-
Needle roller, kraskoosty, rakla and beacons for the work with rovnitel.
-
Construction gloves, respirator, goggles. To protect the skin, respiratory system and organs of vision.
-
Tanks for mixing.


How to calculate the flow?
For bulk mixtures, the average consumption values for a coarse level grinder are 2-5 kg per 1 sq. Km. m room with a layer thickness of 1 mm. For the finishing rover - 1.5-1.7 kg per 1 sq. Km. m per 1 mm layer. All that remains to be done is to count the quantity.
Example: the consumption of a rough leveling agent of 5 kg is multiplied by a layer thickness of 3 mm, and then multiplied by the area of the room in square meters. It turns out the following: 5x3x10 = 150
In total, you will need 150 kg of self-leveling mixture on a room of 10 square meters. m. Considering the fact that in a package there are 25 kg of dry mix, then these are 6 bags of leveling agent. Calculations for the finishing layer are done in the same way.
For a classic concrete screed on 1 square. m and a layer thickness of 5 cm will need 22.5 kg of cement, sand 47.5 buckets with a volume of 10 liters, water 10 liters. For screed using large inclusions in the form of crushed stone per 1 square. m and the thickness of the layer will need 8.5-9.2 kg of cement, 40.7-46.1 kg of gravel, 22.8-26 kg of sand.
These calculations are approximate, accurate calculations must be made independently based on the recommendations of manufacturers of building materials.
Important nuances
If the elevation difference in the room exceeds 4 cm, then it is necessary to choose a starting level for the draft layer of the floor. Cement-sand and concrete composition is always placed on the beacons. In rooms with high humidity, such as a bathroom, toilet, kitchen, work with cement-based solutions. In living rooms it is possible to use screed using gypsum.
When constructing a multilayer tie, you need to choose solutions that are lighter. It will be better to opt for compositions using expanded clay or polystyrene concrete.
If the differences in the level of the floor surface are small, it is better to fill in self-leveling mixtures. They can be based on cement, gypsum, sand, with additives for plasticity and reduce or increase the time of drying. Polymeric floors based on polyurethane, epoxy resin or methyl methacrylate, despite the high cost, have a large number of advantages.
Due to the thin liquid layer, they are excellent for apartments with low ceilings. The finished surface has good waterproofing properties and special strength, is not subject to temperature changes, deformations,exposure to aggressive environment.
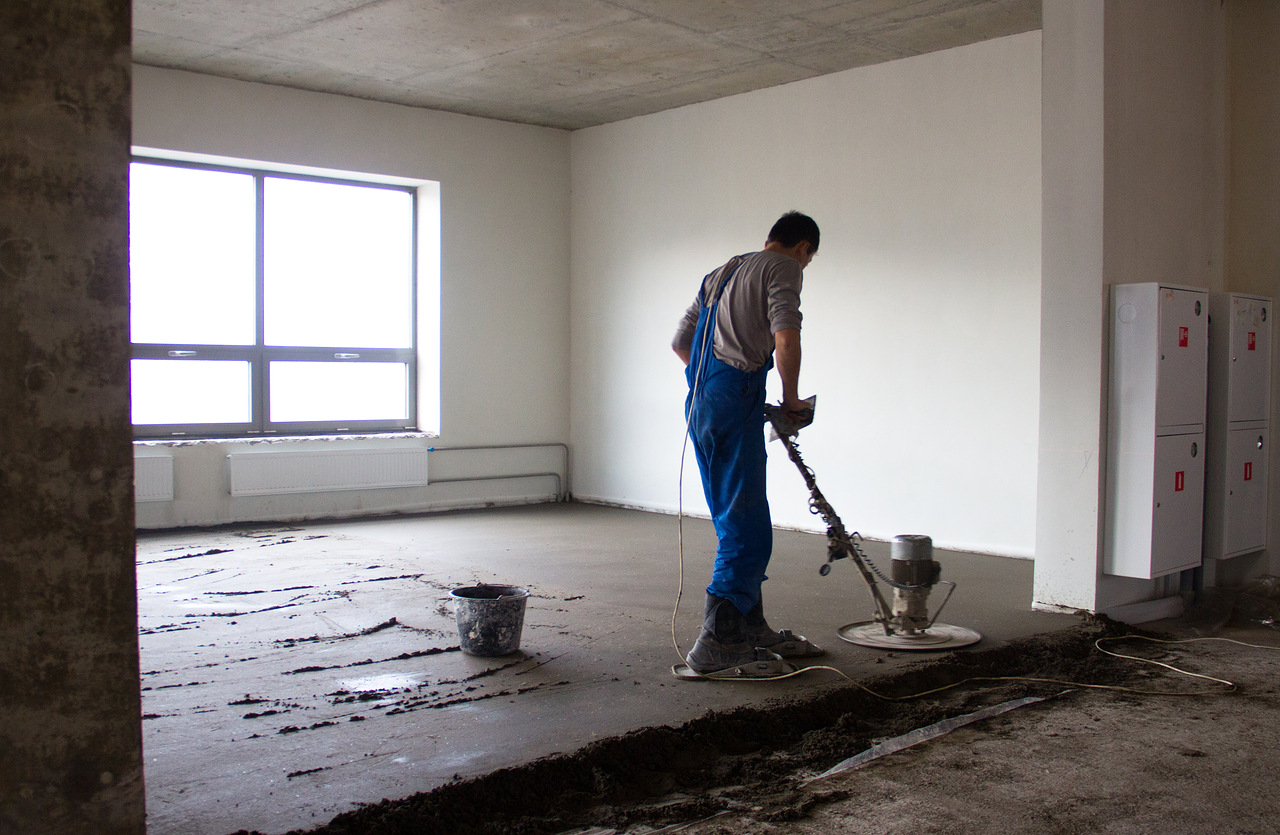
For the final leveling of the surface is usually used self-leveling self-leveling mixture. Such a composition can be made independent decorative coating when using pigments to create a colored background or pattern. When mineral crumb or other inclusions are added to a standard cement mortar and then ground after the mortar hardens, a surface similar to natural stone can be achieved.
If the area of the room is too large and the work will take more than one day, the surface is divided into several sections using closed beacons or partitions.

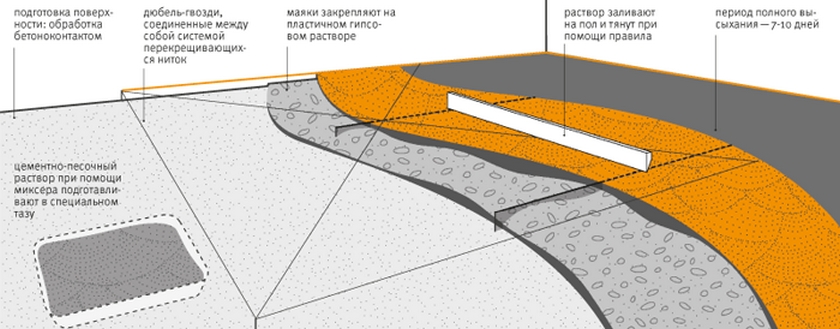
Preparatory work
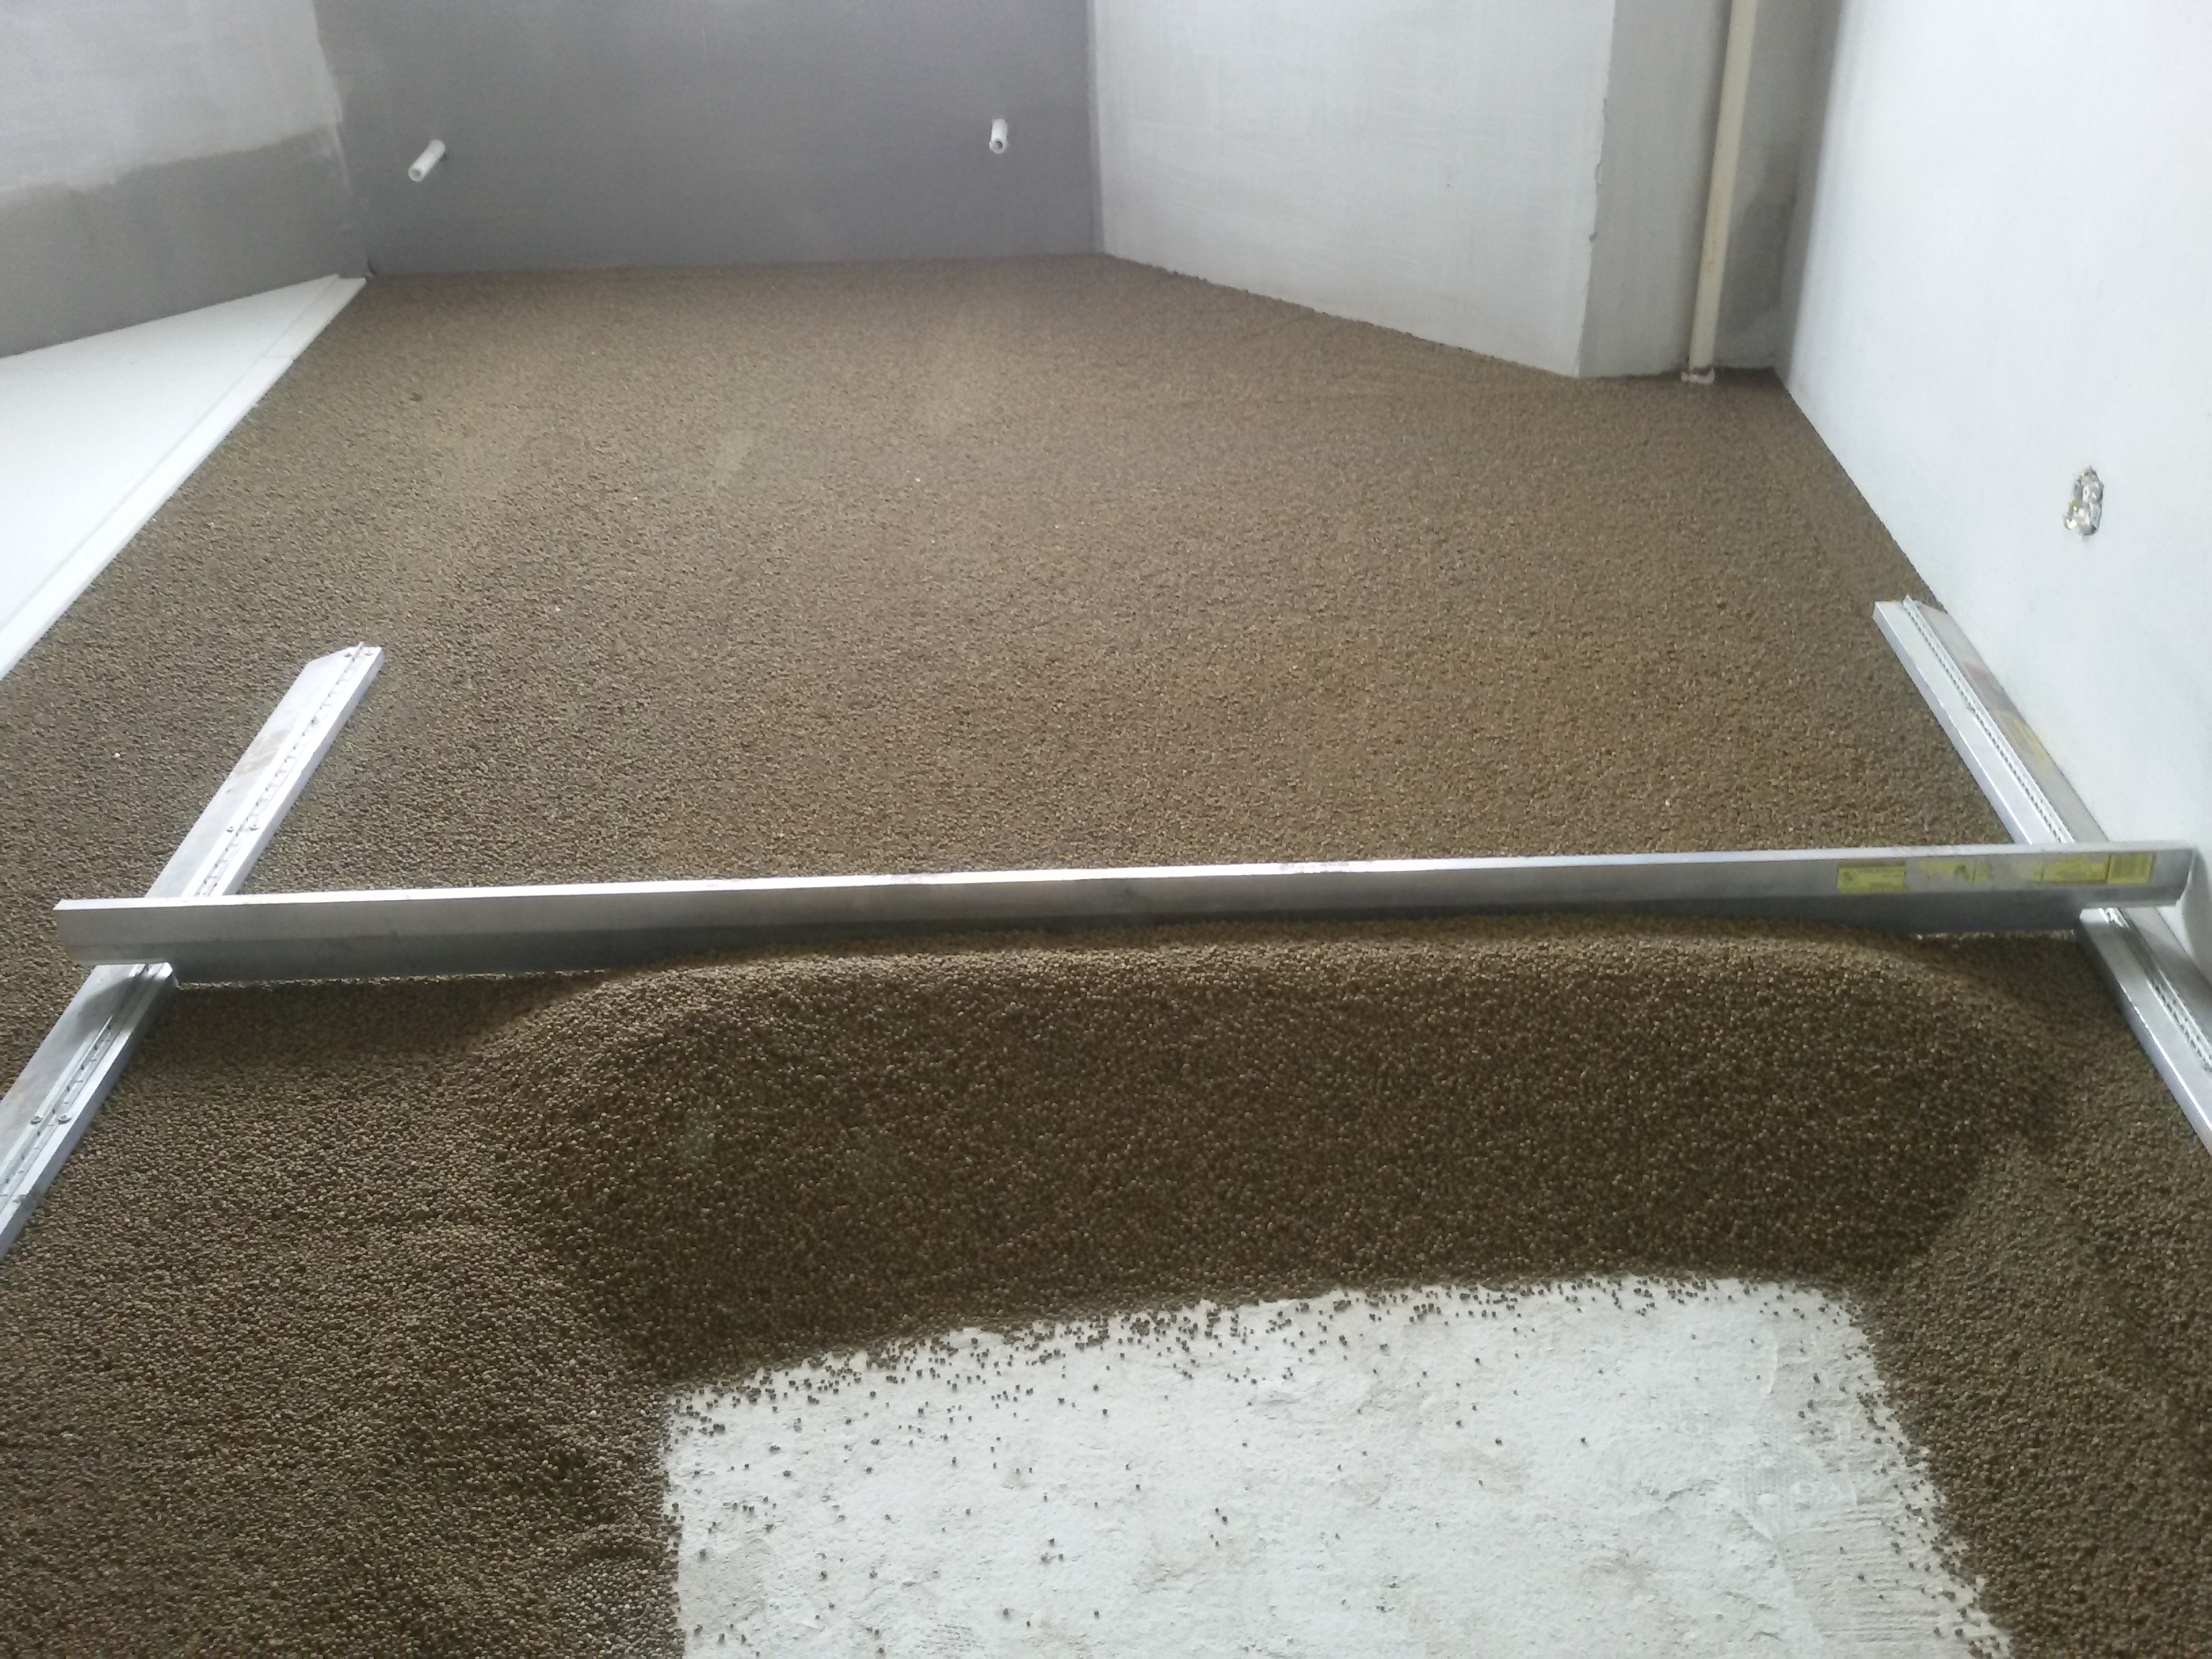
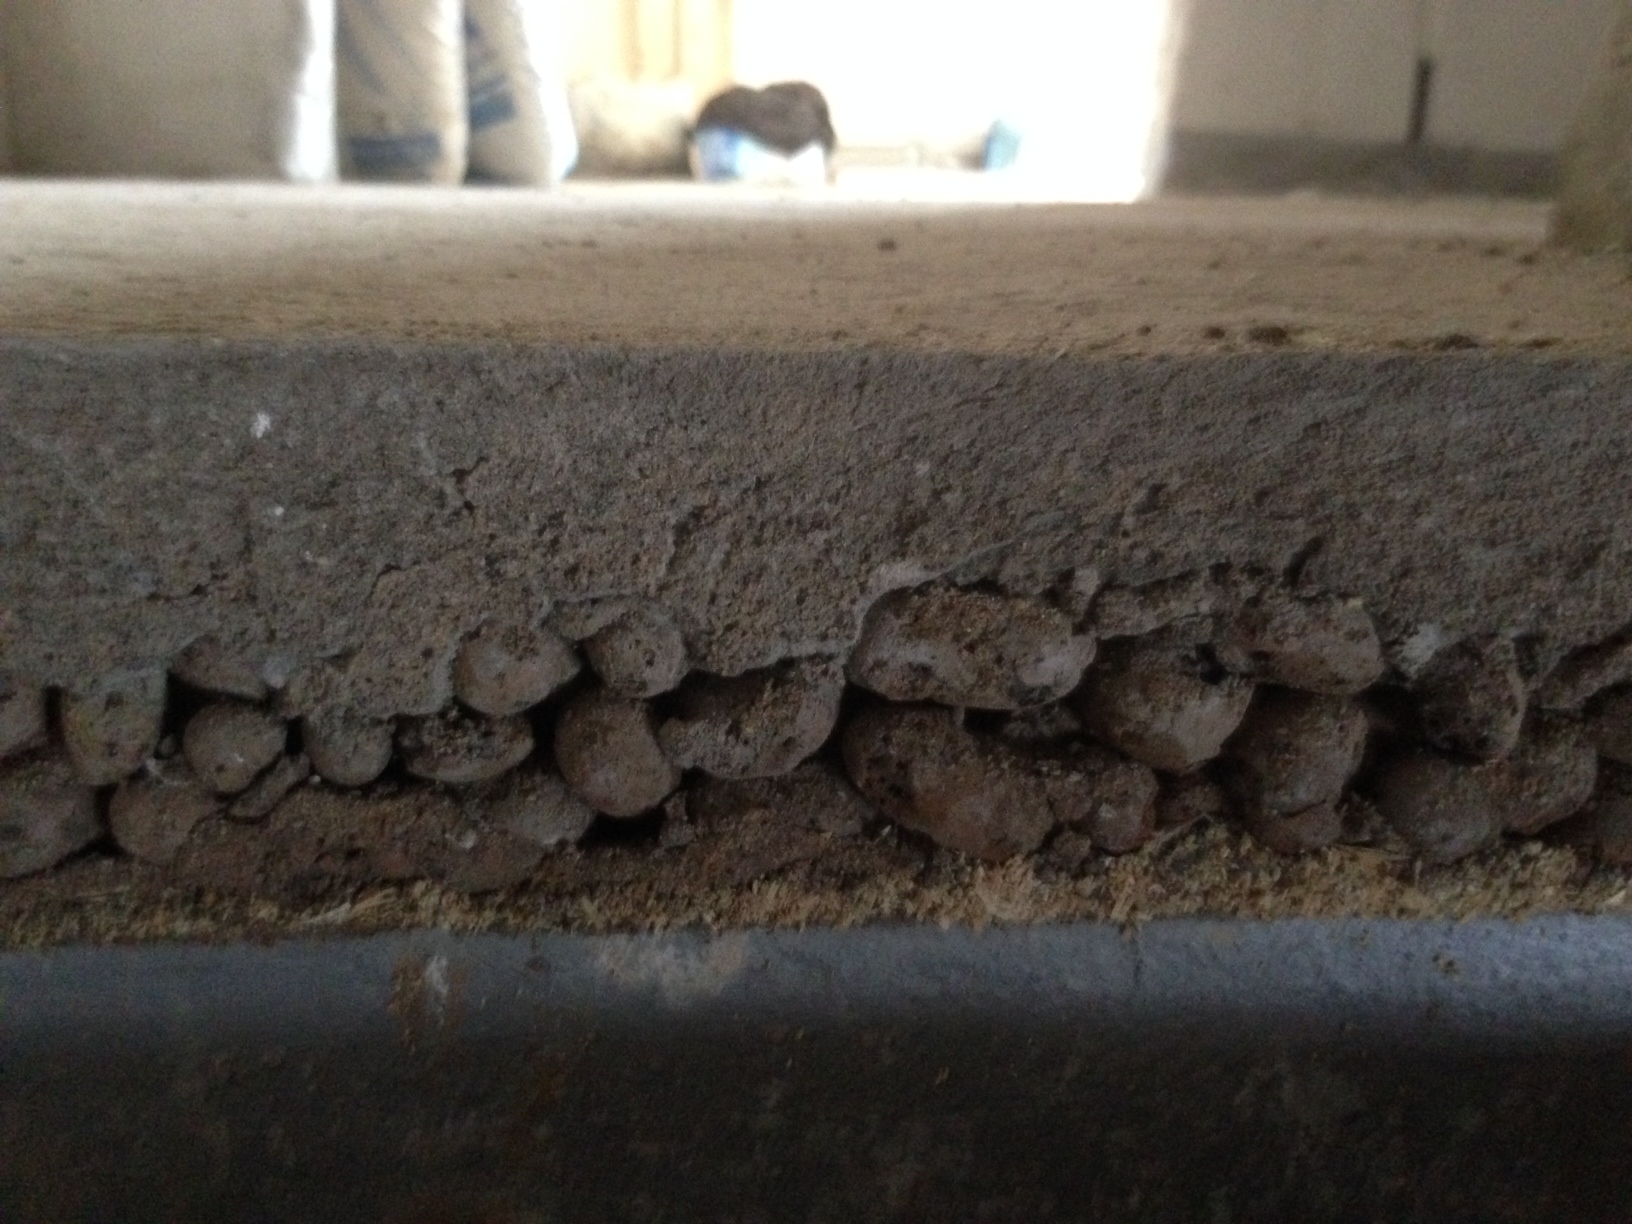
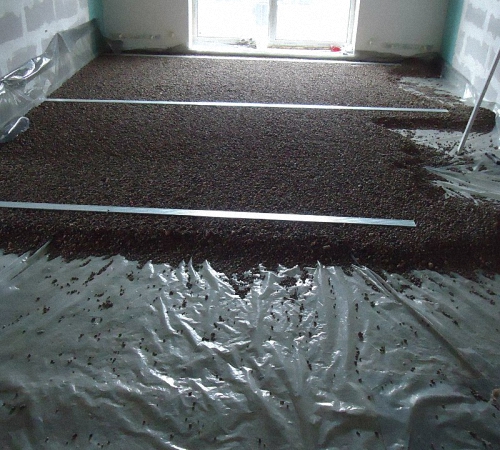
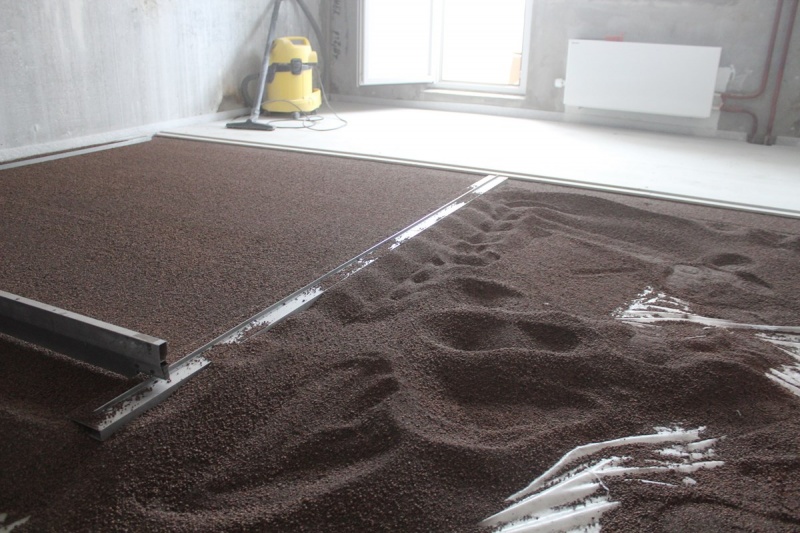
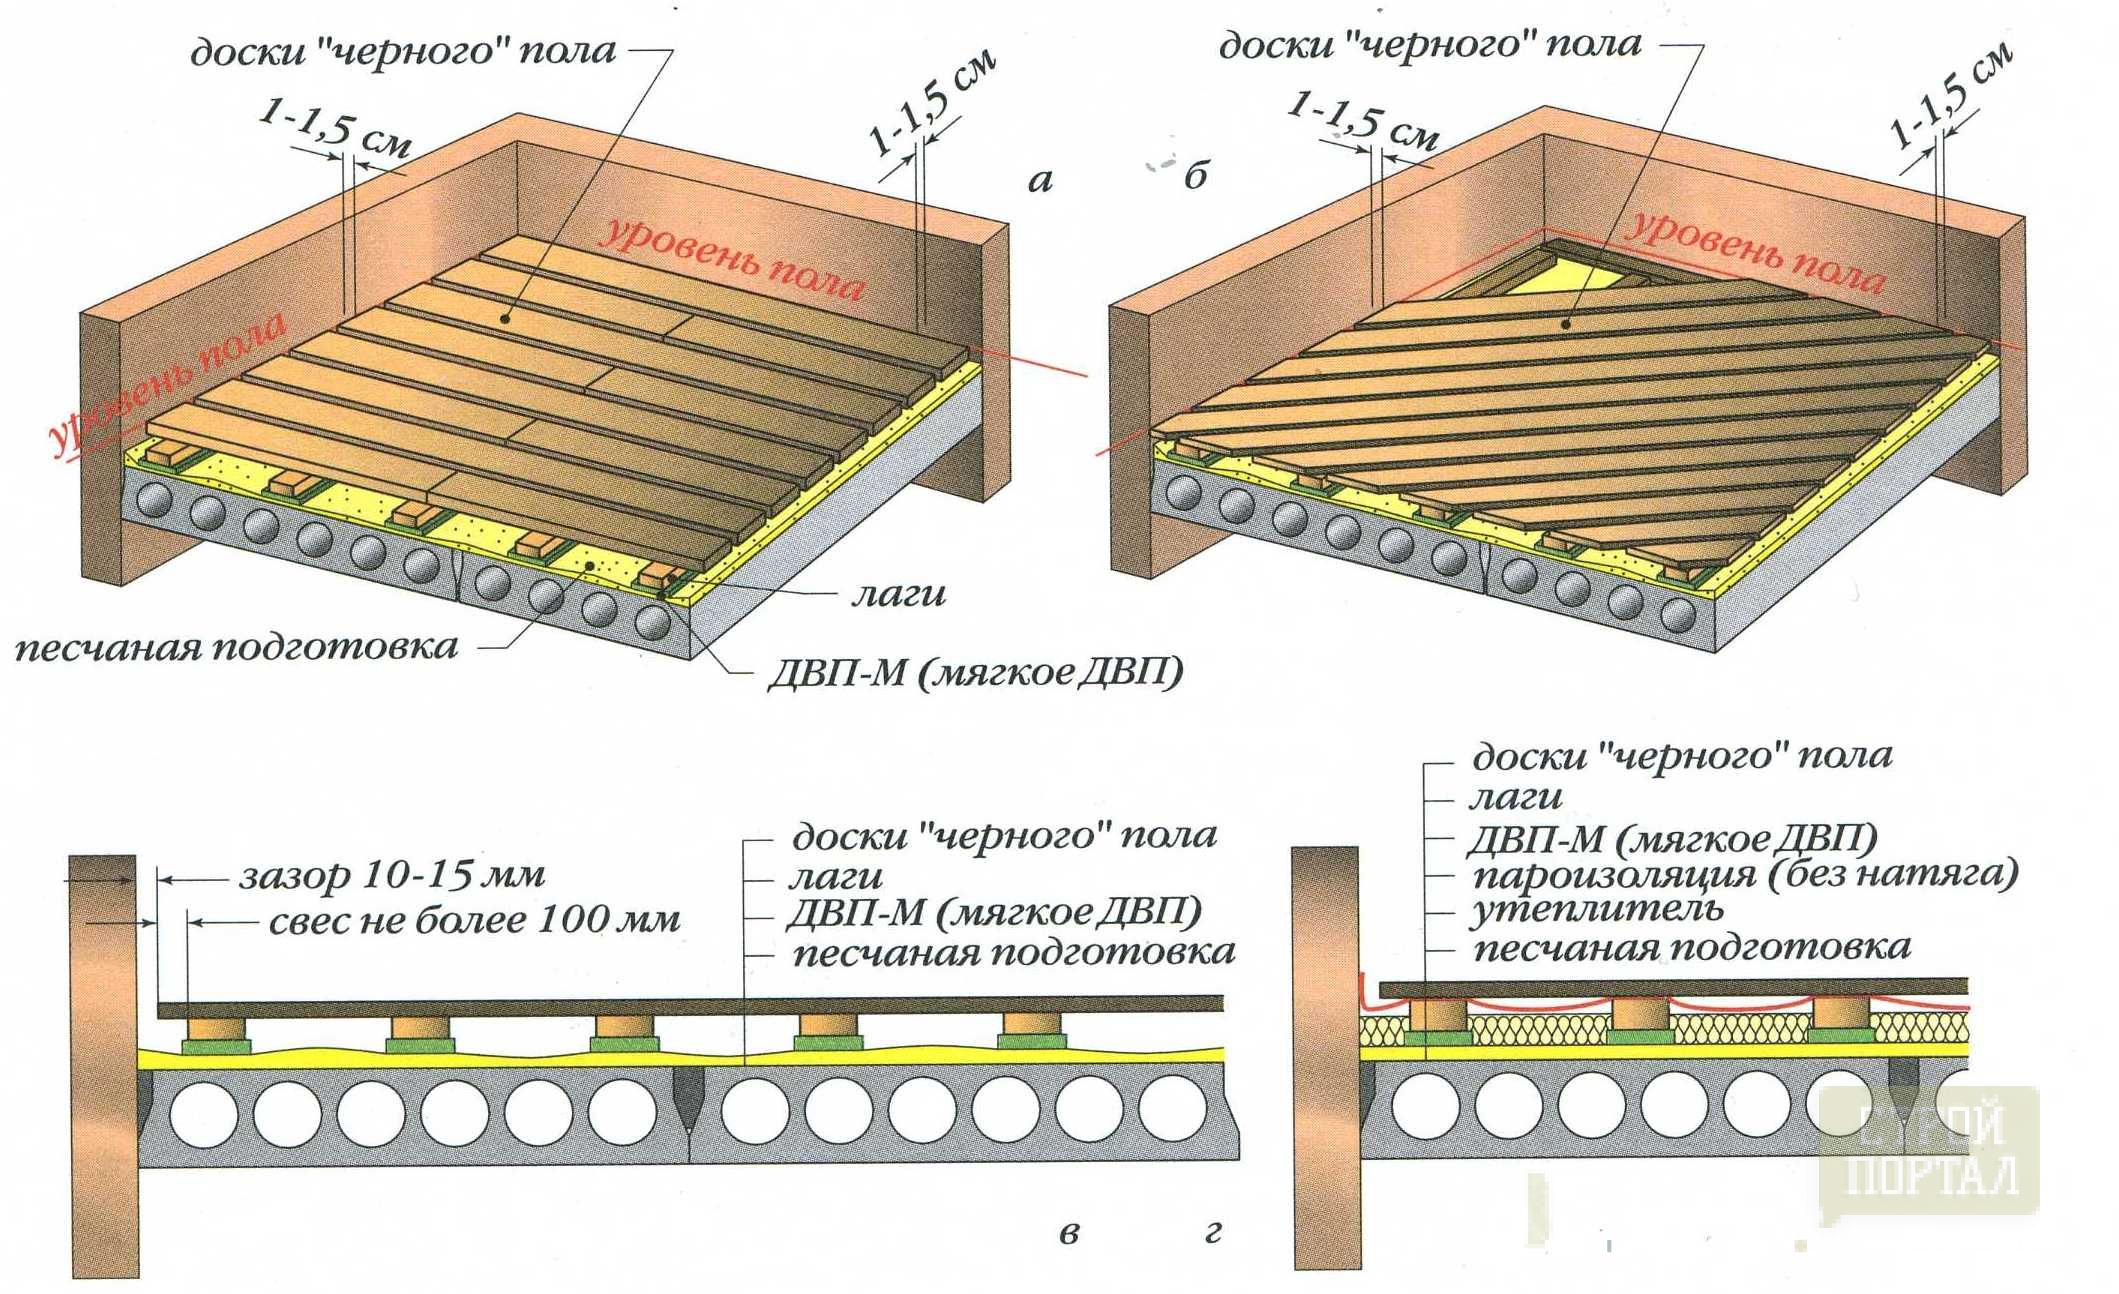
Preparing a room for screed installation on the ground begins with laying a cushion of heat and waterproofing. Materials can be selected at its discretion, but there are a few general recommendations. Layers can be swapped, use different fillers or change the thickness.
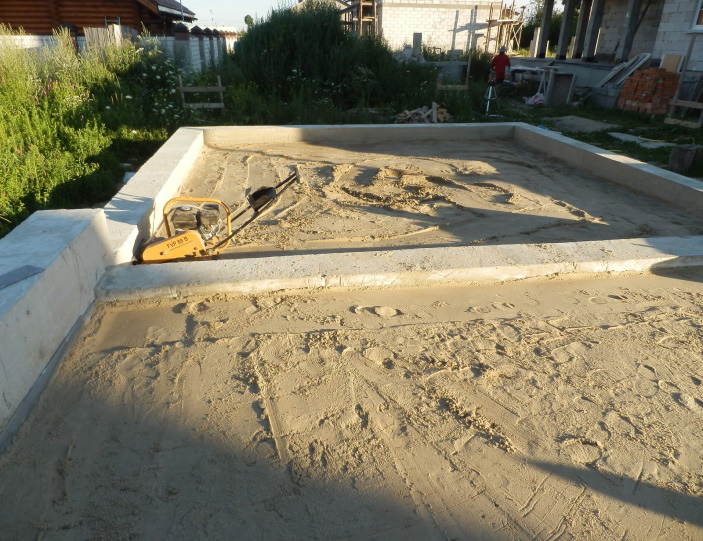
A layer of gravel or crushed stone 5-15 cm thick is poured on the surface prepared in advance. The next layer is 10-15 cm of sand, which can be moistened, and a layer of 10-15 cm of crushed stone or expanded clay. Each layer is carefully tamped with a vibrator or a heavy log. Crushed stone must be selected with a fraction of 40-50 mm.


Layers of crushed stone or expanded clay are recommended to be powdered with crushed stone or sand. The last layer is well leveled and control the absence of sharp corners on the rubble. If sharp stones remain, the waterproofing material may tear. For better adhesion, it is recommended to shed the top layer with liquid cement and wait for it to dry.
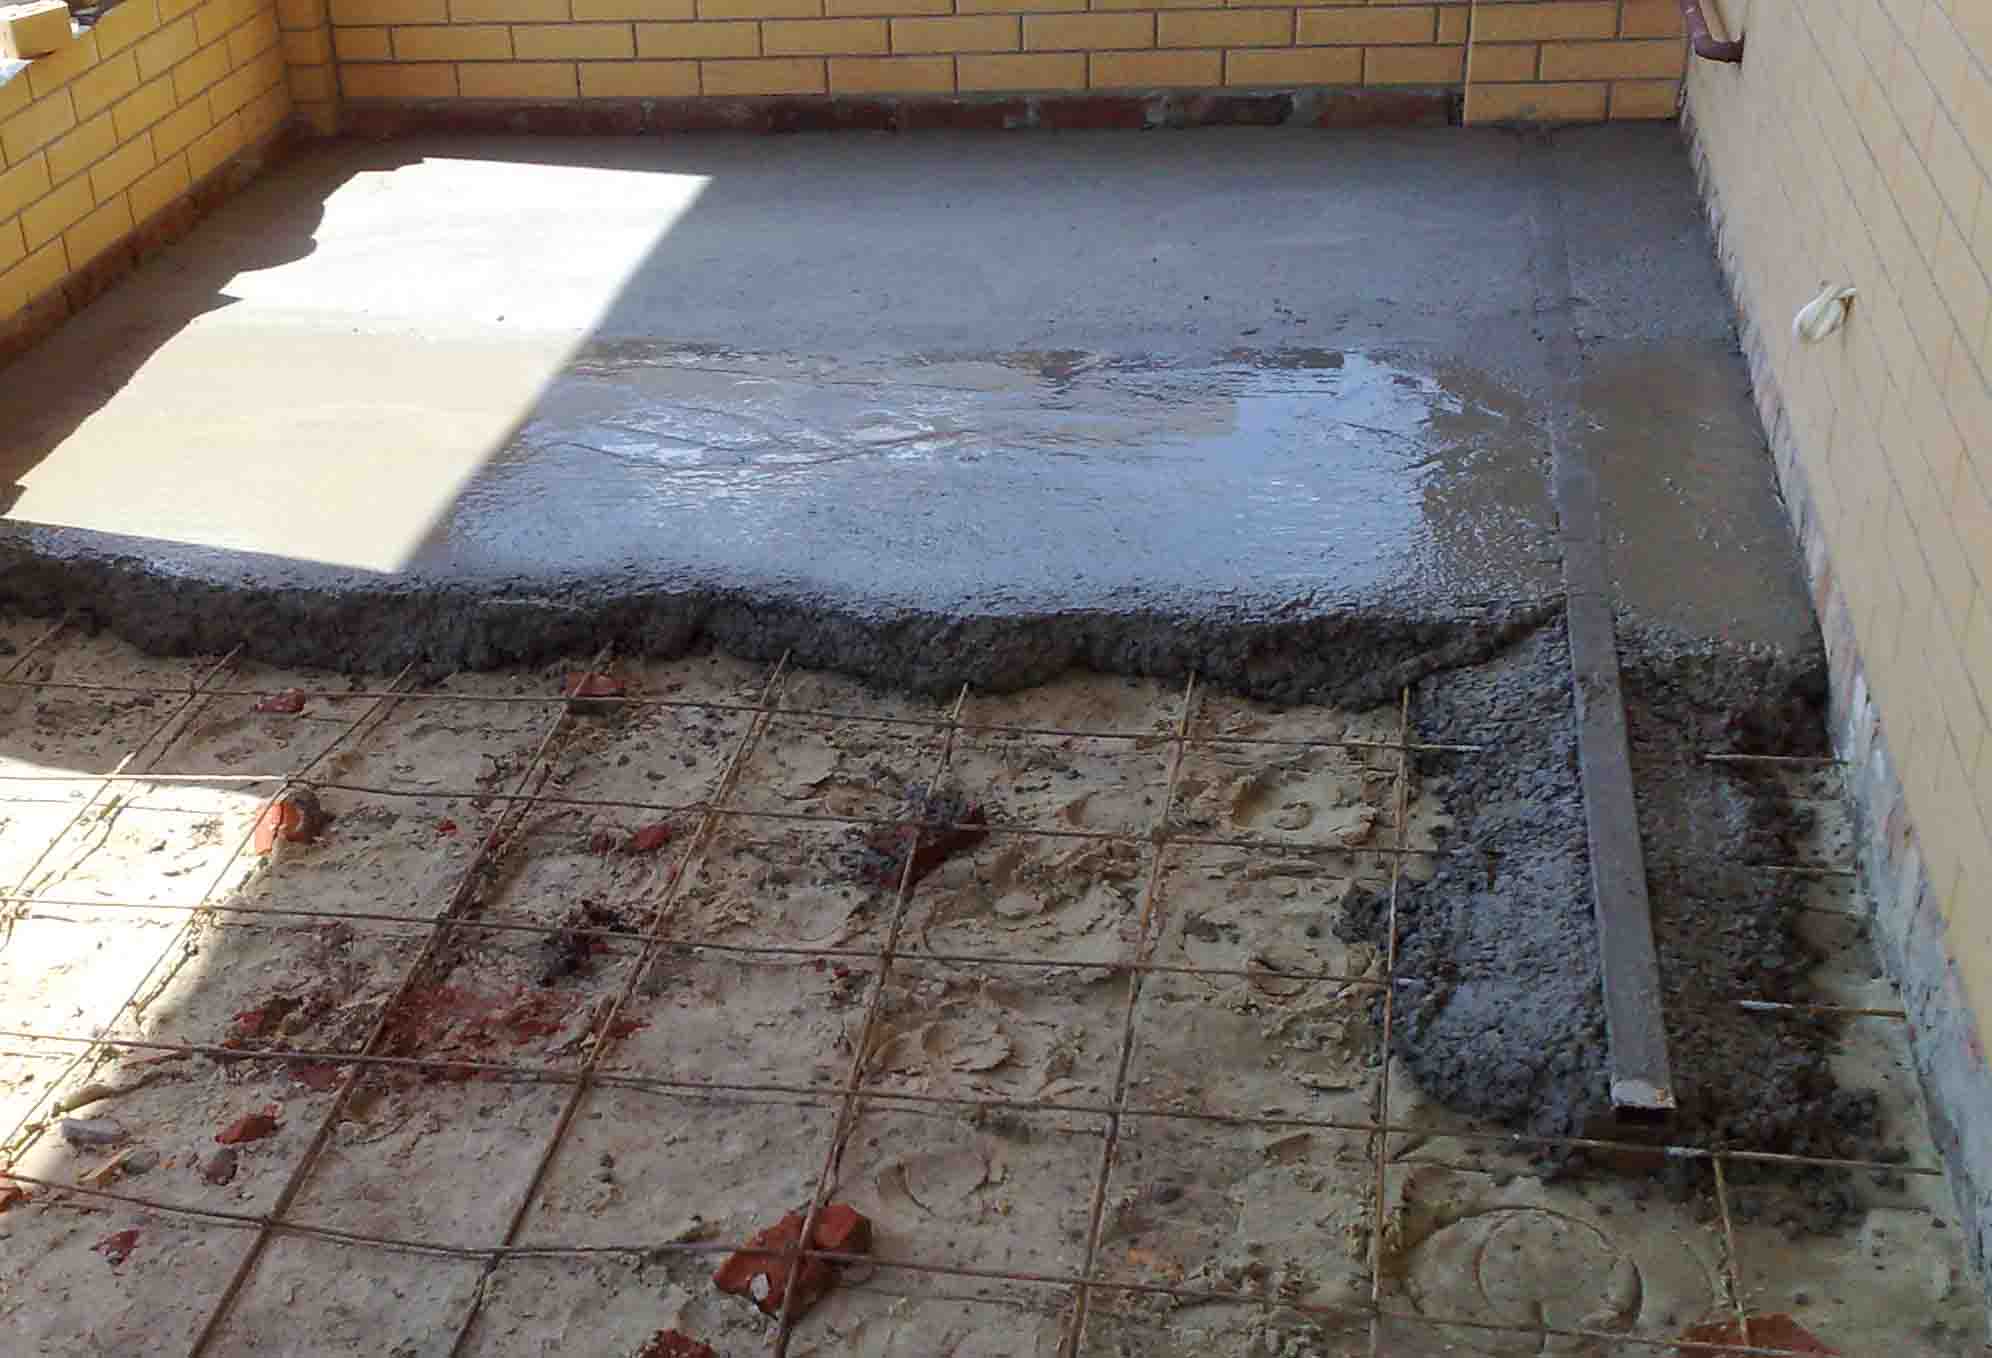
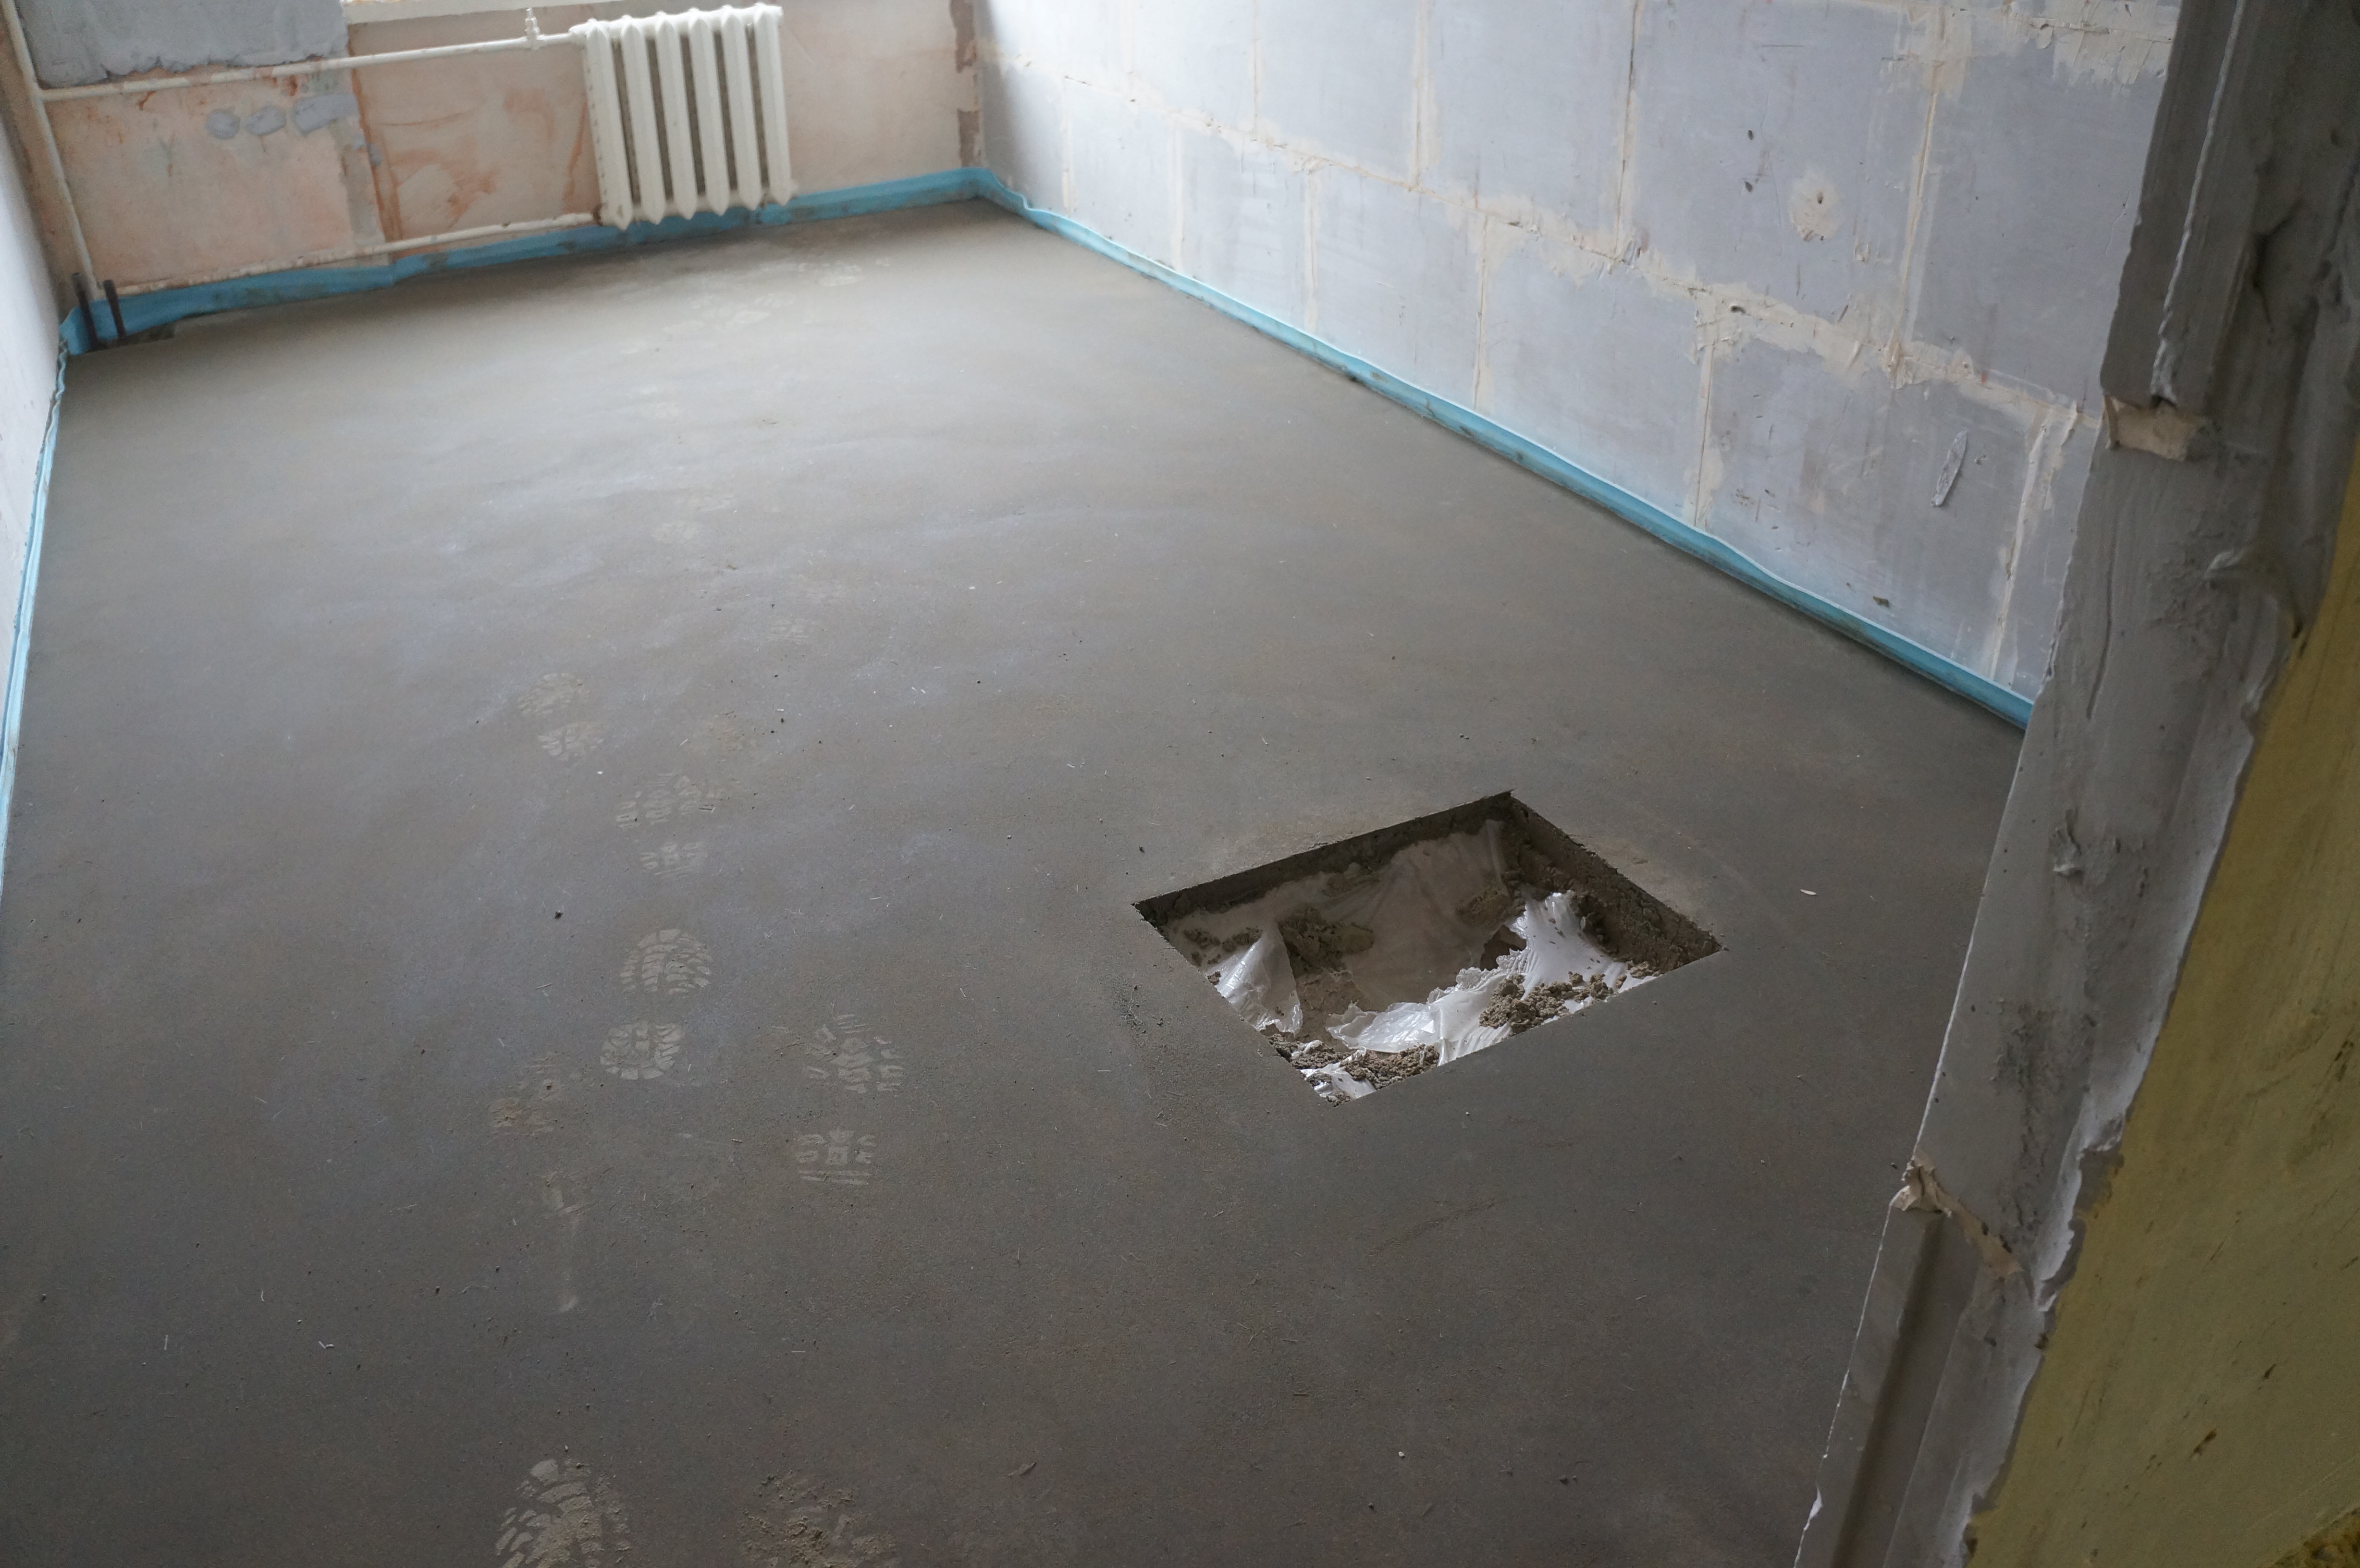
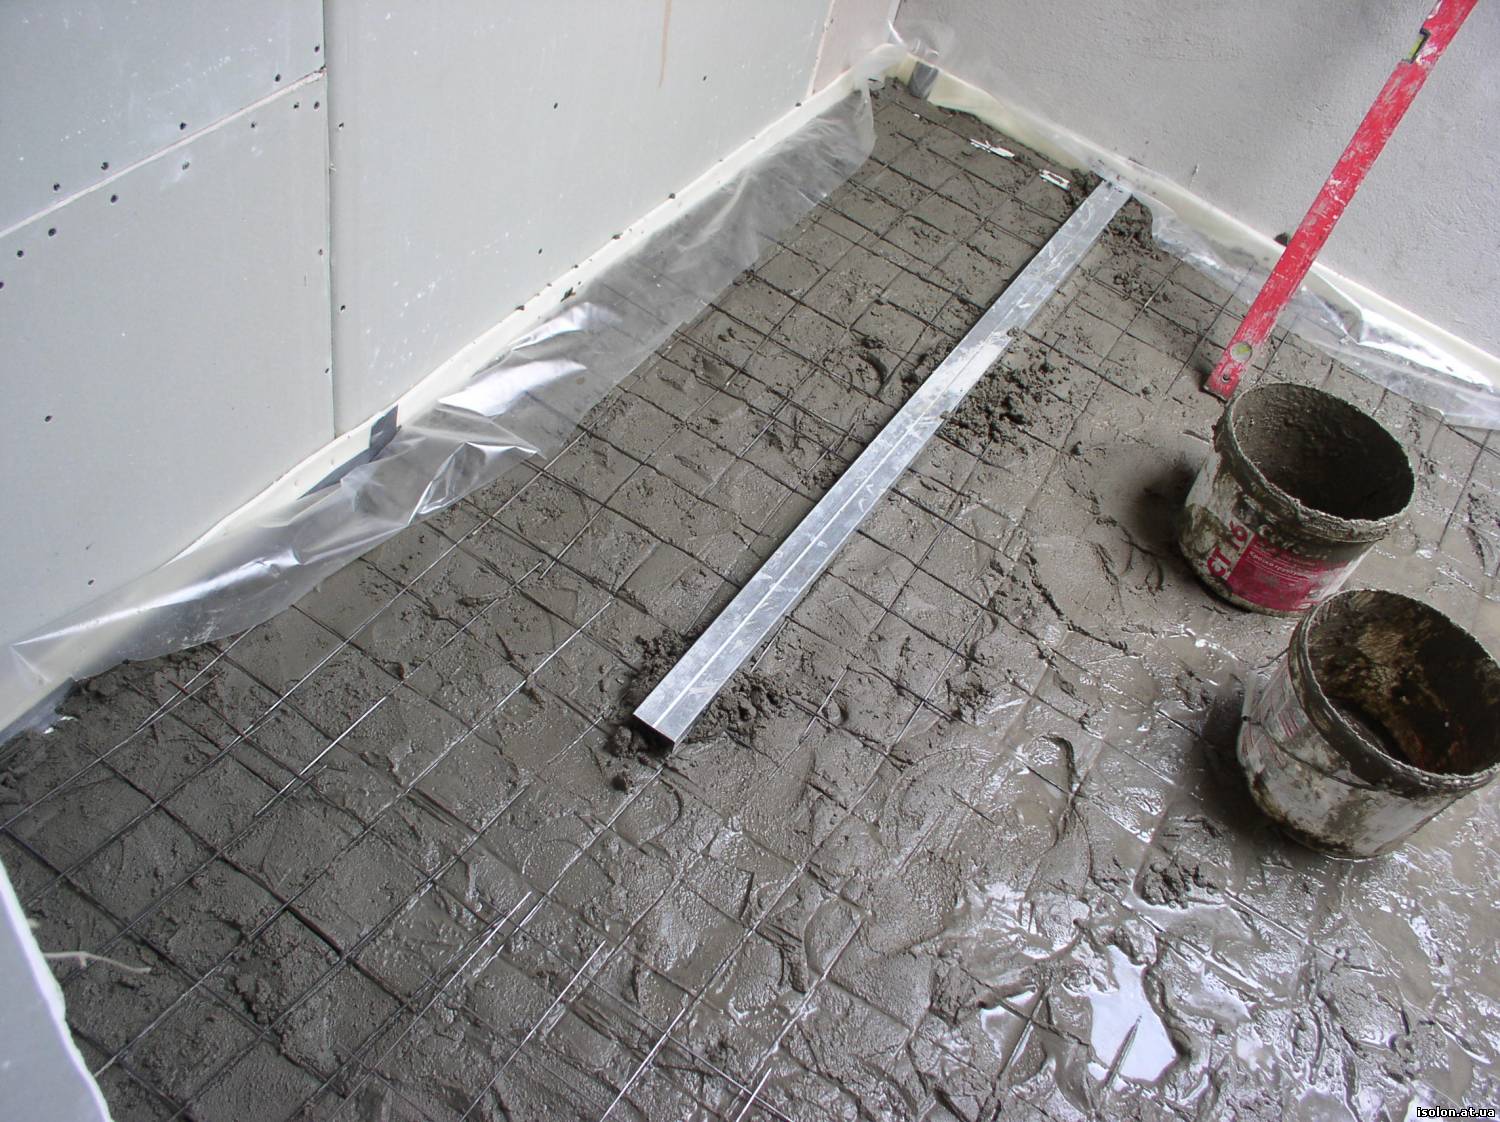
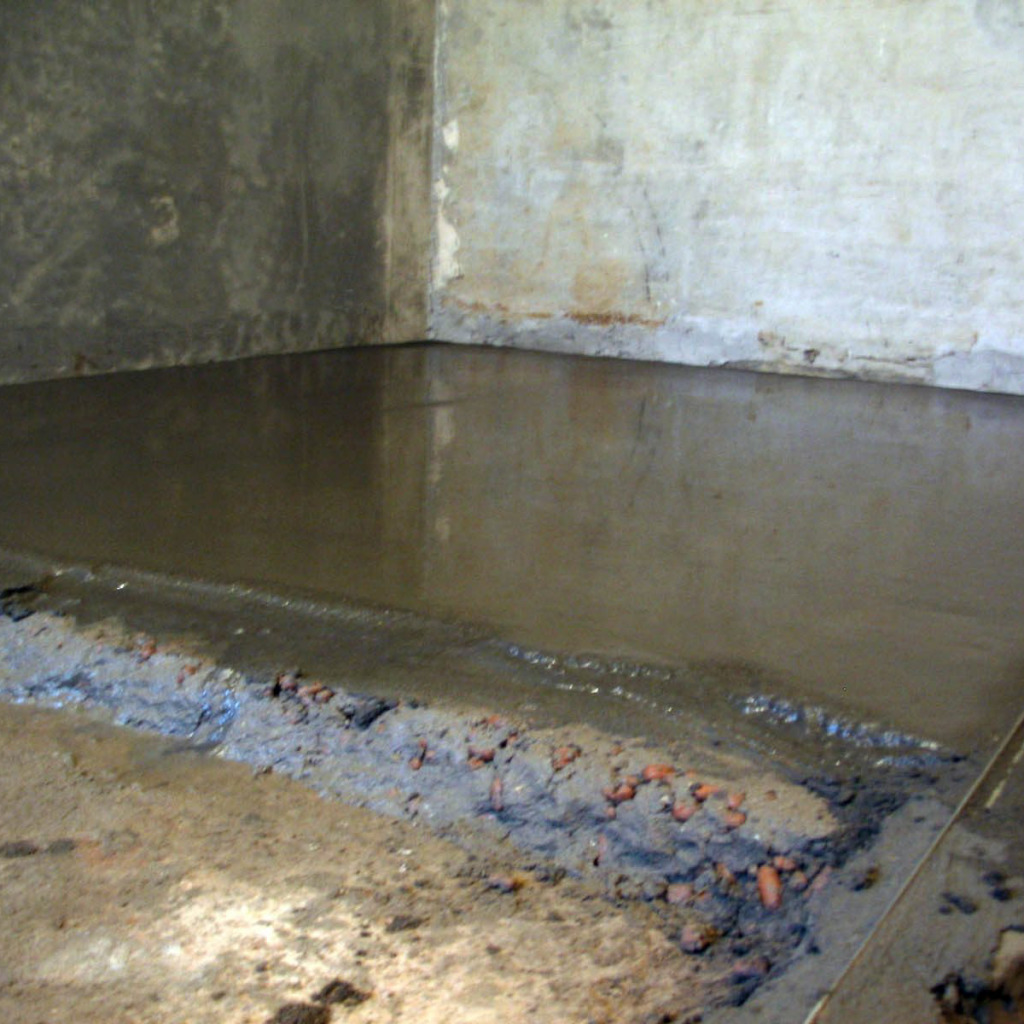
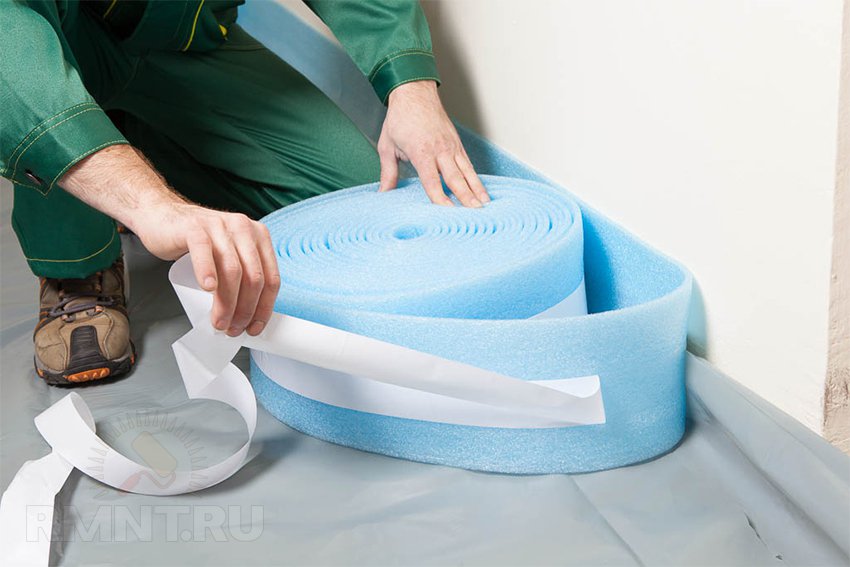
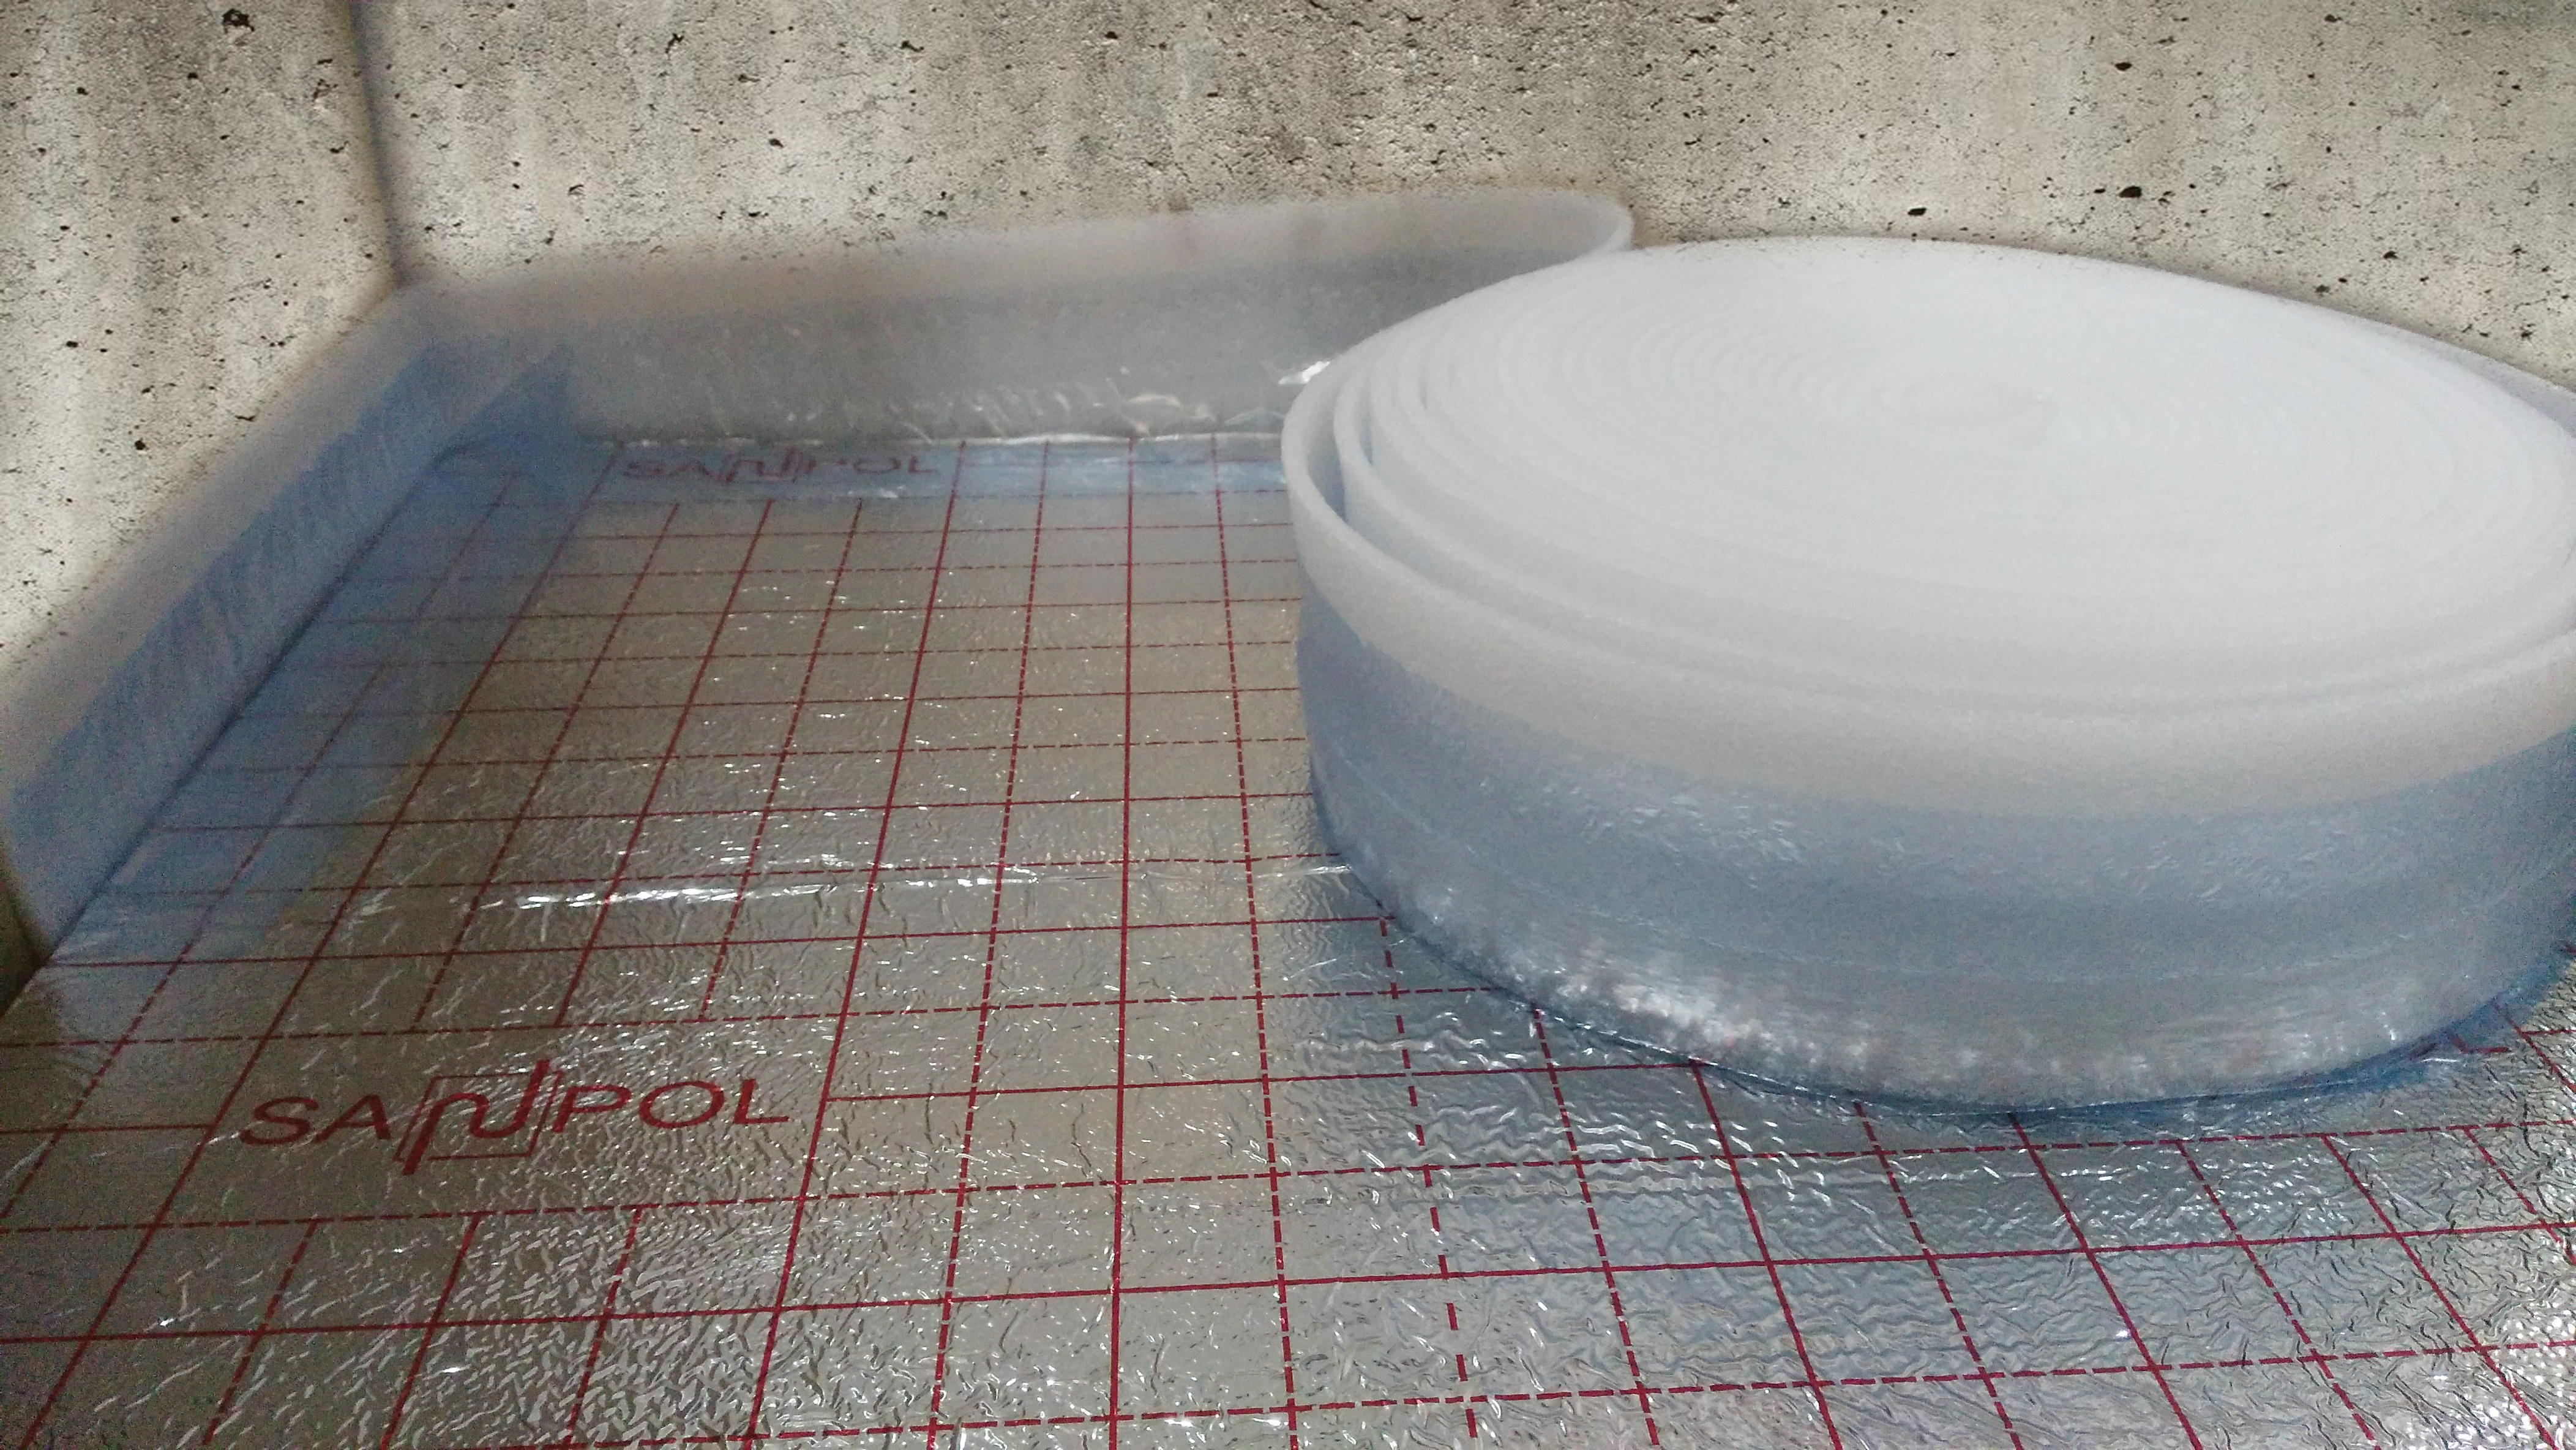
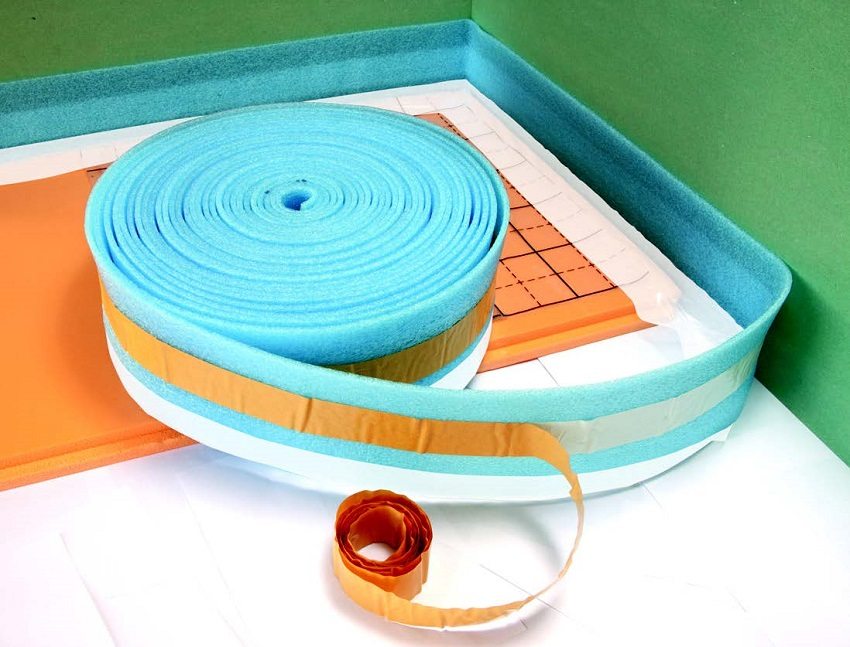
For waterproofing on the ground, you can use roll materials or film with a density of 200 microns. The material should be laid on the base with overlapping each other, the edges should be raised 15 cm above the level of the future screed and attached with adhesive tape to the walls. At the level of the screed with a small margin in height attach the damper tape. It compensates for the compression and expansion of the screed, thereby preventing deformation of the walls and floor with temperature and humidity drops.
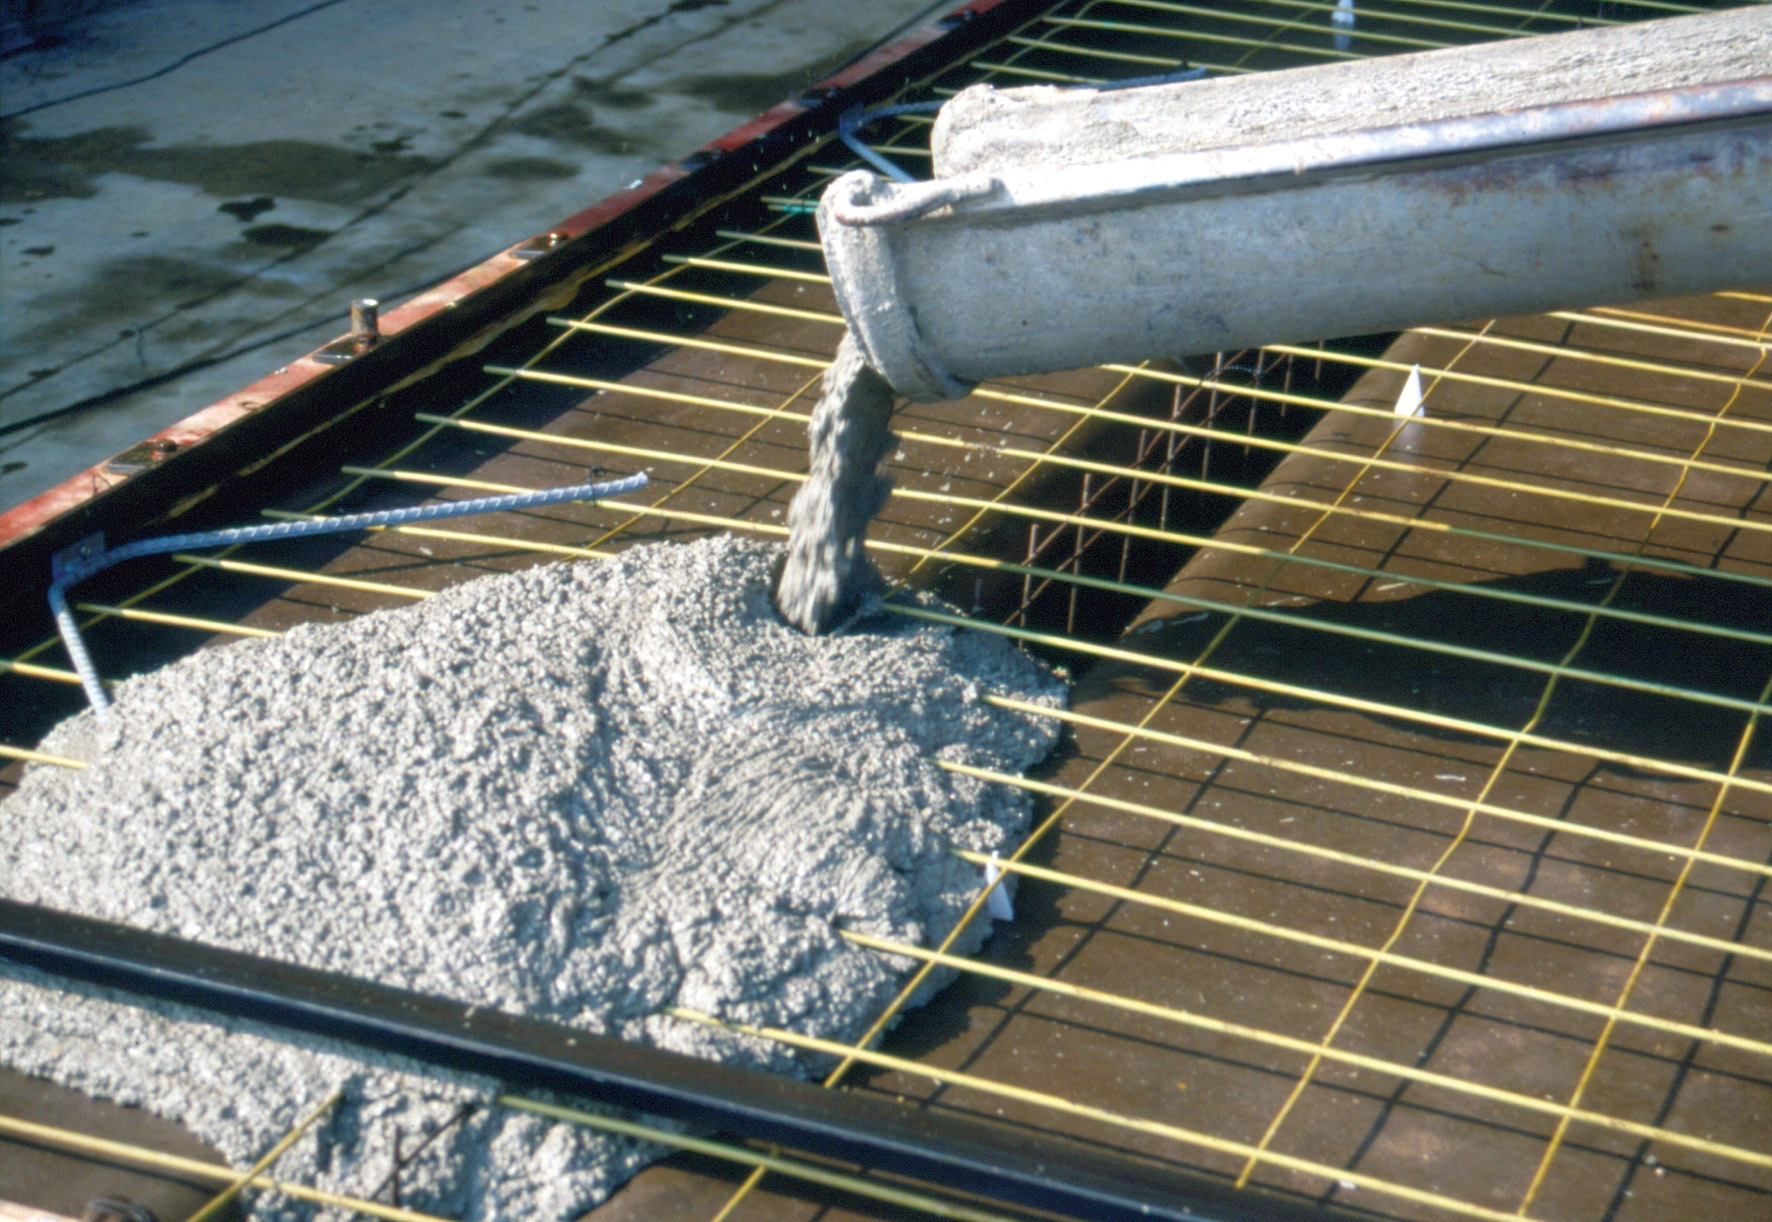
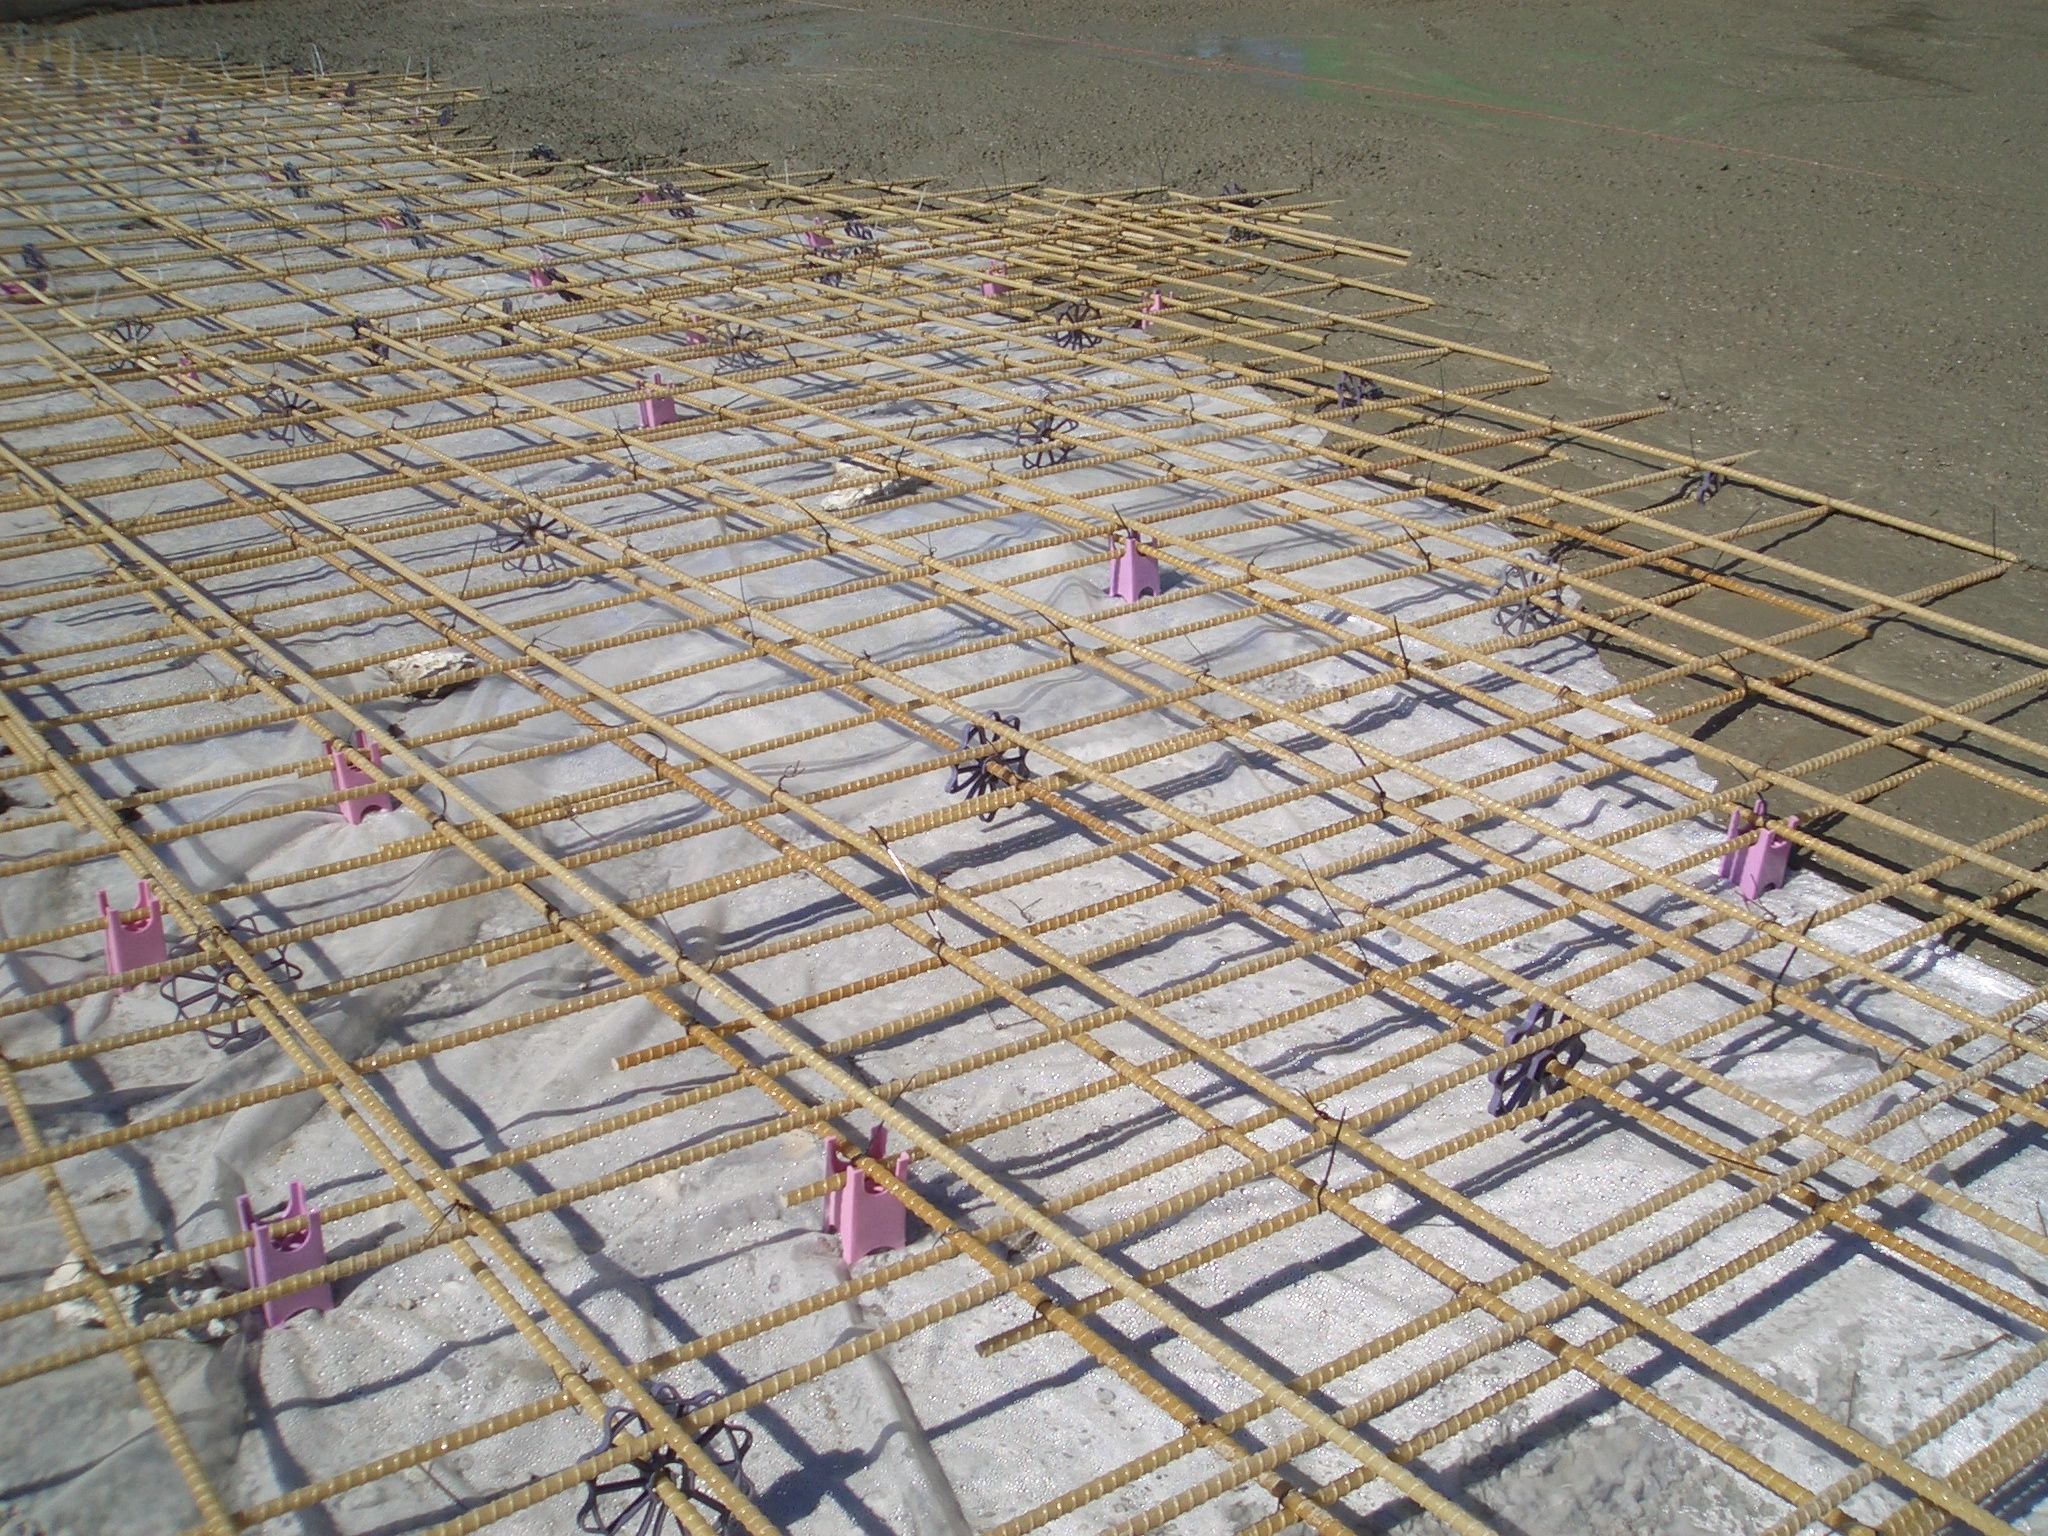
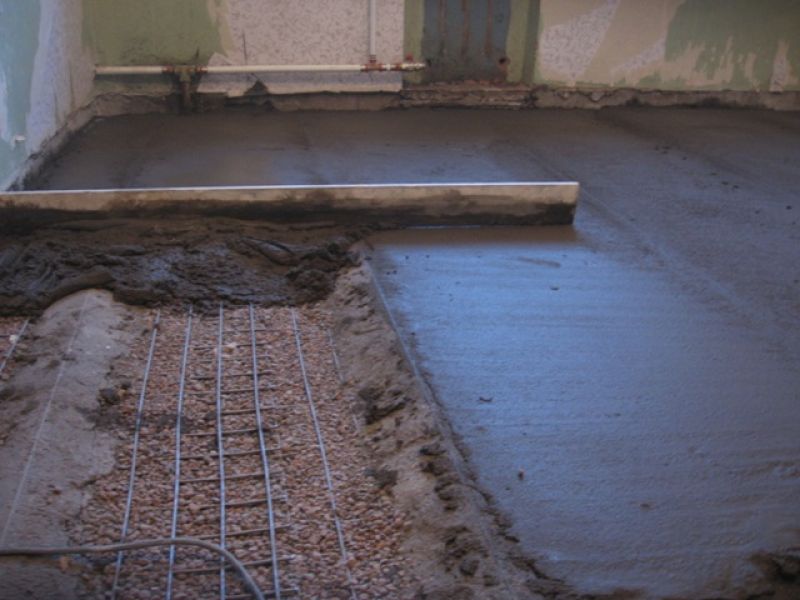
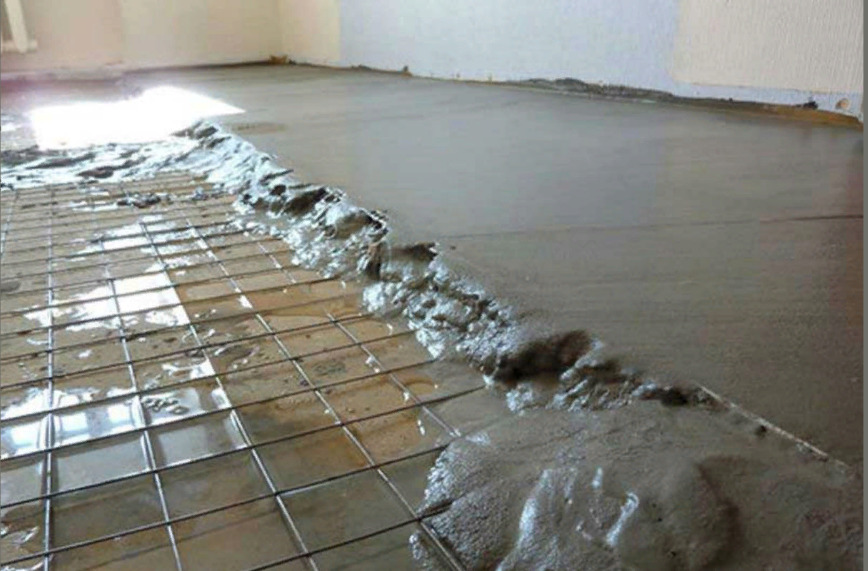
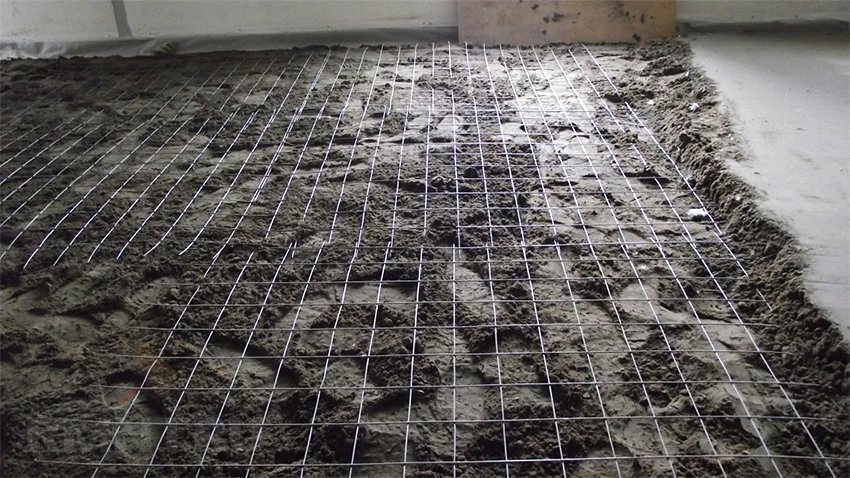
Over waterproofing the reinforcing layer keeps within. Best of all is fine mesh steel welded wire mesh, which has the necessary rigidity. The steel mesh is installed at a height of 1/3 of the thickness of the screed using special pads-chairs. If a reinforcement structure is used, concrete after pouring will need to be sealed with special vibration equipment.
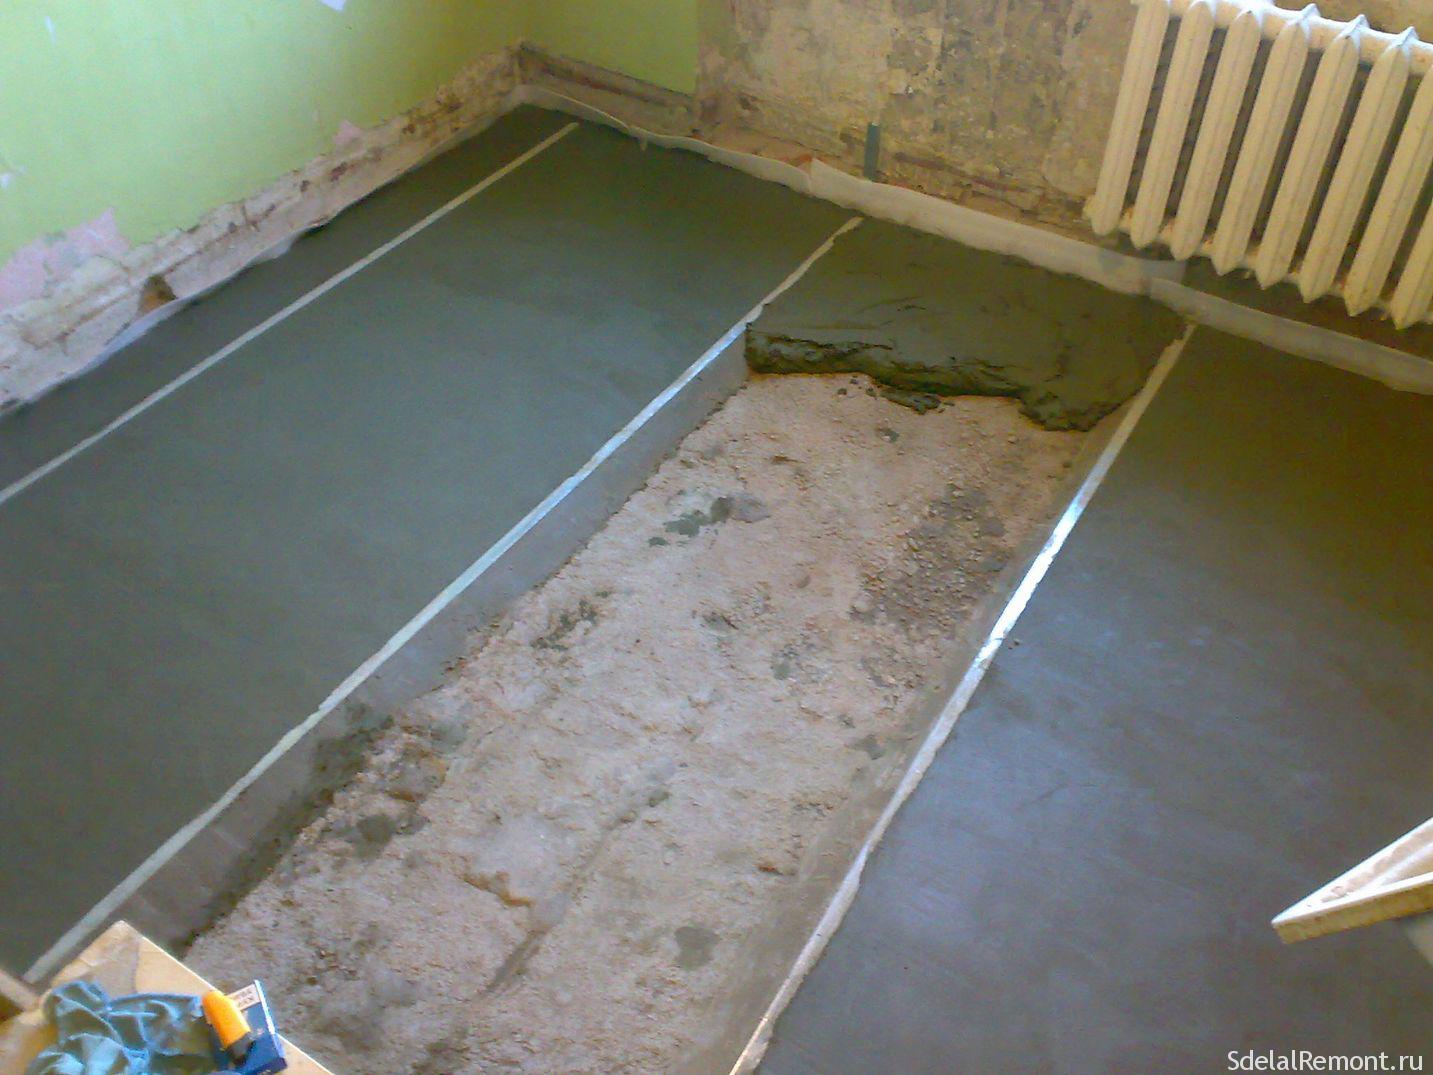
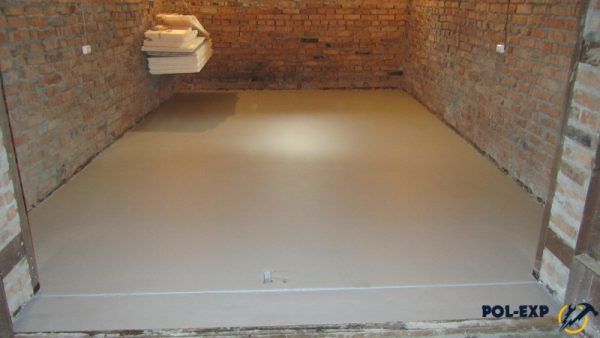
Too much room can be divided into square or rectangular parts, which are also called maps. One card must be filled in in one day and its size depends only on the productivity of the workers.
The card is fenced off with a formwork made of wet wood or laminated plywood with a screed level height; after setting the formwork, it is necessary to remove the formwork.
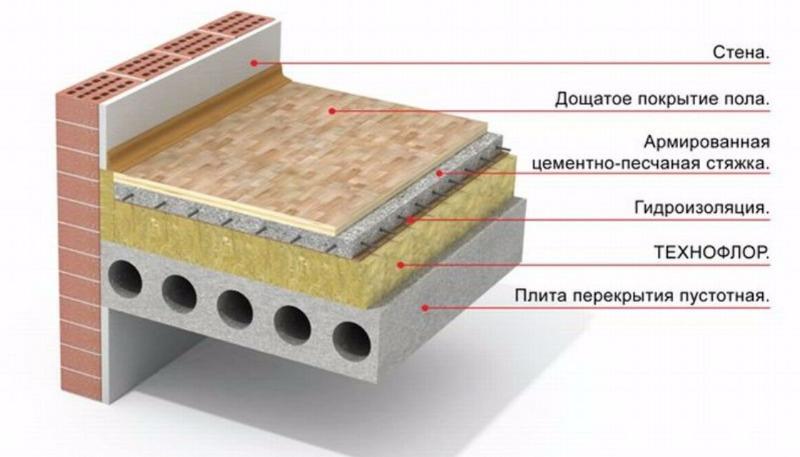
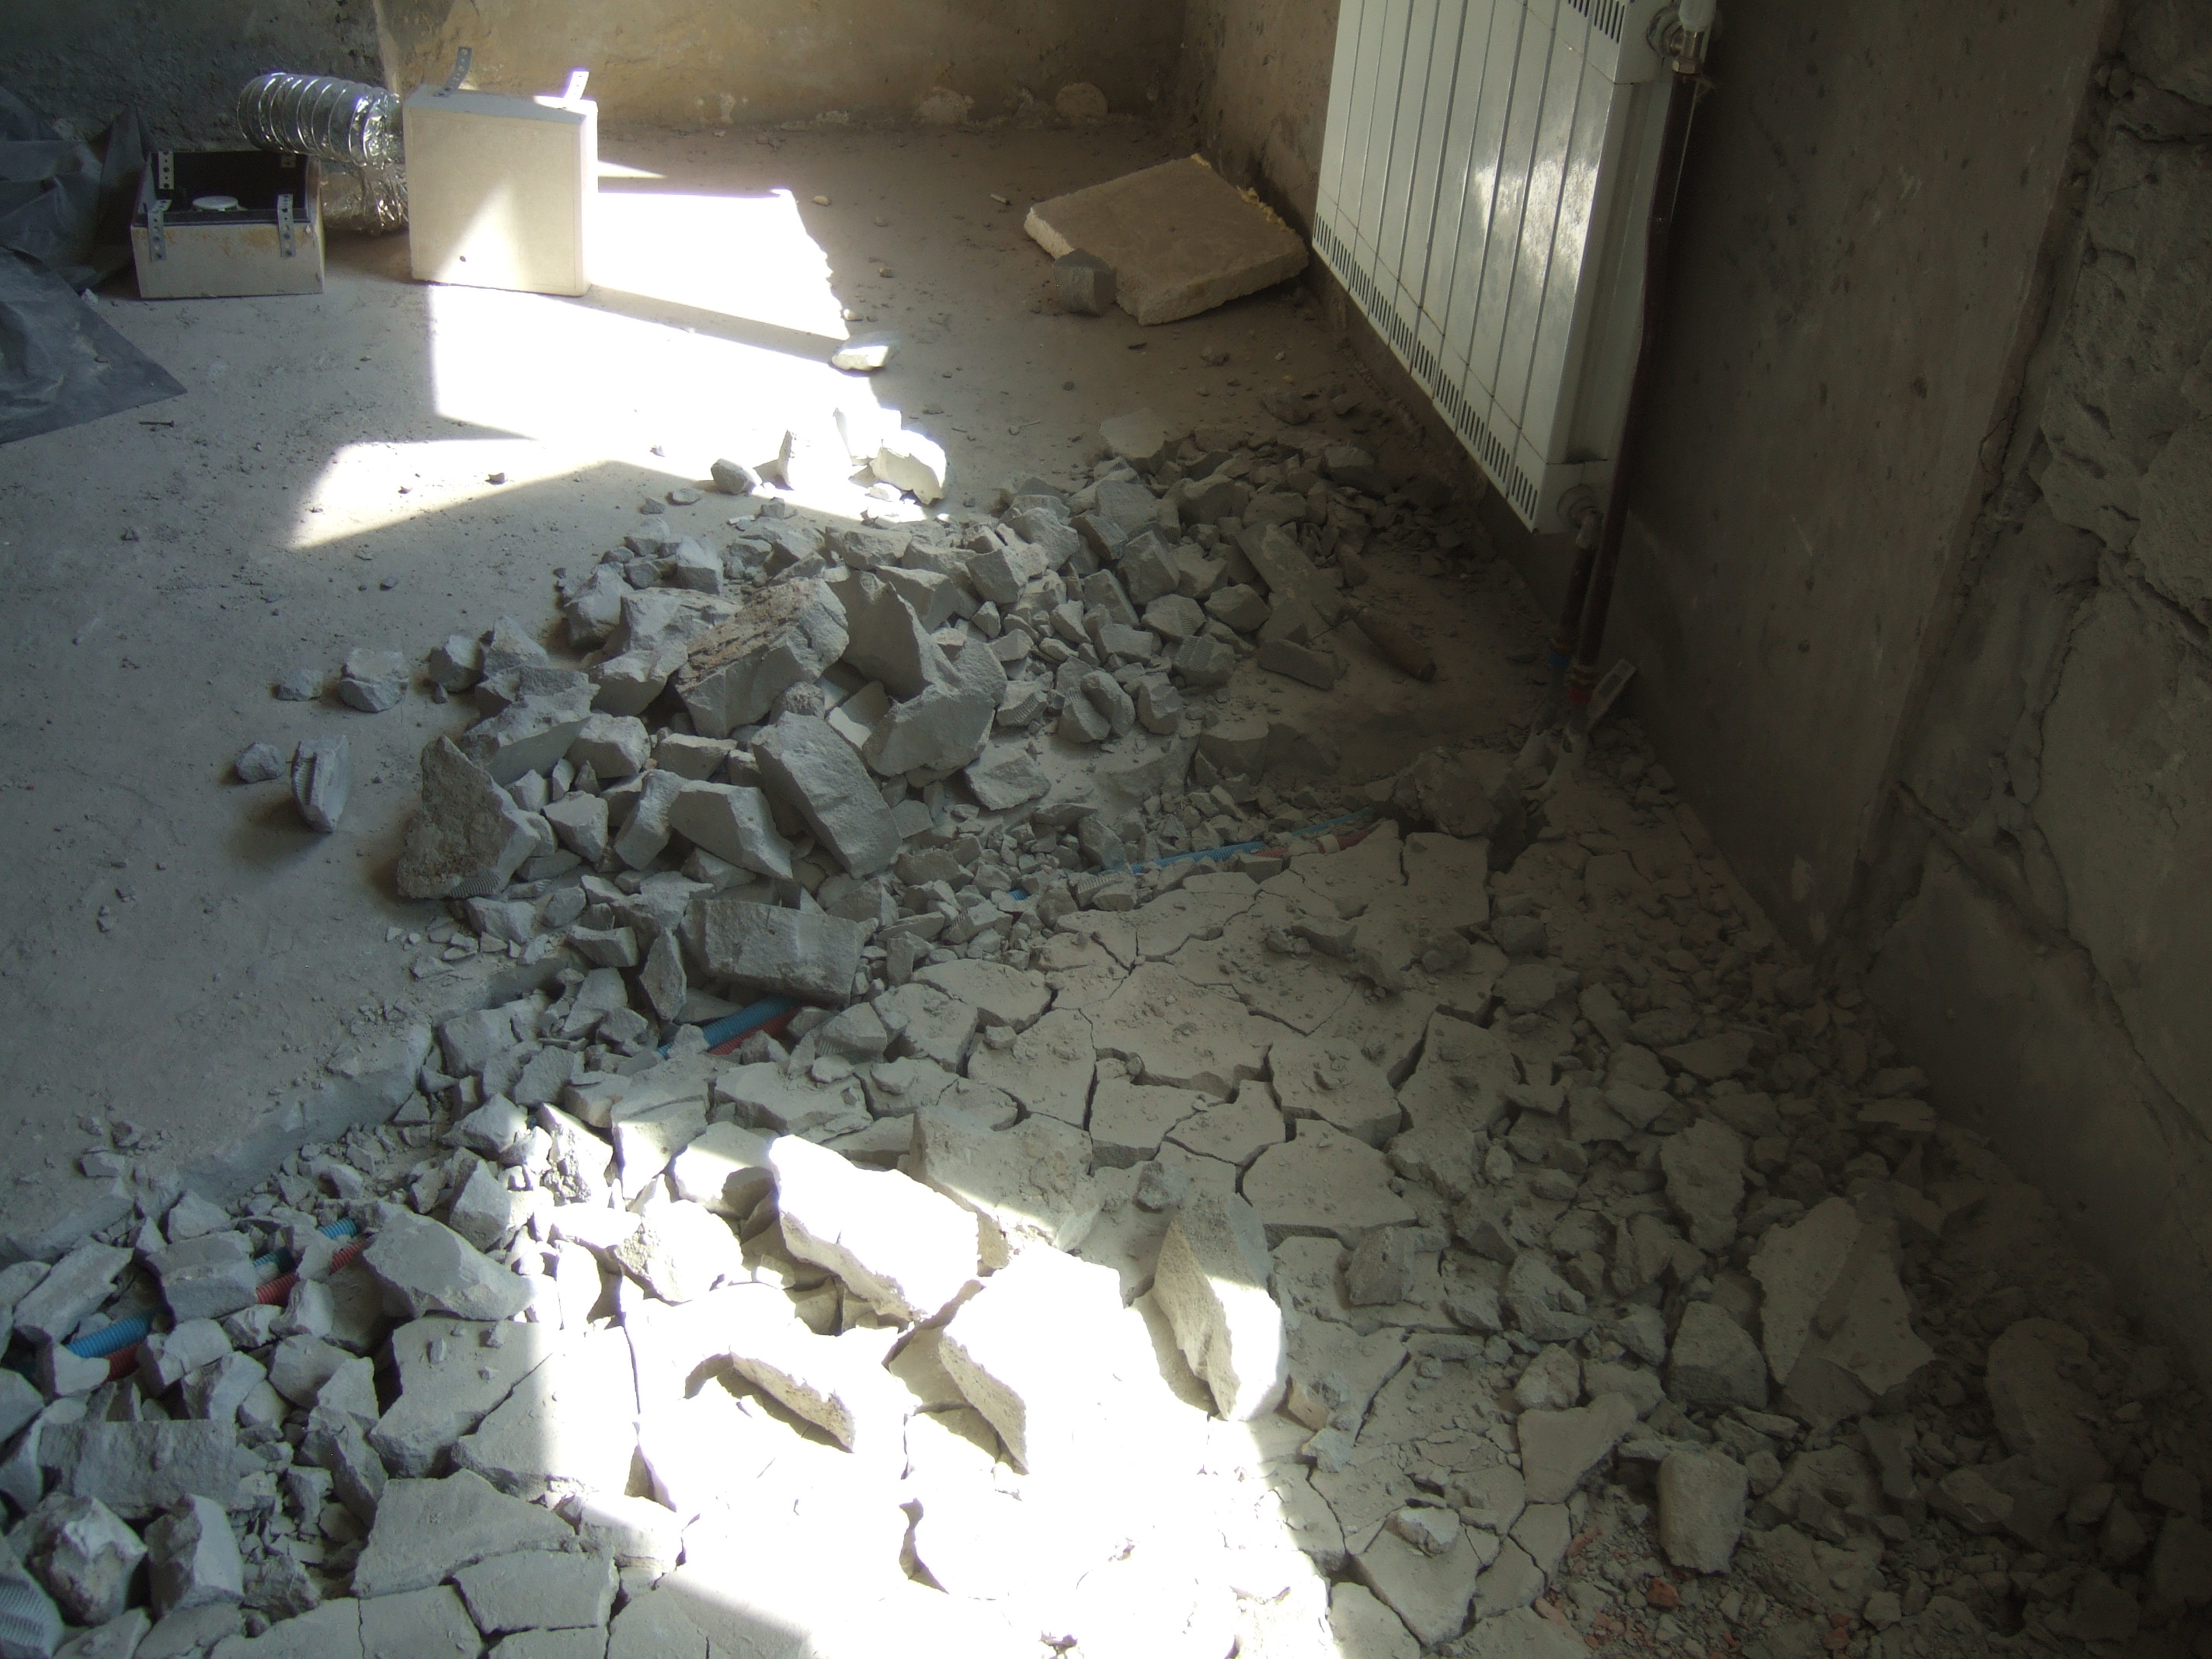
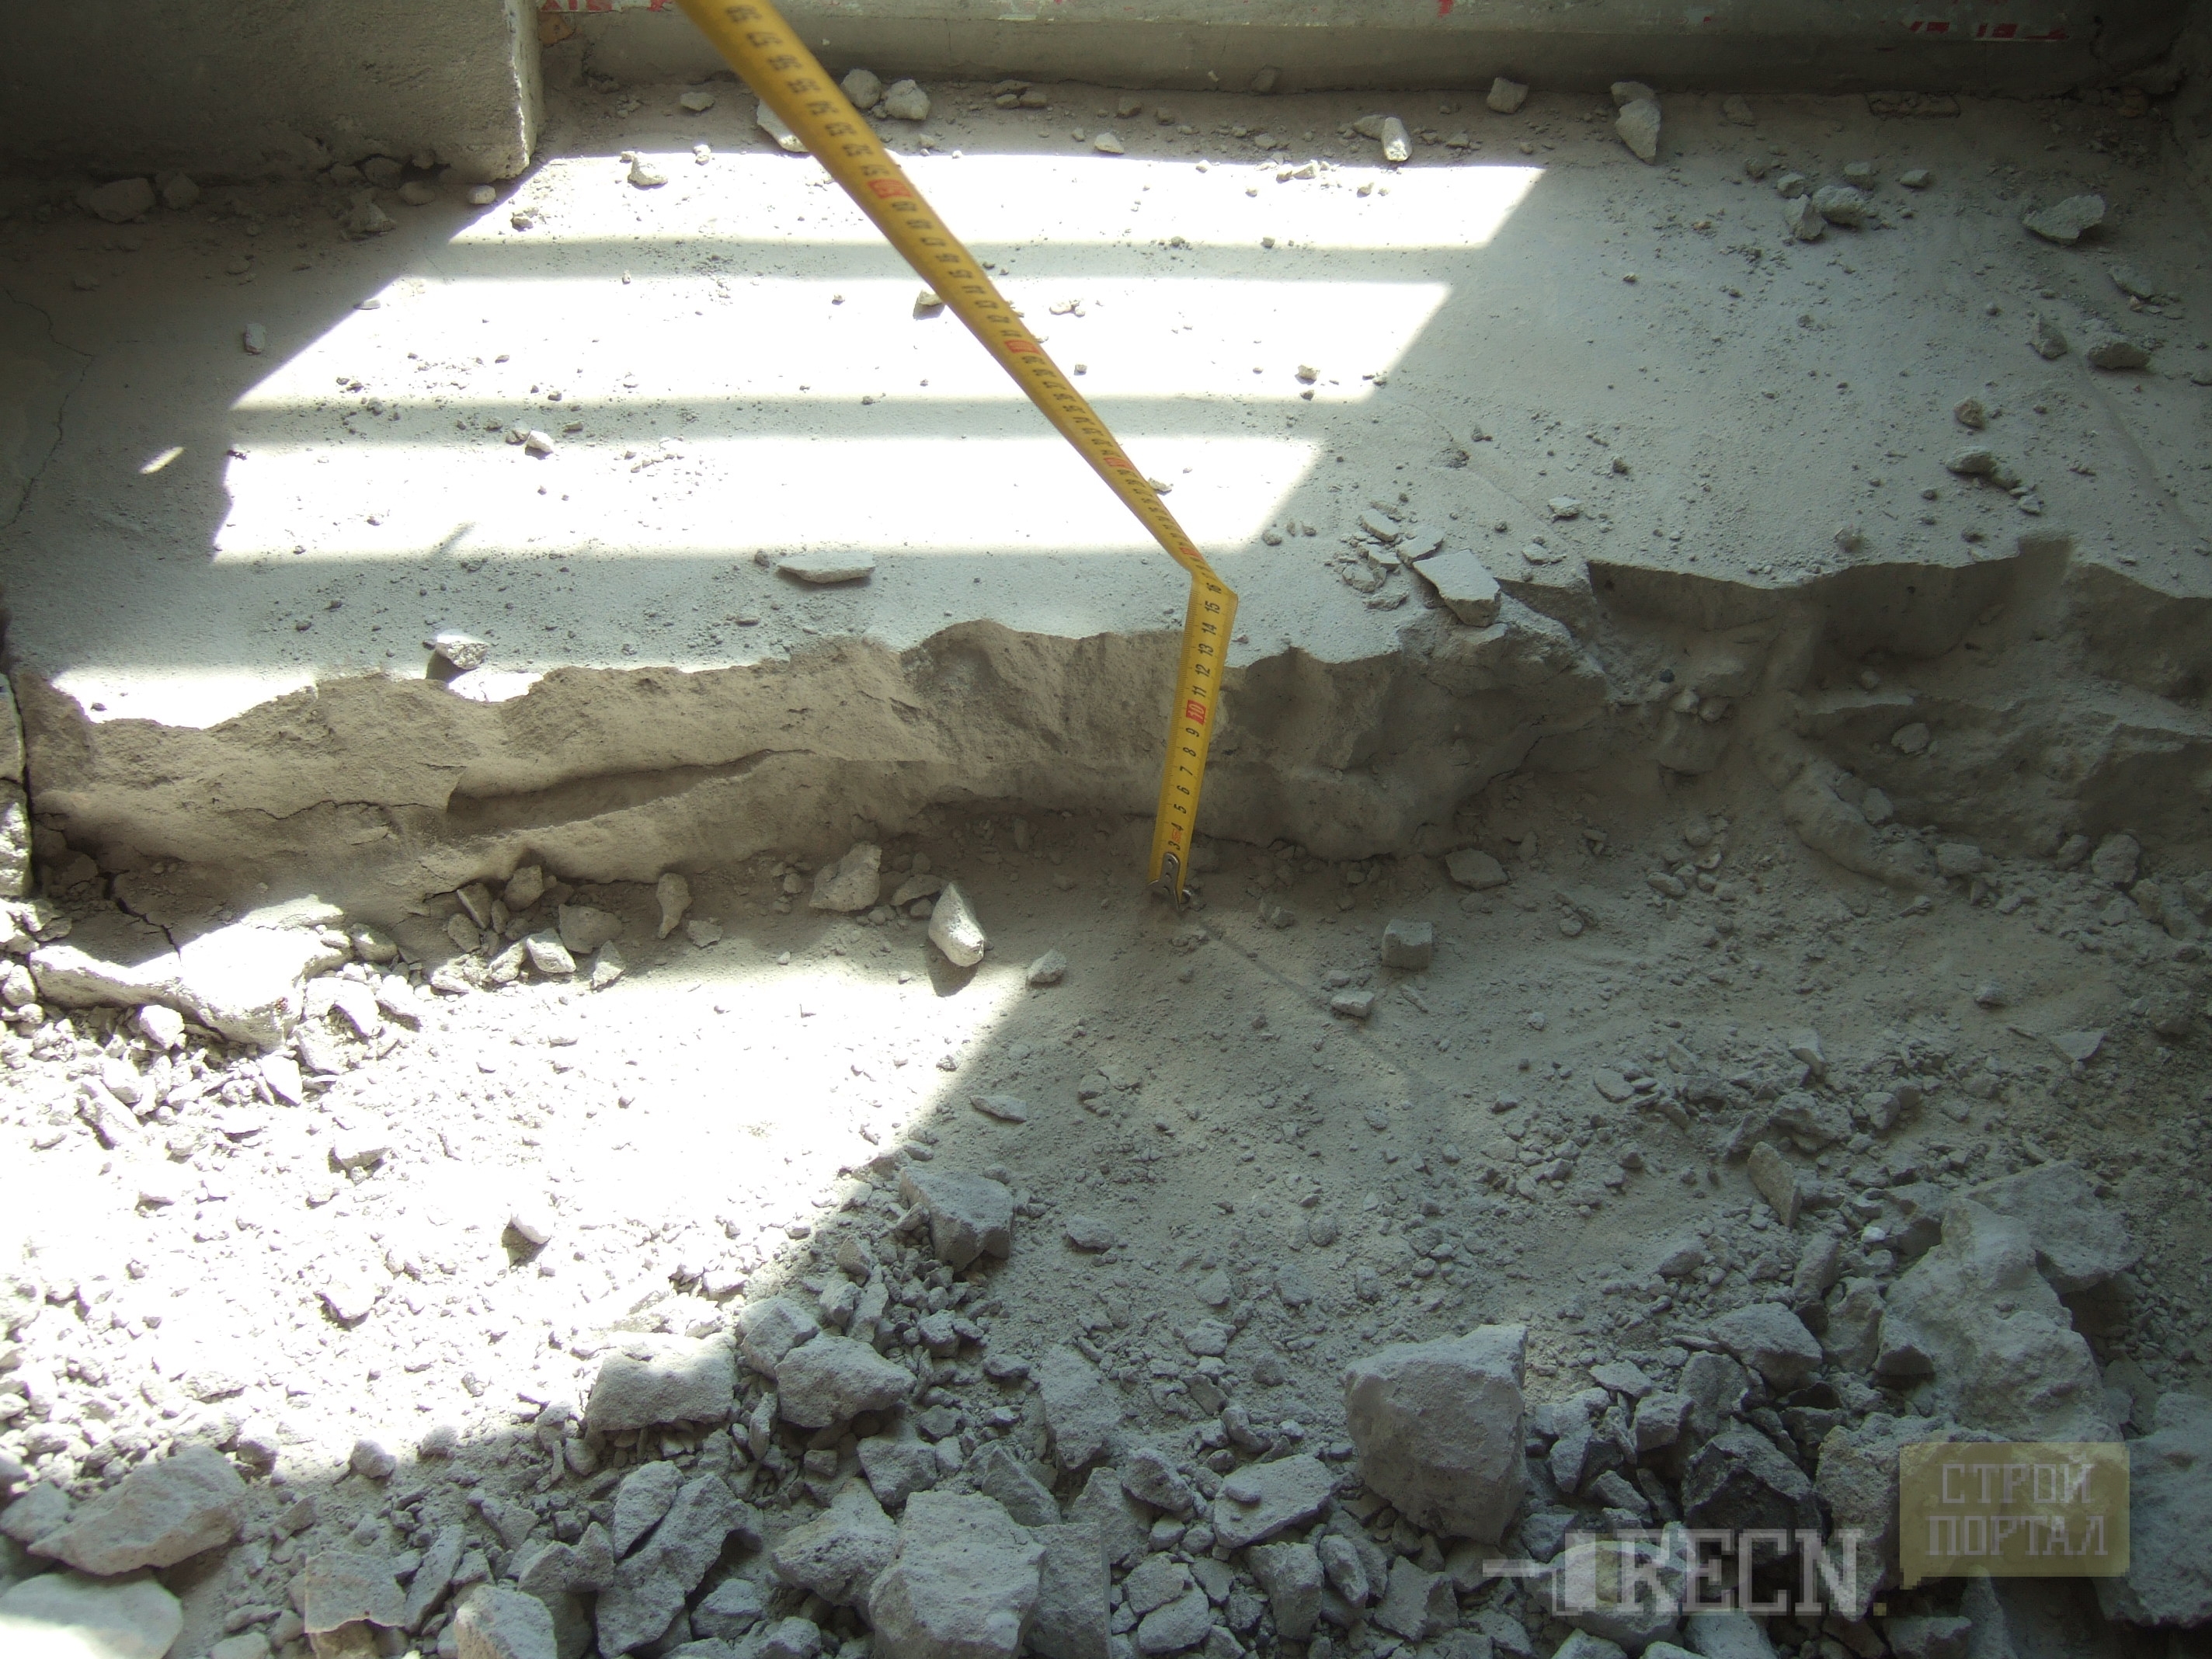
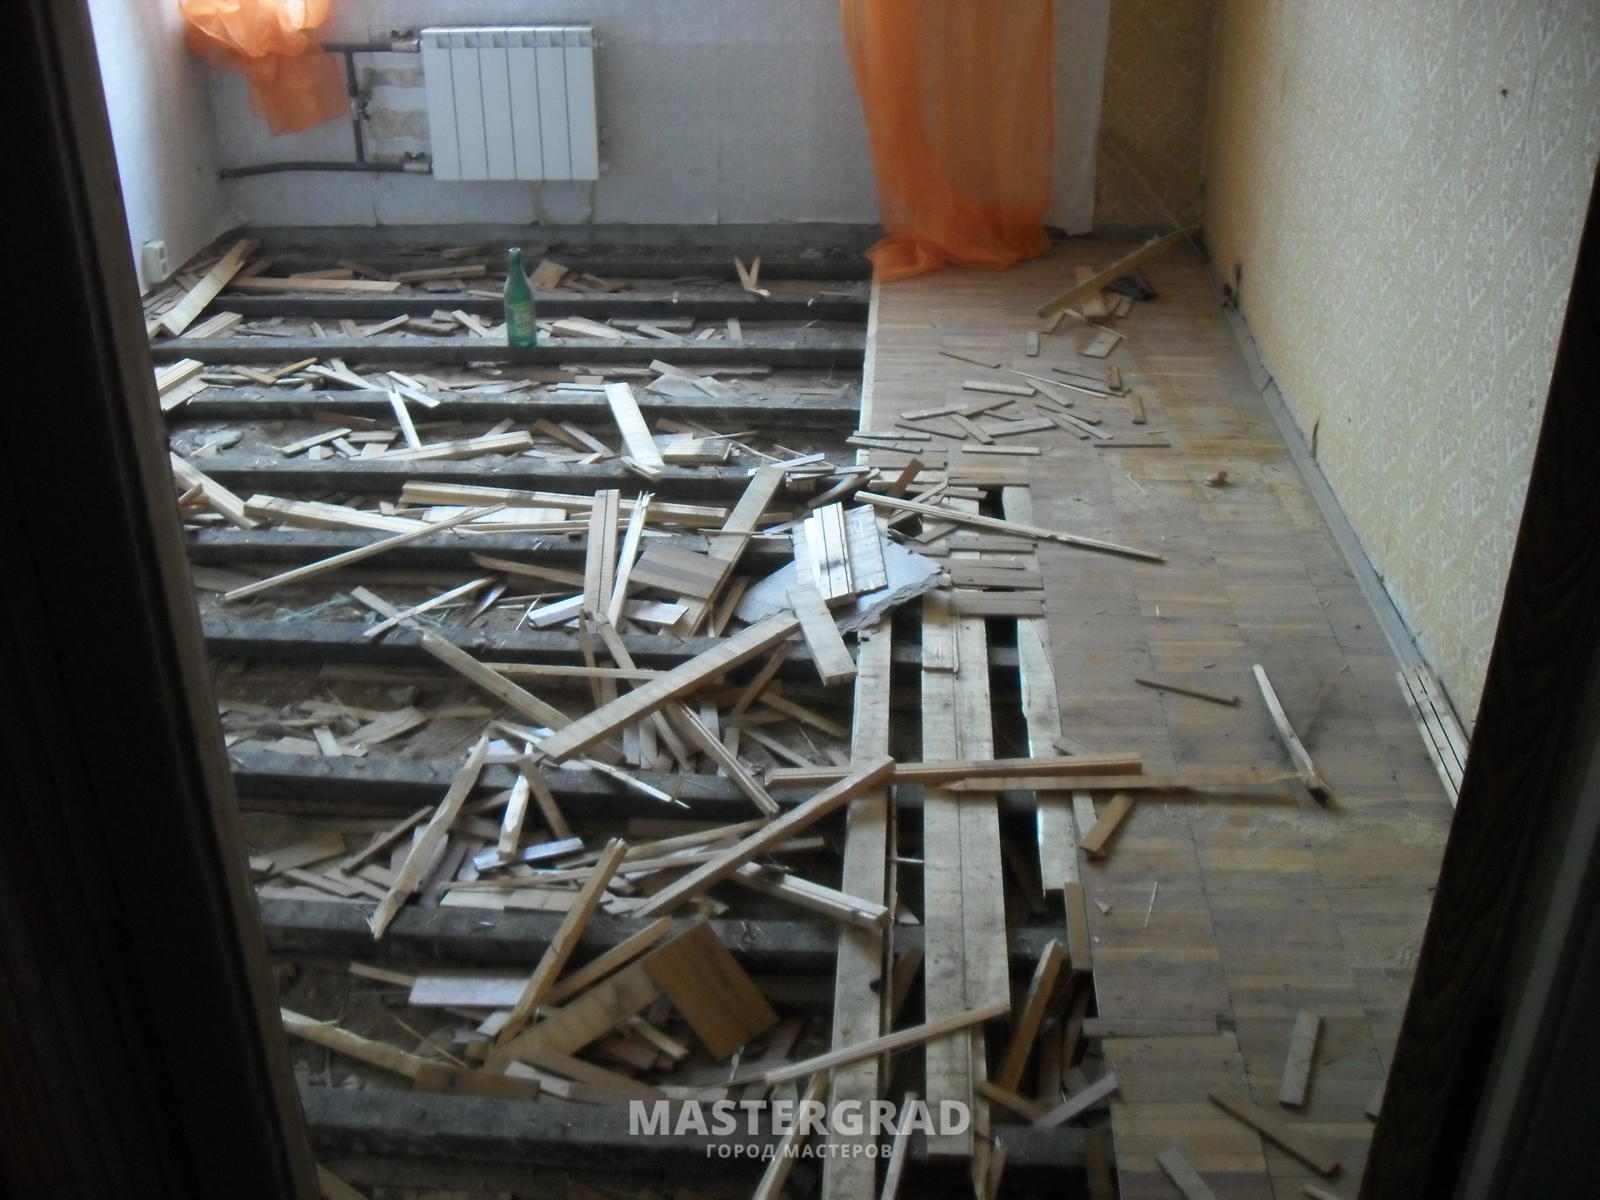
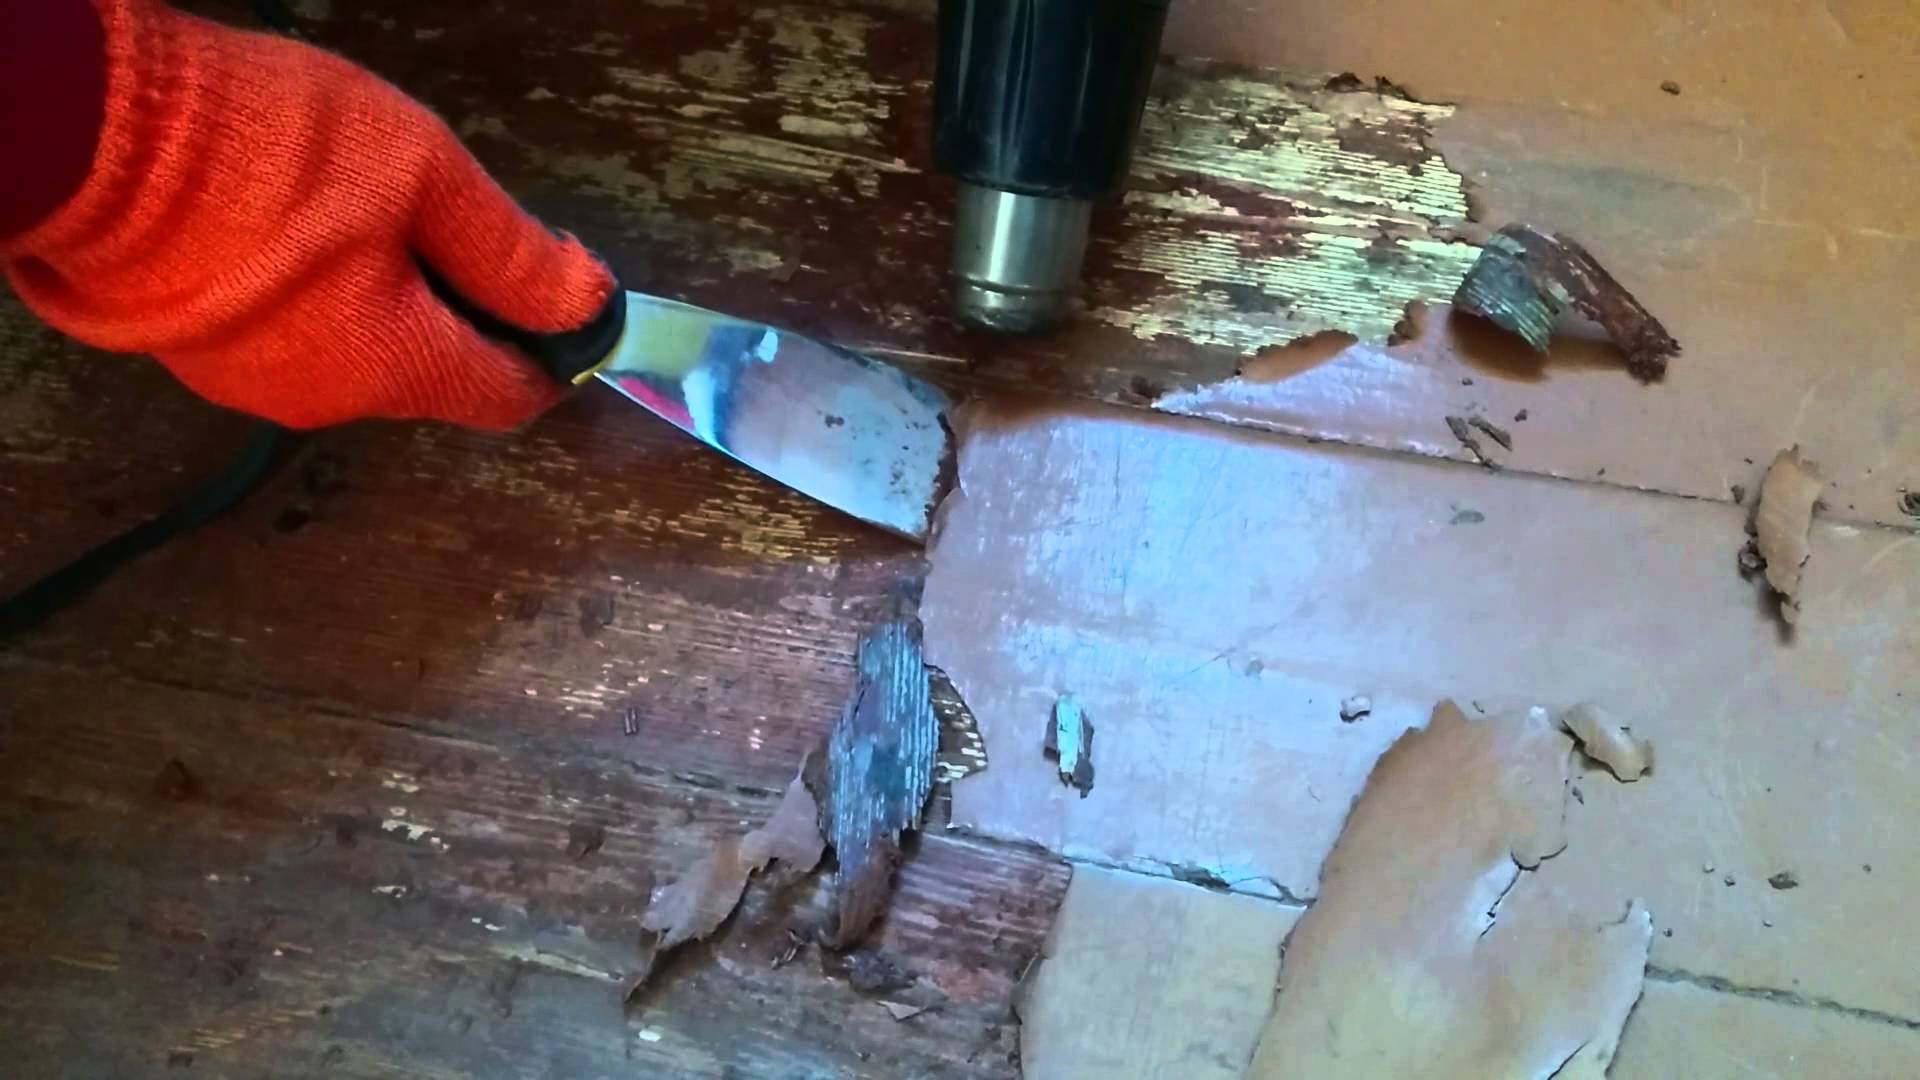
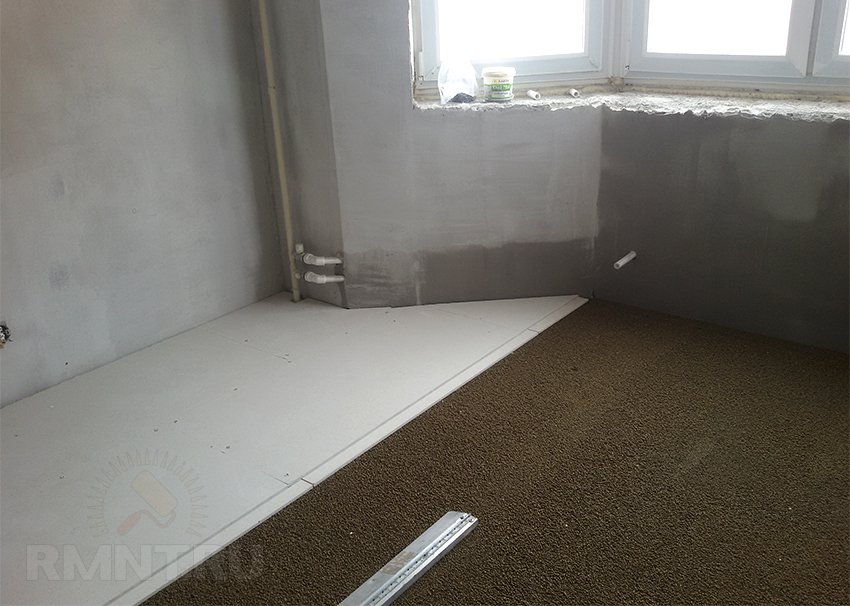
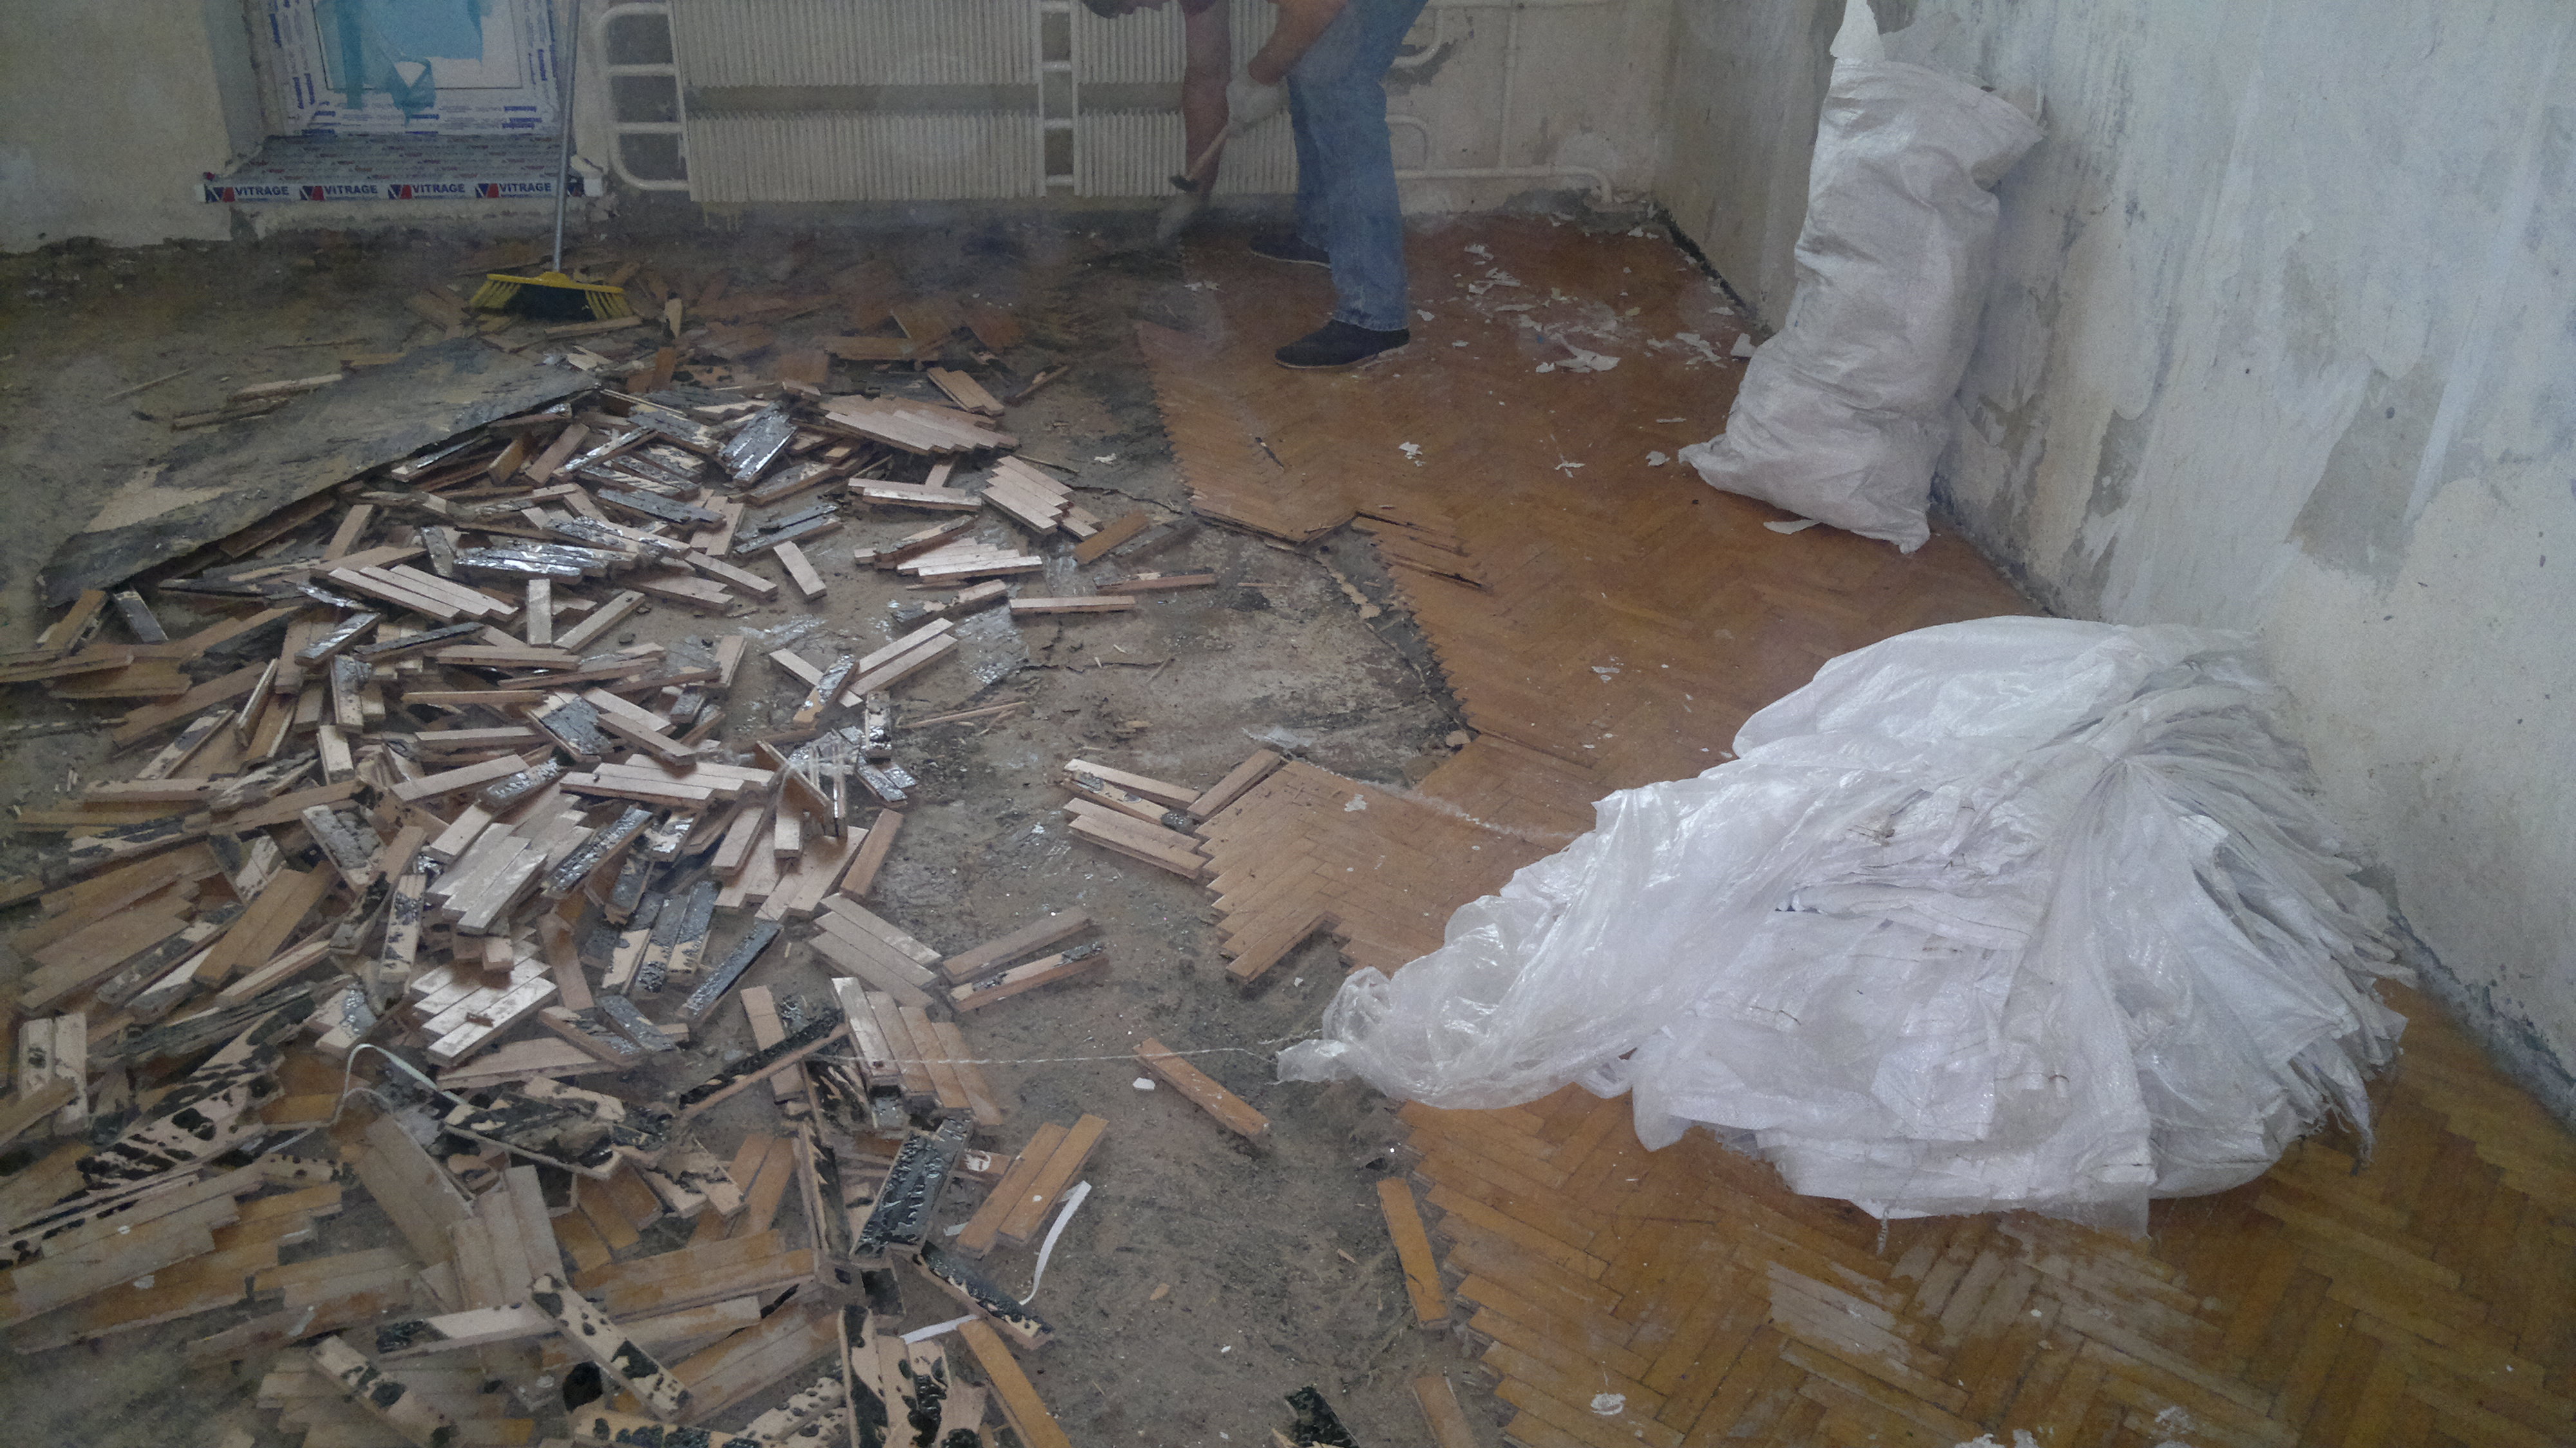
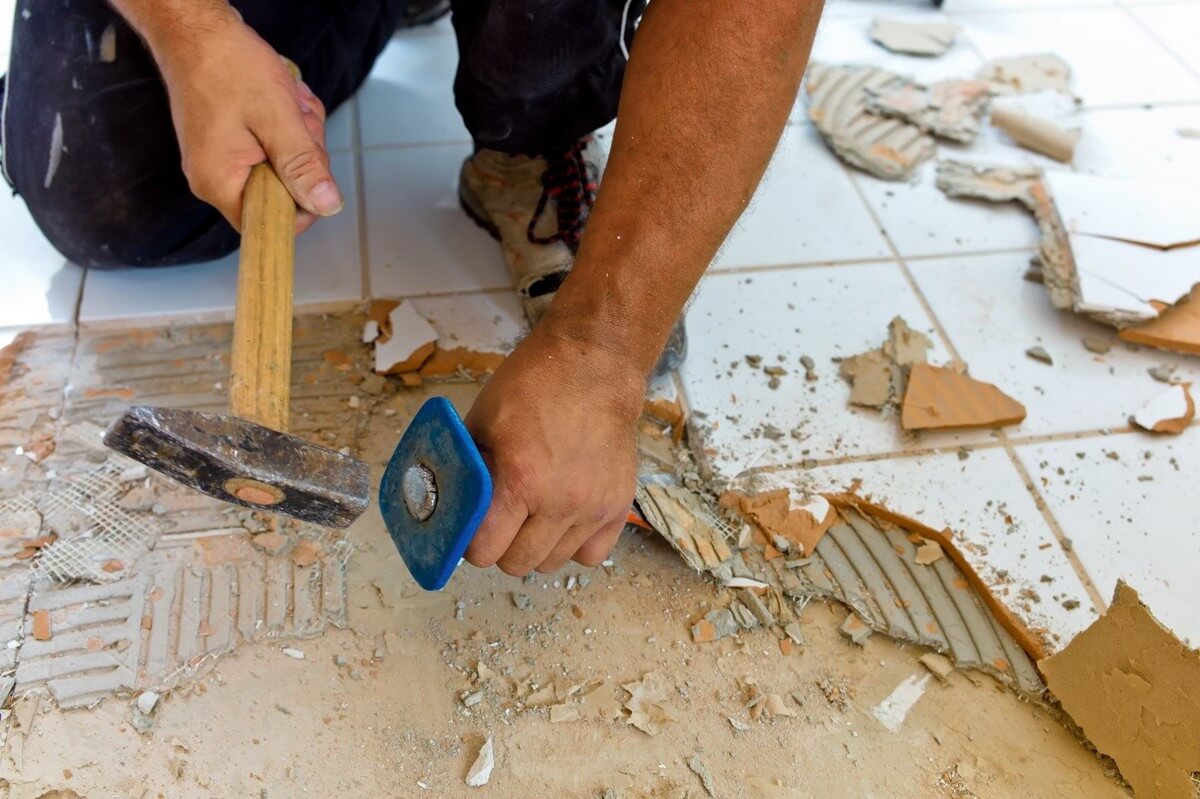
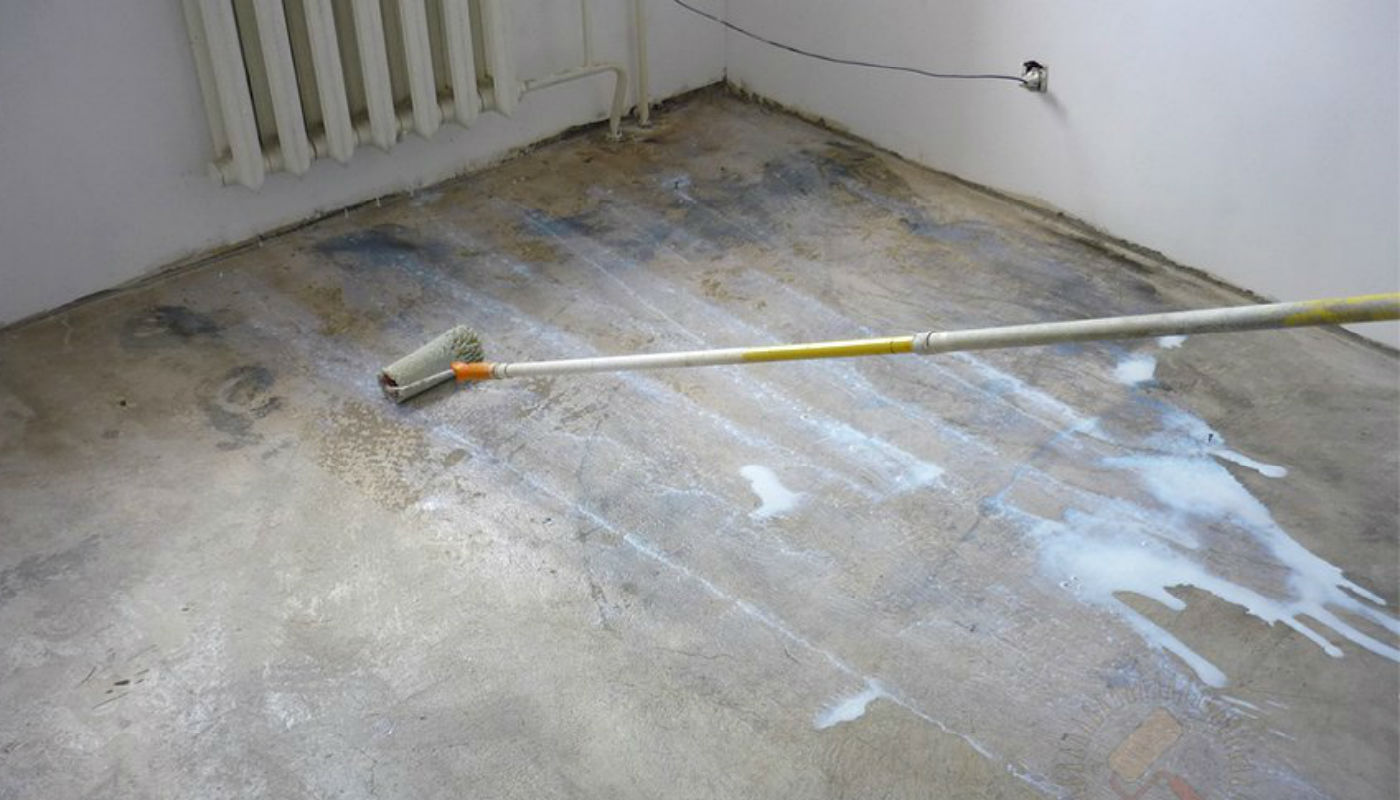
To prepare the room for the screed work begins with the dismantling of the old coating. Linoleum and wooden floor boards are torn off quite easily, but the tiles will have to be beaten with a perforator. Skirting and doors along with the slopes also need to be removed.
Under the dismantled layer can be both floor slabs, which greatly simplify the task, and the old screed. In the second case, the concrete must be carefully inspected. If it crumbles or there is a large number of defects in the form of cracks and chips, it is necessary to beat off the entire layer using a perforator. If the old screed is in good condition, only light thin-layer mixtures can be poured onto it.
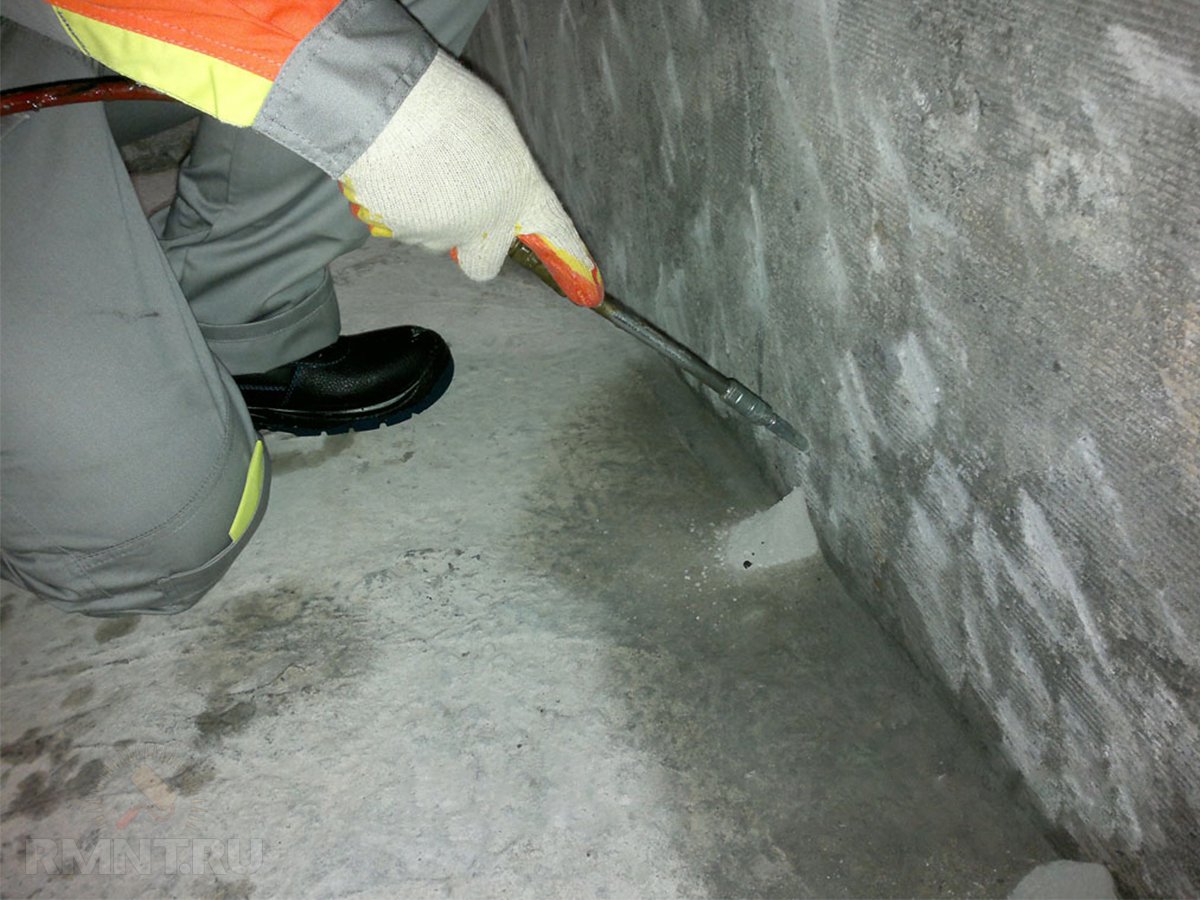
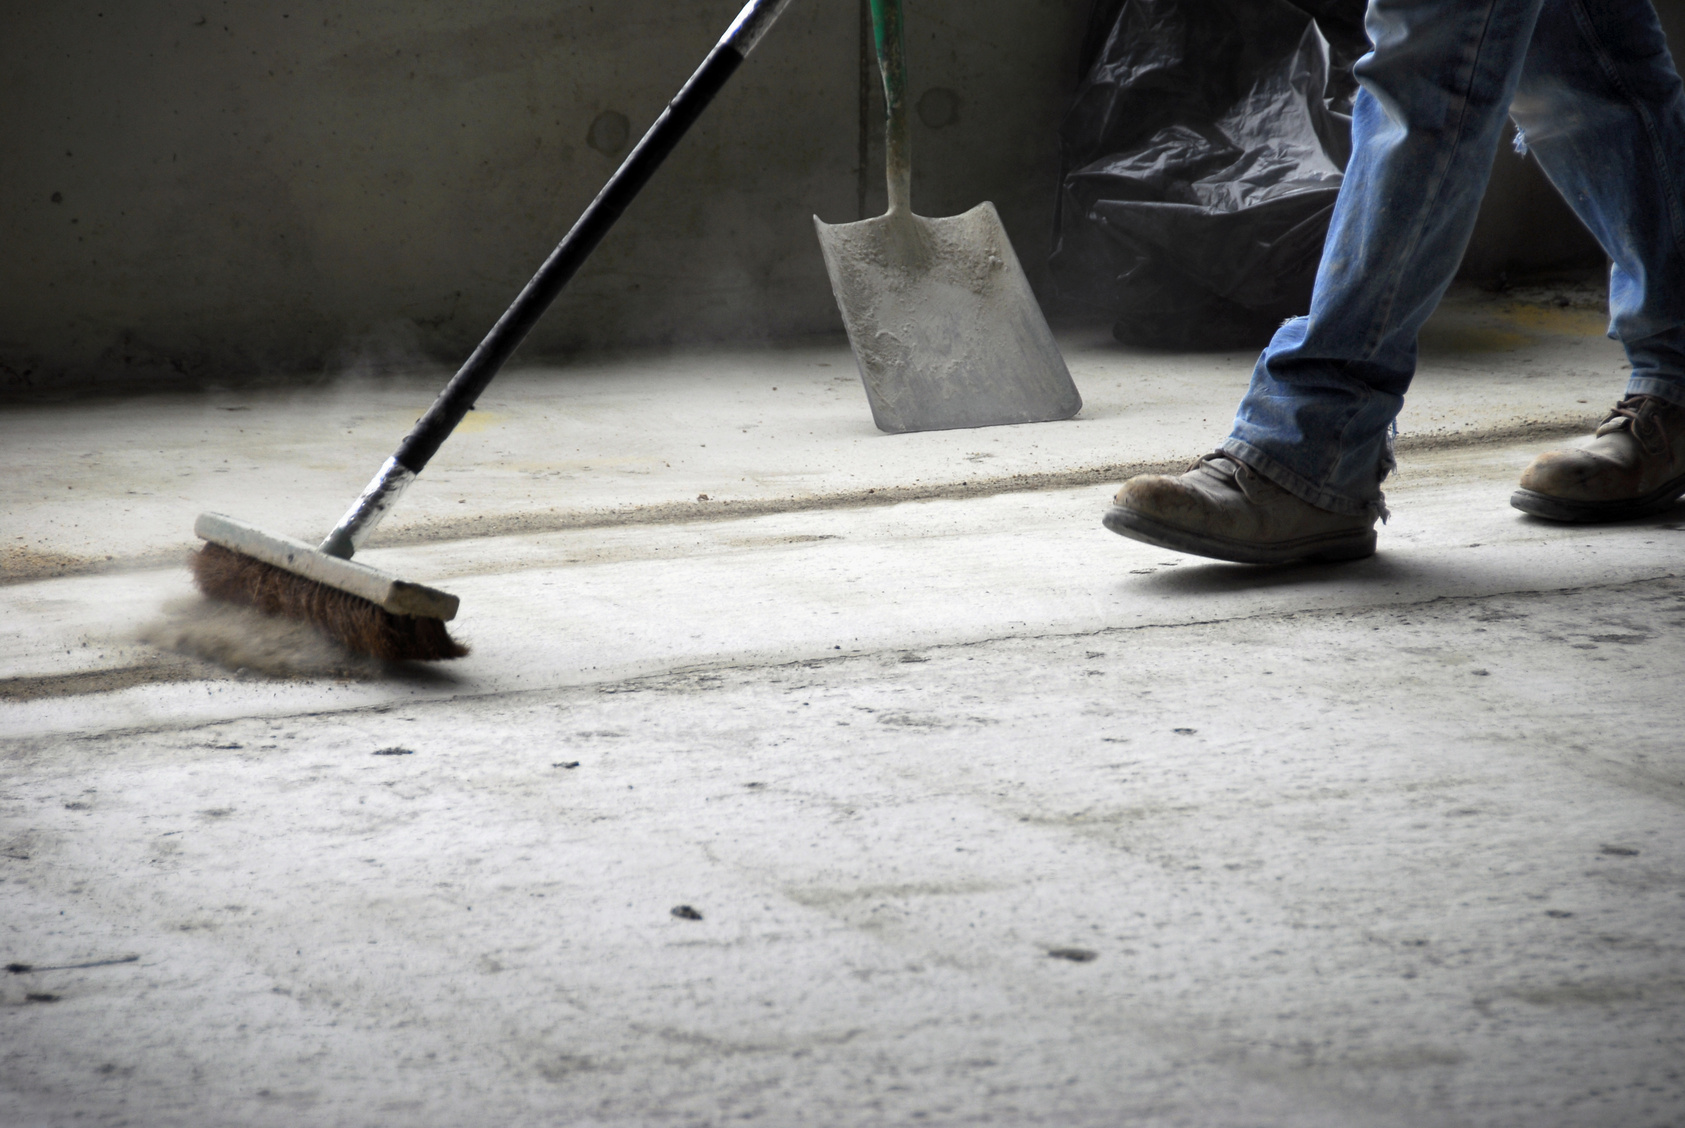
After cleaning debris you need to clean the surface with a grinder or brush. Remove crumbling concrete, residues of glue, mixtures and stains. To do the cleaning with a vacuum cleaner and degrease the floors with soapy water or solvent. Small cracks, chips, gouges and floor joints with walls should be embroidered up to 5 mm, primed and covered with a thin layer of putty based on resin or glue. To correct major defects, it is better to use a cement-sand mortar or a self-leveling mixture.
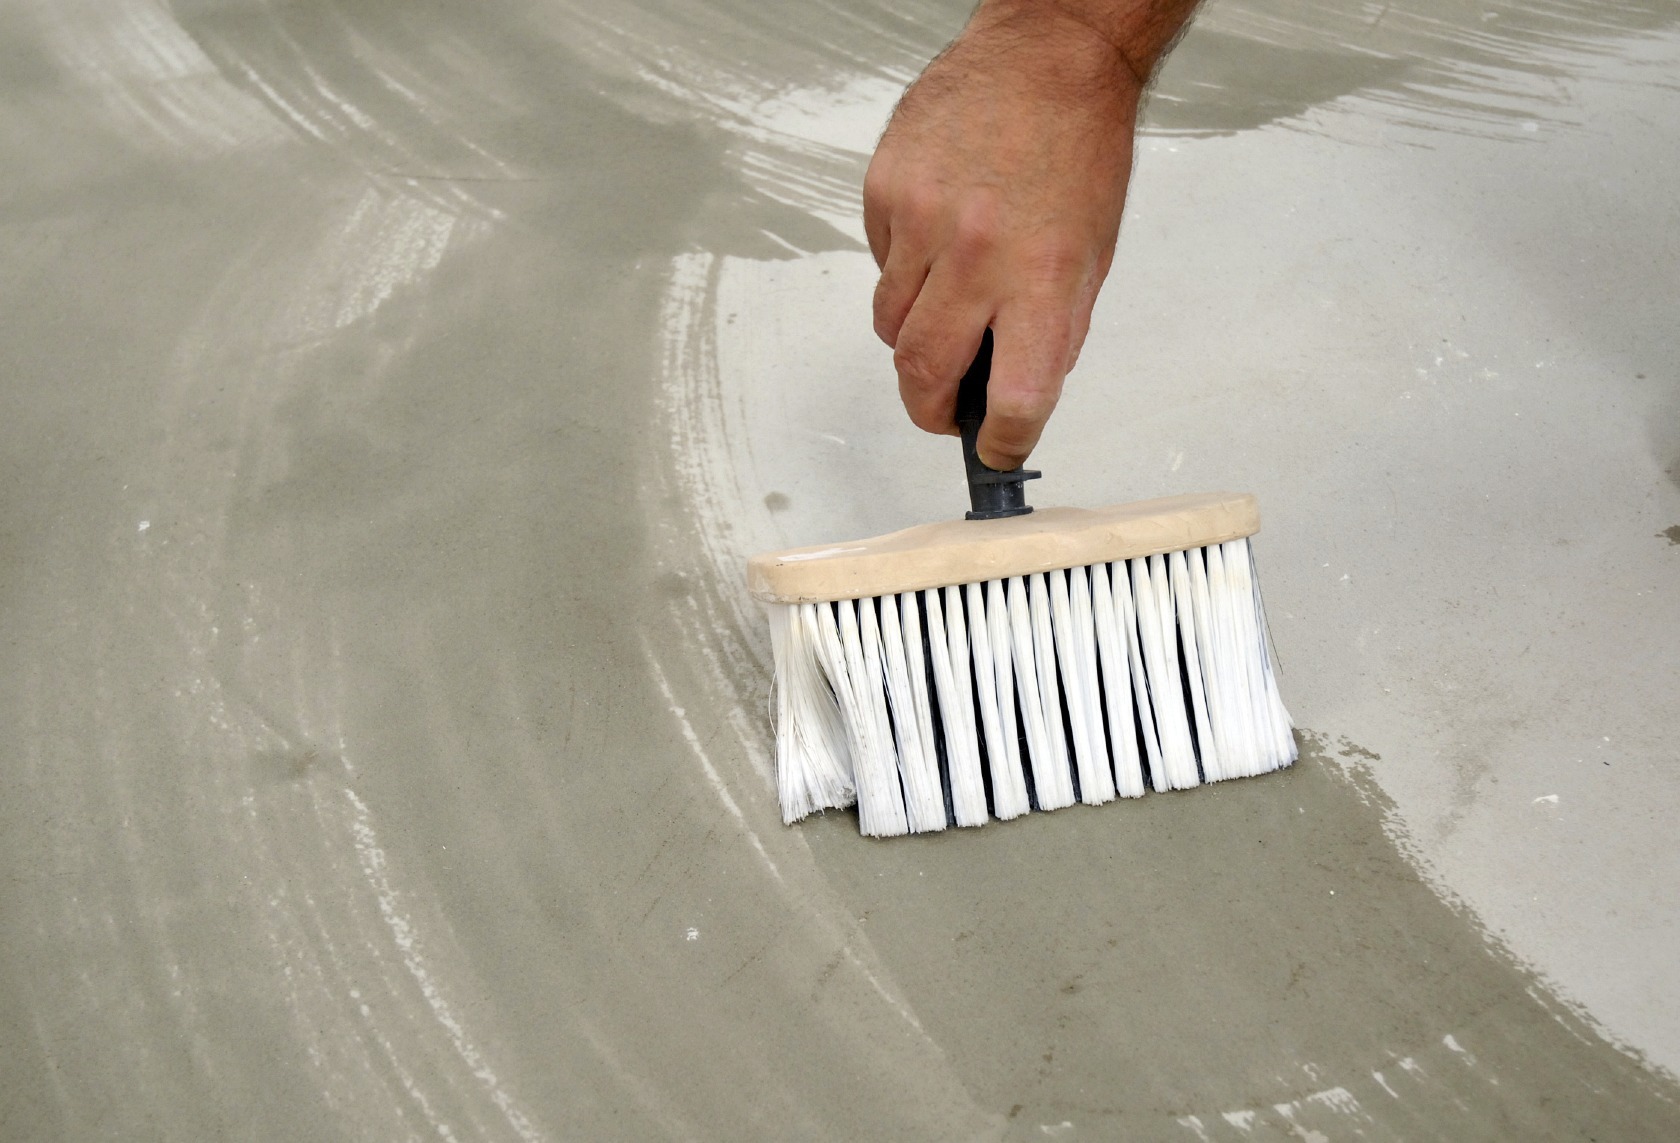
The next stage is surface treatment with a primer using a roller or a paint brush. Under the concrete or cement-sand screed, any universal primer or concrete contact will suit; under self-leveling self-leveling floors you need to use a special polymer primer. With a multi-layer screed priming the surface is necessarily before each layer. The average drying time is two hours. If necessary, you can apply a primer with a second layer after the first is completely dry.
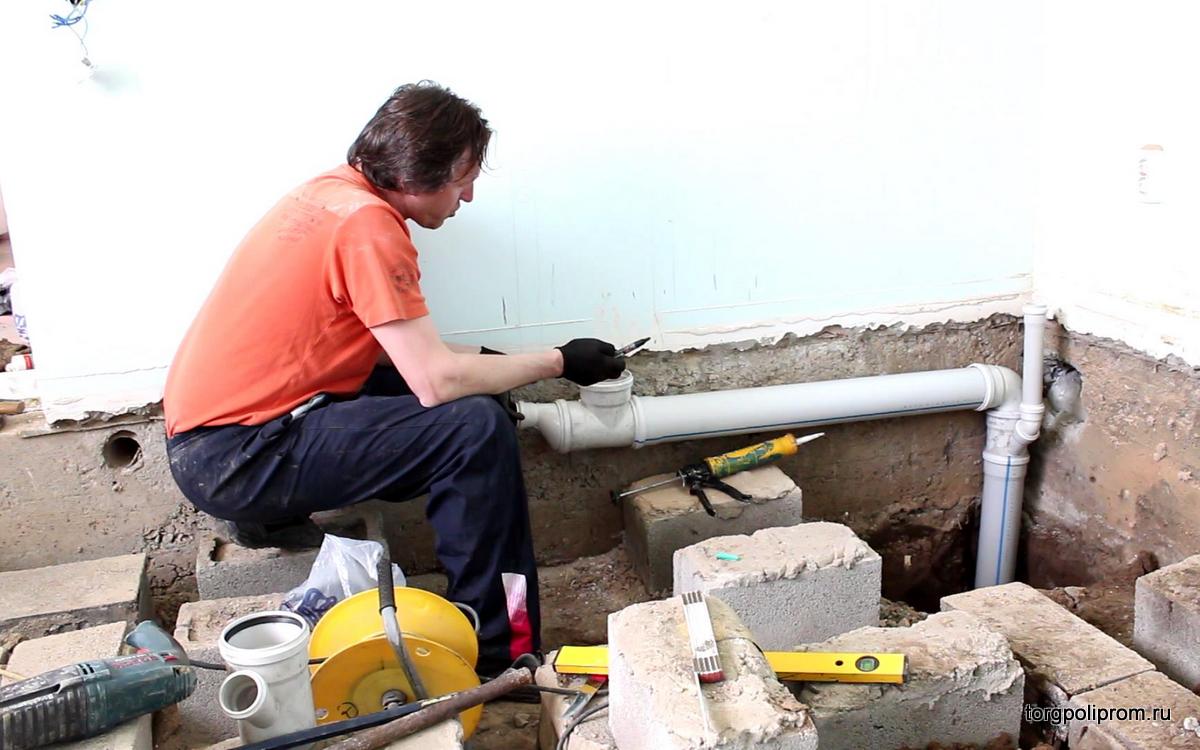
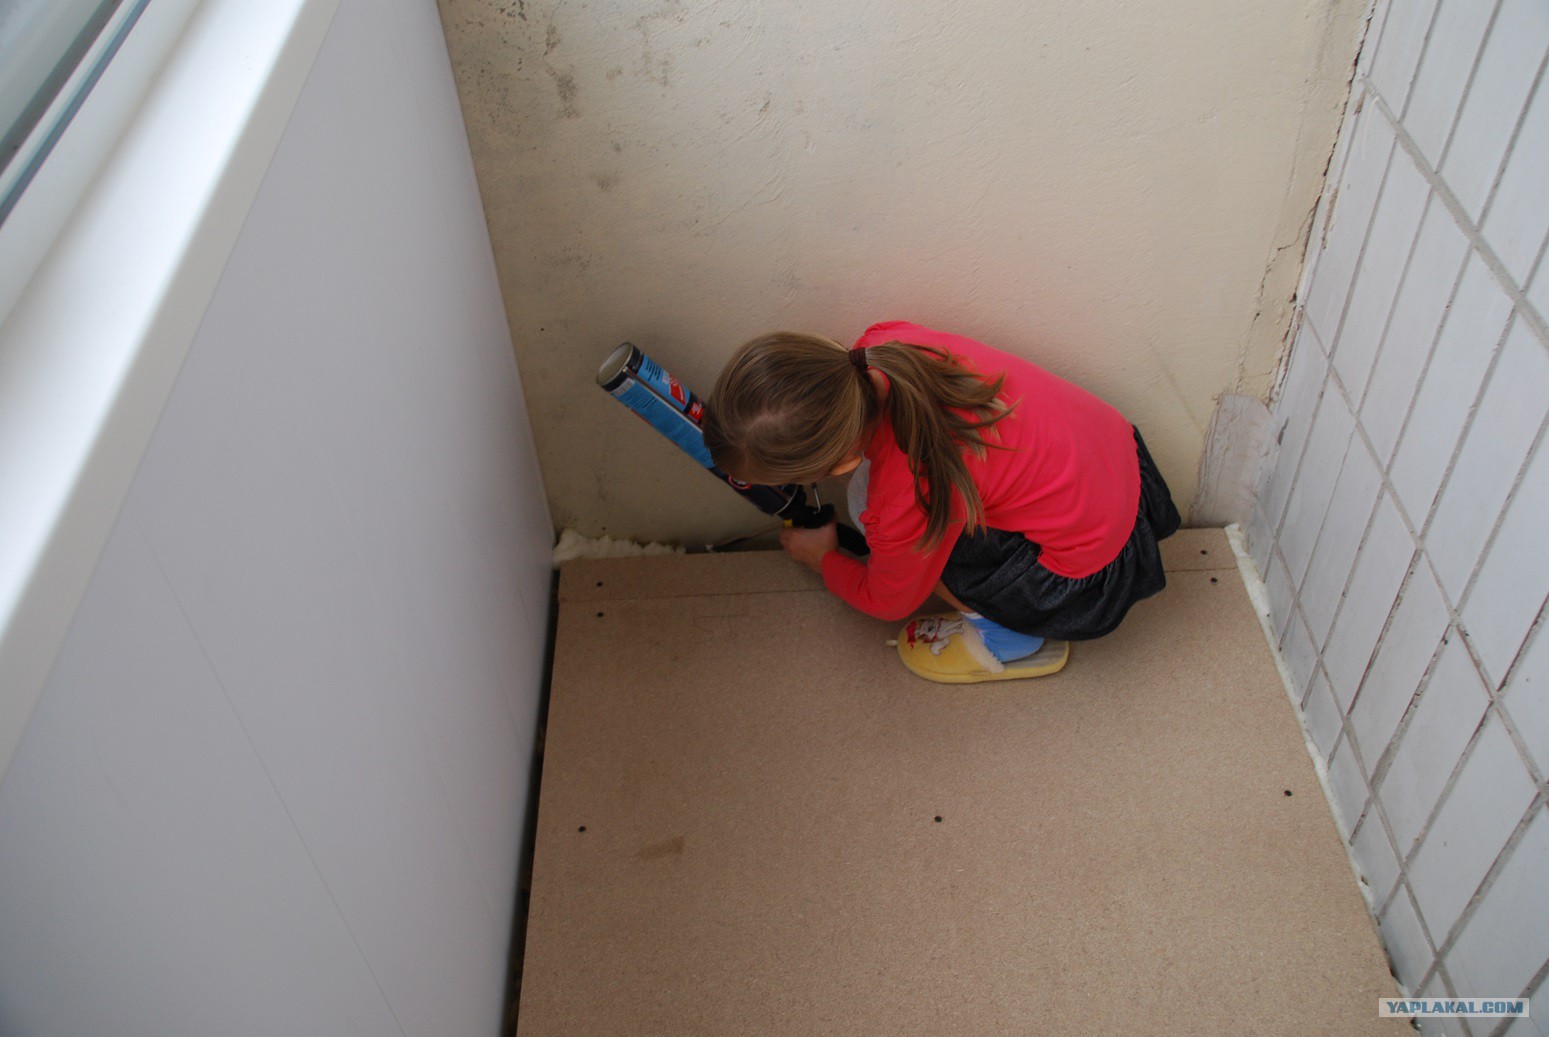
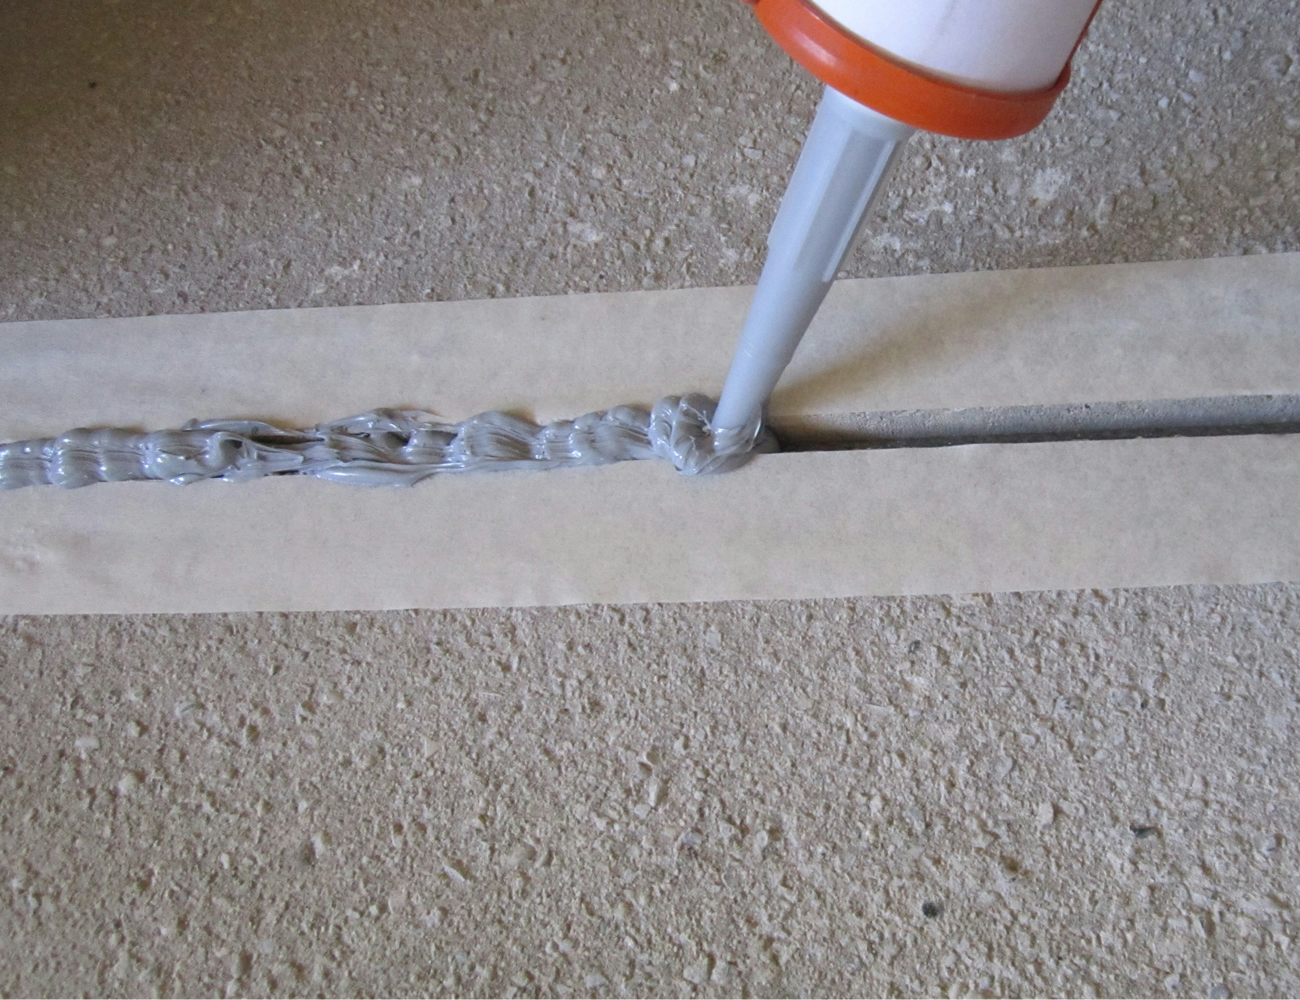
Using mounting foam, it is necessary to seal all the holes through which the screed mixture can flow into another room or to the neighbors below. Most often such places are located near the heating pipes.
It is necessary to wait for the foam to completely dry, cut off the protruding surpluses, and only then proceed to the rest of the work.
A waterproofing layer is laid on the prepared surface. It is necessary to do this in the following cases:
-
If at the joints of the floor and walls there are large cracks;
-
In the bathroom and in the kitchen;
-
On the first floor of the house;
-
At arrangement of systems of heat-insulated floors.
For these four cases, it is best to use roll or film materials. They need to stack overlap each other, putting the edges of the material on the walls with a margin of up to 15 cm and attaching tape. In some cases, you can use liquid waterproofing, which is applied strictly in accordance with the manufacturer's instructions. It is recommended to attach a damper tape over the waterproofing layer on the walls, the protruding part of which is cut off after work is completed.
At this stage, the installation of a system of warm water or electric floors. Under them must be laid insulation in the form of plates to reduce energy loss. Reinforcing mesh is installed on special chairs, the height of which must be at least 1/3 of the thickness of the screed.During installation, damage to the waterproofing layer must not be allowed.


How to do?
When all the preparatory work is completed, you can proceed directly to the device screed. All methods have their own nuances, so it makes sense to consider each of them step by step and familiarize yourself with the detailed step by step instructions on how to properly make a floor screed with your own hands.
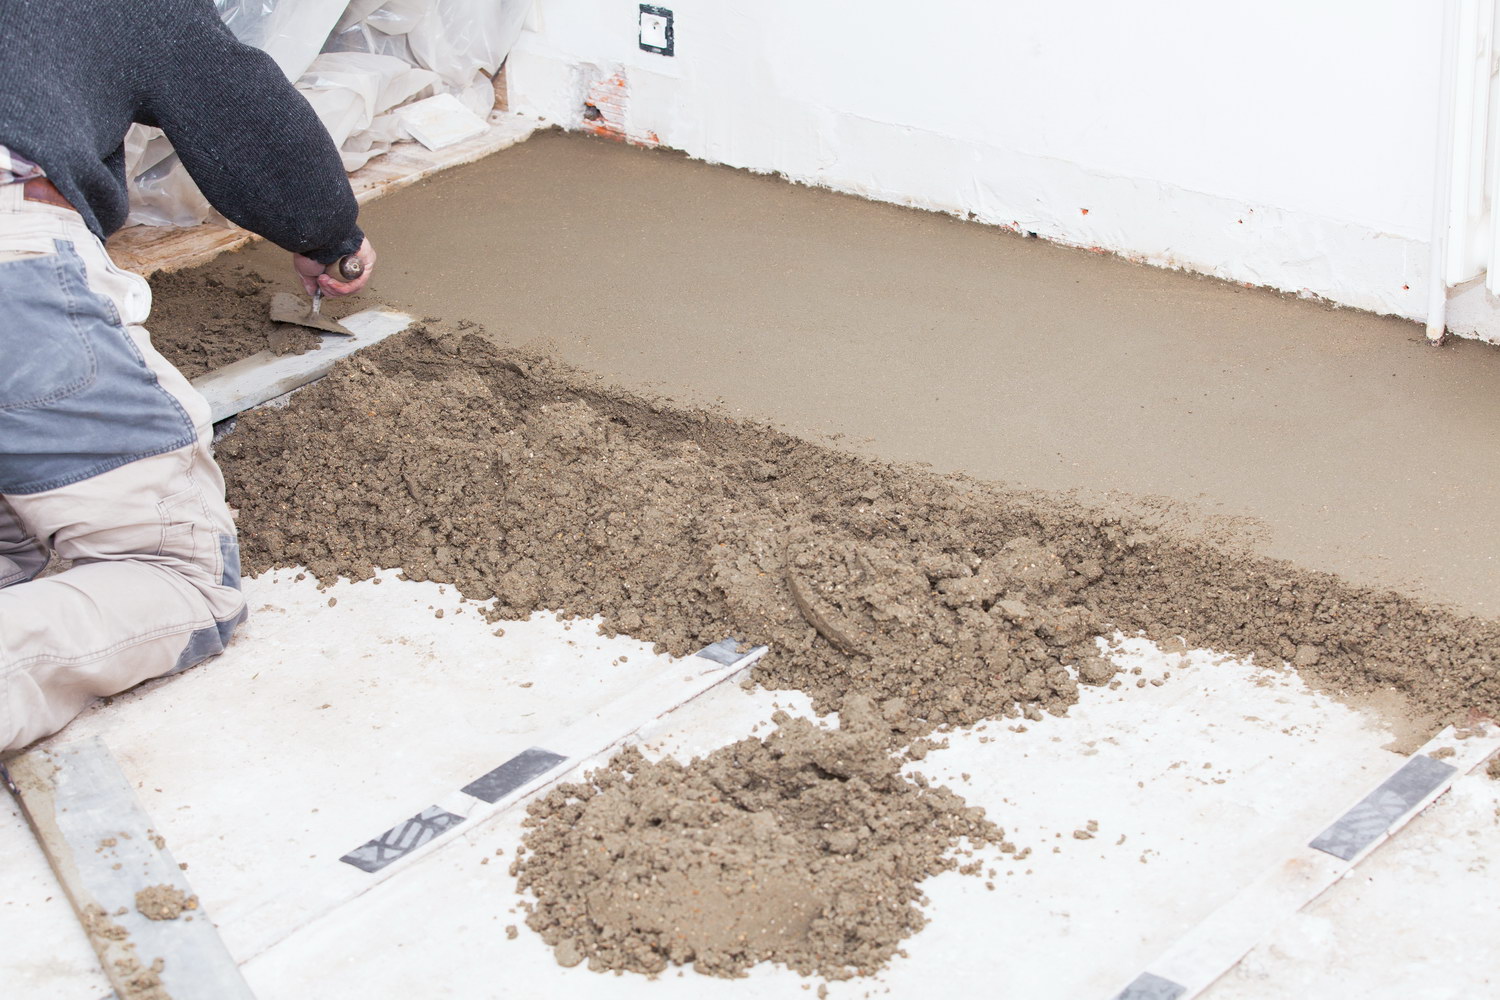
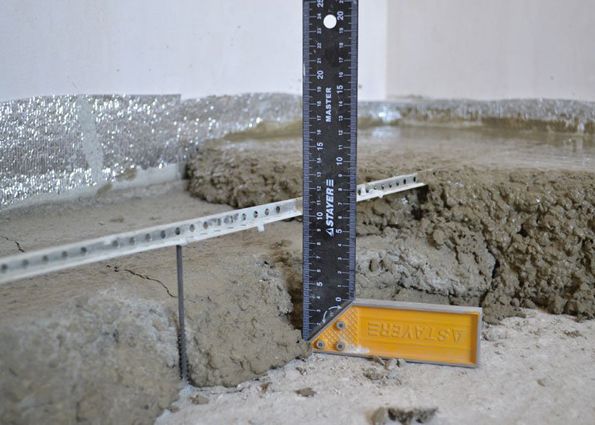
For a screed made of concrete or cement-sand mixture with a thickness of 3 cm, it is necessary to install lighthouses on which the solution will be leveled. In the apartment it is most convenient to use an aluminum T-shaped profile as beacons. It does not need to be dismantled and it does not weigh down the floor structure.. The only drawback of such a material is if during the installation of the profile and laying the protective tie withaluminum will be damaged, rust may appear over time.
Lighthouses from wooden slats and steel pipes must be removed from the partially stiffened screed, and the resulting grooves covered with the same solution. When screed on the ground, steel pipes with a diameter of up to 70 mm are used. Instead of pipes, you can use a steel profile of rectangular cross-section.

Lighthouses for plaster mix or cement-sand mortar, lined with small slides at a distance of 15-20 cm from each other, are mounted. Gypsum dries faster without affecting the strength of the coating, so it is more convenient to use it in residential areas.
In rooms with high humidity fastening on plaster is not allowed. If a waterproofing layer was not laid on the base, the beacons can be mounted on self-tapping screws.

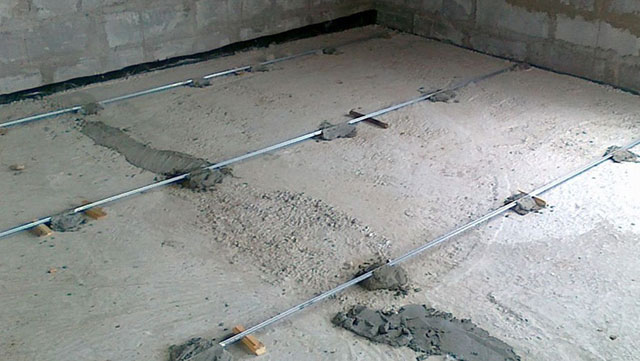
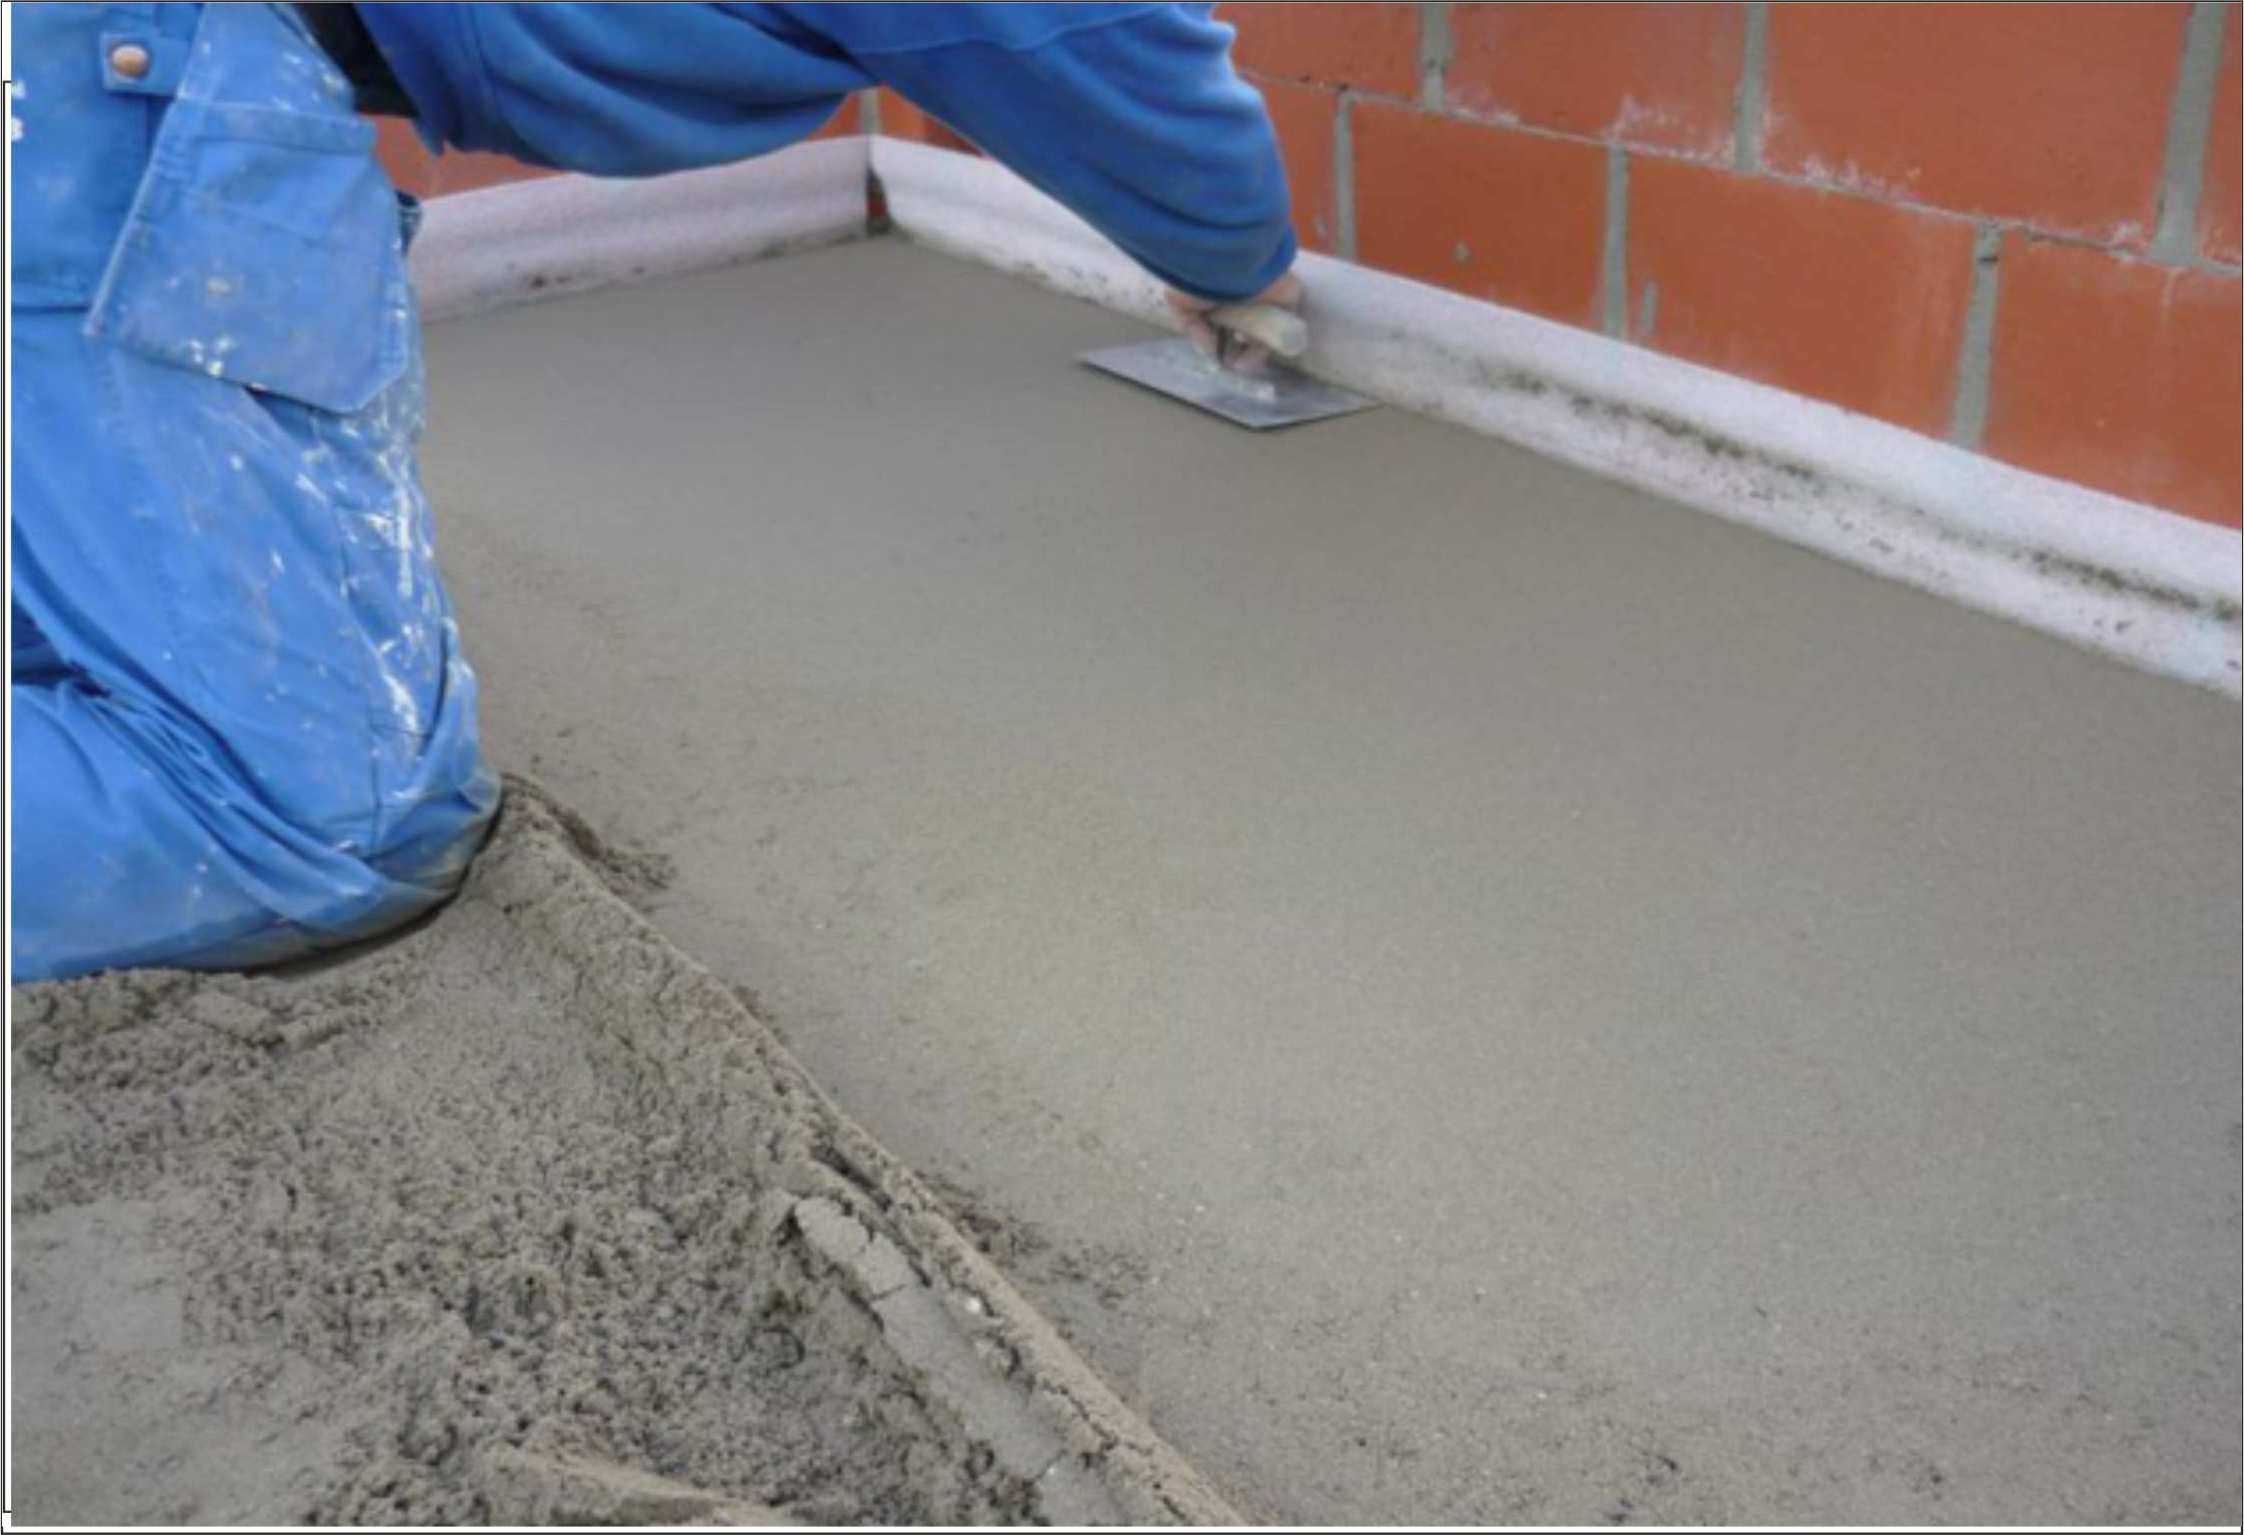
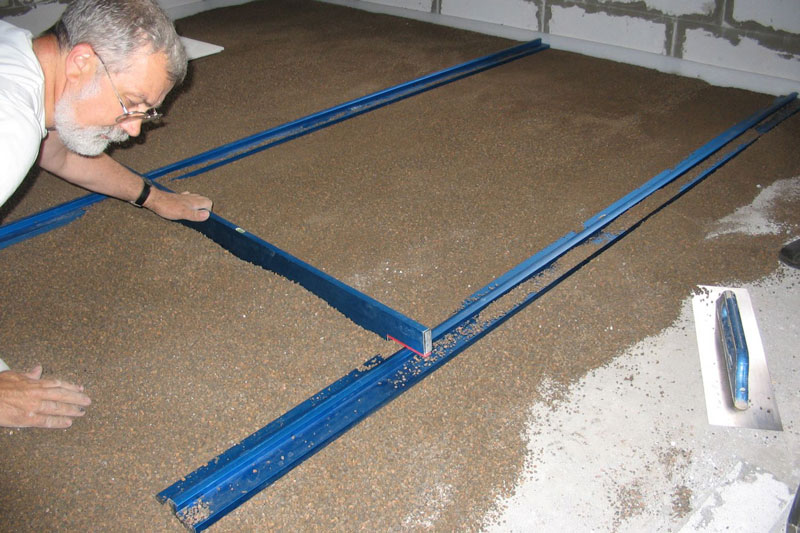
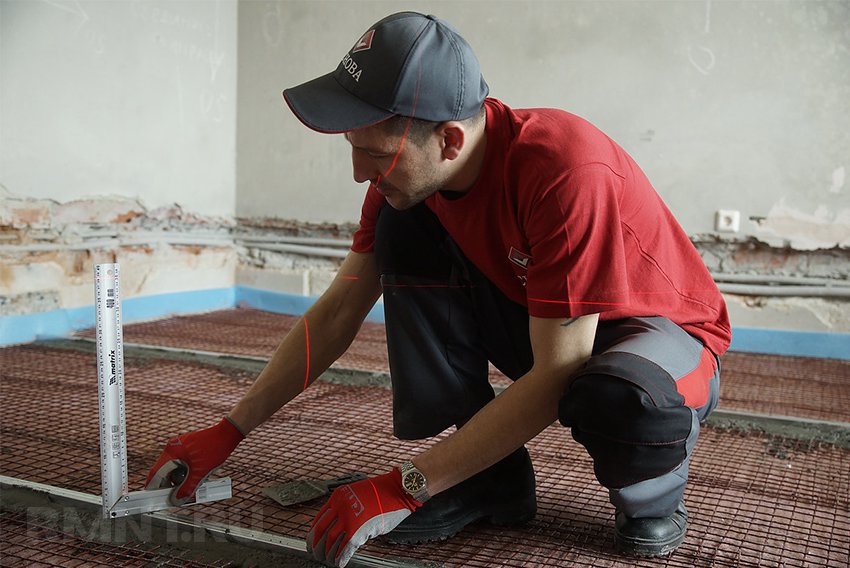
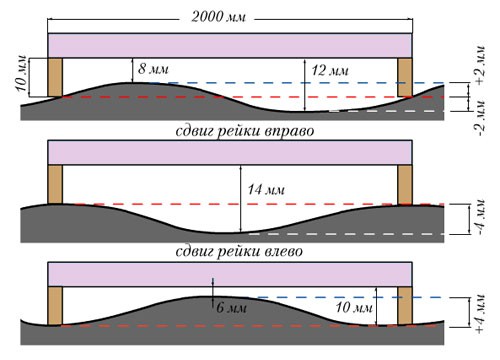
It is necessary to place lighthouses along one of the walls of the room so that the distance from the lighthouse to the wall is no more than 10 cm, and the step between them is a quarter less than the length of the rule. After placing on the floor surface, the profile must be leveled using a laser or building level on the marks of the highest point of the floor. When leveling, the lighthouses are pressed closer to the floor or raised with the help of pieces of brick.
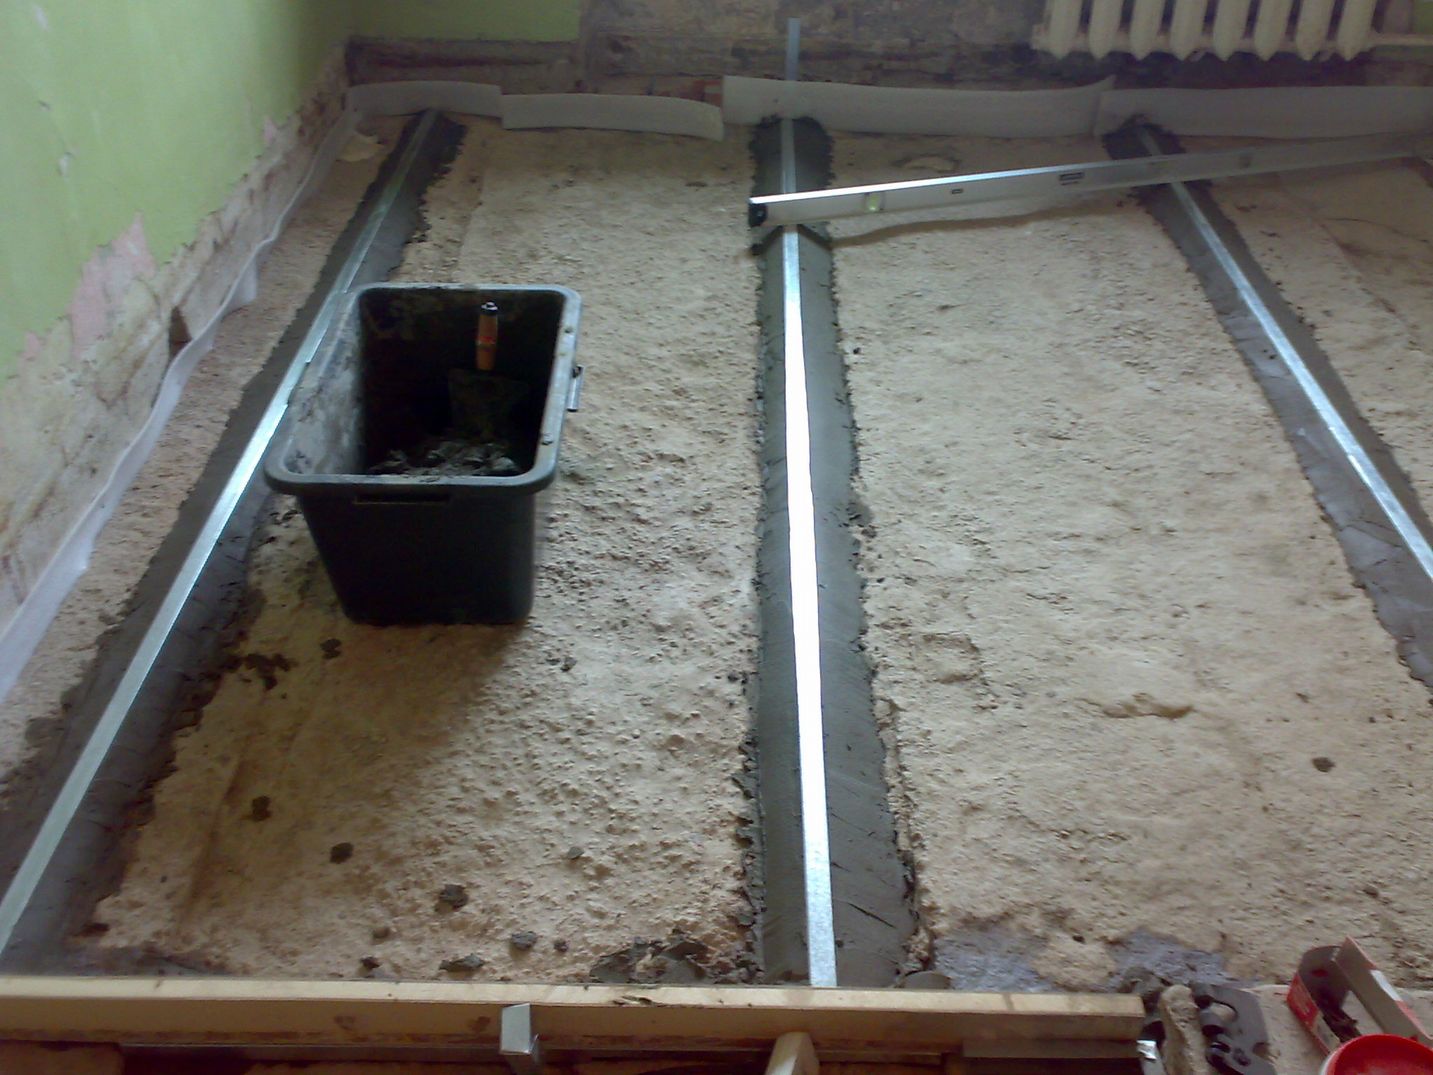
After the lighthouses are exposed, it is necessary to once again check the evenness with the level and, if necessary, correct it. A large room is recommended to be divided into several sections by continuous beacons so that you can take a break in the process. A solid beacon or fence is always installed on the threshold of the room. Thermal insulation material should be laid between the lighthouses, and after drying the beacon mounts, you can begin to fill the screed.
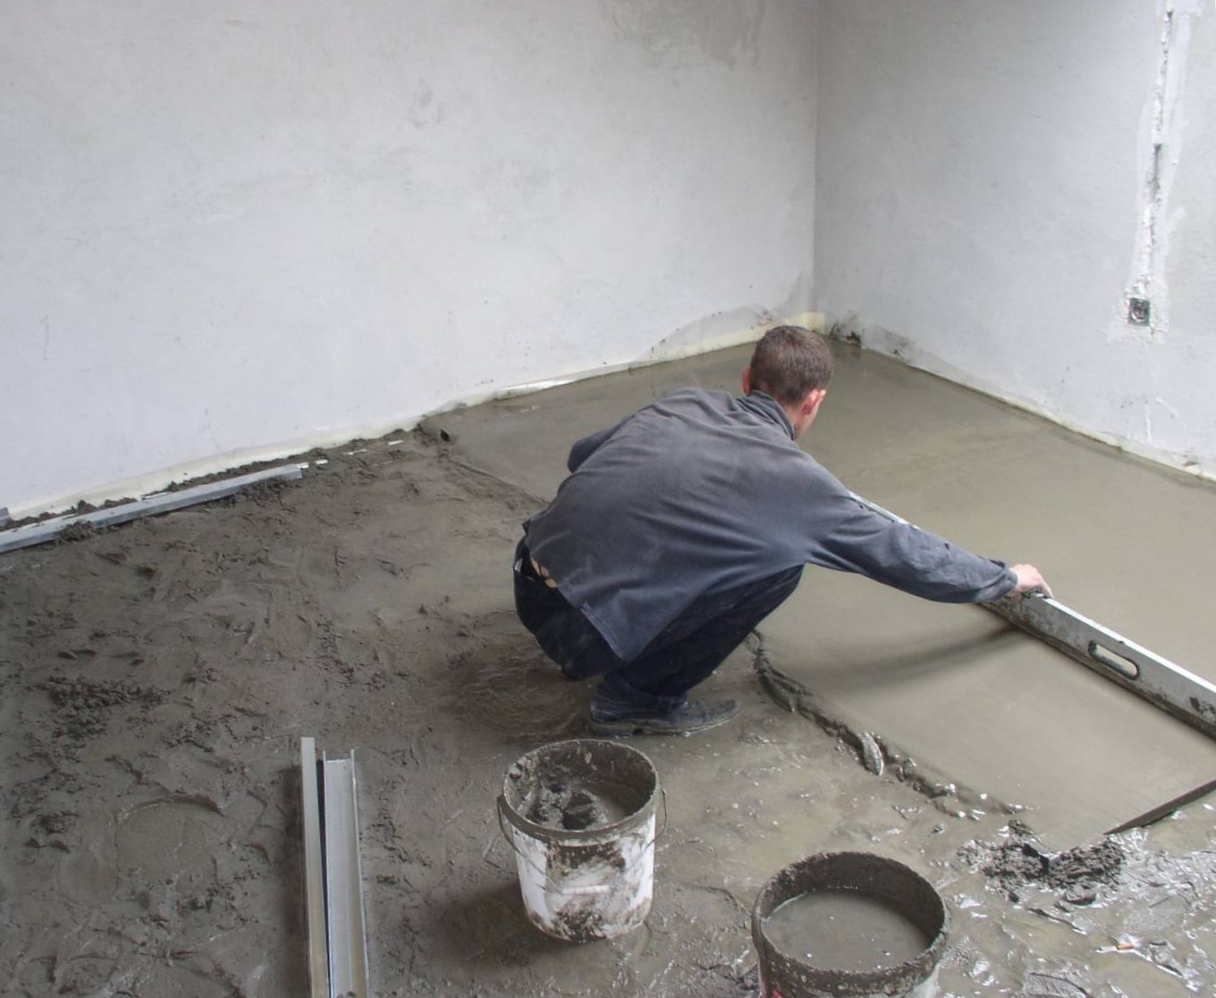
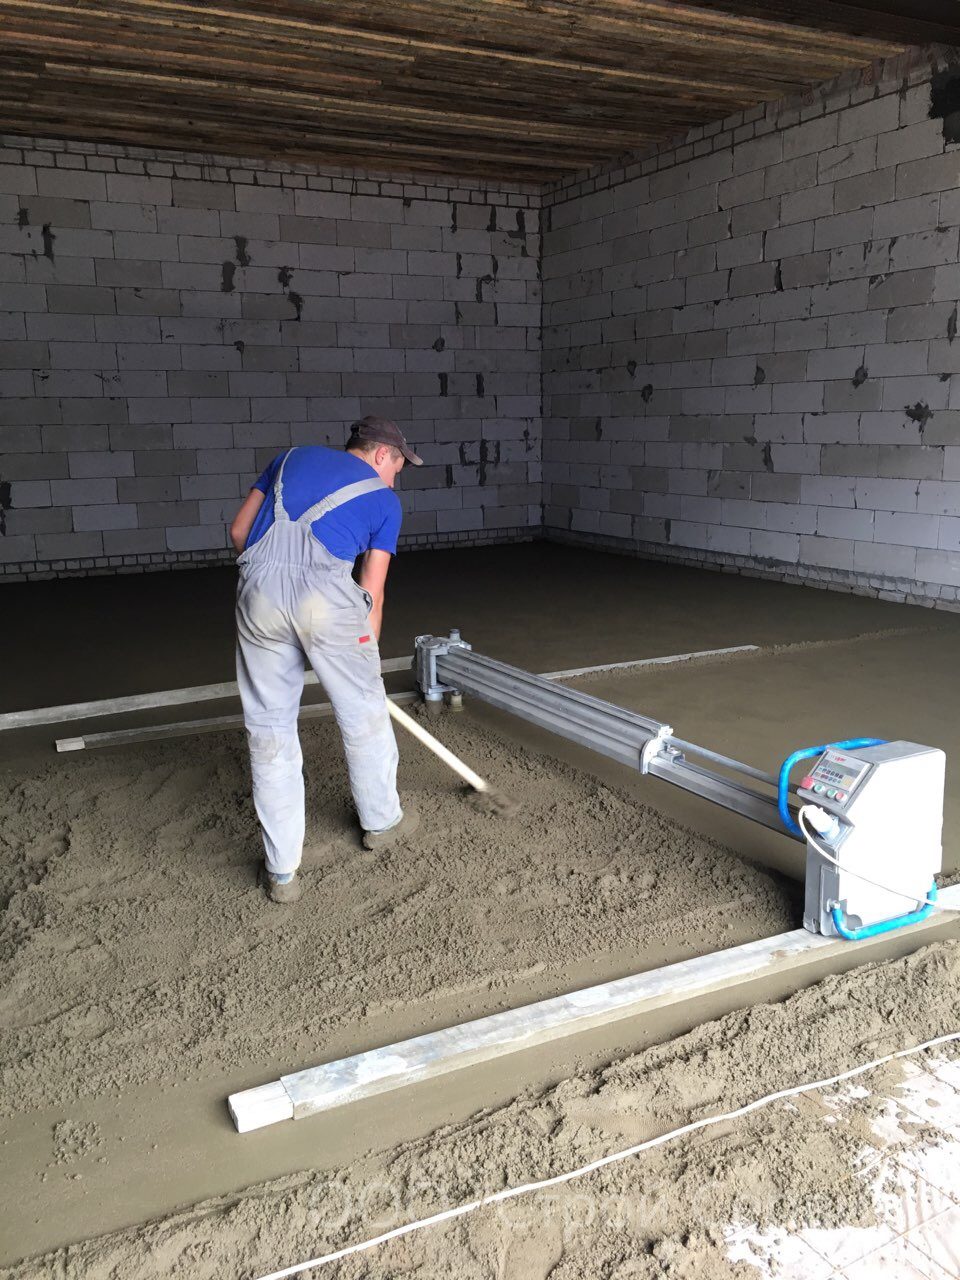
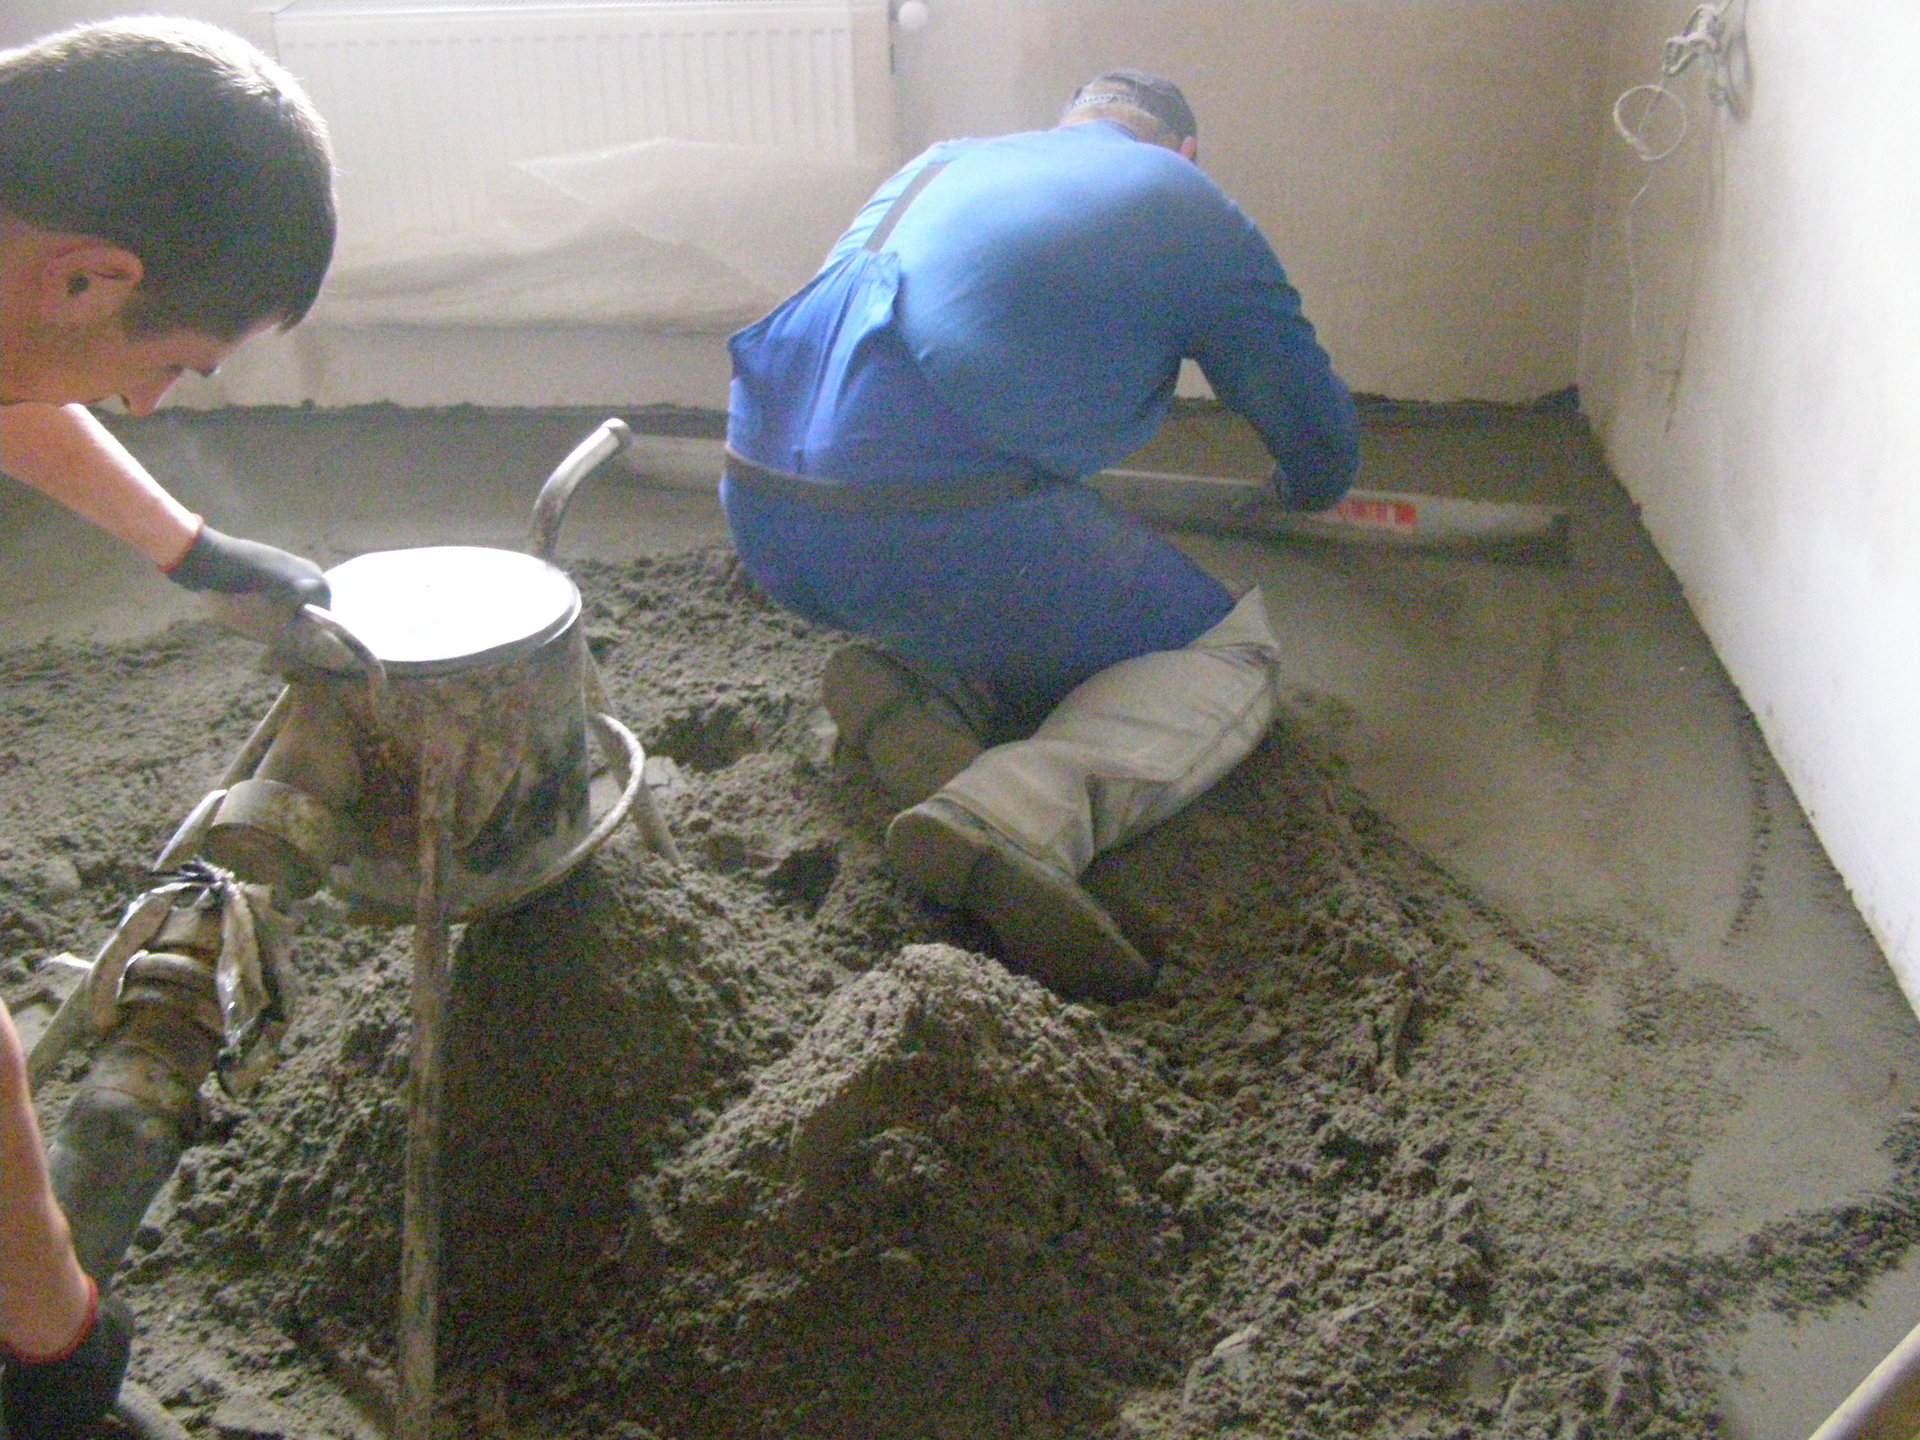
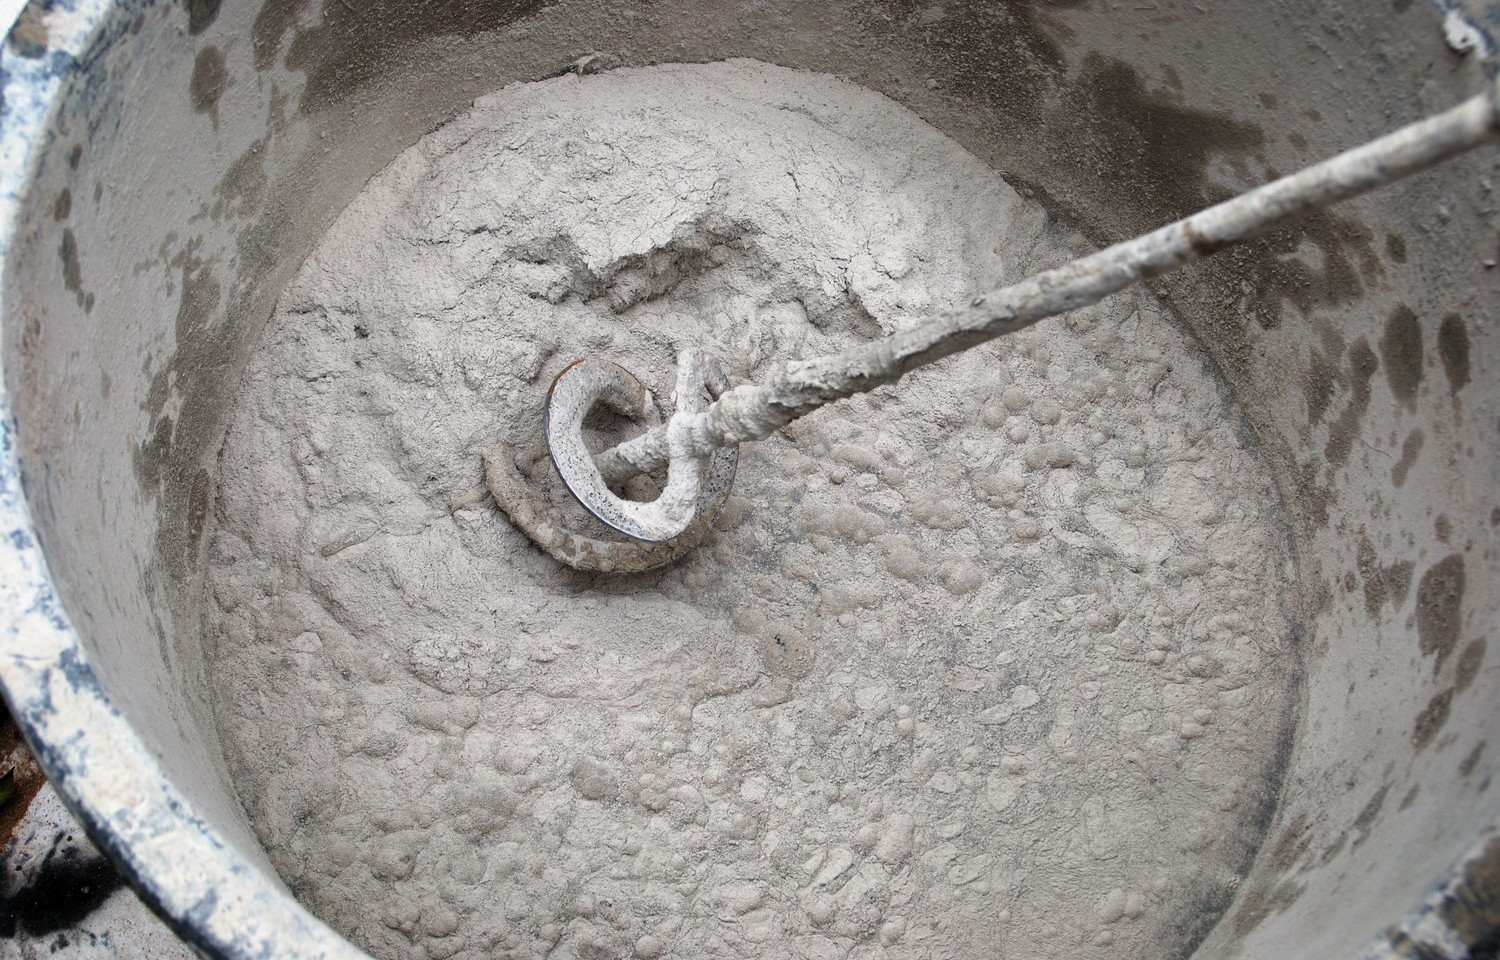
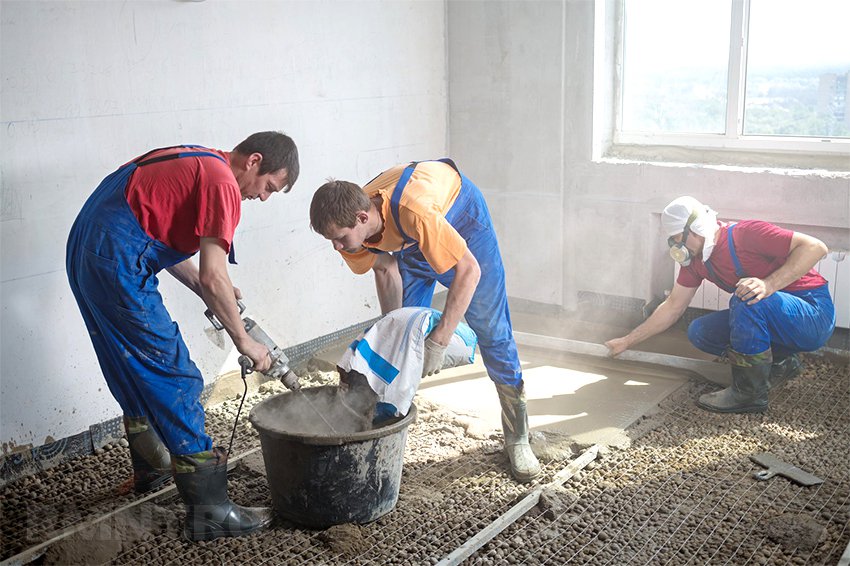
Cement-sand mixture is mixed in a concrete mixer or construction mixer. To get a solid foundation, you must strictly follow the sequence of mixing. Place 2 parts of water and 4 parts of perlite into a prepared container; mix all this very thoroughly until a homogeneous consistency. Then add 1 part of water and 1 part of cement, mix again. Finally, add 10 parts of water and 2 parts of sand and mix to a plastic consistency.
In the process of mixing the consistency of the solution must be constantly monitored. If wet sand is used, it is necessary to reduce the amount of water. In the finished form, the solution should be easily smeared, and not spread, resemble dough in consistency. If necessary, plasticizers can be added to the mixture. This screed must be laid within an hour. Full drying time takes 2-3 days.
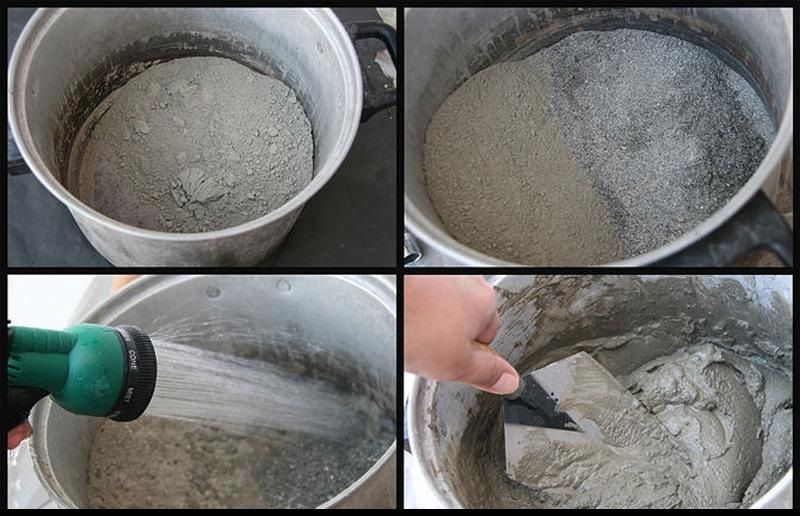
Concrete mortar is denser than cement-sand, therefore, it is much more difficult to knead it using a construction mixer.If opportunities permit, it is better to rent a small concrete mixer. The simplest composition of sand and cement is done like this: for 10 kg of a mixture of 3 parts of sand and 1 part of cement, add 2 liters of water and mix. To enhance the strength per 100 kg of the mixture, you can add 50 g of fiberglass. It is necessary to use solution within 1-1,5 hours, it will reach full hardening in 28 days.
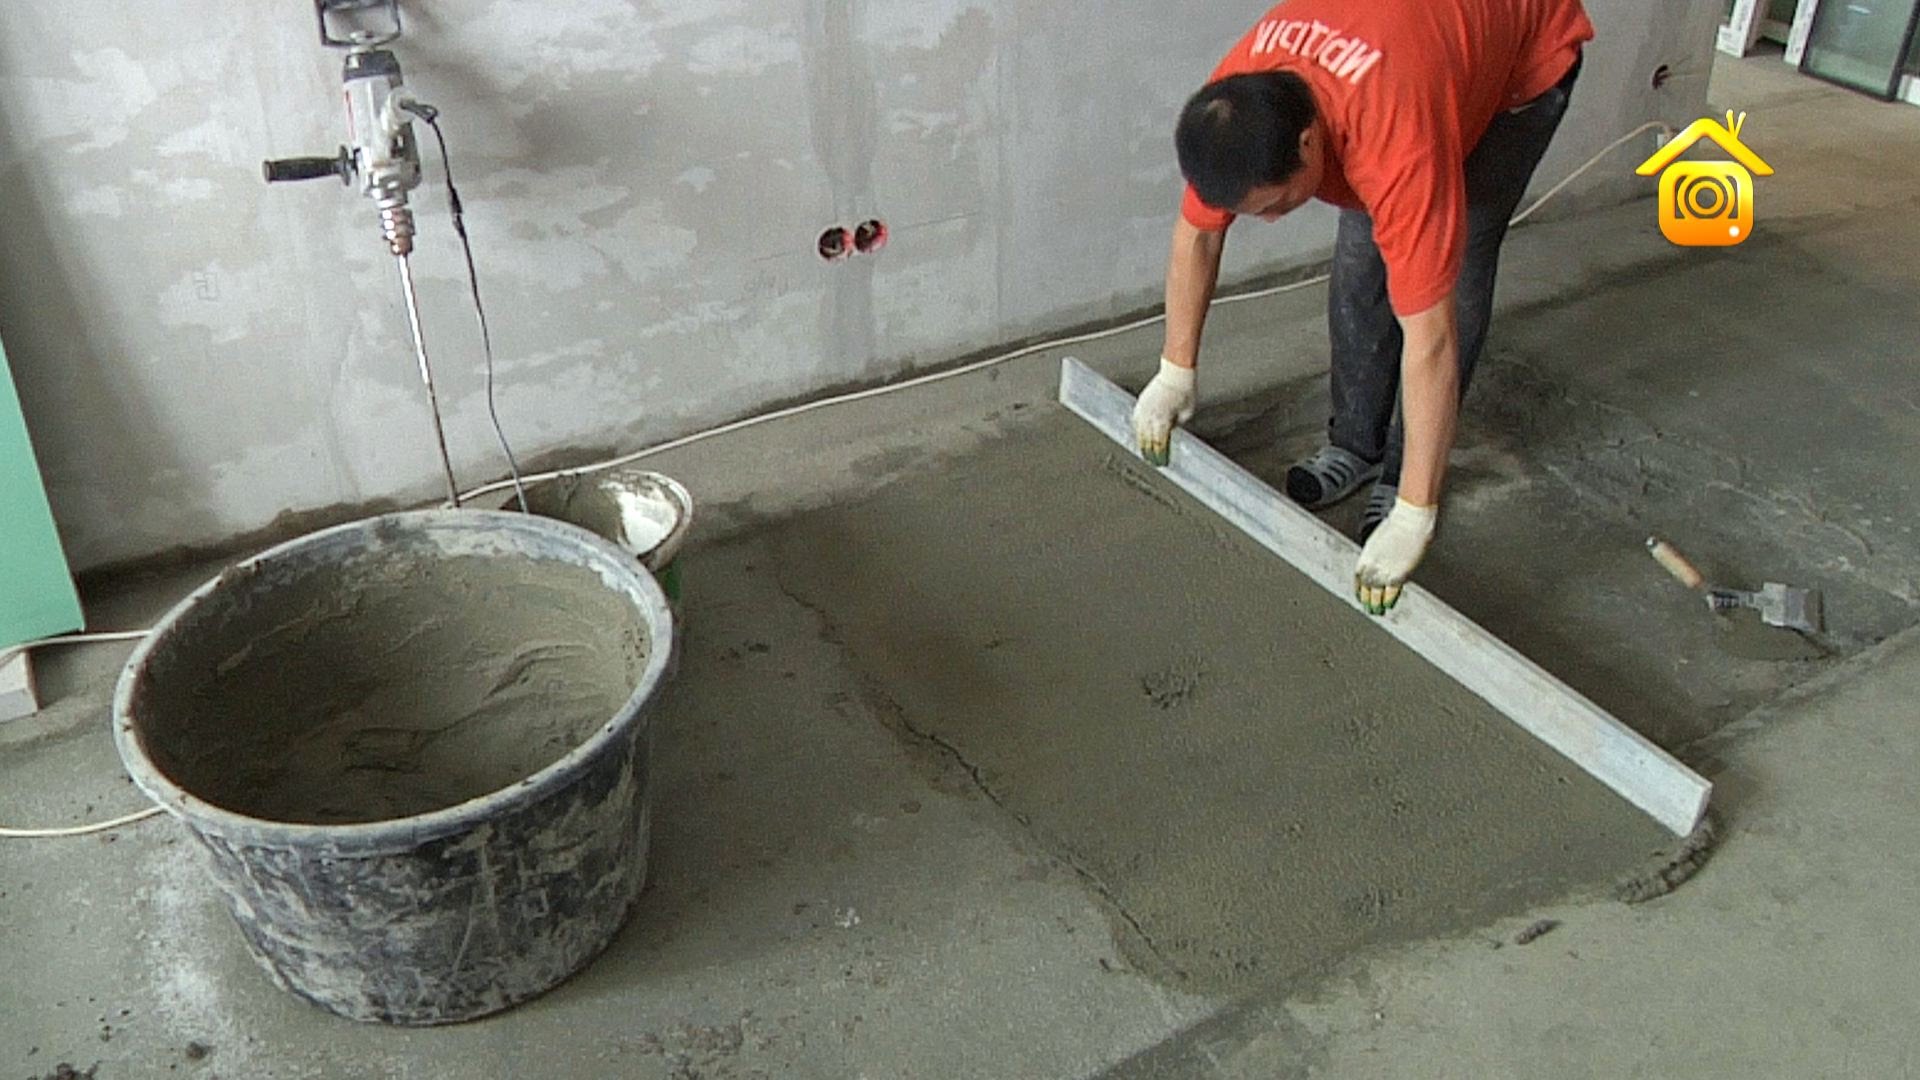
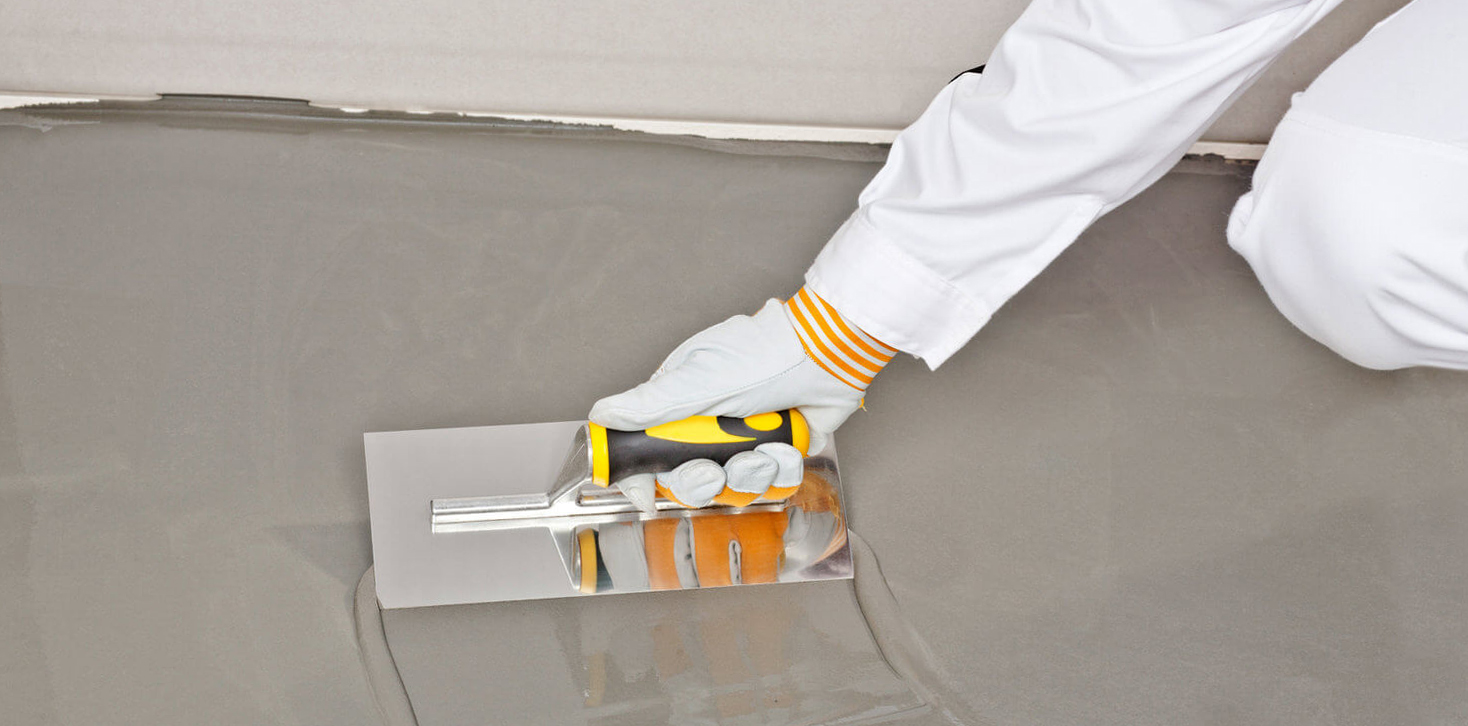
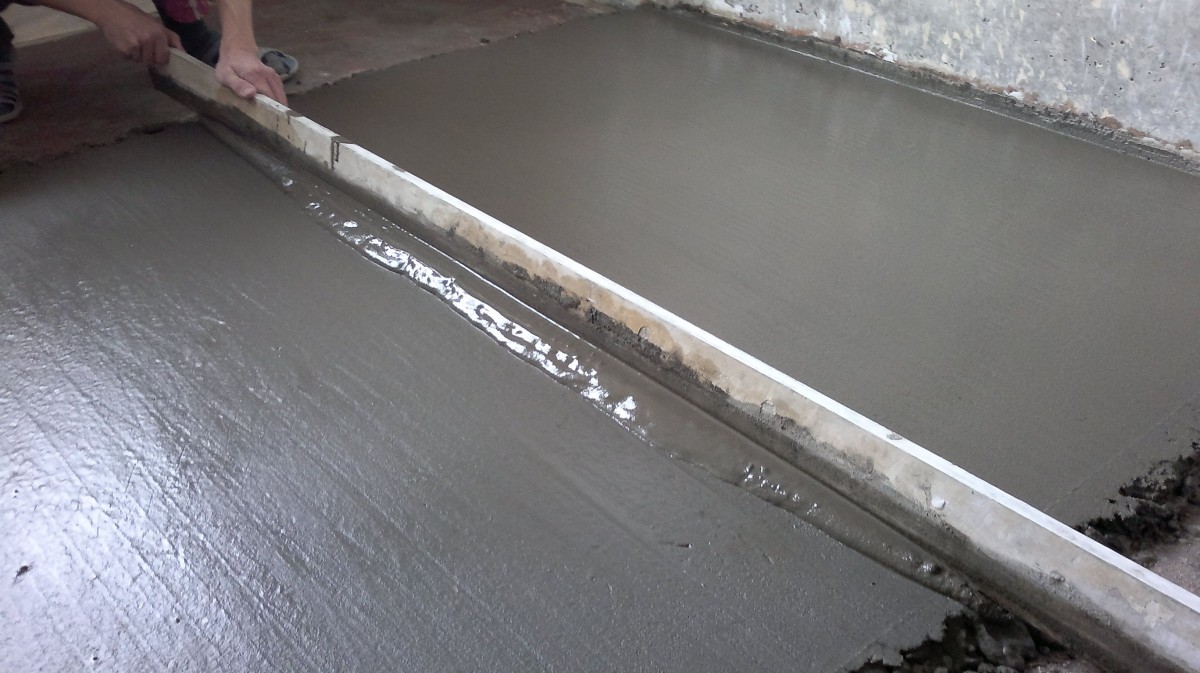
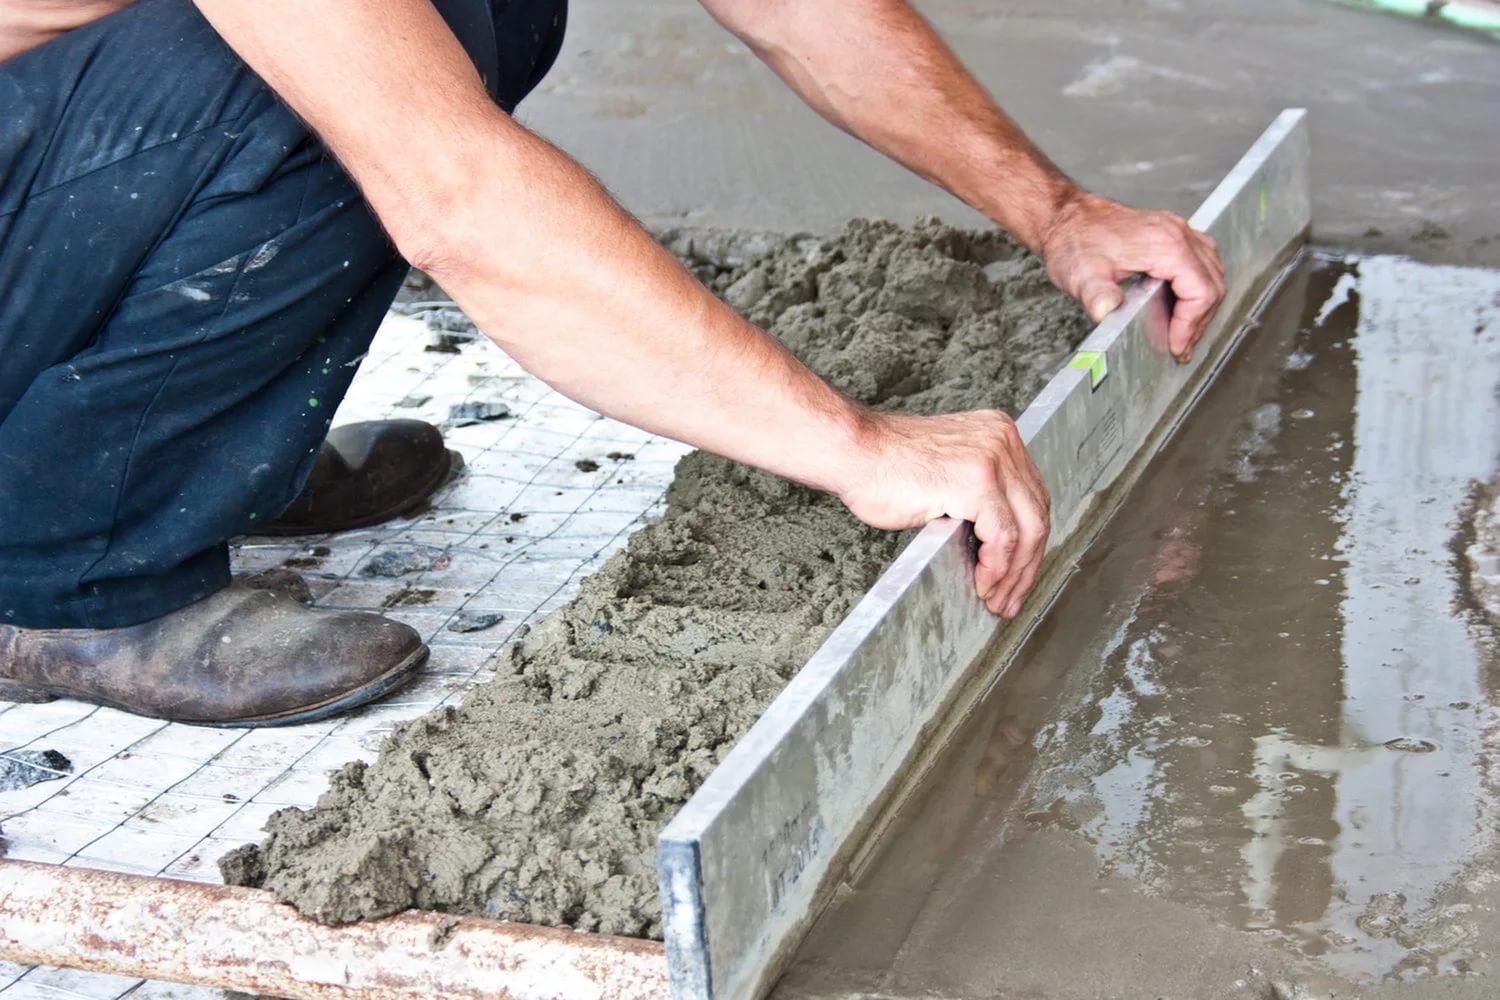
How to align?
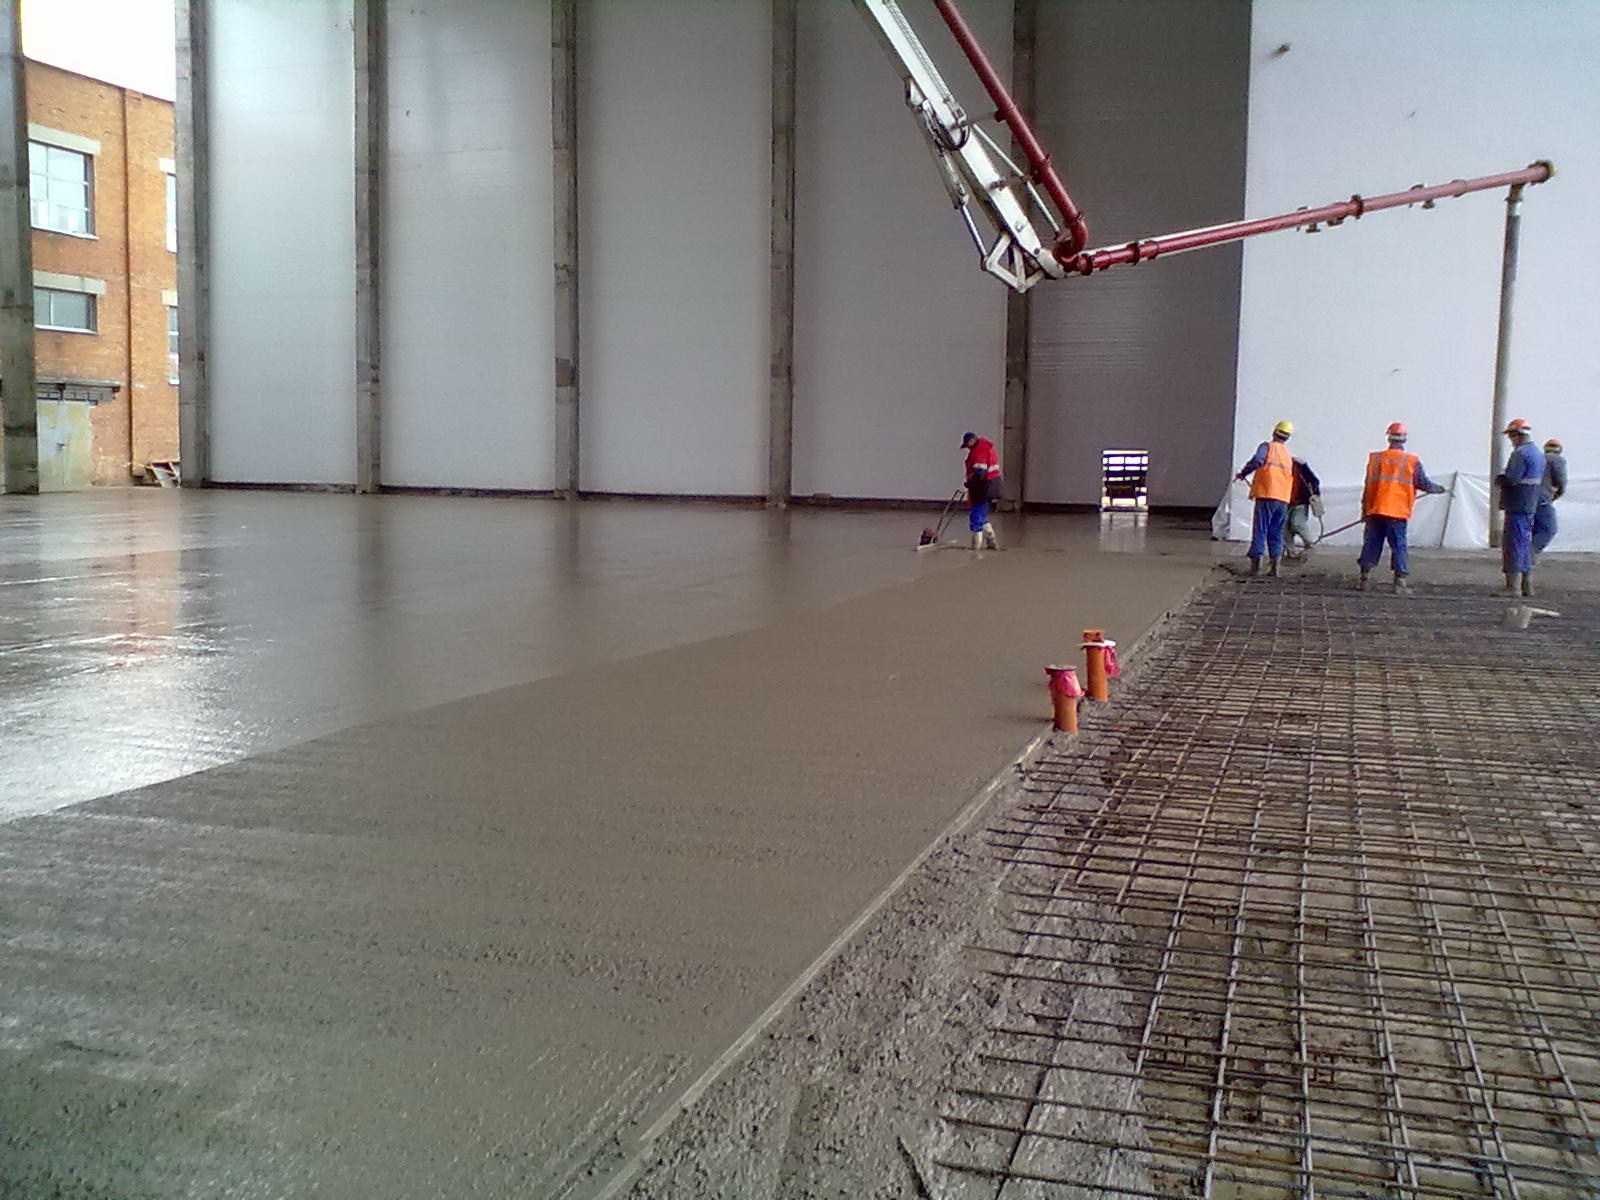
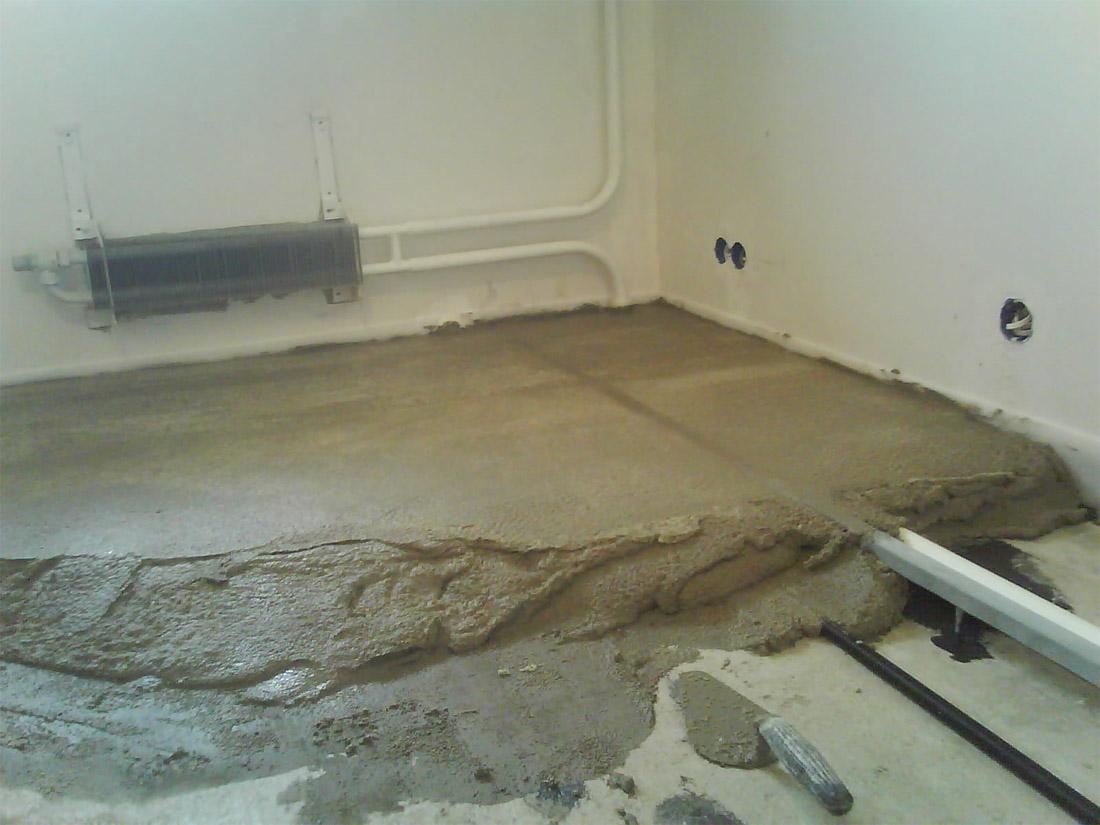
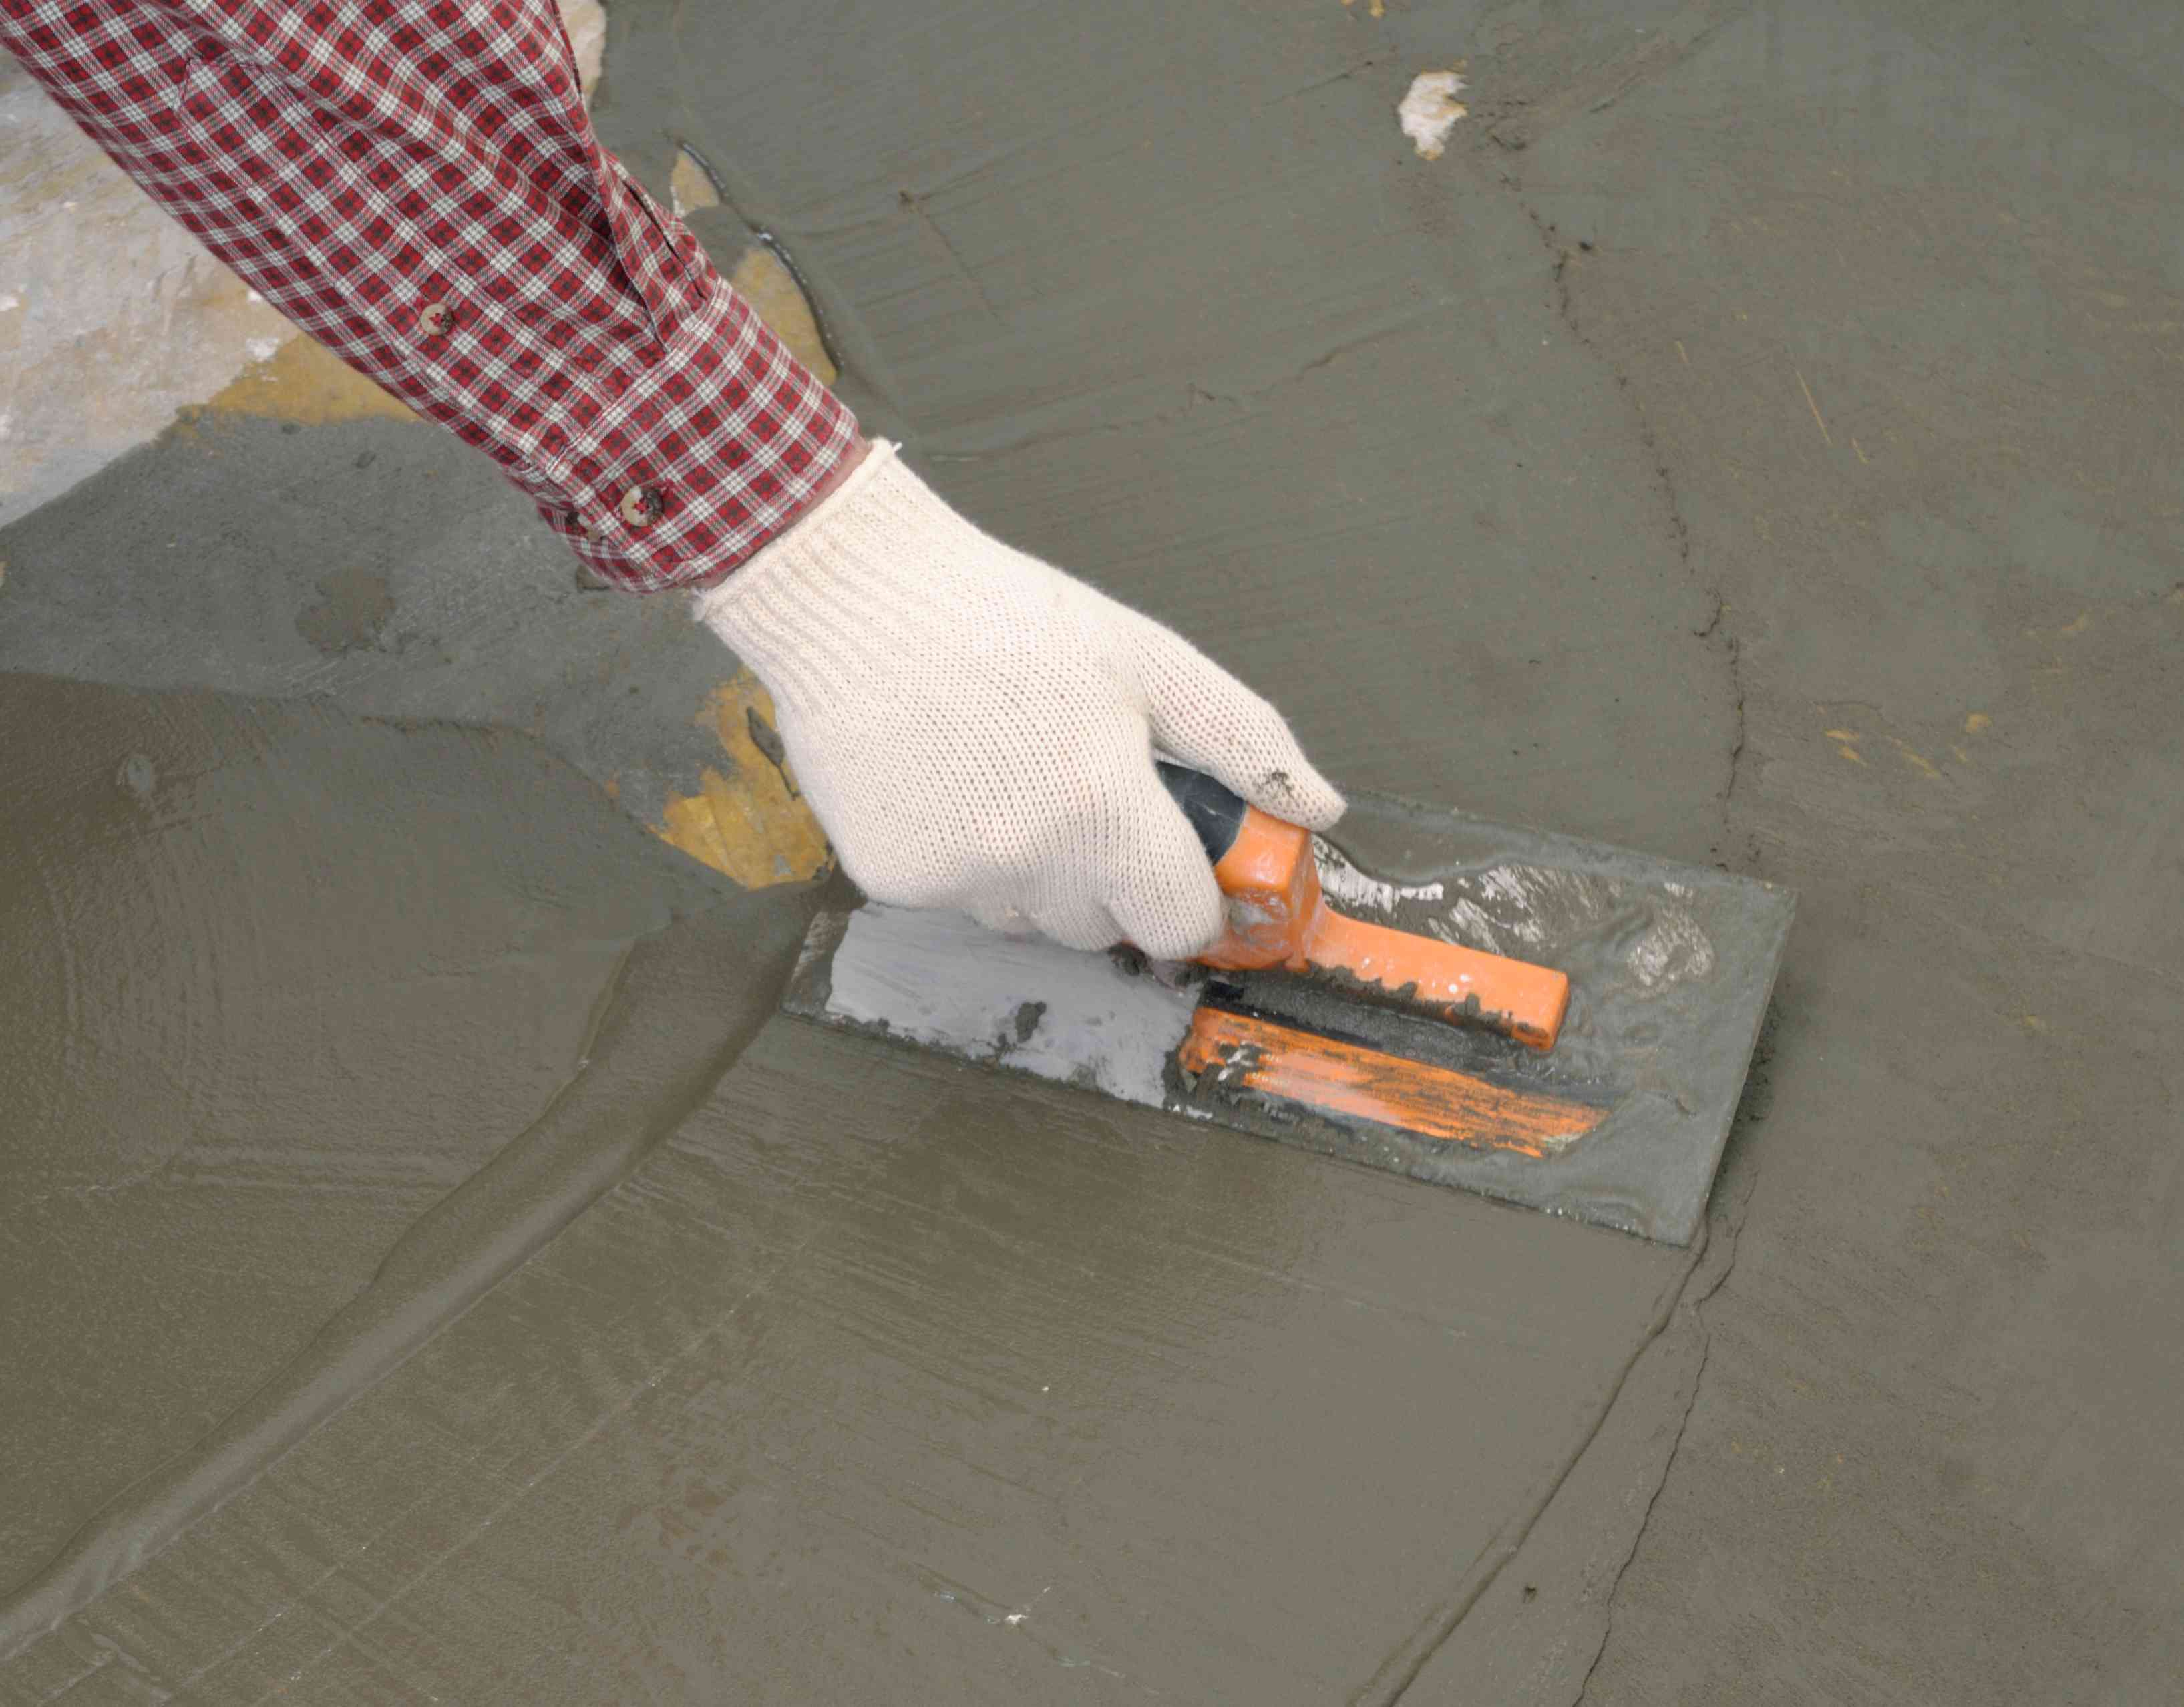
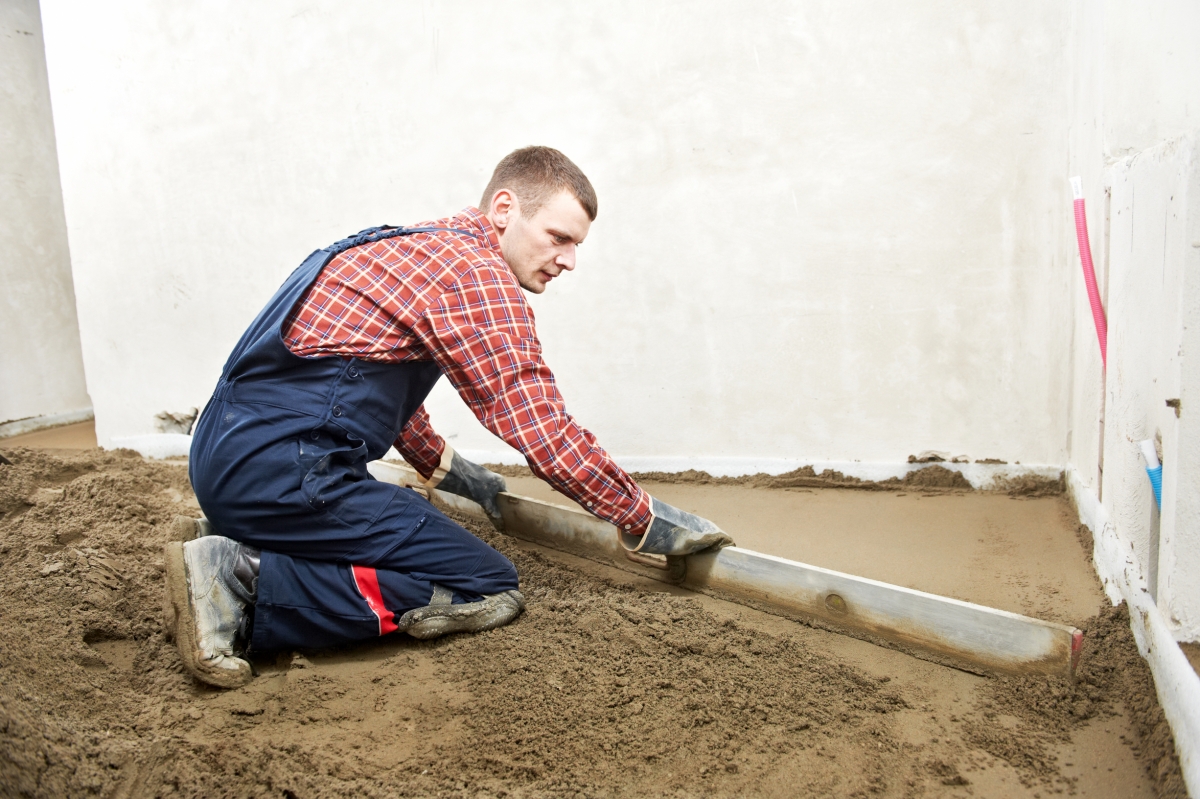
Starting from the farthest wall from the entrance, the solution is laid out between the beacons and leveled by the rule. It should be perfectly smooth, without chipping and cracks on the working side. Slightly pressing, the mass needs to be pulled onto itself, making leveling movements to the left and to the right. To remove air bubbles, the solution should be pierced with a shovel or metal rod. You can use a special deep vibrator. They are treated with a surface until cement milk appears on it.
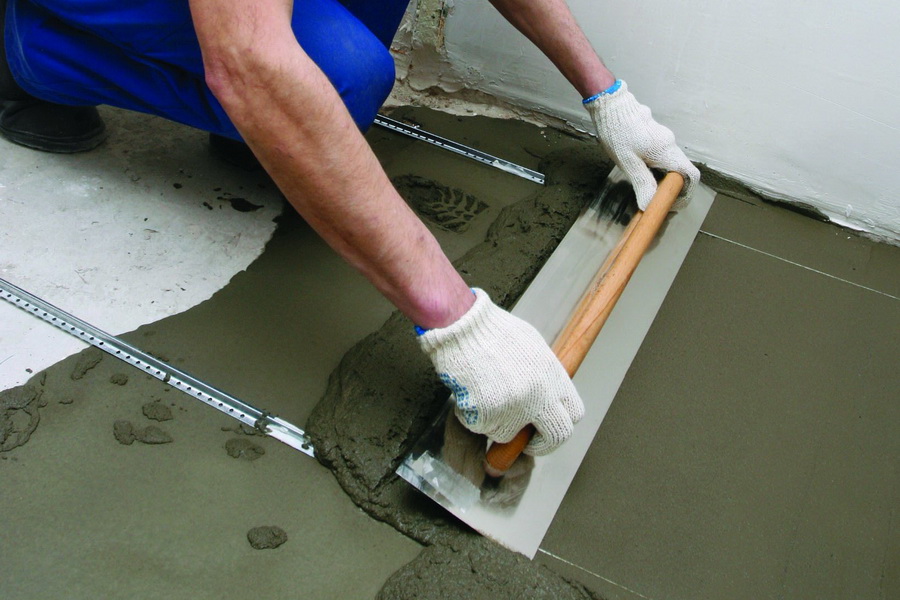

The screed is leveled with a spatula at the walls and in hard-to-reach places. Work can be stopped only when the whole room or the enclosed area is made. When the concrete is grabbed and can withstand human weight (after about 12-20 hours), you need to remove all the bumps on the surface of the screed and the beacons.

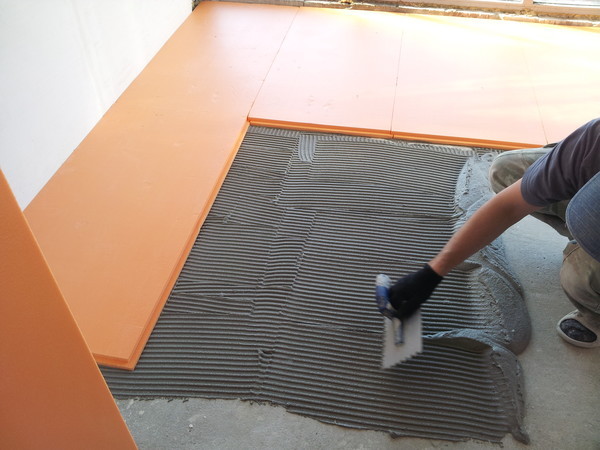
The technology of dry floor screed also implies a layer of waterproofing, sizing damper tape and the installation of beacons. Between the lighthouses, the selected dry mix of materials is poured and leveled. Most often recommended to use expanded clay sand. Then on the screws with double thread and glue is the installation of plates. Once the glue is dry, you can make a layer of self-leveling floor or immediately begin to lay the flooring. The remaining grooves pour the same composition and smooth out with a spatula.

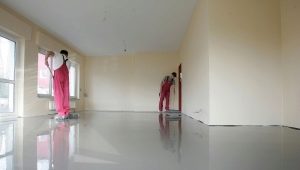
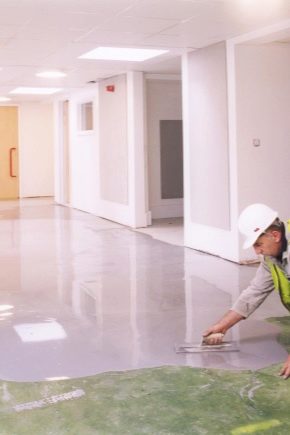
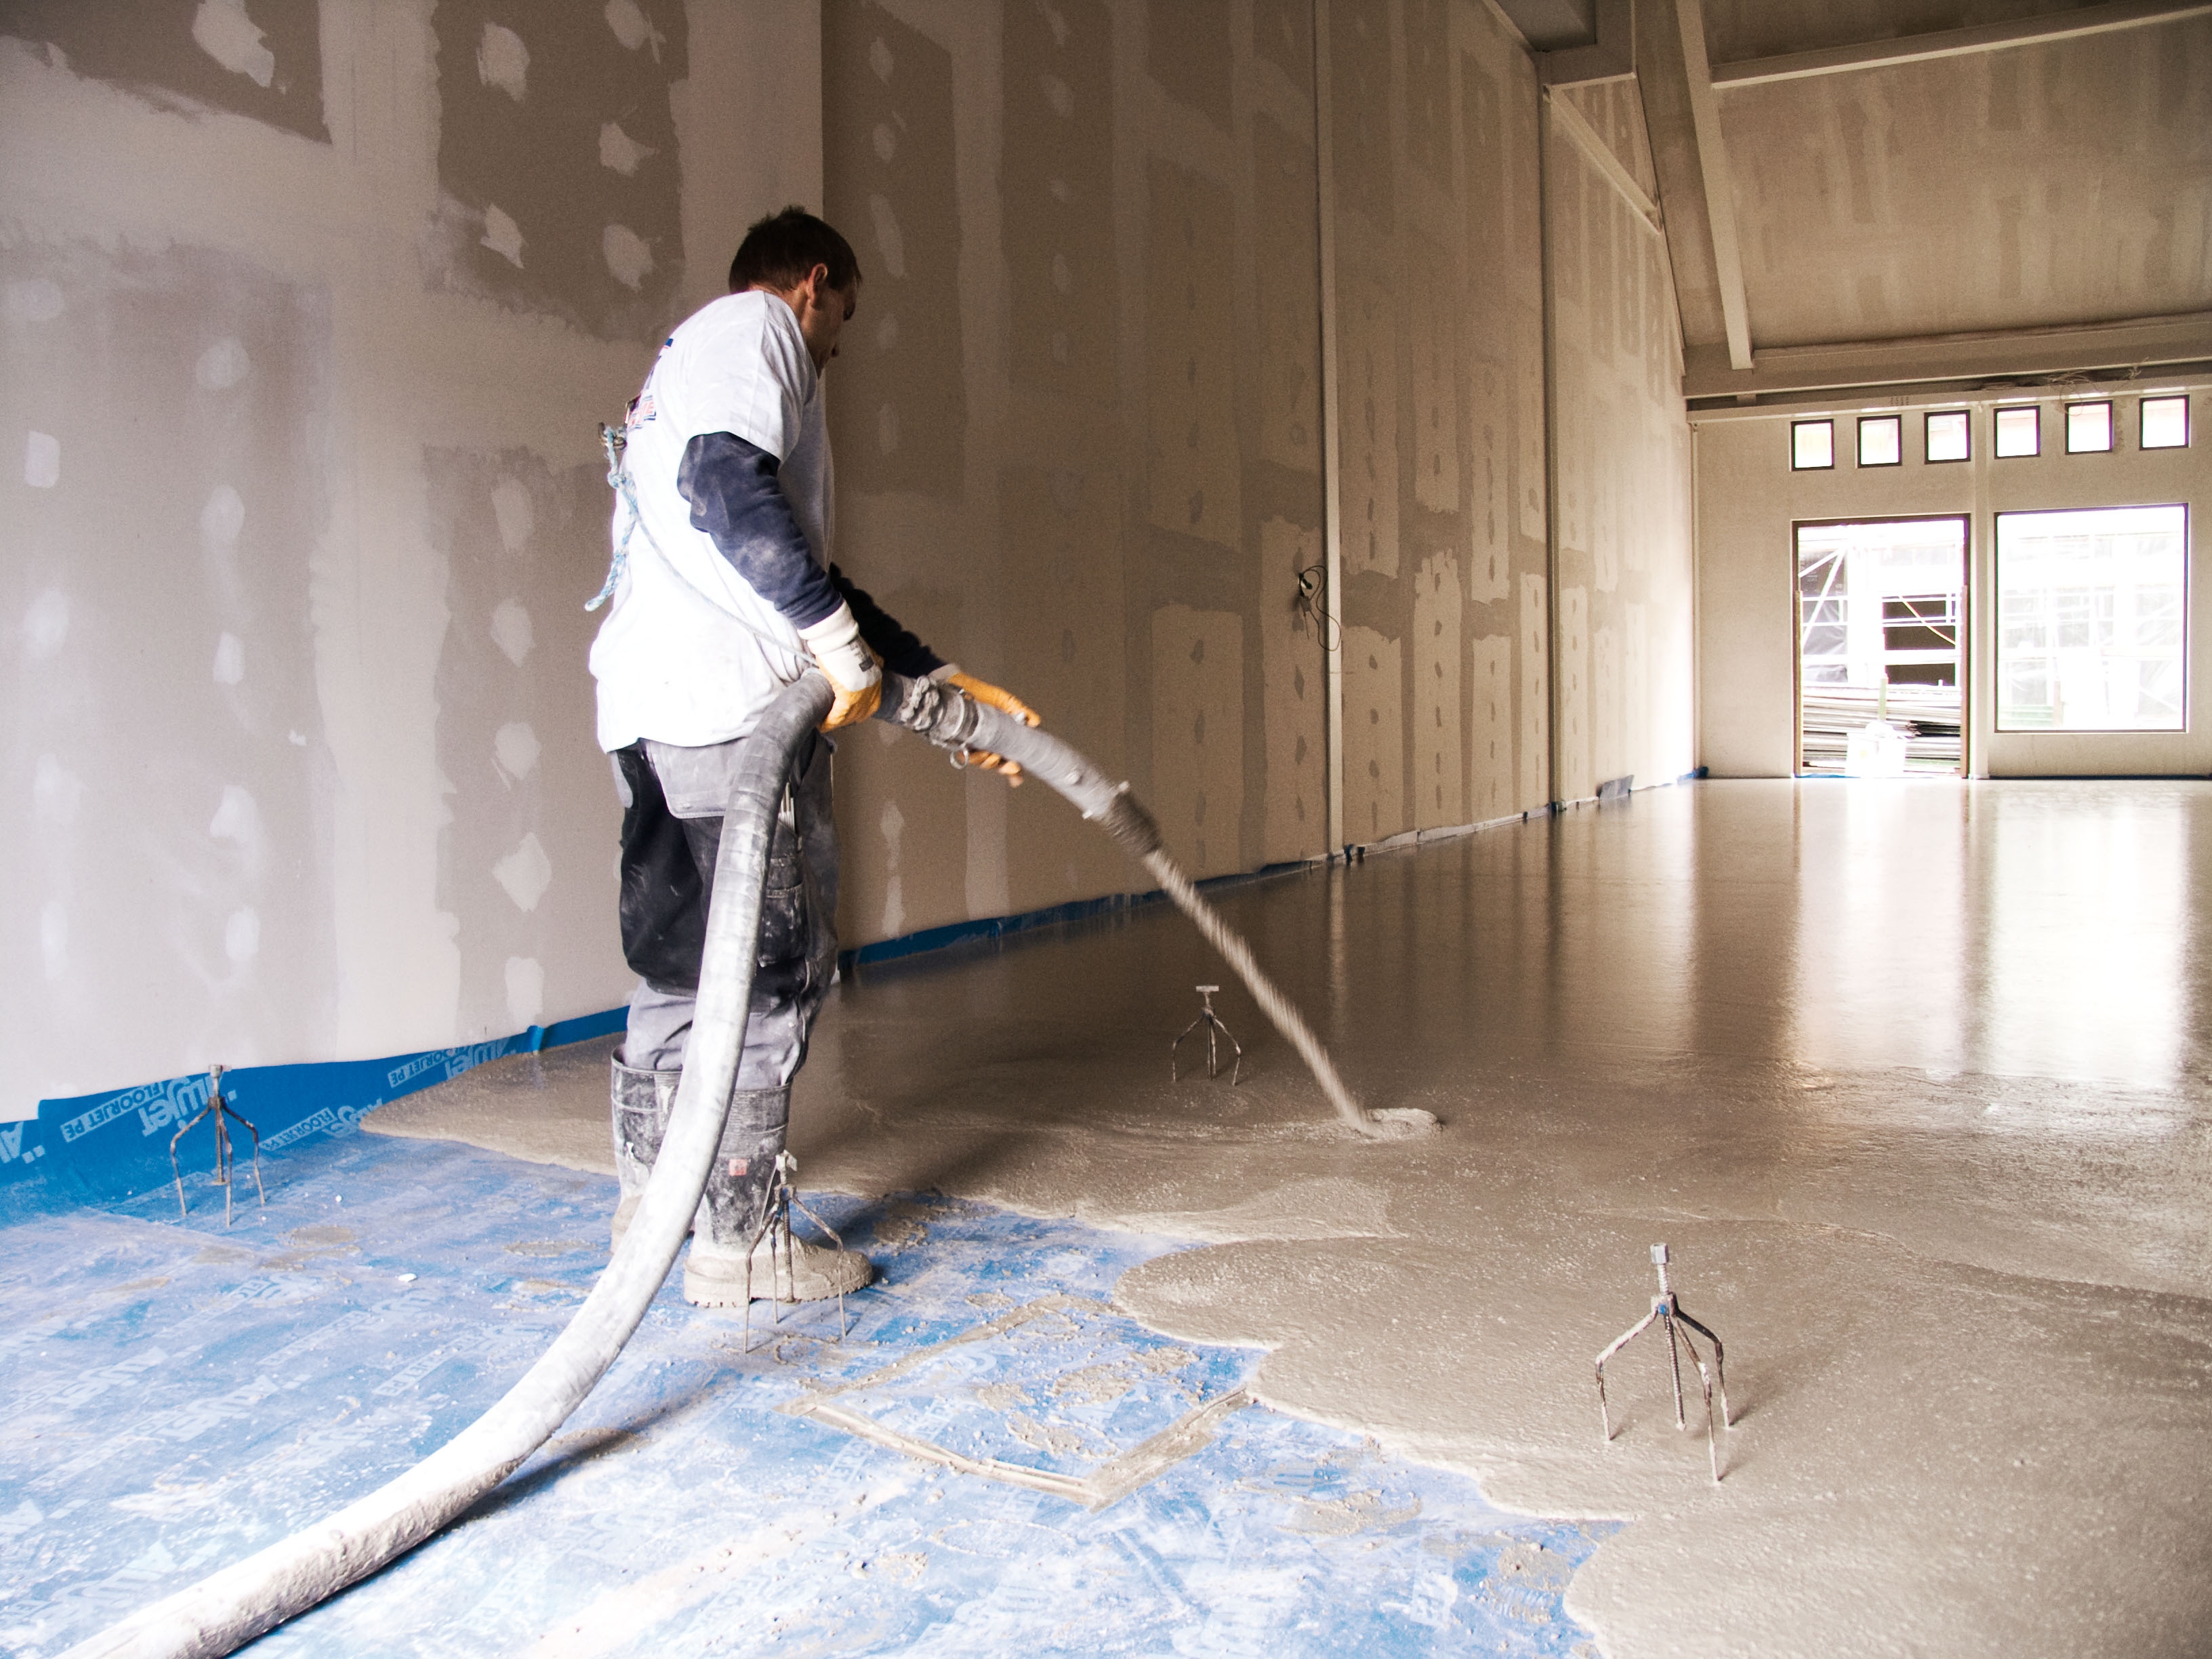
Finish casting
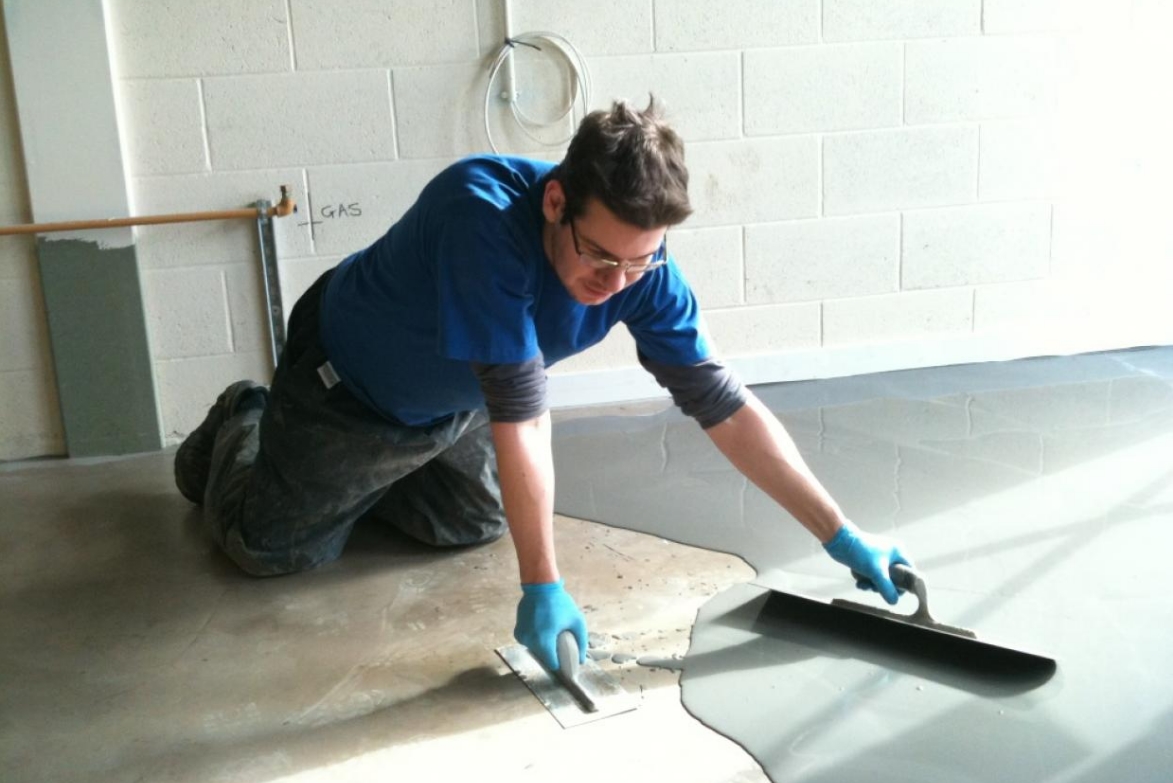
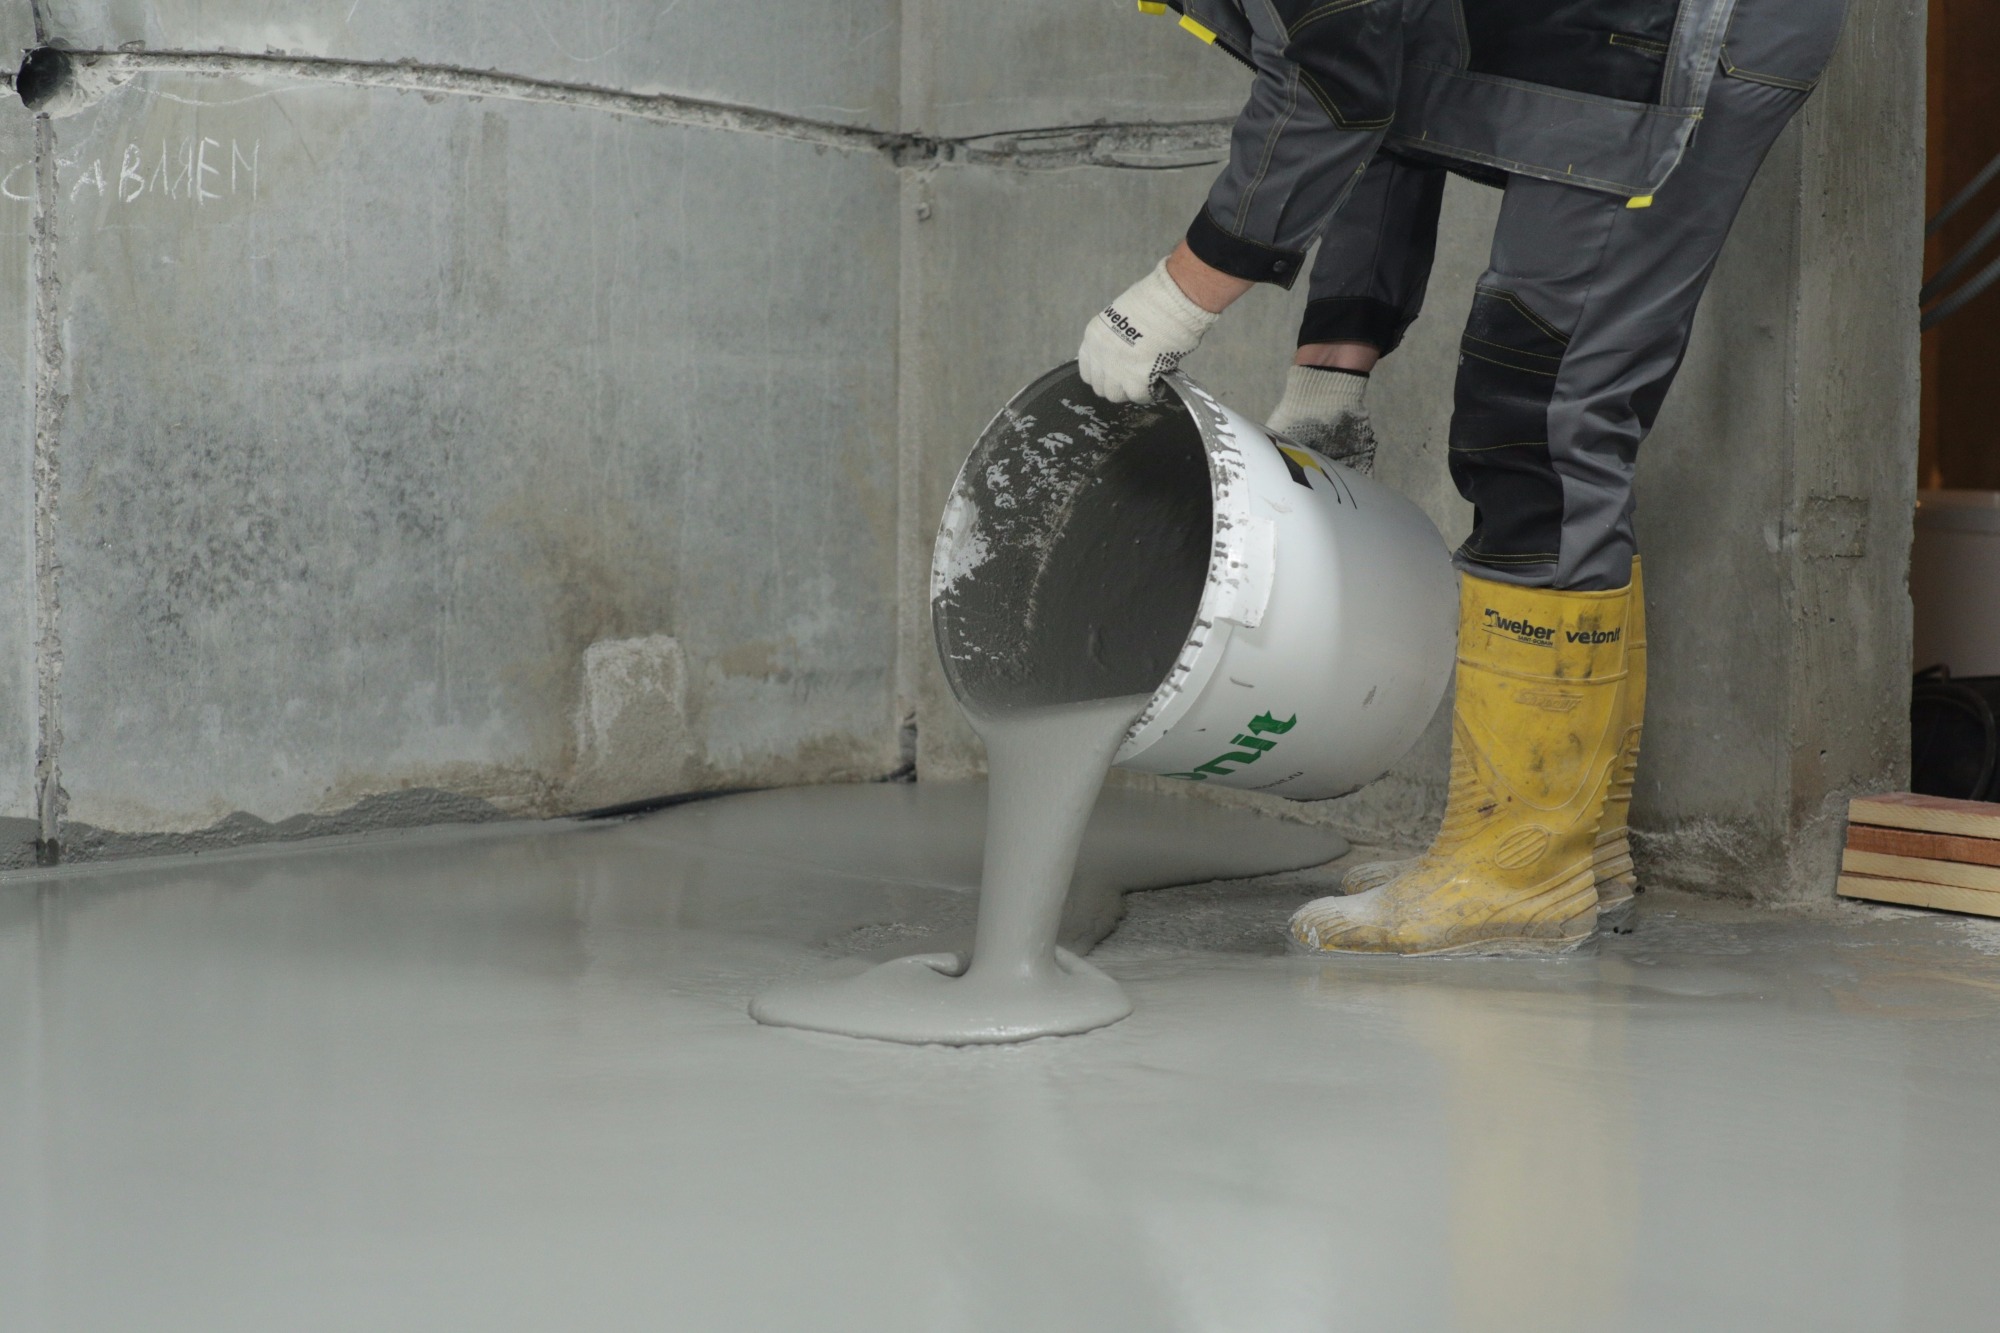
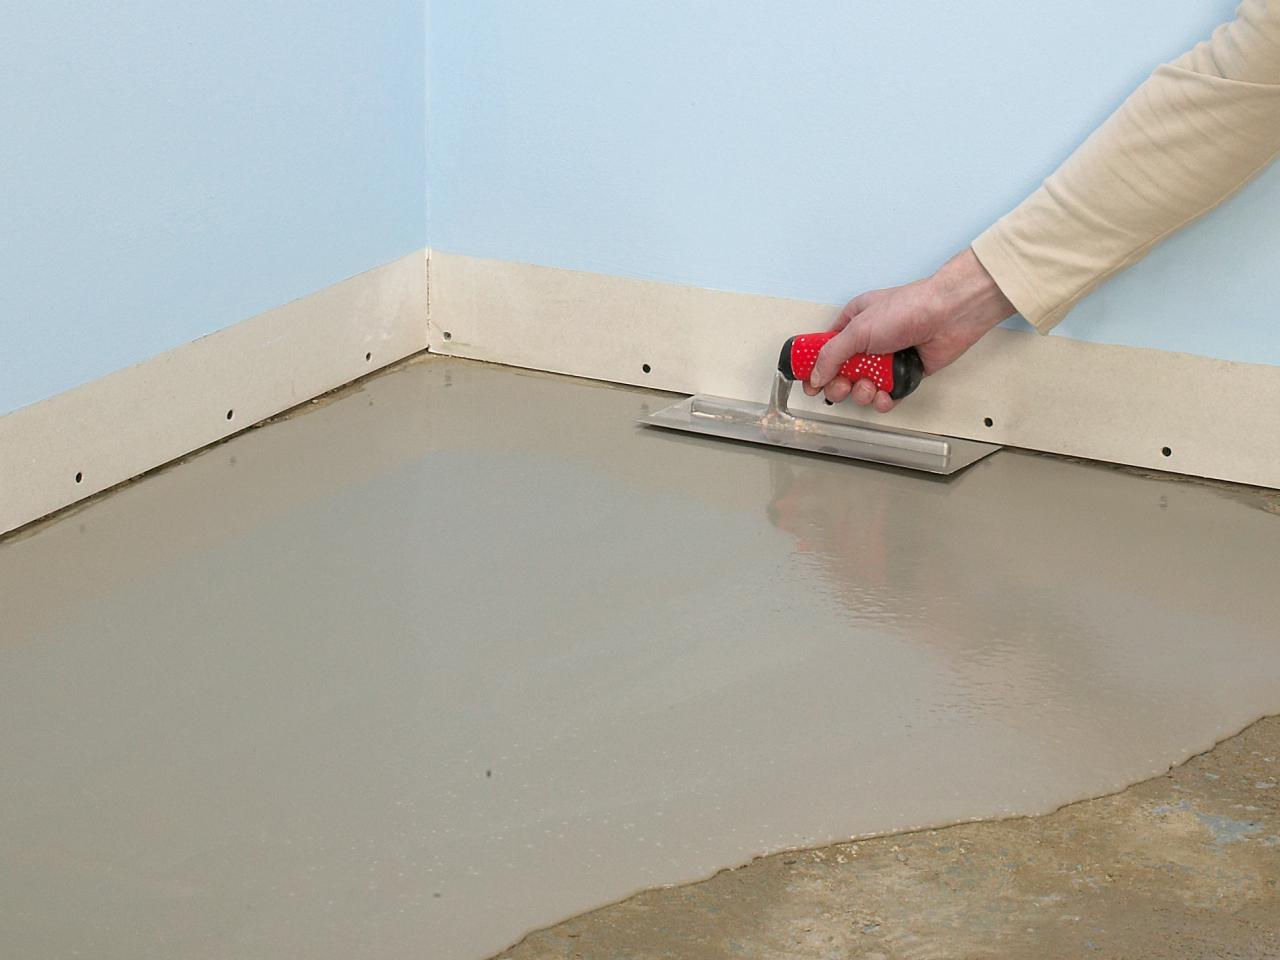
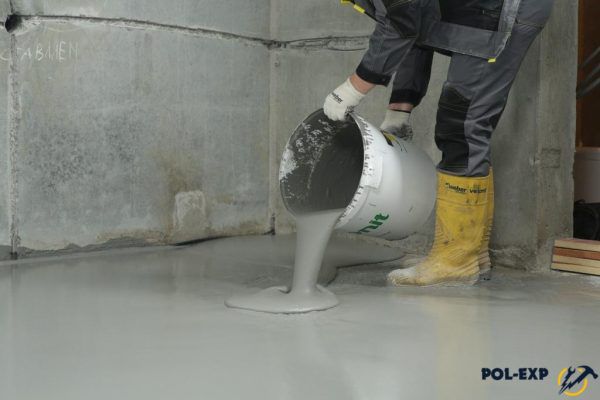
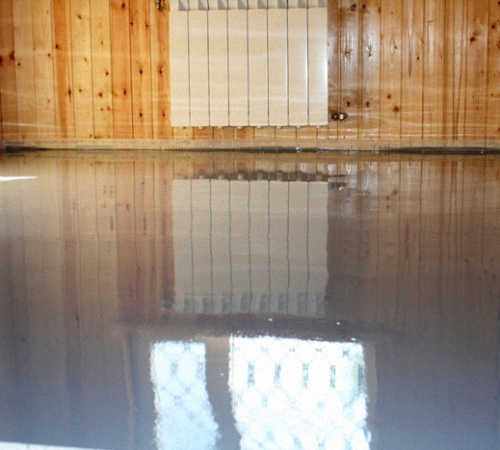
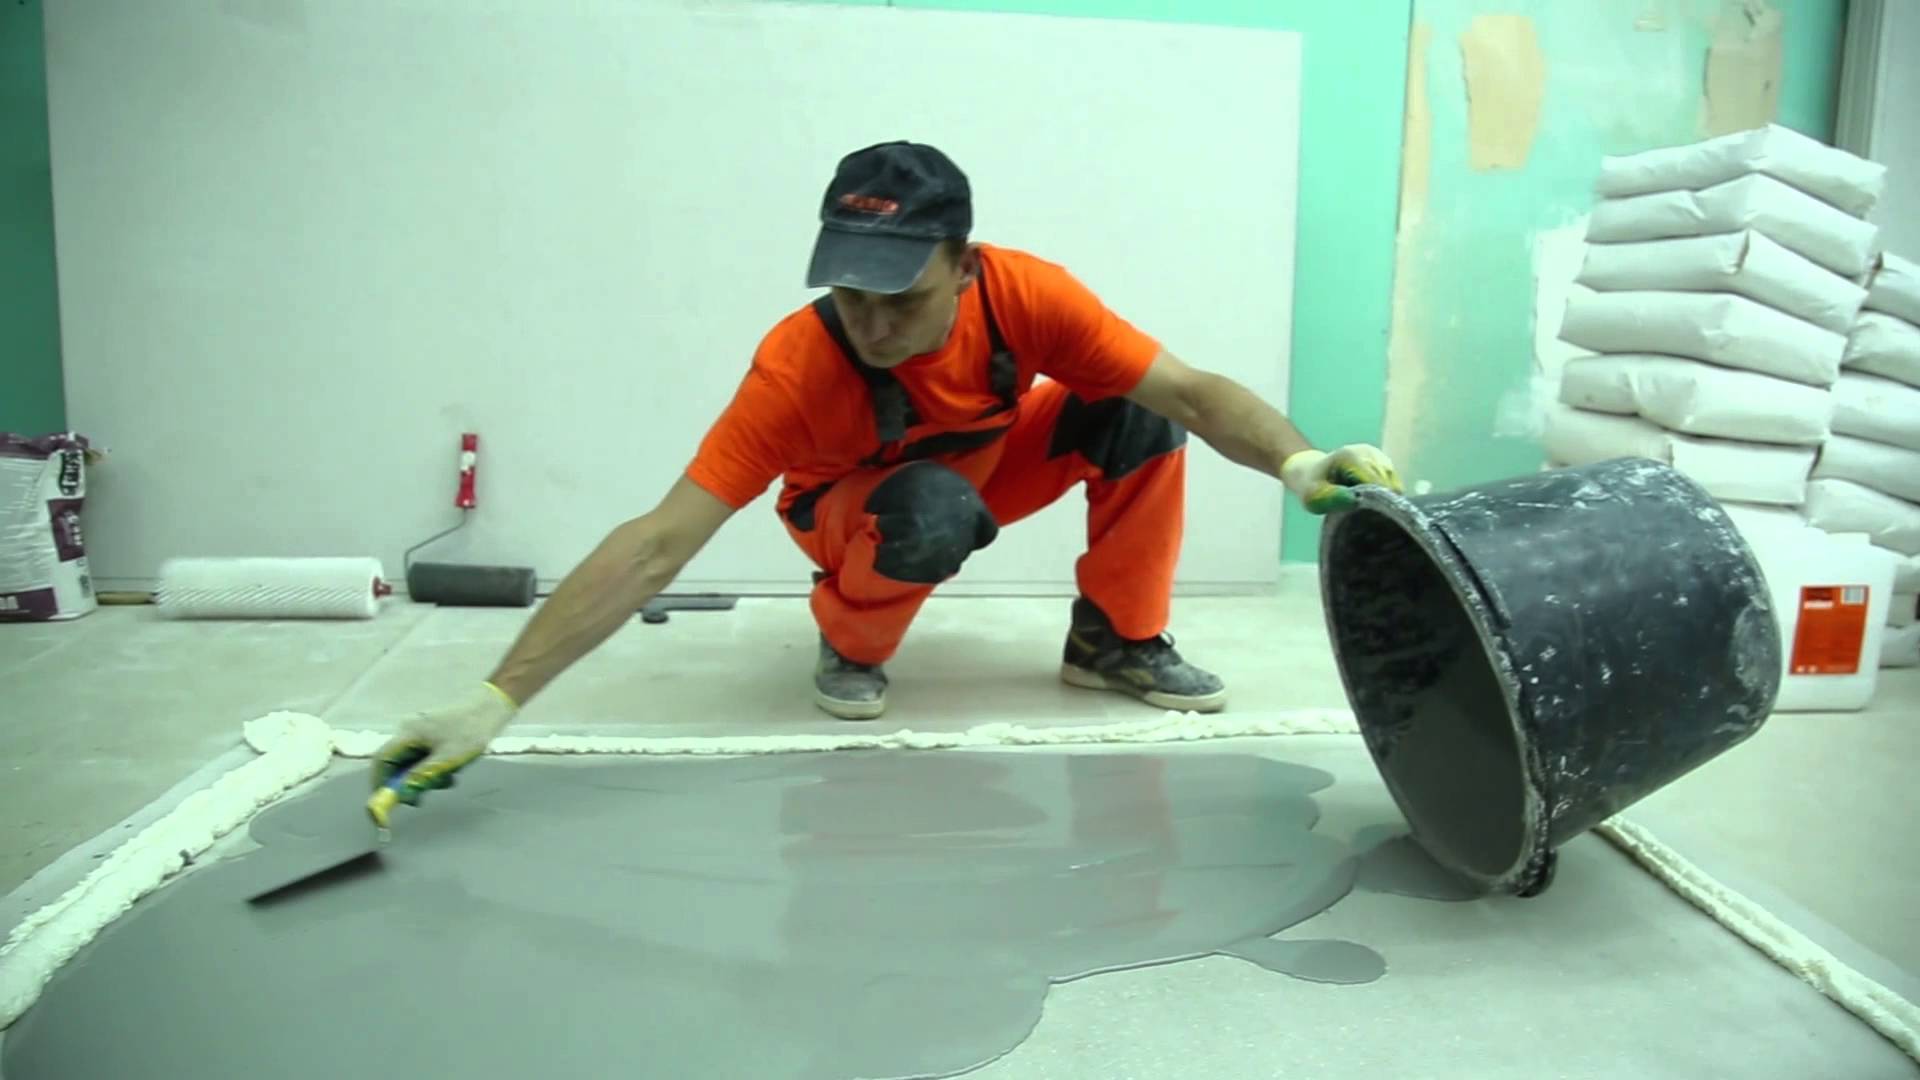
If the floor height drops are within 3 cm, you can start pouring self-leveling liquid mixtures. The principles of the device finishing and rough self-leveling floor are identical, and the difference lies only in the thickness of the poured layer. To make the coating perfectly smooth, need to be guided by the marks applied to the wall so that the mixture reaches them, but does not cover them completely.
It is possible to install dowel-nails or special beacons-repers on the surface with a large number of irregularities and drops as beacons.
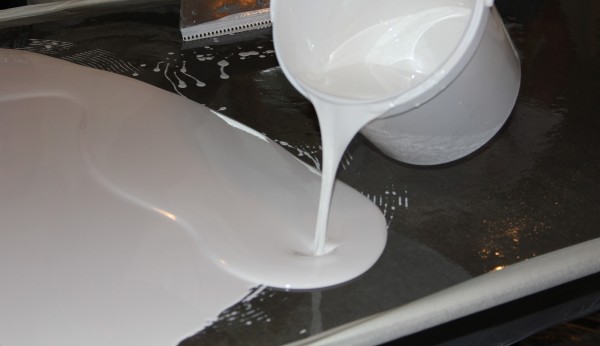
These lighthouses look like tripods and are tuned to the building level.It is necessary to breed a bulk floor strictly according to the instruction. Also, the instructions indicate the minimum and maximum layer, which you need to strictly adhere. Water is poured into a specially prepared container and the mixture is gradually poured out, which is stirred by the construction mixer at low speed. It is necessary to use ready mix within 15-20 minutes.
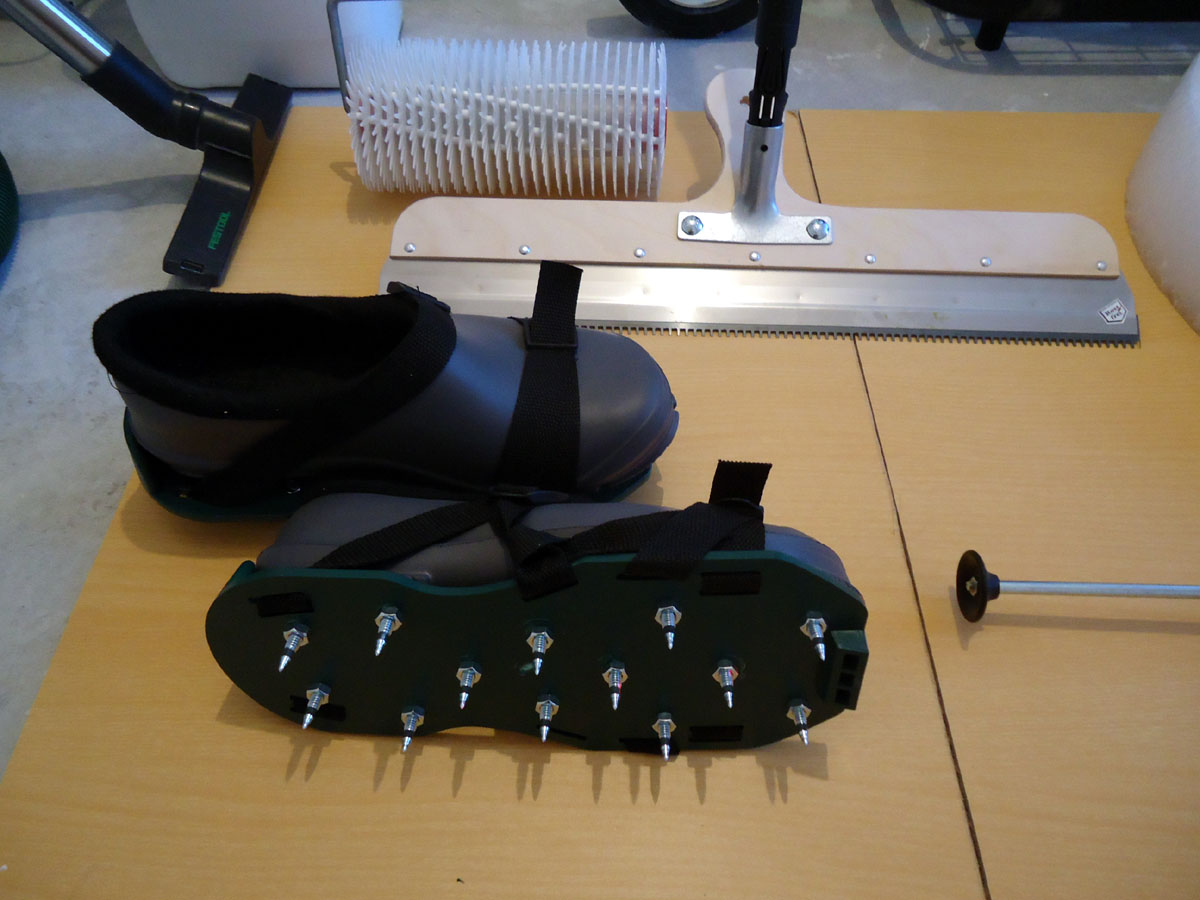
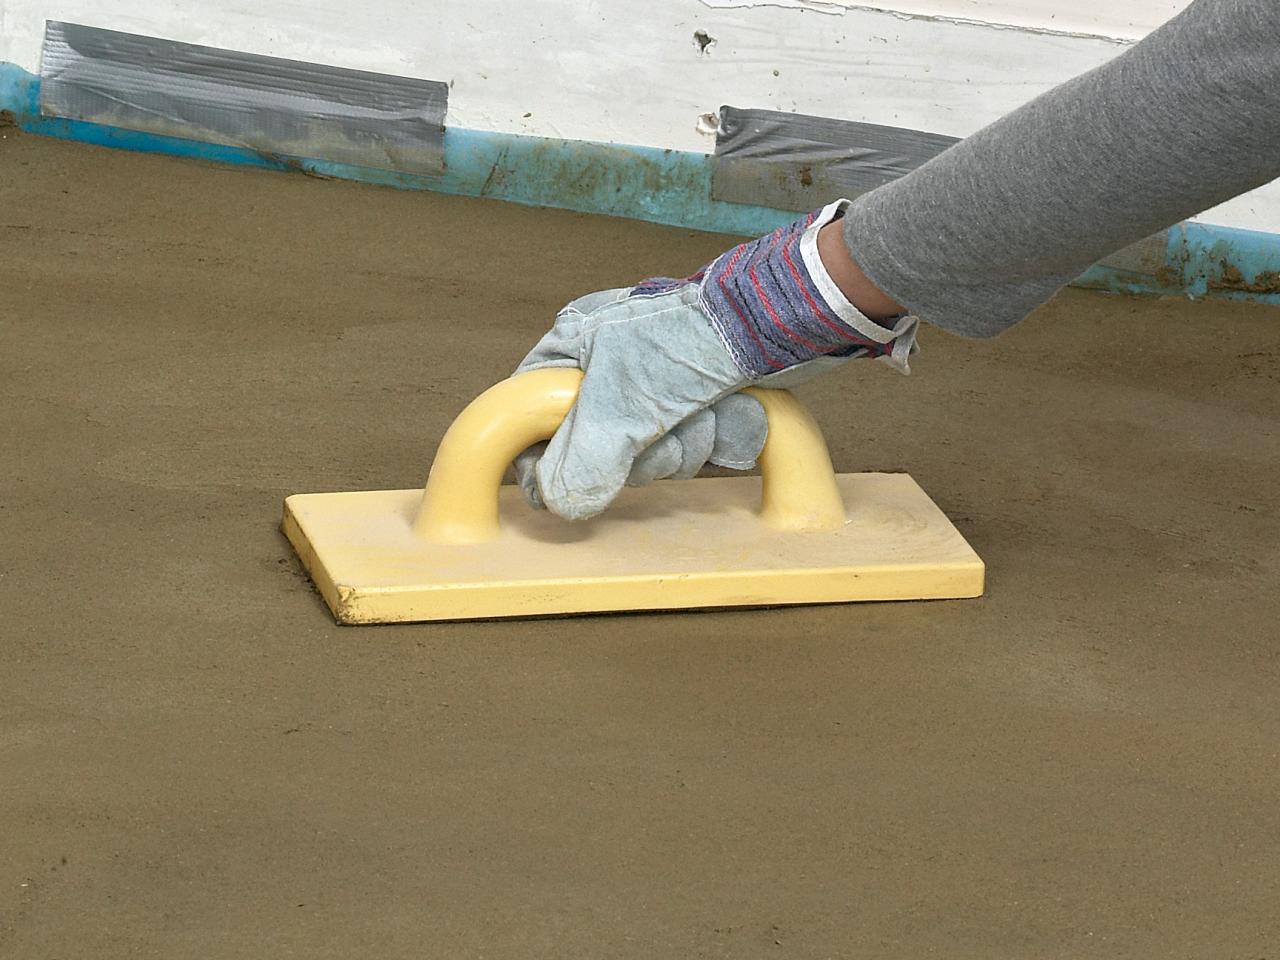
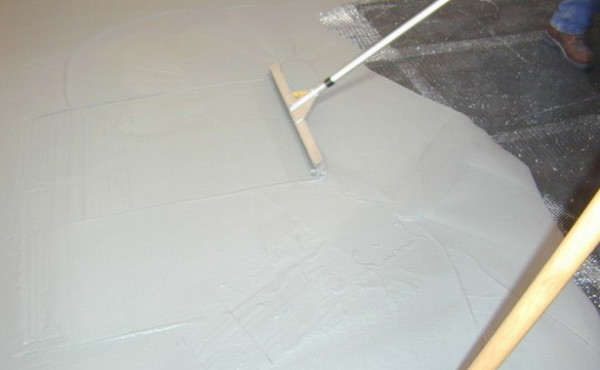
Filling of the floor starts from the corner of the room farthest from the entrance. Leveling is made by squeegee or spatula. Between pouring strips need to withstand a period of time not more than 10 minutes. Walking on the poured floor is possible only in the paint spikes. Next you need to remove the bench beacons and roll the entire surface with a needle roller to remove all air bubbles.
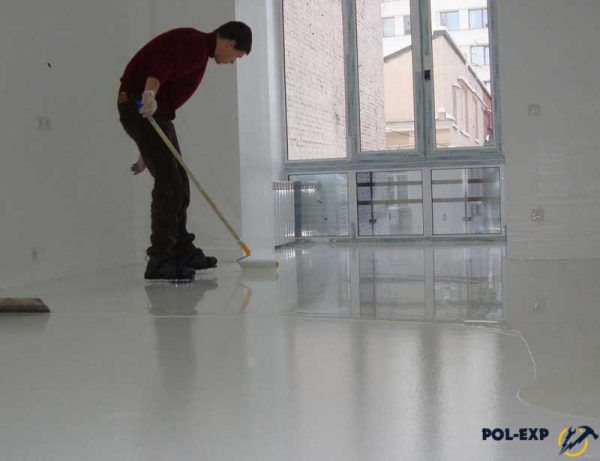
At the threshold of the room there must be a barrier so that the mixture does not overflow. After seven days, you can begin laying the flooring. Flooded finishing layer can be made independent flooring by adding colored pigments or drawing pattern.
In this case, the surface after drying must be coated with a special varnish.

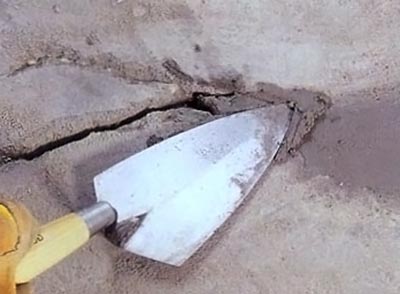
How to repair cracks?
In order to prevent cracks or other defects from drying out on the concrete screed, it is necessary to make simple, but daily maintenance for the first 7-10 days. To do this, the surface must be watered with water 2 times a day and covered with plastic wrap. If the room is hot, it is recommended to increase the regularity of watering up to 4 times a day.
If cracks and irregularities still appear on the surface of the screed, you can get rid of them with a grinding machine or pour the same composition that was used to make the screed. You can also use self-leveling self-leveling mixtures. To do this, apply a primer mixture to the surface of the floor, and after it dries, pour a thin layer of the finishing fill.
Useful tips from professionals
If you have not previously had experience in the device screed, it is first recommended to practice in a small room, such as a closet. And even experienced professionals in this business need assistants, so you need to start work at least two people.
When choosing materials for screed, you need to pay attention to the following points:
-
The color of the mixture should be gray, without foreign inclusions of dirty color. Most often this happens with poor-quality mixtures, which together with the sand gets clay. A screed based on such material will quickly crack and become unusable;
-
In no case do not use mixtures in which PVA glue is specified as a plasticizer;
-
Sand for screed must be sea;
-
If the concrete layer needs to be made thicker, it is recommended to add expanded clay to the composition of the mortar. This will not affect the strength of the screed, and the load on the base and material consumption will be less.
Do not neglect the use of damper tape. This does not greatly affect the costs and will allow to avoid deformations of the walls and the floor. It is necessary to fix such tape not only on the walls, but also on columns and other structures with which the screed comes in contact.
It is recommended to rinse the construction mixer after each use in the operating mode in a separate container with water. This will simplify the task of its further cleaning, and extraneous inclusions will not get into the solutions.
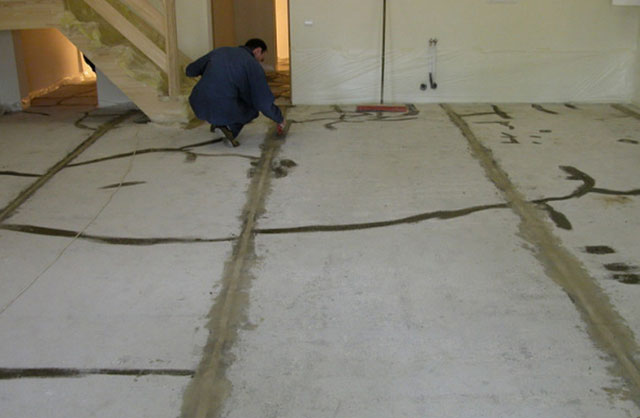
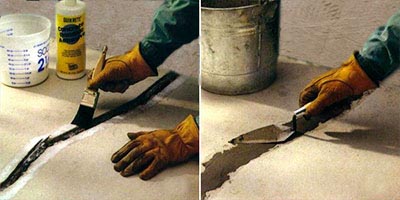
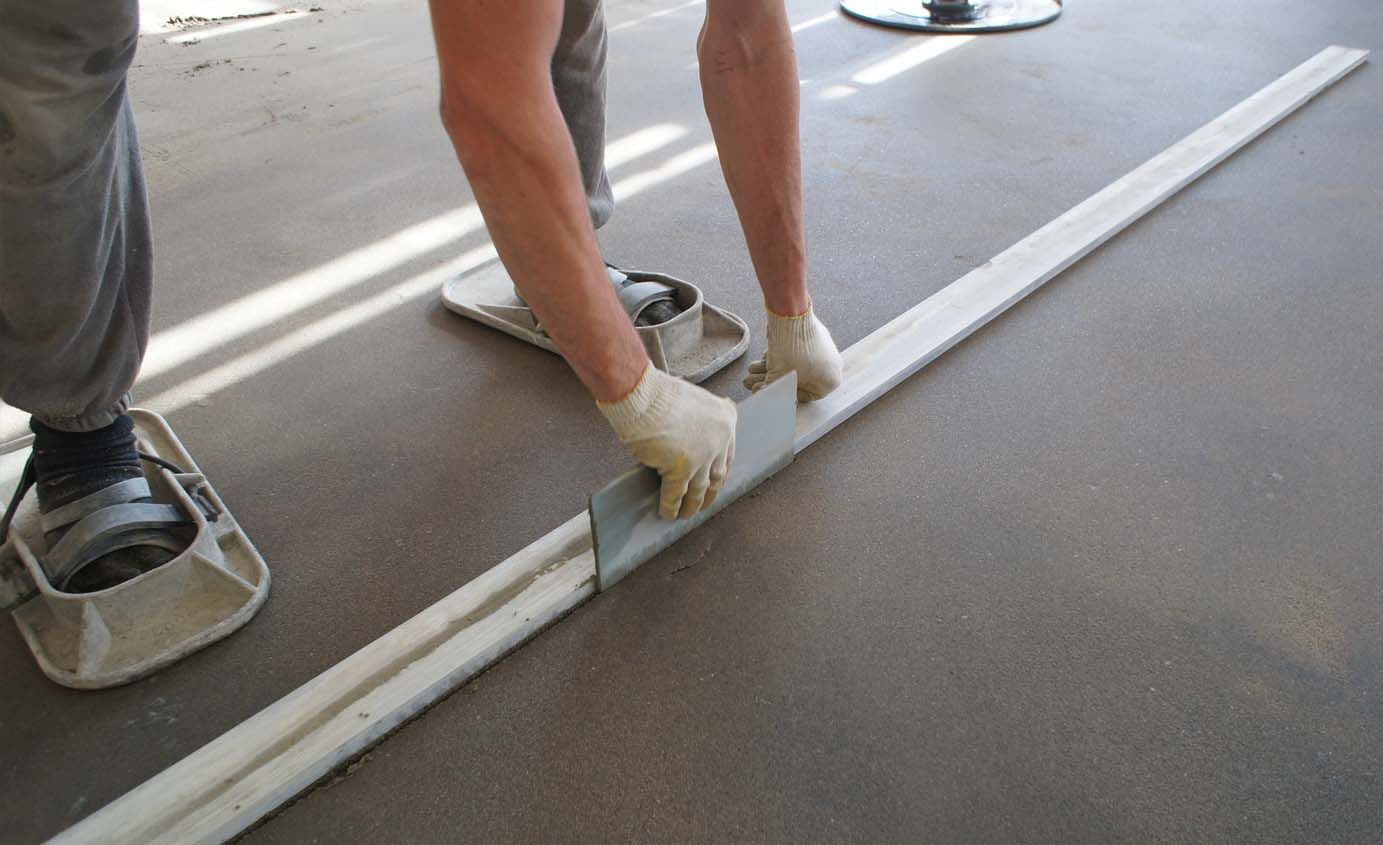
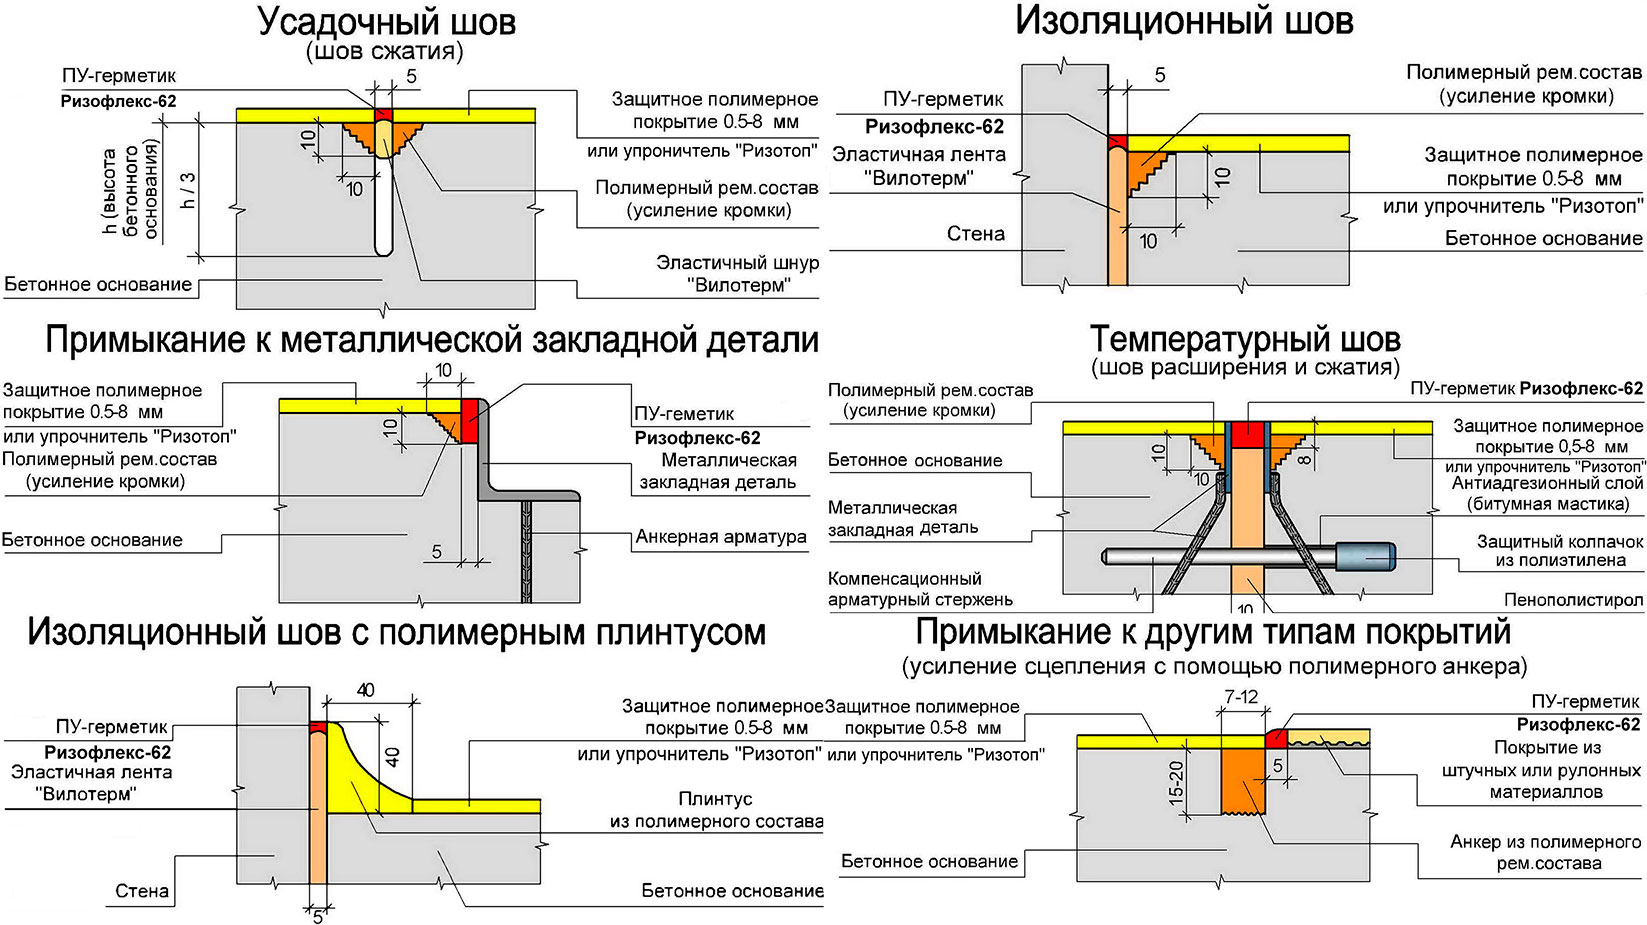
To prevent cracking of the screed, deformation joints can be cut into it.The depth of such joints should be equal to 1/3 of the thickness of the concrete. Cutting is made on the hardened, but not fully frozen concrete. After complete drying of the screed, the seams are filled with sealant. There are three types of stitches:
-
Insulating. Make the joints of the concrete floor and other structures.
-
Constructional. Cut through in place of uneven hardening of the concrete during breaks in the pouring more than 4 hours.
-
Shrinkage. It is necessary in order to avoid possible deformation during the shrinkage of the screed during the drying process.
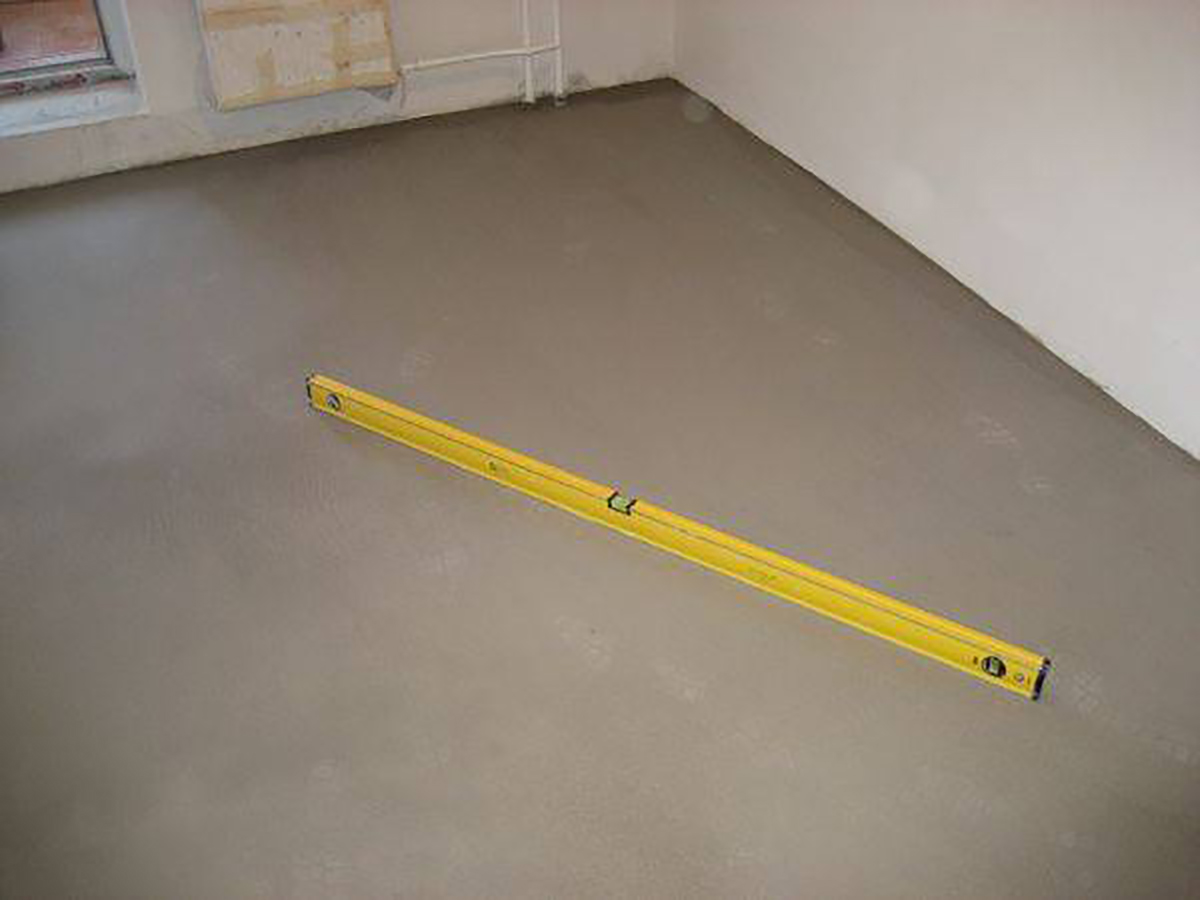
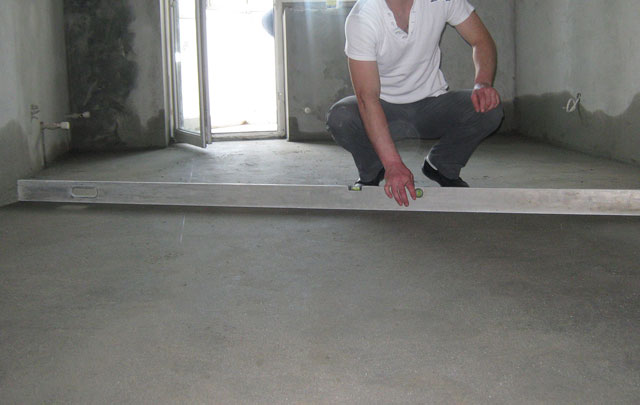
It will not be superfluous to check the result of the work. To assess the flatness of the coating, you can use the construction level, applying it to the floor in different parts of the room. The allowable gap is 4 mm. The presence of voids inside the screed is checked by tapping with a wooden block. The sound around the perimeter of the room should be the same - hard and ringing.
See the next video for a master class on floor screed.